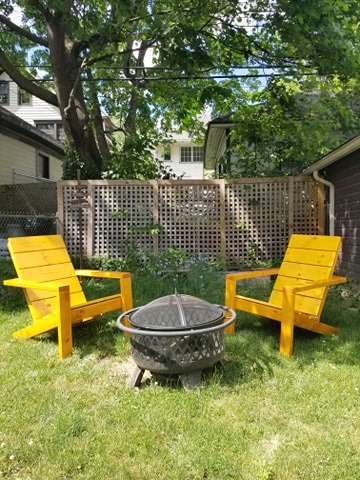
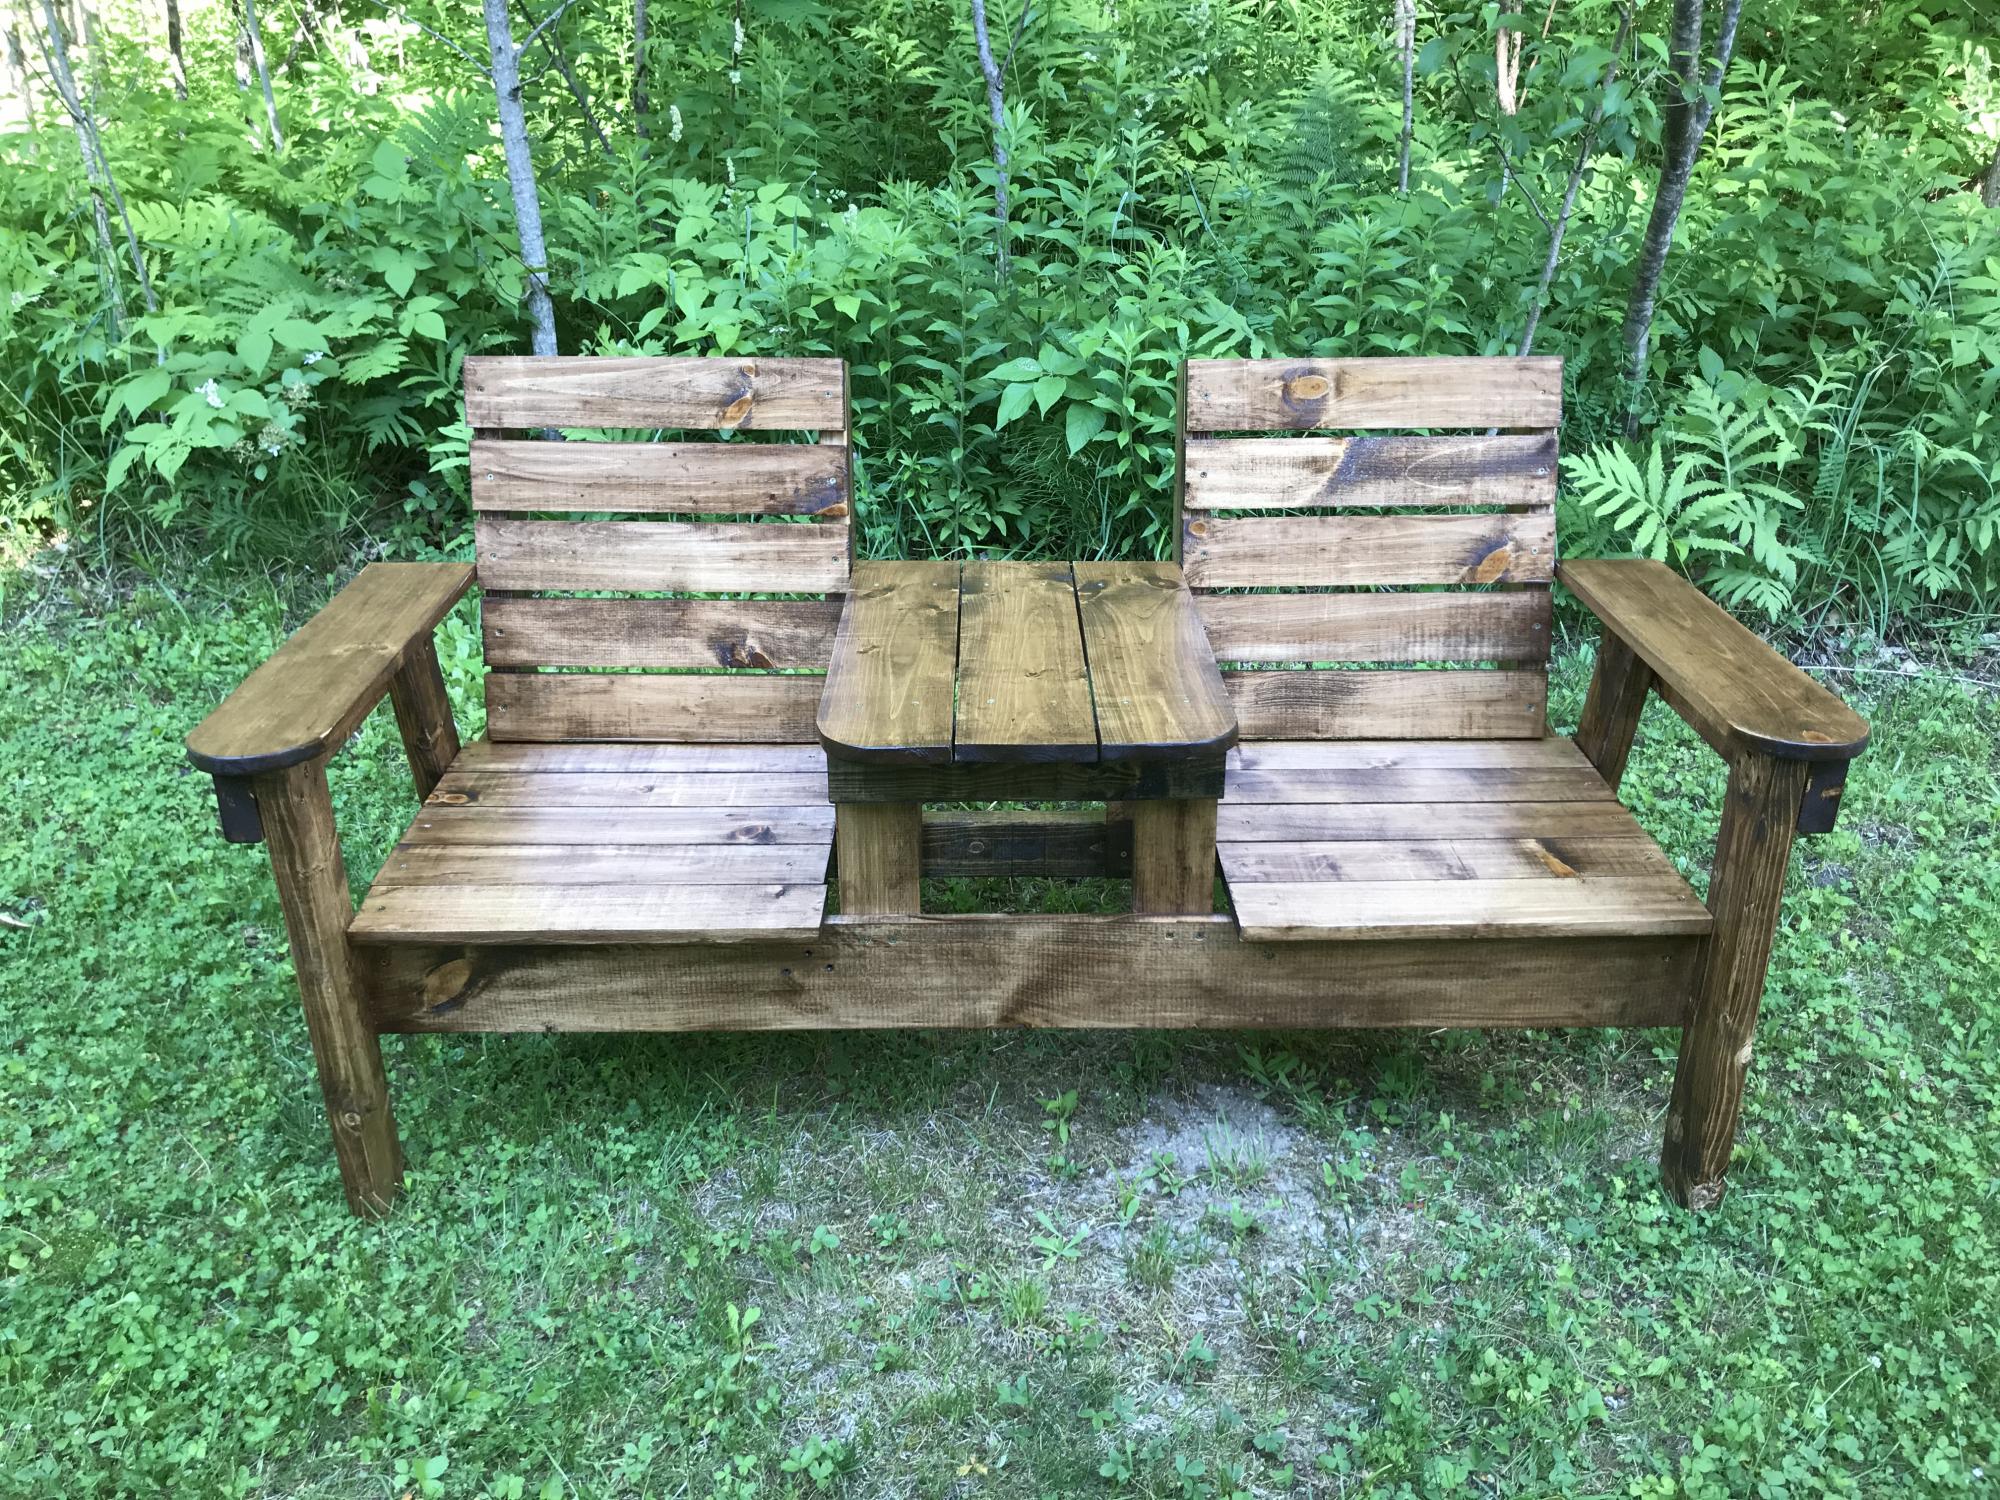
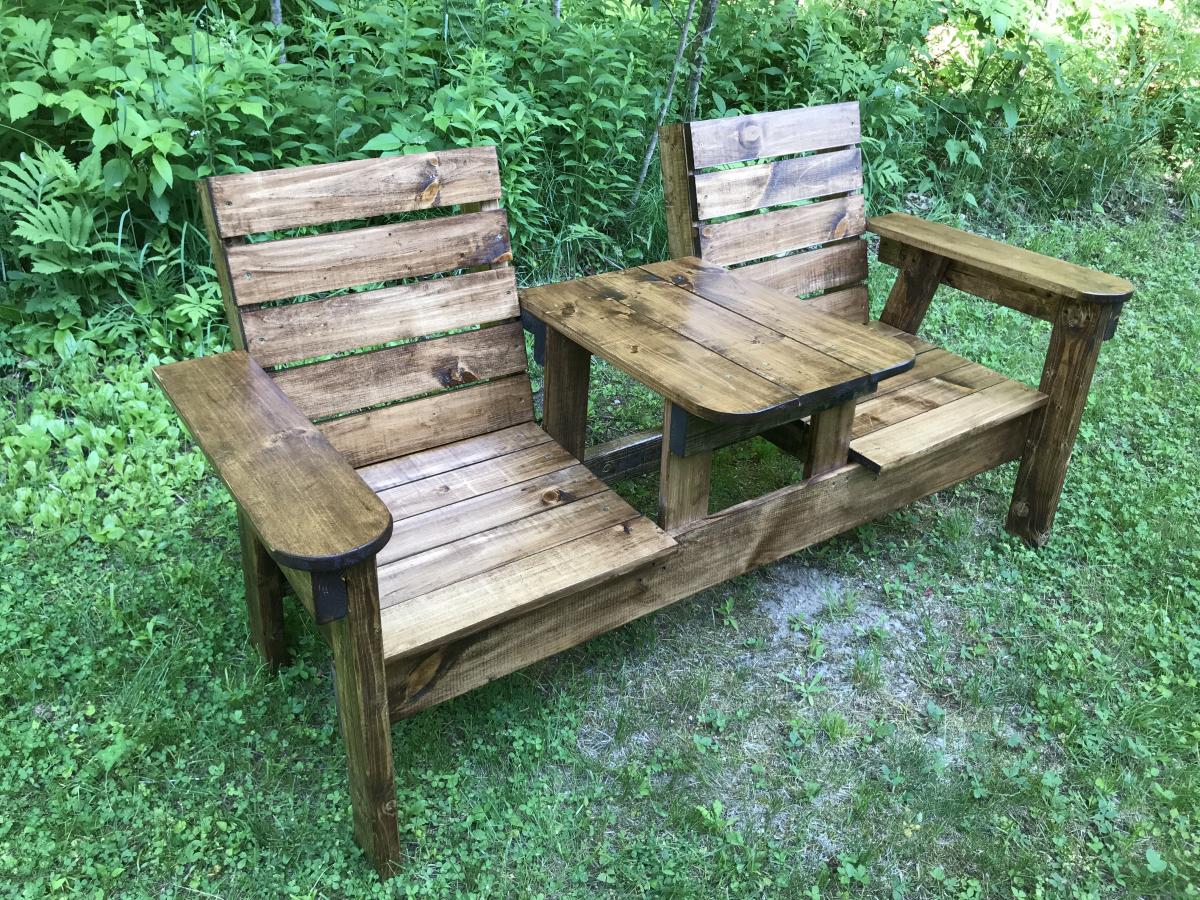
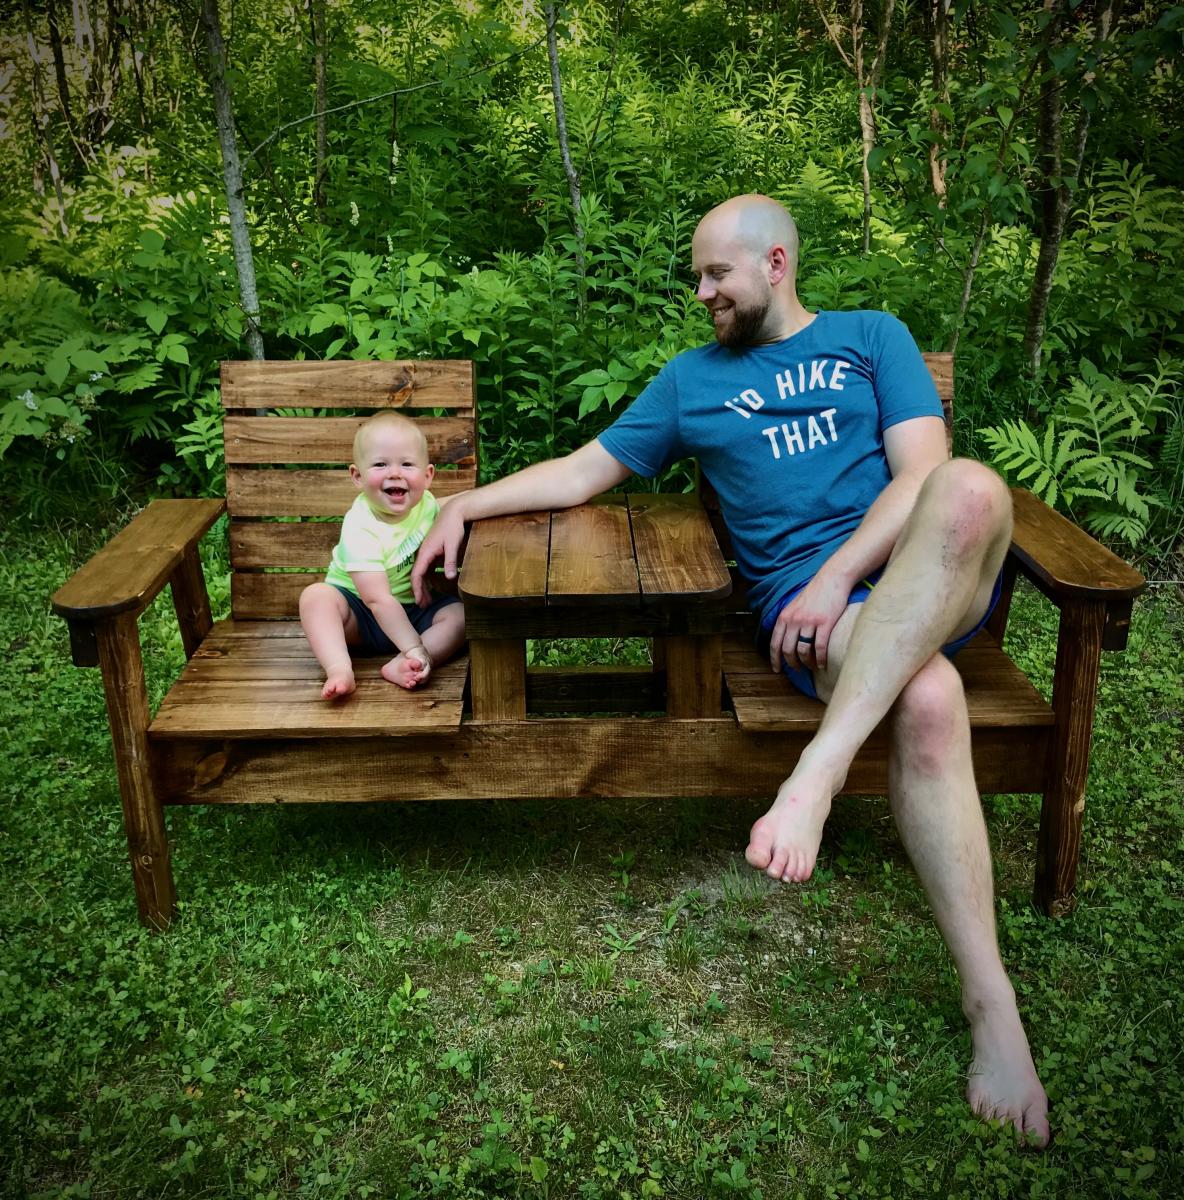
Modern 2x4 Adirondack Chairs
Modified 1x6 slats for seat and seat-back. Purchased four 1x6x8s for both chairs to replace 1x10s
Built from Plan(s)
Finish Used
Cabot Gold Sundrenched Oak
Modified 1x6 slats for seat and seat-back. Purchased four 1x6x8s for both chairs to replace 1x10s
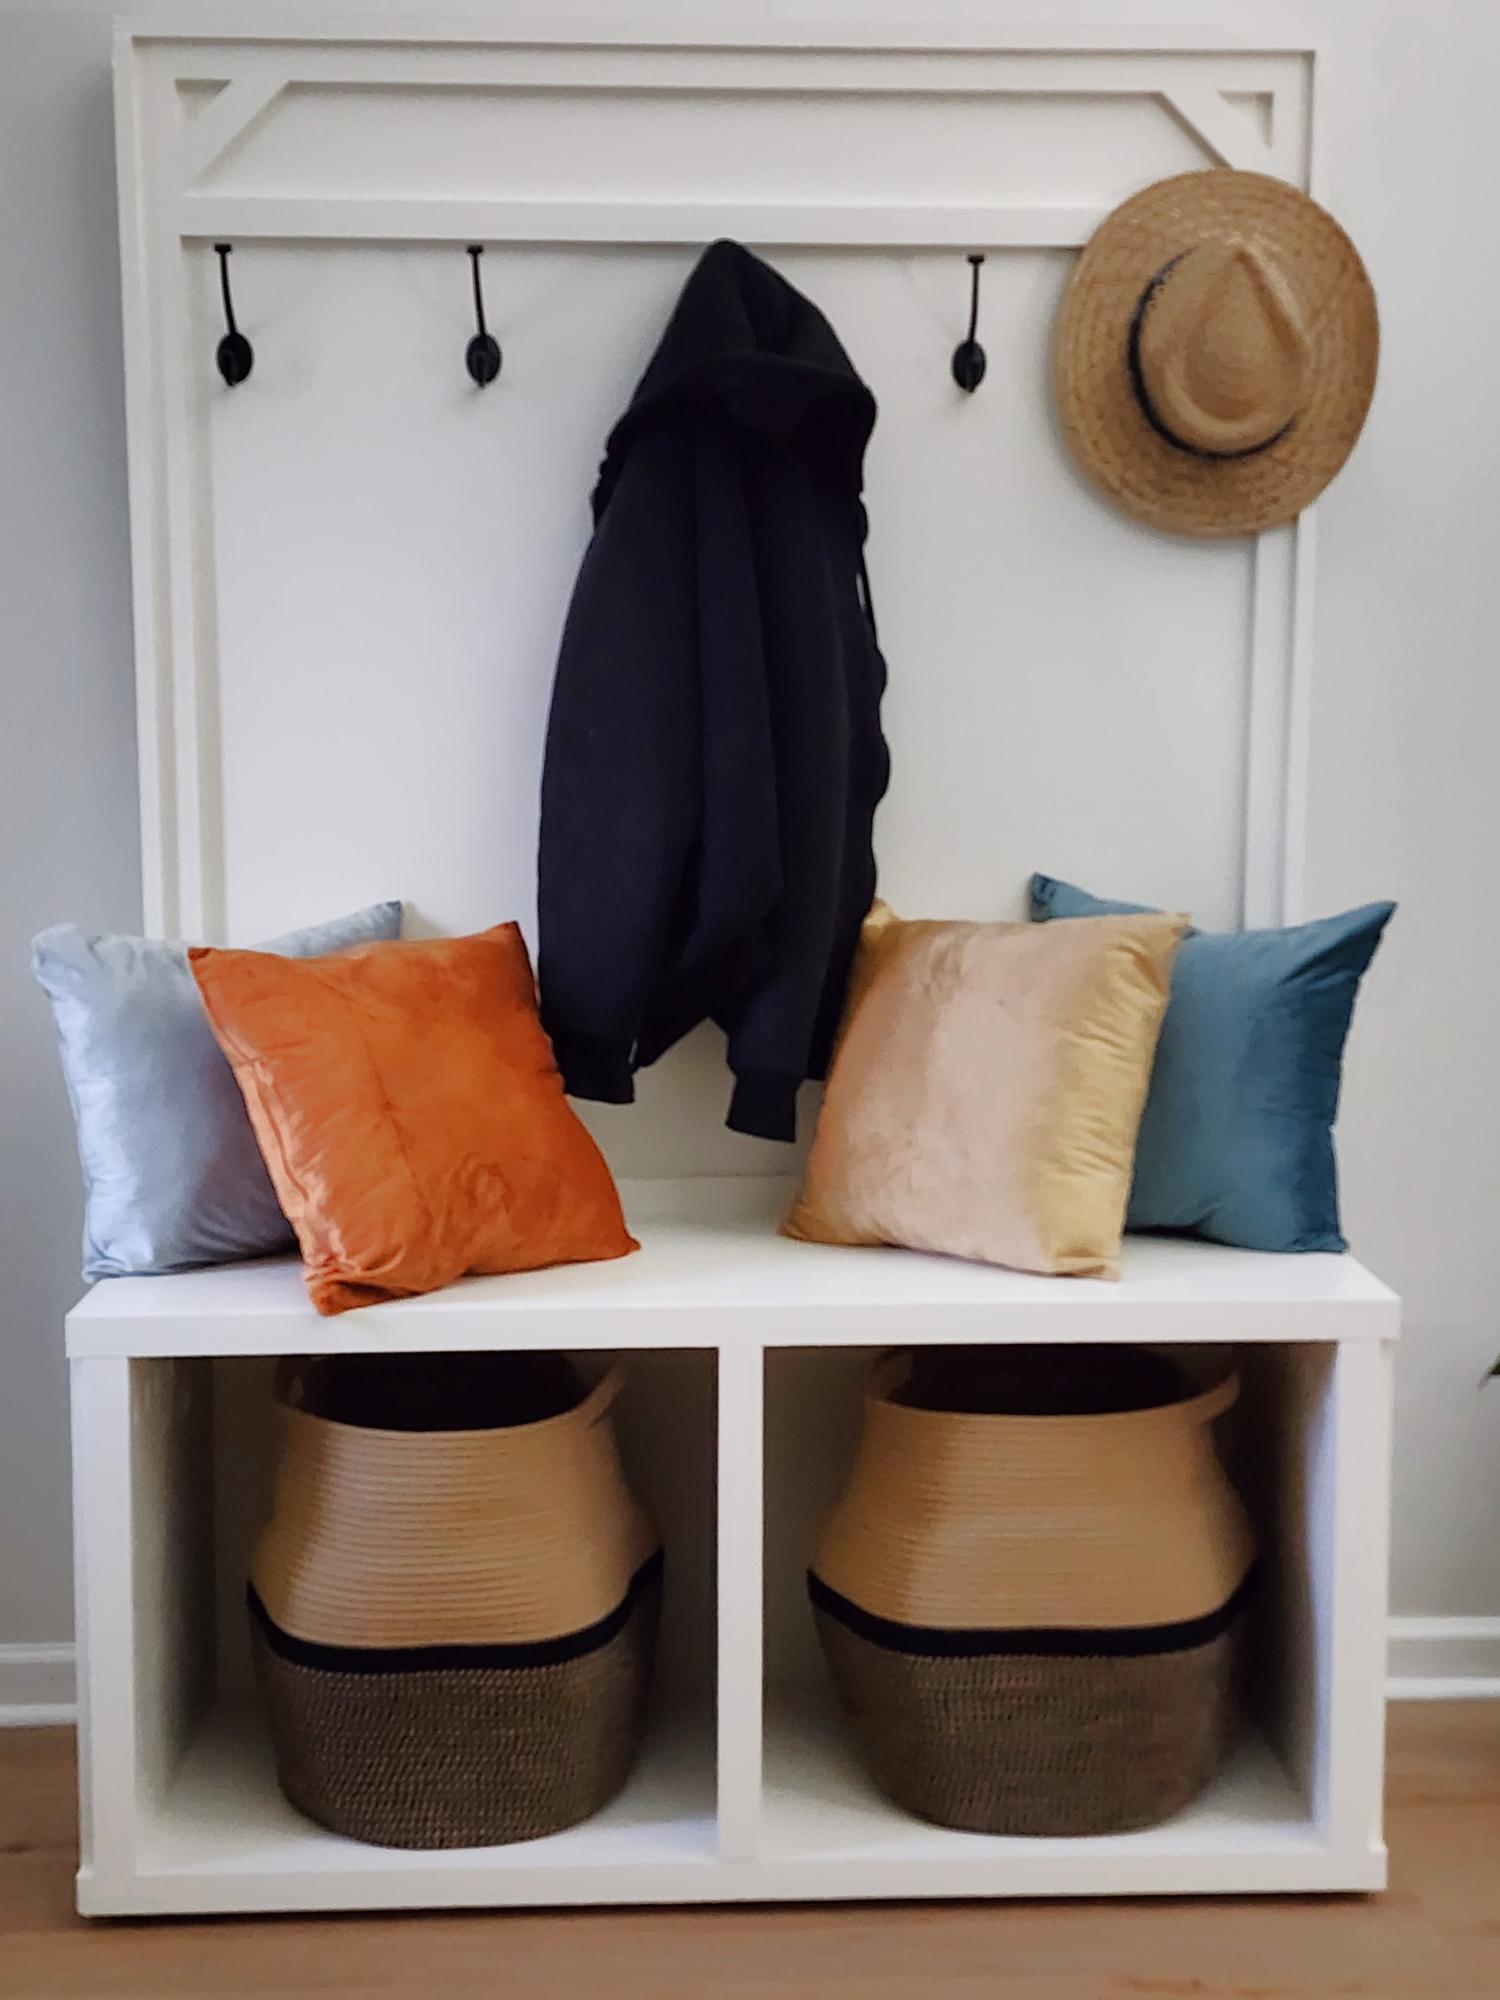
My husband built this coat rack and it is amazing and beautiful.i love it. I know the hooks look crooked in this picture but they are definitely straight.
Tracey and Wilbur Fawbush
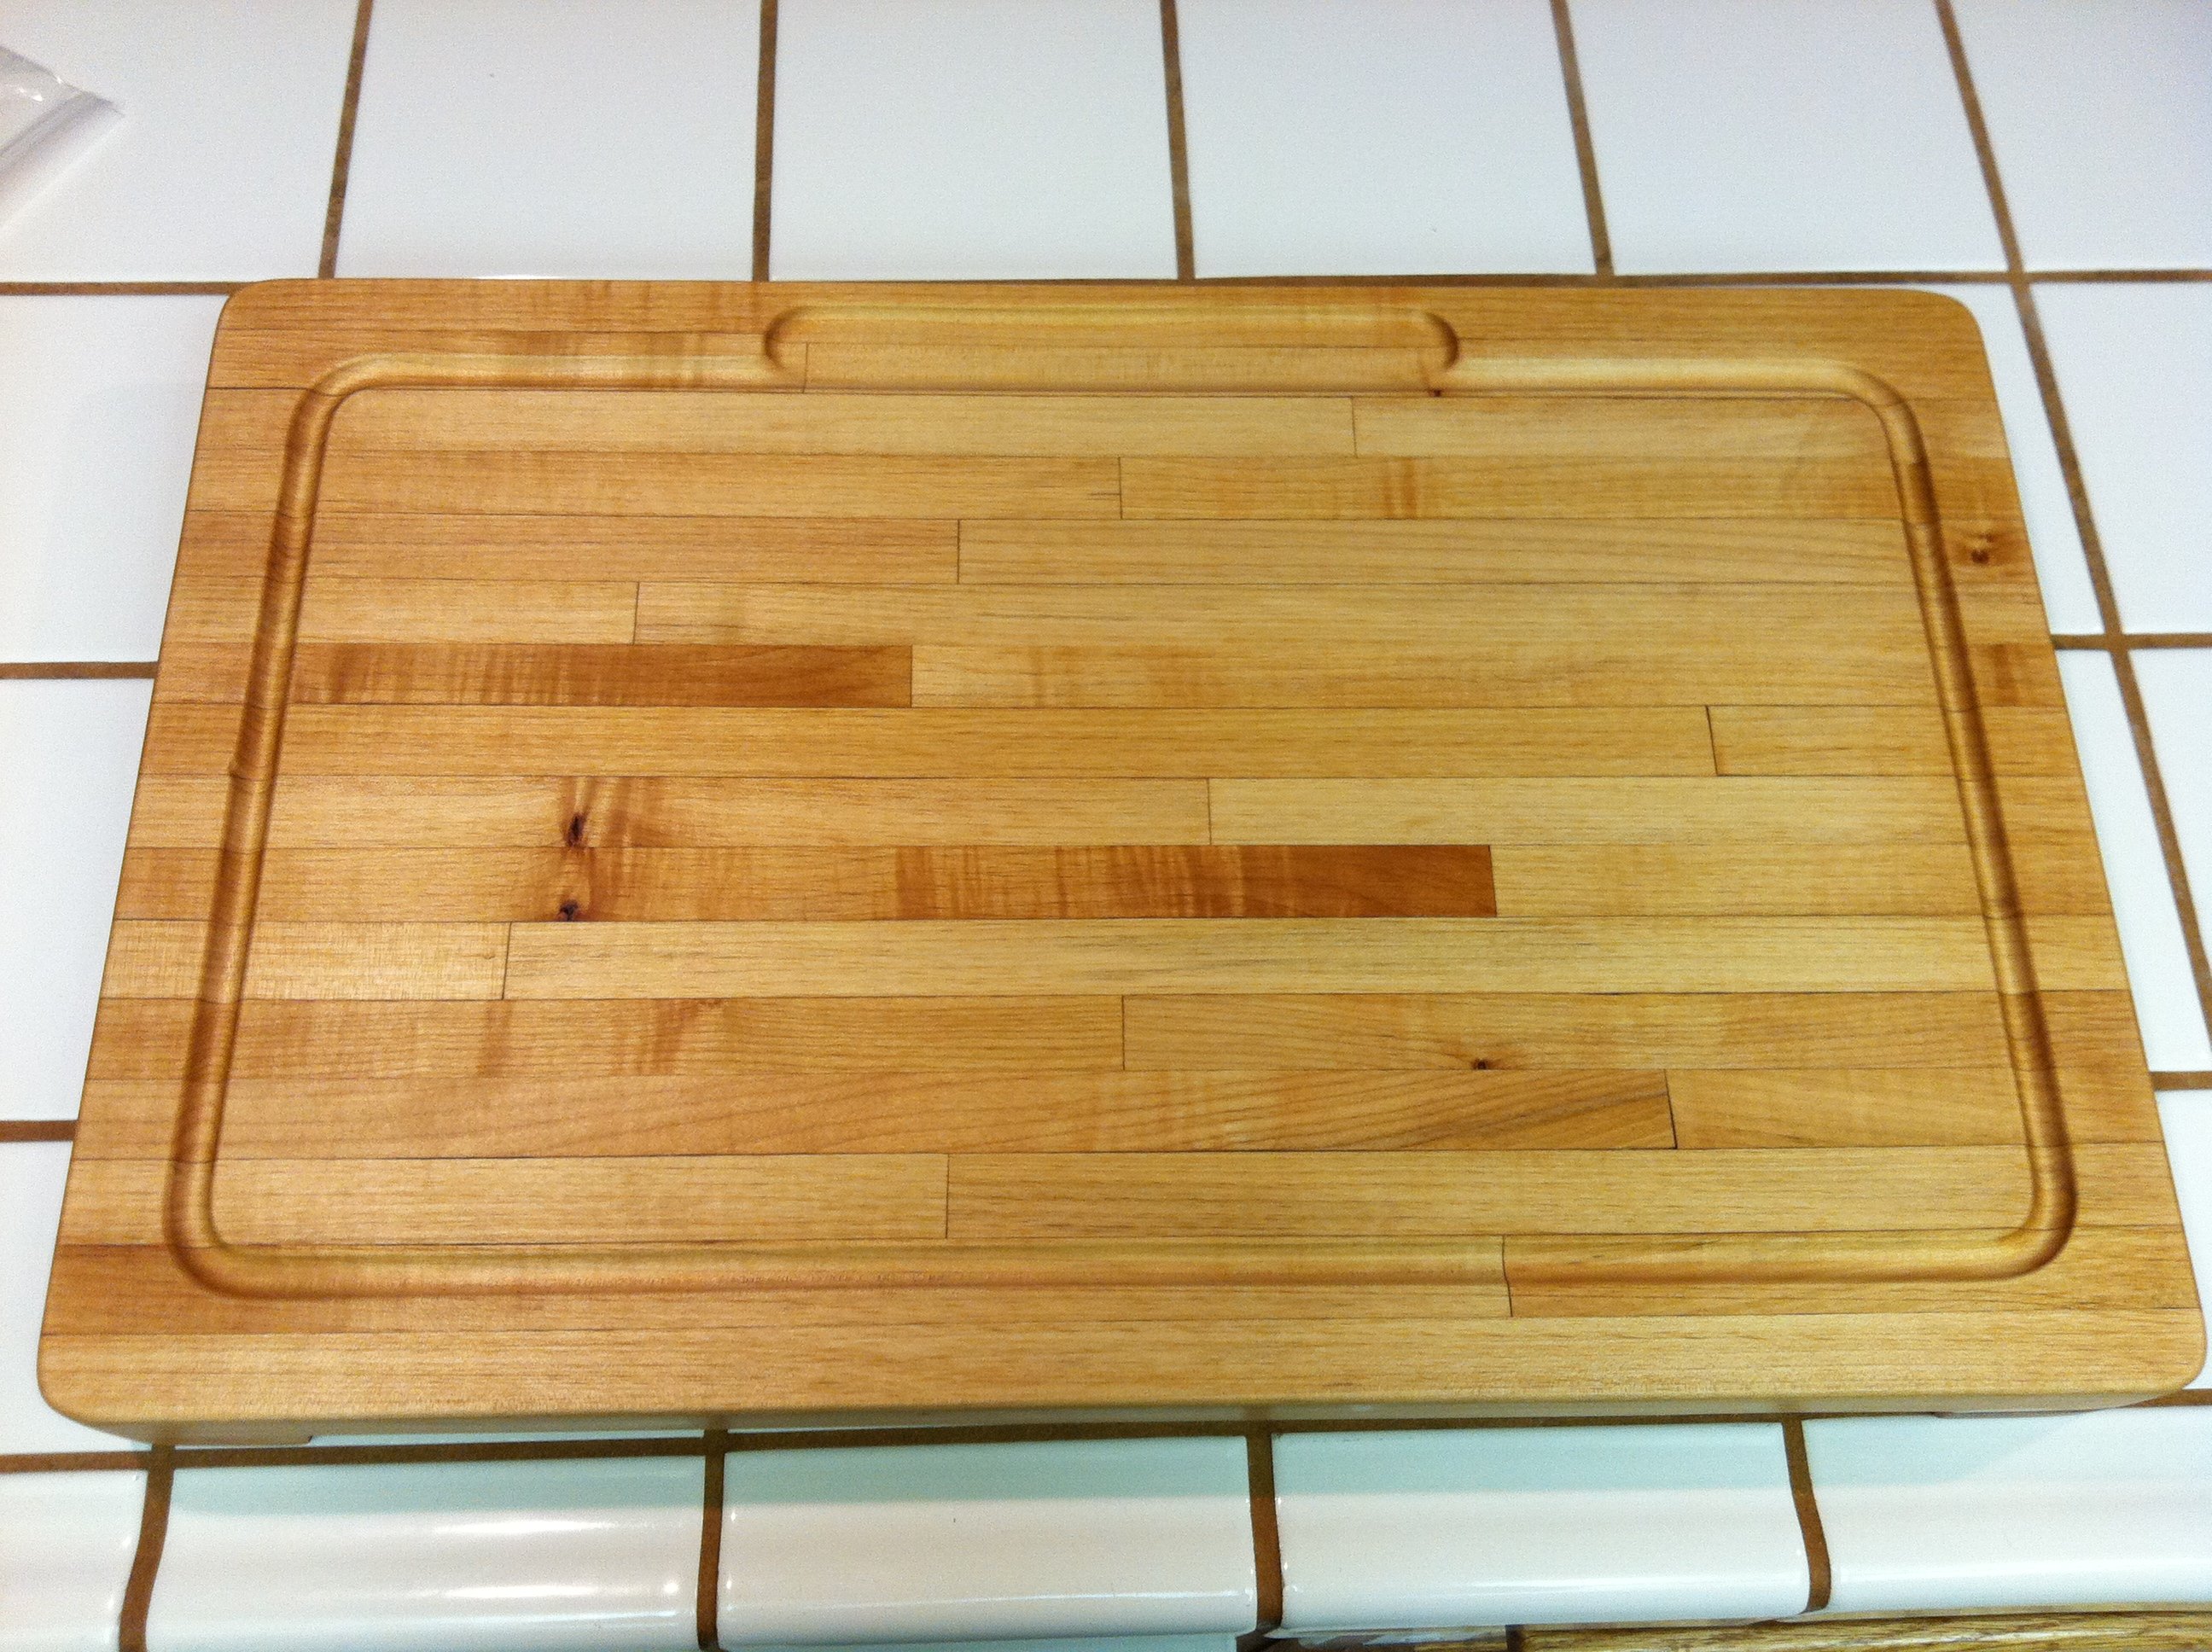
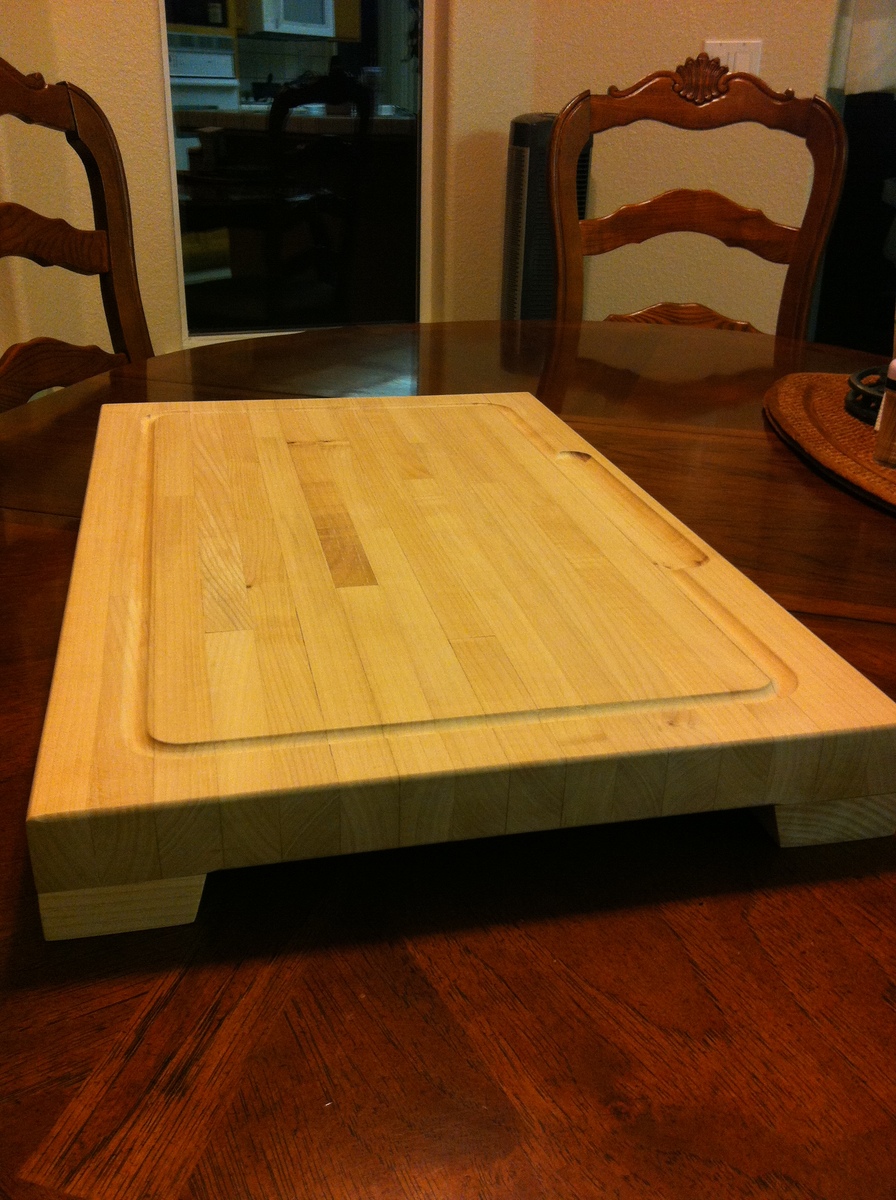
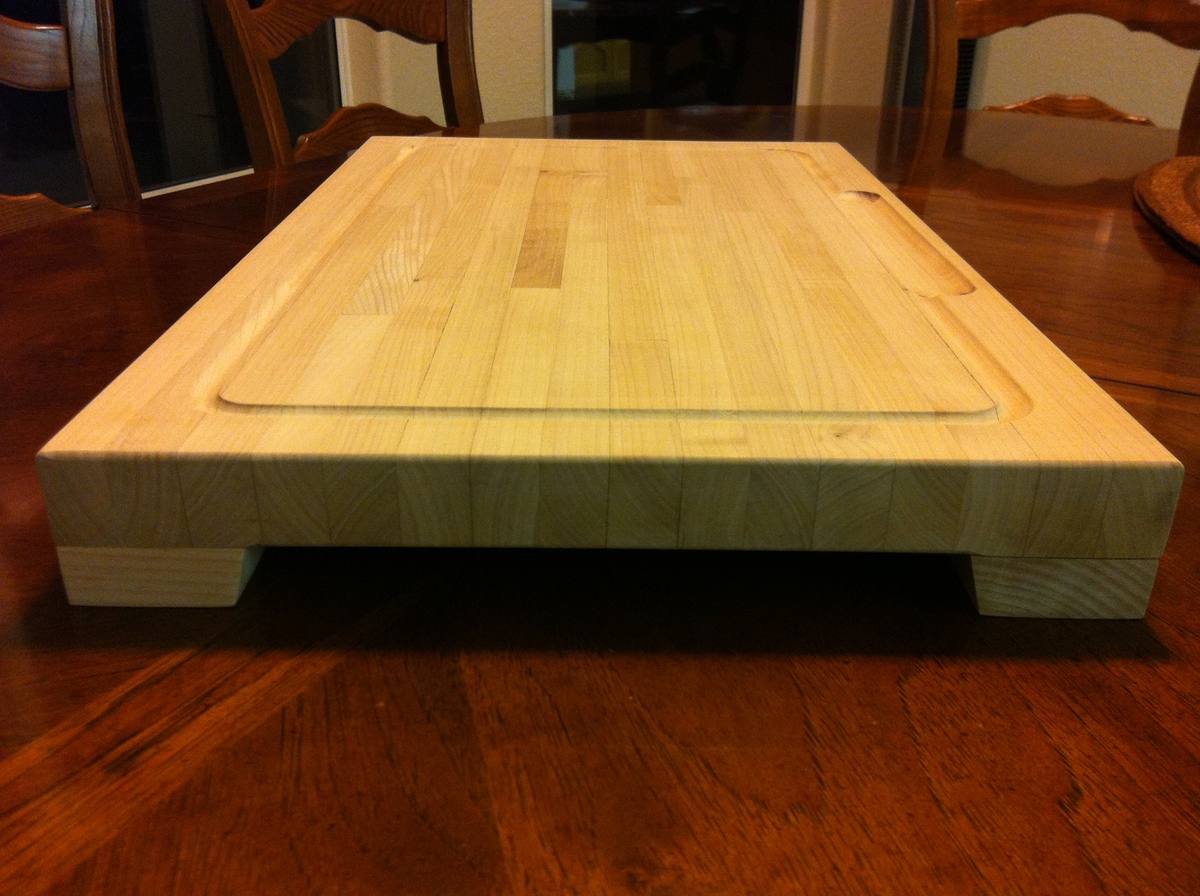
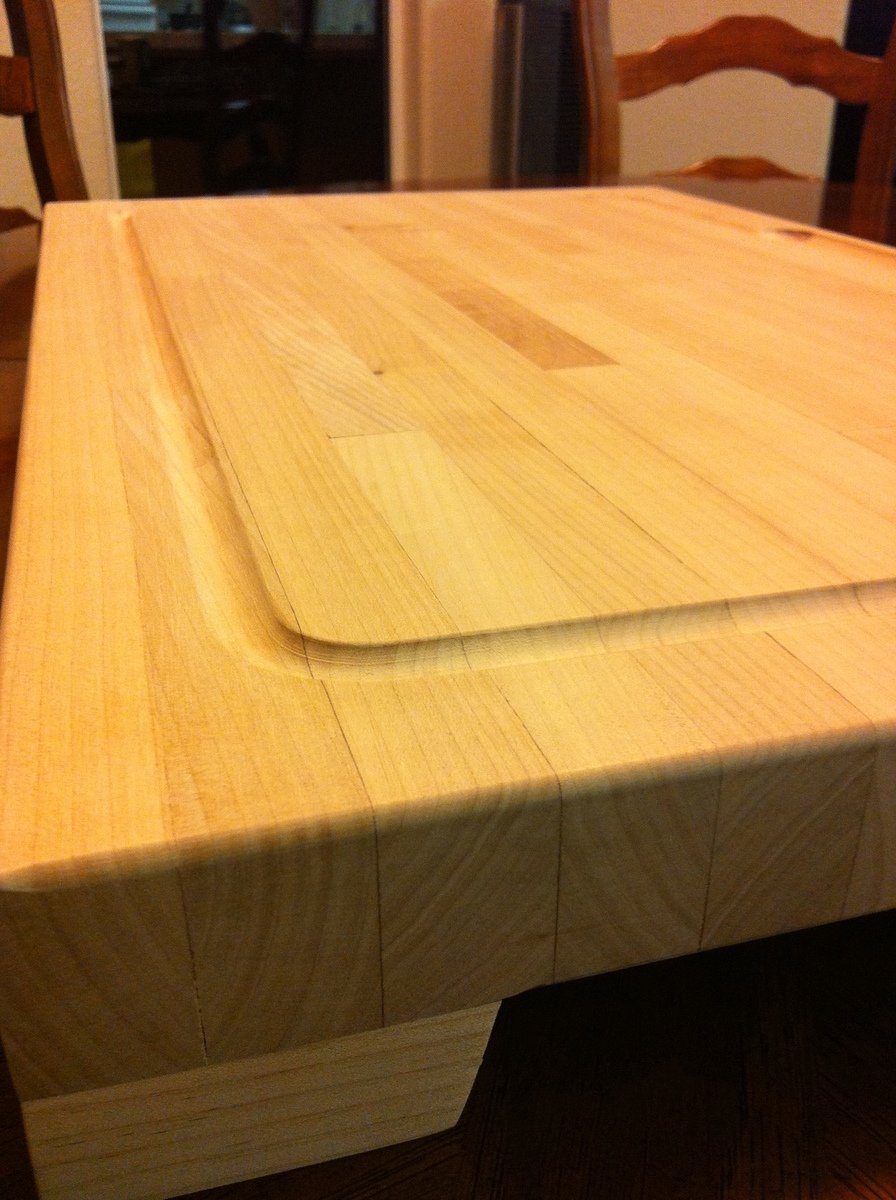
This was my very first build ever! I enrolled in a beginning woodworking class at the local community college and our first assignment was to make a cutting board. All that was required was a super simple cutting board with some wood strips glued together then cut into a shape of some sort. But I decided that if I was going to bother making a cutting board, I was going to make something awesome and useful. I wanted to make a butcher block style cutting board. My boyfriend's only input was that he wanted something "big enough to hold a tri-tip". This was the result! It's made of PC maple and measures 23-1/4" long by 14-1/2" wide and 2-1/4" tall with the feet (1-1/4" thick cutting surface). It took me way longer than most of the other people in the class, but I love it. For this project alone, I had to learn to use the table saw, the compound miter saw, the planer and jointer, the router, an assortment of machine sanders and palm sanders available in the school's shop, the glue scraper (oh goodness I hate glue squeeze-out), and how to do clamping set-ups. At the very end, I finished it with mineral oil, and we broke it in with an amazingly delicious prime rib at New Year's ;D
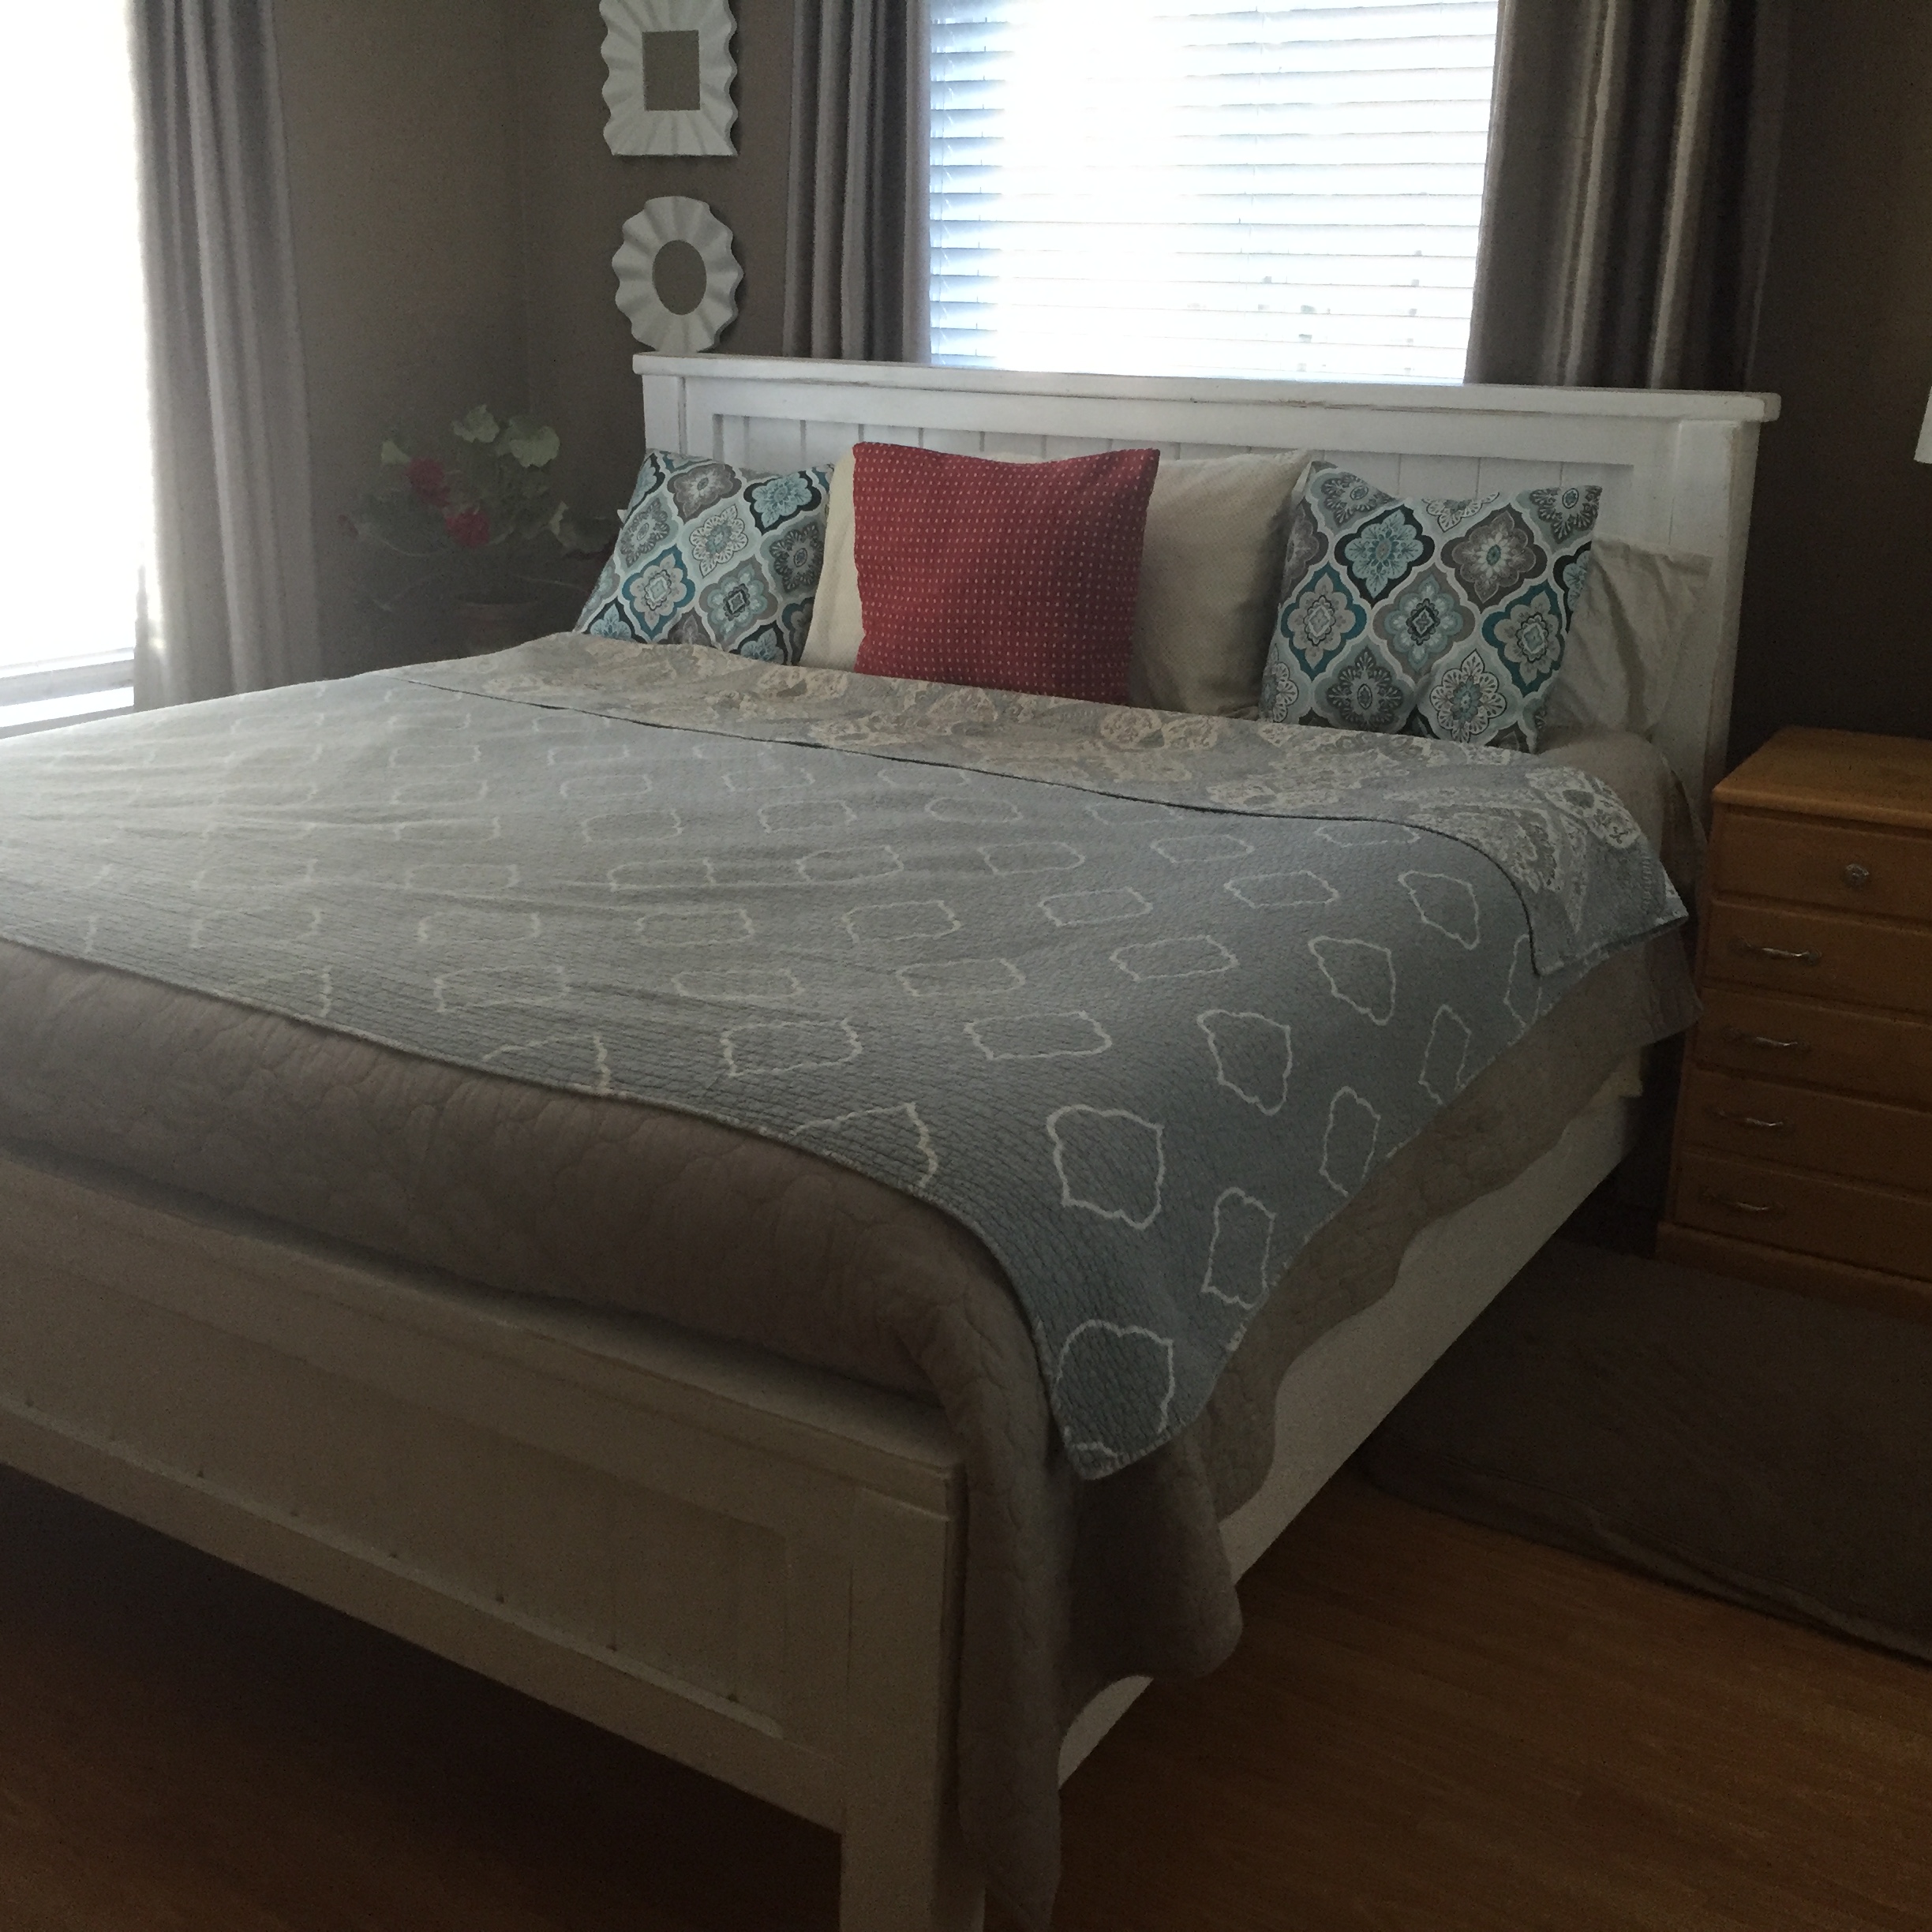
I loved this bed and after making Ana's fancy farmhouse table for my daughter, I couldn't wait to try this. It turned out beautifullly and even accomodates our three labs. Extra support added underneathe, of course! Love it!
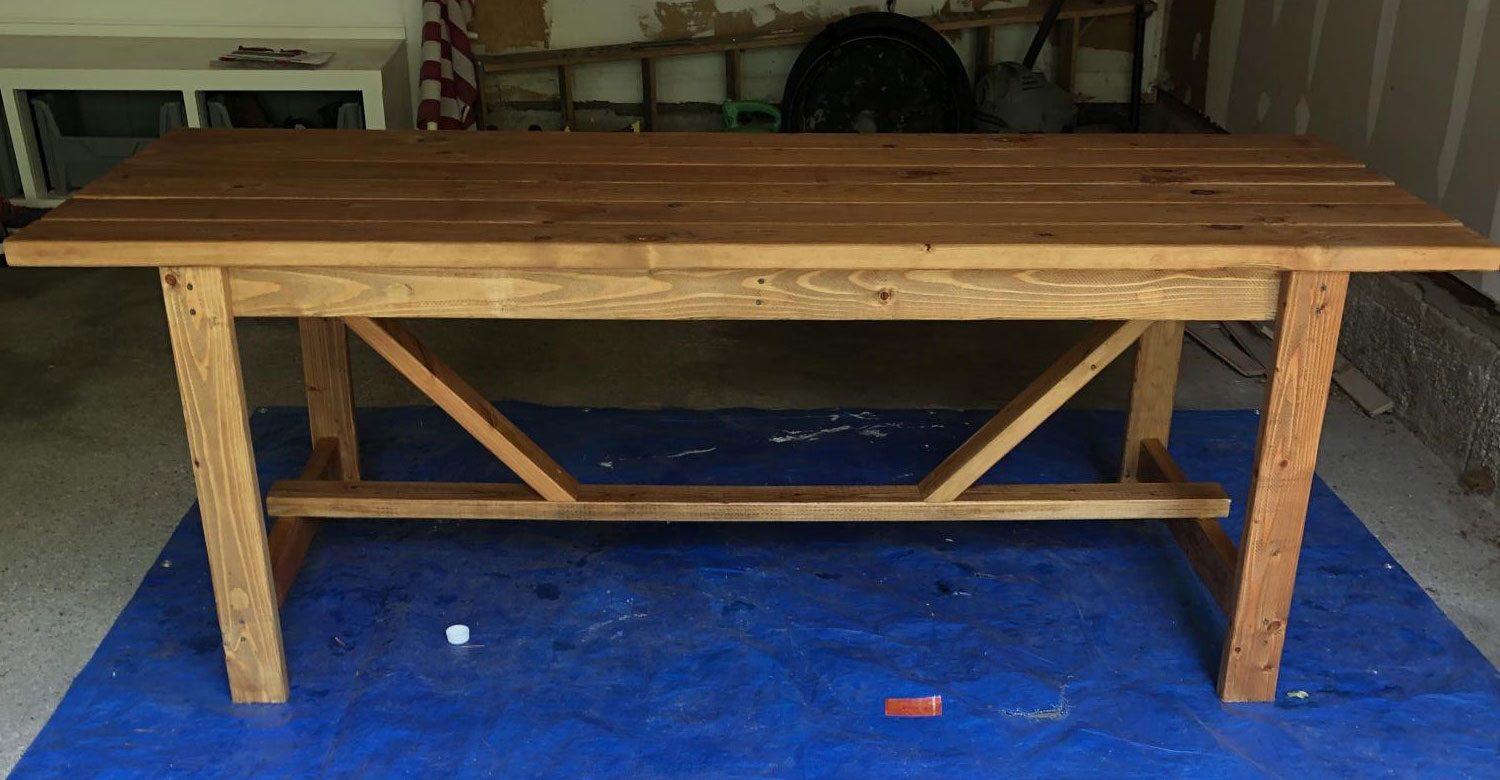
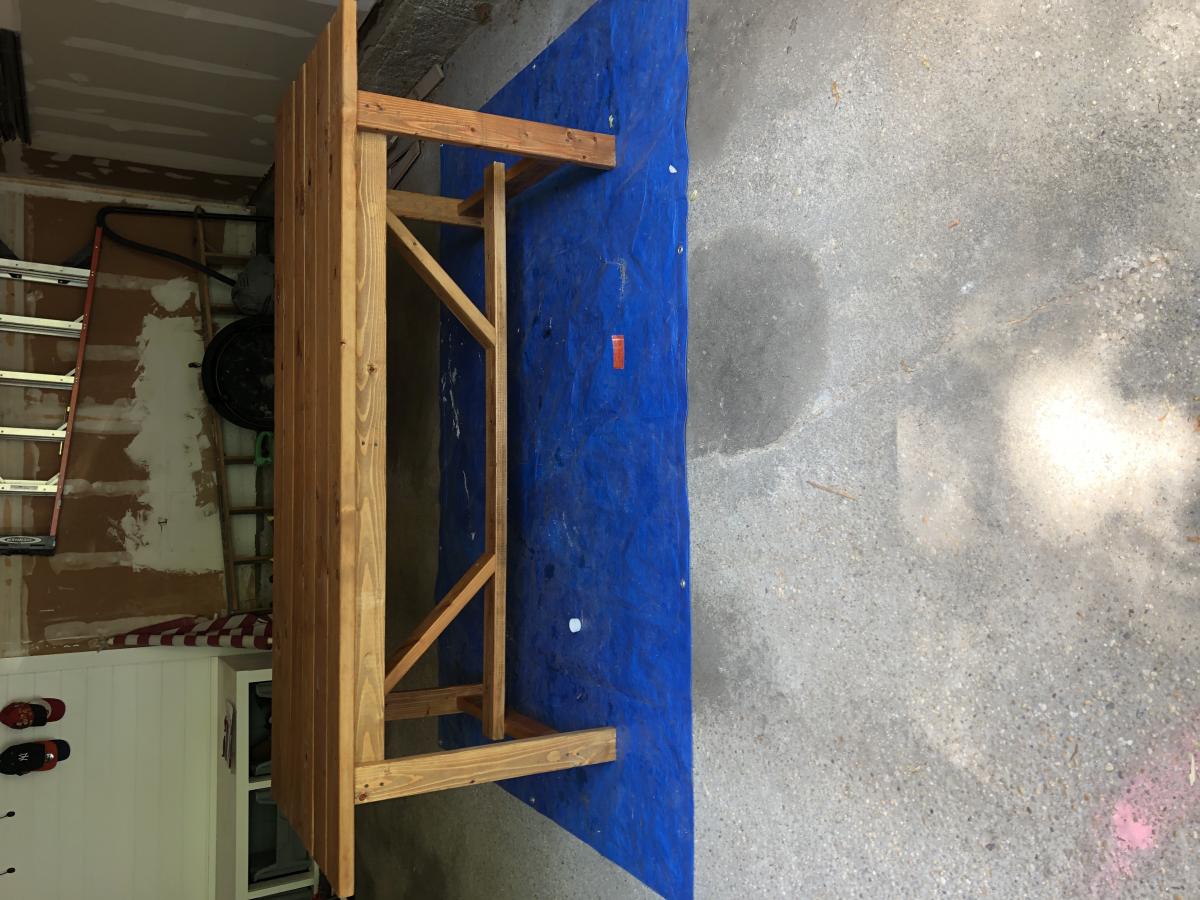
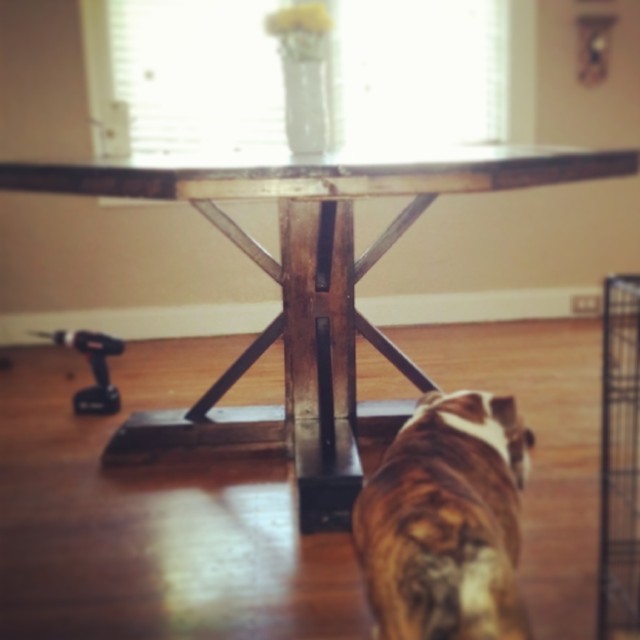
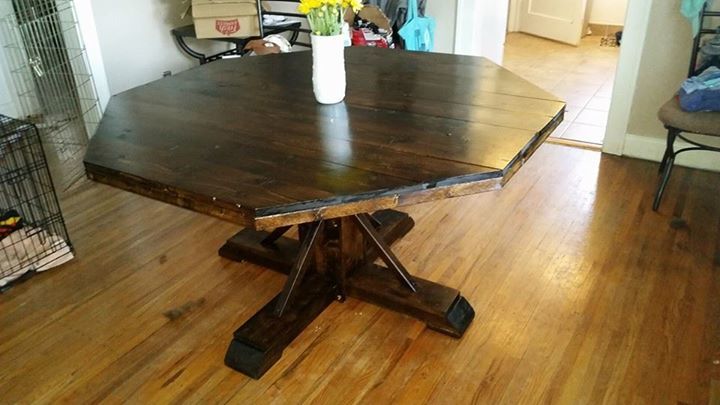
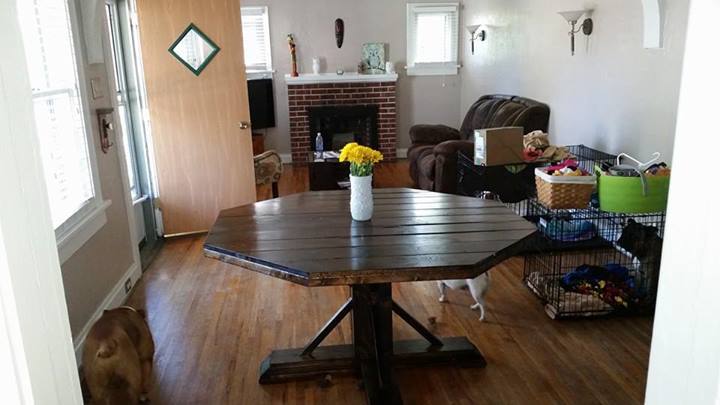
Used watco danish oil. Table will be used outside not sure how the danish oil will hold up by itself. May add polyurethane or if it falls apart I’ll build new next years. Also added diagonal supports at the bottom because it swayed a bit
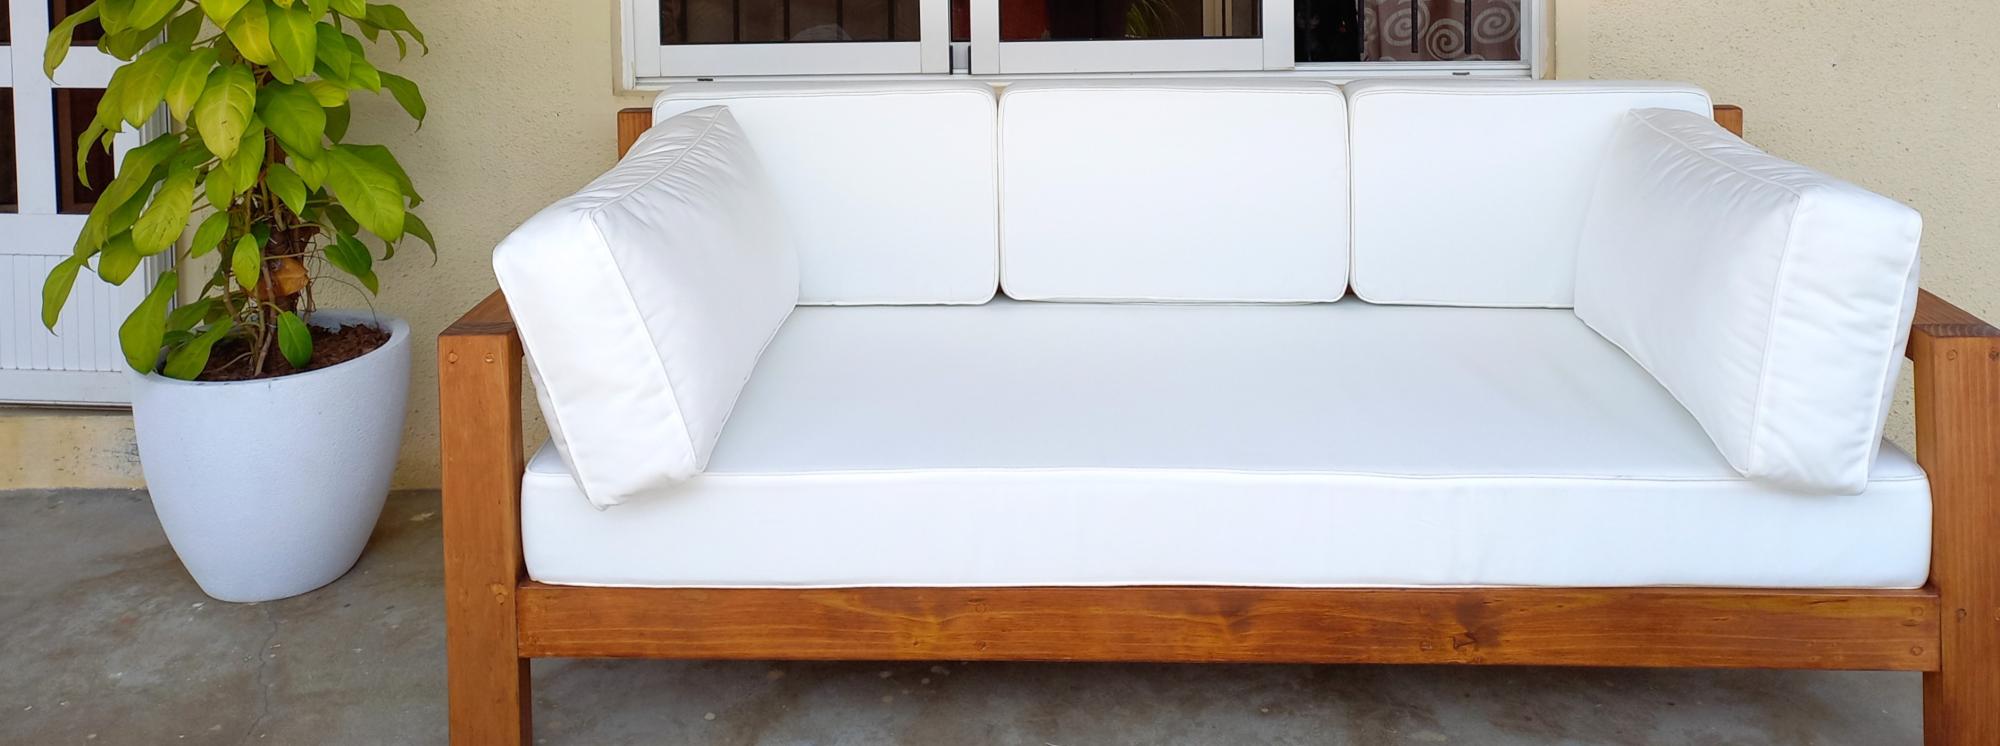
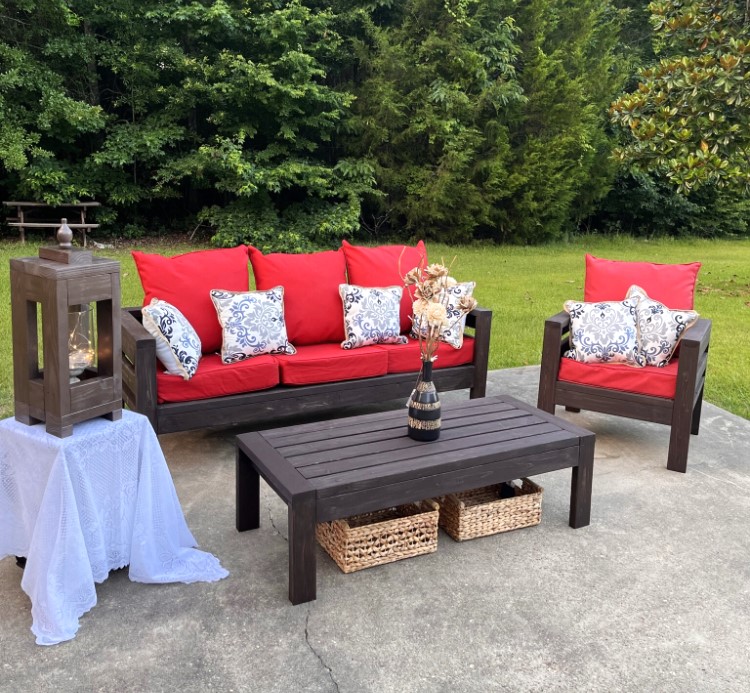
DIY outdoor couch, reader build
Daybed cushions and pillows, modified depth
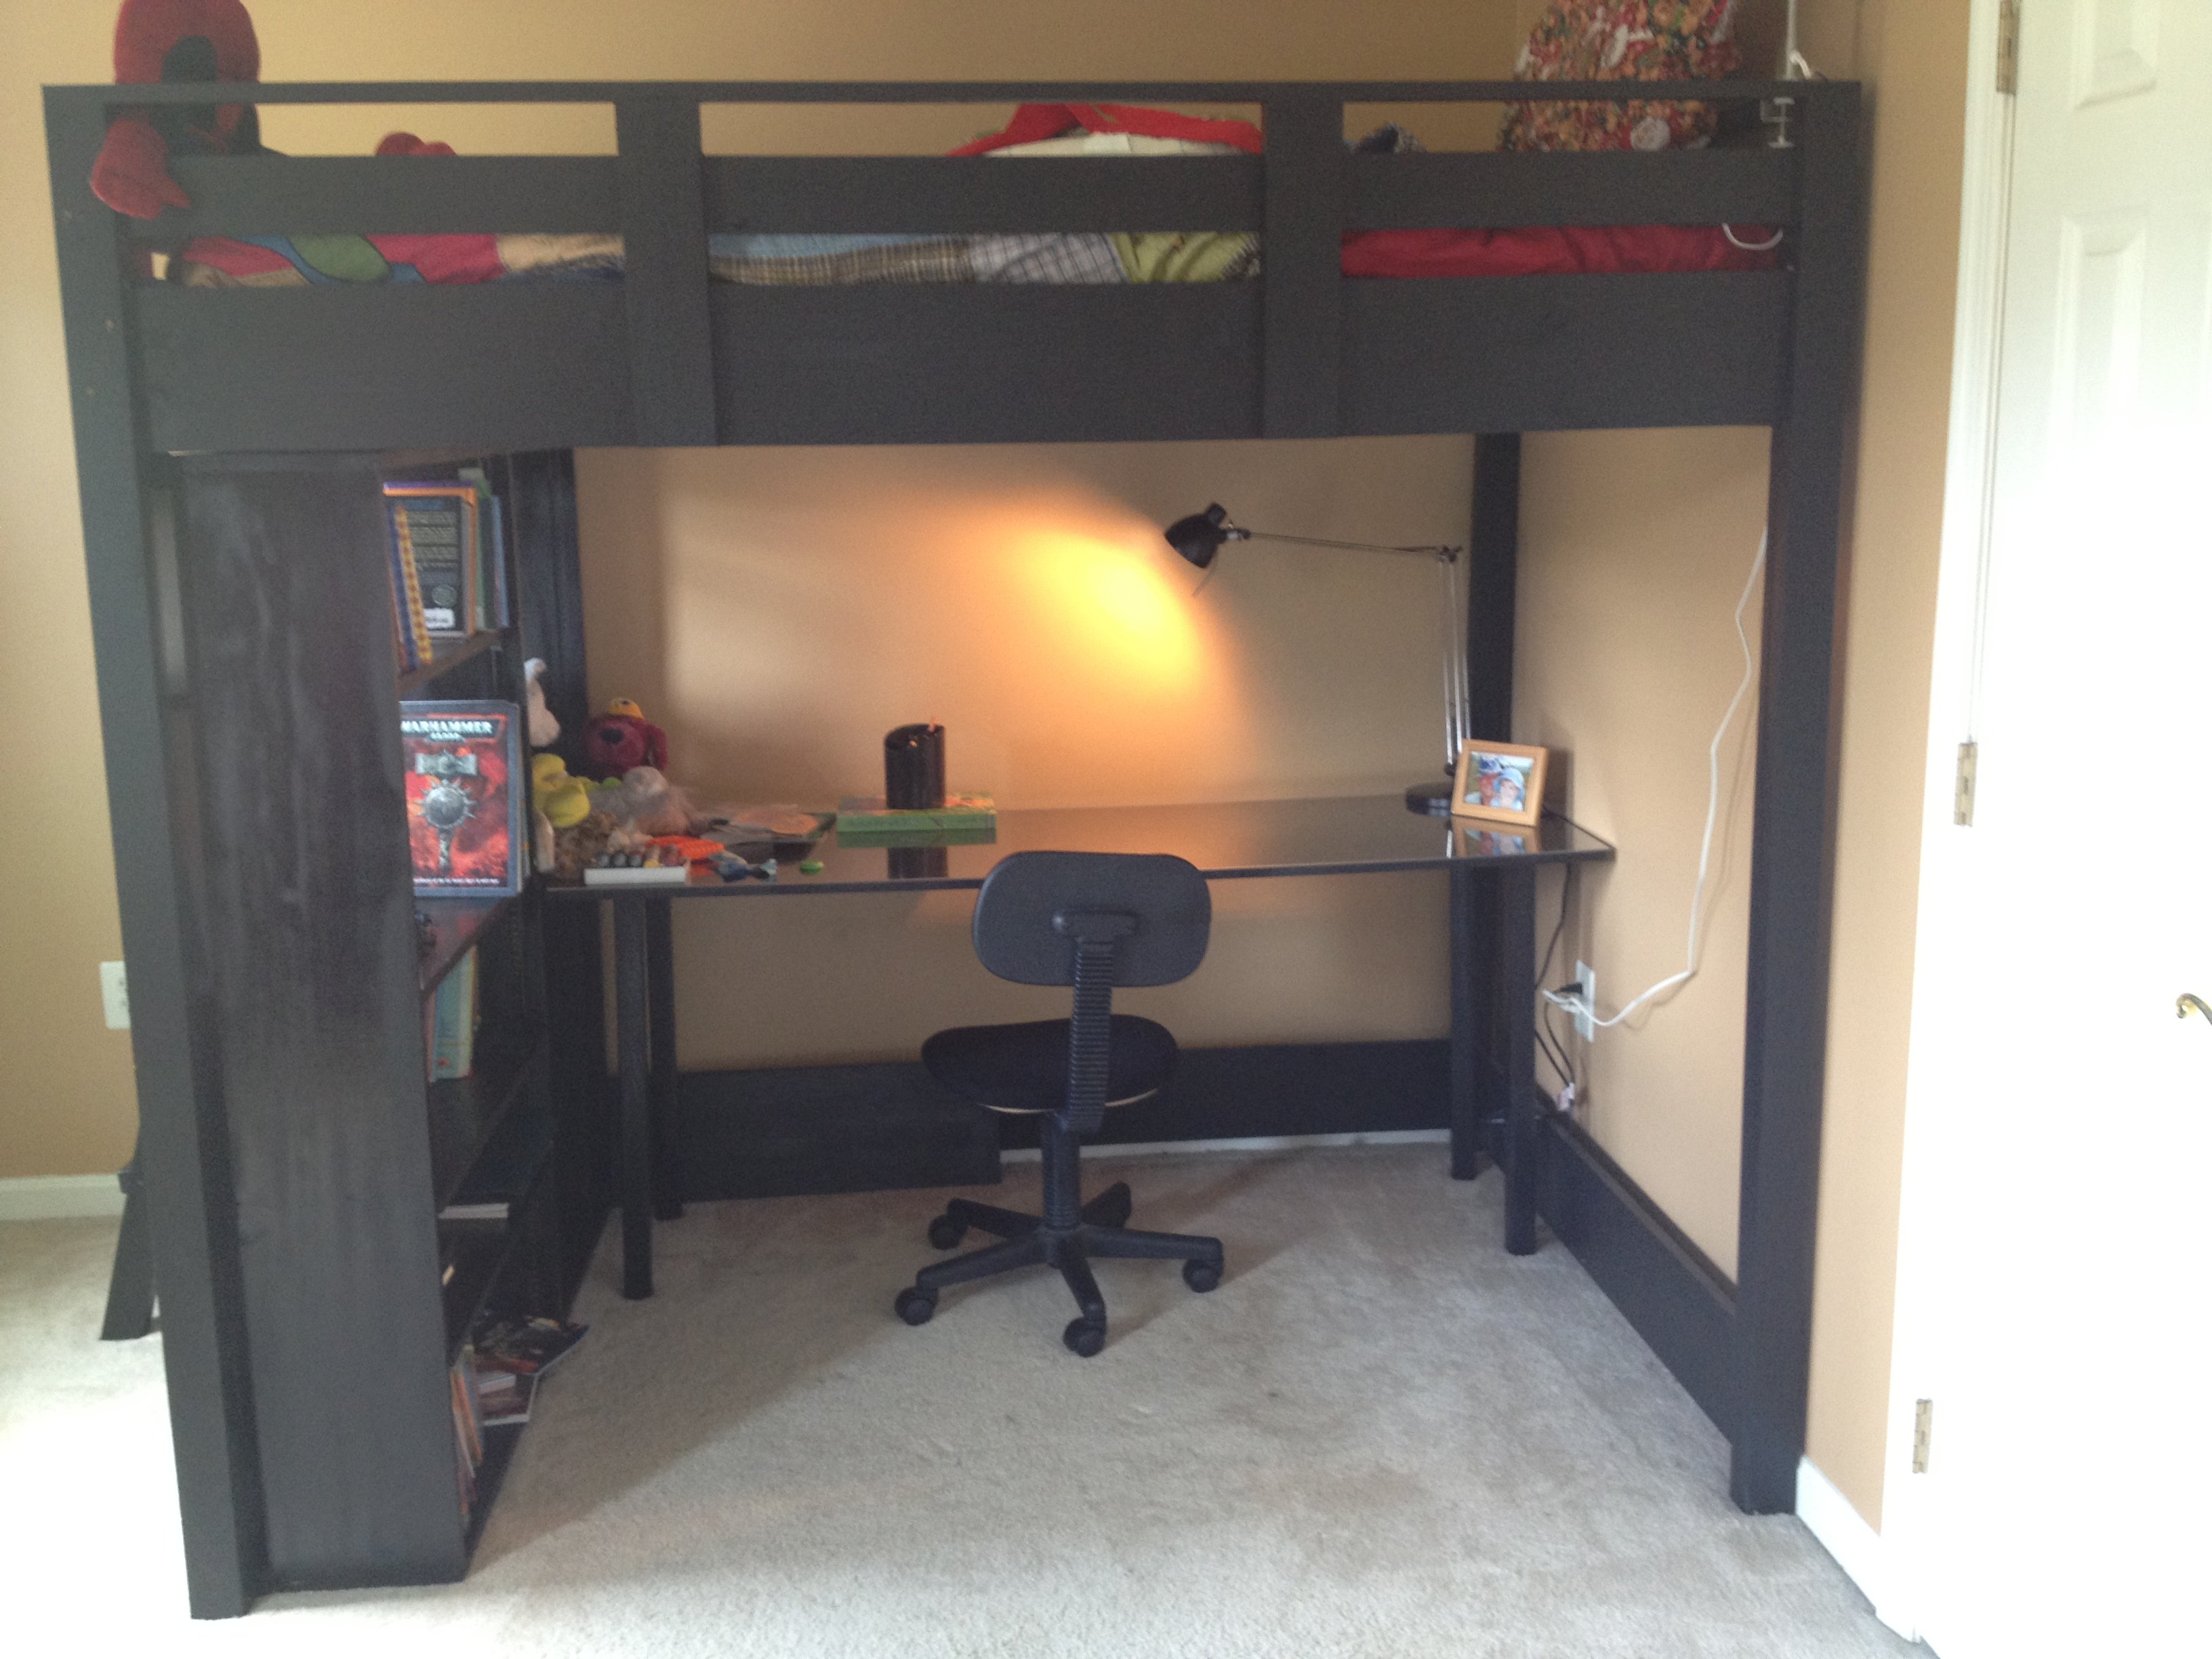
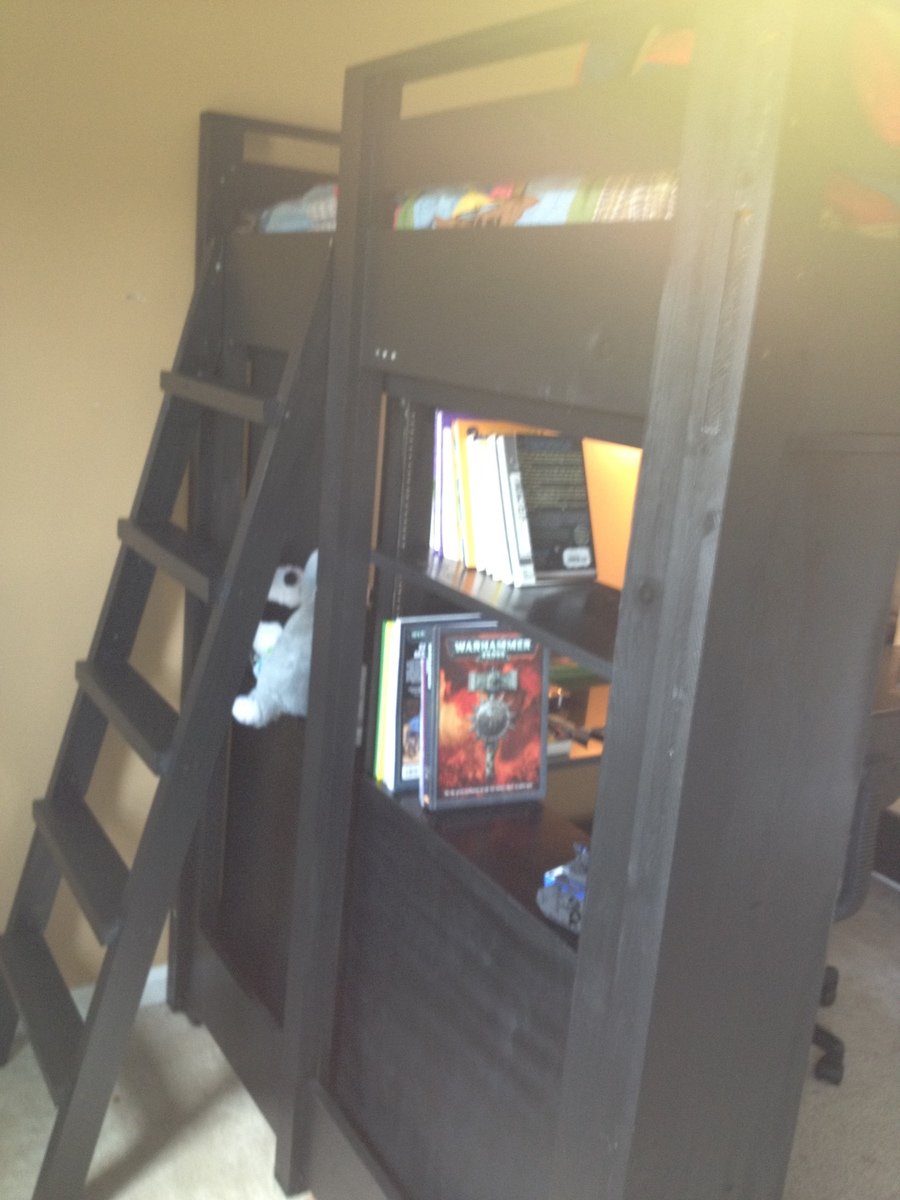
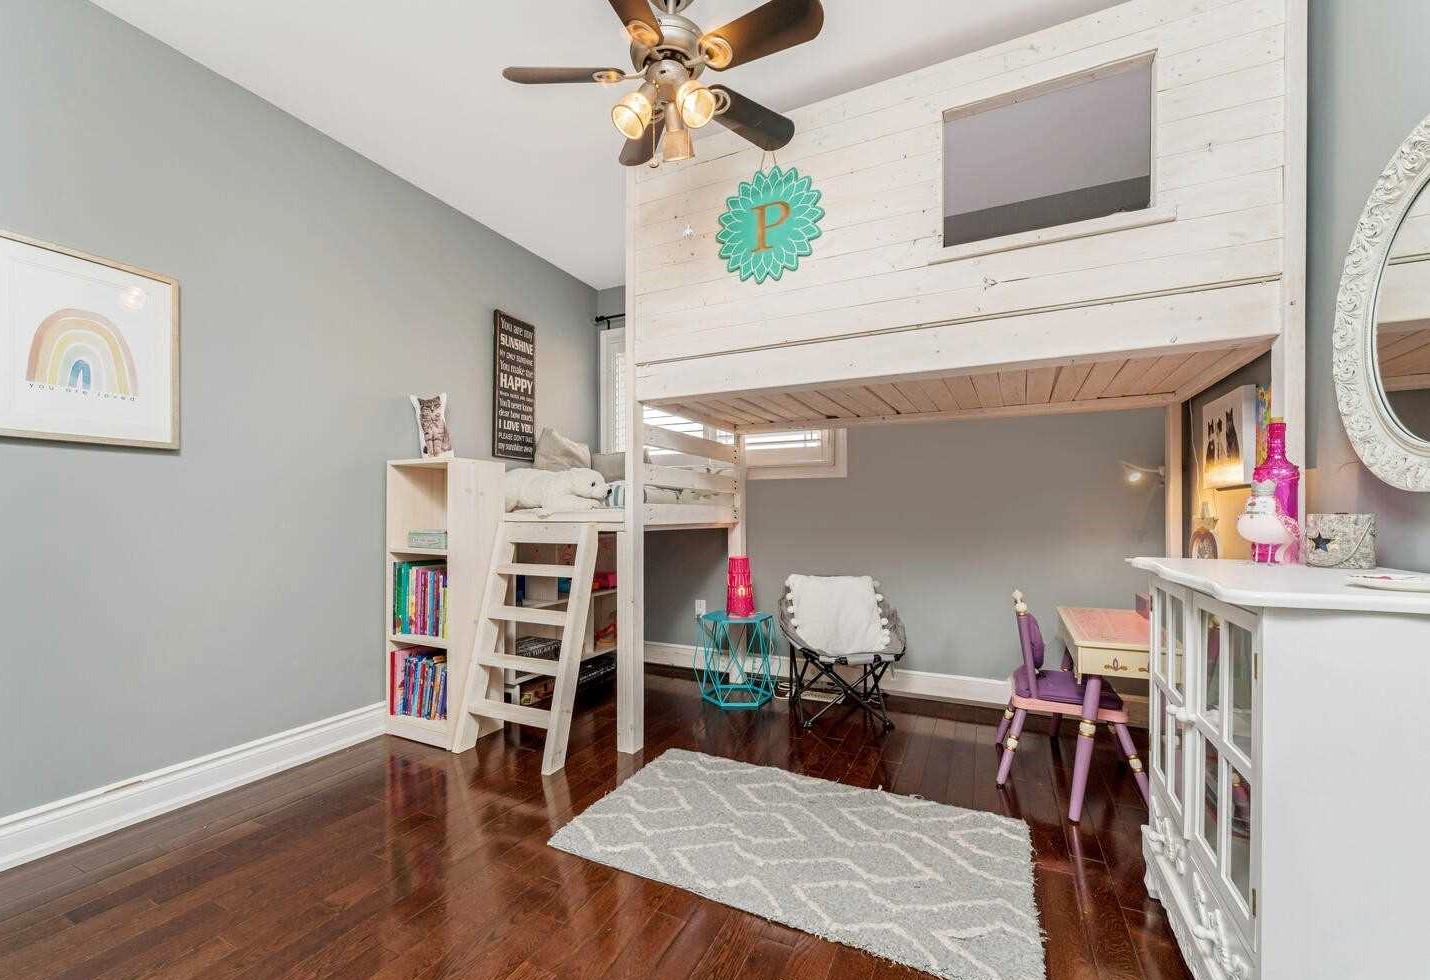
My son needed more room in his bedroom...and to be rid of the very girly furniture he inherited when he moved into his "big boy-ish" bedroom. At 10 yrs old, it was high time he got a bed that wasn't pink-tinged, white washed pine with 4 posters and enough curlicues to choke a forest. He also needed a desk which I couldn't really fit in his room with the armoire and chest of drawers that came with the Queen sized bed.
So off to Ikea we went and I saw a black loft bed for $300, but it was really, really high which meant I would have to cut it down and it was not sturdy at all. I looked at PB and saw the $1800 bed. Um, no - that wasn't happening. So, off to Ana-White I went and I'm so happy I did!
I built the full sized version of these plans and, to keep costs down, used wood I had on hand. This meant I had to work a bit at the cuts, but it all worked out.
Mods:
1) I modified the railings to have the ladder at the end of the bed to keep away from the ceiling fan.
2) Because I put the ladder at the end of the bed, I got very nervous about having a soon-to-be teen climbing on to a ladder secured to a 1x10 that was only connected to the side railings with glue and screws. So I sandwiched extra 1x3s over the bottom rails and attached them to the top railing.
3) I was very nervous about making sure that the bed was adequately supported so I put a 2x4 down the center instead of the 1x2.
4) I went a wee-bit overboard screwing things together to the point where it's a bit embarrassing and now I have to paint over the screw heads.
5) I made the ladder treads with 2x4's, modifying the inside spacer board cut lengths.
Because I had quite a bit of lumber on hand, the bed only ended up costing me about $90.
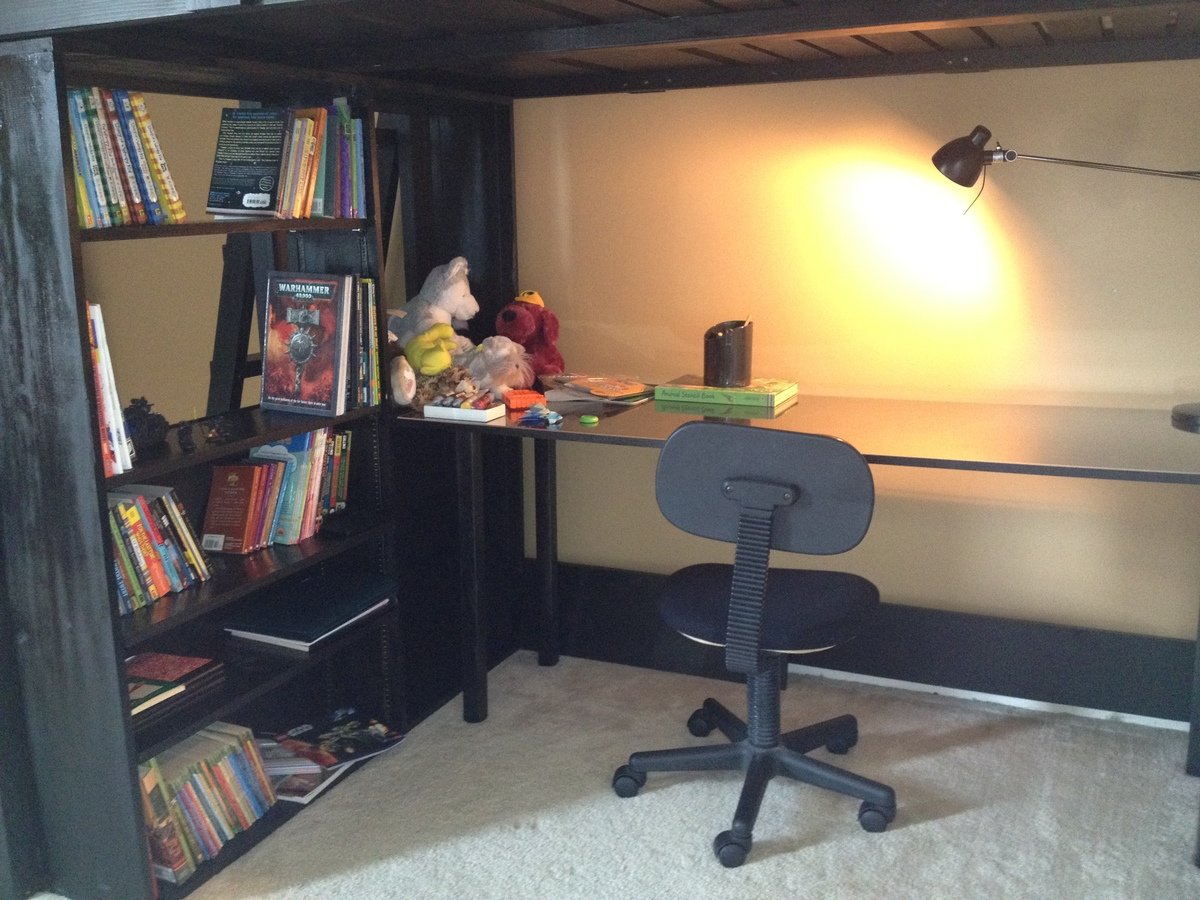
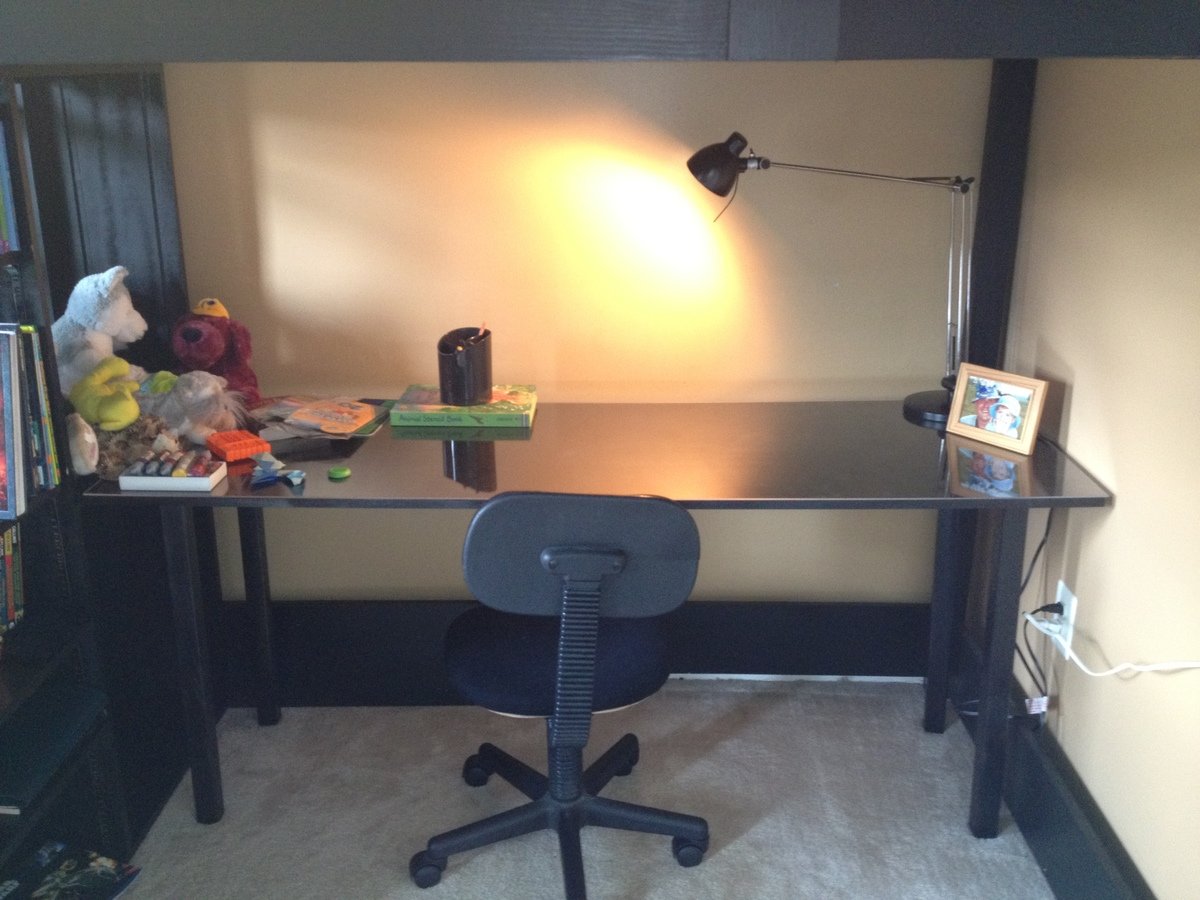
For the bookcase, I did end up buying the 1x12s and the adjustable shelf railings. I made the book shelf the entire width of of the bed and split the two sections based on width of the 1x24 board I bought for the desk. I only put the backer board up half way so that the daylight could get underneath the bed and make it not so cave-like.
The book case cost me about $70.
The desk was the easiest...but most costly item. A 1x6x24, 4 table legs and the table leg mounts ran me about $80. The plexiglass top that I had cut for the top cost me about $80.
Time wise, this would have taken me a lot less time than the 4 months it took - but I worked on it as I could and when I could, by myself. I got some friends to help me bring it upstairs and put it back together, but it was mostly done when I could fit in some time.
My son LOVES this and it really does give him so much room!!! Thanks Ana - I really appreciate it!

Thu, 01/17/2013 - 08:42
Hello,
Where might I find the modified loft bed plans that allow for a full-sized mattress and the under desk-shelves?
Thank you!
Fri, 01/18/2013 - 07:38
Hi!
To modify this to be full sized, I just added 15" to the width of the bed. Ana said this in the plans:
Cutting Instructions:
Converting to Full Size This bed can easily be converted to full size. You will simply need to add 15″ to all boards that run parallel to the ends. This includes the planks, end top pieces and the slats. Shopping list will need to be adjusted as well.
So I modified the cuts to the head and foot board parts and the full size mattress fits perfectly.
For the shelving underneath, I just looked at some of Ana's other plans for shelves and winged it.
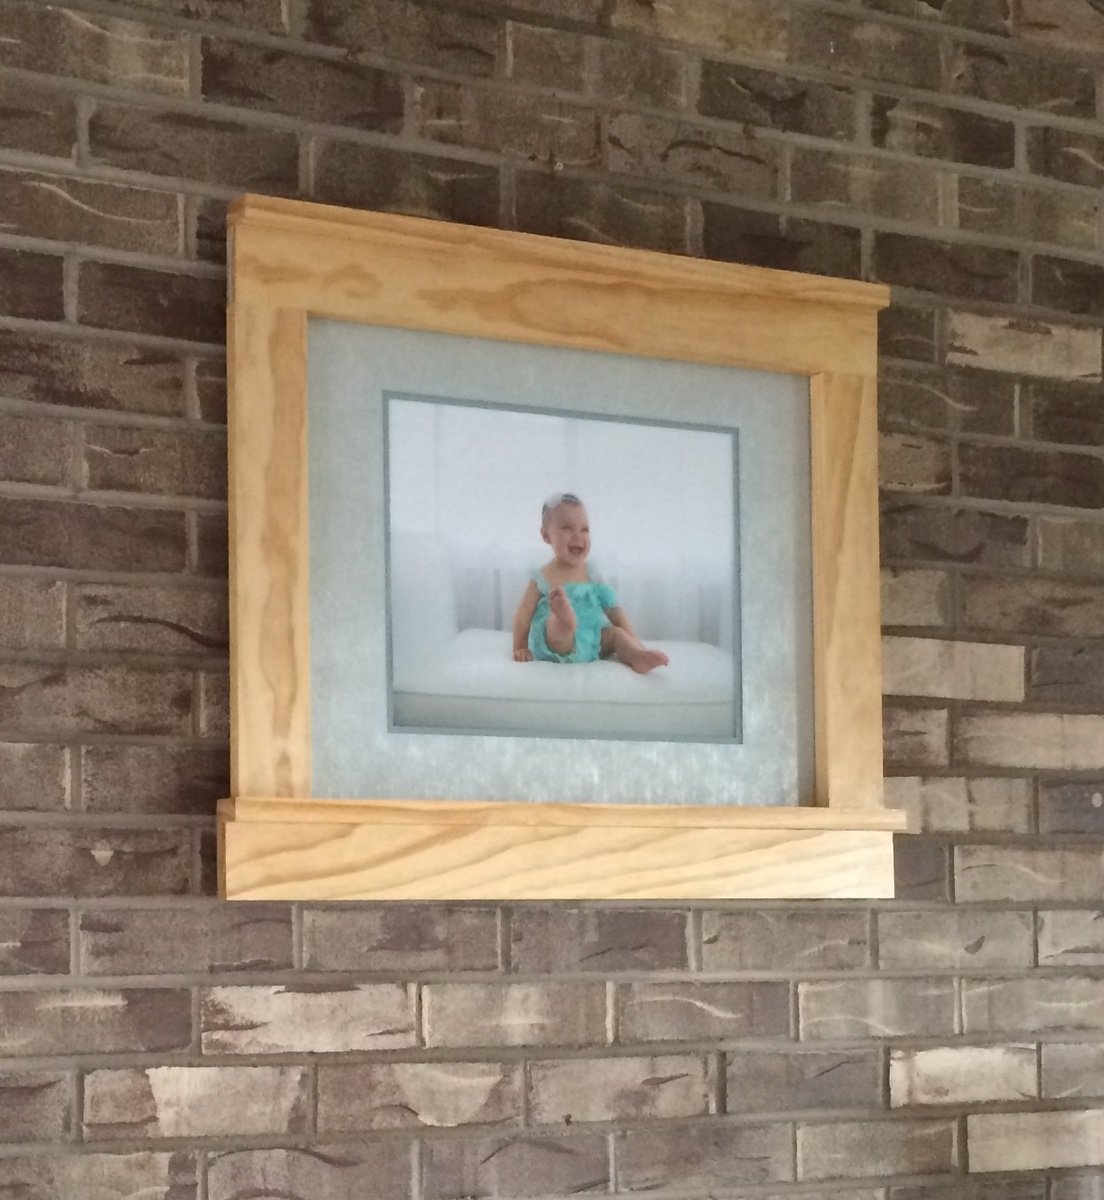
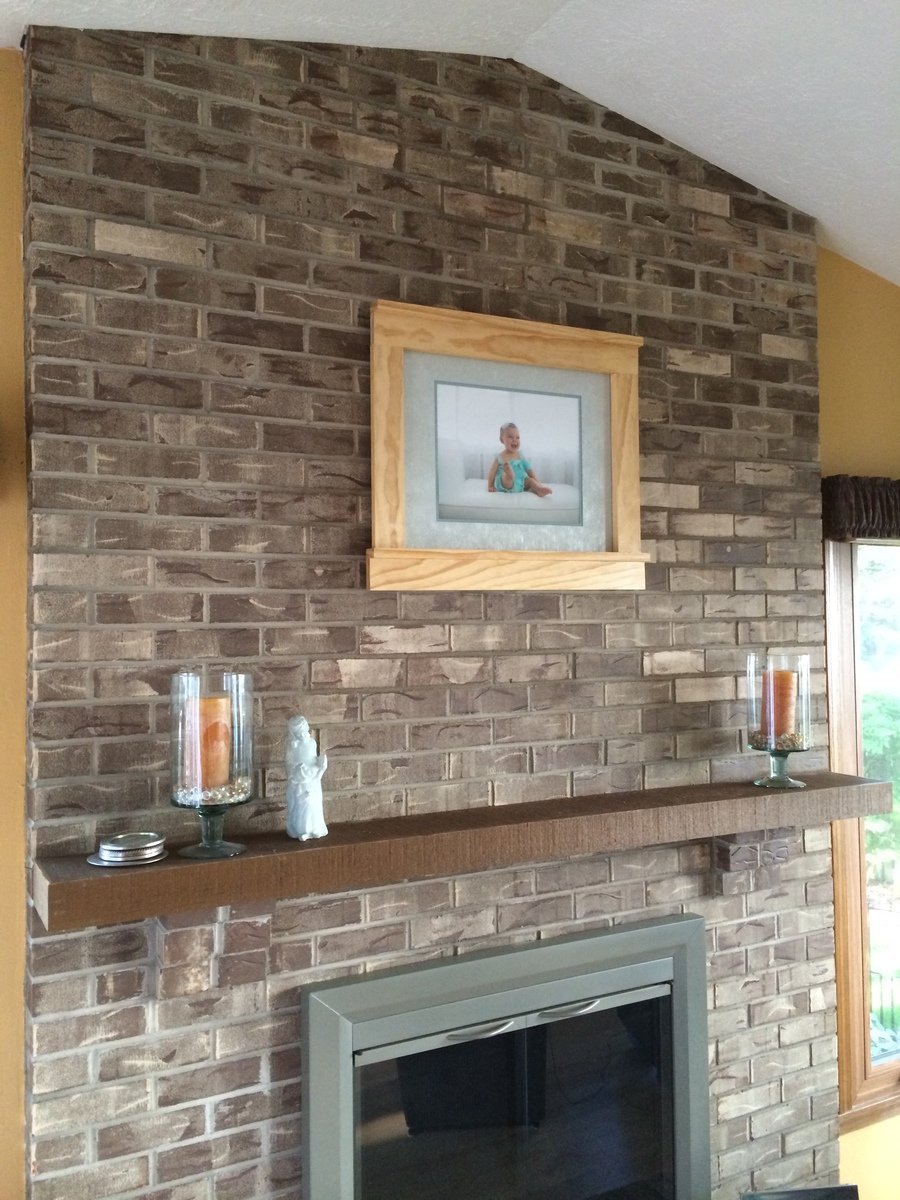
Our new house has an imposing exposed brick wall over a fireplace and mantle. To fill the big wall, we wanted to post enlarged pictures of our baby/family, but did not want to spend to money on a massive frame. Executing these plans turned out awesome. We blew up a photo, had a matte and glass cut to size, and then I built the craftsman frame to fit around everything. The framing probably would have been better/easier if I had a router to cut out an indent on the backside, but I ended up framing the photo/glass/matte inside some plain molding I nailed to the back.

Farmhouse table and benches

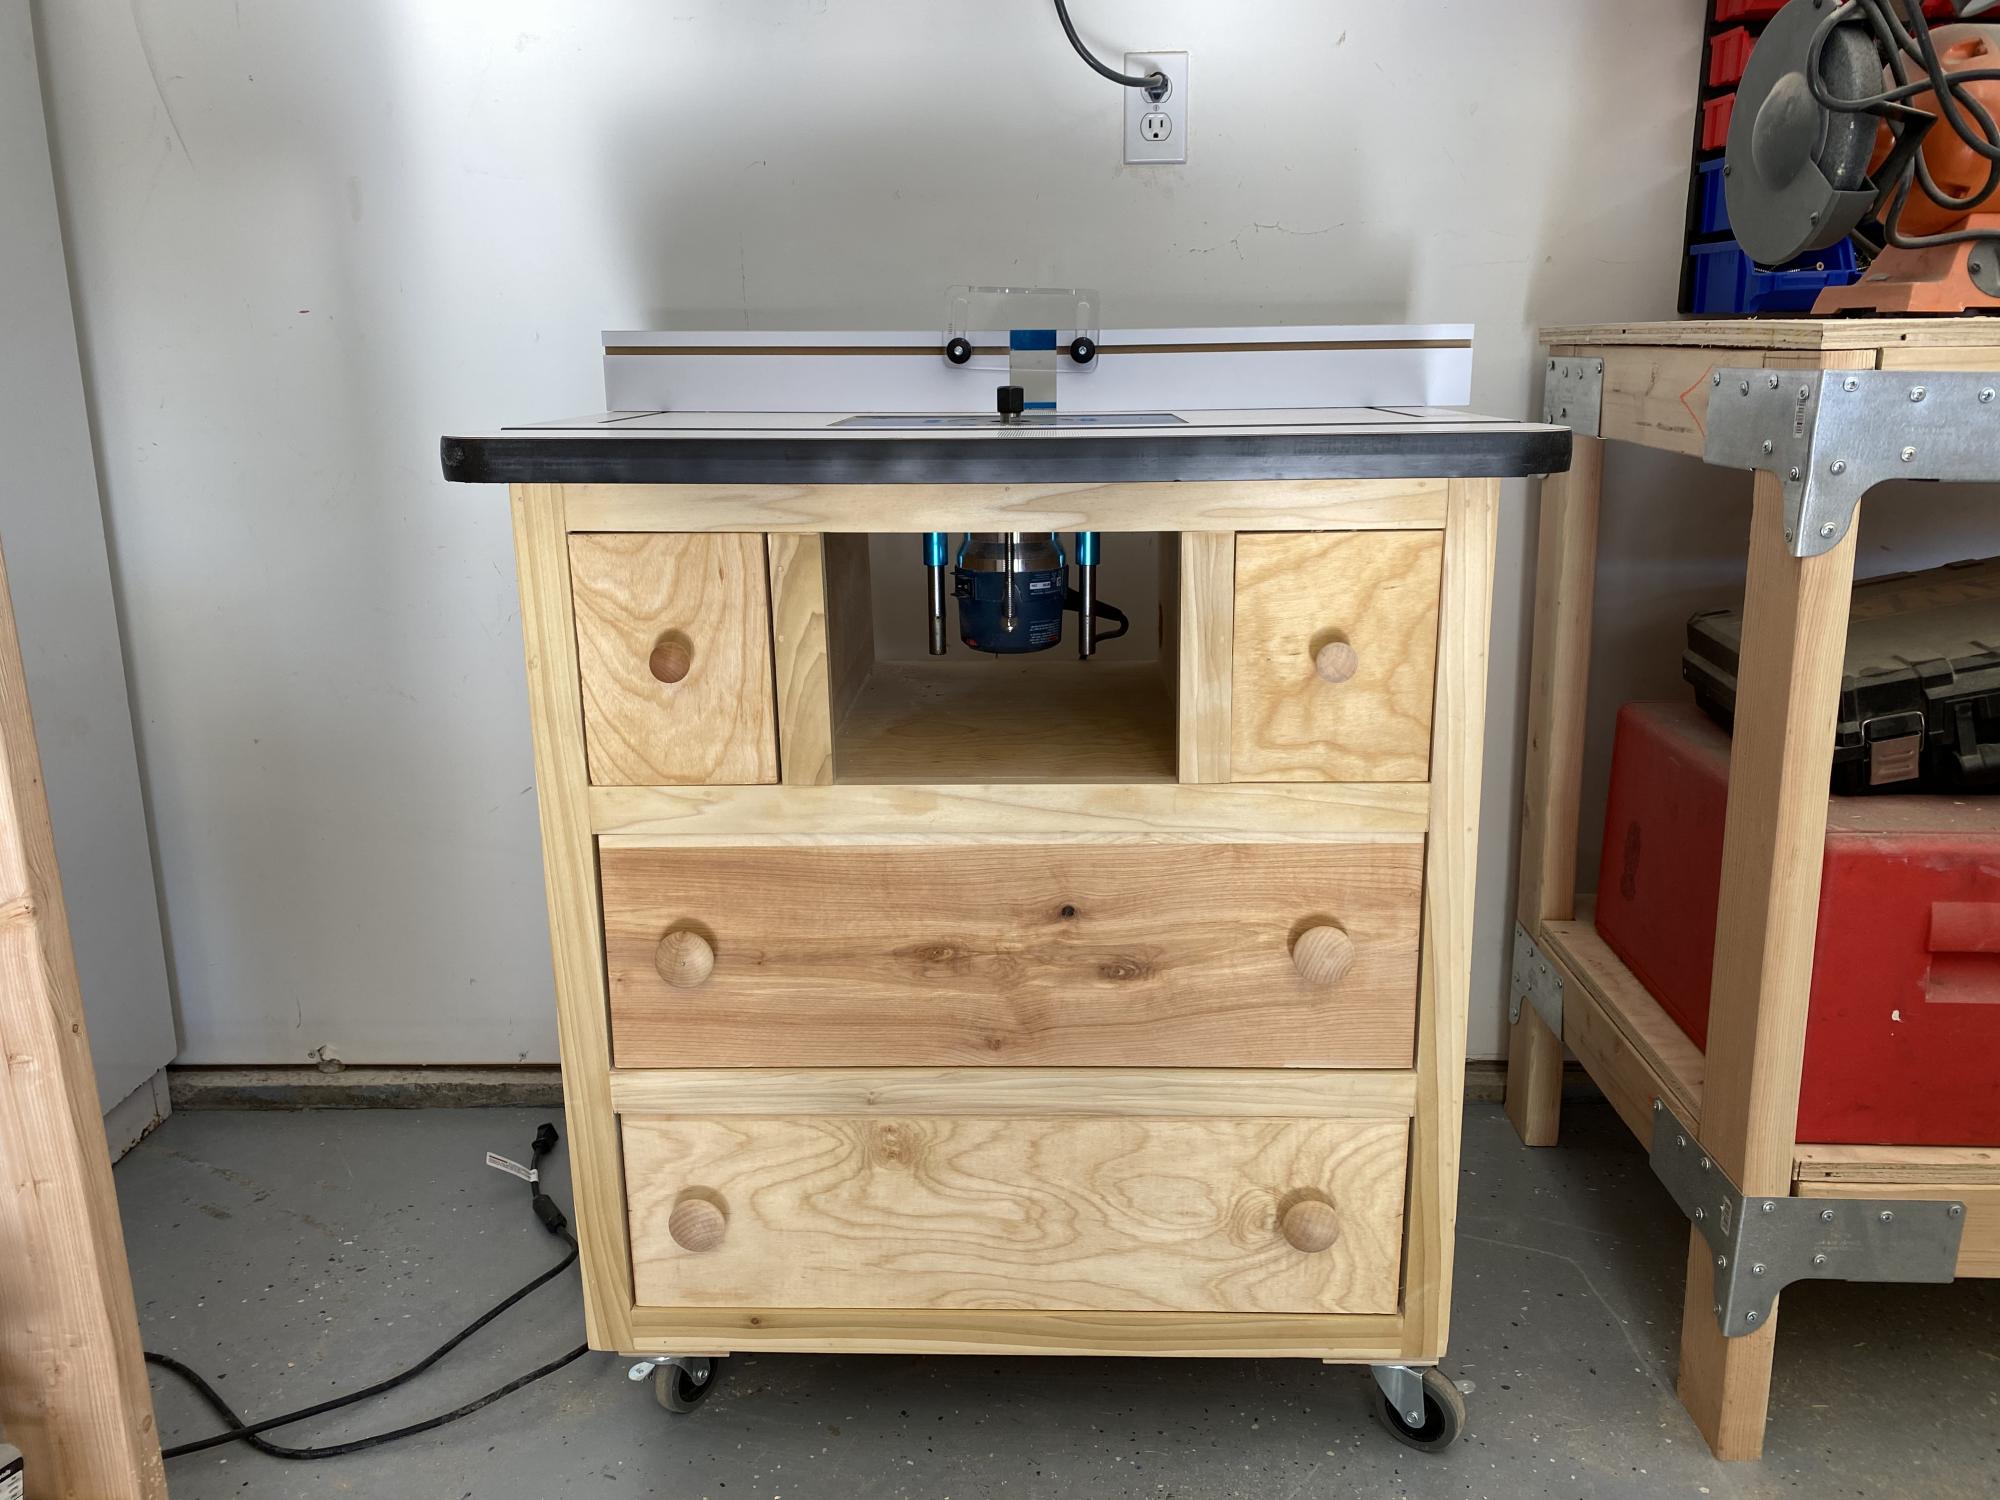
As a beginner woodworker I was searching for a router table project and came across this one. I constructed it entirely out of birch plywood. I will admit is was a challenge for me as I had never done drawers before. The biggest challenge was the small drawer for bit storage. I used a Rockler table top and it worked perfect. Overall I’m pleased with the way it turned out and have already used it in several projects
Reader Build

This table was super easy to make and is solid as a rock! I'm very happy with the way it turned out. It is the first piece of indoor furniture I have made. I did need 3 2x2x8's instead of two though. I don't know if it was my inexperience or what, but that is the only thing I had trouble with.
I finished it exactly like Hillary did, with the steel wood vinegar concoction, but mine came out much more brown than hers did. It wasn't exactly what I had planned, but in the end I'm happy with it. I guess that's one of those things that can't be controlled.
I can't wait to build the end table to match!
Mon, 08/27/2012 - 22:41
Gorgeous, Meagan! It did come out a lot more brown than mine. That is so strange. I guess with oxidizing you never really know what you're going to get! I go a bit crazy with scraps before I oxidize and I experiment with more or less vinegar to tone down the effect. Anyway, yours is really beautiful and looks super square and sturdy. You did a great job.
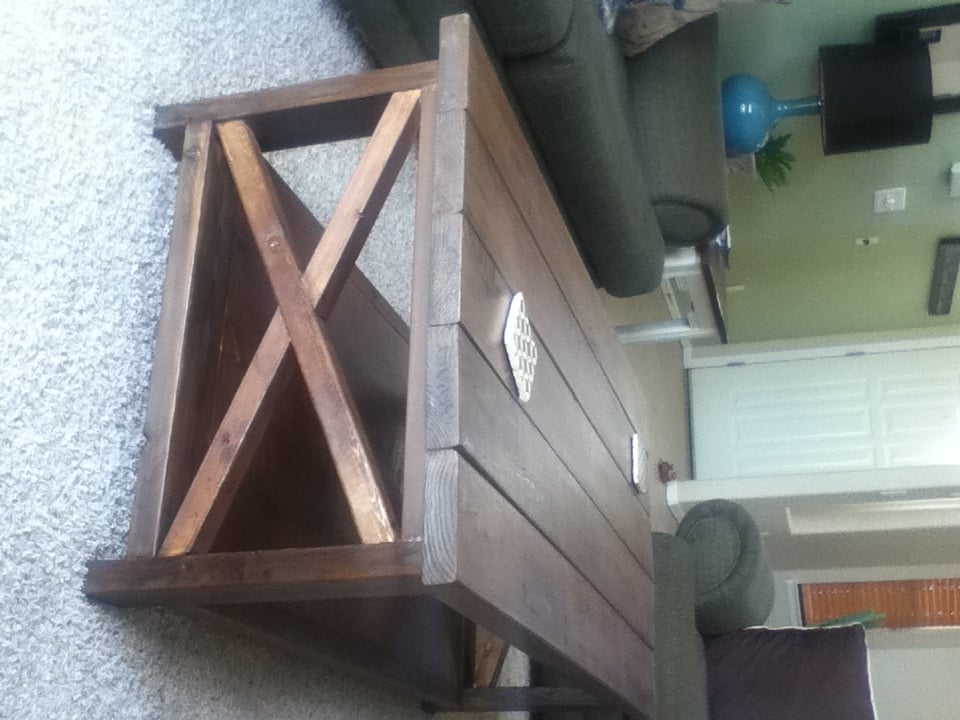
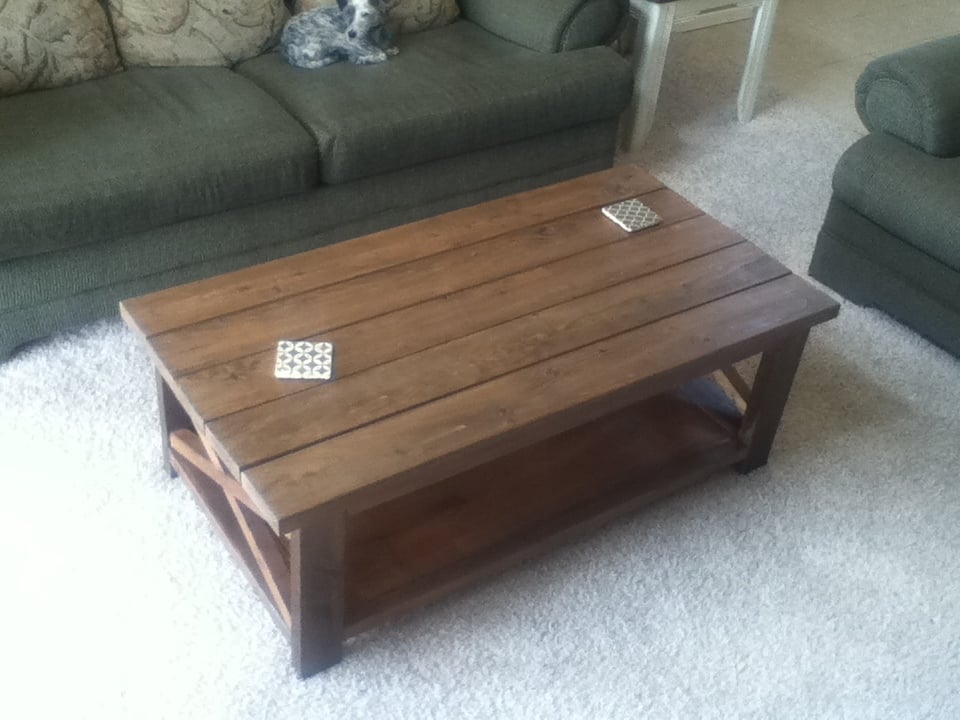
This is my first major DIY project and was relatively easy if you follow the instructions (I have done the crate coffee table and turned an old coffee table into a bench).
This was my second bigger builds. It came out beautifully and I am so proud to have built this for my husbands very first Fathers Day. Easy to build.

Happy Easter for the grandchildren. Your post inspired me....thankyou. I was happy with my
outcome.
I had trouble with this project. I wasn't sure of the terminology, off square and such. It went well, I ended up not putting the truss part on due to not paying attention when cutting the wood.

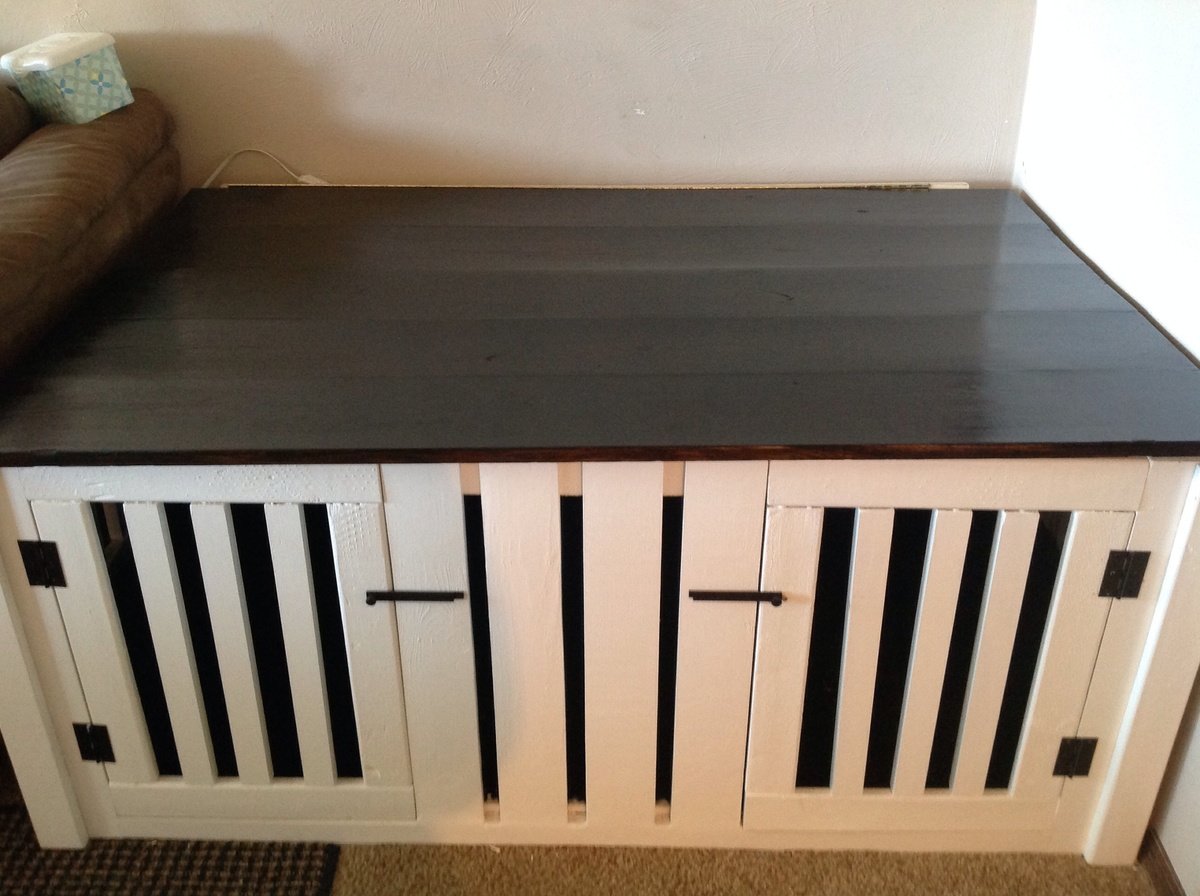
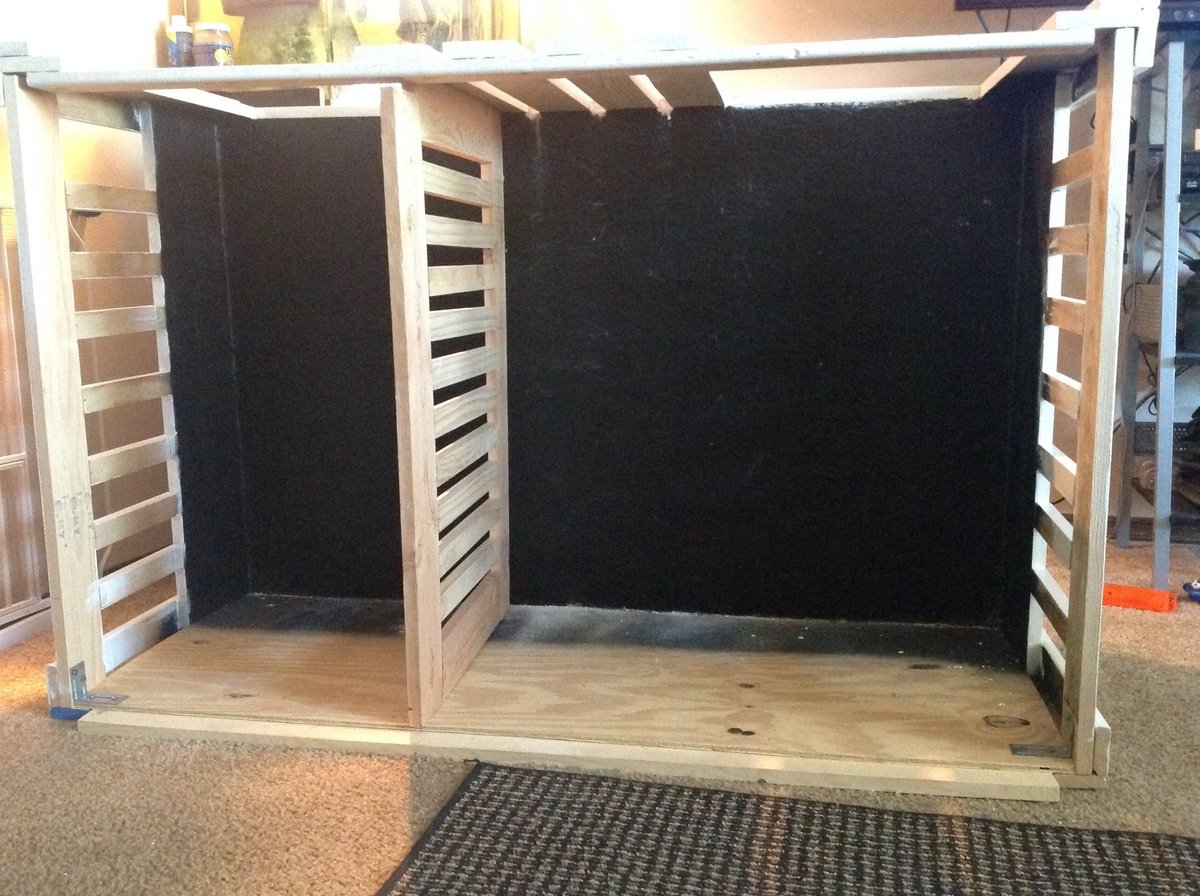
I LOVE the way this turned out! I used truck bed liner for the floor and the sides because one of the dogs is still a puppy and truck bed liner is TOUGH and waterproof (in case of accidents)! I made one side of the crate huge and one side small to match the size of our dogs. The really nice thing is that you can't tell by looking at it that it is two different sizes inside. This looks so much better than those ugly wire or plastic crates.
Fri, 01/23/2015 - 08:44
I plan to do a crate/table similar to your design - how big are your dogs and compartments??
Thanks a lot!!
Misti
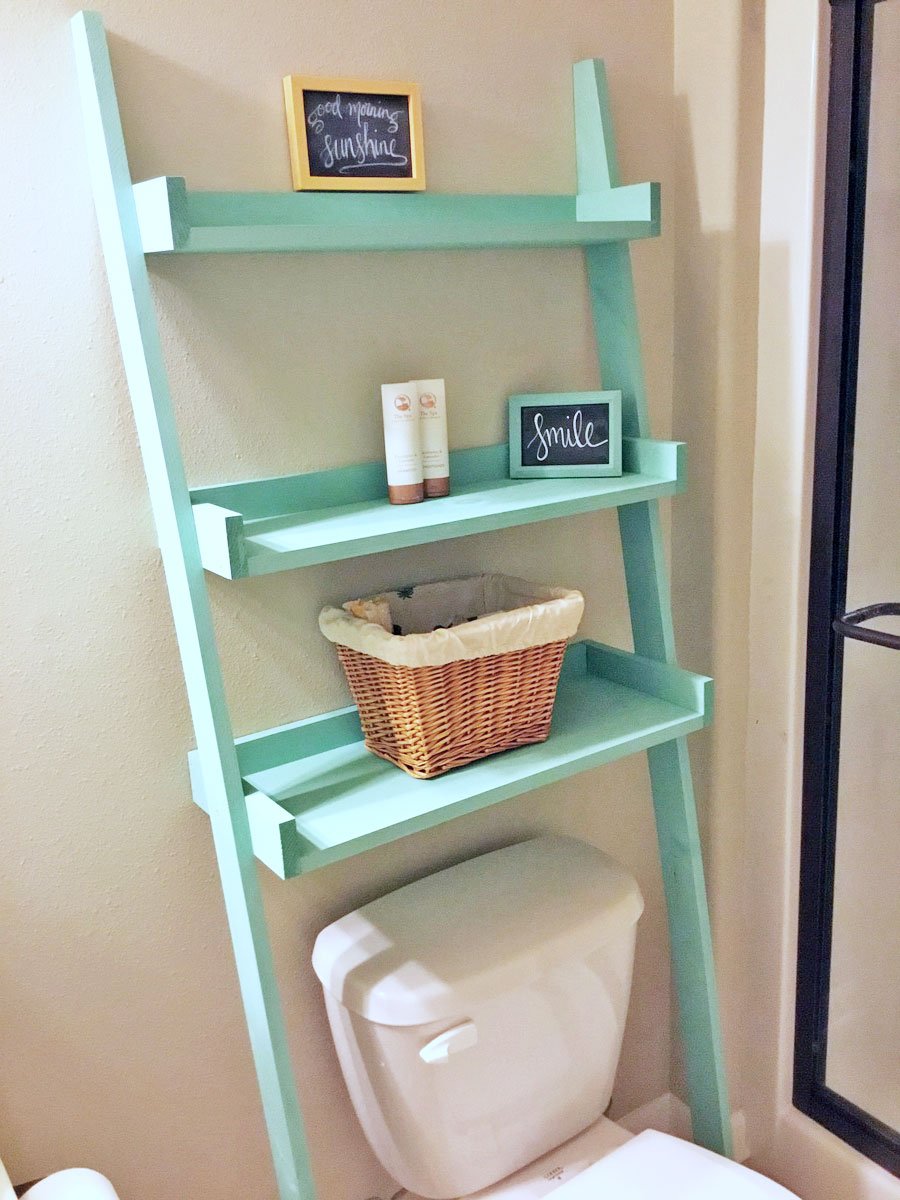
I saw this plan and immediately decided to make it! My mom had been telling me for a while I needed a shelf in the bathroom she uses while visiting. She was coming the next day so decided I needed to hustle to surprise her. I left the lumber store at 8pm and finished painting the assembled shelves by 11pm. The next morning I moved shelves to the bathroom and when she arrived later that day she was so surprised! She loved it! Thank you so much for the idea!

Wed, 06/19/2019 - 17:01
This is amazing! Three hours! I'd be surprised too!
Thank you so much for sharing a brag post, much appreciated!
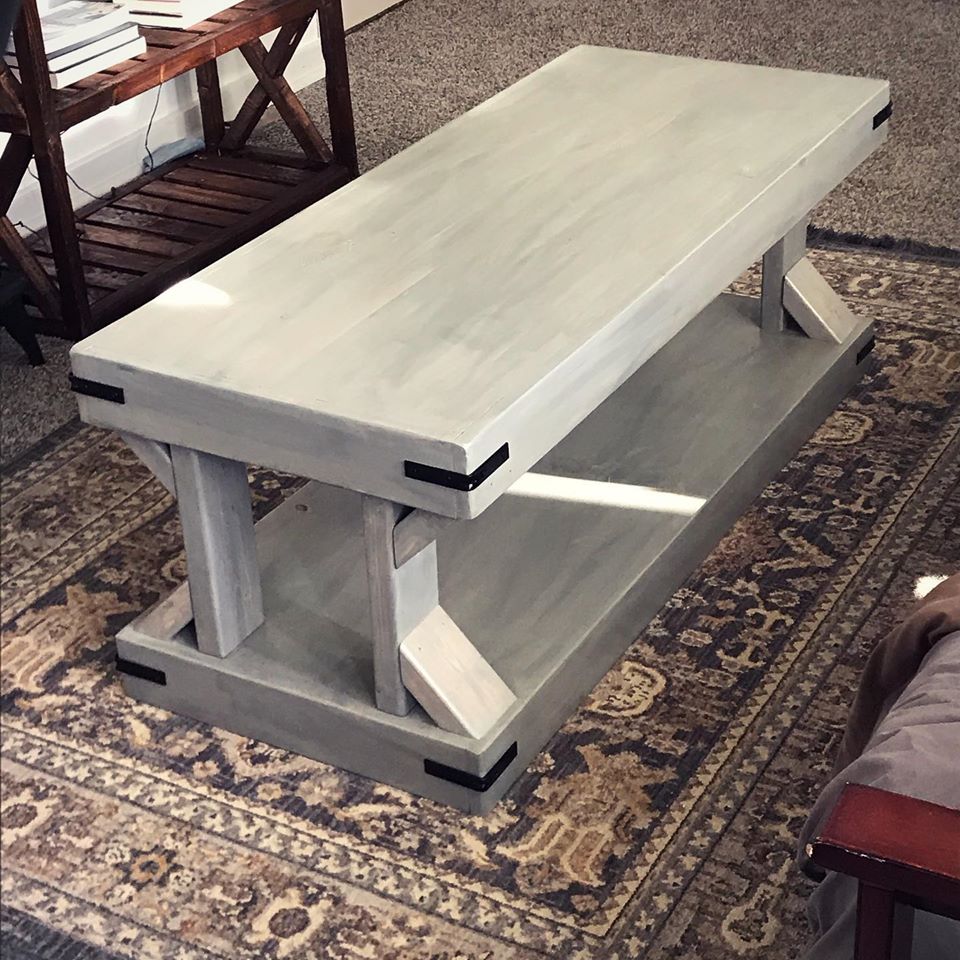
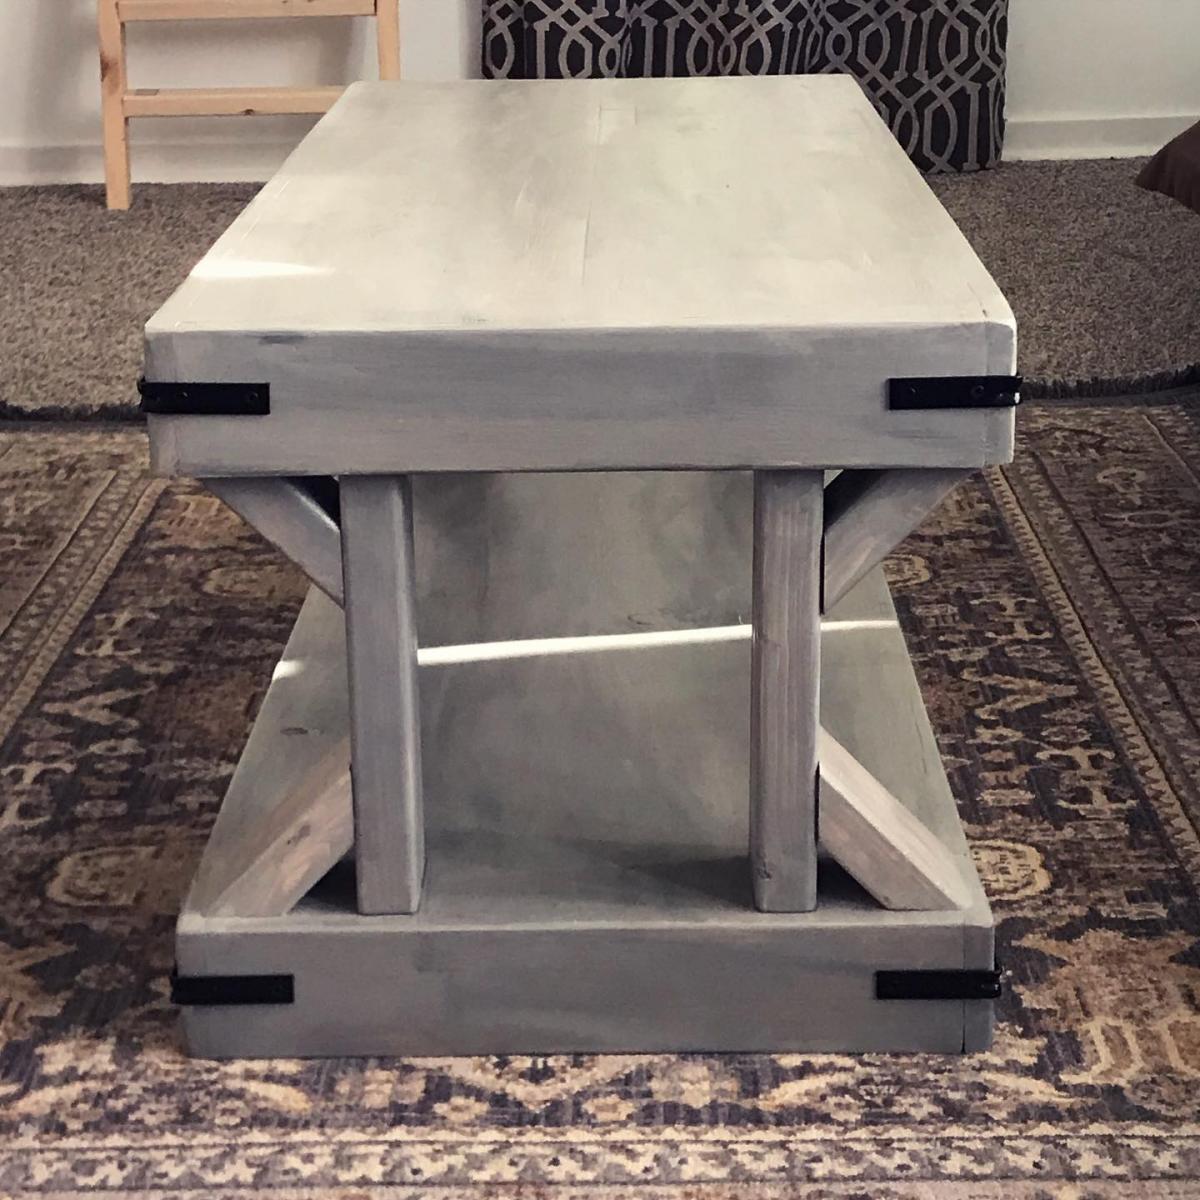
I built this coffee table with off the shelf lumber and finished with Varathane Sun Bleached and Weathered Gray Stains, and Minwax satin polyurethane. I applied a fairly even coat of the Sunbleached Stain and added a few streaks of the weathered gray. I used 1 ¼" pocket screws instead of the brad nails. I used a hammer and a couple of finishing nails for the braces.
I built this bed a little higher so it will last my daughter a lot longer.
Such a great way to get back all that floor space! The 2x4 frame makes it super strong as well.
Diane
