Side Table
.
Built from Plan(s)
Recommended Skill Level
Beginner
.

I modified this sideboard from the Anna White plan that used 2x4s and 3/4 inch plywood, by substituting select pine 1x4s for the face frame and 1/2 inch maple veneer plywood for the vertical partitions and shelves. Vertical partitions were inserted into dadoes in pine 2x4 cross pieces joining the two base 2x4s. The end pieces and doors were made with tongue and groove joints using 1/4 plywood and 1x4 or 1x2 frames. Next was addition of the face frame(1x2s)and base. The 1x4 base covered up the 2x4s, and was mitered at each corner. I used ball bearing slides to attach the drawers, made of 1/2 inch plywood. I painted the carcass with a latex paint and purchased 13/16 inch Cherry boards to join together to make the top. The drawer fronts where made from 1/2 inch plywood, with rabbitted pine edging added to match the doors. The Figure shows the finished side board with hardware installed.
My husband built this conversation set during covid. Since then he has built so much stuff for our yard. More pics to follow.
I started baking my own bread a few months ago, and storage was an issue. My husband decided to build me an old fashioned bread box and set out designing one on his own to fit in our small galley kitchen. I love it. It is a double decker, so I can fit two loaves in it just fine. The inside is coated with a food-grade sealer.


Sun, 12/04/2011 - 02:32
That is a great idea indeed and I love how it has a shelf inside.

Wed, 12/07/2011 - 03:49
This is an awesome idea, can't wait to make one for my kitchen. Beautiful job! Thanks for sharing this!
Sat, 06/30/2012 - 07:05
Just what I'm looking for! Do you have a pattern or measurements on this project? Thanks!
Tue, 08/20/2013 - 10:40
Please, let me know if there are plans/measurements somewhere. Love this!!

We followed the plans closely, and it turned out well for the first project. It was the perfect size for what we needed! My husband had never built anything like this before and after a little research on how to use the kreg jig, he was able to finish it in a weekend.
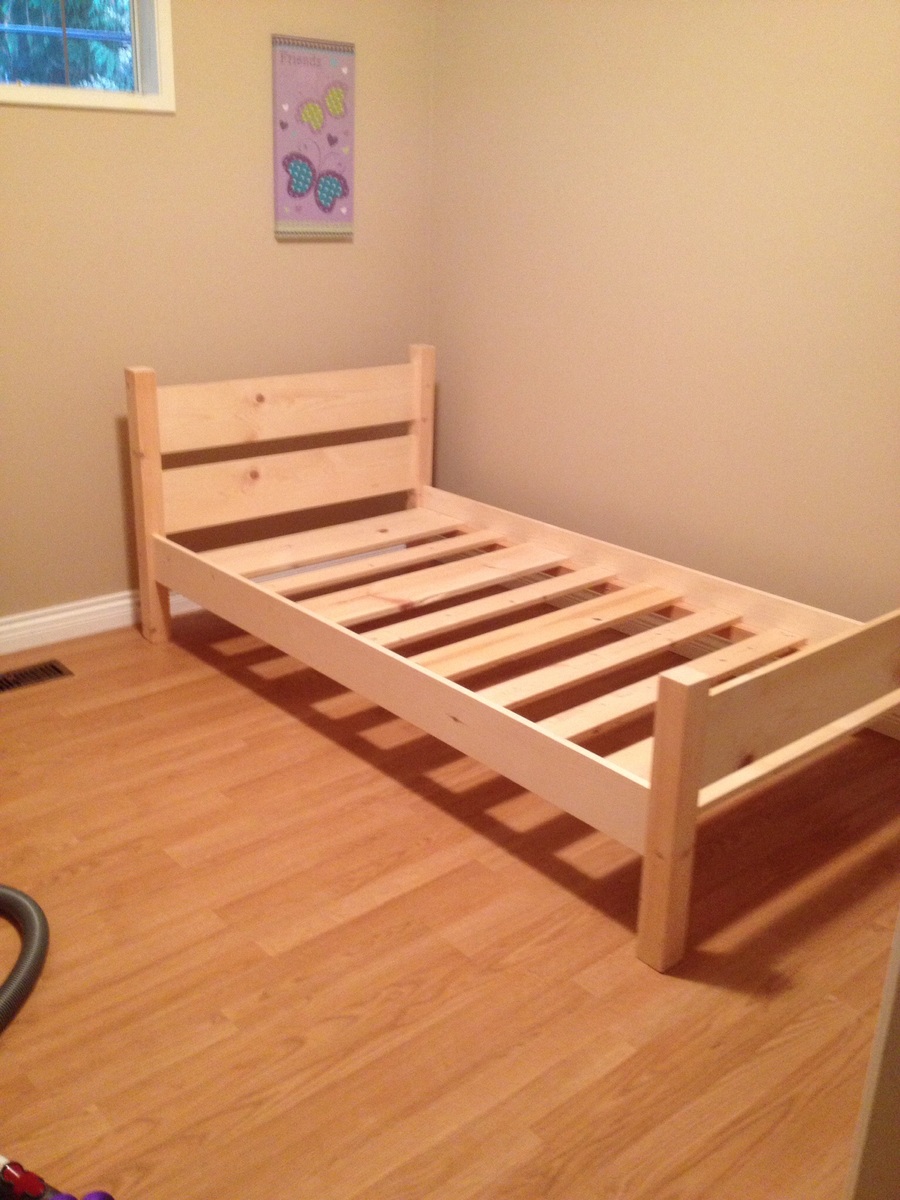
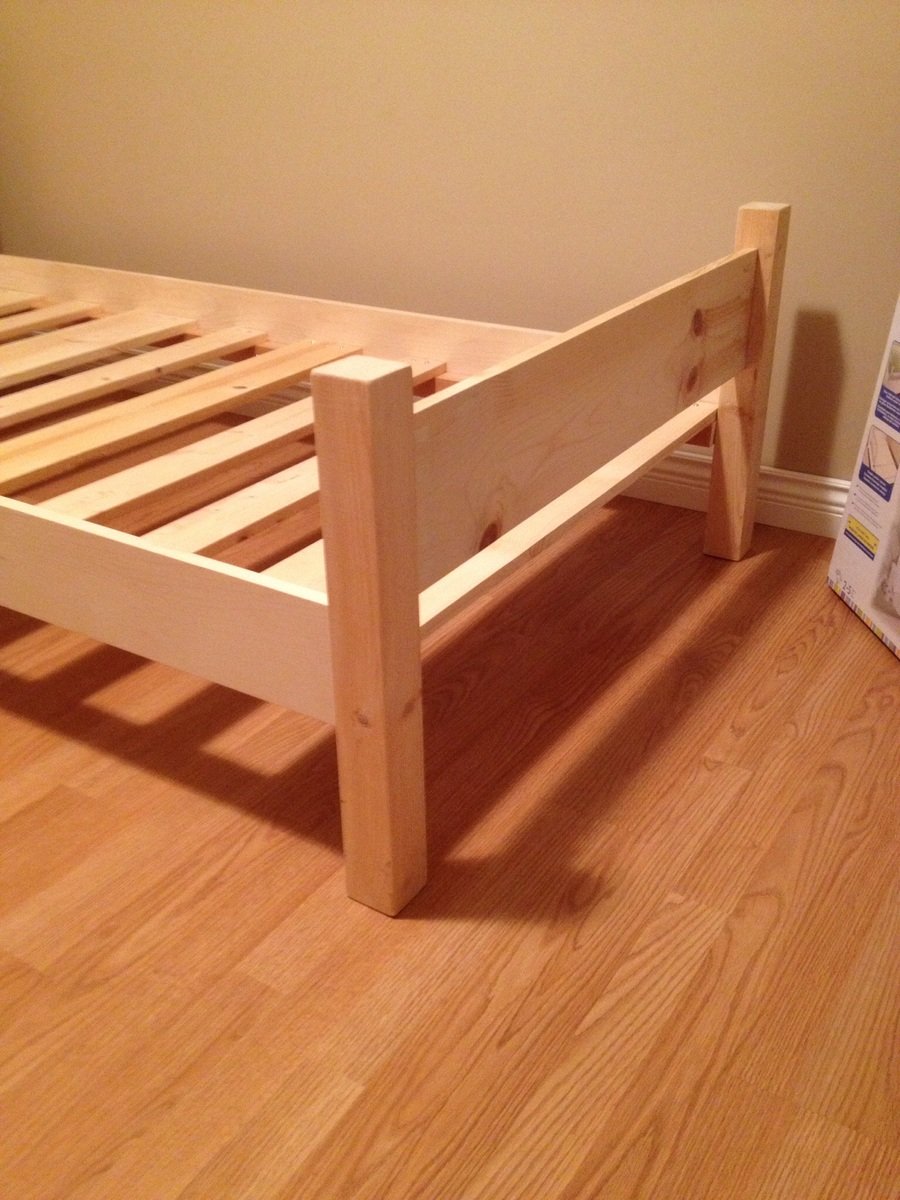
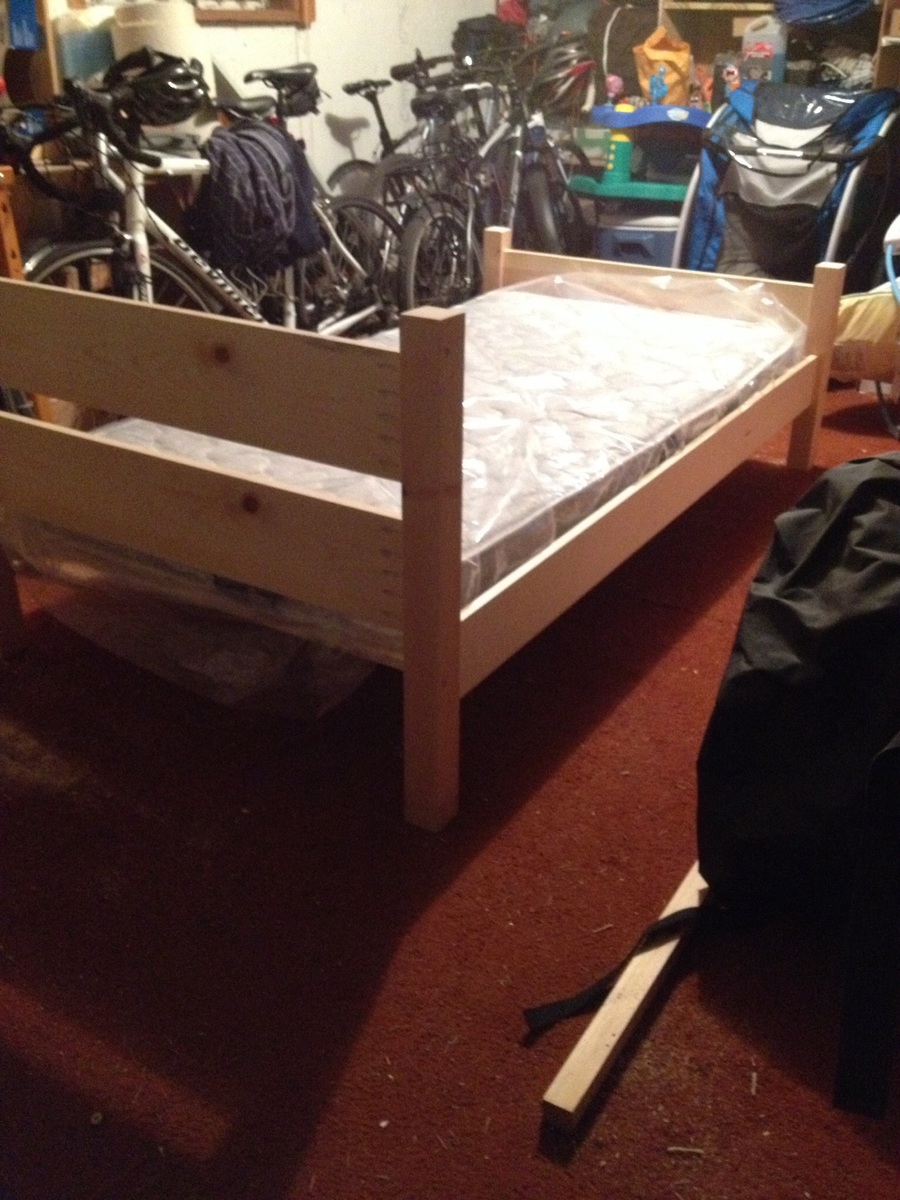
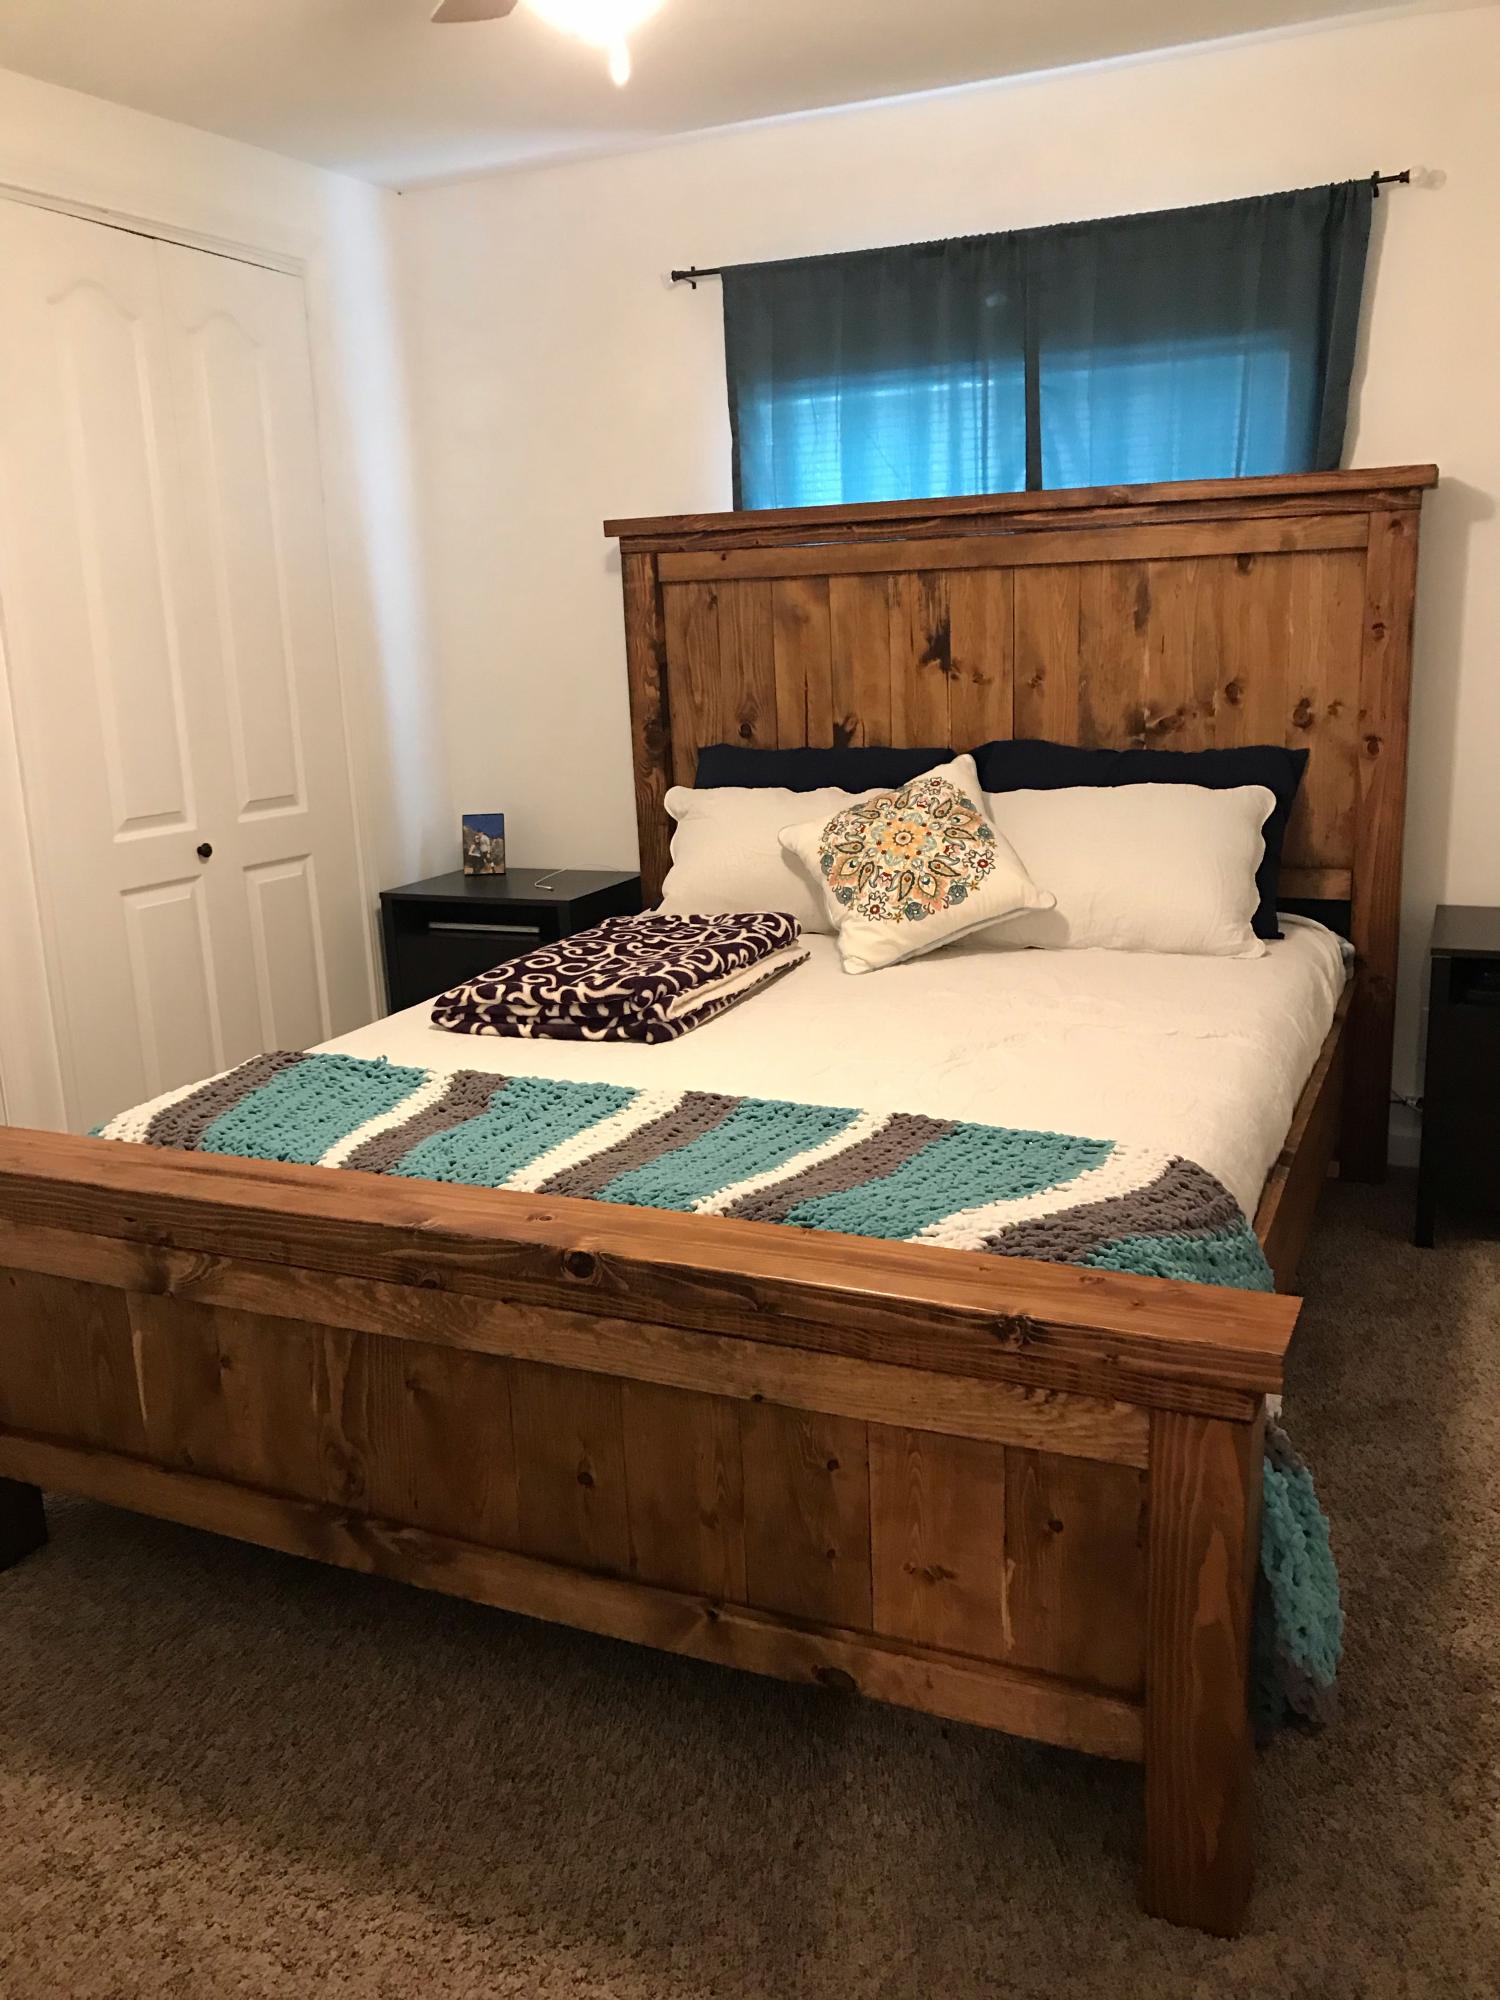
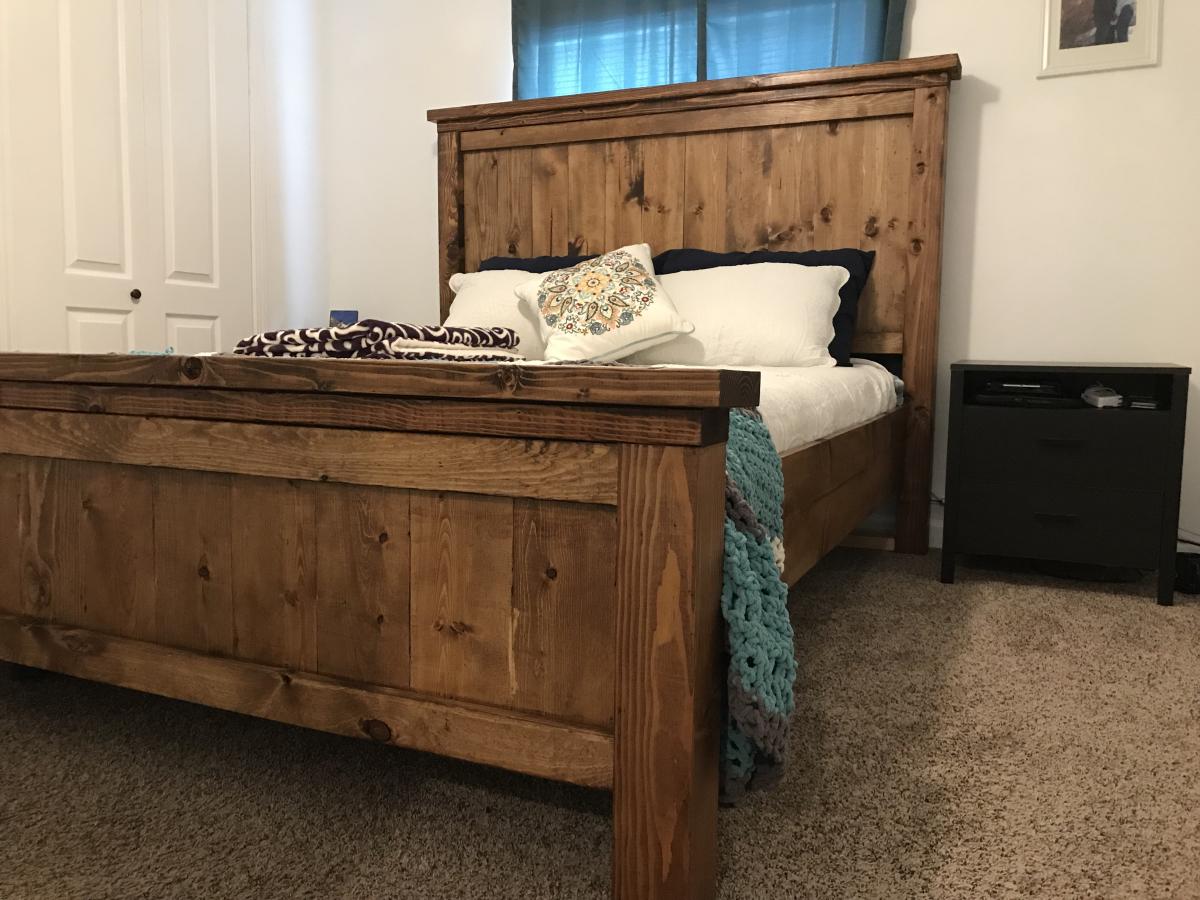
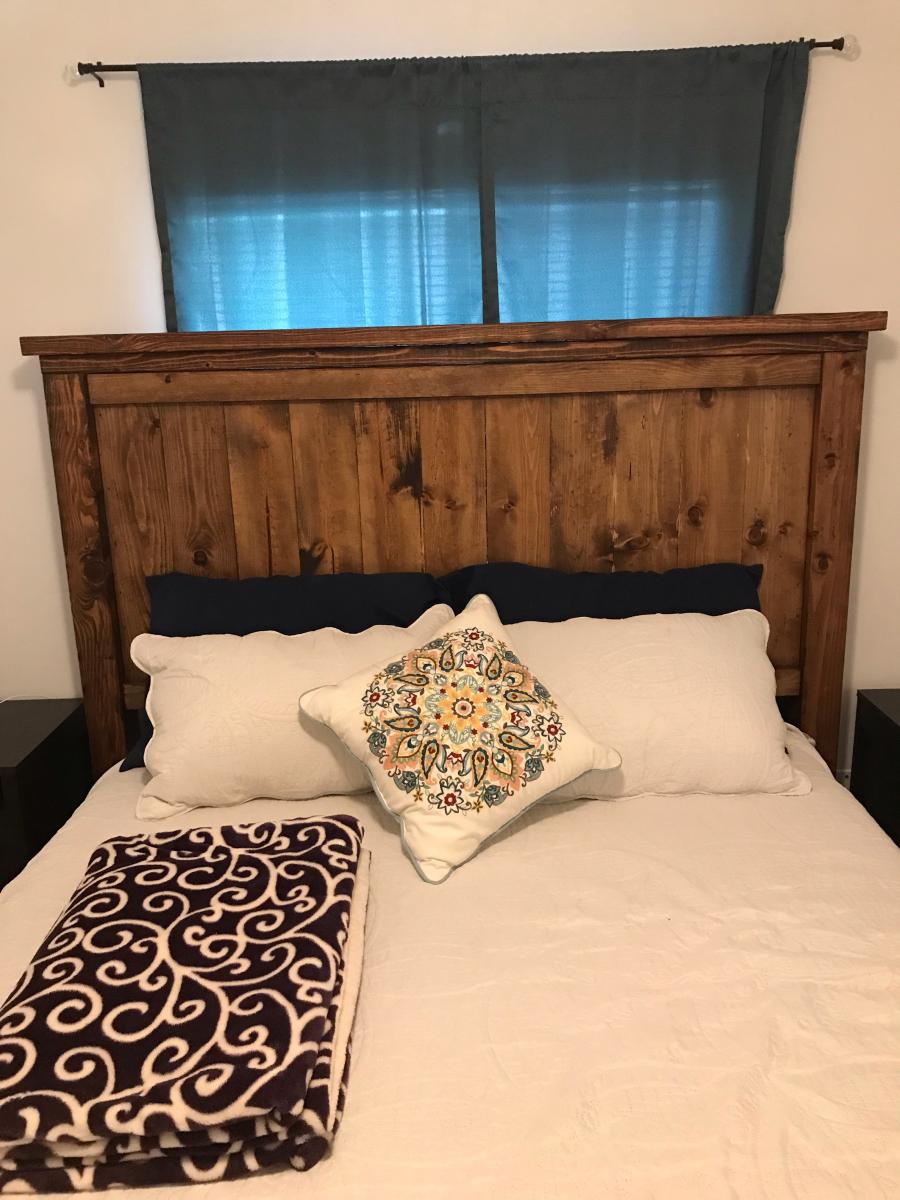
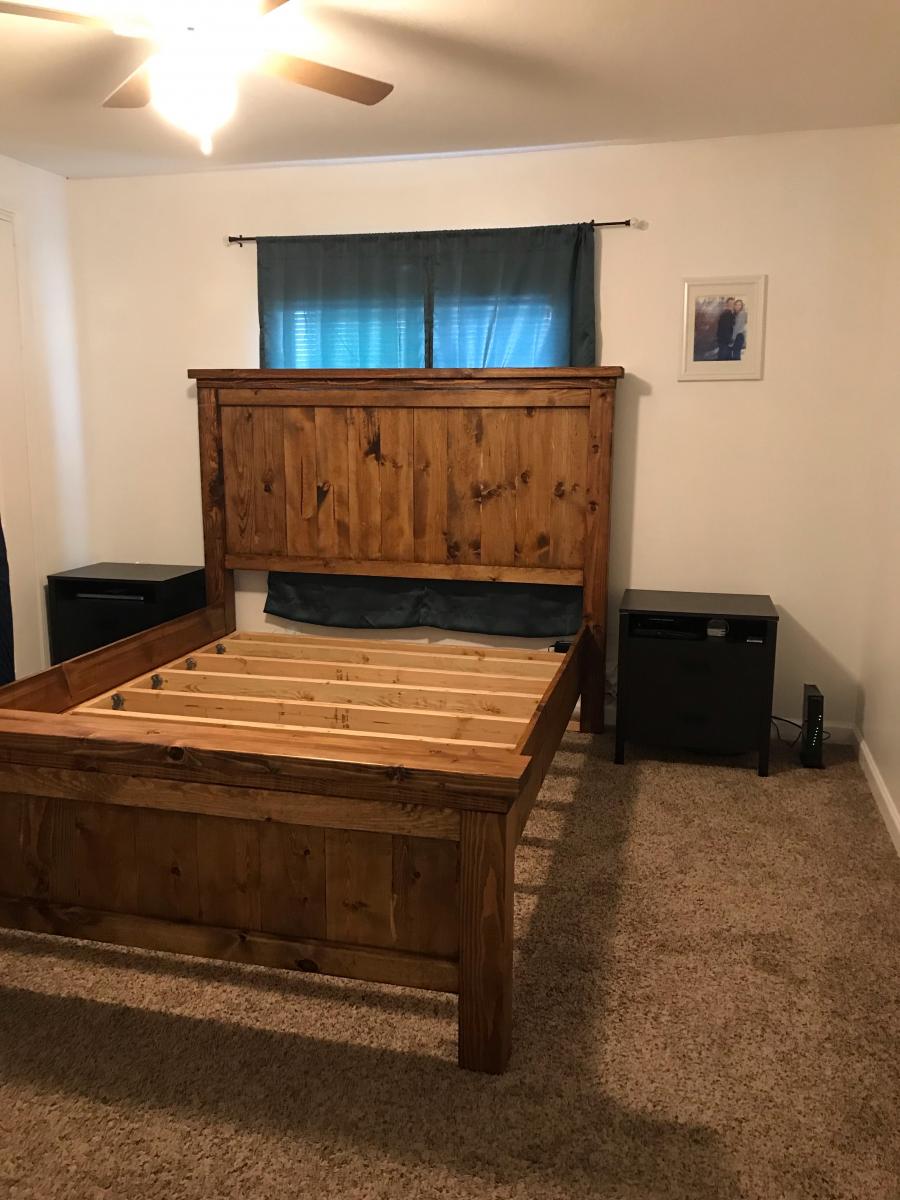
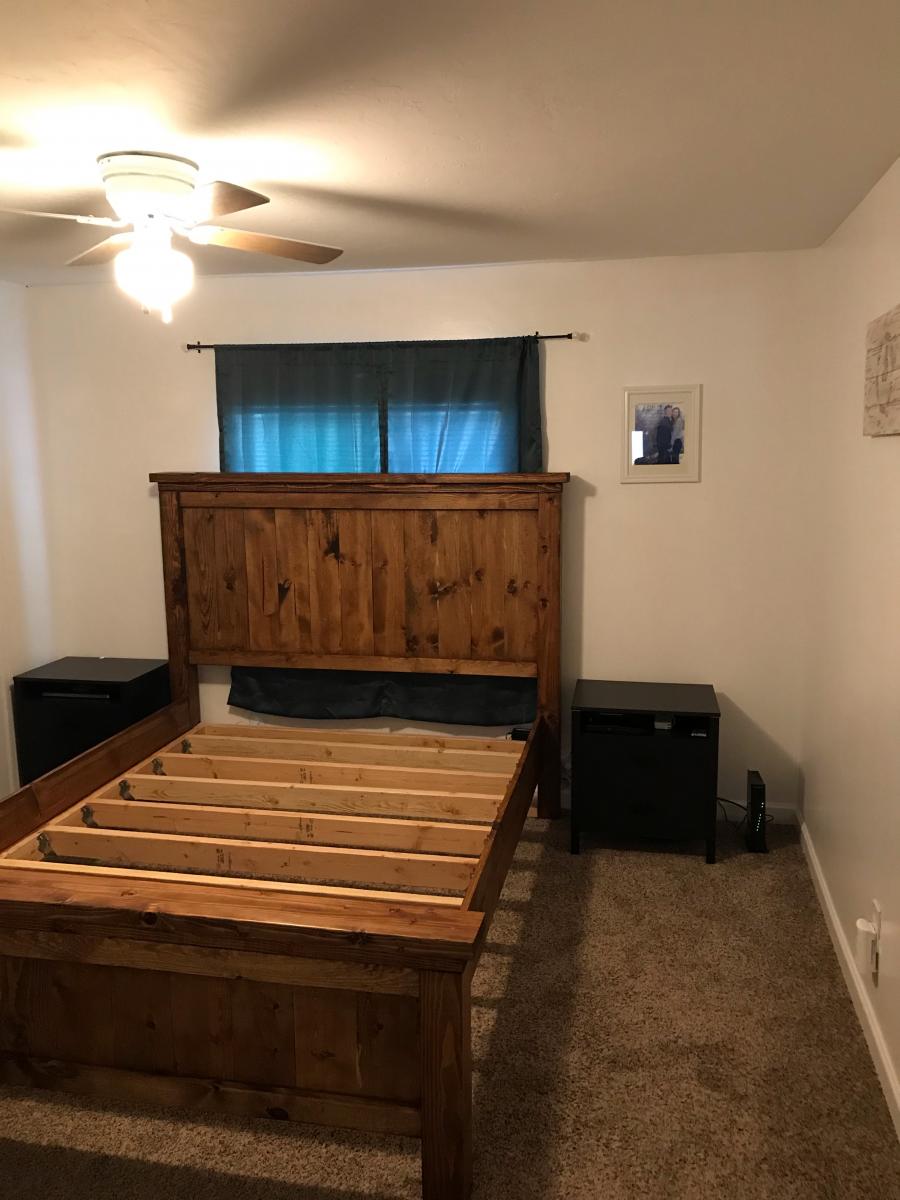
This site introduced the Kreg Jig which was a game changer as far as allowing me to give this a go. Thanks to the various posts for inspiration particularly Suzie_R. I added an off the shelf guard on the bed - photo to follow. I built the dimensions to fit a day mattress that I bought.
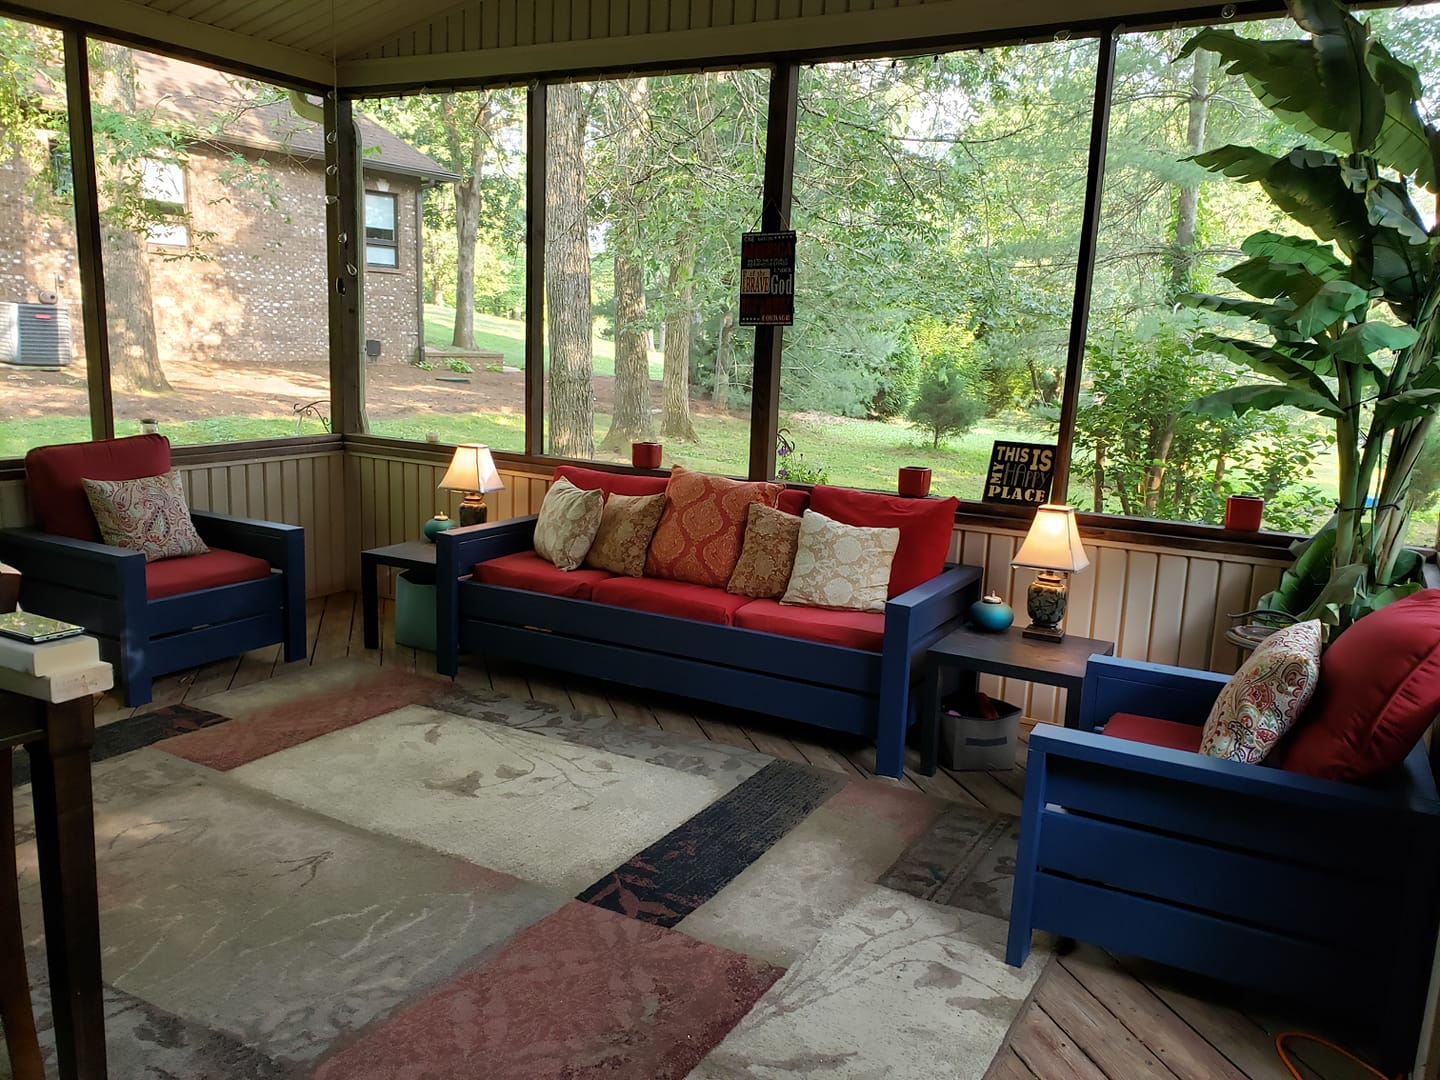
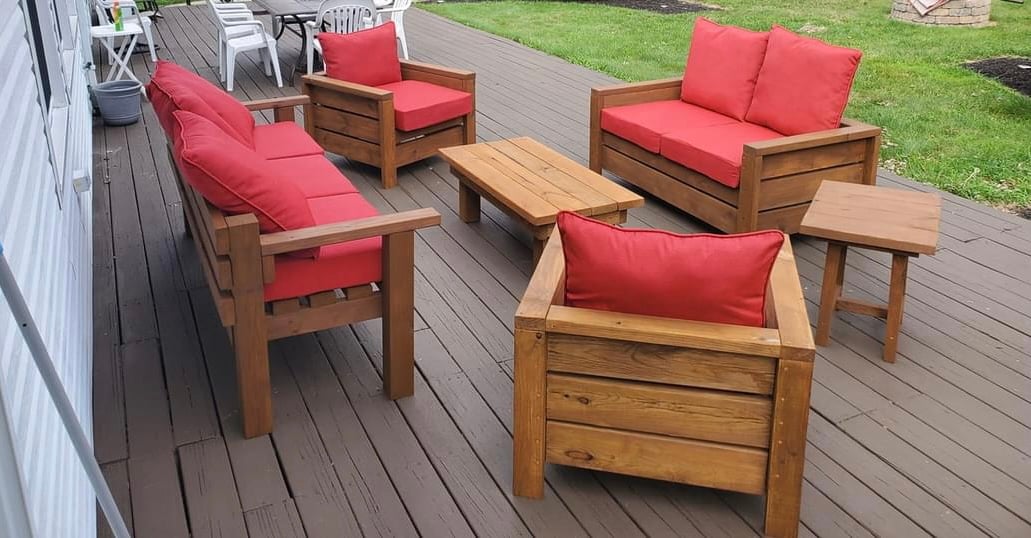
We built the chairs first using the Modern Outdoor Chair Plans found here on Ana White. We then modified the plans to make a 75" couch that fits 3-25" cushions. Both were super easy to build. We are very happy with them. We built the couch on the porch because it is very heavy when finished. Everyone loves them!

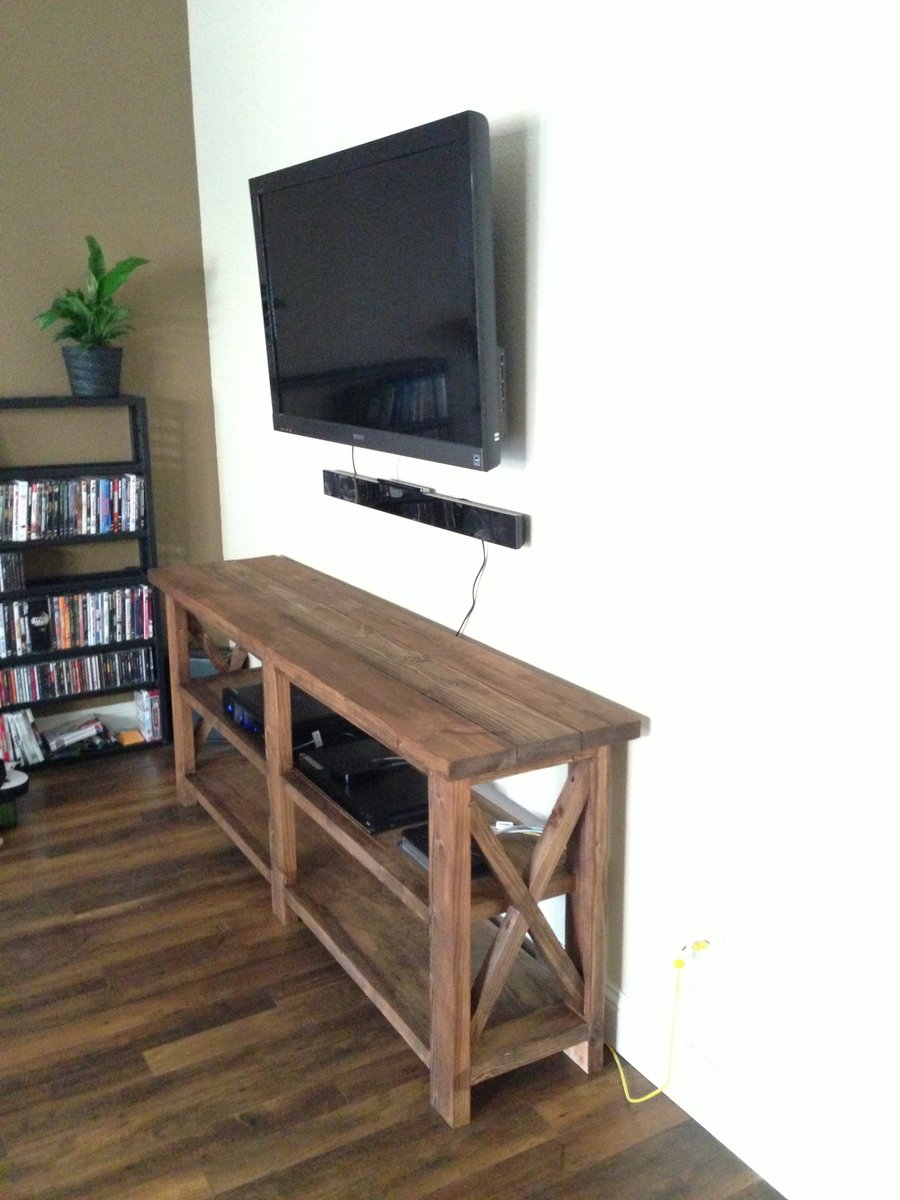
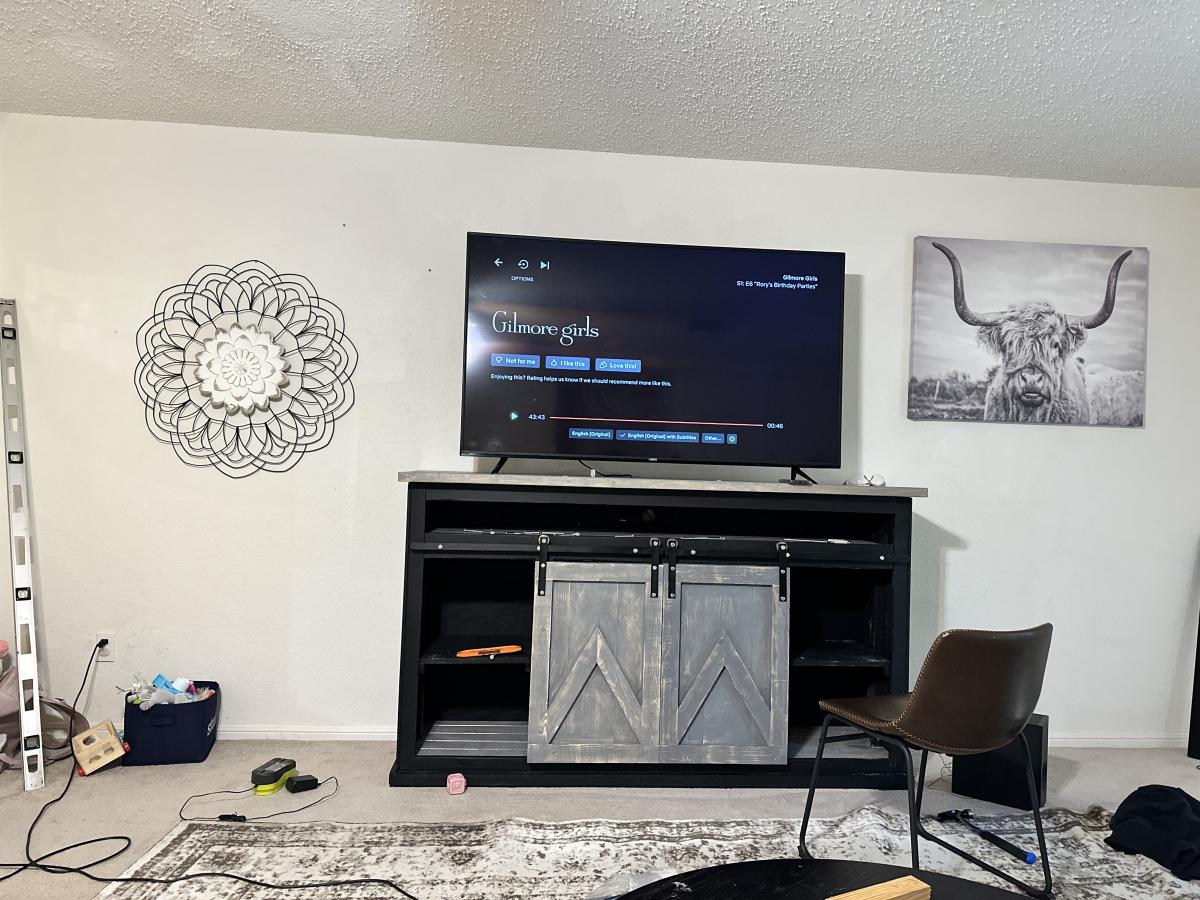
My daughter wanted a TV stand with a space for her sound bar, along with storage for toys and blankets. Hardware for barn doors were used from a video you had posted
Tue, 03/28/2023 - 15:44
This looks fabulous, love the finish choice. Thanks for sharing!
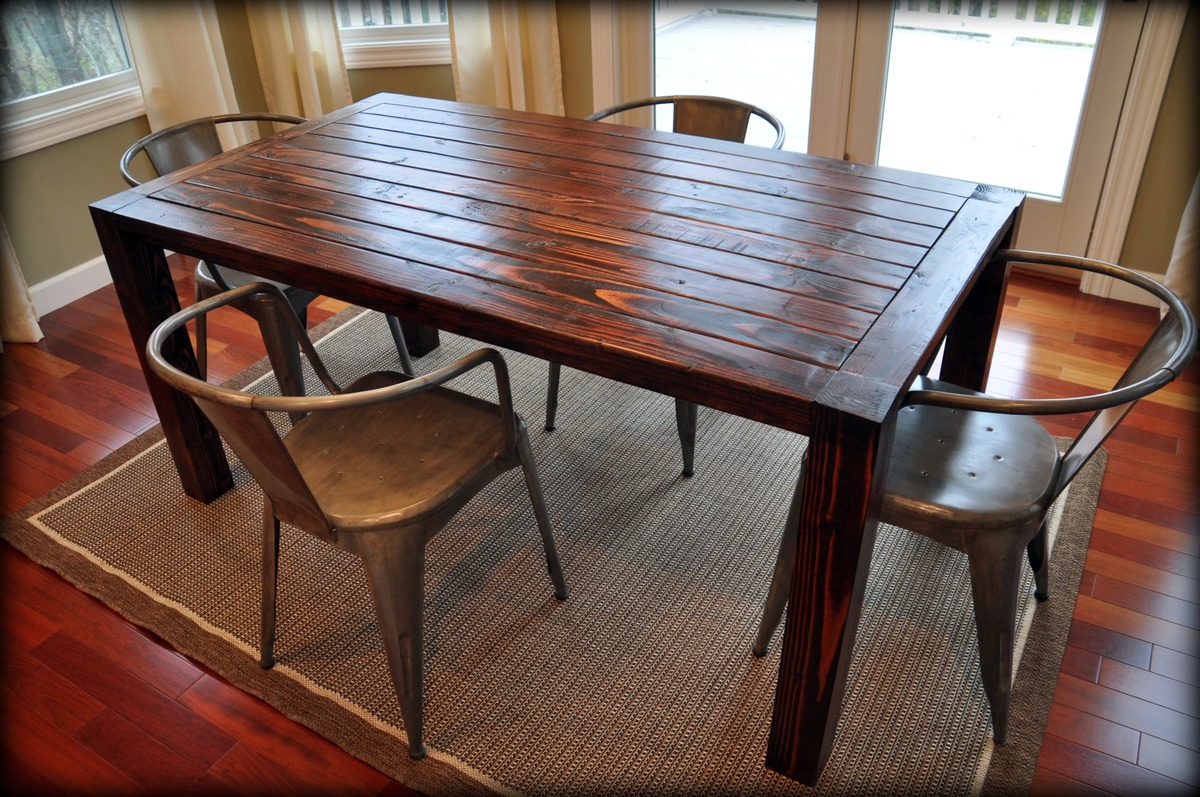
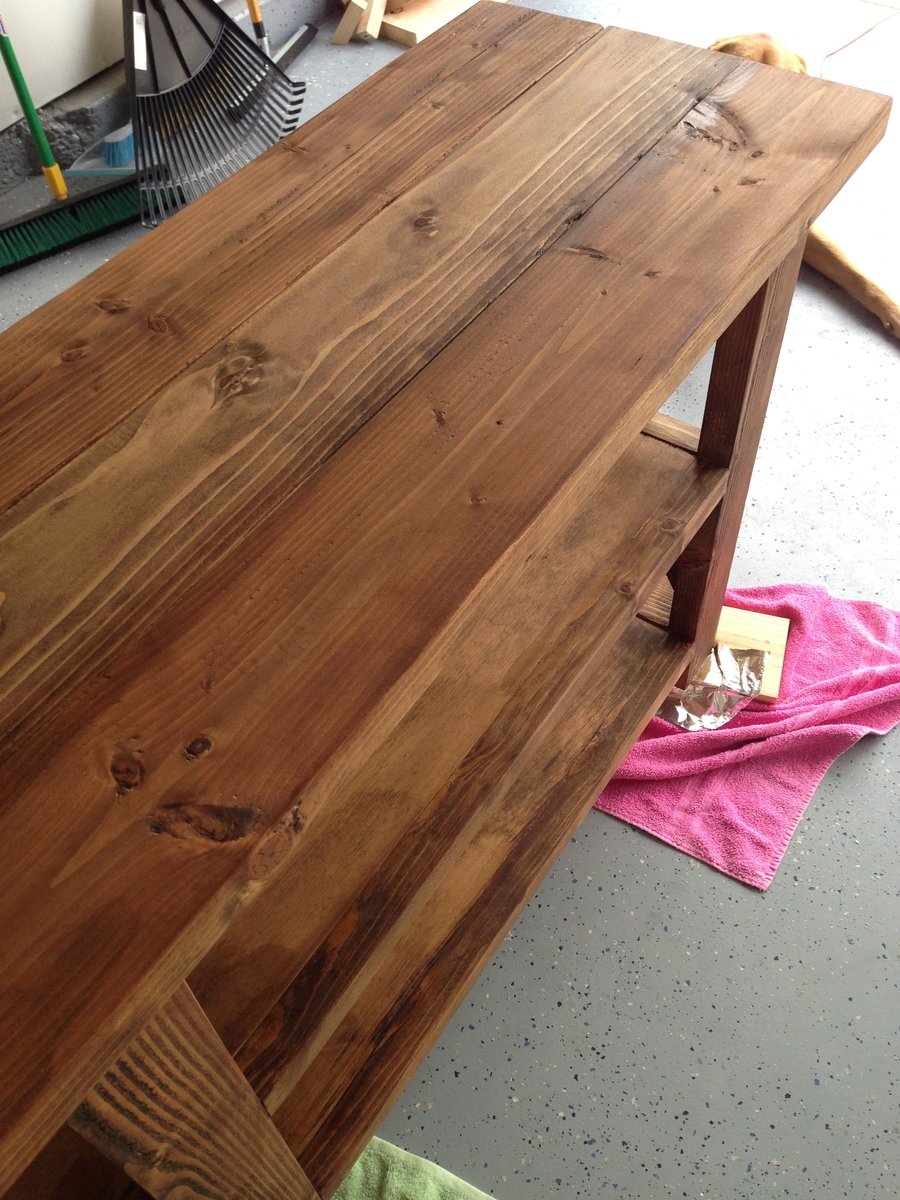
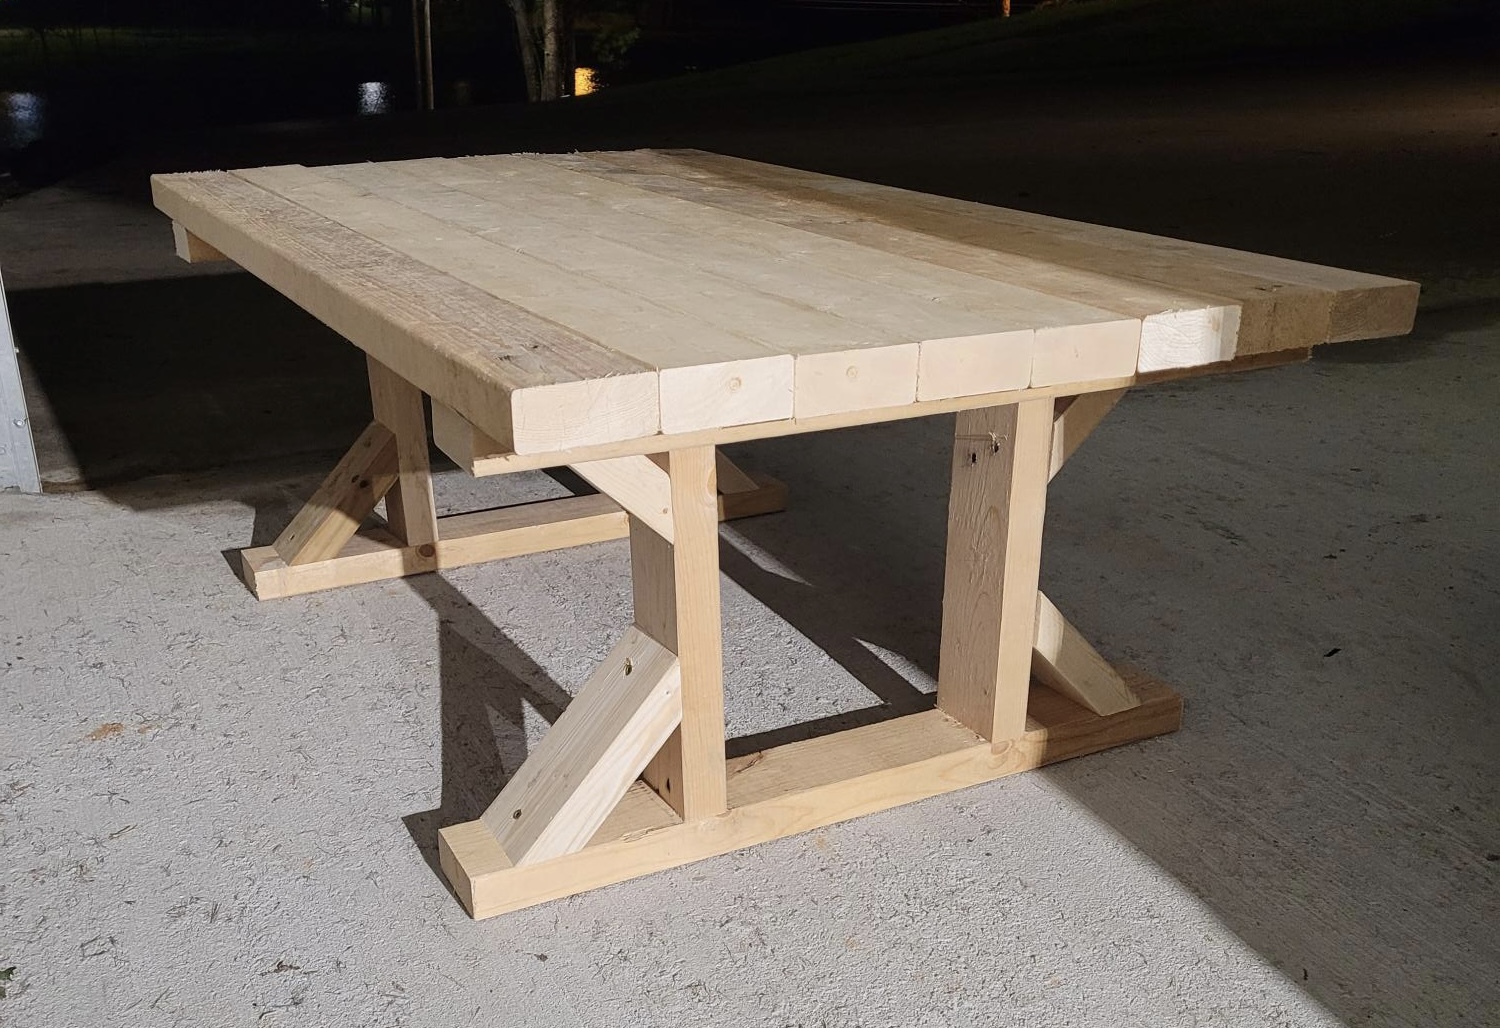
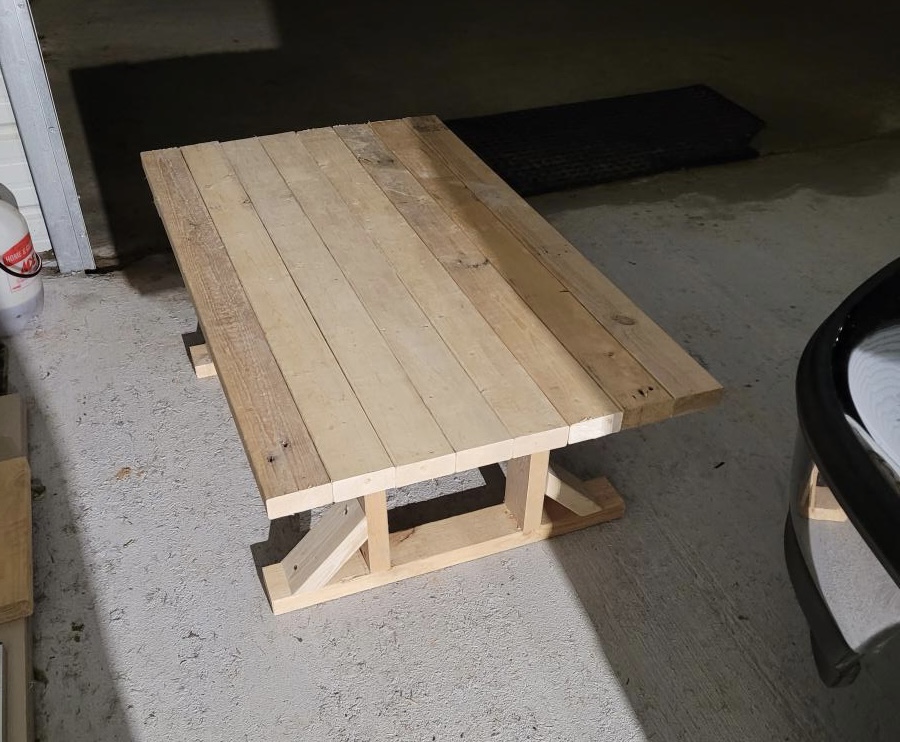
We love the look of farmhouse tables but not their hefty price tags. So we decided to build our own. $60 in supplies and a week-end's worth of time left us with a beautiful table that has a story. Ana's plans were easy to follow. Building furniture is so rewarding...and easier on the wallet!

Sat, 12/10/2011 - 06:35
I think this is the motivation I needed to get my butt outside and move the lumber in from the yard and build a table. Thanks!
Sun, 01/01/2012 - 16:59
Not the original poster but looking everywhere lately for metal chairs I know these are from Cost plus world market:)
http://www.worldmarket.com/product/index.jsp?productId=11108348
Thu, 01/12/2012 - 12:32
Hi, I love this, great job! I am wanting to build a bigger one that will seat 10-12. I love the farmhouse table on this website, but I do not like the way the supports underneath prevent you from sliding chairs up to the ends. Do you think it would be sturdy enough without them? Like you did for your table here.
Thanks!!
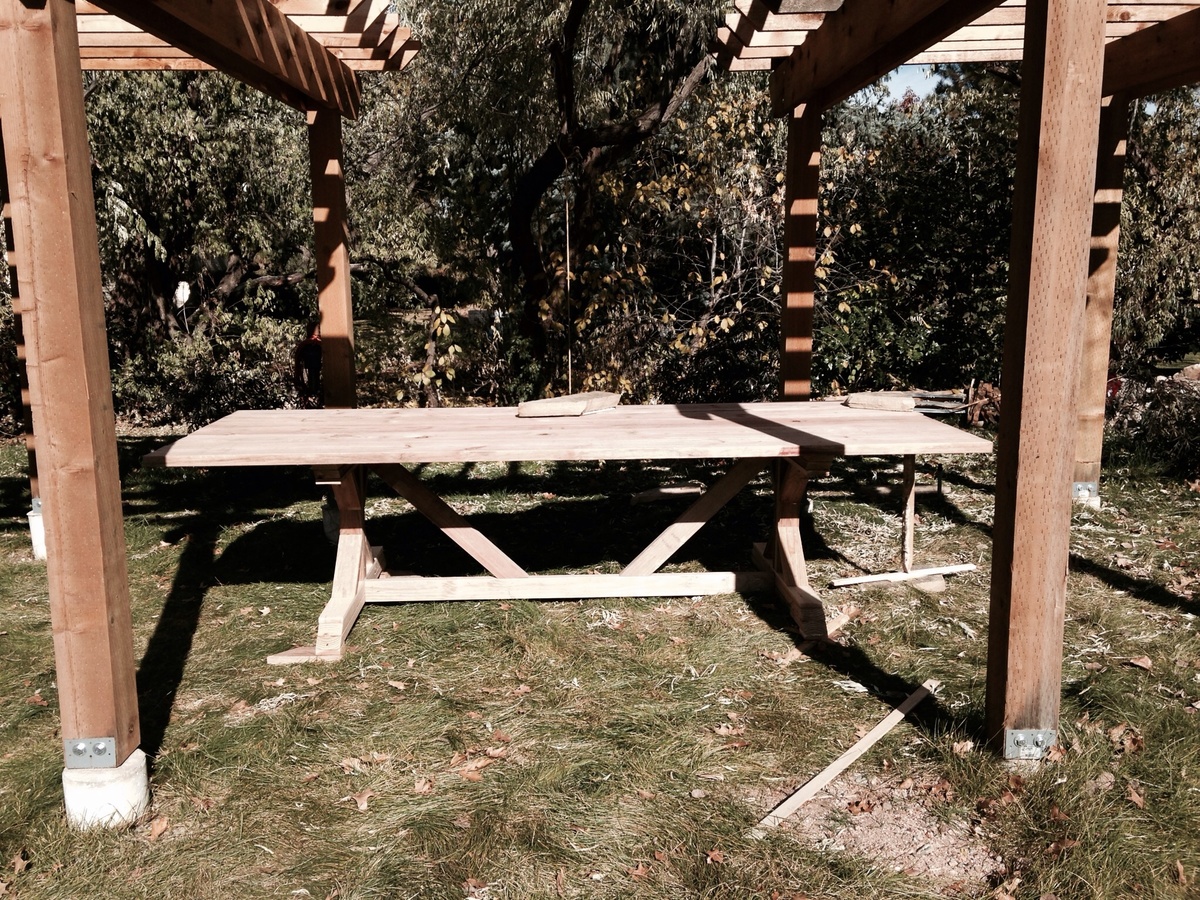
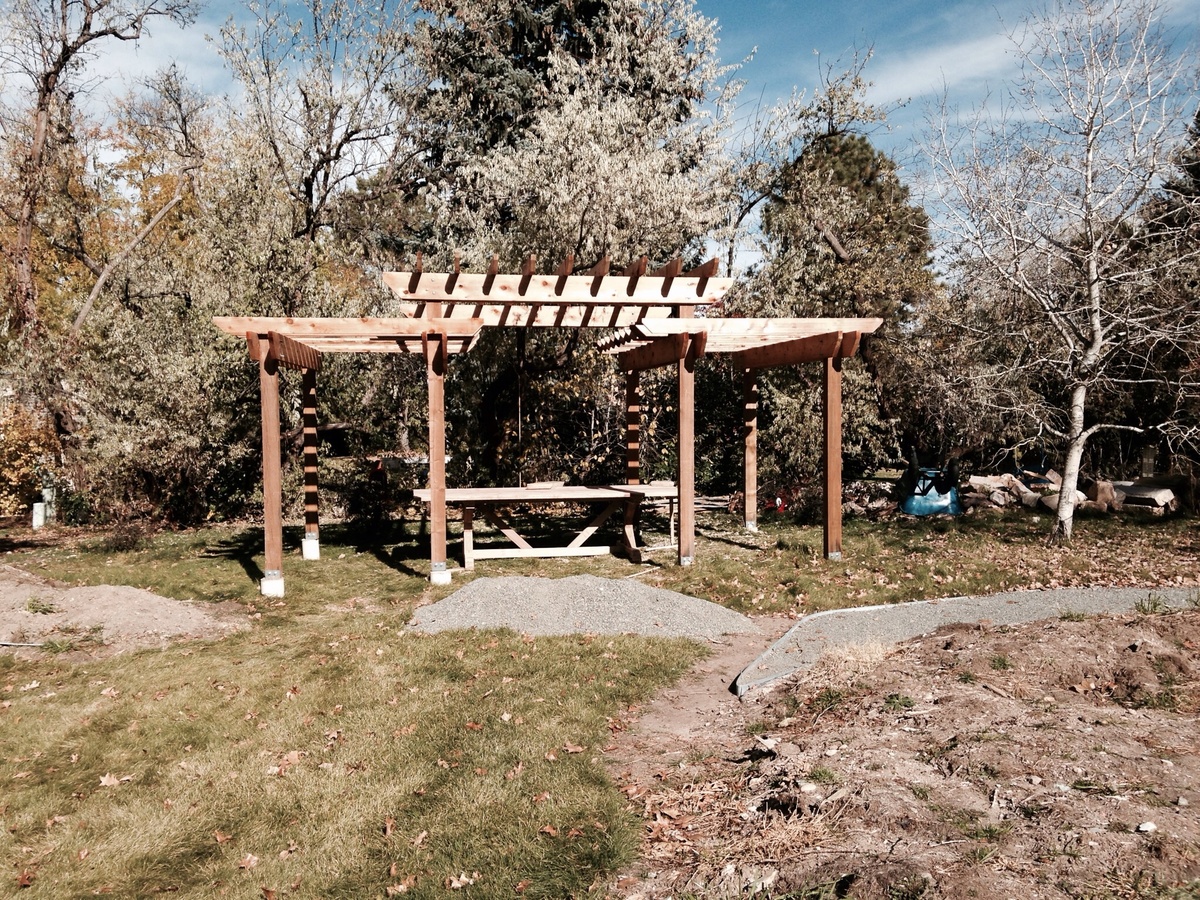
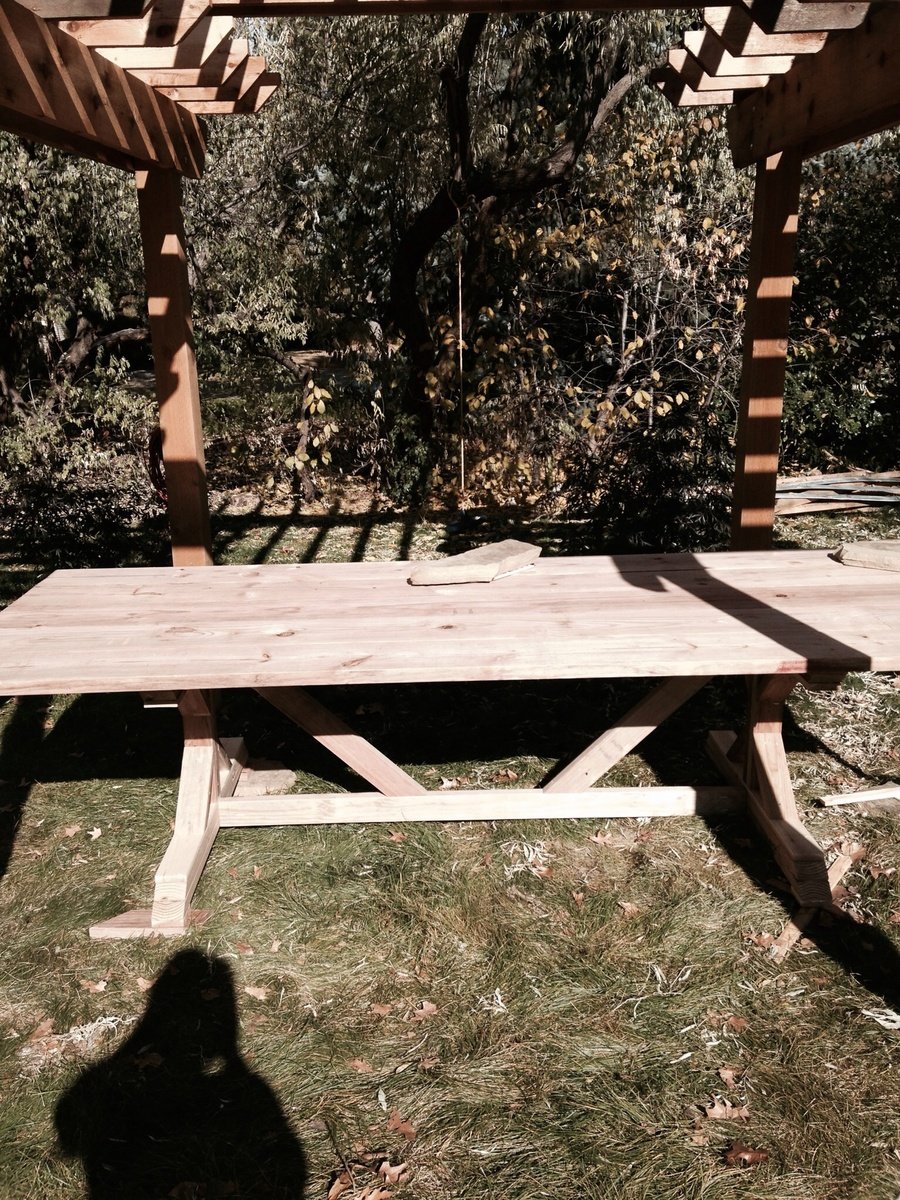
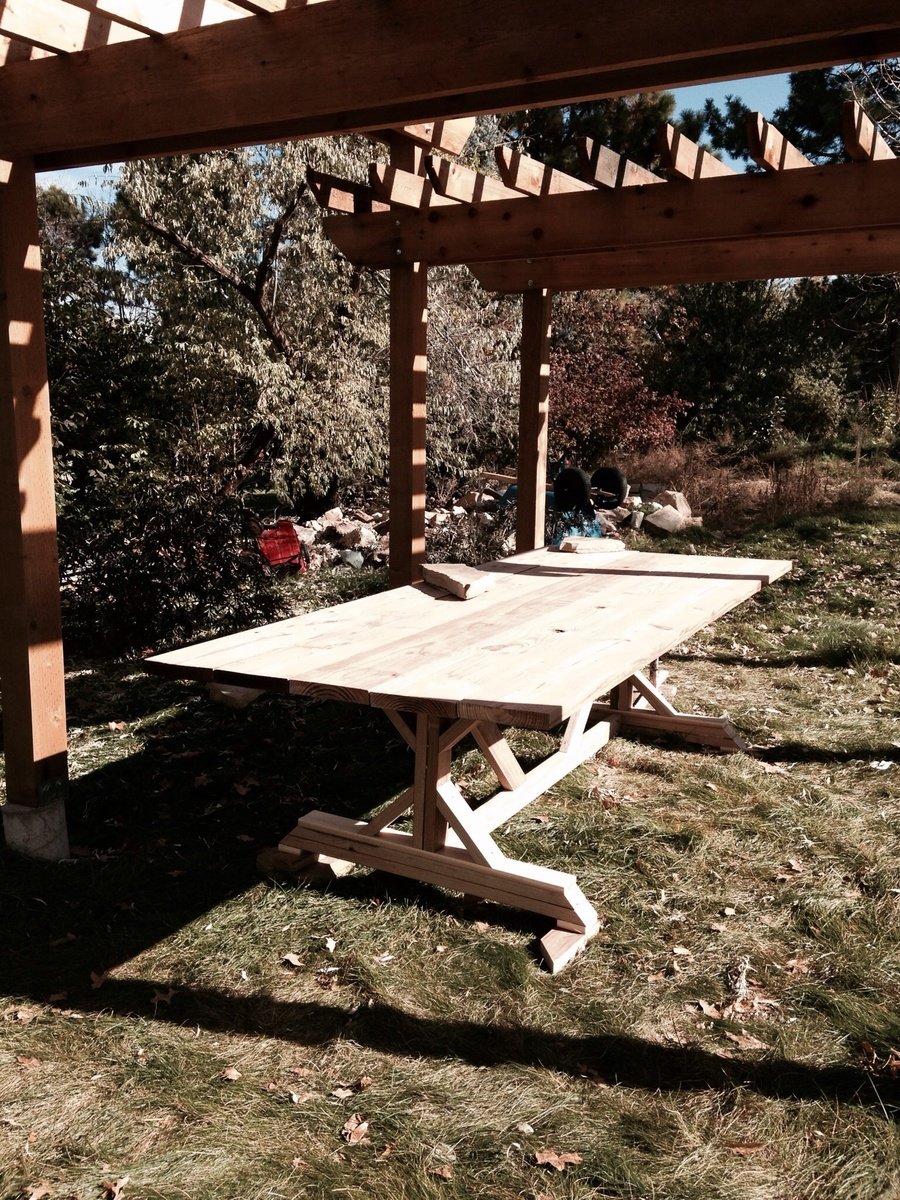
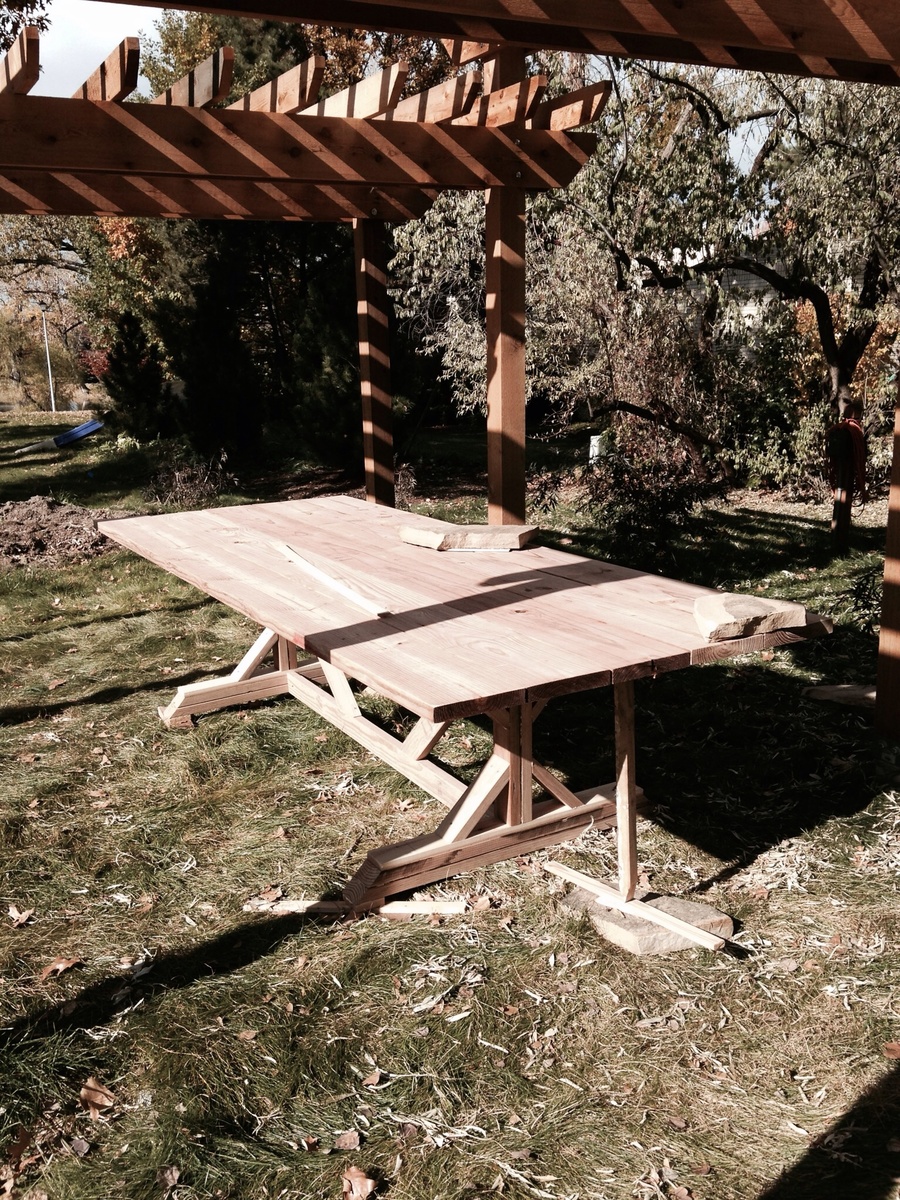
Our dear friends built us a pergola over the summer and I wanted a big outdoor farm table to go underneath but had no interest in spending thousands on one already made. So, thanks to Ana White, I found the directions to making this 'anthropologie knock-off' for under $200! We made ours 10' long by @46" wide. And I included support boards on the underside of the table top for additional support and to try to address the fact that one of the boards us a little warped. It's not nearly as beautiful as our pergola and still needs to be stained/treated, but I can't wait for next spring and summer when we can hang and laze around out here! I'm so proud of us. Thanks Ana!!!
Built this over 5 days, around my son's naps (including 2 days for sealant to cure). Actual time was probably around 8 hours total. Not too bad for my third project! I only built one shelf and am using it for storage in our master bathroom. I love the way it turned out. Thanks again, Ana, for a great project plan. :)
For my first ever DIY project this was easy and fun. Didn't take long at all, less than 2 hours. Will be making the sectional also.

Thu, 06/20/2019 - 10:57
Looks awesome! Thanks so much for adding a brag post! Can't wait to see the sectional.
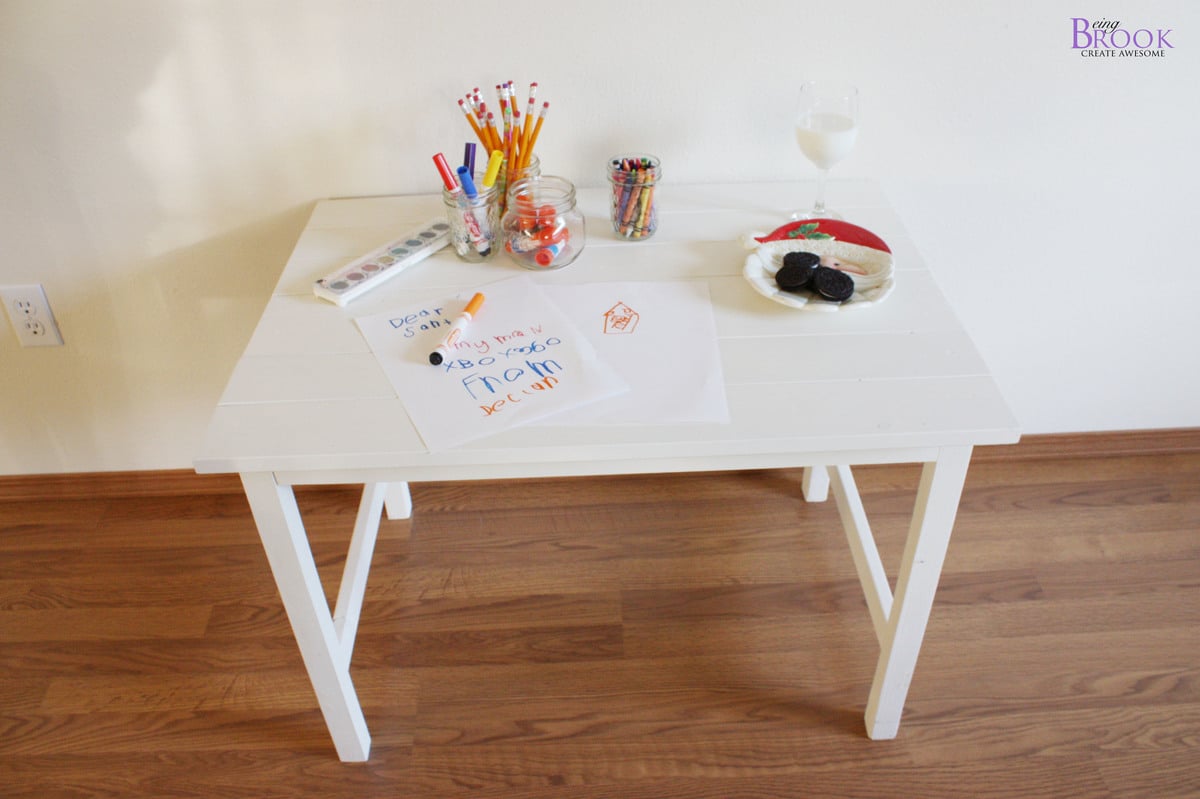
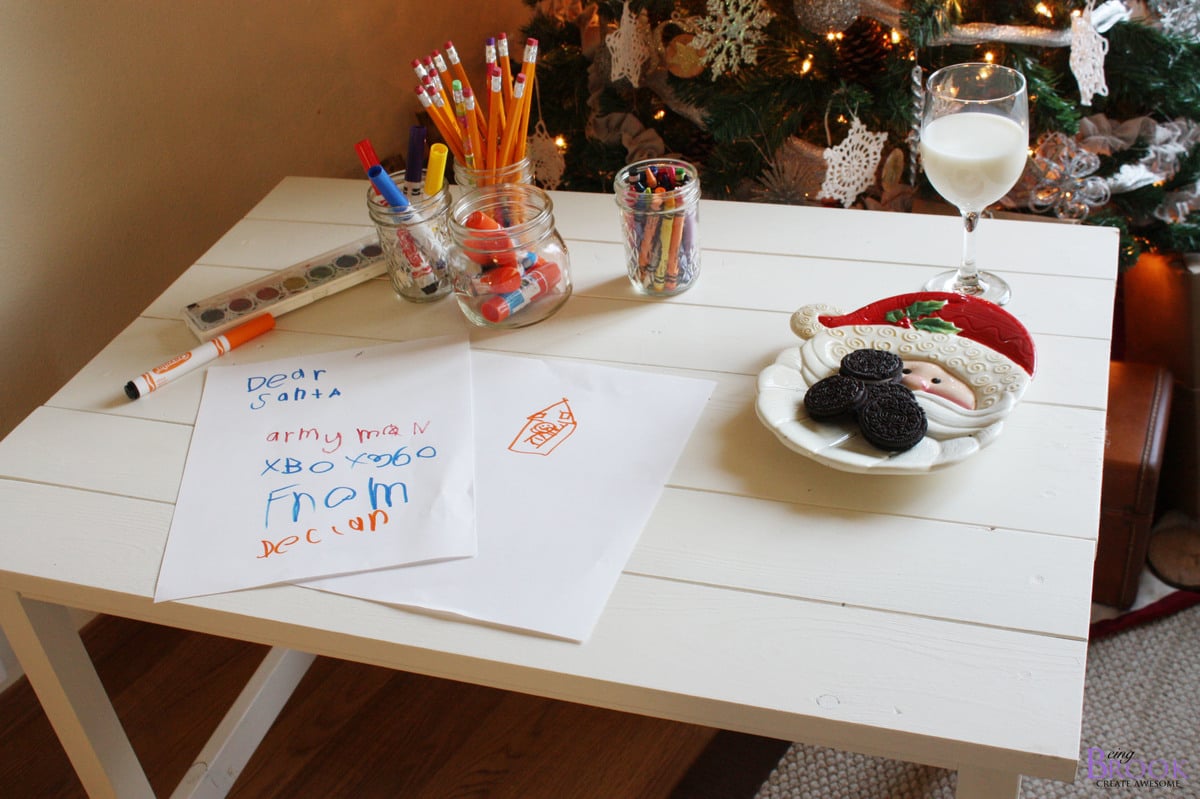
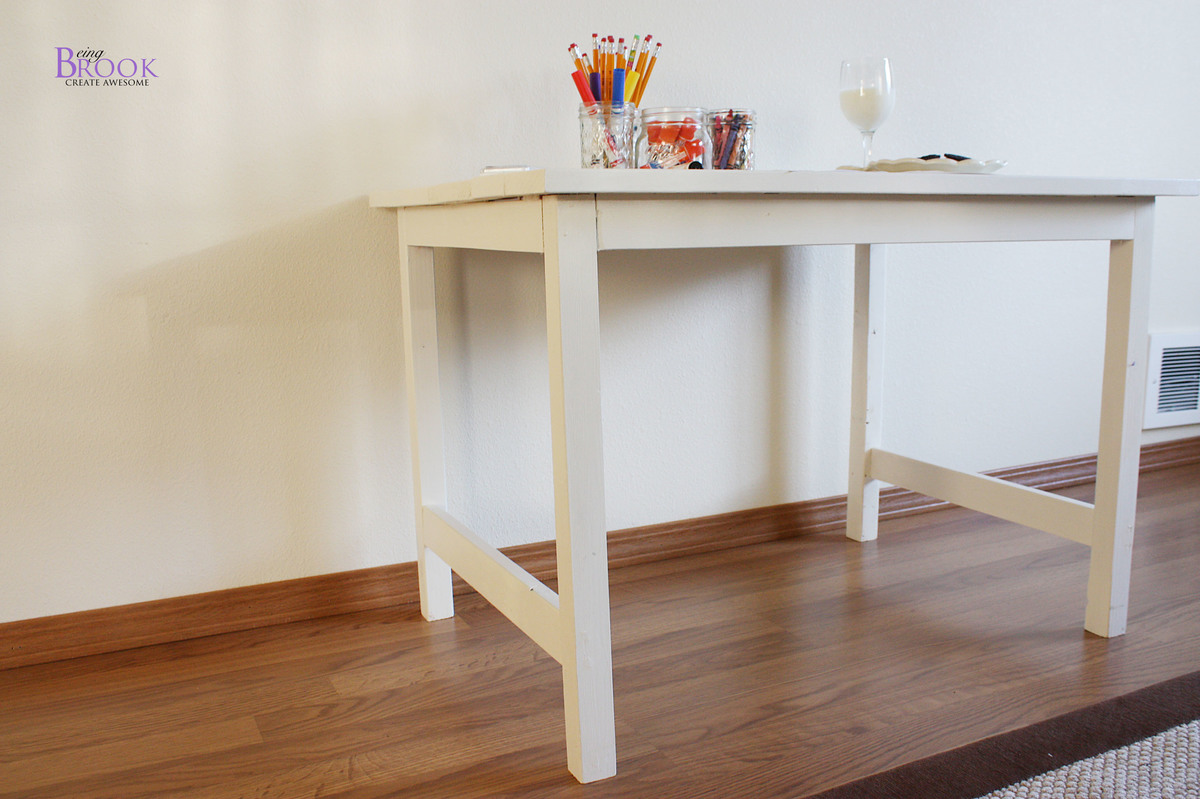
My husband and I built the art table to give our 3 year old for Christmas. We have had great success building from other Ana-White plans and the Clara table was no different. We did modify it by adding a 1x3 to the legs to give it more stability. I think the table is great without it but we have older kids too and wanted to make sure the table could withstand them sitting on it or leaning against it.
The table was built with scraps from our garage so the top is modified slightly because of that. I think the only thing we bought for this project was a 2x2 for the legs. Can't beat a $3 table!

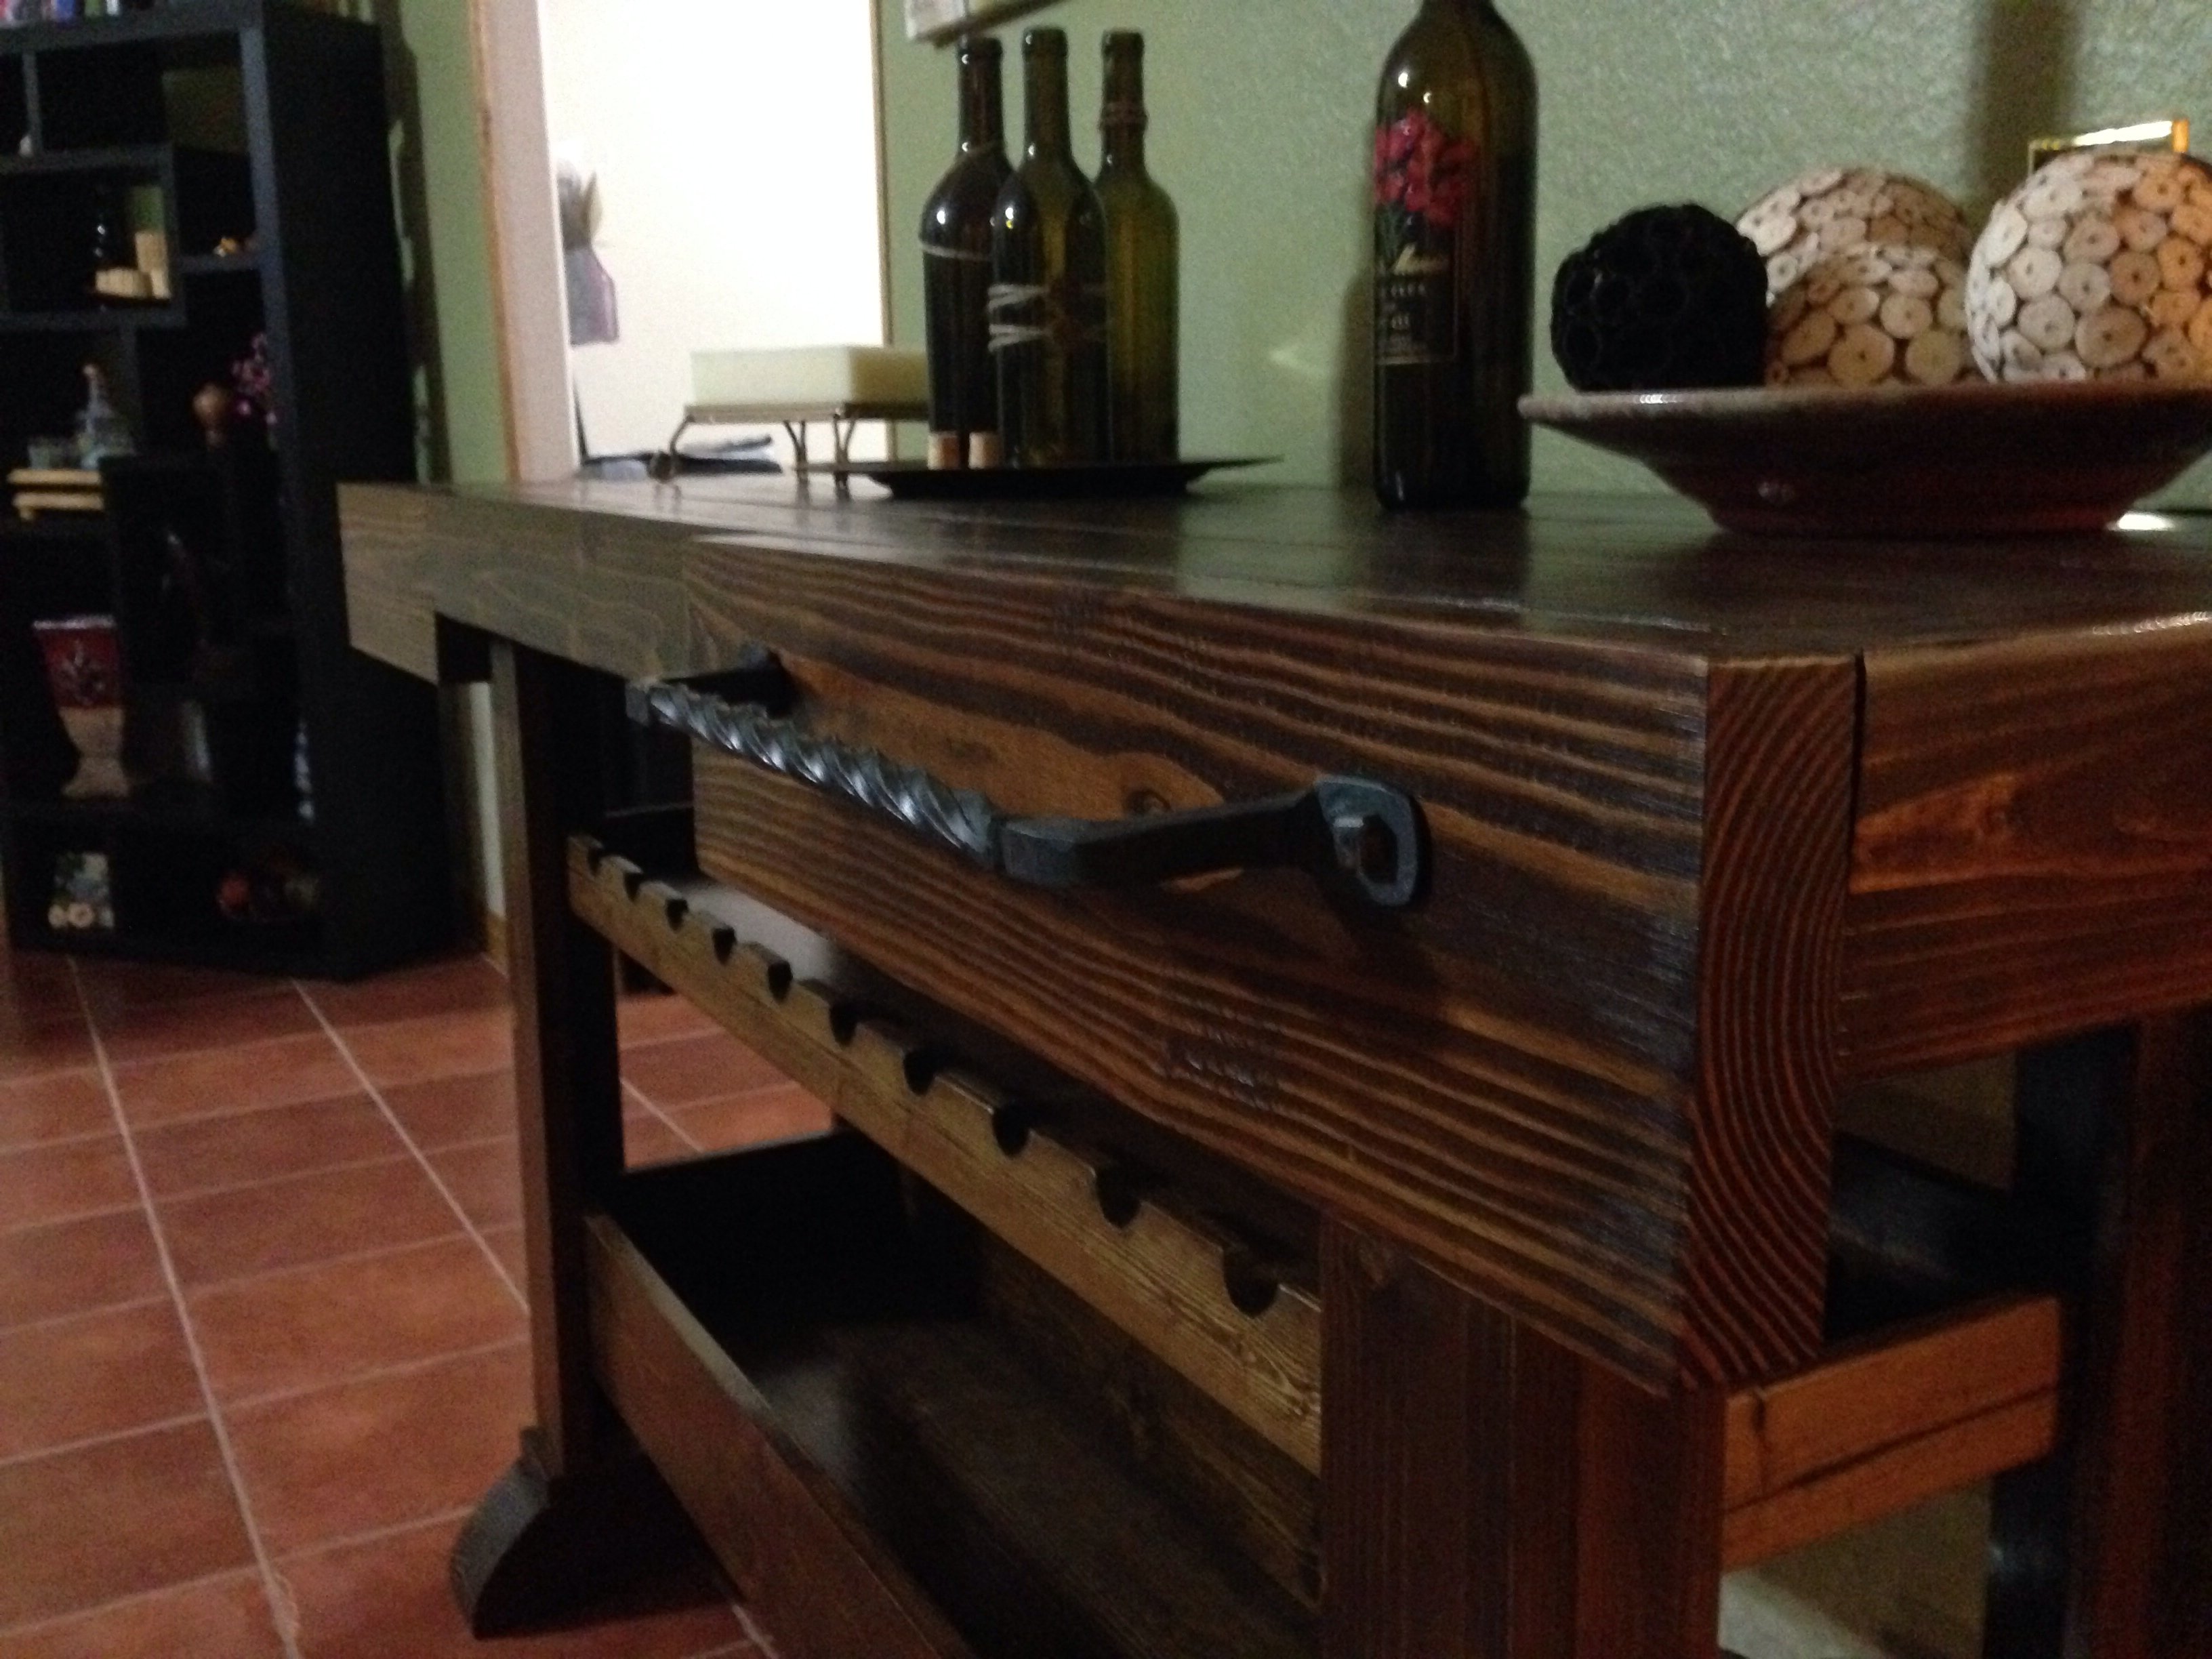
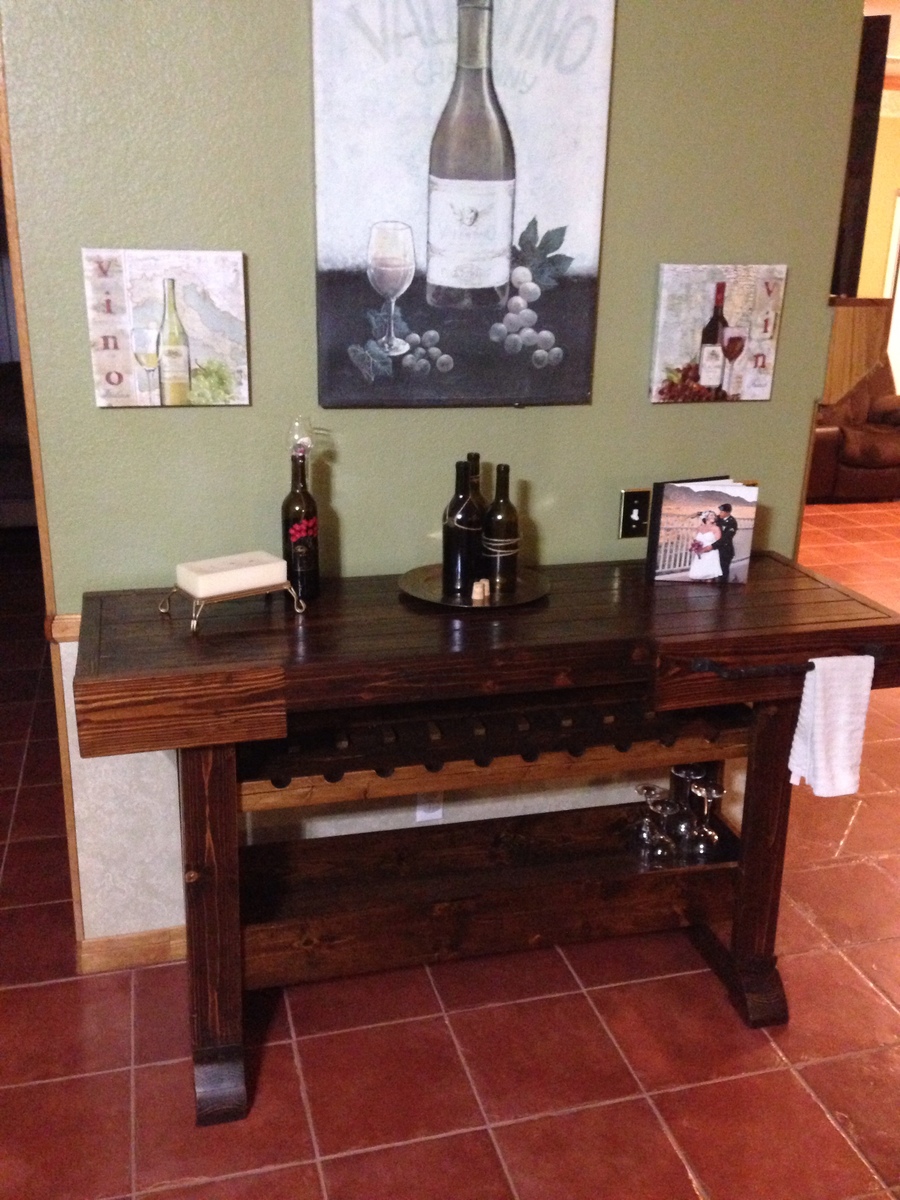
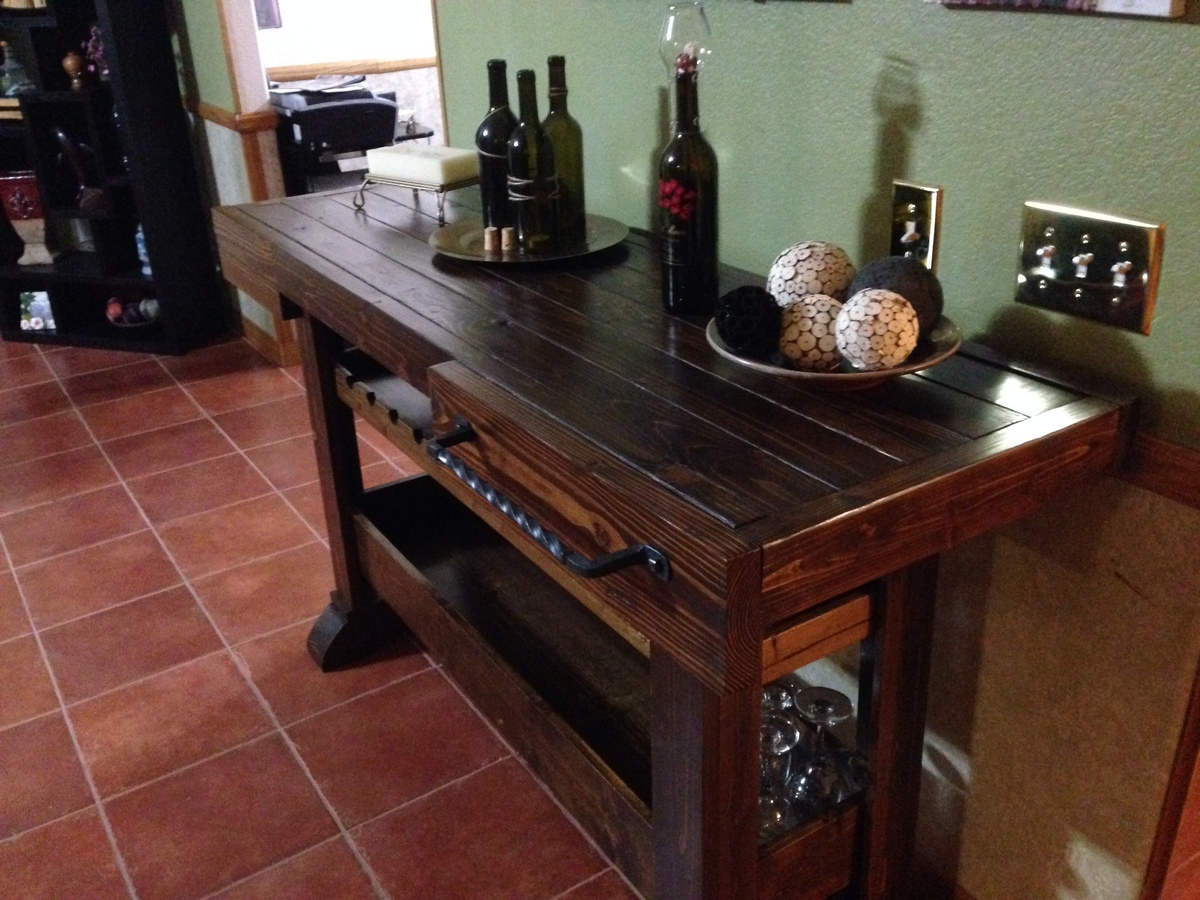
So this is my first attempt at woodworking. In fact it's the first time I've really created anything with my hands. I came across this website and saw all of the wonderful creations people have made and decided I wanted to give it a try. I saw the Workbench Console and loved the design of it. I knew my sister-in-law was looking for a console table for her new house and being a wine lover I figured I'd give those plans a go. I added a second shelf for wine bottle storage and flipped around the tabletop. I really wanted to have a towel rack attached to it as well but after scouring the hardware stores I couldn't find anything that "fit" the look I wanted so I called a buddy of mine who is a blacksmith and with his expert guidance he taught me how to make the towel rack I wanted. I'm proud to say I made everything on that table including the hardware (minus all of the wood screws of course ;)
To be honest, when I went into this project I wasn't too sure about what the results would be, but I was very pleasantly surprised with how well it turned out when it was finished. So much so that after surprising my sister with her new table I've already started on another console for my own living room wall. This site has been very inspirational and has shown me that anyone can build fantastic pieces as long as the desire is there! Thanks Ana!
P.S. This project took a long time for me to complete mainly because I had no experience at all going into it. Now that I've put one together I've noticed the next one coming together much faster.
Fri, 11/08/2013 - 10:20
YOu have created an amazing piece that will last a lifetime! Thanks for sharing, so glad you found a new love for building!
Fri, 11/08/2013 - 21:27
Thank you for the kind words. It's been fun to see the response from friends and family. It's kind of hilarious to me that I've only built one table and now I have requests coming from family, friends and co-workers for everything from end tables to entertainment centers! But first things first, I'm piecing together my new console table for the living room. I just wish I had more time during the day to spend on it!
Loved making this shelf!
This was my first project I have ever done. The plans seemed pretty simple, so I gave it a try and it came out even better than I thought.
I'm building for stress management and it's working out well
We have the IKEA Lack furniture in our living room and wanted the shelves to match. We also wanted them to take up more of the wall. the shelves measure 80" tall by 47" wide and are made out of 2x12s. Three of the shelves are 15" and the other is 24" since it is to be used for larger display items.
The shelves are secured with 3inch deck screws, sunk in and filled with wood filler.

Built for my daughter's new home. Tried to match finish to recently obtained Hitchcock Furniture Harvest Fanback chairs.

Thanks for the great plan!