Community Brag Posts

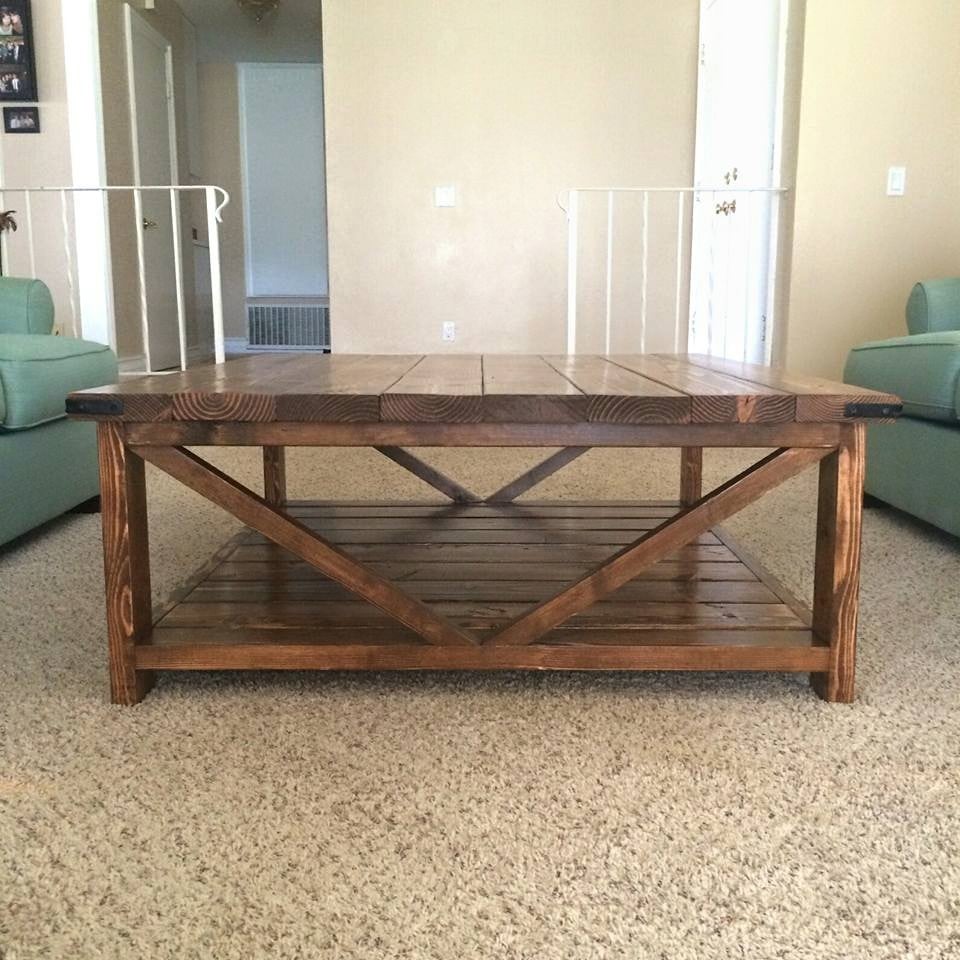
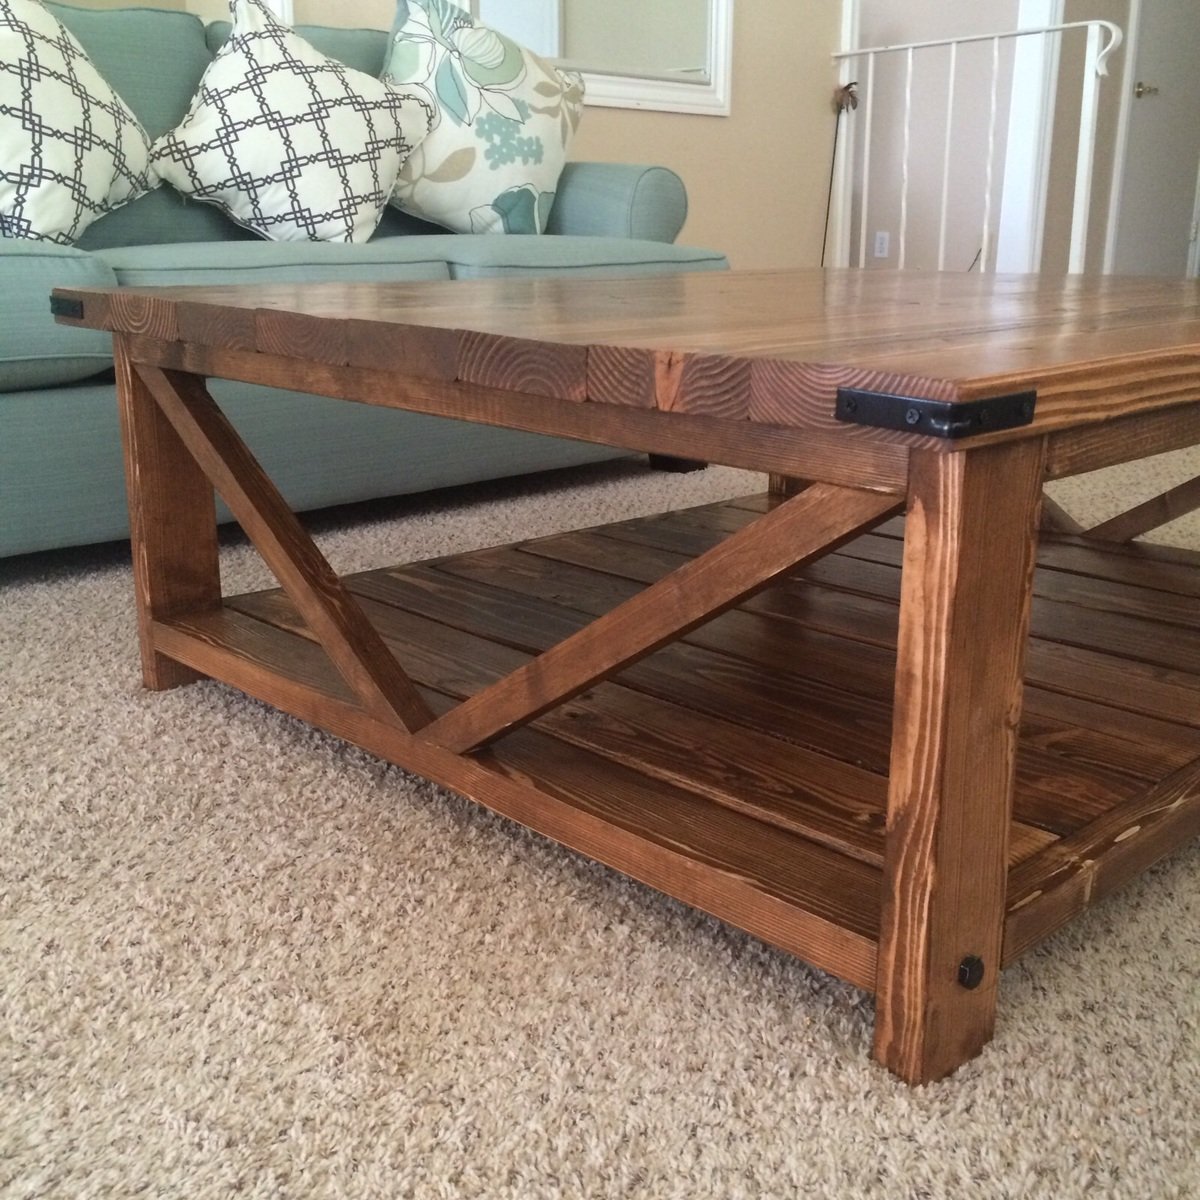
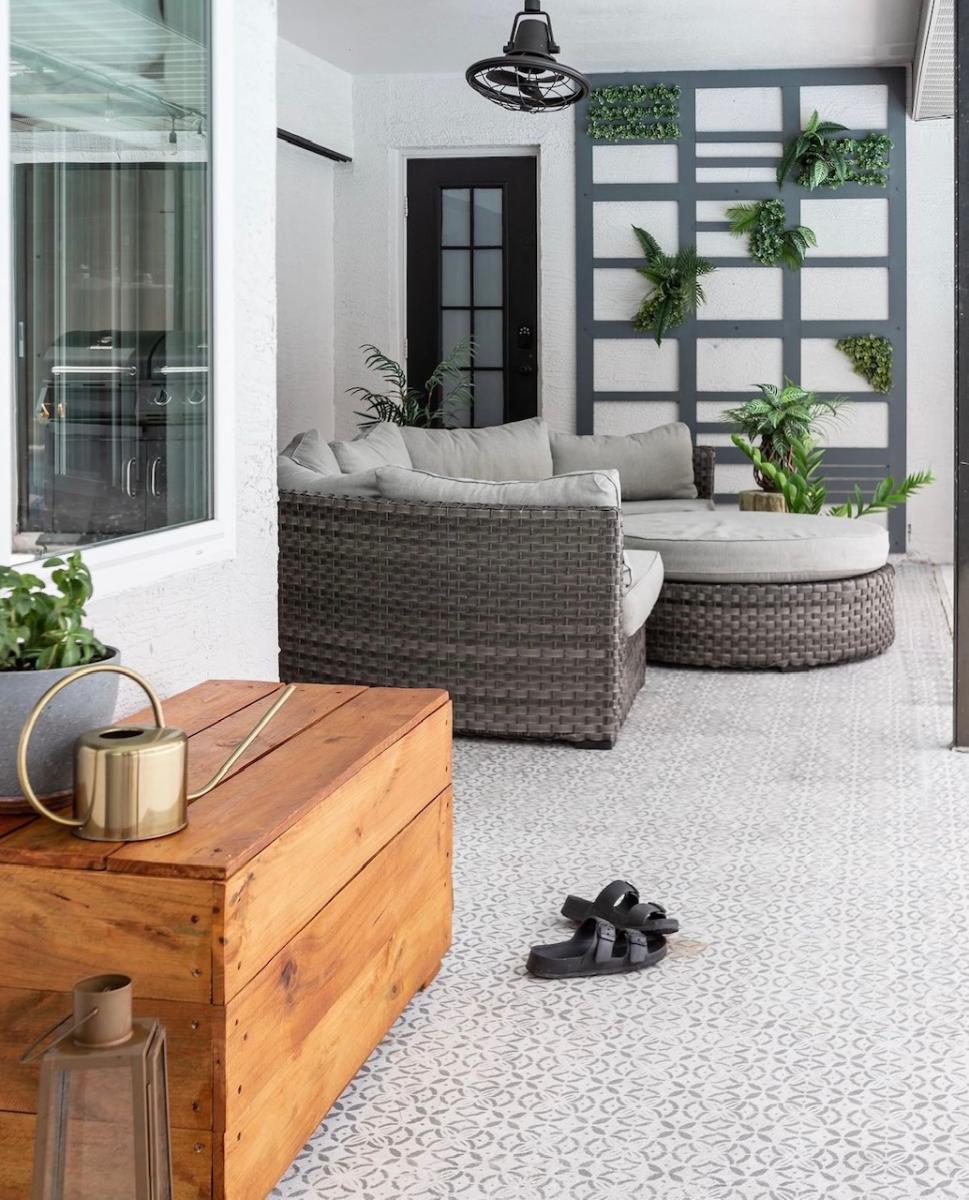
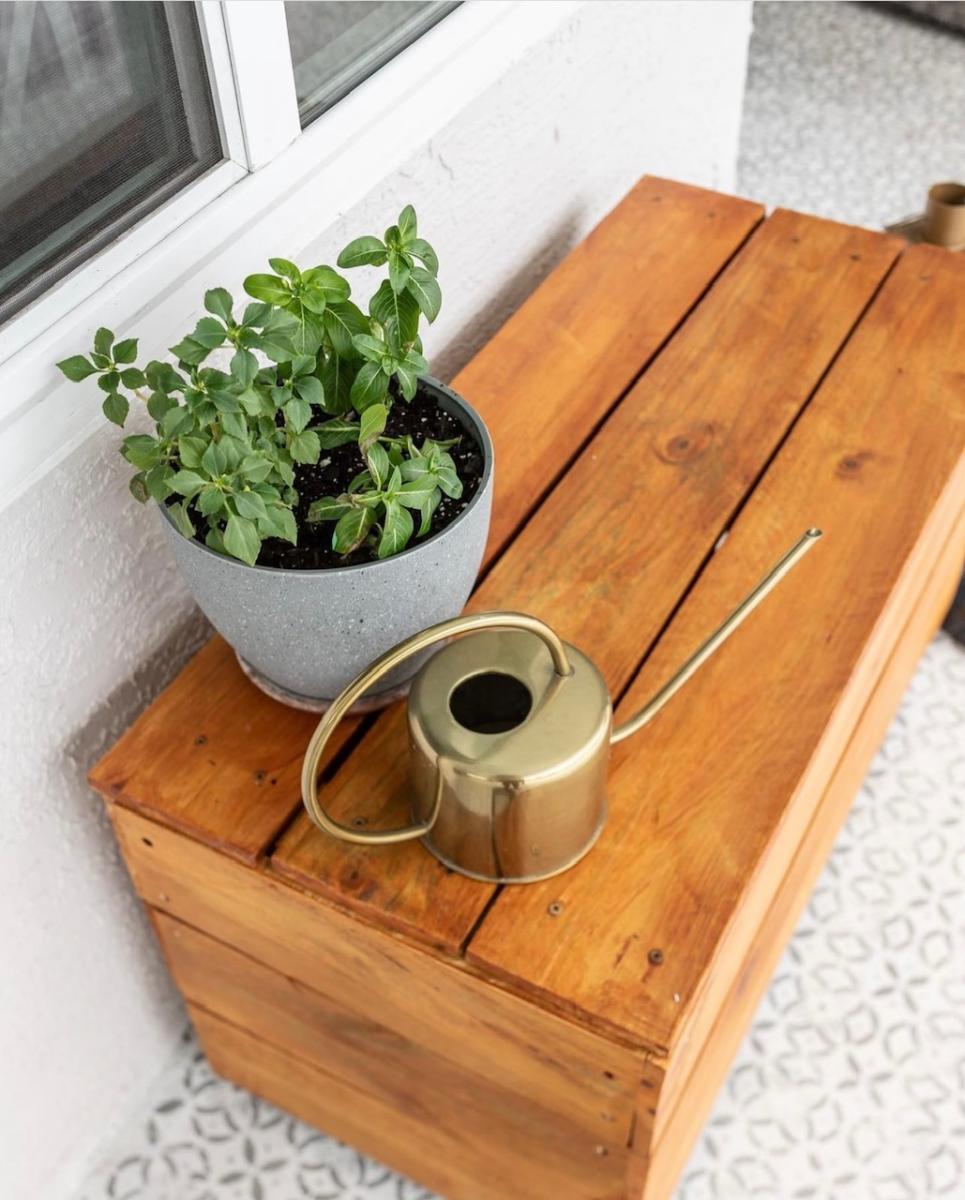
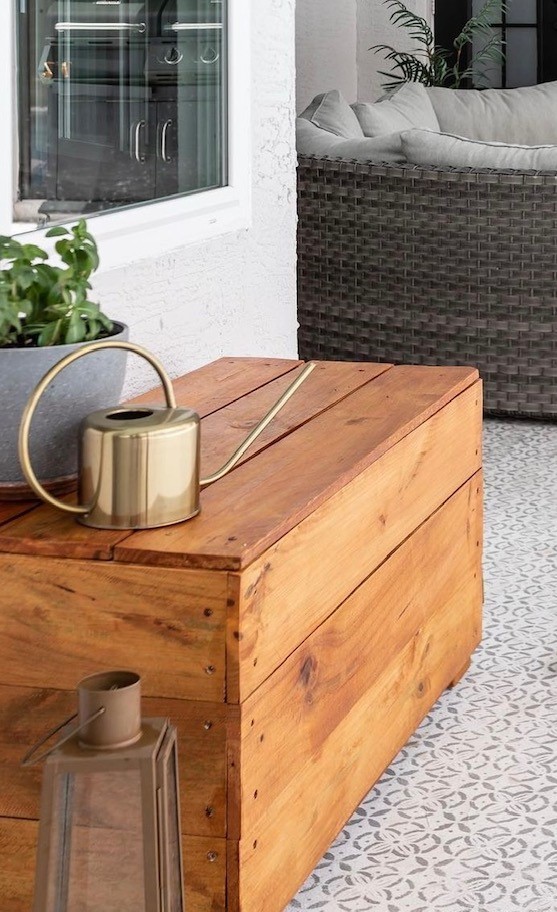
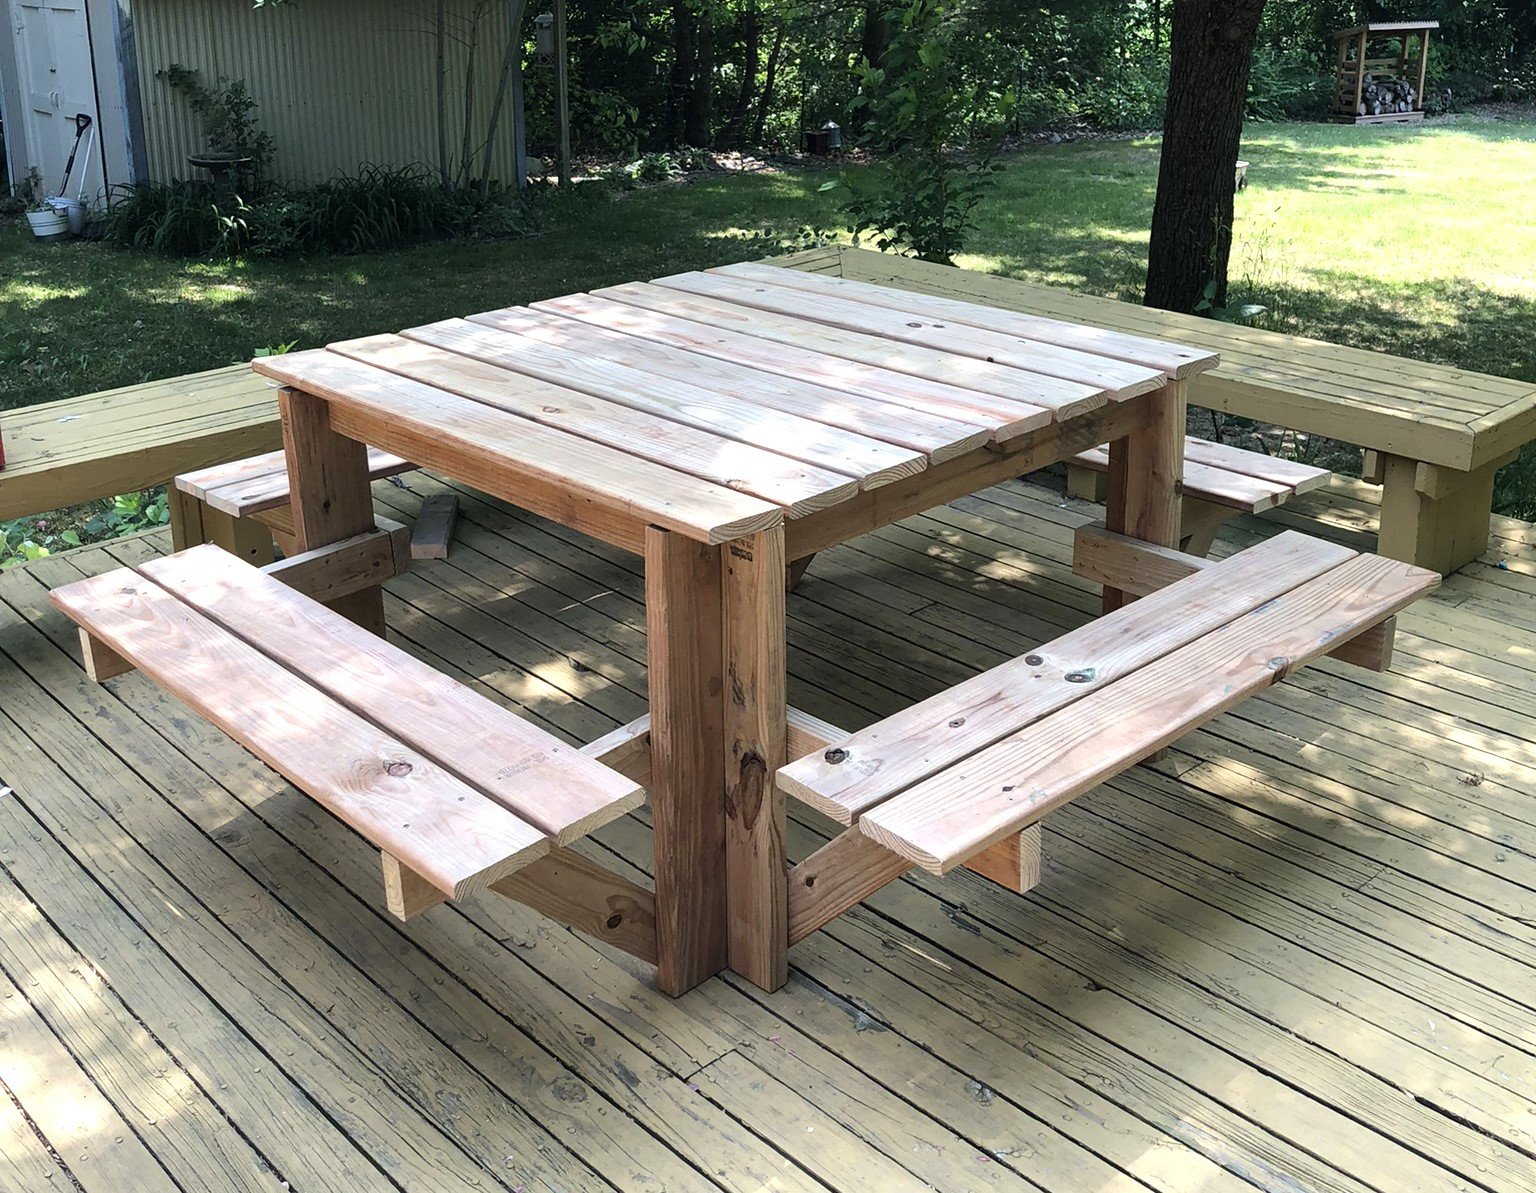
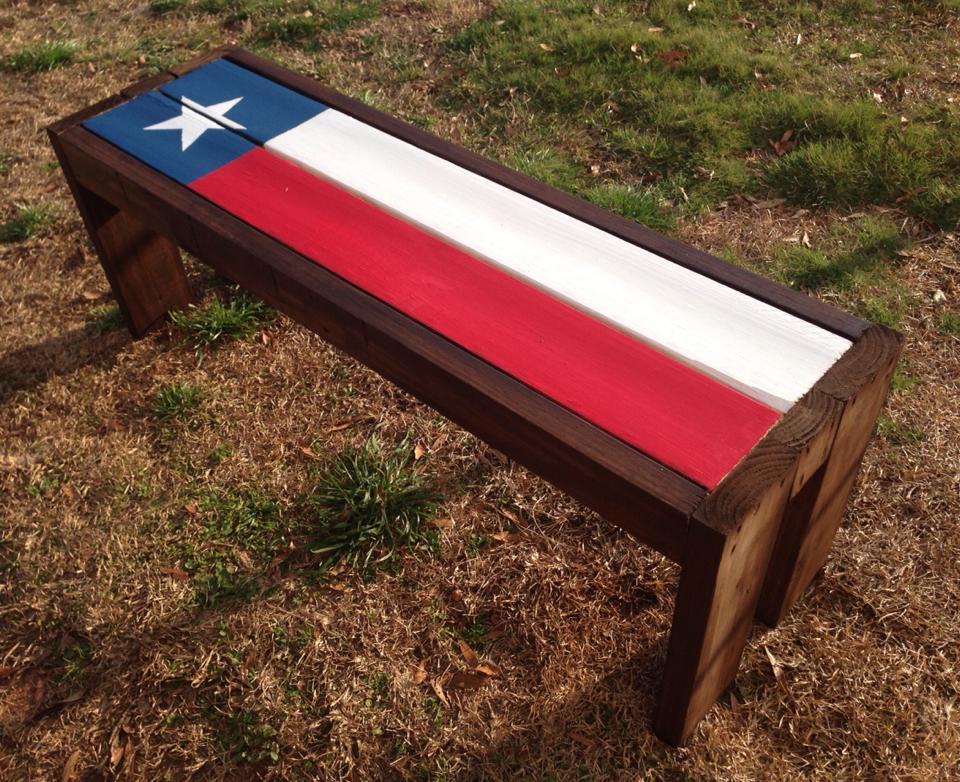
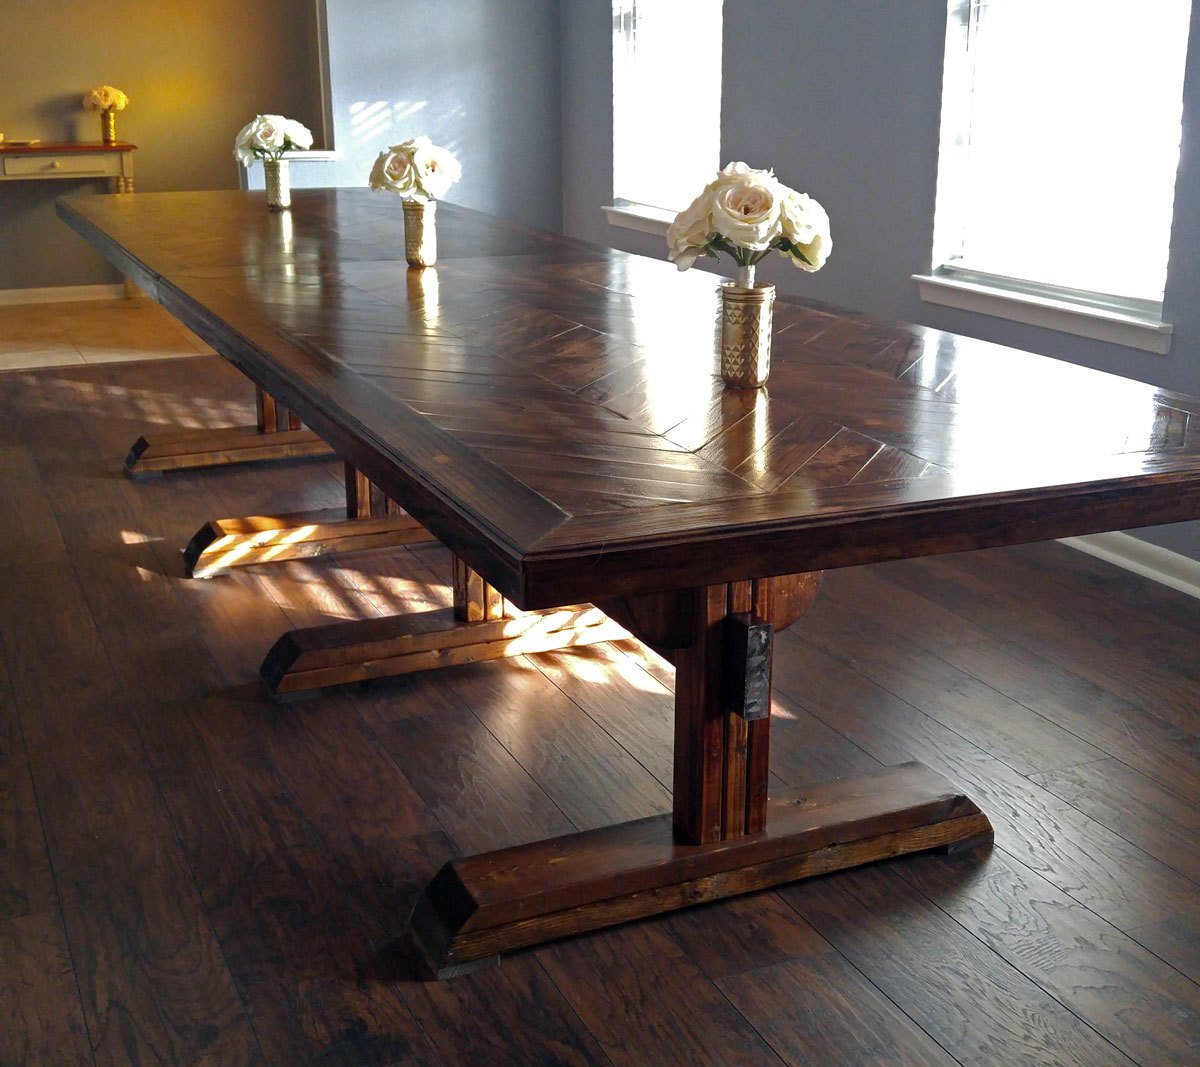
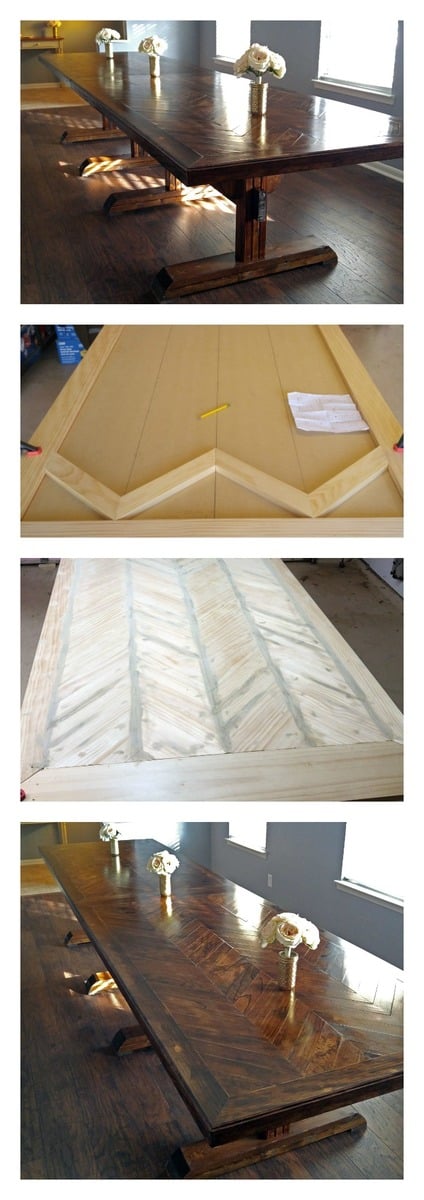
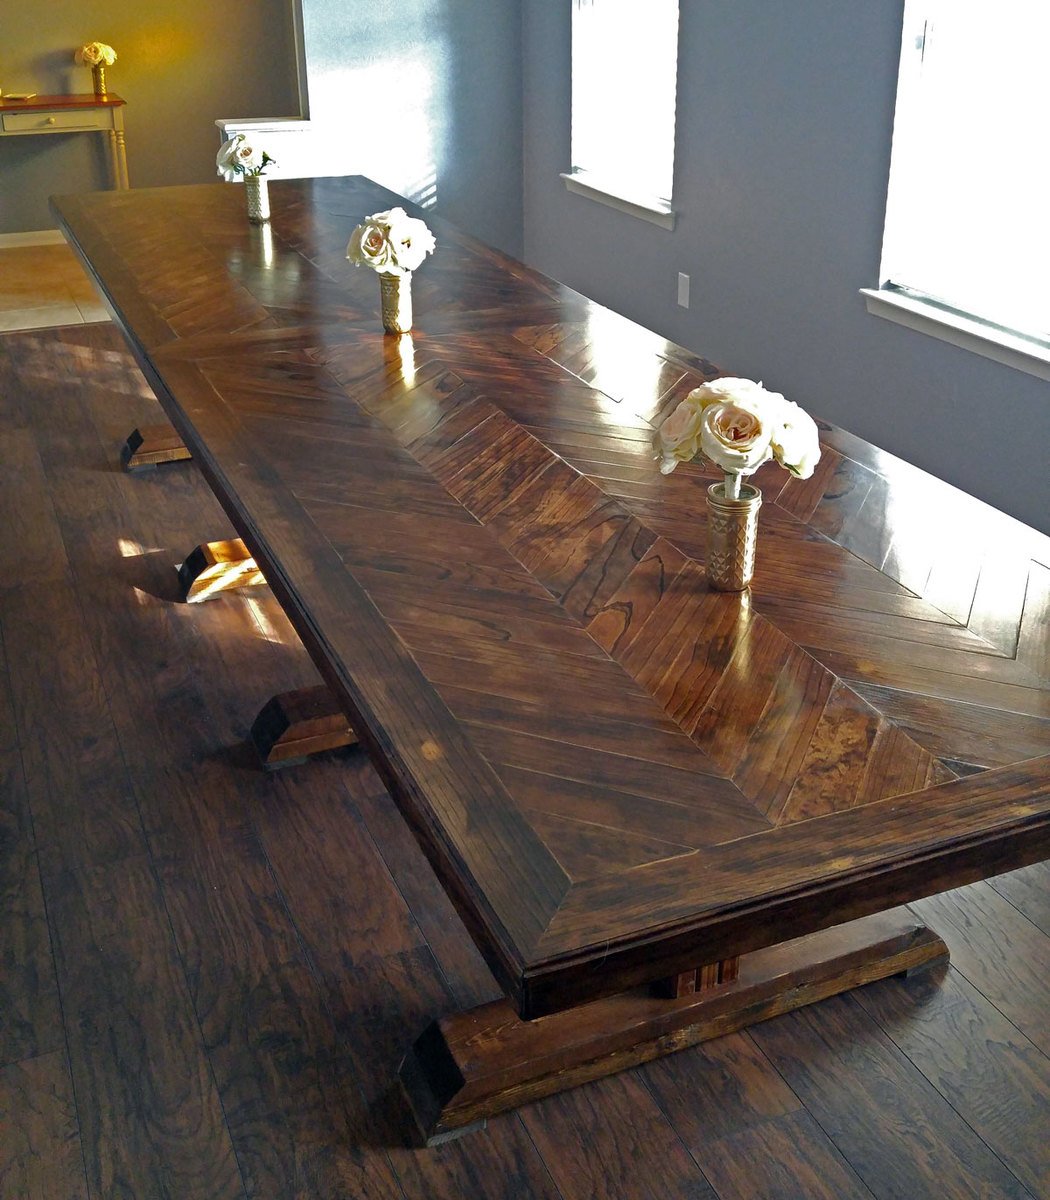
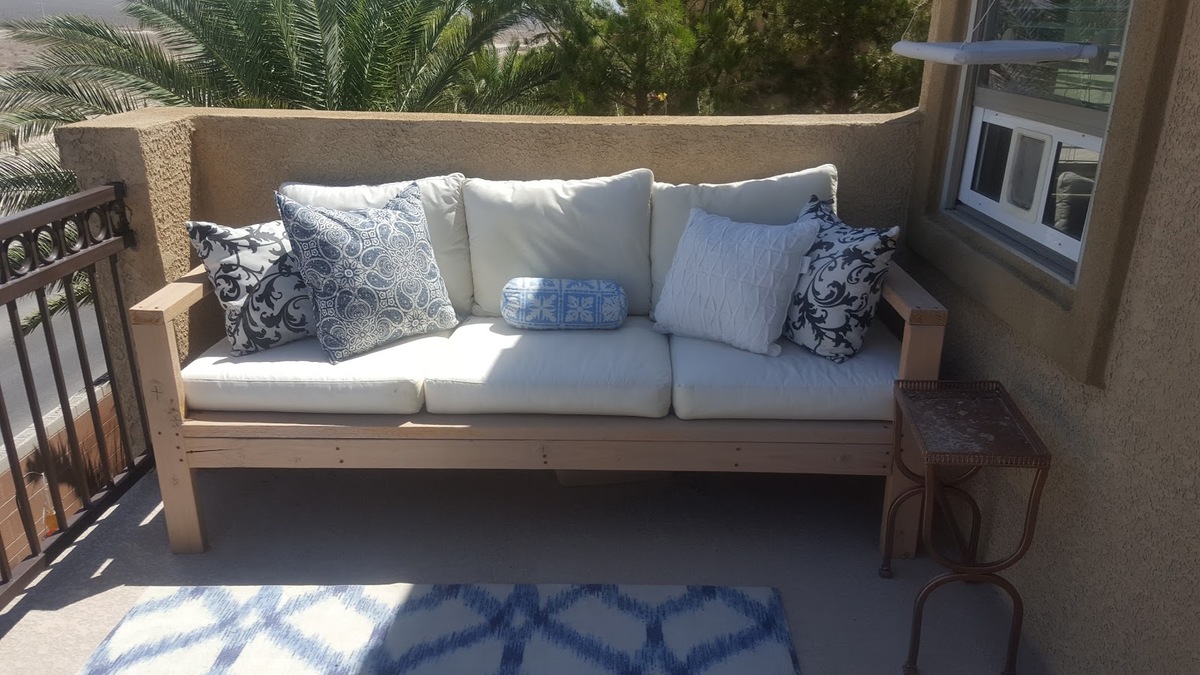
Modified Rustic X Coffee Table

Submitted by PamC03 on Sun, 10/18/2015 - 22:28

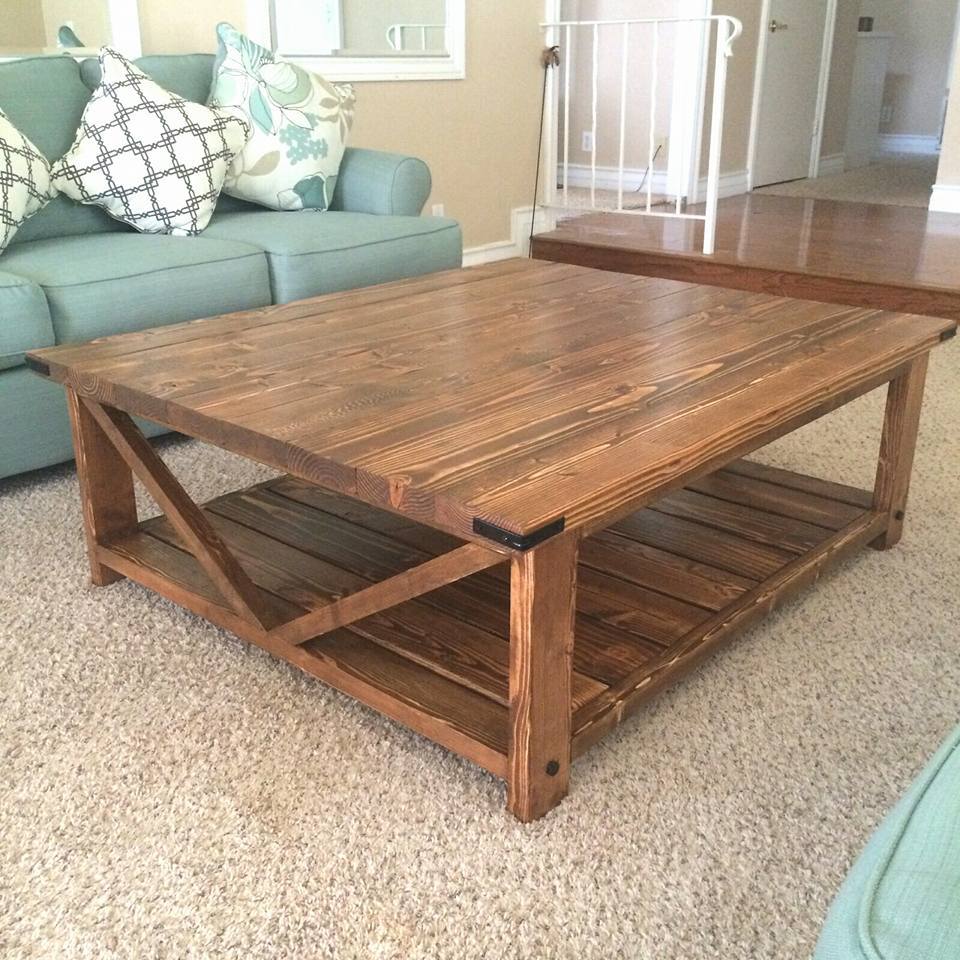
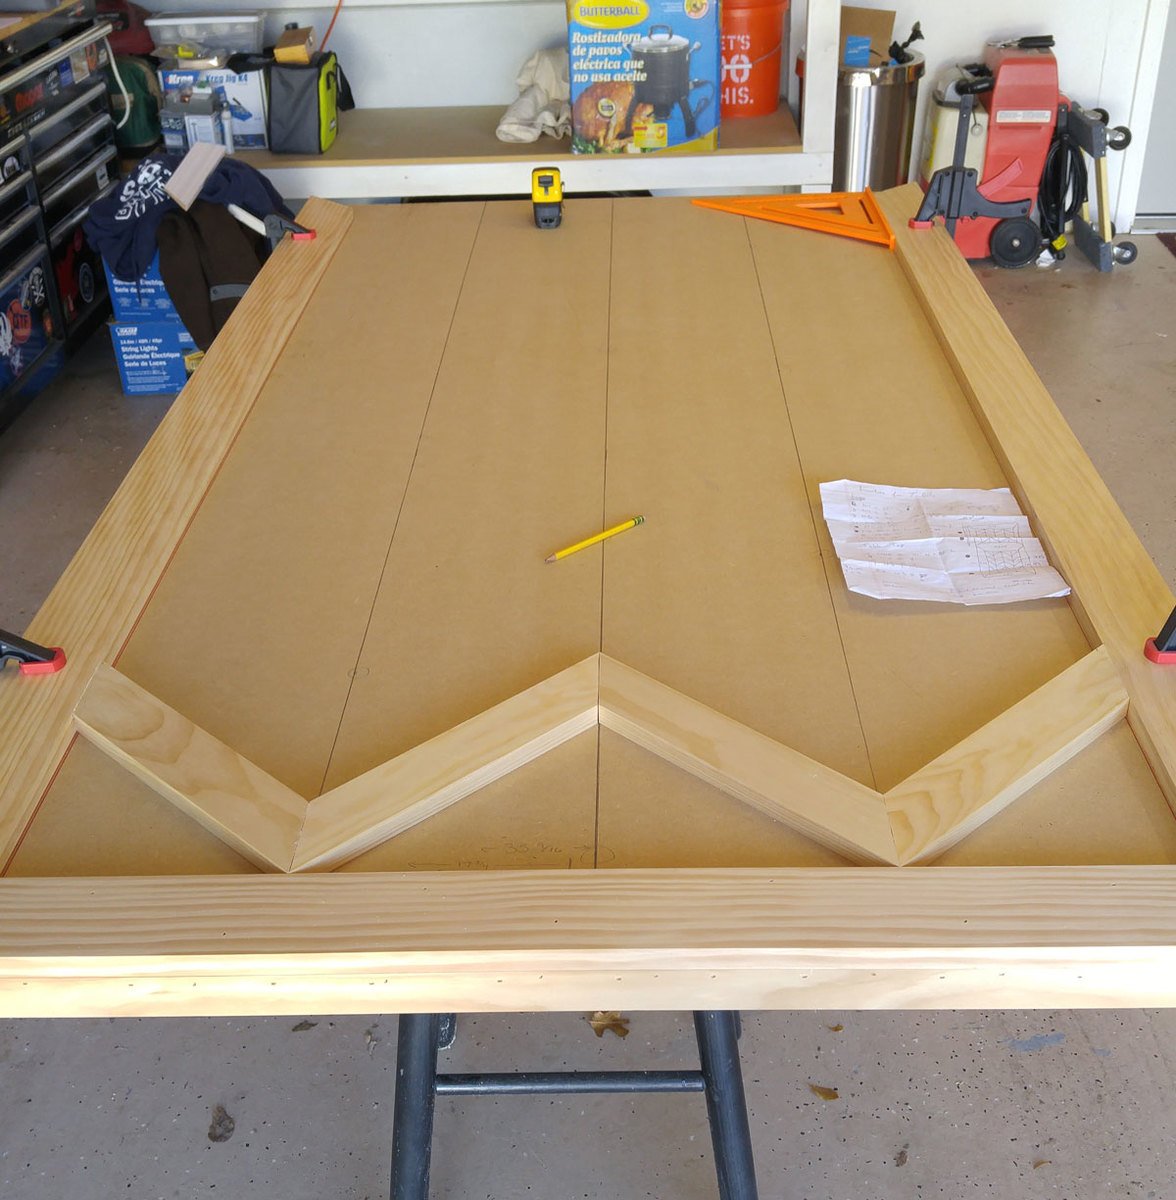
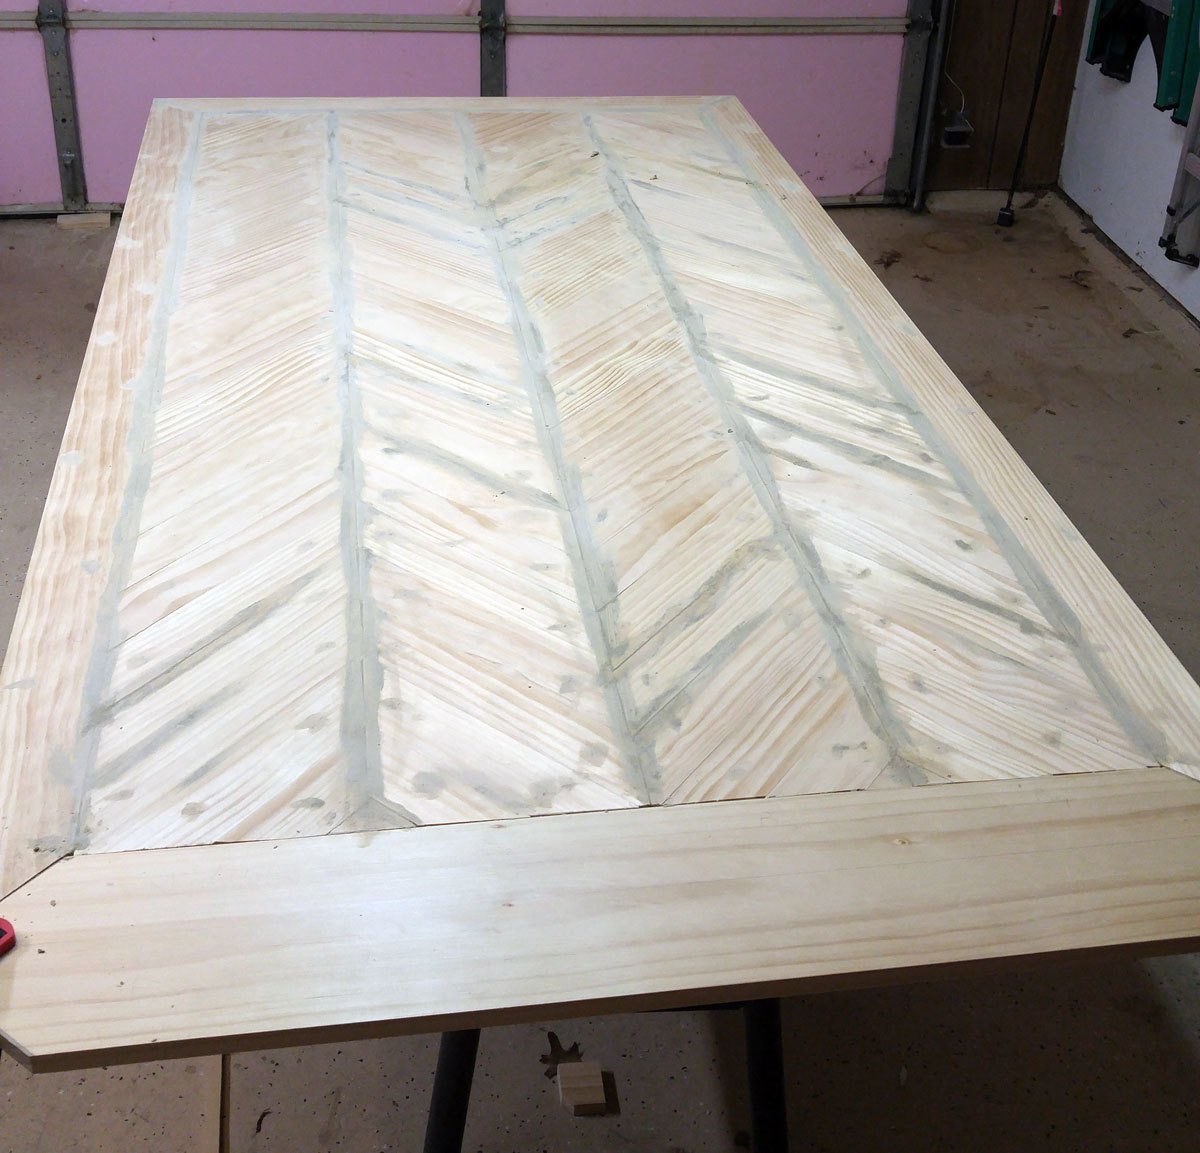
As a beginner at woodwork, this table was pretty easy to make. The instructions were easy to follow. I modified the table by adding 2x6 planks on the bottom and changing up the "X" design. The angles are tricky to get right, but i used scrap wood until i got the perfect angles then used my 2x2's for the final cuts. I also changed the finished dimensions of the table to fit in the room I was making it for, so this table was quite a bit wider than the original. It took me about a day and a half/two days to fully build and then I finished slowly over the rest of the week by staining and using a satin poly finish (I gave the top 4 coats so it took a little longer than normal). I'm so happy with the finished table I've already bought the wood to make another smaller one!

Built from Plan(s)
Estimated Cost
$70 for wood and hardware
Estimated Time Investment
Weekend Project (10-20 Hours)
Finish Used
Varathane Early American w/ Satin Poly
Recommended Skill Level
Beginner

Comments

Audrey Wright

Thu, 10/22/2015 - 05:02

For a beginner, you'd done a great job. I'm a beginner too and I can hardly do this in two days.. 

Modern Outdoor Storage Bench by Crazy Life with Littles

It’s a miracle I was able to finish this outdoor storage bench considering my kids are on summer break 😂

💡Tip: can’t find cedar pickets at your local stores? Just stain them. No one will ever know 😉 sealed with Thompson’s WaterSeal

by Crazy Life with Littles on Instagram

Seasonal And Holiday

Square Picnic Table using Deck Boards

Submitted by Anonymous (not verified) on Fri, 07/07/2023 - 11:32

I used deck boards instead of 2x6 for the top and seats; this lightened the table overall while negating the need to sand and finish the boards.

I also used a cedar-tone treated board so staining wasn't necessary.

Kelly S.

Built from Plan(s)
Seasonal And Holiday

6-Pack Carrier

Submitted by stacynabby on Mon, 01/20/2014 - 20:55

I've seen a couple of photos of "bottle caddies" for sale and I figured I could make my own. Seemed easy enough. I used 3/8" project wood from the Blue Store. I made the six-pack carrier for my neighbor who has been teaching me how to make all-grain homebrew.

http://www.pinterest.com/pin/179369997632846325/

Estimated Cost
$20 (including hardware and bottle opener)
Estimated Time Investment
An Hour or Two (0-2 Hours)
Finish Used
Danish wood oil
Recommended Skill Level
Starter Project

Comments

tommybo76

Tue, 01/21/2014 - 14:56

I home brew myself and I think this is a fantastic idea! How did you go about putting the label on the side?

tommybo76

Thu, 01/23/2014 - 07:09

This will come in very handy for lots of projects. I really appreciate you sharing this with me!

Debbie742

Thu, 11/27/2014 - 05:49

I checked the PDF and can't seem to find the plans to make this. Are they available??


debbie.

Texas Farm Bench

Submitted by BARROW12 on Sat, 02/08/2014 - 19:40

Modern Farm Bench w/ Texas Flag

Built from Plan(s)
Estimated Time Investment
Weekend Project (10-20 Hours)
Finish Used
Rustoleum American Walnut stain and Valspar paint in Deep Sea Diving, White, and Classic Red.
Recommended Skill Level
Beginner

Farmhouse Stair Railing

Submitted by Anonymous (not verified) on Wed, 01/03/2024 - 08:44

We built our house 5 years ago and I’ve disliked our stairs since then. They were never finished and were big and bulky compared to the rest of the house. These plans were the perfect fit. We switched the top 2x4 for an actual handrail, purchased from a big box store. We used pocket holes to install it and I couldn’t be happier. It’s now my favorite thing in the house. We plan on adding a loft and will use these plans for the railing.

@livingsmallerintheholler


Pedestal Table Herringbone Top

Submitted by Anonymous (not verified) on Sun, 01/22/2017 - 10:38

Herringbone Table

Thanks for the wonderful plans! This is my 2nd Ana White build (traditional turned leg, pottery barn desk). I used the legs from this build and then leveraged some tips from another blog for the herringbone top using 2 sheets of MDF as a base (http://www.southernrevivals.com/2014/06/tile-top-herringbone-table-make…). My herringbone table took some planning, as it is over 13' long. Now all of my family can eat together when we get together!


Built from Plan(s)
Estimated Cost
$500
Estimated Time Investment
Week Long Project (20 Hours or More)
Finish Used
Provincial Stain (4 coats) and Semi Gloss Poly, both by Minwax
Recommended Skill Level
Intermediate

Comments

Rolling grill cart table

Submitted by kmatt55 on Sat, 10/18/2014 - 19:13

I made the countertop with 2 plywood boards screwed together and topped the stainless steel with heavy duty adhesive.  I adjusted the plans a little to accommodate my space.  Thanks for the plans!  It was a fun build!

Built from Plan(s)
Estimated Cost
$100
Estimated Time Investment
Day Project (6-9 Hours)
Finish Used
Glossy black exterior paint
Recommended Skill Level
Beginner

Backyard Bliss!

Submitted by kdins31 on Mon, 01/12/2015 - 09:26

I built this outdoor play area for my kids this past summer.  The area under that portion of the deck was always messy and muddy and so I wanted to make use of it.  I built the deck and anchored it with lag bolts to the deck supports.  On the one side I used rubber mulch and on the other there is play sand.  I dug holes in various locations and filled with gravel to allow for drainage under the sand and mulch.  For the awning I used plain cedar shingles.  I added a shower that is just regular 1/2" metal pipe with a hose adaptor.  The shower wall and fence are just old pallets that I had for a while, cut to size, which was pretty much random but they came out great.  I added a misting system under the awning that works great, the kids love the cool mist on the hot days. Overall, a heavy job ripping up the grass, moving the wood, gravel, stones, sand and mulch, but a fun deck build and even better experience doing this with my kids by my side!  

Estimated Time Investment
Week Long Project (20 Hours or More)
Recommended Skill Level
Intermediate

Comments

Einman10

Tue, 12/29/2015 - 17:10

I'm extremely interested in the plans for the bathroom vanity with the step stool that pulls out for kids to be able to reach the sink.  Is there a way I can get those plans?

Modern Dorm Mini Refrigerator Microwave Cabinet

Submitted by rachelcb on Sat, 07/31/2021 - 12:35

I changed plan to make deeper. I also modified the bottom trim and top. I put a ball bearing soft door drawer guide on modern door so it can slide back and forth. I feel we need more modern plans on here but with a bit of creativity and using plans you can make anything. I have never built anything before. I love General Finishes Milk Paint in Snow White and I brushed rolled it on (sanded between 3 coats). It’s basically self leveling and leaves a nice matte finish. Used door glide in picture bought from homedepot in the 24 inch and that’s how wide door was and it was 36” tall. Door glide I only used one on top of the door not on bottom as well. Door piece of fiberboard with just strips glued on and quarters spacing them correct.

Estimated Cost
$200
Estimated Time Investment
Weekend Project (10-20 Hours)
Finish Used
Dorm mini refrigerator microwave cabinet
Recommended Skill Level
Starter Project

Comments

Foldable Farmhouse Table 2

I recently published my first foldable farmhouse table last week here: http://ana-white.com/2013/06/foldable-farmhouse-table The first one I made was very heavy because I used 2x6 tops and 4x4 legs. I decided to make another one that would be lighter and easier to transport. The plans are basically the same just instead I used 1x6 for the top and put 2x4s together for the legs. I also shorted the length by about a foot. The only issue with making the table shorter length is that the legs don't fold completely flush. You could easily make the legs short enough to fold flush, but then the table was a little too short from the ground up for us. The same as before I simply used kreg joints to join the top boards together. I then made a 2x4 frame and attached it to the bottom. I made each of the legs separately by joining 2x4s together and sanding everything down. Everything was stained before putting the legs on using Miniwax Dark walnut stain. I used 2 coats of Miniwax water based clear coat to seal it. A notch was cut out on each of the bottom 2x4 supports on the legs and I glued in a small piece of wood cut to size. These are so I can put in a 2x4 support board under the table so that the legs do not fold in on themselves when it is standing up. The legs are just attached using door hinges you can buy in packs in the hardware section. Be careful when screwing into the 1x6 top not to use too long of screws or else you will over screw and have them come through into your table top. Table design was by Amber Veatch Designs and photographed by Andi Mans Photography

Estimated Cost
120.00
Estimated Time Investment
Day Project (6-9 Hours)
Finish Used
Sand to finish and then used Miniax dark walnut stain followed by Miniwax water based clear coat.
Recommended Skill Level
Beginner

Comments

Freddyflis

Tue, 07/07/2015 - 06:41

We have built something very similar and we have a good bit of wobble at the top, even though the stretcher down the center of the table is holding solid in there and secred with clasps. Were thinking of some sort of sliding pin into the top of the leg to the apron. Anyone run into this before?

Seasonal And Holiday

OUTDOOR SOFA

Decided to build Ana's outdoor sofa for our Master Balcony and love the results. I was a bit impatient to finish the build and therefore did not take the time to use pocket screws for a more finished result, (which I will do next time). Regardless, I love how the sofa turned out and would reccomend for anybody to build. The cheapest outdoor cushions I could find were from Ikea and we spent around $160.

Built from Plan(s)
Estimated Cost
$100 BUILD, $160 CUSHIONS
Estimated Time Investment
Afternoon Project (3-6 Hours)
Finish Used
OUTDOOR STAIN
Recommended Skill Level
Beginner

New Outdoor Kitchen!

Submitted by ColleenM on Wed, 07/06/2011 - 06:48

This is the new outdoor kitchen I had been working on - finally finished! It was inspired from the kitchen island plans - I like the slats, and thought they would work well outdoors for air flow and water drainage. I worked around the existing grill, and it is all modular, so it can be moved if necessary (such as painting or treating the deck). It includes cupboards underneath the bar, dorm fridge and sink with storage under the countertop. The cooler stand raises the cooler up to 'user' level (no more bending!). Because I'm an avid recycler - most of the products used were recycled items. All told (not including the already purchased grill) - this kitchen cost me a total of approximately $95.00 (I had a lot of the materials already). This project took me approximately 5 weeks working on it part-time after hours. I built one cabinet at a time, then the countertops.

Built from Plan(s)
Estimated Cost
$95.00
Estimated Time Investment
Week Long Project (20 Hours or More)
Finish Used
I used the same paint I used on the house - an exterior Behr latex stain.
Recommended Skill Level
Intermediate

Comments

kmatt55

Wed, 07/06/2011 - 17:29

This looks really awesome Colleen! I was thinking about putting a sink like that on my deck. What kind of finish did you use for the countertops? Would you please post more pictures of it? Great job!

ColleenM

Thu, 07/07/2011 - 04:42

Thanks Kmatt & Viola...I'll try and get some more pictures up asap. For the bar top and countertop I used tile, and treated the grout lines many times with a waterproofer. Both tile and grout were purchased at our local ReStore - a total of 20 cents a piece for the tile, grout was $3. Not bad for a countertop!

mamafiona

Wed, 07/20/2011 - 11:48

Wow, this is really amazing! This is just what we need for our new deck - something modular and not too expensive to build. Do you have any more pics? I'd love to see what the area in front of the grill looks like. Very, very nice work.

Guest (not verified)

Mon, 03/05/2012 - 10:54

Hi, I was wondering if you have the plans for the kitchen around the bbq grill, i would love to make this for my husband for his birthday.

Guest (not verified)

Mon, 04/09/2012 - 18:38

Hi, this is great. Is there anyway you can post pics of the front of the bar where the sink is and especially the bbq, I want to build around my existing bbq grill but dont know how. thank you so much.

Small Cedar Fence Picket Storage Shed

Submitted by Pembat on Sun, 10/06/2013 - 20:37

Built this in a weekend, took about 1.5 days. I ended us using 2x4's instead of 2x2's, I think it resulted in a much stronger frame. I also built a base for it to sit on. I got pre-stained cedar fence boards, and overlapped them 1" instead of a 1/2". Pretty easy project, I ended up siding the back on the ground, installing it, and then adding the side walls without the siding (just the framing), and then sided them in place. The doors work perfectly. I took my total inside dimension between walls, made sure the opening was square, and then divided that by two to get the width of each door. I then took another 1/4" off that, so each door had an additional 1/8" gap, it worked perfectly. When I set the doors, I put them on a piece of roofing closed as I screwed in the hinges, and then opened them and removed the roofing. I opted to run the door siding horizontal to use up a bunch of waste wood. I'm happy with the outcome. I also found some 6" self starting lag bolts and lagged through the back of the shed into studs (through the siding) into the garage behind it.

Estimated Time Investment
Weekend Project (10-20 Hours)
Recommended Skill Level
Intermediate

My first chair

Submitted by Anonymous (not verified) on Mon, 05/15/2023 - 05:16

Thank you Anna for designing such beautiful plans, and making them available for free. My husband likes the chair so much he doesn’t want it outside! I guess I’ll have to make a few more for our deck.

Comments

Kitchen Cabinets

Submitted by Anonymous (not verified) on Wed, 10/02/2019 - 21:30

I followed the kitchen cabinet building plans to build all new upper cabinets up to my ceiling. I built all new drawers with soft close drawer slides also and built the refrigerator enclosure cabinet.I did the entire remodel myself including the new doors out of MdF.

Finish Used
Emerald urethane paint
BIN Shellac Primer

Comments

Ana White

Tue, 11/05/2019 - 10:41

We are so thrilled to let you know your entry WON the Best Brag contest!  There were many amazing entries, and it was tough to choose.

Look out for an email from us shortly!

Pool supplies storage shed

Submitted by Anonymous (not verified) on Sun, 06/25/2023 - 18:50

I was looking for a shed to keep pool towels and other deck and pool items. This shed hit every feature I was looking
for. My husband loved the plans. He's always saying he can build anything with a measured drawing and a
cut list. The only thing we changed was the roofing material. we were given some metal roofing by a friend.

Built from Plan(s)

Comments

Swing set

Submitted by lazyLiz on Wed, 02/29/2012 - 10:21

I've finished my swing but my porch don't have enough clearance so I built A frame stand for it.

Built from Plan(s)
Estimated Time Investment
Day Project (6-9 Hours)
Finish Used
mahogany latex based exterior primer and paint in one
Recommended Skill Level
Intermediate

Comments

Ashley Doucakis

Fri, 04/19/2013 - 15:37

I love the idea of adding the A-frame considering that where i live there are no real trees to hang it on and building a porch where one doesn't already exist is a pain in the butt! Lol. How wide do you think we could go before it starts compromising the frames integrity? And how much weight can it hold?