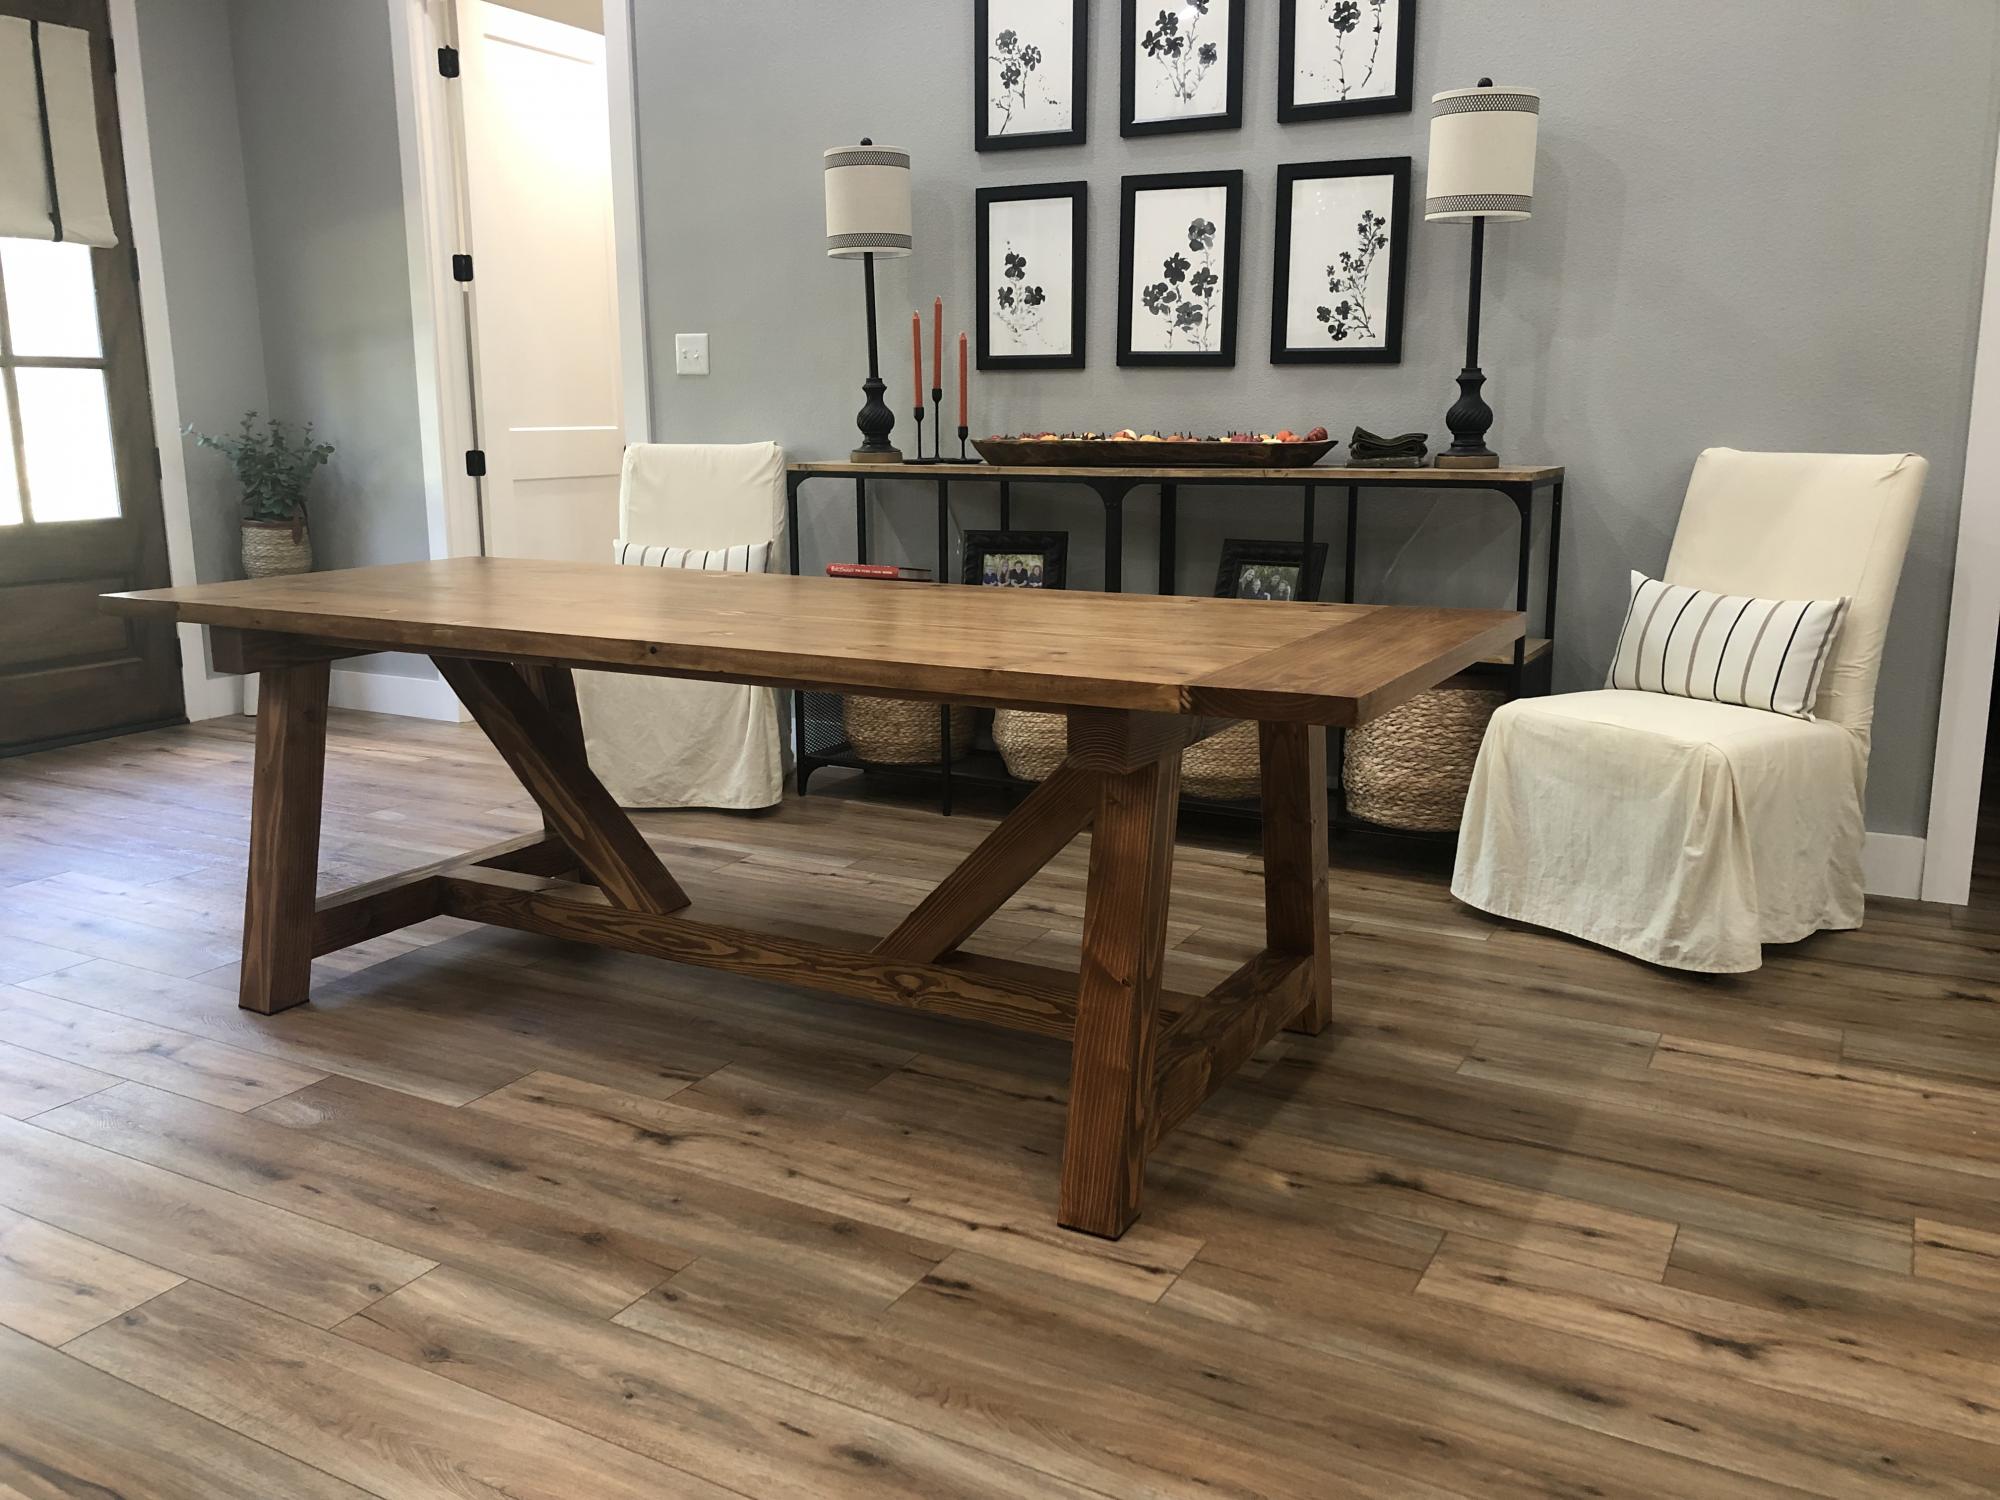
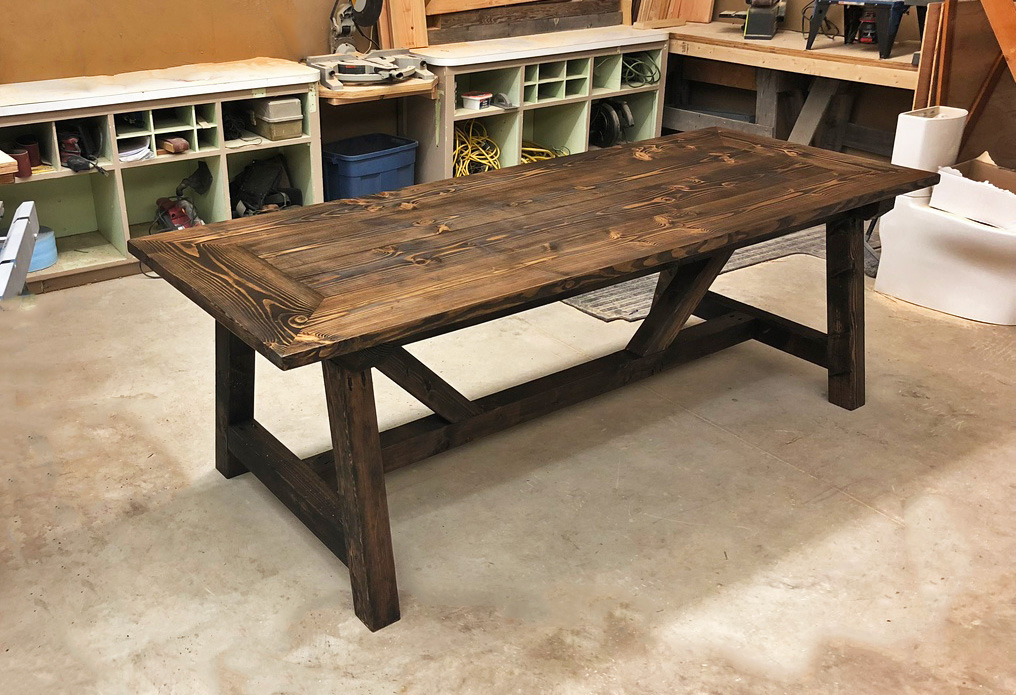
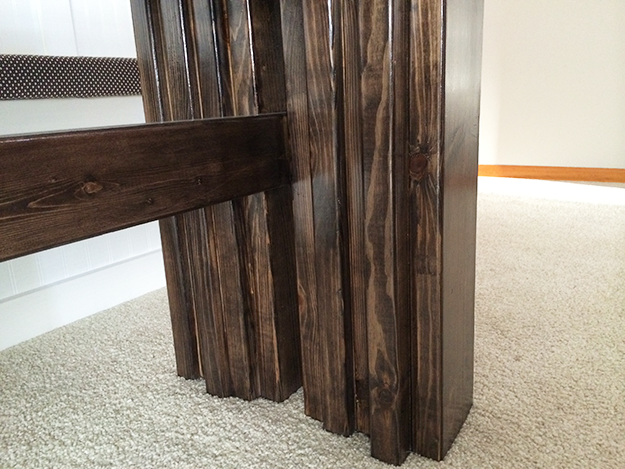
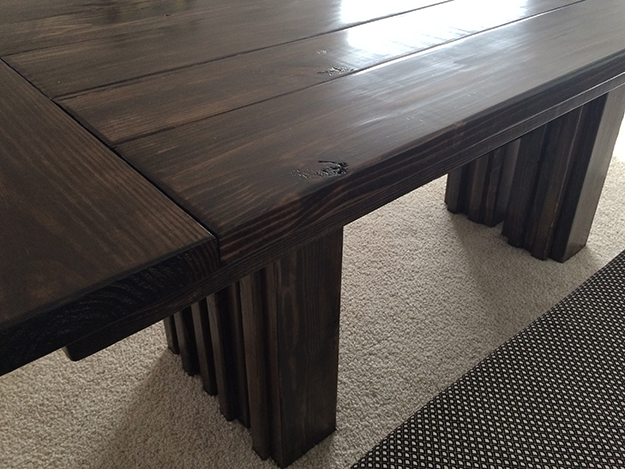
4x4 Truss beam table and bench
The plans were very easy to follow for non avid woodworkers. We decided to upholster the seat on the bench.
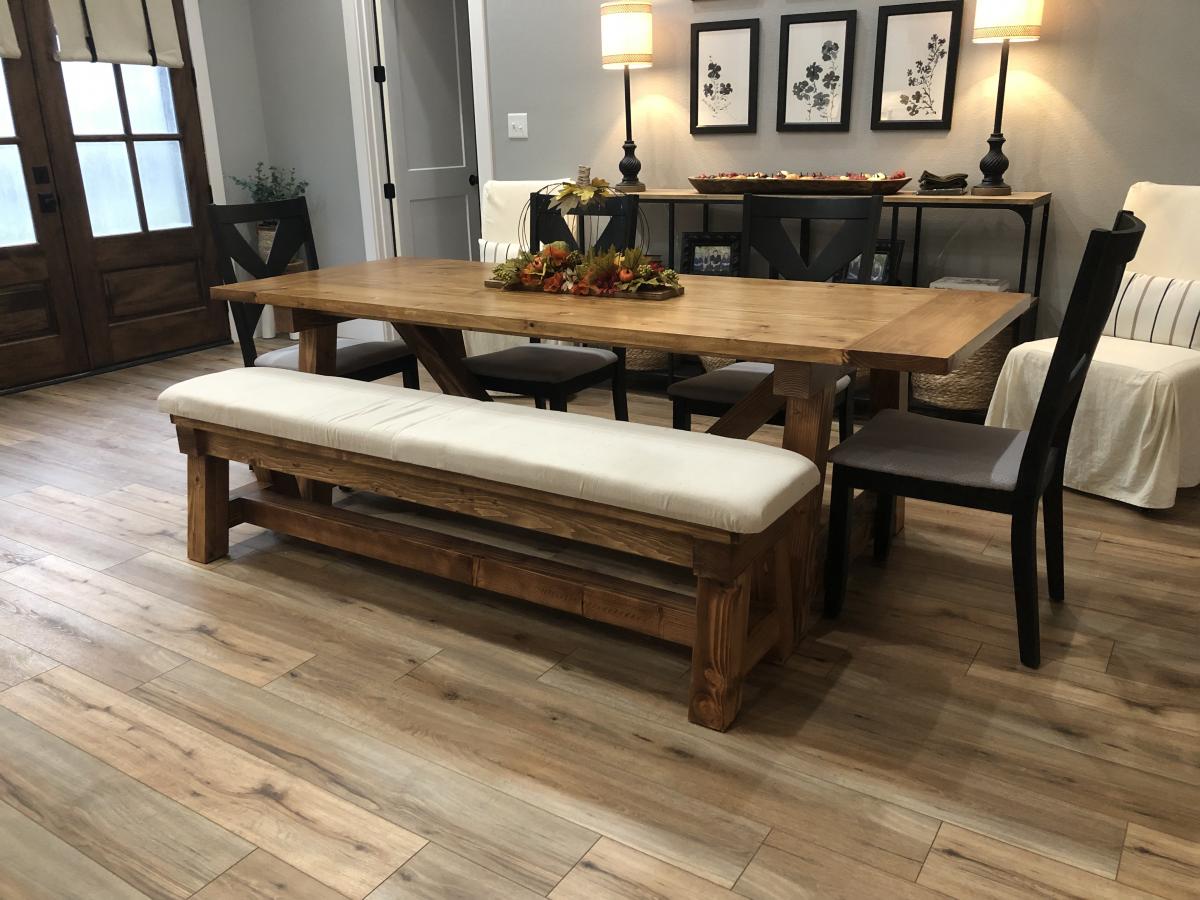
Built from Plan(s)
The plans were very easy to follow for non avid woodworkers. We decided to upholster the seat on the bench.
Super Easy.. I like it better without the doors. Recommend getting a KREG Jig. I have the Jr and it was perfect for this project.
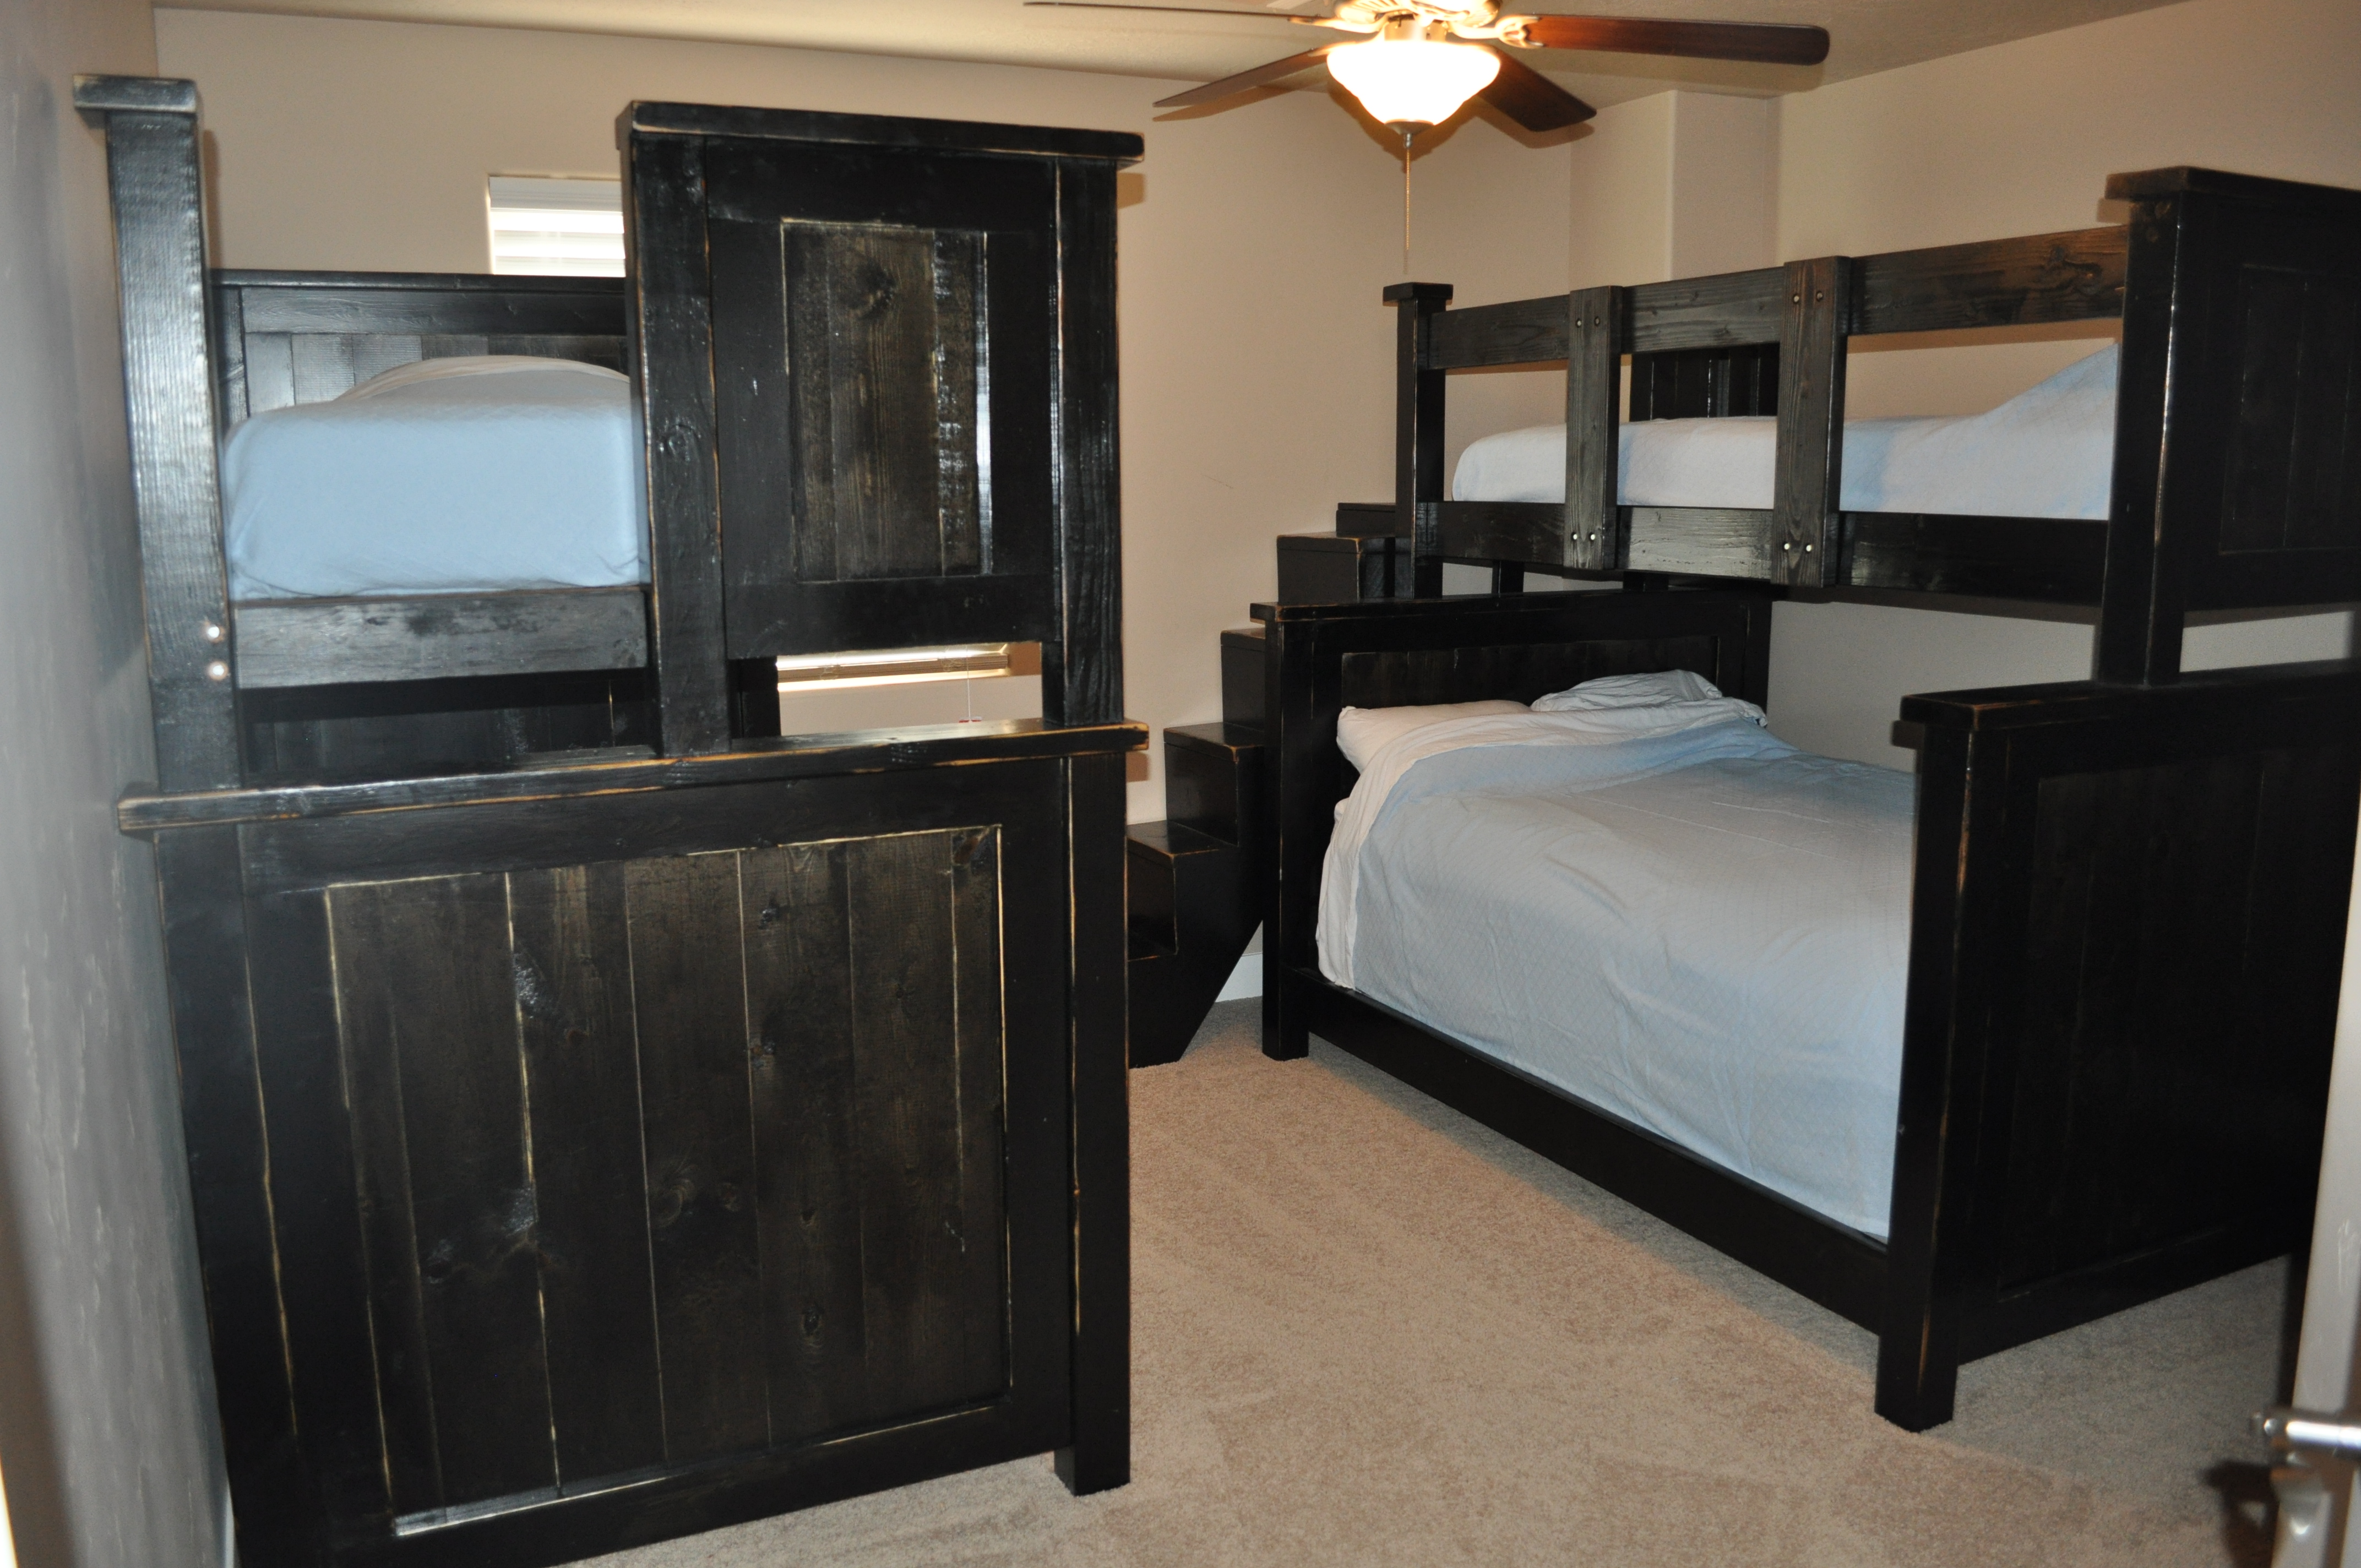
We have a rental unit and decided to fill one room with 2 sets of bunk beds. One is a twin over a full. The other is a full over full. Due to a duct running through one corner, and limited amount of space, I decided to build a set of stairs on the 17" gap. I used the simple bunk bed plans, but modified it to the style of the farmhouse. Also, I changed several of the heights of the foot/head boards. The full over full will have a ladder coming off the end and is in progress.
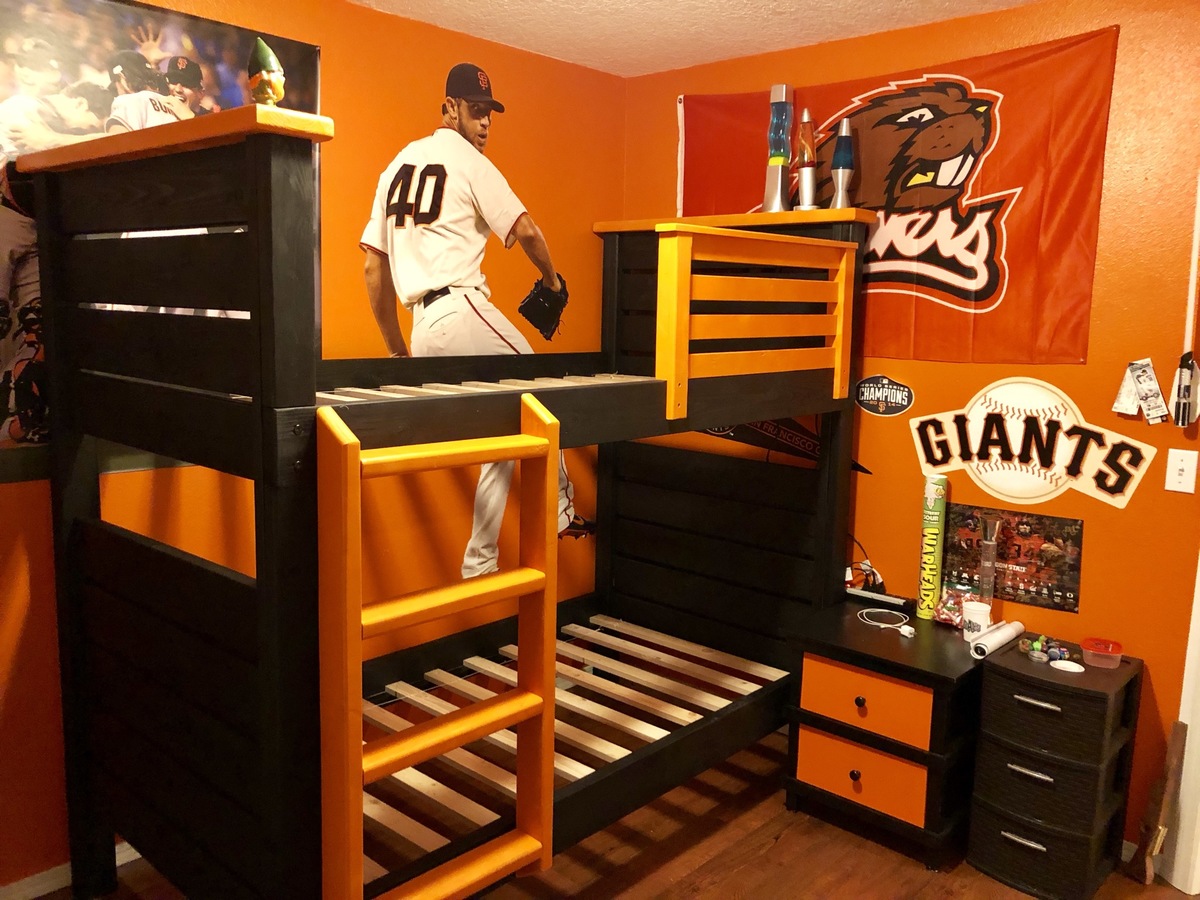
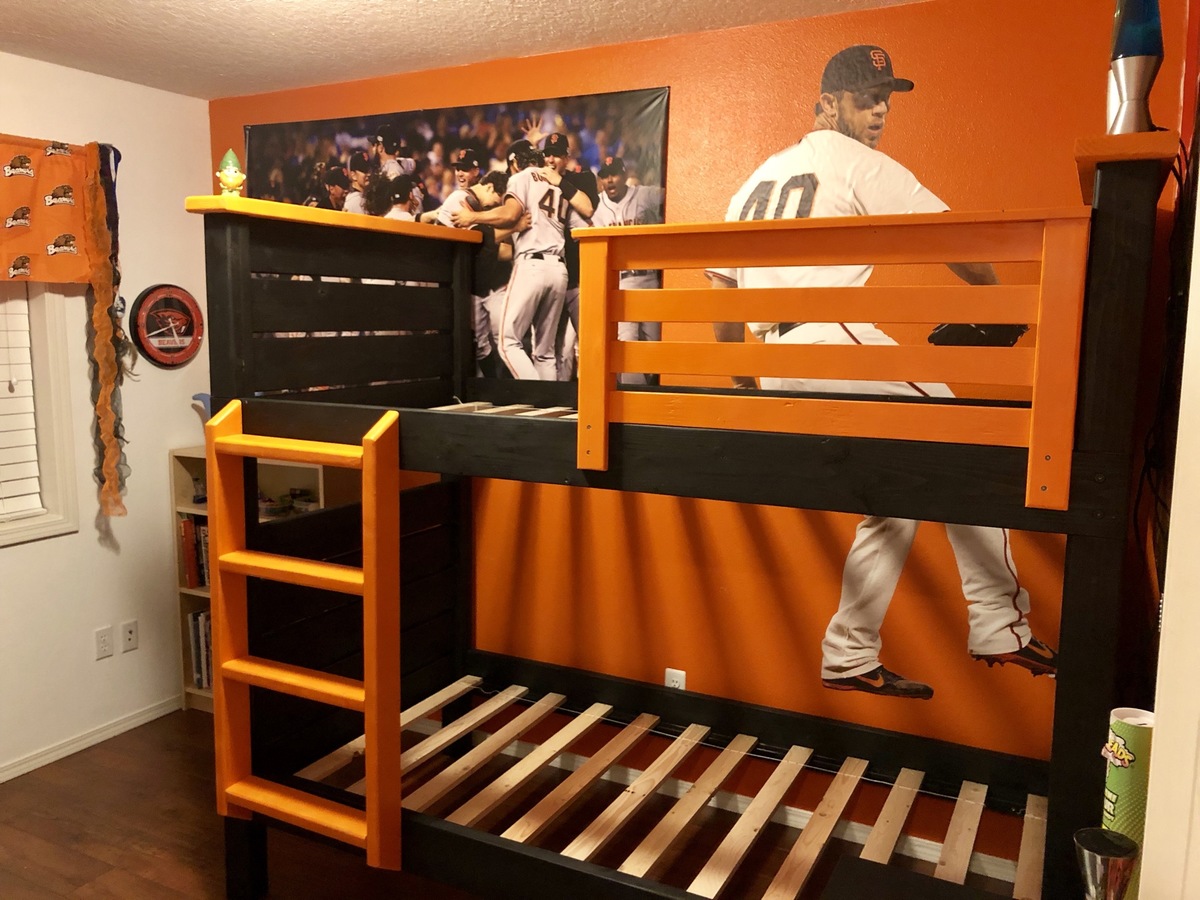
I’ve made several of these bunk beds now and my oldest was wanting a oregon beavers/San Fransisco giants themed one after we donated his during our move. It’s made out of 2x4’s, 2x6’s and 1x3 pine.
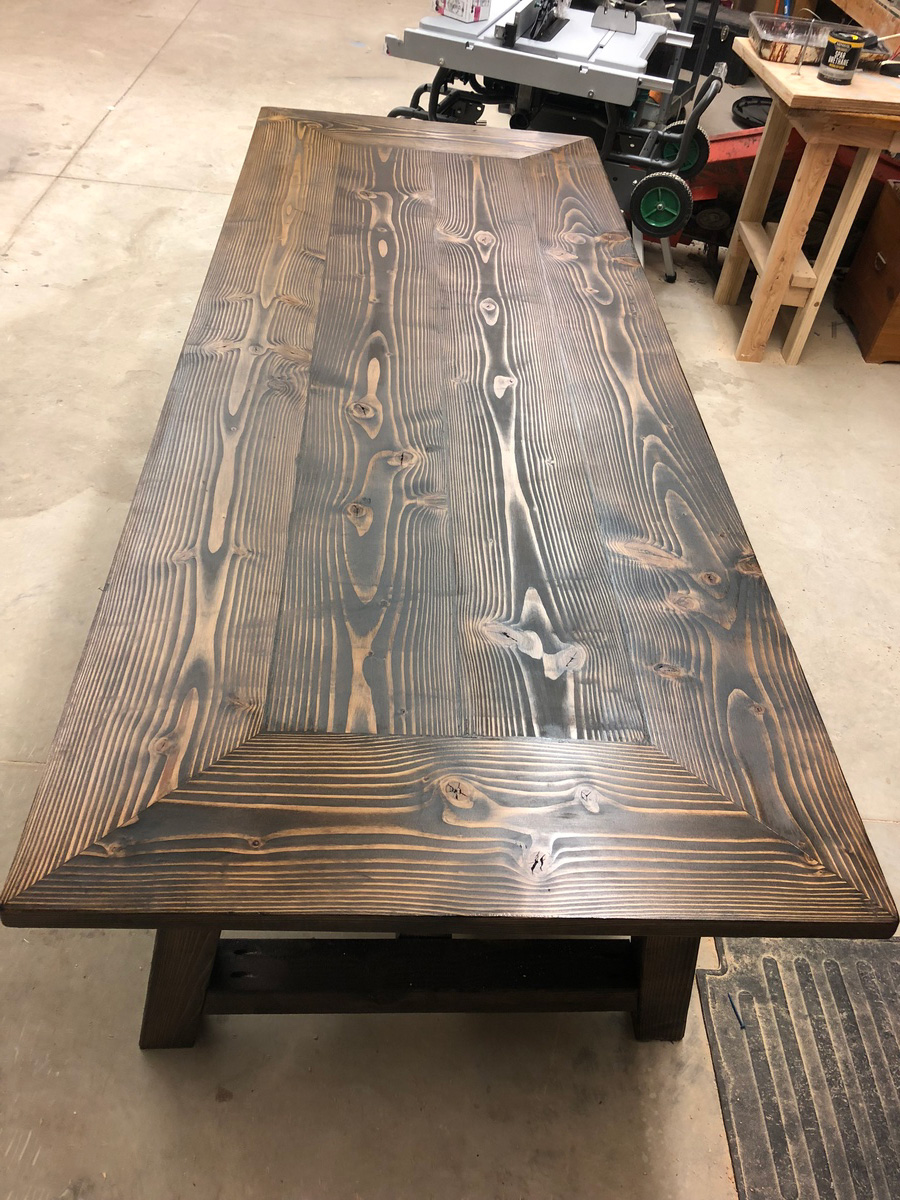
This was an easy project although it took us 3 weekends to get it finished. My son loves to help now but it slows down the process. We used wood we already had and reclaimed oak to make this table.
We had to resize the table to fit our entryway. The table design was 64” long and we made ours 48” in length. It was easy to do the math, the cuts for length were 75% of the original size. For example, the table top trim piece calls for a 64” cut, take 64 x 75% and you get 48. So that cut piece would be 48” instead of 64”. We kept all other measurements the same, both width and height. The only other change we made was in bottom shelf, it calls for a 1x12 and we already had a 2x12.
I am still looking for a metal piece(towel holder) to go on the front of the table.

Built this for our 6yr old. She has decided she wants it to be pink so we picked out a beautiful Aubrey Hepburn worthy shade and will update our photo.
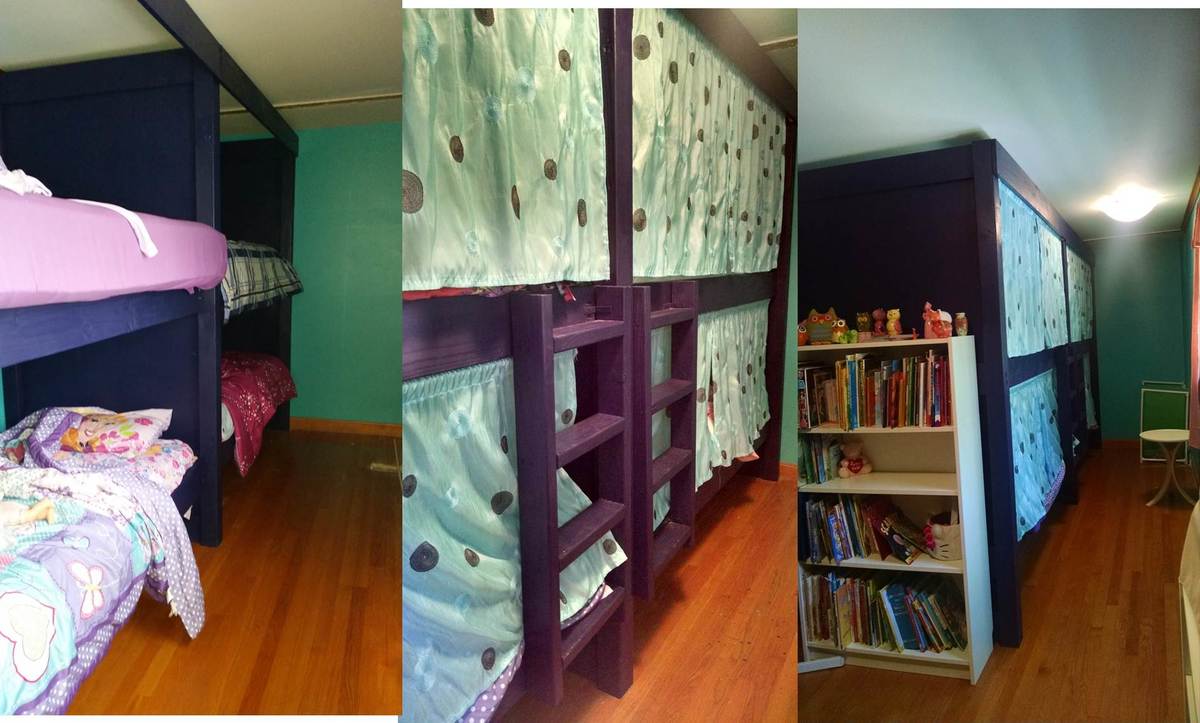
We used the Build a Simple Bed plan and the Bunk Bed from Simple Bed. I modified the plans to build a double bunk bed. We needed a way to fit up to 6 small children in a long, narrow room. Although we haven't built the trundle beds yet, each bunk will also have a trundle bed. The kids especially love their "privacy" curtains!
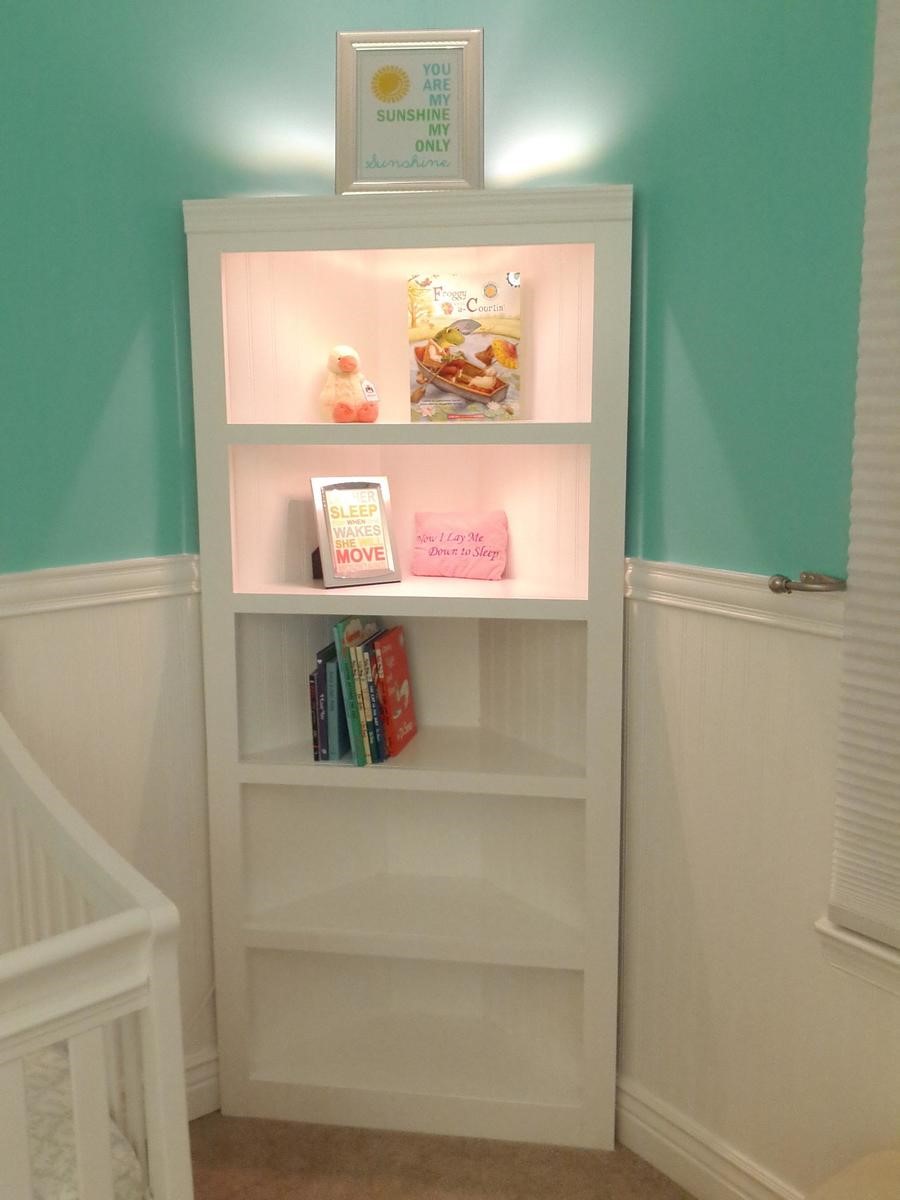
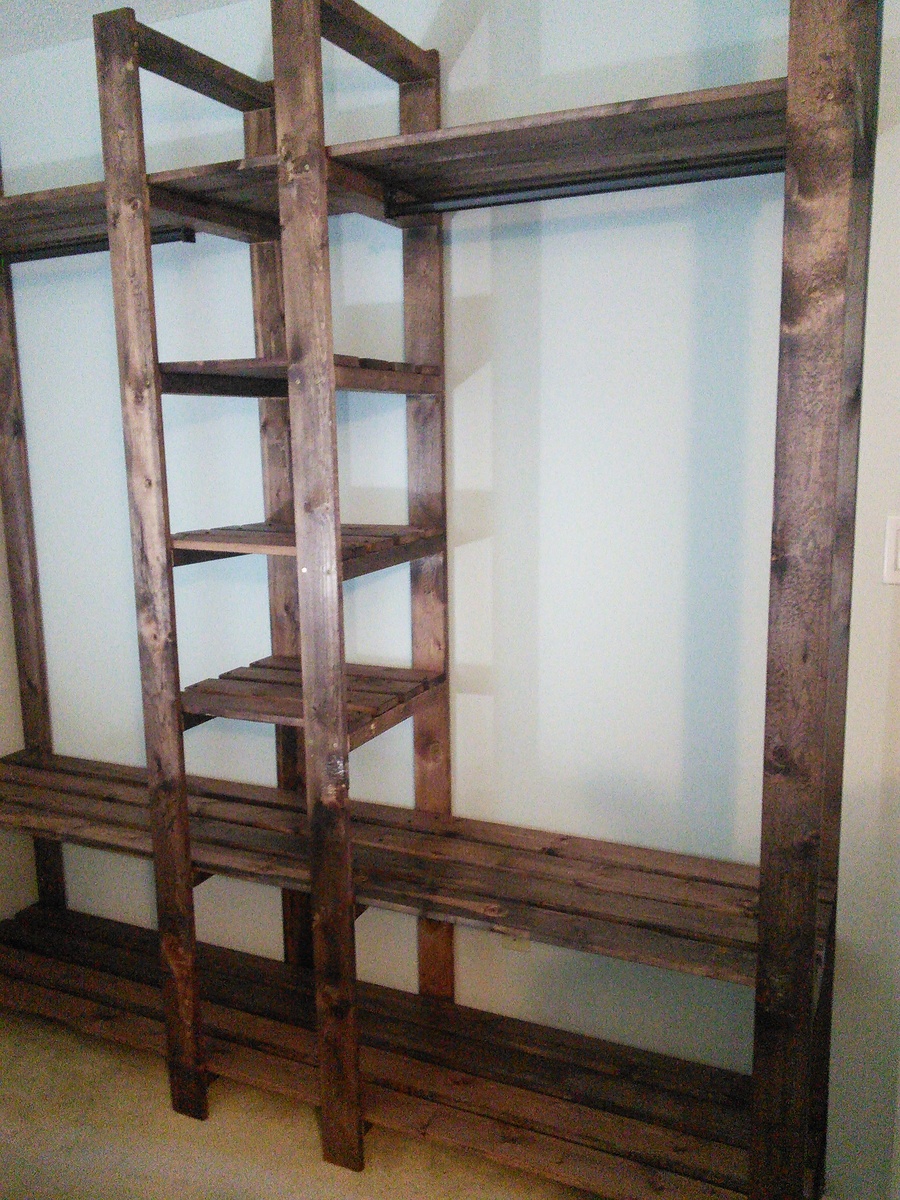
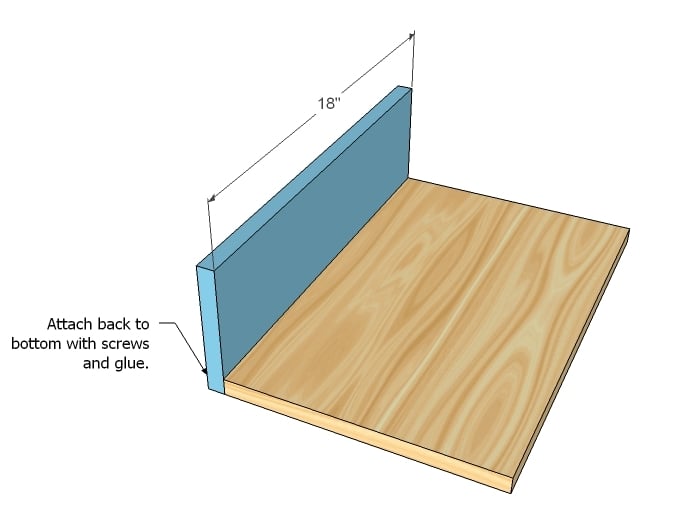
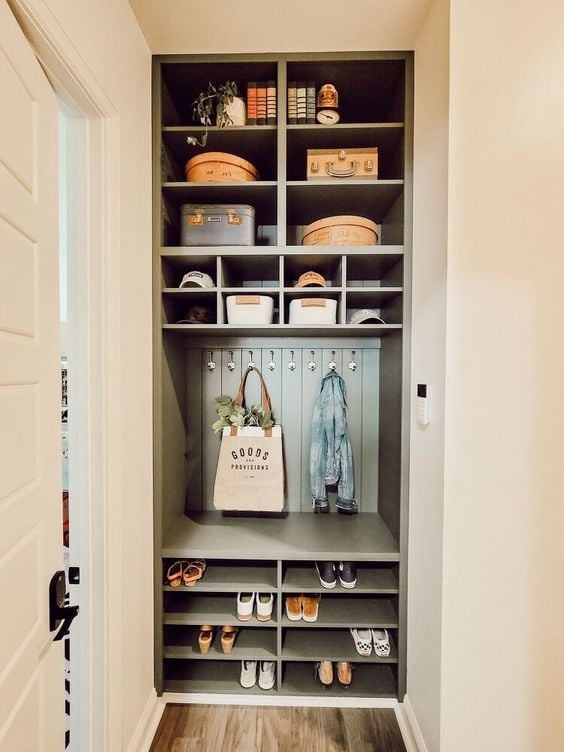
Slat closet.
I made this one three inches taller and two feet longer and decided to miter the top. I also used a LOT of glue and blue Craig screws.

Using 6’ fence slats. Planed until smooth then assembled to fill opening. Finished with beeswax and mineral oil with additional hanging hardware, handle and floor roller.
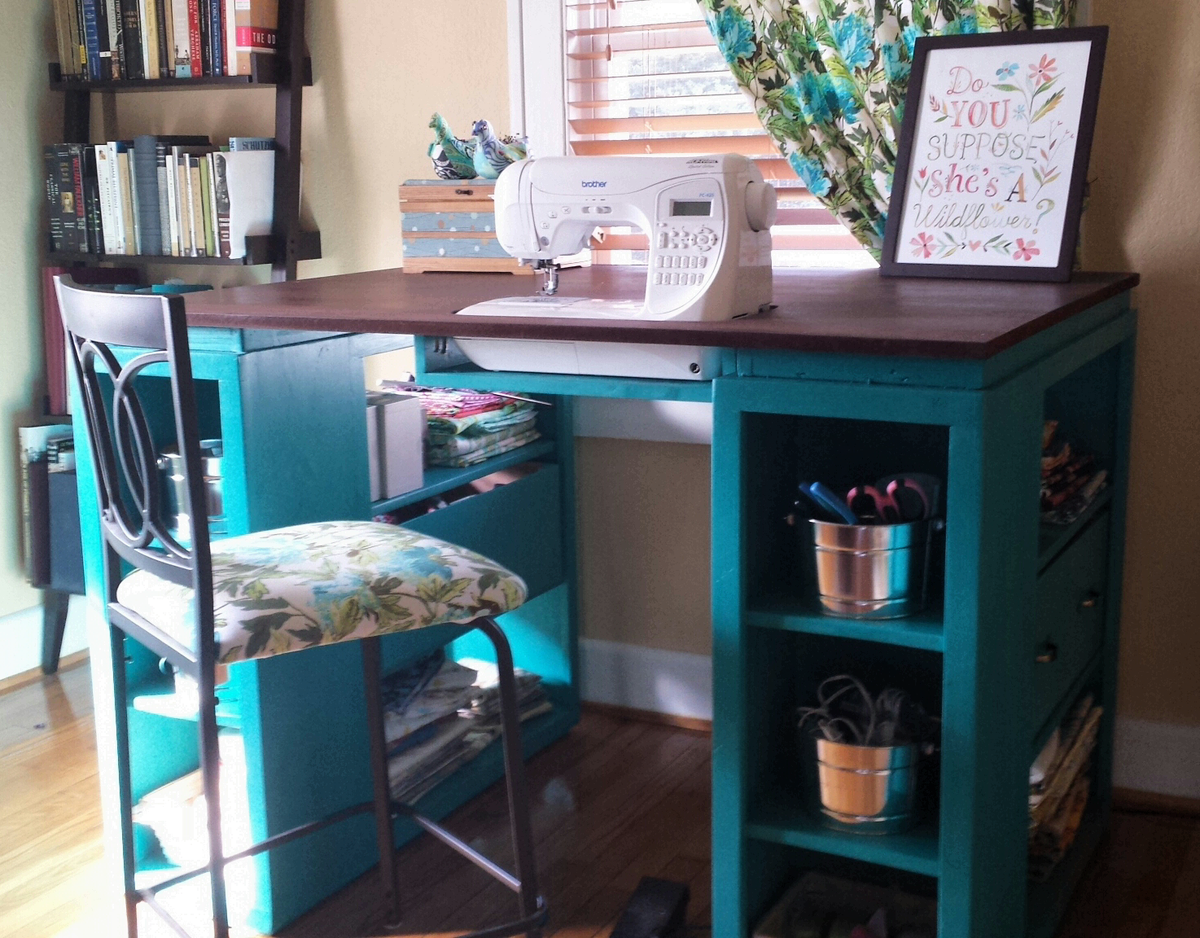
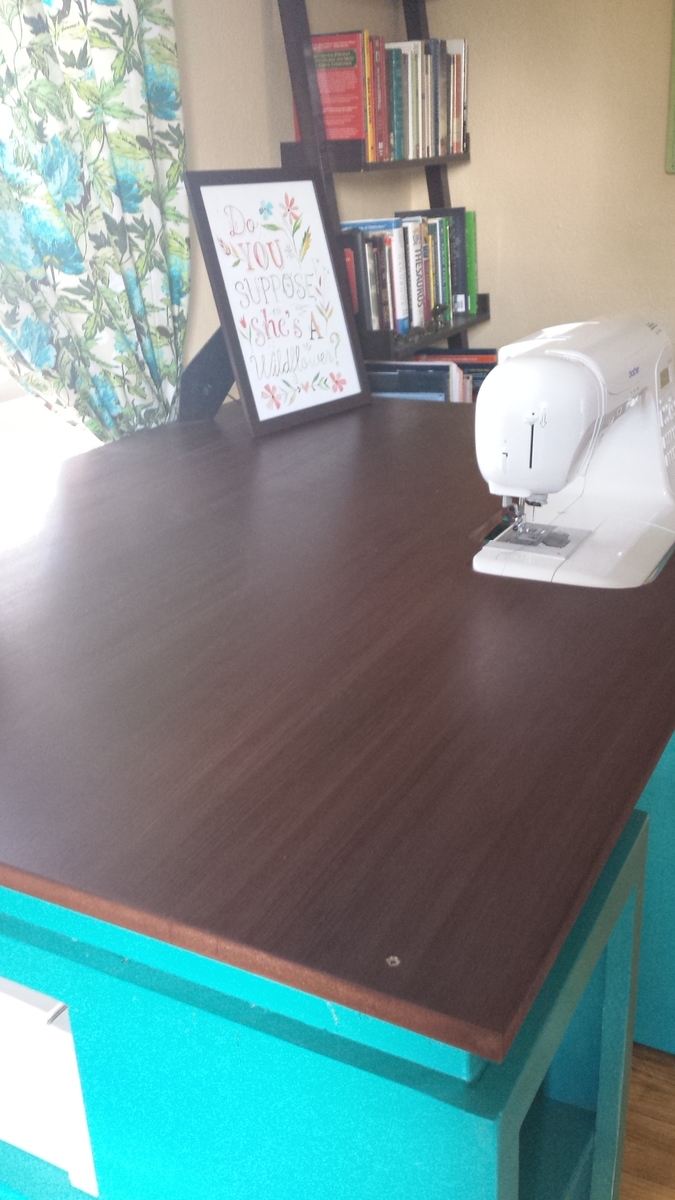
I have been looking at sewing furniture for years, but the prices always made my jaw drop. I have a small craft room, so I needed a table that could also triple as a cutting table and fabric storage. Thank you so much to Ana White for this plan! I built exactly to the plan in The Handbuilt Home, and it's the PERFECT size.
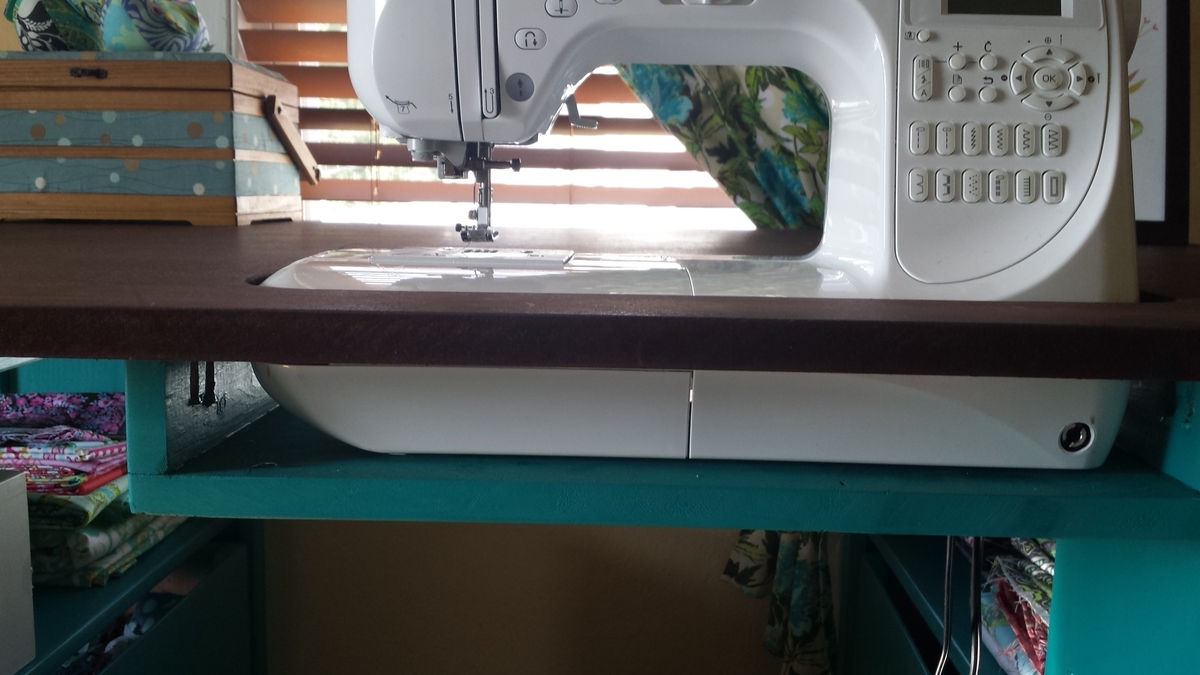
So the sewing machine can sit flush with the top, making working on big sewing projects way easier, I traced the outline of my machine on the MDF and cut it out with a jig saw. Then I built a small shelf using a 1x12 scrap and 2 1x3 scraps. Putting the 1x3s on top of the 1x12 made the shelf 3.75 inches deep, which is exactly the depth I needed. I attached it to the underside of the tabetop using a pockethole jig and screws.
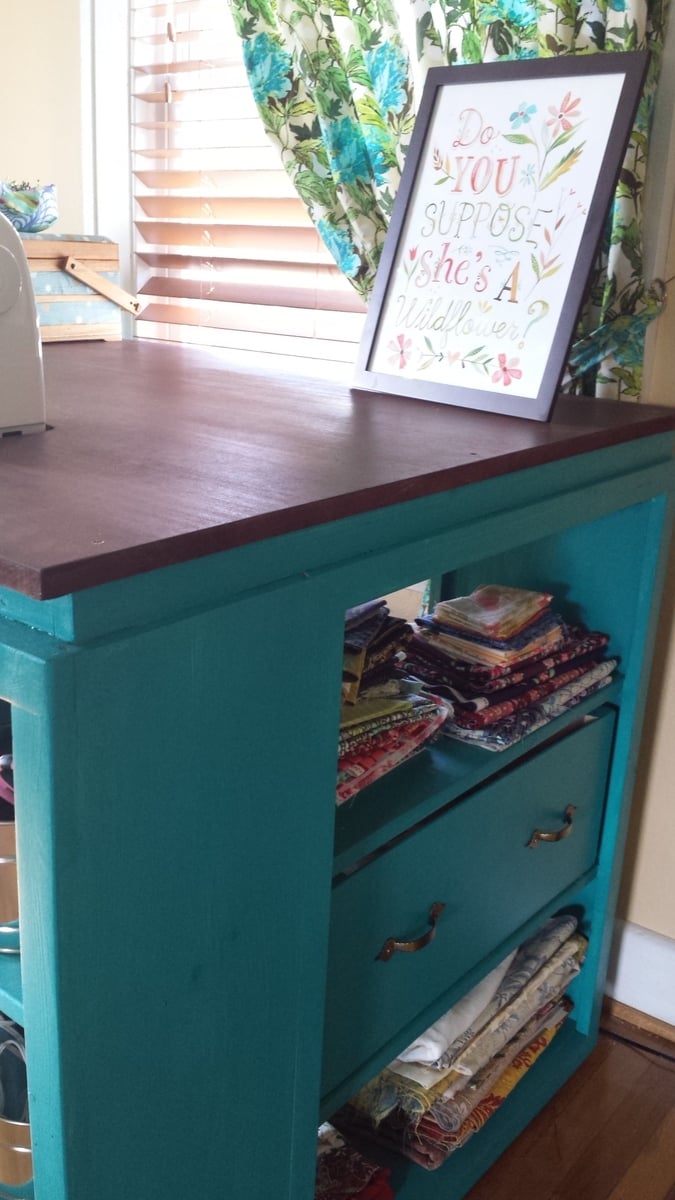
I built 2 boxes using 1/4 inch plywood, and installed drawer pulls on them, giving the illusion that the table has 2 drawers built in. This is where I keep my ugly stuff--interfacing and fabric scraps.
I got the color scheme for the table from the entryway console plan in The Handbuilt Home. In order to make the MDF top look like it had a wood grain, I applied mahogany gel stain with an old washcloth in very thick strokes that spanned the length of the tabletop. It soaked in and lost the "grain" look in some places, but the majority still looks like wood. I did have to apply several coats of polyurathane over the stain; the MDF has a prickly texture that grabs fabric and makes it hard to feed through the sewing machine.
My only complaint is that I didn't quite think through the fact that seating is bar height and I'm 5'7". It's a little difficult to reach my sewing machine pedal. I may build a small stool for the pedal to sit on so I don't have to half sit/stand to sew.
This is the first woodworking project I've done alone from start to finish: from going to Lowe's and picking out the wood, to cutting the wood with a circular saw, assembly, and finishing. (My fiance did carry it up the stairs for me. :) )
I'm so in love with this table! And now to finish the quilt I started 6 months ago....

Mon, 09/23/2013 - 07:40
I really like your colors! And that drawer idea is so clever! Nice work!
Val
artsybuildinglady
Mon, 09/23/2013 - 15:22
I love this idea!! I too have wanted a sewing table for a long time but the prices of them take my breath away. I may have to make myself one! Thanks for the inspiration!!
My husband and I had worked on this bed together, and we are so happy with it! We went with taller side tables that we purchased, and just stained the wood instead of painting it.
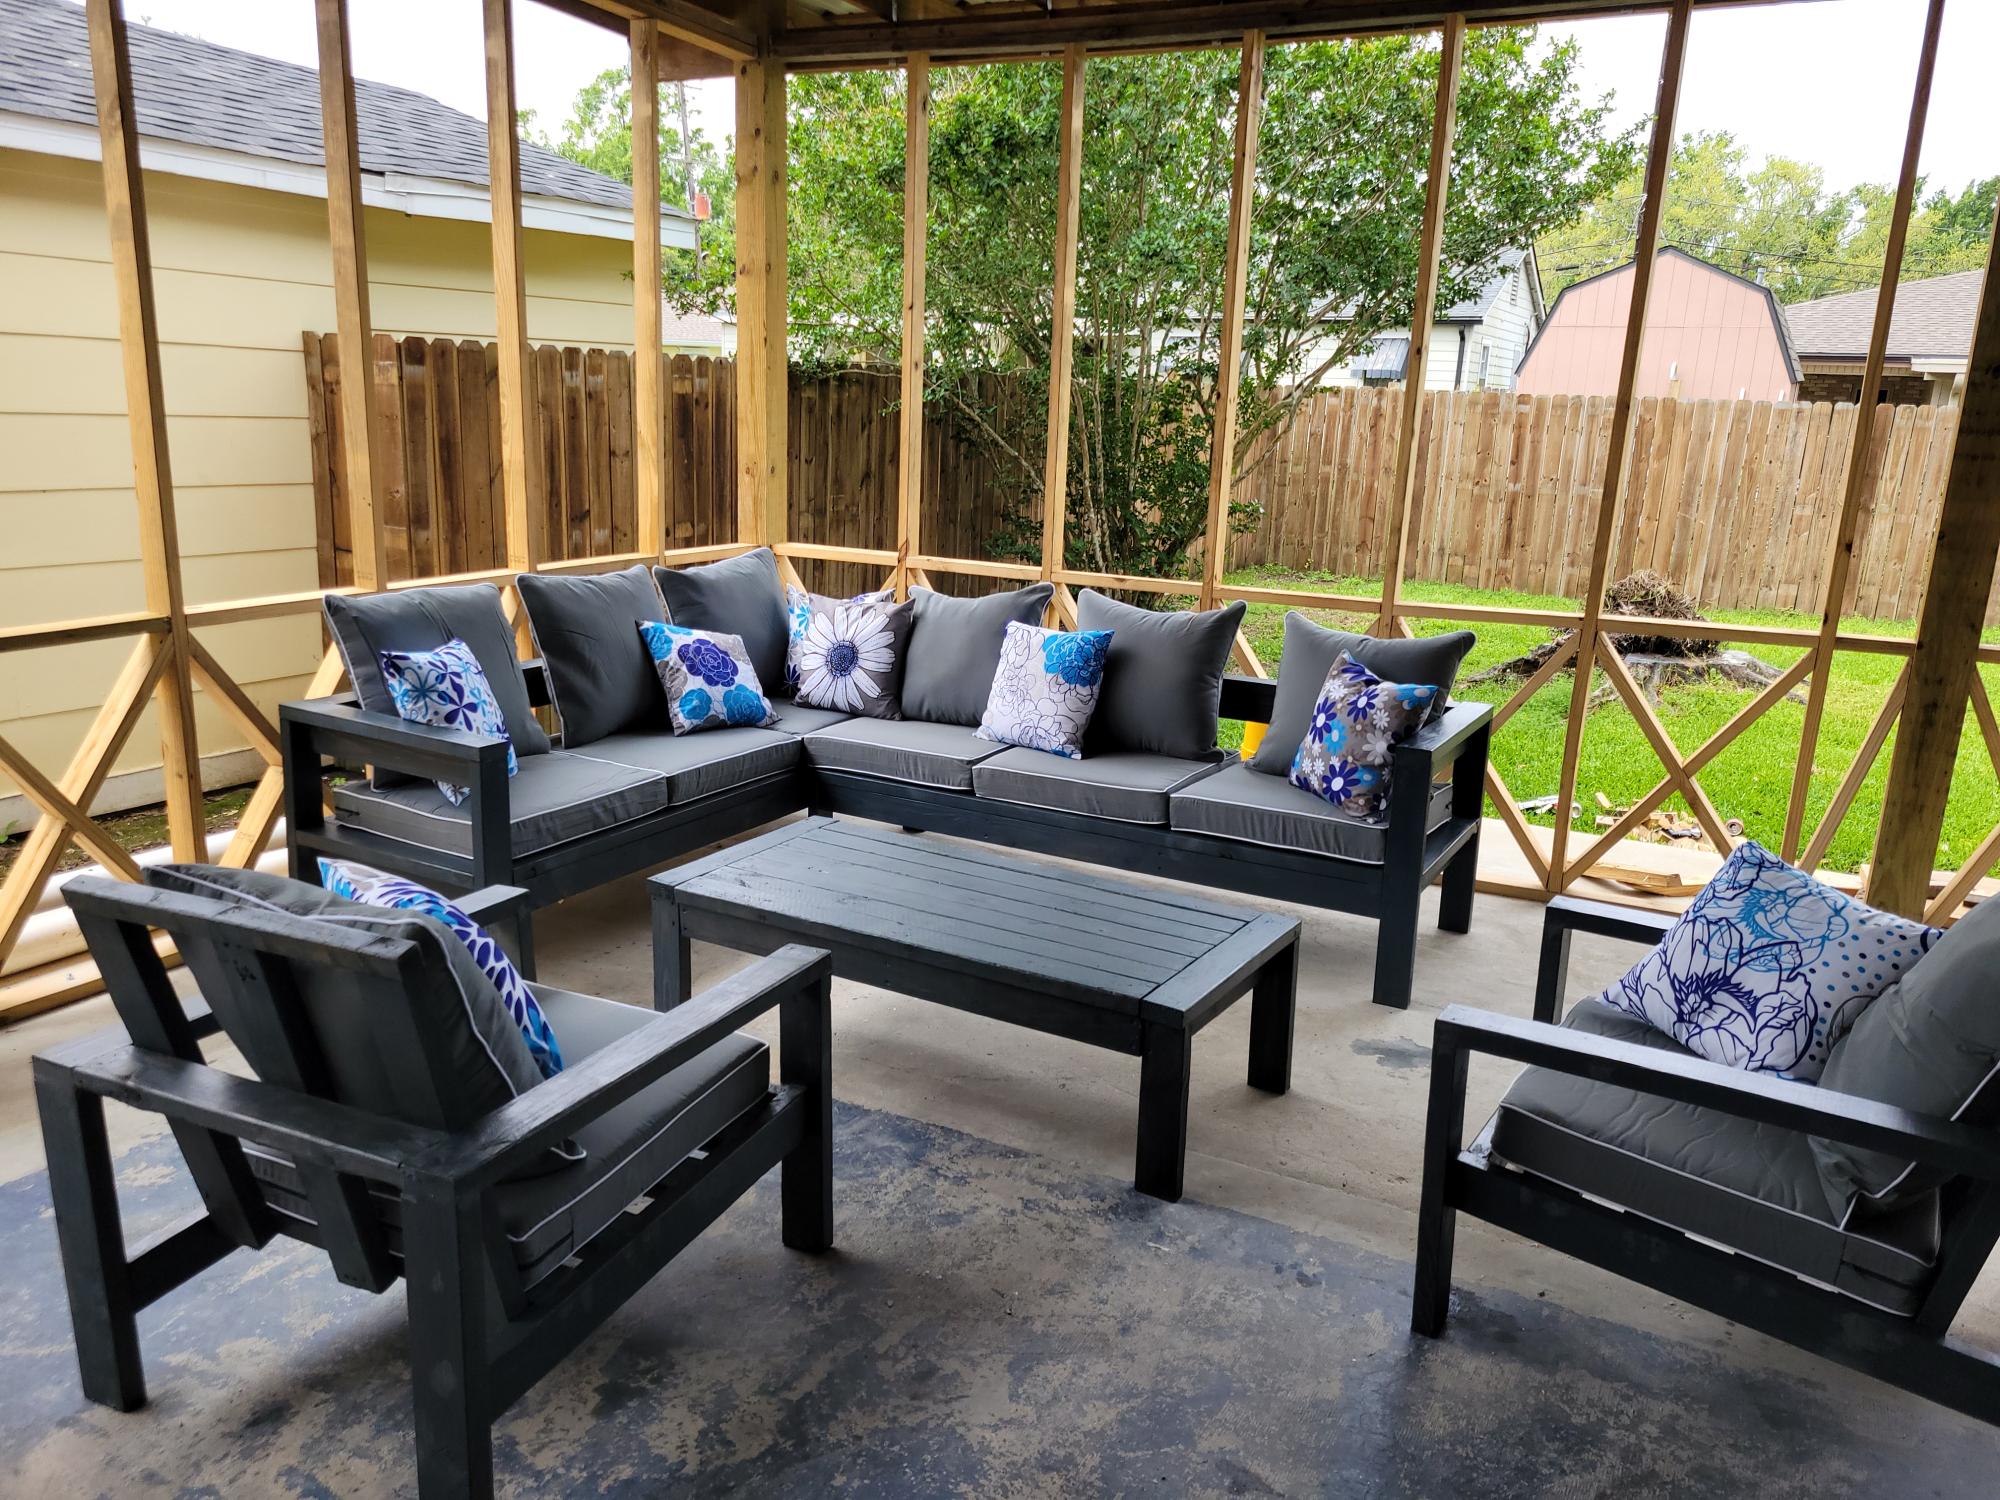
Your easy to follow 2x4 proje ts turned out amazing. My outdoor set is complete. The chairs, also, came from your plans. I built all of it by myself in one weekend. Thank you

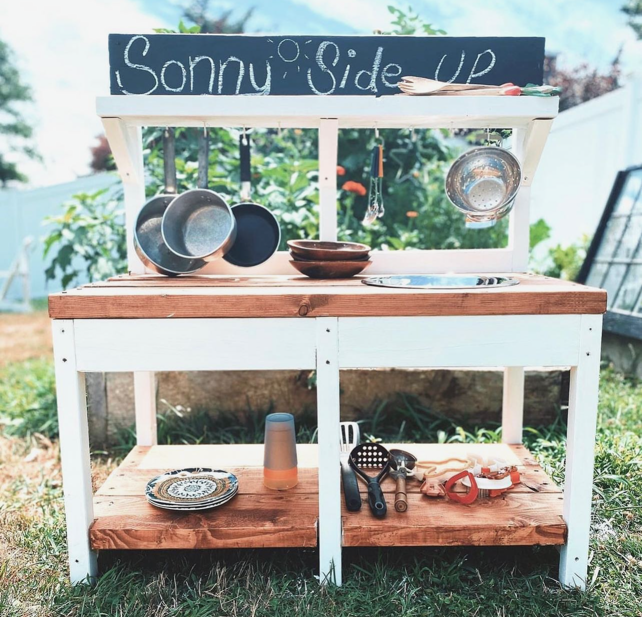
Darling Mud Kitchen by Sarah Jean Gammon
"I had this idea of making Sonny a mud-kitchen, a kids play kitchen for the yard. I mentioned it to Brent and he laughed saying he had enough projects on his list. This was not something he was going to build. Sooo I built this all by my self...or as Sonny would say, “me do this my own self”. It cost ~30 bucks in lumber and a trip to the thrift store for some second hand pots and pans. 3 hours later, a little paint, a little stain and voila... Sonny Side Up Mud Kitchen! Thanks for the plans Ana."
This was so super easy. We are so in love with this. Thank you Ana for making DIY so much fun!

Thu, 05/18/2023 - 09:22
Way to go, so happy you enjoy it! Thanks for sharing.
it was an old swing on the family farm. I saved it from the burn pile and remade it. Have made five so far. All hav even 5ft wide, but one was 7ft. Amazingly comfortable swing!
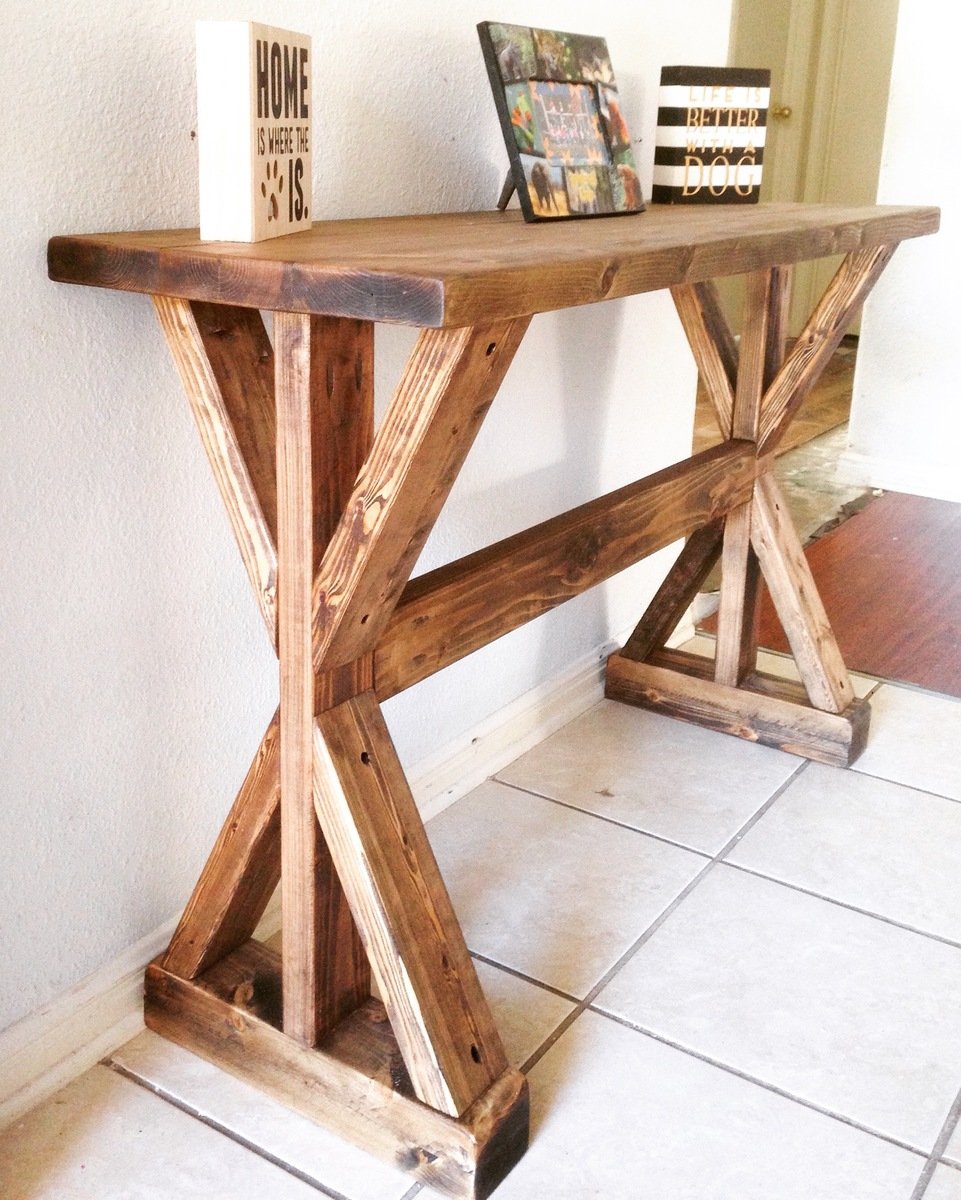
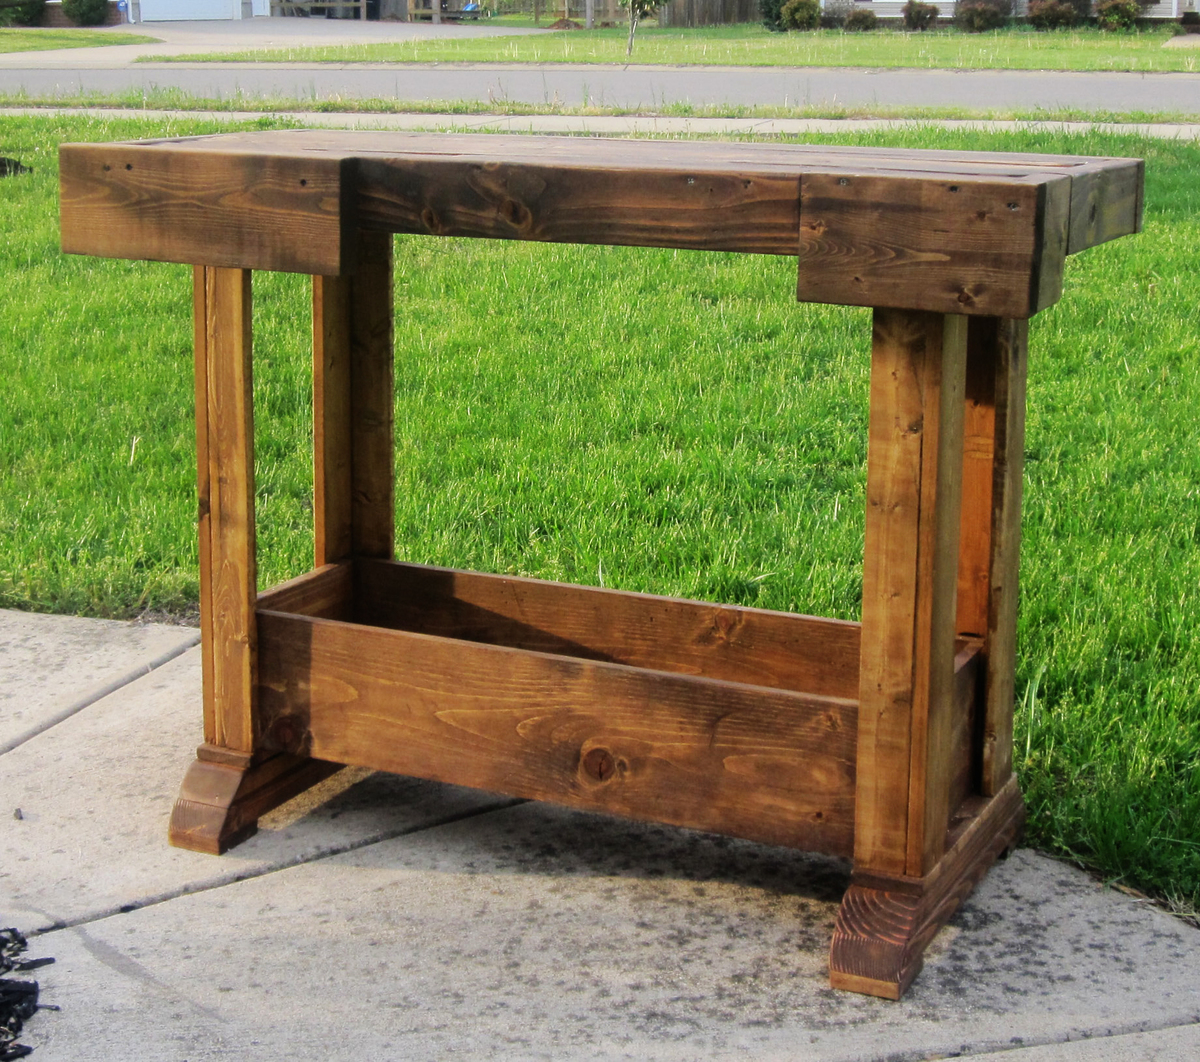
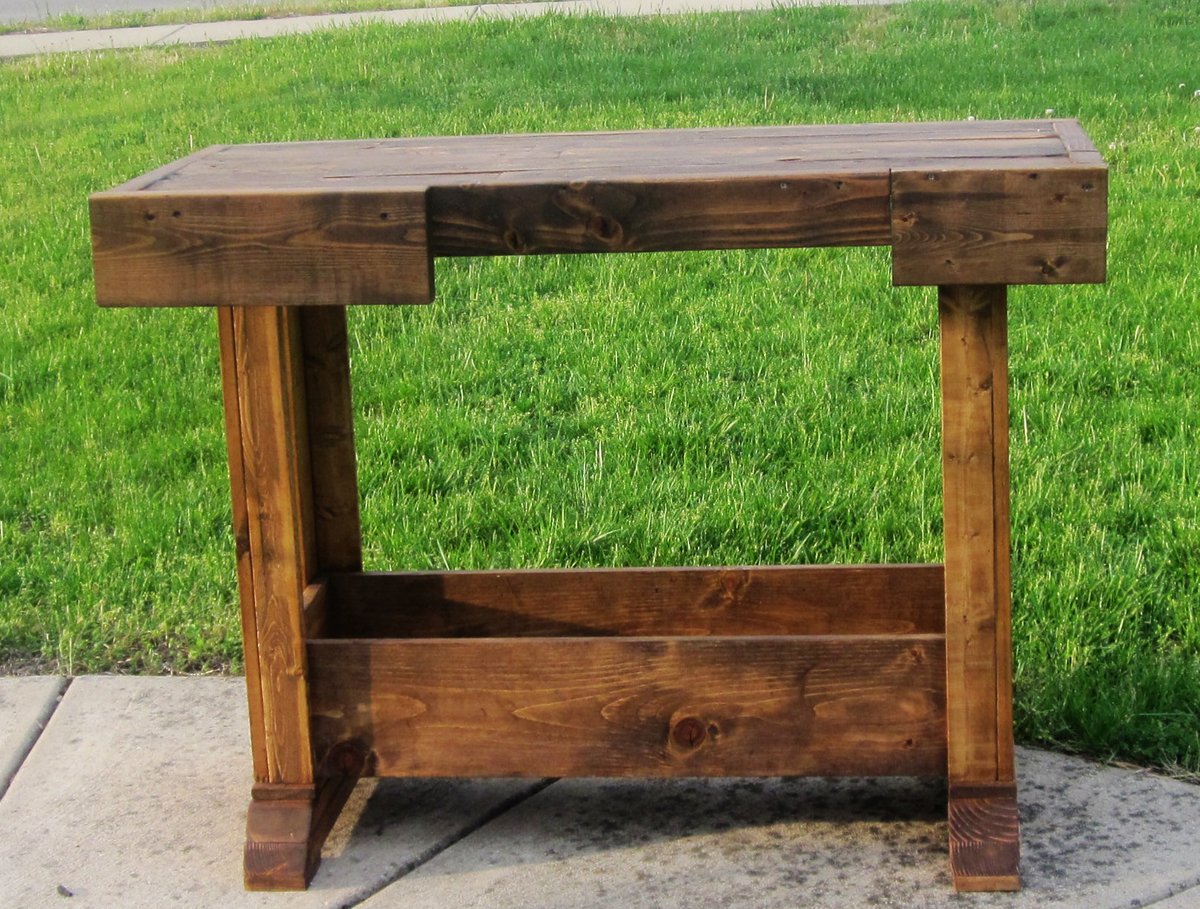
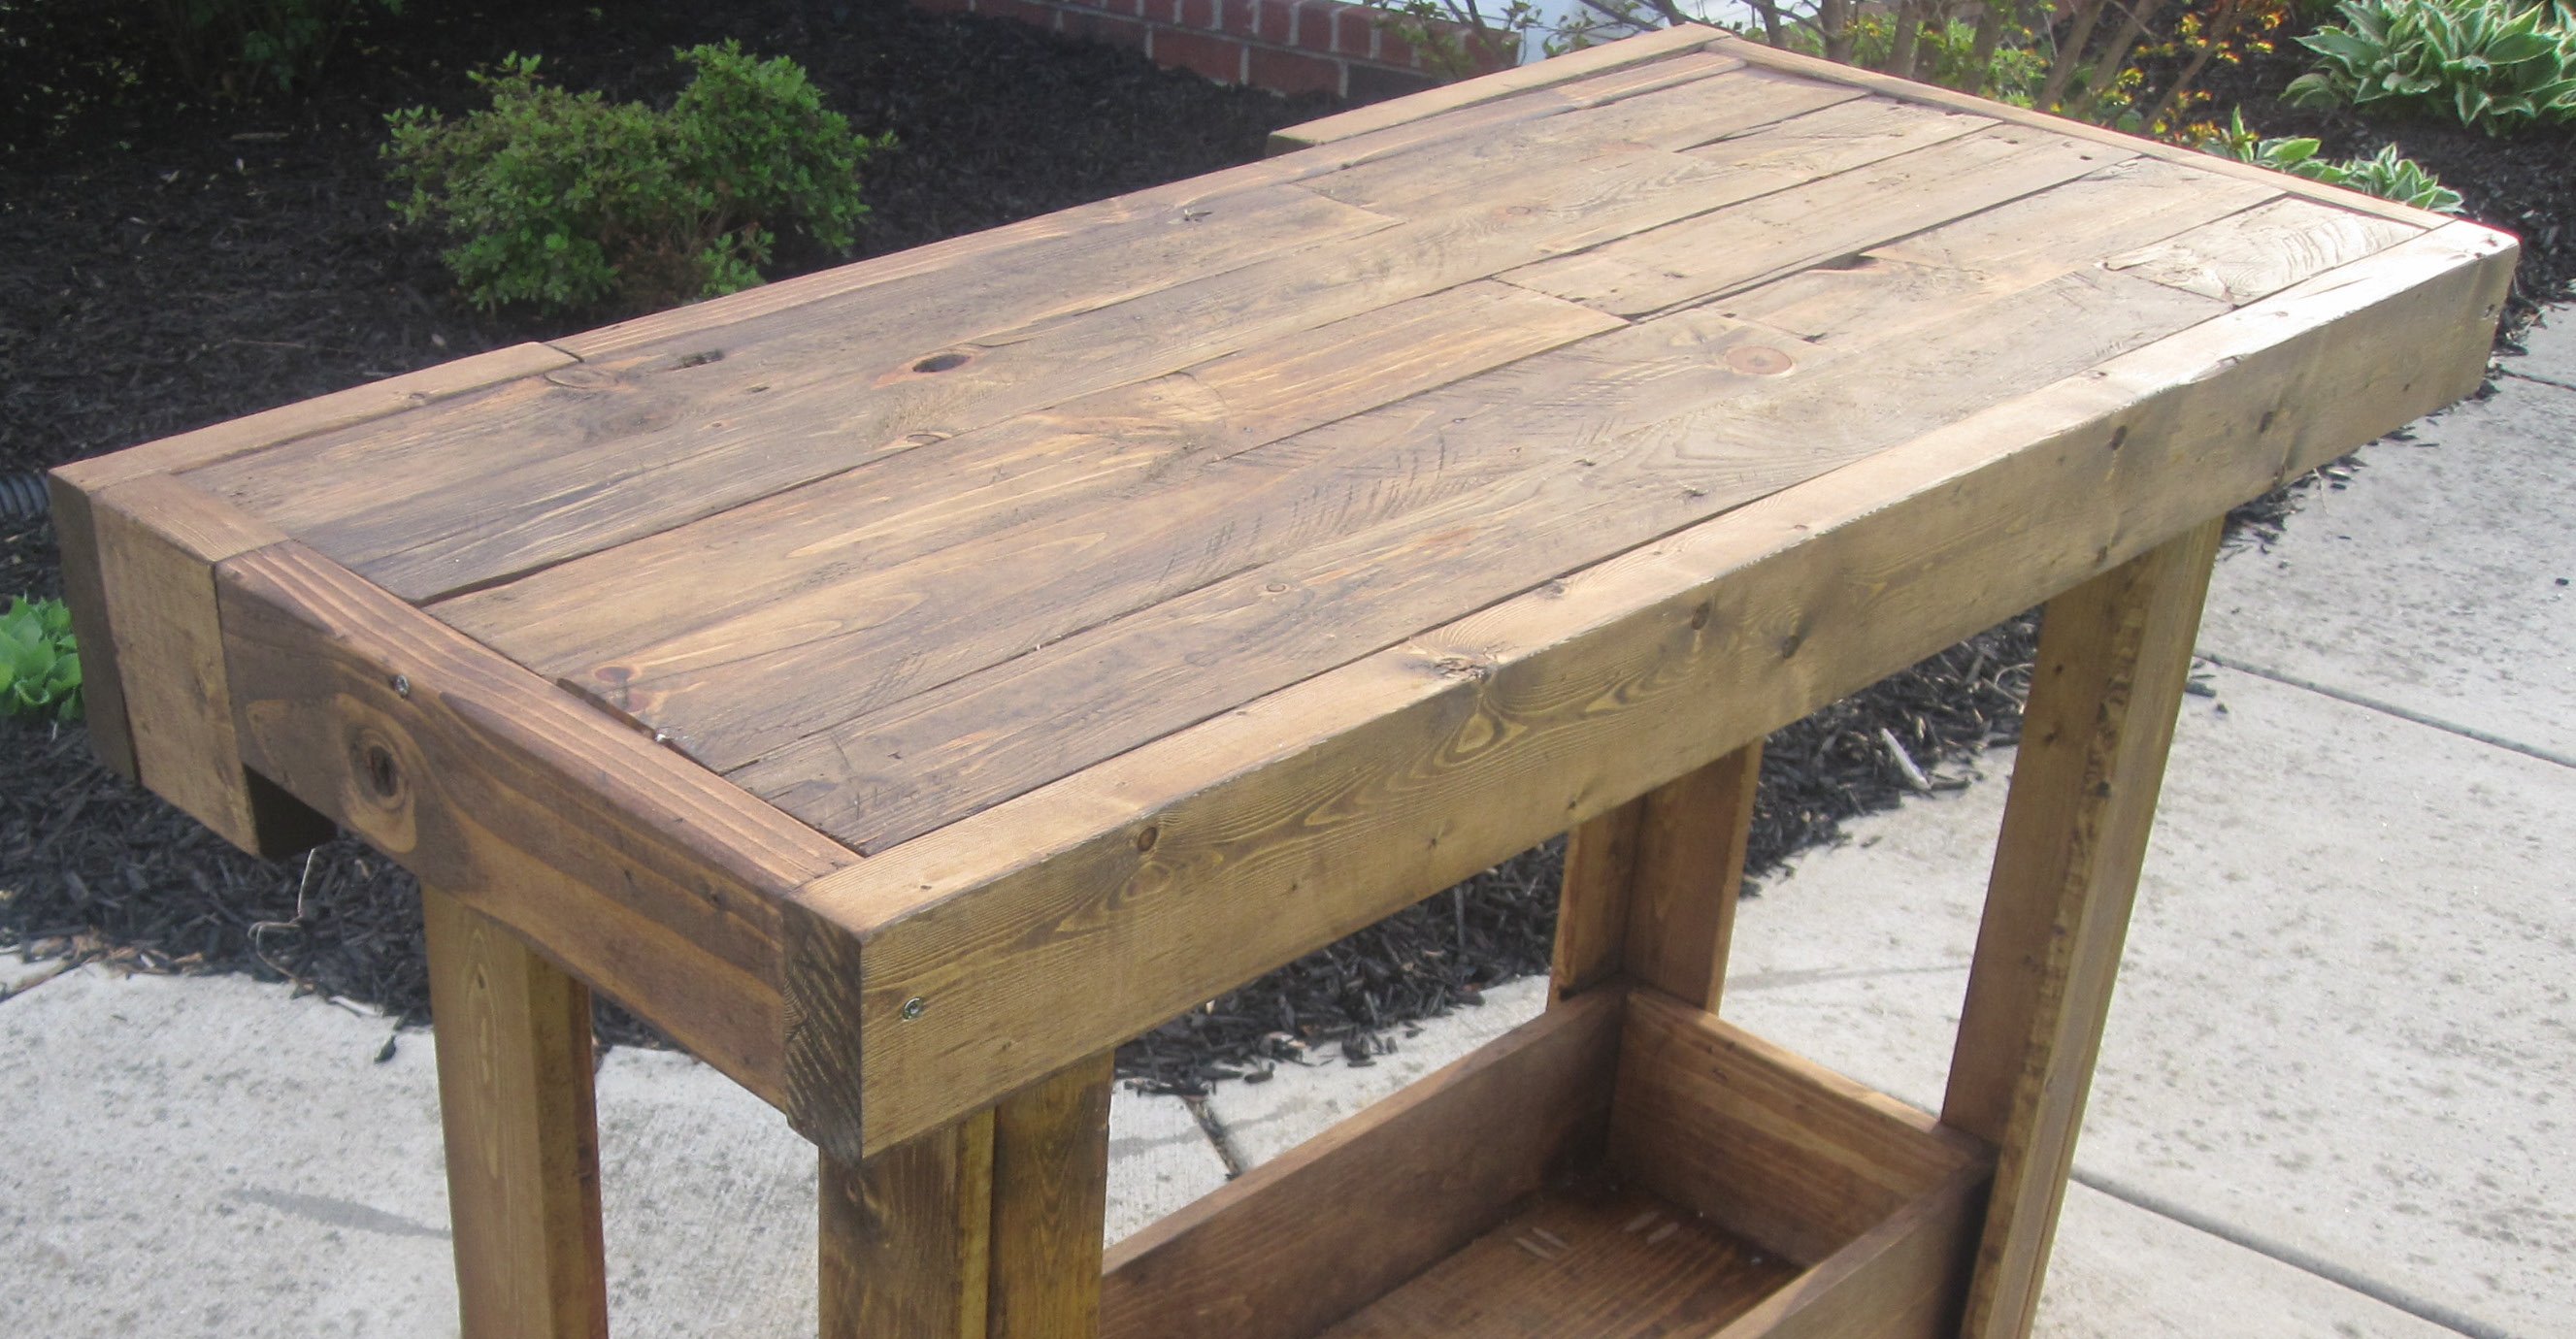
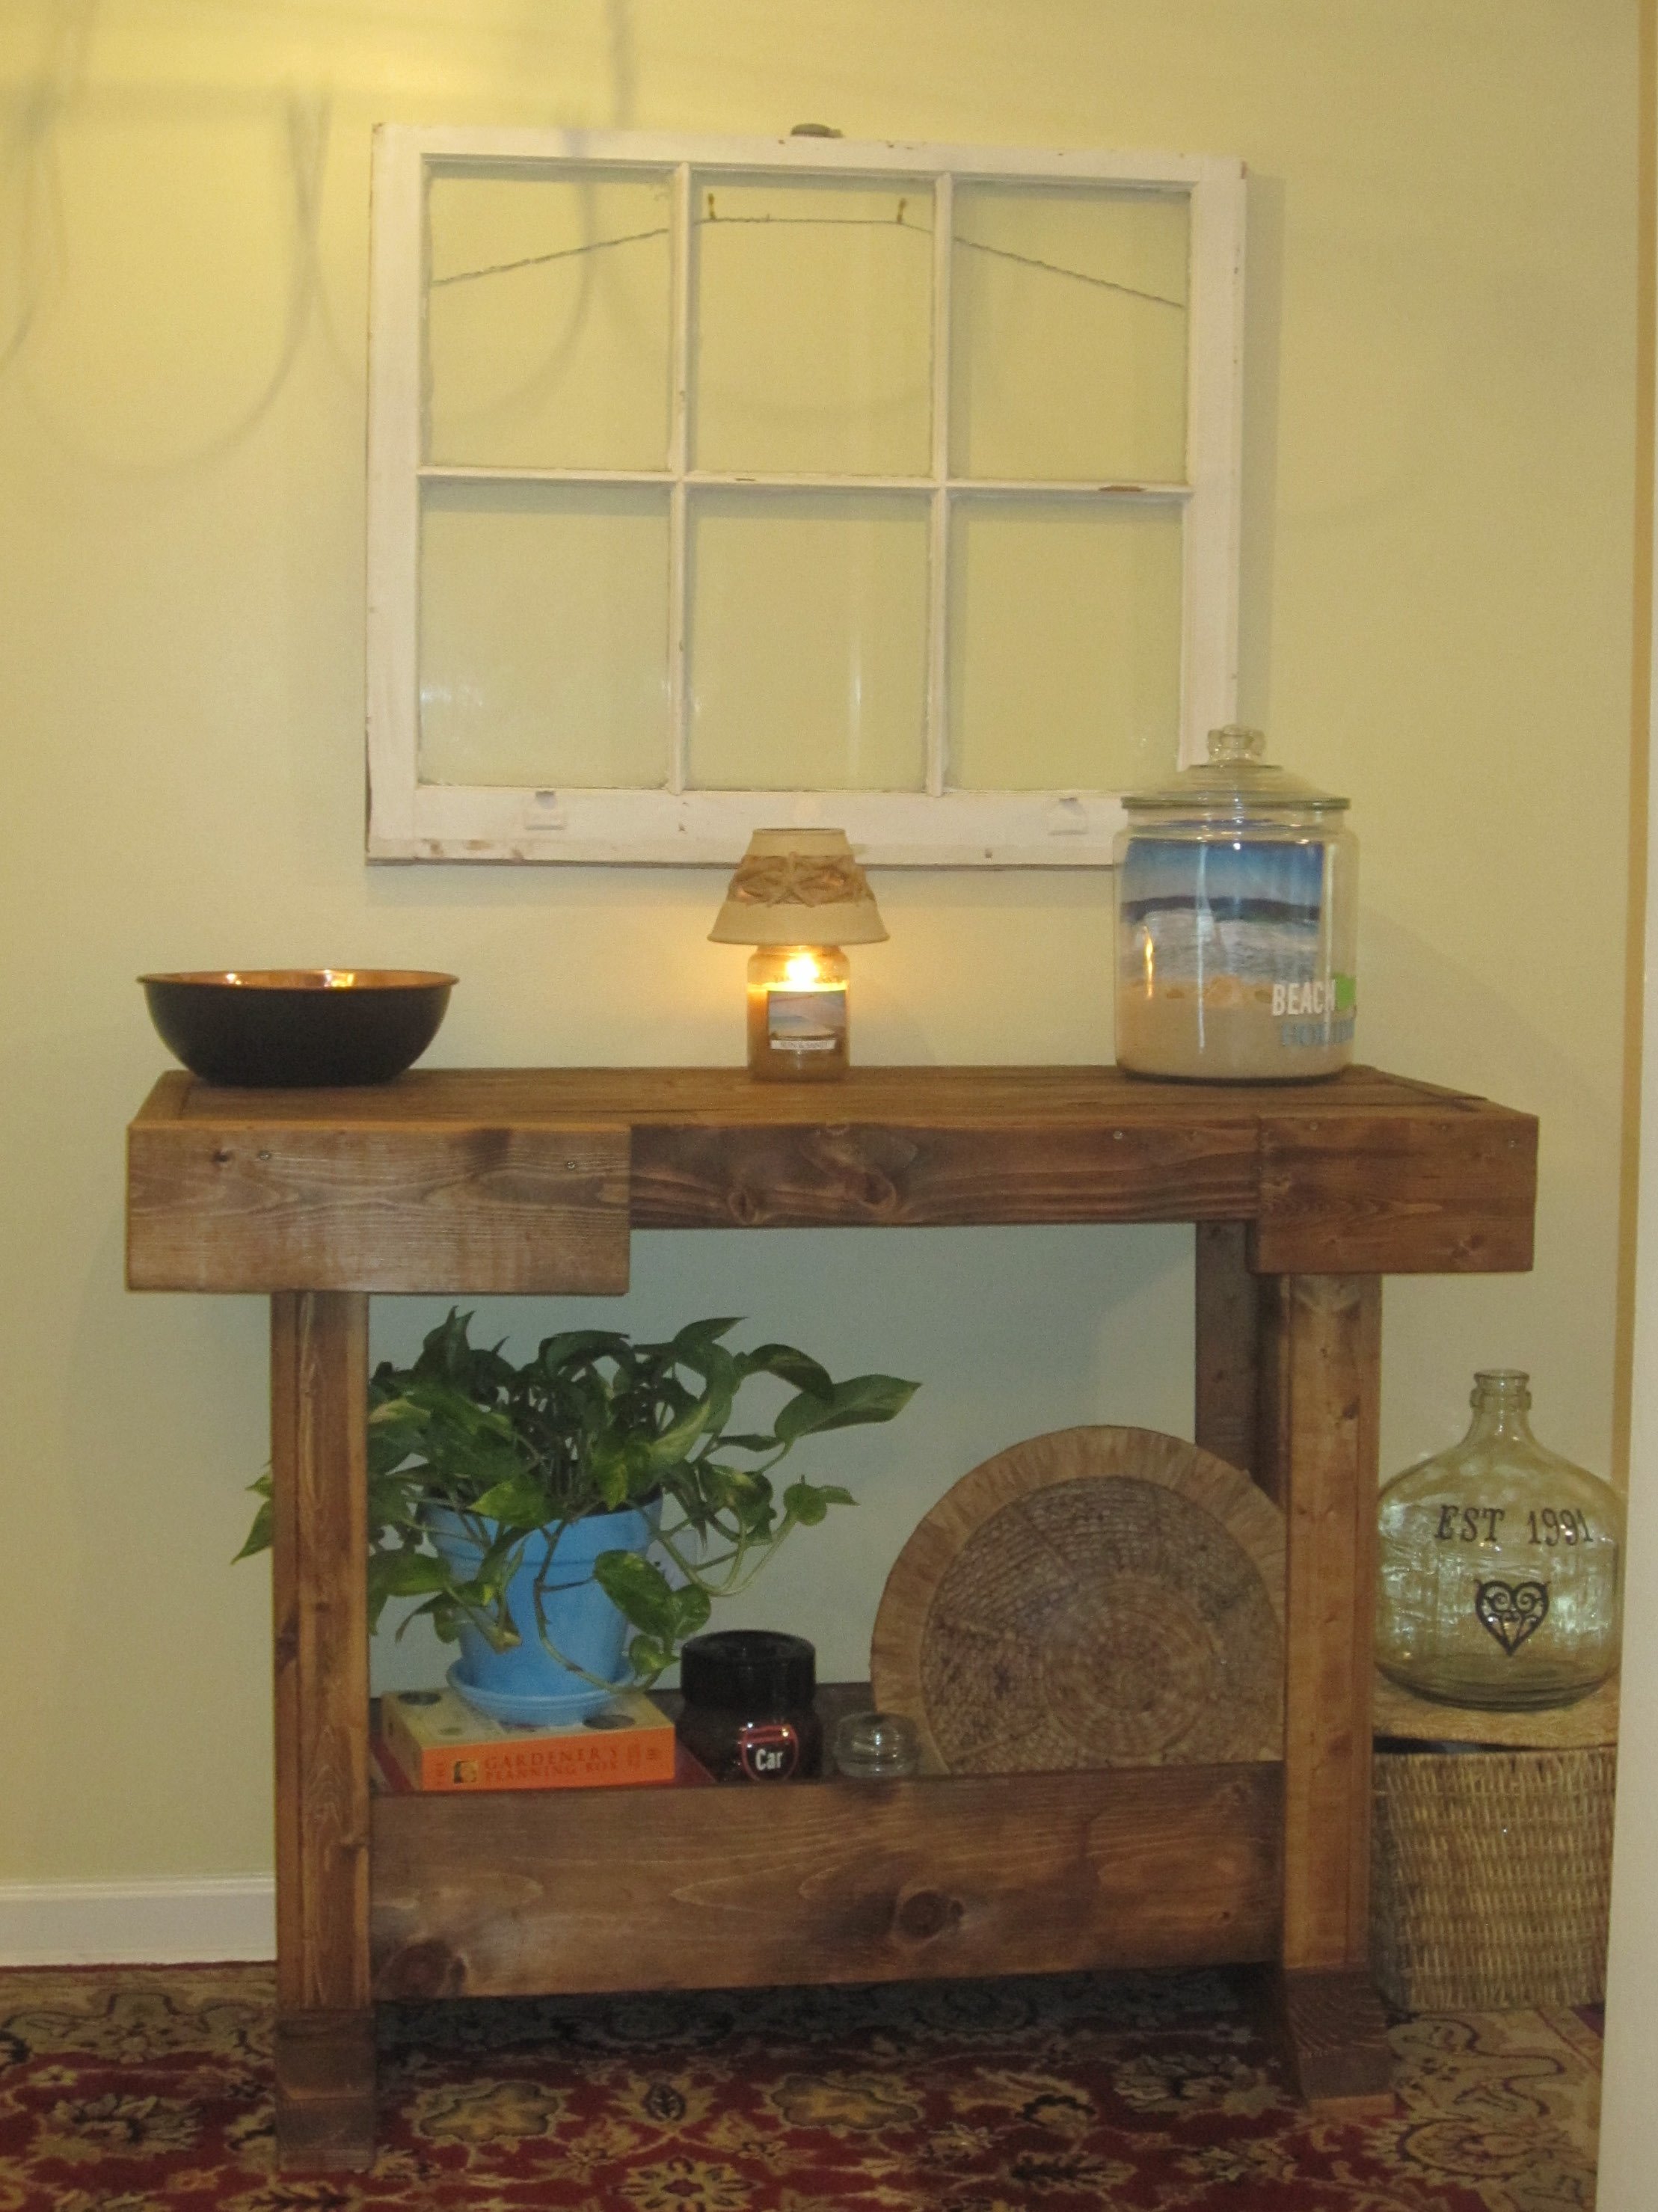
Handmade rustic entryway table. Stained with Varathane Stain and made from 2x4s & 2x6s Canadian white pine
Mon, 04/11/2016 - 05:30
Hi,
I really love your entryway table. Do you have a plan that we can use with dimensions and cut list?
Thank you
Tue, 05/17/2016 - 20:33
Hello can you provide us with plans for this? What saw(s) did you use?
Sun, 08/21/2016 - 08:18
Do you have plans for this entry table?! I love it but can't seem to find the plans?
Thank you!
In reply to Are there plans for this ? by Jatin2286
Fri, 03/16/2018 - 10:49
If you are OK with waiting a few days, I could draw you plans based off of the images.
In reply to Are there plans for this ? by Jatin2286
Sat, 03/17/2018 - 19:38
I modified the design slightly, by adding feet and a 1x4 board accent (that makes it easier to build). I'm assuming the overall height is 29.5" and the length is 48". If you want these to be different, feel free to reach out to me and I can help you adjust.
You can find the plans here: http://famousartisan.com/diy-x-base-sofa-table-plans-or-entry-table/
In reply to Are there plans for this ? by Jatin2286
Sat, 03/17/2018 - 19:39
I modified the design slightly, by adding feet and a 1x4 board accent (that makes it easier to build). I'm assuming the overall height is 29.5" and the length is 48". If you want these to be different, feel free to reach out to me and I can help you adjust.
You can find the plans here: http://famousartisan.com/diy-x-base-sofa-table-plans-or-entry-table/
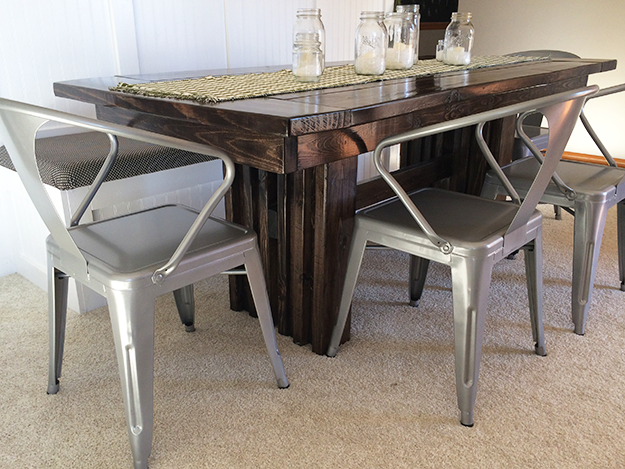
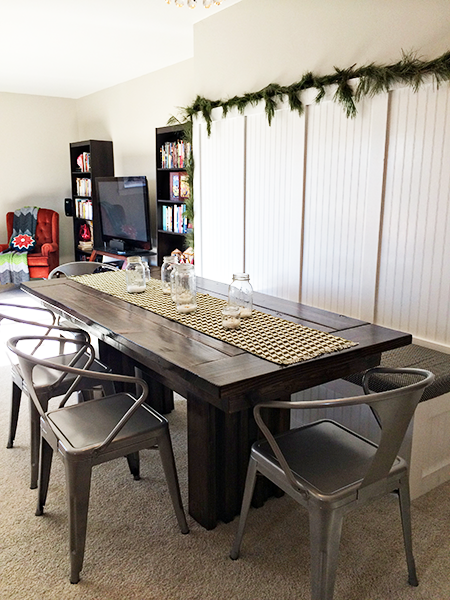
Our extra long living/dining room was just begging for a little definition. So I scoured all of Ana White's plans for some inspiration for the perfect-for-us table. I have never built anything, so I enlisted the help of my genius dad and we got to work!
We ended up using elements of the Modern Outdoor Patio Table and the Farmhouse Table. We sized the patio table down to six feet long and used the board layout from the farmhouse table for the table top. We also changed up the table legs a bit to add some visual interest.
After tackling the table, we built the banquette and beadboard wall. I never thought I would learn so much about power tools. Ha! This project was so much fun. Thank you for the free plans!! I can't wait to work on our next project!
You can read more about our table here: http://www.becomingwhitney.com/dining-area-progress/
here: http://www.becomingwhitney.com/it-is-finished/
and here: http://www.becomingwhitney.com/christmas-cheerin-it-up/

Tue, 01/07/2014 - 10:15
The fabulous thing about DIY is how you can modify a plan to suit your needs. You and your dad have built a one-of-a-kind that can be handed down to future generations. Love the style and finish. Keep up the good work!
Tue, 02/18/2014 - 19:39
can you share the cut list and measurements for your beautiful TABLE?
BIG STEVE
I took on a little bit more than I could chew with this one, but after a little R&I(Resourcefulness, and Ingenuity) I was able to figure it out. I love how it turned out though! Thanks for the inspiration!
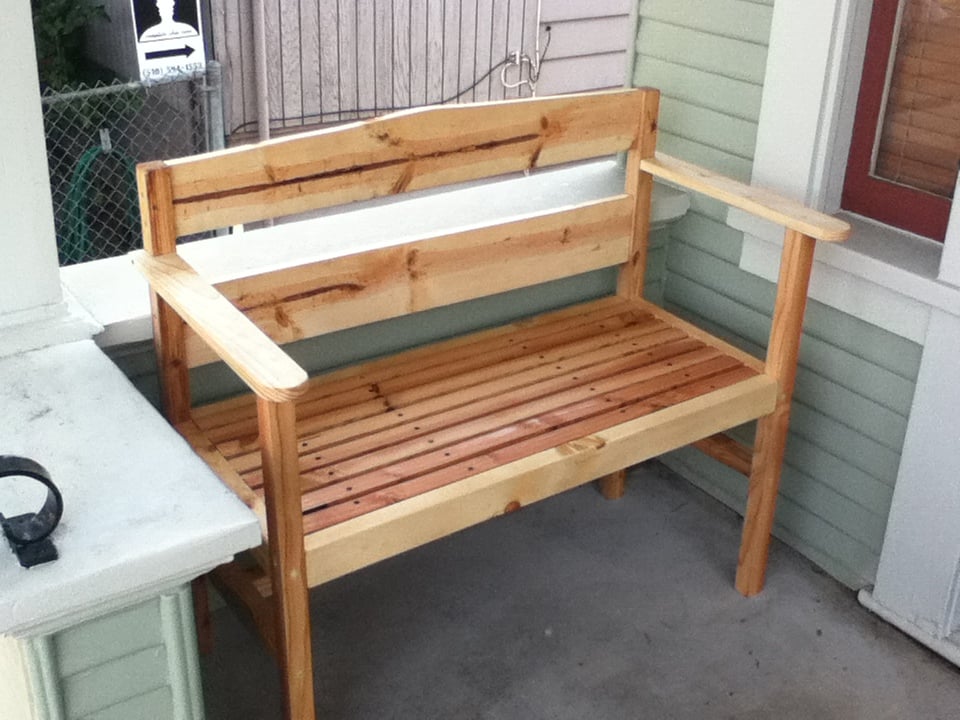
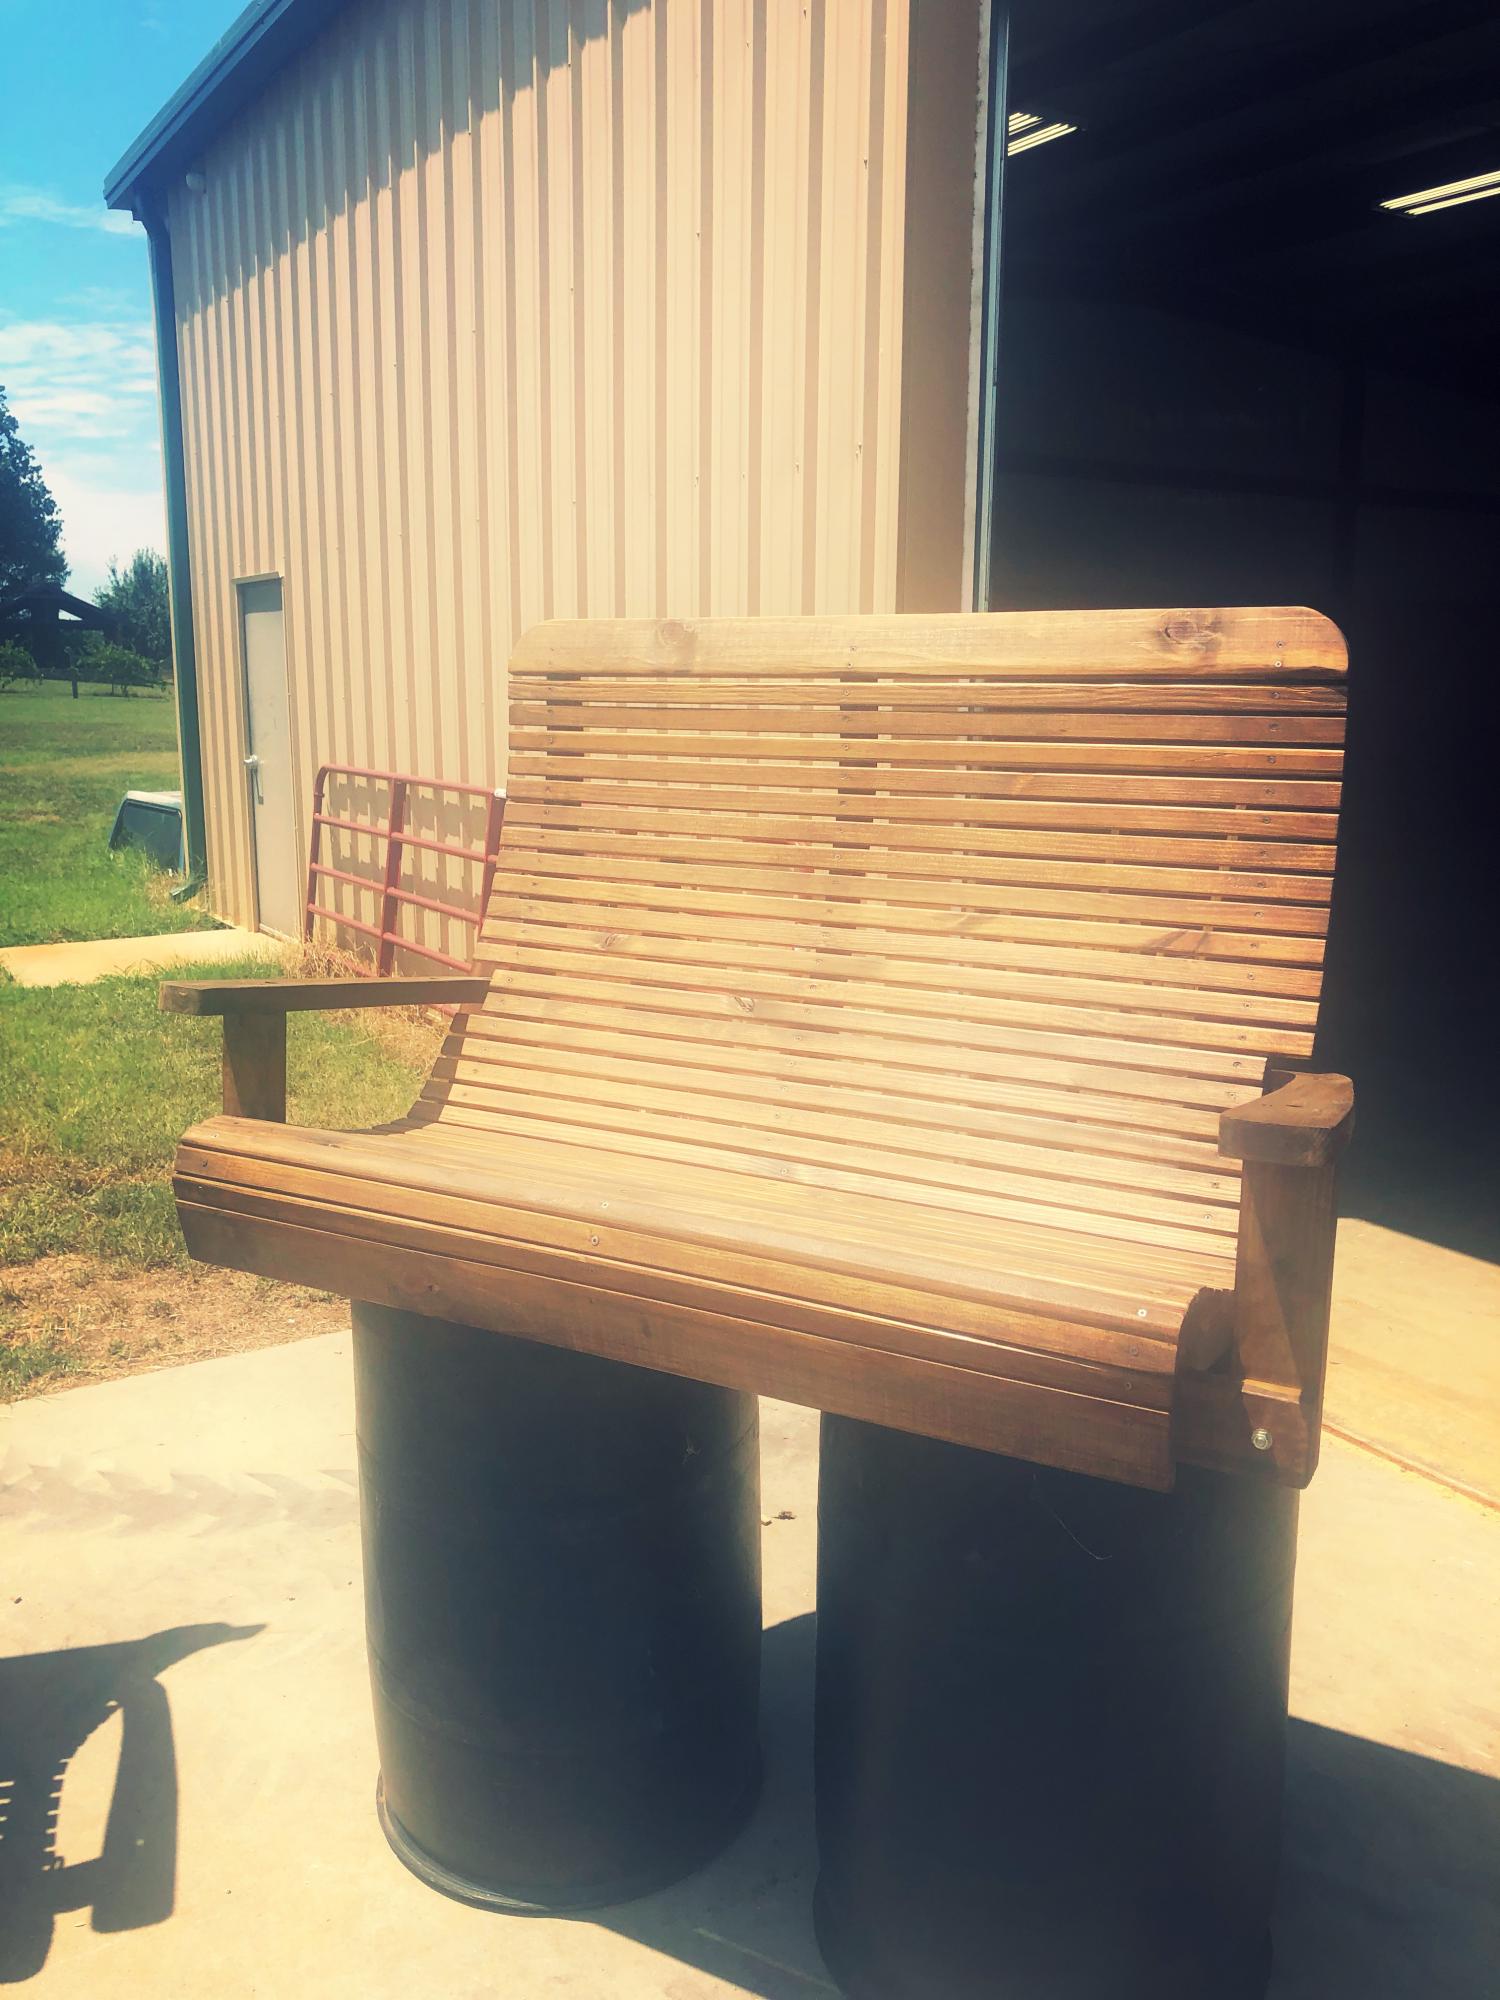
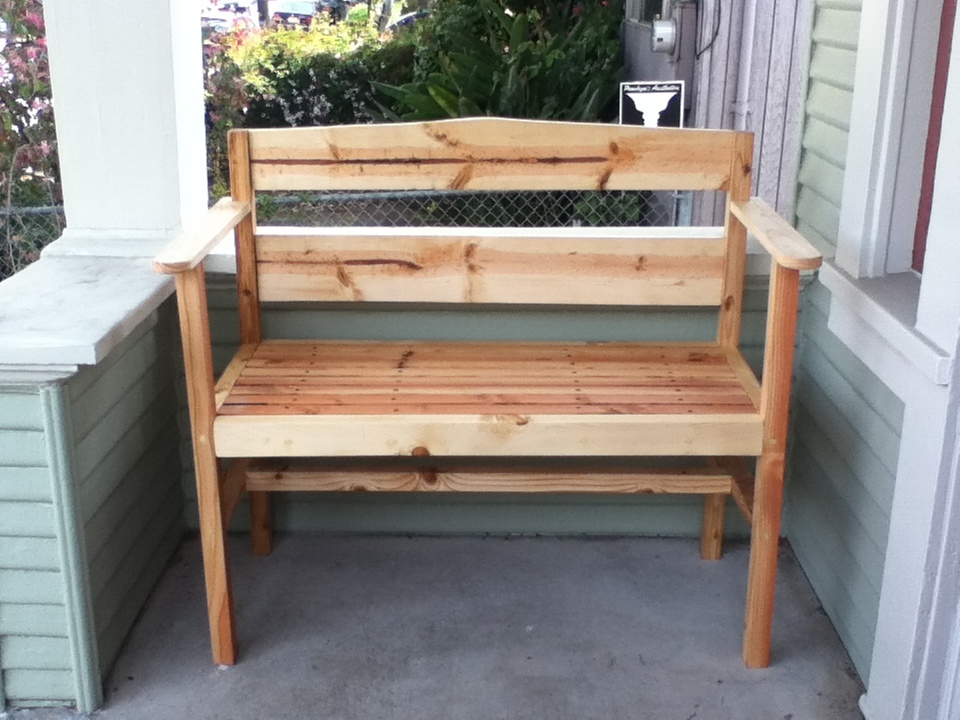
This bench was perfect for our front porch, but after I bought all the lumber I realized how big and substantial it would be. So, I slimmed it down and swapped out the following: seat slats 1x2, posts and supports 2x2, arms 1x3, backrest 1x6, aprons 2x3. Looks great and feels like a better fit for our porch. Enjoying the afternoon sun in style now, thanks!
Wed, 05/01/2013 - 09:31
I would like to make the bench on a diet since my front porch is smaller aswell. Are the cuts the same as original plans?


Comments
Ana White Admin
Tue, 10/05/2021 - 10:43
Great addition!
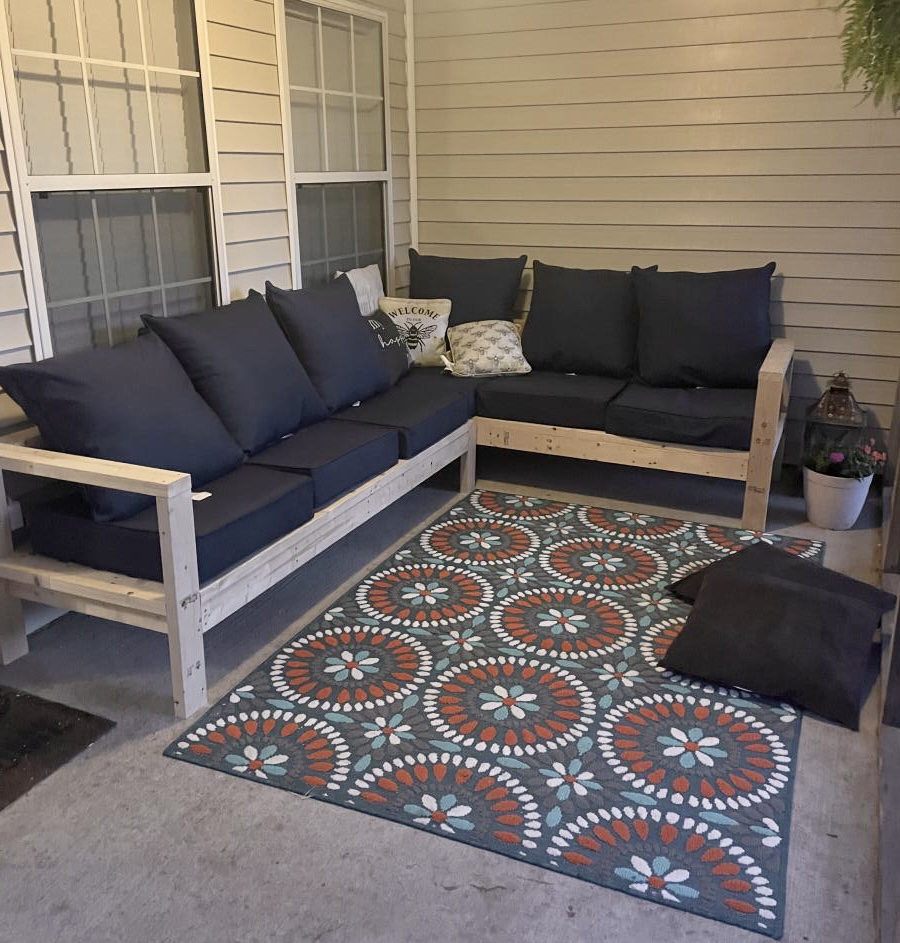
Looks professionally done and well built, the upholstered bench is a beautiful addition!