Community Brag Posts

Console Sofa Table

Submitted by naomi on Fri, 06/23/2017 - 06:51

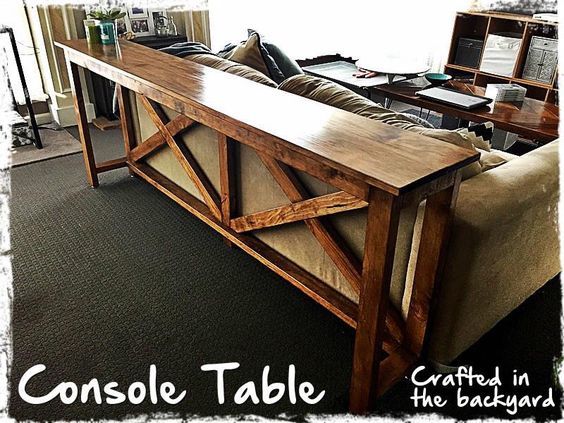
Made from the modified Ana White Rustic X-Console Table.

I made this console table to fit the length of my sons couch. It's about 6 foot long.

It was really easy to make. My only tip is to sand all your timber before assembling. Getting into the tight spots with a sander is quite difficult. I hae now made 4 of these tables and sanding first saves so much time and headaches. The other 3 I have made were painted white and had stained tops. 

Estimated Cost
About $50
Estimated Time Investment
Afternoon Project (3-6 Hours)
Finish Used
Walnut Stain
Recommended Skill Level
Beginner

Comments

kgoss5

Tue, 06/18/2019 - 08:46

Any way you could share your material list/plans ? Thanks 

Dog Bunk Bed

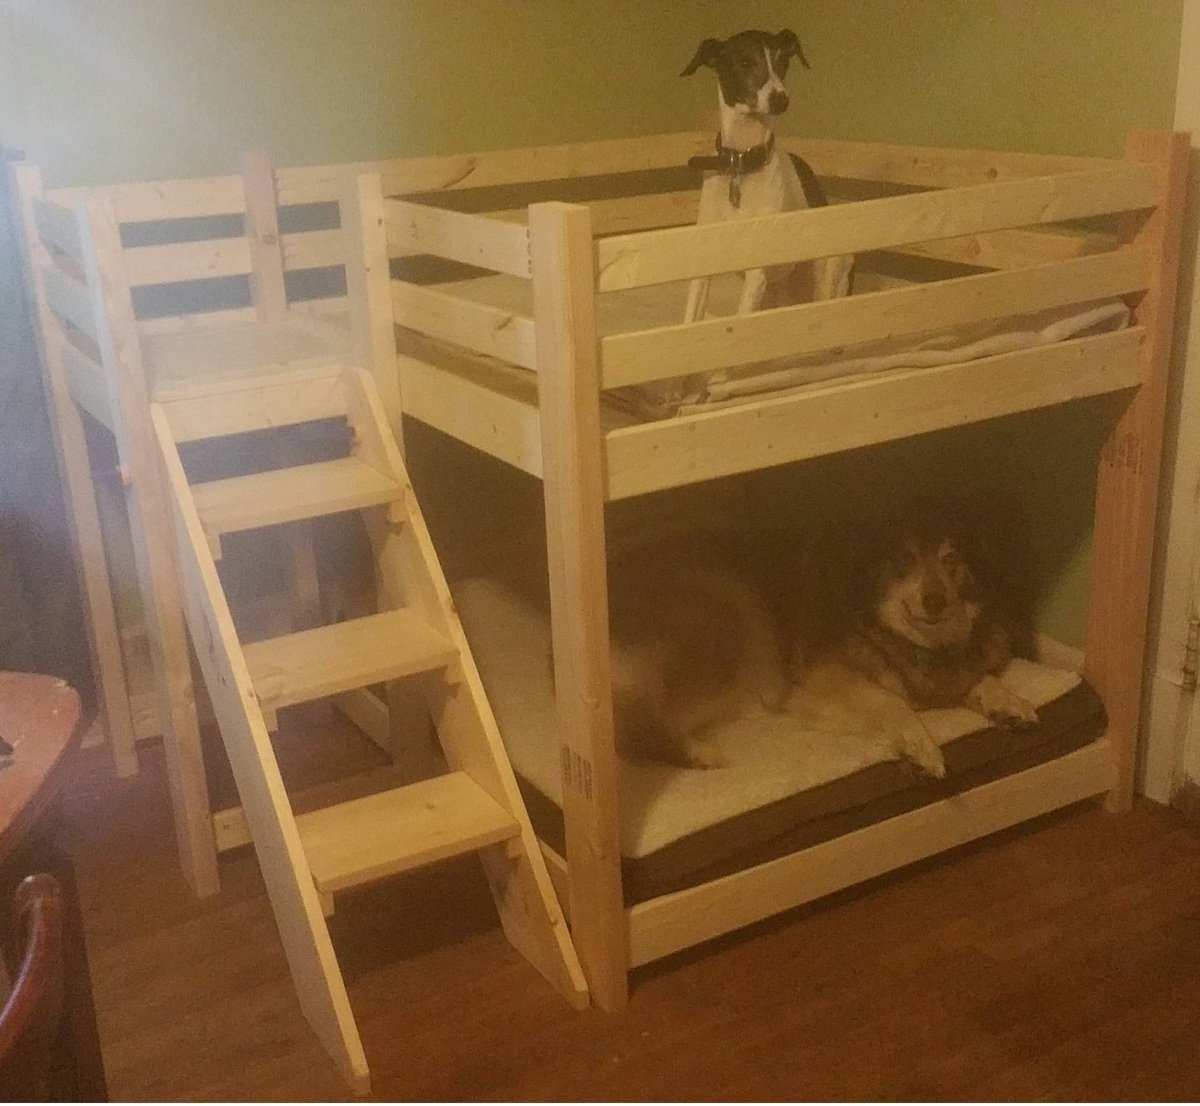
We’ve been looking around for some plans for a doggy bunk bed for a while now, but couldn’t find anything that we liked so I decided to build it from scratch. This is a huge bunk bed that was built based on the size of our larger dog’s bed which is 44 x 35. This was pretty simple to build although the stairs we’re quite challenging as I have never done them before so if I can make it, anybody can.

I must stress that before I found Ana’s website about 6 months ago I could barely cut a piece of wood straight. Over this time I have made several things based on the easy to follow plans on this website which ultimately gave me the confidence to go it alone and build this bunk bed. Friends and family are shocked at some of the furniture I’ve made and some don’t even believe I made them and think I’ve bought them from IKEA. My wife has got a list of furniture she wants to make now including a TV console, an armoire and a twin bed for one our daughters. Every spare second I have now is spent is making furniture and I LOVE it.

For anybody who has never built anything and is apprehensive to do so I would just say, do it. Grab what you need and dive right in. You may get frustrated and scream a bit at first, but the reward at the end is well worth it and each project you do will get easier and easier. Be warned though. The better you get, the more people will pester you to make things for them.

Thank you, Ana.

This was made using cheap 1 x 3 and 1 x 4 furring strips for the railings and bed slats, 2 x 4s for the posts and 1 x 10 board for the stairs.

Estimated Cost
$75 - $100
Estimated Time Investment
Weekend Project (10-20 Hours)
Finish Used
I haven't sanded or finished this yet as we are still deciding on what to do with it.
Recommended Skill Level
Beginner

Comments

DIY Sauna

Submitted by Anonymous (not verified) on Thu, 02/15/2024 - 10:17

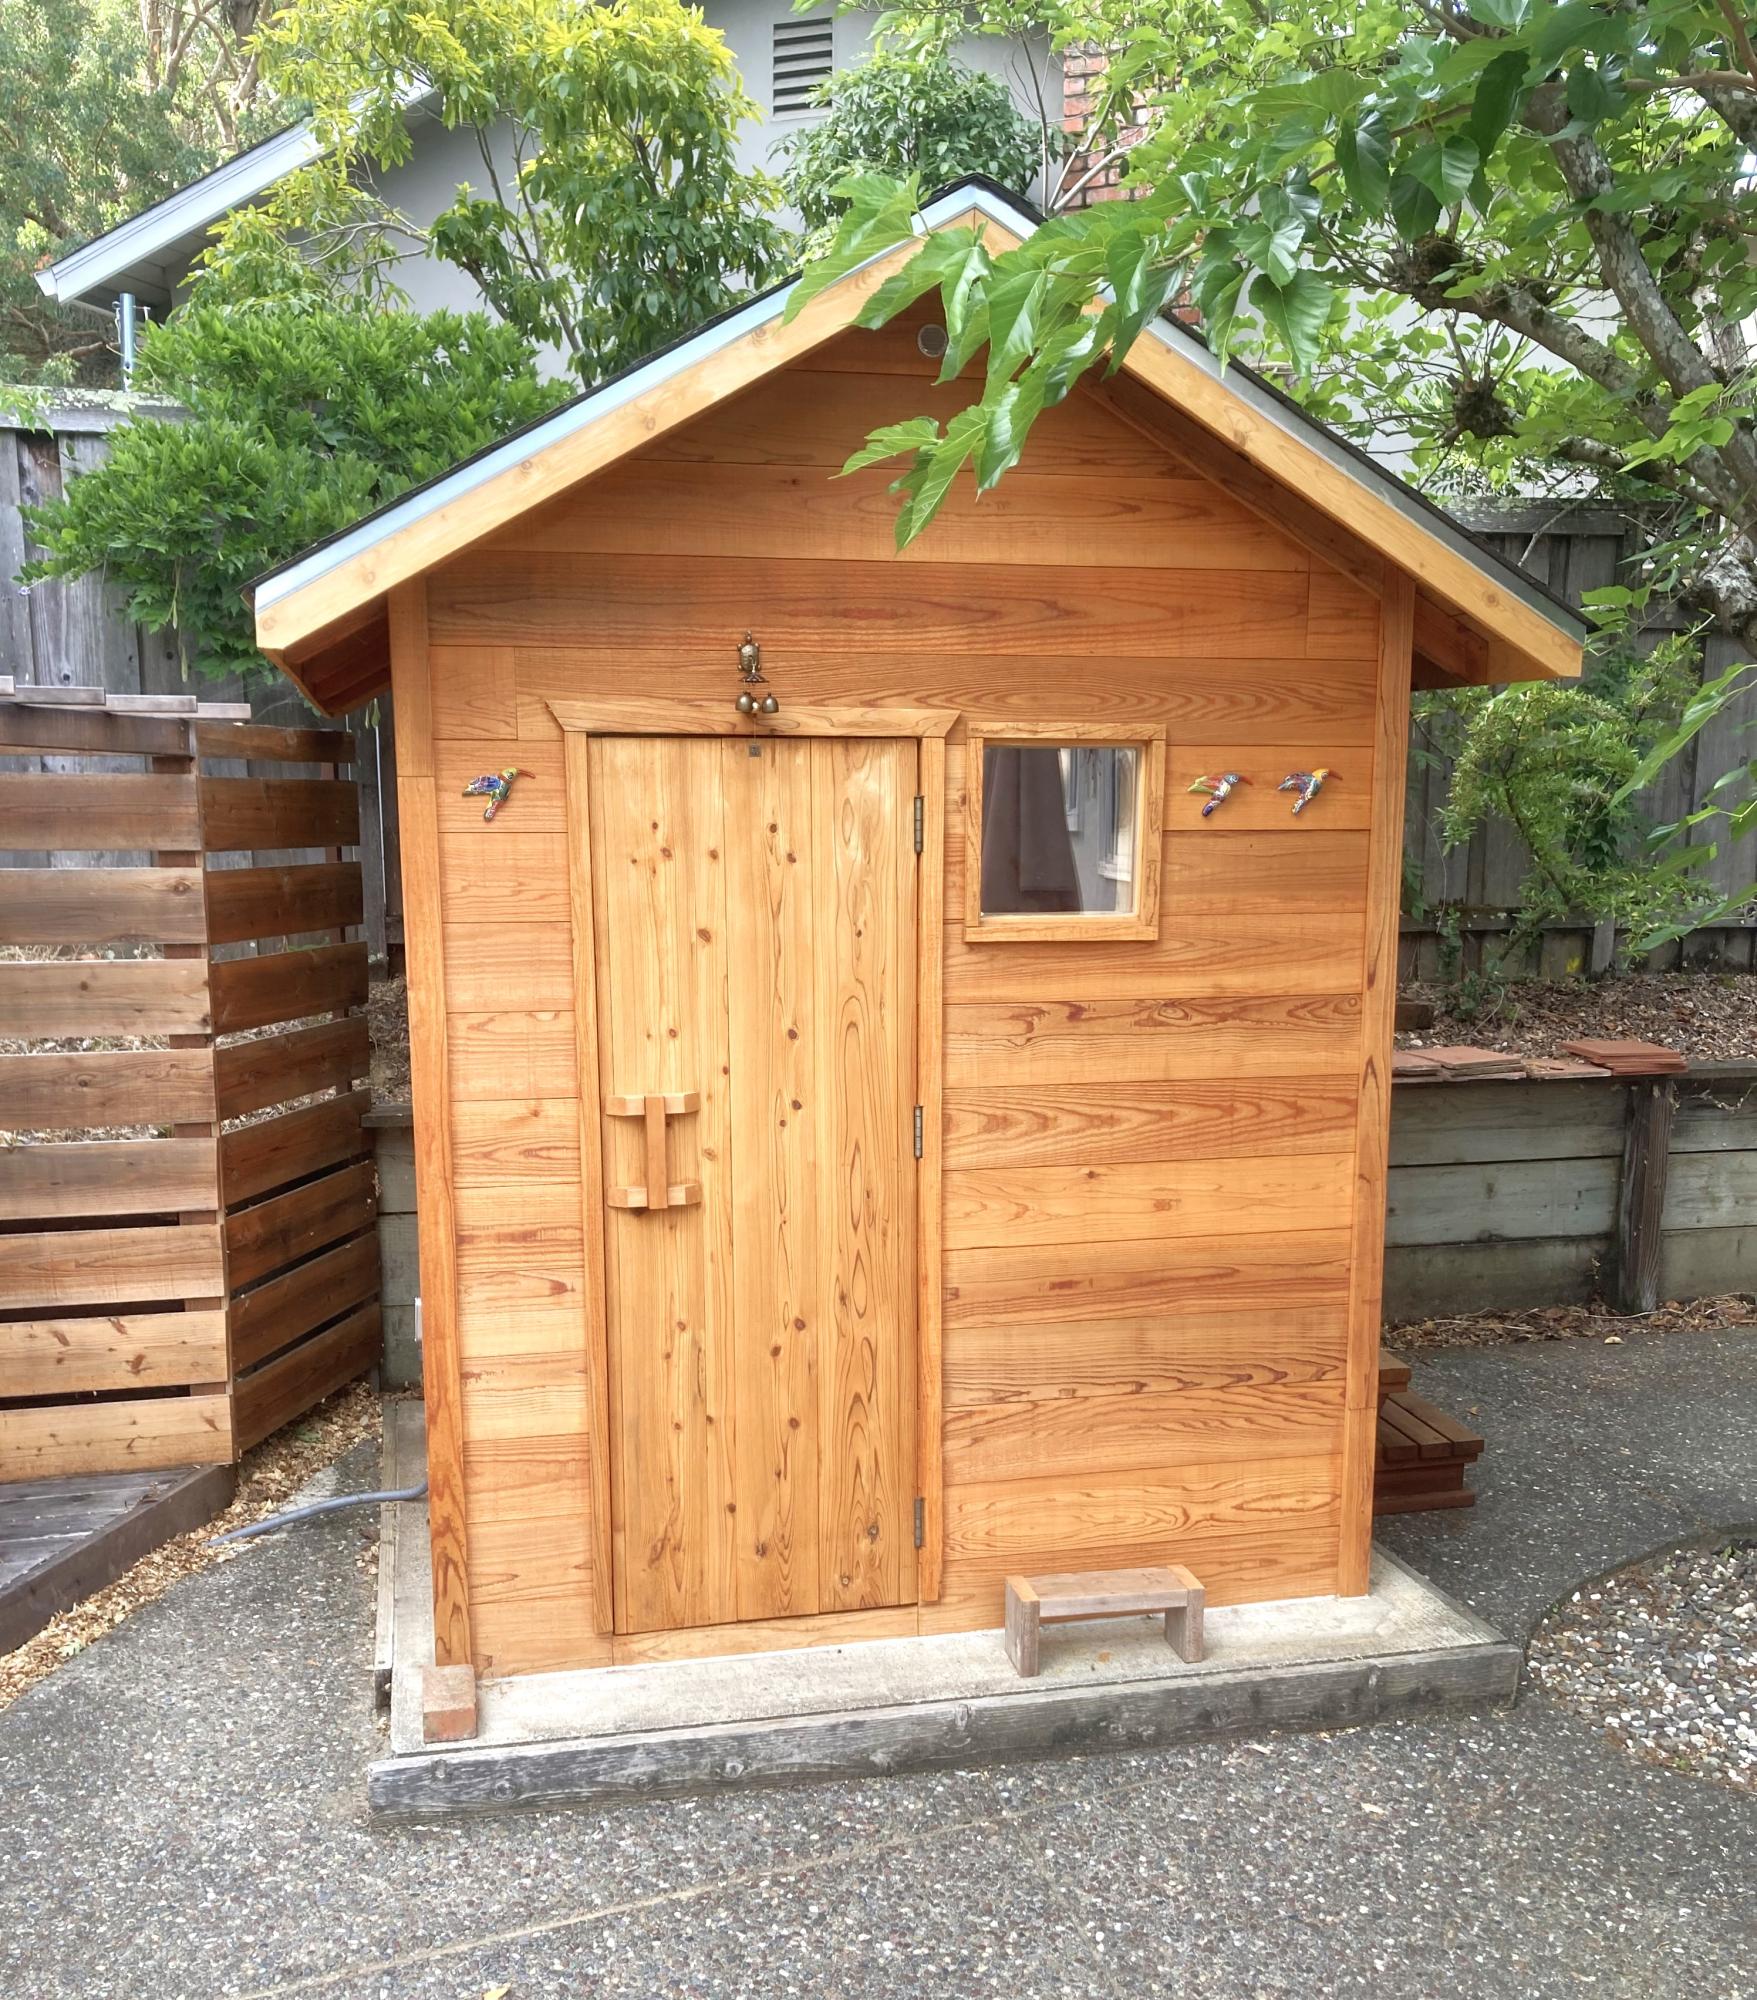
Outside sauna.

Charles

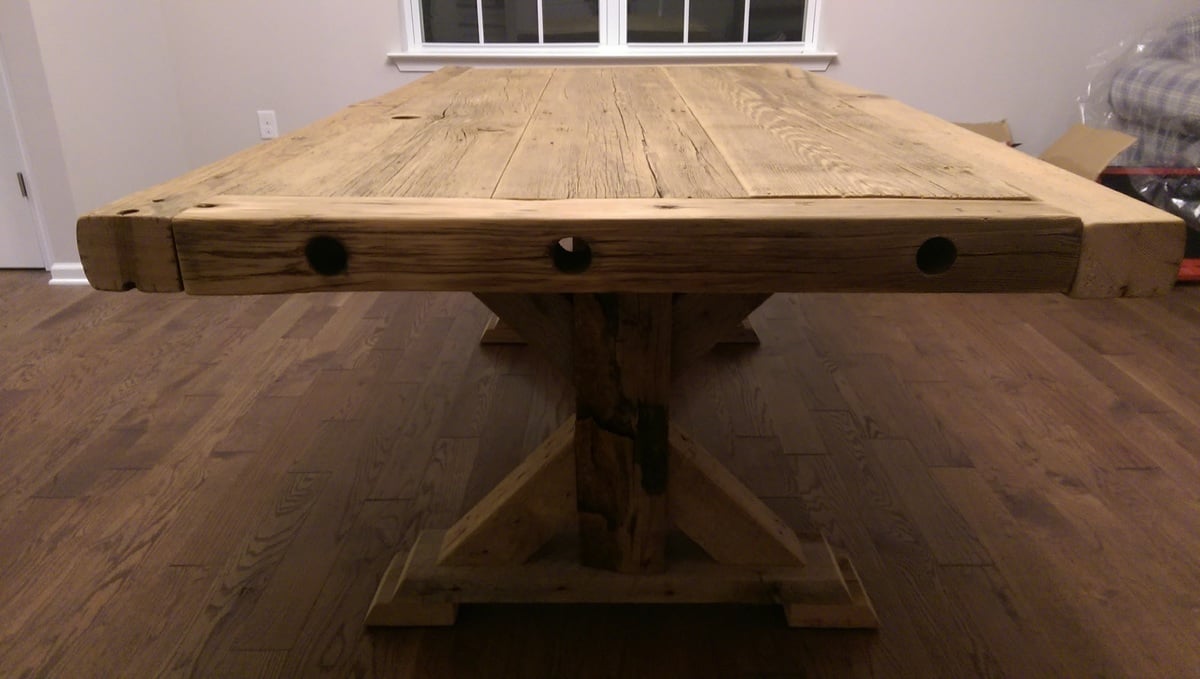
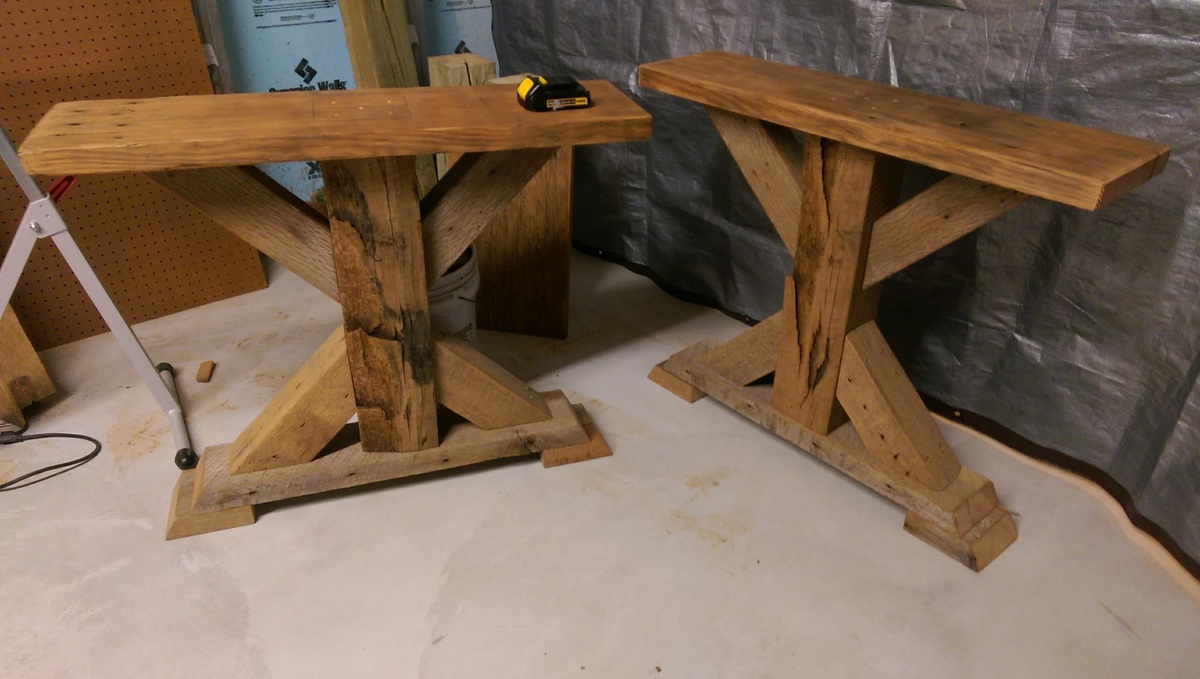
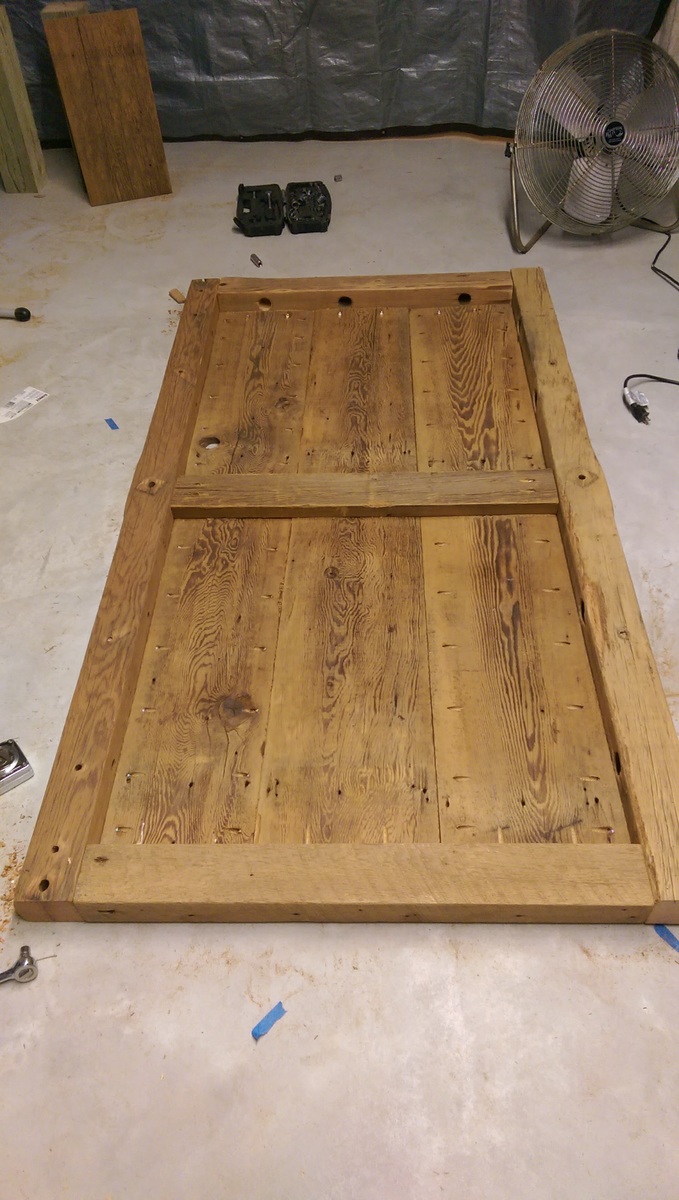
Chunky Barnwood Farmhouse Table

Submitted by jgioulis on Wed, 12/14/2016 - 12:27

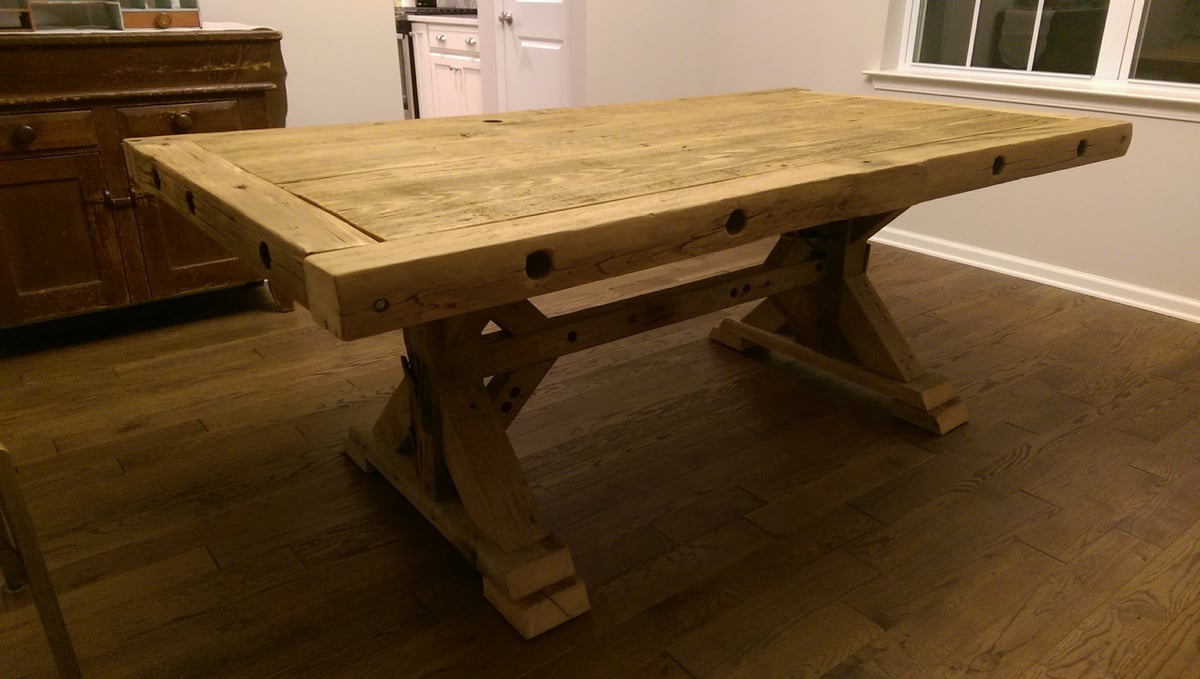
I was lucky enough to know someone who's property had 4 barns that were on the virge of falling over.

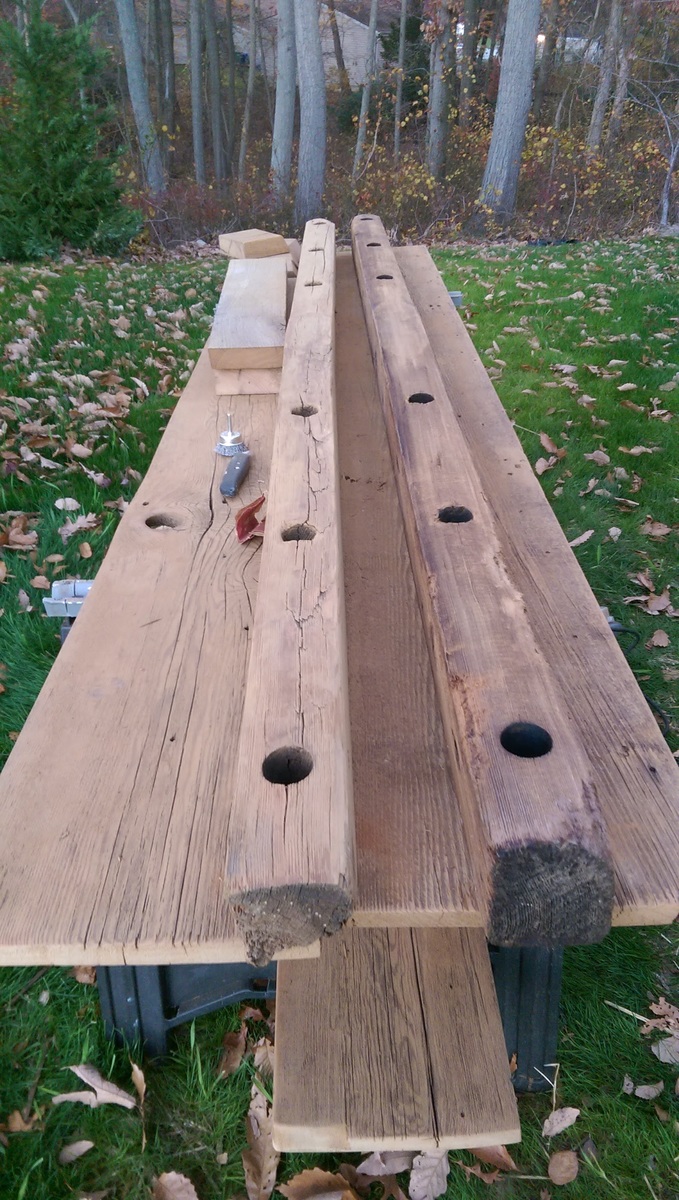
I removed wood from the barns I needed, some wood was just inside the barns. The thick pieces with holes going around the table were actually old telephone poles (horizontal section). 


The plans were straight forward, but prepping, cleaning, sanding the wood from an old barn was the most time consuming. Also hardly anything was straight or square! 

Estimated Cost
cost of tools I didn't have... pocket hold jig, belt sander, 36" clamps
Estimated Time Investment
Week Long Project (20 Hours or More)
Finish Used
unfinished
Recommended Skill Level
Intermediate

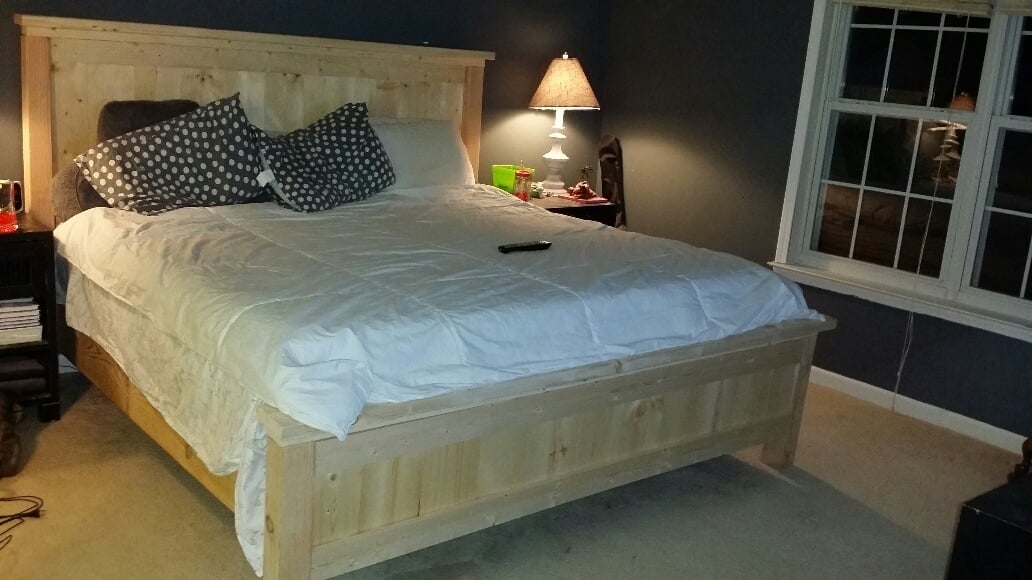
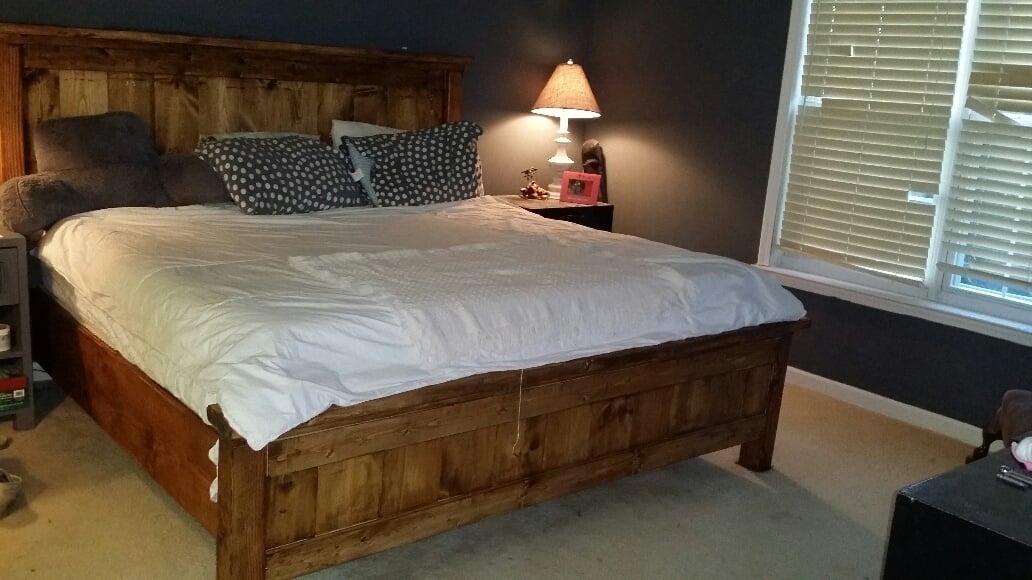
Farmhouse King Bed resized to fit standard king

Submitted by hpu2002 on Wed, 11/05/2014 - 06:14

Hello everyone and thank you Ana-White for all of your plans.  I love this site and have built several pieces of furniture for our home from them. 

This bed is absolutely Rock Solid! In reading the blog I noticed several people asking for the "modified" dimensions or resizing for a standard king ( I put them in the blog but this is what I did)

Headboard: 9 1x8's at 30 inches long and 2 1'x6's at 30 inches long (I omitted the 1x3 end pieces at 30 inches and that way I had 76 inches wide.

The plans call for the 1x4 panel trip pieces (for headboard and foot board) to be 80''.  I resized them to 76''

The headboard 4x4 legs were still 54''

The bottom headers 2x4's for both the headboard and footboard calls for 87''...I changed it to 83''.

The top header 2x6's  for both the headboard and footboard call for 89''...I changed those to 85''.

The plan calls for the footboard to have 10 1x8 panel pieces at 15 inches. like the headboard I changed these to 9 1x8's at 15'' and 2 1x6's at 15''.

We have a new 12'' memory foam mattress so I did like others and used 2x4's for cross beams secured with truss hangers and then used peg board for additional support.  The side rails are 2x12's at 62' ( I wanted a little extra room to be able to bolt them to the head and foot board.)

NOTE: The cut list calls for 4 1x8's  You Need 5.  And to do the plans my way you need a few 1x6's.

Sorry if this is wordy but I hope it helps!

Thanks Ana for all of your awesome plans!  My Fiance' loves the furniture and I am addicted to building because of you!

Dave
Estimated Cost
$200-$300
Estimated Time Investment
Weekend Project (10-20 Hours)
Finish Used
Minwax Polyshades in Mission Oak (it has poly in it)
Recommended Skill Level
Intermediate

Comments

16' x 16' Storage Shed

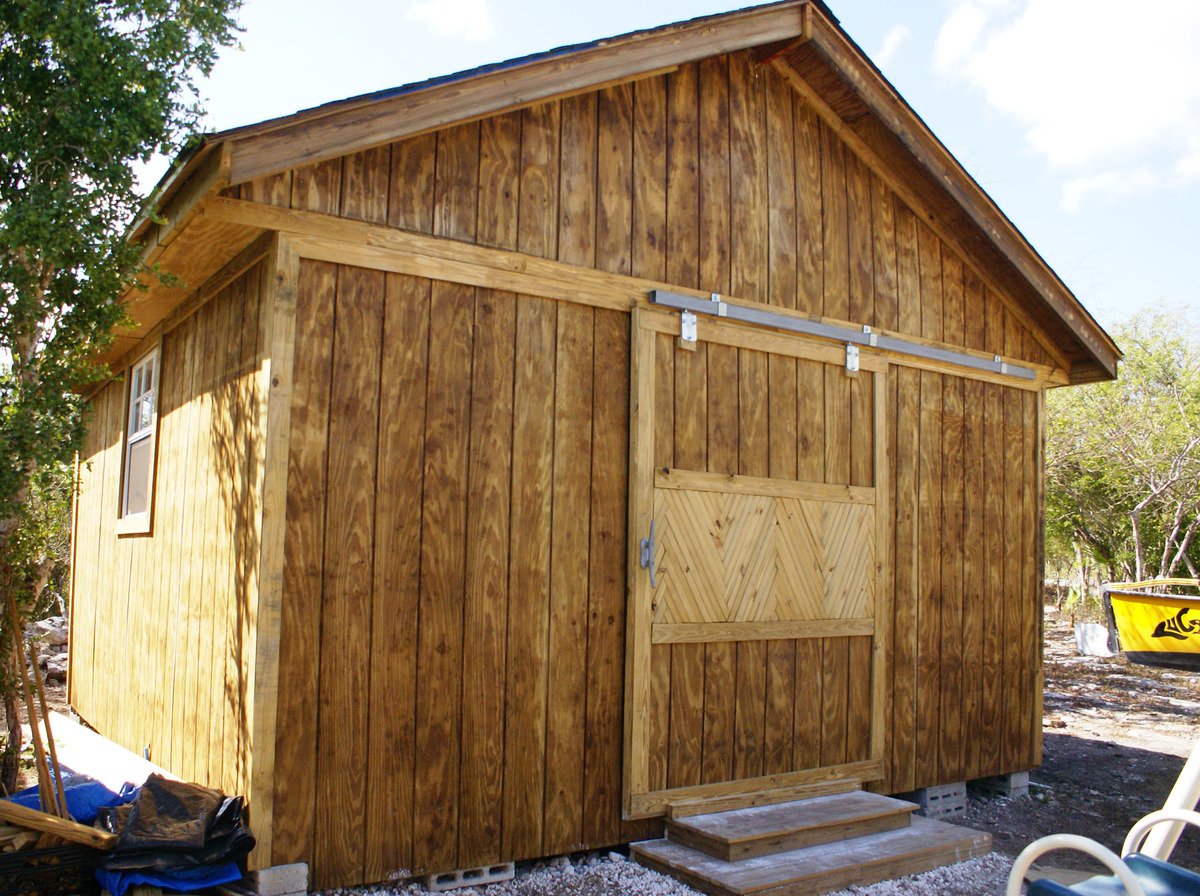
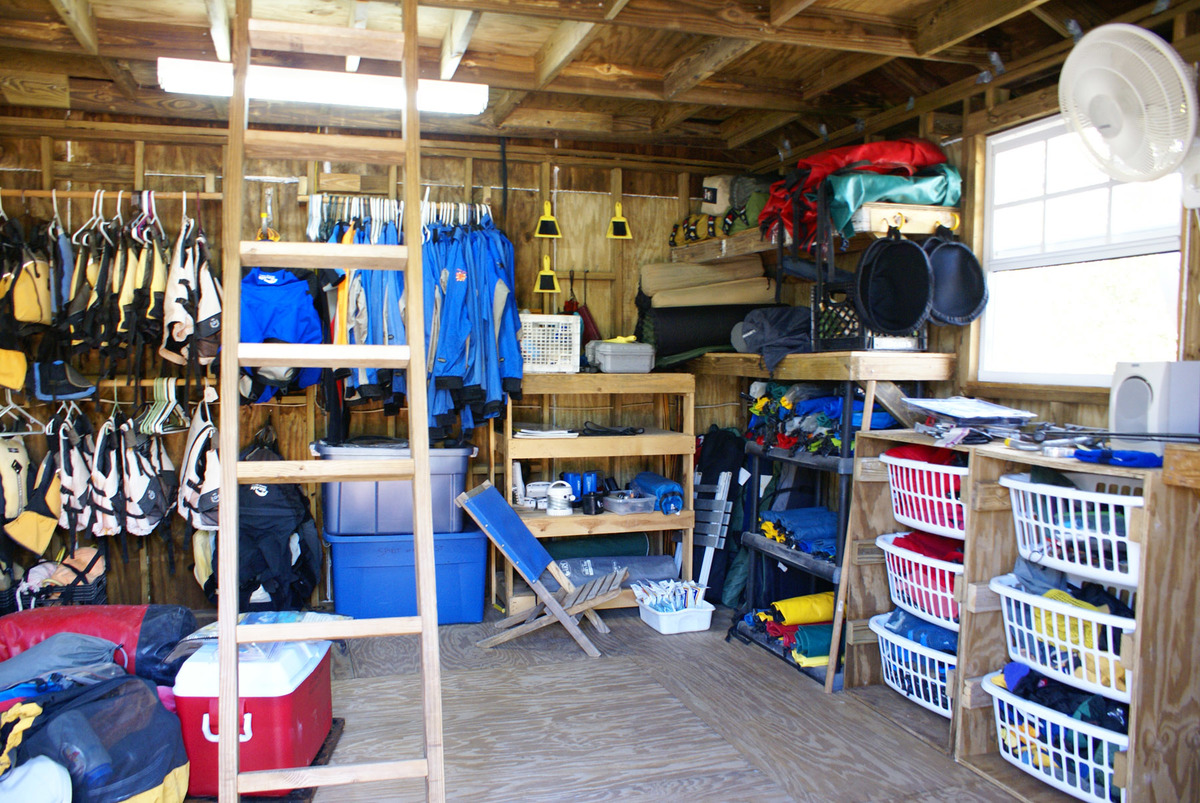
Thanks to the tips and tricks we picked up from Ana here, we were able to build our very own storage shed. We use it for storing our kayaking, sailing and camping gear for our company down here in the Bahamas (which is still a bit unorganized in the photo). It works so much better than what we had before in multiple kit sheds. We even have a loft up top for extra storage, electricity in there with a fan, fridge and lights... MAJOR UPGRADE :) We still need to paint it and finish a few things, but we are very thankful to have it up and being used.

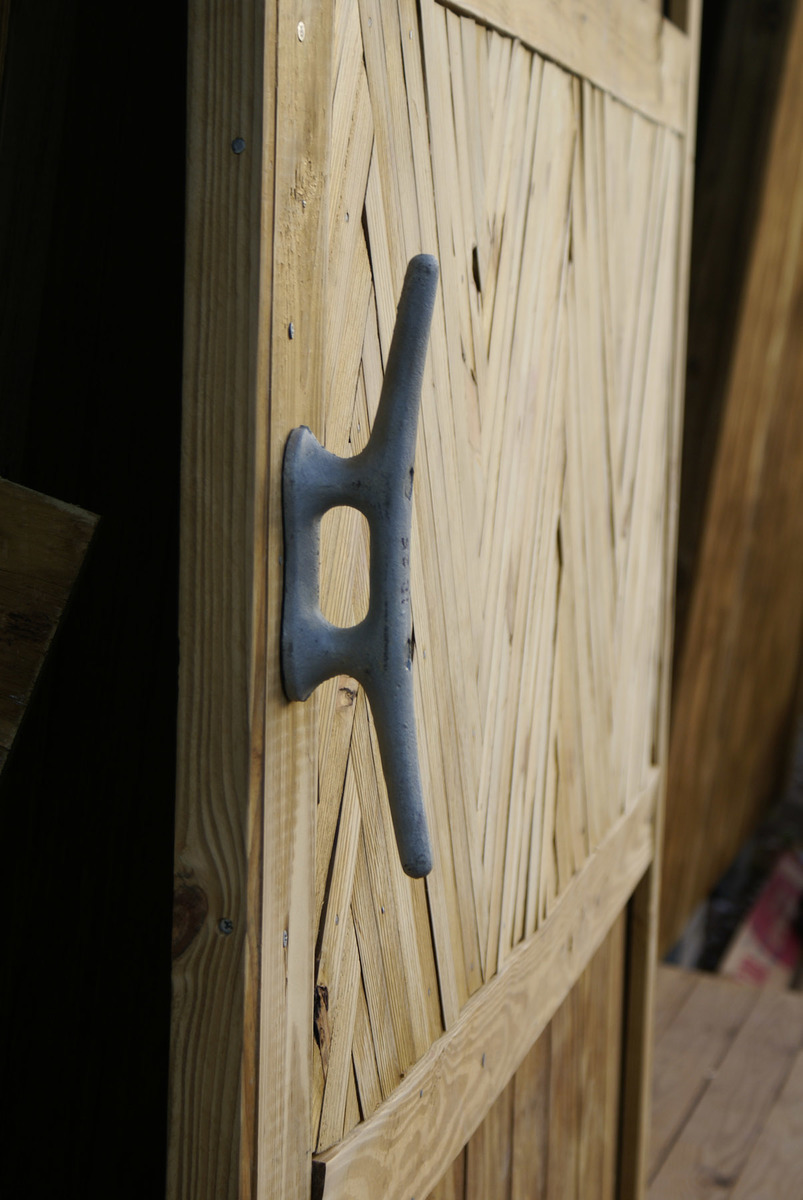
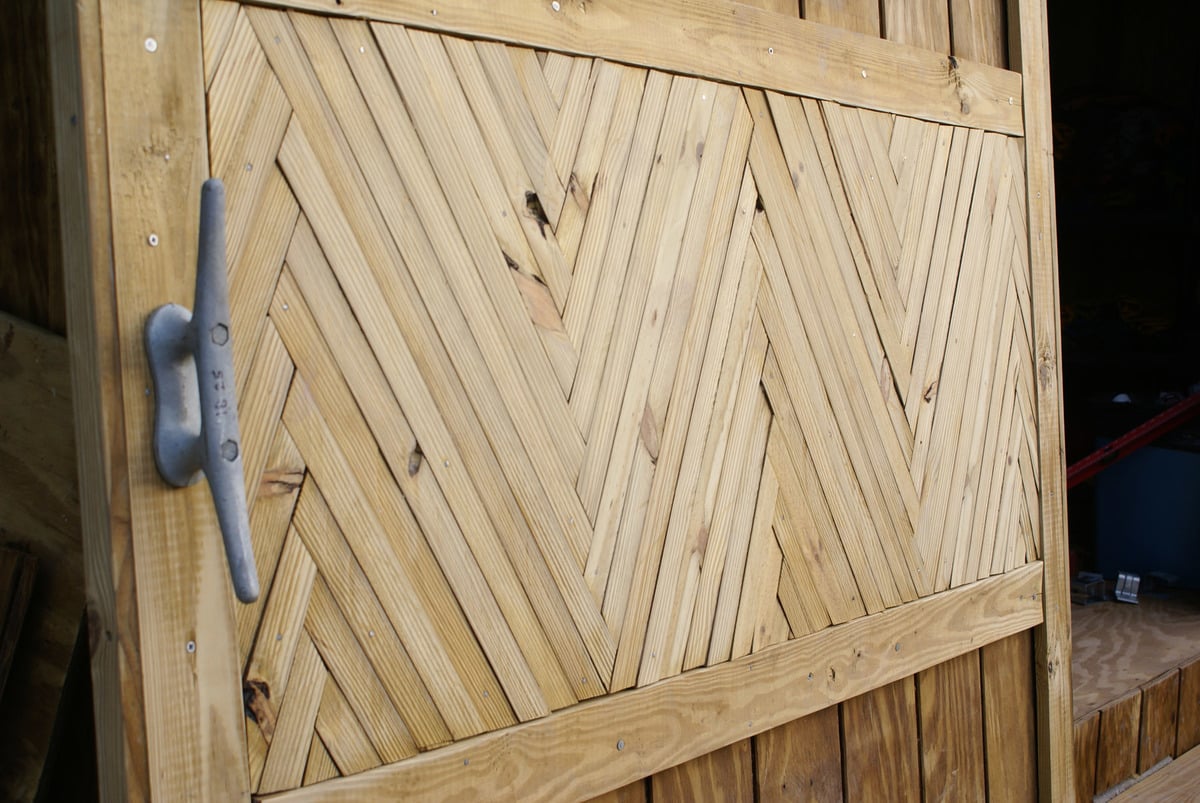
My favorite thing is the door handle (a boat cleat) sliding barn door and the herringbone design for 'eye candy' :)
Thanks go out to Ana and her wonderful site! I would have never attempted this without the foundation I built here!

Estimated Cost
$4,000 (living on an island in the Bahams so it's a bit higher here)
Estimated Time Investment
Week Long Project (20 Hours or More)
Finish Used
Still need to paint it!
Recommended Skill Level
Intermediate

Comments

jbayer80

Sun, 04/14/2013 - 20:37

What did you use to make the sliding door? Can you upload pics? I really want to make one for my bathroom but all the hardware I find is really expensive.

spiceylg

Mon, 04/15/2013 - 11:30

Great job and love that you also incorporated her laundry basket dressers!

mistievn

Sun, 05/05/2013 - 11:19

It looks amazing! Would you happen to have plans to share? We are in need we do not even have a garage. This would be perfect.

In reply to by mistievn

exuma_momma

Sun, 05/05/2013 - 13:58

Not really any plans that would help. We just drew some rough sketches up some paper and kind of went from there. Between Ana's site here and this book: http://www.amazon.co.uk/Building-Shed-Build-Like-Pro/dp/1561586196 we just pieced things together with the space and money we had. The book just helped me a lot to plan it out, and then all of the building techniques Ana has taught me on here came in handy. It's a group effort :) Hope this helps!

Simple Bar Stools

I used Ana's idea for the plan, but modified it slightly to stand up to my wrecking crew (aks the kiddos). I posted a step by step plan with photos on my blog if you want to use the information for yourself.

Estimated Time Investment
An Hour or Two (0-2 Hours)
Finish Used
Walnut stain and three coats of poly
Recommended Skill Level
Beginner

Comments

jsle_bel

Tue, 07/05/2011 - 08:26

I tried posting on your blog but for some reason it wouldn’t allow me.

Okay, I seriously LOVE them! I'm in the process of making my own pub table for outside entertaining and was considering altering Ana's stool plans....now no need to! Thanks for posting, I'll just need to lengthen the legs a little and for that reason reinforce it a bit to make them sturdy (I've got three boys and a daughter that can be a rough as the boys). Thanks again and I'll be back to check out future posts. Check me out at: http://laundrywillwait.blogspot.com/

~Jen

Kids' Playhouse (under stairs)

Submitted by kdins31 on Sun, 12/18/2011 - 09:22

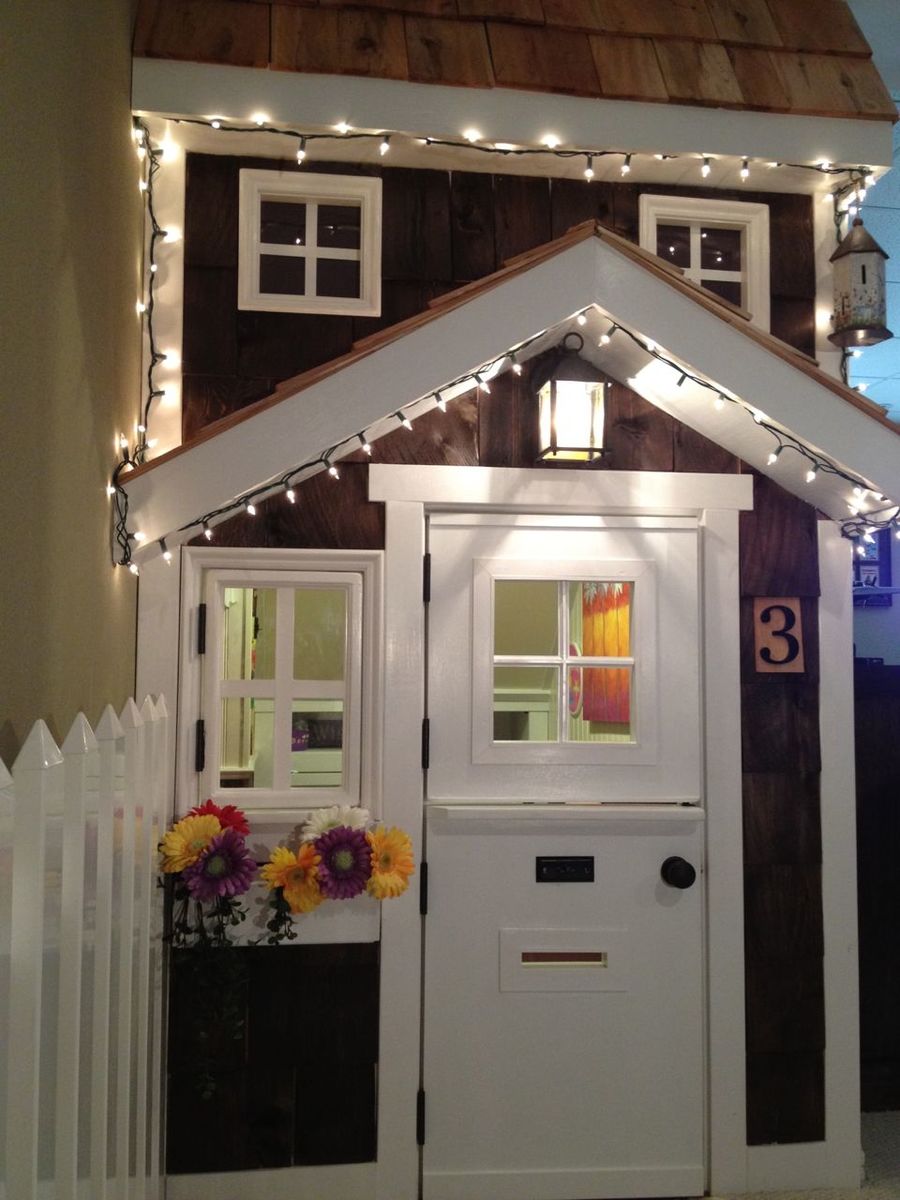
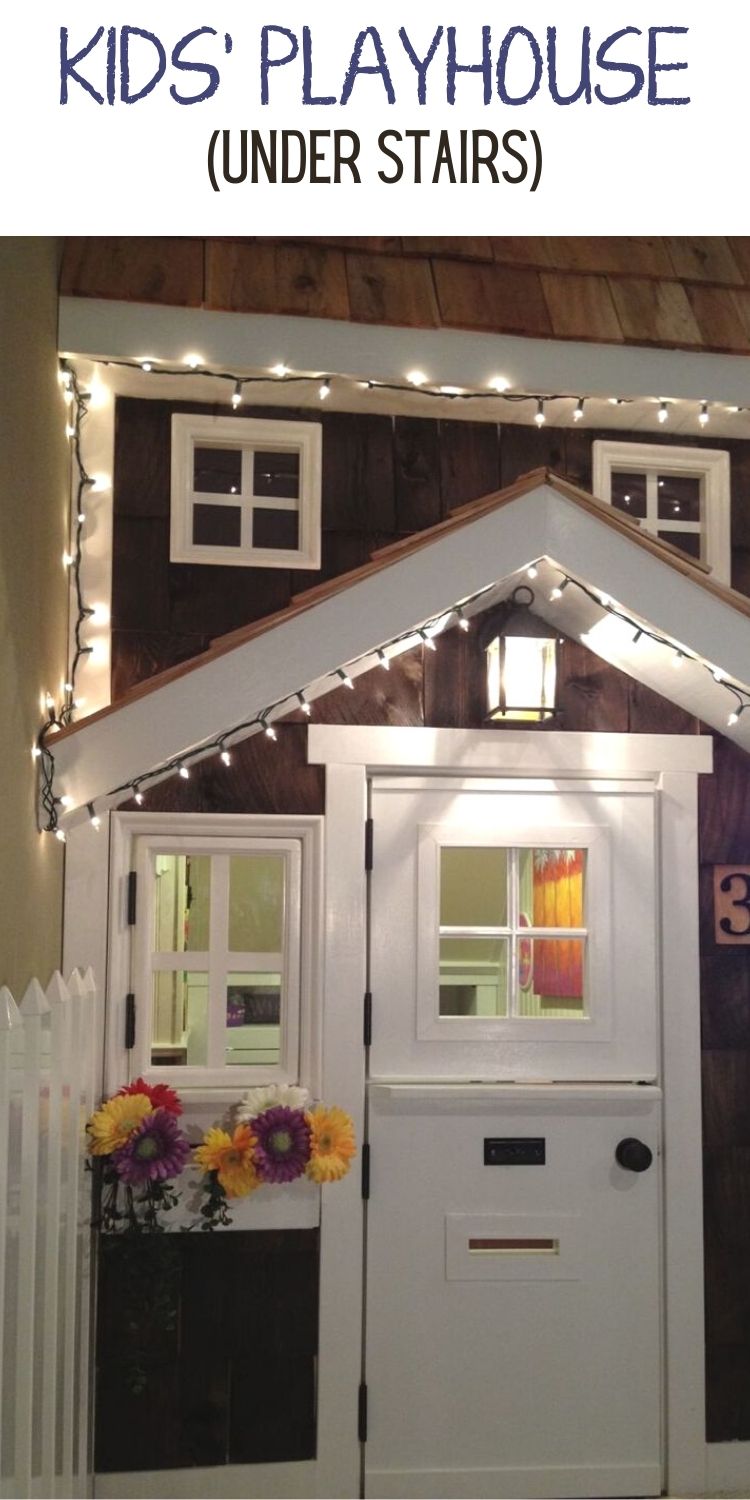
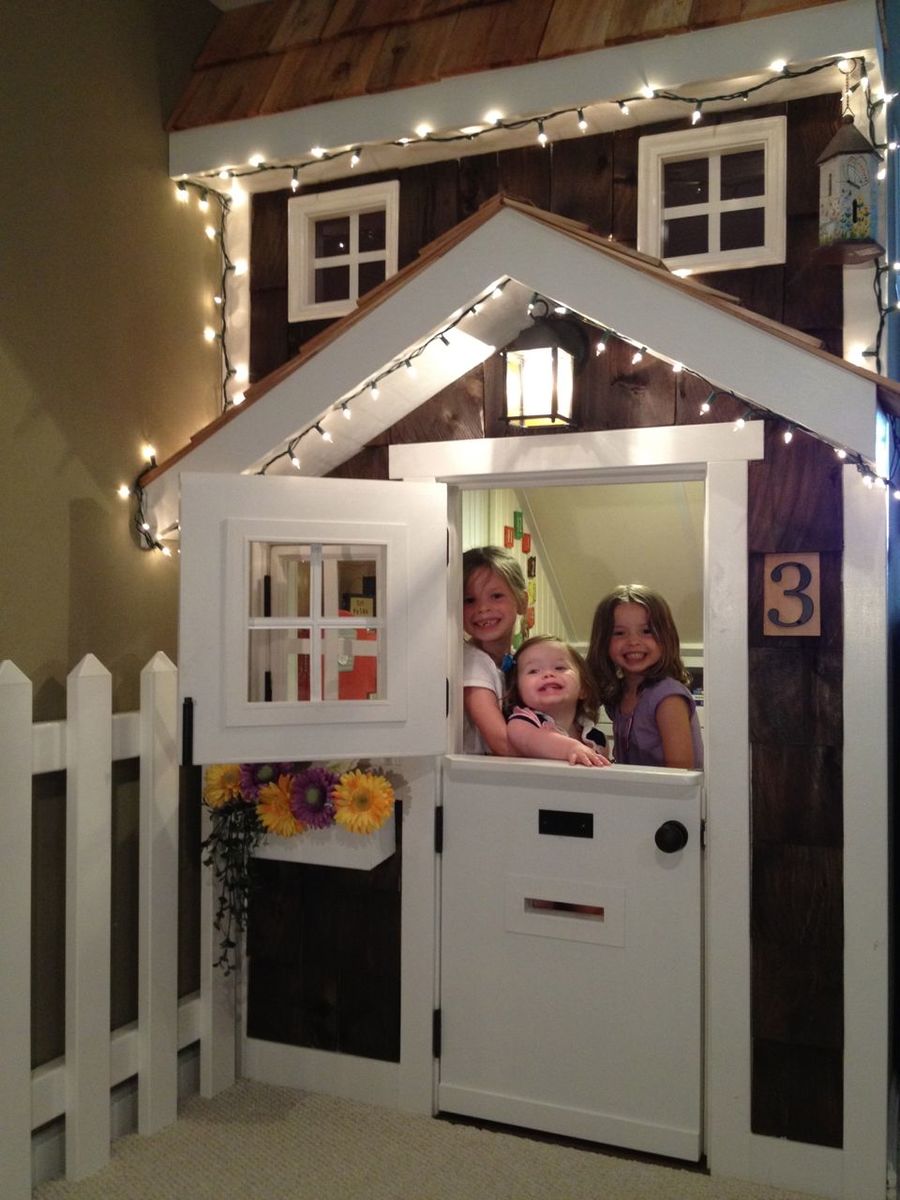
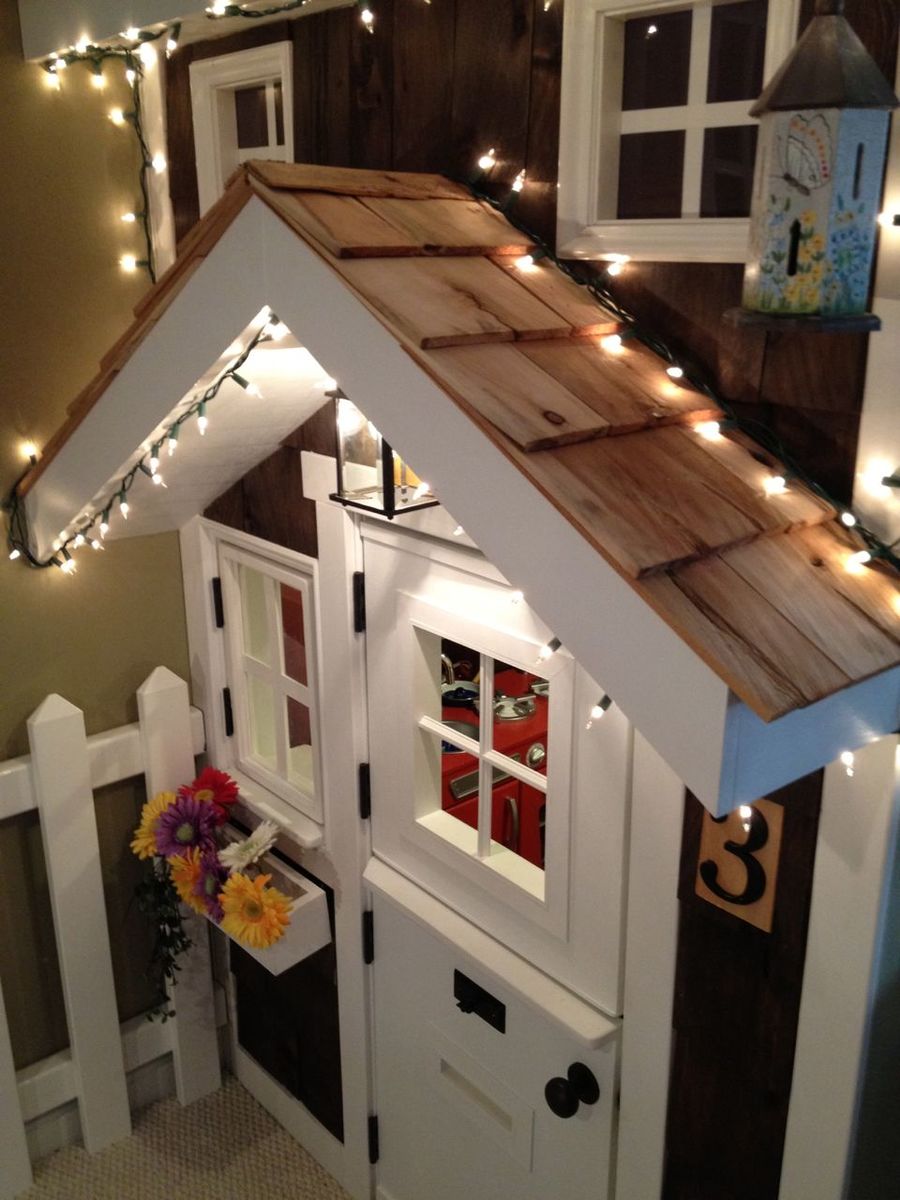
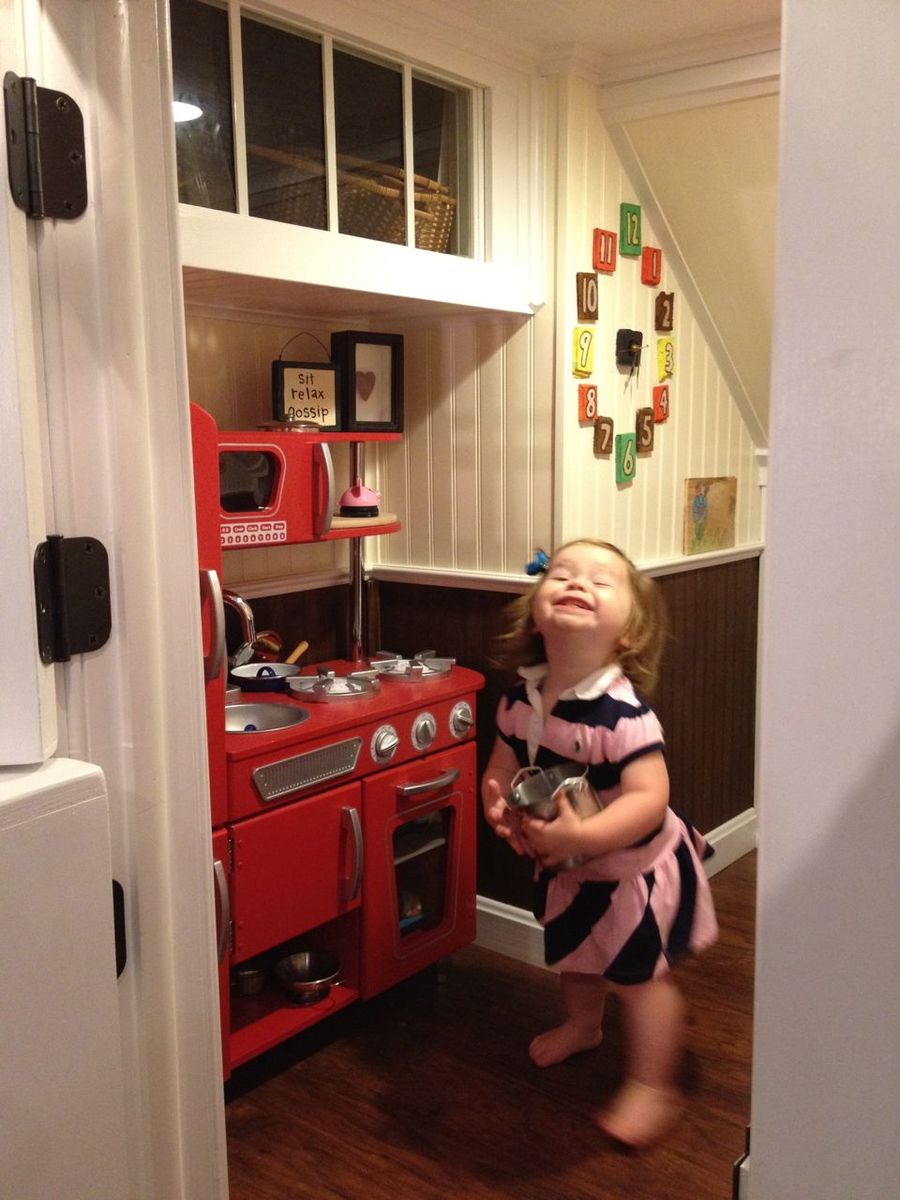
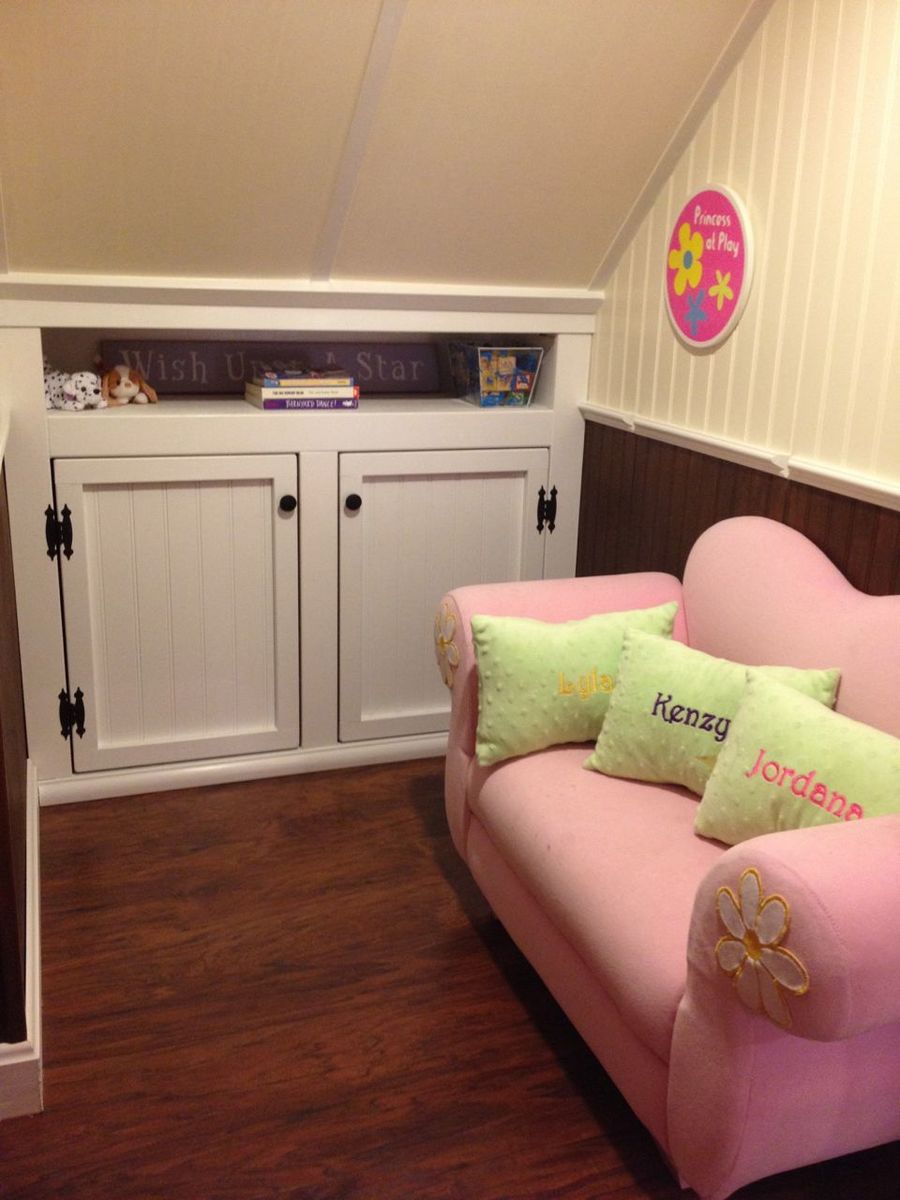
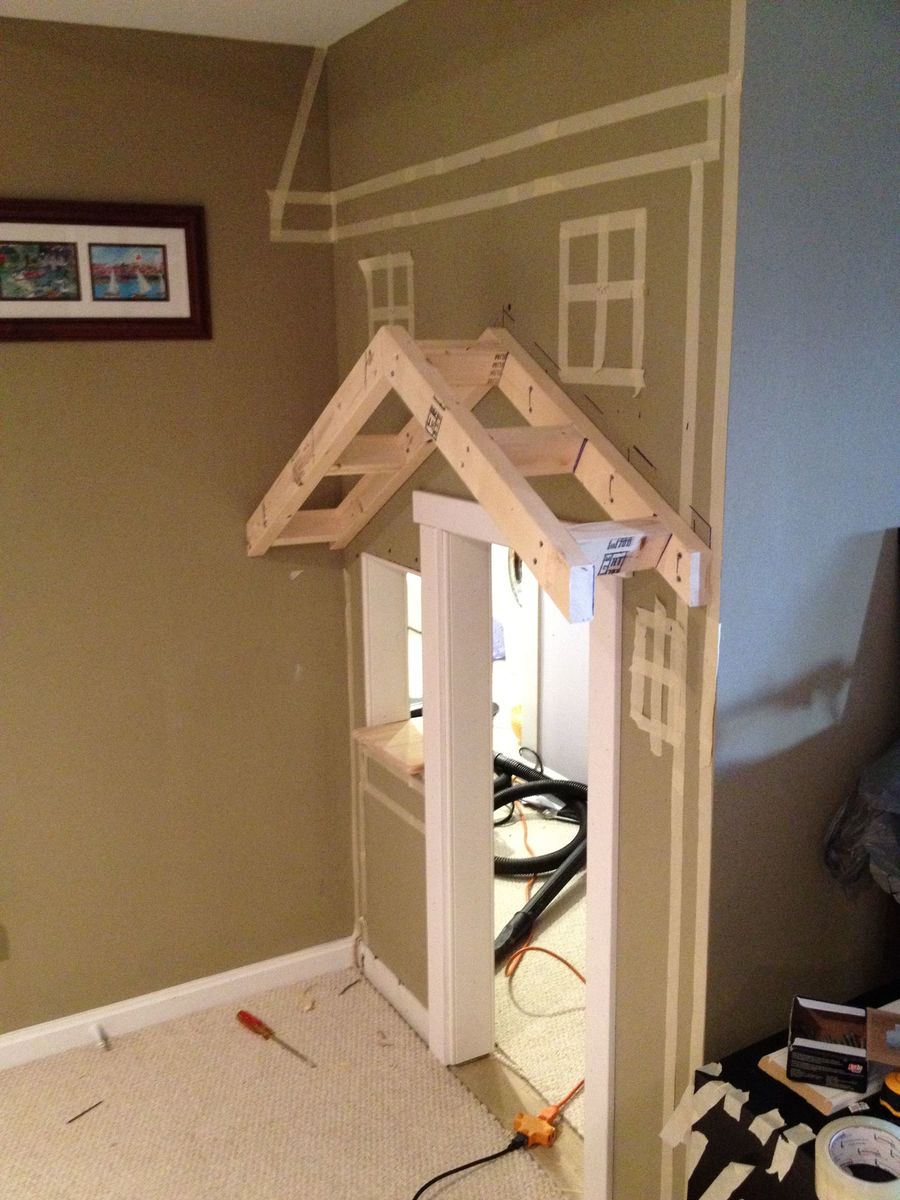
Had the perfect space for a little playhouse under the stairs in the basement and it's been our plan for 4 years to do something. Finally, we did something. Wanted depth so I added the roof and portico. Also added cedar shingles that I picked up for $7 at HD. Inside I had extra laminate flooring so I put that down and added beadboard, chair rail and crown molding. There's also a small transom window above the small kitchen area. The kids love the barnhouse doors with old fashioned doorbell, mailslot and window. The bookshelf under the stairs was the final touch. I didn't use any plans from this awesome site but did, as always, get a bunch of tips and inspiration!

Pin for Later!

Kids' Playhouse (under stairs)

Estimated Time Investment
Week Long Project (20 Hours or More)
Finish Used
Dark walnut stain on cedar shingles.
Recommended Skill Level
Intermediate

Comments

Cindy from Indiana (not verified)

Sun, 12/18/2011 - 19:00

Wow! That is awesome!

You really did a great job on that! So imaginative, too. WTG!

Guest (not verified)

Sun, 12/18/2011 - 19:58

That is so stinkin' adorable! Fantastic job. I love everything about it. Your kids (and grandkids) will remember the playhouse under that stairs forever!

spiceylg

Mon, 12/19/2011 - 06:54

Wow, this is too cool! They are going to love love love this! Can't wait to see the kitchen reveal!

bhoppy

Mon, 12/19/2011 - 08:43

LOVE LOVE LOVE this!!!! It looks amazing! Makes me want to buy a new house with stairs. LOL

birdsandsoap

Sat, 12/31/2011 - 18:26

You did an amazing job on this. I'm planning a bunkbed with a similar facade. I love how cozy it looks without having to make an actual pitched roof. The shingles are such a nice touch that I may have to copy you! And it's wired for lights; you've really outdone yourself.

Guest (not verified)

Mon, 02/27/2012 - 21:14

I love this playroom you created. We are currently in the process of building a playroom under the stairs for our girls. Where did you find the door...it is exactly what I am looking for! What a wonderful job you did!!!

kdins31

Mon, 03/19/2012 - 14:26

Thanks to all of you for the nice comments! Re: the door, I just cut a plain 18x80 door slab ($21 from orange) and trimmed it out. I still need to put the window grille over the open space, and was hoping to find a cool 'speak easy' grille that fits the space.

Thanks again!

megan_m

Fri, 04/27/2012 - 09:07

this is such an amazing little space! great work!

MicheleInAlabama (not verified)

Thu, 05/03/2012 - 23:38

This has to be one of the most adorable things I've ever seen! What an awesome idea......how cool is that for the kids??! Love the lighting and the laminate (or is it hardwood) flooring inside. Even the stove is gorgeous! Such fond memories will be made there and remembered forever. Kudos!!

Amanda Rhoads (not verified)

Wed, 12/05/2012 - 15:34

Oh my goodness this is such an inspiration! However, as a beginning tool user, I don't think I could get my finishes so nice. How much experience had you had at this kind of stuff before? Was the area closed in before this project or did you do that too? I've got an open stairway into our basement and would be starting from scratch with ceiling, walls, etc. and have no experience hanging drywall or anything. I think it would take me a year. Great job, and thanks for sharing!

maggieasselin

Sat, 06/21/2014 - 12:51

Hi there!

I was just wondering how you made the door for your play house? We're basically stuck at this level in ours right now... ;) Thanks for any tips!!!

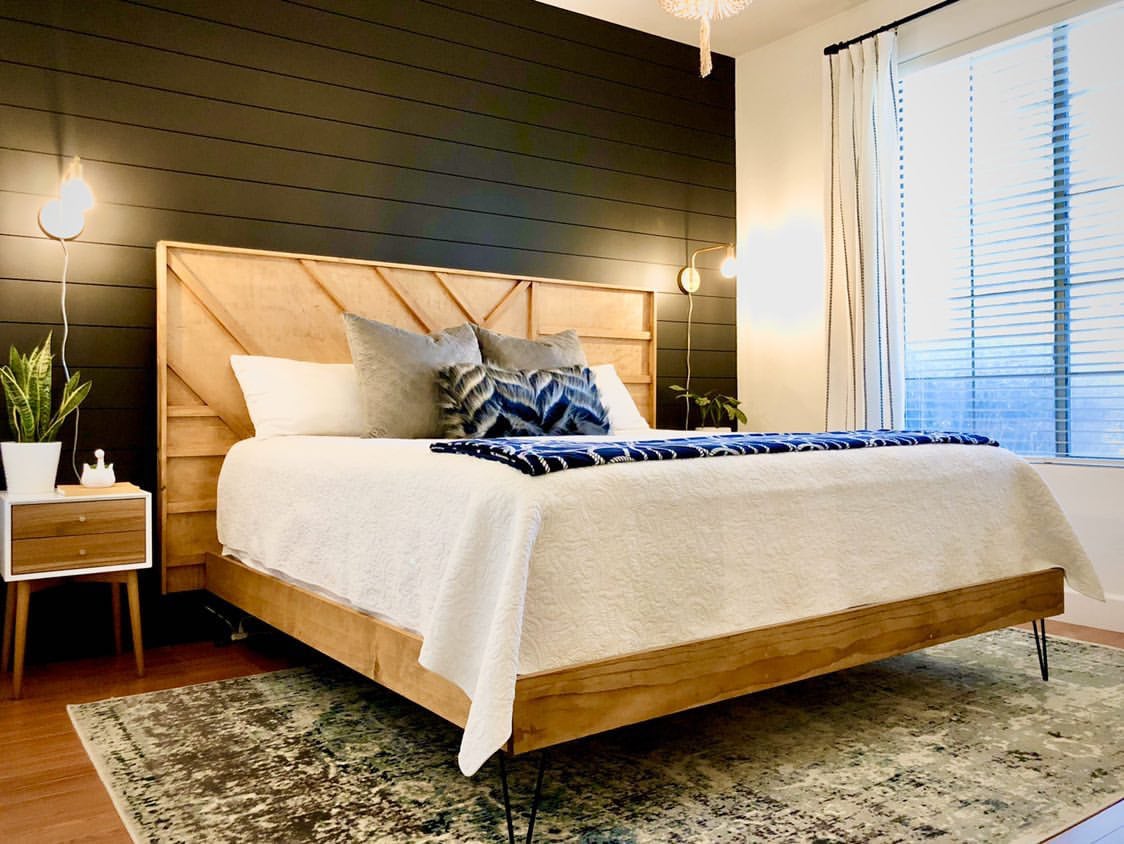
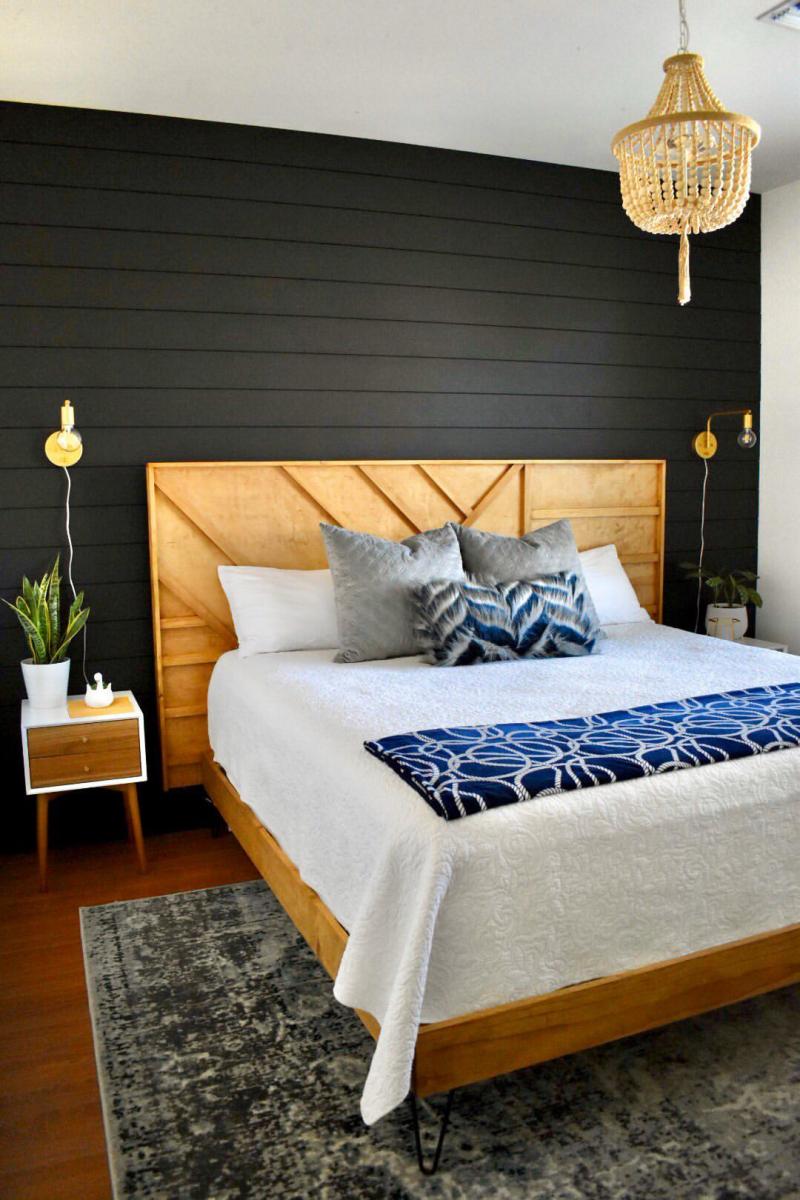
Modern Geo Headboard

Submitted by Ana White on Sun, 11/03/2019 - 08:48

For more information and photos see House of Rumors in Instagram www.instagram.com/houseofrumours 

Comments

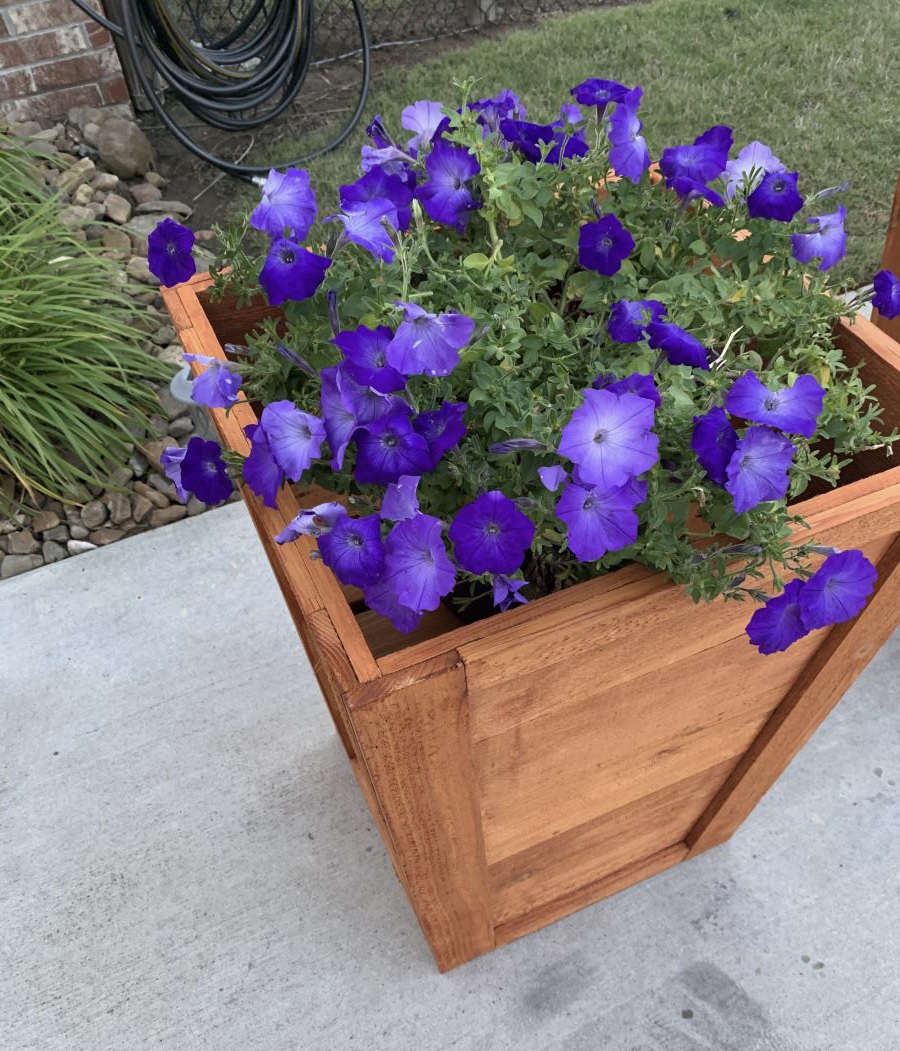
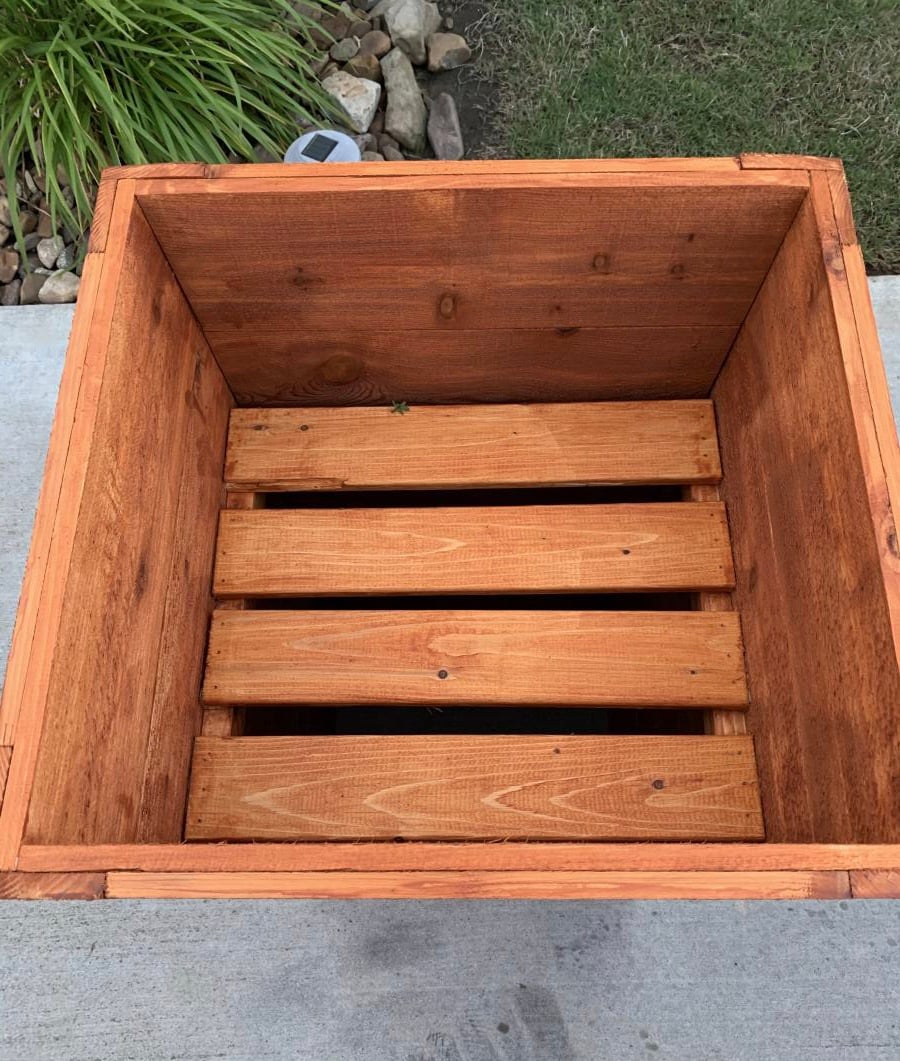
Tall Wood Planters

Submitted by Knuckles78 on Fri, 05/15/2020 - 05:27

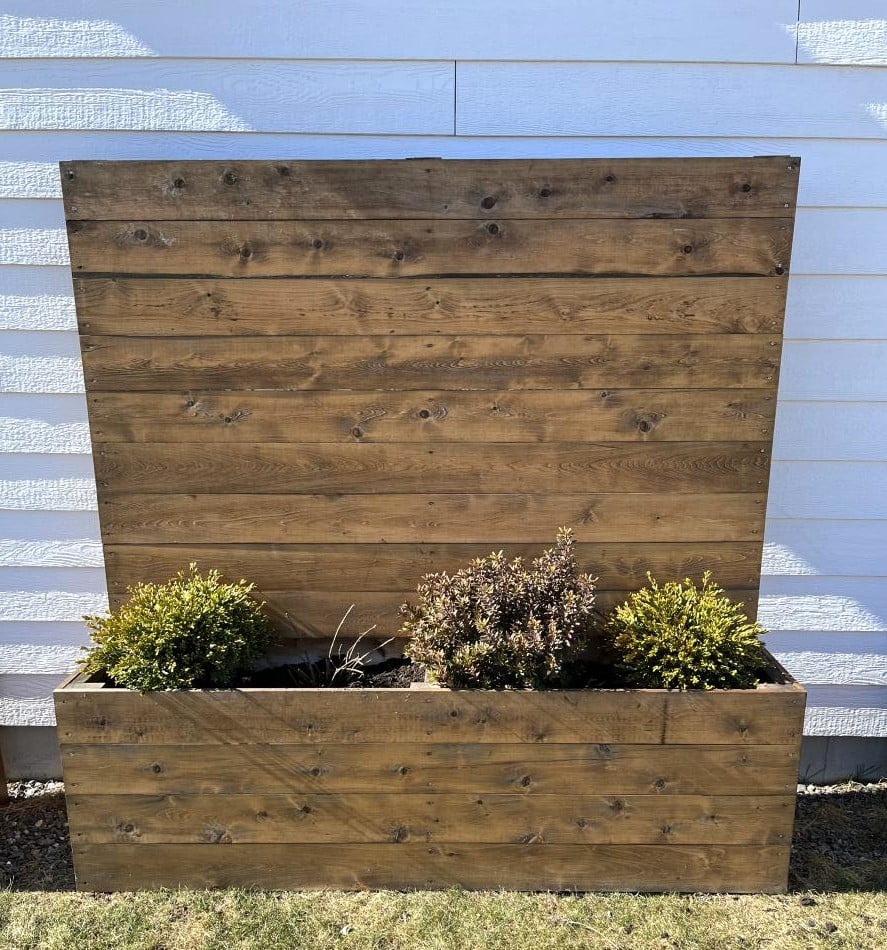
Added some extra trim pieces to finish it out. turned out really nice!!

Built from Plan(s)

Comments

Seasonal And Holiday

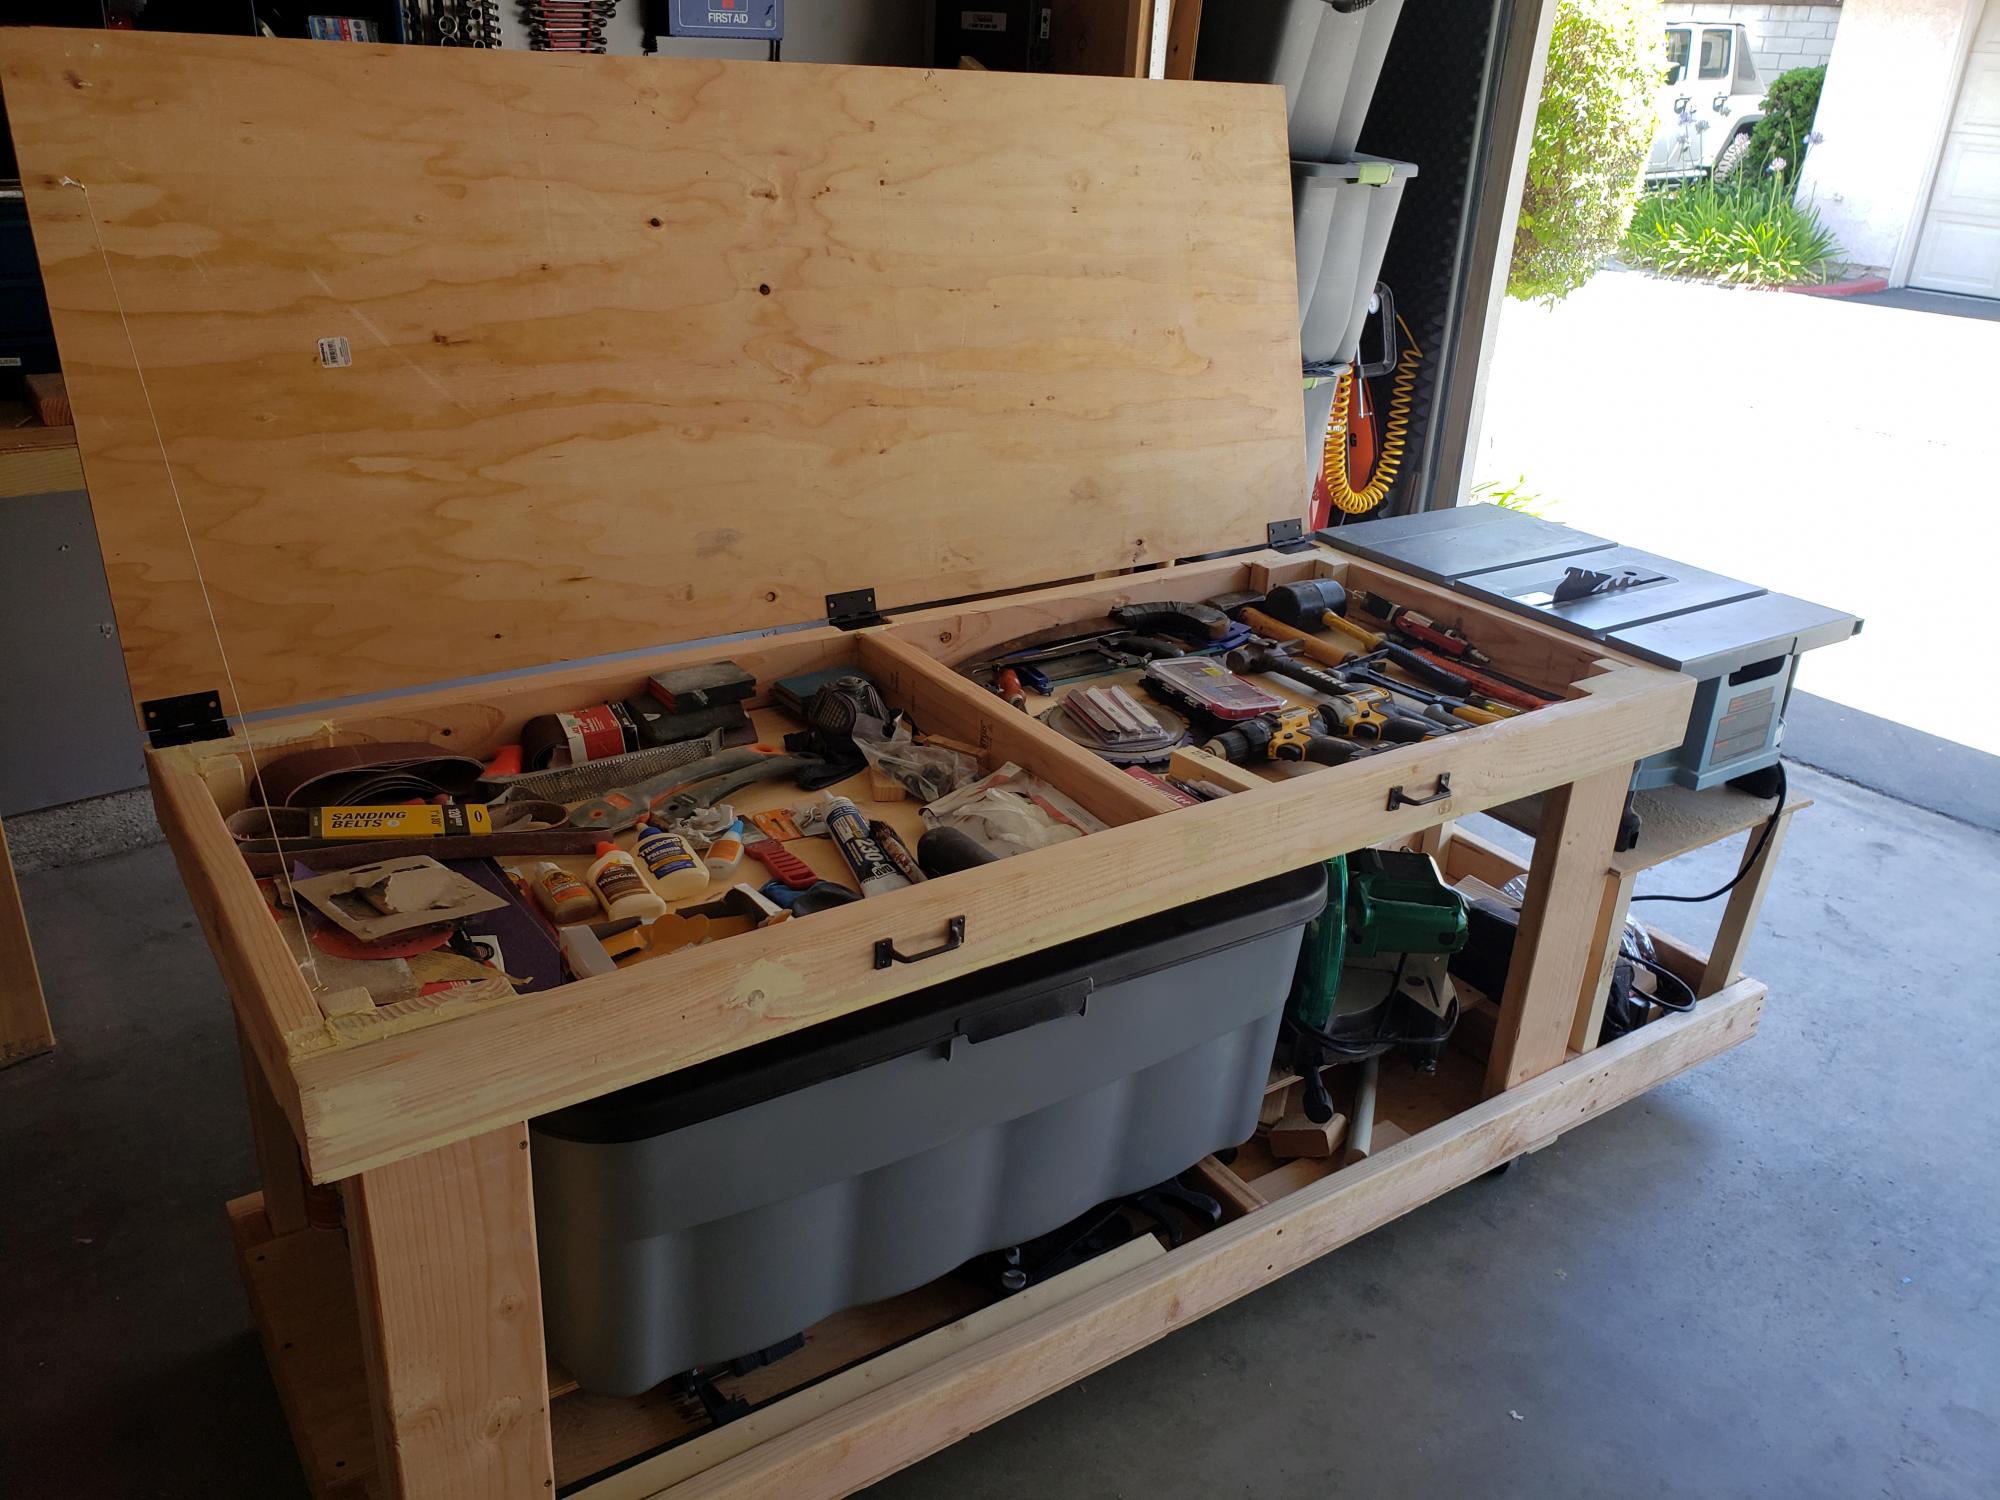
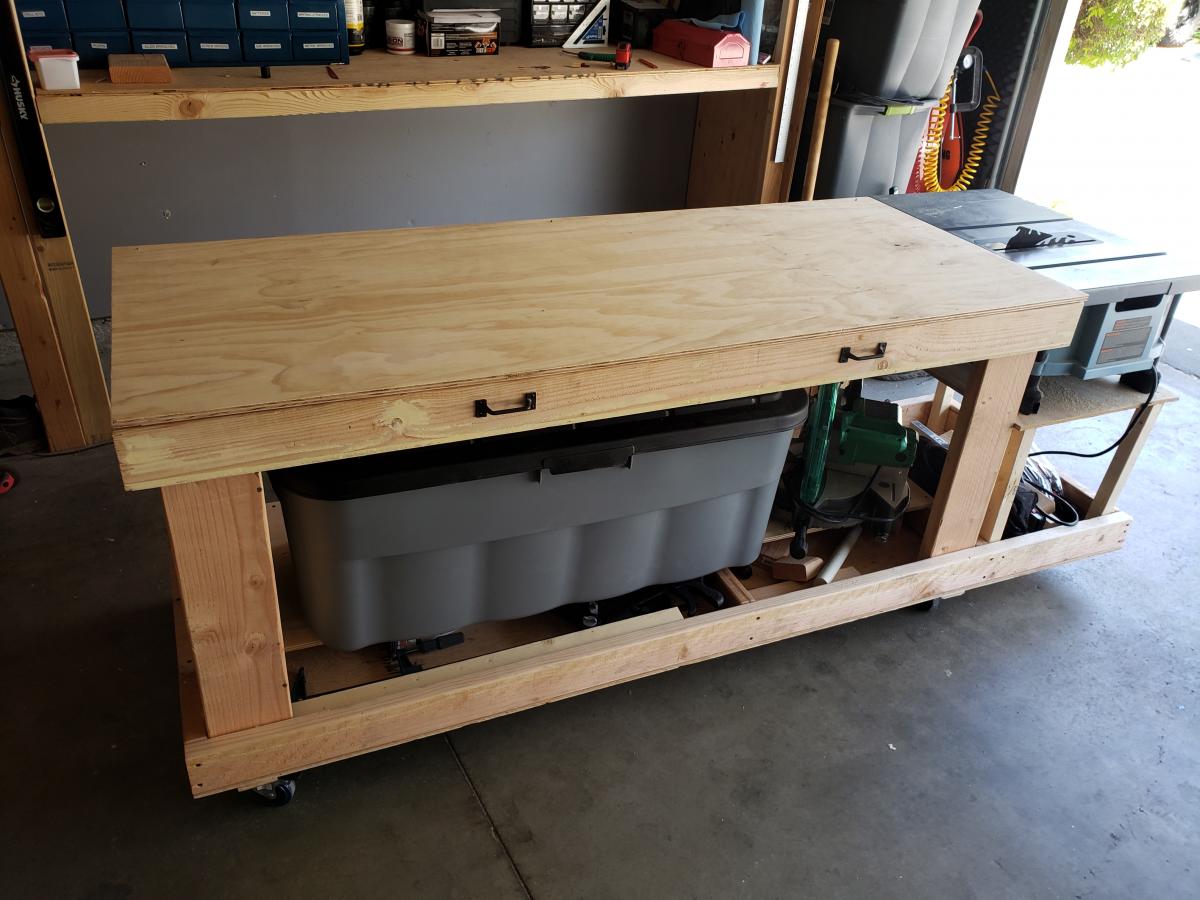
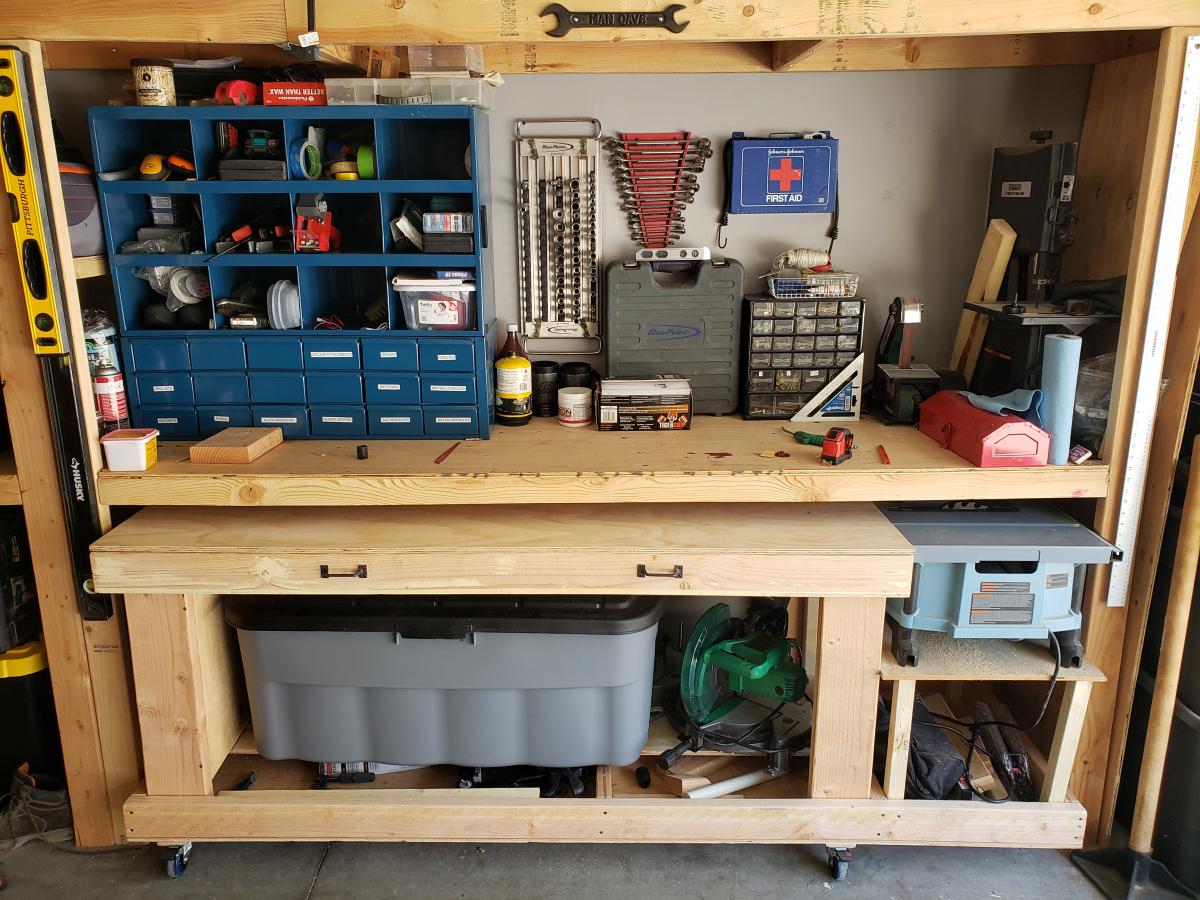
Modified workbench

Submitted by jayhicks84 on Sun, 05/24/2020 - 19:45

A modification of the traditional work bench. Great for storage. Bench area of 70 inches with 18 additional inches for the table saw.

Comments

Octagonal Picnic Table

Submitted by frmoody on Fri, 05/28/2021 - 15:08

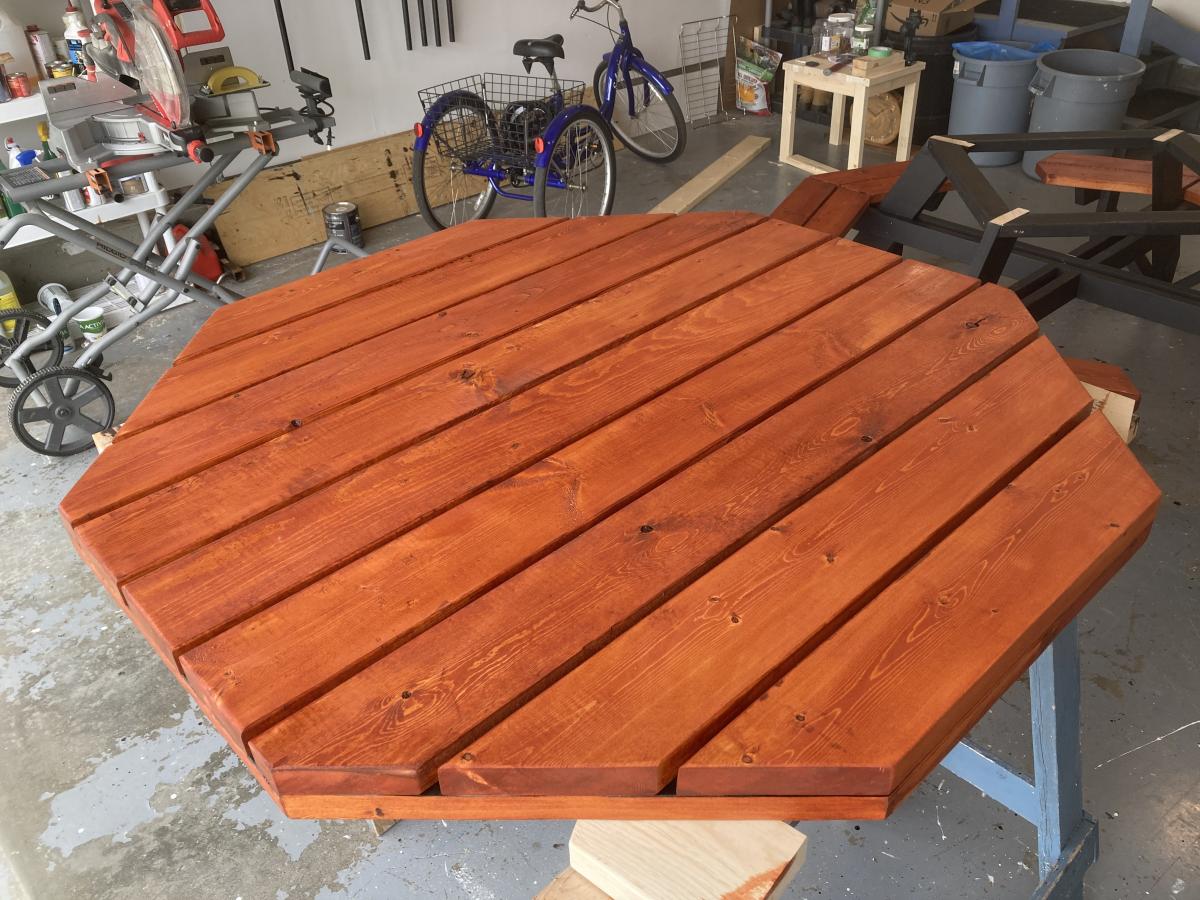
To say this was a complicated build is an understatement. Lots of pieces, lots of different angles and lots of screwing it together. It was really tough to keep everything perfectly square but in the end it turned out well. It is a very heavy table. I want to get it outside on a sunny day for some photos.

Estimated Cost
The price of lumber is ridiculous right now. Last summer this would have cost me about $200 in materials but I spent about $450 on wood, finish and screws. 2 x 4 x 8's right now are about $10.40 CAD$ and 2 x 4 x 6's are about $15.00
Estimated Time Investment
Weekend Project (10-20 Hours)
Finish Used
I first painted all black parts with Wood Shield Oil Deck & Siding solid stain. I used two coats. I painted most of the boards prior to cutting to save time. The top and seats were stained with MinWax Gunstock Stain. Once everything was together I put on two coats of Helmsman outdoor polyurethane.
Recommended Skill Level
Advanced

Comments

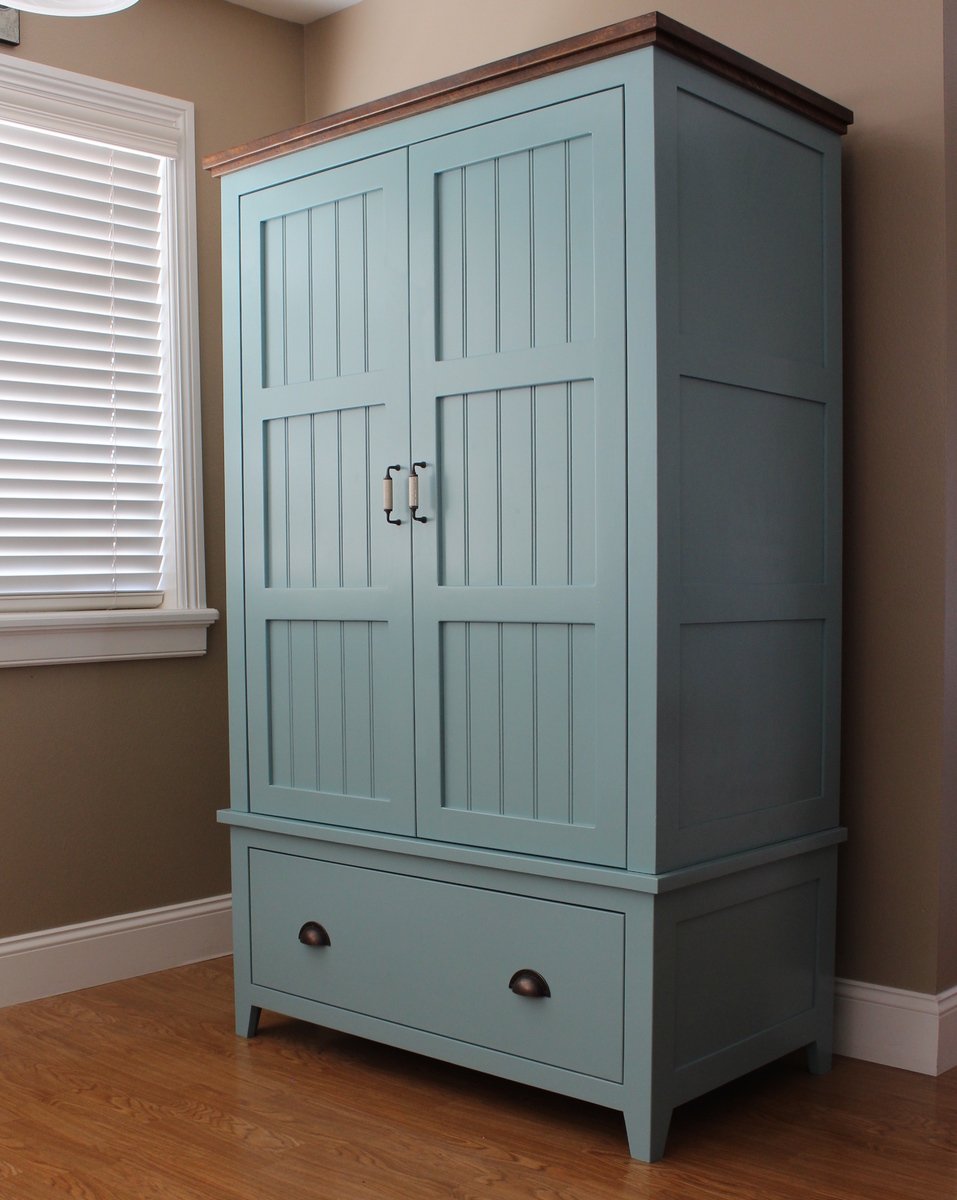
French County Wardrobe

This is probably one of my favorite pieces I have built.  Challenging but fun.  I built it as two separate sections, an upper and lower cabinet to make it easier to carry indoors.  I added a full-extension drawer below for storage. The two-toned paint combination did take a lot of extra time. Because I used an airless spraying to paint I had to tape and cover each section separately. 


Built from Plan(s)
Estimated Cost
$300.00
Estimated Time Investment
Week Long Project (20 Hours or More)
Finish Used
Venus teal and creme brulee by Behr. Dark walnut stain for the top.
Recommended Skill Level
Intermediate

Comments

Wood Chuck

Fri, 03/06/2015 - 10:43

WOW it looks awesome the extra time spent on the painting was more than worth it looks spectacular. I bet you also could make a great profit selling this Wardrobe either on line or in a consignment shop, if I had the need for one and the money I would defiantly buy one!!

MrCoffee

Fri, 03/06/2015 - 13:54

I love the way the paint job came out on this and I really dig the having the molding on the top stained.

Calmly

Sun, 03/08/2015 - 07:36

This looks awesome! I love the the paint finish and it your profession work

TwoCuteKids

Mon, 03/09/2015 - 17:30

I agree this is your best so far...which is hard to say b/c all your projects are amazing! I love the style, the paint colors, the stained top, and the hardware!

whopua

Tue, 11/10/2015 - 11:13

Are there any available plans? I'd love to make this for my wife!

Anela

Sat, 03/19/2016 - 15:06

It looks really great! 

I have fallen in love with it the second I saw it and somehow I am now convinced that I need a new wardrobe ;) 

I guess you don't have plans for the wardrobe laying around - but would you mind doing a fast sketch (just a simple one on paper) with all the measurements noted? I would be thrilled to try building it myself in the summer. 

Greetings from Germany!

Anela

Sat, 03/19/2016 - 15:07

It looks really great! 

I have fallen in love with it the second I saw it and somehow I am now convinced that I need a new wardrobe ;) 

I guess you don't have plans for the wardrobe laying around - but would you mind doing a fast sketch (just a simple one on paper) with all the measurements noted? I would be thrilled to try building it myself in the summer. 

Greetings from Germany!

petemoore

Mon, 08/22/2016 - 07:32

its very nice but there are no plans

can you put up the plans or email me them please

many thanks

leftysgirl

Tue, 07/18/2017 - 05:43

Are there plans used for this beautiful piece? I do not see any links. Help please!! I absolutely need to make this armoire :) :) 

Folding Sewing Table

Submitted by cchalifour on Wed, 11/24/2021 - 19:36

Built this Folding Sewing Table for my daughter.
- 18 mm Baltic Birch
- Birch leds

Built from Plan(s)

Comments

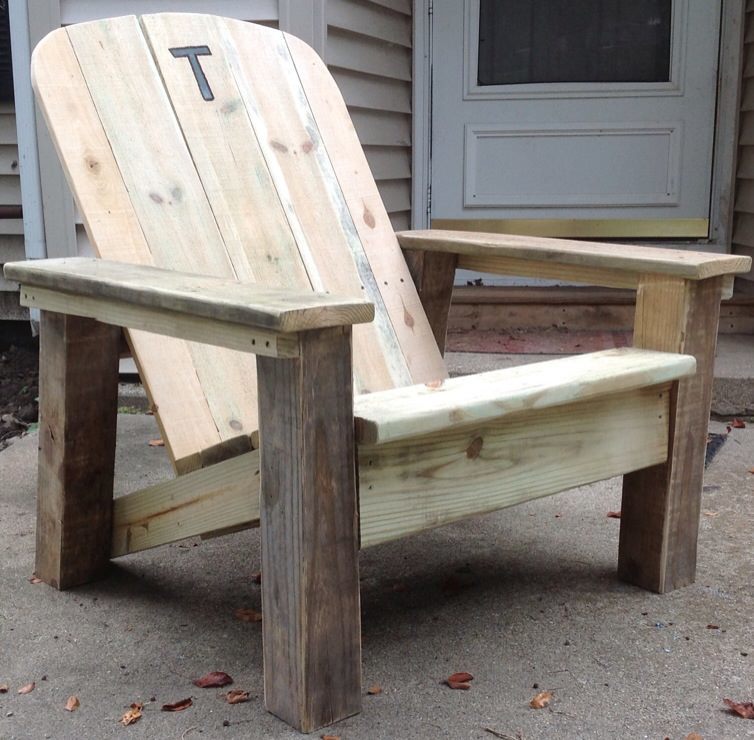
Reclaimed lumber Adirondack chair

Submitted by rkyount on Thu, 08/08/2013 - 13:23

For my brother's 35th birthday, I helped him build a fence and side deck on his house. Using the leftover lumber scraps and screws, I adapted the DIH Adirondack chair plans to build this for him. He wanted a big, sturdy chair with a wide arm rest that looks "rustic". I used 4x4 and 2x4 post scraps, deck boards, and fence pickets. I also widened the seat just a bit for comfort. This is definitely the perfect chair for him!

Estimated Time Investment
Afternoon Project (3-6 Hours)
Finish Used
Since it's all treated lumber, we'll just seal it whenever we do the deck with Thompson's Water Seal.
Recommended Skill Level
Beginner

Comments

rkyount

Fri, 08/09/2013 - 14:38

Thanks! I always enjoy building with your plans, and it was a bonus that I didn't have to buy anything to build this, since I used leftover materials.

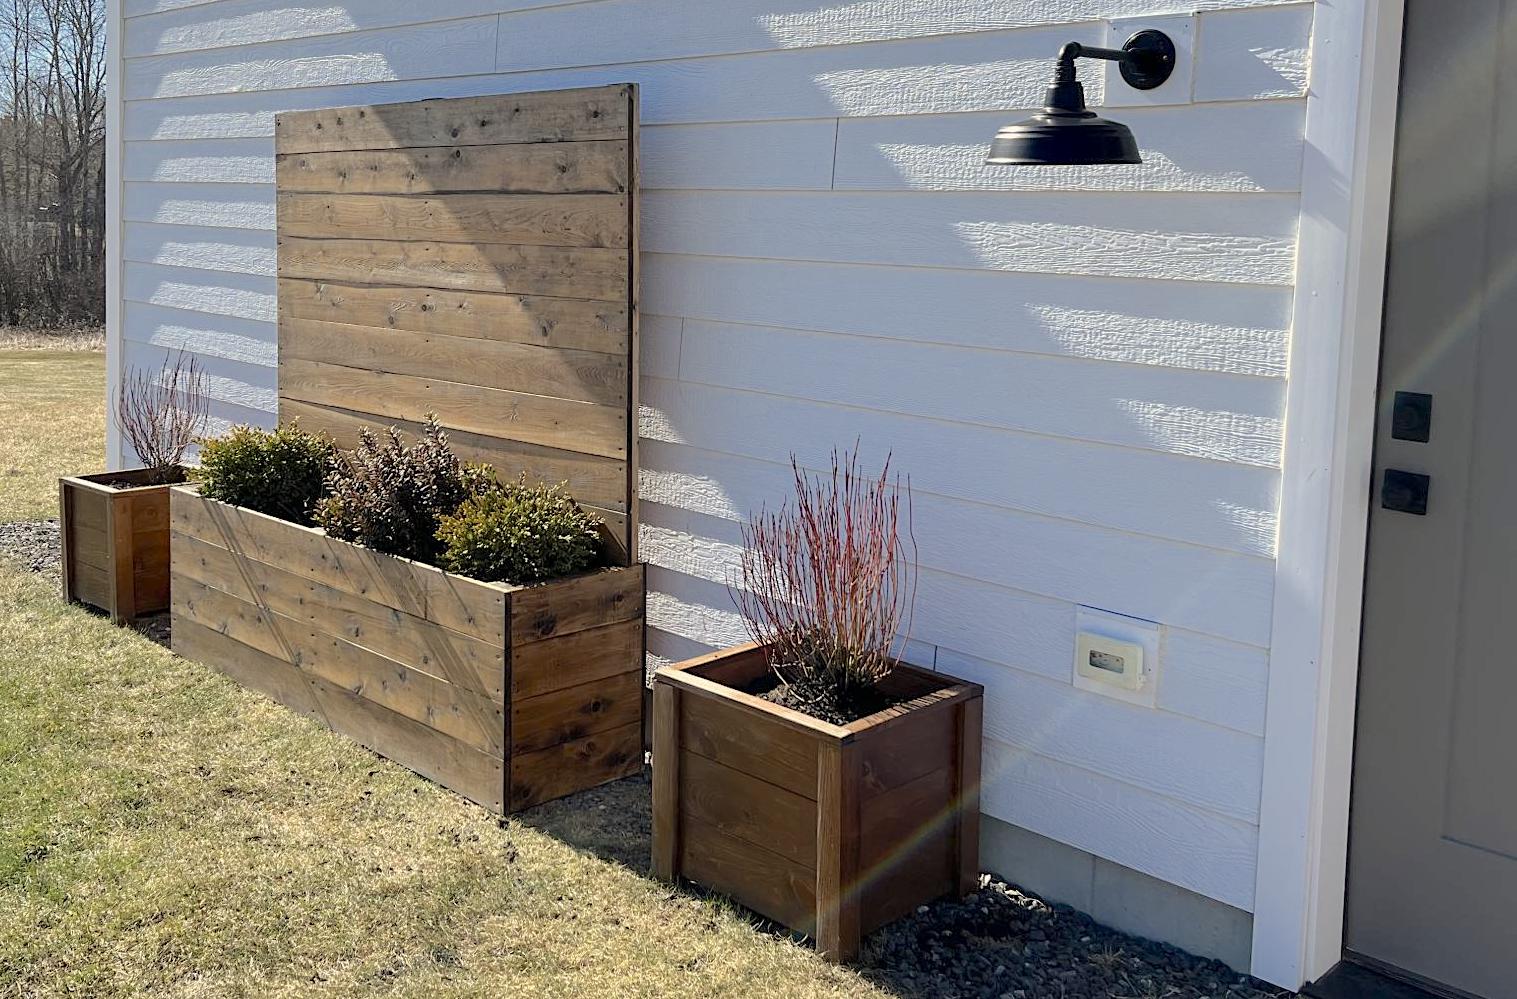
Planters!

Submitted by Anonymous (not verified) on Fri, 04/14/2023 - 03:50

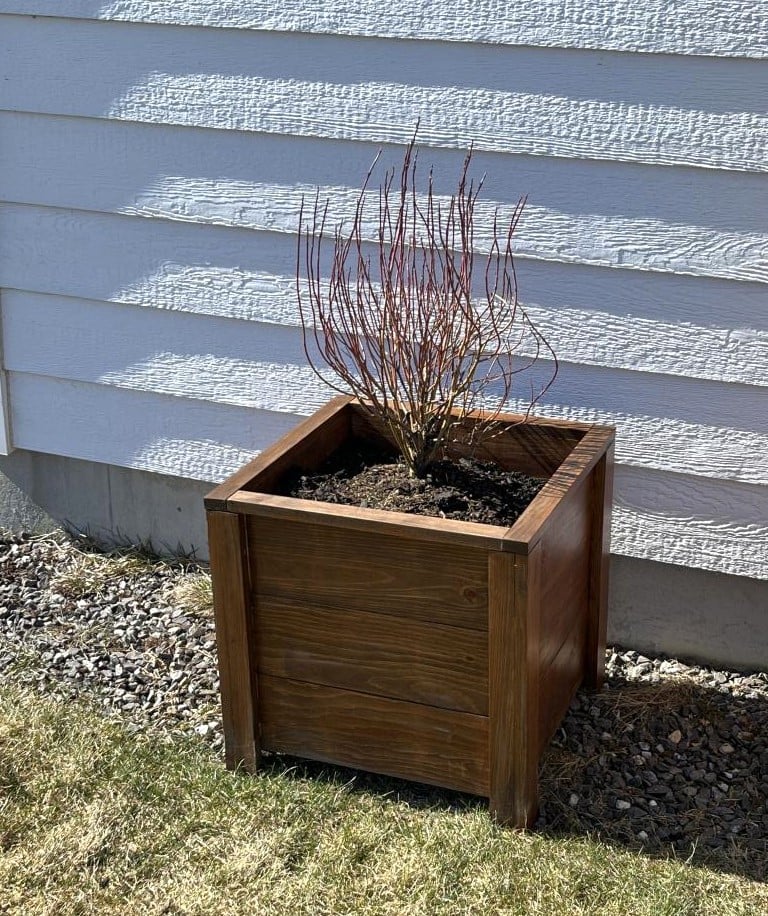
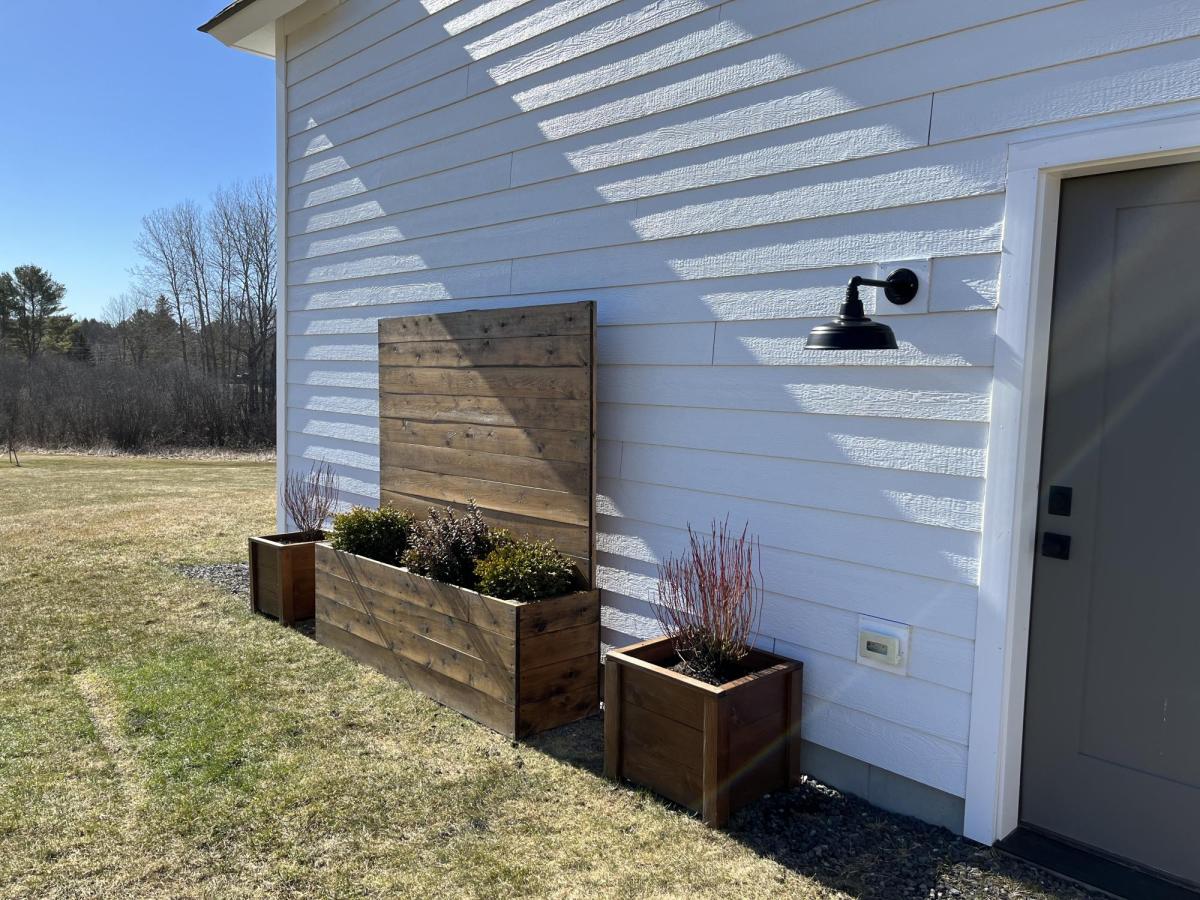
These planters are exactly what we needed to warm up this blank siding! The smaller planters are made from pine, the larger from cedar.

Comments

Seasonal And Holiday

Two Camp Loft Beds

Submitted by Tjslove04 on Tue, 08/28/2012 - 21:00

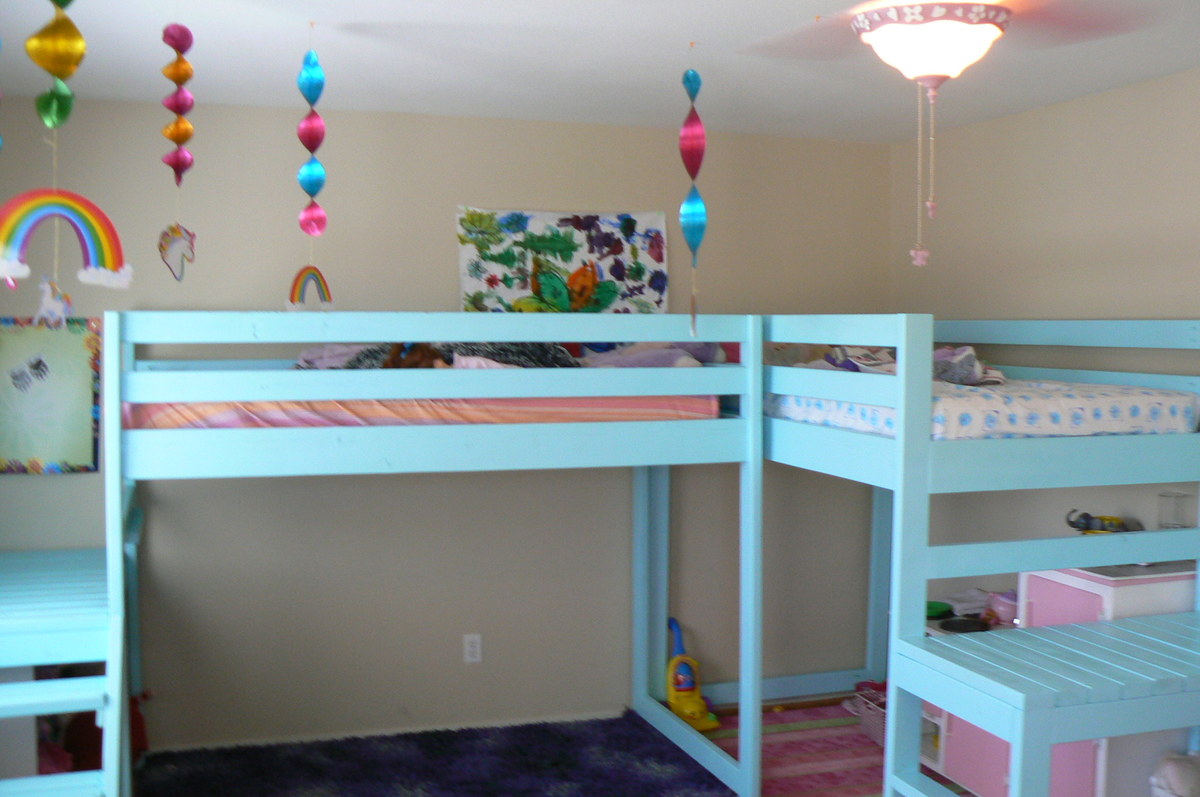
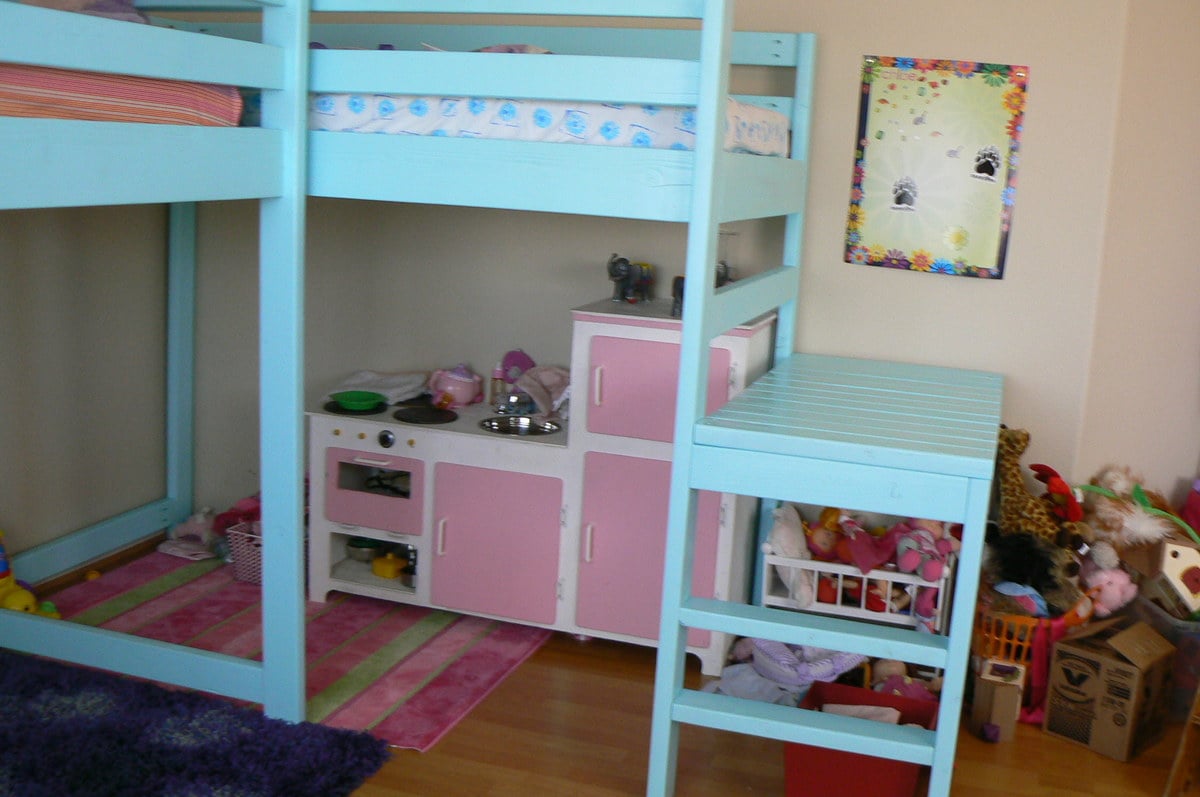
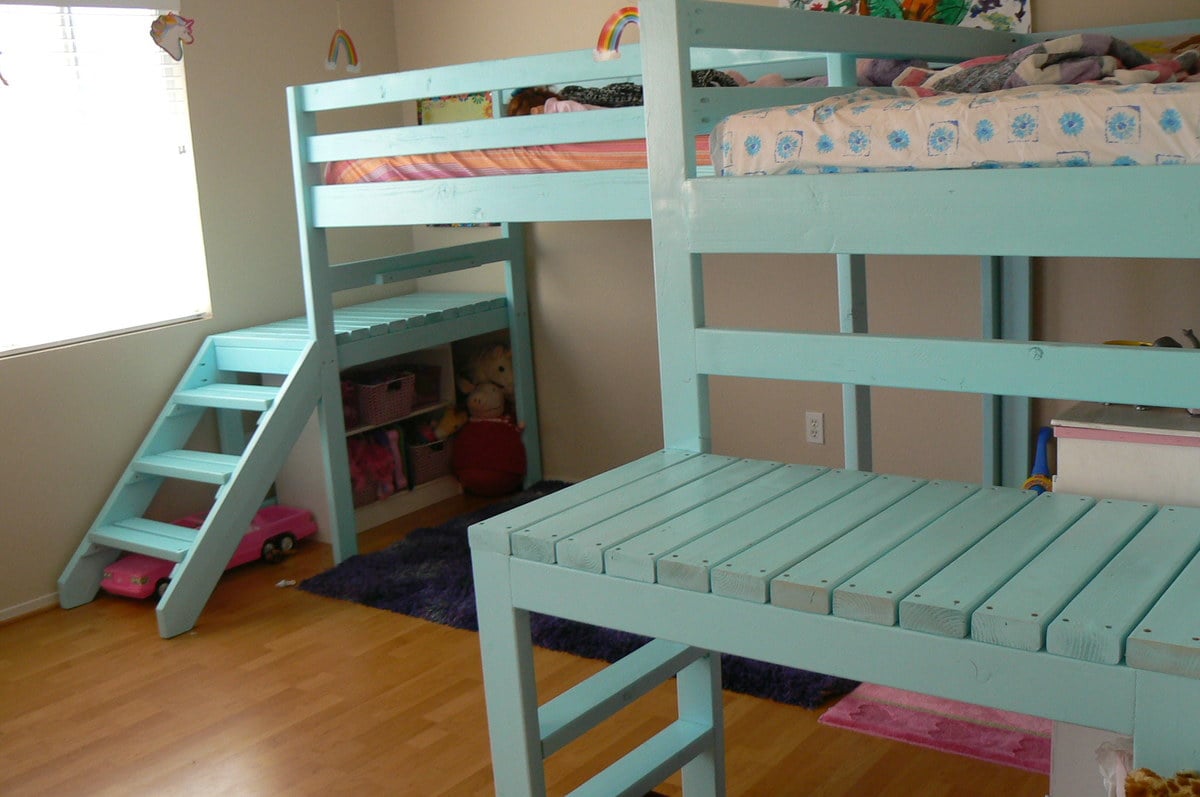
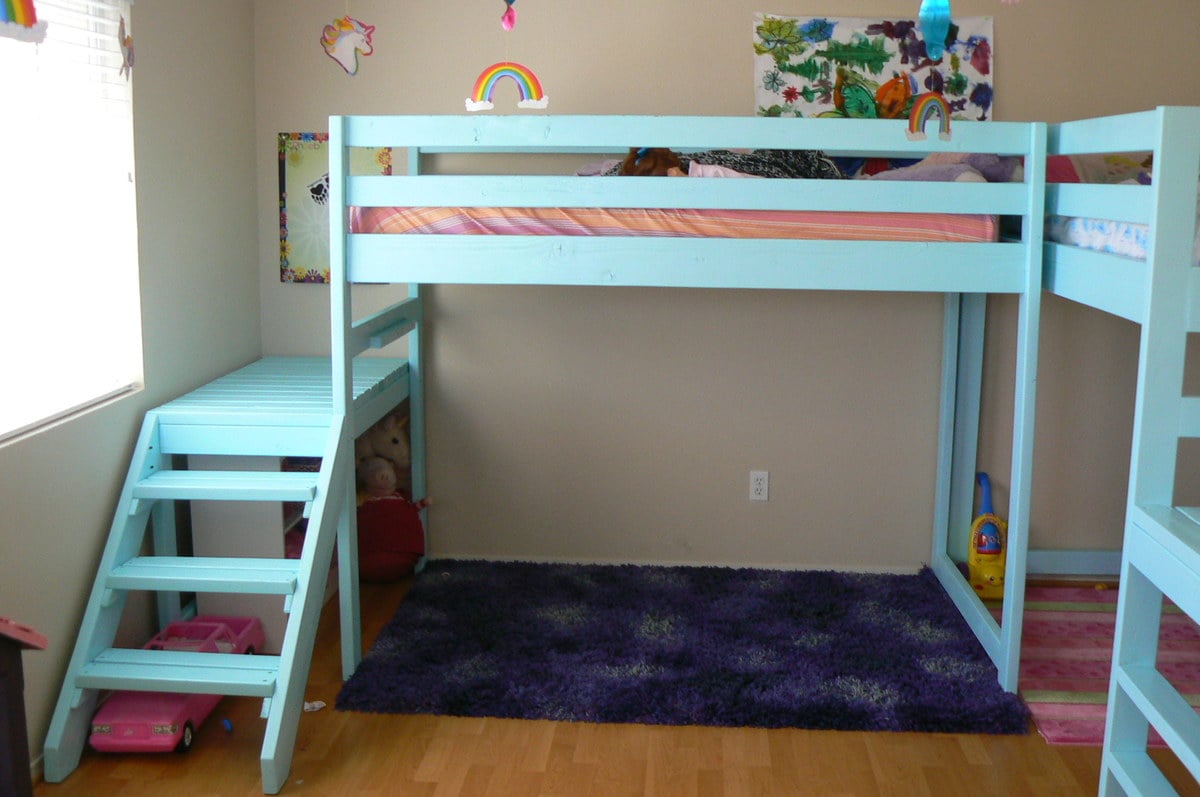
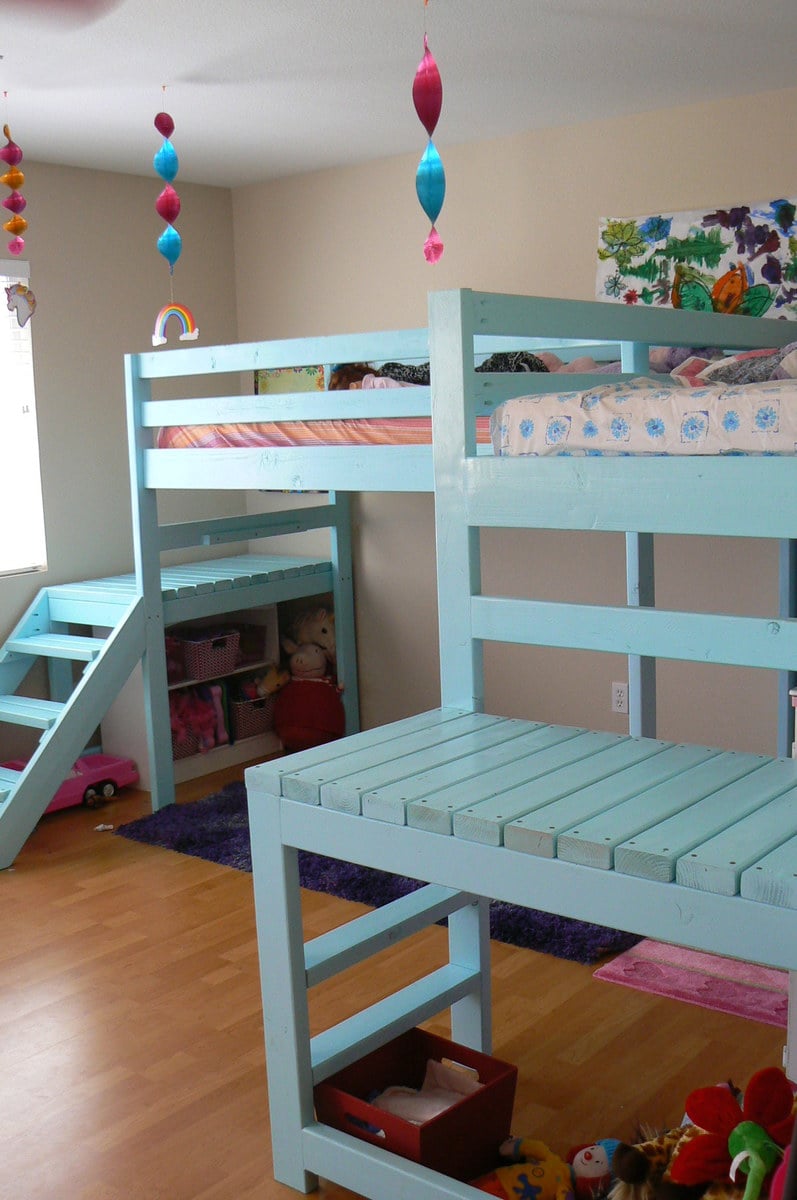
Ana read my mind! I was telling my husband that I wanted "L" shaped loft beds for our girls abouttwo weeks before she posted these plans! As soon as I saw them we went and got our lumber. So excited to have these done and the girls love them!

Estimated Cost
$75 each
Estimated Time Investment
Weekend Project (10-20 Hours)
Finish Used
Bher premium paint
Recommended Skill Level
Beginner

Comments

mskatiesartstudio

Thu, 09/13/2012 - 13:05

I saw another post where they did horizontal 2x4s instead of stairs. I see that you did one of each. Could you tell me what your thoughts are on how the kids like them....if the 2x4 steps are easy to get up and down on....
We are adopting and we're not sure what age children we will get....so, I want to make sure they are easy to navigate. Any thoughts???

Thank you!

Tjslove04

Tue, 09/03/2013 - 09:30

we id the stairs for our 3 year old and the ladder for our 5 year old. She has no problem getting up and downthem but our 3 year old doesn't like to come down the ladder ones. The stairs are really nice and make the bed easily accesable even for me. =)

melncurt

Wed, 02/04/2015 - 18:48

What are the overall dimensions with the two landing areas and stairs? I really like this idea, but the bedroom is not super big. Thanks!

Printers Cabinet

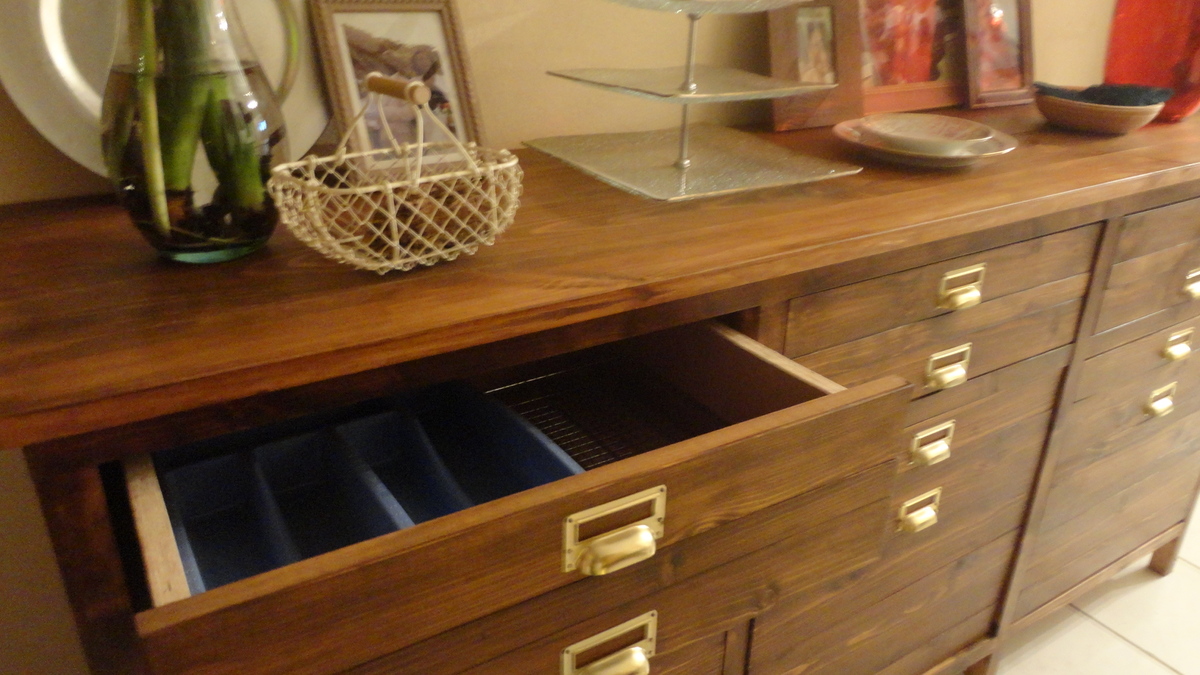
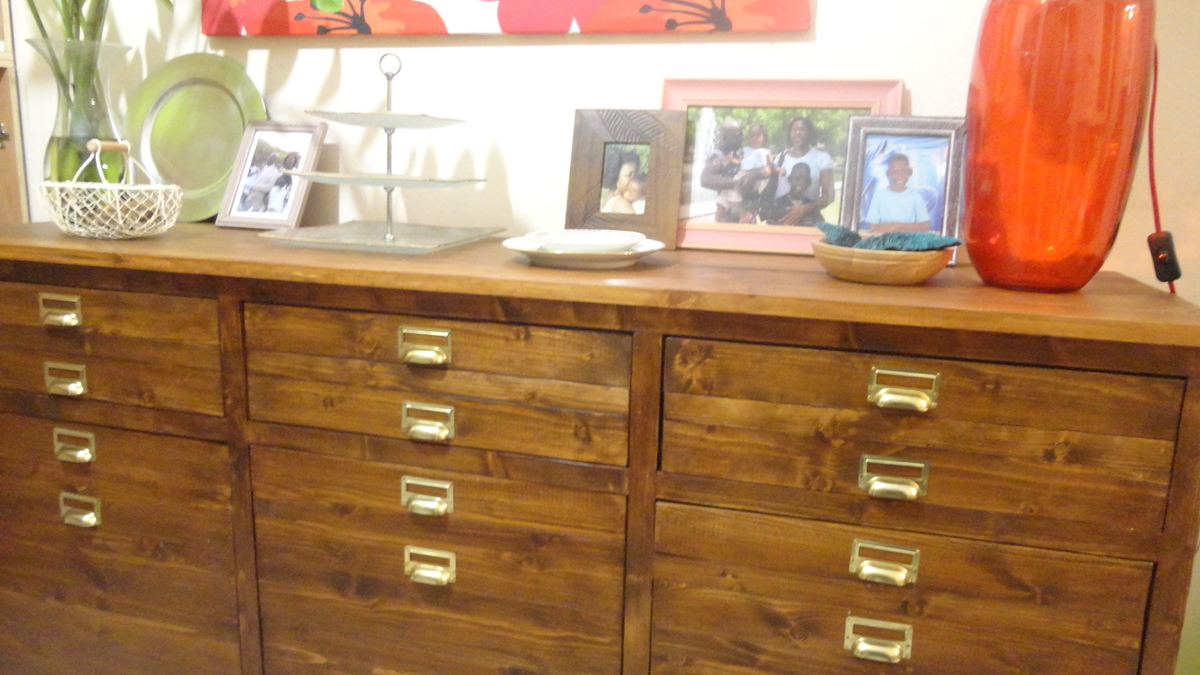
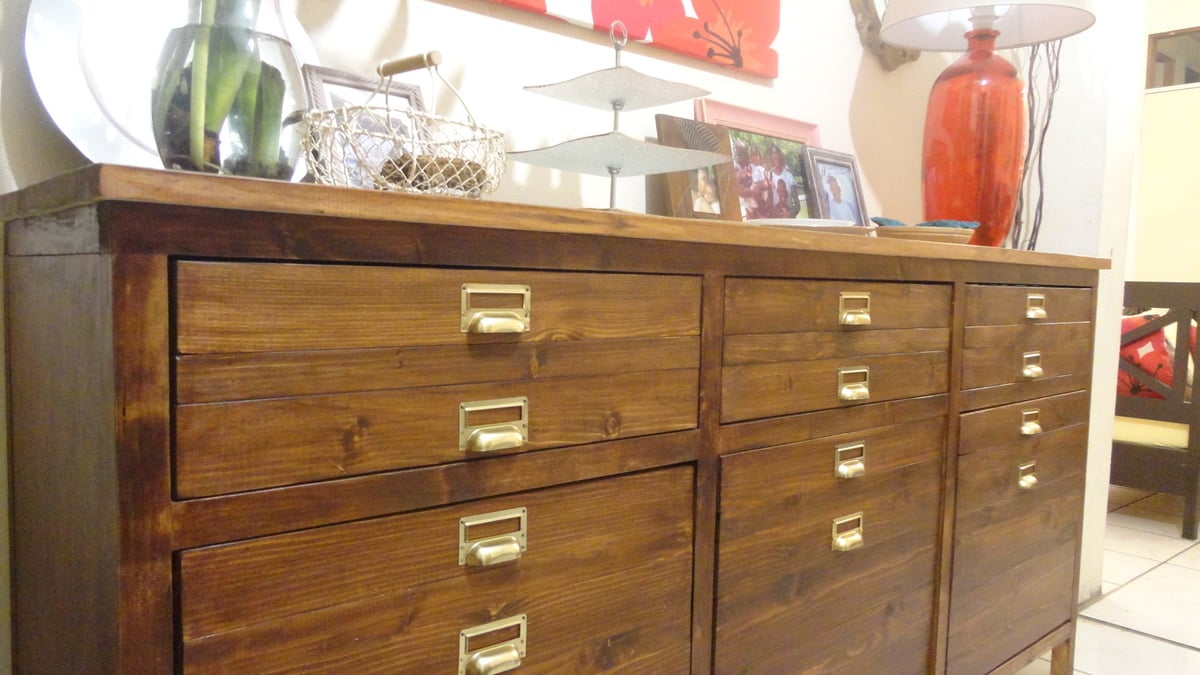
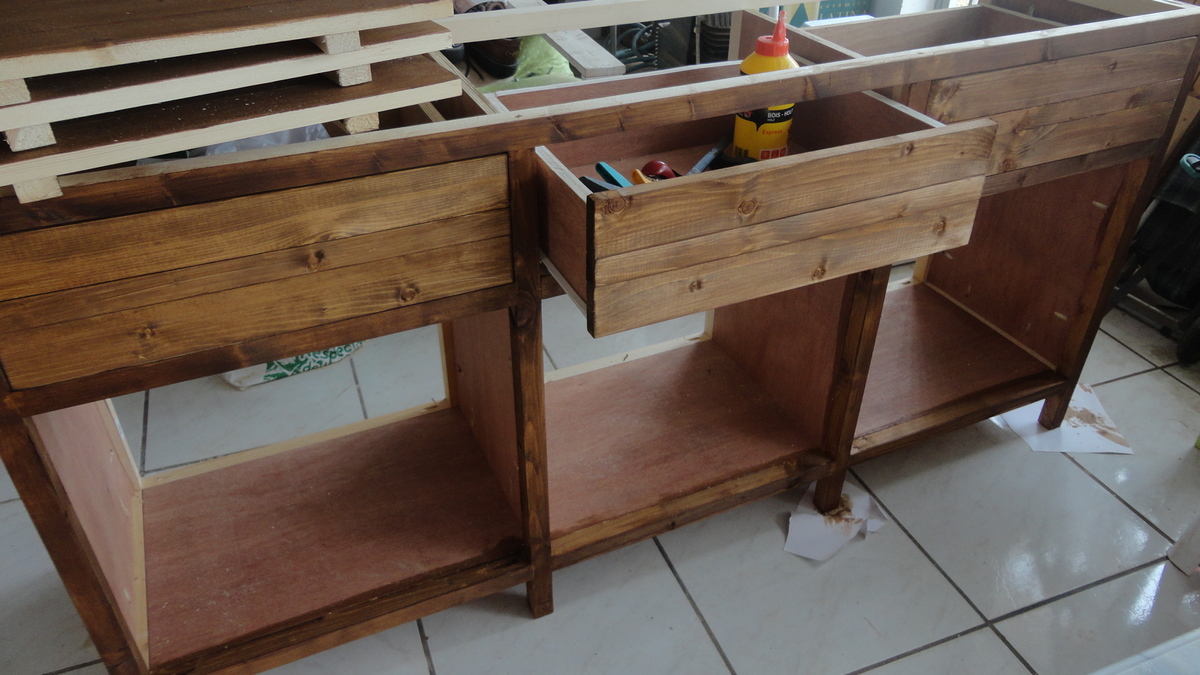
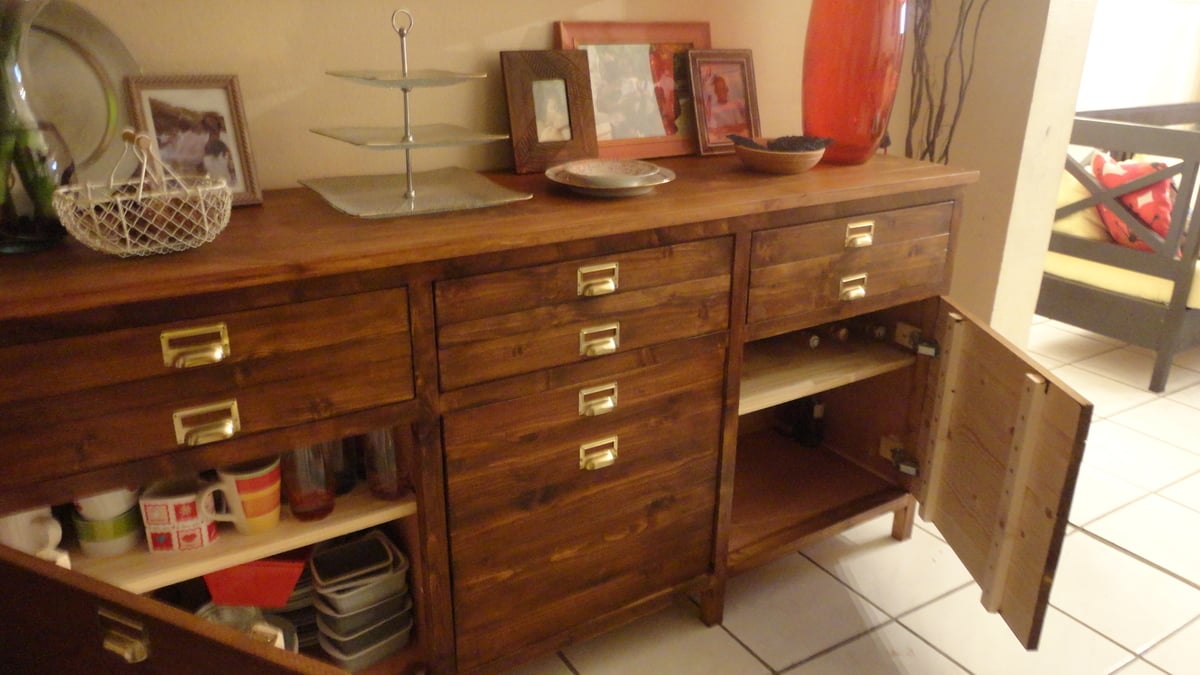
I built this console because I love it. I built the other printers console and when I saw this one, I decided to build it too. My house is not so big but I found a place for this console in the entryway.
It took me three weeks to achieve it. I was affraid drawers but now, I know I can do it. Thanks Ana and all of you because you inspire me!

Built from Plan(s)
Estimated Cost
250 euros
Estimated Time Investment
Week Long Project (20 Hours or More)
Finish Used
Dark Oak Stain and 2 coats of semi gloss Polyurethan Varnish
Recommended Skill Level
Intermediate
Back