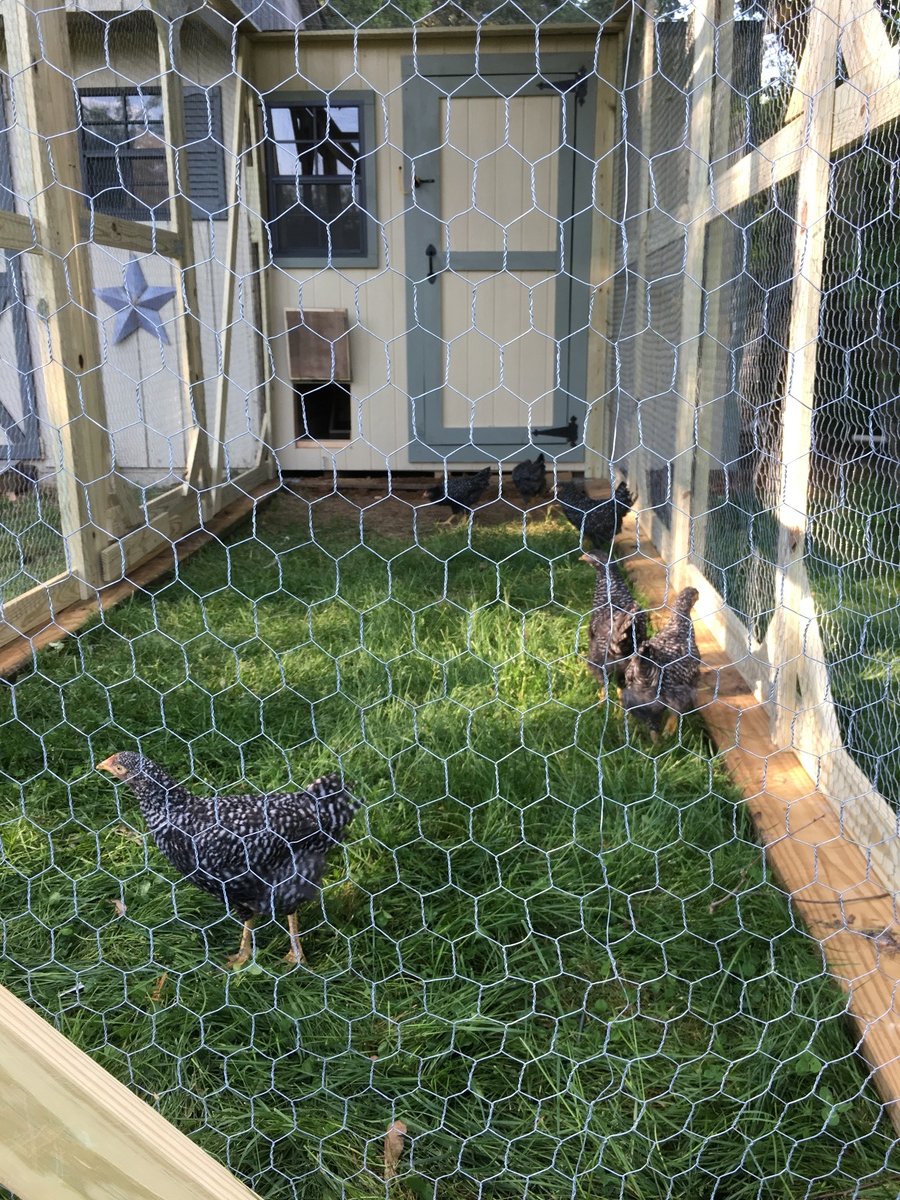
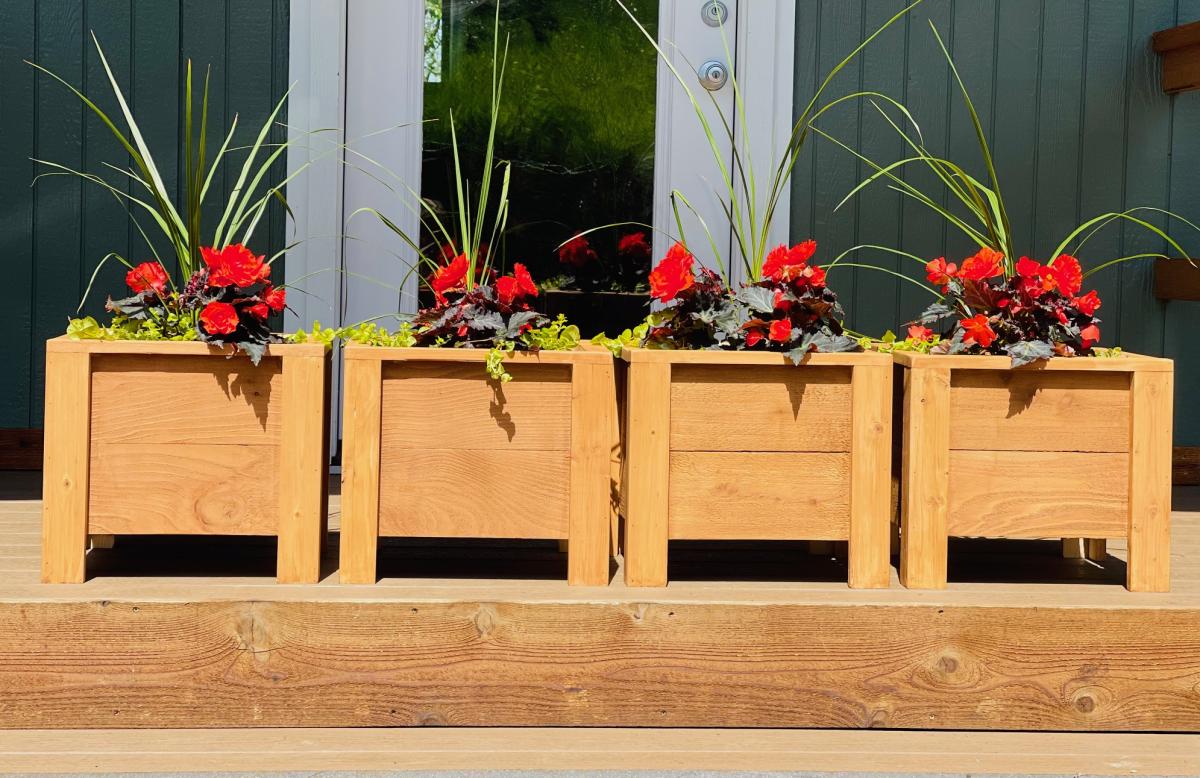
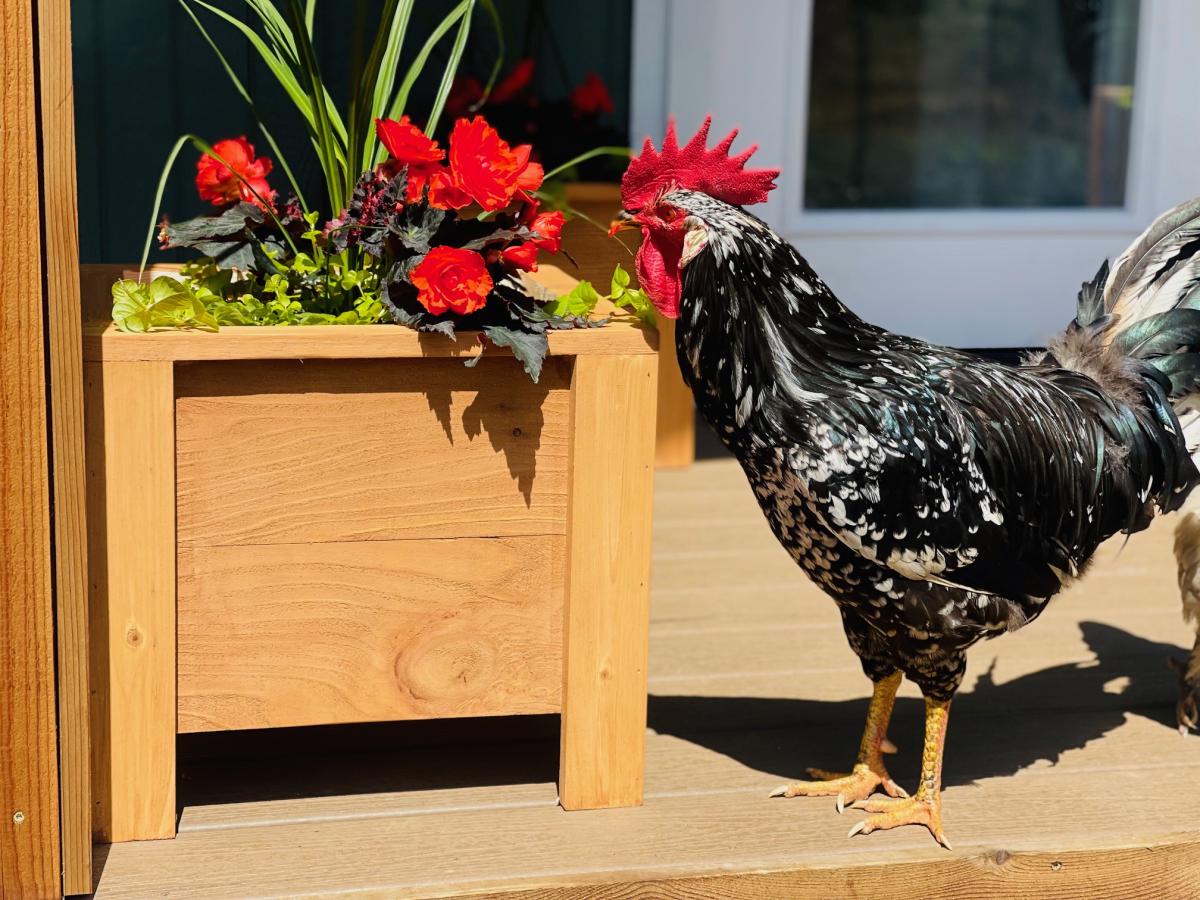
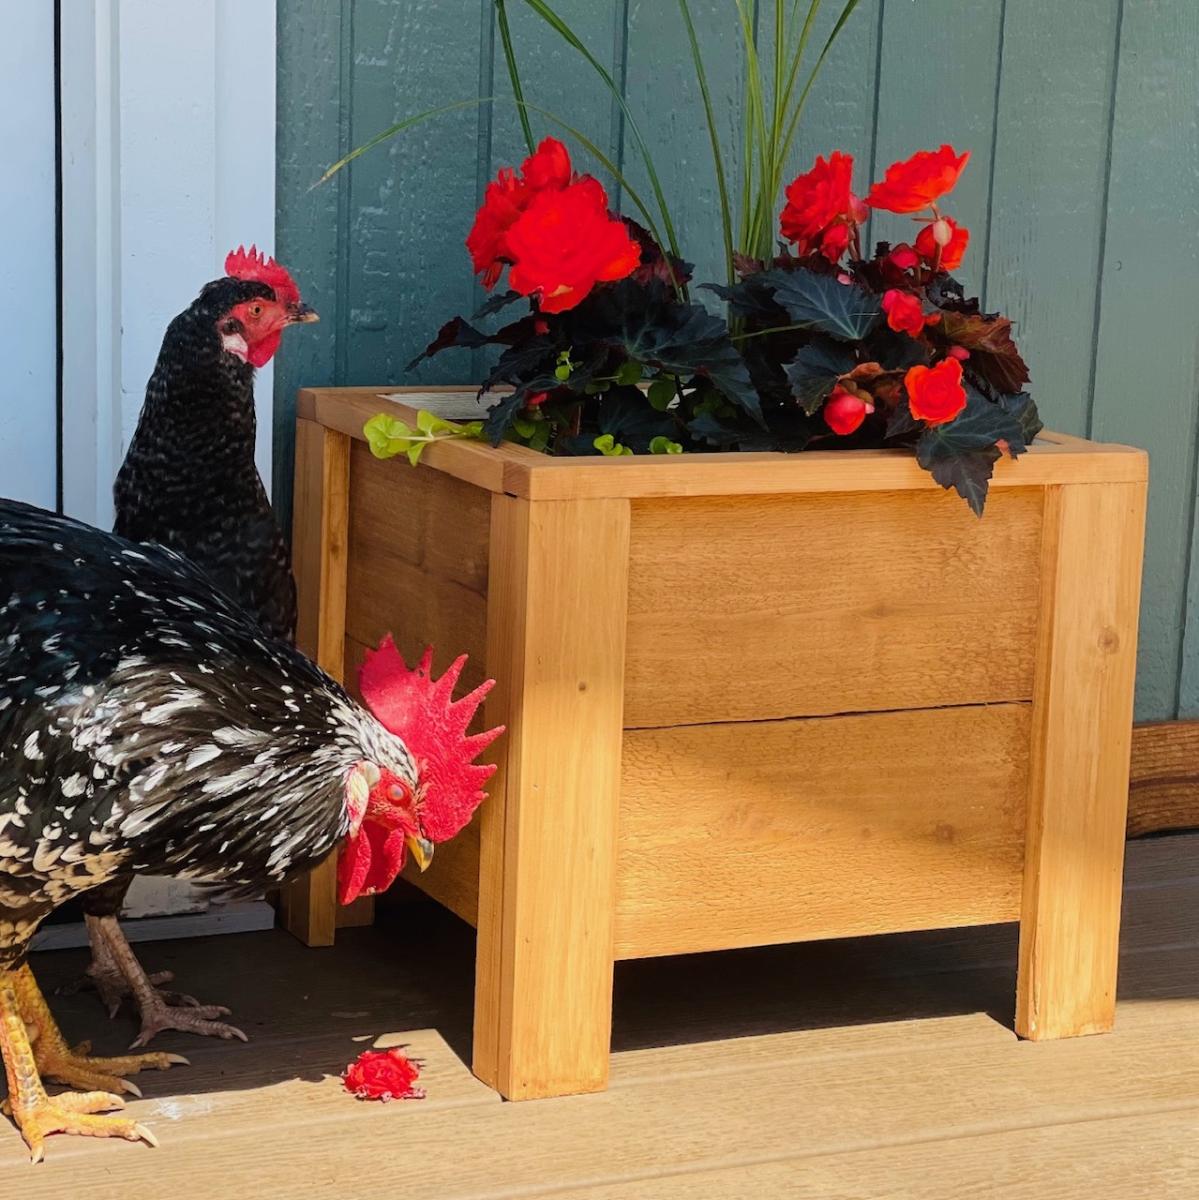
Chicken Coop
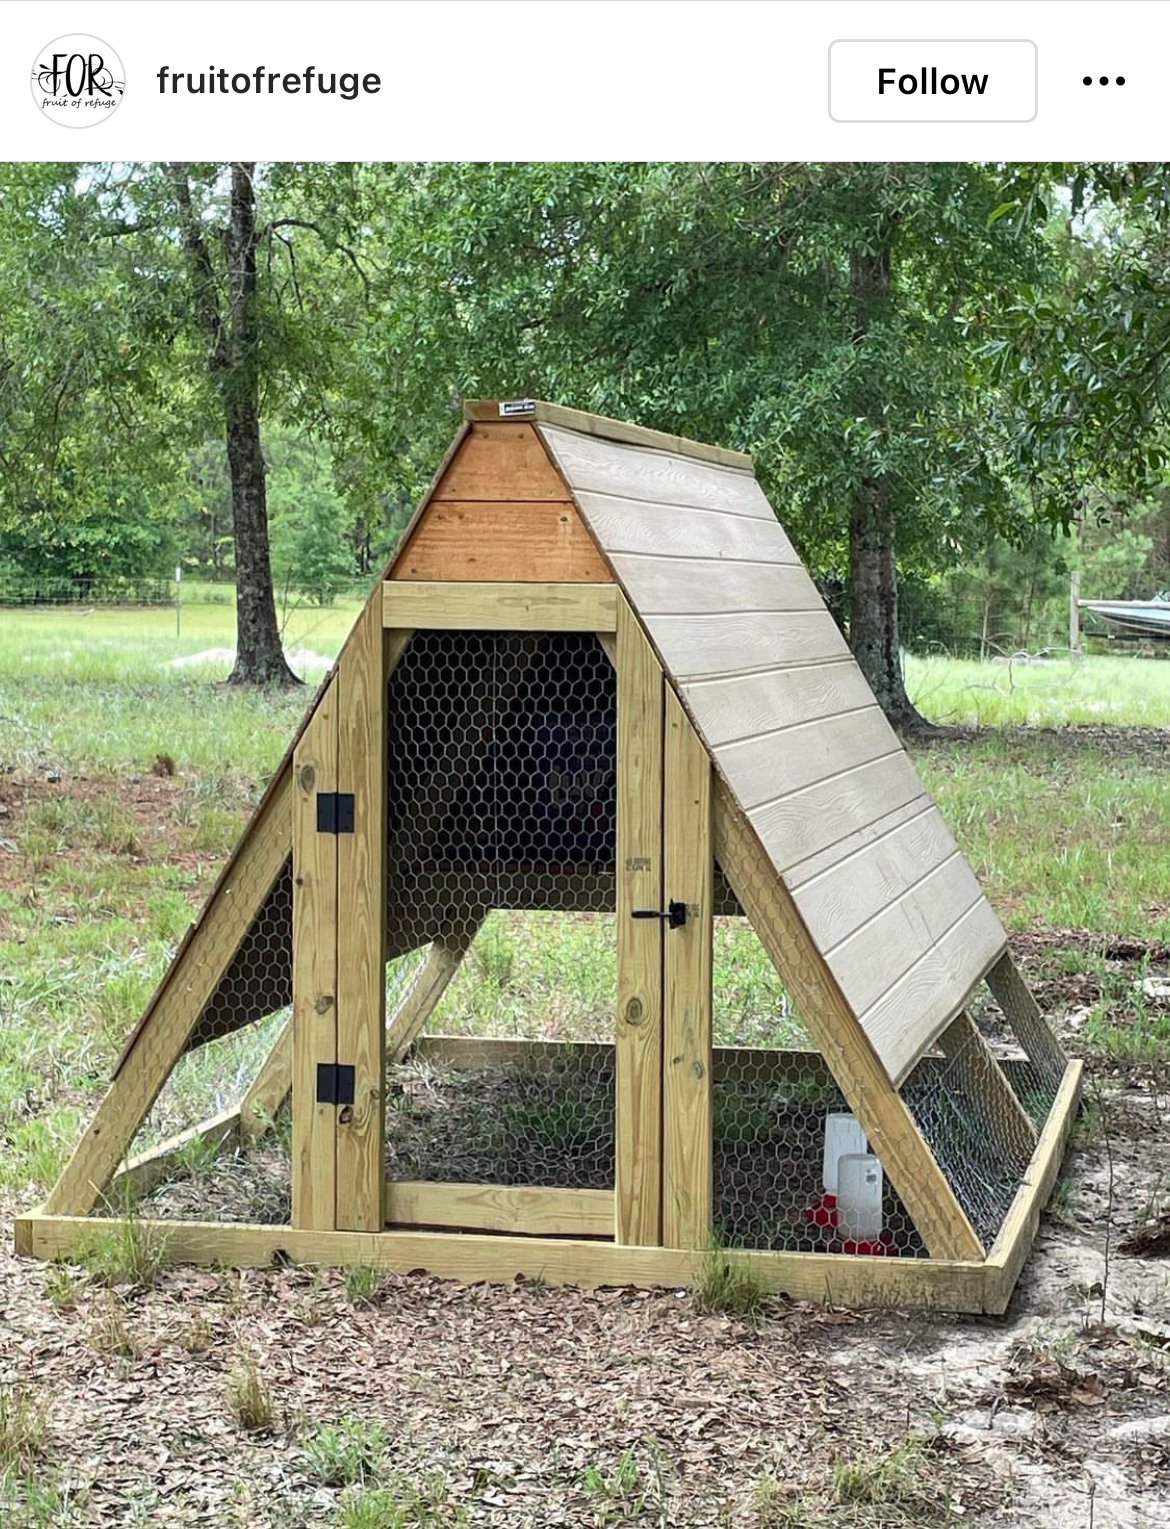
Great for a small flock of 5 or less.
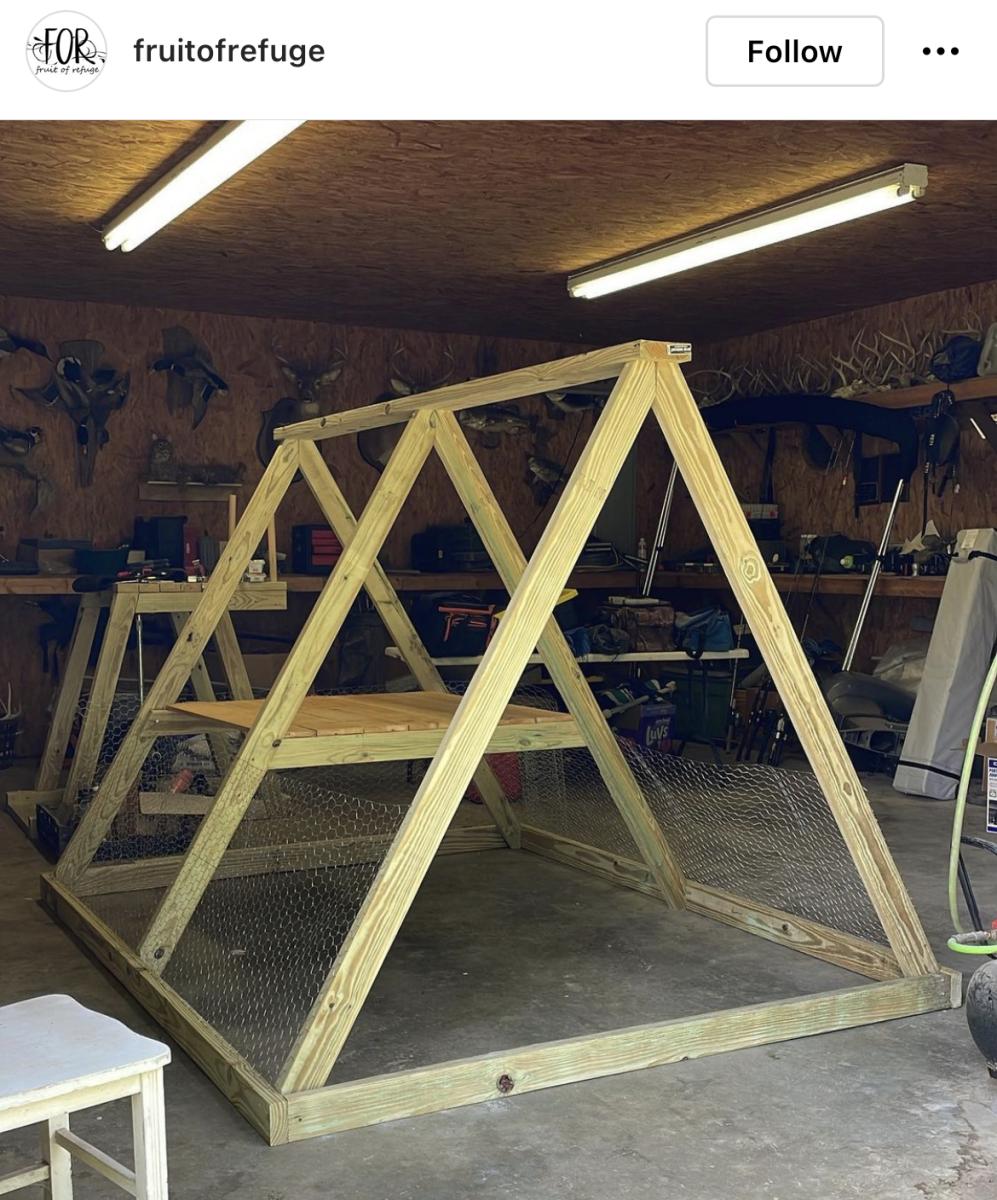
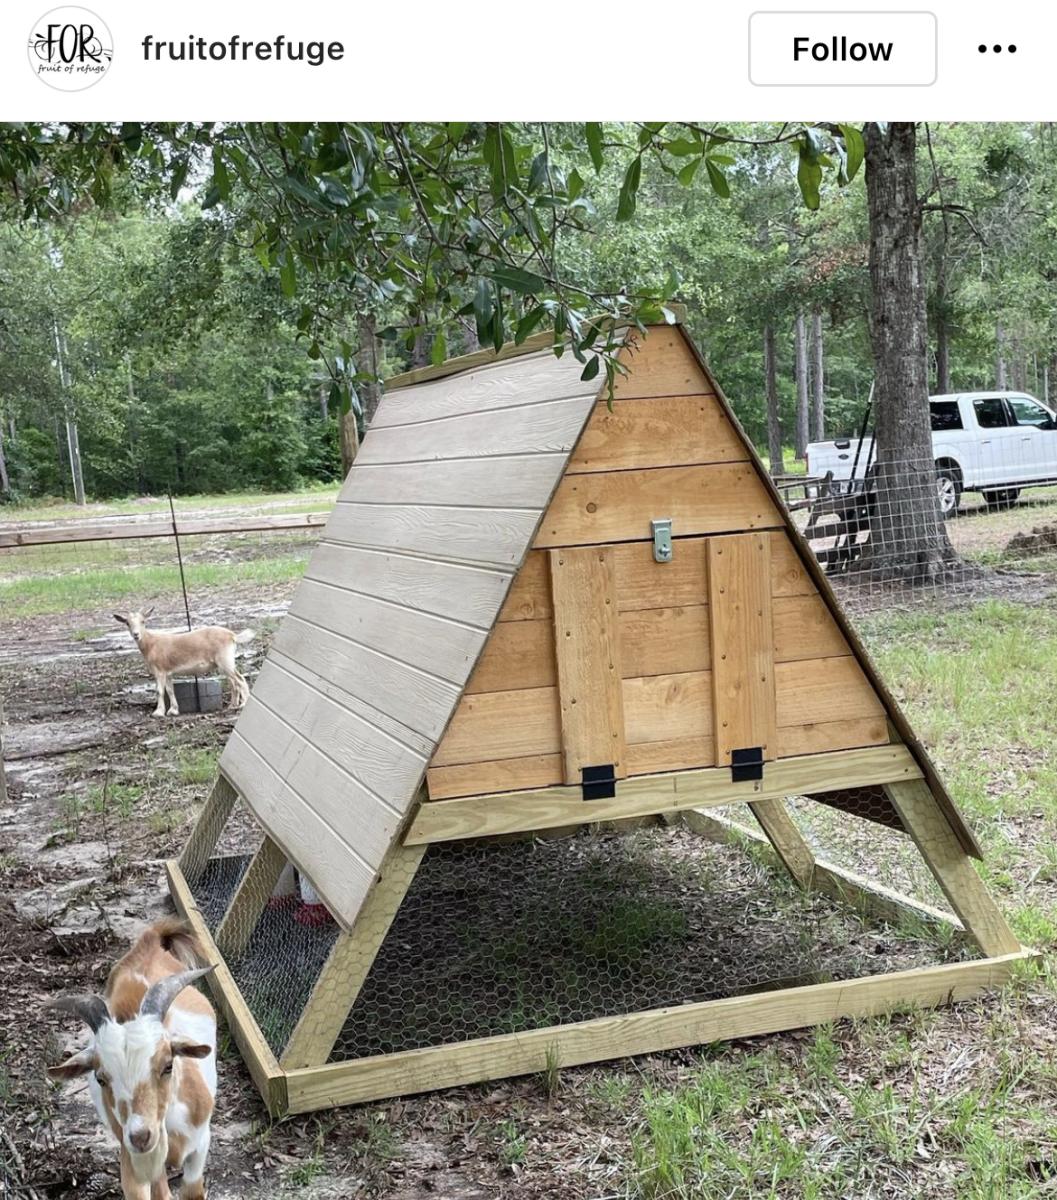

Built from Plan(s)
Great for a small flock of 5 or less.
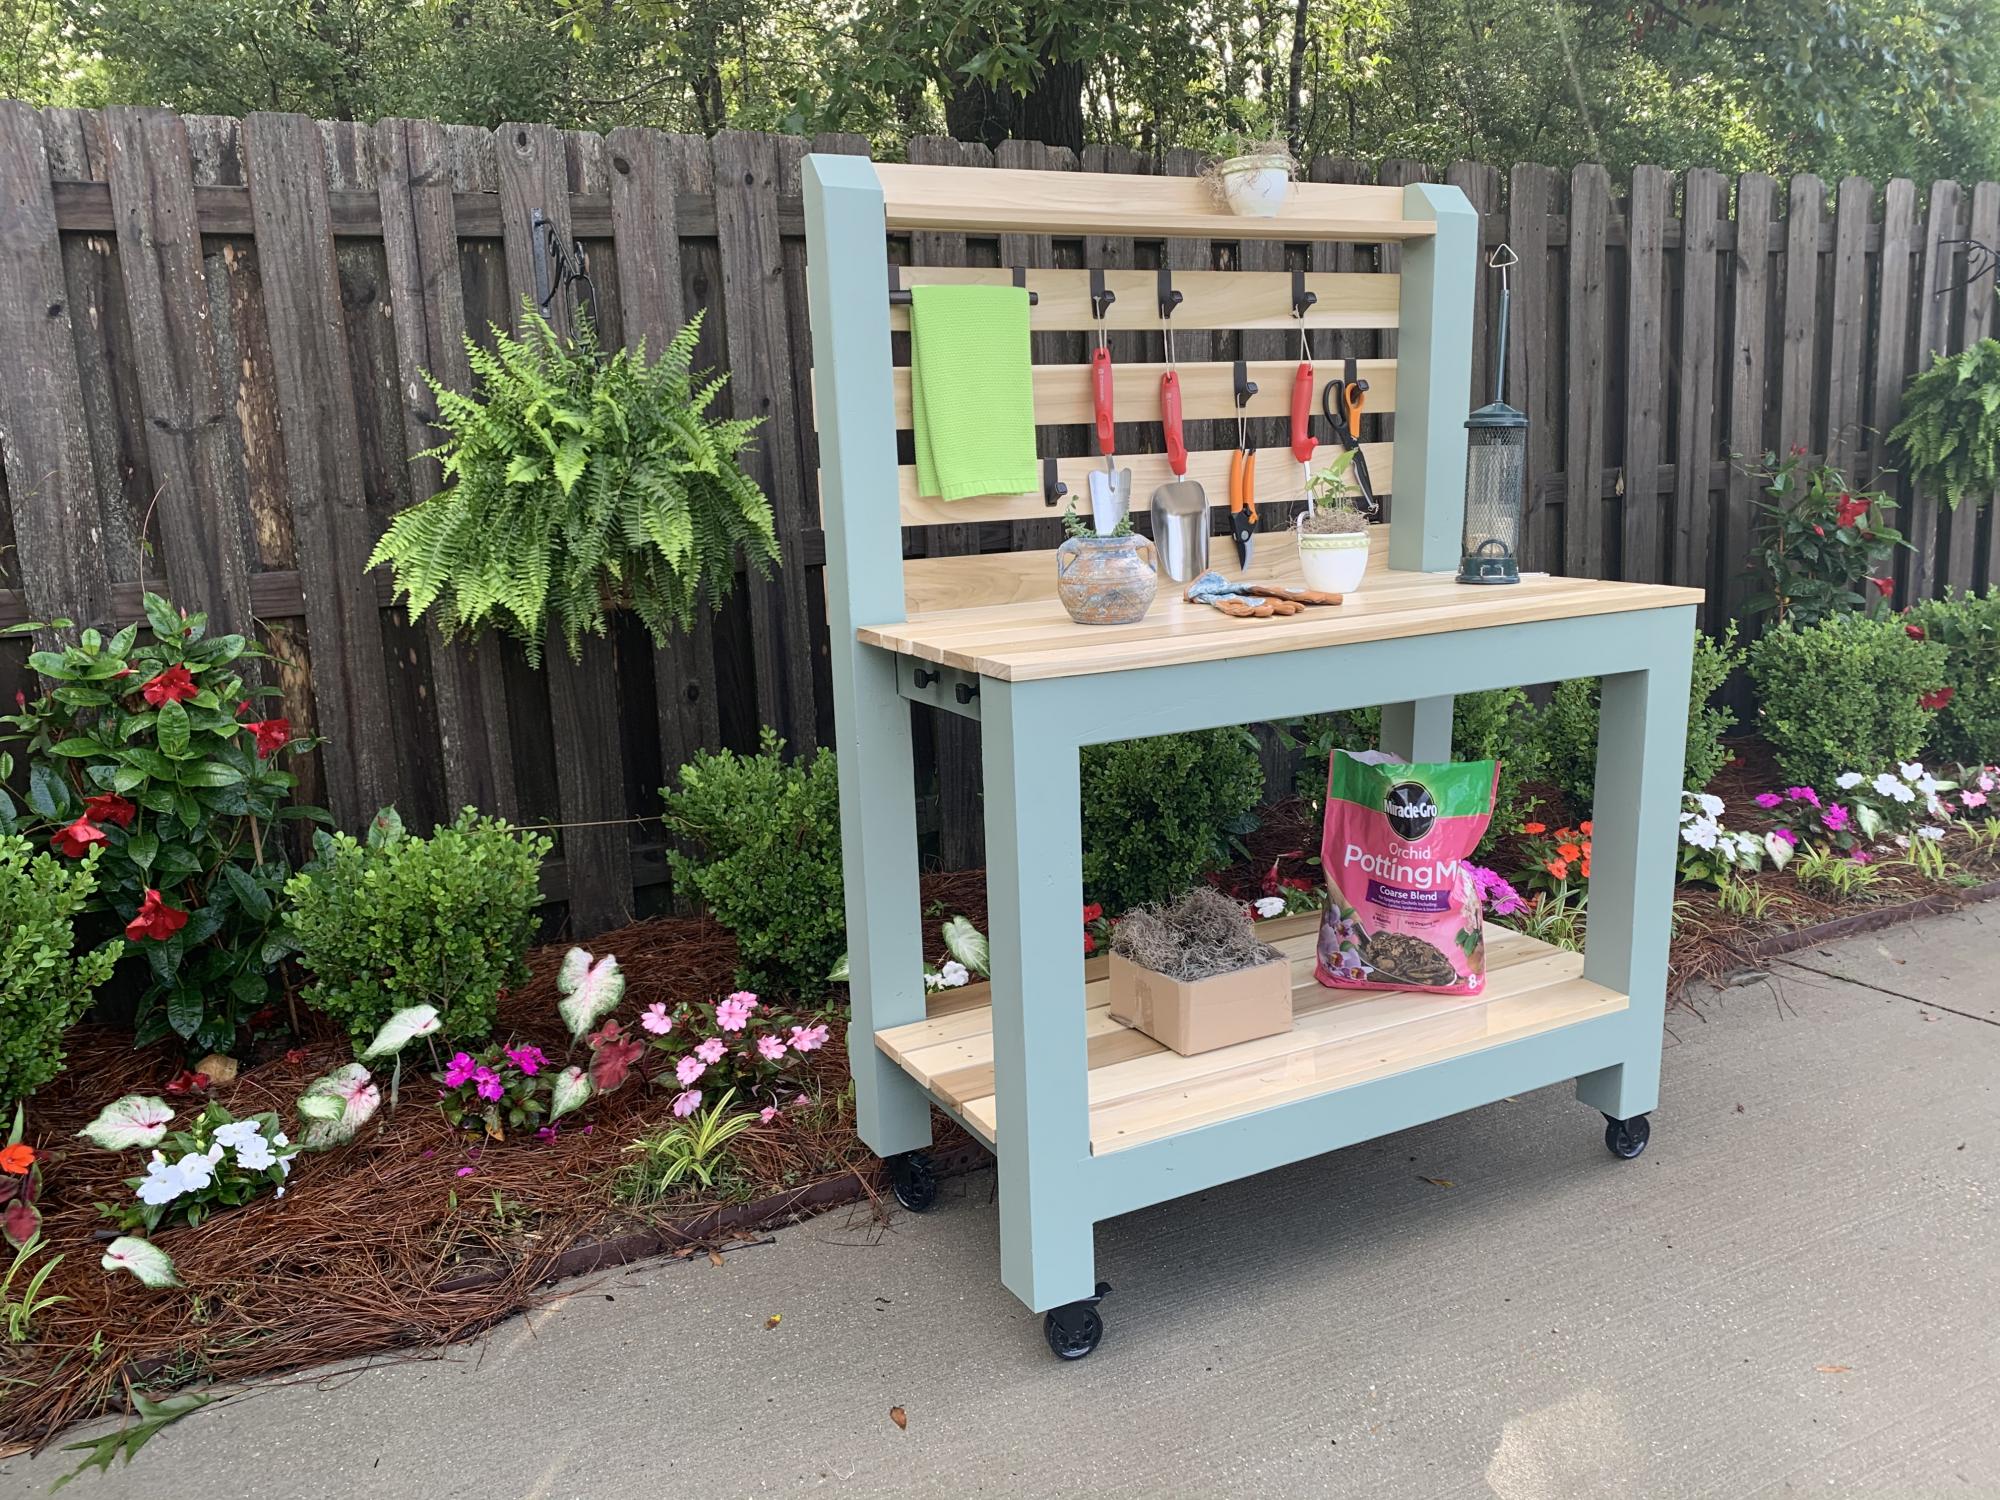
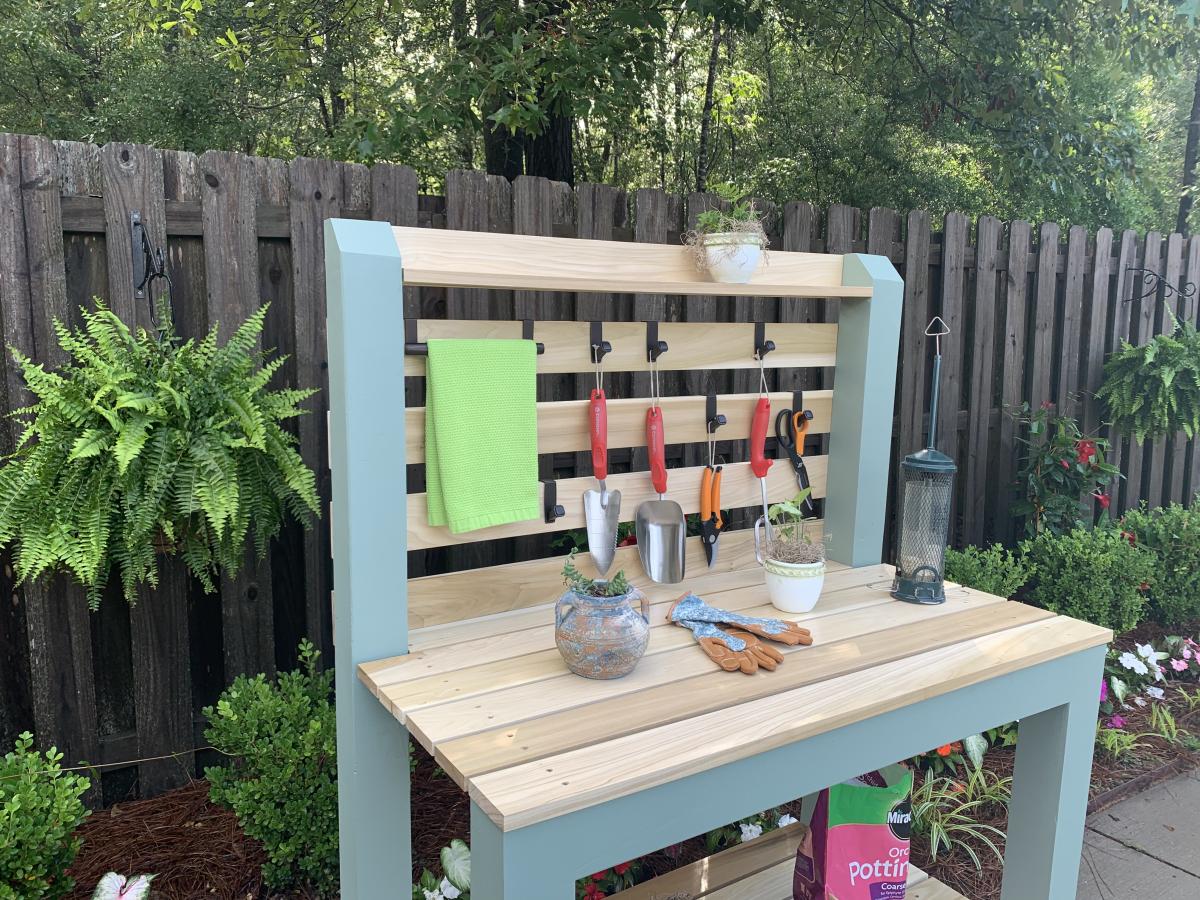
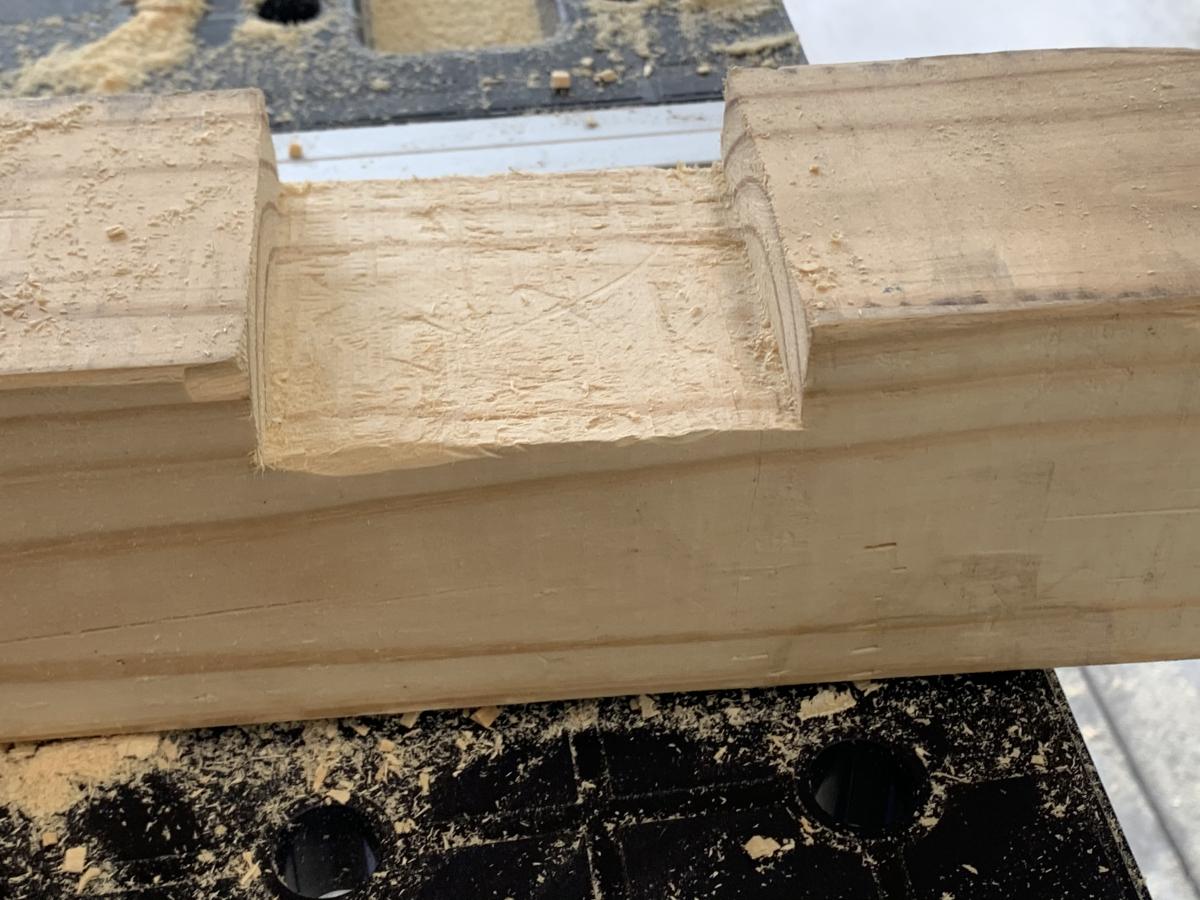
I was intrigued by Ana’s Simple 2x4 Potting Bench. The project seemed simple enough and it would be used as a means to clean up clutter in the garage. My main focus was to make it semi-portable and weather resistant. Instead of using 2x4’s for the corner posts, I used 4x4’s to accommodate casters. I also shorted the length of the posts by 4 inches to compensate for the height of the casters. To provide extra rigidity I did a dado for the 2x4’s that connect the front and rear legs. In retrospect, I wish that I did not dado the legs because it made it more difficult to attach some of the shelf planks. I painted the frame green and left the shelves and backboards clear for beautiful contrast. My wife is ecstatic with the result.
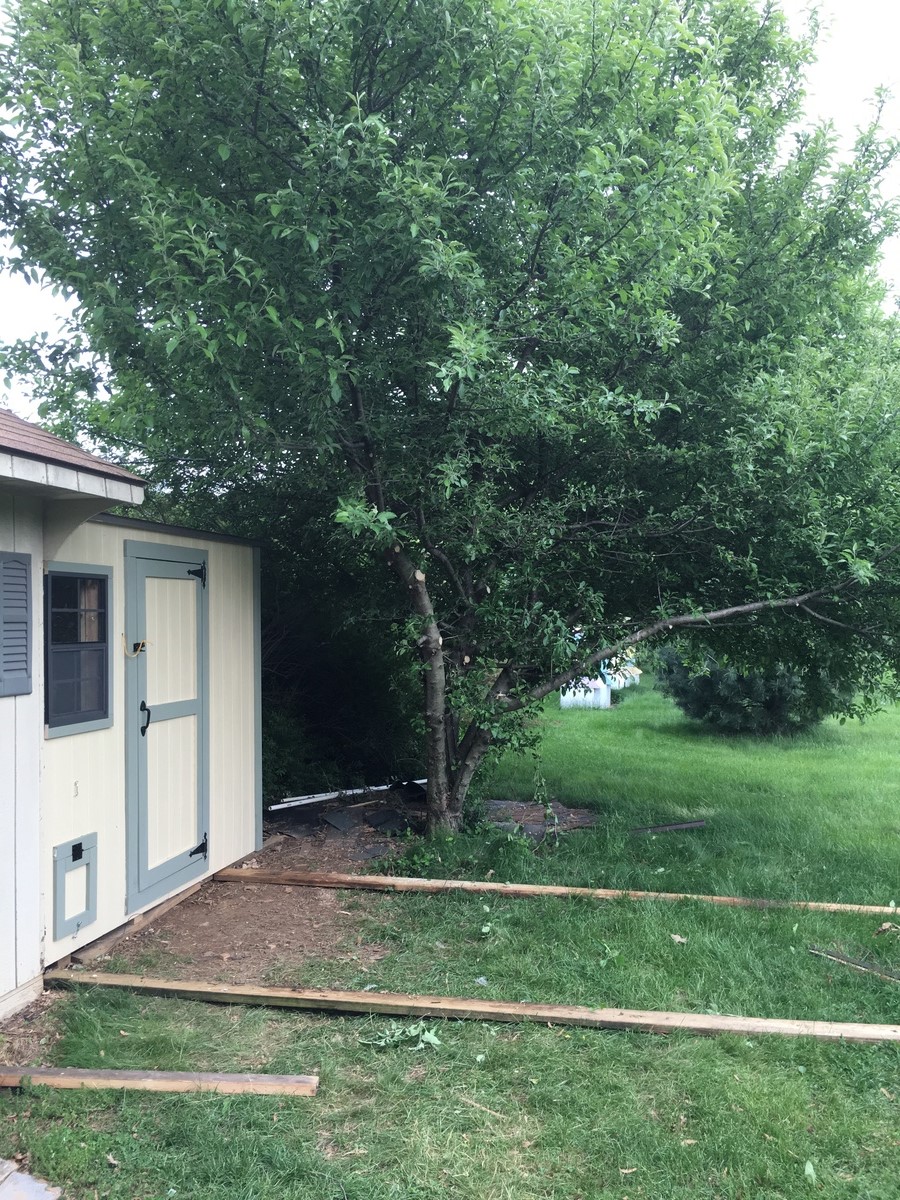
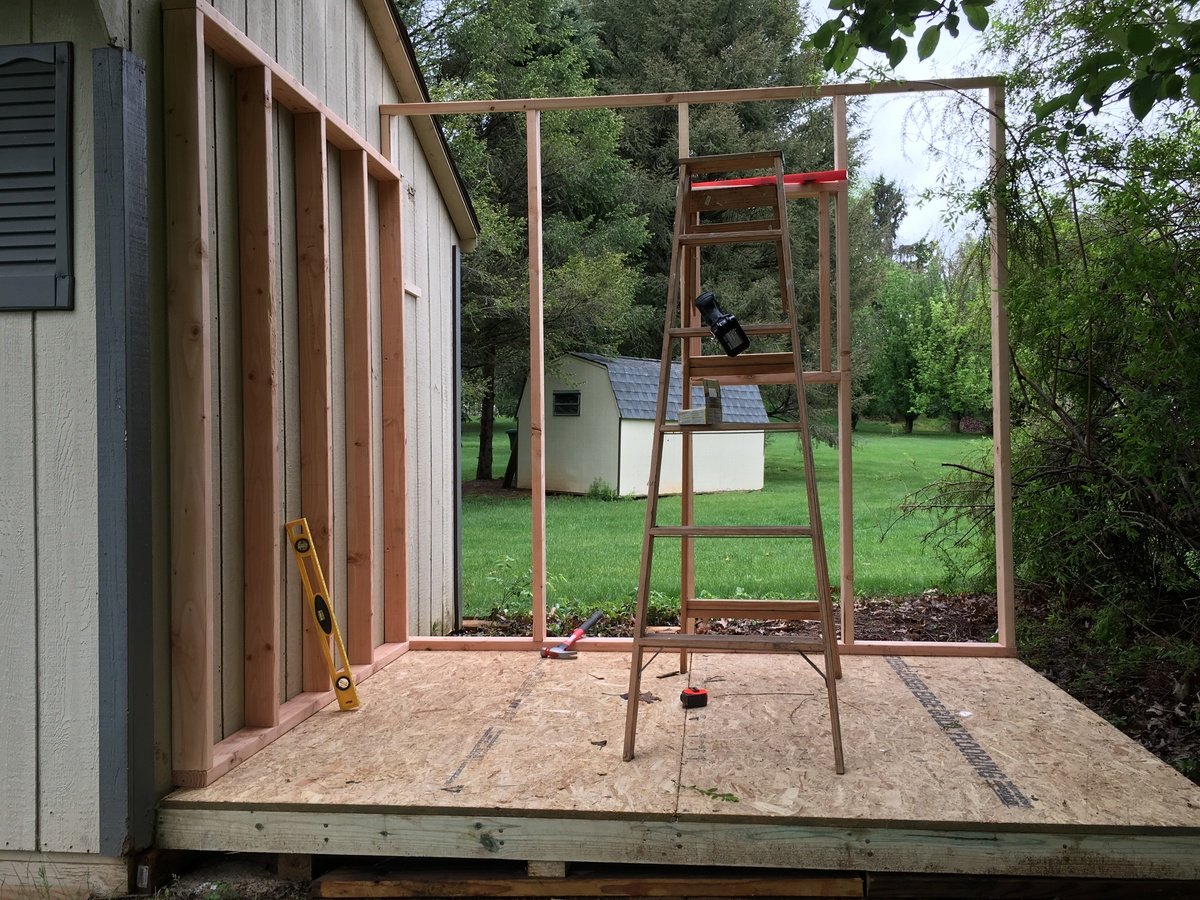
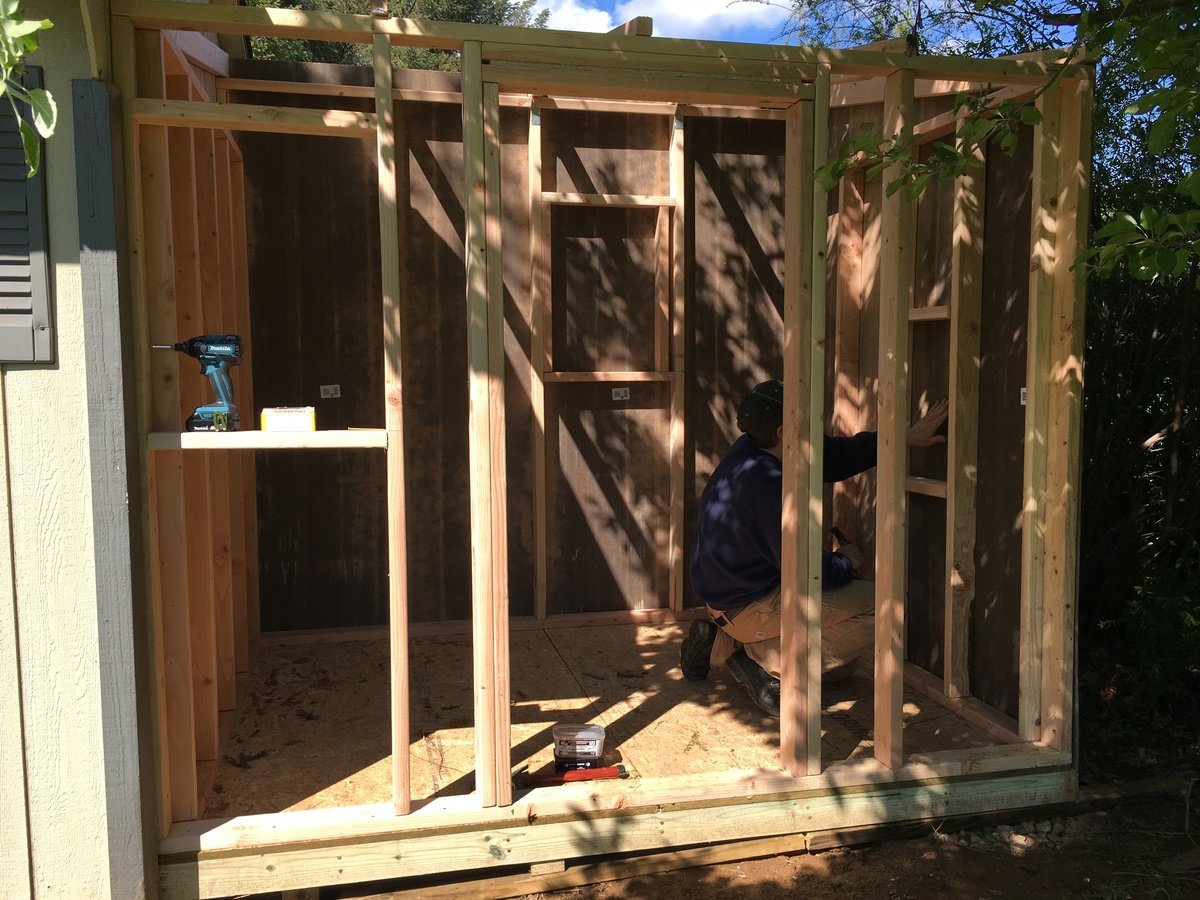
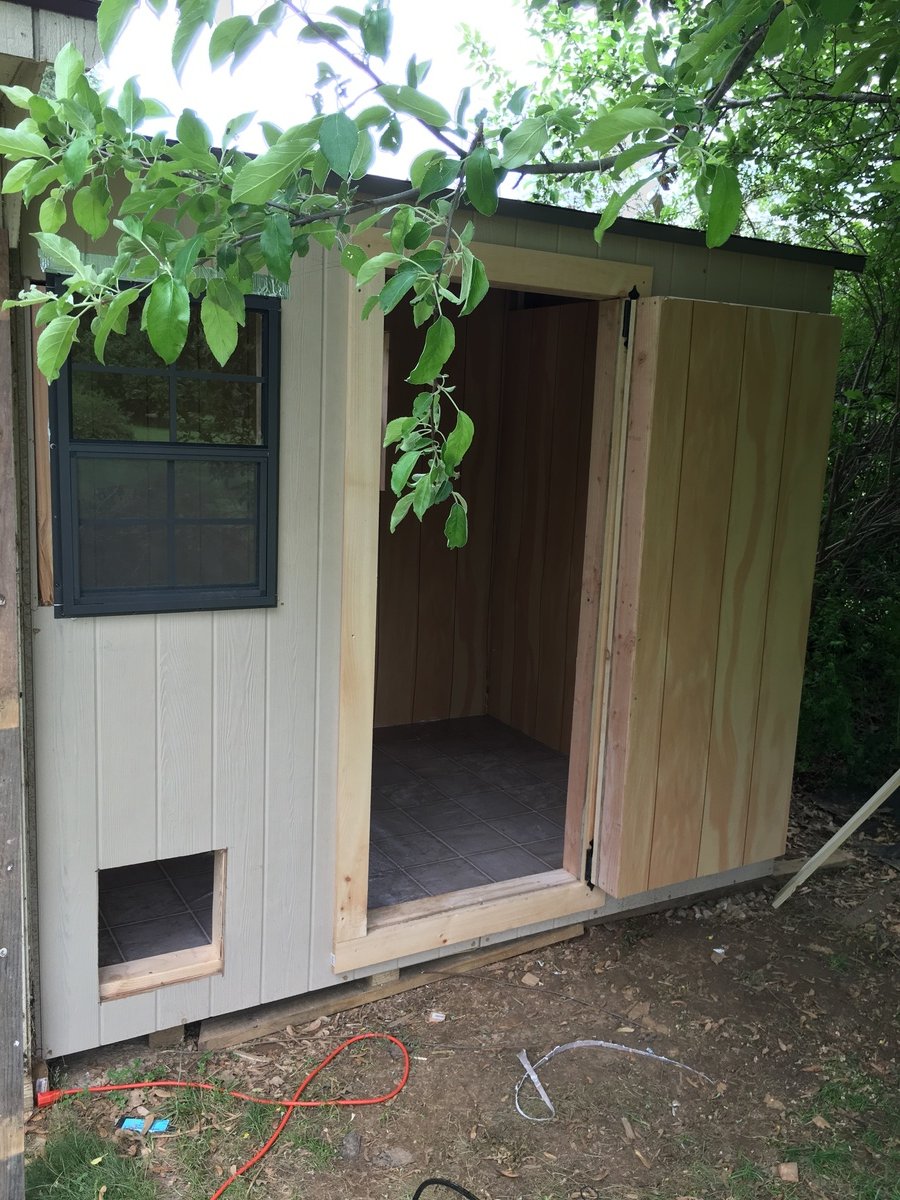
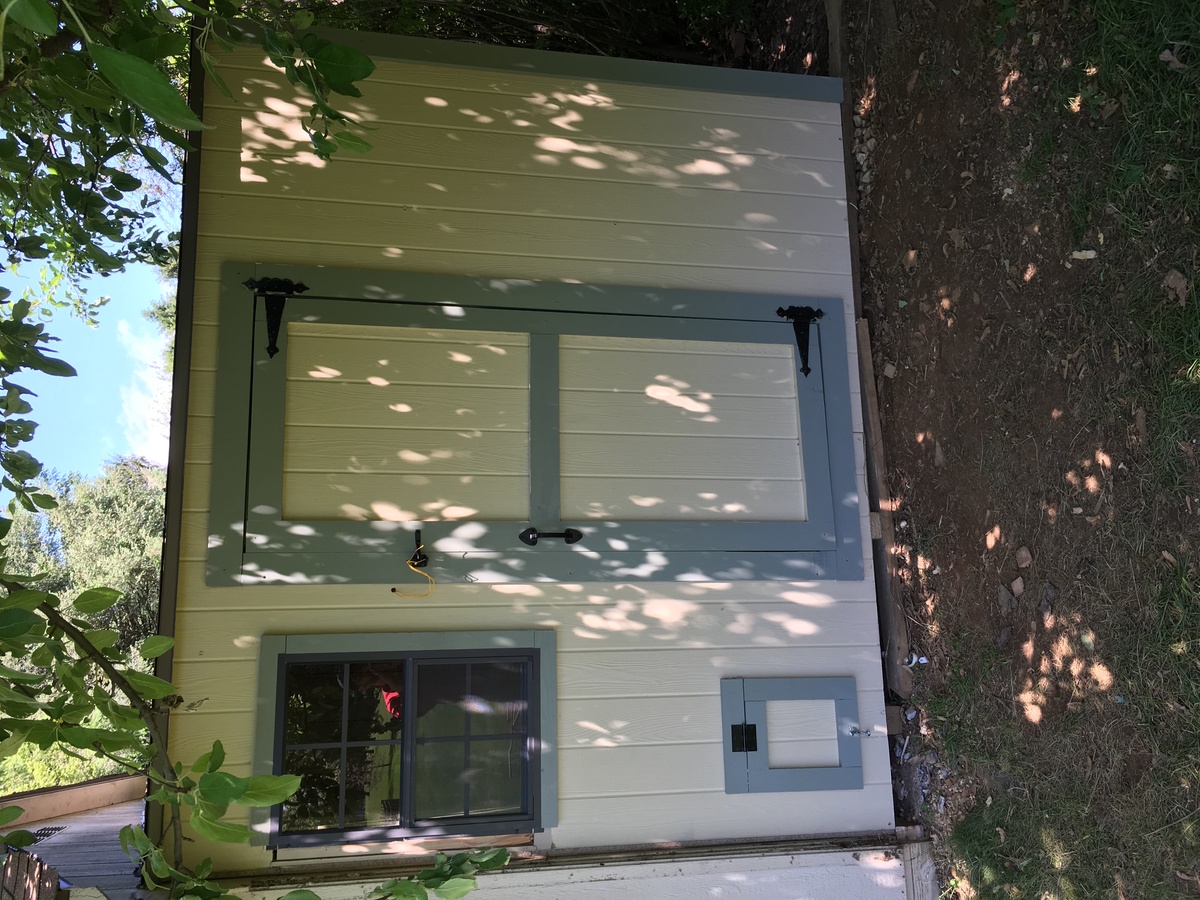
The project was used using the same plans but I extended the floor to be 6 feet wide vice 4 feet the additional 2 feet provided the perfect amount space I wanted. I also added an extra windows to get cross ventilation. I also insulated the coop and put paneling on the walls and lenolium on the floors. I dropped the back wall sheeting 1.5 inches for additional airflow since the shed doesn't have a ridge vent. The plans are easy to follow and easily adaptable.

Thu, 07/02/2020 - 11:29
Great job! We are getting ready to build a coop for our chickens which arrive in 3 weeks!
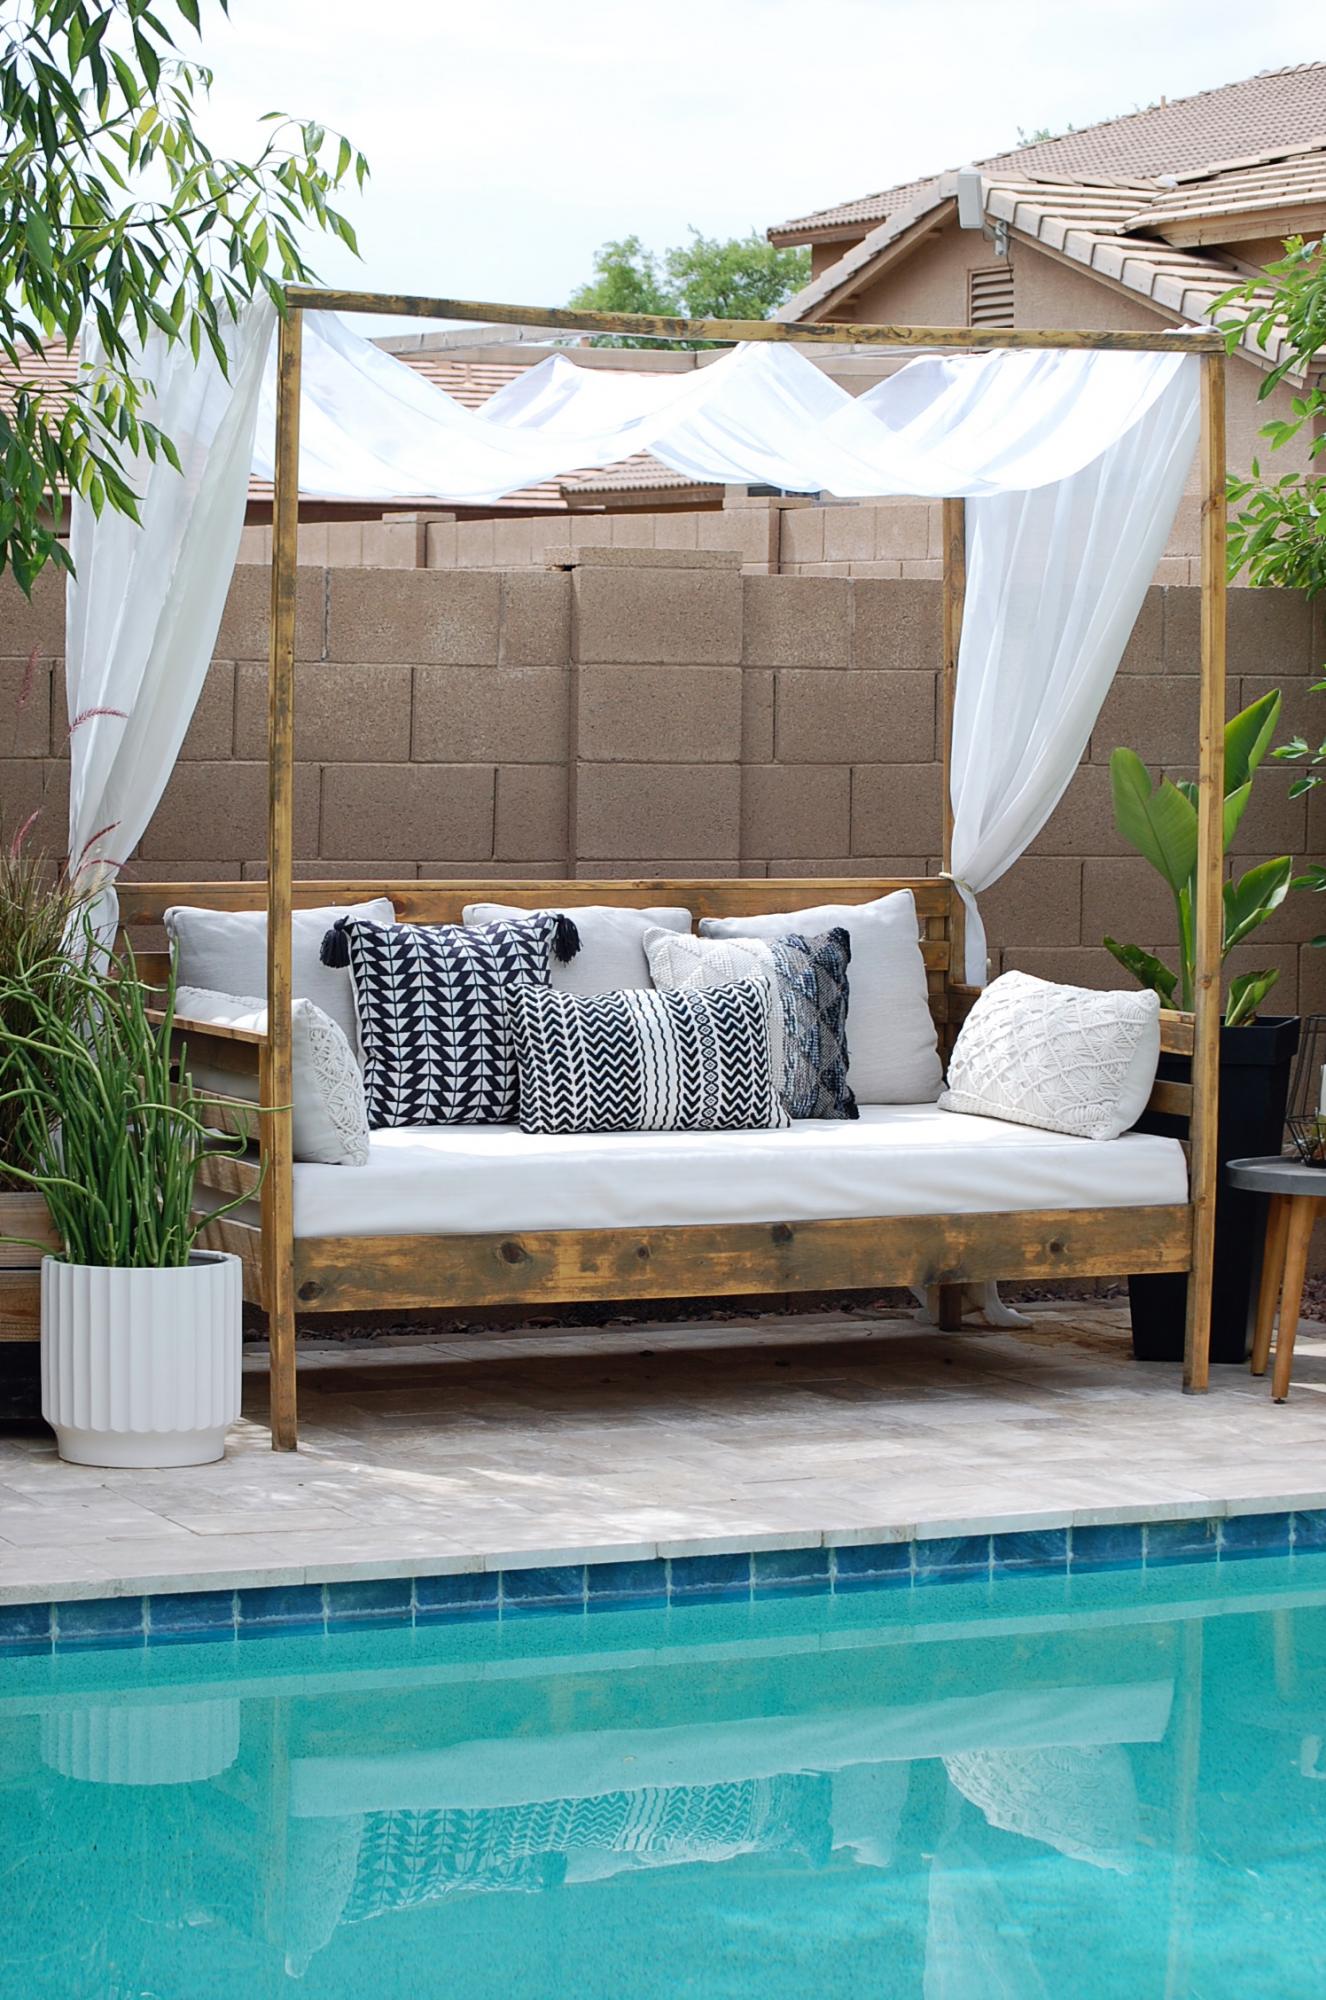
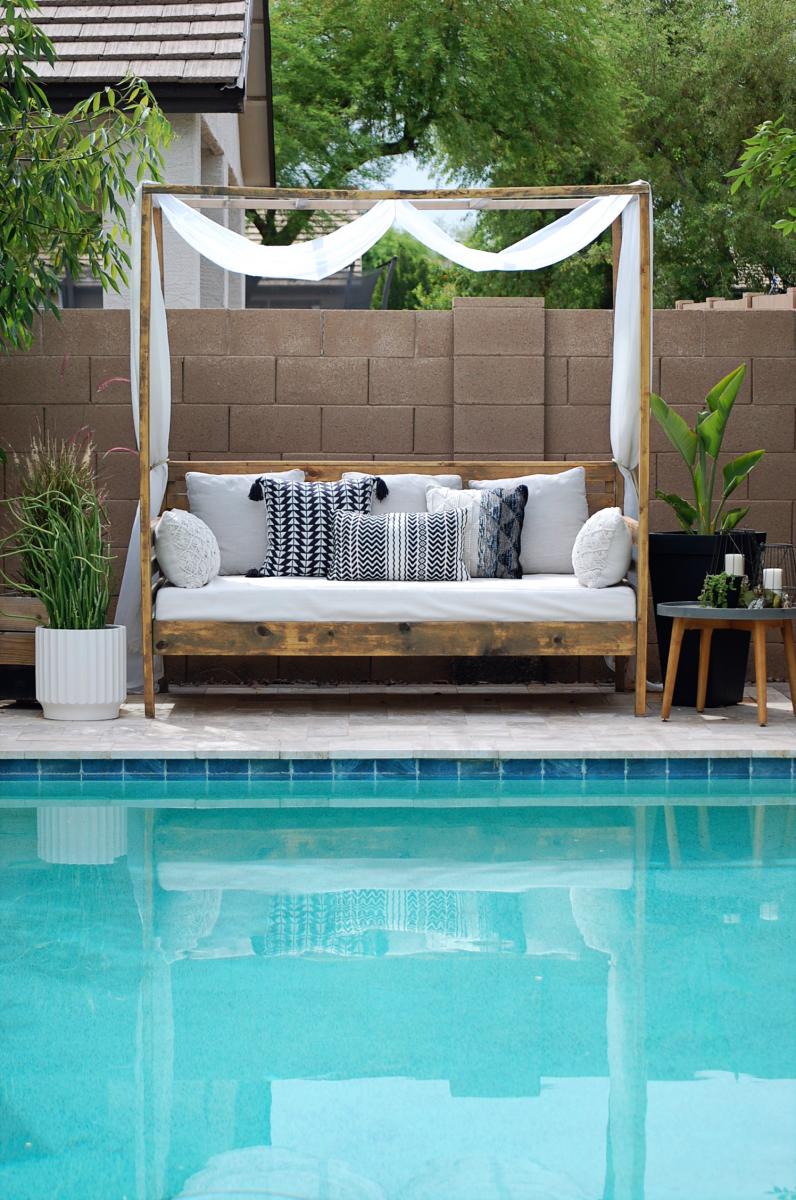
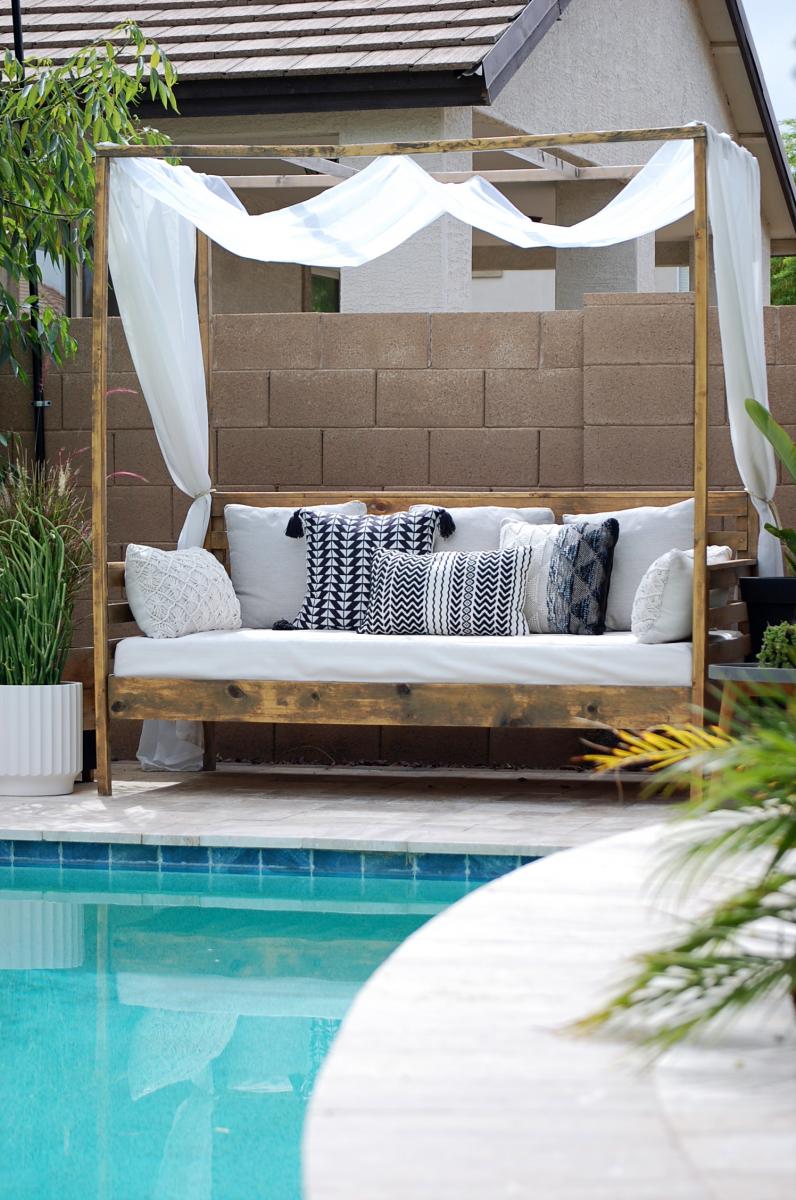
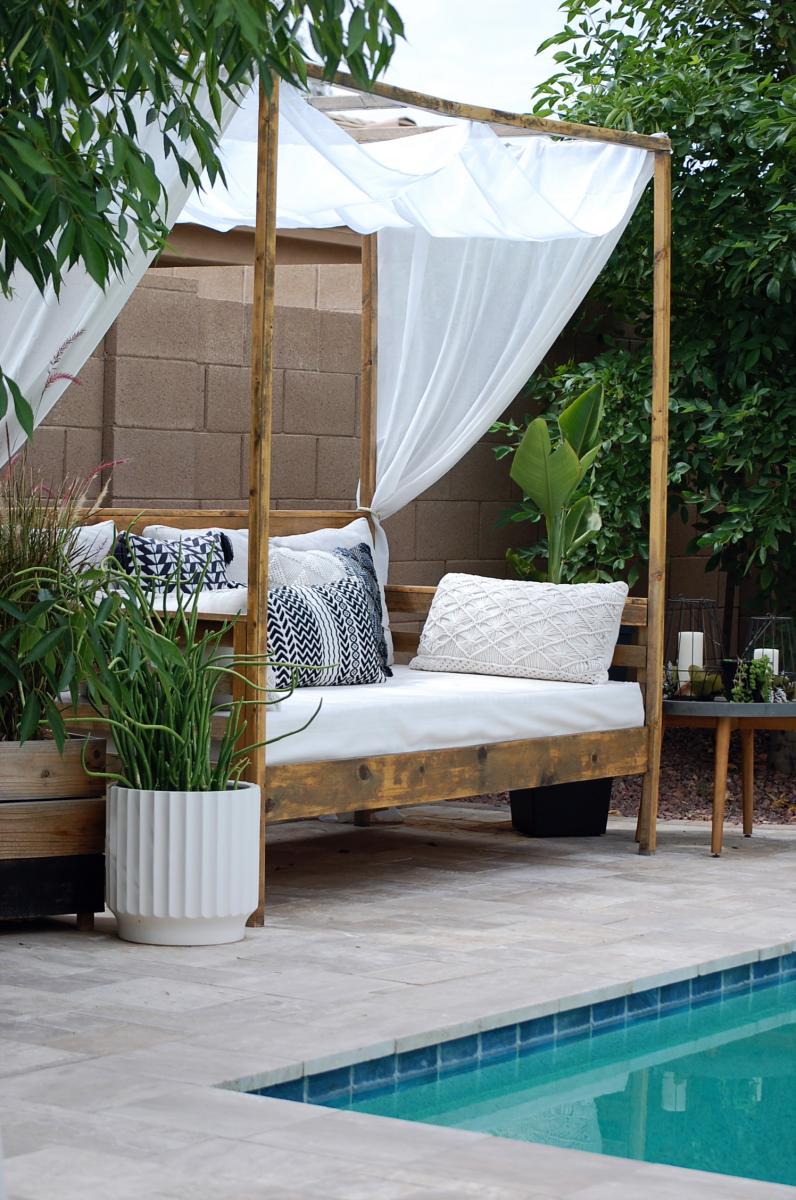
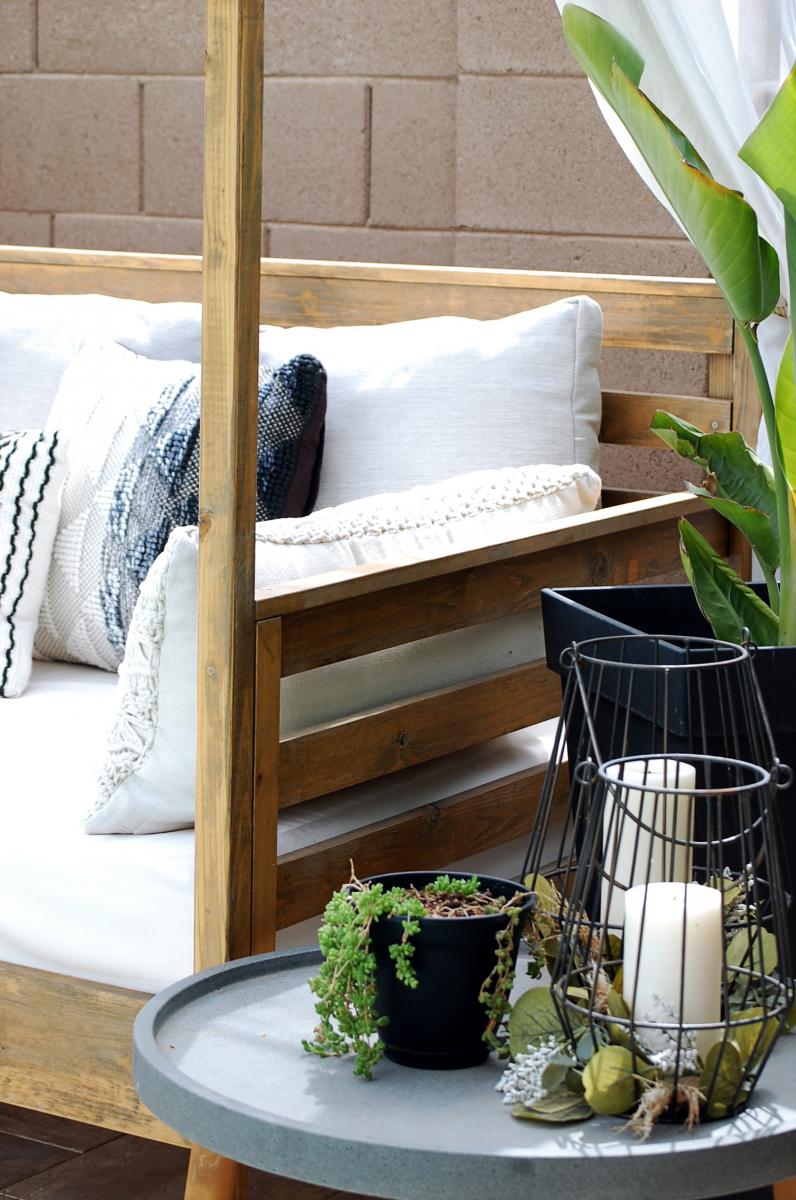
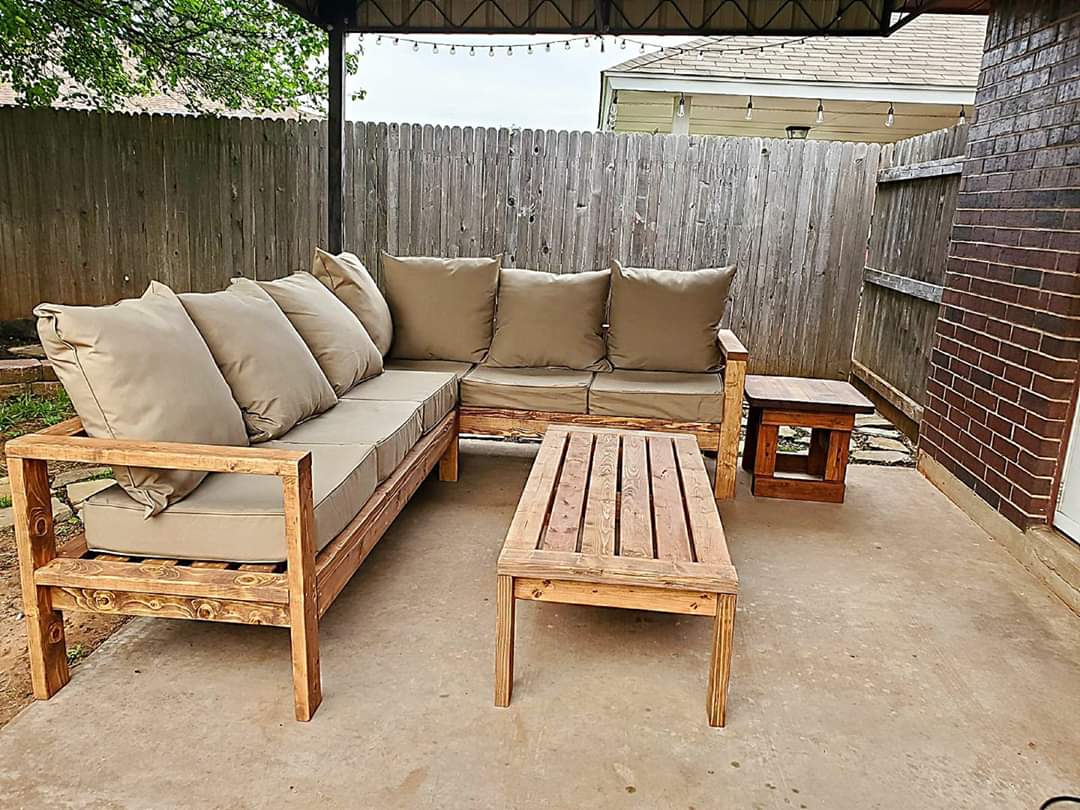
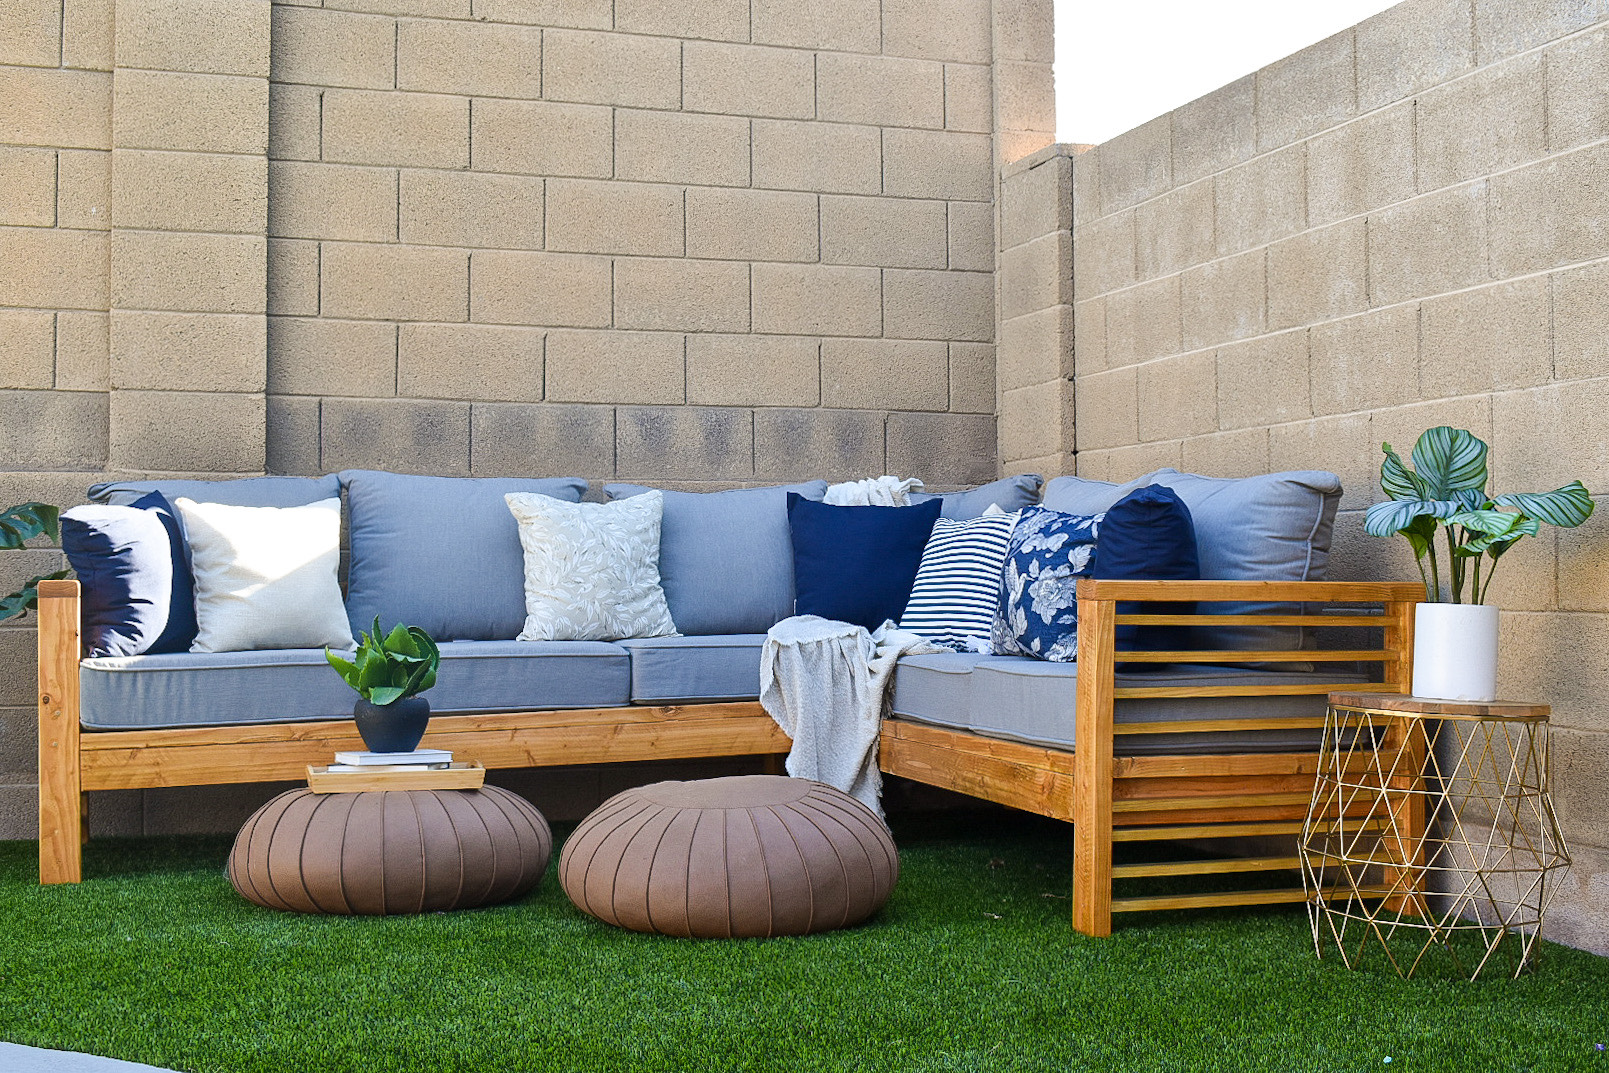
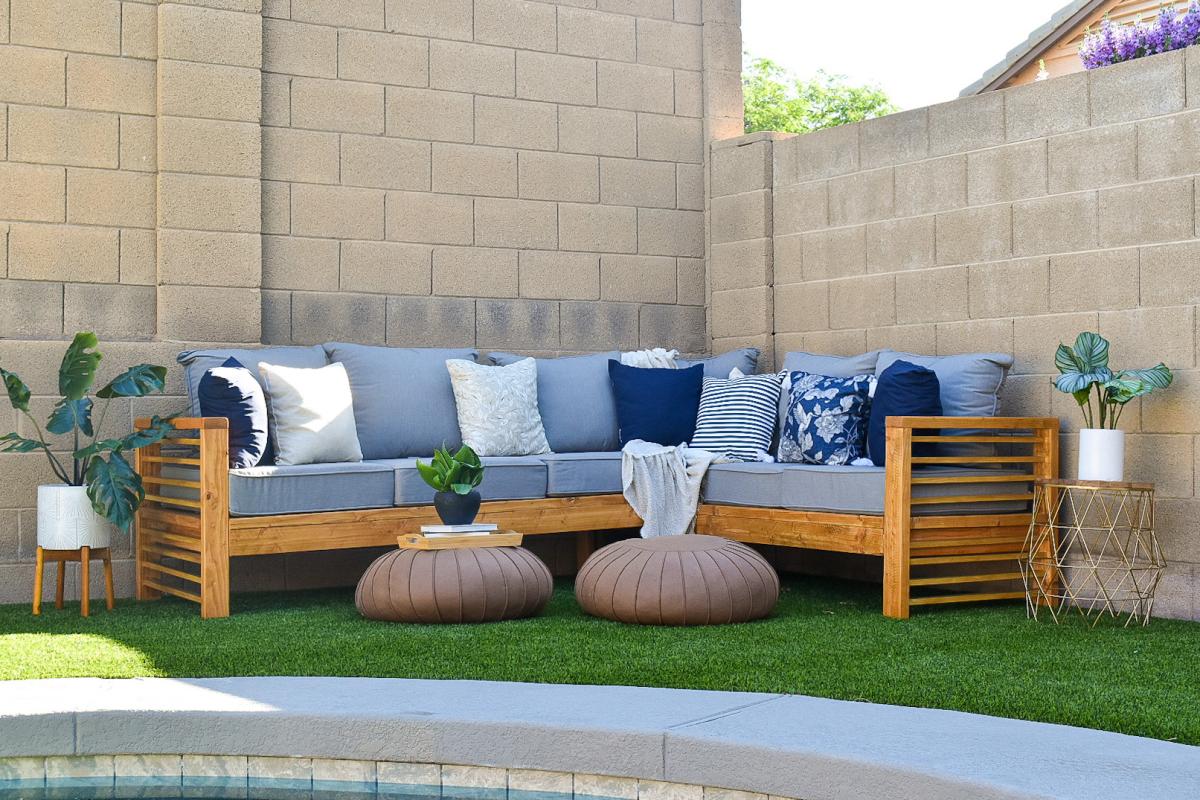
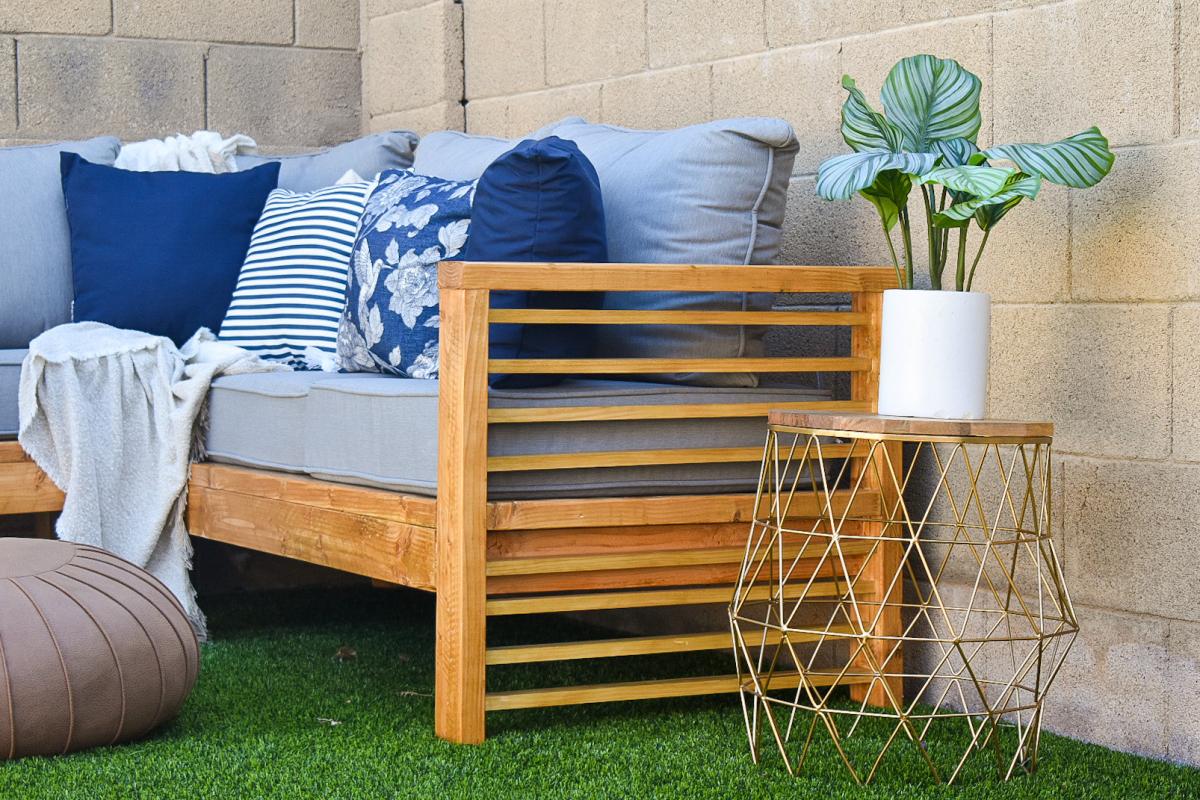
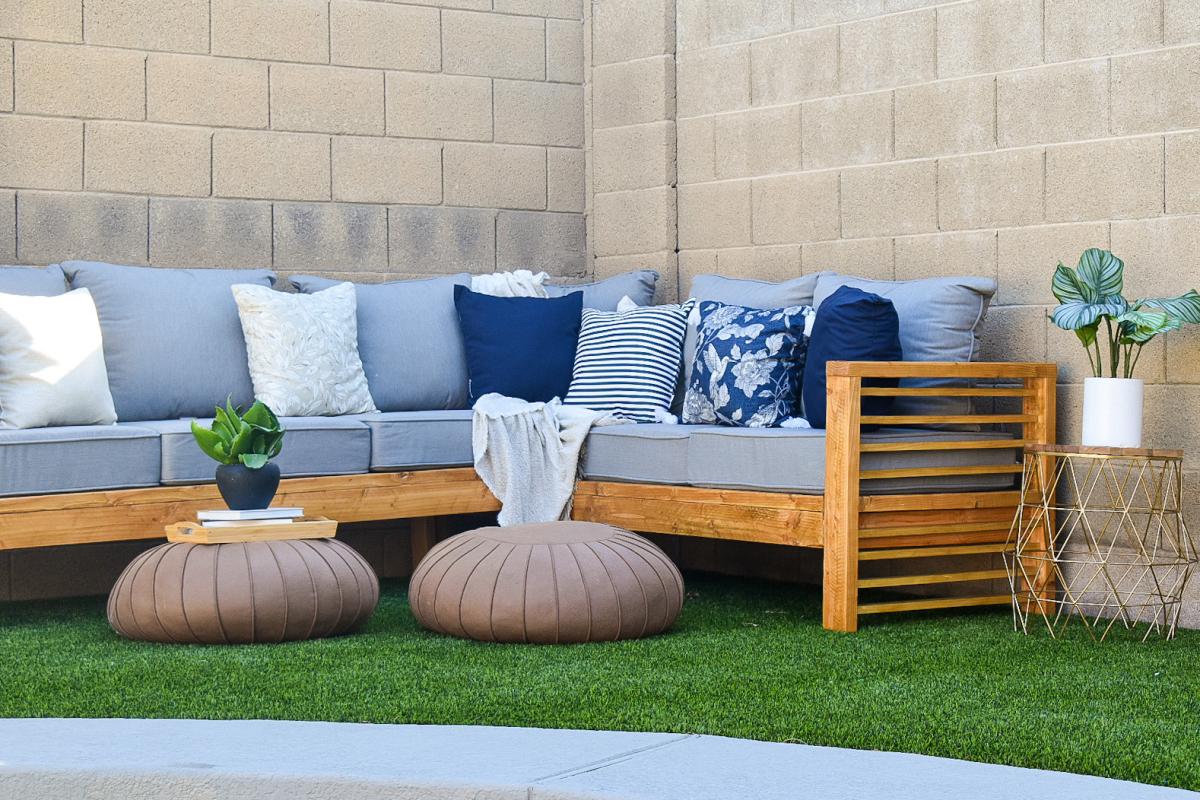
I built this outdoor daybed to add a cozy and inviting space to my backyard. It was a fairly easy build, which I managed to tackle by myself. Head over to the blog for more details.
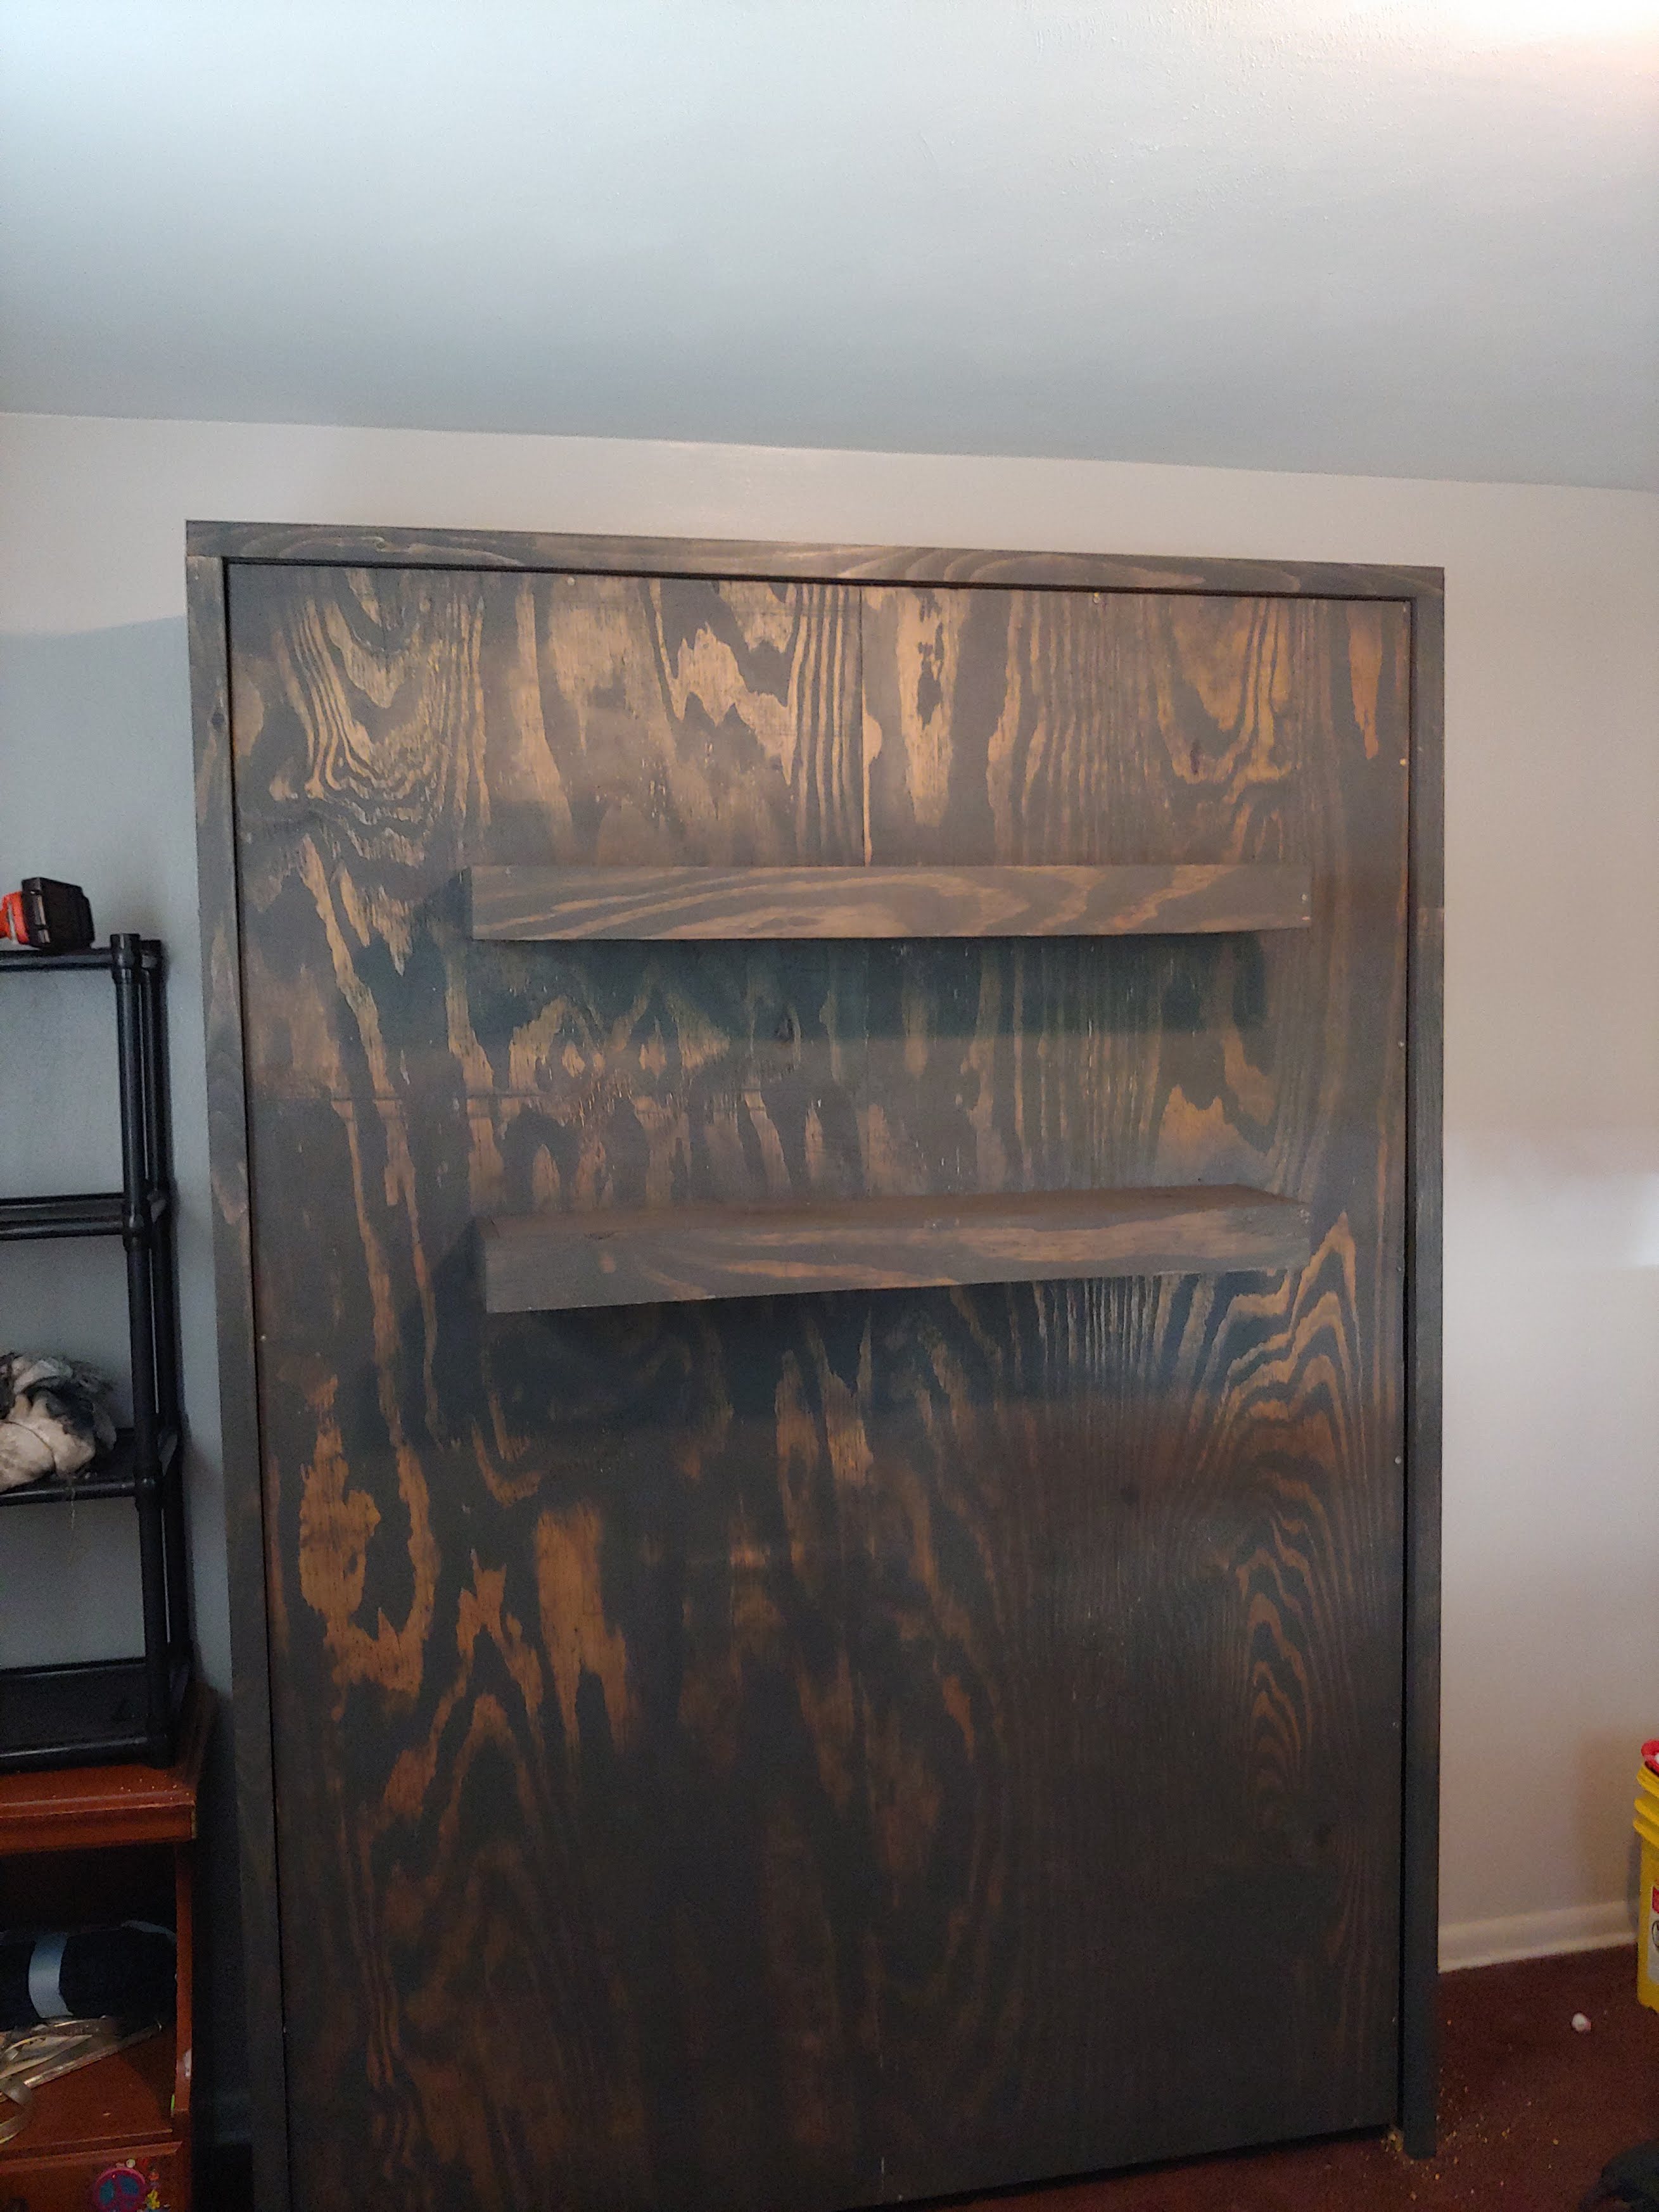
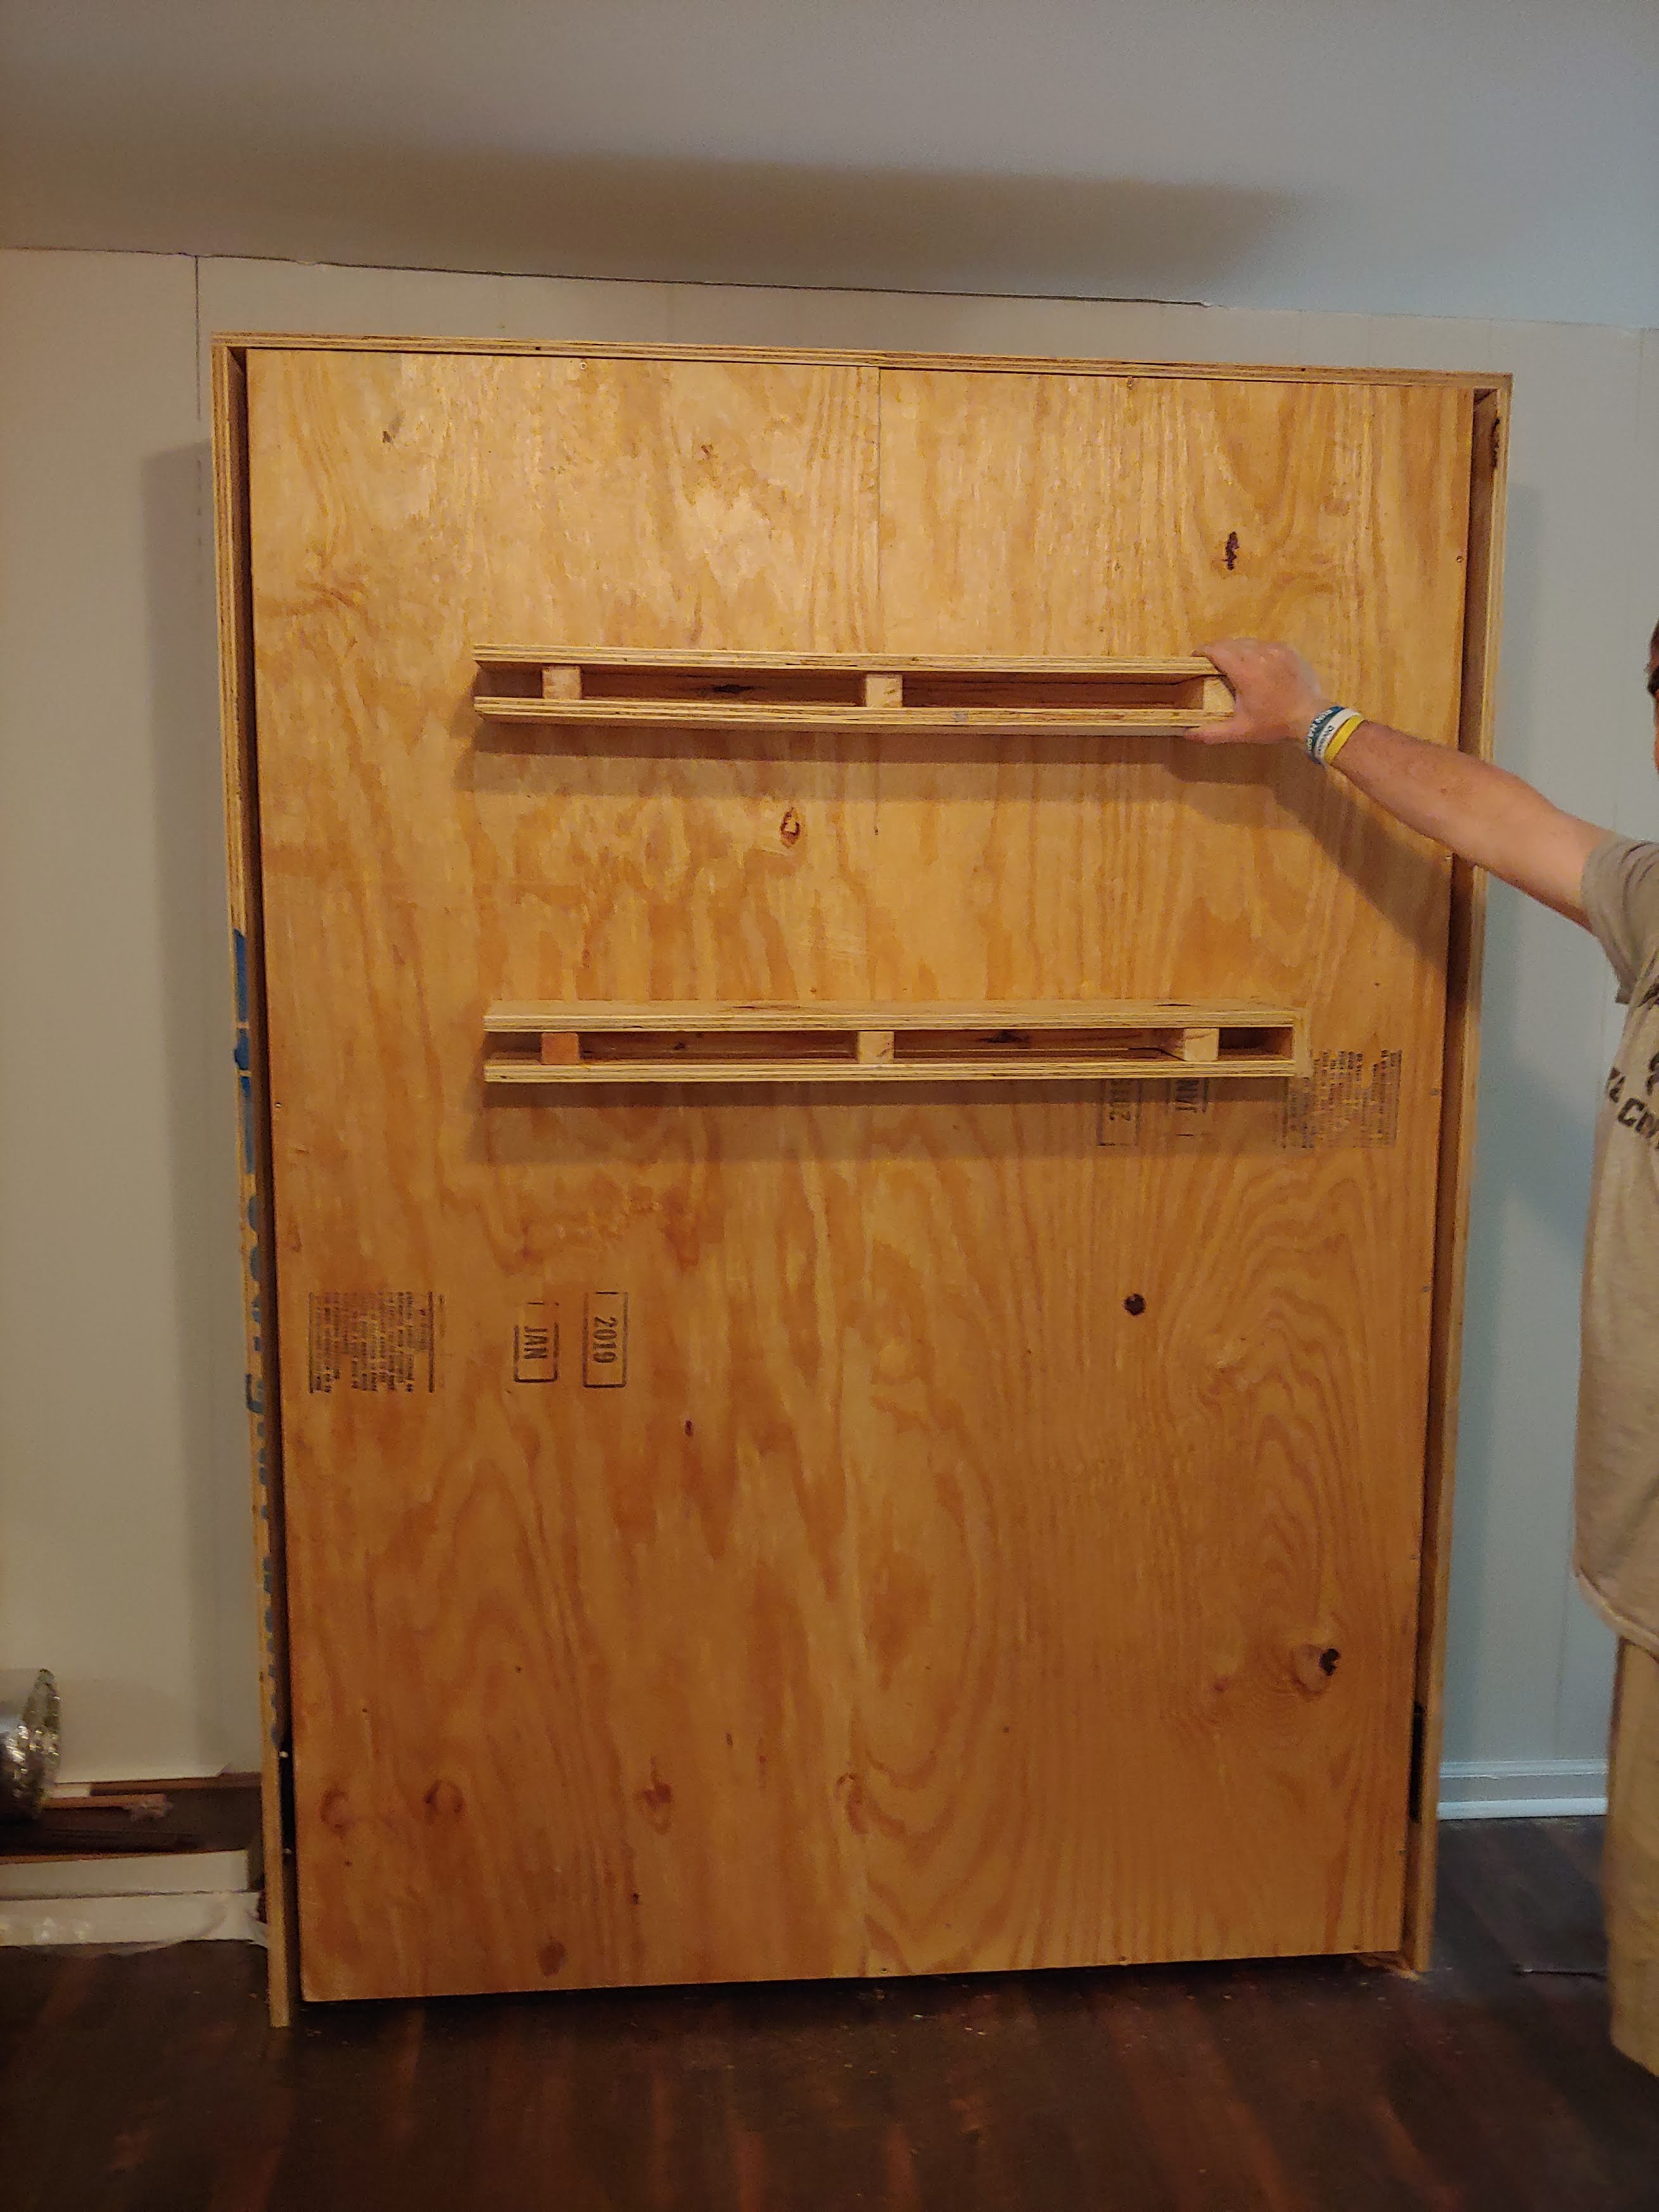
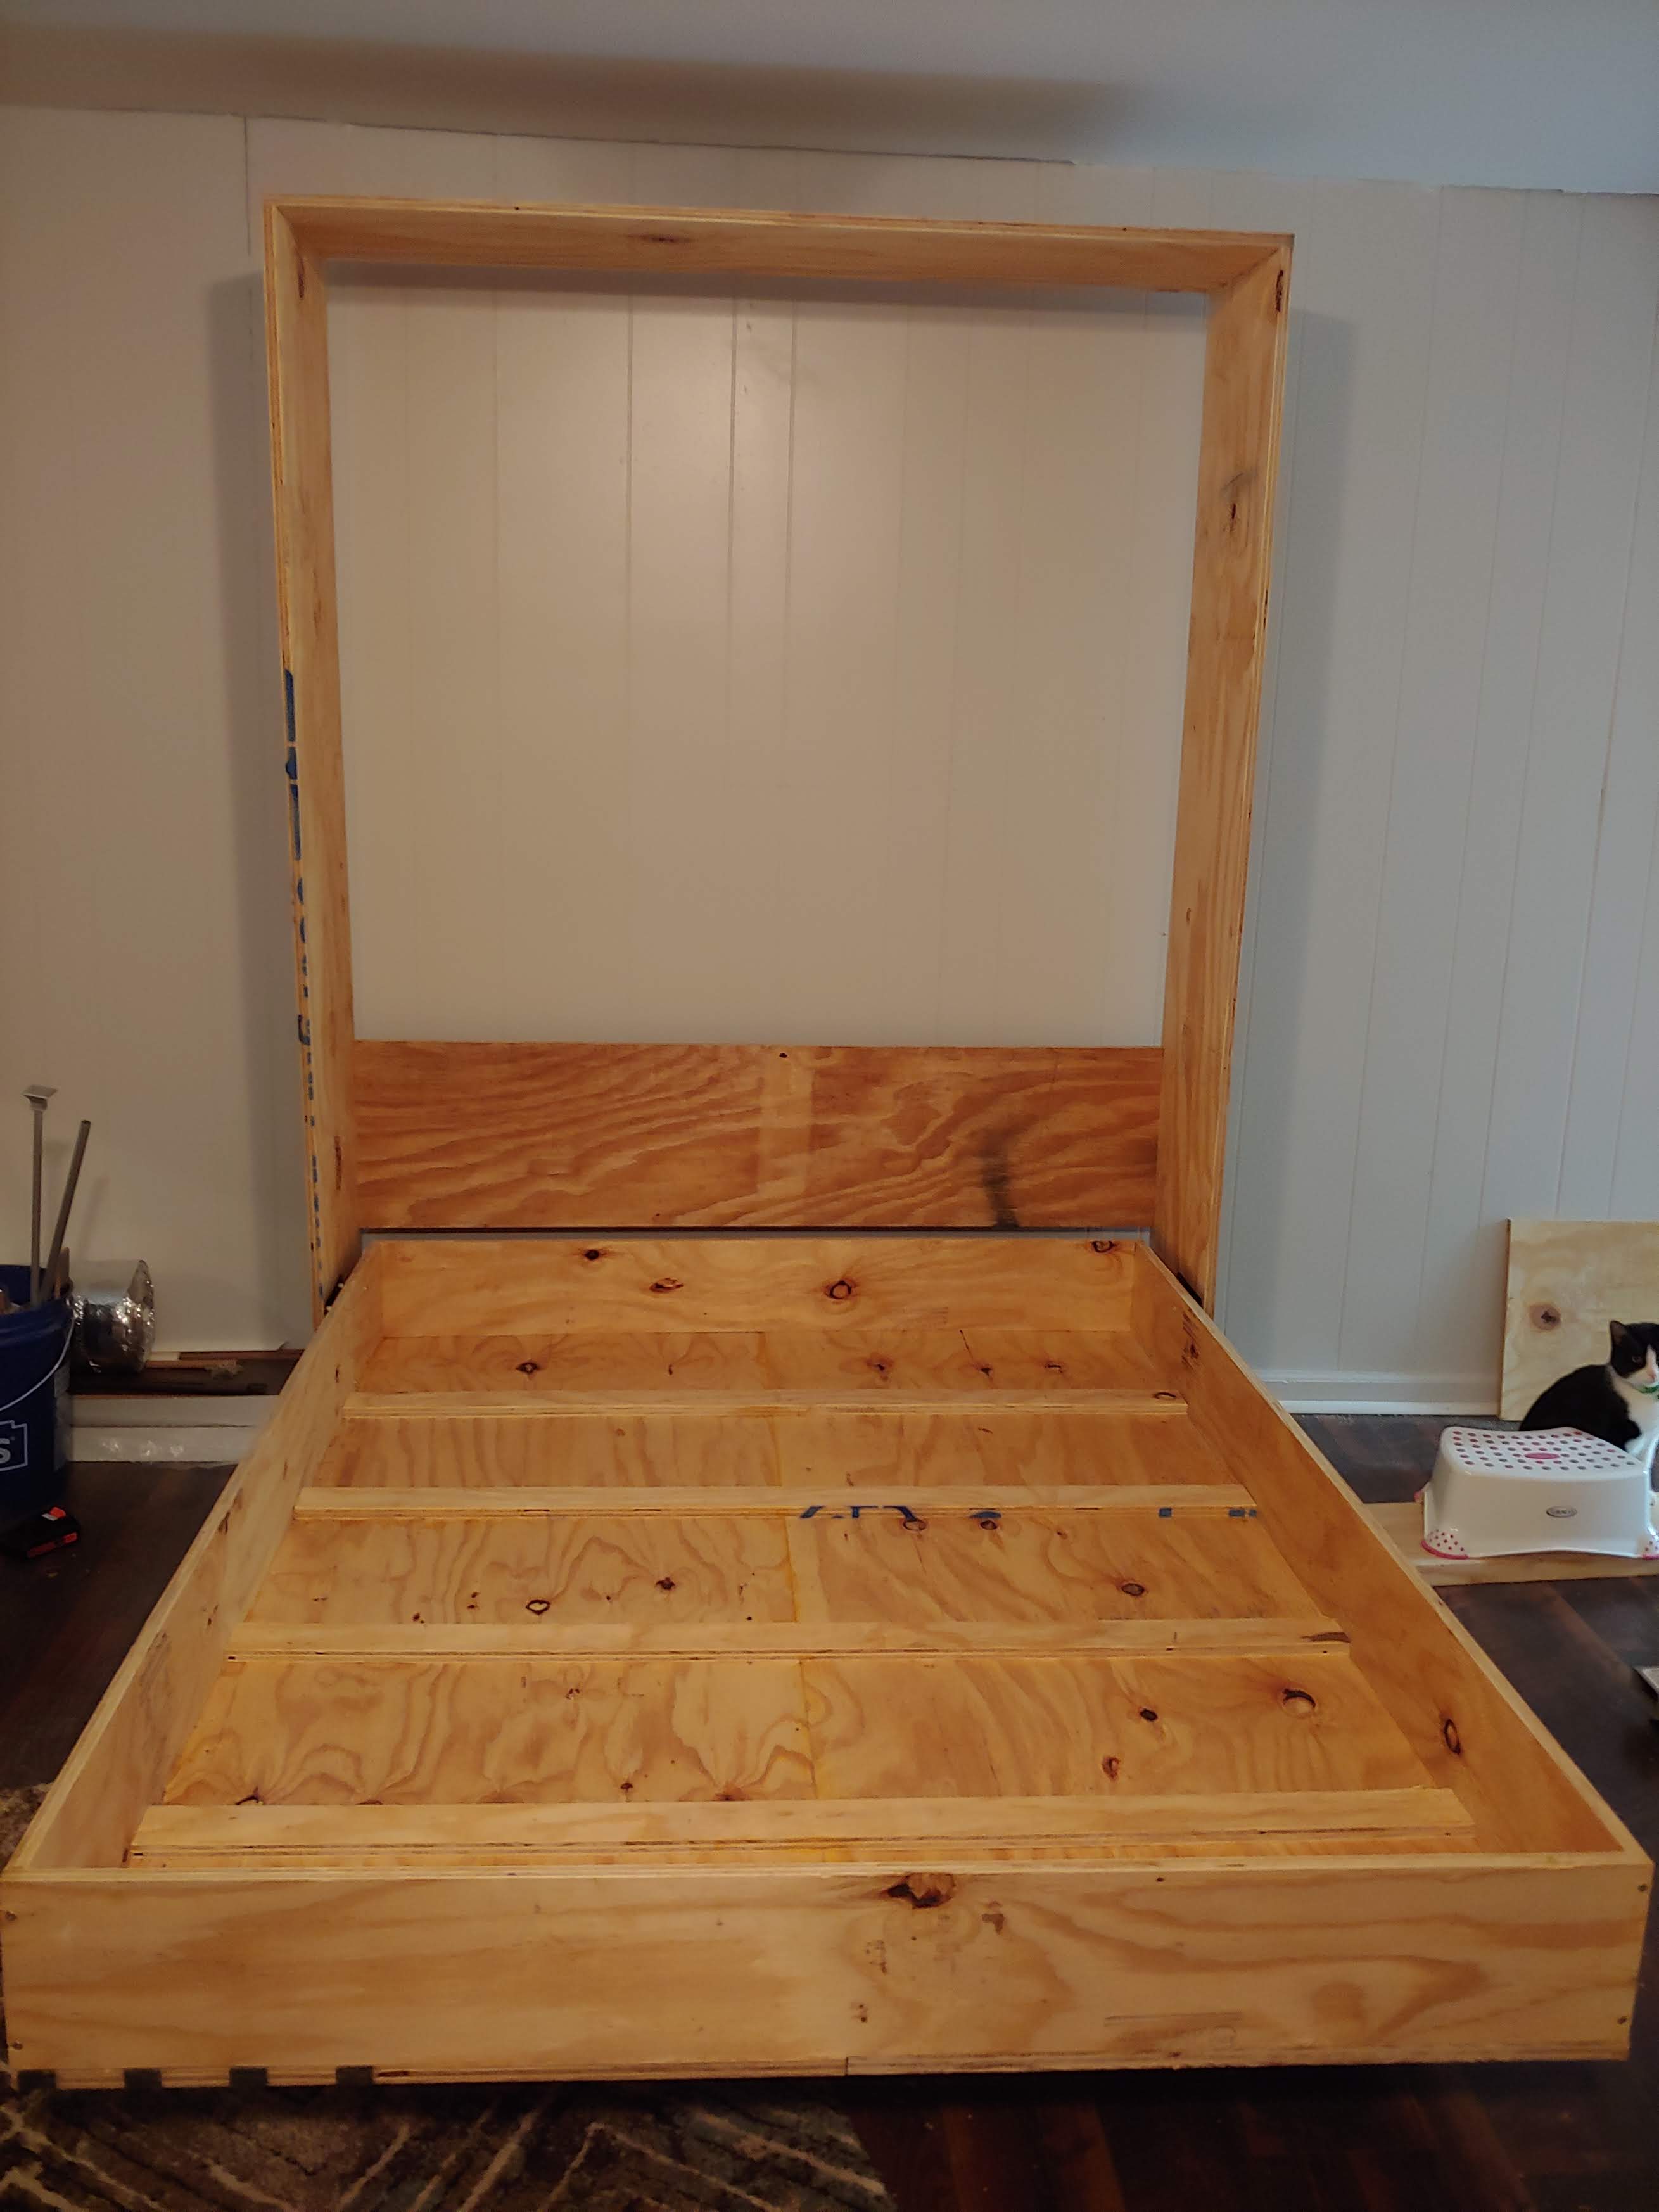
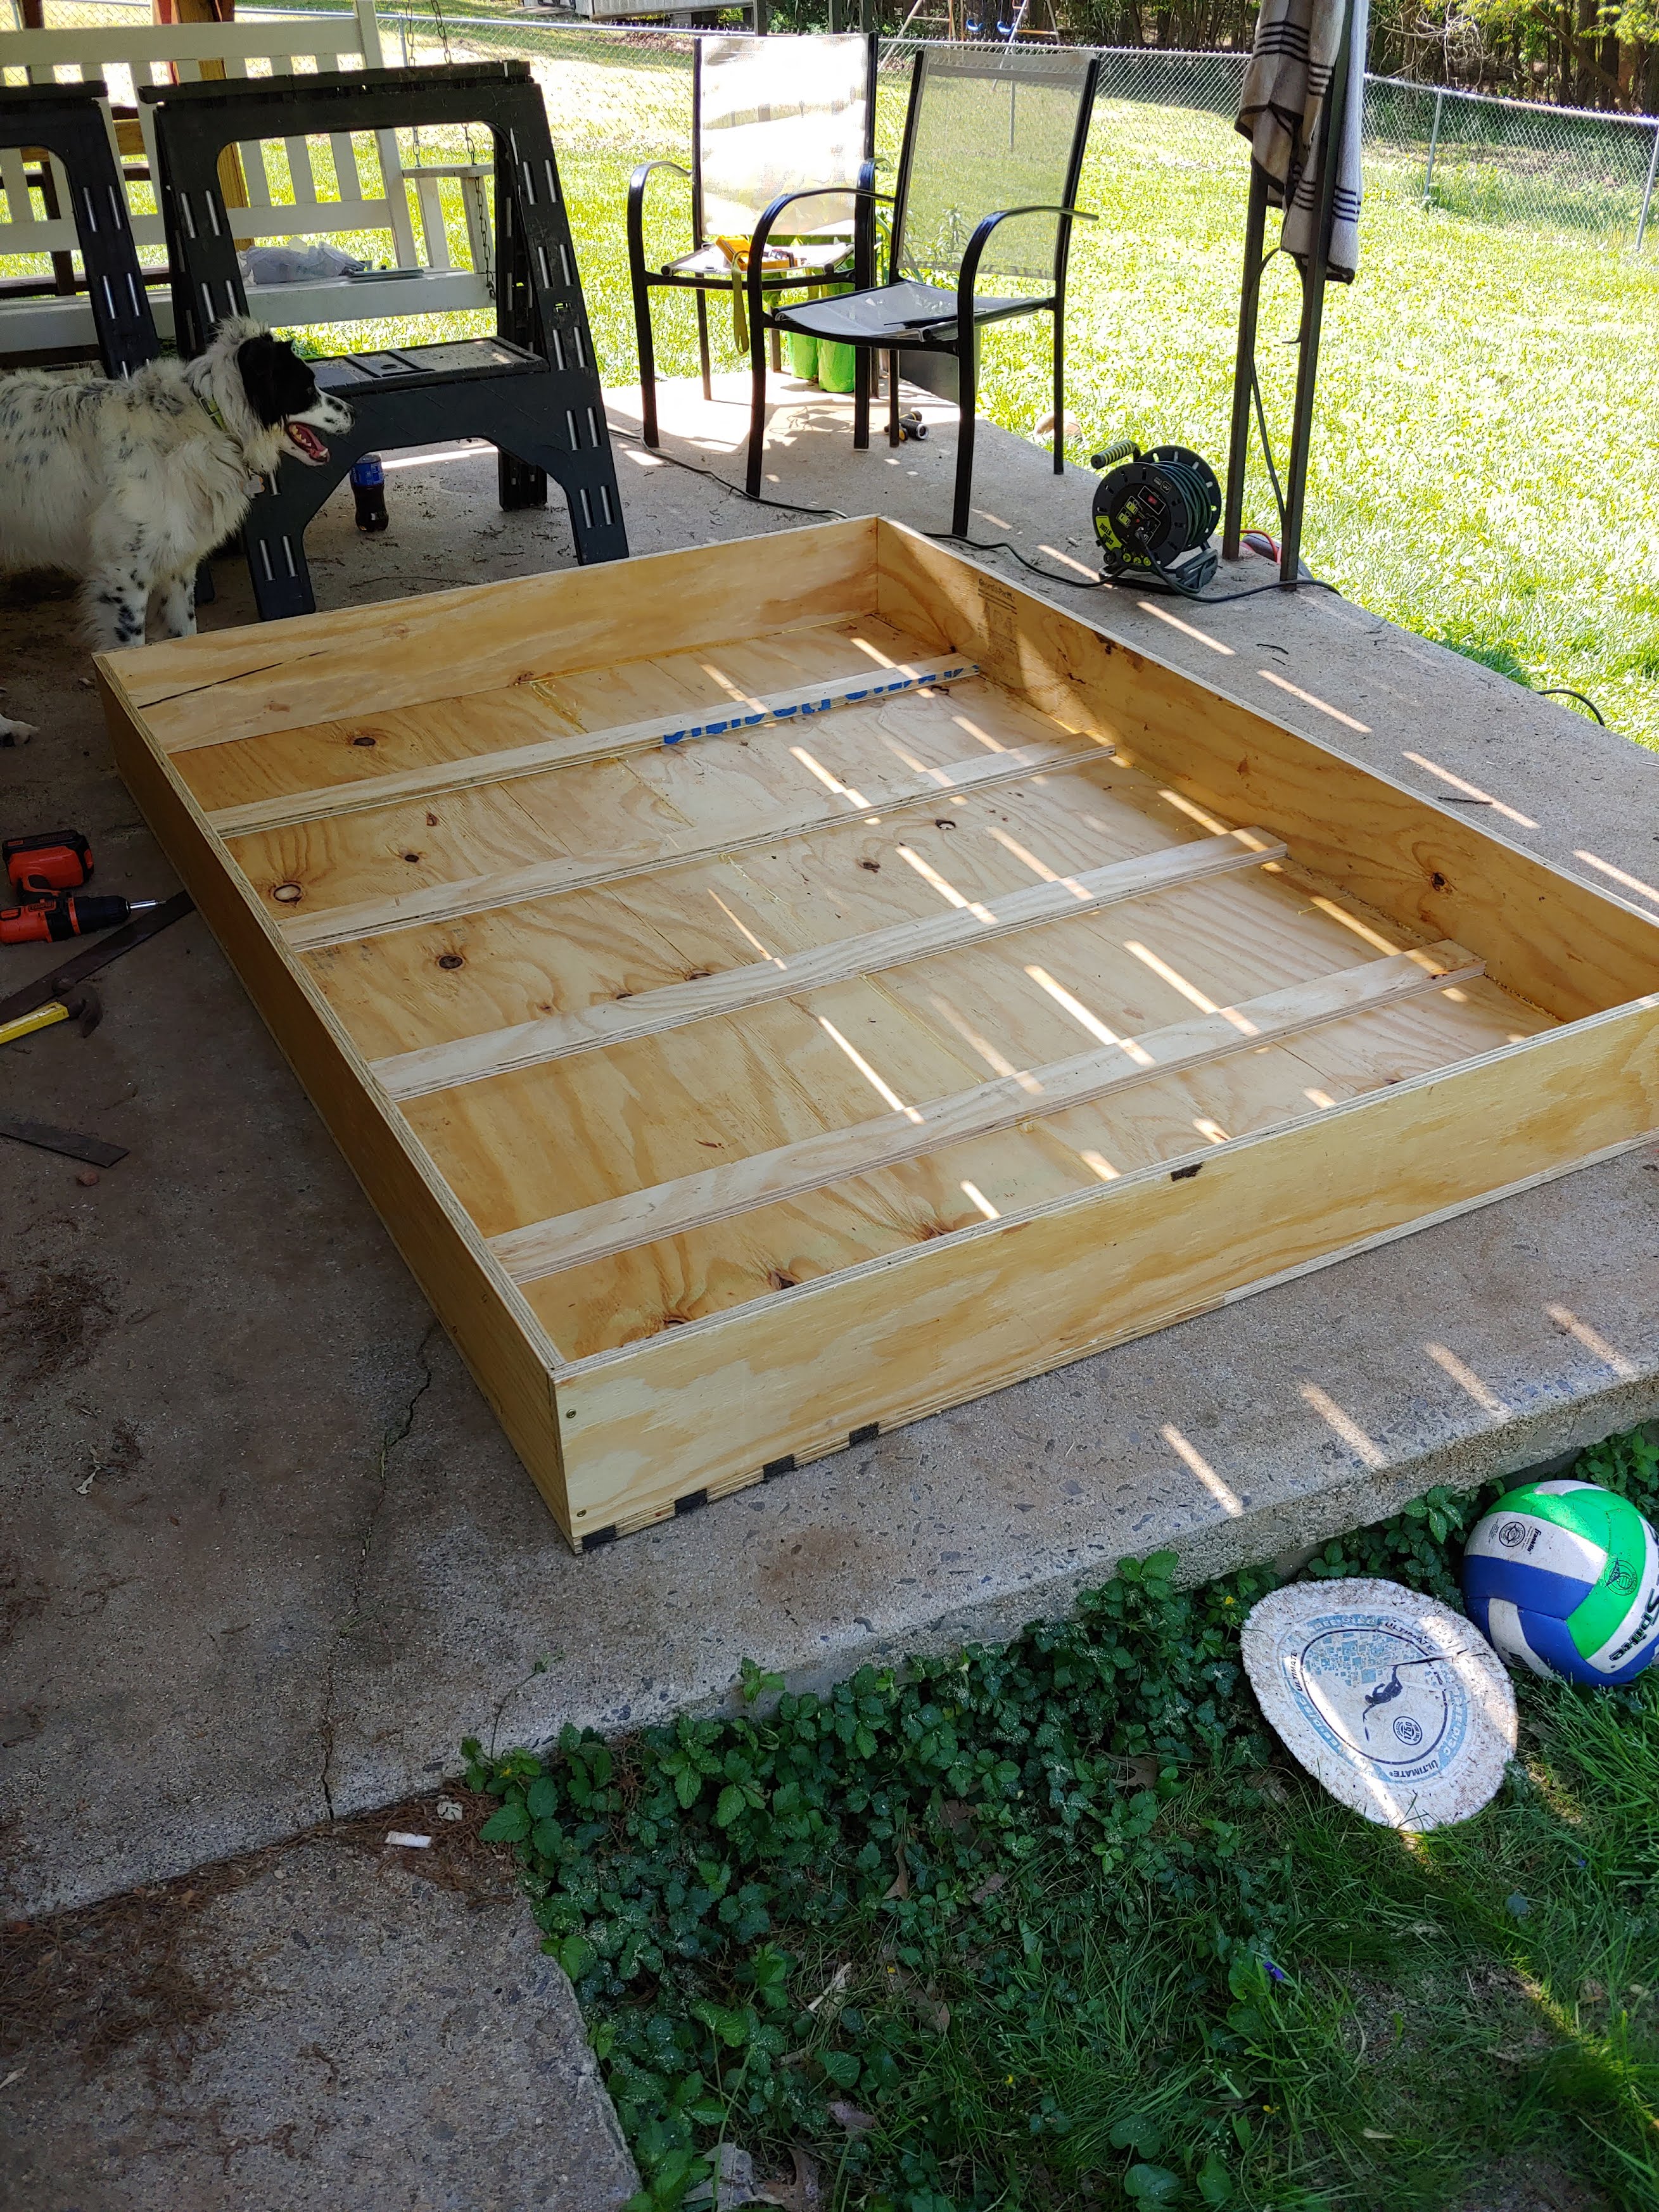
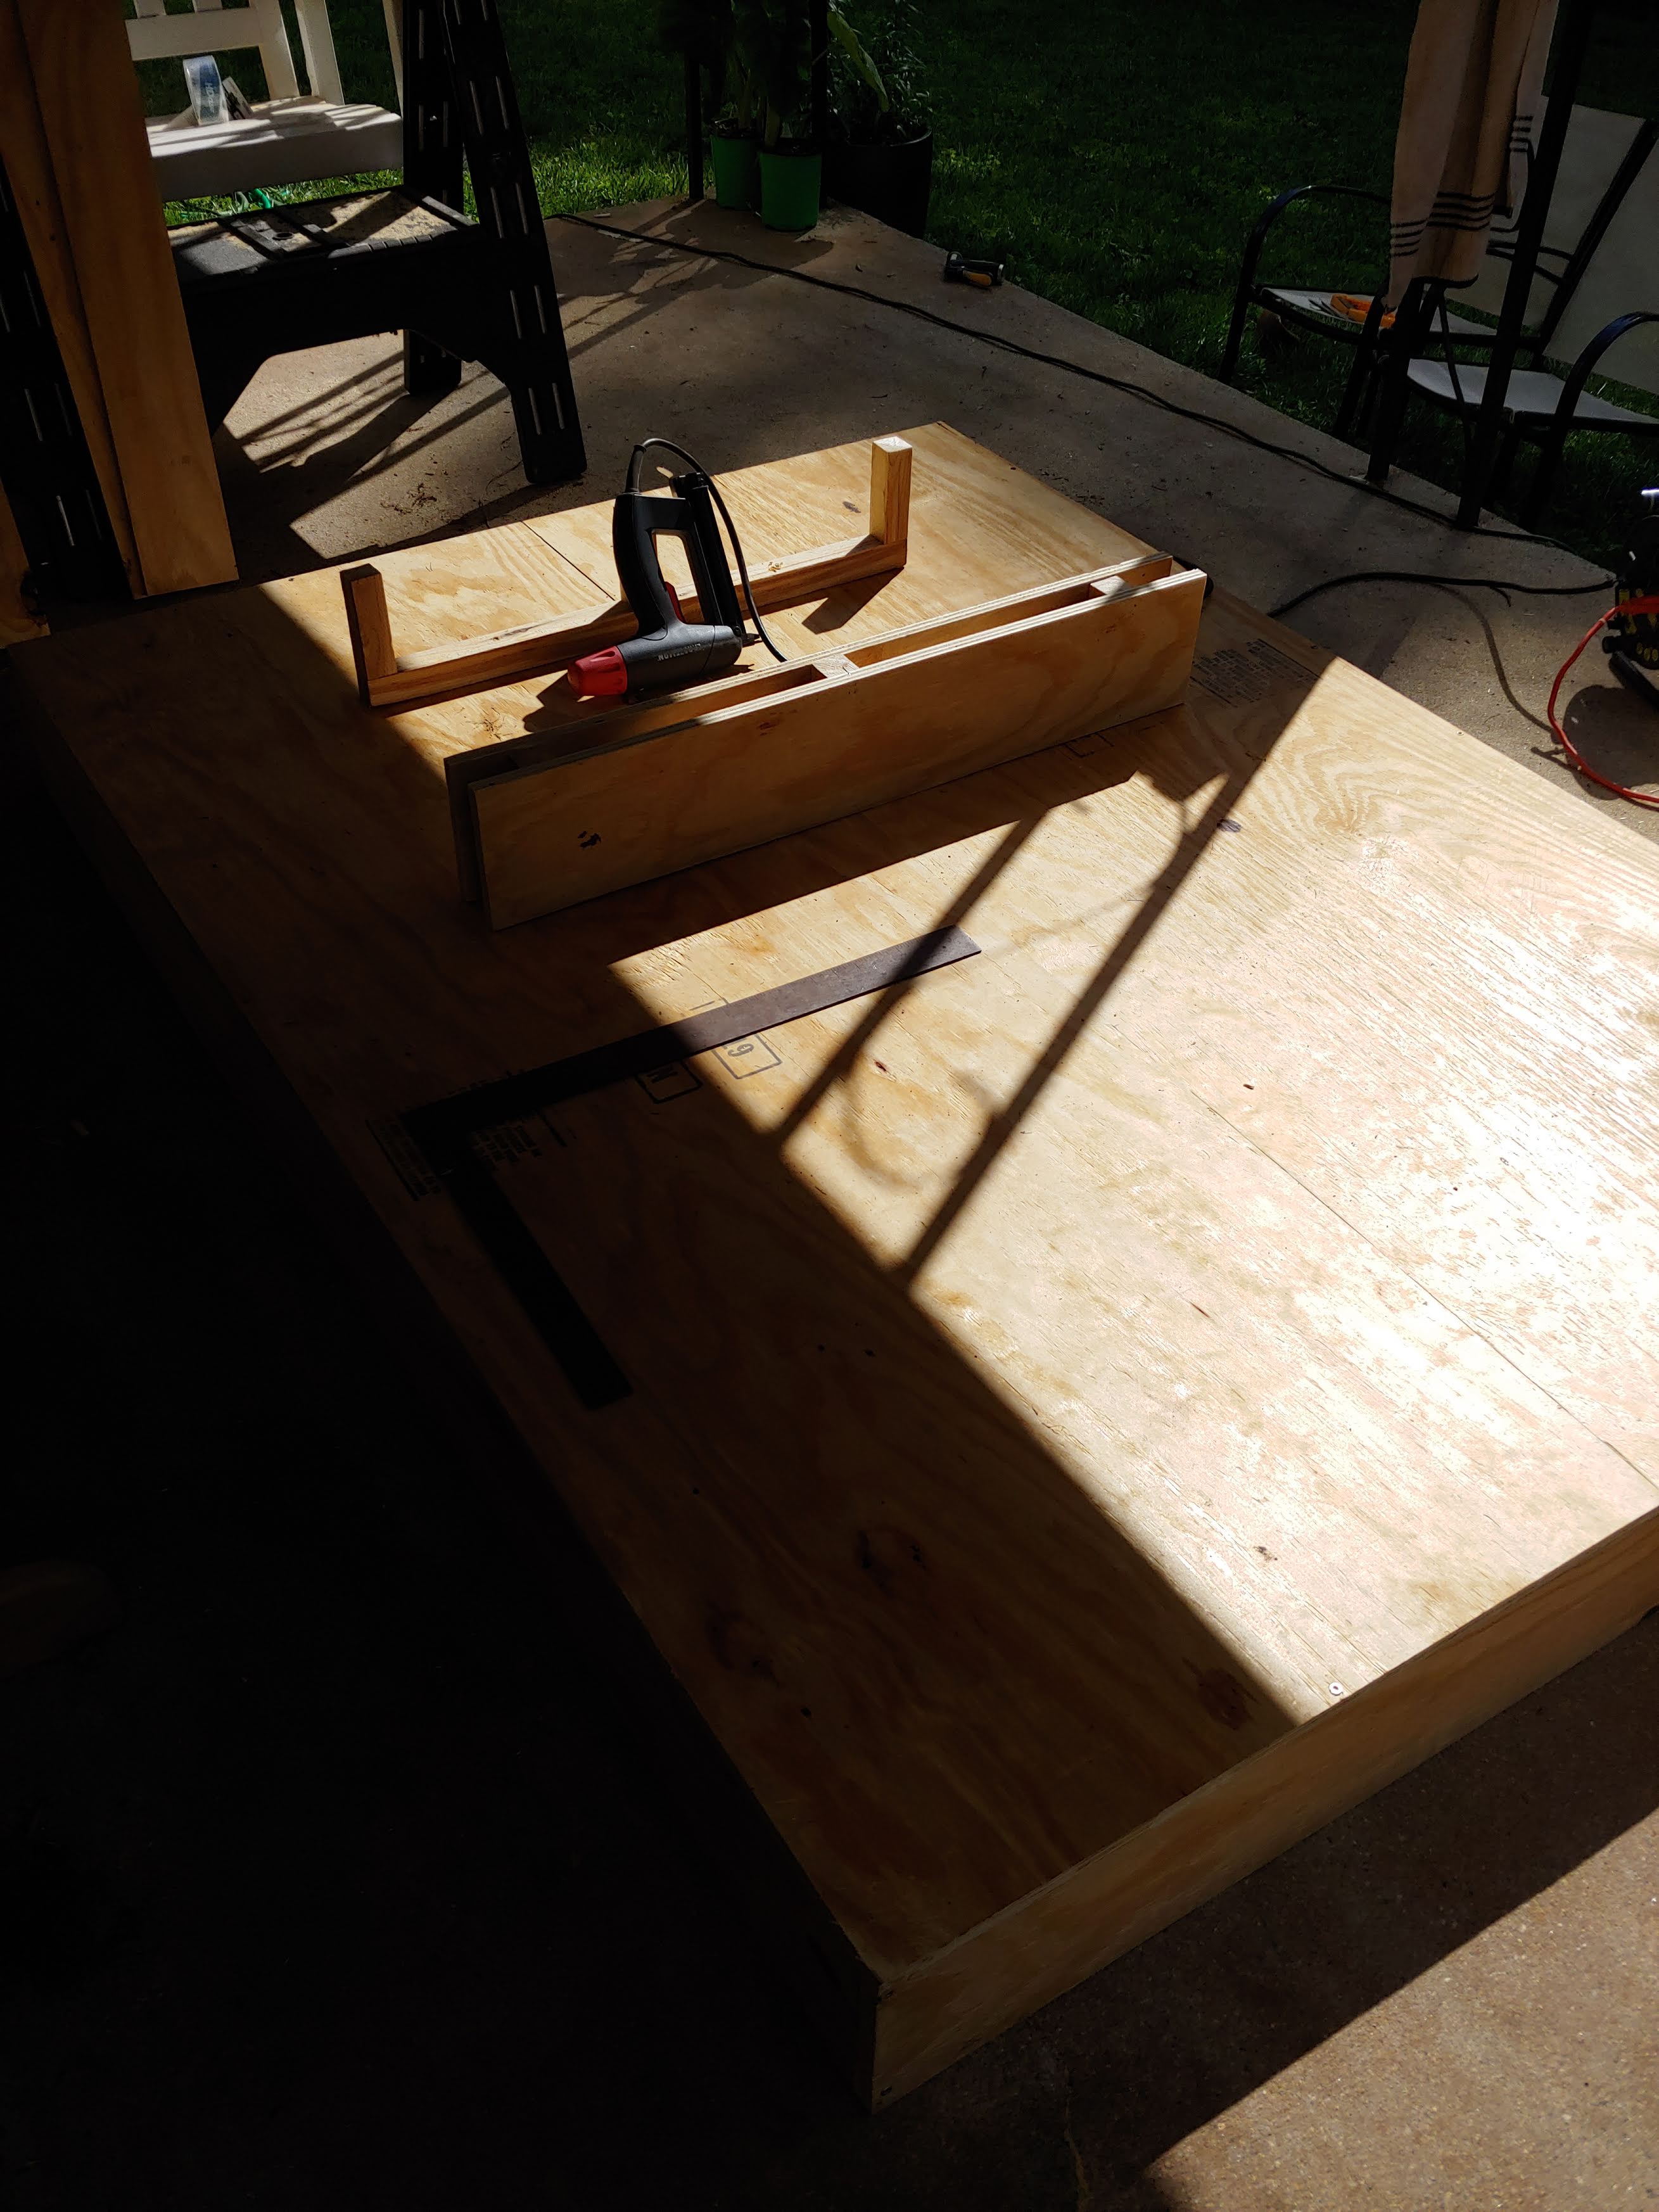
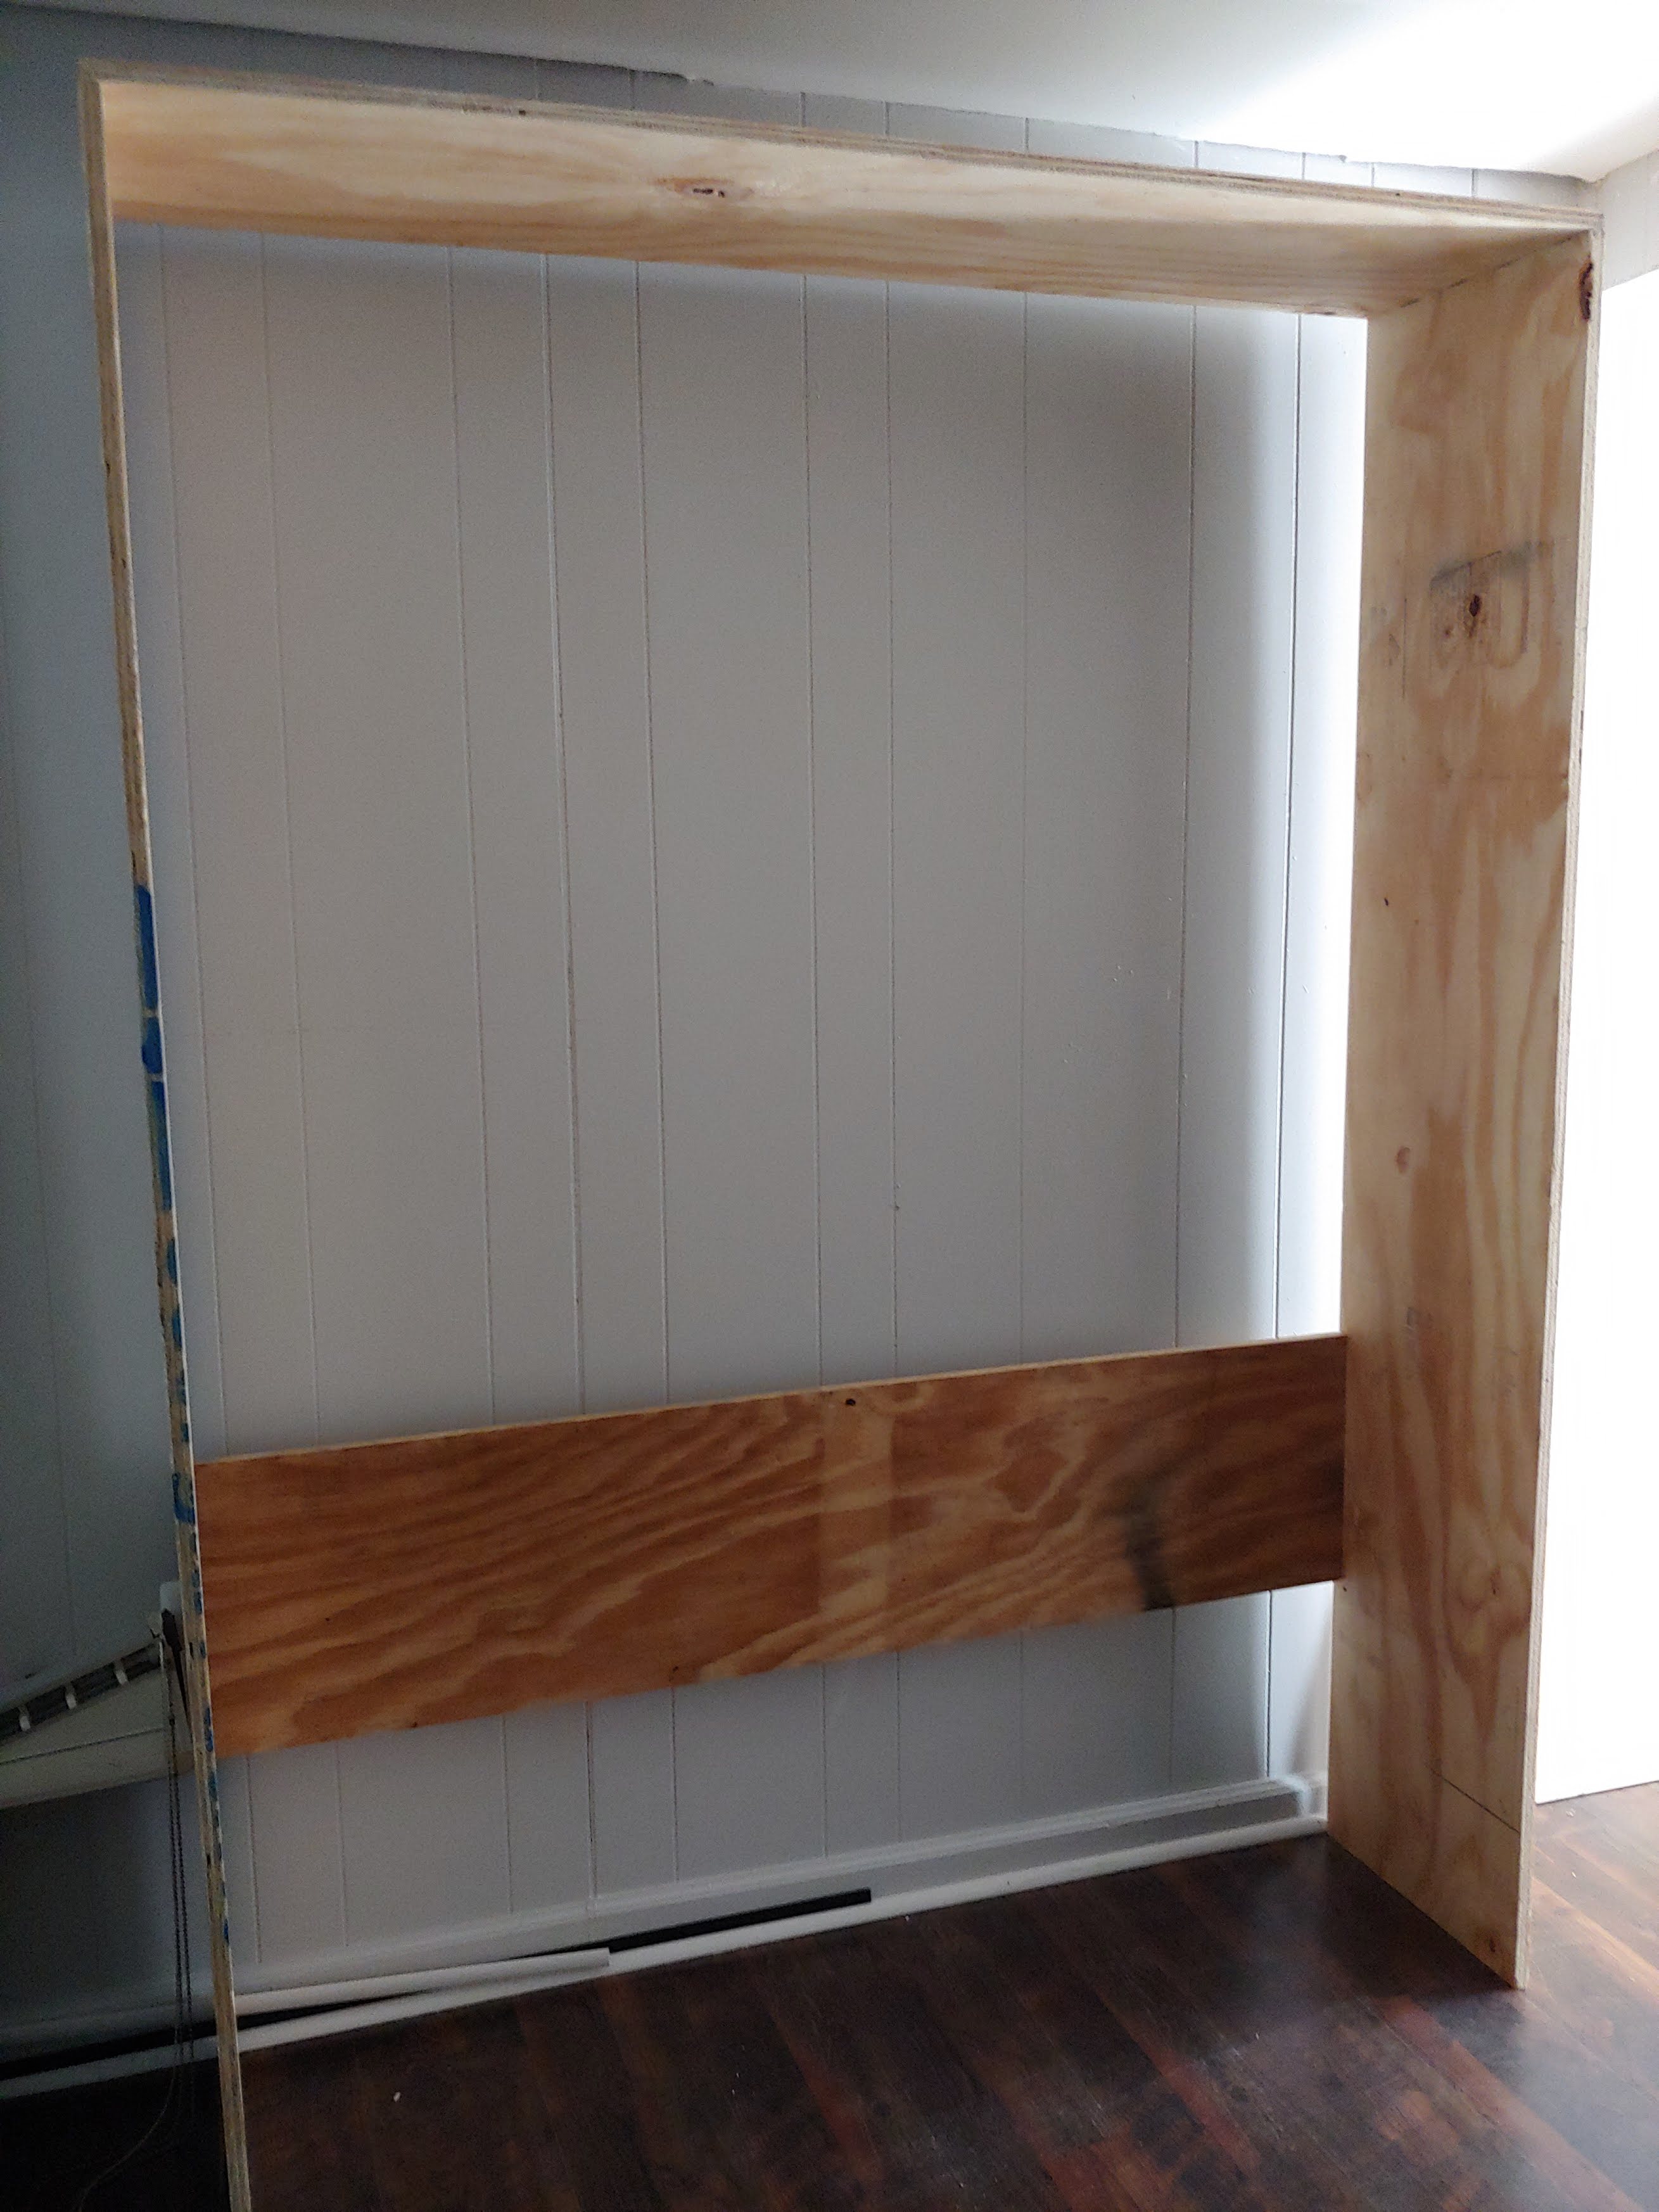
So I've always wanted to build a Murphy bed. And by always I mean since I first came across plans here that made it look so simple. It ended up taking me a while to do because my job has me working 6 days a week so I was only able to work on it for short chunks of time.
I ended up utilizing a few different plans and mashed them together to build a full size murphy bed. The shelves are the support legs when the bed is down. The "hinge" mechanism are heavy duty 360 degree seat swivels.
All-in-all it turned out WAY better than I expected with only some minor issues throughout the construction process.
Next up is a twin xl Murphy bed with a murphy desk attachment that will serve as a craft table when up.
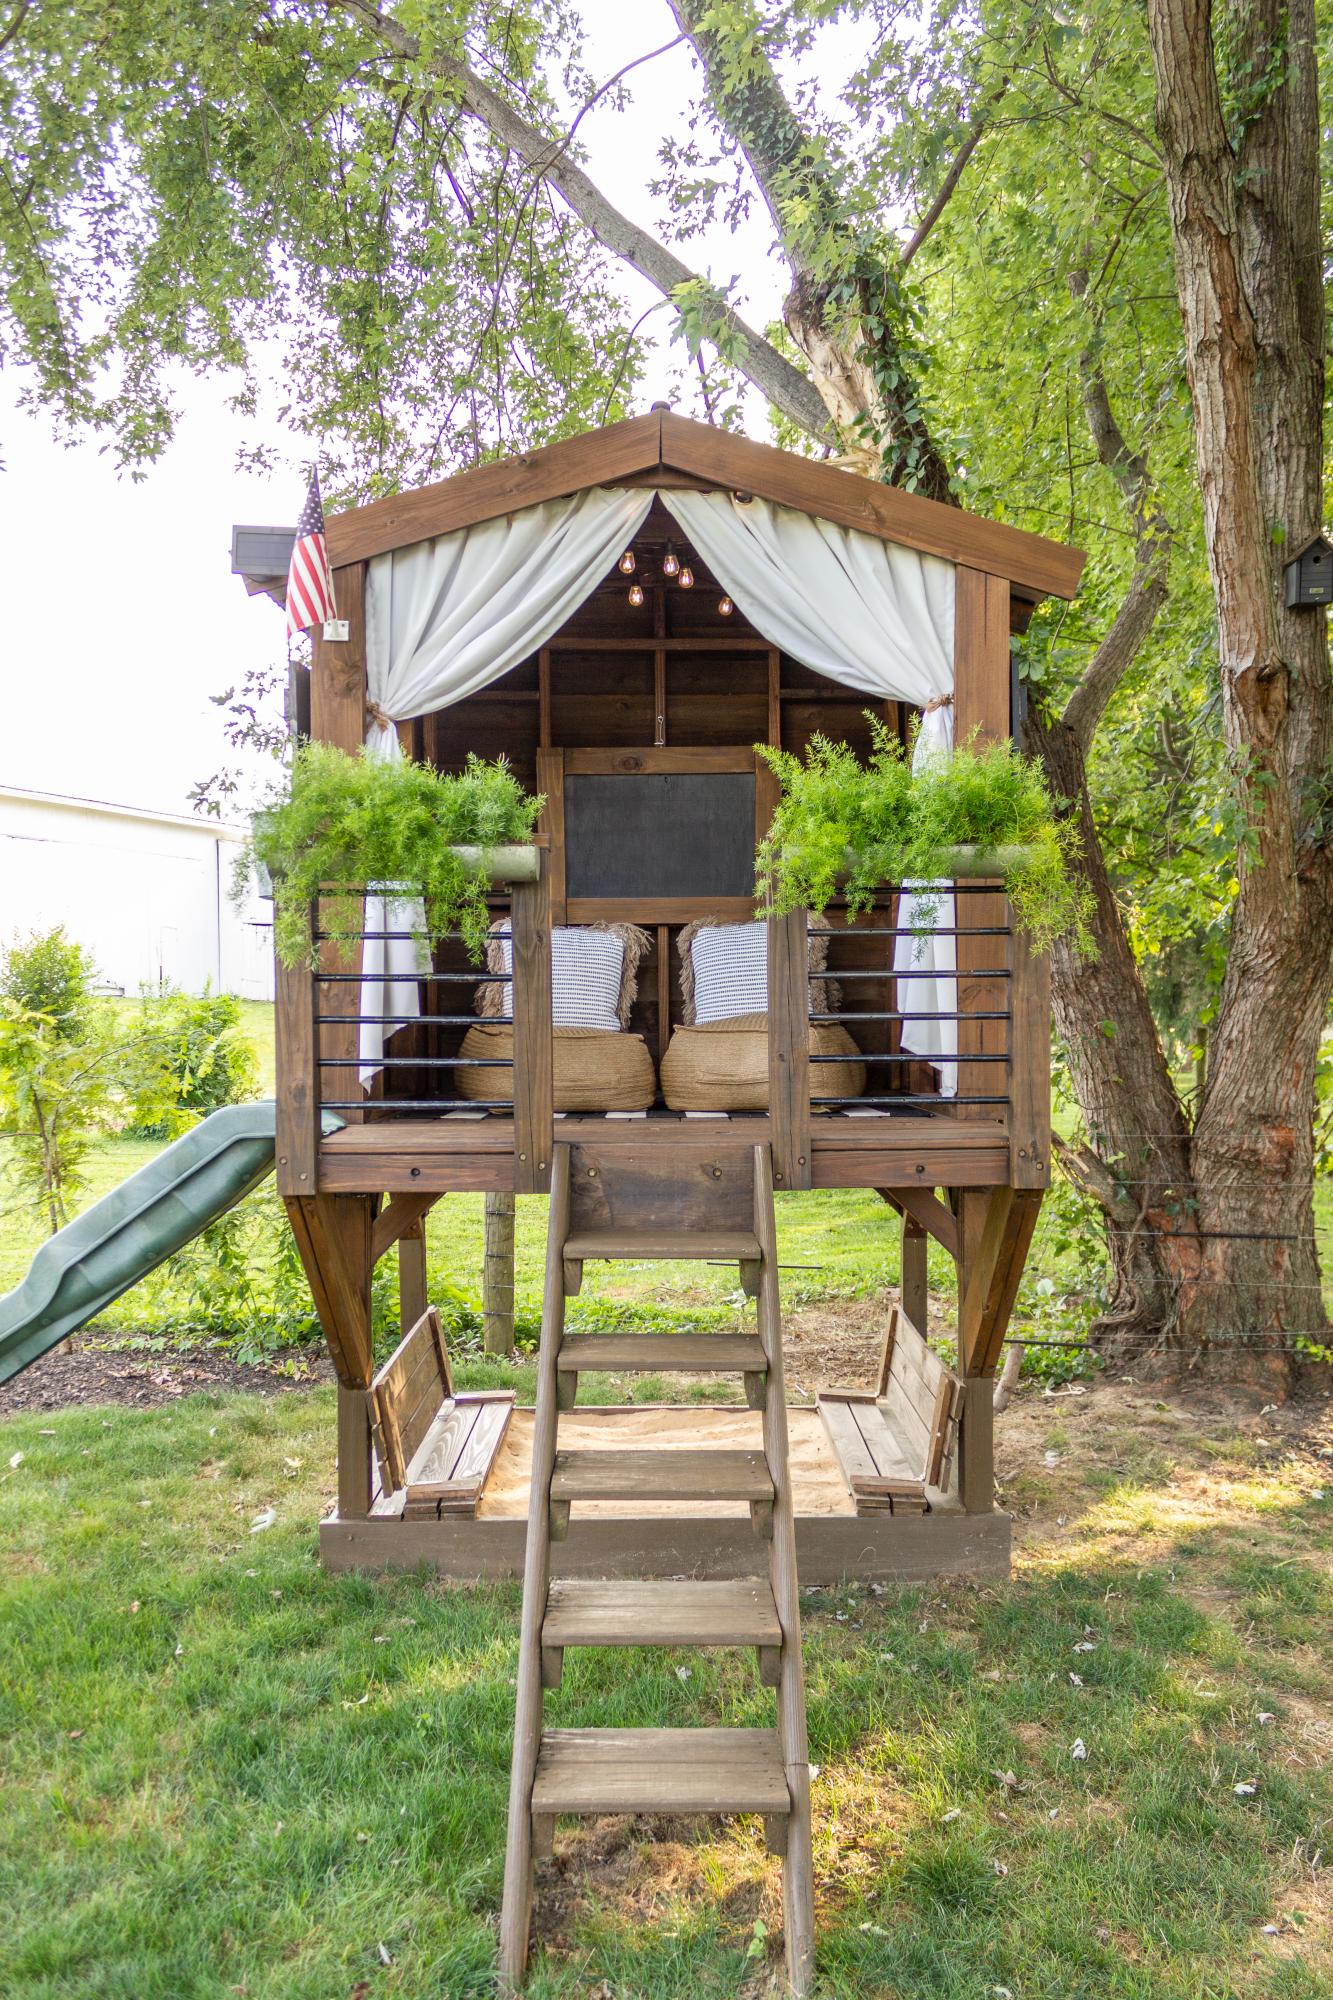
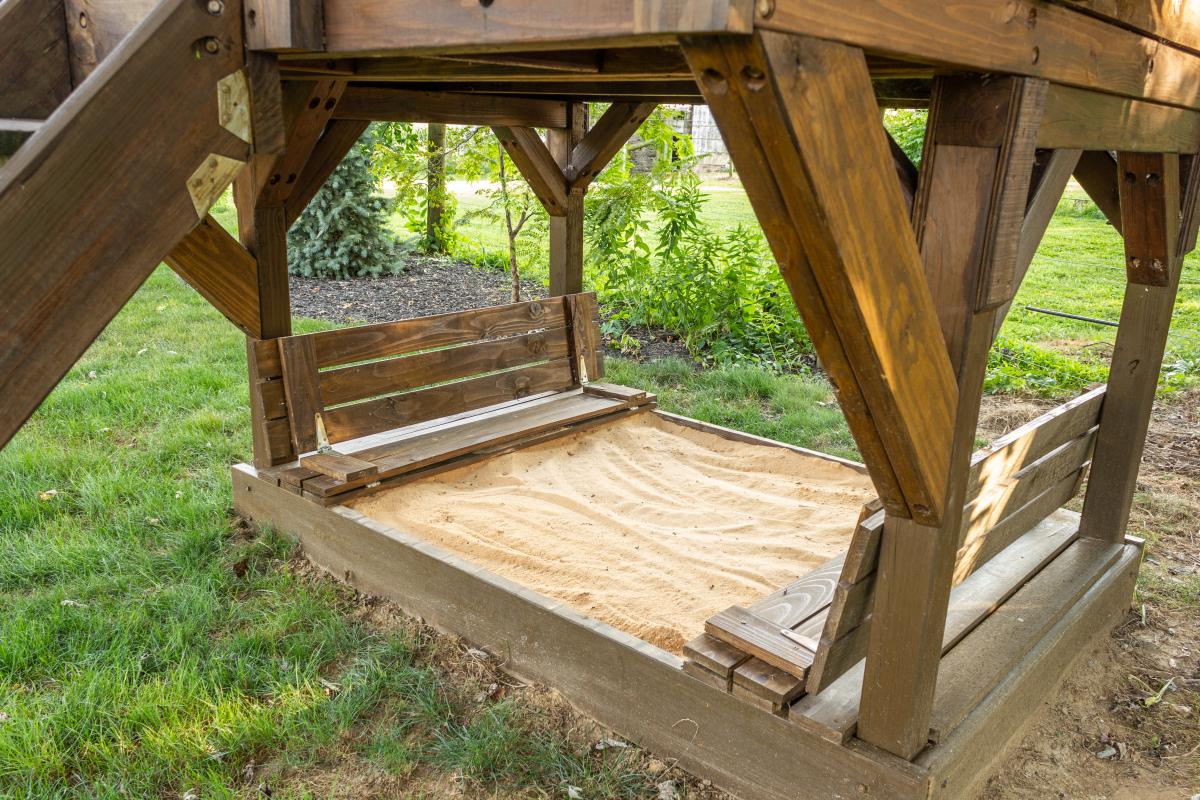
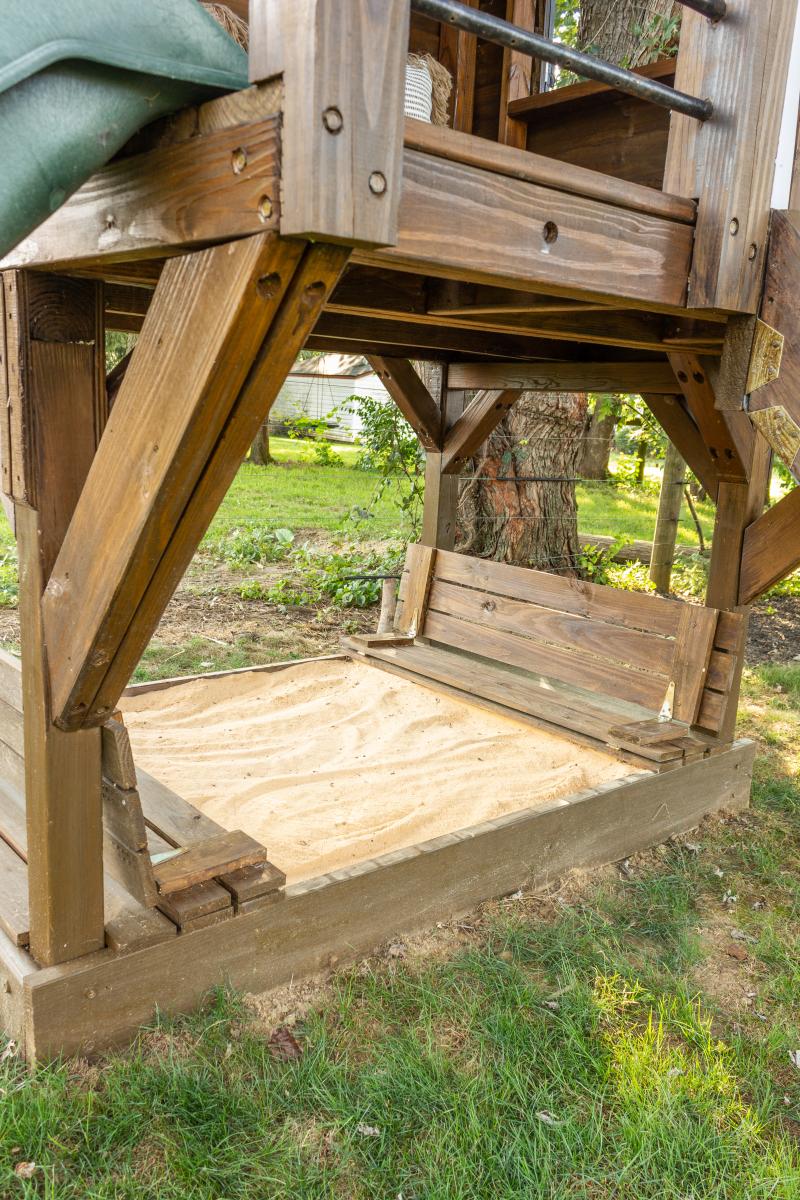
The base of our playhouse felt like the perfect spot to use the sandbox plan with built-in seats. The bench seats actually fold flat to create a lid for the sandbox when it’s not in use. I followed Ana’s plans exactly and used the list of materials she provided. The only modification I made was eliminating the back supports. It was not necessary for me to add the back supports since we have the playhouse posts to support the back of the bench.
Loved these plans! Was my first project I tackled trying my hand with a new hobby of wood working to stave off quarantine craziness :-) finished project looked awesome and got me started working on other plans on the site.
**note**
Side table was just sanded and refinished, wasn't built just tried to match.

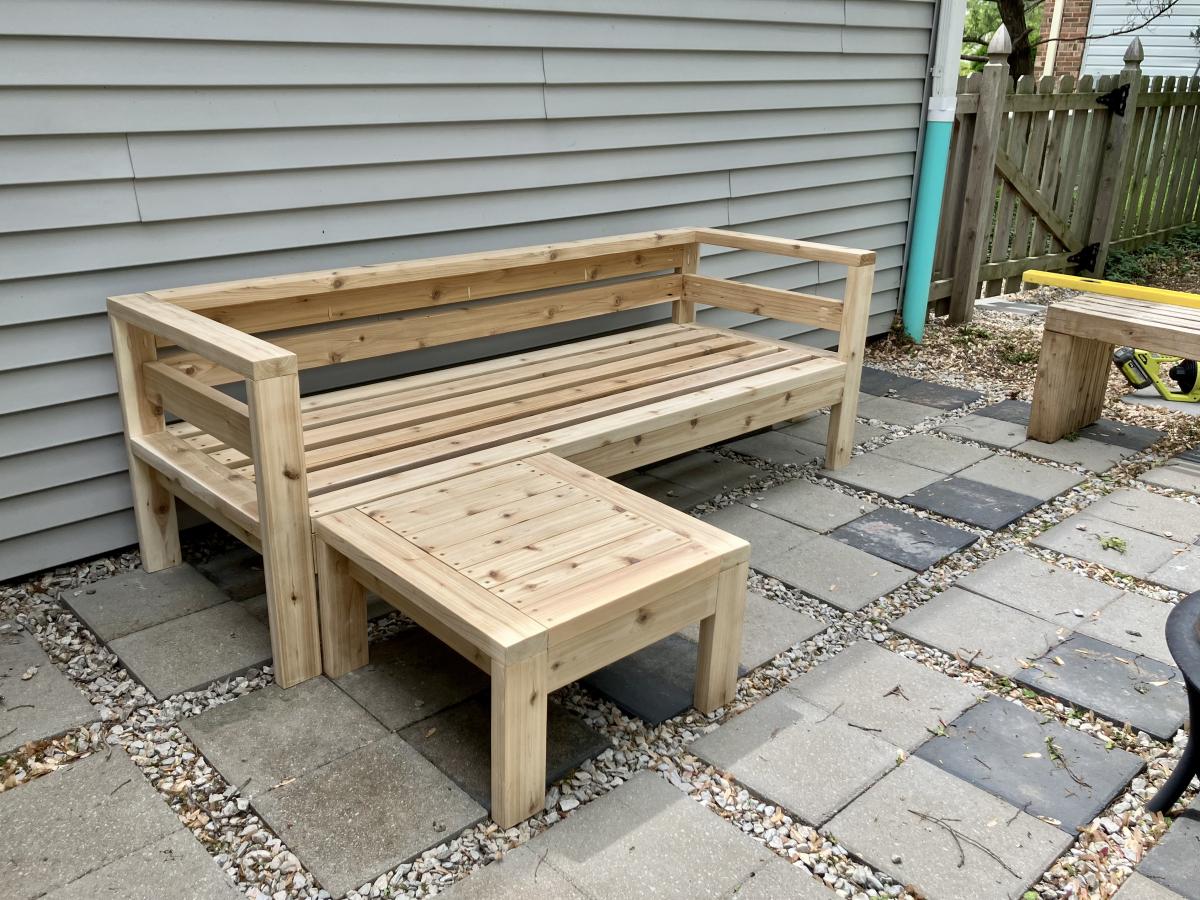
I had so much fun building this! I got a little creative with the corner section and decided to make it a table. I built a small hatch so that I could put in a container for ice and cold beer. When the hatch is not in use, the container can be removed and the hatch can be closed to provide more table space. I also added drink holders!


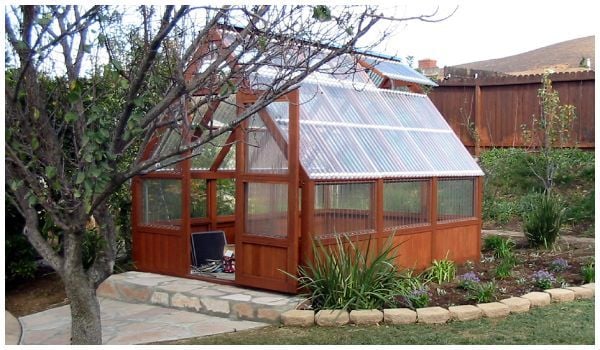
I saw the barn shaped greenhouse plan but preferred a regular roof pitch. I did however incorporate the corrugated polycarbionate as a covering. I find it odd that you guys installed the polycarbonate horizonitally instead of vertically.
Anyway thanks for the info on polycarbonate.
Tue, 09/01/2020 - 17:47
Love this! I really prefer the roofline on your greenhouse. Did you modify Ana's design, or did you get plans from another site? Would love to replicate your design if possible-very elegant.
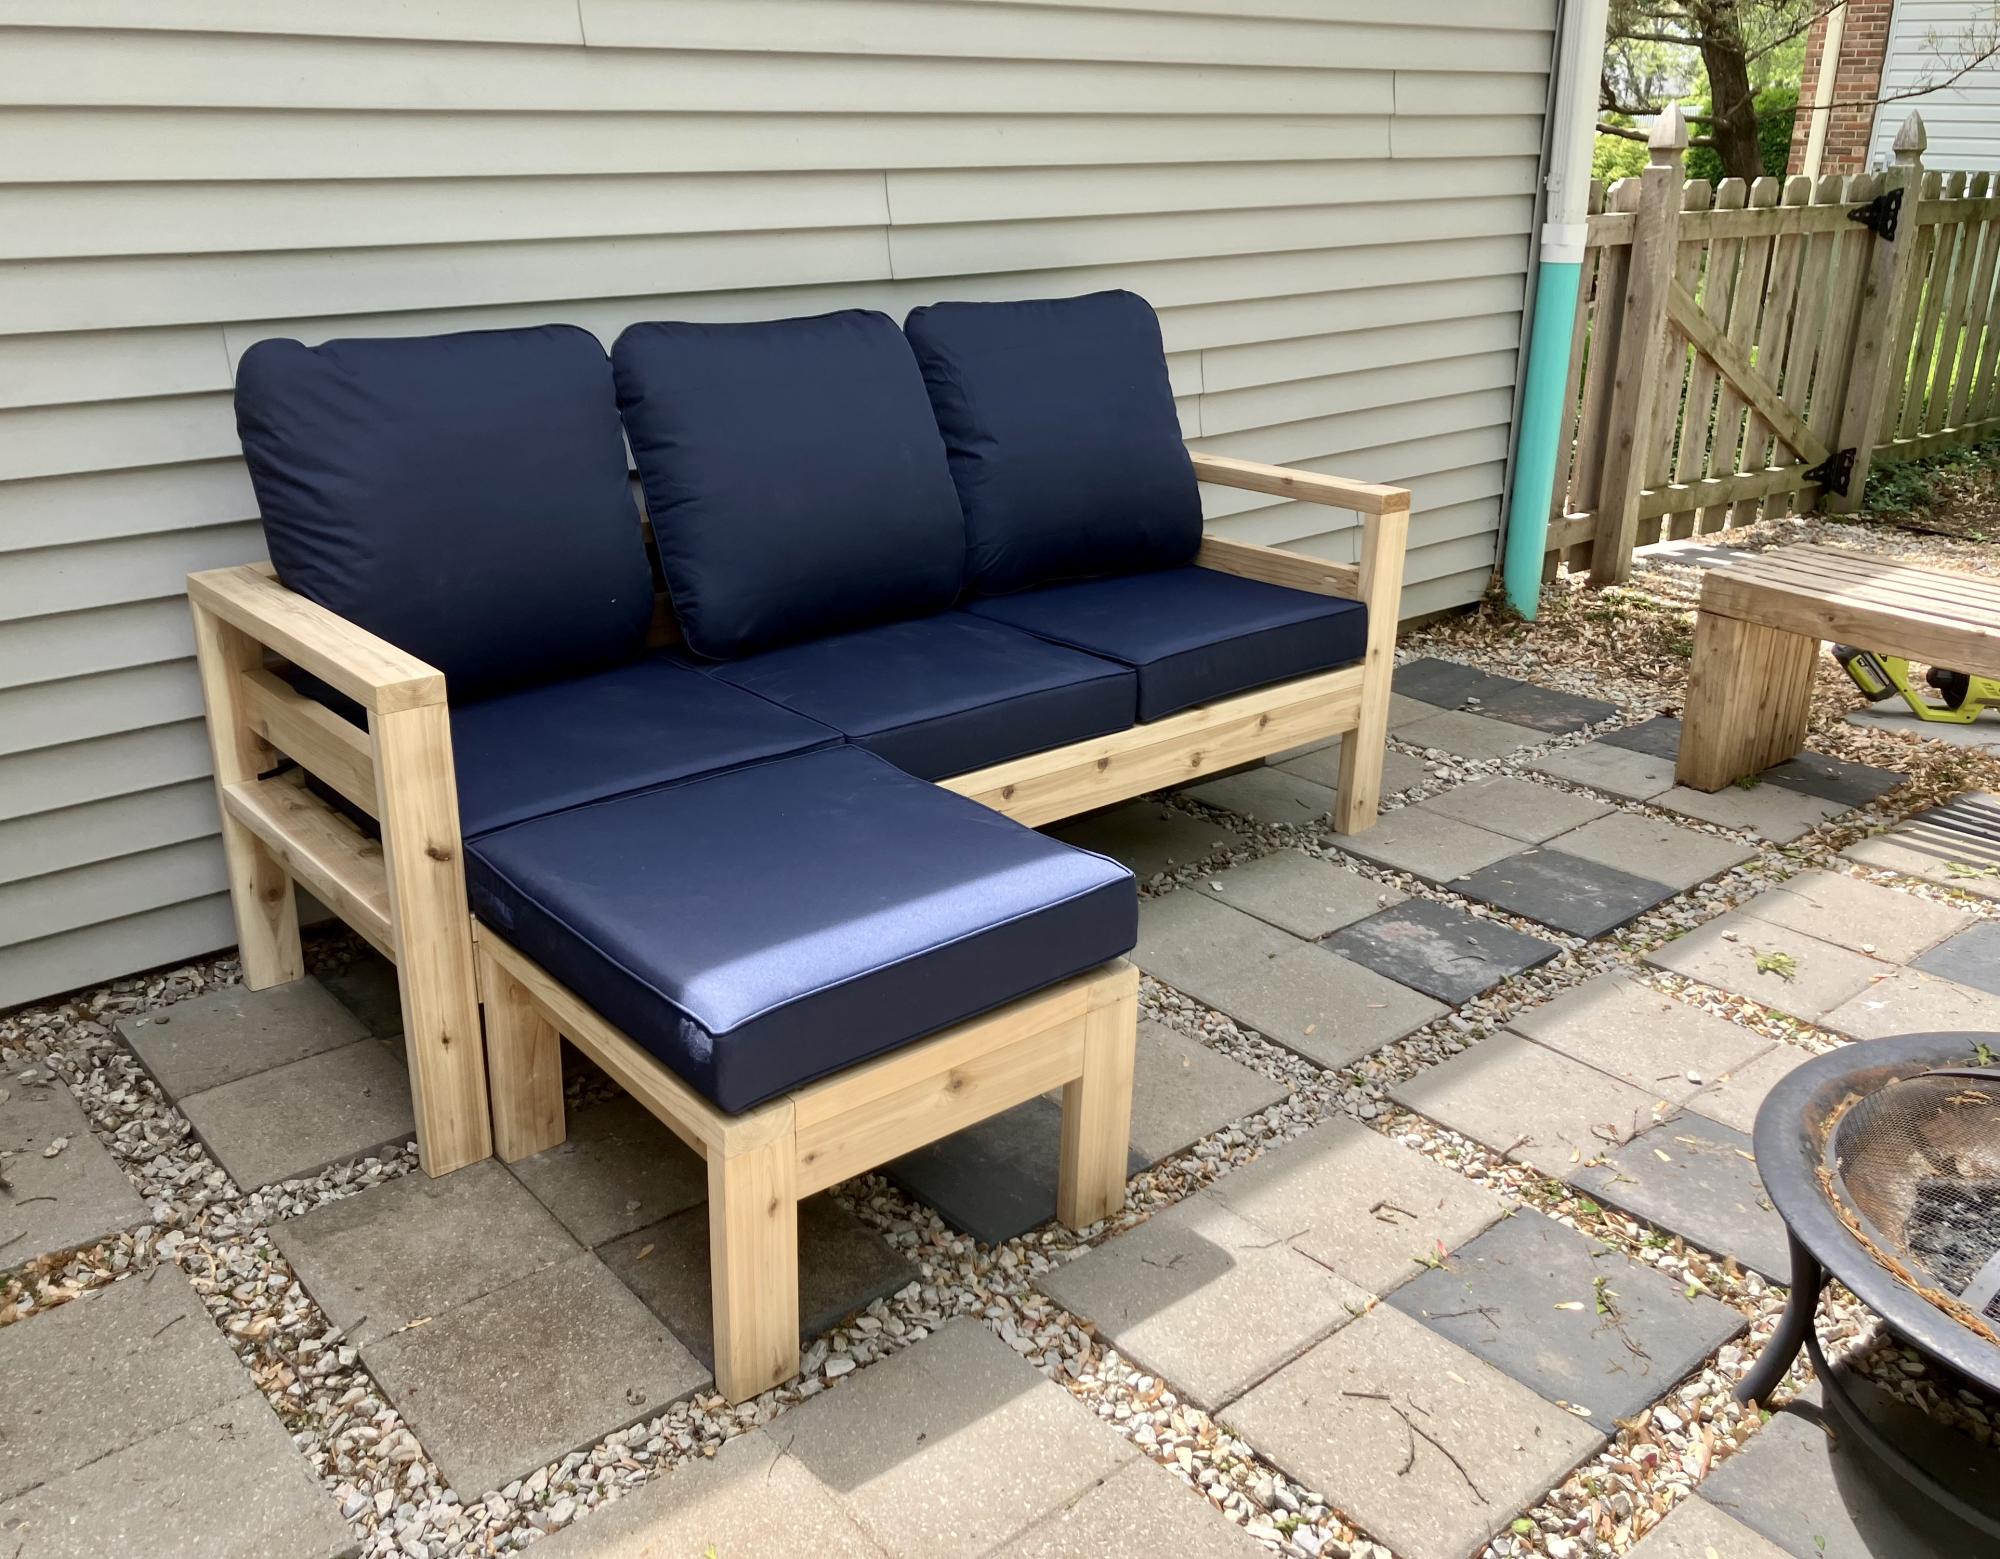
I used pocket holes to hide the screws. I made an ottoman out of the outdoor coffee table plans to my dimensions that can be used as a coffee table when we need it.

These are made from the three drawer plans but modified the size to meet our needs and used planks for shelves instead of drawers. Painted white and black gel stain.
UPDATE FROM ANA - We have received MANY requests for this plan and have created a plan inspired by this post here.
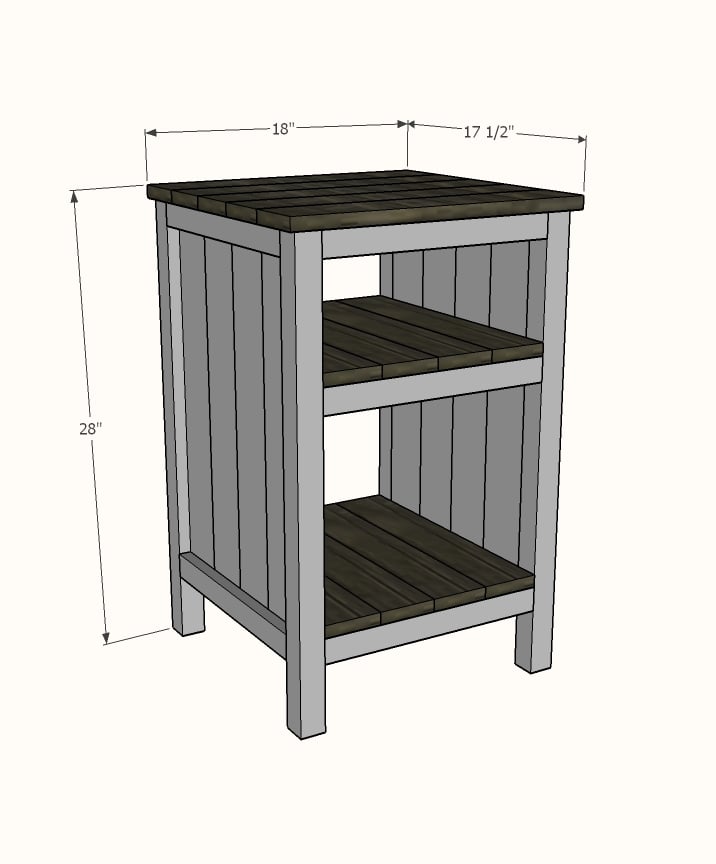
Shopping List (for ONE bedside table) + Tools
Cut List (for ONE bedside table)
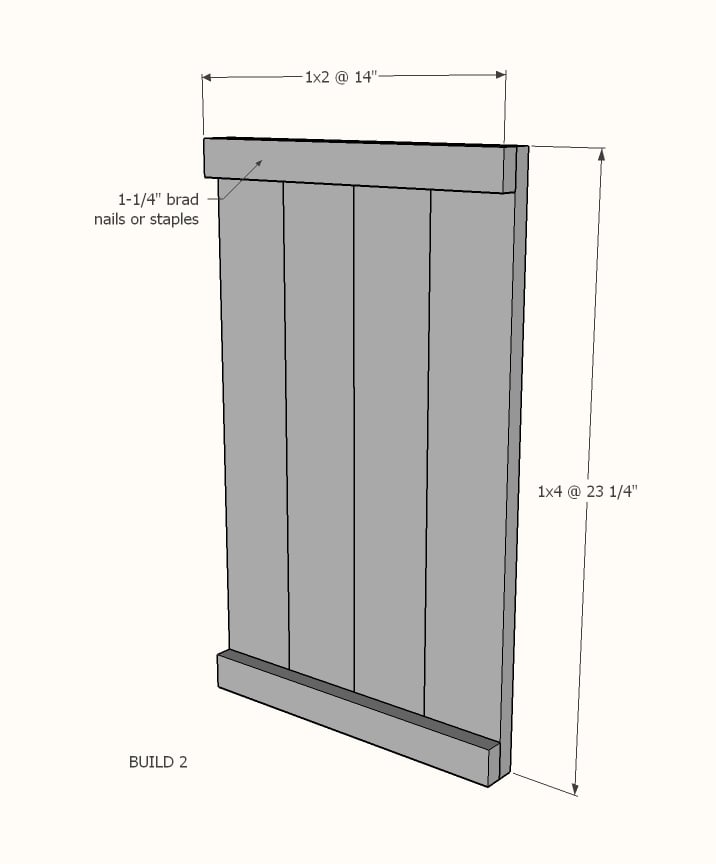
Cut 1x4s and 1x2s with miter saw. Layout side panel 1x4s as shown above. Measure and cut 1x2 to length. Nail the 1x2 to the 1x4s, two nails per overlap with glue. Make sure your side panels are square. Build two.
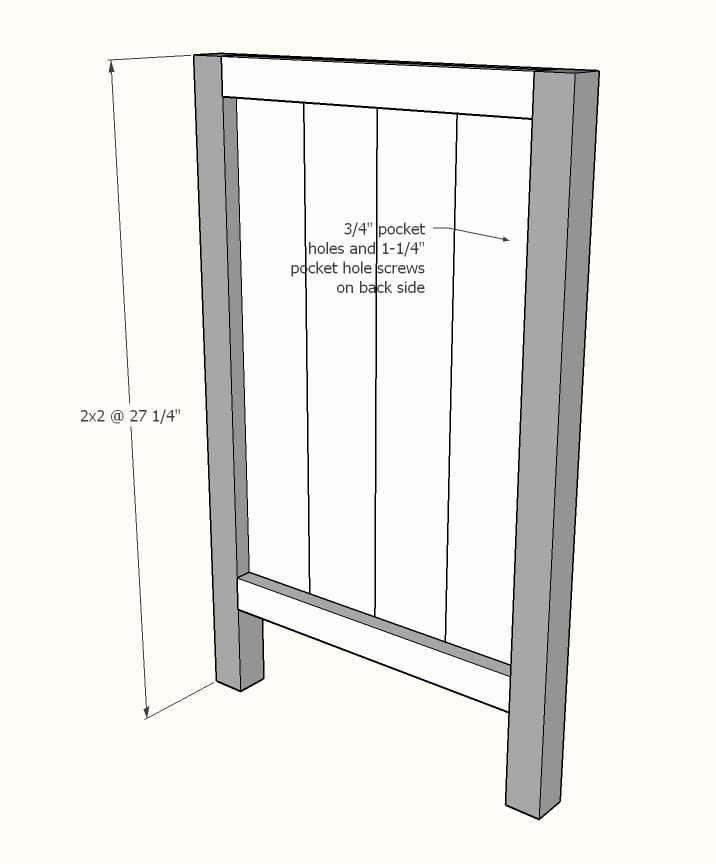
Drill 3/4" pocket holes on inside edge of 1x4 ends as shown above. Cut 2x2s with compound miter saw. Attach to the 2x2 legs with 1-1/4" pocket hole screws.
Set Kreg Jig to 1-1/2" setting. Drill 1-1/2" pocket holes on end of each 2x2, one per end. Attach to 2x2s with wood glue as shown above.
Cut 1x4 shelf boards with compound miter saw. Nail and glue to the inside of the project as shown above.
Cut 1x4 top boards with compound miter saw. Nail and glue to top with 1-1/4" nails and wood glue.
If you wish to add a back, measure and cut from 1/4" plywood and attach with 3/4" brad nails.
Mon, 02/12/2018 - 16:24
Is there plans for this one? Its gorgeous and I'd love to build it!

In reply to Is there plans for this one? by laurahamer07
Thu, 06/07/2018 - 15:37
Hello, this nightstand was built using these plans http://www.ana-white.com/2011/06/reclaimed-wood-look-bedside-table instead of adding drawers the builder added shelves. The shelves can be 3/4" plywood or 1x boards.
In reply to bedside end tables by karenlouder
Thu, 06/07/2018 - 15:40
Hello, this nightstand was built using this plan, but instead of drawers, simply measure and cut shelves to fit from 3/4" plywood. http://www.ana-white.com/2011/06/reclaimed-wood-look-bedside-table

Wed, 07/24/2019 - 09:24
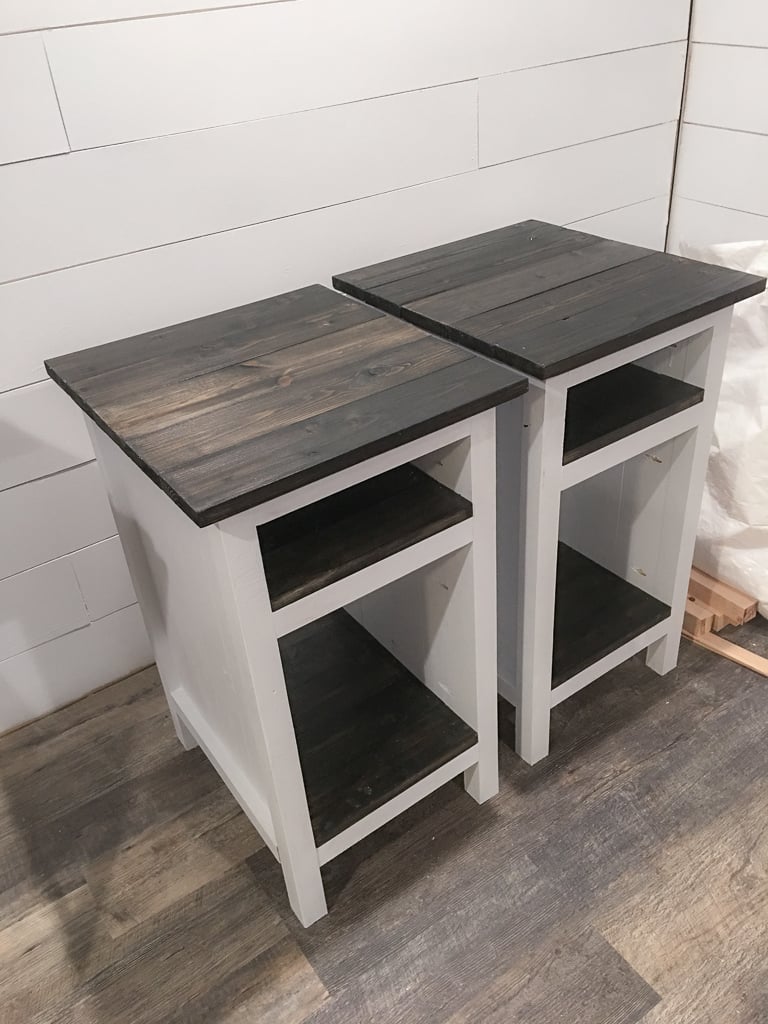
It's taken us a couple of weekends, but we finished our bedside table. We made two, but one still needs painting.
Thank you for the plans. We had a great deal of fun and learning experience making these.
Want to see it? https://www.facebook.com/photo.php?fbid=2830583376957272&set=pcb.283058…
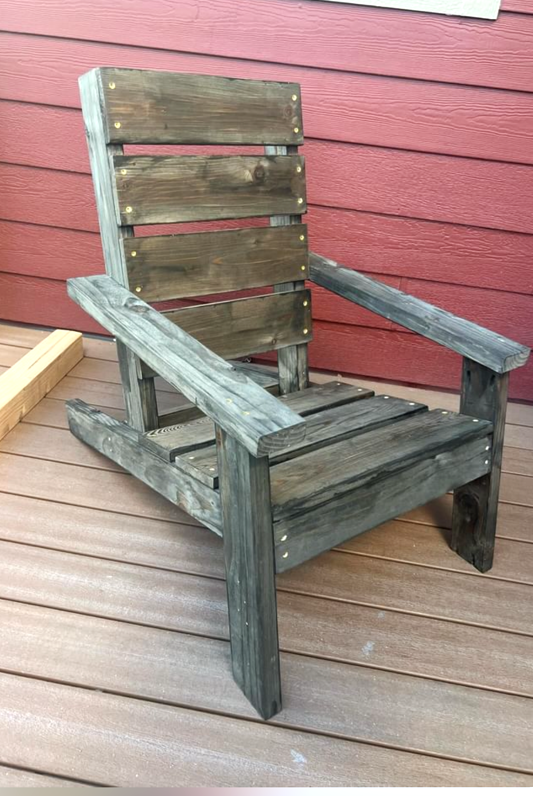
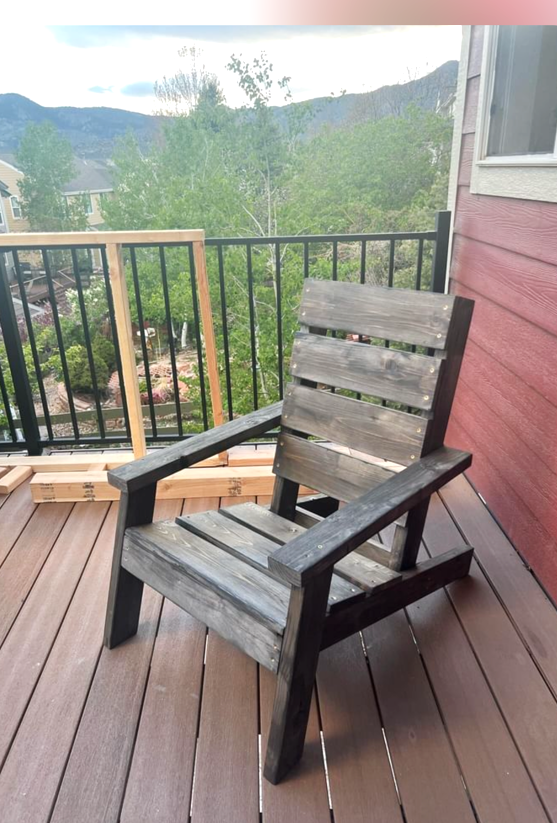
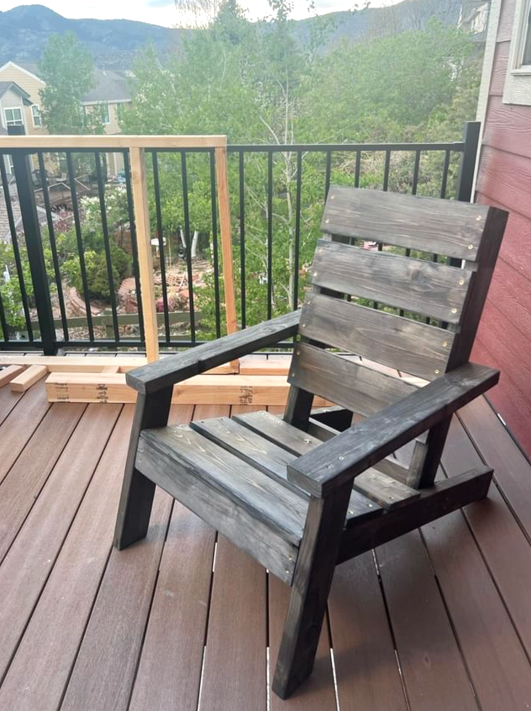
DIY Adirondack Chair
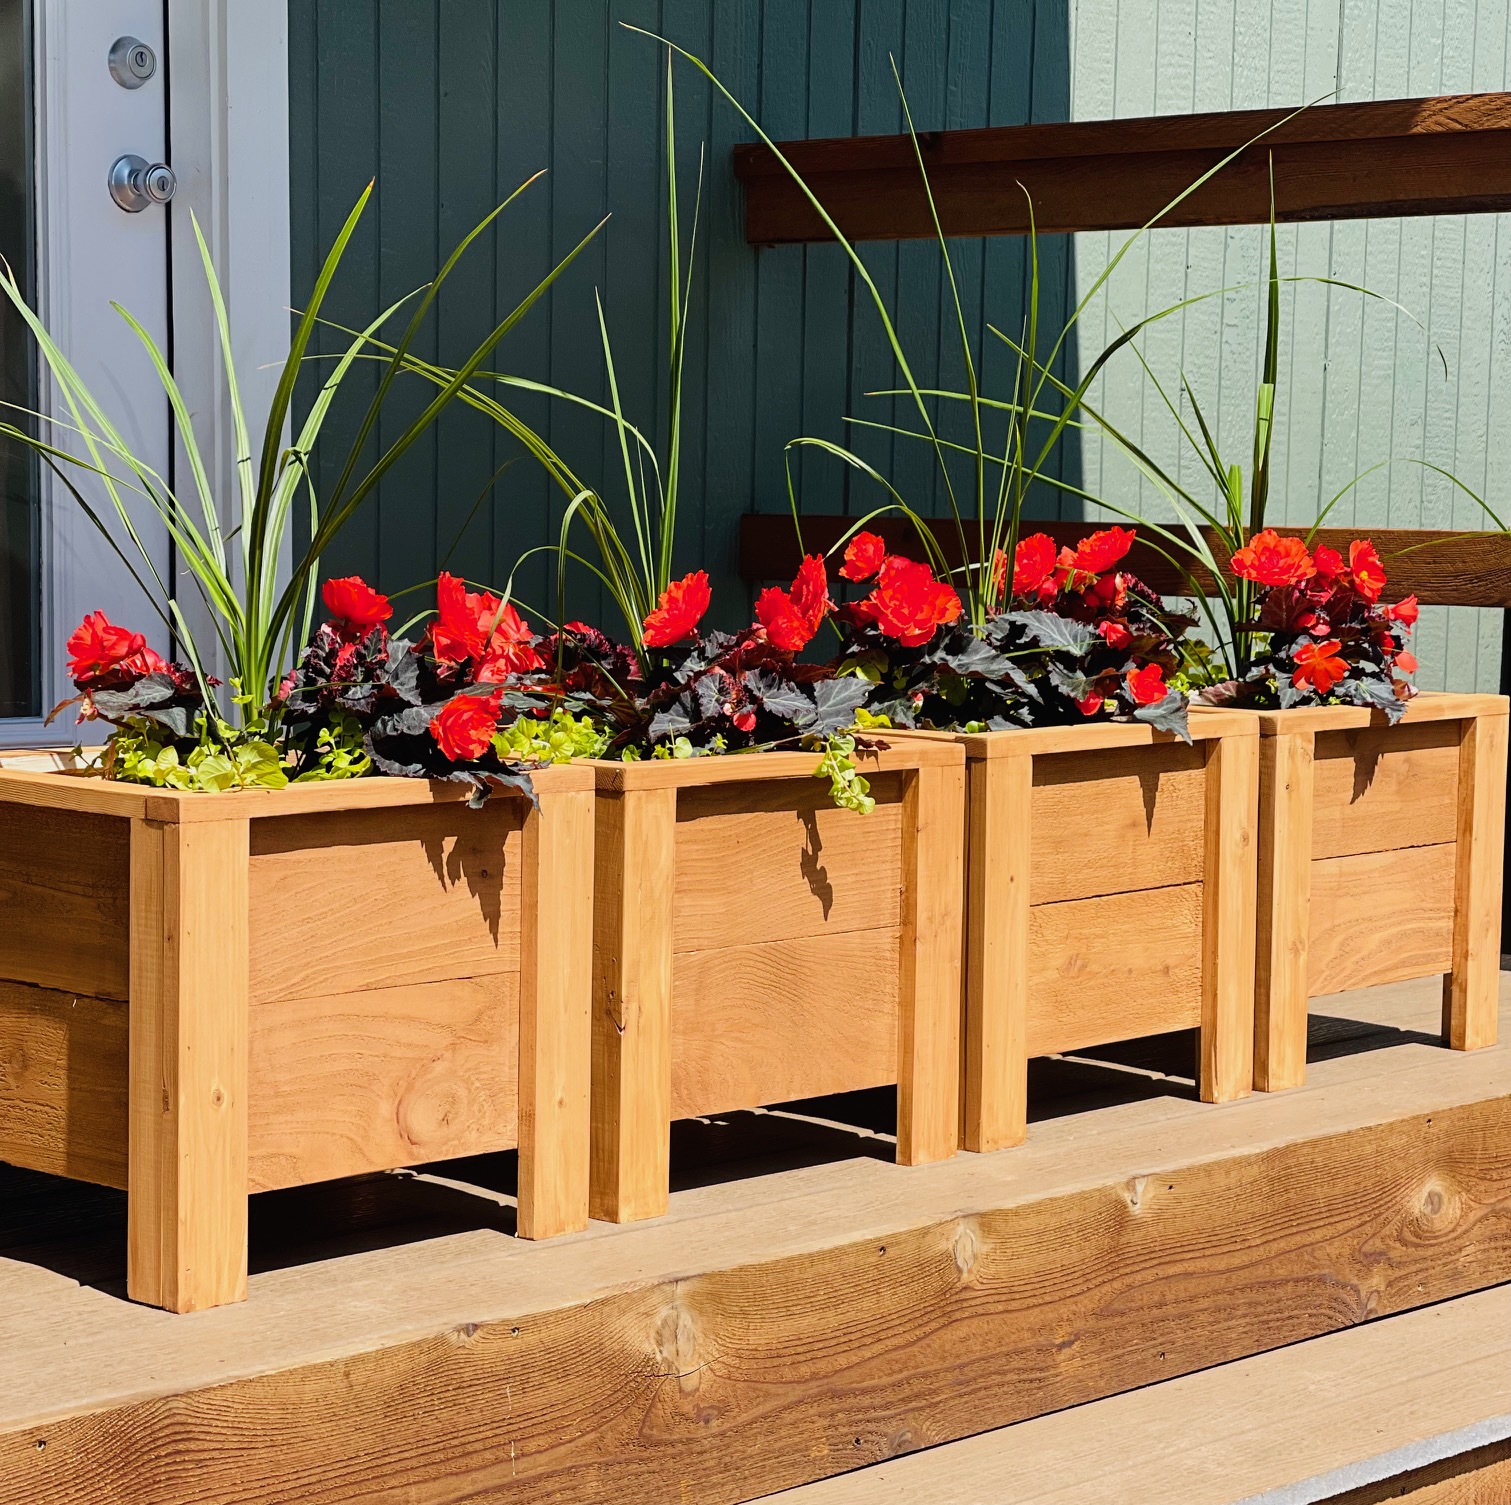
I've been wanting to build this plan for quite some time! Took me about 2 hours to build and 1 hour to finish. Giving these as gifts for Mother's Day! Total cost was about $15 per planter. I scaled down the design after I found the plants I wanted to put in them. Ana has the best and easiest plans!


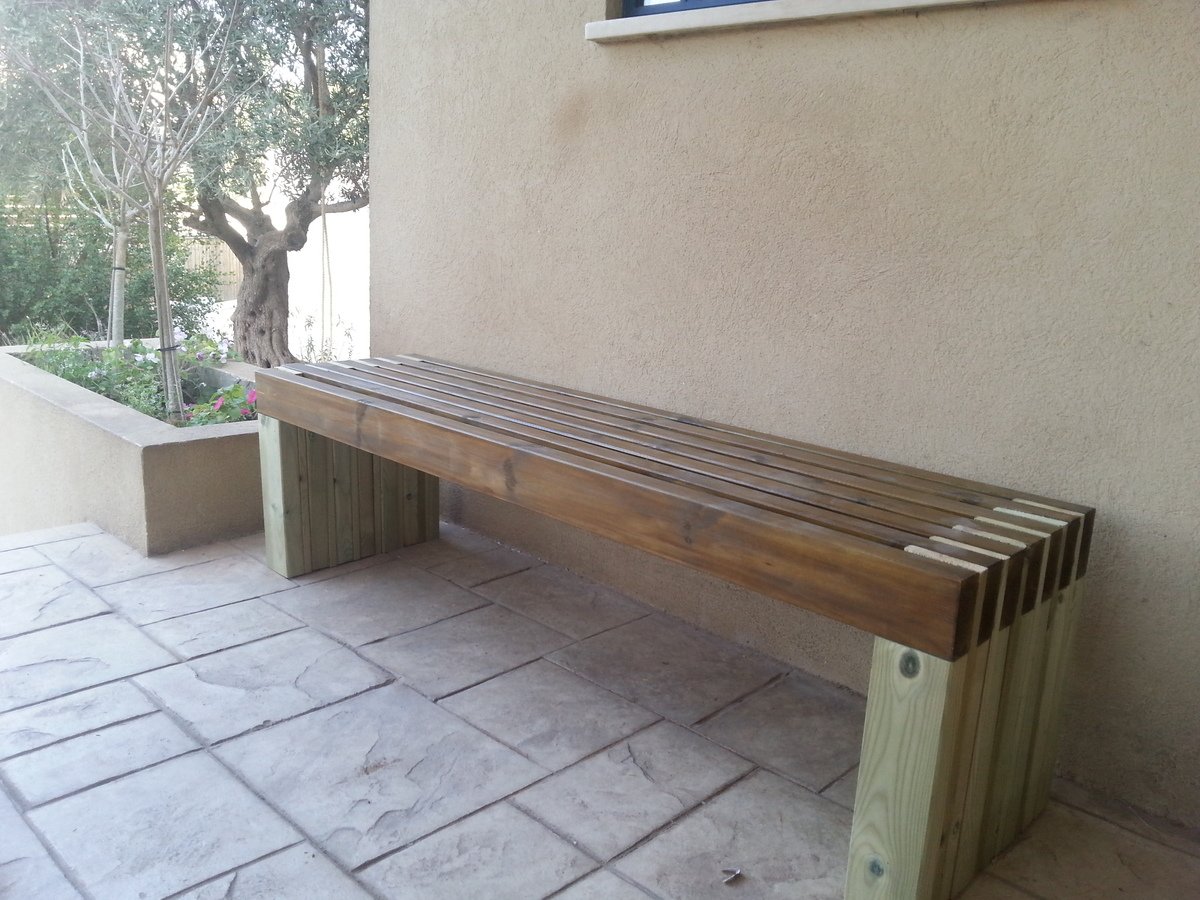
Thank you for the easy and fun bench plan.
It was really easy to install.
Even my 2 little daughters had fun (-:


Thu, 04/24/2014 - 08:06
I love the finish you did on the bench. Thanks for sharing!
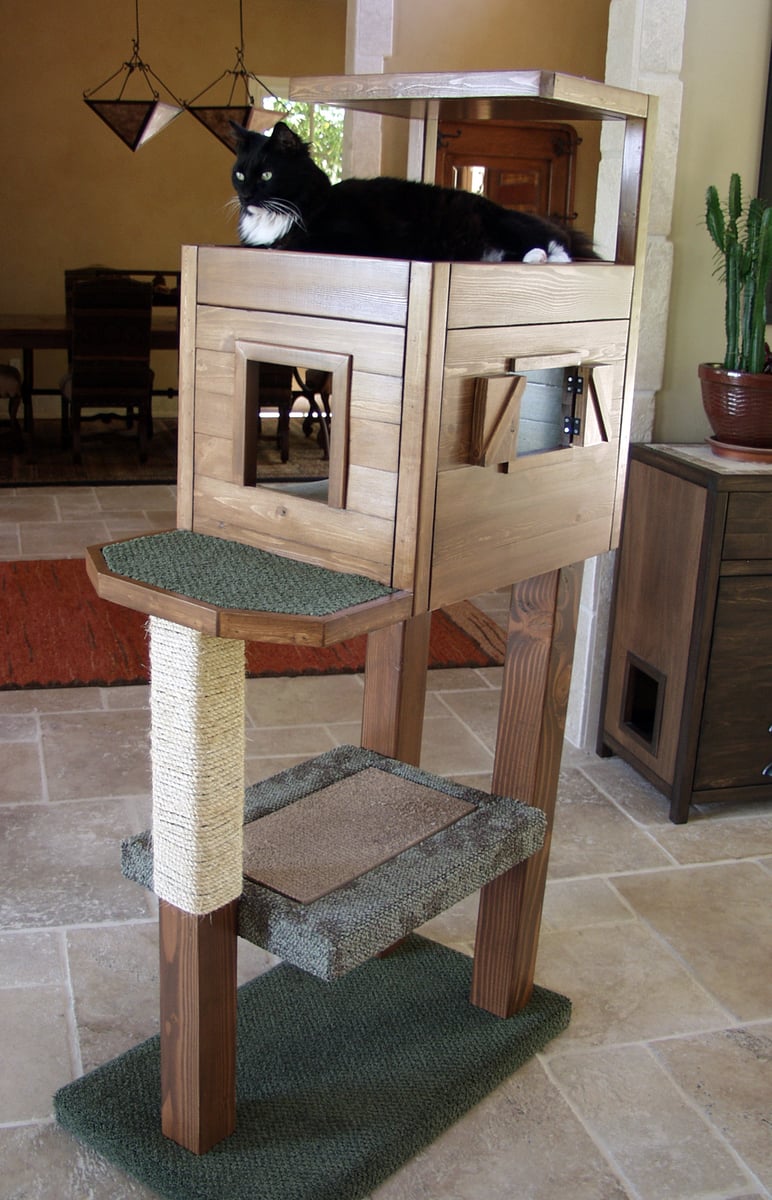
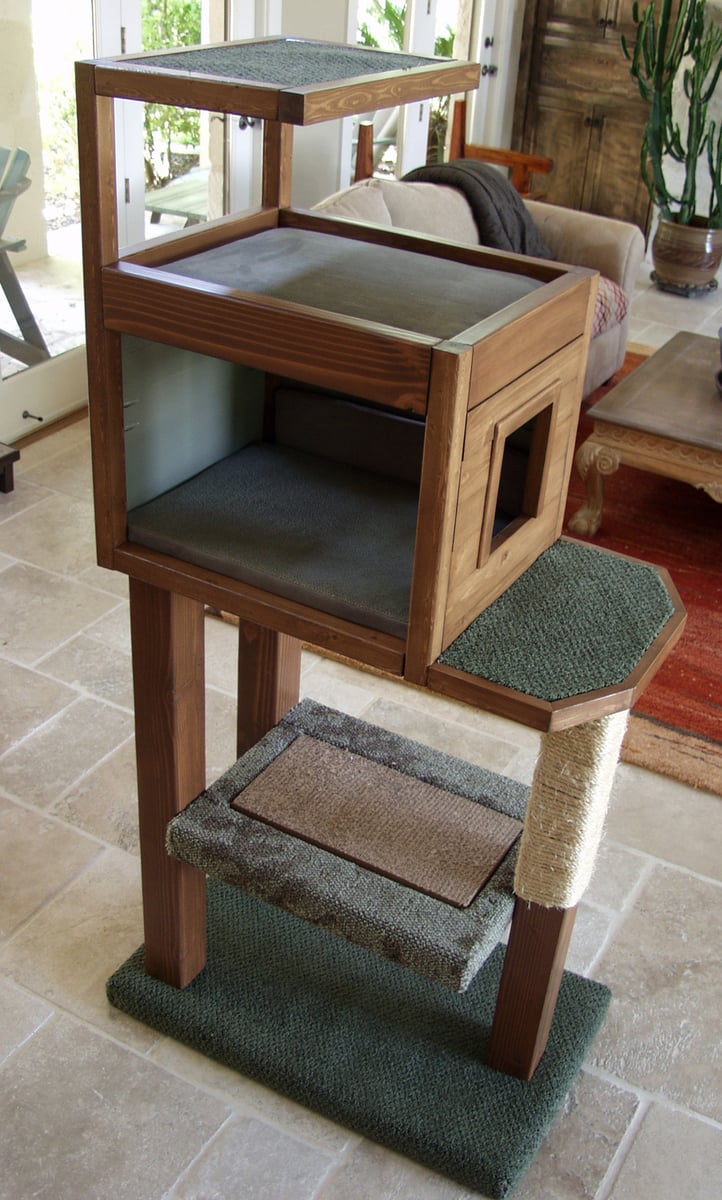
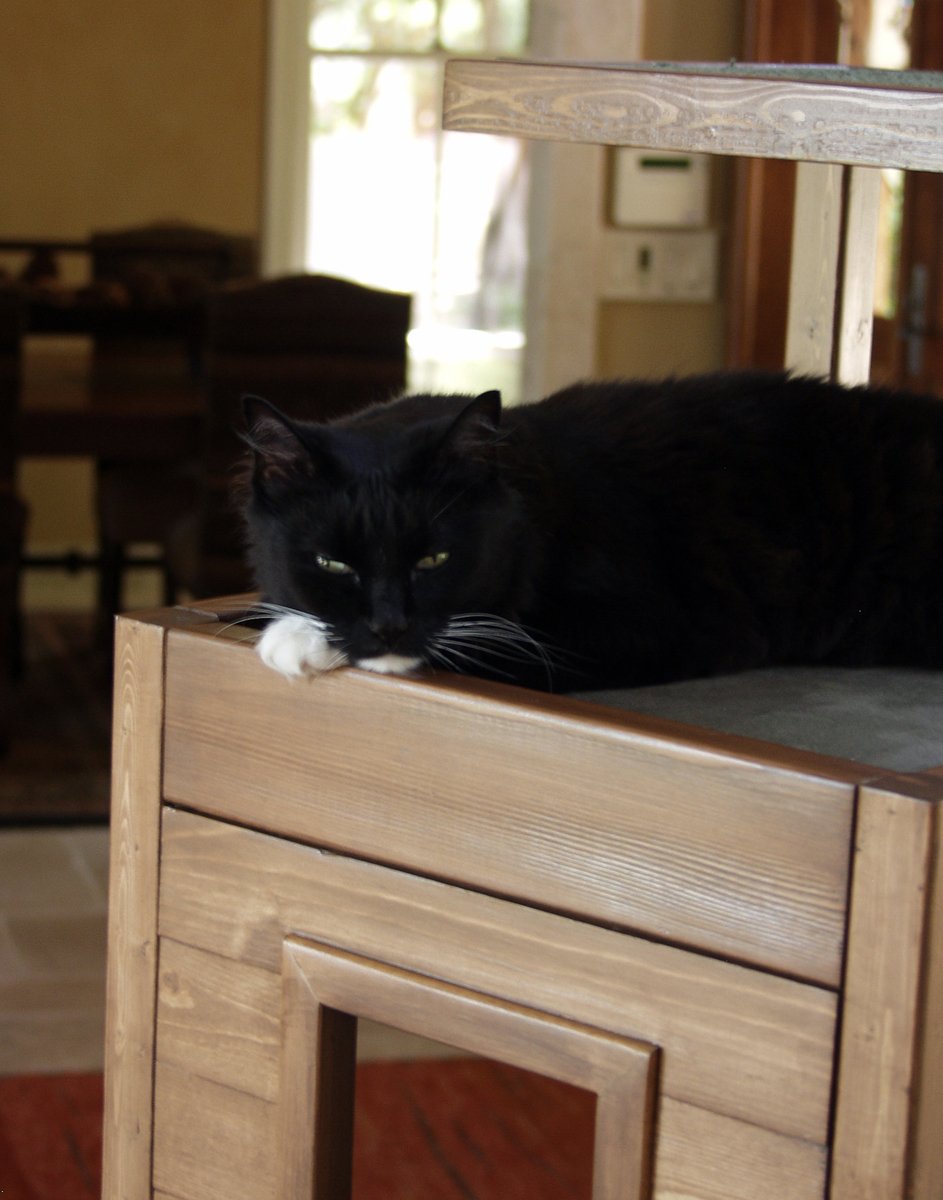
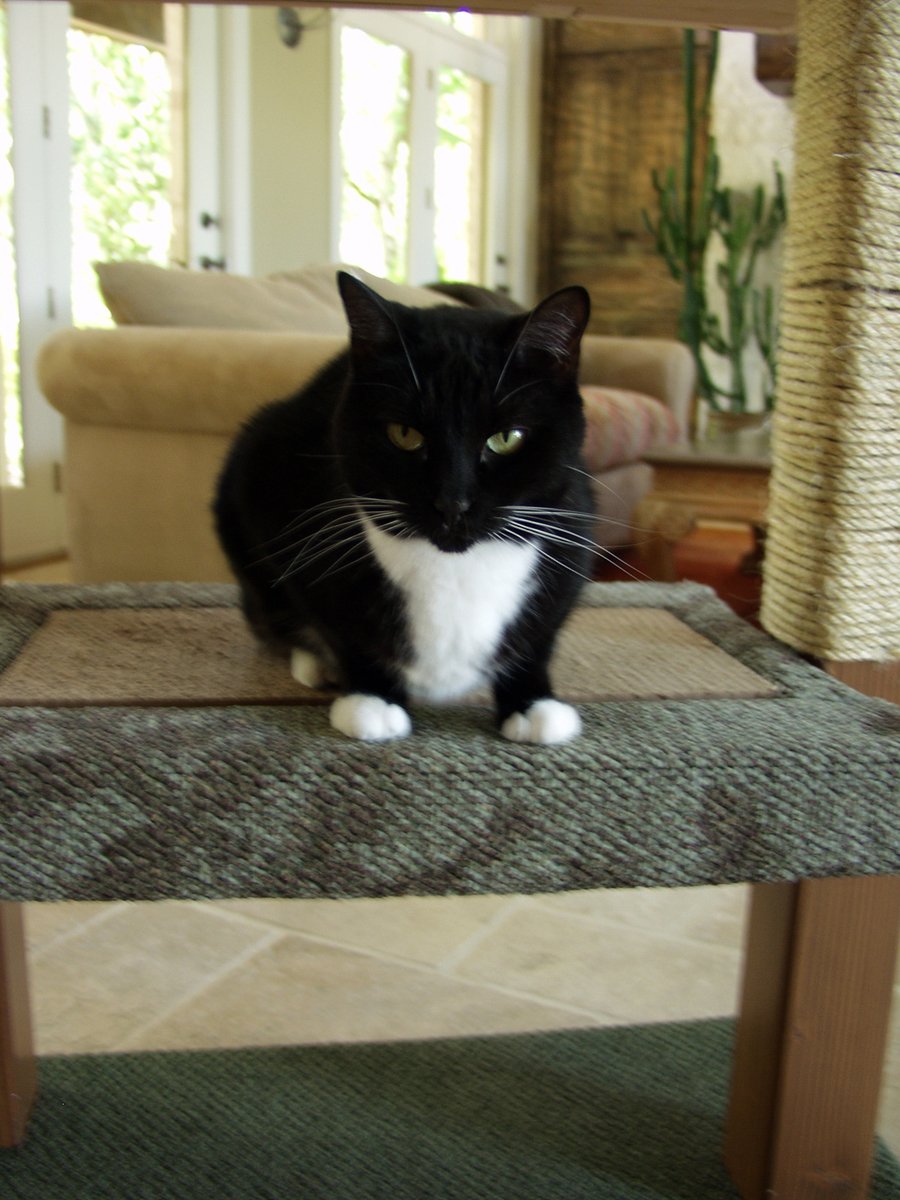
I always wanted a cabin-type cat tree where my cats could crawl in and feel safe, but still have a great view of the birds out of a window. I tried to draw my vision on paper, but that had a hideous result. Learning Google SketchUp (at least the basics) was an absolute necessity. I could never have built this without drawing it in 3D first, and seeing how the boards would connect, etc.
For the scratch pad, I built a frame out of 2x4s on top of plywood, covered it with carpet, and dropped the standard size scratch pad in place. This is the cat's favorite feature. I put barn doors on the window with tiny hinges so that I can close for added privacy. The tree sits against a window so that the back side is totally open. I made cozy zippered cushions for the platforms (that can be taken off and washed). I covered the carpeted areas with spare carpeting.


Fri, 07/12/2013 - 09:36
Would you mind sharing your dimensions for this? It is absolutely beautiful!
Sun, 08/25/2013 - 08:10
Do you have the plans somewhere? I really want to build this (even got the okay from the hubby!) but I don't think I could do it without some serious guidelines...

Fri, 08/30/2013 - 15:55
First, sorry for the late notice; I just happened to look and saw the comments/questions.
I don't have plans...all I have is a google sketchup diagram that I created as a guideline for my construction (which is included in the photos), which is not to scale. Actual measurements are:
* Base (green carpeted base): 33.5" x 19"
* 4x4 legs: 35" tall
* 'Mezzanine' scratch pad level: 22" x 17.5"
* Mid-level base: 18" x 32"
* Enclosed cabin: 18.25" x 22.5" x 17" high
* Highest point: 56"
This has turned out to be a fantastic hit with the cats. They use all 5 levels, but the scratch pad and cabin are their favorite spots. If you need anything else or additional pics, please contact me.
Fri, 08/30/2013 - 18:15
Thanks for the dimensions, Joni! I'm trying to learn SketchUp so I can draw up my own plans, also. If I can't figure it out, I'll hand it off to my 12 year old, who is a pro at it (go figure). I know my cats will love it if I can manage to get it built!
Fri, 09/27/2013 - 10:15
I used your pictures and diagram Joni and made one for my friend for her cats! I used 2x4's for the cabin which makes this thing so heavy but so sturdy! It holds my 60 lb child without budging... here's a pic of it almost done. My friend was not finished wrapping the posts with sisel rope though.
https://www.facebook.com/stephanie.brooks1975#!/photo.php?fbid=10151788…
Thu, 10/31/2013 - 14:30
Bhoppy -- I looked at your cat tree on facebook. It's awesome! The sturdiness of it shocked me too. And I was initially worried that my cats might knock it down!!
The worst part of building it was getting that lower scratch pad level on straight with the 3 posts. I'd never want to do that again!
Thanks for sharing, Joni
Fri, 01/02/2015 - 01:18
Funny, almost every time I'm looking for ideas or inspiration when I want to build something, I end up back on this site. I was searching for pictures of cat trees and this was the only one that made me say "Holy crap, that's EXACTLY what I want!" My cat will love it!
Mon, 04/27/2020 - 20:41
Not sure if anyone is still around to see this, but I fell in love with this tree the second I saw it. Wondering if anyone created a detailed plan and might have it handy or possibly a detailed sketchup and wouldn't mind sharing the save file?
In the event nobody has either... I'm planning on having someone else build this for me as I don't have the tools nor skill to do it myself. I have a few questions:
1. The tree base/platform, what's a good recommended thickness?
2. The platform for the scratchpad... is there any certain reason it's so much thicker compared to the other platforms?
Thanks.
Sun, 09/12/2021 - 11:51
Reverse engineering this project, using just 2x4s. None of the photos show the undersides. How are the plywood pillow bases attached for the top and bottom of the cabin? and the base of the top viewing platform?
Sun, 09/12/2021 - 16:42
There are no Minwax water based stain colors with those names that I can find.
Will be making MANY more of these, so easy and a fun gift! This one was for my niece.
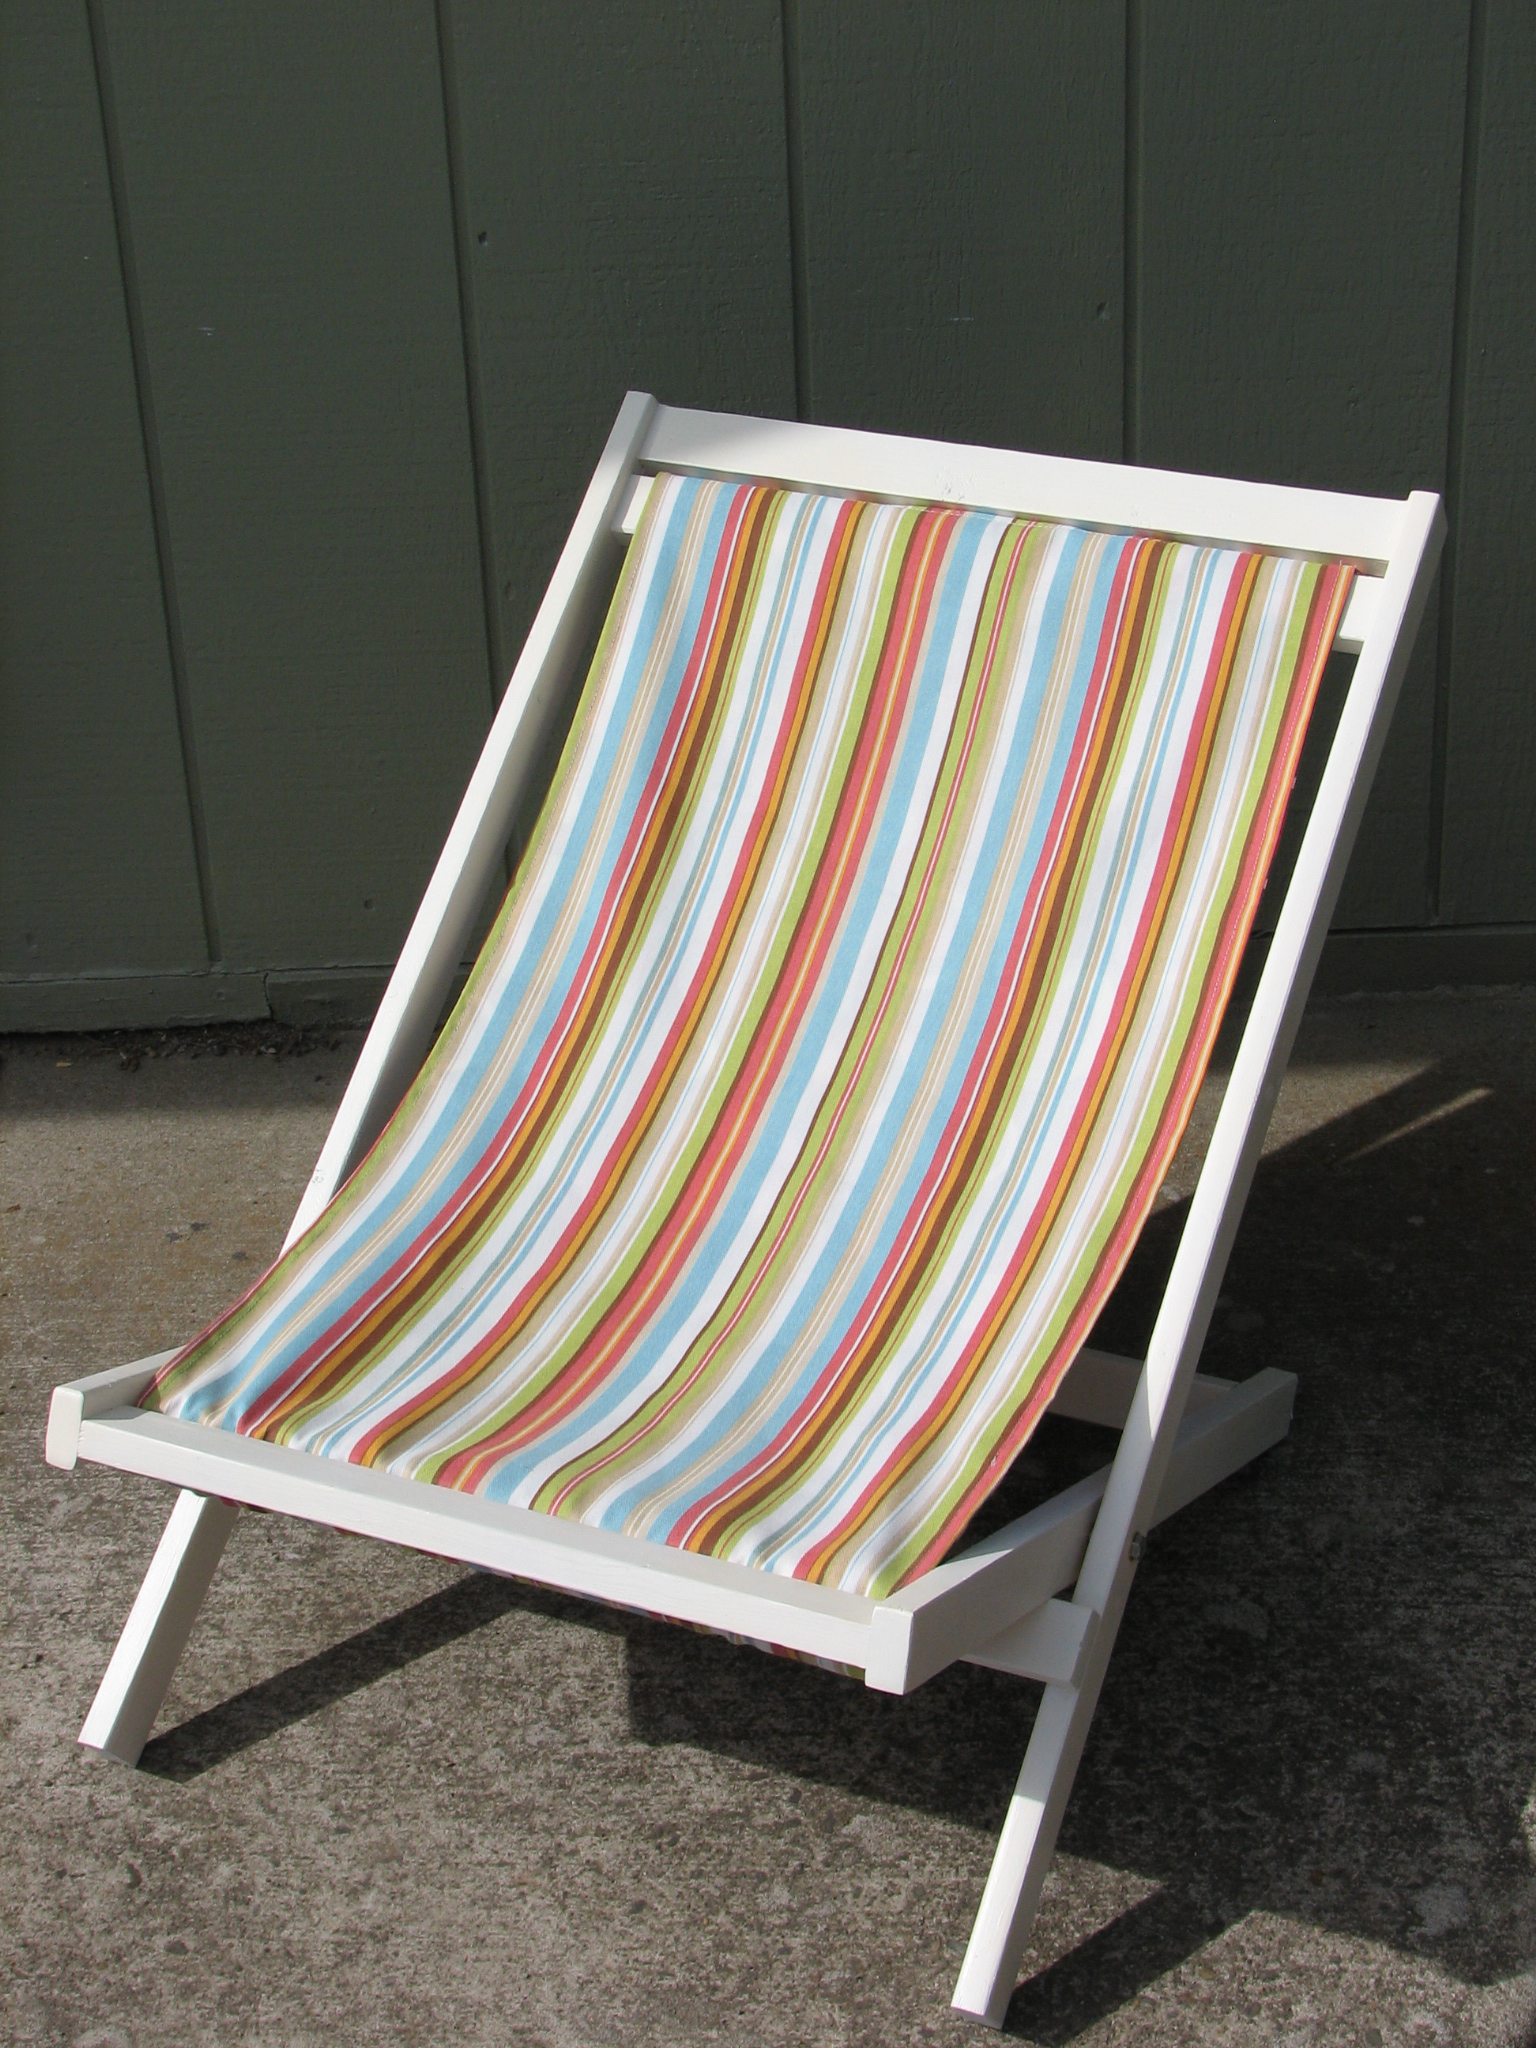
Fri, 06/10/2011 - 11:28
This chair is just beautiful! Really perfect, really! Thank you for sharing!
Fri, 06/10/2011 - 22:34
Loving the sling!! Simple and traditional which I am really getting into lateley. Love it!

We had some leftover granite from an outdoor kitchen build and wanted to maximize the use of it. We loved the look of a rustic table from Pottery Barn and set out to find something that was asking the same aesthetic. I came across the Jilly and Mia workbench console and thought it would work great with some minor modifications. I shortened the overall length and height, went with some heavy duty casters to support the weight of the granite, and reinforced the cross beams that would support the 3/4" plywood sheet and granite. I went with cedar for this build since it was outdoors and I'll finish it with a clear sealant.

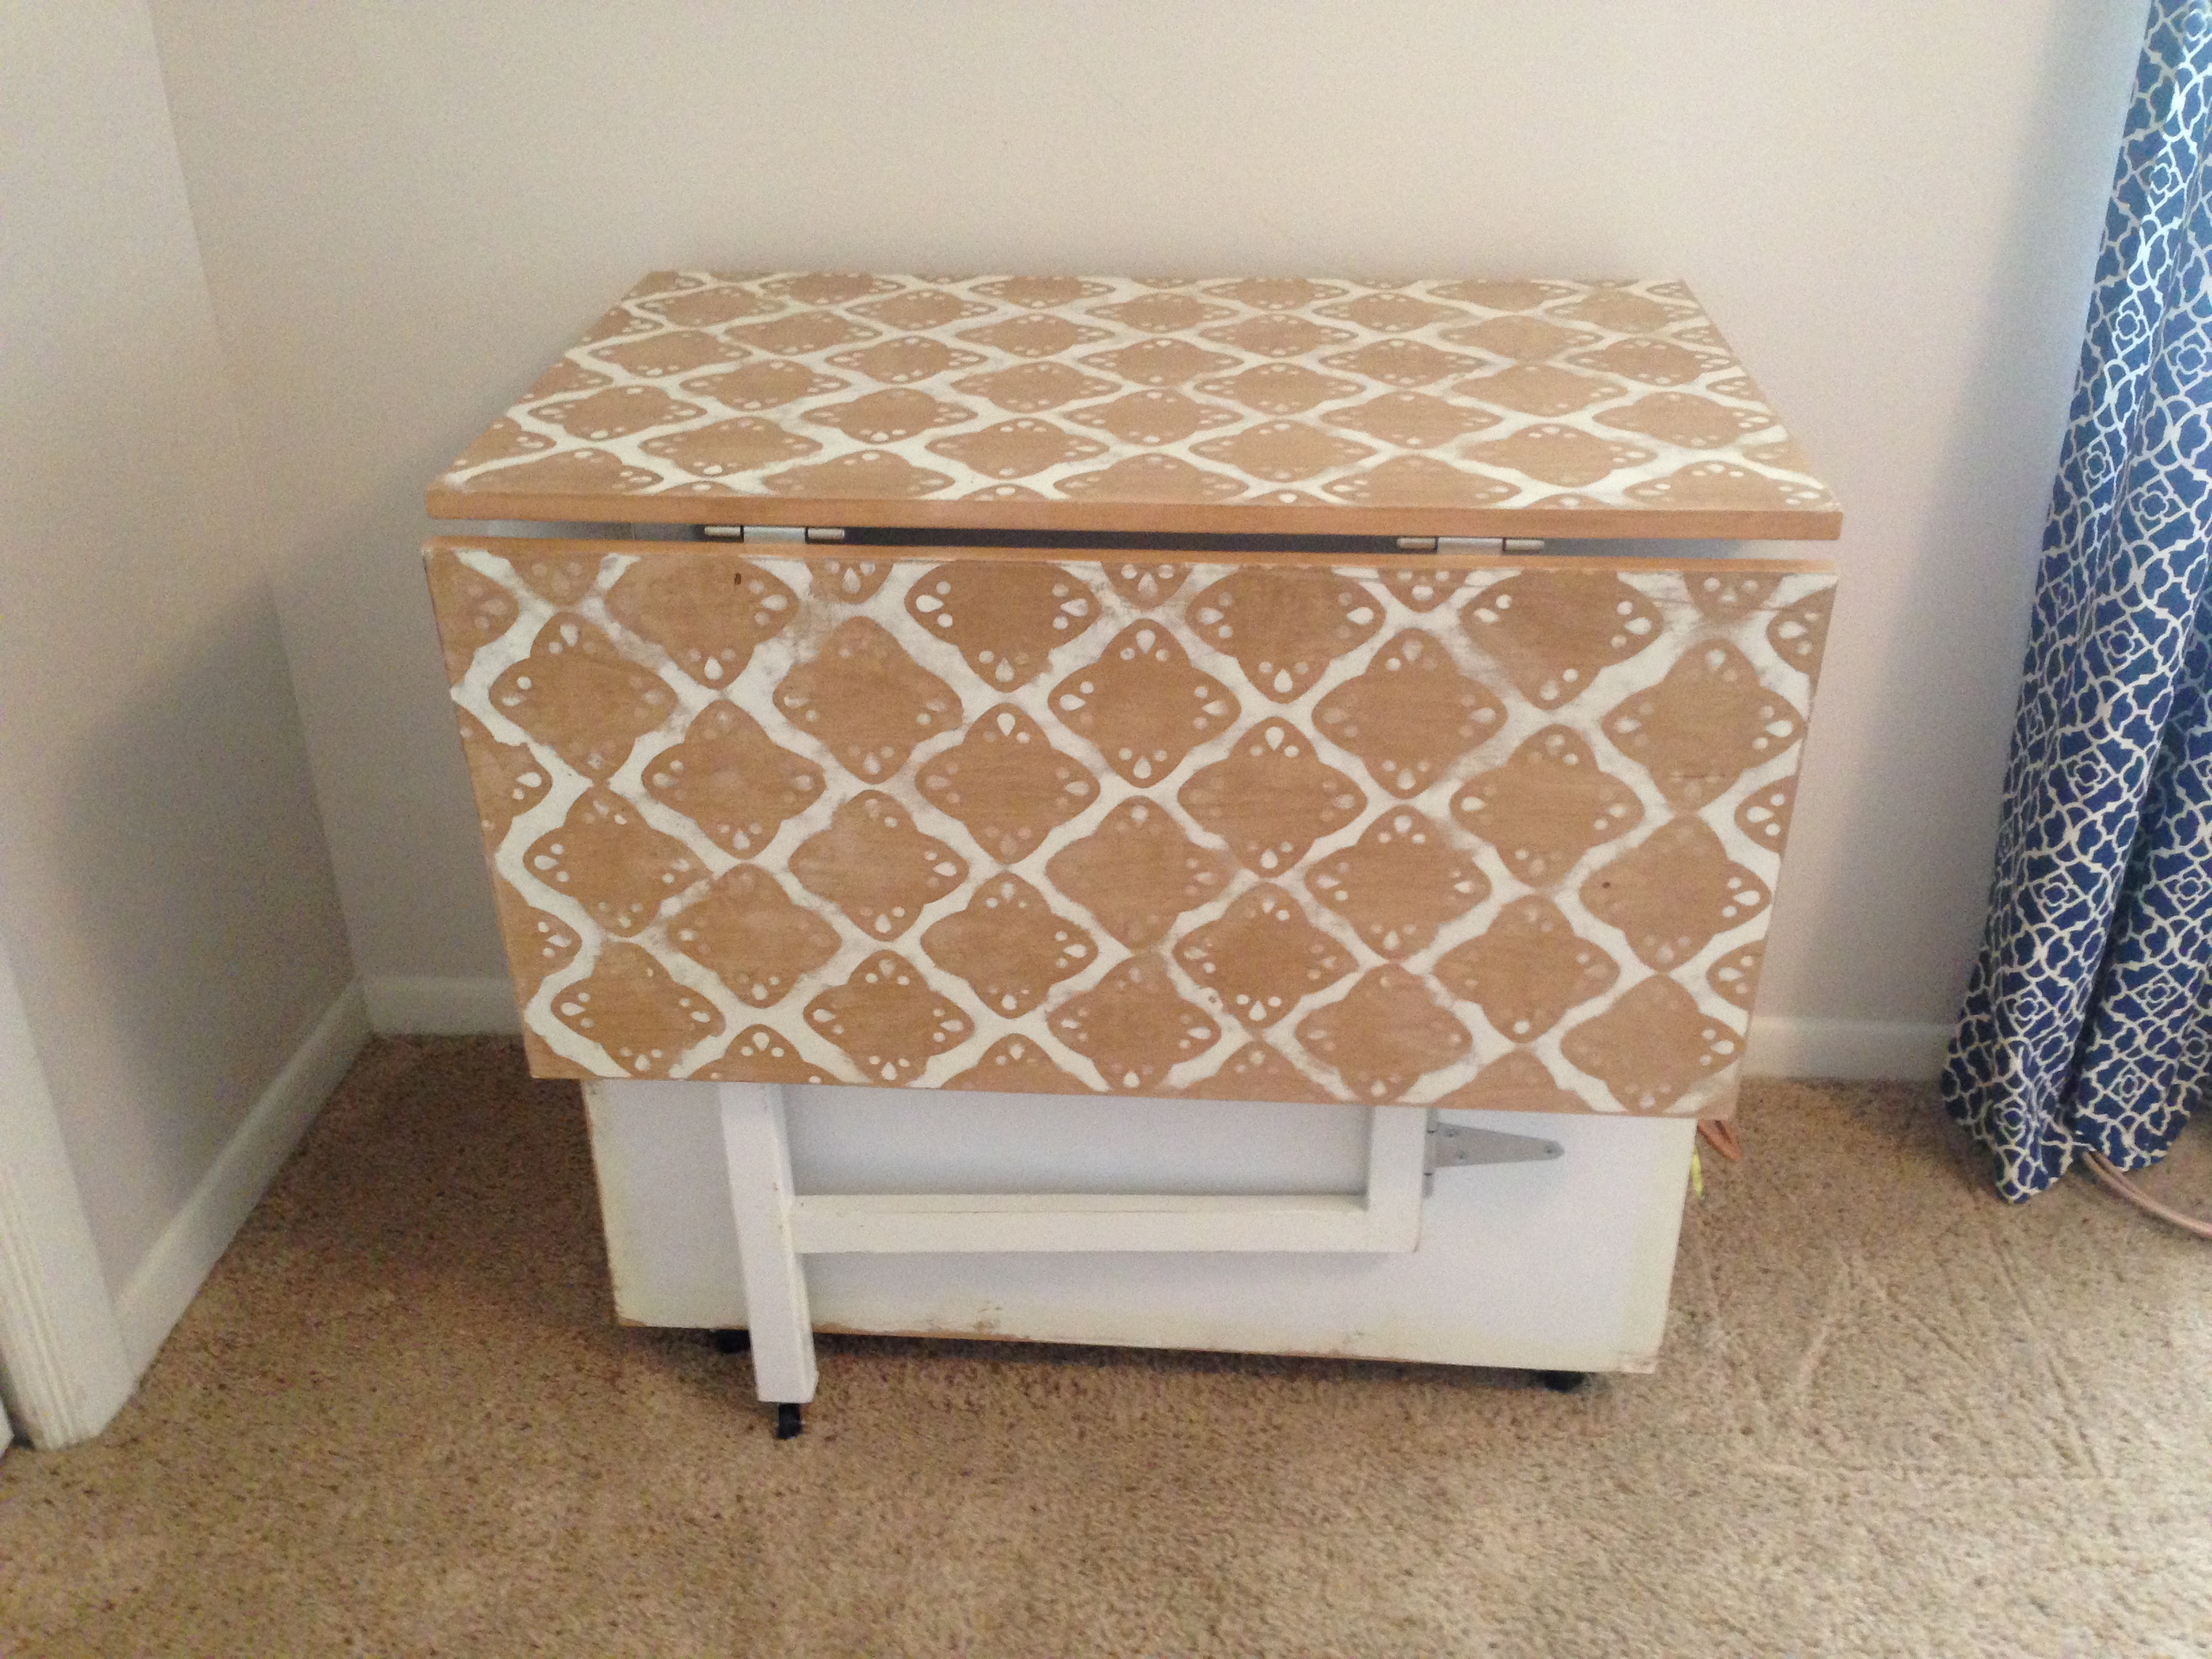
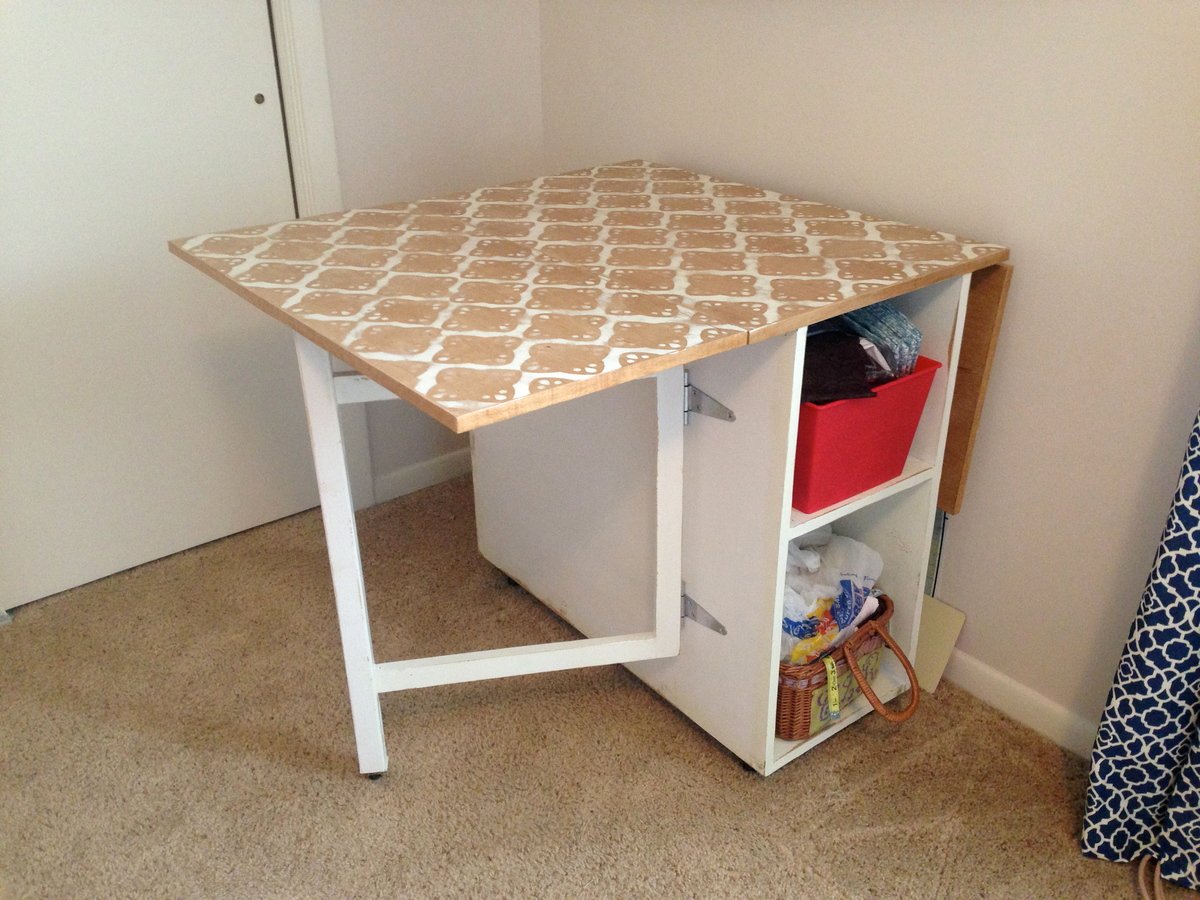
My husband and I built this table as our first project. We followed all of the dimensions from Ana's "Small Sewing Table" project here: http://ana-white.com/2010/10/plans/sewing-table-small-spaces?page=1 The only thing we changed was the size of the table top and the legs. We were worried about putting my heavy sewing machine on top of the leaf called for in the plan, so we created gate legs to support the leaves. Since the legs were going to be folded up in between the base and each leaf, we extended the center portion of the table top to accommodate the change. After it was assembled and stained, I decided that I didn't like the solid color, so I stenciled on a pattern with white latex enamel paint (what I had on hand) and continued to paint the base. After lightly scuffing it up with the sander, I layered 3 coats of poly on top. It has held up well, even after many large quilt projects! I just LOVE my sewing table!


Fri, 08/05/2016 - 13:41
Hi there. Could you please tell me what the brackets are you used with the gateleg? Do you remember where you got them? Thank you!!!
Fri, 05/26/2023 - 16:59
Hello I was wanting to know how to make the Gate-Legs for this project? Like the measurements and such. Thank you.
Sun, 05/12/2024 - 08:40
How heavy of sewing machine can this hold? My machine is 32 lbs. Would it be able to sit and be used on the “leaf” side of the table ?

Comments
Ana White Admin
Sun, 07/10/2022 - 18:01
Nice Coop!
Looks great, thanks for sharing your project!