Queen Farmhouse bed
This is a modified Farmhouse queen bed. This was the first thing I have ever made from wood by myself for my wife and I.
Channing Desk built with select pine boards and maple plywood top/sides. Fairly easy project. The sanding/painting/staining took much longer than the actual building. We used 2 coats of Special Walnut followed by 2 coats of Weathered Oak. Then to finish, 3 layers of polyurethane. Very pleased with the plan and finished desk. Thanks Ana!
Sat, 02/01/2014 - 12:30
It turned out great.
I agree. The finish work is what takes the most time.
This was an easy project. It took longer to paint and stain than the construction.
Thanks for the plans, this web site is awesome.
Used the plans for the Arts & Crafts Play Table, but ditched the angled legs (the squared off legs have no stability issues at all), and used a regular piece of 1/4" fiberboard instead of acrylic for the lid. On the lid I glued a 15x15 LEGO baseplate, and compartments underneath are for LEGO storage. The local REStore had an 8ft length of 3" laminated MDF trim for $2, which worked perfectly as the trim for the top of the table with no sanding or painting required.
I know the paint in the photo looks super-streaky, but I used some leftover Rust-Oleum cobalt blue metallic floor paint, so it's shimmery and glossy. Unfortunately the visual effect photographs poorly.
Wed, 10/20/2021 - 09:53
Totally clever integrating the lego baseplate! Thanks for sharing:)
I modified these plans slightly so as the add wrought iron mantel supports. I increased the length of the top and bottom and then added 2 additional internal supports where I made cuts on the front board (just on the inner edge of the mantle support. love how it turned out.
Stacyw3838
I wanted two sideboards flanking the doorway in my dining room. I took these awesome plans and just scaled them down, building the middle portion of the sideboard only and ignoring the two sides. I used the exact measurements of the middle portion of the plan. Other changes were that I used 1x12's on the ends of the sideboard, instead of planks, and luan in the doors, instead of beadboard. My biggest advice to someone else building this would be to make sure that the unit is square as you build, if it is not, you will have some serious shim work to do with the drawer slides! (of course, I know nothing about this, haha!) It was a great plan and a lot of fun to build. Oh, and I also used my router to rout out a 1/2 inch deep groove all the way around the back side of the unit, that way I could inset my back into the piece and it would not be visible from the side.
Thu, 04/19/2012 - 08:04
You did an amazing job! Great idea and looks fab! I'm trying to get up the nerve to build it full size. I've just done simple projects so the thought of doing doors and especially drawers makes me nervous as I'm real particular and get frustrated when things don't go as planned!
Thu, 04/19/2012 - 10:47
great job! These look beautiful. Did you use a router table or just do the grooves by hand? How difficult was that if you did it by hand?
Thu, 04/19/2012 - 17:04
Hi! Thanks for the compliment. I have a Bosch Colt, handheld router that I used for all of the routing, on the back of the unit and also on the doors to inset the panels. Hope that helps!
Mon, 05/14/2012 - 23:02
Great work! I love that you routed the back. It's so nice not to see the back tacked on. In some applications it is no big deal, but for a piece like this, when you're walking by the side of it every day, I think it is much more polished not to see the back. And...I totally know what you mean about building square for that drawer!!
Originally I wanted a cubby shelf for the empty space between the sliding door and window in our master bedroom. However, that is also where the ironing board always sat out and I got tired of looking at it. So this project evolved and I decided to add an ironing board to the top of it. I used a 41" 1x12 for the top and 2-11" scraps for the flaps on either side. I covered each piece with one layer of felt and one layer of fabric. Flaps were attached to main board with hinges. Under-mount drawer slides were used to both allow the board to shift left and right and to support the flaps in open position.
Wed, 02/03/2016 - 21:07
Are there more specific plans for building the ironing board part of this? The other builds are so specific, having everything laid out even the amount of screws needed. But this one is definitely lacking. Is there further directions elsewhere that I'm missing?
Thu, 02/04/2016 - 09:24
Hi, this particular project was submitted by a reader, who modified the plans of the cubby shelf to include the ironing board top. It is not part of Ana White's project plan, so that is why there are no specifics. Perhaps you could try contacting the person who posted, and he/she could tell you more details.
-Ann
A few years ago I was looking for plans for a dog house to be used as a prop for a seasonal photo promotion. I found these plans and made the house, it was perfect! The promotion was to get a holiday photo of your dog in exchange for a donation of dog food, which was donated to a local food bank. The project brought in over 500 pounds of food!
The plans were super easy to follow and the structure was very soild.
Thanks for all you do!
Ken from Canada
This was my first woodworking project, and it turned out really well. I am going to have to make all of the matching furniture to go with it as well now. My wife has been pushing me to find a hobby (probably to get me out of her hair), and it looks like I have found the one. Did this one with just a circular saw and a drill, now it's time to get a Kreg Jig. Also need to find a way to make my cuts a tad bit straighter as well, but I hope this soon leads to me getting a miter saw.
Fri, 01/24/2020 - 19:25
Wow, this is really beautiful especially for a first project!
Here's to that Kreg Jig and miter saw!
Sat, 03/14/2020 - 12:01
This was actually before I had my Kreg jig and miter saw. I’ve acquired a few new tools since starting this hobby.
I used Ana's Laundry Basket Dresser plans but I added a drop-down ironing board and and made the entire top surface ready to iron on. A swing-out leg under the ironing board helps to stabilize while ironing.
Mon, 04/23/2012 - 16:25
You really figured out a way to make the most of your space. Ironing boards are always such a pain to find room for - this is perfect!
I created a comfortable study space for my teen's room with plans from Ana. This was fun to build and everyone enjoyed working on it as a family project. I love that I can customize the furniture to fit my home and lifestyle by diy-ing it all! Thank you Ana for sharing your plans.
We had a cheapo tv stand made out of pressed board which I felt was one nudge short of collapsing. So decided to build an upgrade. There were a few electronic components I wanted to be in the middle so designed a 3 bay instead of the 4 bay originally posted here. I used the picture from the sliding door hardware tutorial site - but instead of joining the plywood box with kreg screws I instead used Spax MDF screws on the end grain + wood glue (they work great and don't split the plywood at all - no need to predrill either!).
For the shelves, I drilled a buncha pin holes in case I wanted to adjust the height. For the top I used 3 2x6's instead of the 1by used here.
With the backing, I used scrap planks from a couple pallets - I spaced them at about 2 inches to allow airflow for the components (HTPC/ PS4/ modem) as well as the ability to run cords through.
Adjusted the plans to have the sliding mirror be a hidden Tie rack. Love the adjustment and being able to hide ties in the room.
My daughter watched me do another build project and wanted something for herself. We built the Toy Barn from Ana White's plans using only scraps around the garage!
Laura Thompson
This is the twin farmhouse bed and the matching trundle. We chopped about 8 inches off the headboard since we were not using a boxspring for our mattress. Other than that it's as written. I'm so thrilled to free up space in our girls' room!
Fri, 08/22/2014 - 16:27
This is exactly what I'm looking for!
My husband and I would like to begin building this ASAP. Could you please clarify for me that the original measurements for the Twin Farmhouse bed and the trundle bed will certainly be able to accommodate one another? I just want to make sure it'll fit! I think I saw someone else comment that they changed some of the measurements to make a trundle bed fit underneath, but they didn't go into detail.
We also won't be using a box spring.
Thank you for your help!
We built Two children's table and 8 stackable chairs for one of our daycare's. It took a lot of work but once we figured out the first chair it was a breeze for the other 7.
Sat, 02/08/2014 - 15:54
Awesome! I built one for our homeschool and it works great. Yours look very nice.
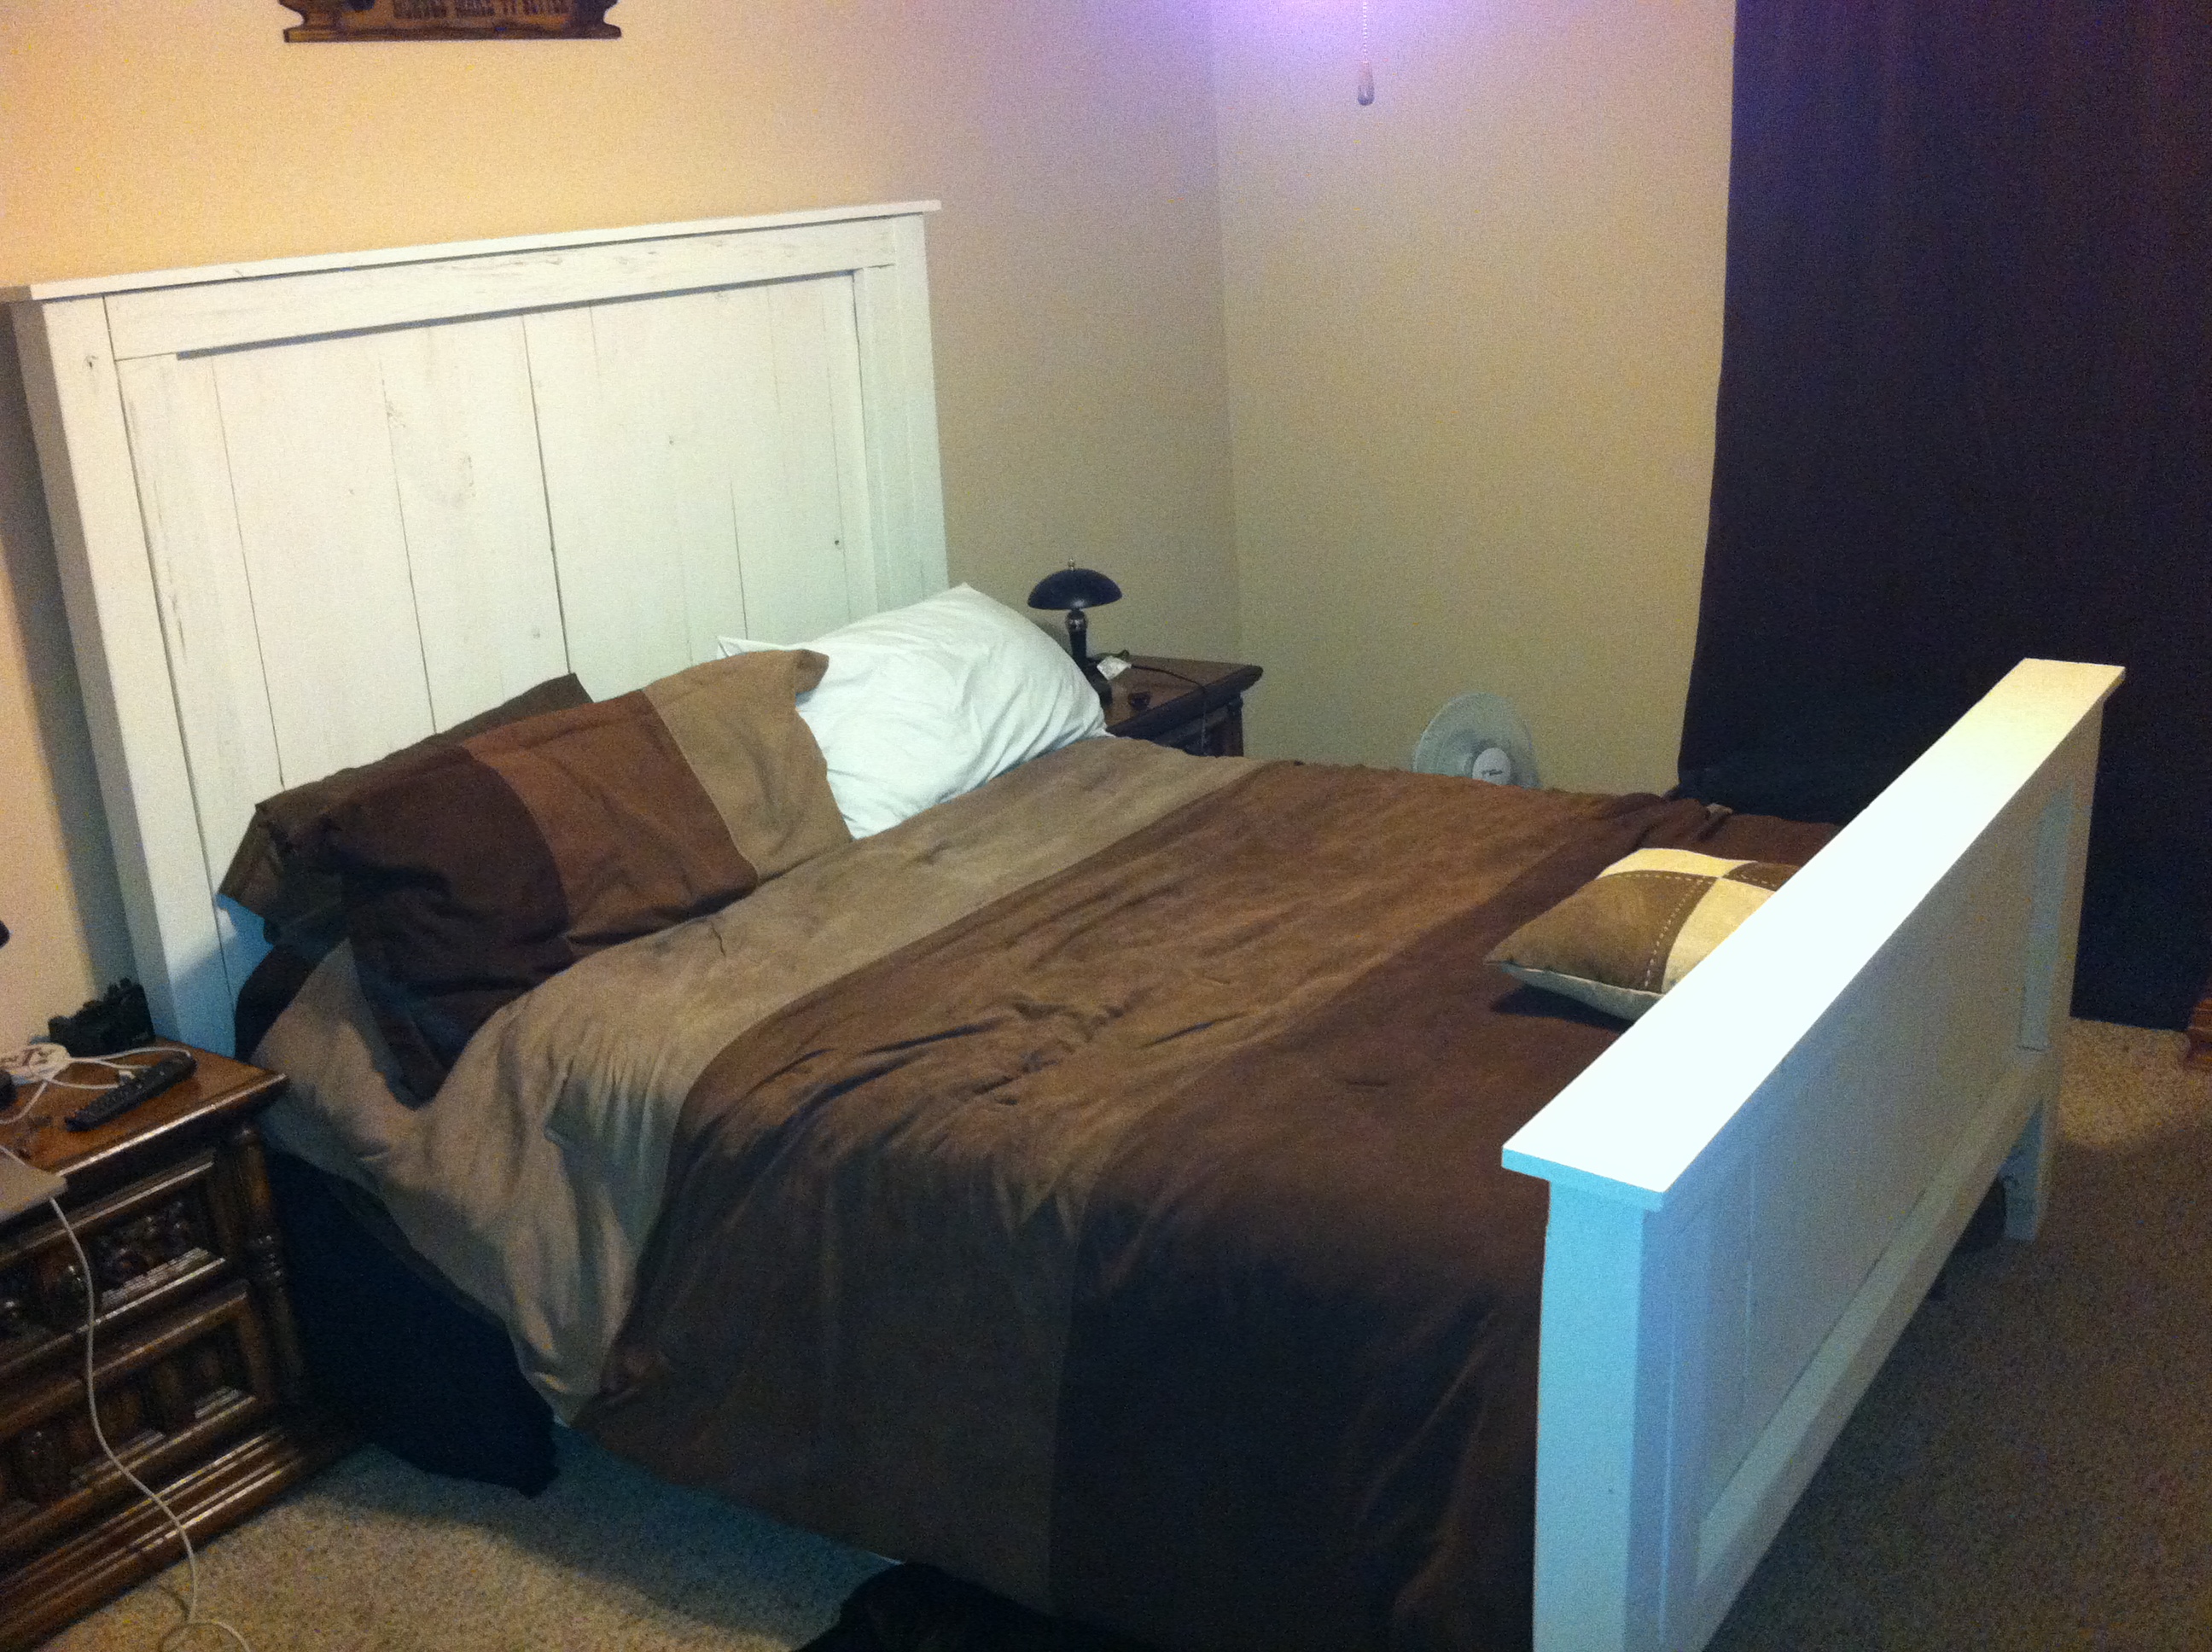
Made the bed using the Queen Farmhouse bed plans as a guide.
Wanted to include my box spring so modified the frame so the bed sits inside the frame. Also had to increase the height of the head and footboard to accommodate the additional height of the box spring.
Added middle legs to the frame, somewhat for support but mainly to make the connect to the head and footboard easier (since I was doing it myself).
Used leftover prefinished fooring for the paneling. Like the contrast with the white, plus really ties it in with the room. Bed came out really well, wasn't sure since I've never used plans from this site before but can now say, will be doing so in the future. Next up, matching farmhouse mini nightstand!
Had a great time building the Farmhouse Coffee Table plans from Ana! As with the Farmhouse Queen Bed, I used the old barn wood, ran it through the planer until I liked the look of the grains and then built away. I haven't decided on a finish yet but I'm more than likely going to epoxy the top only, so as to protect it from drink spills and water rings. THANK YOU ANA!!
Each grandkid and the little girl across the street built their own step table. Of course it was accomplished through my confused and sometimes inaccurate direction but they all came out looking good and withstood my 180 lbs standing on them. Each used a slightly different method of securing the legs, top and bottom but it worked. Great project for kids. I had a ball. Keep them coming.