Community Brag Posts

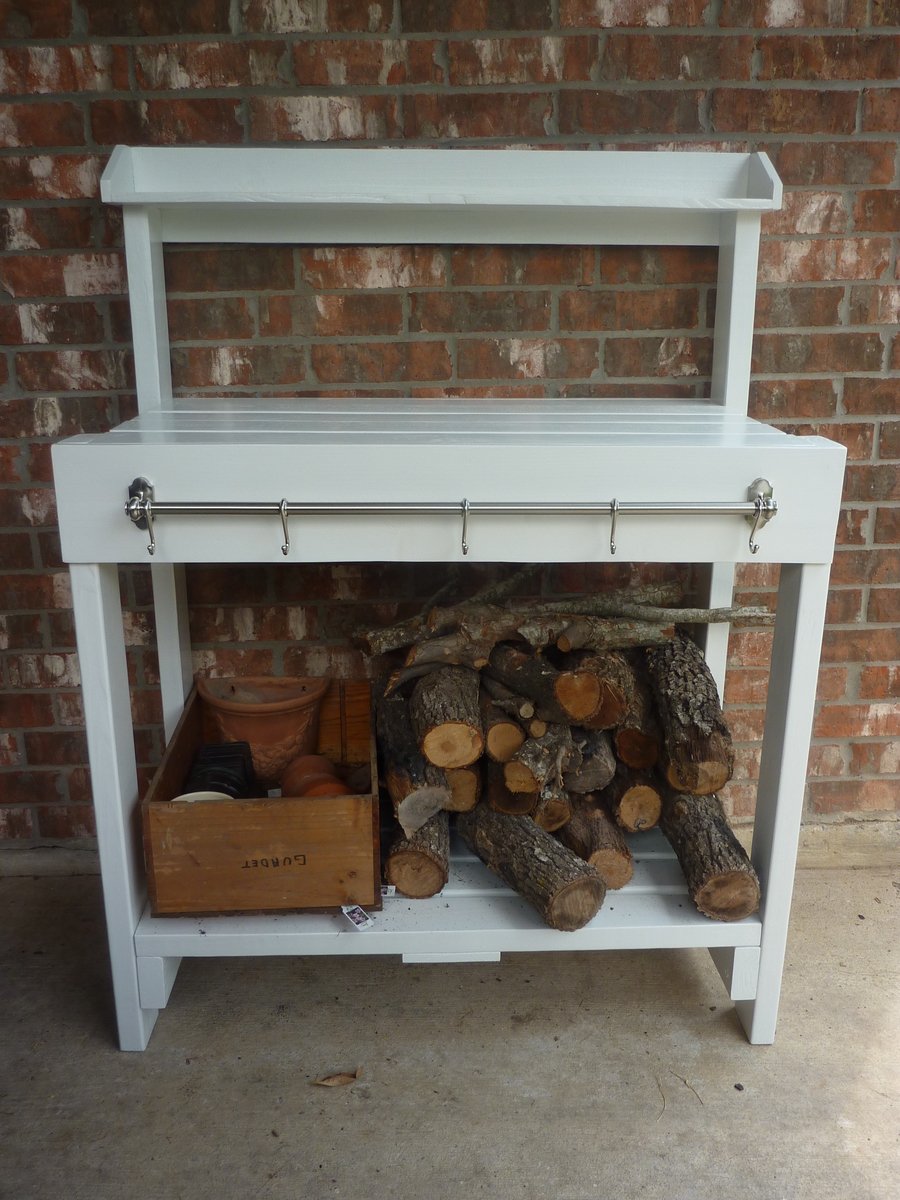
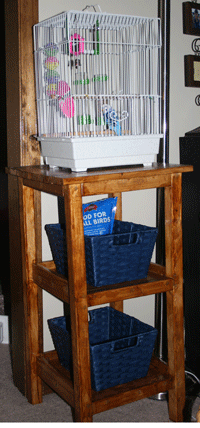
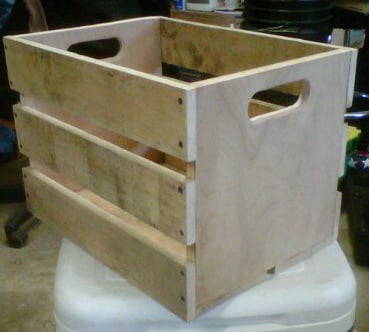
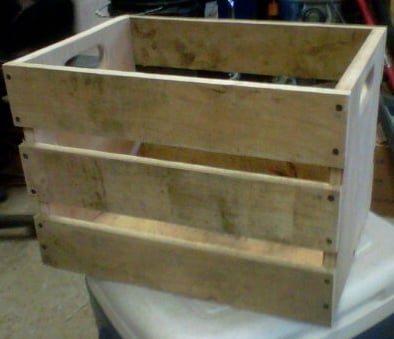
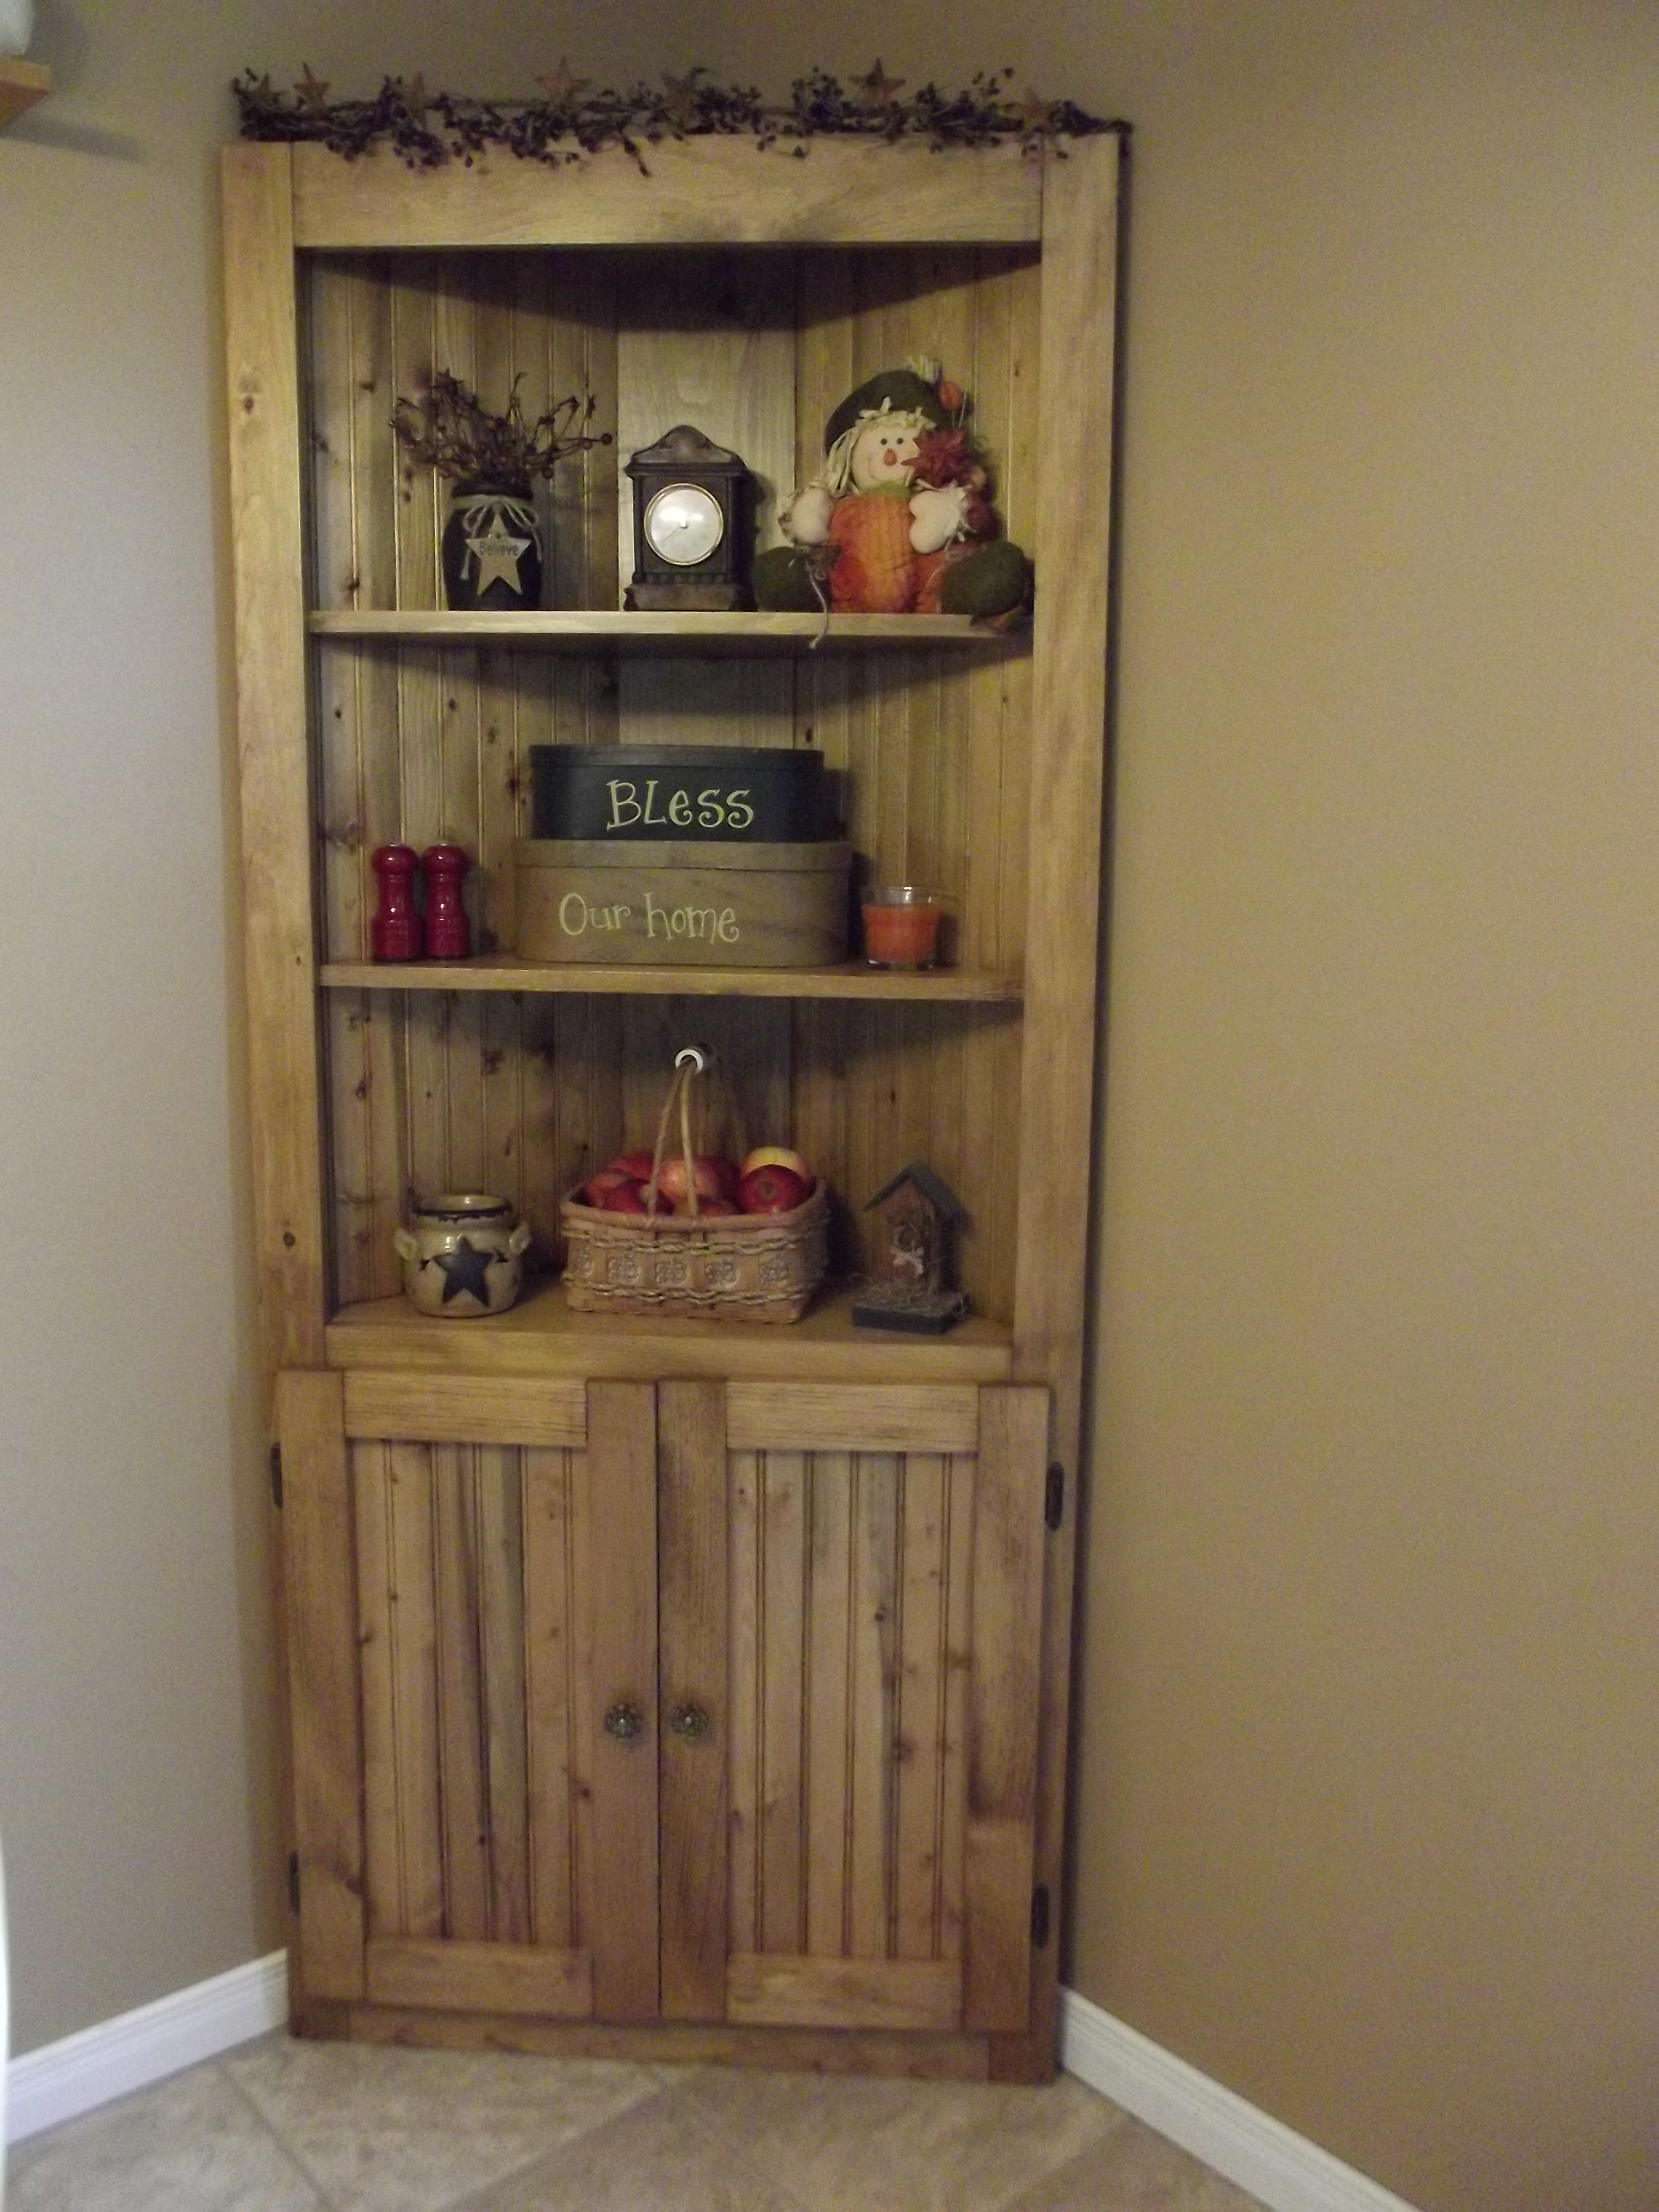
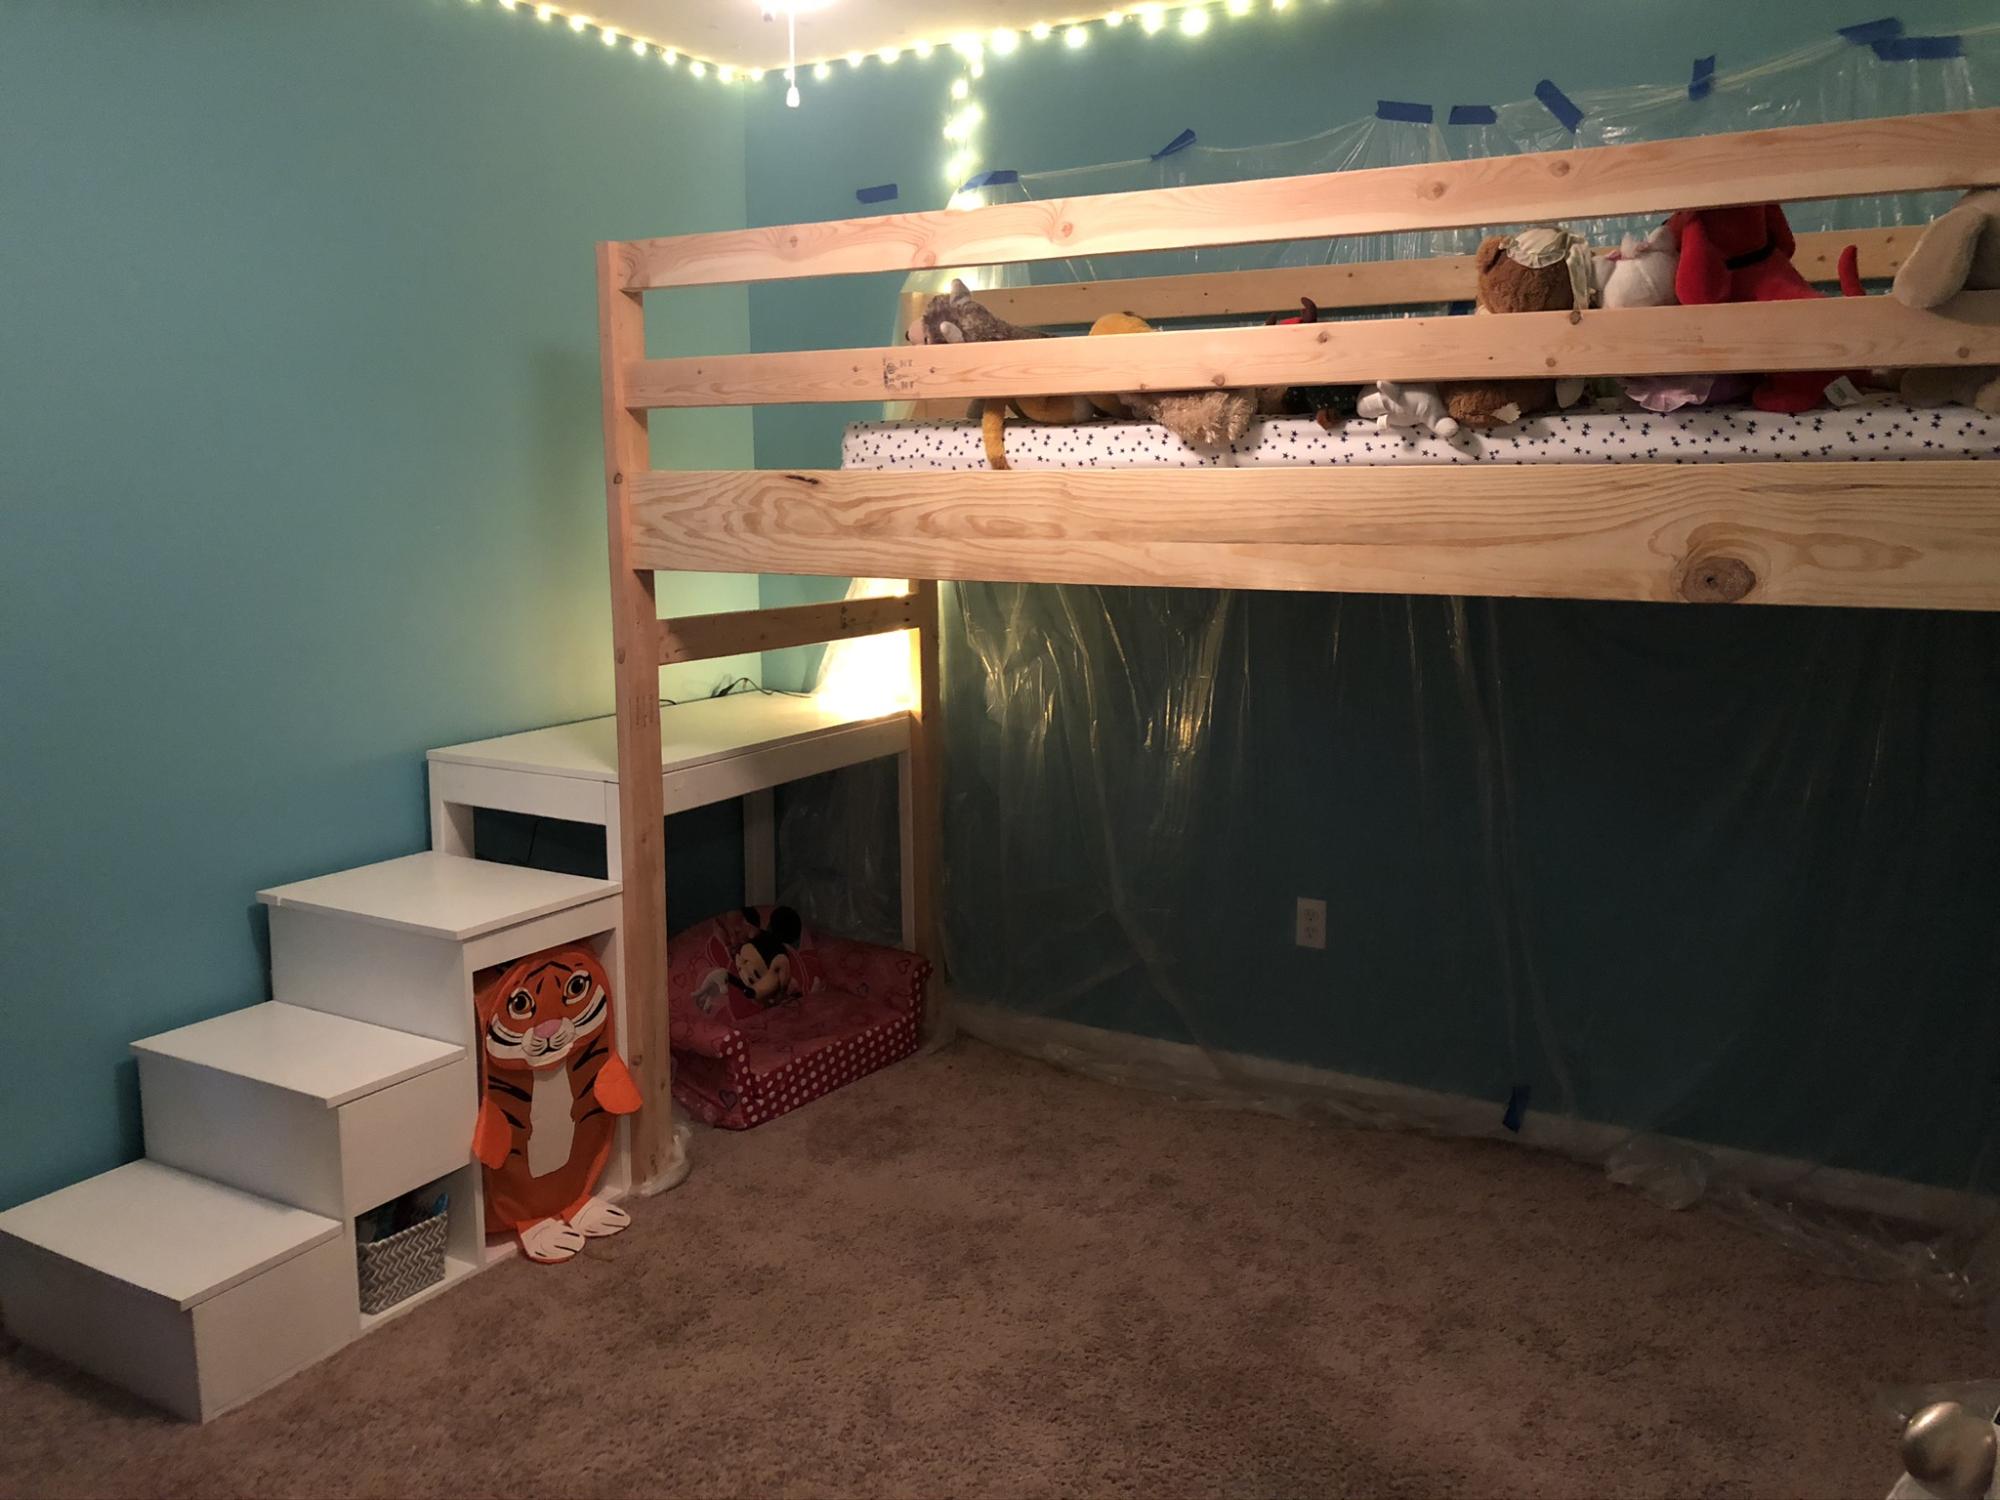
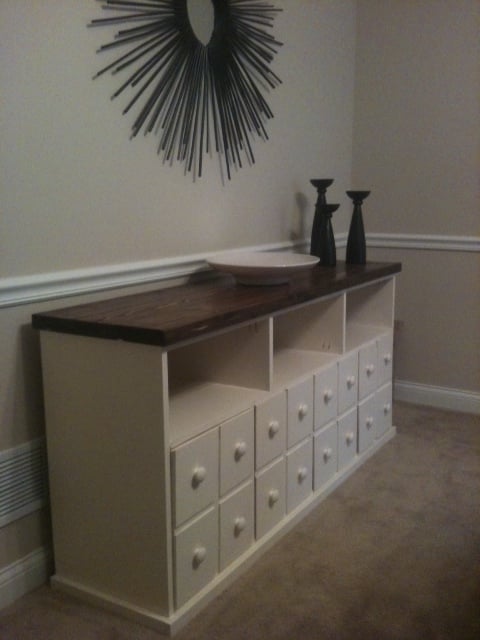
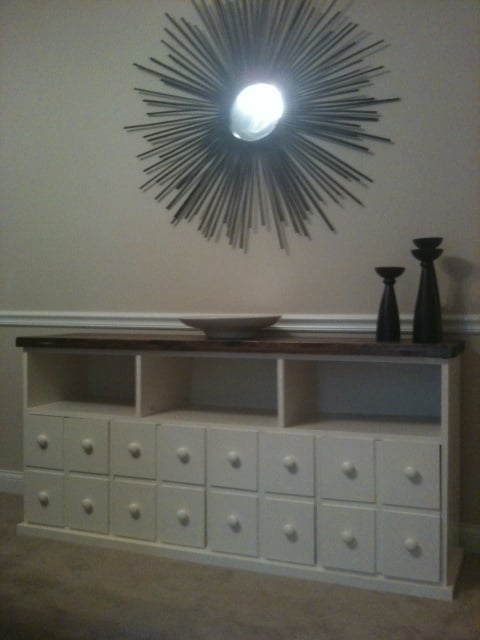
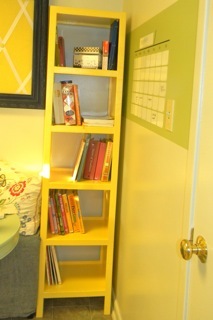
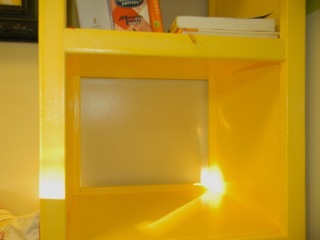
5 Cube Tower Bookshelf

Submitted by rhilborn on Thu, 08/11/2011 - 12:25

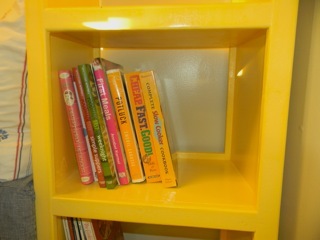
This narrow cube bookshelf is a very handy addition to my kitchen! I use this shelf to store cookbooks, our iPod speakers, and some other utilitarian odds and ends. I'm particularly a fan of how to facing on the front and back acts as a stopper to keep your items in the bookshelf. It did not specify in the plans but we chose to align the back facing piece flush with the bottom of the shelf and the front facing piece flush with the top of the shelf. You can see what I'm describing in the pictures.

This piece was fast and easy. I think there is a time when finish work is faster to be done once a piece is finished but this not one of those projects. This shelf would benefit from finish before assembly.

Built from Plan(s)
Estimated Cost
$30
Estimated Time Investment
Afternoon Project (3-6 Hours)
Finish Used
existing can of Behr Premium paint plus primer; Minwax Wipe on Polyurethane
Recommended Skill Level
Beginner

Simple white potting bench

Submitted by JW on Thu, 09/05/2013 - 05:59

Finally, a place to corral all of the stuff on the patio!

What we really needed was a wood rack and buffet/usable surface for the patio, but this potting bench fit the bill perfectly because:
1. It's sturdy enough to hold all that firewood
2. I had all of the supplies already (2x4 scraps, leftover paint, screws, etc)

Free and easy? Yes, please!

Only real change is that I added an apron to the front of the top shelf, and used well-sanded fence slats for the top shelf instead of a regular 1x6 (it's what was in the garage already).

The towel bar is from Ikea. That was also an extra that was already on hand.

Built from Plan(s)
Estimated Cost
$0 (made from all leftovers from other projects)
Estimated Time Investment
Afternoon Project (3-6 Hours)
Finish Used
Some exterior white paint that was already in the garage. Pretty sure it was Behr brand paint.
Recommended Skill Level
Starter Project

Club house bunk

Built for our 4 ur old son.. We all love it and had fun together!

Estimated Time Investment
Weekend Project (10-20 Hours)
Finish Used
Weathered Minwax
Recommended Skill Level
Intermediate

Comments

King Size Farmhouse bed

Submitted by Anonymous (not verified) on Sat, 09/03/2022 - 21:05

I love the plan for the King Farmhouse bed. I built it and made a couple of changes that just made it easier to move. I did not want to screw the middle support legs through the footboard and just happened to have six fence brackets in my fastener box, we just moved in a month before this build. I put the fence brackets on the front of the side rail cleats and added a 2x4 that went into those brackets. Then I added fence brackets to the front 2x4 and the back 2x4 that would receive the leg support boards. I also added supports made from two 3" cuts of the scrap 2x2 for the back of the side rails on the headboard legs. This modest support was just to help put it back together in the bedroom. We plan on moving again in a few years and I want the bed to last through many years so I thought this was a good idea. The bed is sturdy and I love it. Thank you for another fantastic plan Ana!

Comments

Bathroom storage tower

I just recently decided to try my hand at woodworking. This was my second project, first one from Ana, super easy instructions. I hadn't gotten the straightest 2x2s, since I had done my shopping with a two year old in tow, but I got it to work. After I completed it, my husband tells me it actually looked good--he seemed surprised. Anyway, I built this tower so that our new parakeet will have somewhere to live and I can conceal his food and other supplies in the baskets underneath. Without making any adjustments to Ana's plan with the exception that out 1x12s are only 11 1/4 it is the perfect size for our little bird cage. Thanks Ana for the design and inspiration to do it myself!

Built from Plan(s)
Estimated Cost
$15
Estimated Time Investment
Afternoon Project (3-6 Hours)
Finish Used
Cabot Golden oak stain
Recommended Skill Level
Beginner

X Dining Table

Submitted by raybotelho on Sat, 09/07/2013 - 06:57

I built this table a year ago just never got the chance to post pics. It was an easy build.

Built from Plan(s)
Estimated Time Investment
Weekend Project (10-20 Hours)
Finish Used
It's been so long I cant even remember exactly :/ but I believe I started with the vinegar steel wool mixture.
Recommended Skill Level
Beginner

Comments

JoanneS

Sat, 09/07/2013 - 17:16

Your table looks beautiful! Love the finish, and the way you arranged and photographed it is wonderful, great job!

Adirondack Chairs for our Fire pit

Submitted by Robert4588 on Fri, 11/06/2015 - 10:08

We had recenty been to Jasper National Park in the Canadian Rockies and saw beautiful red adirondack chairs out on many of the trails, so we built these to remind us of a great family vacation.

Built from Plan(s)
Estimated Cost
$100 Each
Estimated Time Investment
Afternoon Project (3-6 Hours)
Finish Used
Behr Outdoor paint
Recommended Skill Level
Intermediate

Reclaimed wood headboard + footboard

Submitted by Anonymous (not verified) on Sun, 12/30/2018 - 19:42

At 43, I feel like I finally have the bedroom I have wanted for many years.  Lots of thought on creating a bed, but this is the first time it's come to fruition.

Estimated Cost
$100-150, including the wax to finish the bed off. Lumber seems to cost more in Canada! Plus, I added in a footboard and rails.
Estimated Time Investment
Day Project (6-9 Hours)
Finish Used
Black paint, sanded down and then Country Chic Antique Wax applied on top.
Recommended Skill Level
Beginner

Comments

Small rustic bench

Submitted by Lukilla on Tue, 09/13/2022 - 15:28

Fun build. We've been going through the scrap bin trying to figure out some ser projects to build. Had a piece of 1x12 that was perfect for this project. It had a little split in it, so we added a cherry bowtie to it.

Minwax weathered oak finish.

Built from Plan(s)

Comments

First Finished Project!

Submitted by MrsD2008 on Tue, 08/16/2011 - 17:00

I decided to not paint it, but we sanded it REALLY well. I also decided to forgo the caster wheels just so it would fit under an entryway table. Right now I'm using it for dog toys!

Built from Plan(s)
Estimated Time Investment
Afternoon Project (3-6 Hours)
Recommended Skill Level
Starter Project

Wooden Star

Used a compass to make my star as I wanted the points to be a little taller. 10 pieces of 8" walnut was used. And I used a table saw sled to cut the pieces. 

Built from Plan(s)
Estimated Time Investment
Afternoon Project (3-6 Hours)
Finish Used
Pallmann Magic Oil
Recommended Skill Level
Intermediate

Added some trim and everyone thinks it cost $1000

First piece of furniture every built. I added some quarter round and 1x4 blocks. Finished with a grey stain and paste wax. Everyone asks me is where did I buy it and how did I afford it.

Estimated Cost
$250
Estimated Time Investment
Weekend Project (10-20 Hours)
Finish Used
Minwax classic grey and Johnsons paste wax
Recommended Skill Level
Starter Project

Front Entry

Submitted by Anonymous (not verified) on Tue, 09/27/2022 - 19:55

Sitting bench with shoe cubbie underneath. Barn boards for backing and shelving above.

Comments

My modified simple, cheap, and easy console

Submitted by cbrowan on Sun, 08/21/2011 - 11:35

I wanted a simple table to highlight this retro sewing machine I inherited from my grandma. I had to modify a few of the dimensions of this table and add a different trim up top, but I really like the results!

Estimated Cost
FREE (used leftover boards/paint from a different project)
Estimated Time Investment
Afternoon Project (3-6 Hours)
Finish Used
2 coats of Minwax Dark Walnut stain
1 distressed coat of Valspar Sea Breeze, semi-gloss
1 coat of Minwax Polyurethane finish, satin
Recommended Skill Level
Beginner

Corner Cupboard

Submitted by REASMOM on Thu, 09/12/2013 - 11:54

I've been looking for a corner unit for my kitchen for a couple of years, but couldn't find anything that I liked that fit my budget. This corner cupboard was exactly what I've been looking for. My husband and I built this together and I've definately discovered a new hobby!

Built from Plan(s)
Estimated Cost
$140
Estimated Time Investment
Weekend Project (10-20 Hours)
Finish Used
Minwax Stain in Early American and 3 coats of Minwax Water Based Oil-Modified Polyurethane (Satin).
Recommended Skill Level
Intermediate

Comments

REASMOM

Tue, 09/17/2013 - 06:40

Thank you for choosing my corner cupboard as your featured brag post! I was so excited to see it on your facebook page last night :) I enjoy this website so much and can't thank you enough for sharing all these free and easy to follow plans! I love that reader's can share their builds and give tips and advice! Thank you for inspiring me to be creative!

Poplar toy chest

Submitted by Anonymous (not verified) on Sat, 01/05/2019 - 17:17

Toy chest for our daughter.

Built from Plan(s)
Finish Used
Walnut
Recommended Skill Level
Intermediate

Comments

Loft bed

Submitted by Anonymous (not verified) on Fri, 10/07/2022 - 08:48

I used the Camp Loft Bed plans and adapted the stairs to have storage and a place for laundry (from another plan from Ana White). I also added a small bookshelf to one end. They wanted the bed to extend to the full width of the wall. The bookshelf helps hold the mattress in place and also gives great storage for books and stuffed animals. I wish I had a pic of the bed completely painted, but as you can see, my granddaughter moved her stuff in immediately! She was so excited to sleep up there. (It has since been completely painted.)

Comments

My Apothecary Cabinet

Submitted by Sarah A. on Mon, 08/22/2011 - 17:41

I have always loved apothecary consoles! Then my grandmother gave me her huge collection of pottery, which I have admired since I was a kid. I had nowhere to put it, so it was a perfect excuse to build this.

I used MDF for the cabinet and pine for the top. I did a thick top, I stacked two 1x6s on top of each other, giving me 1.5" thick top. I also distressed in and filled in with Ebony Wood filler. I absolutely love how it turned out. I hadn't used pine before, I always use poplar. This project made me love pine!

I modified the plan slightly...I made 4 doors instead of drawers. I also made the top cubbies 2" taller, just to add extra height. I still need baskets for the cubbies, though!

Built from Plan(s)
Estimated Cost
$180
Estimated Time Investment
Weekend Project (10-20 Hours)
Finish Used
For the top, I used Minwax stain in Provincial. I then distressed it with a screwdriver and filled in the scratches with ebony wood filler. I did two coats of wipe on poly on top, sanding between coats. For the base, I used Vaslpar kitchen and bath paint, can't remember exact color.
Recommended Skill Level
Beginner

Comments

Kristi Hays

Fri, 08/26/2011 - 08:29

You did an amazing job! This piece has been on my to-do list for awhile now. I think that's the beauty of Ana's site, seeing the wonderful finished projects of other amateur builders gives us all the confidence to tackle things we'd never otherwise dare. I hope when I finally get around to building this, it will turn out as lovely as yours has, thanks for sharing.

Sarah Crawford (not verified)

Mon, 08/29/2011 - 12:12

This looks really great! This is next on my to-do list to make as a tv stand... it'll be my biggest project yet & I'm nervous, but this looks wonderful & makes me think it'll be worth it :)

Fireplace

Submitted by lugfish on Sat, 11/21/2015 - 20:47

I really loved the design of Mimi's Faux Mantle. But the wife wanted an electric fireplace for the living room, so after shopping around for them and not finding any that we liked. I suggested we use the Mimi's Faux Mantle design and custom it to fit an electric firebox. We order and firebox then followed the plans pretty close as you. Then finished it in a pure white with an espresso stain. This was our second wood project and had a great time working together on this project. We can't believe how it came out and are already planning more projects.

Estimated Time Investment
Weekend Project (10-20 Hours)
Finish Used
Pure white with an espresso stain
Recommended Skill Level
Beginner

Comments

Cross35

Sun, 11/22/2015 - 14:49

This is exactly what I'm looking to build! Can you give more detail?  Maybe point me to the electric fireplace that you used?

lugfish

Mon, 11/23/2015 - 13:29

thanks, The electric fireplace insert I bought was a 26 inch SimpliFire insert from HEAT & GLO. I ordered from a local vendor and it took a few weeks to get. They had two sizes and based on the space and the plans I went with the 26in. I really liked the look of Mimi's Faux Mantle, so I used those plans but had to change them just a little. First I had to build the opening around the insert and then add sides. I didn't need to but I added a bottom mantle to make it feel like a really fire place.Oh I also made the top mantel a little more bigger than the plans. I hope this helps and good luck on building yours. If you need any more info just let me know.

Seasonal And Holiday