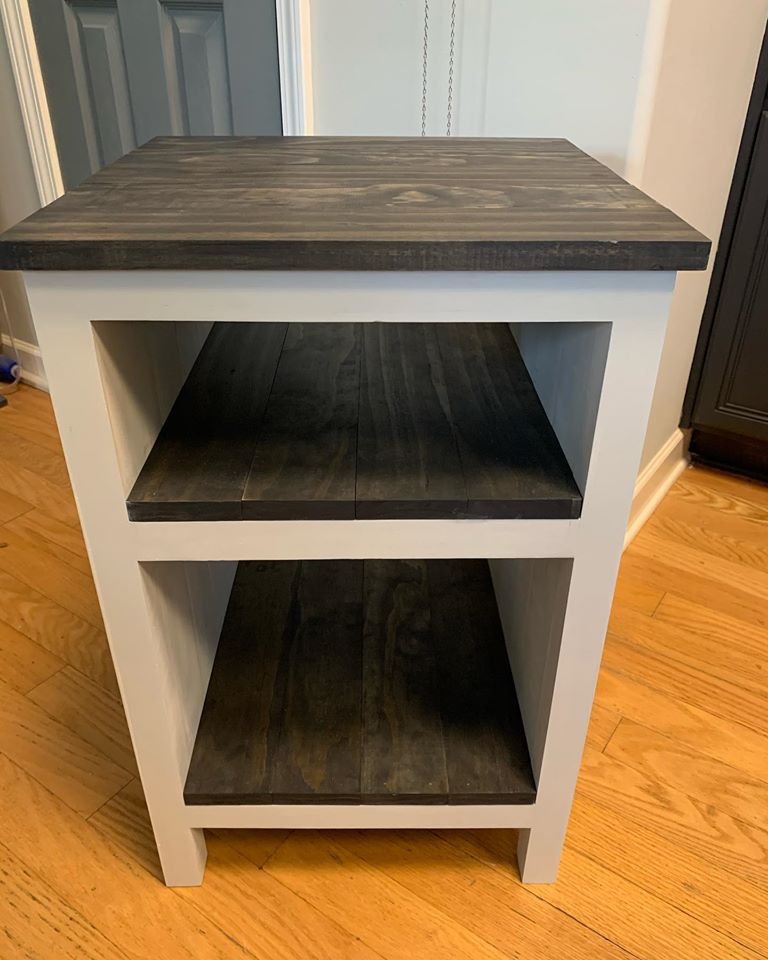
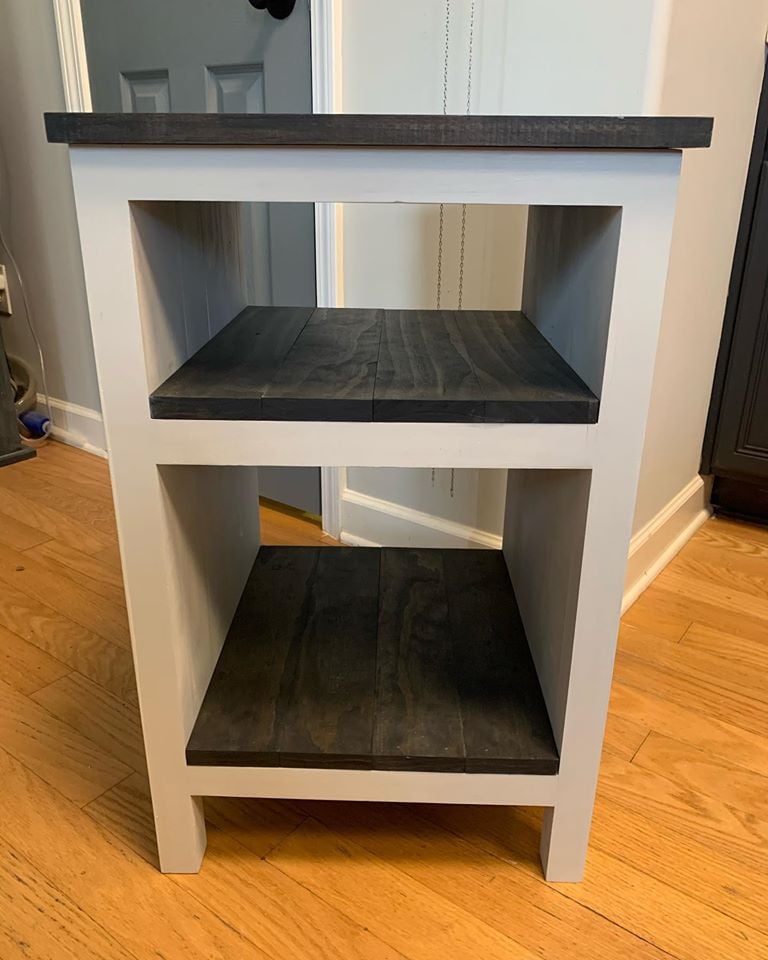
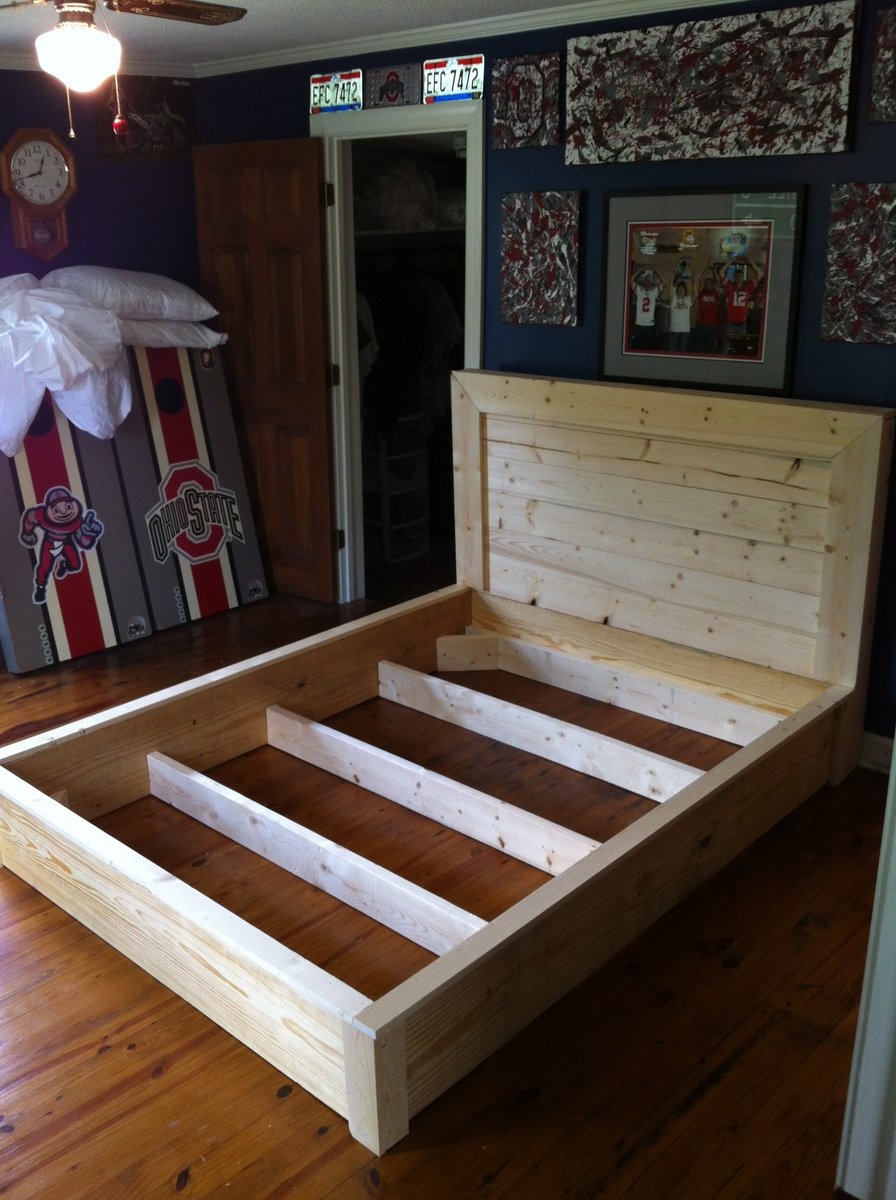
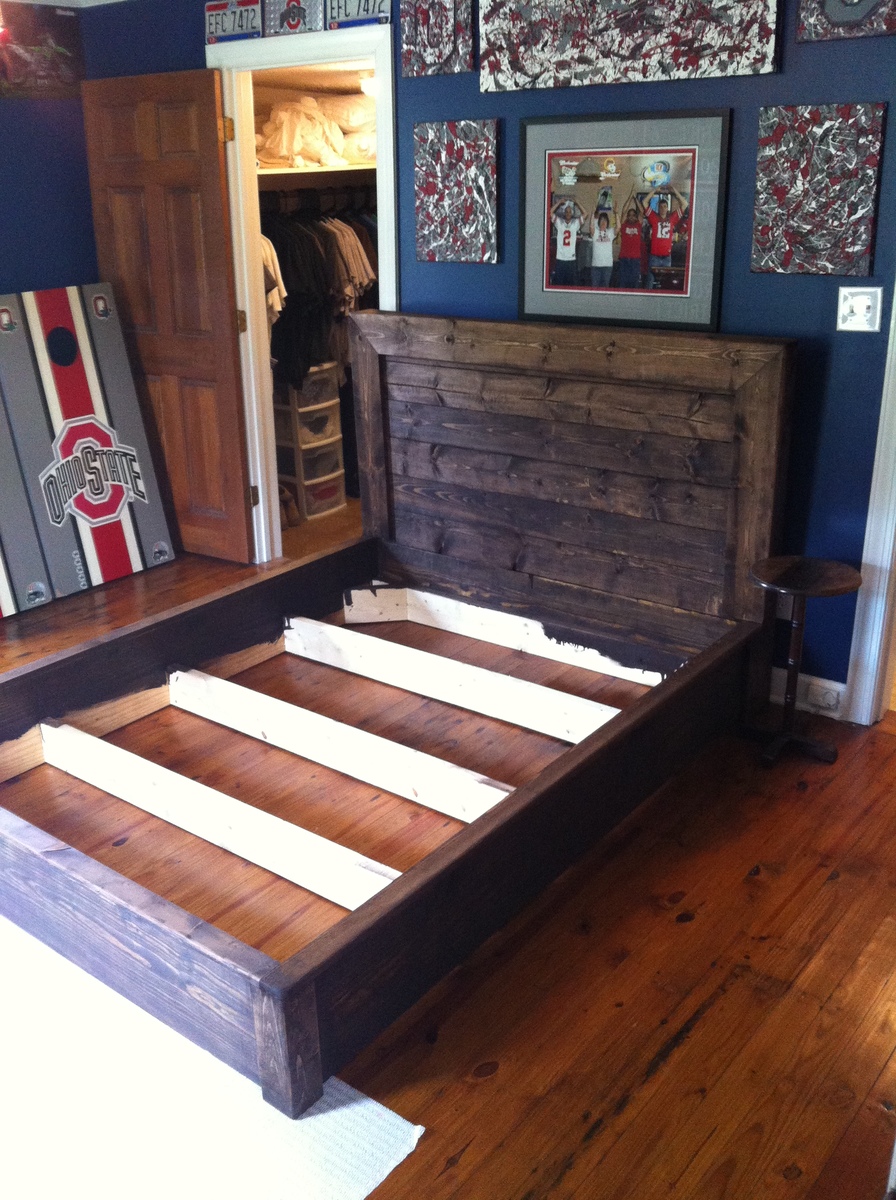
Poster bed and x-end tables

Built end tables based on coffee table
Built from Plan(s)
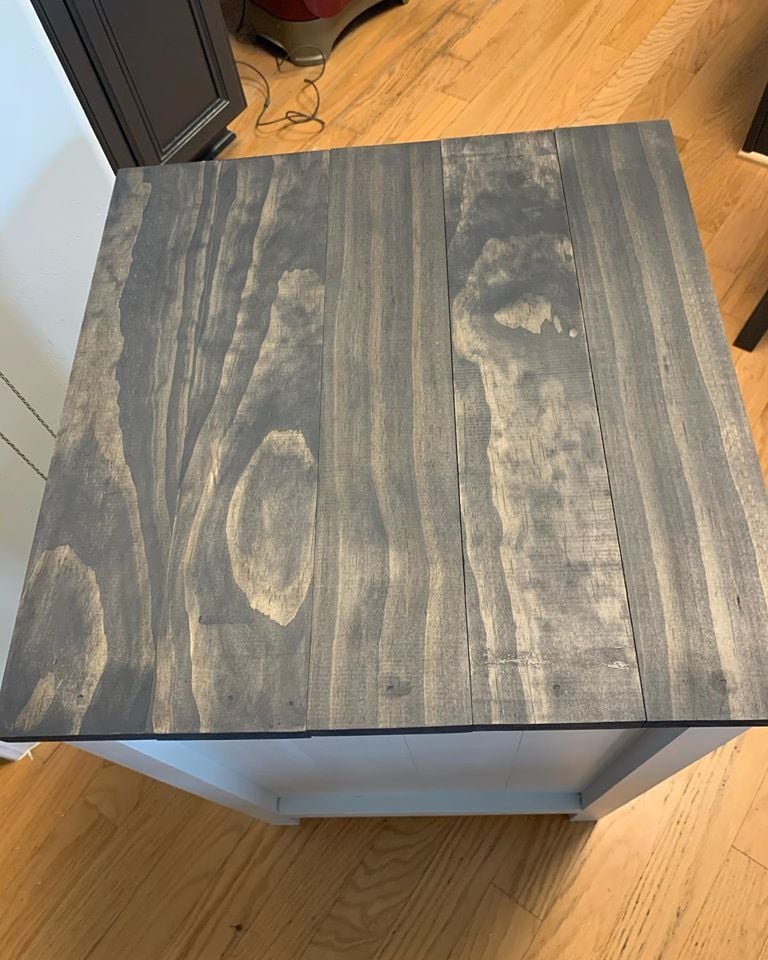
Finish Used
Grey base and express top coat
Built end tables based on coffee table
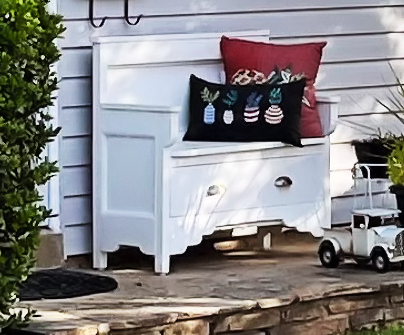
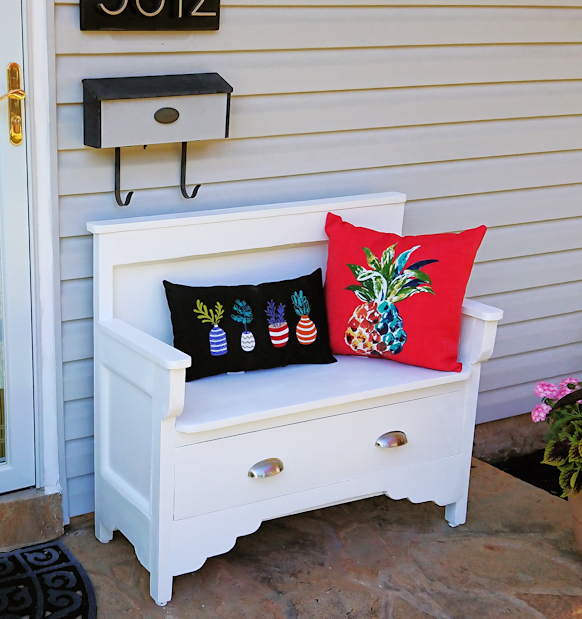
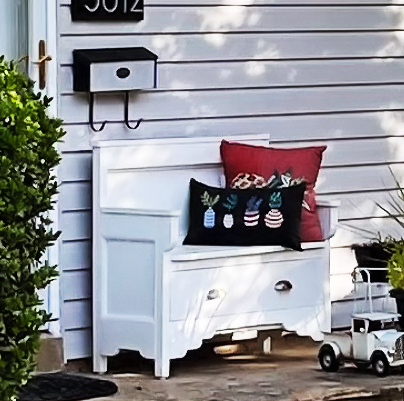
My bench sits outside my front door to welcome visitors and provide a place to set your packages while unlocking the door! I made it two years ago, and it's weathered three Baltimore winters with out repainting. I'll probably sand t and repaint it this spring. Folks are always asking where I bought it, and I give all the credit to Ana White, your site and your wonderful furniture ideas!
Jim Dupree
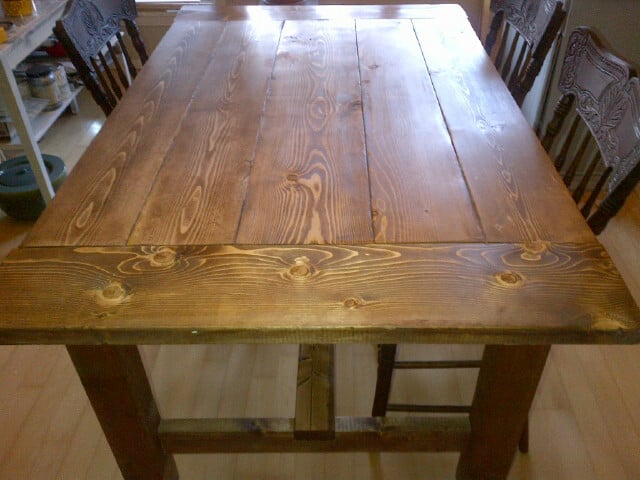
Rustic Farmhouse Table with Pocket Holes, adjusted to 6'

I was looking for a small piece to make as my 1st work of furniture. My husband passed away 8 months ago. He has EVERY tool imaginable. I learned how to use his saws, and my favorite - pocket hole jig!! I started small with the floating shelves. Then I decided to branch out. I love Ana White's plans and find them very easy to understand. I made some mistakes but learned from them! Love how this table turned out. Going to add some rustic hinges. Can't wait for my next project!
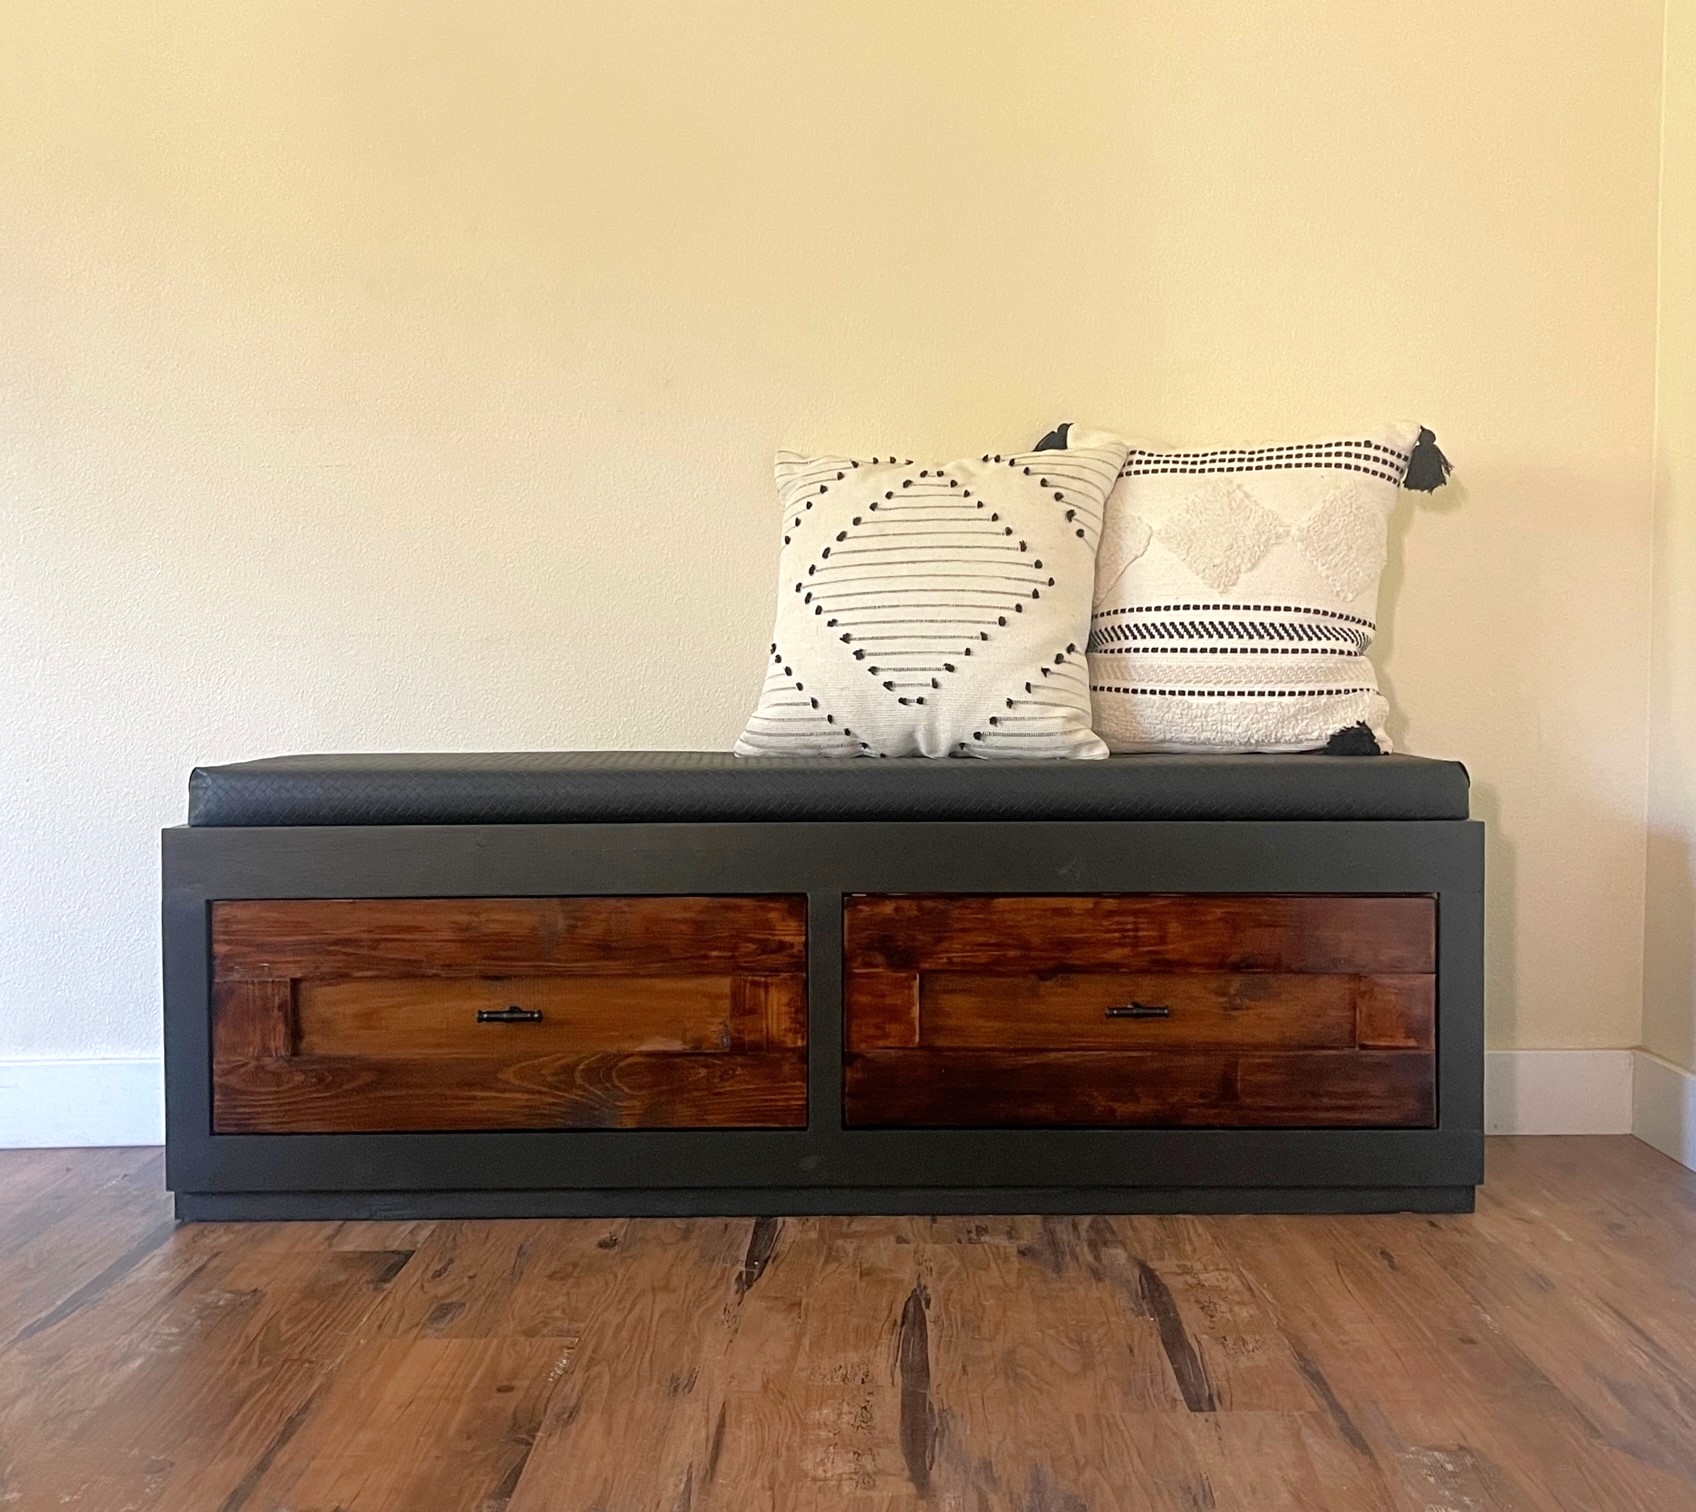
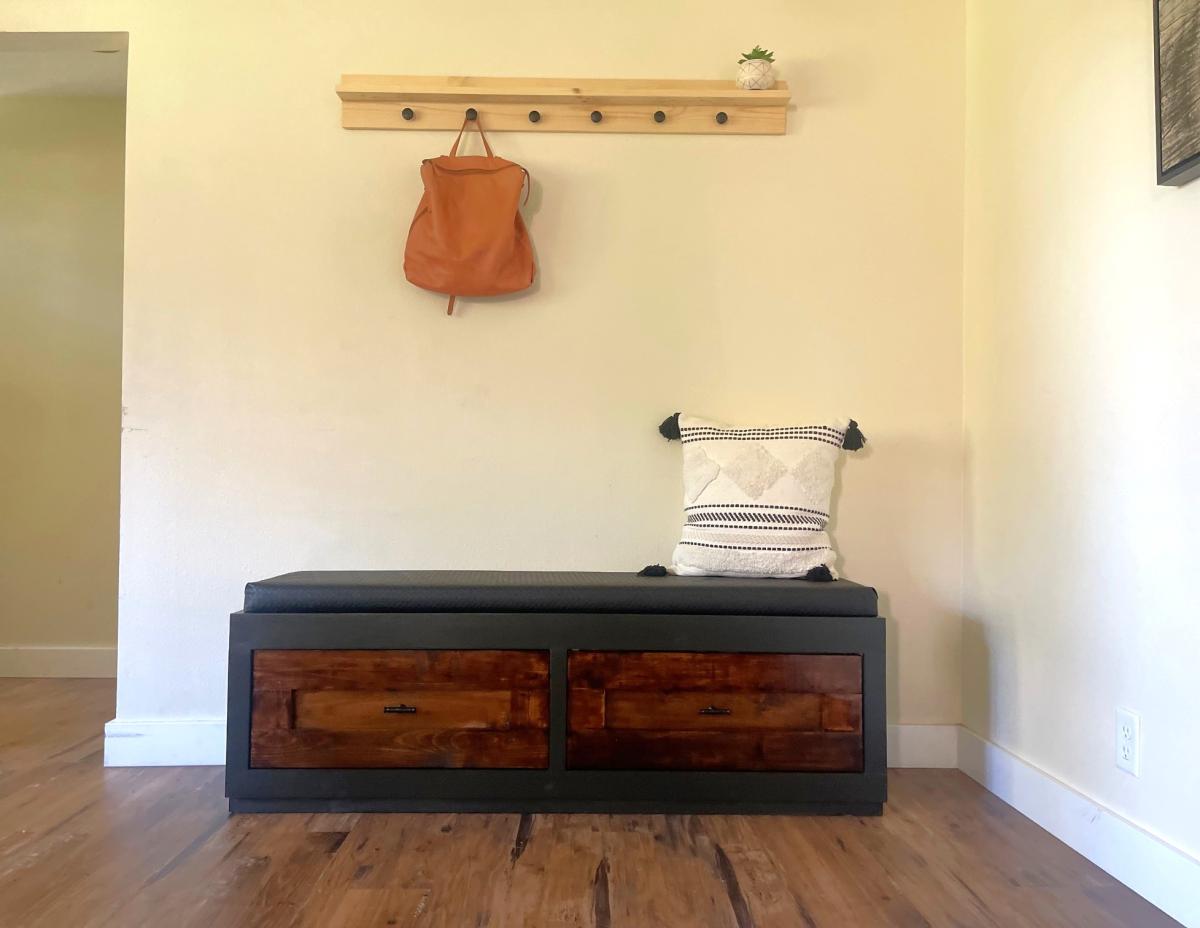
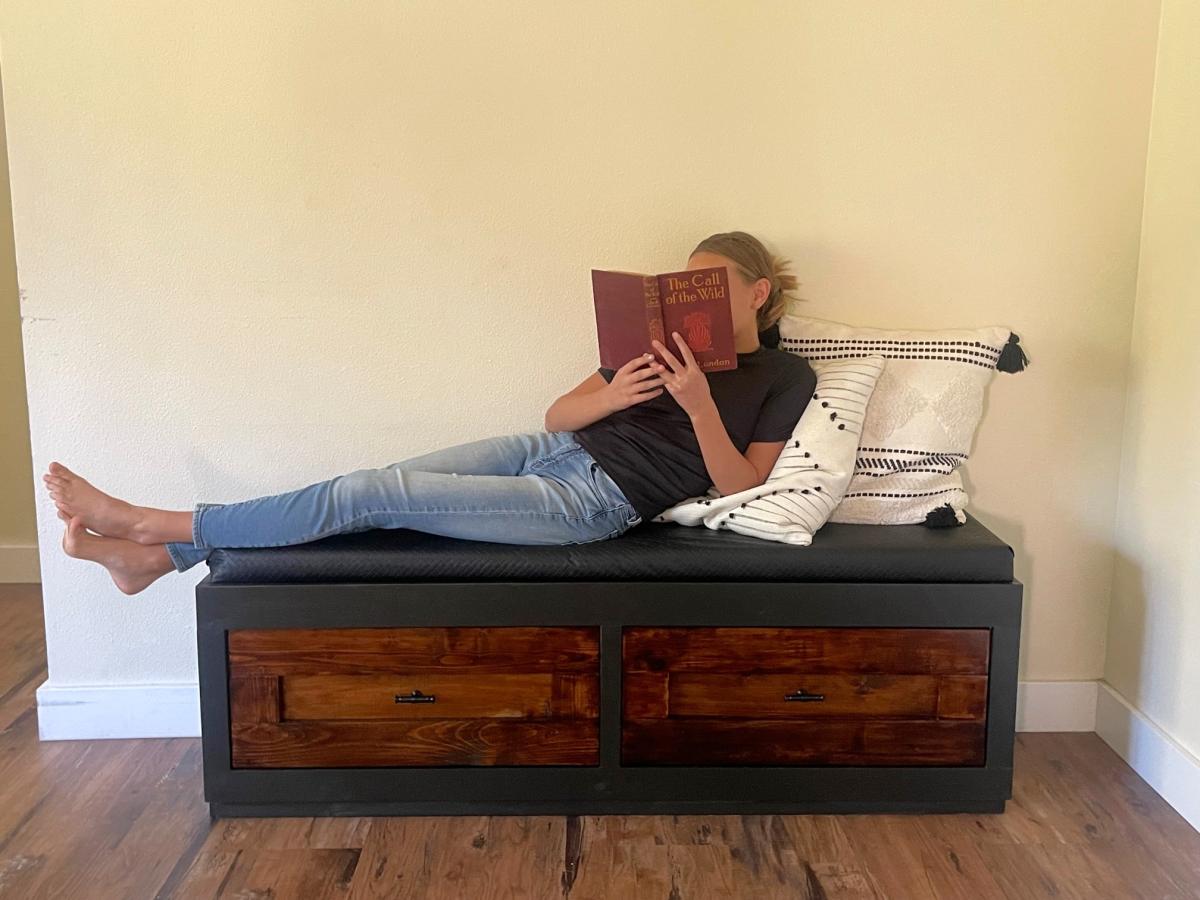
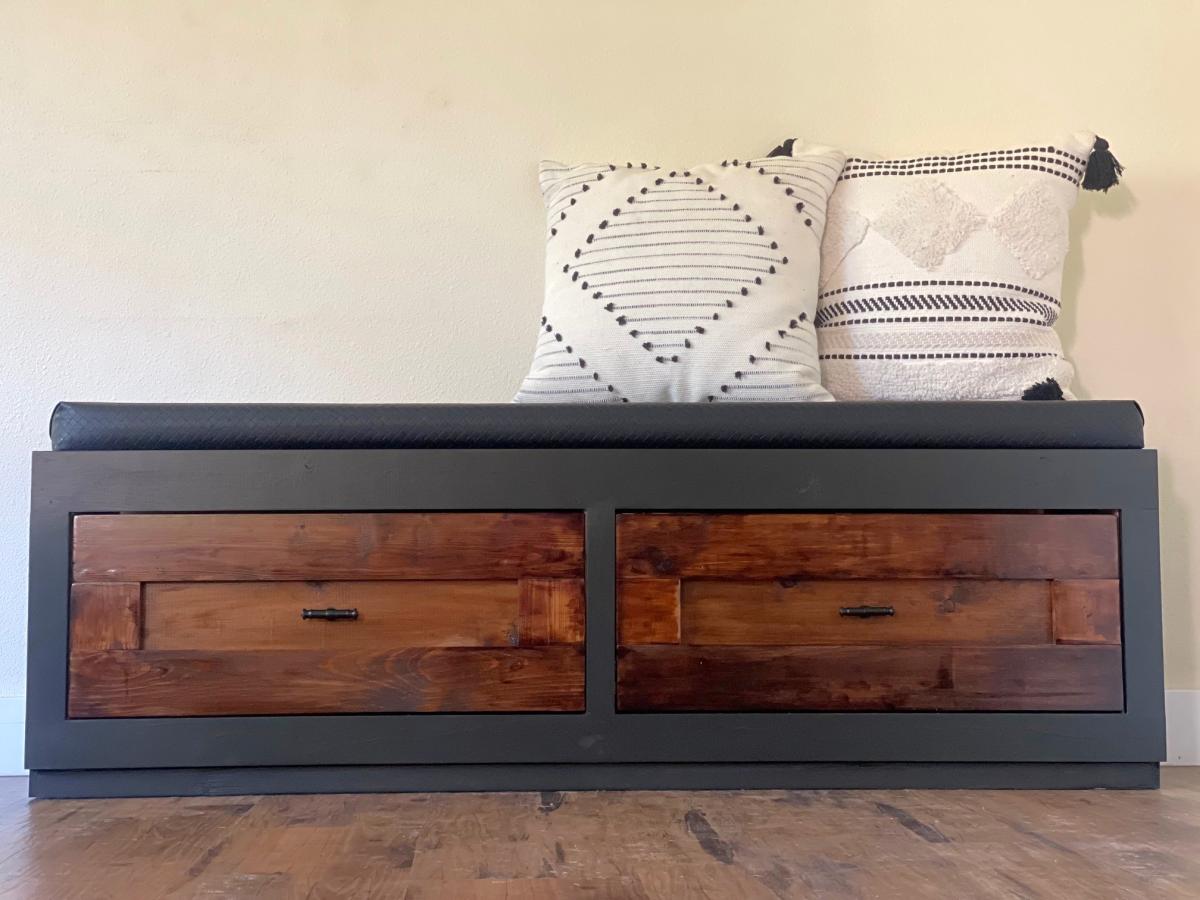
My mom asked for a drawer bench. I haven't been very successful with drawers so I accepted the challenge. It turned out really good, now I want to build more drawer projects! To top it off, I decided to try my hand at building the cushion too, since it was custom sized. There are several good tutorials online for no sew options. The cushion only took about 1/2 hour to put together.I got fabric that is easily cleanable and wipeable. I'm excited to surprise my mom with her new bench!
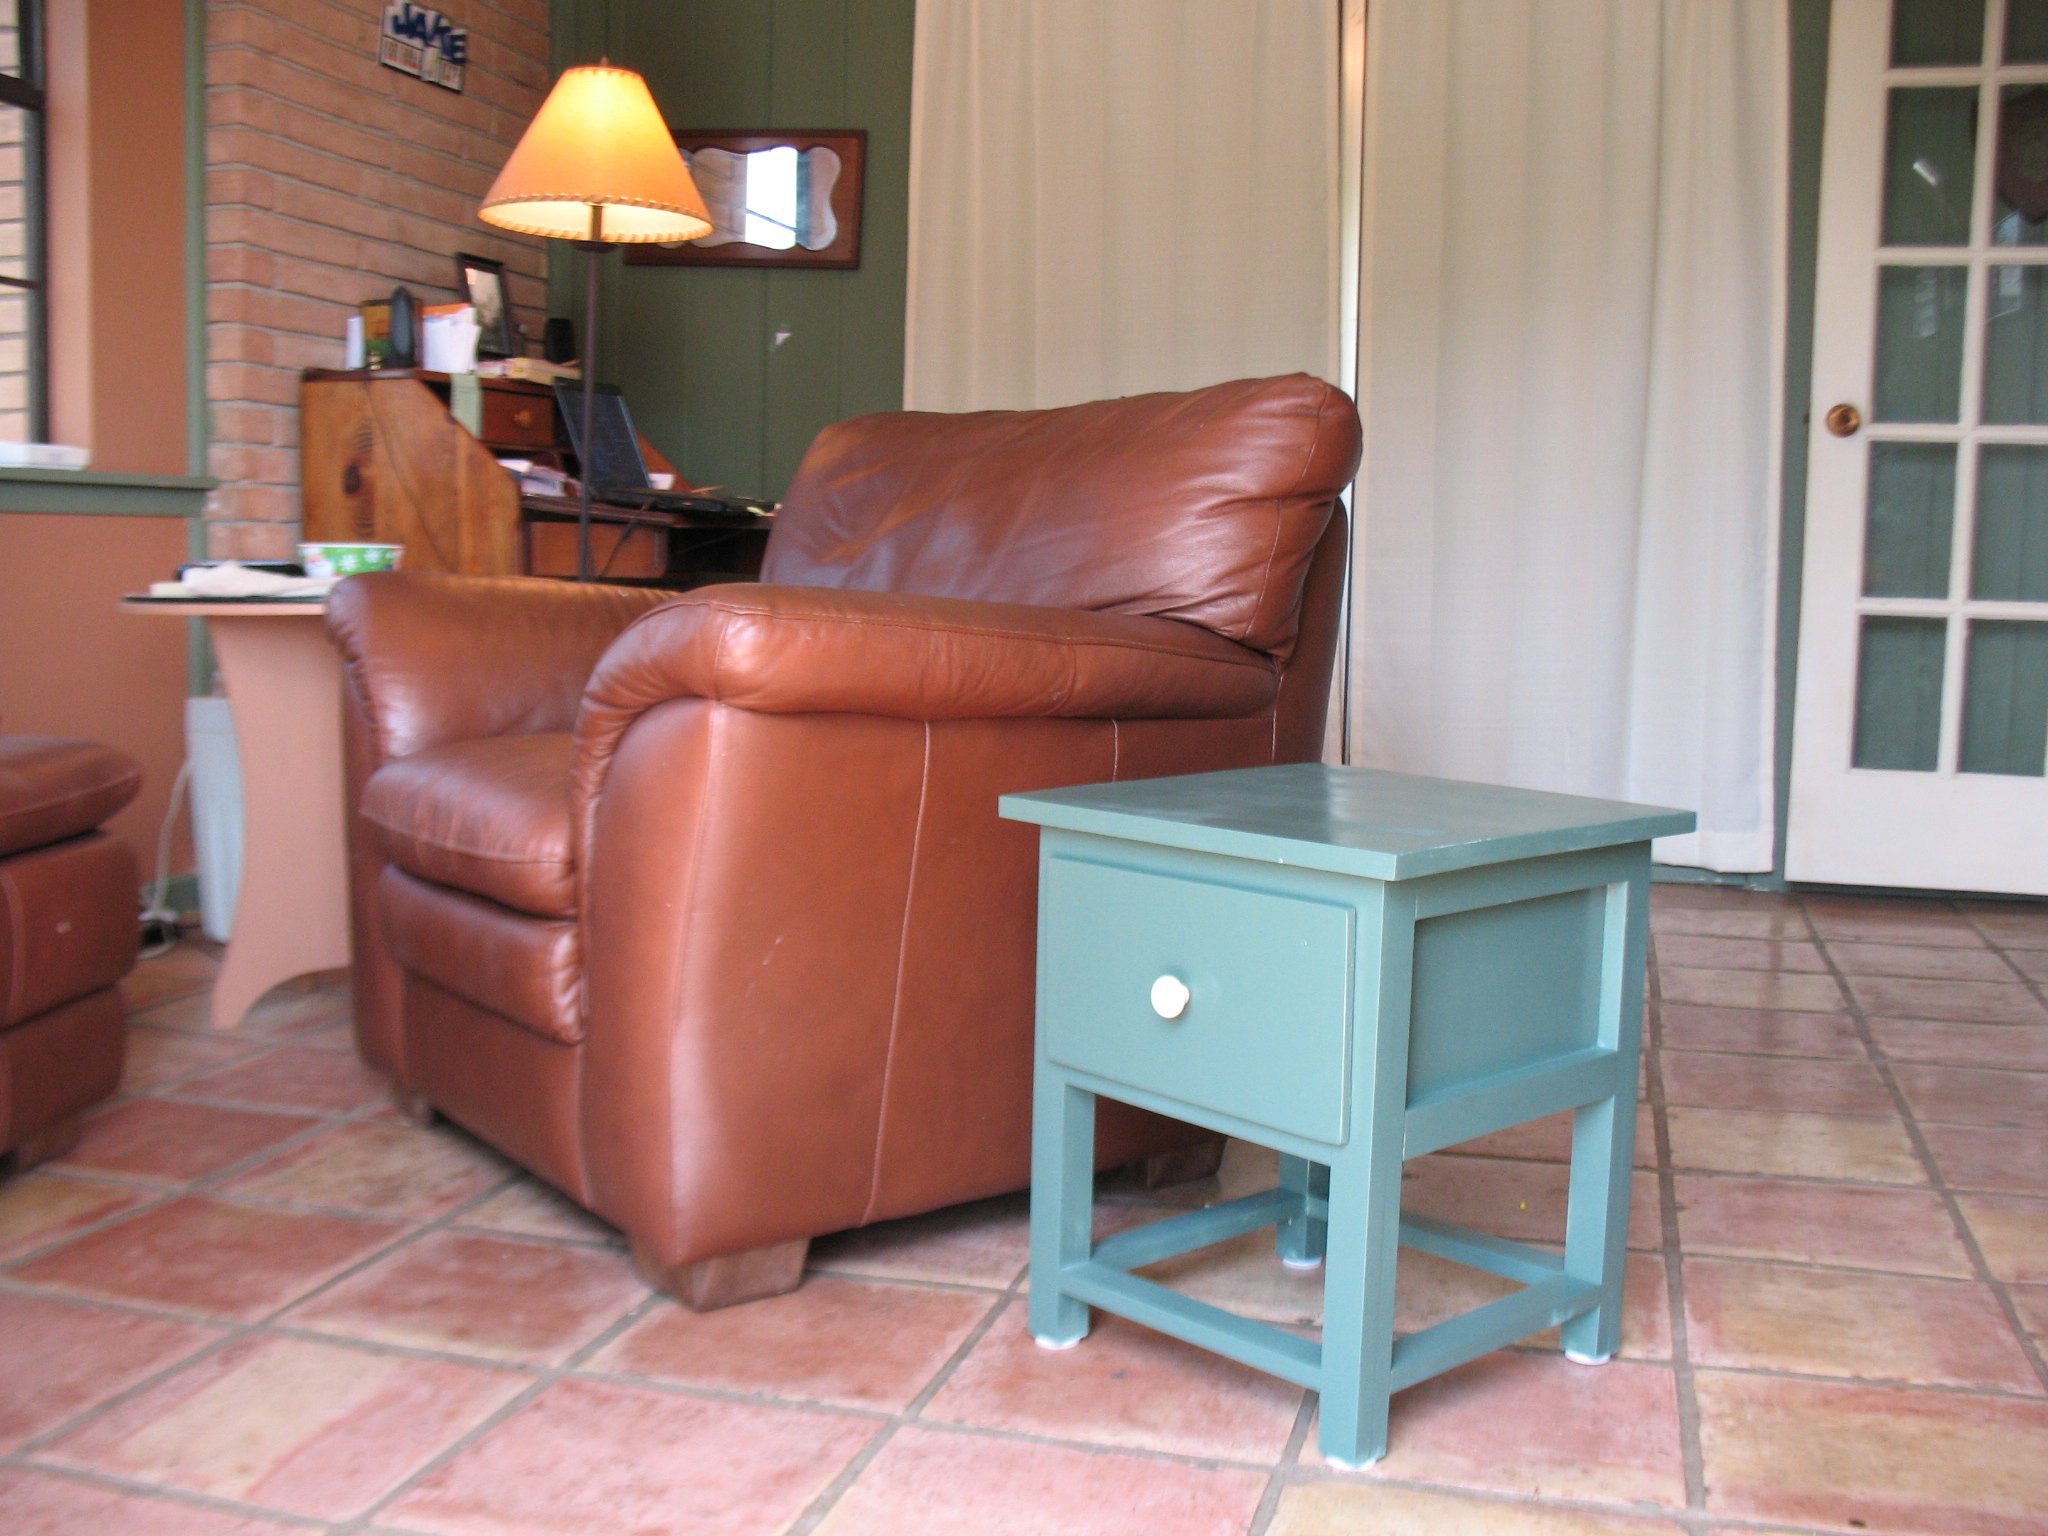
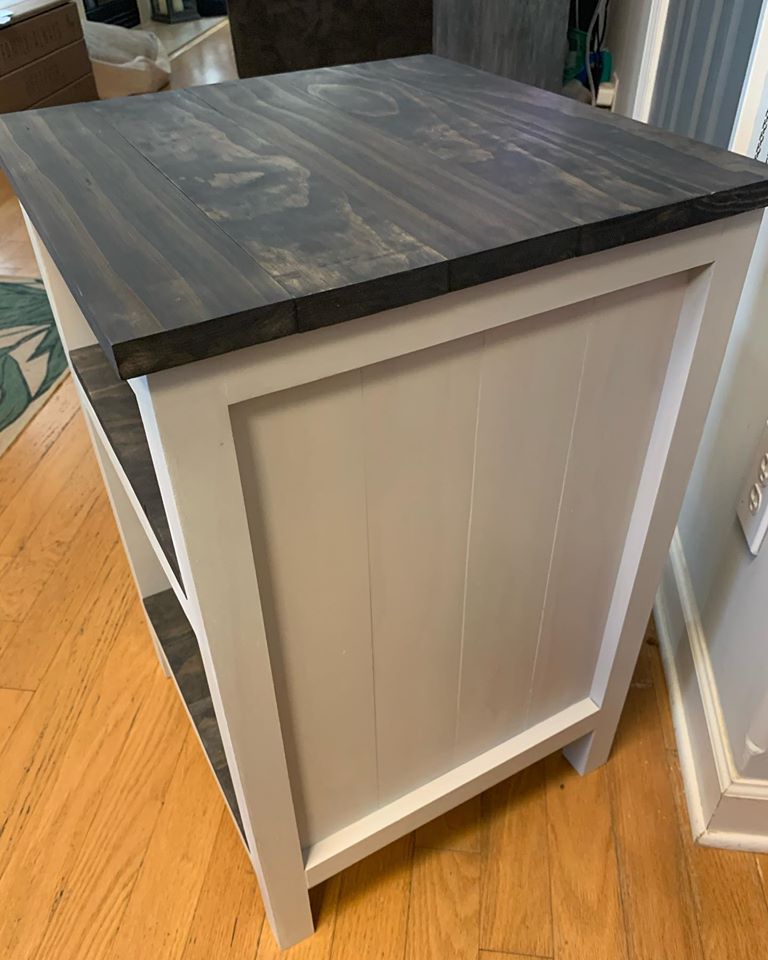
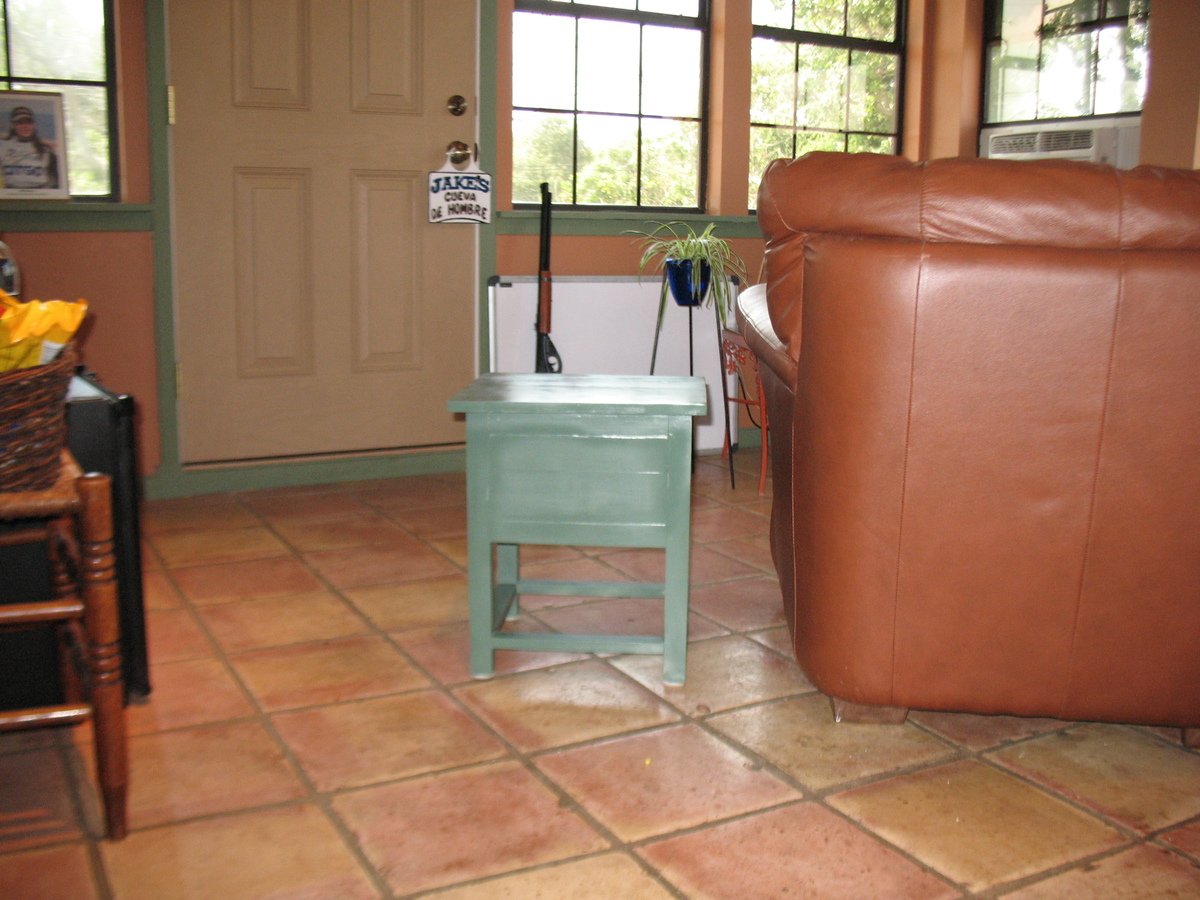
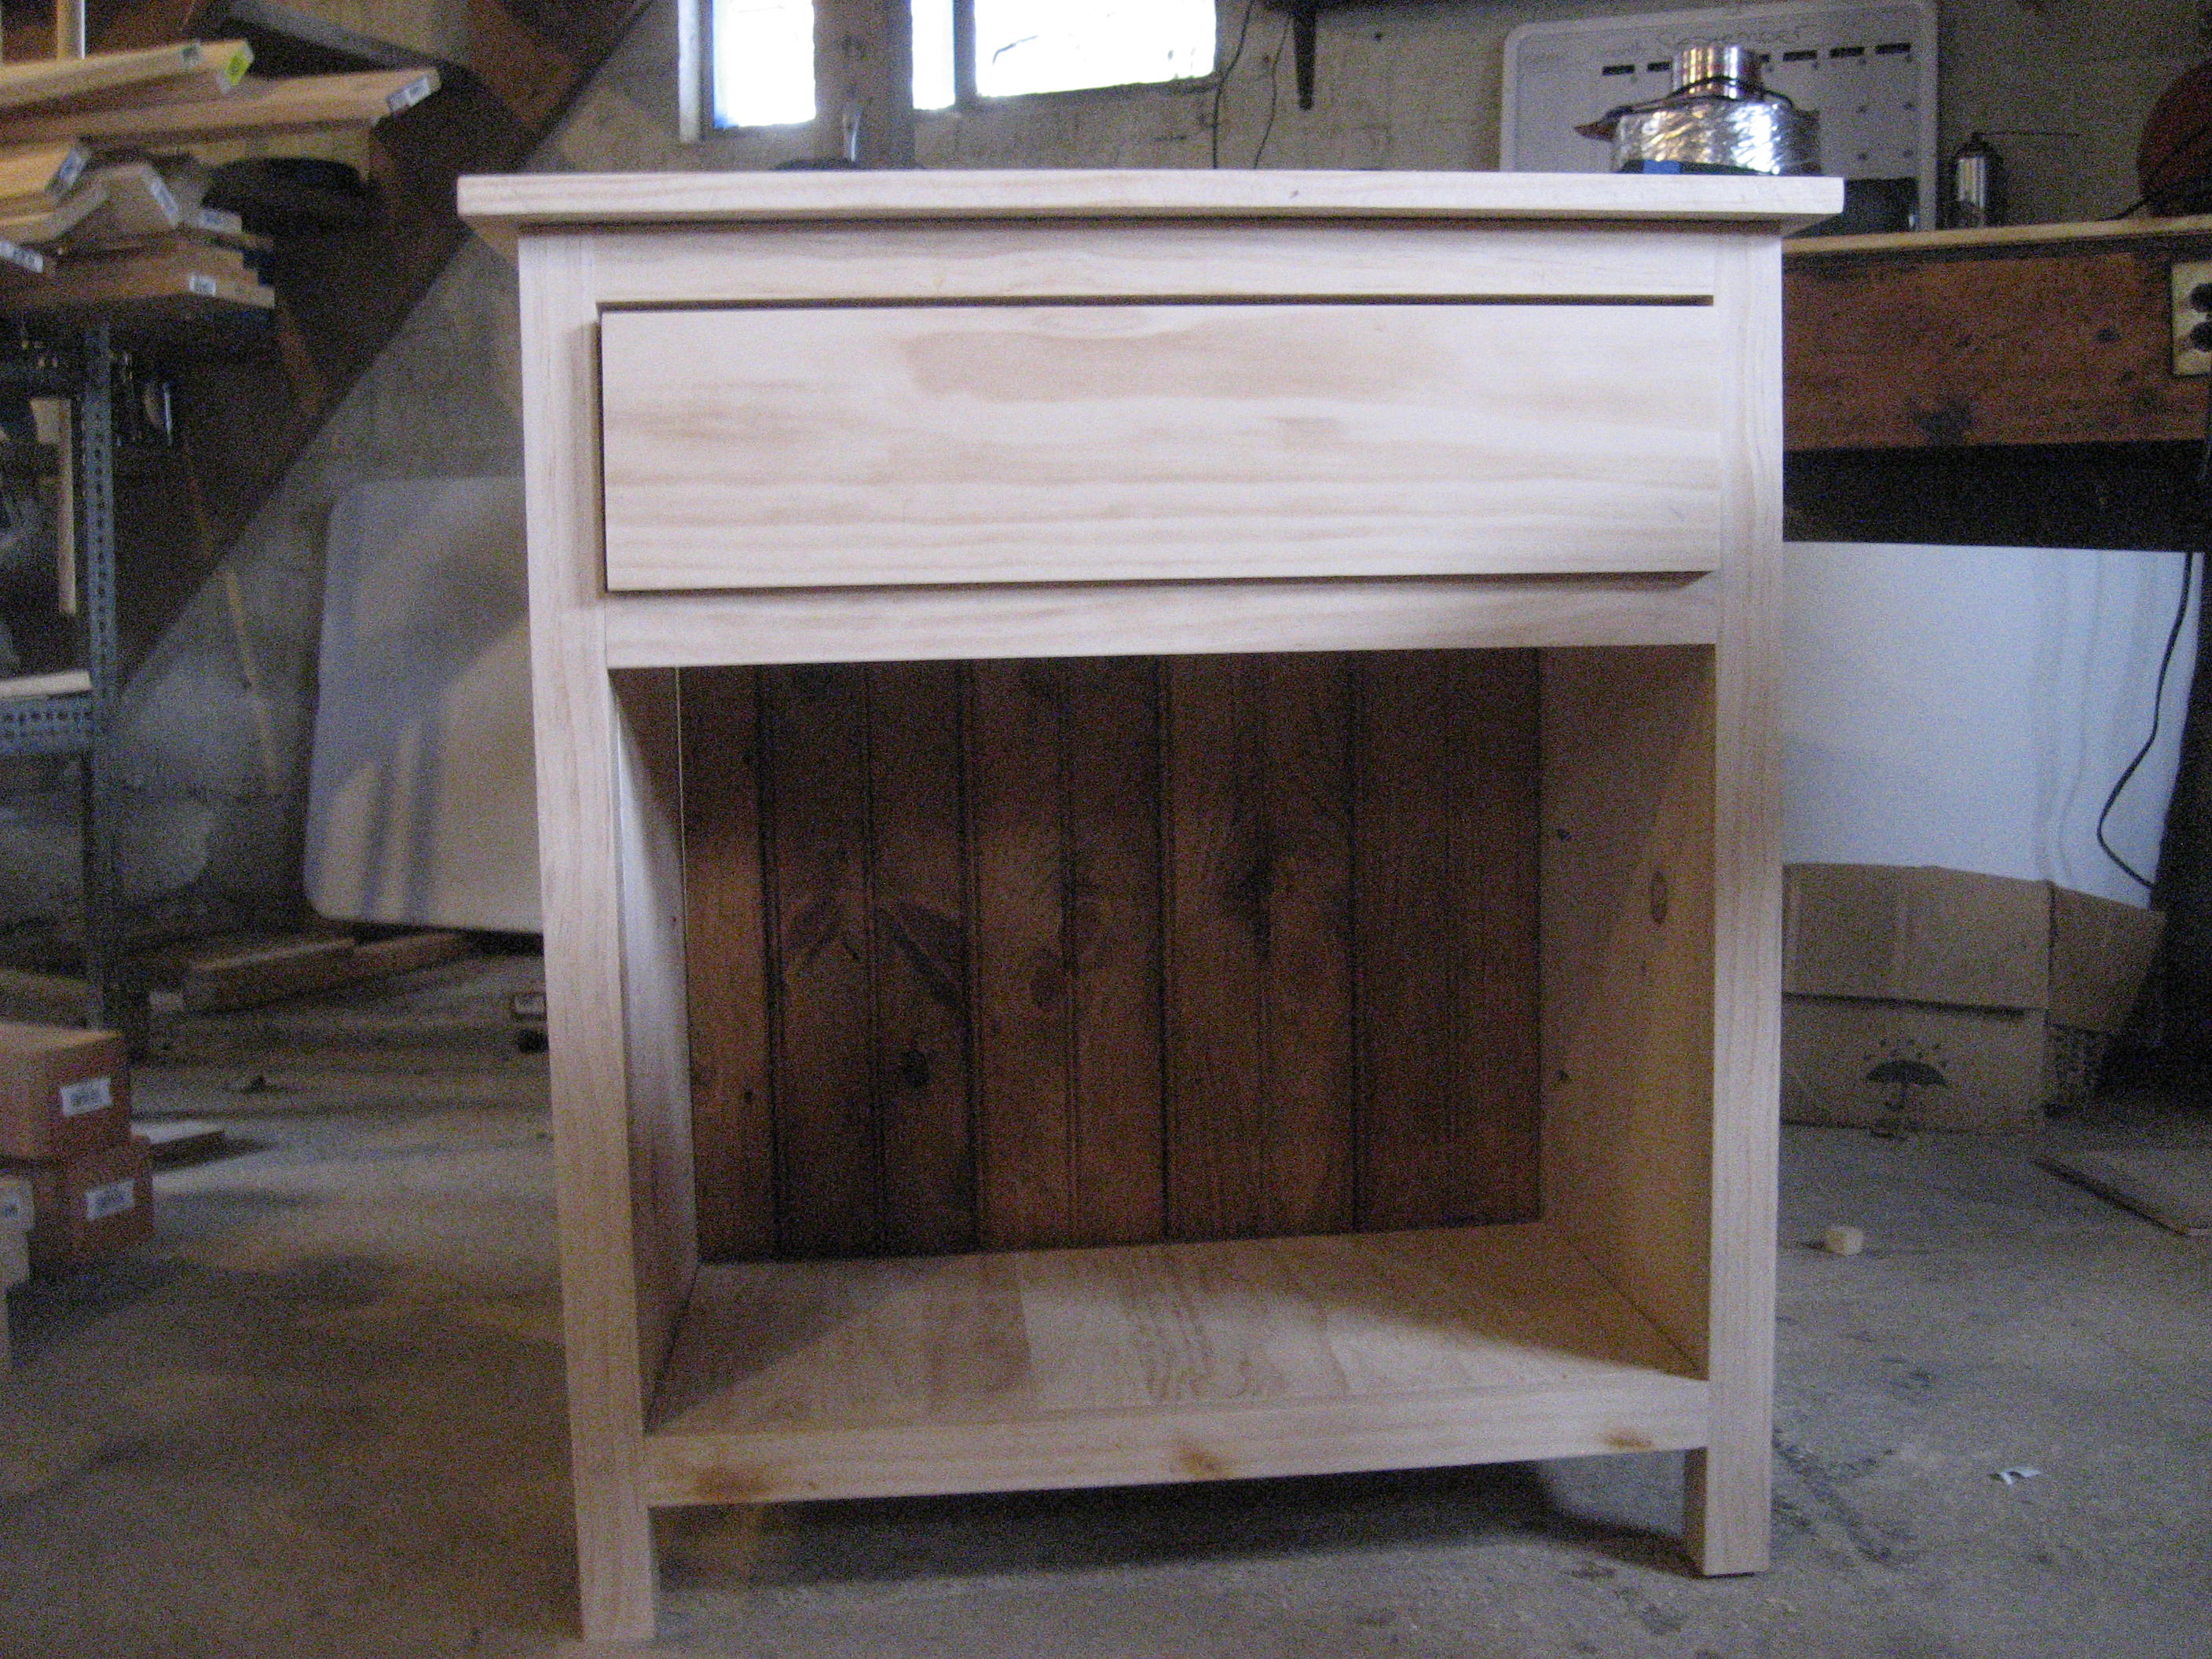
I took the suggestions for the Mini-Farmhouse Bedside Table and revised it a little further. First I cut the legs to 18" which gave me a total height of 19". I enclosed the back to avoid looking at the back of the drawer. I covered the drawer with a piece so it overlaps the drawer slot. Worked great at hiding some of my mistakes. From the pics you can see that it sits next to my easy chair in Mi Cueva de Hombre. Great project.
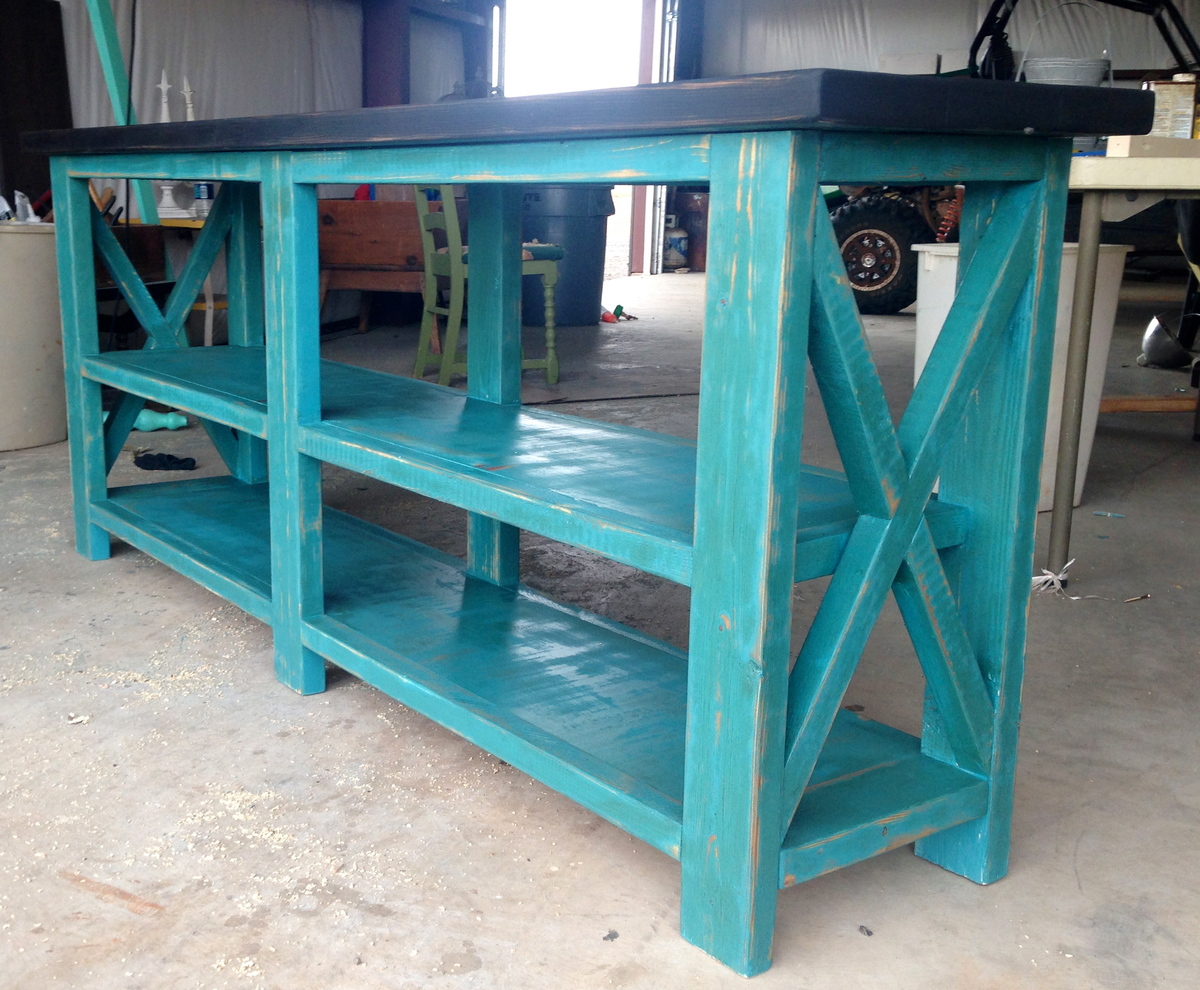
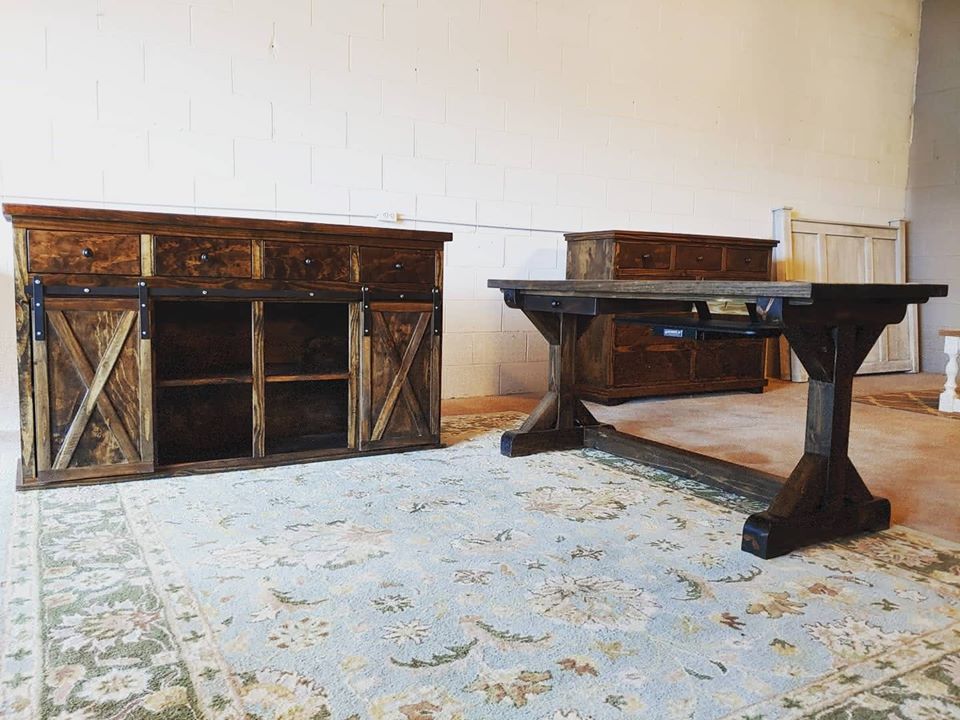
I made this Console following your step by step rustic X console plan. turned out great! I love your site!
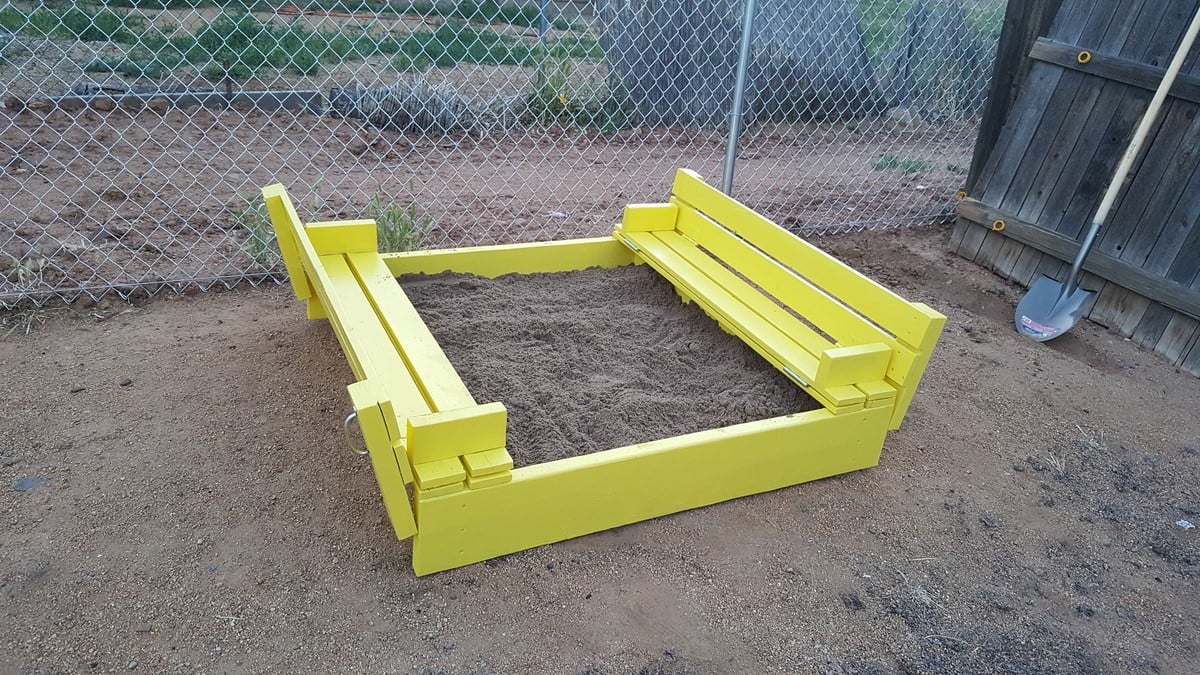
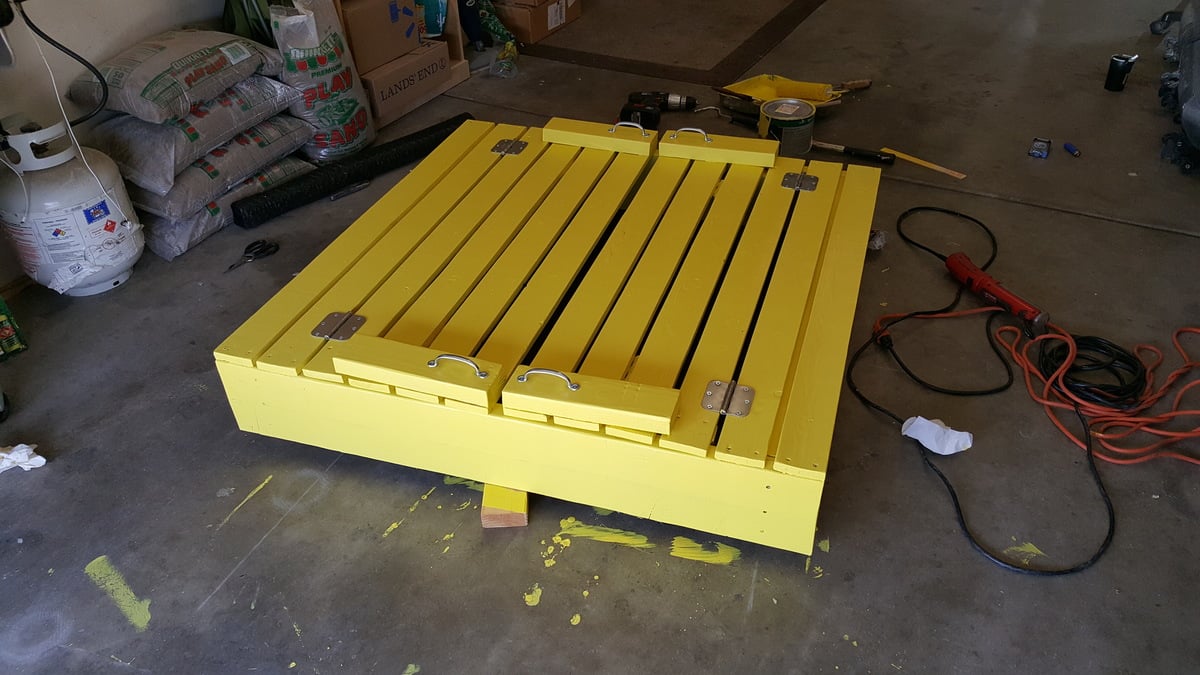
Daughters friend has a store bought plastic sandbox and my daughter asked if I could build one. This is what I built.
Built by Whitney Walters and shared on FB
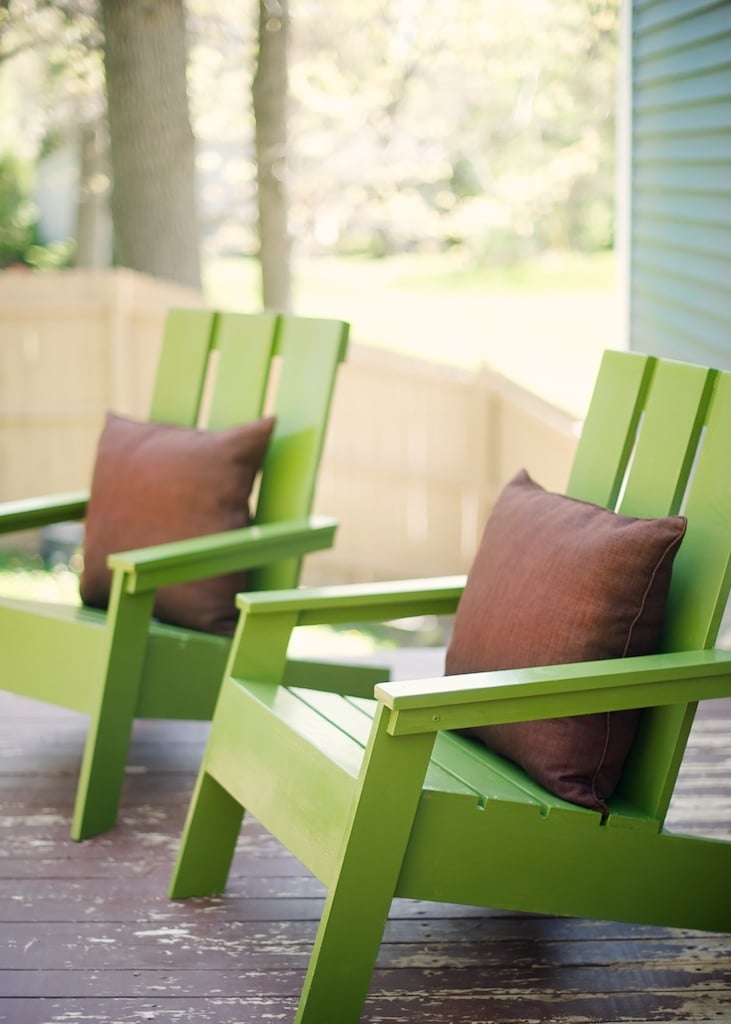
We love how these modified 3-panel adirondack chairs turned out! The pillows were from Costco- $15 for a two pack.
Sun, 05/06/2012 - 14:25
Love these! Did you use 1x8s for the back instead of 1x4's?
Sun, 06/16/2013 - 16:13
Is it possible to get the plans for these chairs??
-c
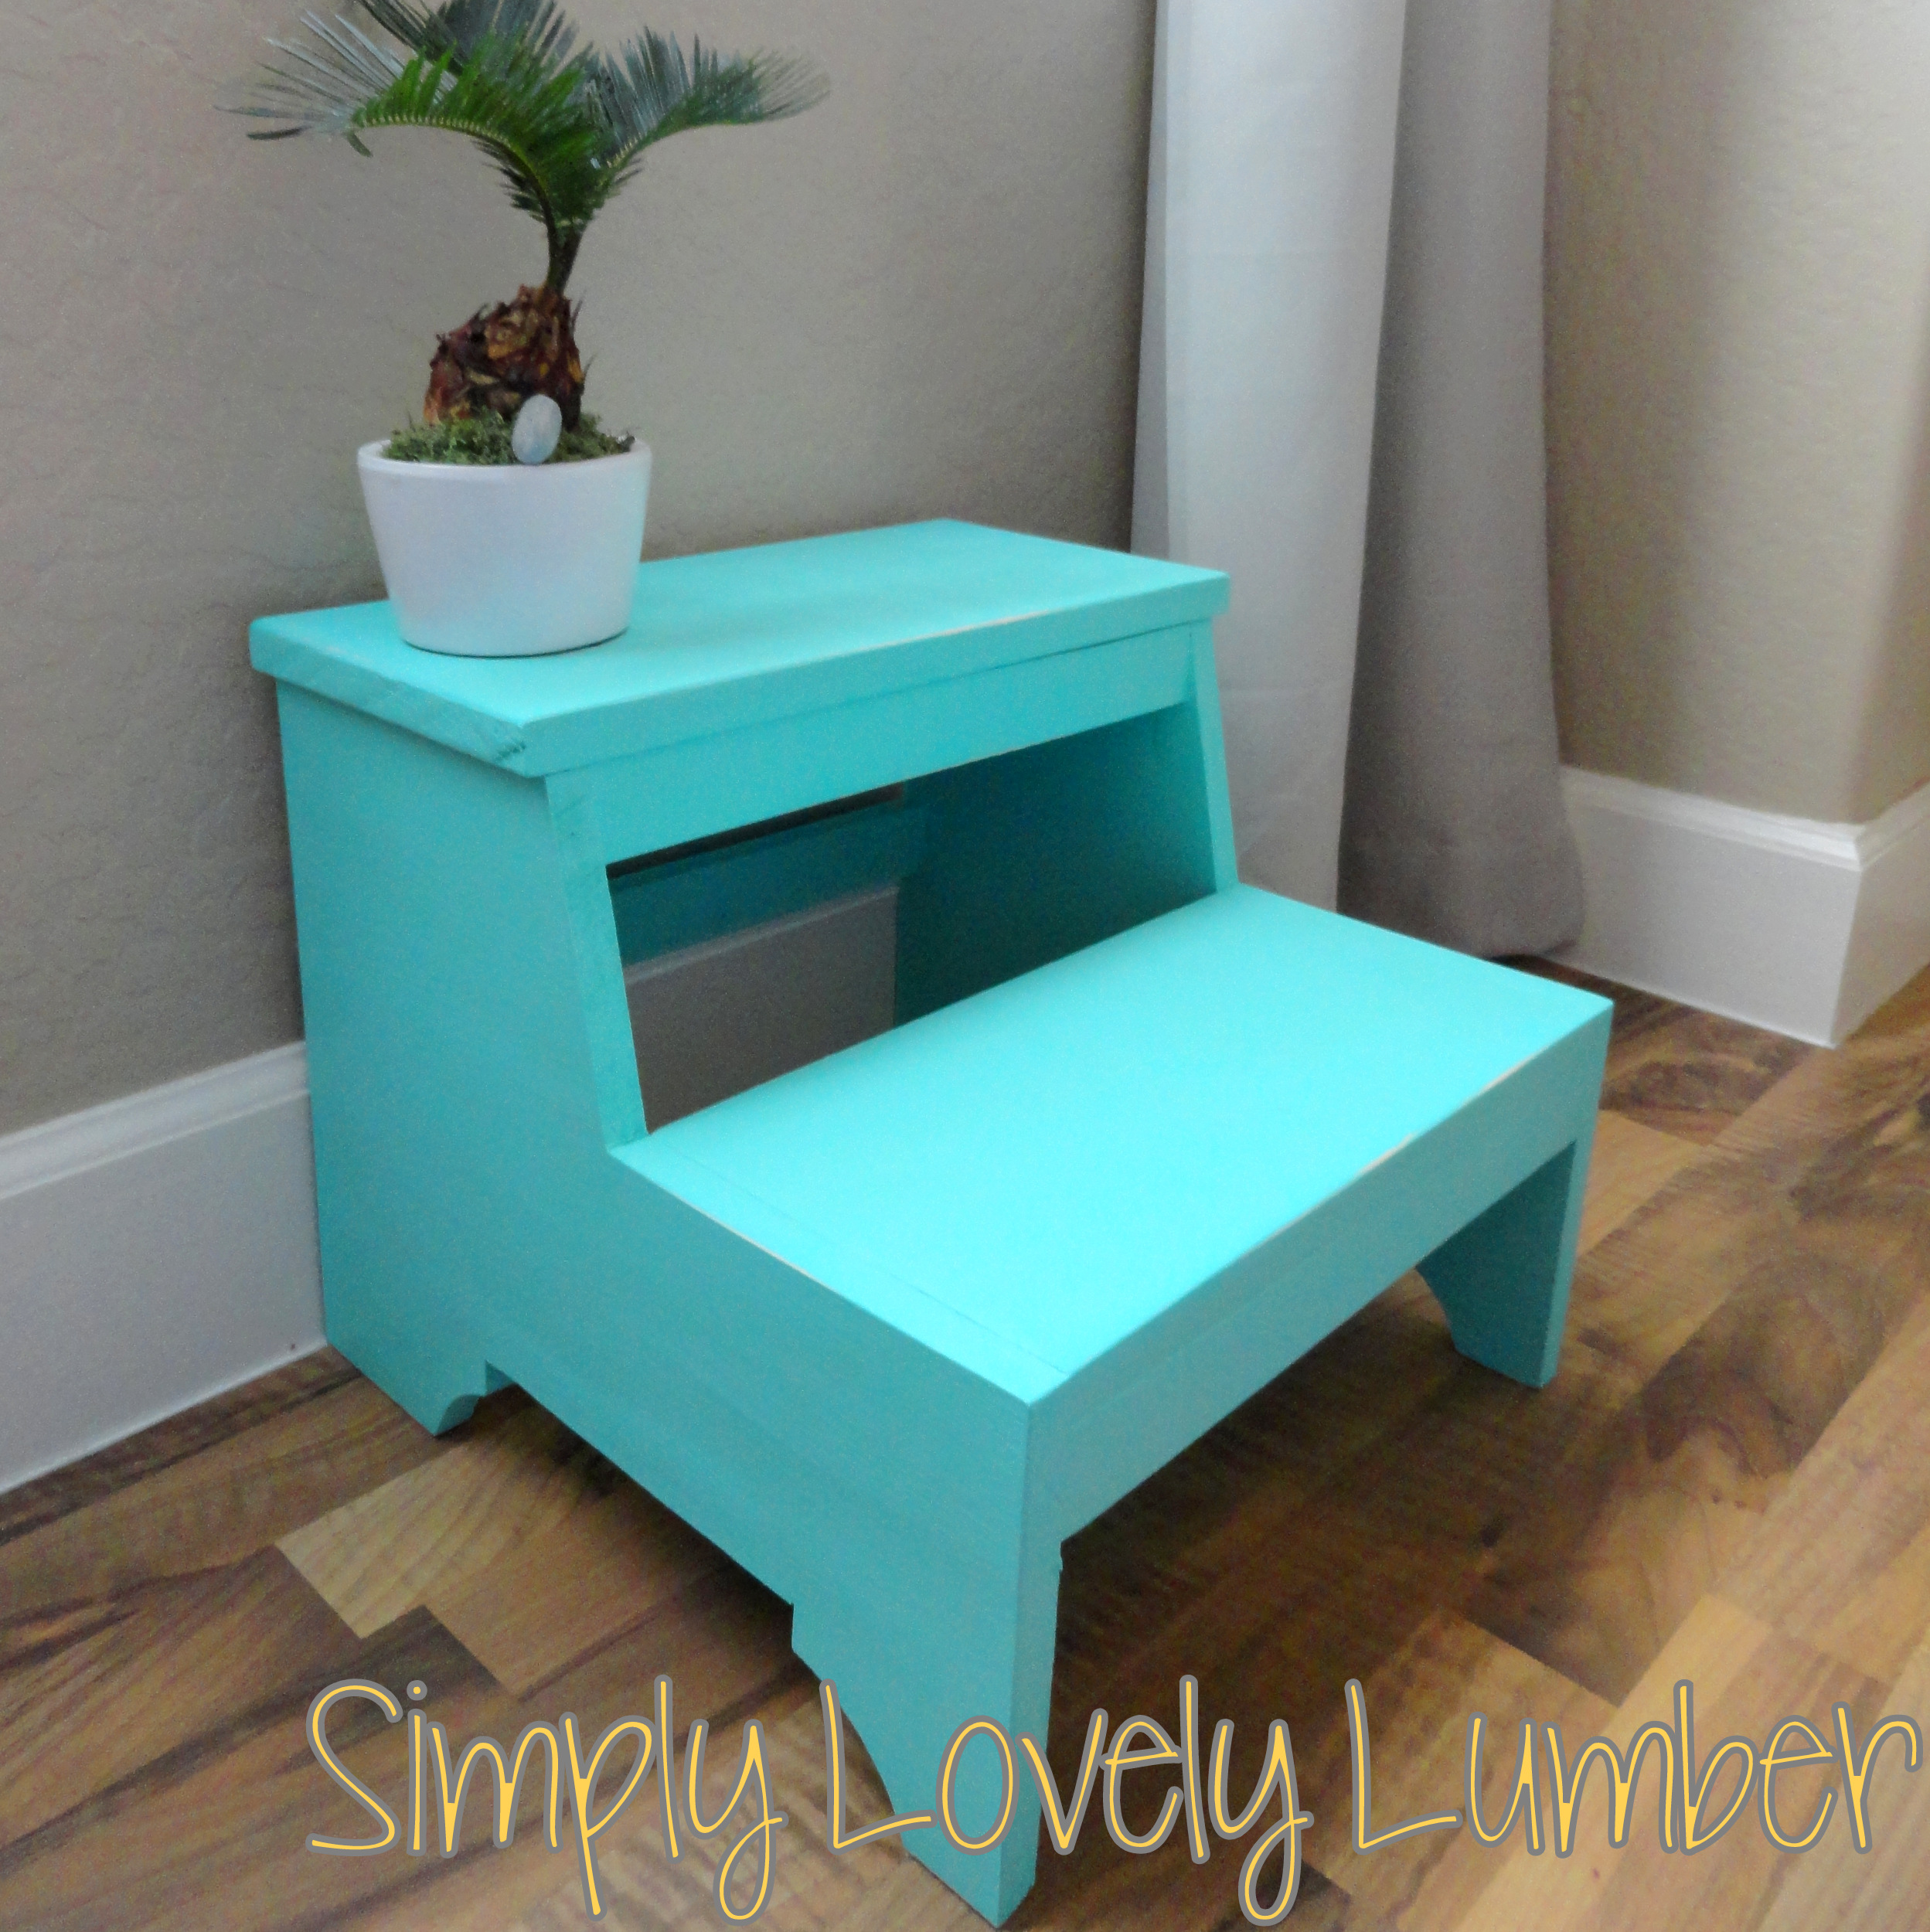
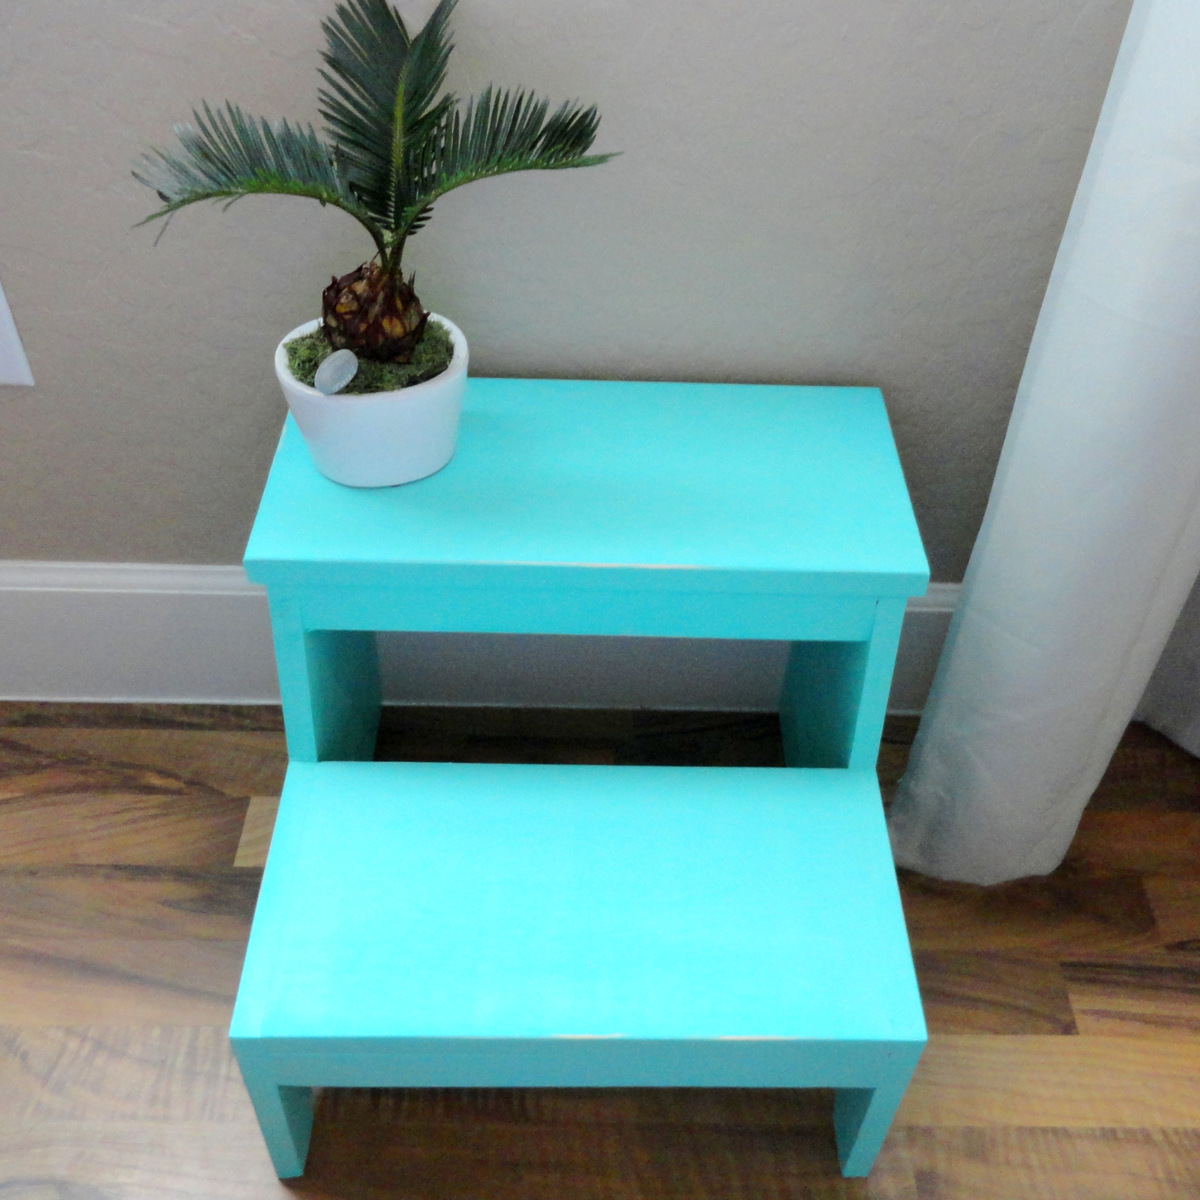
I built this step stool recently and am so happy with the way it came out! I even learned that I'm not all that terrible with my jigsaw anymore haha. I painted it turquoise and distressed the edges a little bit. I also added some silicone to the bottom to prevent it from sliding out from under little ones. I have some of the build process up on my blog. Thanks!!
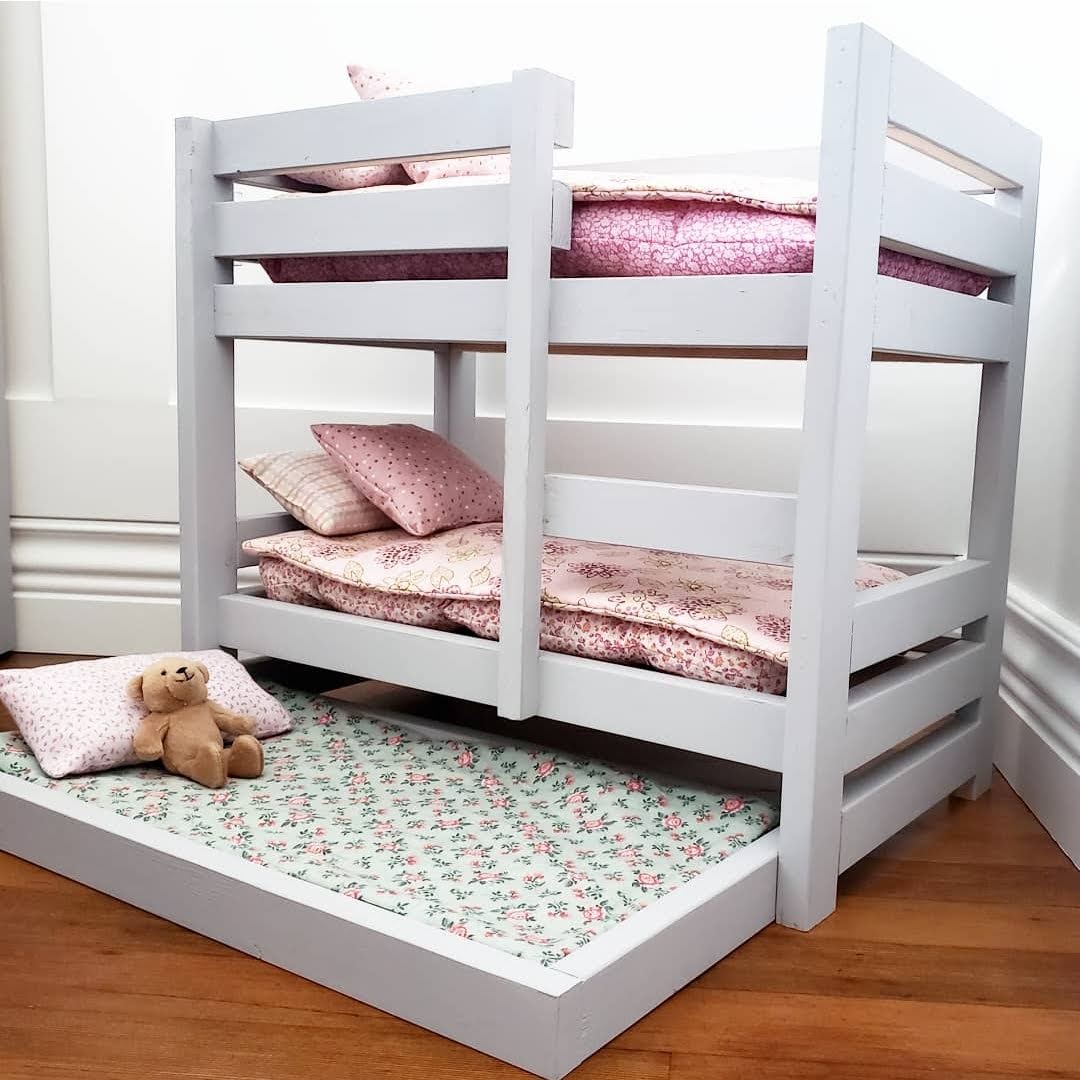
Followed Ana White's Doll Bunk Beds for American Girl and added a Trundle Bed using a few small modifications. Ana's plans were easy to follow and I was able to complete this in an afternoon.
I was remodeling my house. I couldn't find anything that I liked in my price range. I decided to try my hand at making some furniture. I'm wasn't sure if this was something I could tackle, but I'm really pleased with how it turned out.
Mon, 10/16/2023 - 11:08
Way to go, it turned out so good! Thanks for sharing.
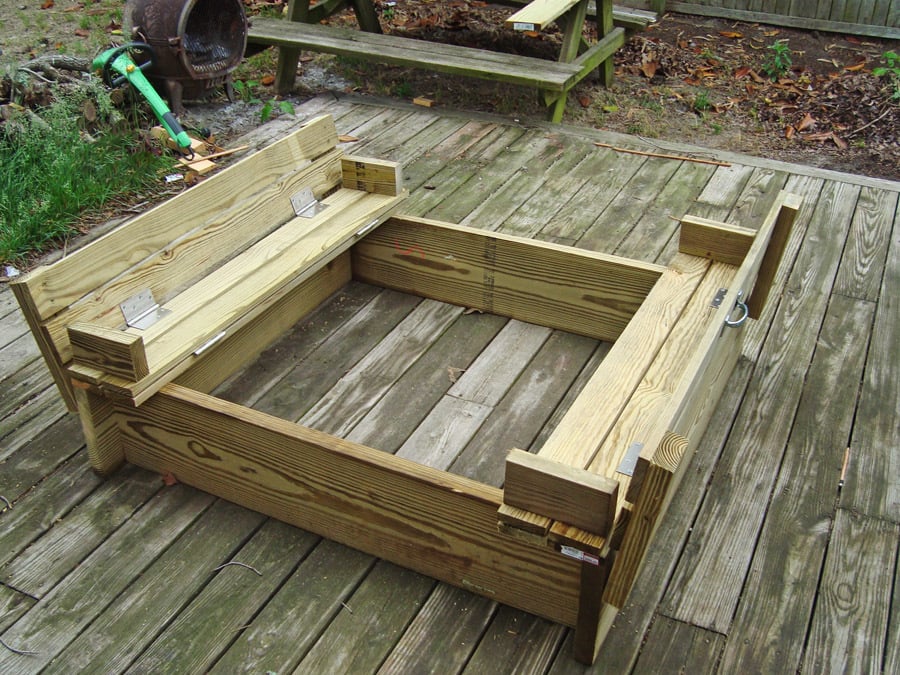
This is a fun project even for beginners. If you have an interest in building a sandbox, and have some tools, I'm sure you can make this easy enough!
I used 2" X 10" wood for my sides instead of the 1" as the plans call for. This gives extra strength and more depth. When you use 2" wood, you will have to turn your 1 X 4's the other way to match the 47½" width, because with the added width of the 2 side boards, your new width is now 49¼". It's not difficult, you just have to match your 1 X 4 X 47½ boards to the proper width. It will turn out fine, they just won't match the plans or pics of those using 1 X 8's for sides.
Sorry, I'm delivering this to my grandson's house for his birthday present, so no sand, but use landscaping cloth under this sandbox, then fill with sand.
One other thing, I'm toying with the idea of matching the angle the backrest is at and re-cut new pieces of 7½" arm rests. I think that may look a little better than the rectangle blocks.
My added pics are as follows:
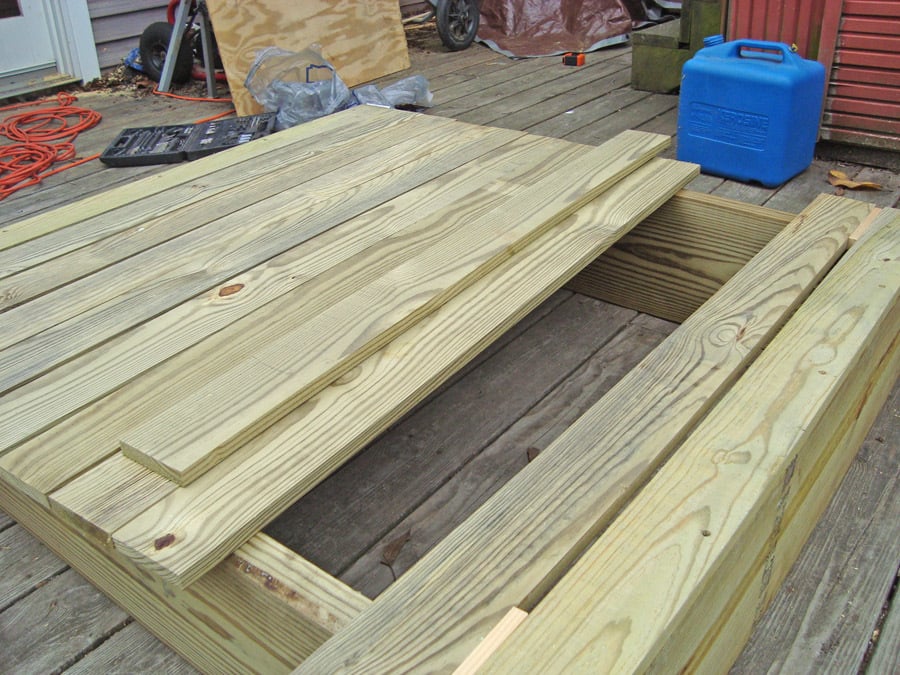
1. The side boards all cut, and sizing up the frame.
2. All other boards are cut; I laid them out for fit before screwing the pieces together.
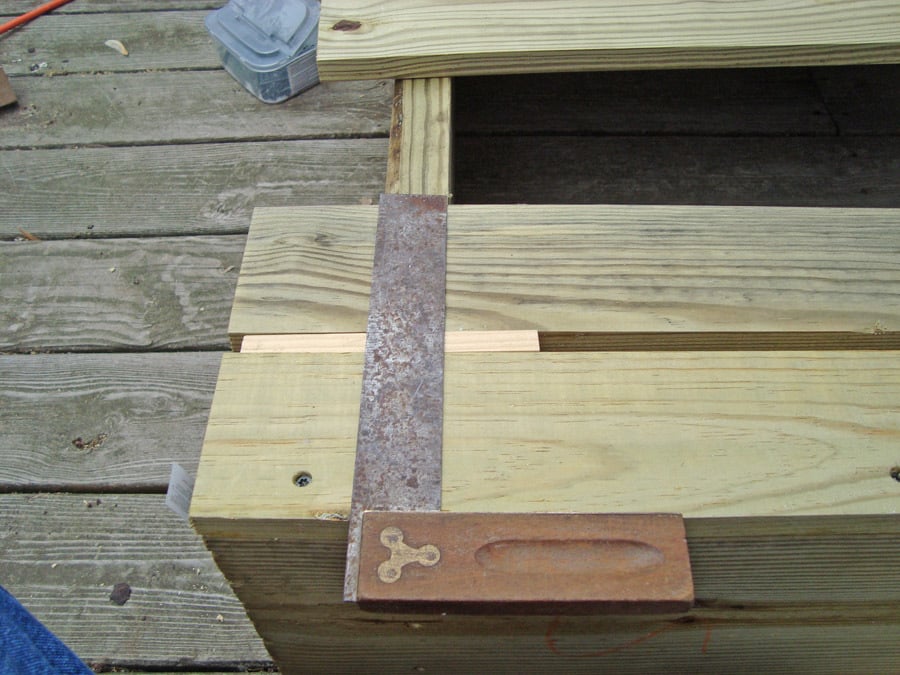
3. Using a square will help you keep everything at the correct angles. Also note in this picture and the next where I used two ½" pieces of wood I ripped to keep the ½" spacing uniform. Just rip any wood to the ½" width, make 2 pieces and butt against the next board on both sides, then screw them down. Makes it VERY easy to keep a uniform gap.
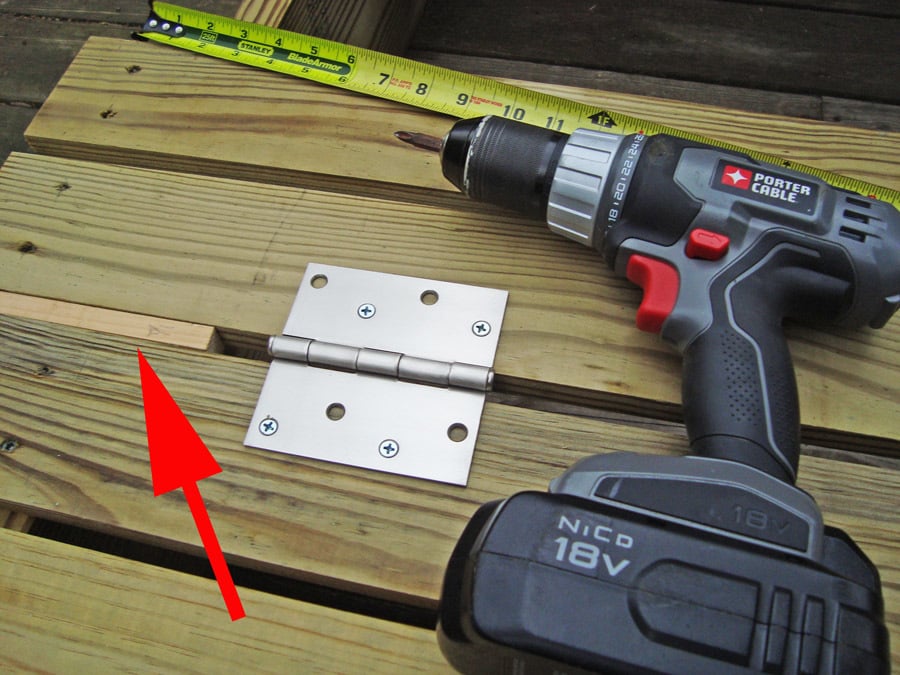
4. This picture shows me using the same "spacer" when putting the hinges in place. The red arrow points to the wood spacer.
5. The first bench is complete, and working fine!!
With the wood I used in my project, I used 2½" self tapping deck screws for the frame and attaching the 1X4's to the frame; I used 2" galvanized for attaching the 1X4's to any 2X4's; and for the hinges, I used ¾" wood screws. Using these sizes prevented the screws from coming through the other side.
I bought everything needed in this project at Lowe's and it was under $90 in costs; this is all the lumber (upgrading to 2 X 10's), hinges, screws, and handles.


Wed, 05/09/2012 - 16:25
I was just going to tell you how to add a brag blog when I saw that you'd already done so! YAY! Your sandbox looks awesome! You guys are all making me wish I had a tolerable yard to put a full-sized box in!!!
In reply to Yay, you figured it out! by Lady Goats
Thu, 05/10/2012 - 13:49
Yeah, you made the plans easy to follow. It was a lot of fun. I spanned it over 2 days, but still was only around 4 hours of work.
I'm considering cutting the "arm rests" at an angle to match the slope of the back rest. I may play with that this weekend.
Thanks for all the help!
Also, what did you use to make the sketch type pics for the plans? I know you mentioned something about not knowing how to put the hindges on them. If I can help, I can probably do it for you in PhotoShop.... Just let me know.
Thanks again!
Loral
In reply to Yeah, you made the plans easy by Loral
Thu, 05/10/2012 - 14:07
And didn't even think of putting the pics in PS to add the hinges. DUH! Thanks for the idea! ;-)
What do you mean about angling the armrests? So they sit right on the back, instead of the gap?
Thu, 05/10/2012 - 15:42
Something like this:
http://www.loraljohnson.com/sandbox/NewArmRests.jpg
I cut these at a 10º angle on both ends and 8" long.
Now, how did you make the "plans" images?? :)
Loral
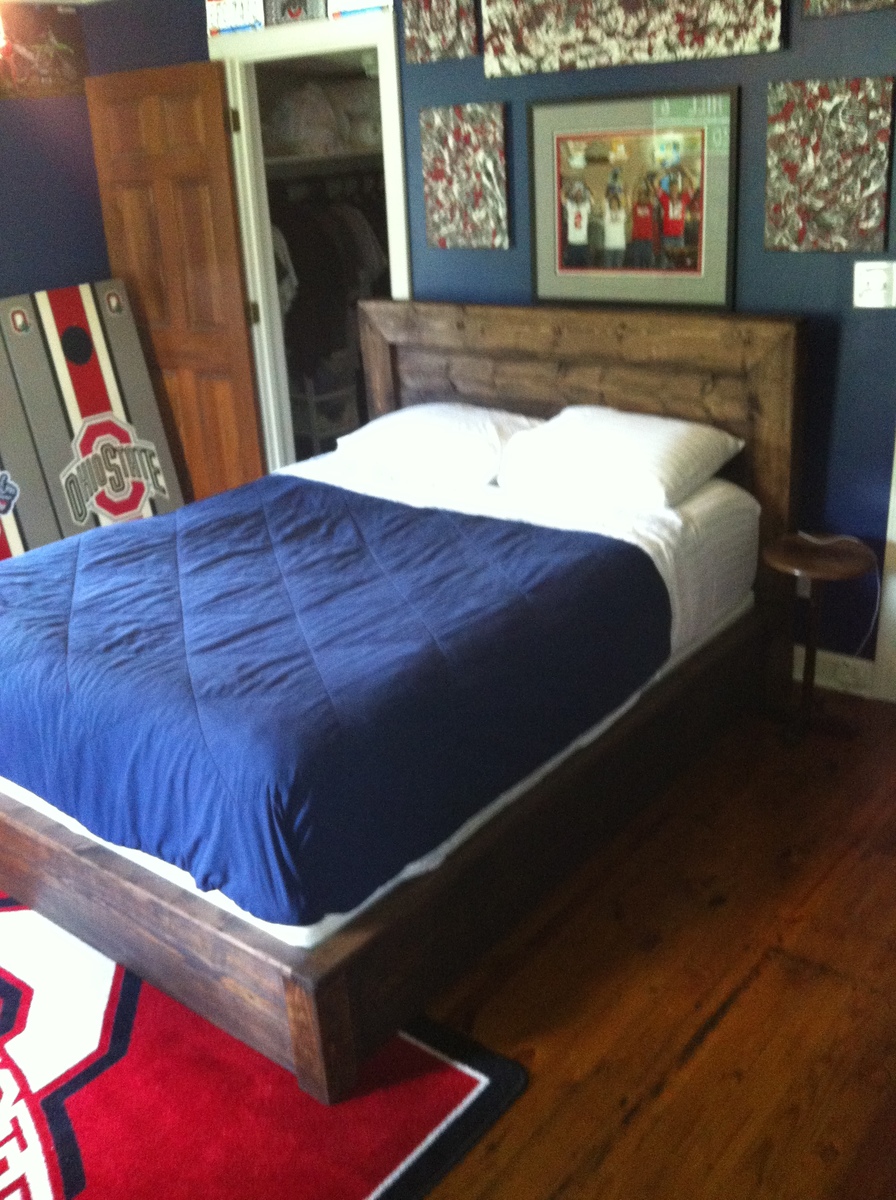
I had searched for a nice bed frame for the longest time. I wanted something that would last and the prices in furniture stores or antique shops were crazy. I found the plans for the platform bed/headboard and modified them a little. I used 2x12's for the frame and set my 2x6's down inside for my box spring. 2x6's for the headboard and trimmed it the same way as in the plans. I love it. Thanks for the plans Ana.
Fri, 05/30/2014 - 18:40
Love your inspired bed! What size mattress is your frame for? I am looking to make a frame just like yours for a queen size bed. Do you have your measurements or are they pretty similar to the original post? Complete beginner here, any help is much appreciated!!
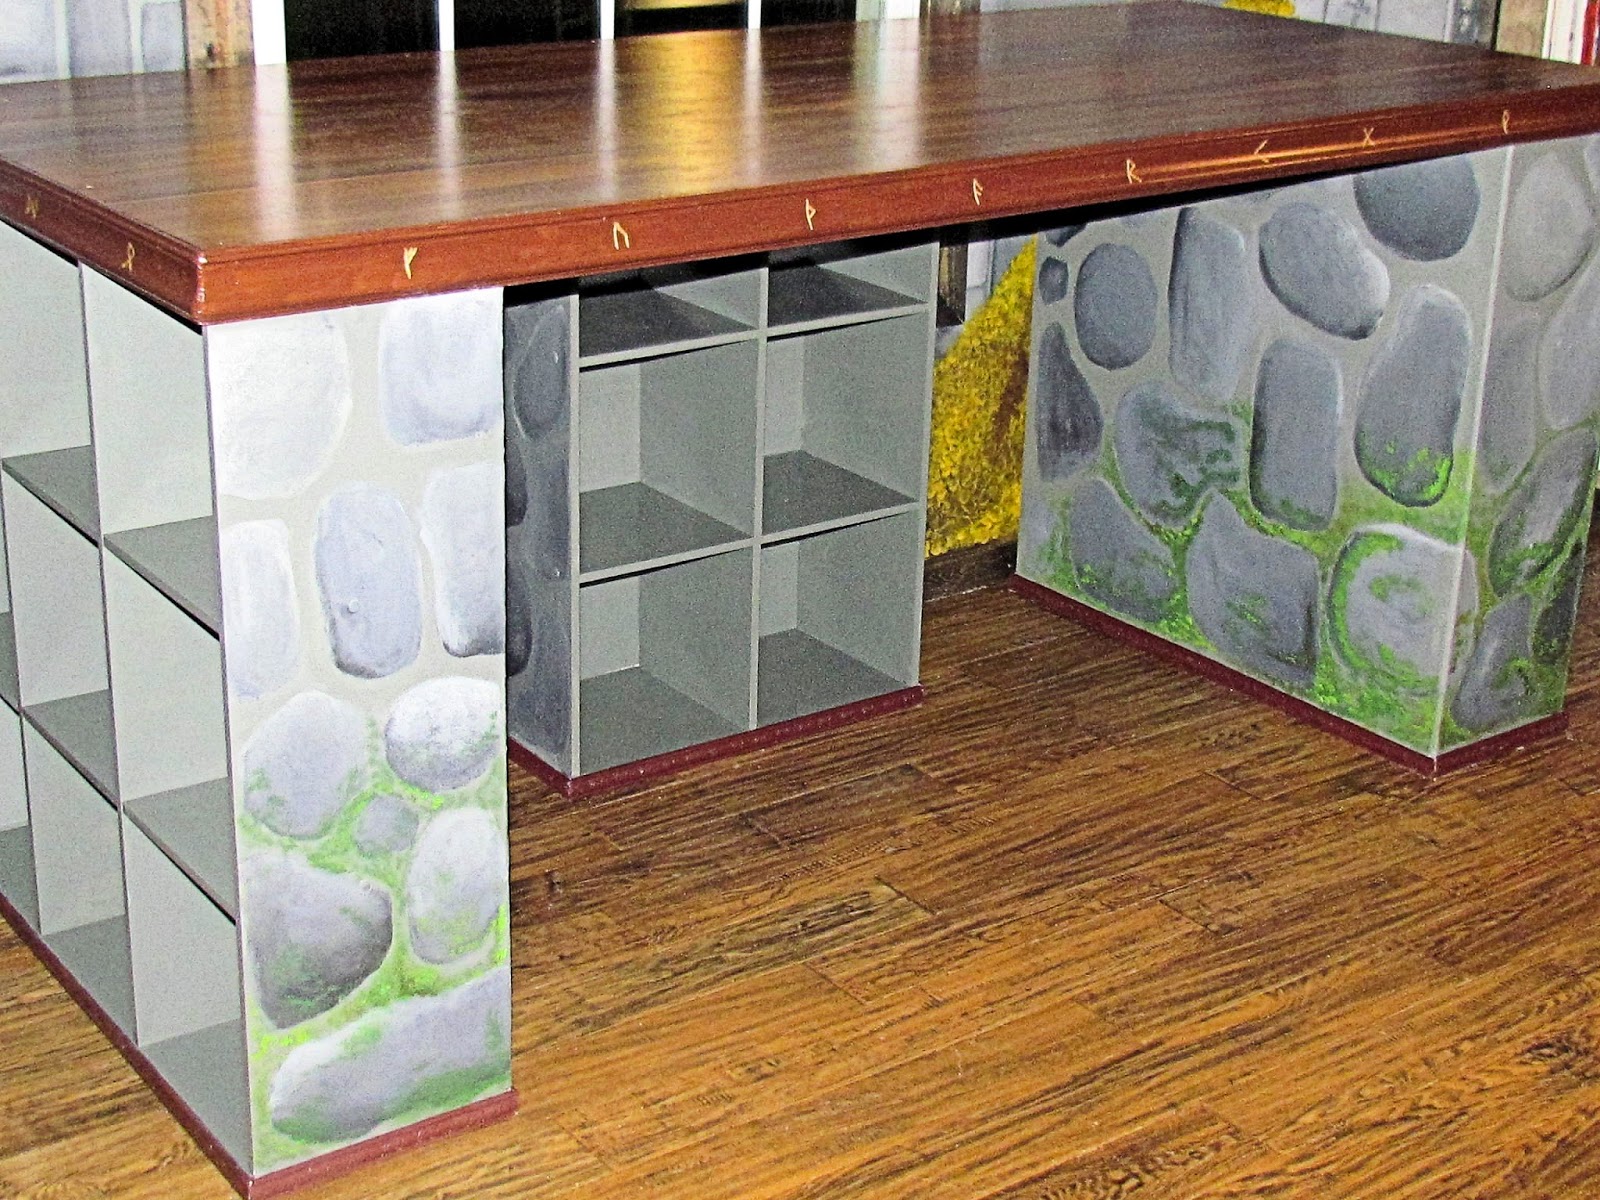
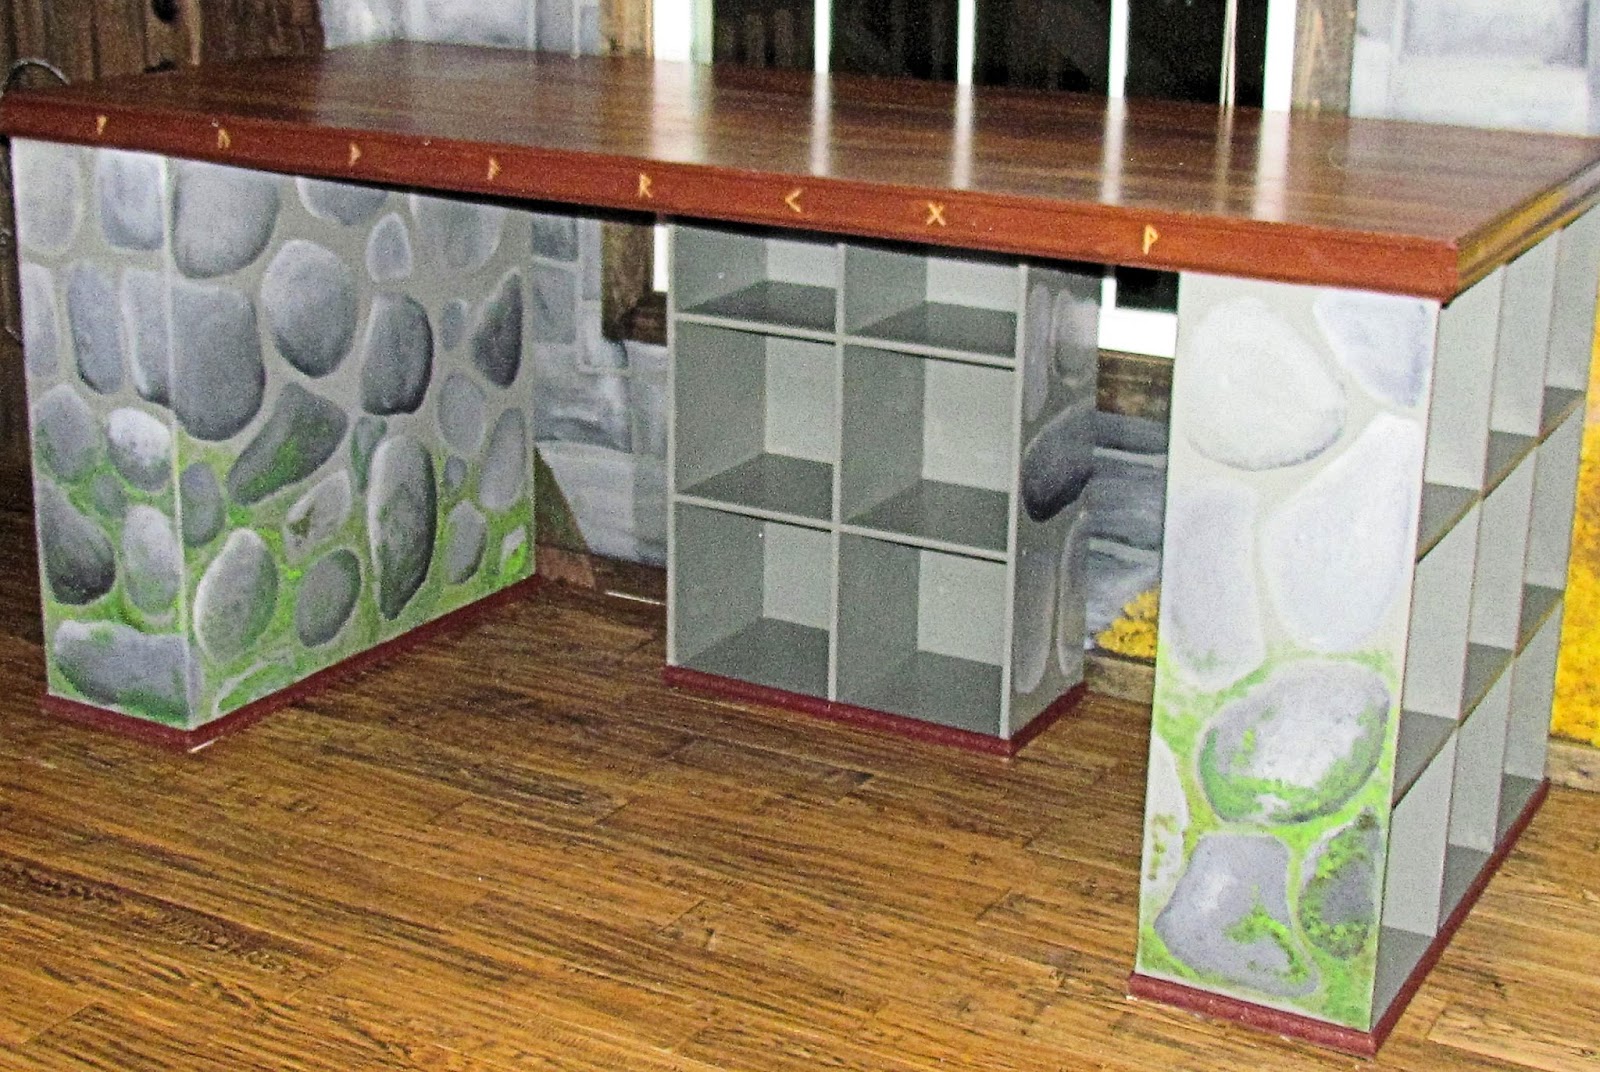
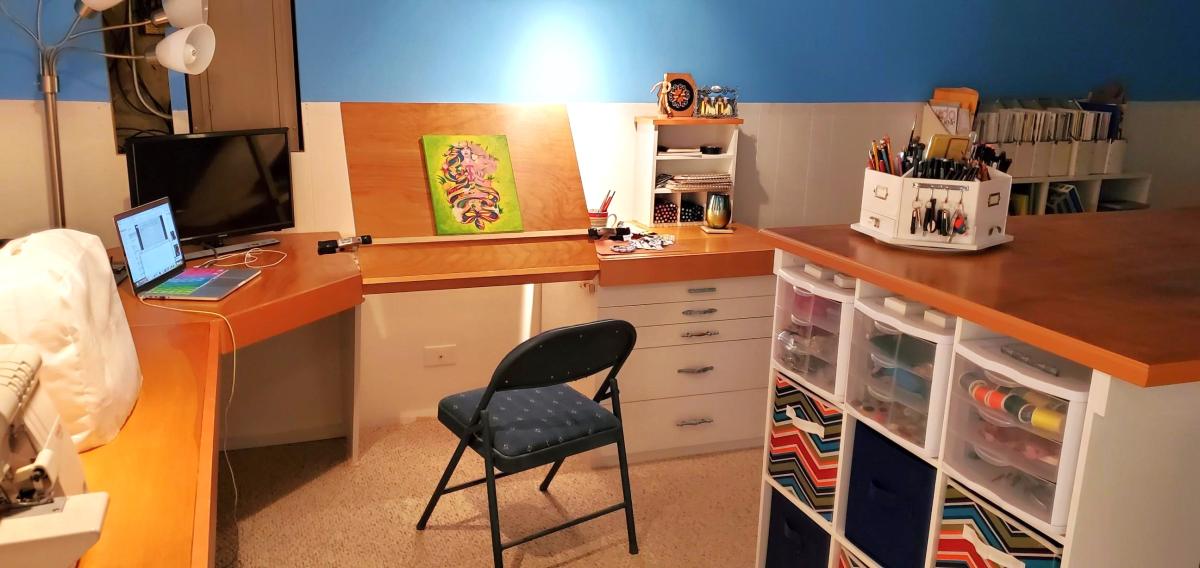
I liked Kristi's version of the modern craft desk but I decided to add another cubby area. I have a lot of art things and I like for them to be organized. Here is Kristi's version: http://www.ana-white.com/2013/10/kristis-craft-desk
I really love the way it turned out and I've definitely got my use out of it.
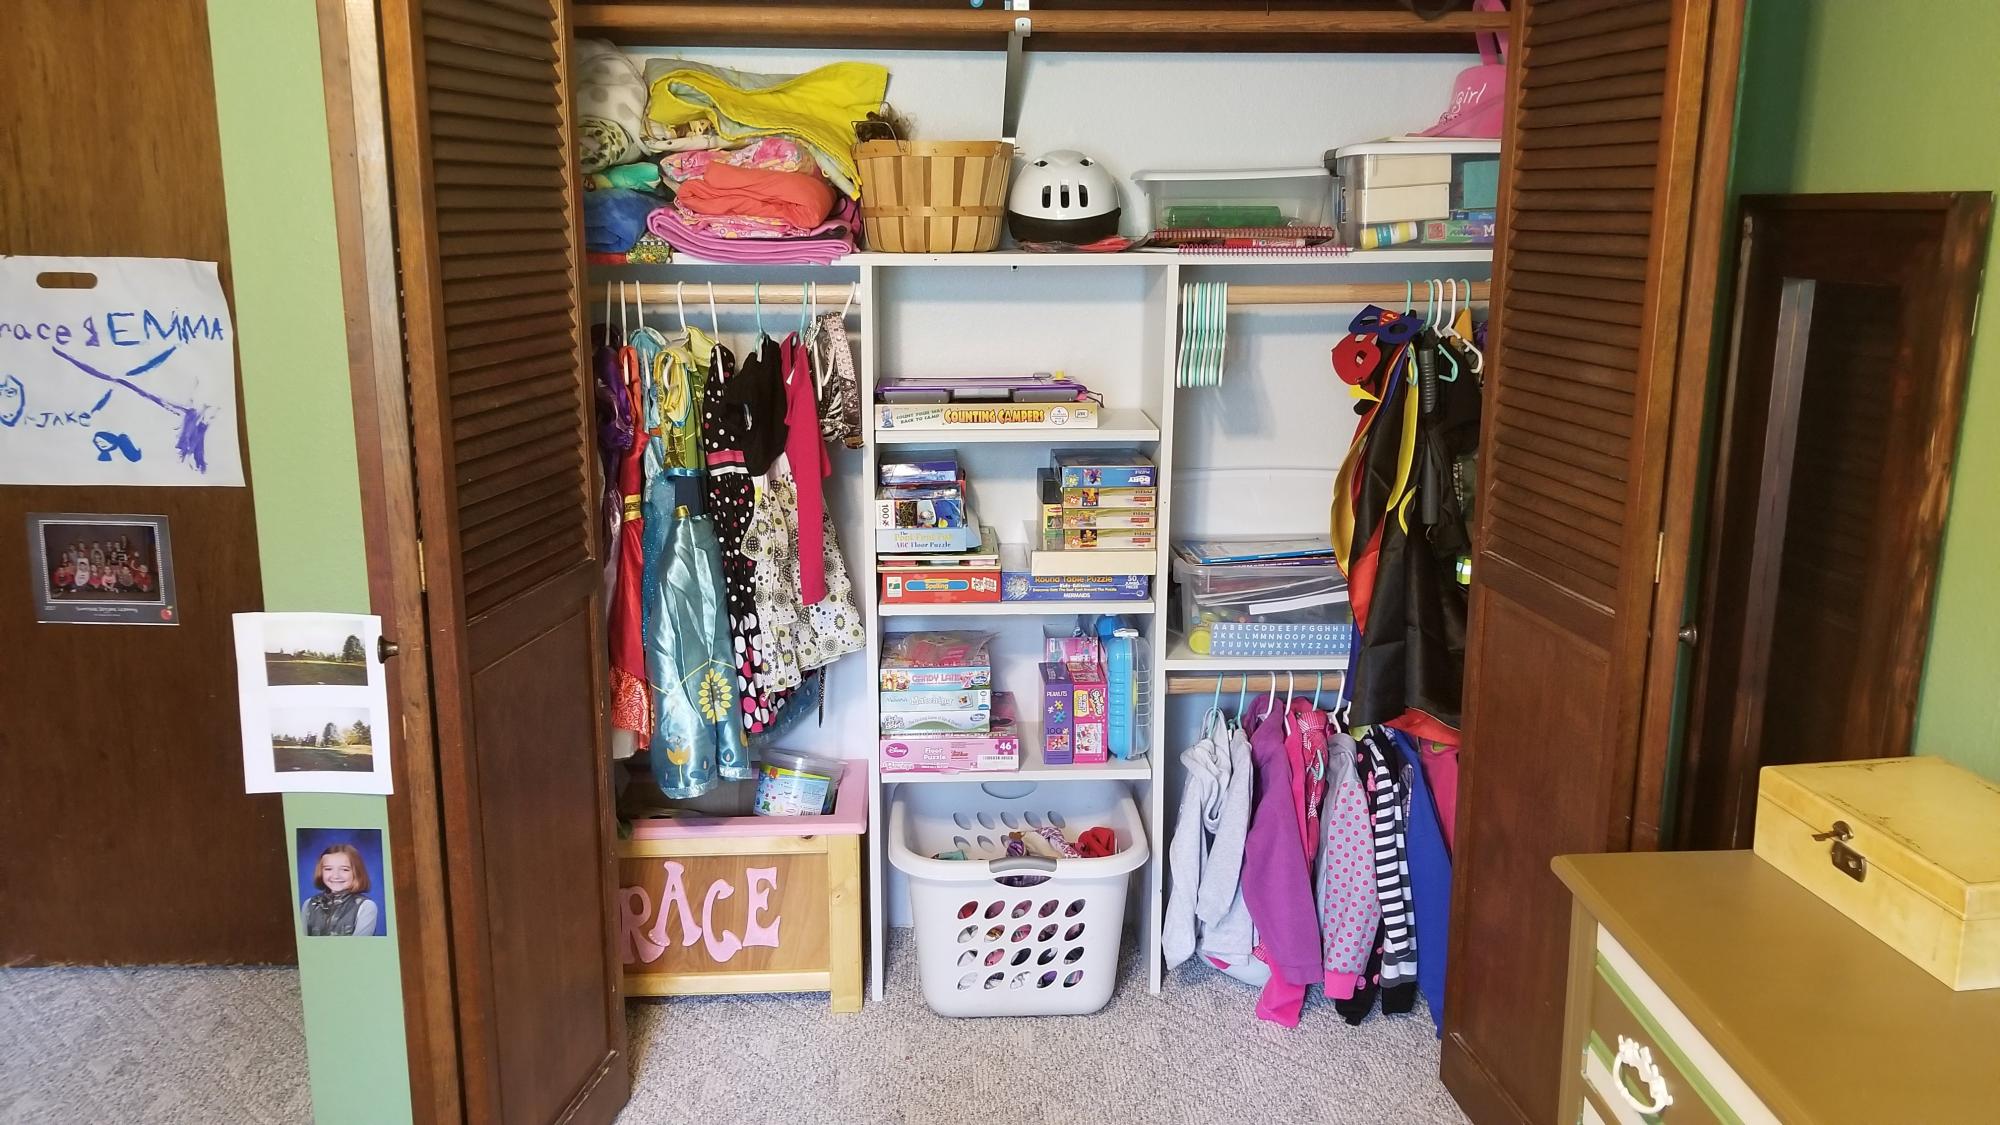
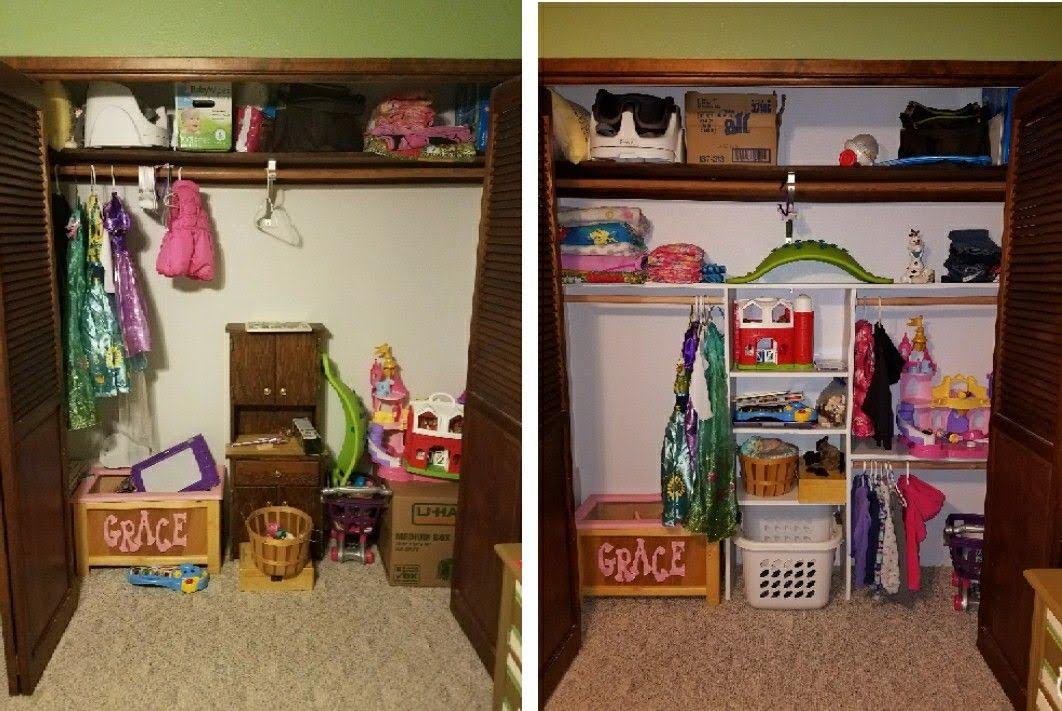
My daughter's closet was a nightmare and helter-skelter with a lot of wasted space after we moved into our house. So I decided one day I was done with the mess and built this to suit her needs. I used 3/4 plywood, closet rods cut to size, and adjustable shelving. When she's bigger, I can pull the shelves out if needed for taller closet hanging but for now this works pretty good. She's kept it pretty clean 3 years later.
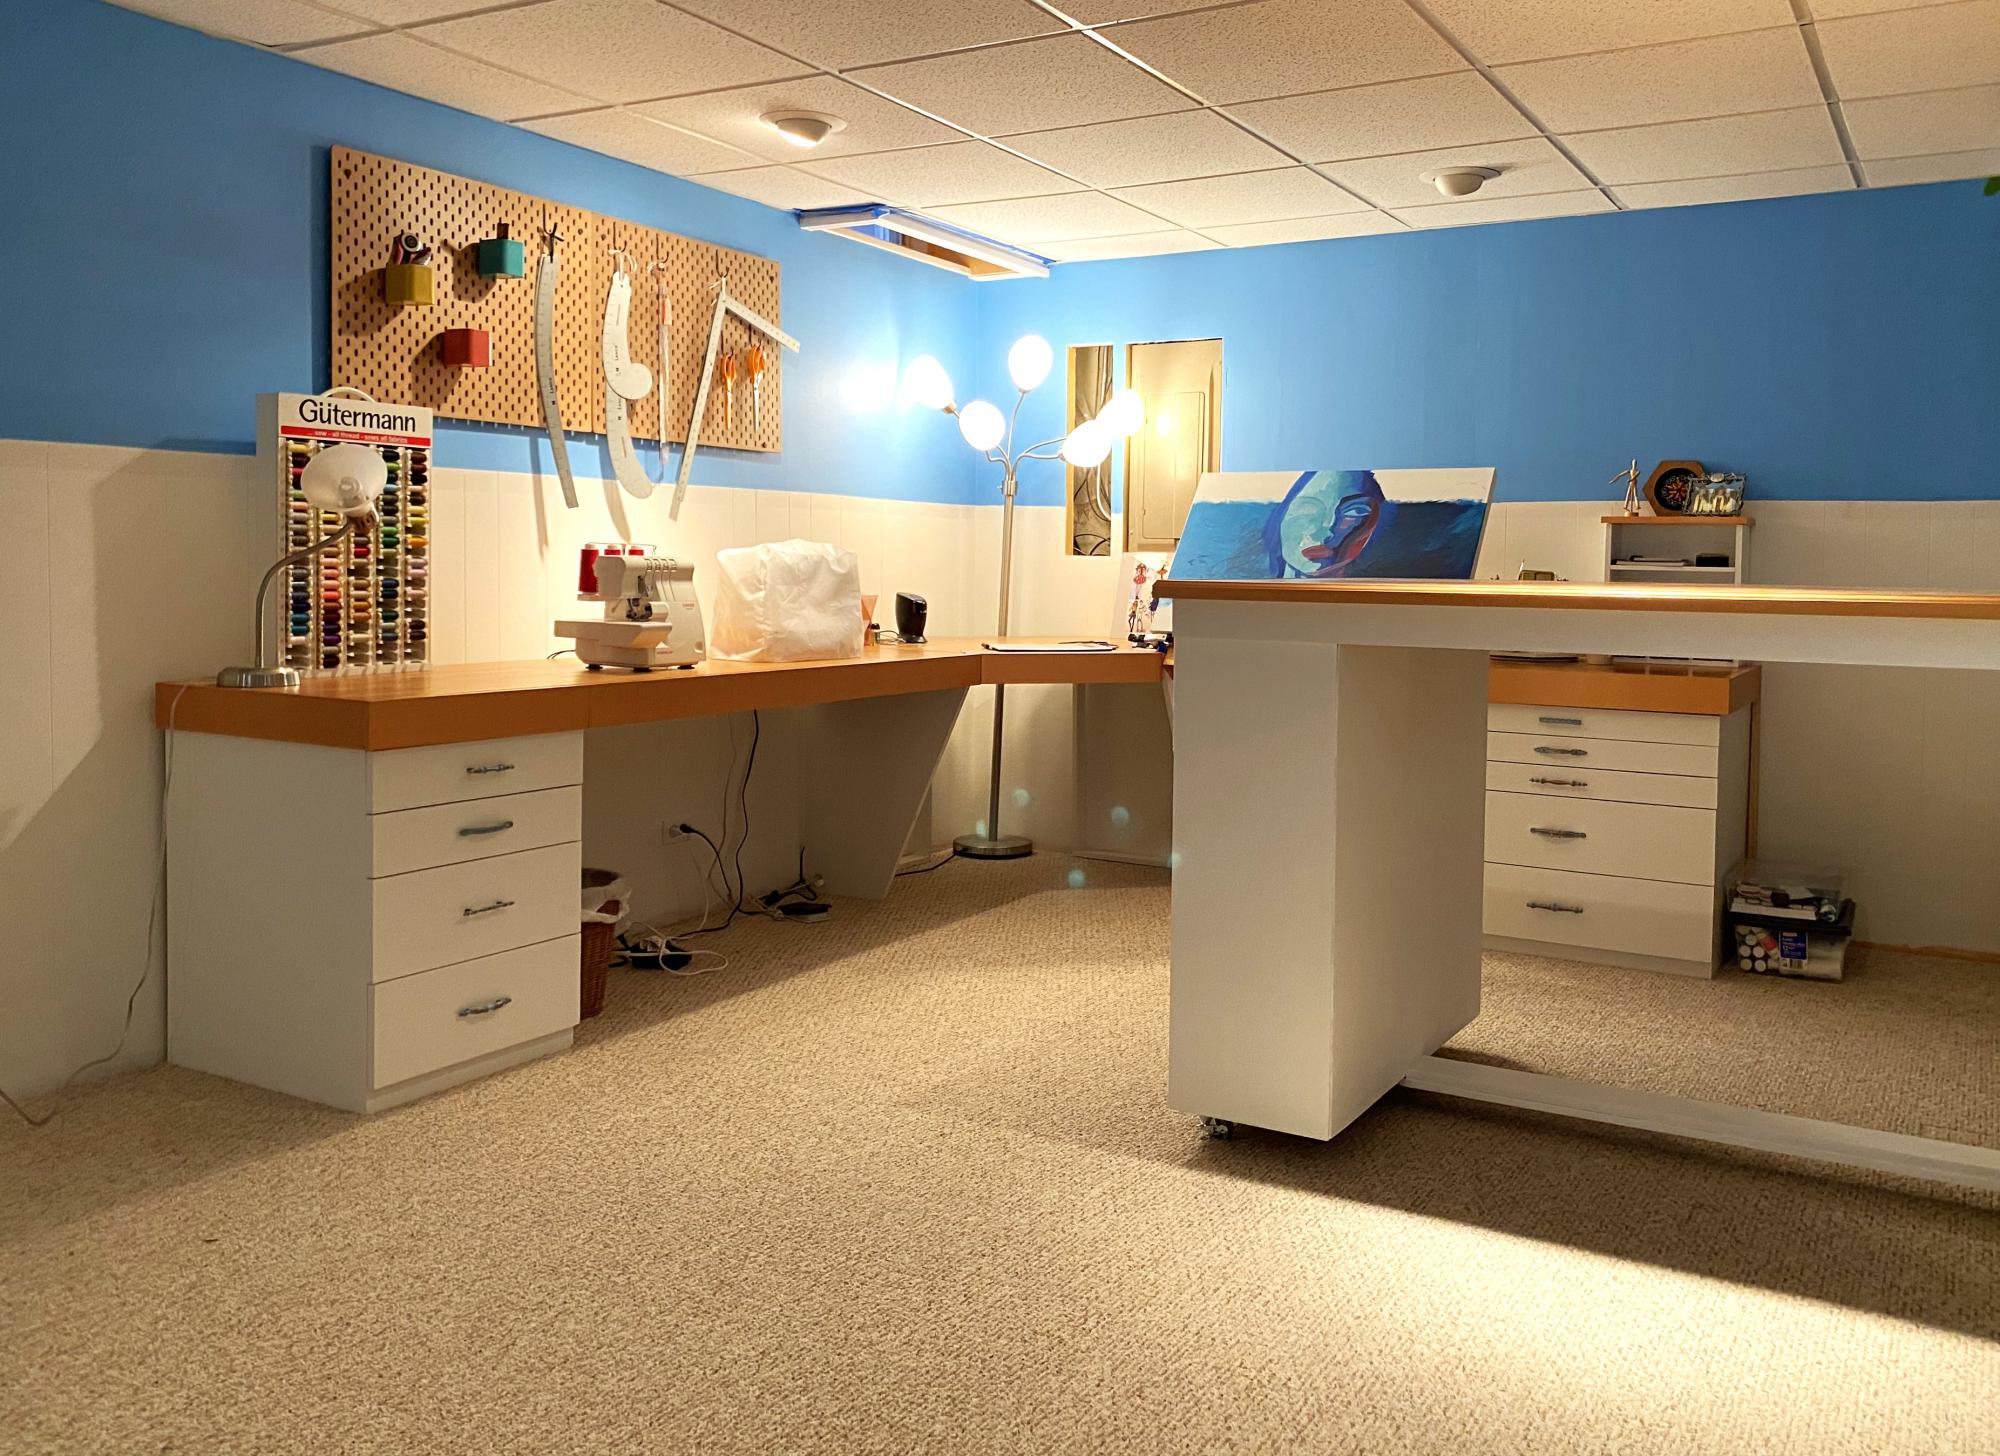
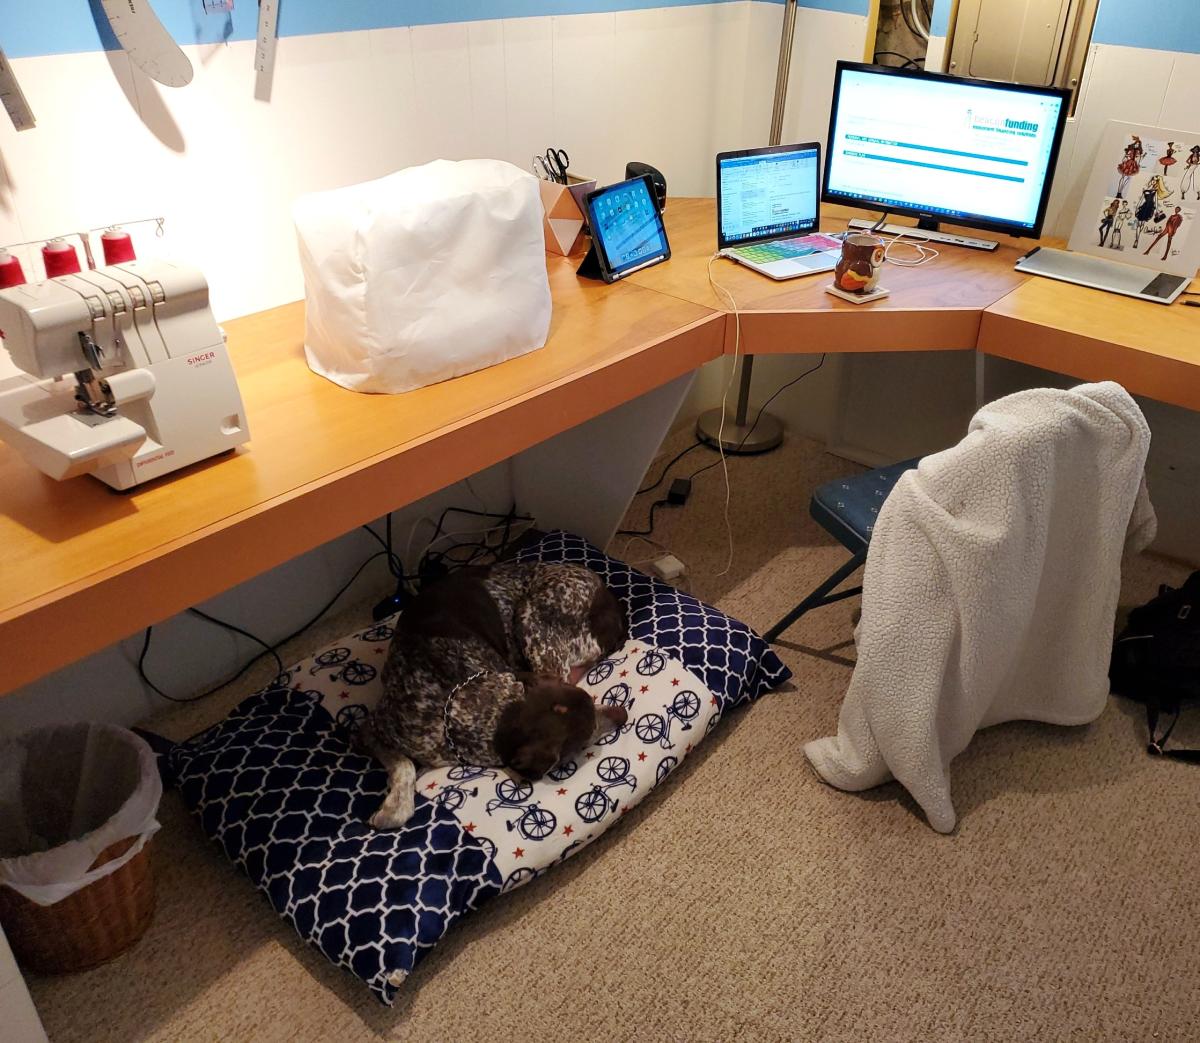
My daughter asked for a corner desk for art, sewing and work. She wanted storage drawers on each end and also a mobile island to use as a place to lay out and pin sewing patterns. She also wanted her art side of the desk to have an easel that laid flat or raised up at different angles. I’m very proud of this and still can’t believe I built it. My son drew the plans on sketch up and then I cut and assembled.
Karla Stevens
Fri, 10/20/2023 - 08:00
You deserve an award for this, it's perfect! Great design and excellent build, you should be very proud.
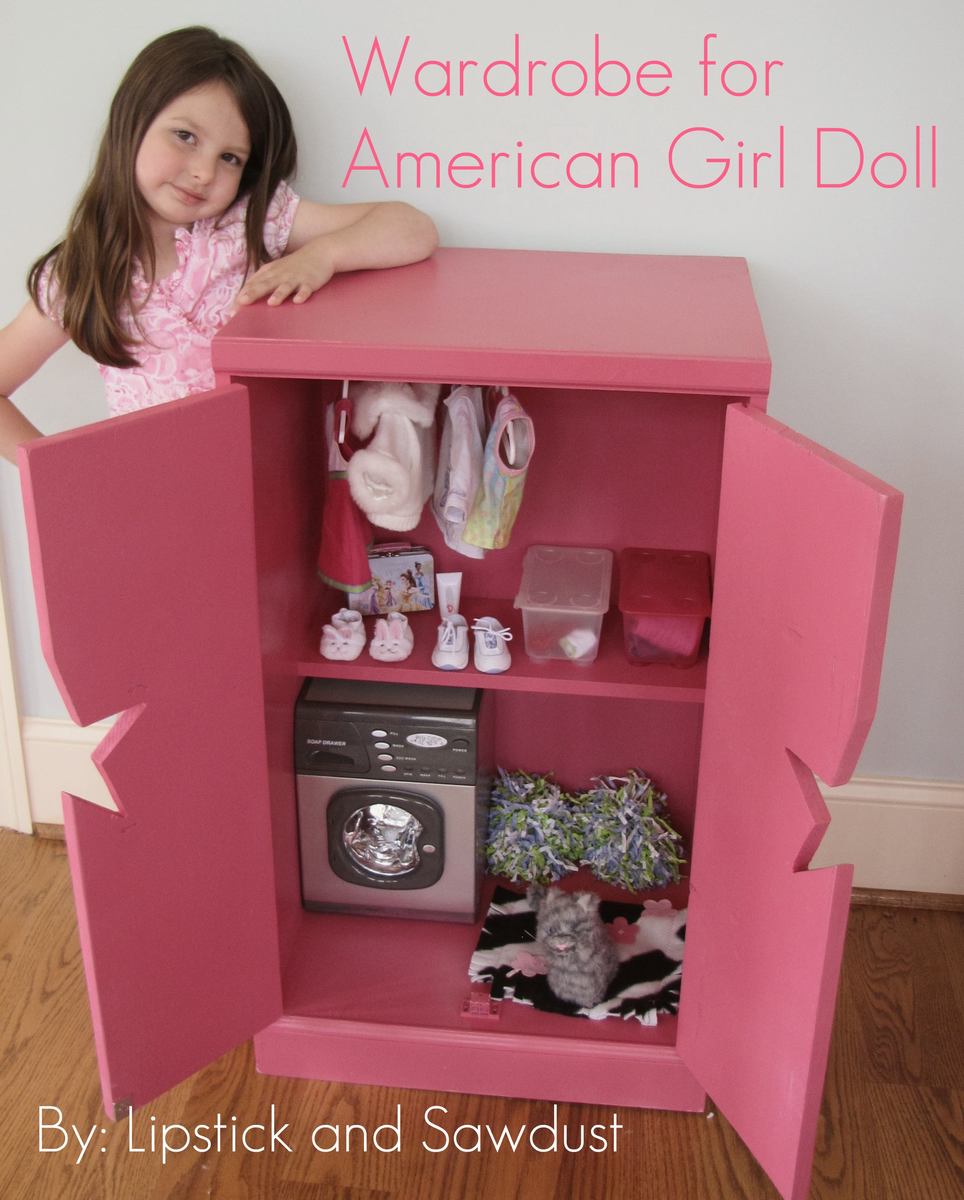
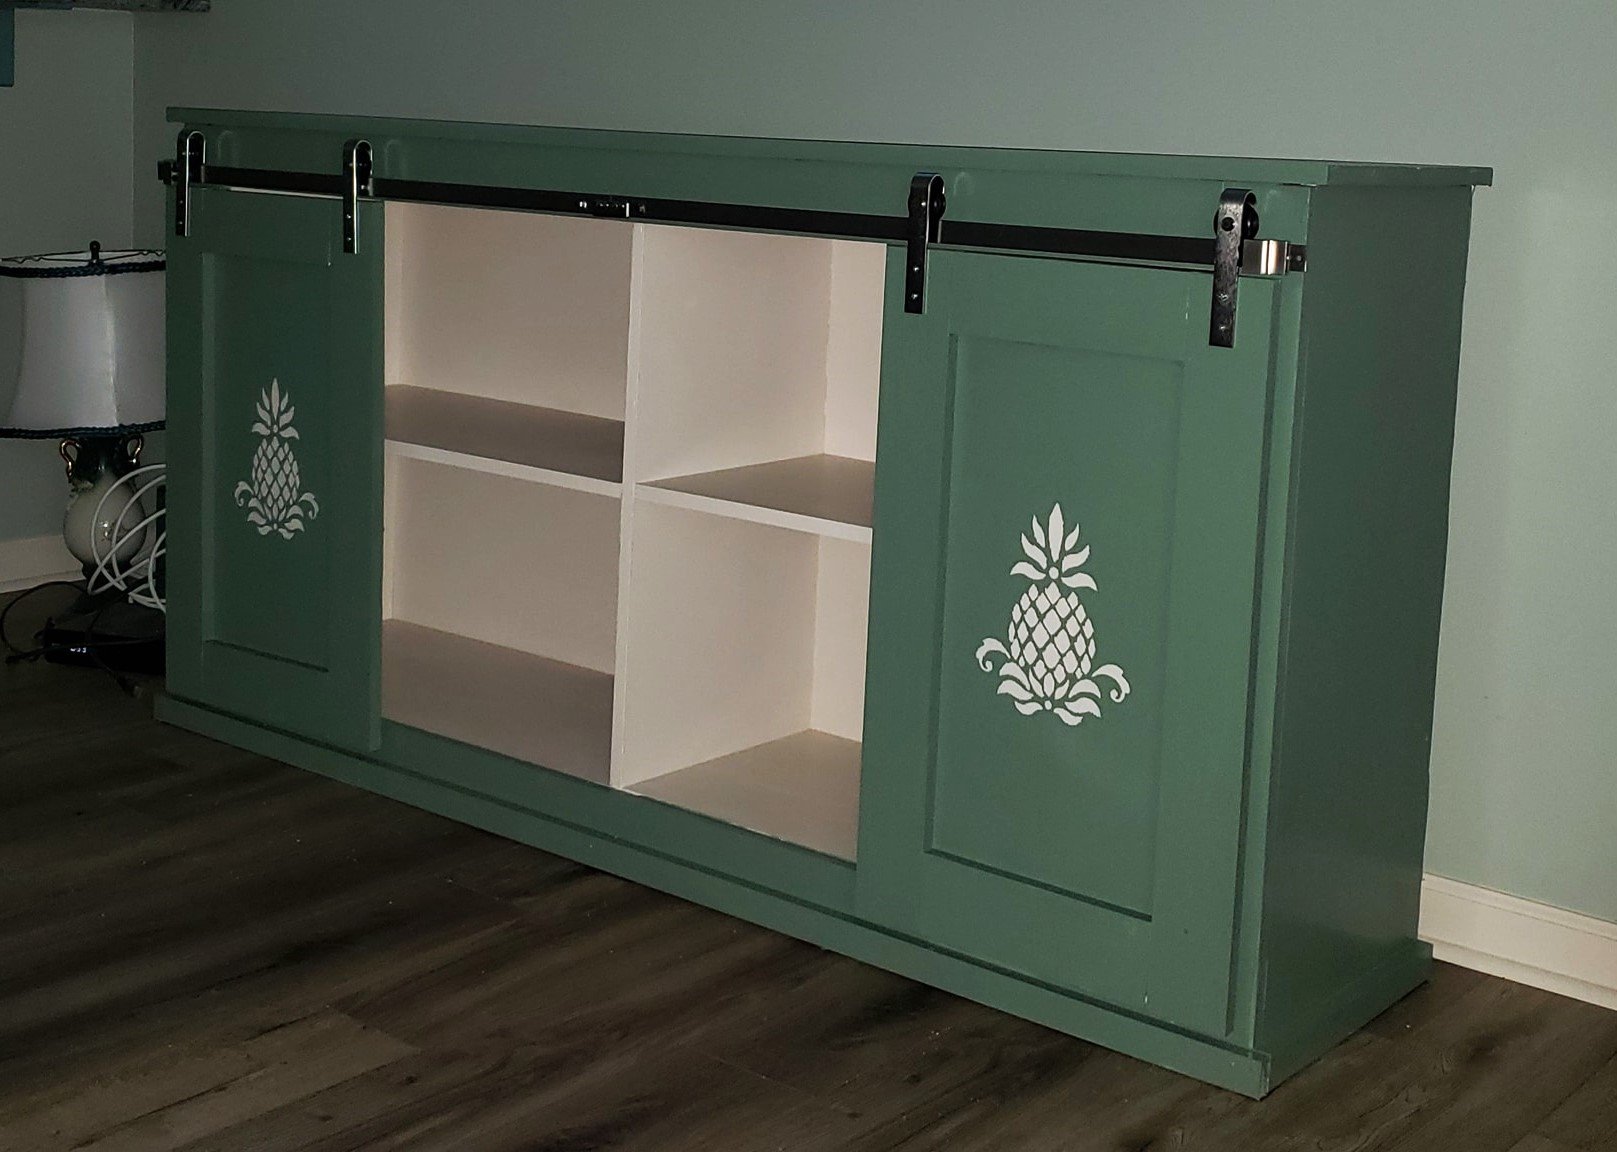
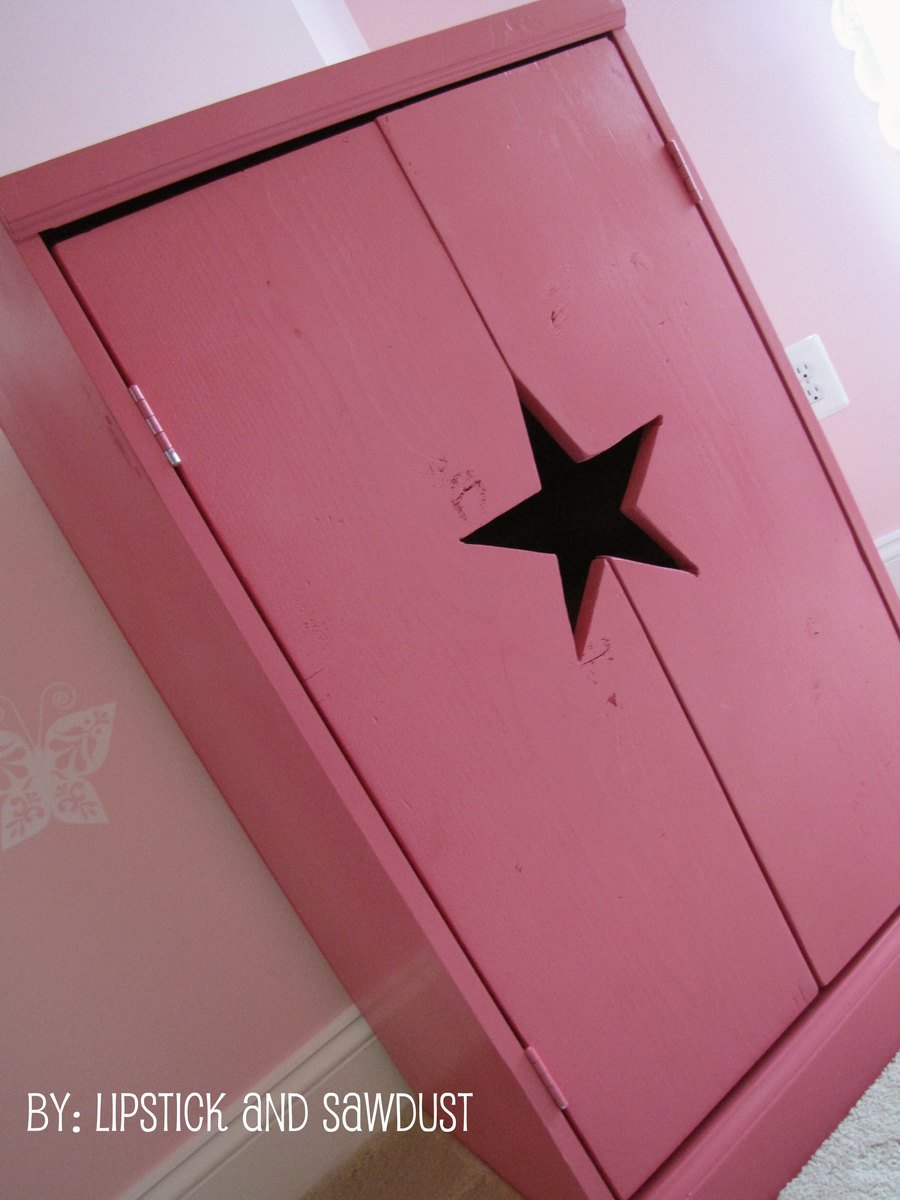
I Loved this plan ever since the first day I saw it! I was very intimidated though by the star cut out.
I modified this plan a little, mine is about 6 inches taller than the plan, because I had to fit my daughter's Pottery Barn kids washing machine inside which I believe is bigger than the machines in the original plan. My middle shelf is only about half the width of the shelf pictured, I wanted to add extra space beneath, plus it was the cheapest piece of shelf I found.
For the star cut out, since I did not have a protractor, I cut out little templates with my miter saw at the different angles, I labeled each piece, so I could reuse them if I ever build another one. My daughter loves this wardrobe, so does my son! I am planning on making this again for my son, but making it grey and calling it a "Hockey Locker". Thanks for the plan Ana! This is my favorite plan so far!

Sat, 10/13/2012 - 09:41
Very nice job! I love that color of pink, too. Where do you find hangers for the doll clothes? I make a lot of clothes for my granddaughters' dolls, so I guess I need to find hangers!
Wed, 09/25/2013 - 13:36
Where do I find the plans for this project?

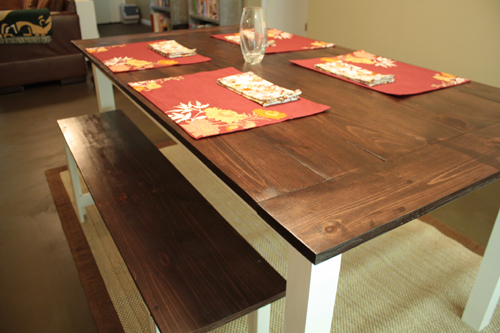
First time project, this was a birthday present to the wife. Good project and a very good build. I only modified the length and went with 3 2x10s instead of one. Nice big table that we hope to enjoy for years. The entire table is distressed and we actually went with two stain colors. Dark Walnut on the top and an Ebony on the base.


Wed, 02/26/2014 - 05:39
This looks so beautiful in your home! The stain is so pretty, great job!
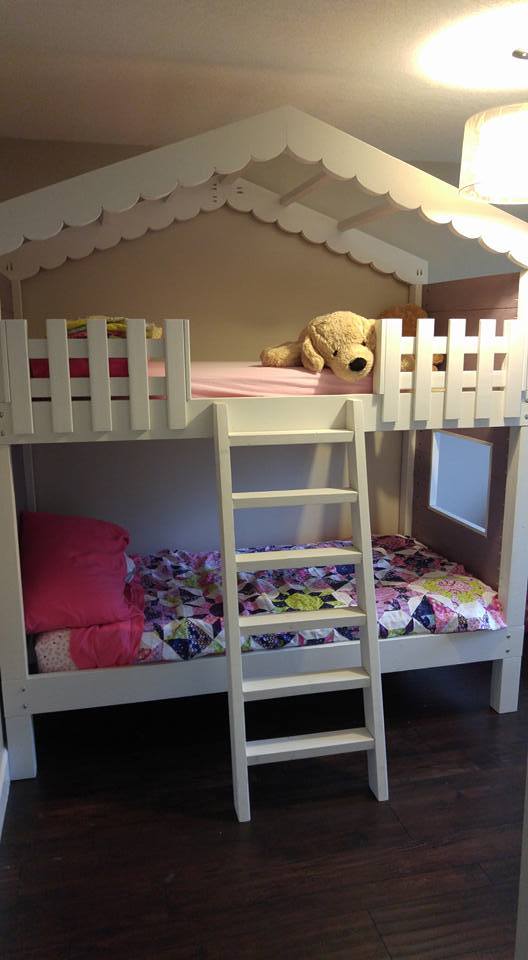
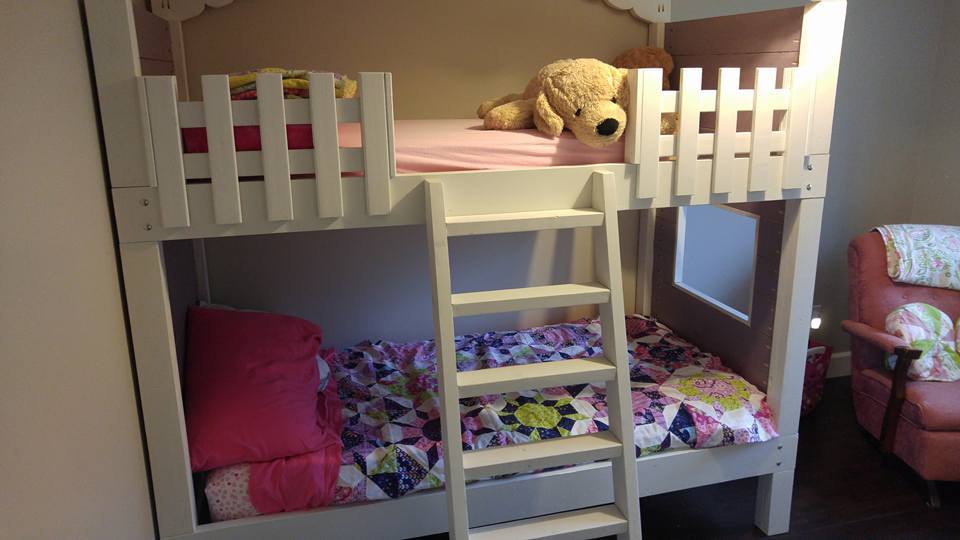
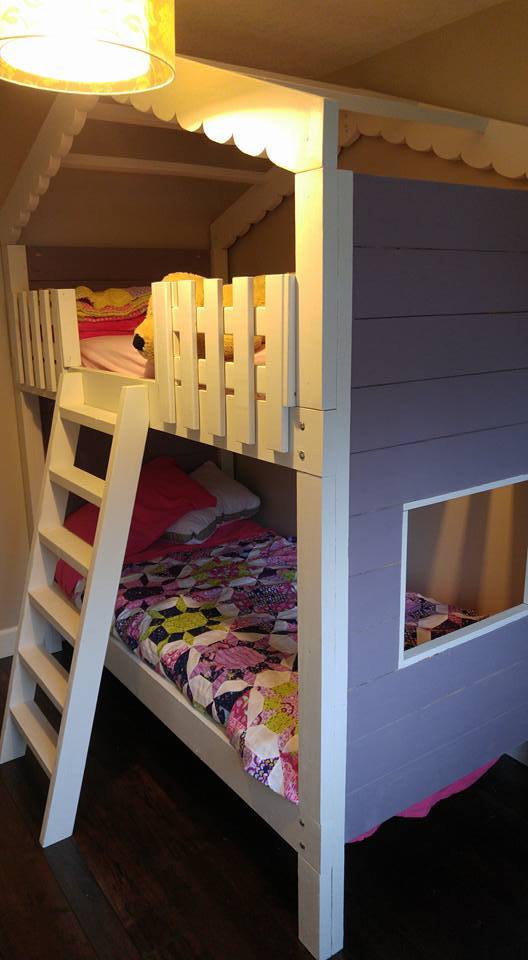
2x6's all the way up the sides, added window and "roof"
picket fence rails and angled ladder


