Community Brag Posts
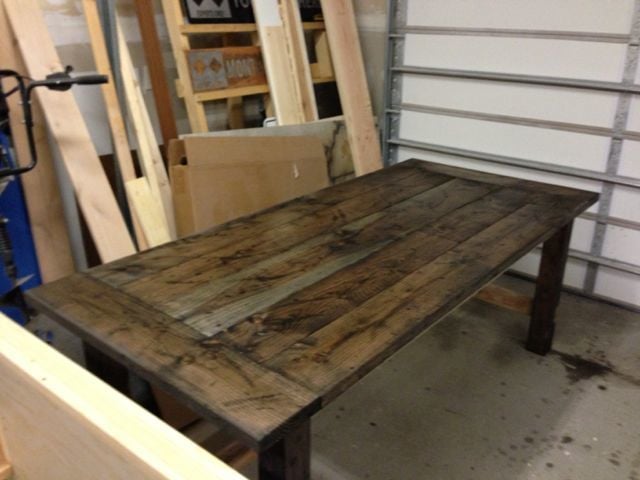
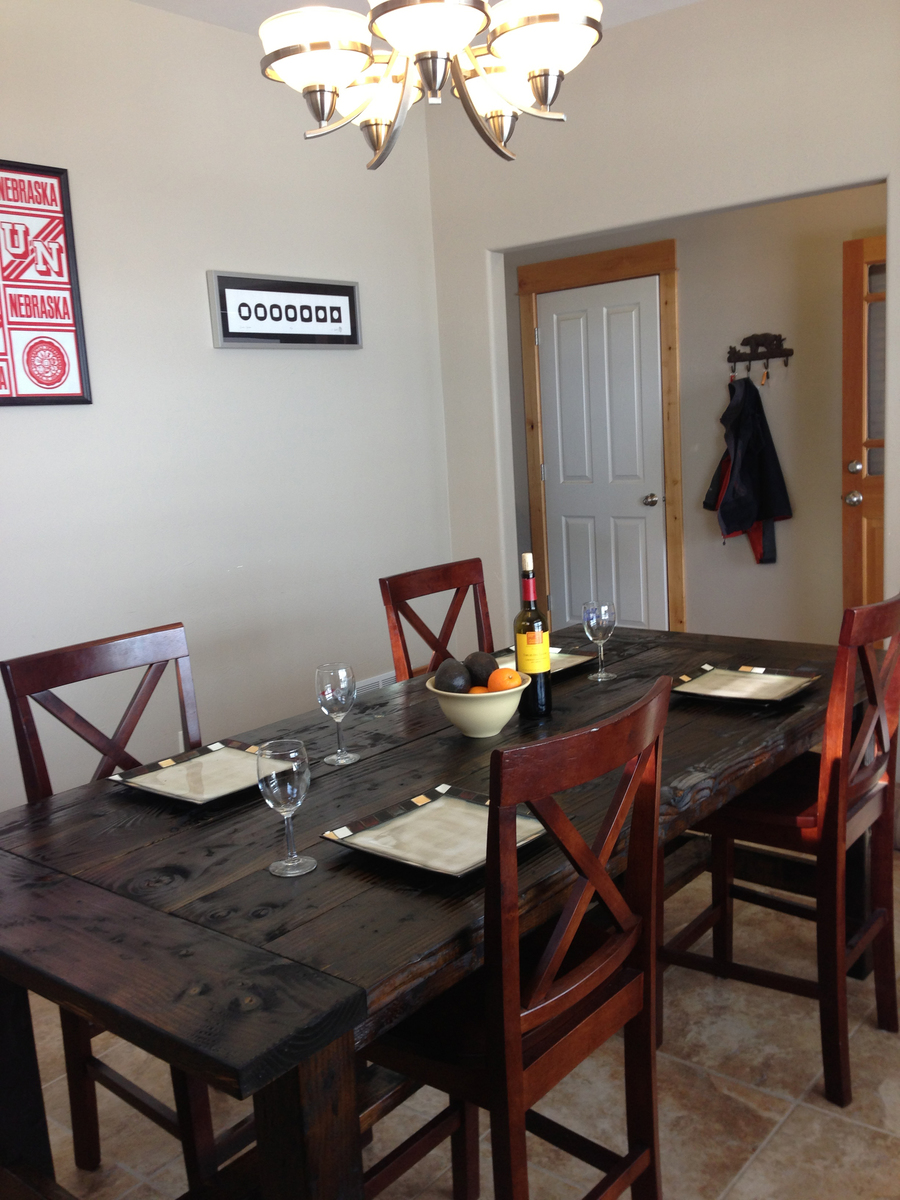
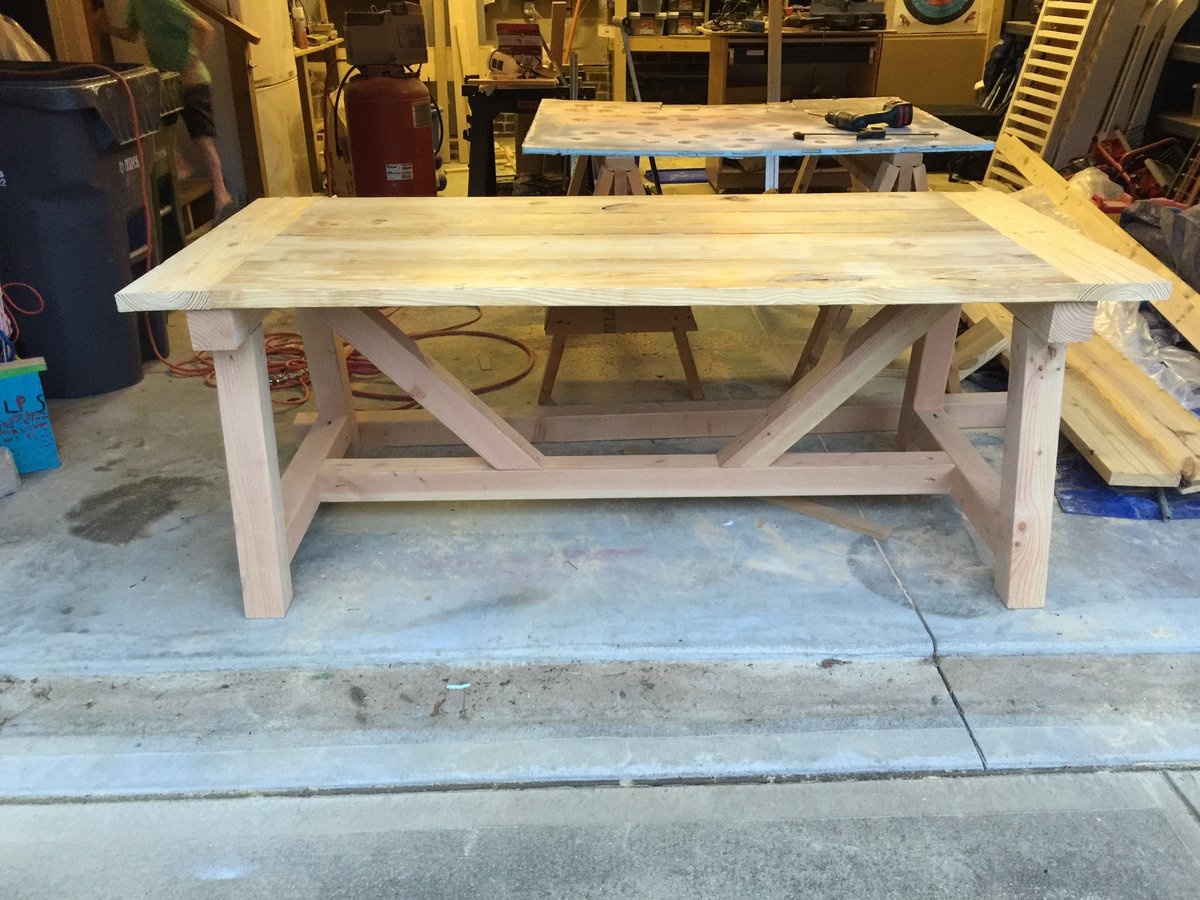
Farm Style Dining Table
I absolutely love this table and couldn't believe how easy it was to build. It was a weekend project and gets so many compliments.
For the finish, I mixed steel wool with vinegar and brushed it on. The table really darkened up nicely and made the distress marks in the wood come out. I then applied walnut stain and followed up with 3 coats of poly.
In my post I have pictures of the finishing process and a video showing how to distress wood and apply the vinegar solution.
If you are looking for an affordable table that looks great, I'd highly recommend building Ana's table.
Built from Plan(s)
Estimated Cost
$90 or so for the wood
Estimated Time Investment
Weekend Project (10-20 Hours)
Finish Used
Vinegar / Steel wool, Distressed with hammer, nails, chains, and walnut stain from Minwax.
Recommended Skill Level
Beginner
Comments
Fri, 08/12/2016 - 07:00
Where buy wood???
Where did you buy the wood? I got a quote from a lumber yard for $1000!! How did you get it for $90??

Fri, 08/12/2016 - 07:28
Type of Wood and Where to Buy
Hi Smith8ar,
2x4, 2x10 and 2x8 stud type lumber and untreated 4x4 post is what most folks are building with to get this distressed look on their farmhouse tables for that low cost. Stud lumber also takes that vinegar stain very well. Local lumberyards will probably have nicer and straighter studs than the local big box stores, but you can find them there if you pick through them for the nicest ones. Our local Lowes calls them common boards, and I've also seen them listed as SPF (spruce/pine/fir) - - here's an example of what is in our local Lowes:
Our Lowes doesn't carry 4x4x10, but I found a 4x4x8 douglas fir untreated post:
:) Joanne
Luxury Storage Cabinet Design

Best Storage Design For Your Home that keeps your books, clothes and anything in a appropriate way.
Storage Cabinets Design Ideas : http://www.spaceworks.com.au/melbourne/shelves-cabinets
Recommended Skill Level
Intermediate
Kendal Extra Wide Dresser
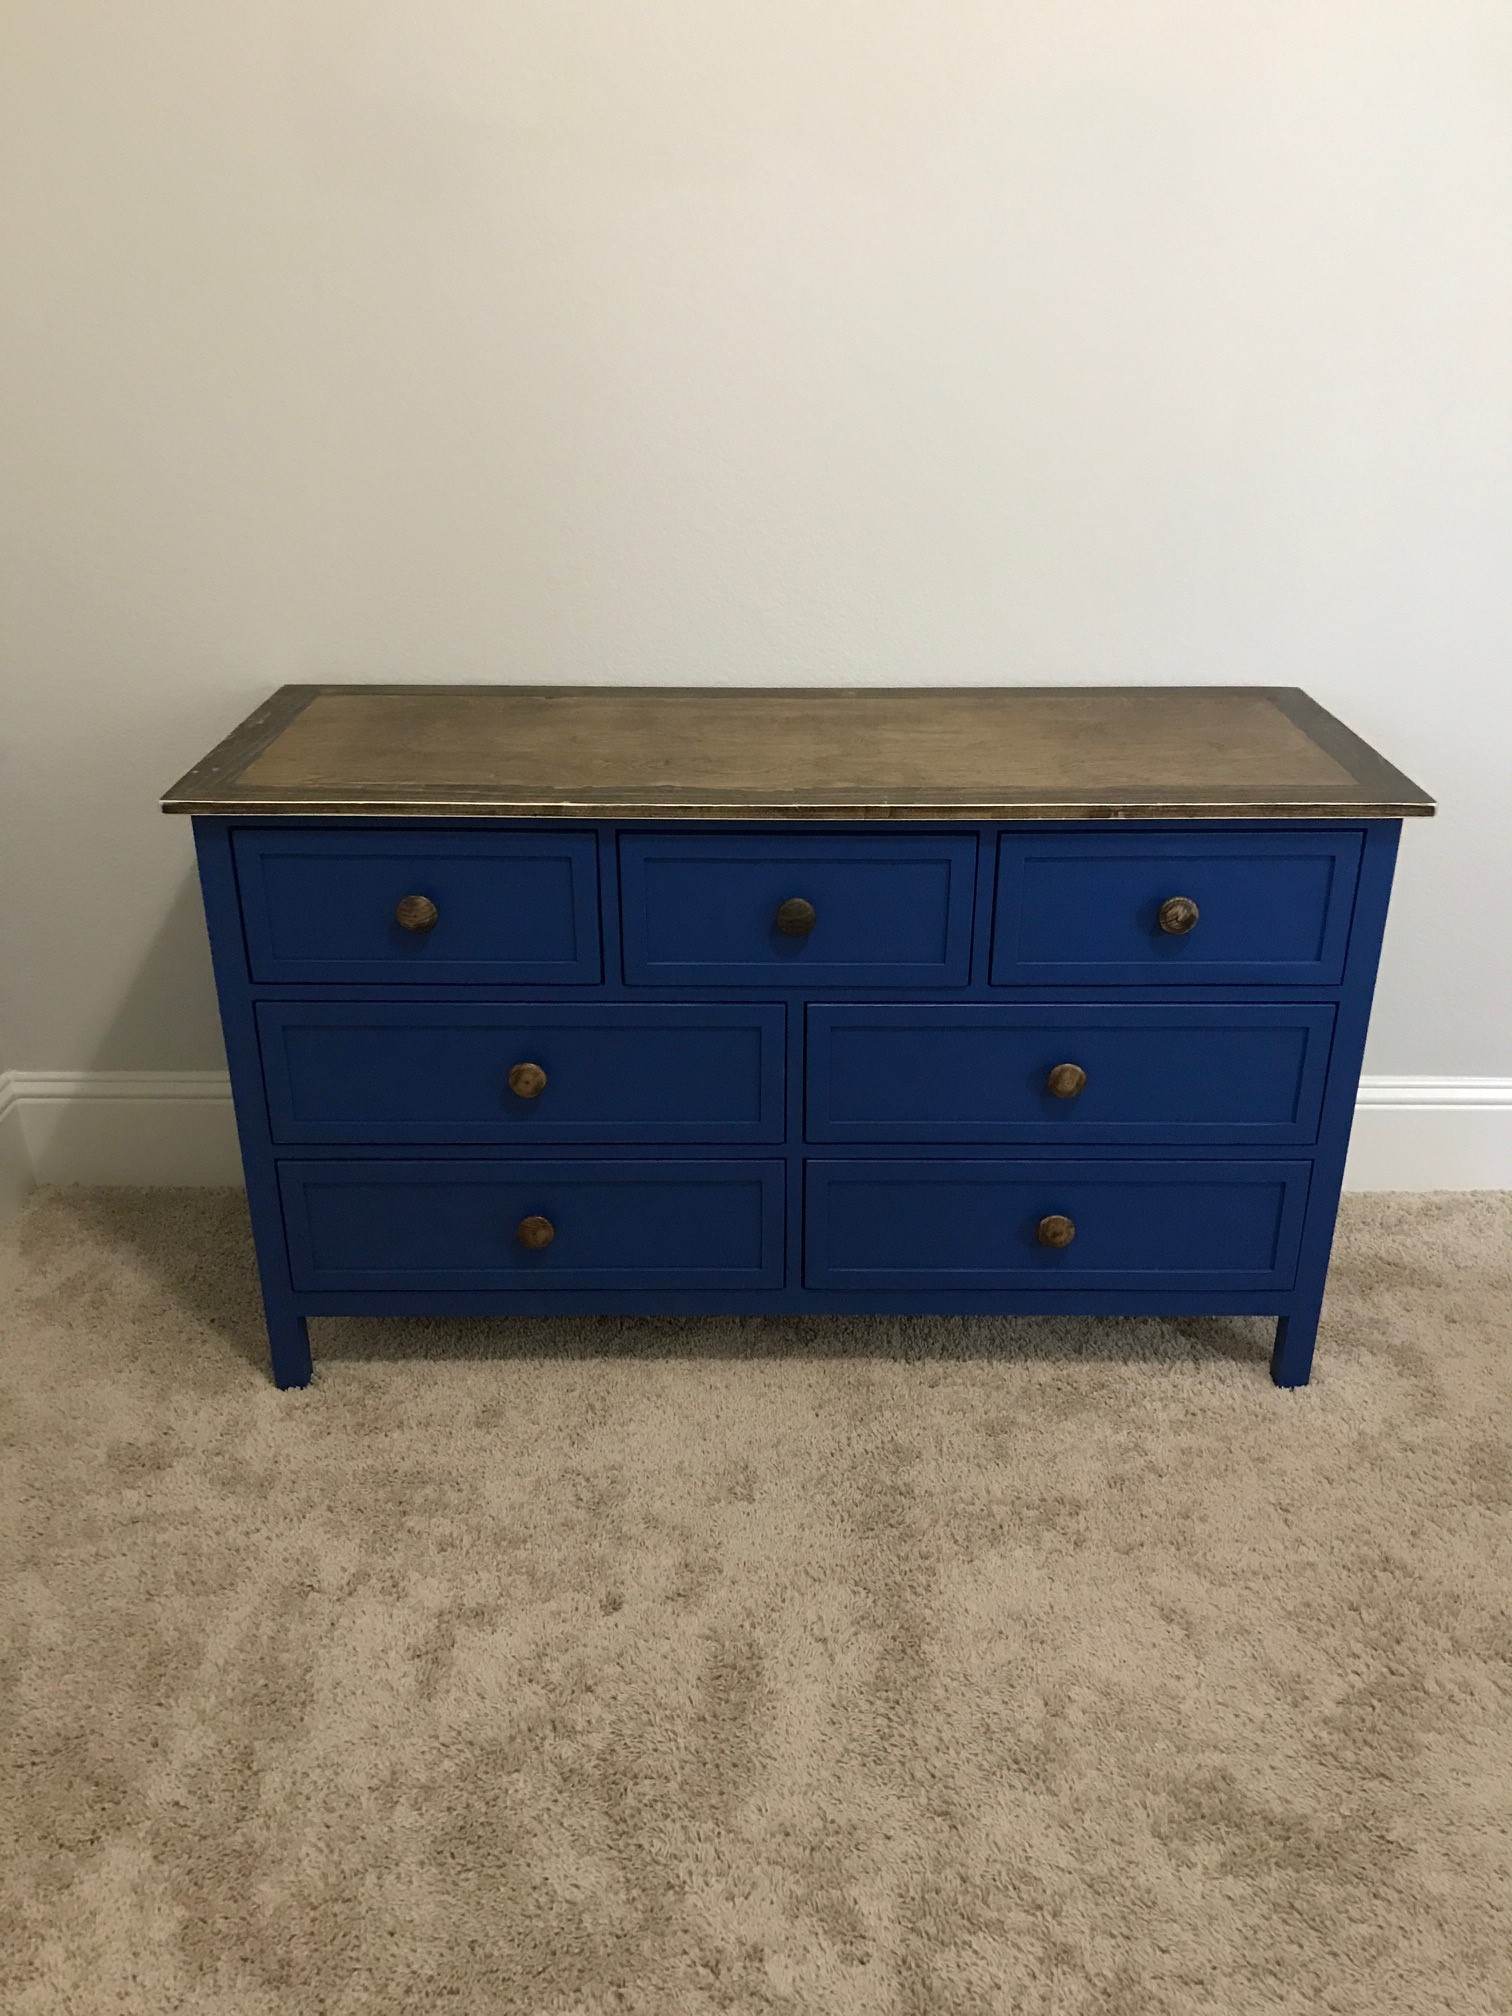
Overall I am very pleased with this project and I deviated from the plan with the drawer fronts and the slides as well.
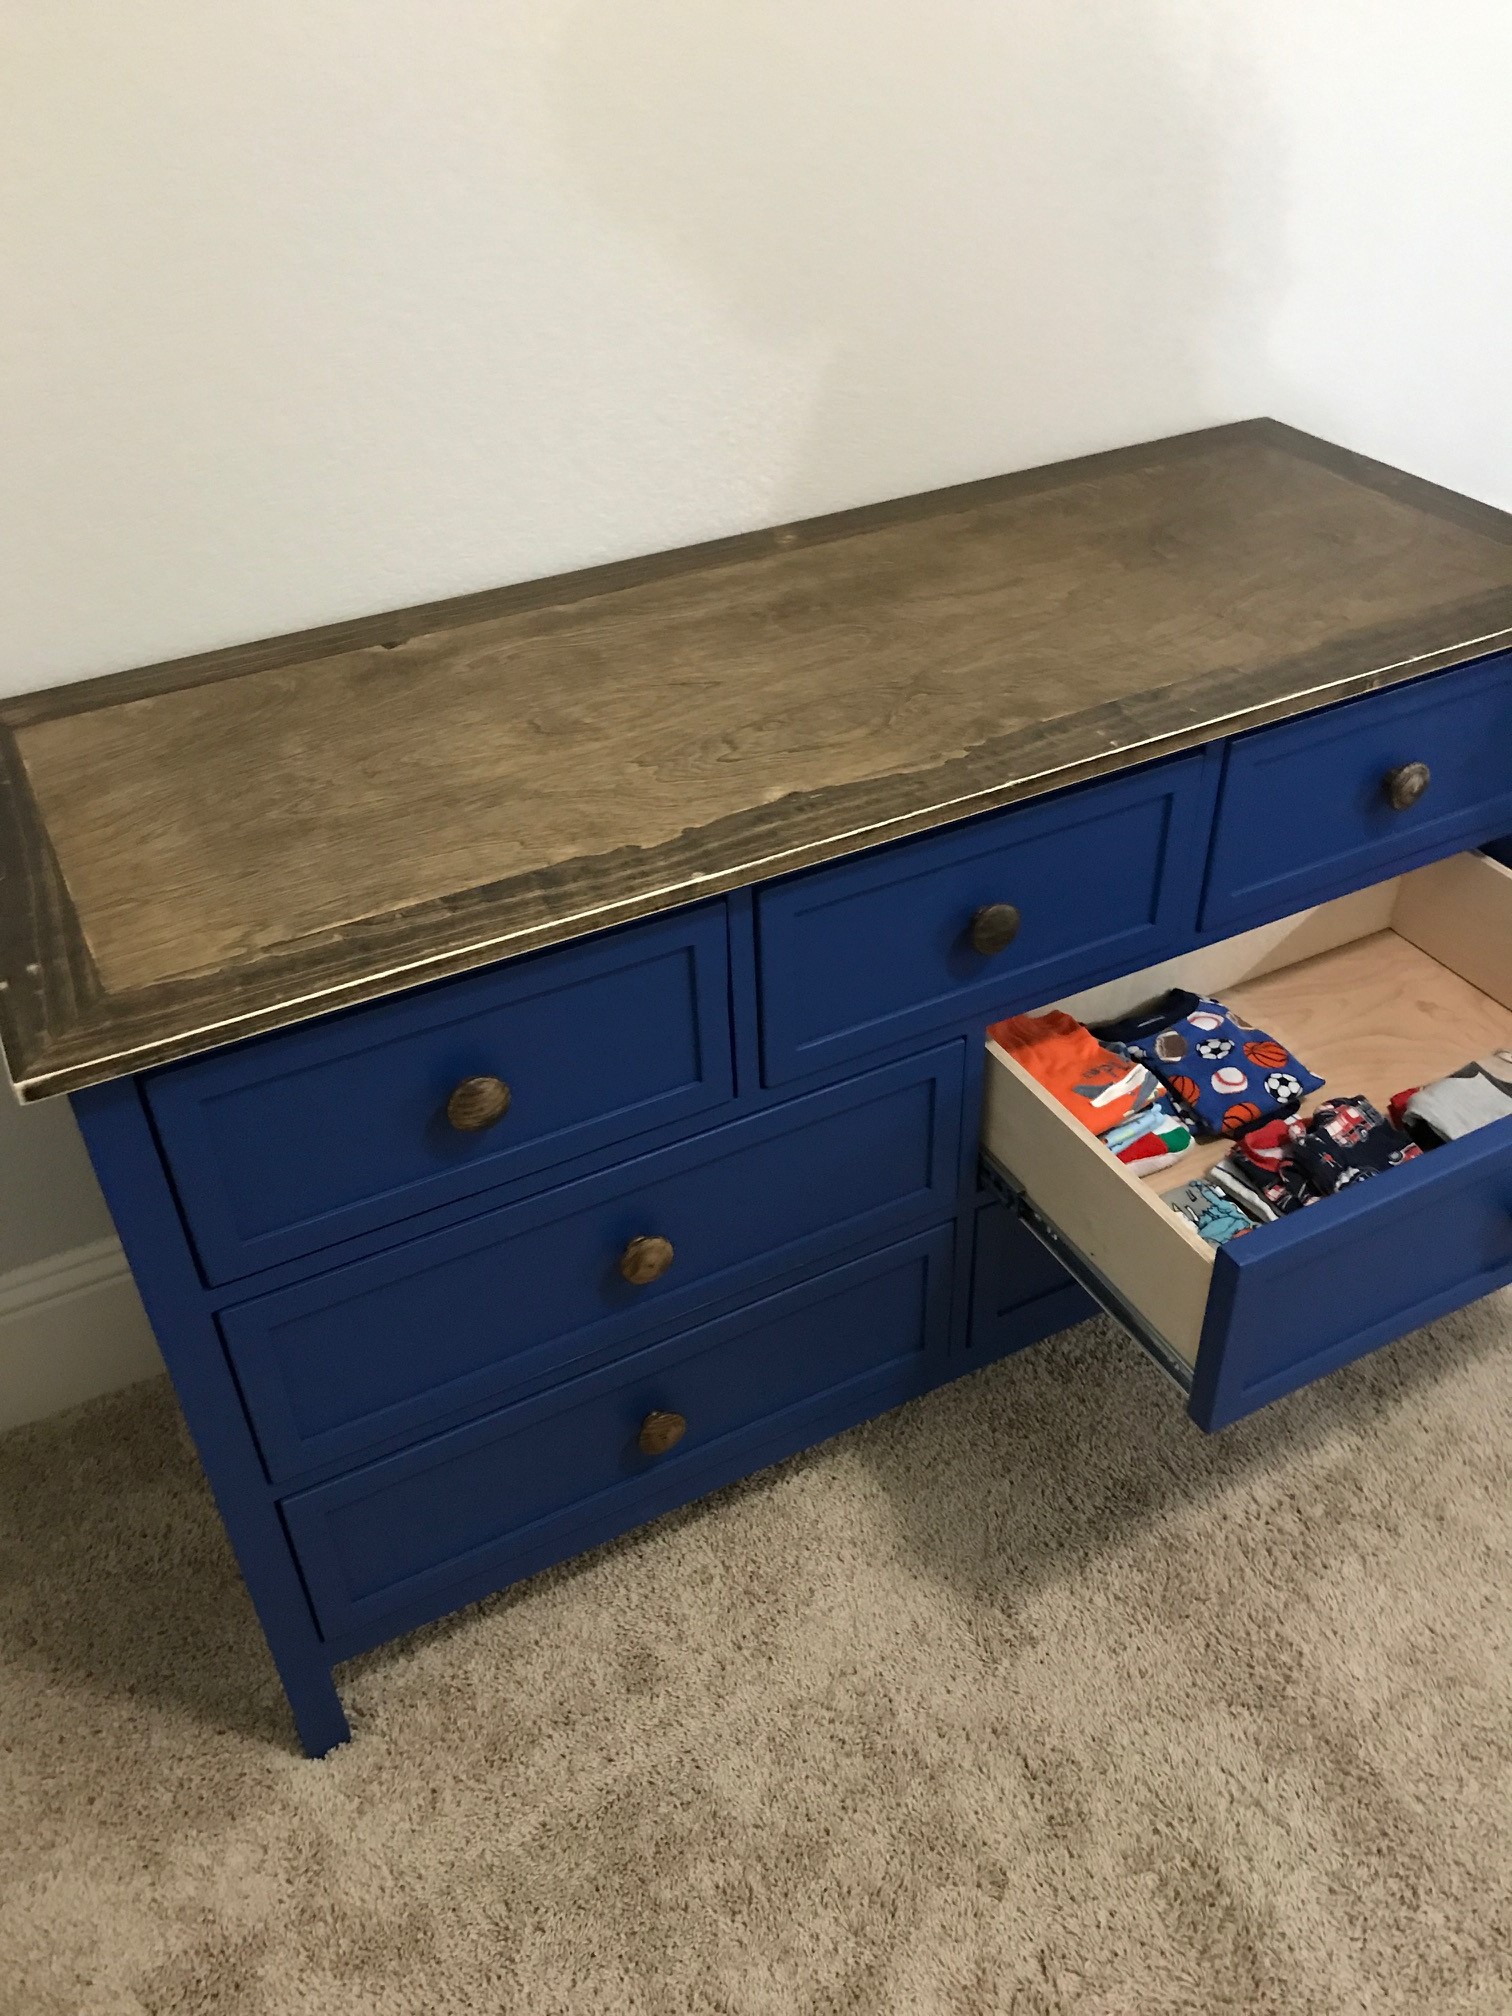
Built from Plan(s)
Estimated Time Investment
Weekend Project (10-20 Hours)
Finish Used
used walnut stain with general finishes flat poly.
Recommended Skill Level
Intermediate
Farmhouse Bed

Bult this for my wife from Ana White plans
Comments
Shutter Entry Table
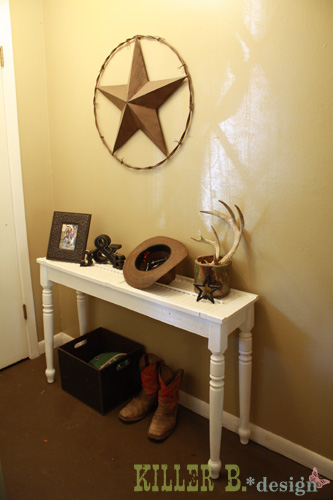
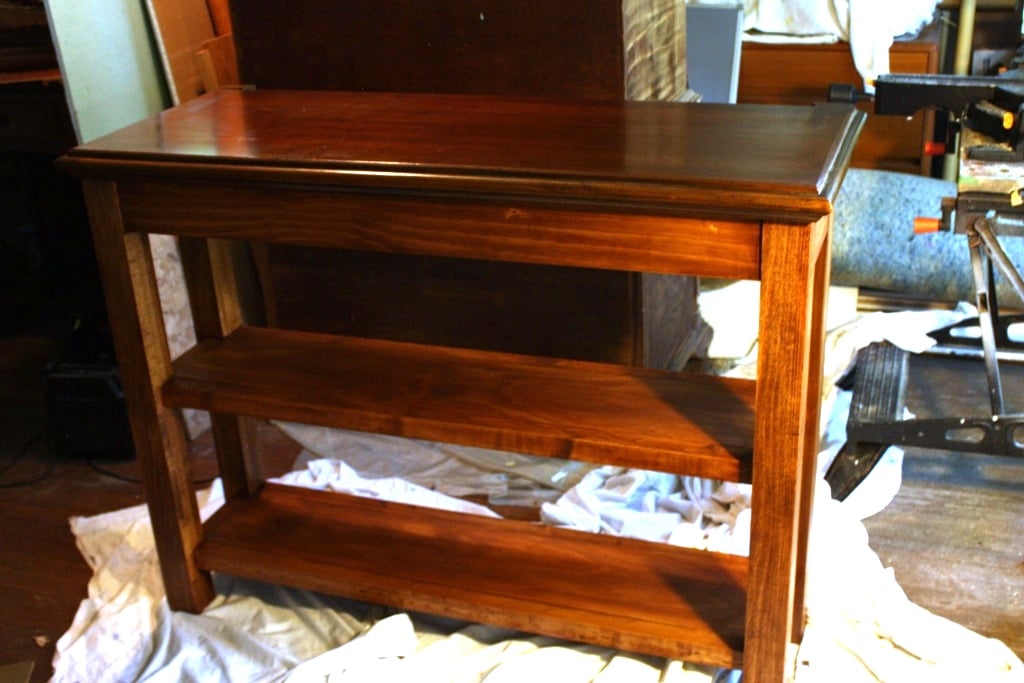
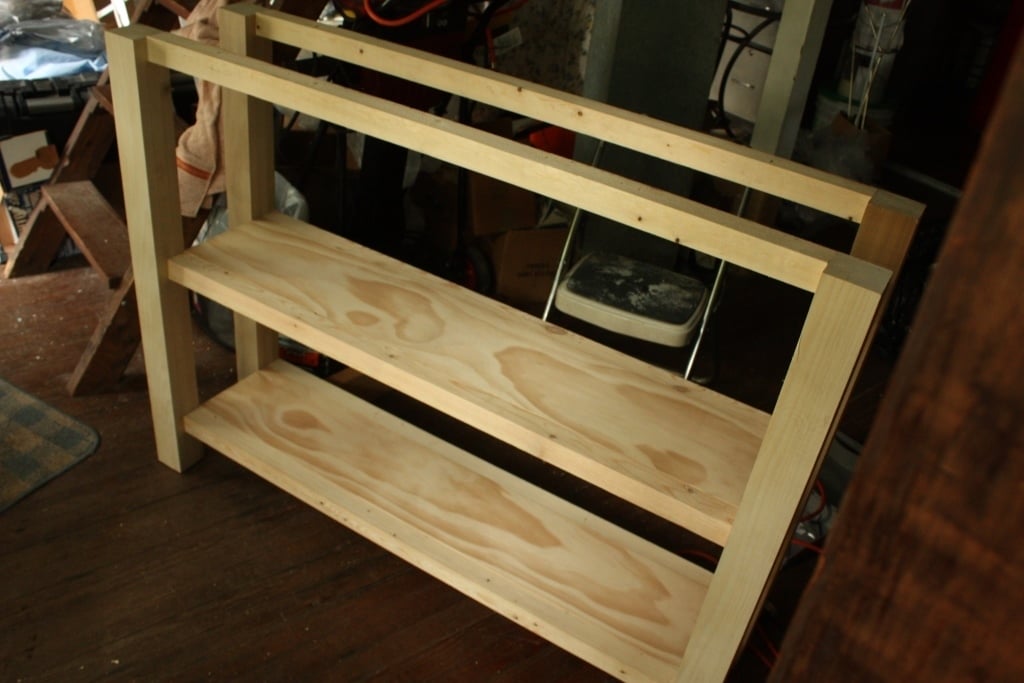
Inspired by a photo online and Ana's cheap and easy console table, I decided to make an entry table out of salvaged materials. I found a shutter at a thrift store for $5 to make the top, rescued some legs from an old kitchen table left on the side of the road, and some leftover barnwood from my rustic cooler project. I used the Kreg jig to put it all together, and now have a simple, rustic table that's the perfect size for my entryway!

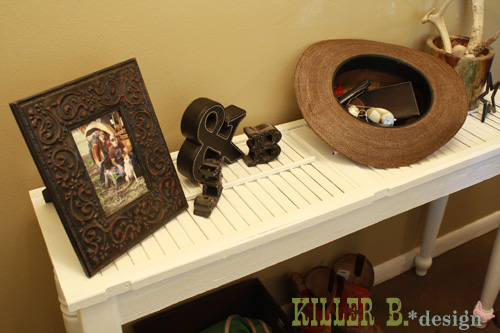
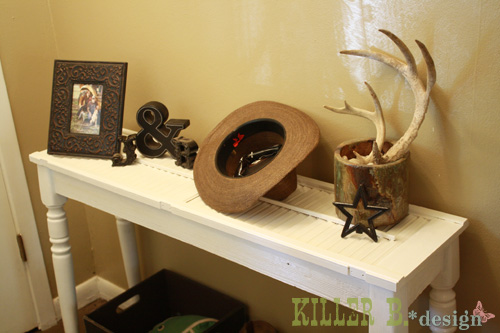
Built from Plan(s)
Estimated Time Investment
An Hour or Two (0-2 Hours)
Finish Used
3 coats semi-gloss white latex
Recommended Skill Level
Beginner
Comments

Sat, 06/18/2011 - 12:52
Lady you crack me up! Next
Lady you crack me up! Next time let's try to not get ripped off by the crabby thrift store woman and find even cheaper things to repurpose!!
Creating a Kitchen Island
I made these shelves to connect to a vintage sideboard that with a new granite top will become our kitchen island. Since the sideboard was dark and highly carved I wanted something chunky, sturdy and with a bit of style. Use links in the original post for all the building details.

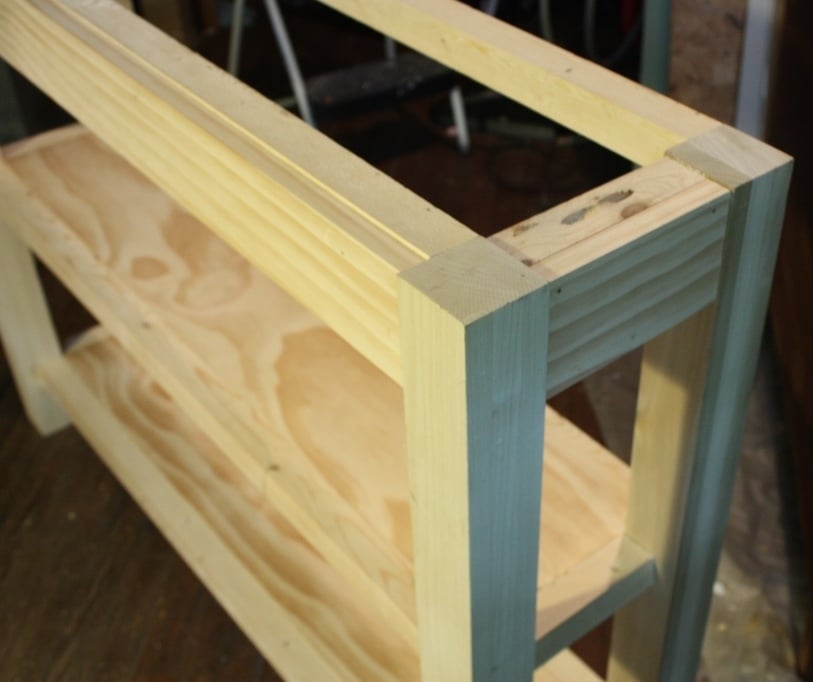
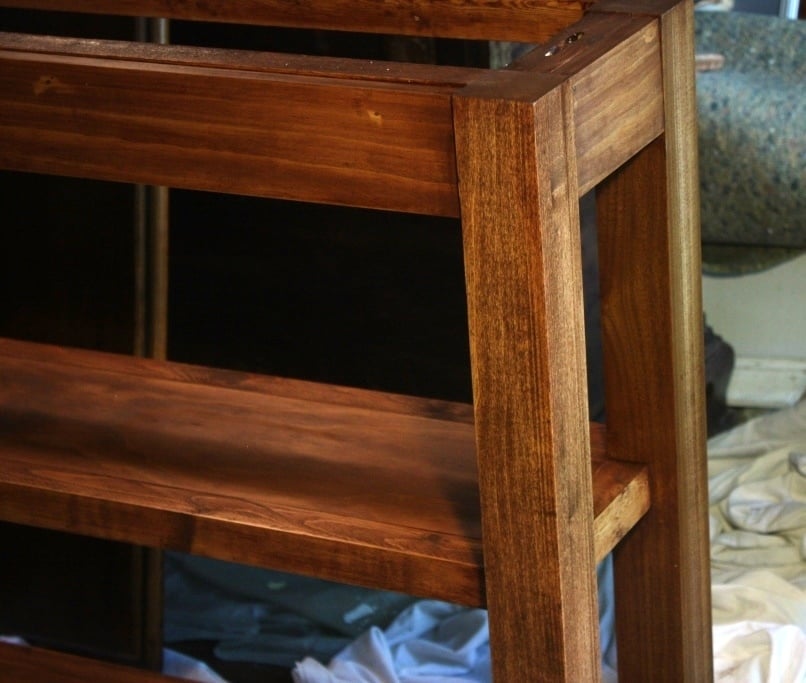
Built from Plan(s)
Estimated Cost
Less than $100 (not including new tools we purchased)
Estimated Time Investment
Week Long Project (20 Hours or More)
Finish Used
Minwax English Chestnut over Minwax Prestain Wood Conditioner. After the stain was totally dry, I waxed with tinted Briwax.
Recommended Skill Level
Beginner
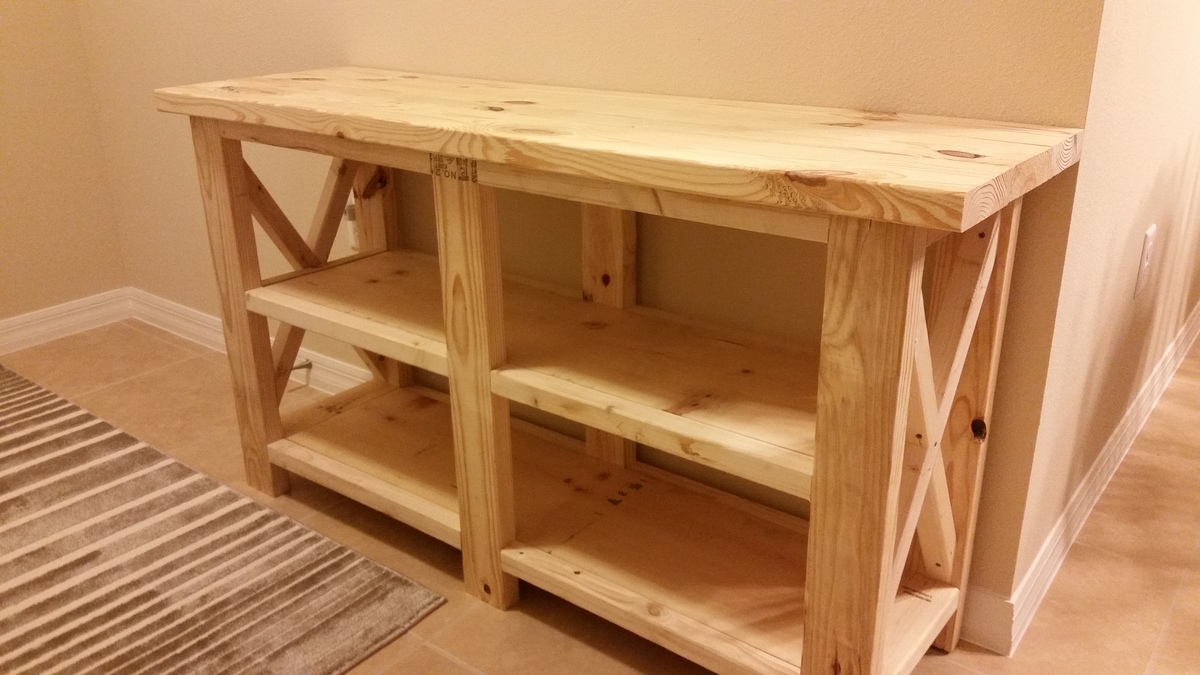
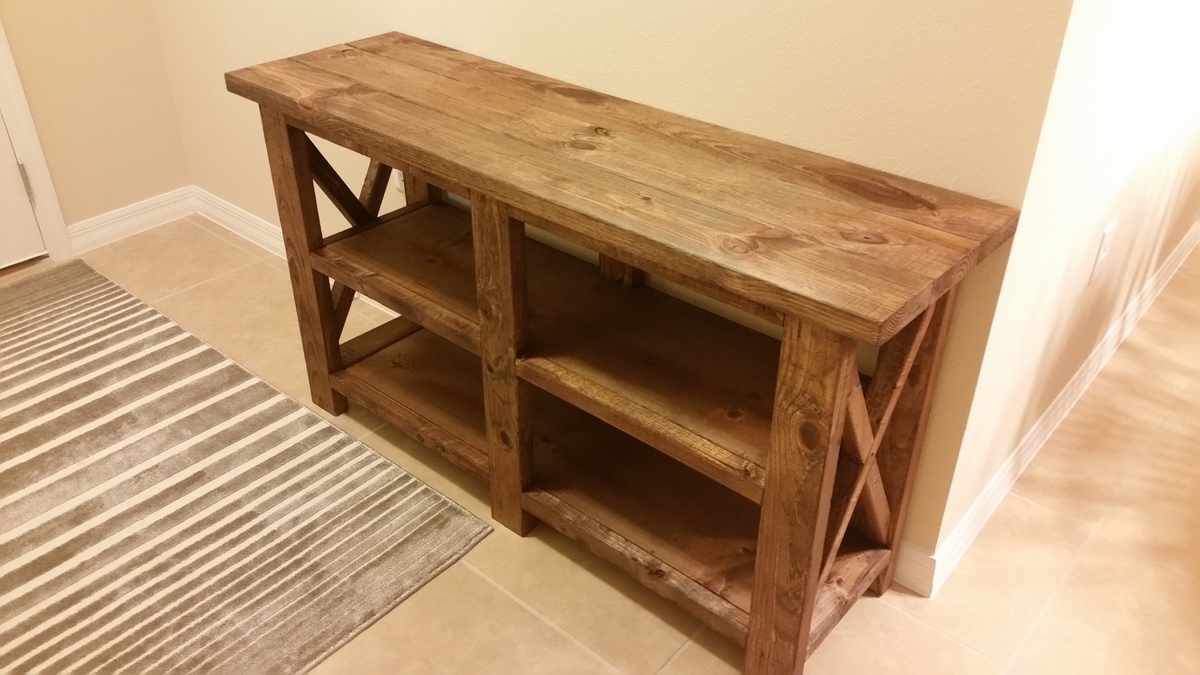
Rustic X Console

This project was for a wedding gift... My wife gave the young couuple some ideas to choose from and after seeing these plans on Ana White they loved it. Thank you Ana for the great plans!!!
Built from Plan(s)
Estimated Cost
$150
Estimated Time Investment
Day Project (6-9 Hours)
Finish Used
White Vinegar/Steel Wool Mix and a polyurethane to protect it.
Recommended Skill Level
Intermediate
Comments
Truss table
Patio table
Built from Plan(s)
Finish Used
Outdoor patio table
Recommended Skill Level
Intermediate
Tilt out Cabinet with Drawer

Great little cabinet with drawer and tilt out garbage.
by Angelo


Built from Plan(s)
Beach Chair
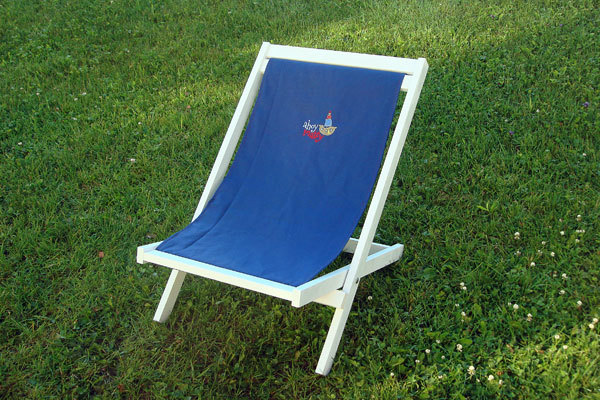
I knew I had to make this the first time I saw the plans! It was super easy to make, I will definitely be making more of these. :)
I used duck cloth for the sling and embroidered a nautical design on the front.
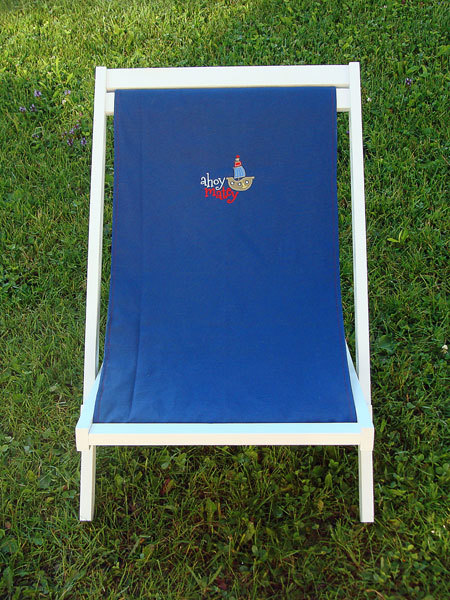
Estimated Cost
$15
Estimated Time Investment
Afternoon Project (3-6 Hours)
Finish Used
Spray primer, Rustoleum Painter's Touch-Semi-gloss White
Recommended Skill Level
Starter Project


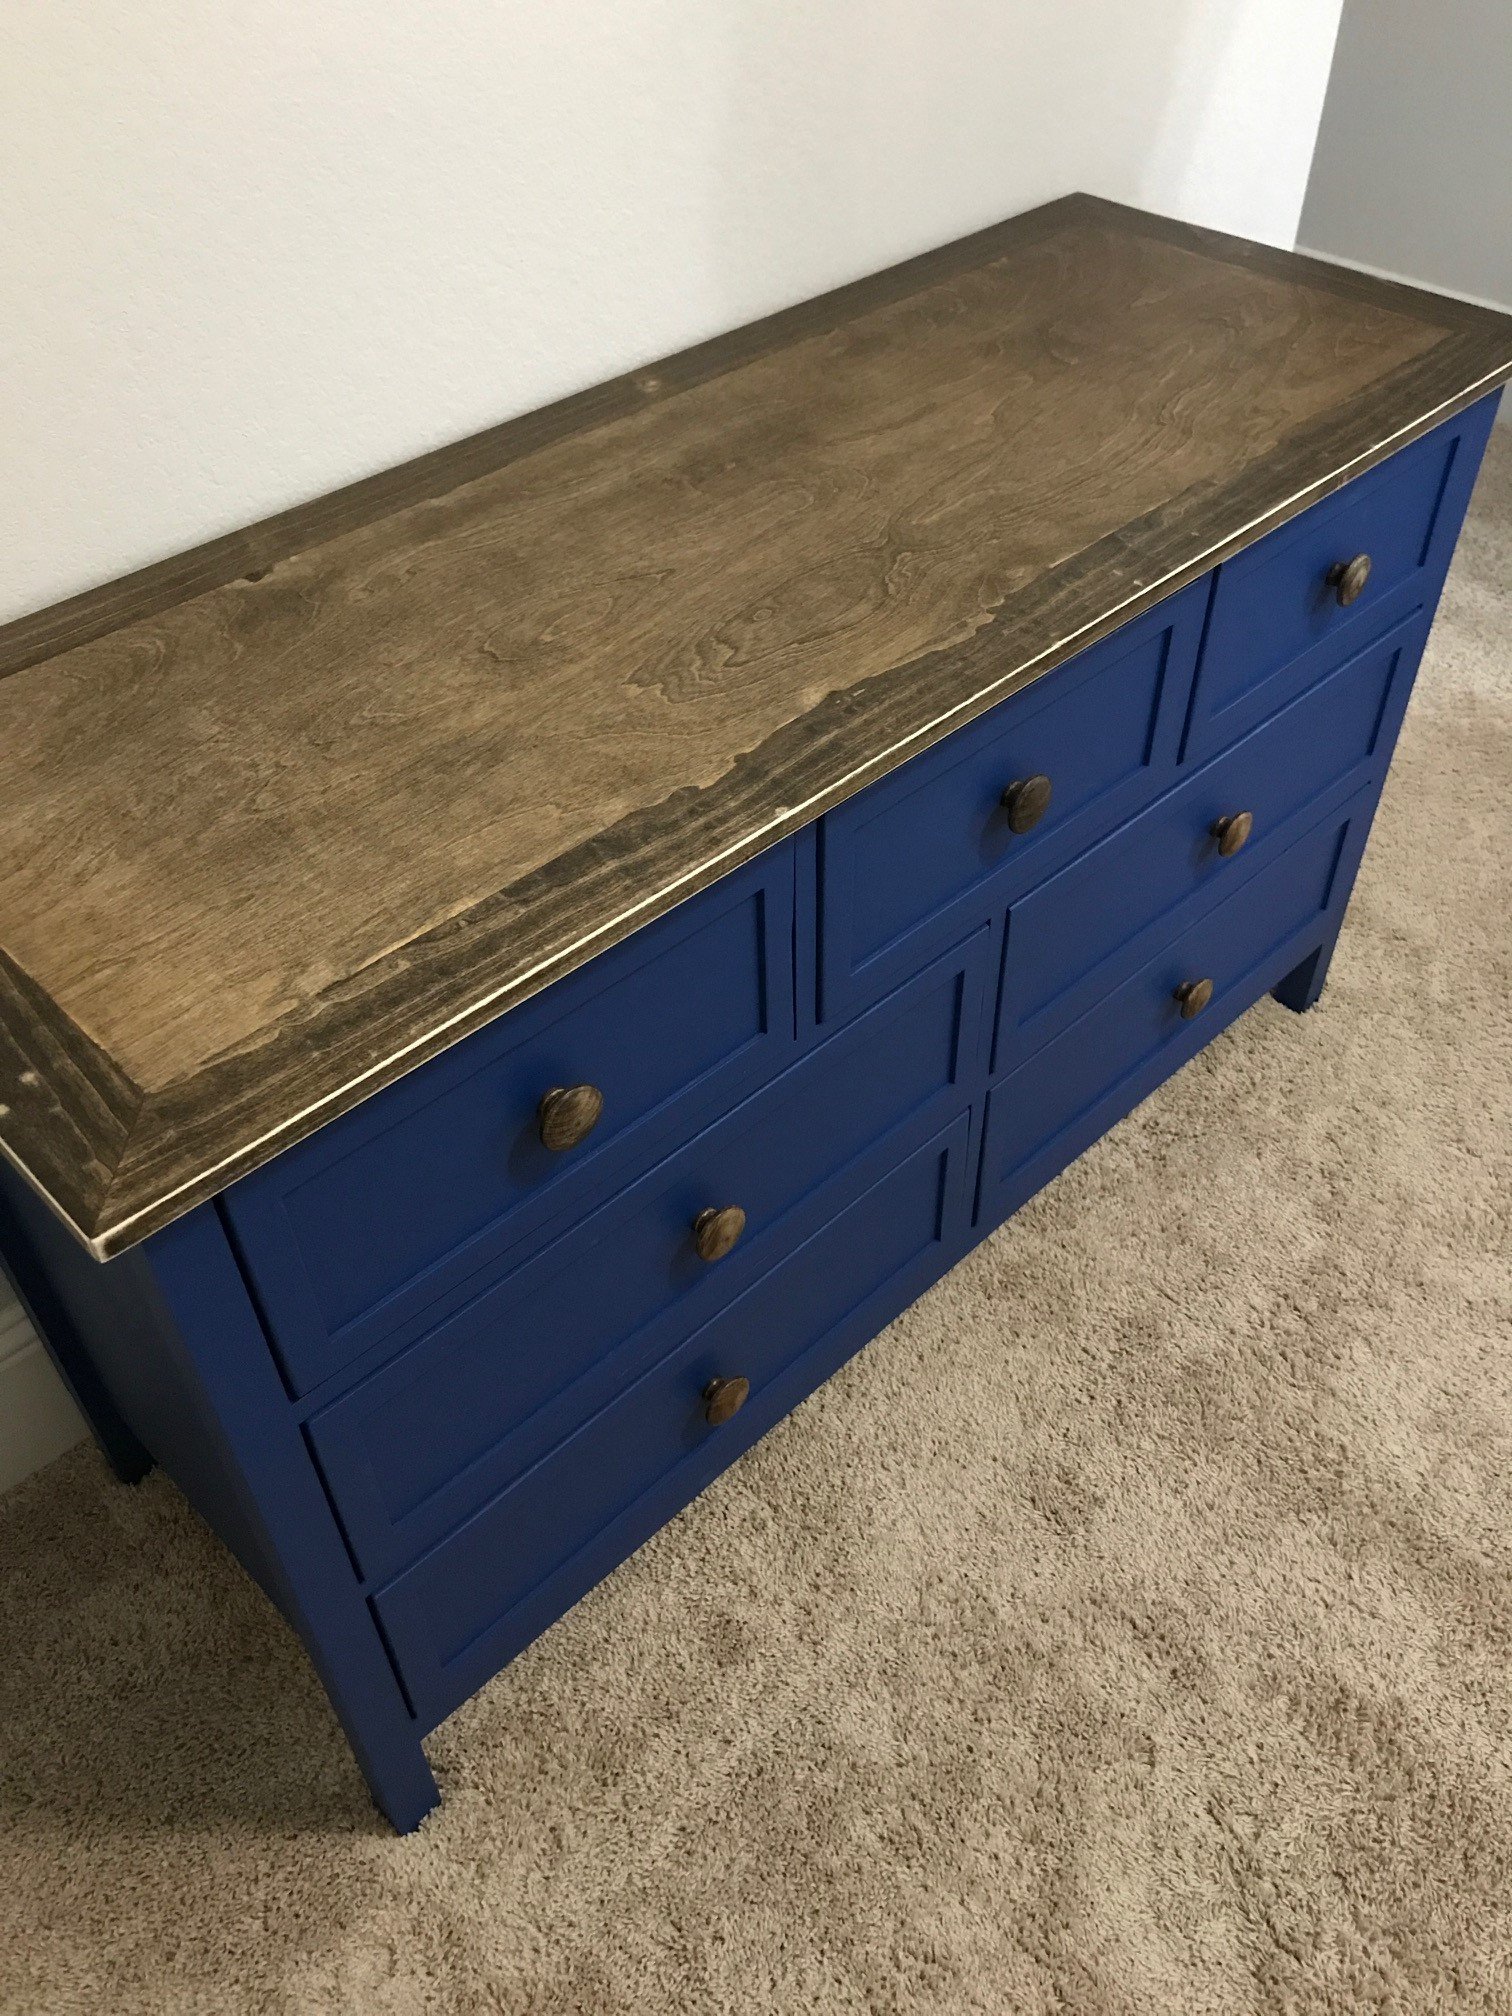
nightstands
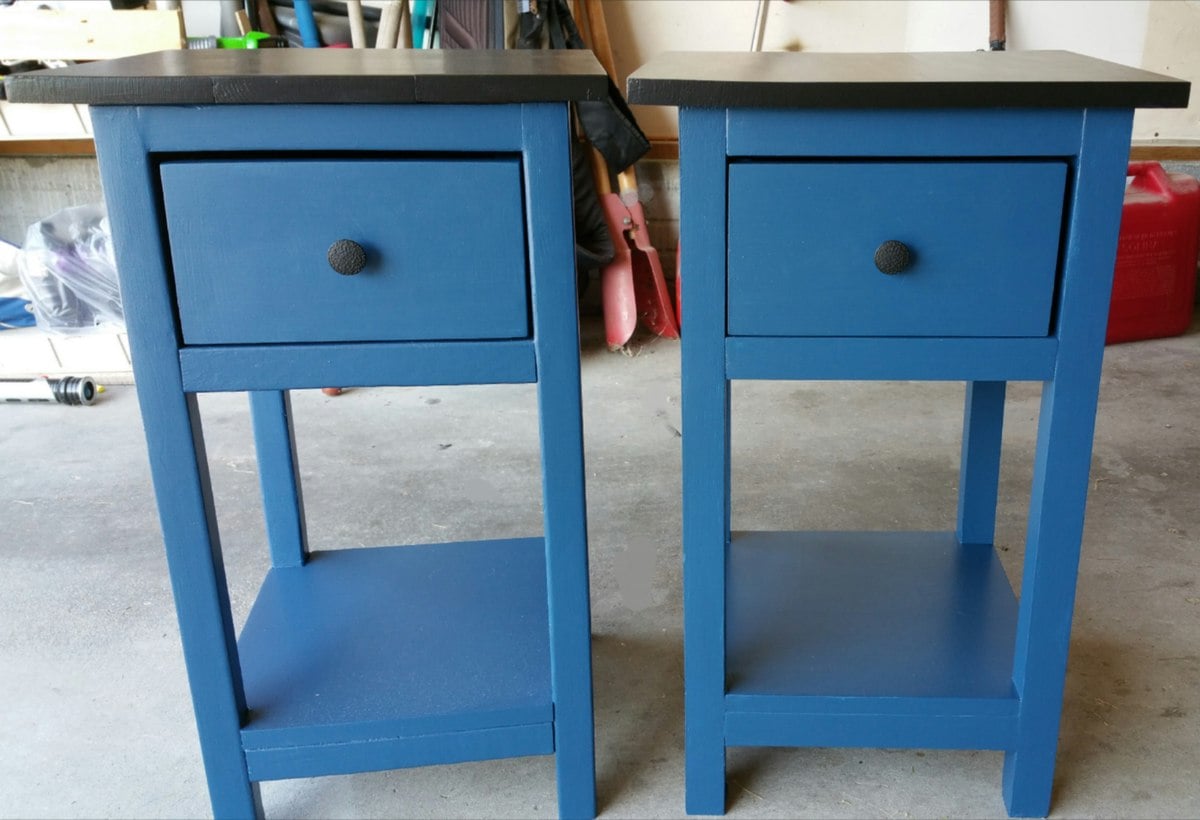
Well this was our first project and we made a few mistakes but we are thrilled with how they came out!
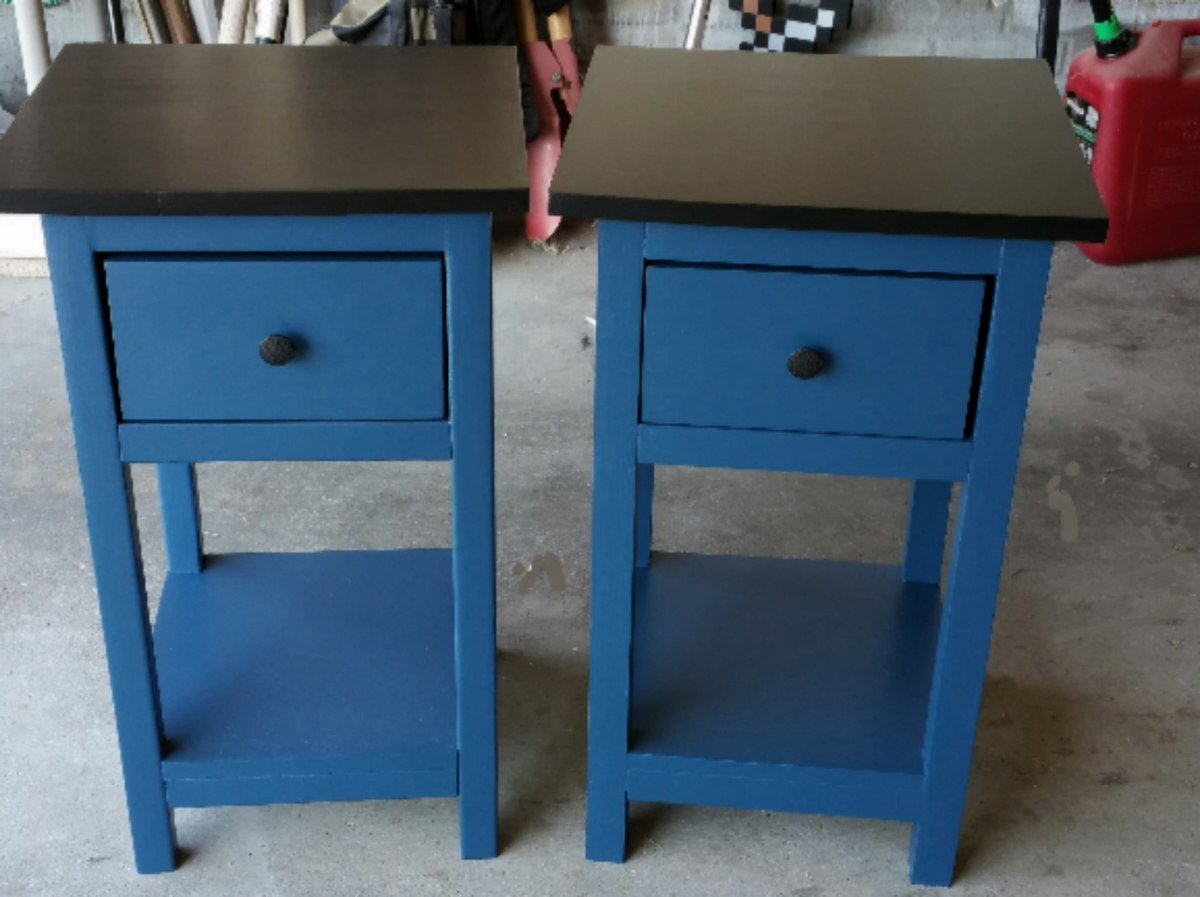
Built from Plan(s)
Estimated Cost
40.00
Estimated Time Investment
Weekend Project (10-20 Hours)
Finish Used
Paint...indigo blue and black
Recommended Skill Level
Beginner
Barn Door Farmhouse Bed
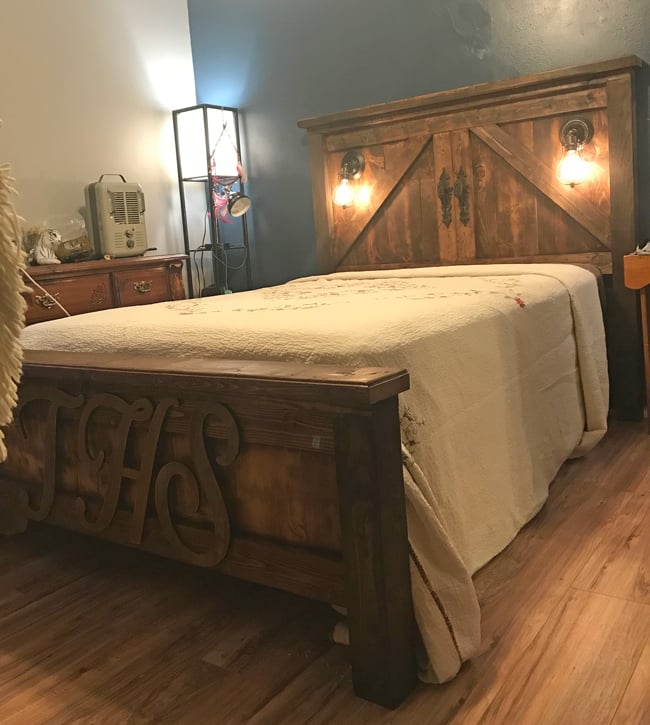
I built this bed for my daughter and we decided to build a farmhouse bed but it didn’t stop there.. We added a barn door feel complete with handles and then we bought some vintage wall sconces and turned them into lights for the headboard.
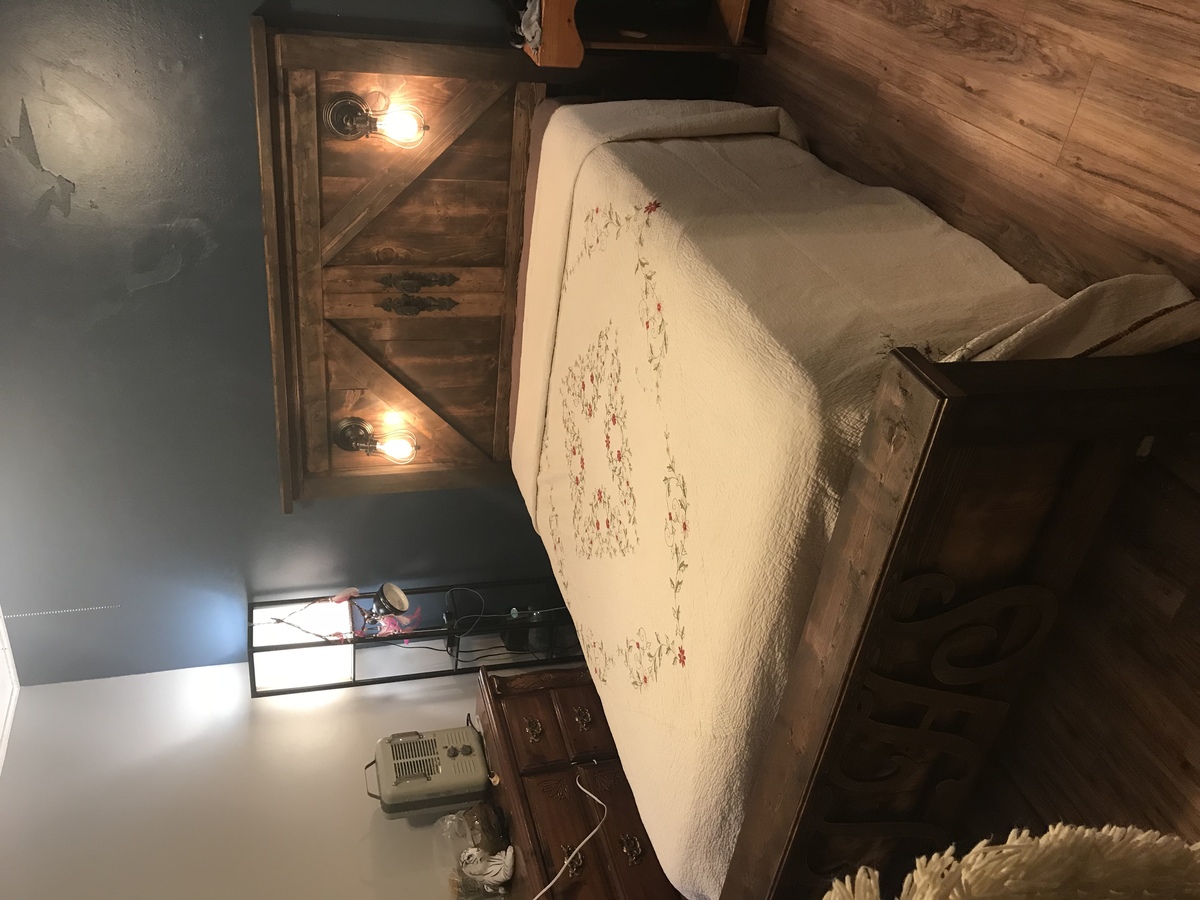
Built from Plan(s)
Estimated Cost
$115
Estimated Time Investment
Weekend Project (10-20 Hours)
Finish Used
Dark Walnut Stain
Recommended Skill Level
Beginner
Gable Greenhouse
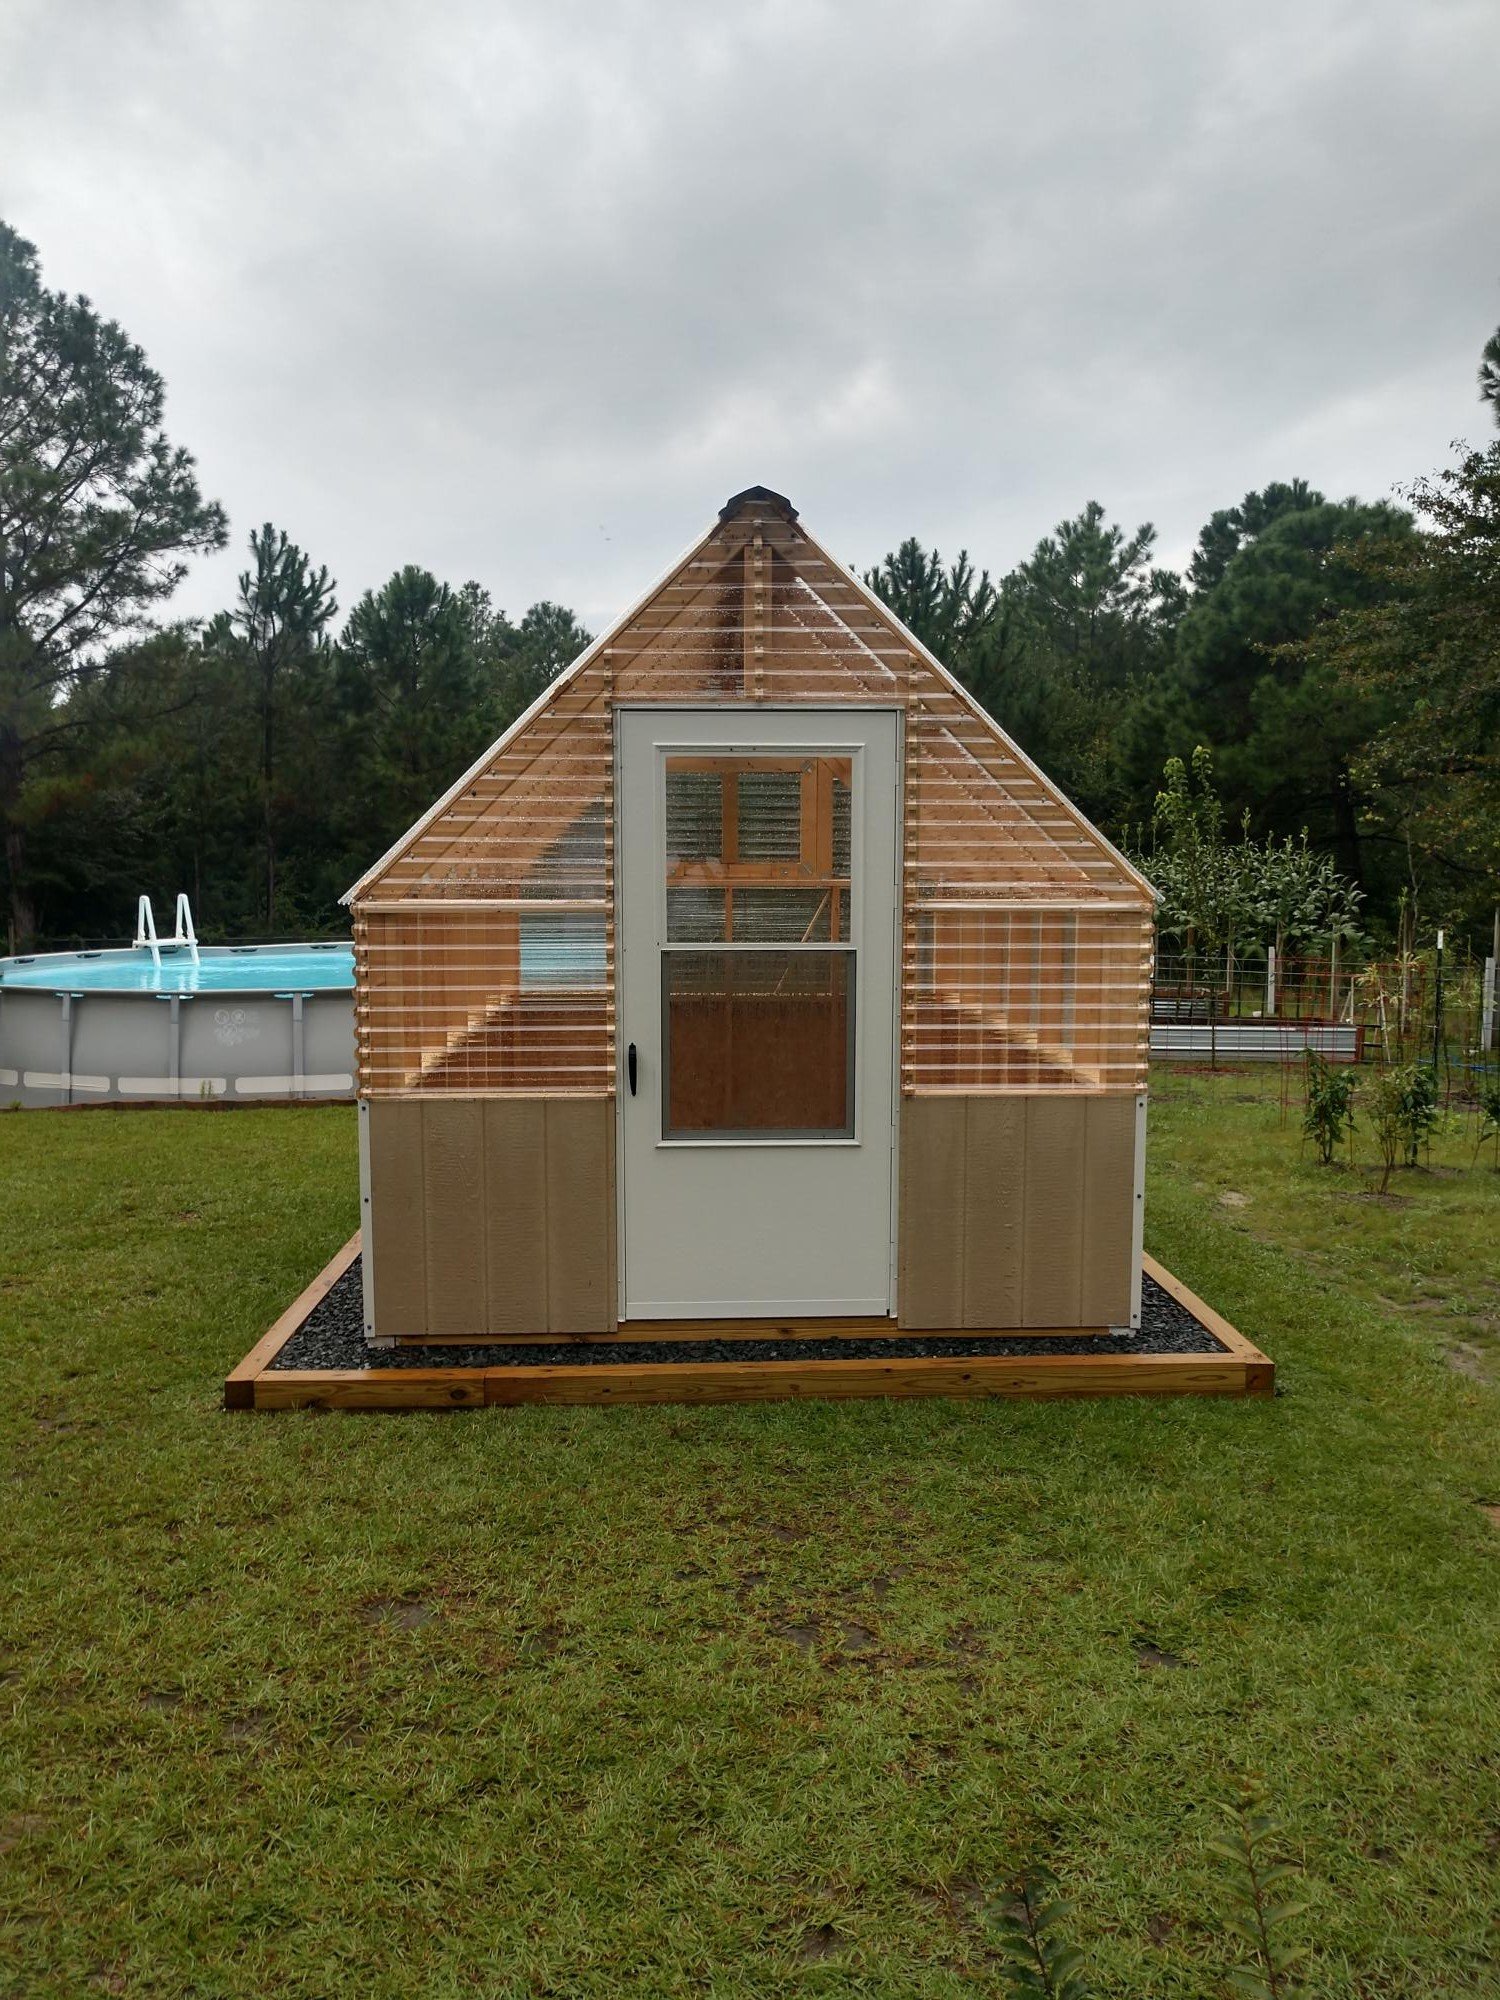
Gable Greenhouse by William
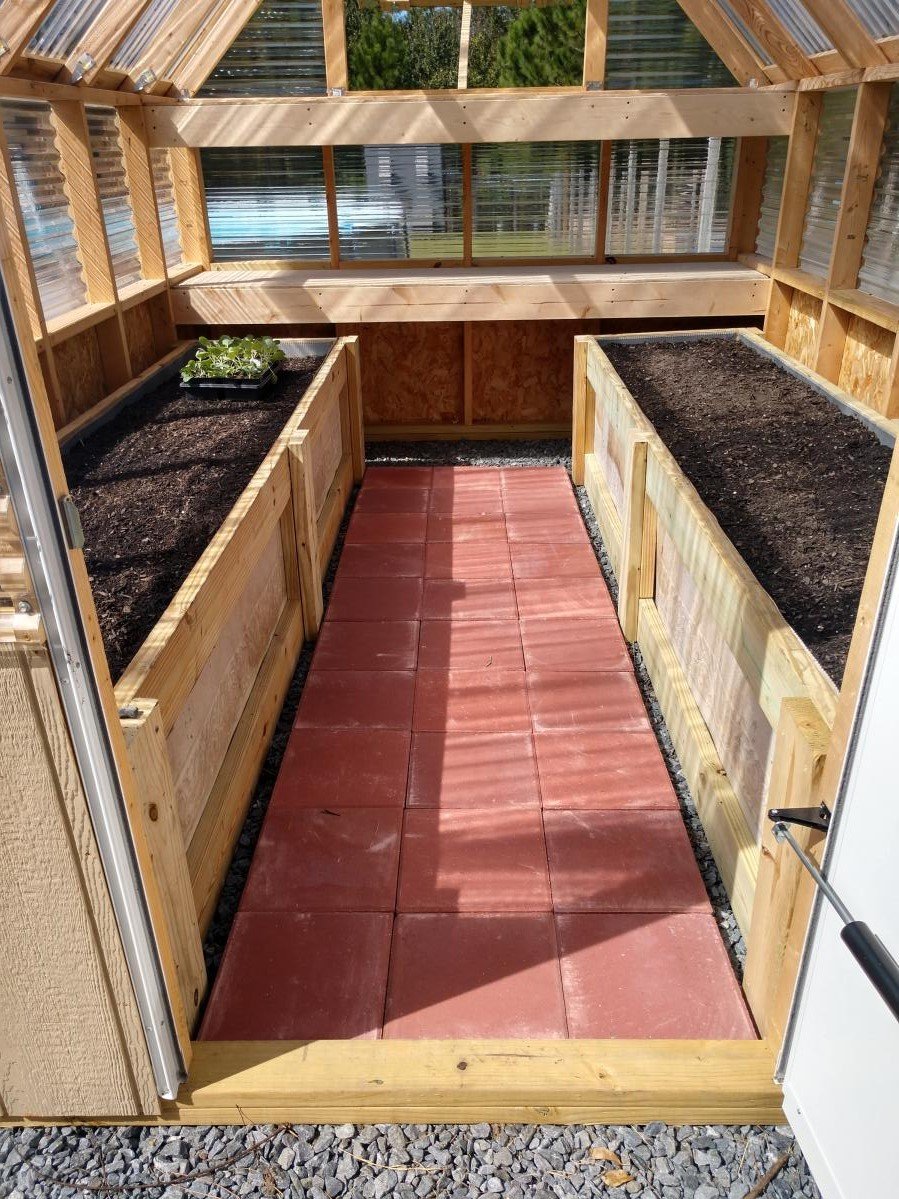
Built from Plan(s)
Pottery Barn Inspired Dresser

I drew up the plan and built it with my sister. The drawers are fake, all of them are swing doors. Even though it's not perfect, I think it turned out great given that we built it in my sister's small city apartment.
Estimated Cost
$200
Estimated Time Investment
Week Long Project (20 Hours or More)
Finish Used
Two coats of paint and polyurethane.
Recommended Skill Level
Starter Project
Comments
Sun, 06/26/2011 - 18:39
Thank you!!
Thank you!! I used 1X3's for the beadboard, so the whole thing is very heavy! :)
In reply to Nice Job by Ryver (not verified)
Mon, 07/04/2011 - 19:57
Thank you! And sorry, I
Thank you! And sorry, I doodled the plan on a piece of paper and didn't get to do it properly in google sketch :p I aso wanted to do the drawers, but the last time I made drawers it was a lot of work, and between the budget and lack of space/tools, a faux drawer face was an easier option. I would love to build this again with proper tools, and when I do, I will make sure to upload the plan! Thanks again!
Step Stool for a Friend
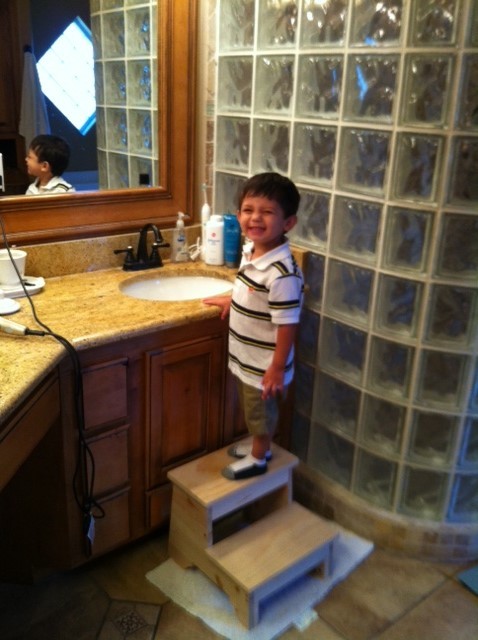
At dinner a couple of nights ago with a good friend and his wife she commented that she really needed a stool of some sort for her older kid to stand on at the bathroom sink. Well that need became the next quest for me. I really savor trying to fill a need quickly and successfully. It took a few hours from the scrap pile to put the stool together and it appears from the picture that it was a success.
I deviated from the plan just a little by adding stiffeners on the four legs just because I did not like the direction of the wood grain and felt they might break off with enough lateral force.
If I build another stool of this type I think I would hinge the top step to give access to a small storage compartment. Should be easy to do and could add some versatility to the stool's function.
Built from Plan(s)
Estimated Cost
Probably about $5
Estimated Time Investment
Afternoon Project (3-6 Hours)
Finish Used
None, just a lot of sanding.
Recommended Skill Level
Beginner
Rustic x Console
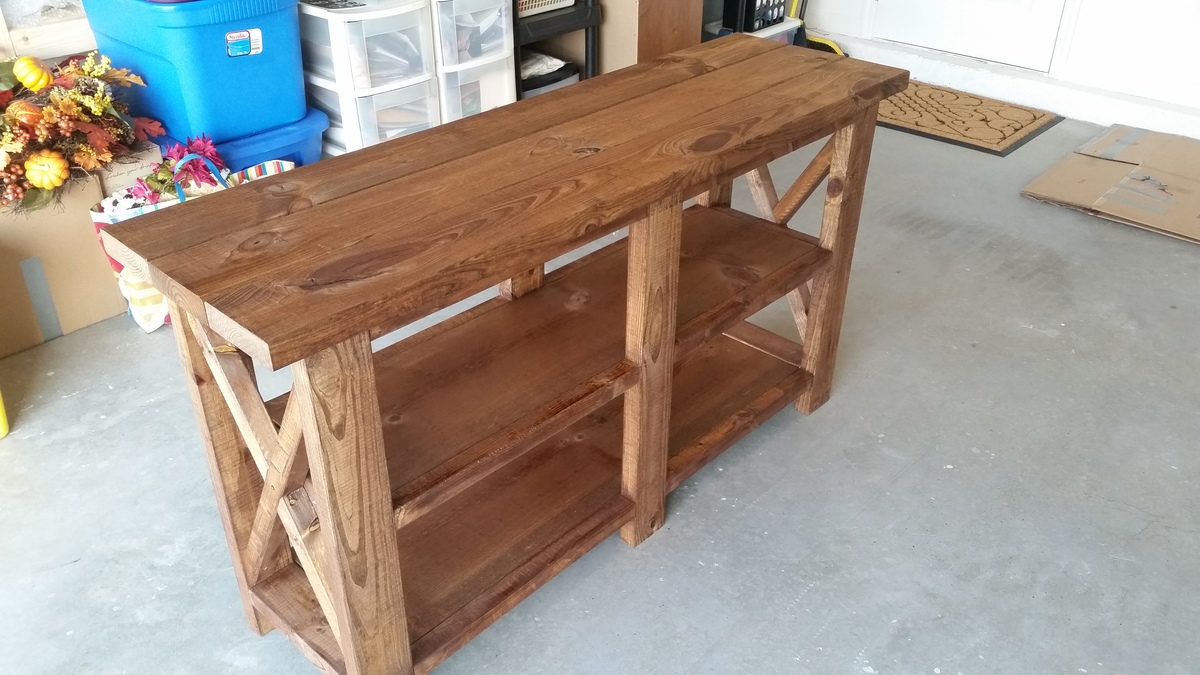
My wife has been wanting this project for months. Had to shorten the size to fit our wall. Thank you Ana for such easy to follow guidelines.
Built from Plan(s)
Estimated Cost
Approximately $75
Estimated Time Investment
Weekend Project (10-20 Hours)
Recommended Skill Level
Beginner
Bottlecap Buffet Coffee Liquor Party Super Bar!
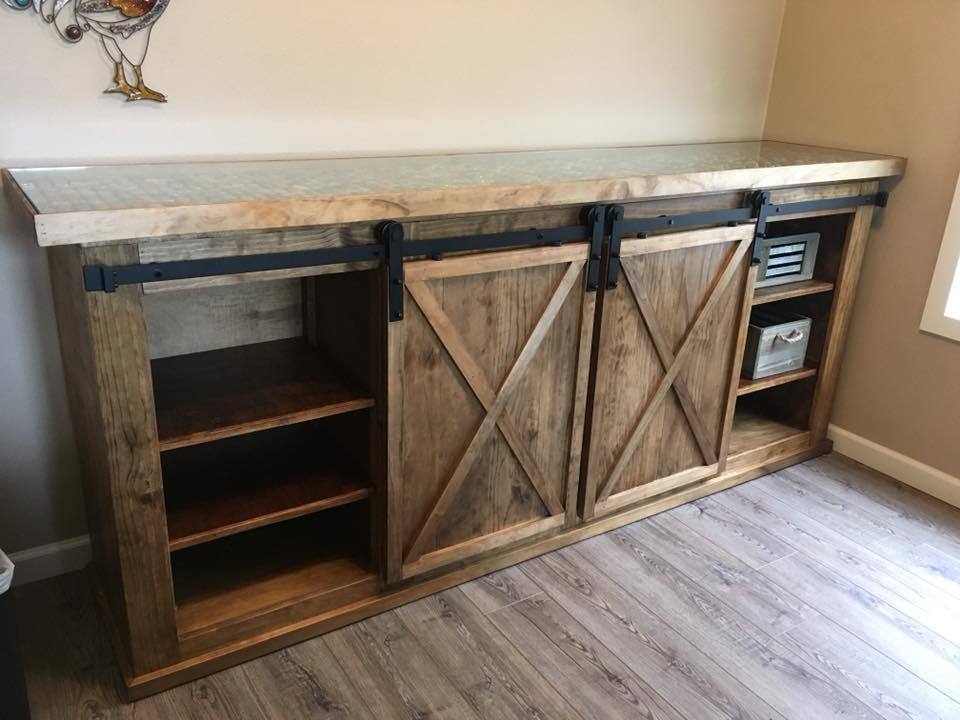
Built the project from the original plans. Modified by creating a shadow box style countertop. Also decided to make the shelves movable rather than just being static. Purchased the mini barn door hardware kit from Amazon.
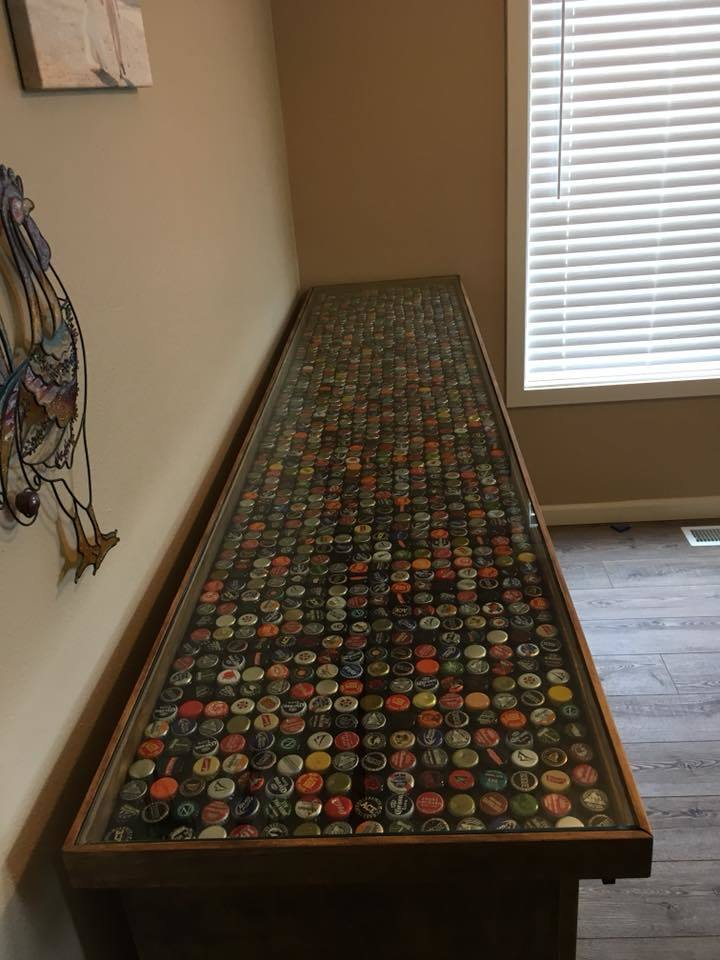
Built from Plan(s)
Estimated Cost
$500 total with barn door hardware kit from Amazon and 3/8 inch tempered glass for the top.
Estimated Time Investment
Week Long Project (20 Hours or More)
Finish Used
Minwax stain and wipe on poly.
Recommended Skill Level
Intermediate
DIY Bathroom Vanities
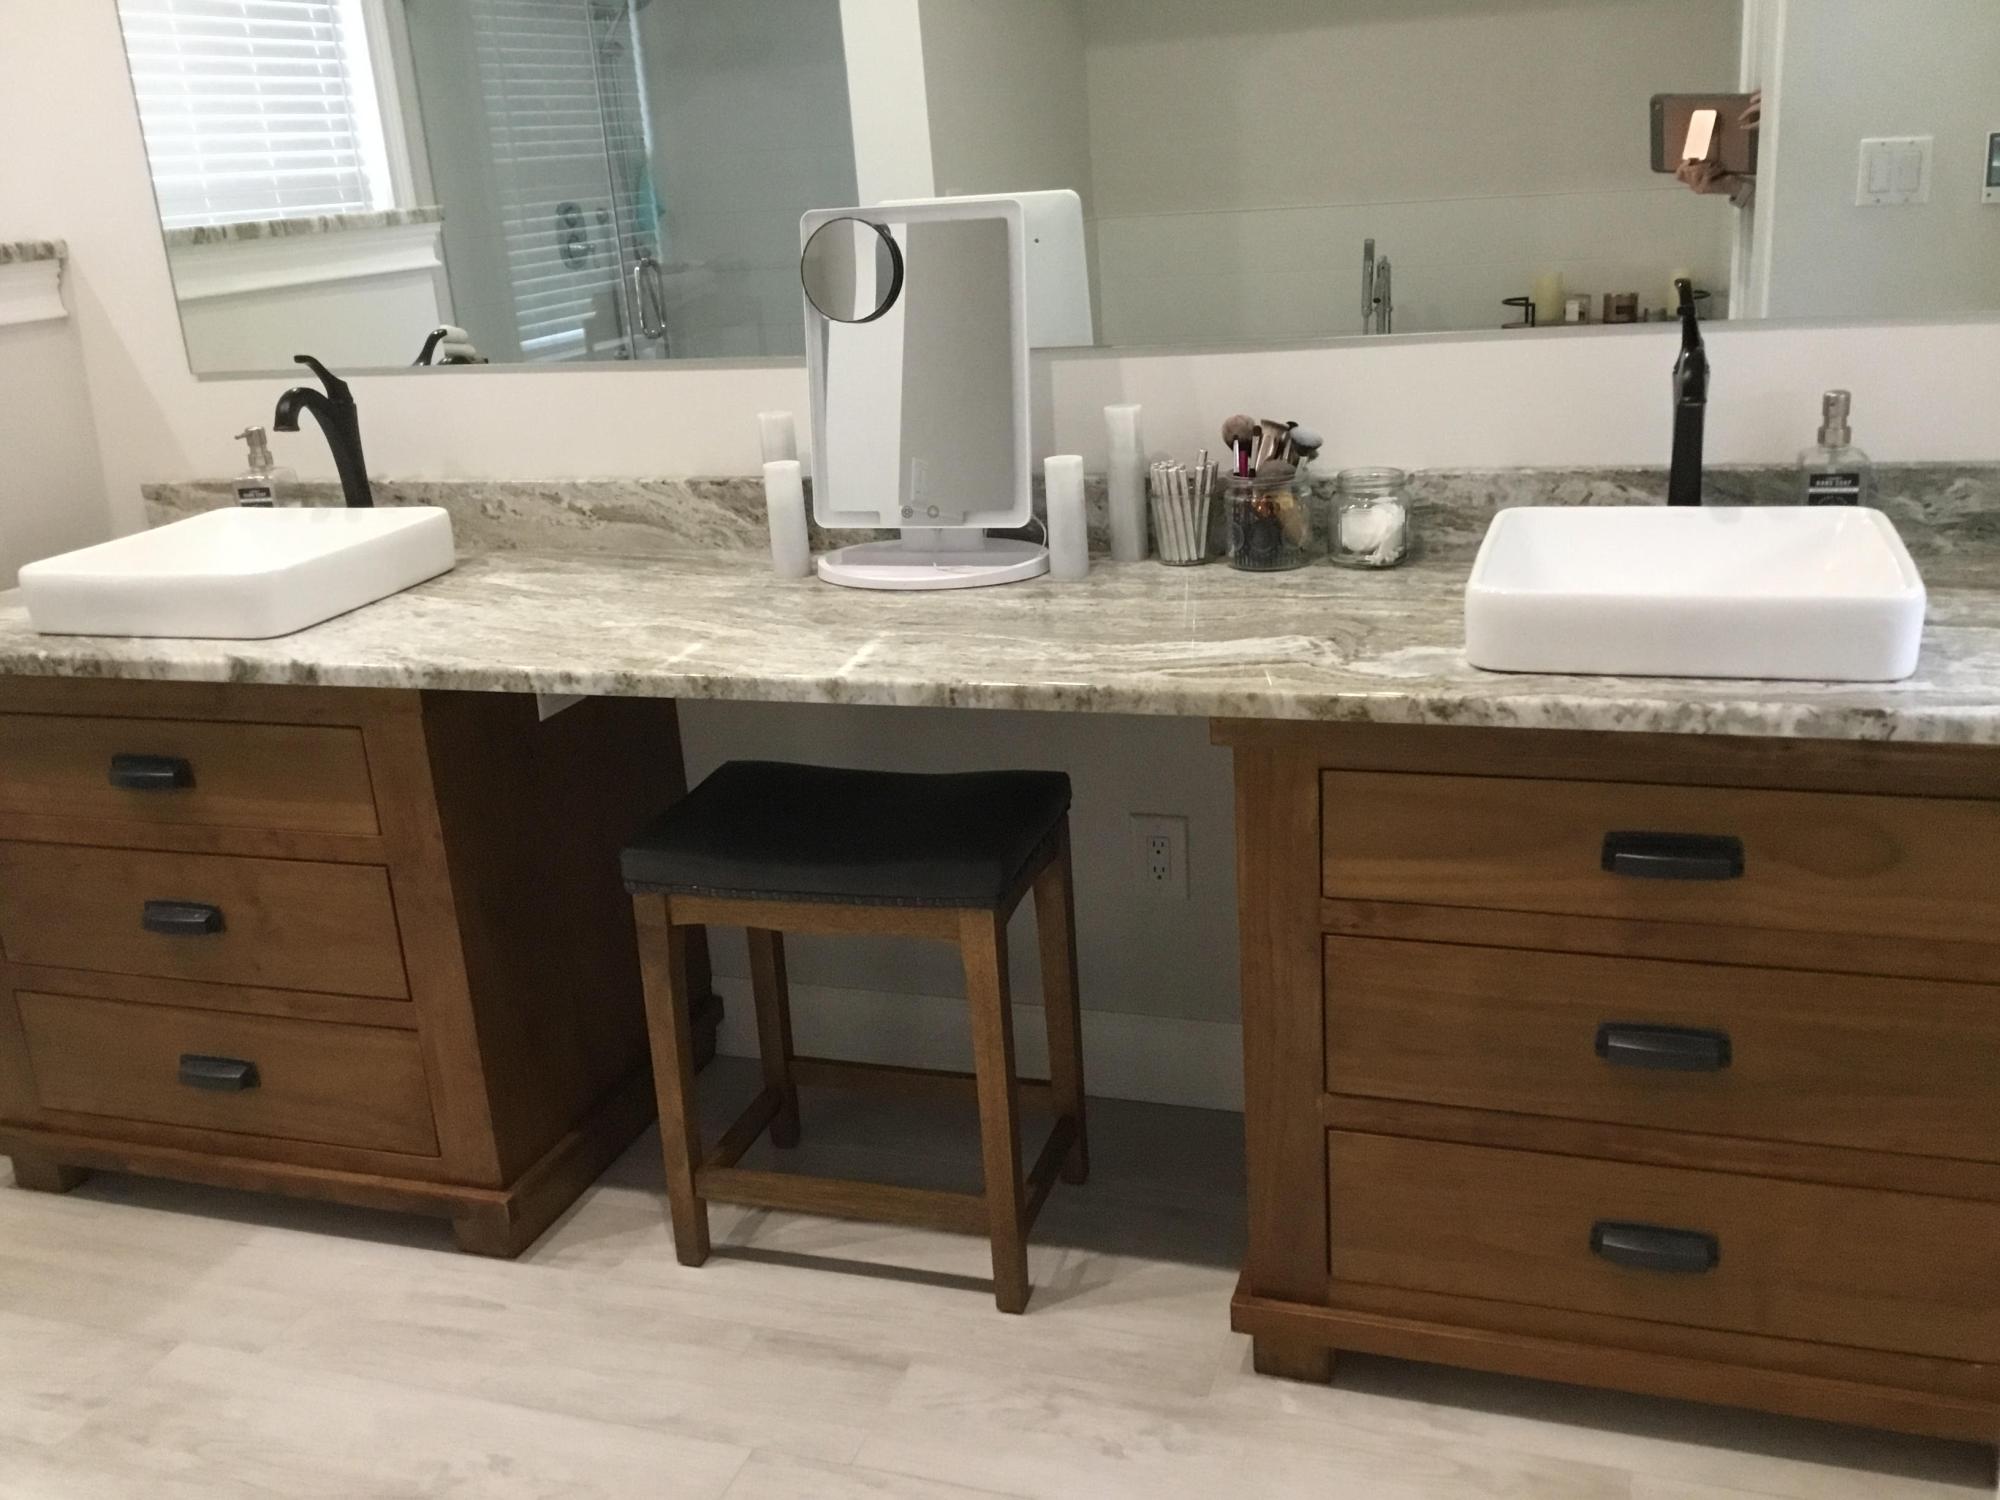
Perfect vanities! When I couldn’t find exactly what I was looking for, I searched online for vanity plans and thankfully your site and these vanities popped up. I love all the storage with these, so much better than ANYTHING pre built we looked at online. We had seen vanities that I was going to settle for but they were around $3,000, and I didn’t love them, so my husband said he could build something and this was the result using your plans. I am so thankful and the whole project was a fraction of the cost! I stained them with a vinegar and steel wool stain with poly over it. I couldn’t be more grateful for you and your generosity of plan sharing. Thank you!
Built from Plan(s)
Comments
Wed, 01/11/2023 - 05:25
These are very pretty. Any…
These are very pretty. Any chance he recalls what type of wood used?
x table and benches

Good plans and easy to follow directions.
Built from Plan(s)
Estimated Cost
$110
Estimated Time Investment
Afternoon Project (3-6 Hours)
Finish Used
None yet.
Recommended Skill Level
Beginner