Gable Greenhouse
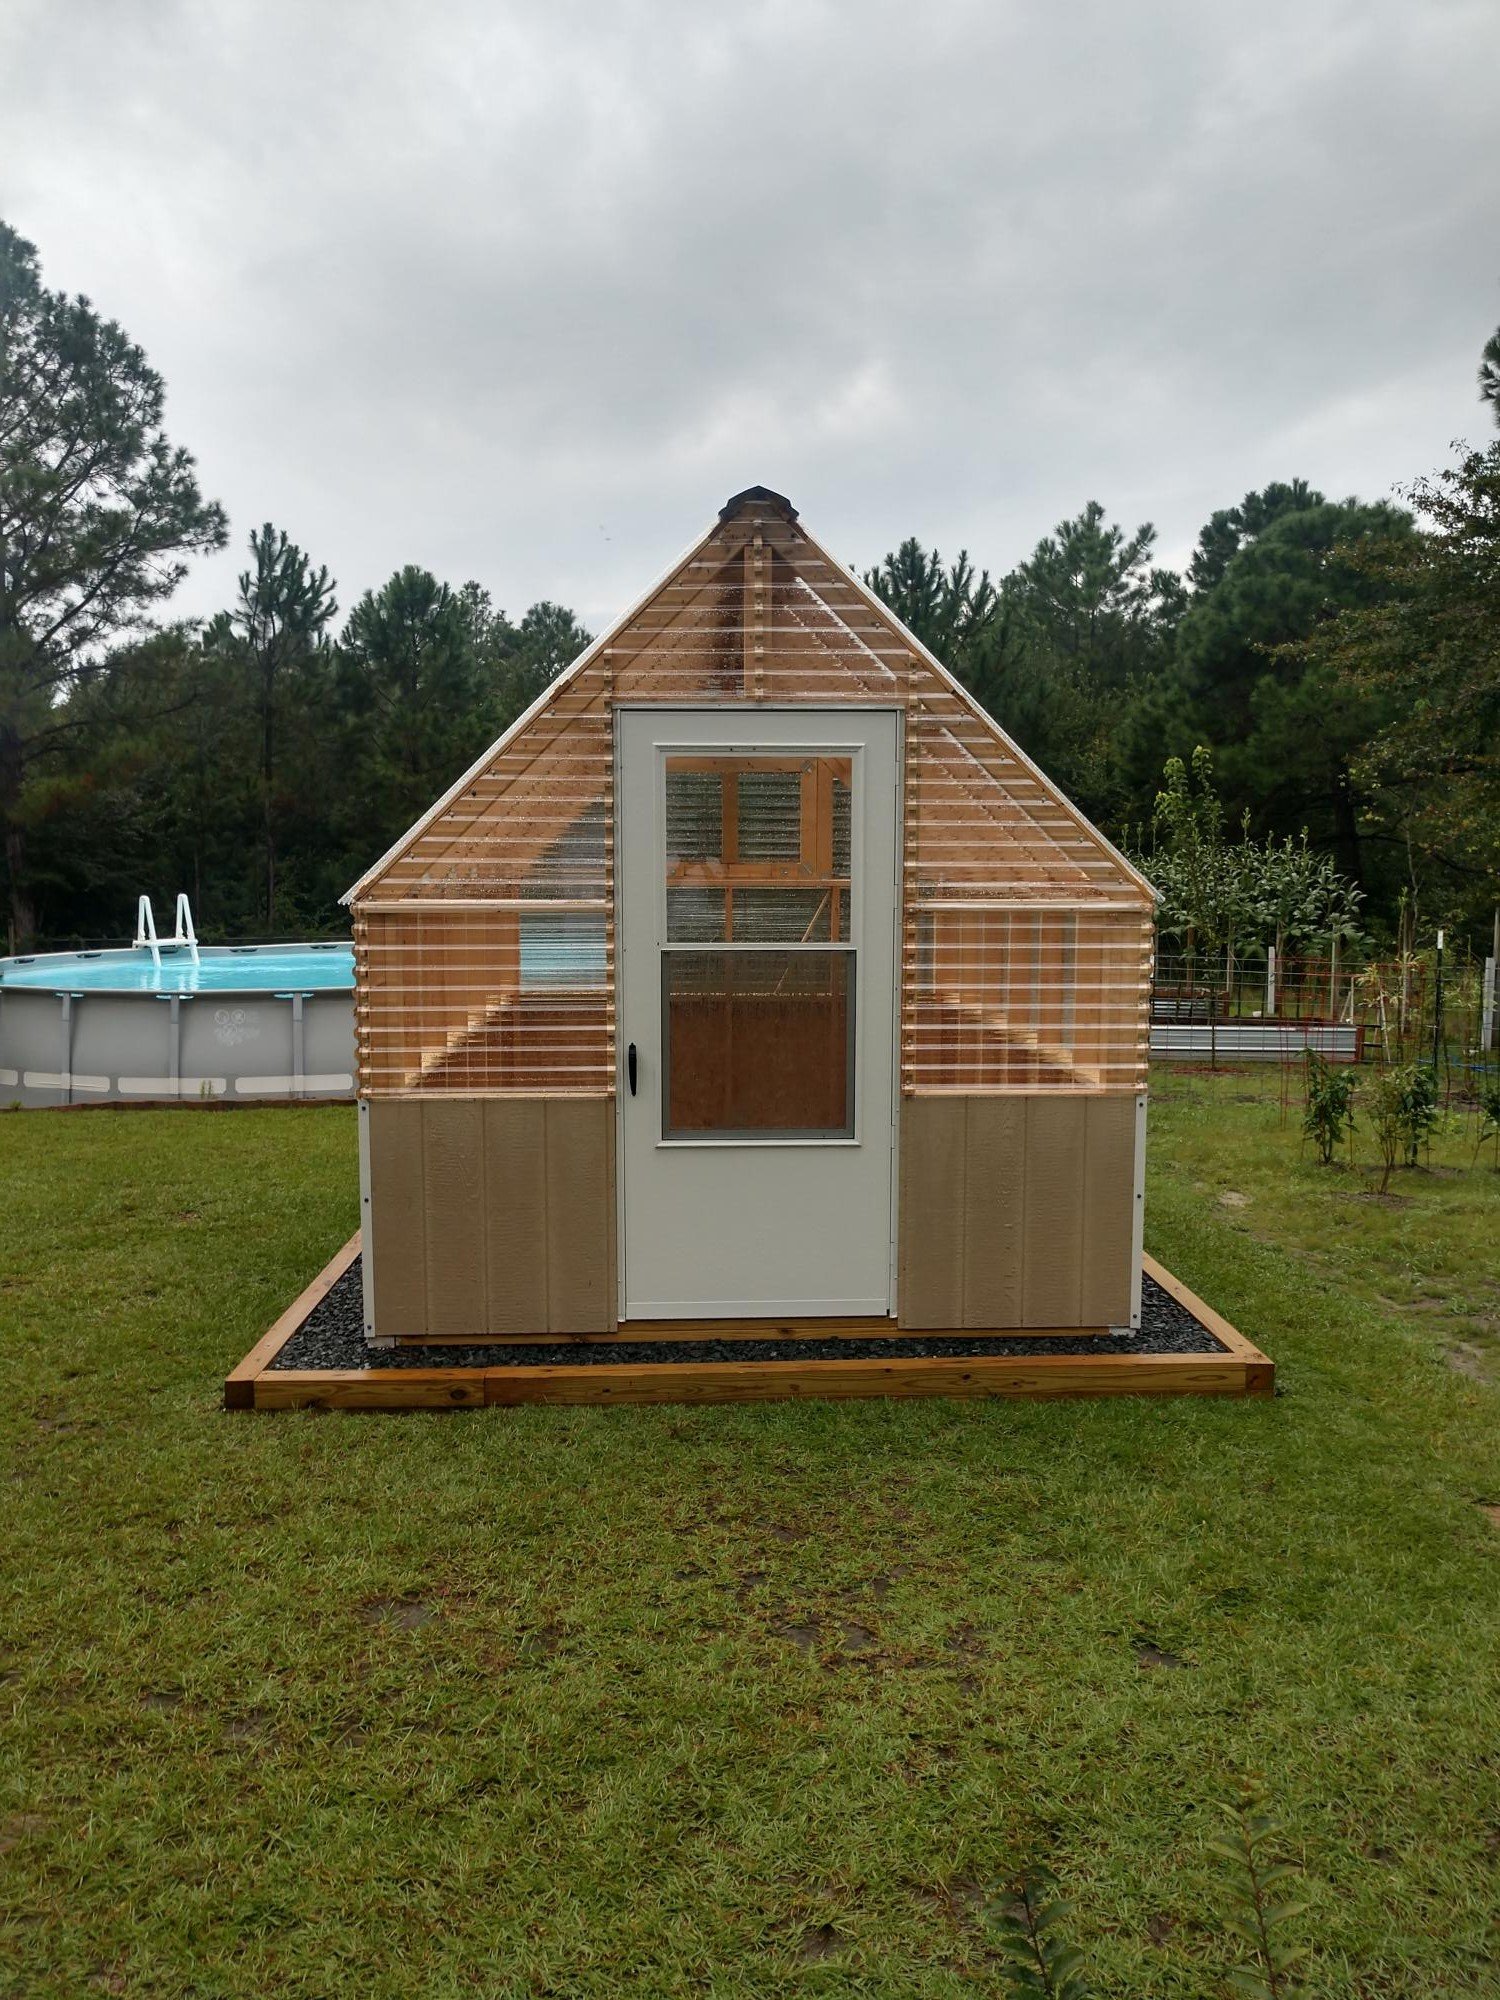
Gable Greenhouse by William
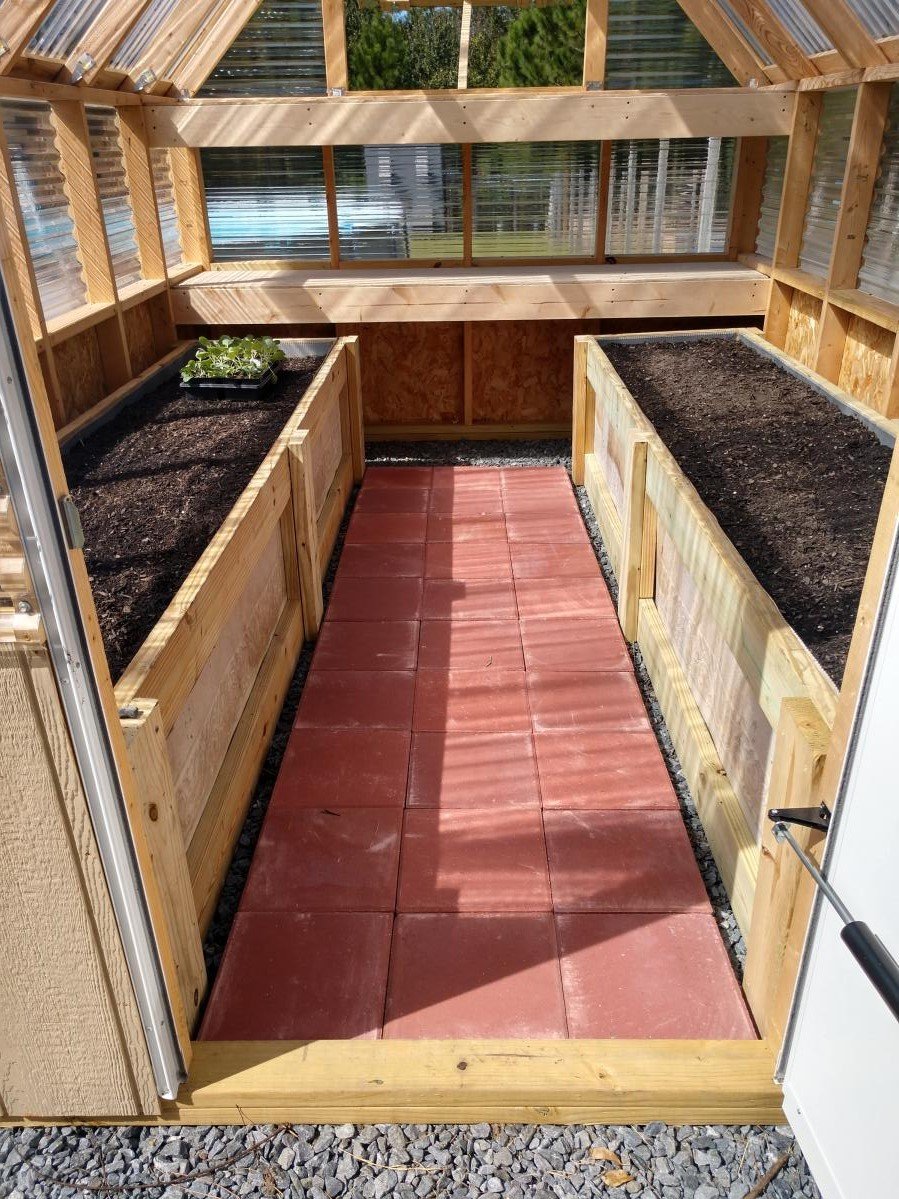
Built from Plan(s)
Gable Greenhouse by William

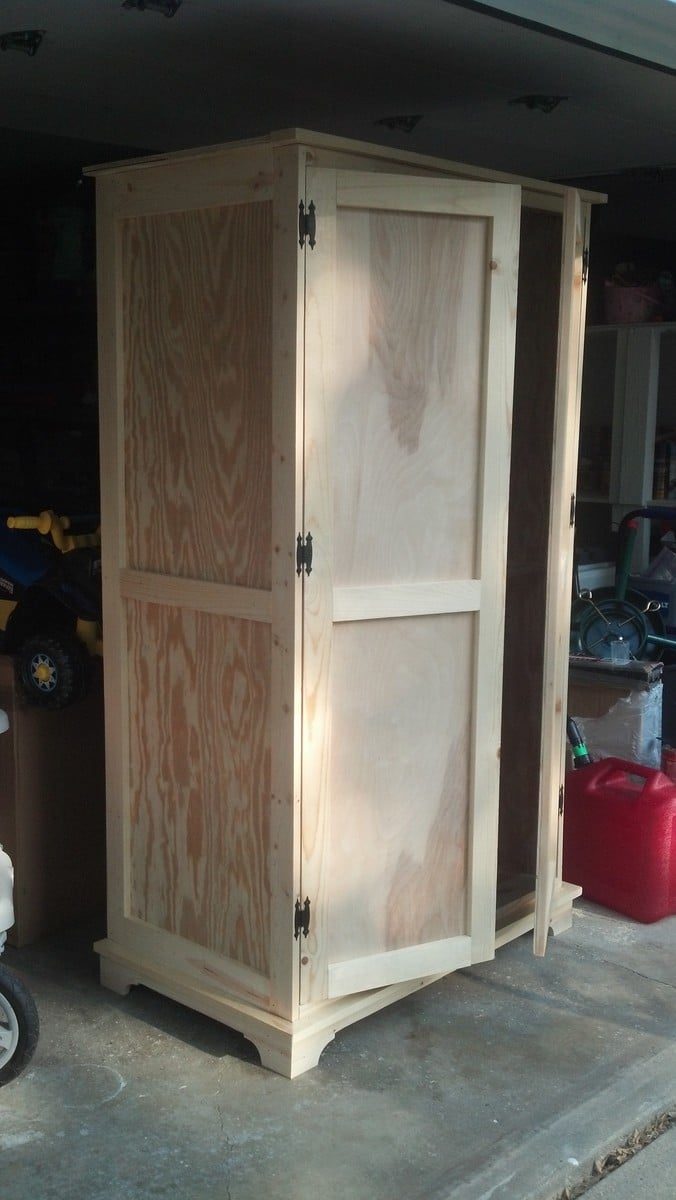
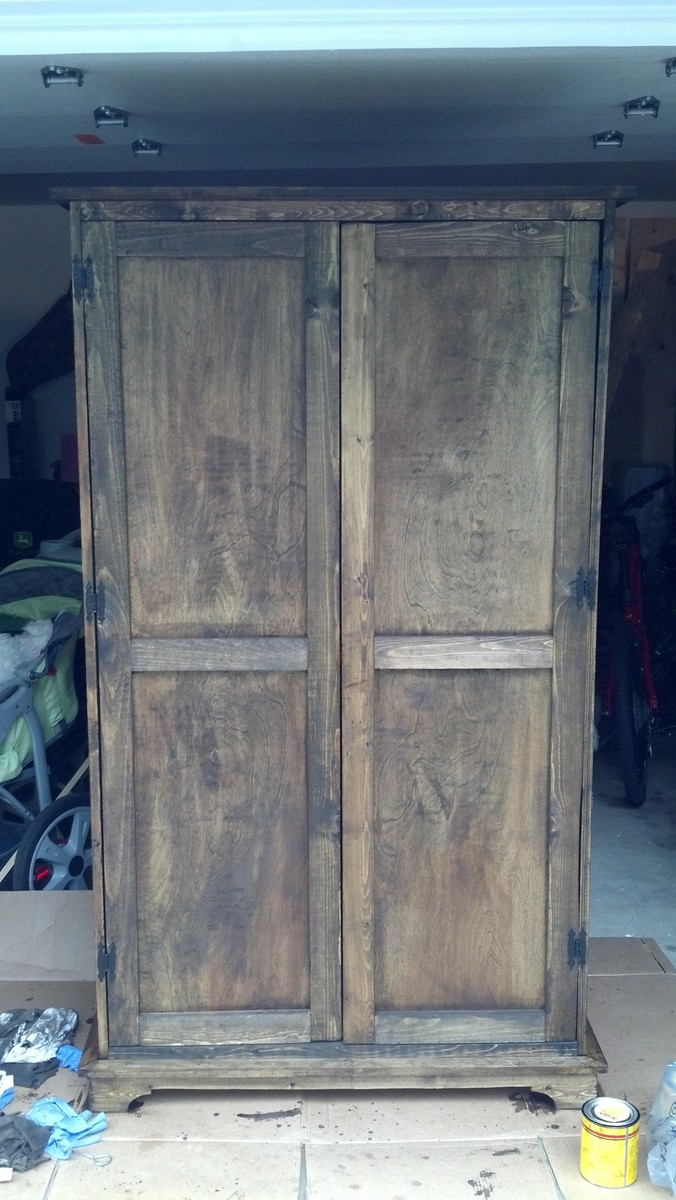
I drew up the plan and built it with my sister. The drawers are fake, all of them are swing doors. Even though it's not perfect, I think it turned out great given that we built it in my sister's small city apartment.
Sun, 06/26/2011 - 18:39
Thank you!! I used 1X3's for the beadboard, so the whole thing is very heavy! :)
In reply to Nice Job by Ryver (not verified)
Mon, 07/04/2011 - 19:57
Thank you! And sorry, I doodled the plan on a piece of paper and didn't get to do it properly in google sketch :p I aso wanted to do the drawers, but the last time I made drawers it was a lot of work, and between the budget and lack of space/tools, a faux drawer face was an easier option. I would love to build this again with proper tools, and when I do, I will make sure to upload the plan! Thanks again!
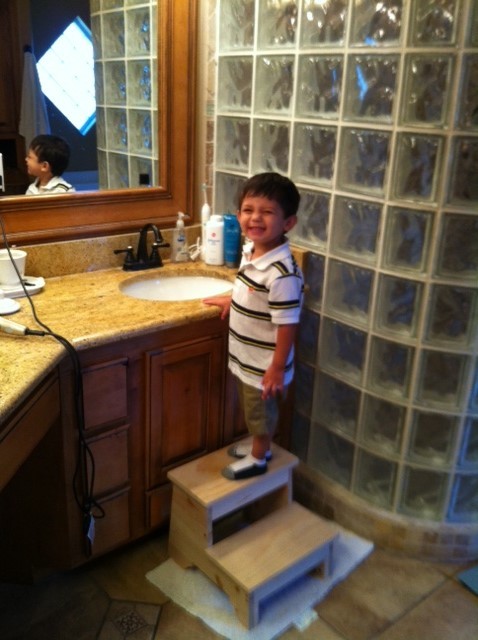
At dinner a couple of nights ago with a good friend and his wife she commented that she really needed a stool of some sort for her older kid to stand on at the bathroom sink. Well that need became the next quest for me. I really savor trying to fill a need quickly and successfully. It took a few hours from the scrap pile to put the stool together and it appears from the picture that it was a success.
I deviated from the plan just a little by adding stiffeners on the four legs just because I did not like the direction of the wood grain and felt they might break off with enough lateral force.
If I build another stool of this type I think I would hinge the top step to give access to a small storage compartment. Should be easy to do and could add some versatility to the stool's function.
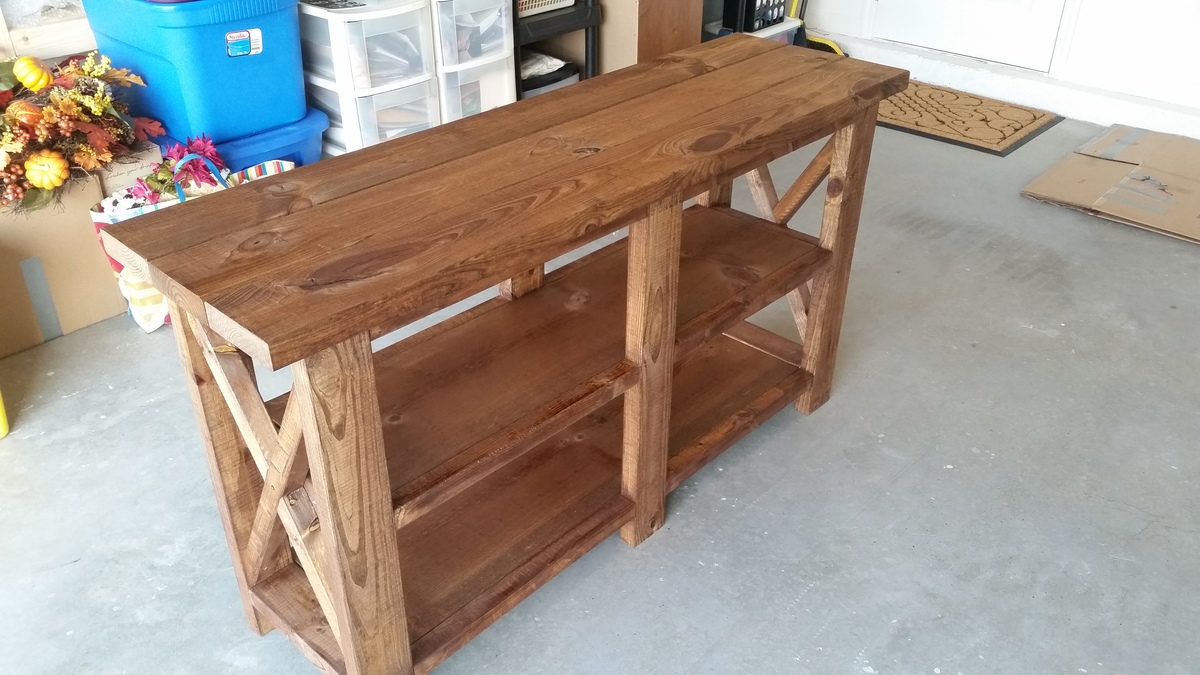
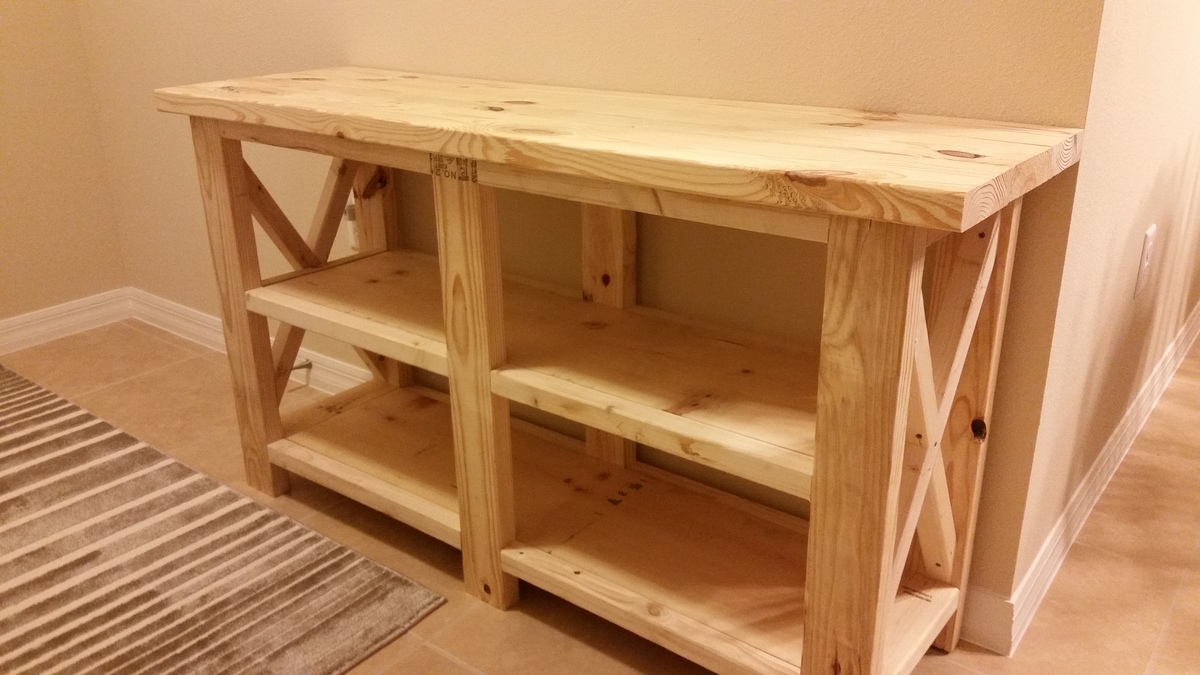
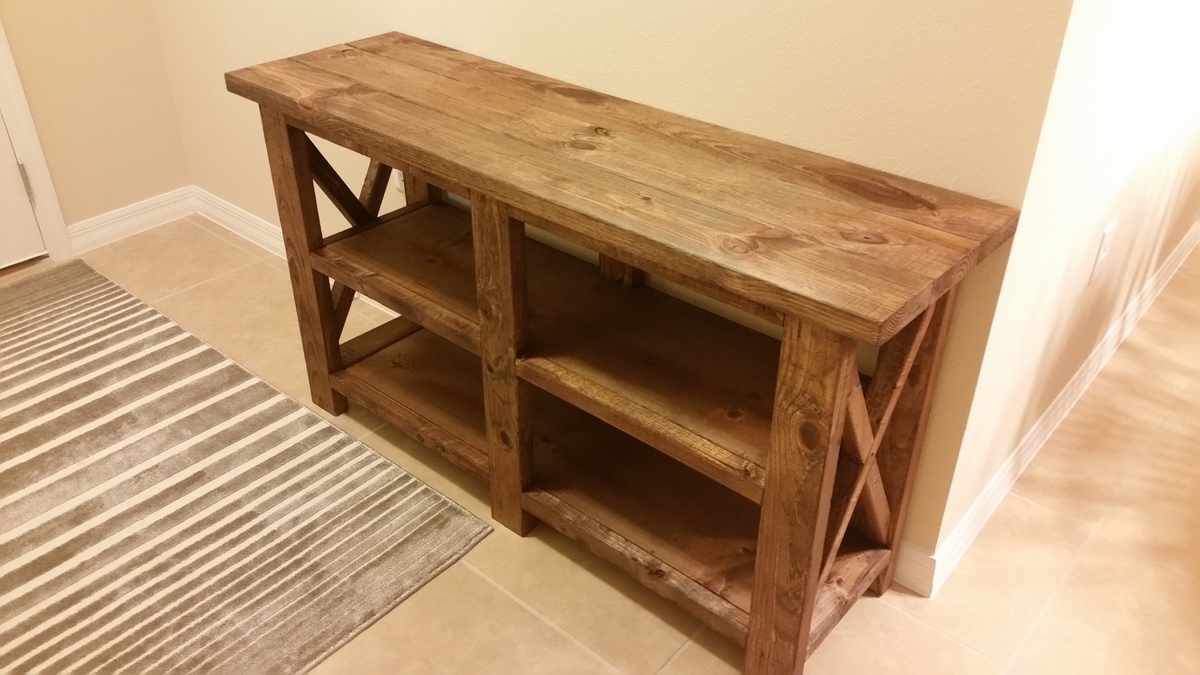
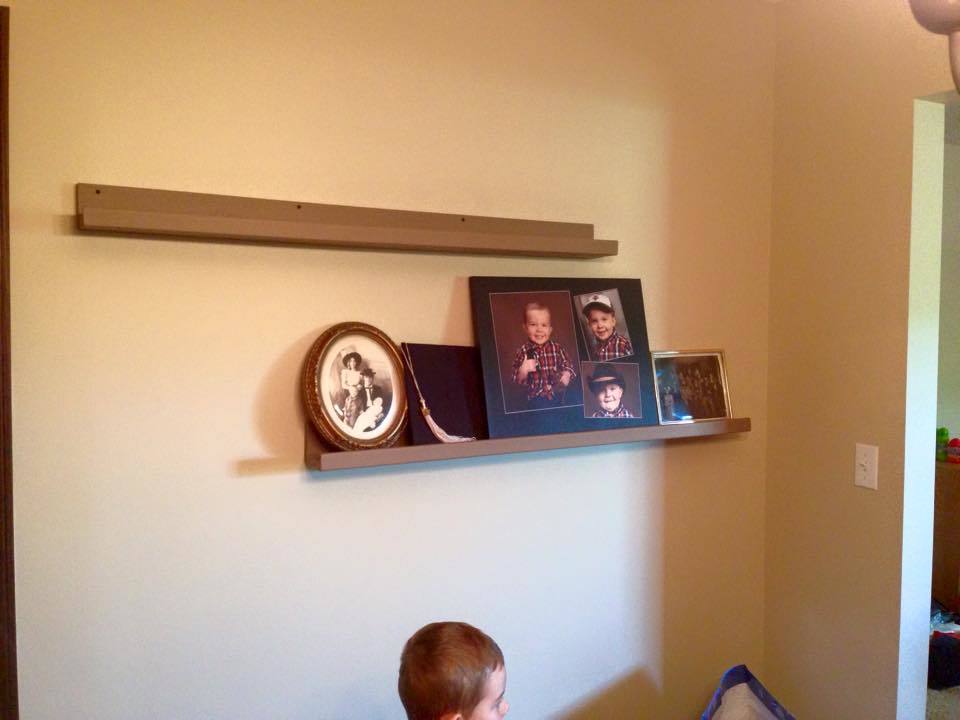
My wife has been wanting this project for months. Had to shorten the size to fit our wall. Thank you Ana for such easy to follow guidelines.
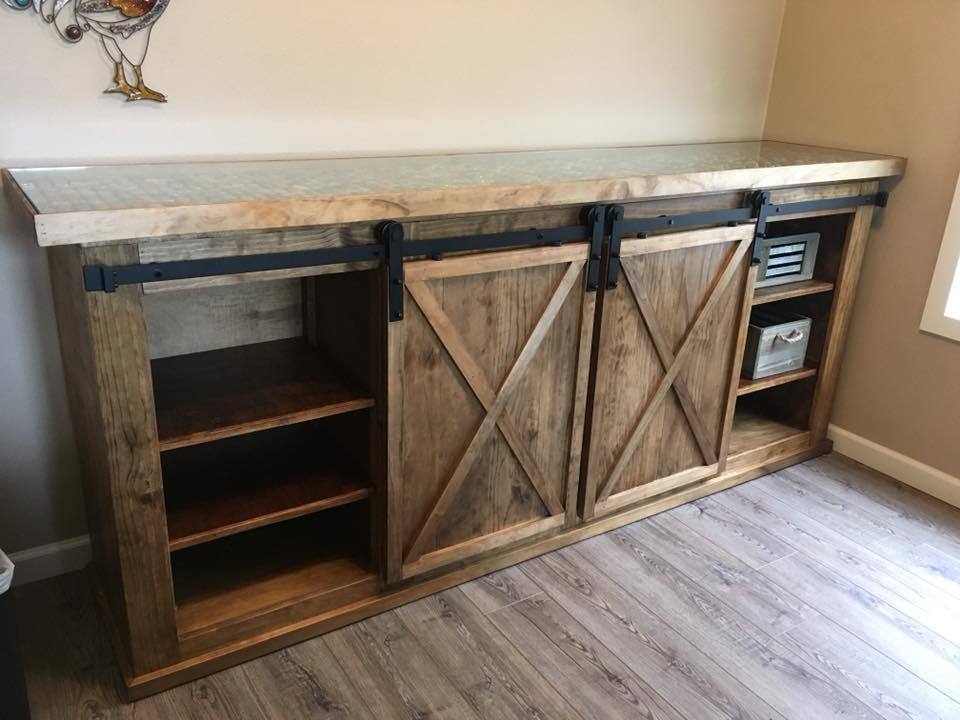
Built the project from the original plans. Modified by creating a shadow box style countertop. Also decided to make the shelves movable rather than just being static. Purchased the mini barn door hardware kit from Amazon.
Perfect vanities! When I couldn’t find exactly what I was looking for, I searched online for vanity plans and thankfully your site and these vanities popped up. I love all the storage with these, so much better than ANYTHING pre built we looked at online. We had seen vanities that I was going to settle for but they were around $3,000, and I didn’t love them, so my husband said he could build something and this was the result using your plans. I am so thankful and the whole project was a fraction of the cost! I stained them with a vinegar and steel wool stain with poly over it. I couldn’t be more grateful for you and your generosity of plan sharing. Thank you!
Wed, 01/11/2023 - 05:25
These are very pretty. Any chance he recalls what type of wood used?

Good plans and easy to follow directions.
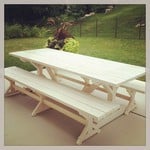
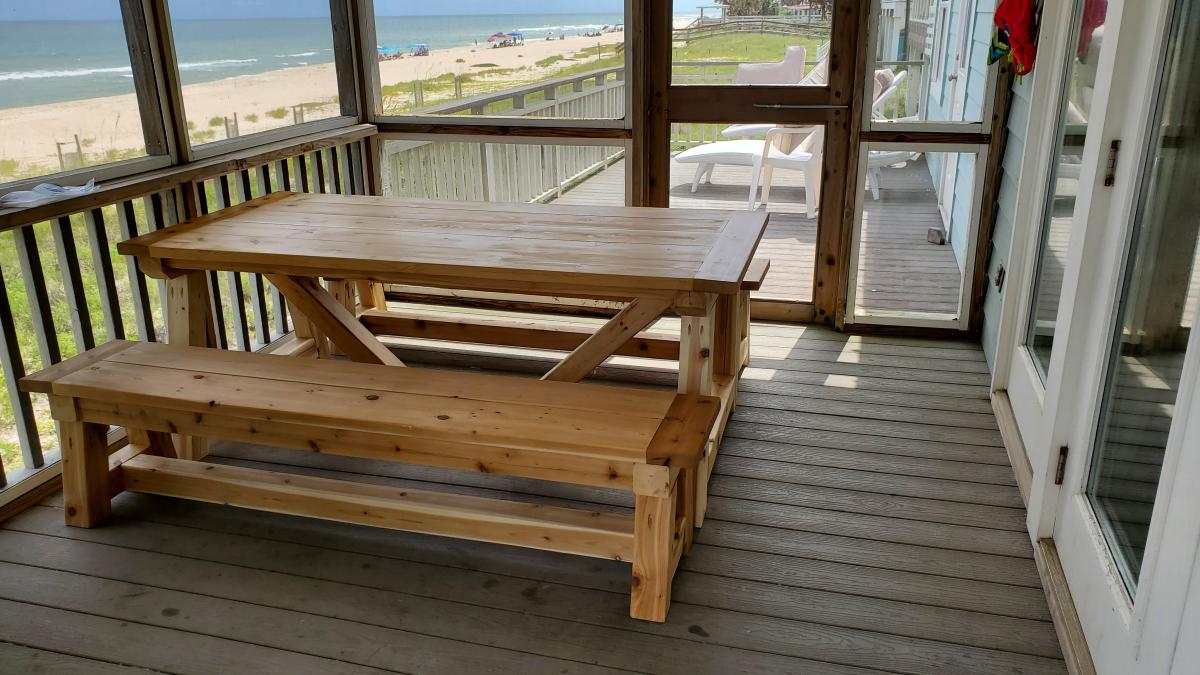
I LOVE my new patio table and benches. They came out great, and I hope they hold up for several years with the waterproofing stain I used.
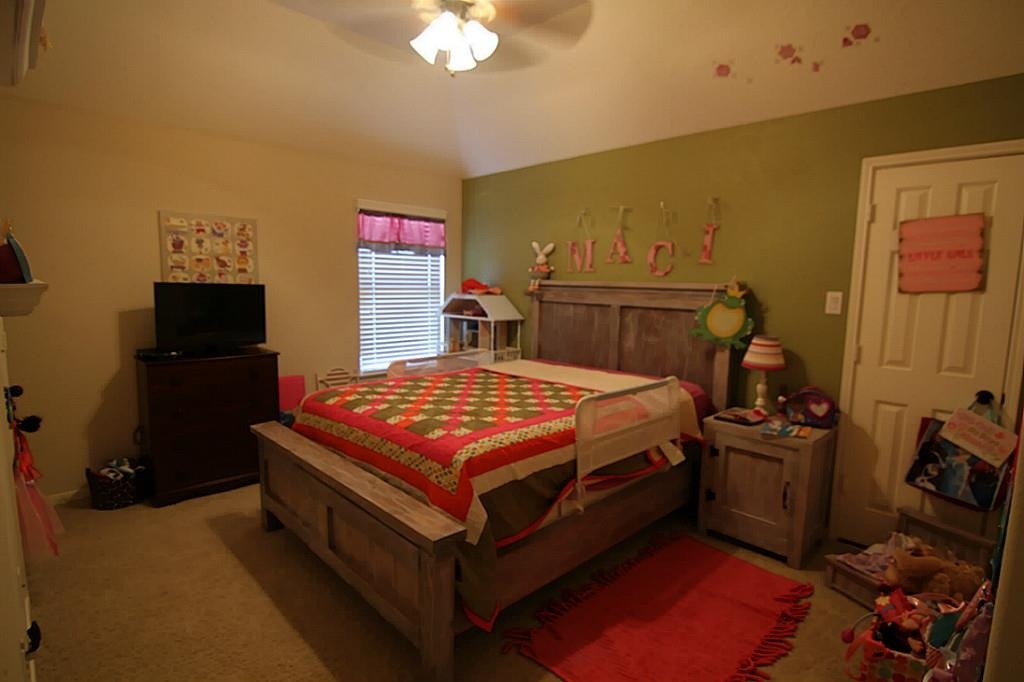
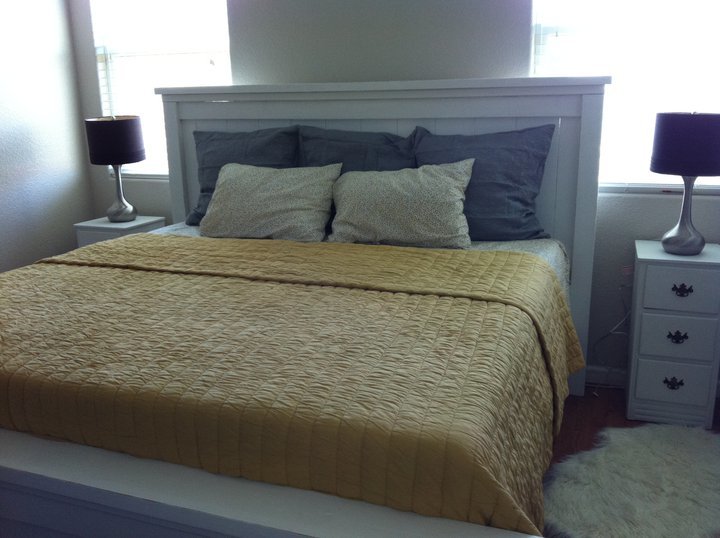
I built this Farmhouse Queen Bed & Kentwood Night Stand for my Granddaughter. She loves it !
Hi friends!
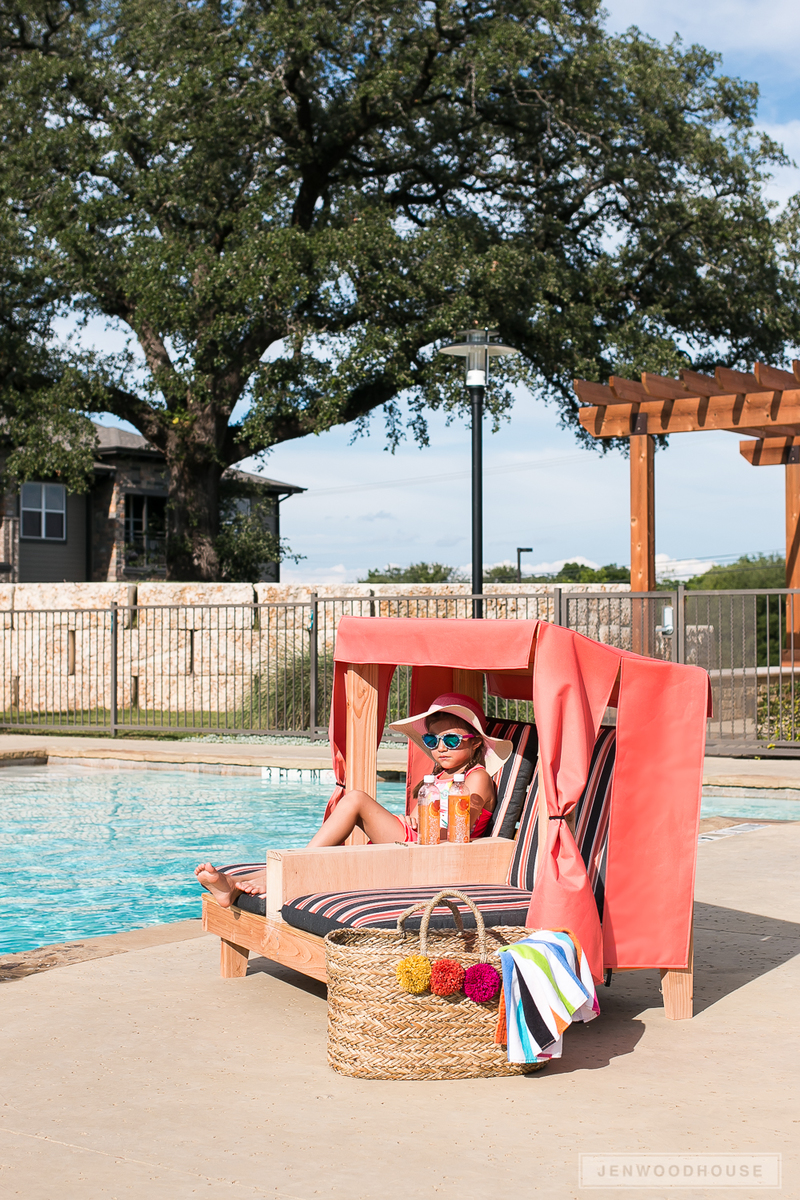
Jen Woodhouse here, sharing this adorable summer project with you! I'm in the mood for all things outdoor, so I thought I'd share this build I created last year. This Kids Outdoor Double Lounge Chair made my kiddos so happy. They spend a ton of time at the pool and this Lounge Chair offers them a little bit of shade, and cup holders too for their drinks!
Be sure to tag me @jenwoodhouse if you share photos of your build on social media.
You can get all the details and the plans for this build on JenWoodhouse.com!
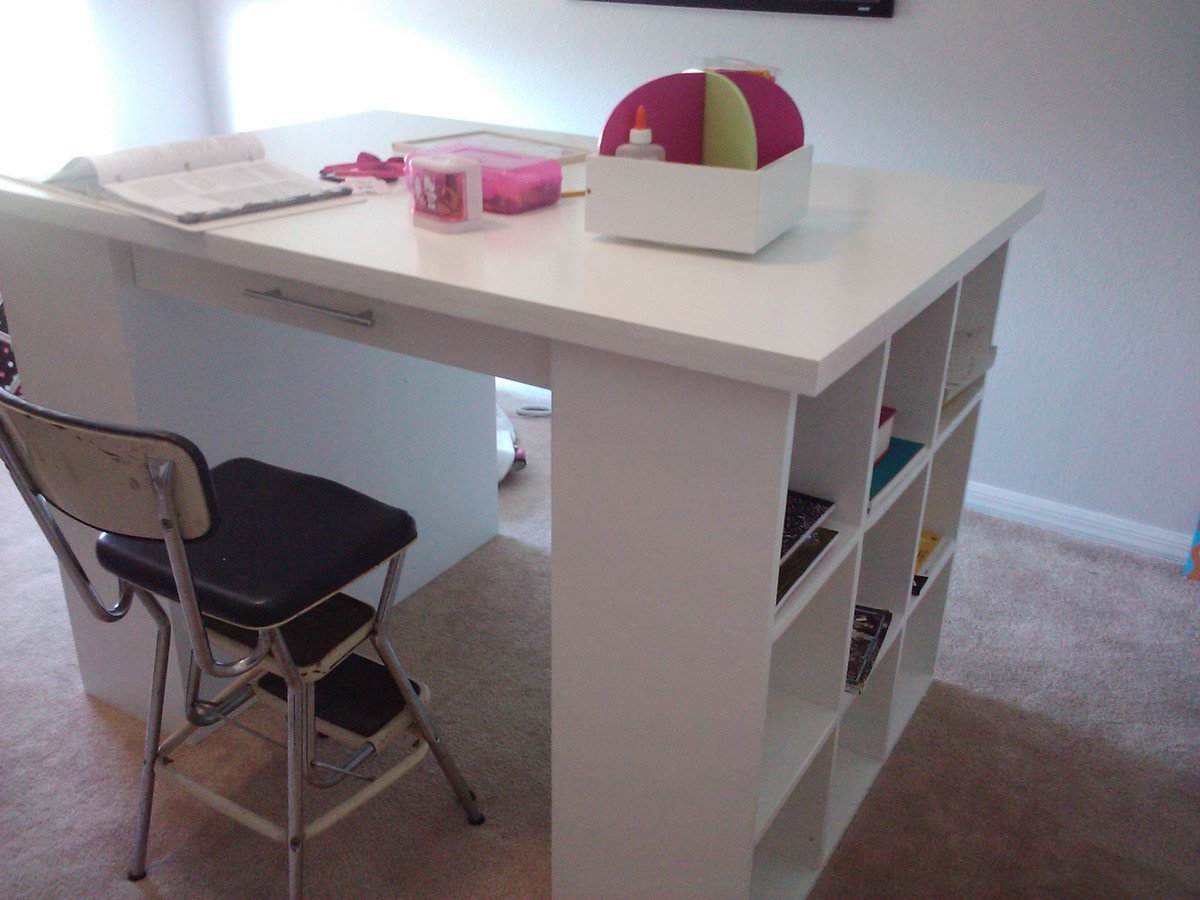
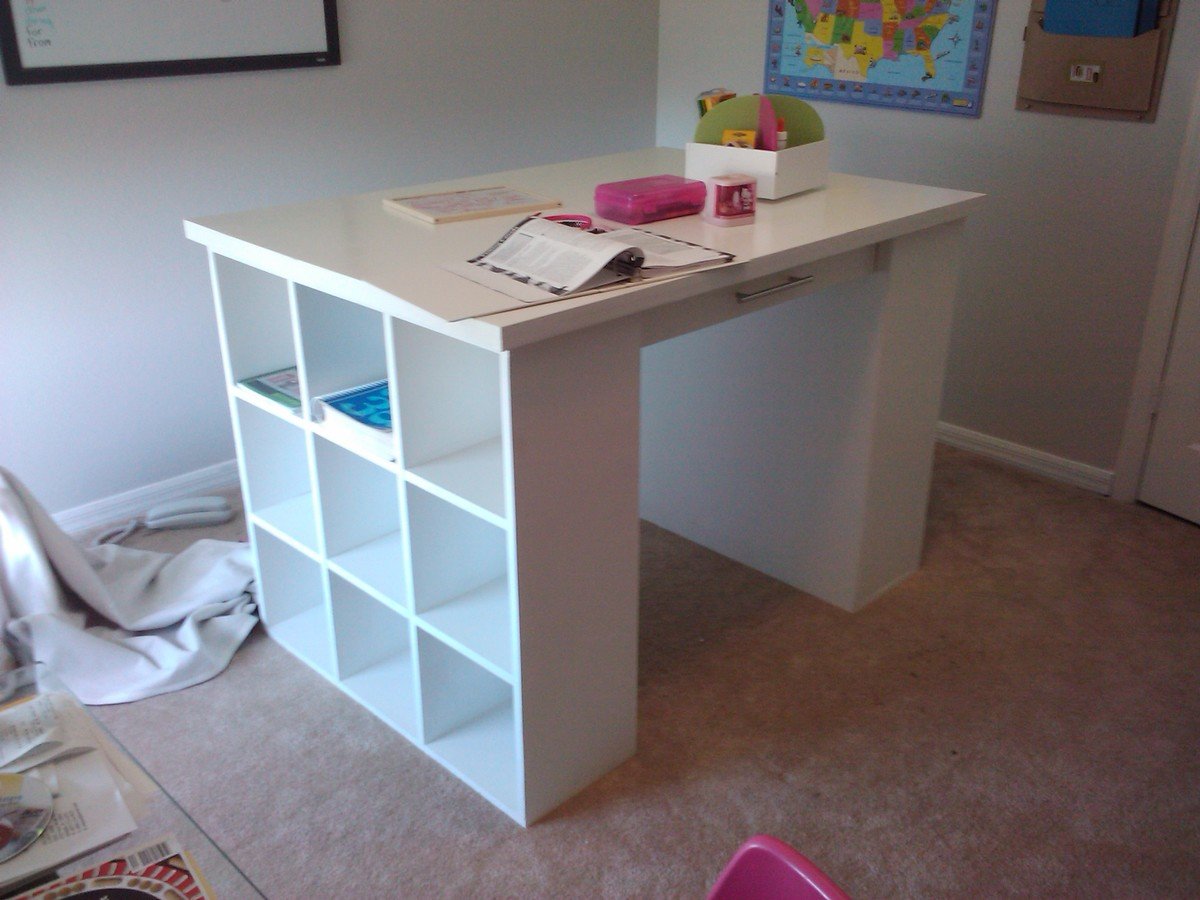
This is the first project that i completed. I made a few minor changes. I used a Kreg jig to fix the shelves into the book cases. I also wanted the top of the desk to be thicker so i glued and screwed two pieces of 3/4 hardwood ply together and finished the edges. I then added heavy drawer slides to handle the drawers as i had made them larger.
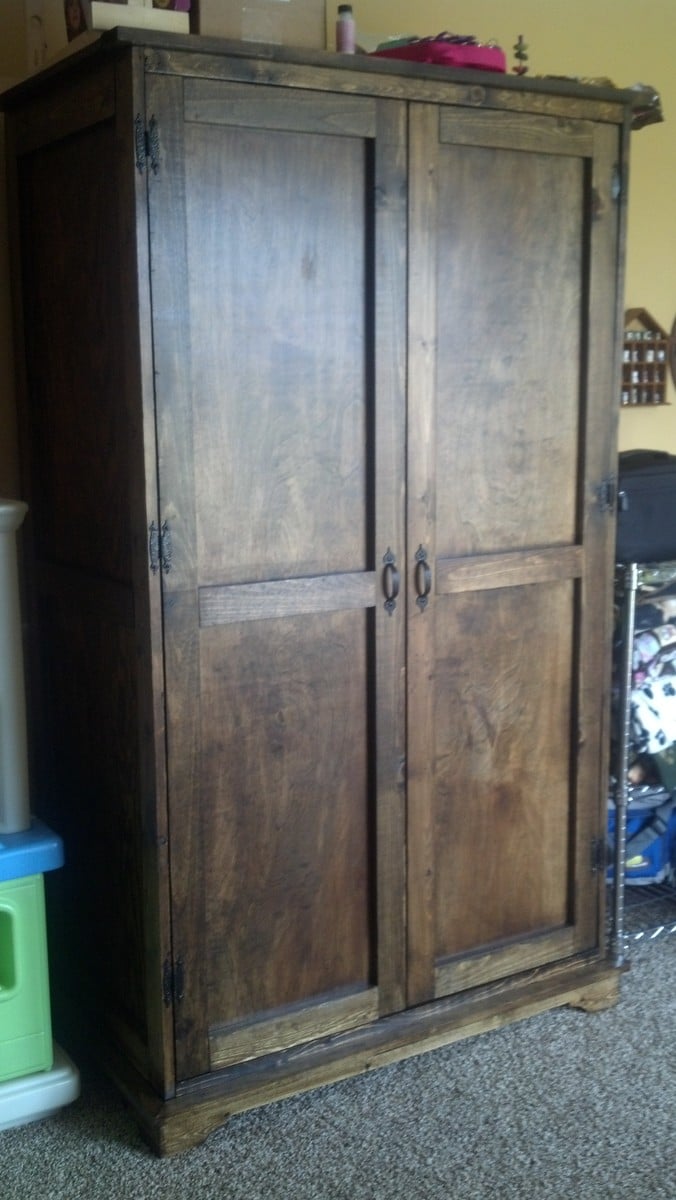
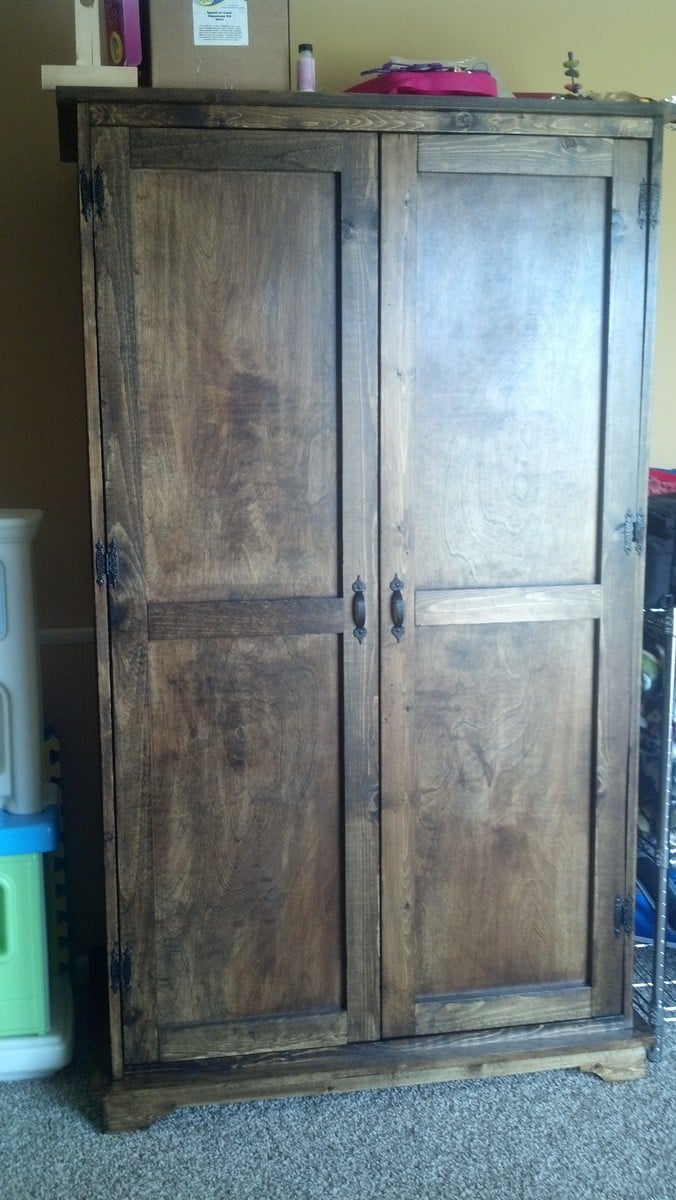
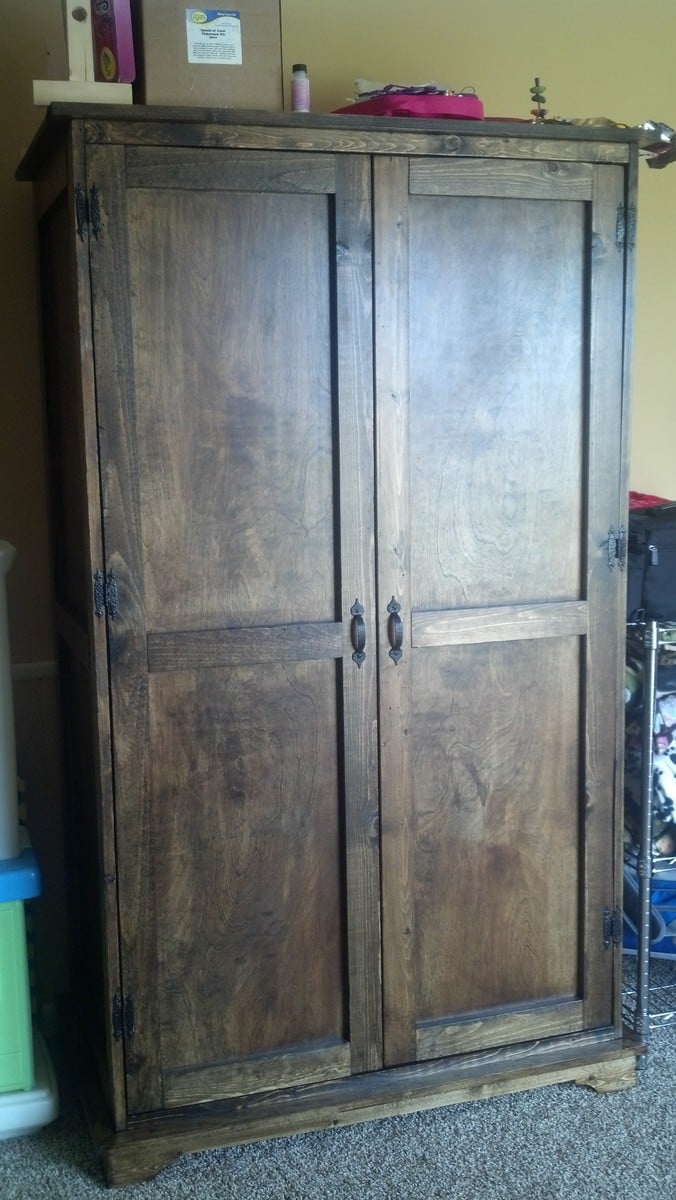
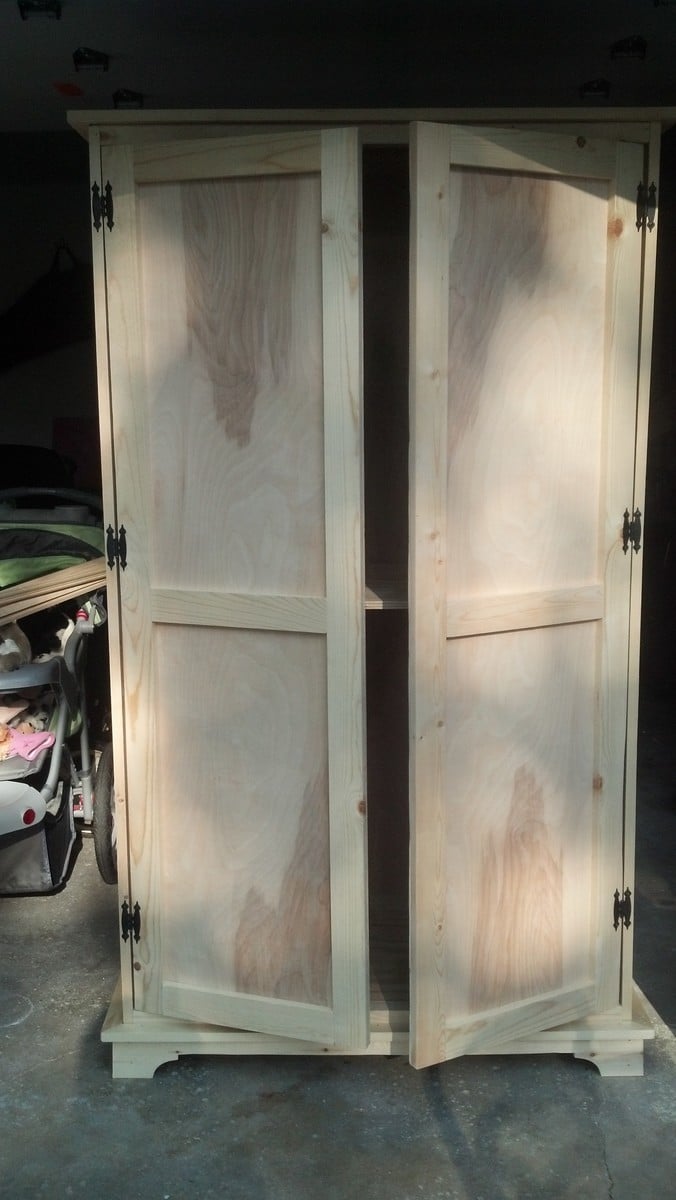
I adjusted the height of the armoire to 72 inches. It was a little tricky getting the doors to hang straight. I blame the new driveway; we just moved into a new house with a sloped driveway (our old one was super flat). I got the hardware at Lowe's. I also added a block of wood at the top, on the inside, to mount the door catches. I mounted them on the top and bottom on both doors, so four catches total. That really helped with the way the doors looked when closed.
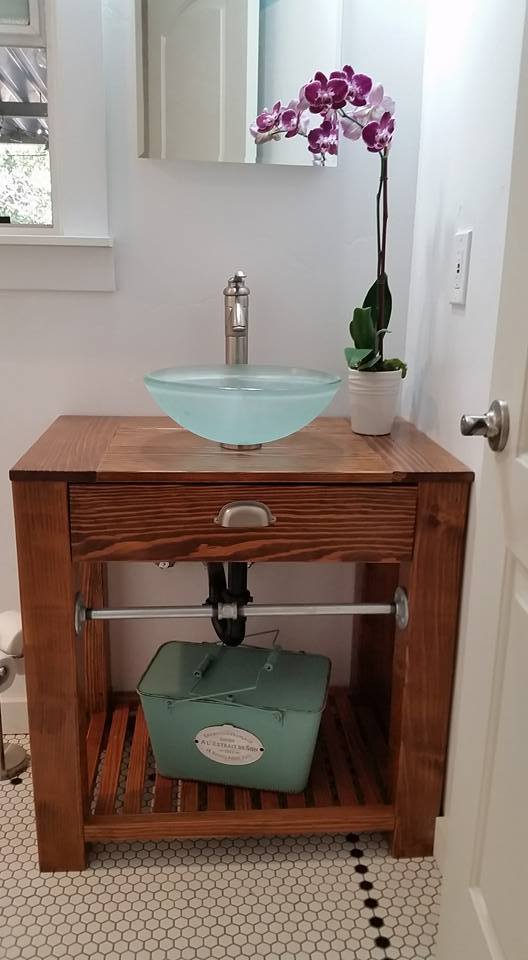
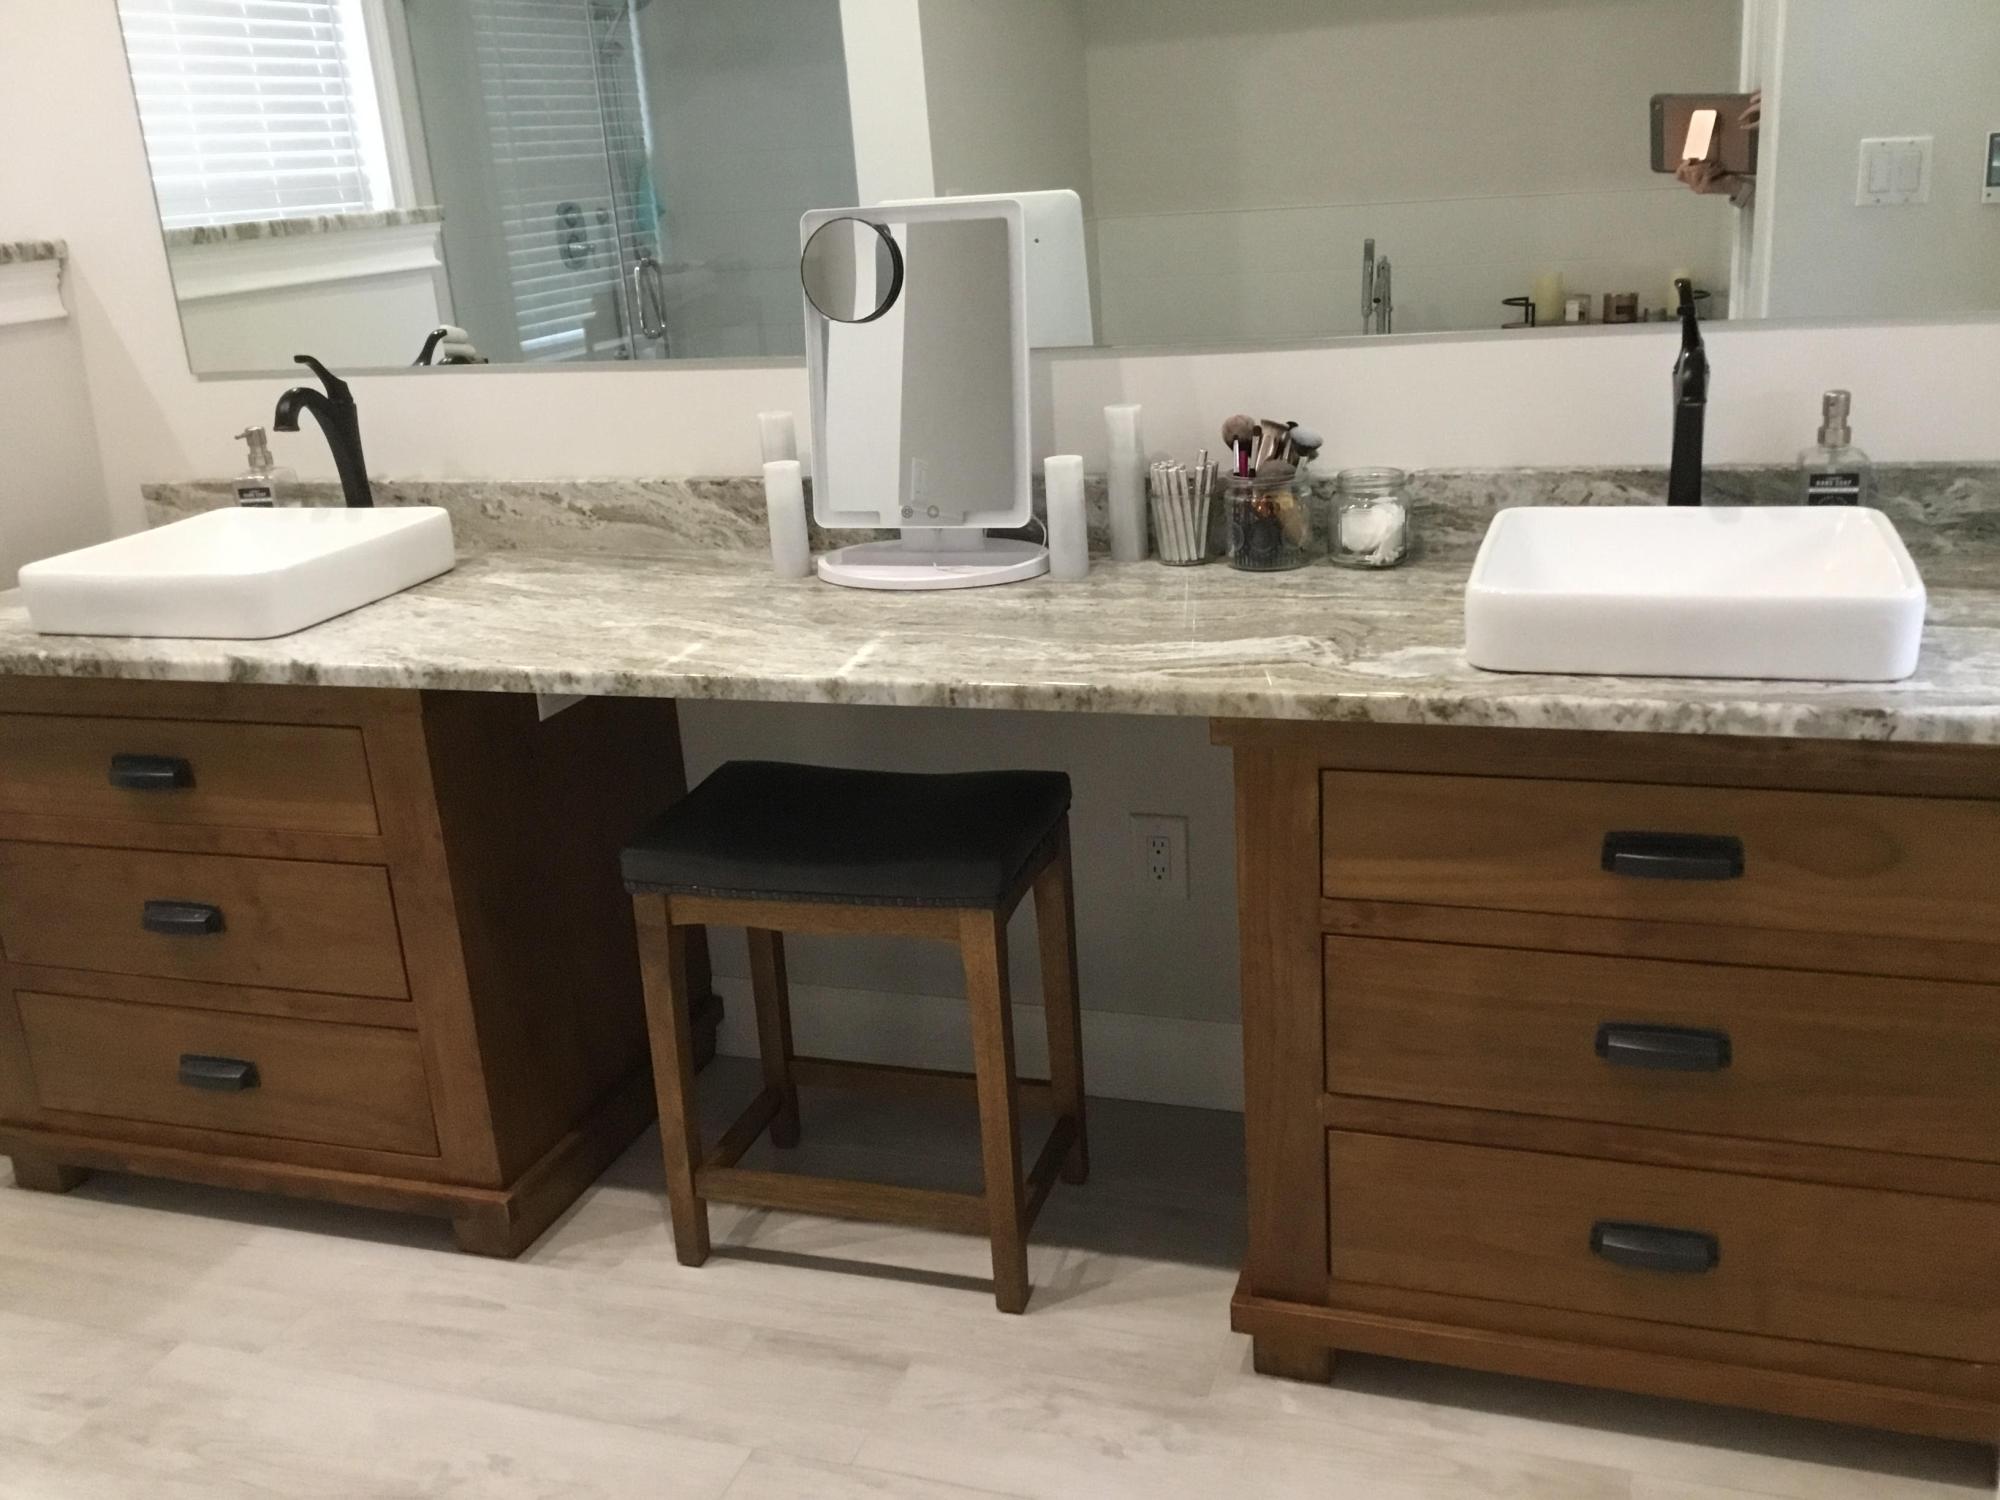
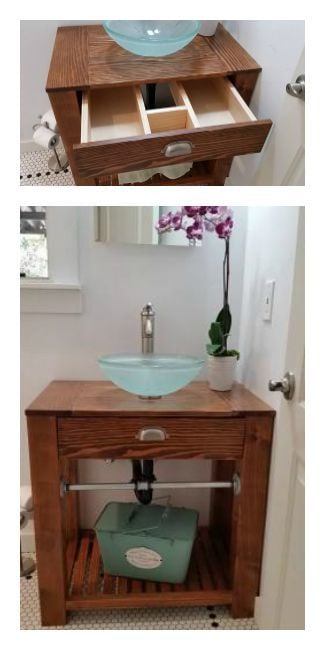
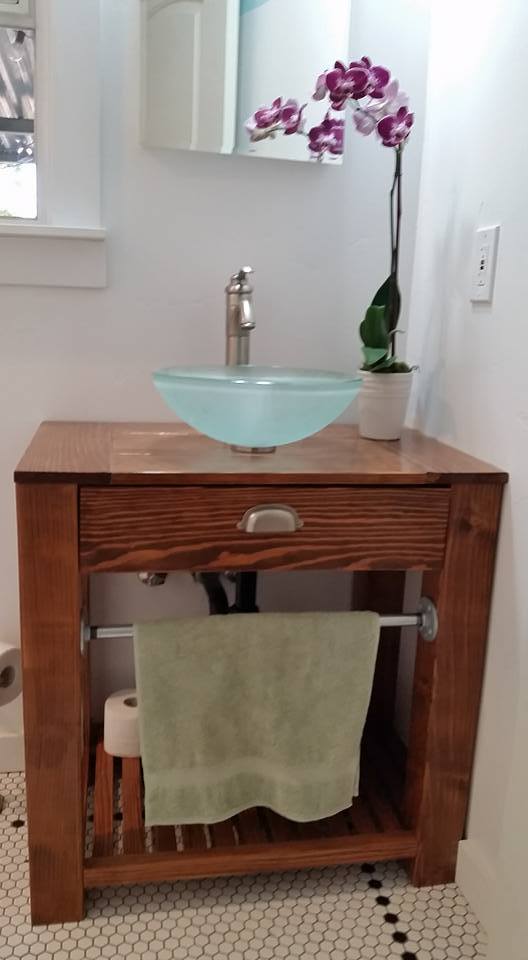
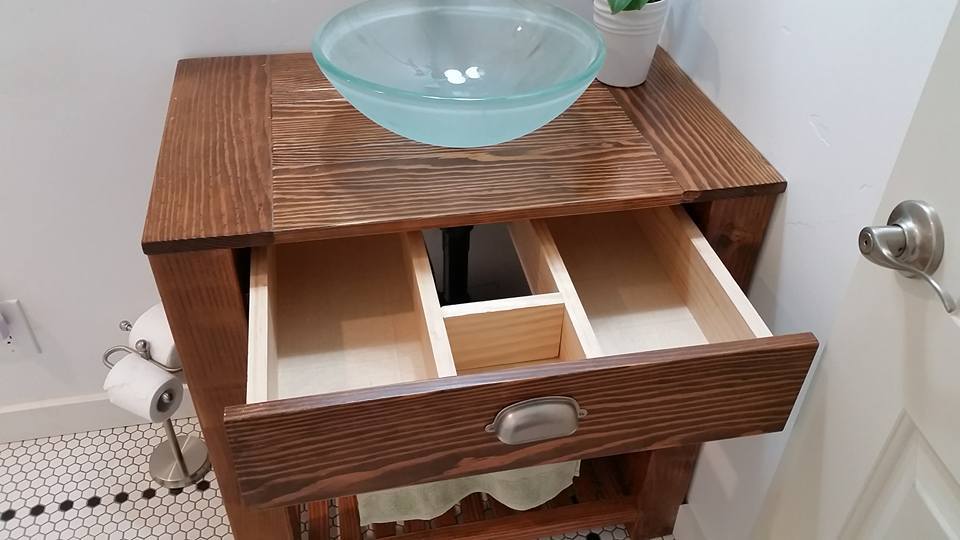
I have only one small bathroom in my house built in 1946. I couldn't find a vanity on the market that was big enough or small enough to fit, so I built my own based on a design from the Decor and the Dog blog page.
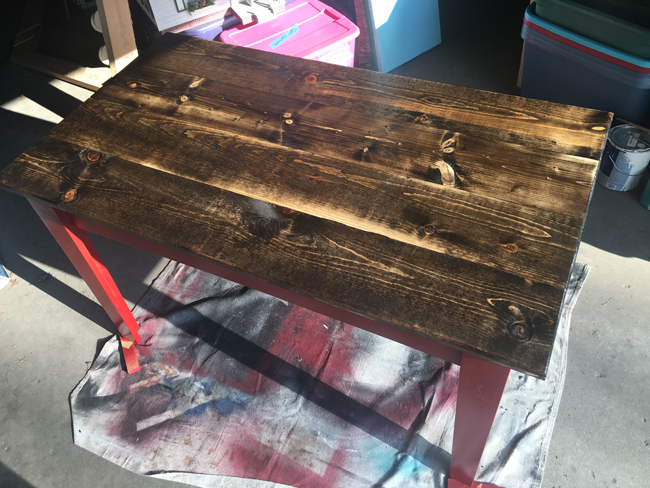
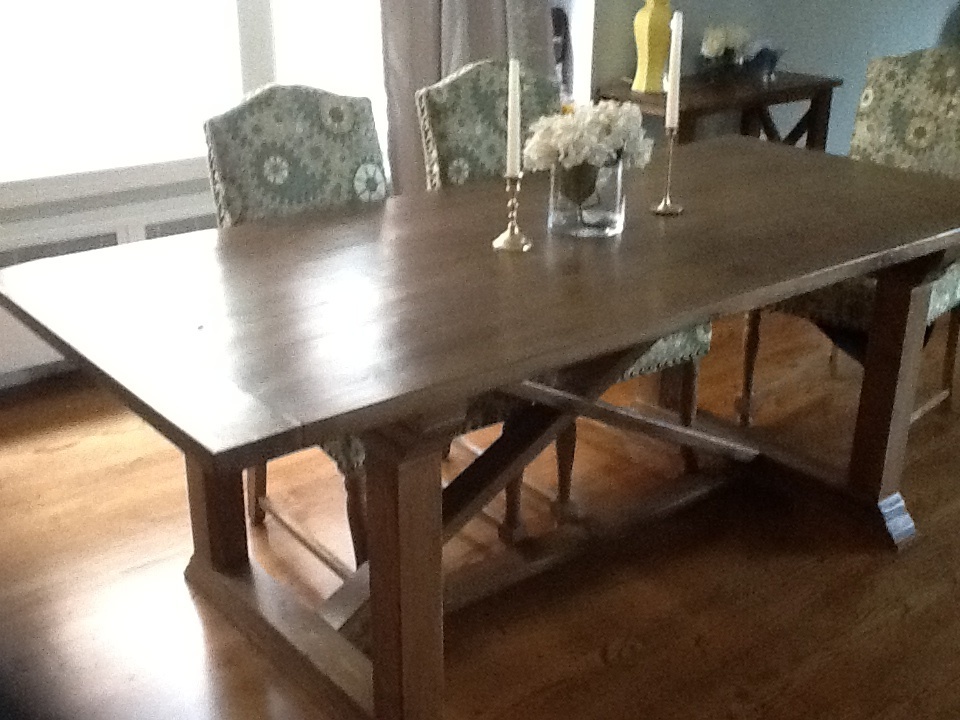
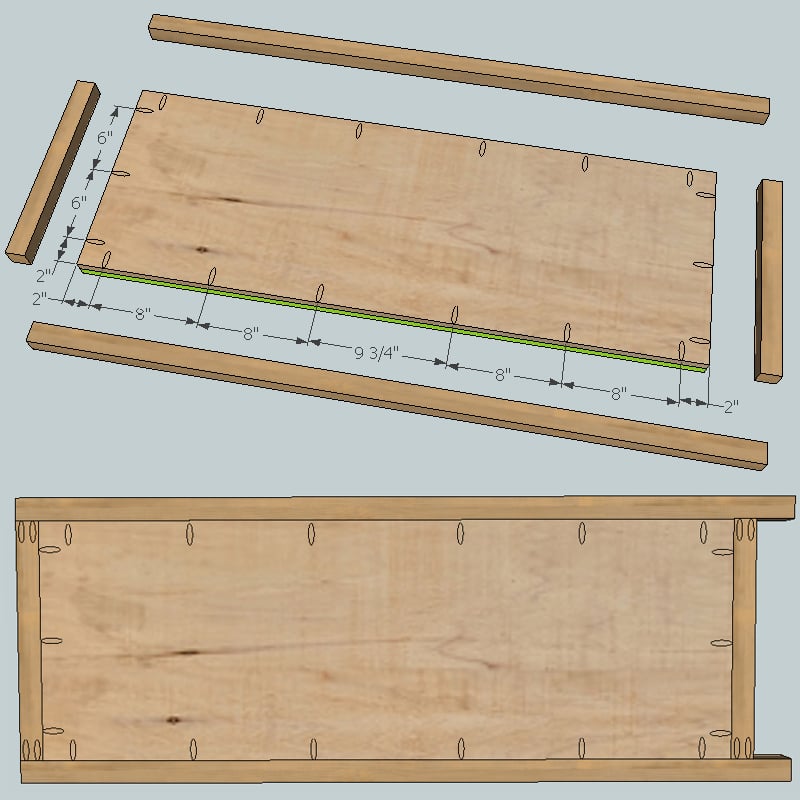
This is my take on the Narrow Farm House Table. Only Fifty-two inches by thirty-two Finished with a flat red base and Jacobean stained top with an over coat of oil based polyurethane. If I were to do this project again I would consider cutting in an arc on the long side stretcher. I did taper the legs in both directions so it dosen’t appear to be too chunky. Corner braces were installed and I didn’t add a stretcher since the overall length was shortened.
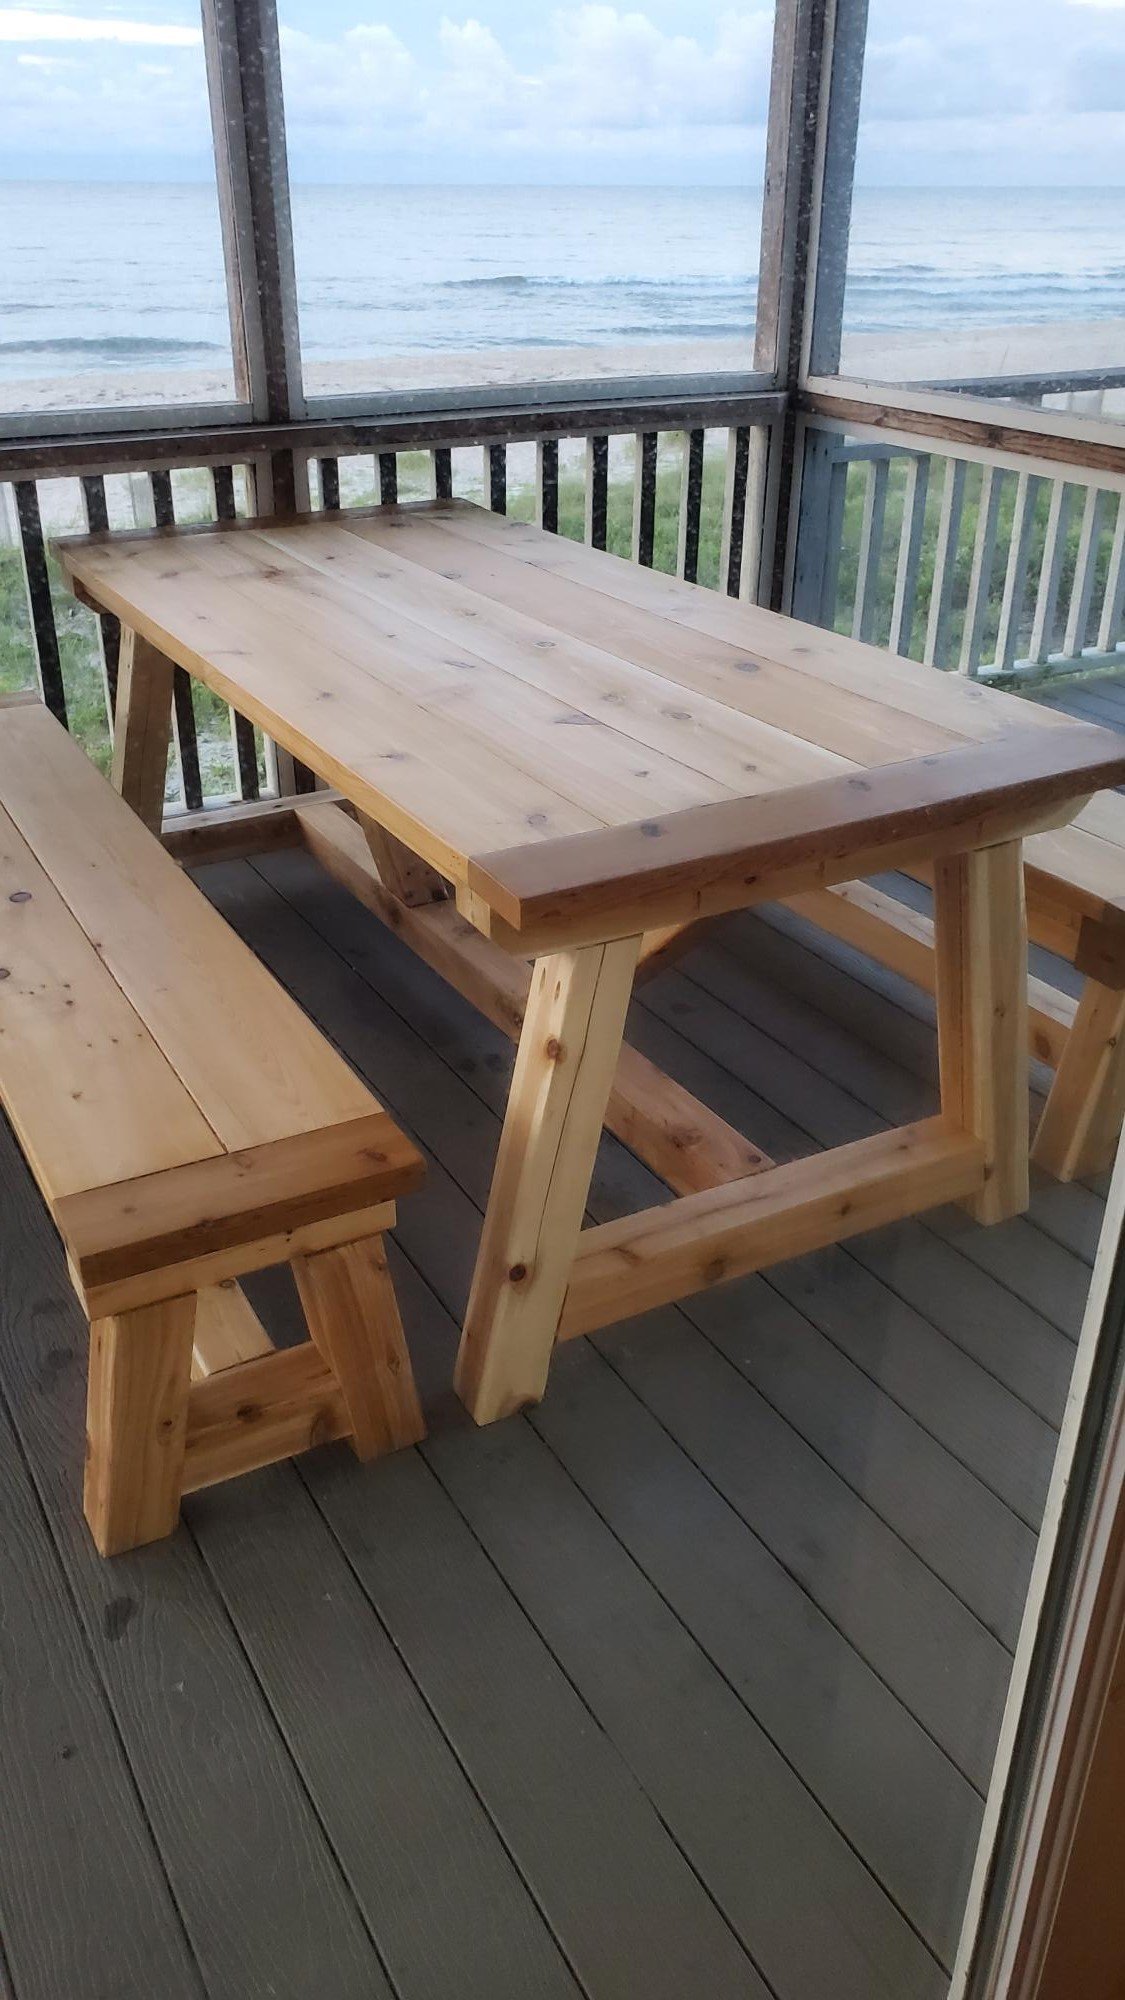
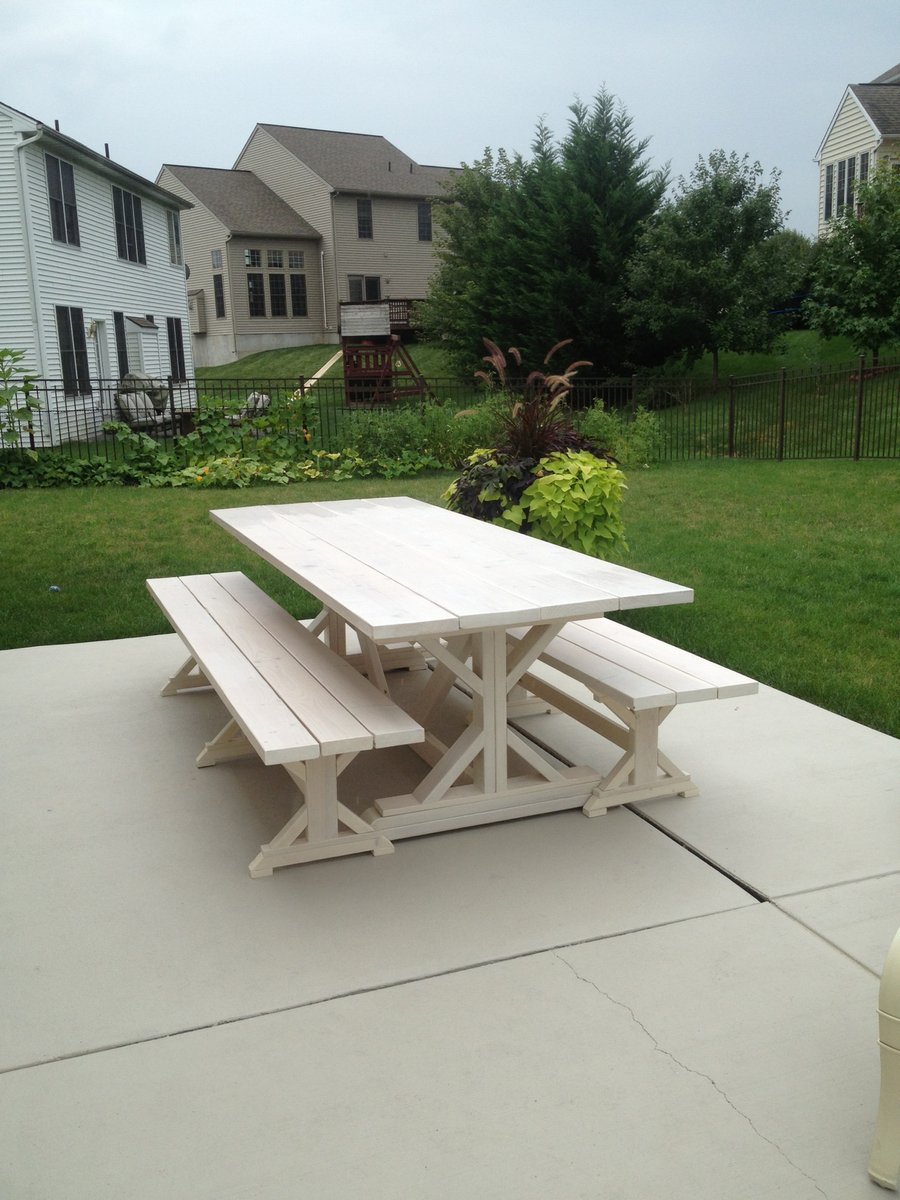
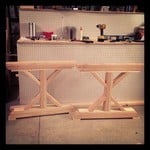
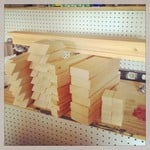
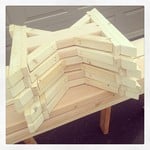
I used the trestle table and benches plans to make a cedar picnic table...
by Joe
I fell in love with the Farmhouse bed after seeing Ana's bed on this site and just knew I had to make it. I'll preface this by noting that neither my husband or myself are builders or even owned any tools with the exception of an 18 volt drill. After building this bed, we went out and bought everything we need to build more pieces from Ana's collection of plans :) This project was very fun, forgiving, and the finished bed is absolutely beautiful.
I do have a few notes that would hopefully help people build this in the future. Hopefully you are reading this.
1) As Ana suggested, read ALL of the Farmhouse plans thoroughly, including the comments! Each of the plans are slightly different and might have a modification that would better suit you (I wish I had built the frame using the Fancy Farmhouse Bed. The way you assemble it makes it 7 inches narrower which would have been nice in our small room). There are also very valuable tips in the reader comments, so read those!
2) Read as many brag posts as you can. I saw that one lady used joist hangers for her support beams and side rail brackets so that the bed could be disassembled some day. That's what I did and I'm so, so glad that I did. You can find her post by googling "joist hanger + Ana White."
3) 4.5" screws are hard to find. I wont say impossible since some people did find them. If you use the new method for the posts of using 2x4s, you wont need the 4.5" screws. If you are using 4x4s, like I did, use lag bolts. I think the lag bolts will be more sturdy in the end anyway.
4) I should have made this item #1. In regards to the King size headboard plans, Ana has her mattress turned sideways and posted plans for a bed 80" wide. Since I did not thoroughly read Ana's notes, I missed that bit of important information and made my headboard 80" wide. Oops. Well, like I said earlier, this is a VERY forgiving plan. We just put the side rails on the inside of the 4x4 posts and added a .5 plywood scab to the inside of the side rails before we installed the joist hangers and that solved the problem. 80"-1.5"-1.5"-.5"-.5"= 76"! Since our bed is a platform bed, it worked out perfectly... just a little wider than it needed to be, but no one can tell the difference.
5) You actually need (5) 1x8 boards. I believe someone also posted that in the comments under the king farmhouse headboard plans. You also need (24) 4.5" screws or lag bolts, the plans only call for 20. (Ana calls for 6 per leg @ 4 legs = 24.
6) Really be sure of how high you want your bed before putting it together. Ours came out a little high, and if we wanted to, we could have cut the posts on the headboard a little shorter and mounted the side rails lower, but we just wanted to get the bed done. There is a lot of room to customize things in this plan so be sure to think everything out.
I think that’s it for now. If you have any questions, please let me know. I’d be happy to offer up any information I have learned while making this bed.


Sat, 01/26/2013 - 17:49
I really appreciate reading what you learned and would have done differently. Thanks for posting this!
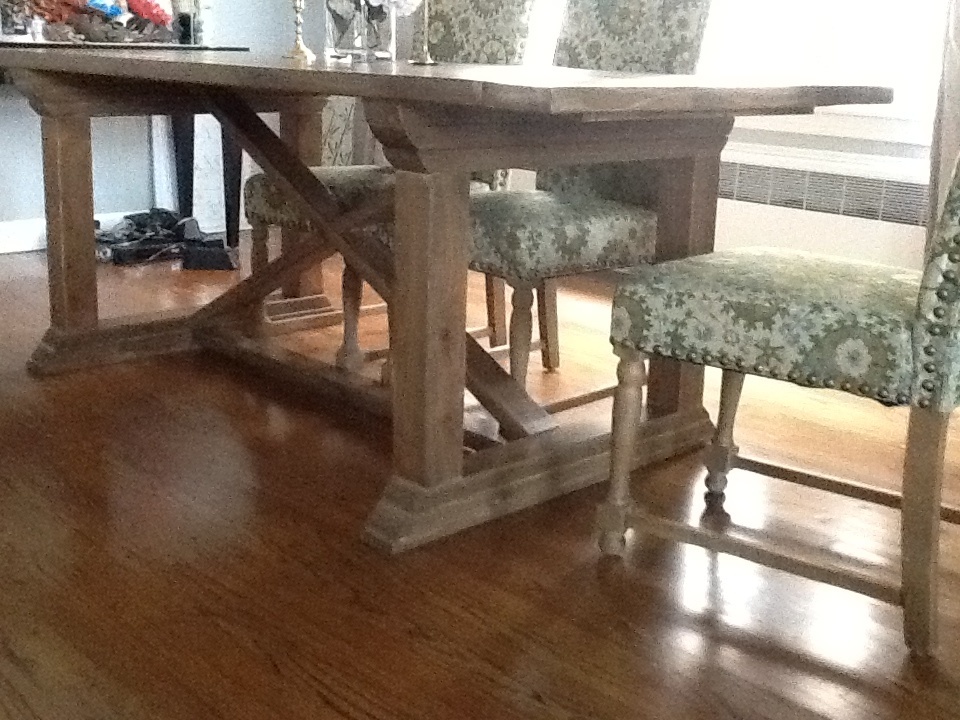
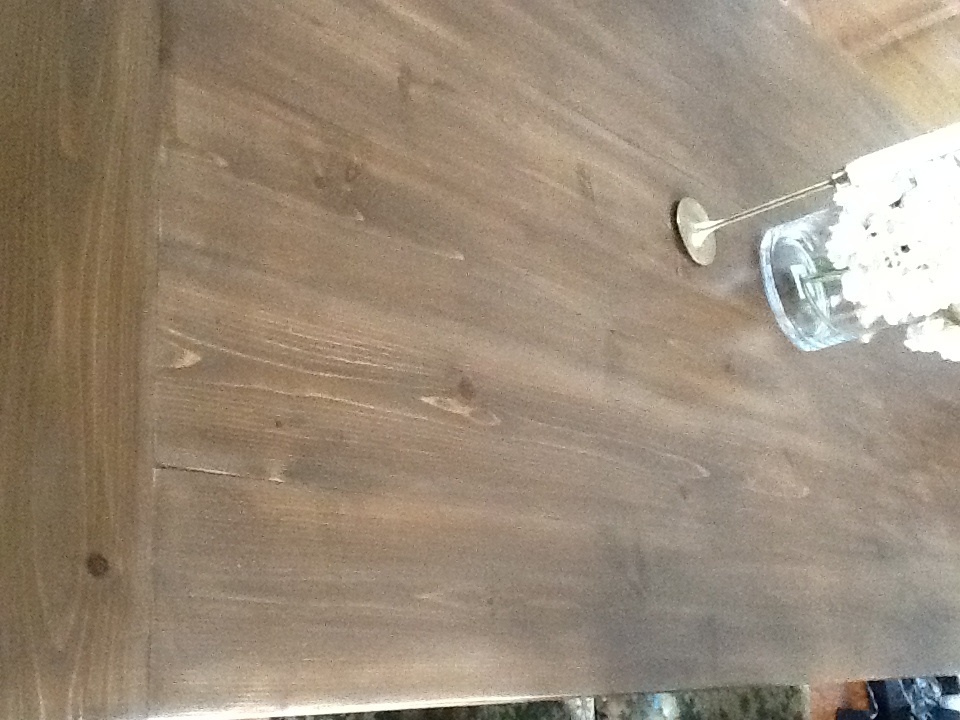
I modified the size for my table a bit to make it smaller
Tue, 09/24/2013 - 15:35
Fancynancy, that tabletop is fantastic! That's something so nice that if I had the money, I would buy it! I was hoping you would share the process you used to get it so smooth. I've done a planked top before and it wasn't nearly as pretty as yours. Thanks for sharing your gorgeous table.
Thu, 09/24/2015 - 20:23
hi fancynancy. i want to know what your modified measurements were on the rekourt table? i can only go to 6' long. width. i am not sure. thx
Sun, 01/22/2017 - 08:38
Hello, I am also curious about the modified rekourt plans. Would love your help/input. Thanks.
Easy-peasy! Painted in a constrating color for a great look on the wall...
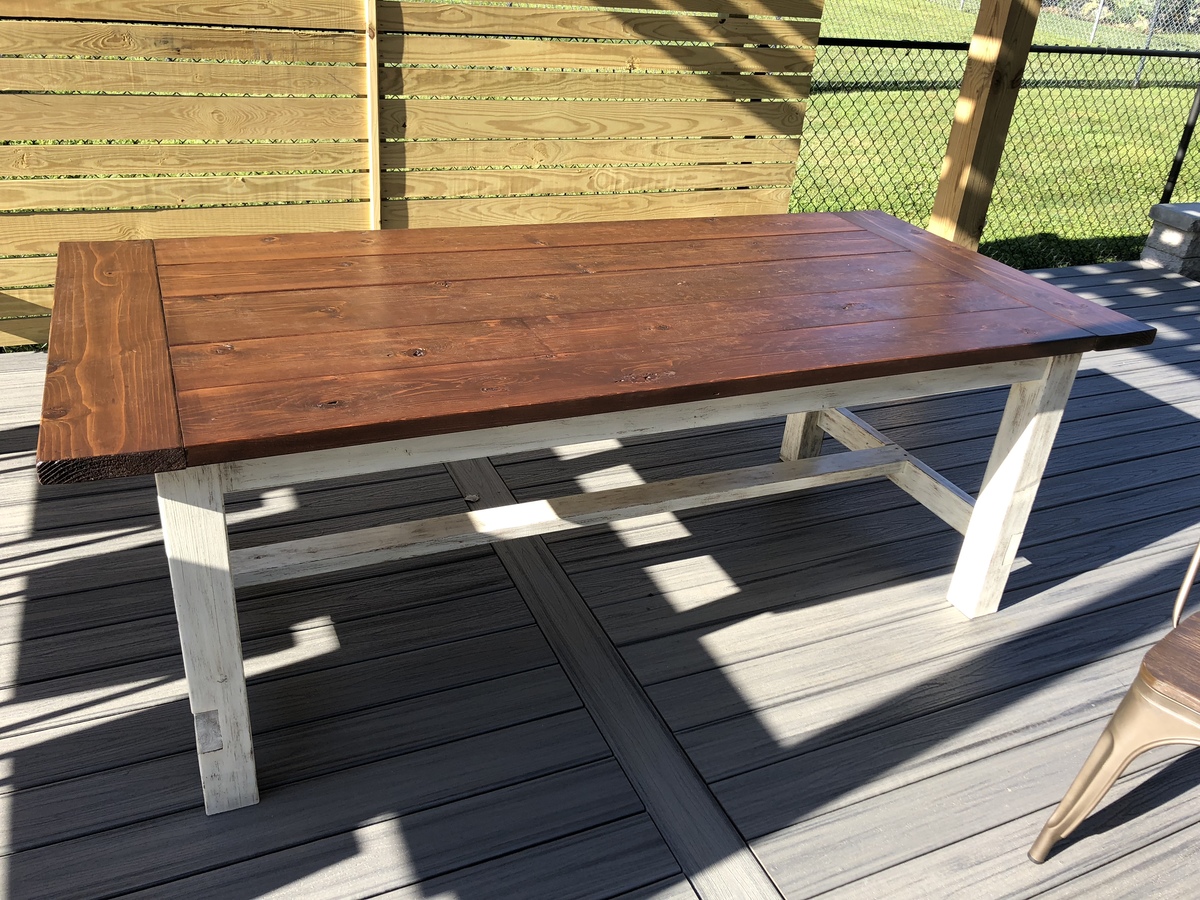
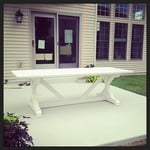
My husband and I built this table from the farmhouse table plans (Kreg-jig). I wanted a farmhouse table for our new patio and couldn’t quit find one to buy-so we made it! We used red cedar because it is an outdoor table and we wanted it weather resistant.
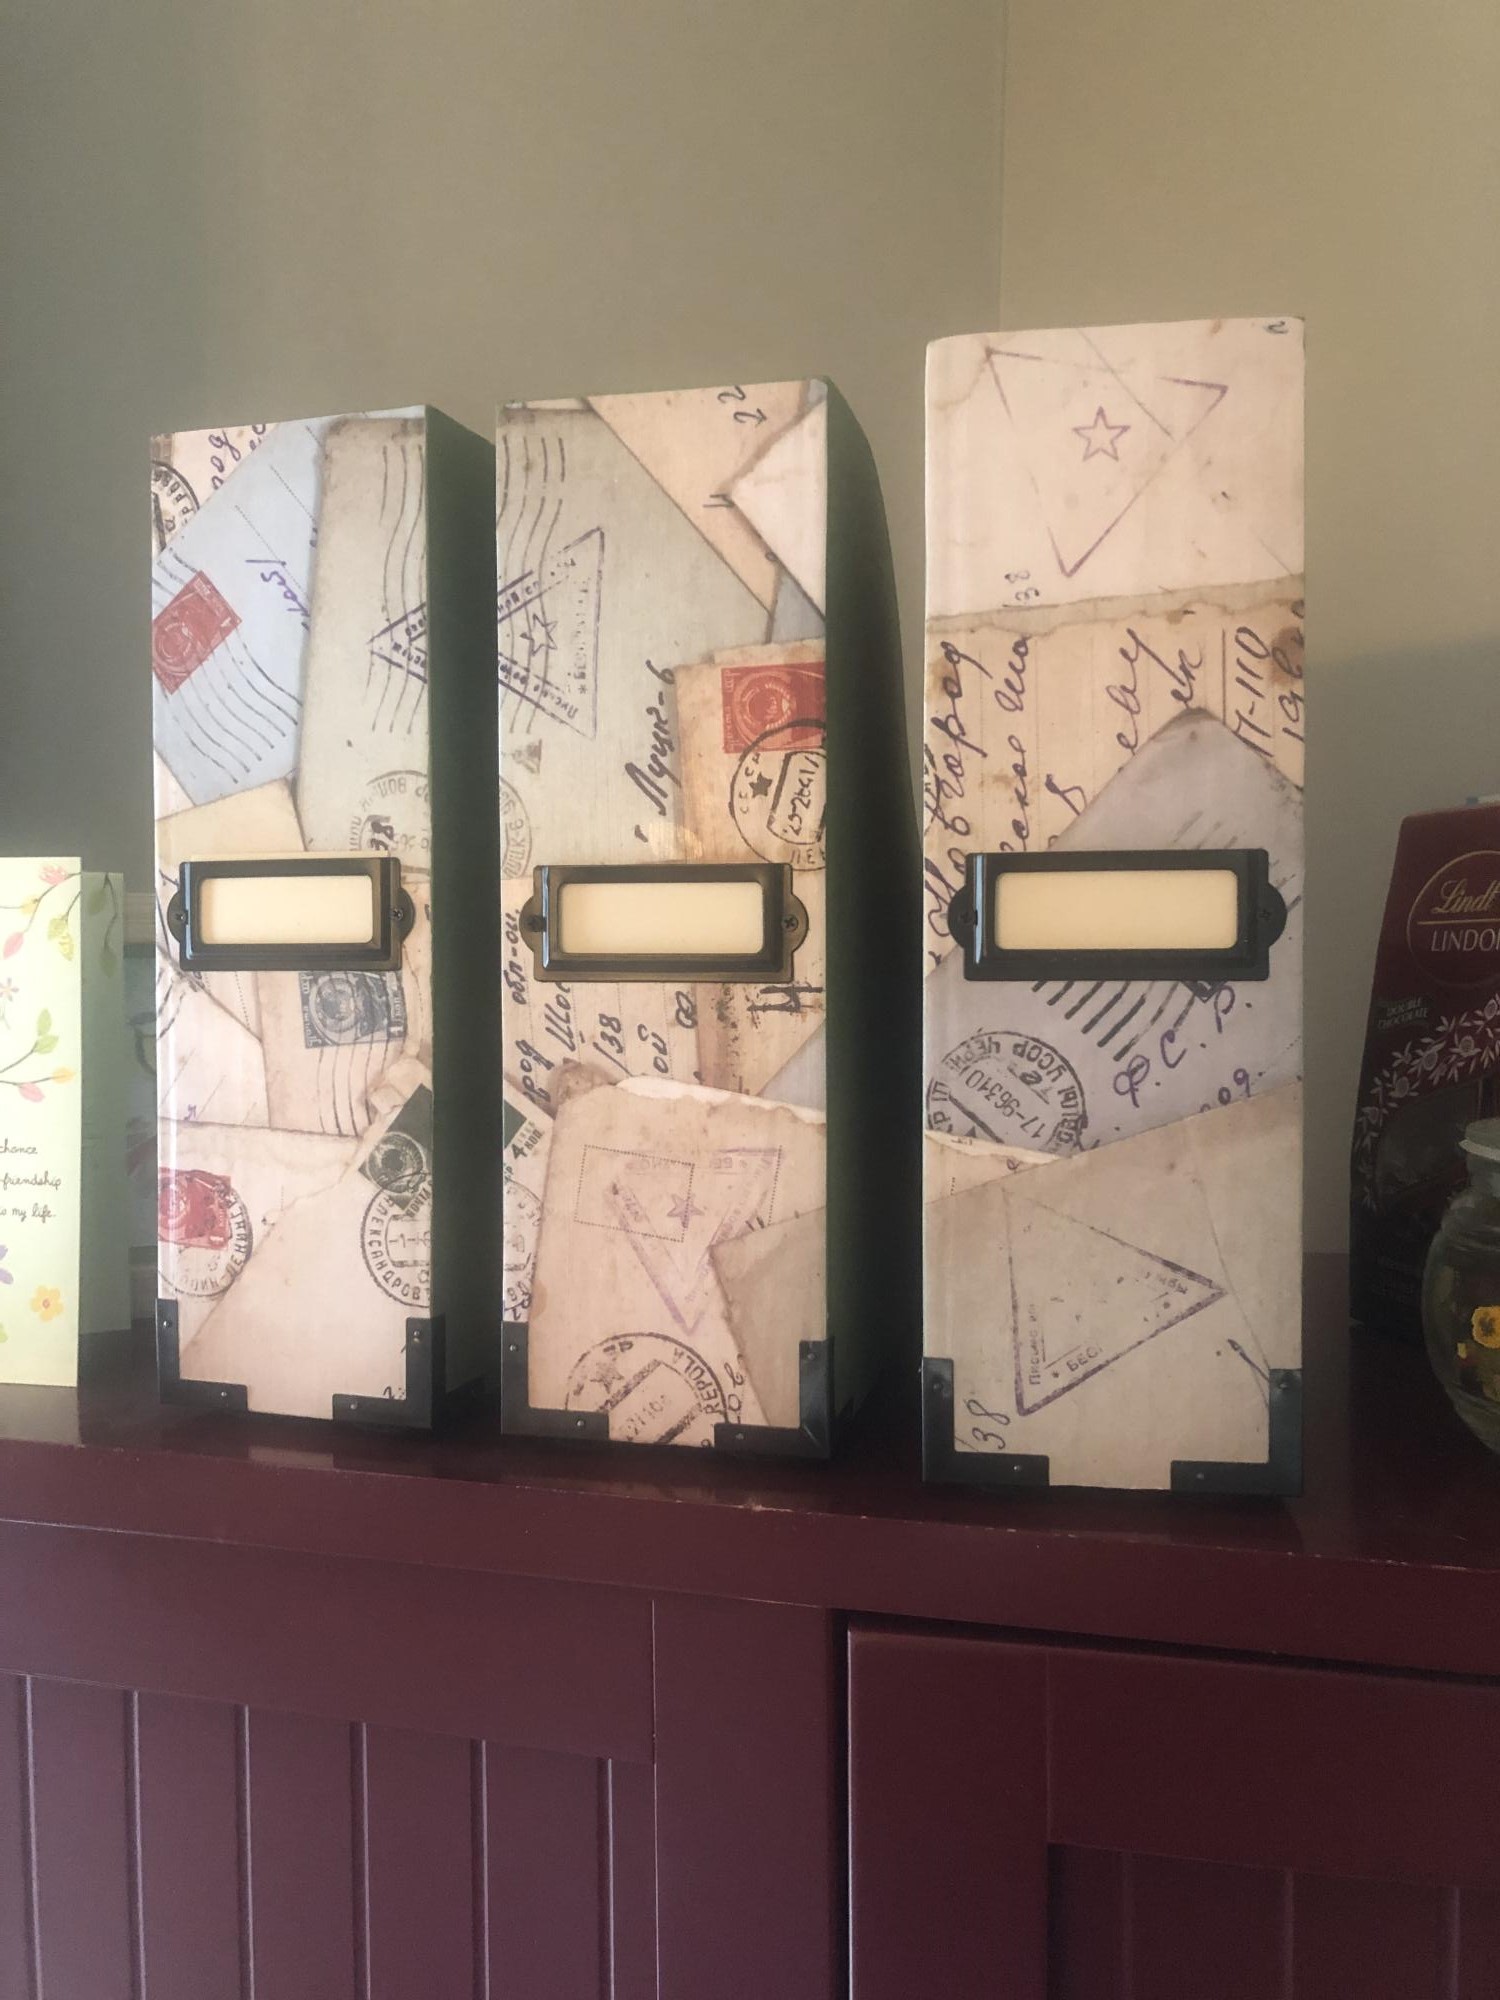
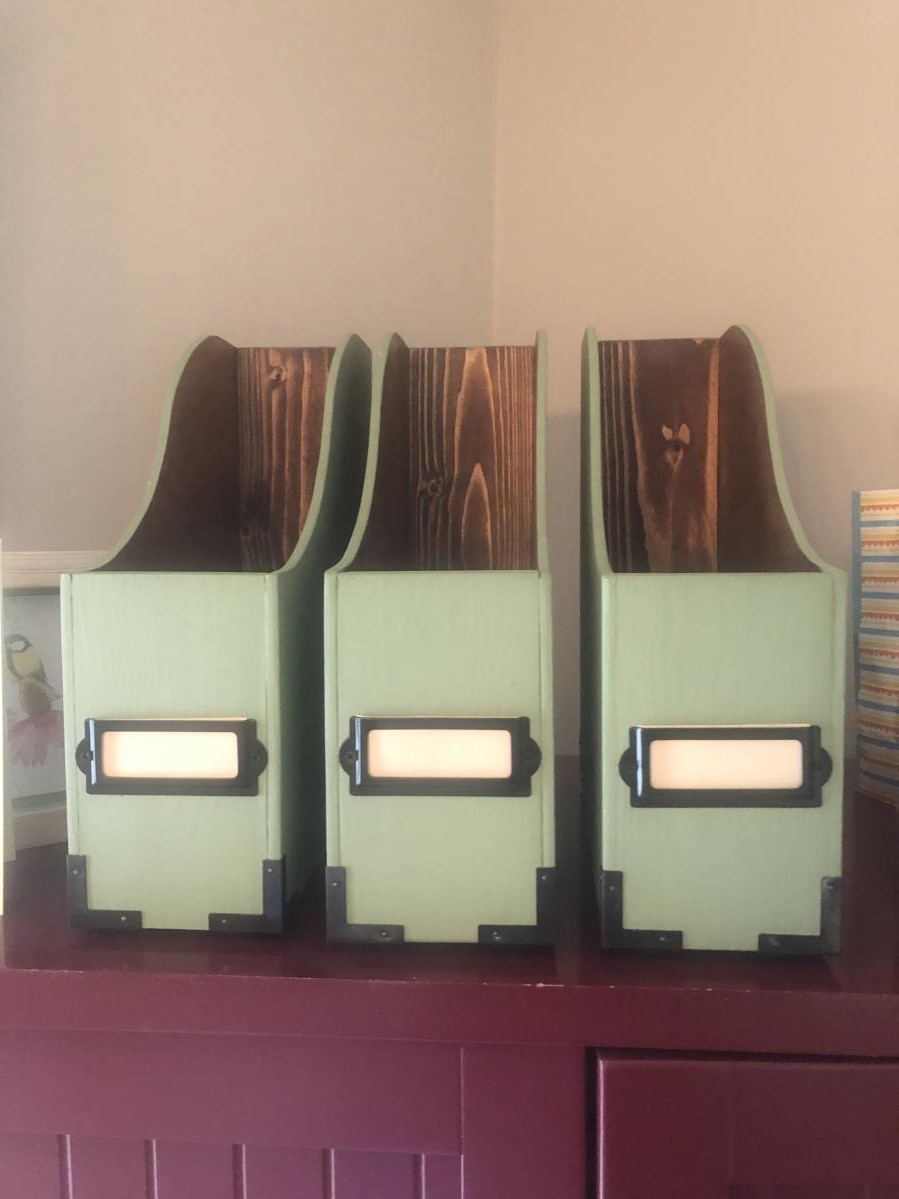
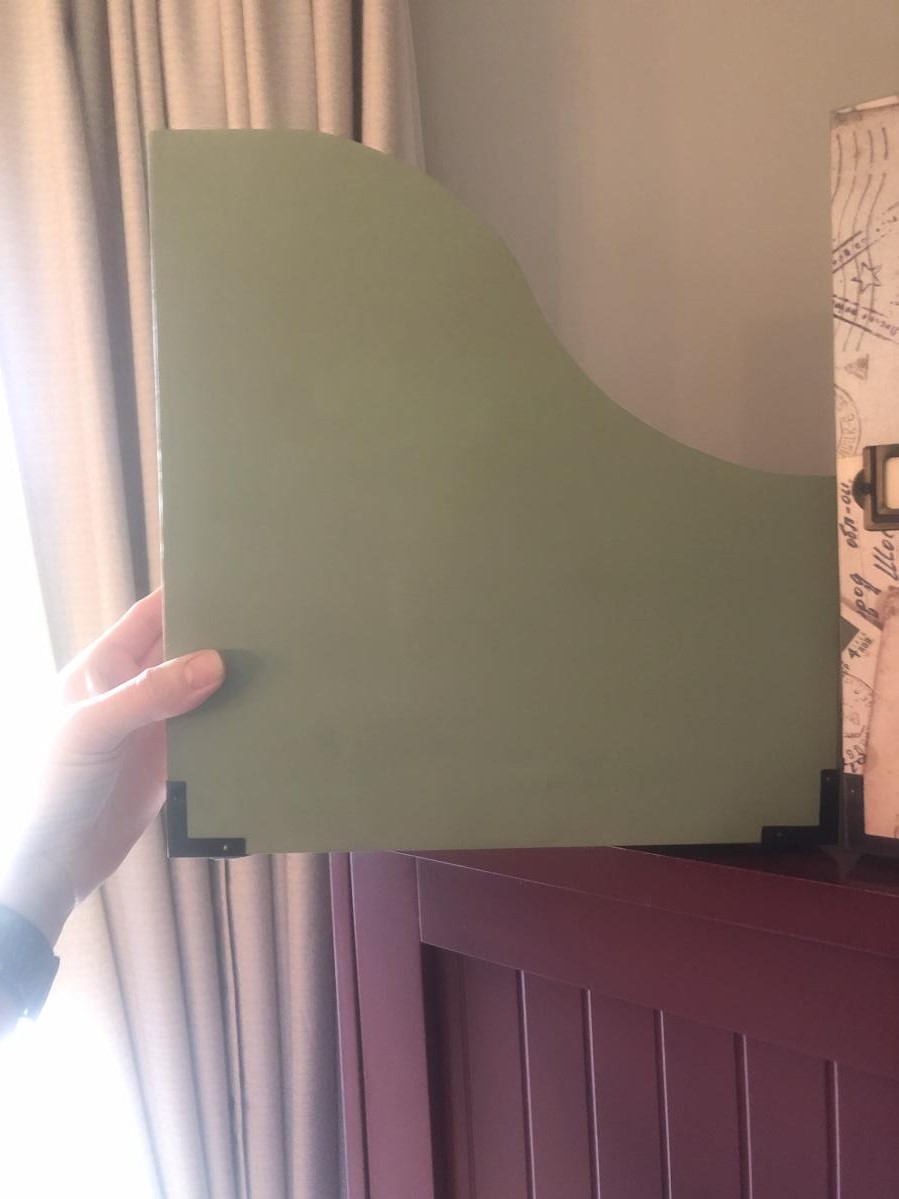
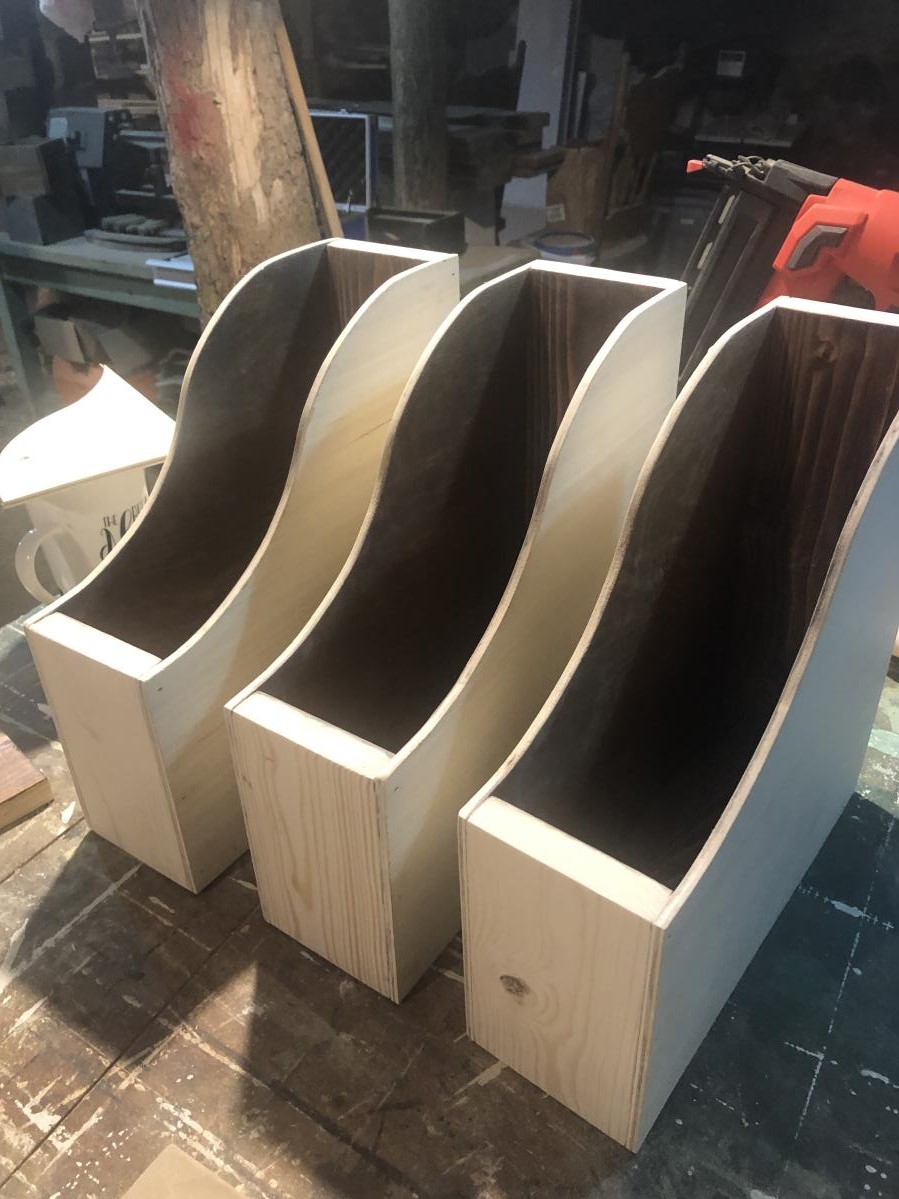
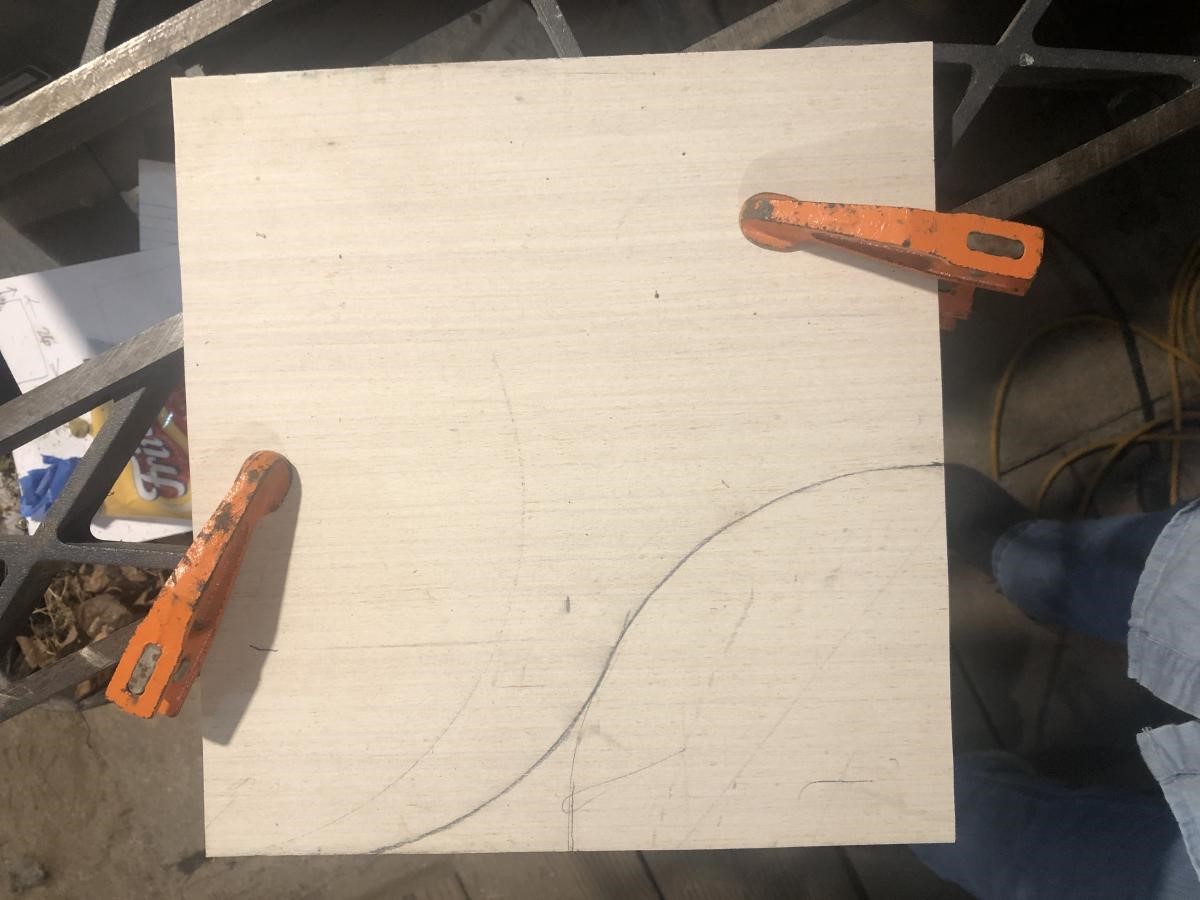
My BFF was looking for magazine holders but refused to pay $10-15 for one made out of cardboard. I told her I could make her some from wood and paint them to match her decor. I found the “letter” paper on Amazon but came in a pack titled Vintage Treasures. I decided to do an S curve on the sides to make it a little more fancy. I can’t wait to give these to her! Thanks for the inspiration, Ana!
Wed, 05/04/2022 - 12:22
Great job, your friend is going to love them! Thanks for sharing.