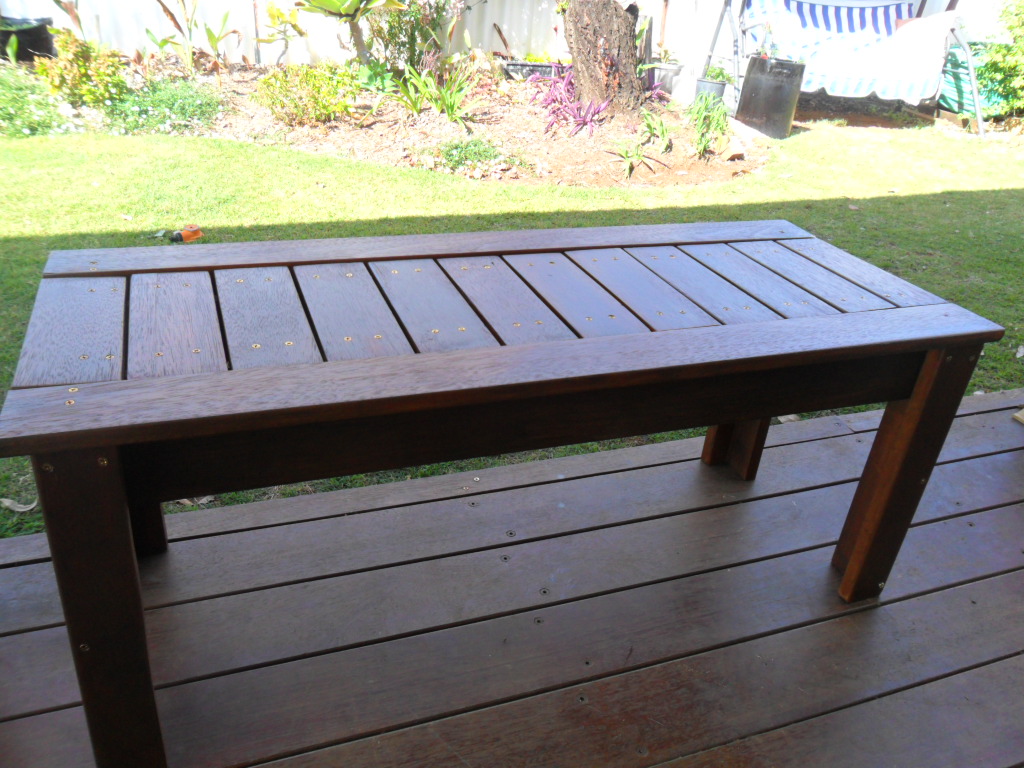
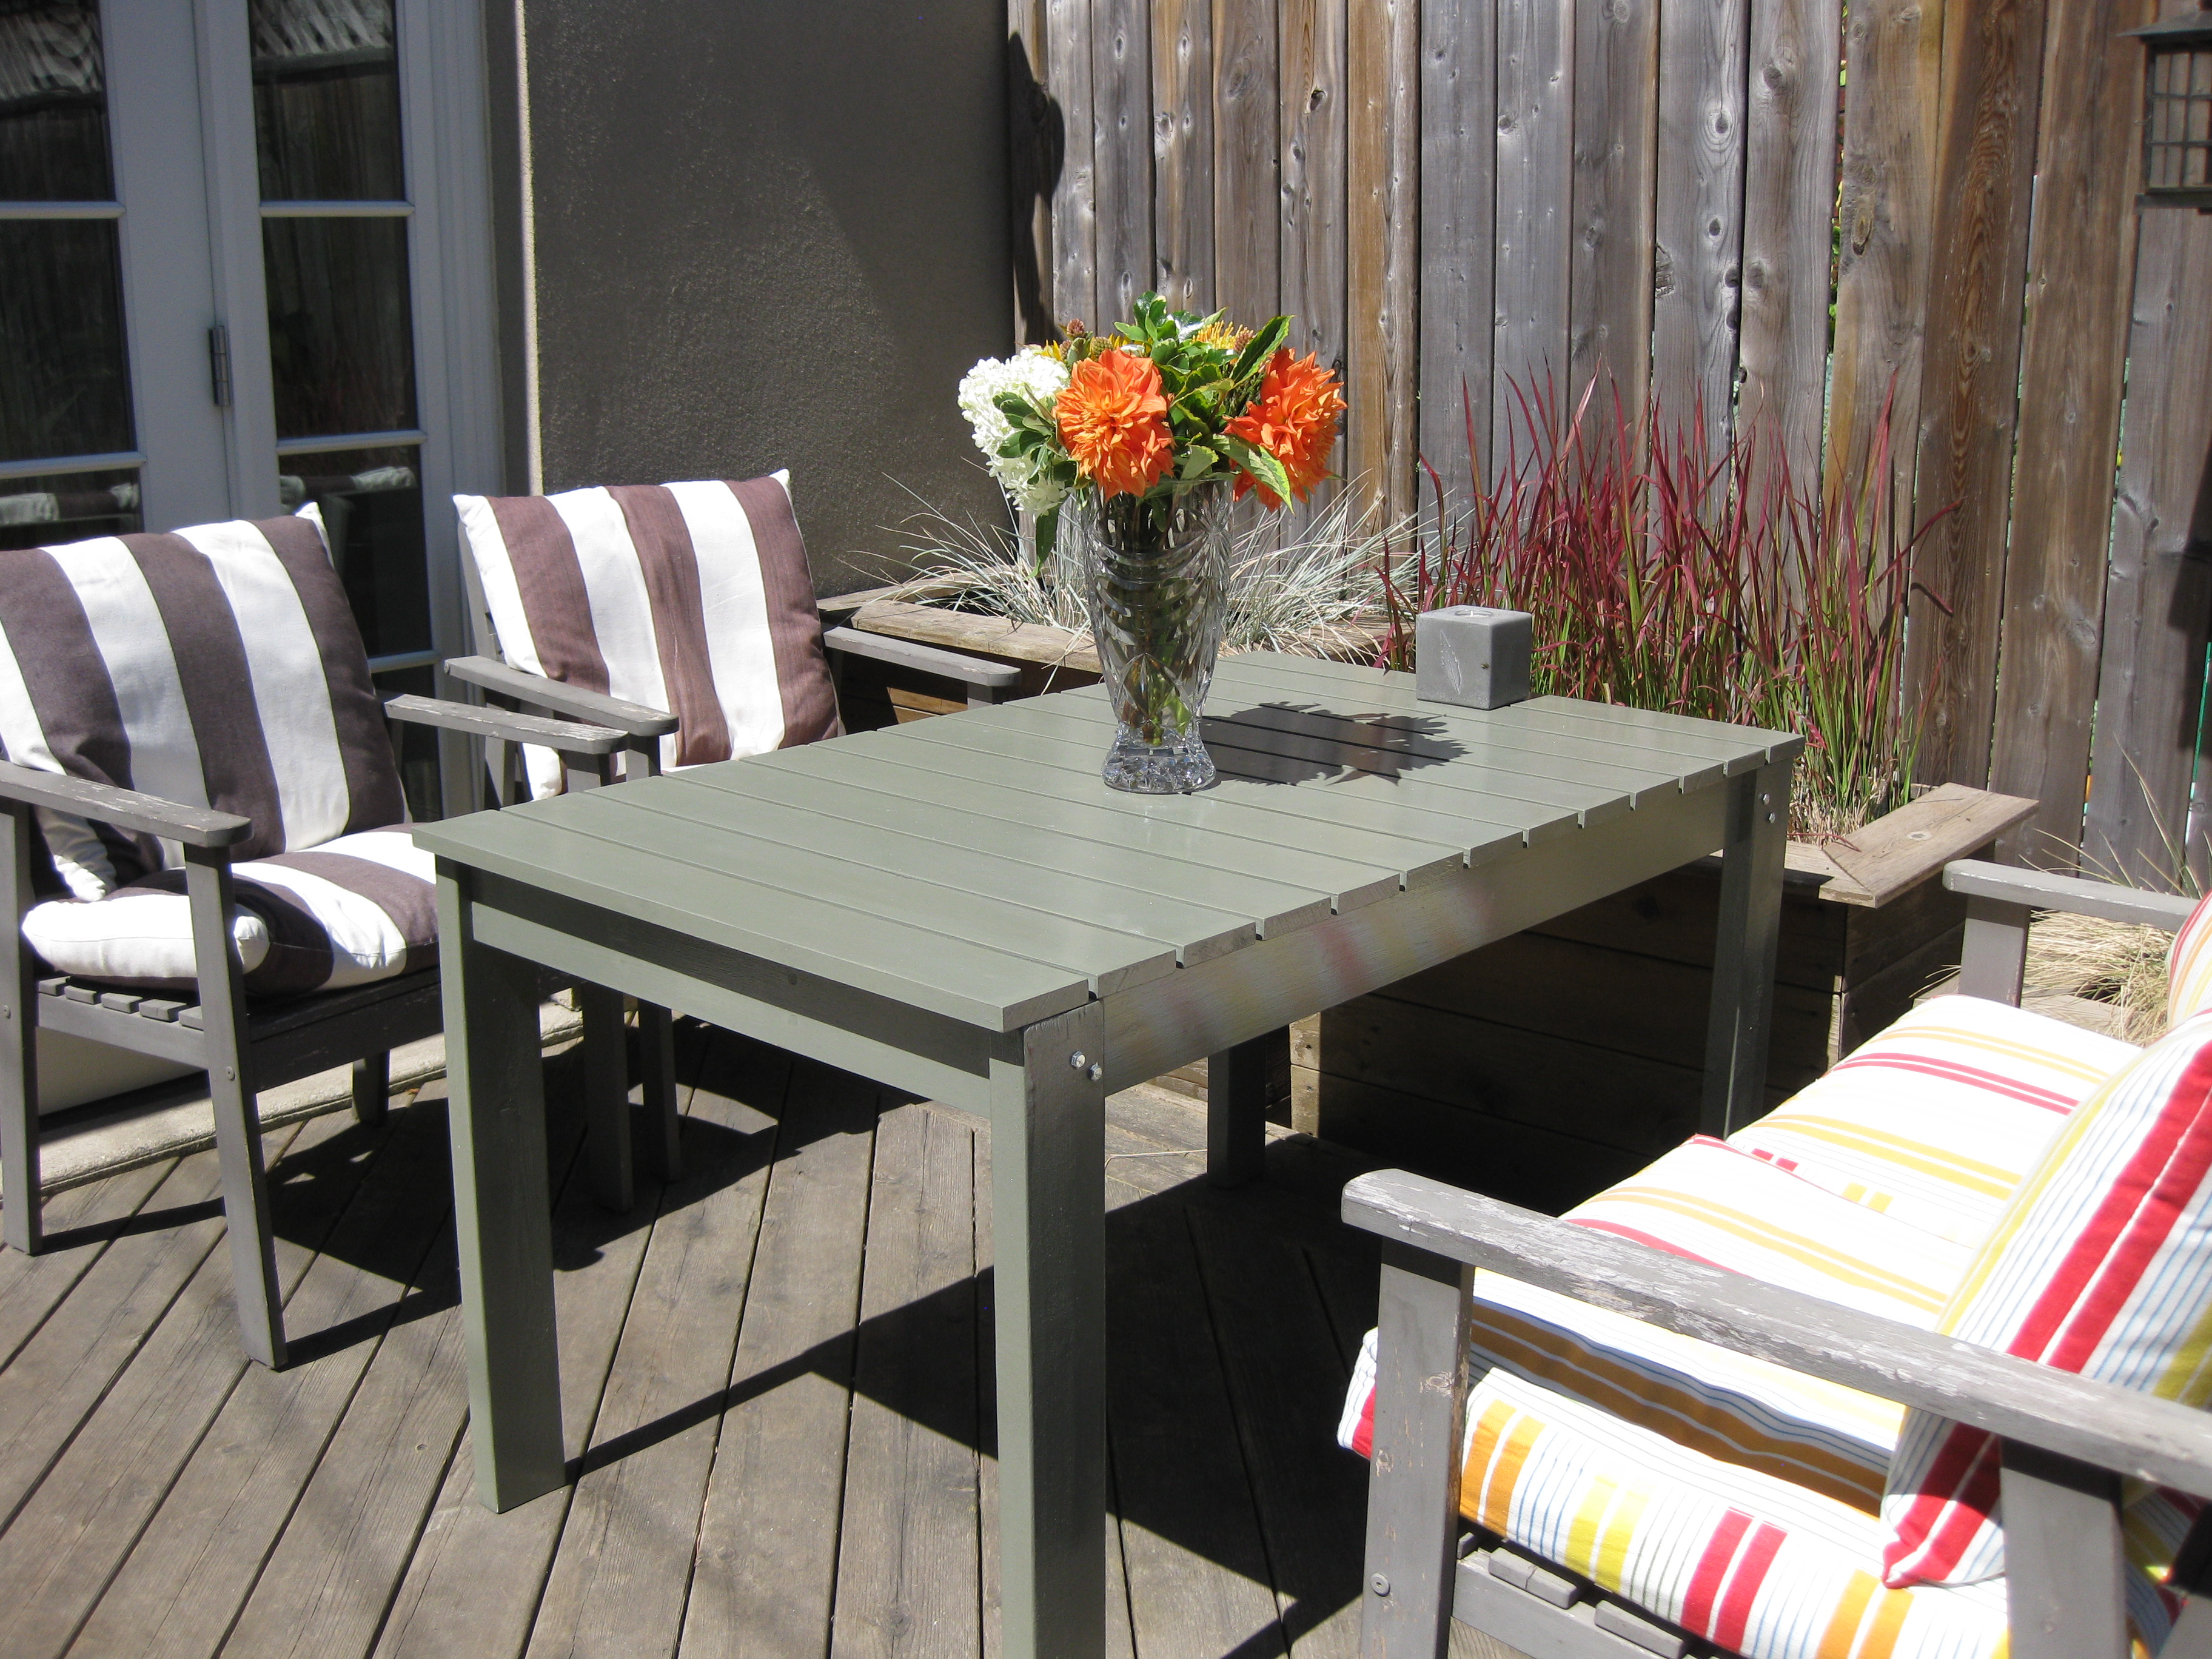
Laundry Pedestal
My first build! Took me a while to complete, but I was in know hurry and was learning about carpentry/woodworking as I went. Overall it was a great success and I'm really pleased with how it turned out. Thanks to ana-white.com!!
Built this bookcase based on the plans for the tall rustic X bookshelf, but made a couple modifications to use one entire sheet of plywood. It made for a monster bookshelf but is perfect for out needs! I also added the cross detail in the middle for extra support, I love how it turned out! I followed the tutorial that mimics restoration hardwares finish applied to originally the farmhouse table plans I think. Combination of weathered oak and special walnut stains with a satin poly.
Turned out looking amazing. My family loves it. Thank you for sharing these design plans!
So Fun!! My first ever wood build!! I’m completely addicted now ha! Thank you so much! I’m learning so much from watching your videos.
My scrap wood storage boxes were overflowing so I decided to try a queen size chevron headboard (with no plans) using teak, rangas , mahogany and other select woods I had used on other projects. I used 2 coats of clear gloss lacquer. I like the way it turned out. Richard - retired
I installed a half door to isolate our dog from the laminate flooring when he sleeps at night.
It was only $25 for the hollow core 6 panel door from HD, which got cut in half.
$25 for the passage knob.
$10 for top plate and trim
Less than $5 for the hinges.
Not having to replace the laminate flooring priceless!
Some Tips:
The $25 door is not prehung. Buy the $14 dollar irwin door jig to install the door "http://www.homedepot.ca/product/door-lock-installation-kit-carbon/904157" It will come in handy if you are remodeling and installing new doors to replace those old flat panel doors. You will also have to chisel out the hinges.
When installing and marking the hinge locations in the door frame shim the door a 1/4" off the floor.
This is a modified butcher block kitchen island built from ana white's plan. Instead of using doug fir (2x4) material for the top, I used hard maple to build an edge grain butcher block top that if knife friendly and food safe. I also altered the dimensions to fit my space.
Sat, 05/10/2014 - 11:05
Yet another beautiful kitchen island. Love the finish and butcher block top on this one! Thanks for sharing!
My daughter loves this! And now I have to make one for my youngest! Instead of rope I used 3/8" Bungee Shock Cord. I used one long piece and threaded it through the screw eyes. I put the screw eyes in the top, middle and bottom.
This project is the first of many FUN KIDS rooms by Breckenshear Designs. We started out using the plans for the cottage loft bed and allowed the bed design to evolve to meet the needs of our two children. Our room space was limited to 10x11 so the function of this bed was extremely important. Our daughters LOVE their new space and my partner and I look forward to creating many more fantastic rooms! Thanks Ana White for the cottage loft bed plans!
Mon, 07/23/2012 - 09:12
OH.MY.GOODNESS.GRACIOUS! Will you adopt me??? This is spectacular!
I needed a couple more birdhouses and this plan was perfect! They were super easy and quick to build and the pickets were on sale for $1.18, so it only cost $.59 for each house!
I built this crib and changing table using the DIYstinctly made crib plans and the simple changing table plans from this site. The tartan design on the shelving is the product of LOTS of painters tape. A word of warning: if you decide to build this crib, buy your matress first and cut the rails to length. I had to remedy a gap of about 6 inches at the end.
Instead of rounding the tops of the headboard and footboard, I simply put a 1x2 board over the top for a more modern look. Instead of cutting out the handle for the drawer, I added a pull. This is actually the second one of these I've built. The first, I followed the plan, but this one was for my daughter's best friend, so I made her one that is the "same" yet different. I love it. Goes together quickly and always is sturdy and so nice. It's a great size for baby dolls.
I only needed to purchase the 1x12 and the 1x6. The rest was made of scraps I had on hand from other projects. Even the paint was from a previous project, and the mattress was made from a remnant.
Your beautiful Fancy X farmhouse table. We wanted to seat 8. Used your plan with the top idea from Hint of Home. We used cedar tongue and groove for the top. We are so pleased with it! Now for chairs!
I built these as end tables in my living room. I made one narrower (only 14") by subtracting 3 1/2" from the end measurements and only using 4 2x4's on the top. Quick build, only about 2 hours to put together ( :) ), but the finishing took a while.
Thanks so much for the plans for this project. It was a lot of fun, and it turned out great!
Sat, 05/17/2014 - 11:54
Really, really nice!!! I love your color scheme! Classy look!
Sun, 05/18/2014 - 12:07
Really sick! Love the contrast. Did you use treated pine?
I was thinking of buying the conversion kit for my son's crib when I came across this bed. I modified it a little but used the base design. It came out great and this was the first time he saw it and got in it. Now all we need to do is figure out how to get him to use it!
Just made a set of your modern Adirondack Chairs. Fun and easy project. Finished with Benjamin Moore Arborcoat solid stain in Aruba Blue for a nice beachy look and weather protection. Added a cushion from Lowe’s and enjoy. Thanks for the great plans.
A variation on your barn style greenhouse. I included a cooling fan with intake louvers, temperature controlled heater and grow lights. Also used anchor bolts embedded in concrete footer.
David Buckmaster d [email protected]
I took on this project about 3-months, I was inspired by the excellent plans provided by fsmumford. I made a couple of modifications, adding a small bump out in the middle, to enhance the castle look, fabric covered seat cushions on the stairs, and an added 2x2 in the middle of the bed to add extra support.
Thanks to fsmumford for the awesome inspirations and great step by step guide.