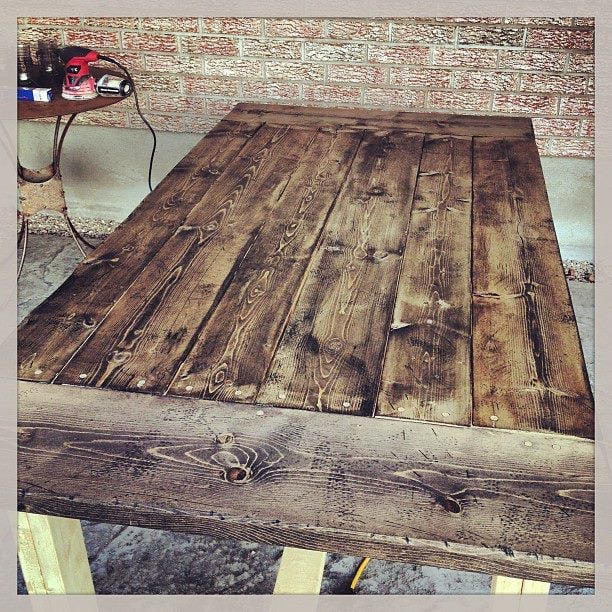
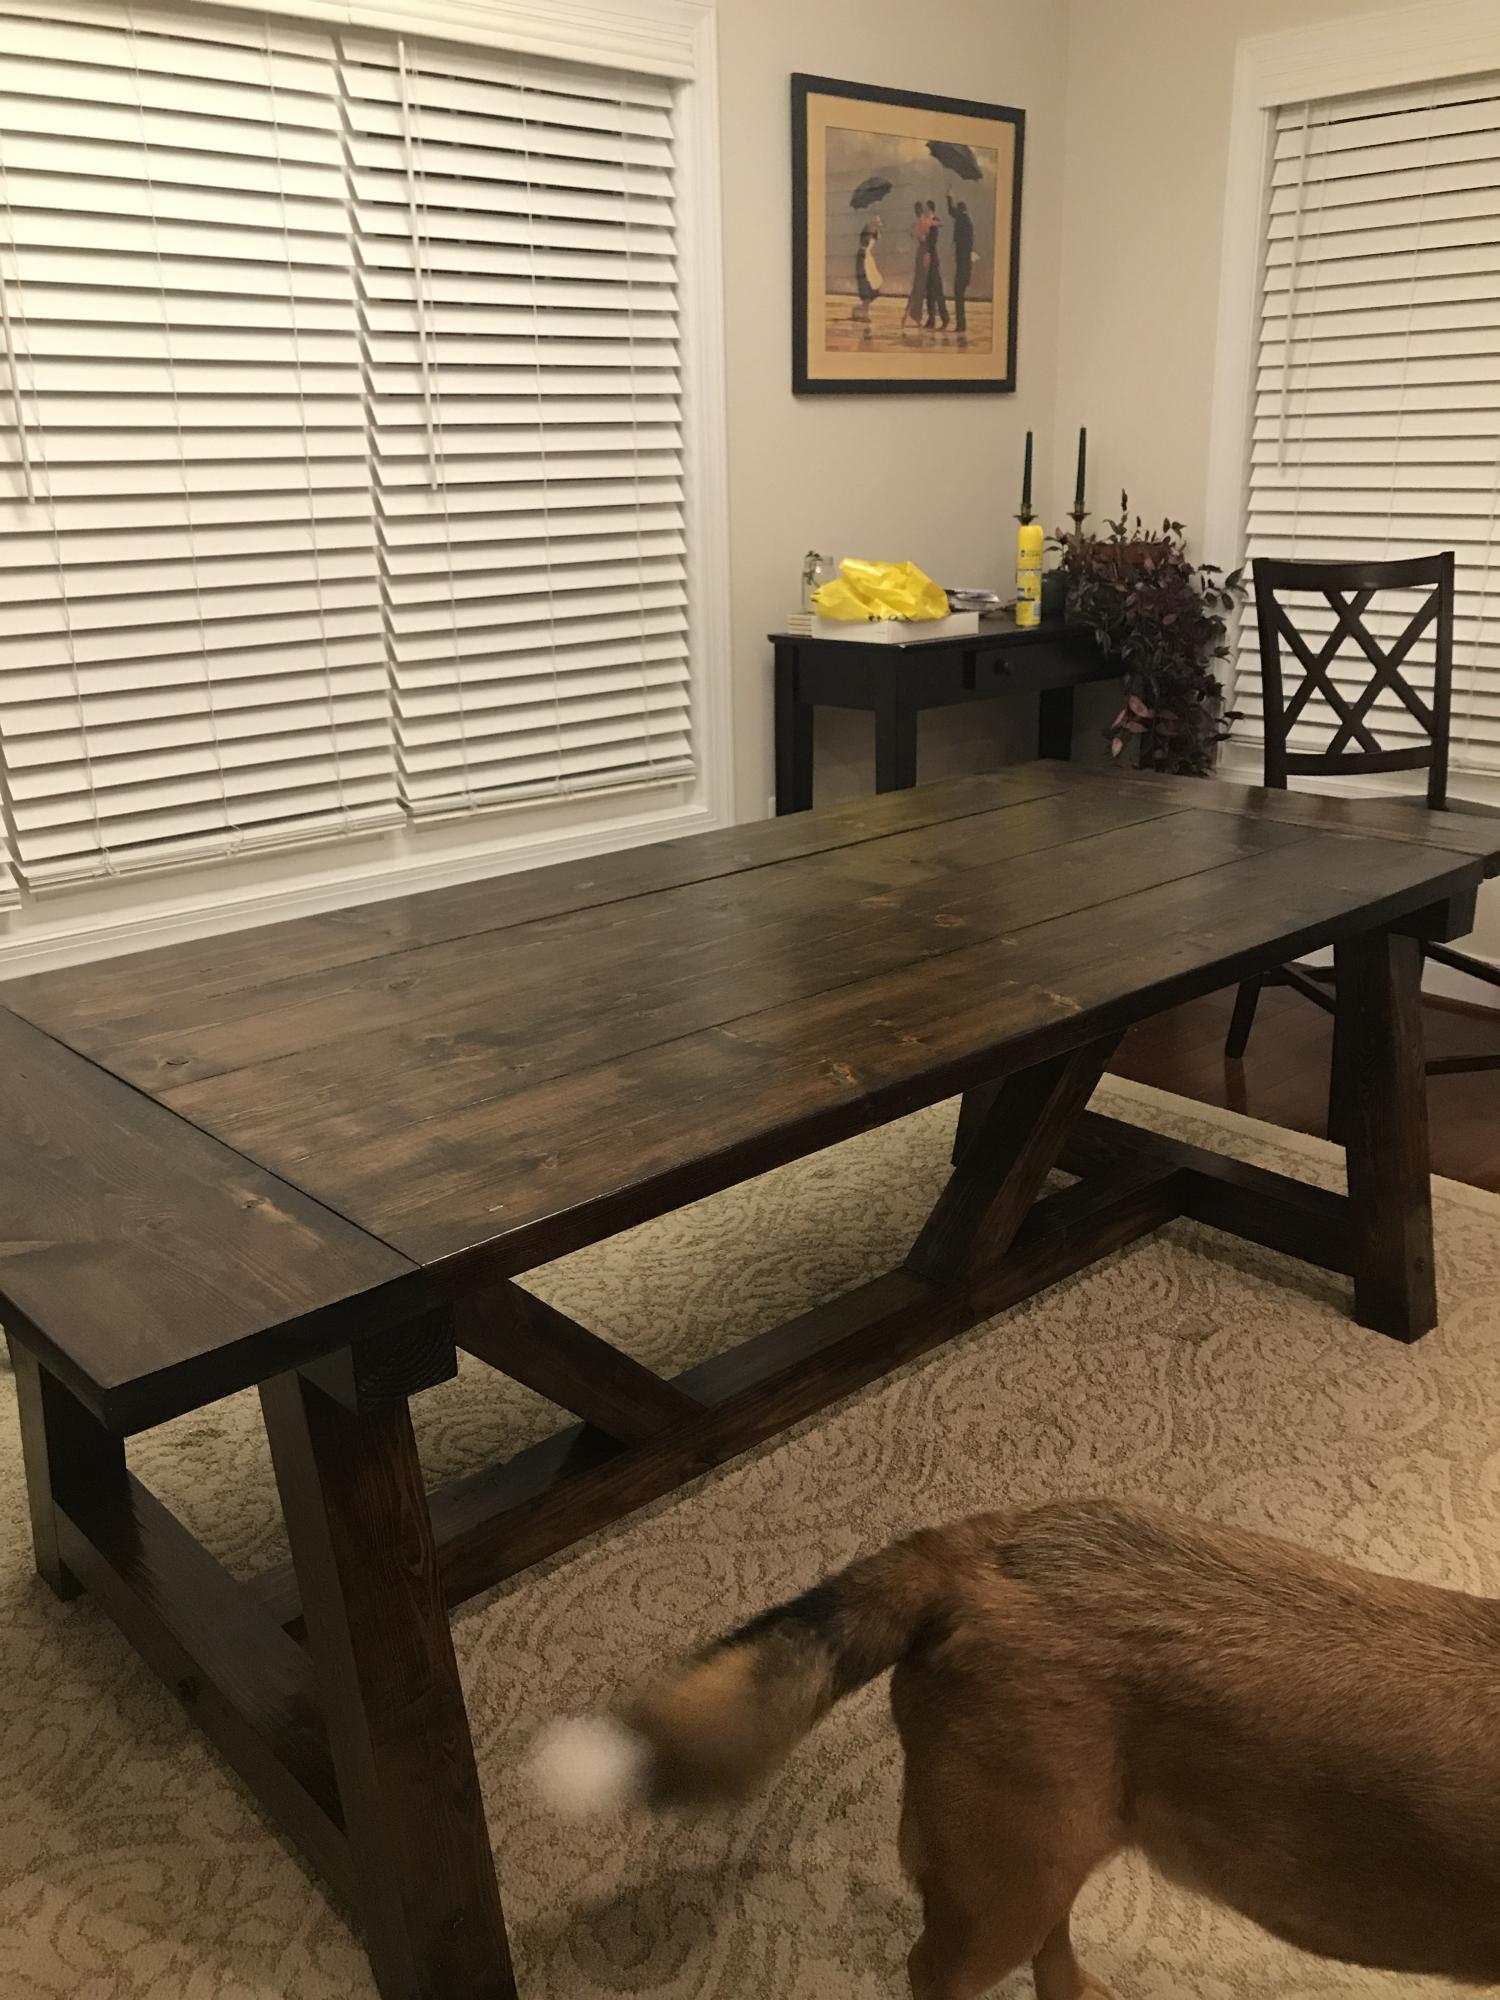
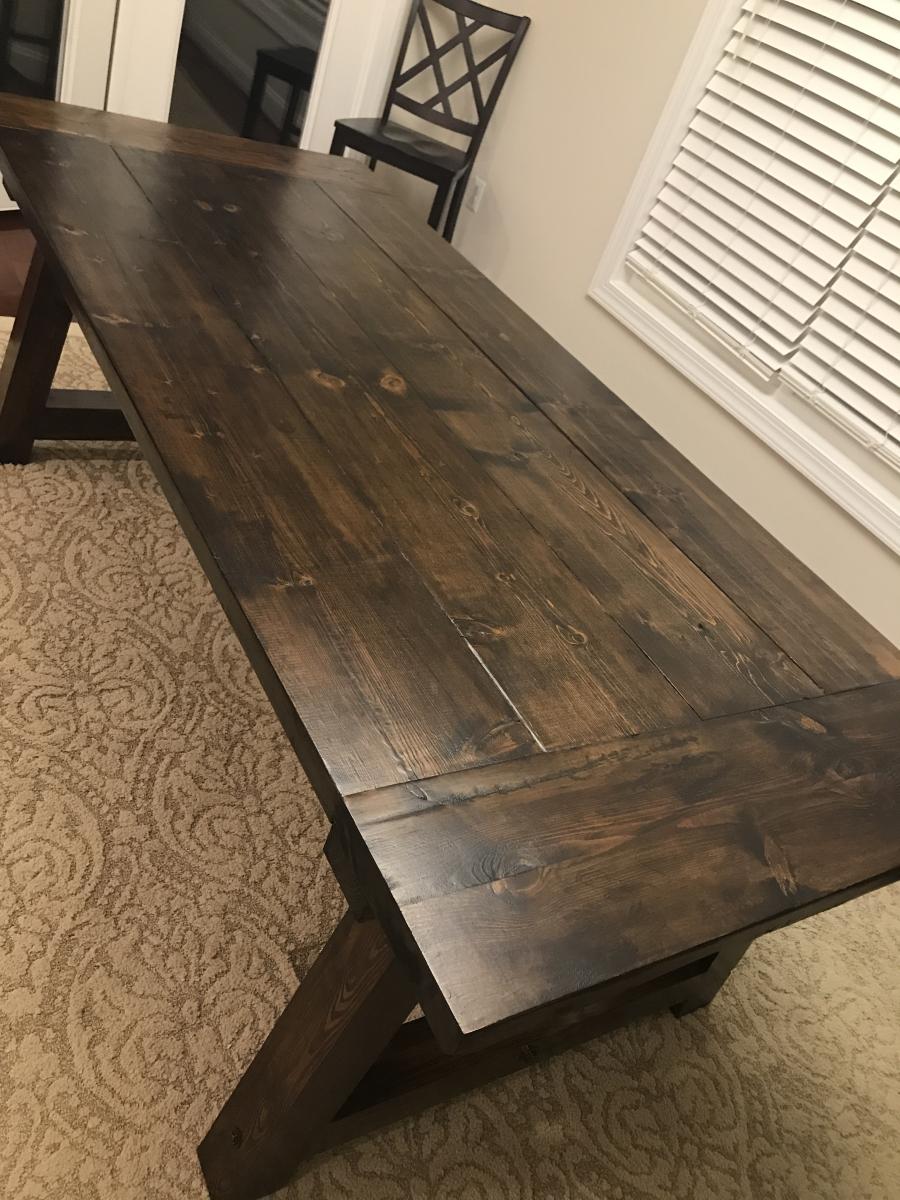
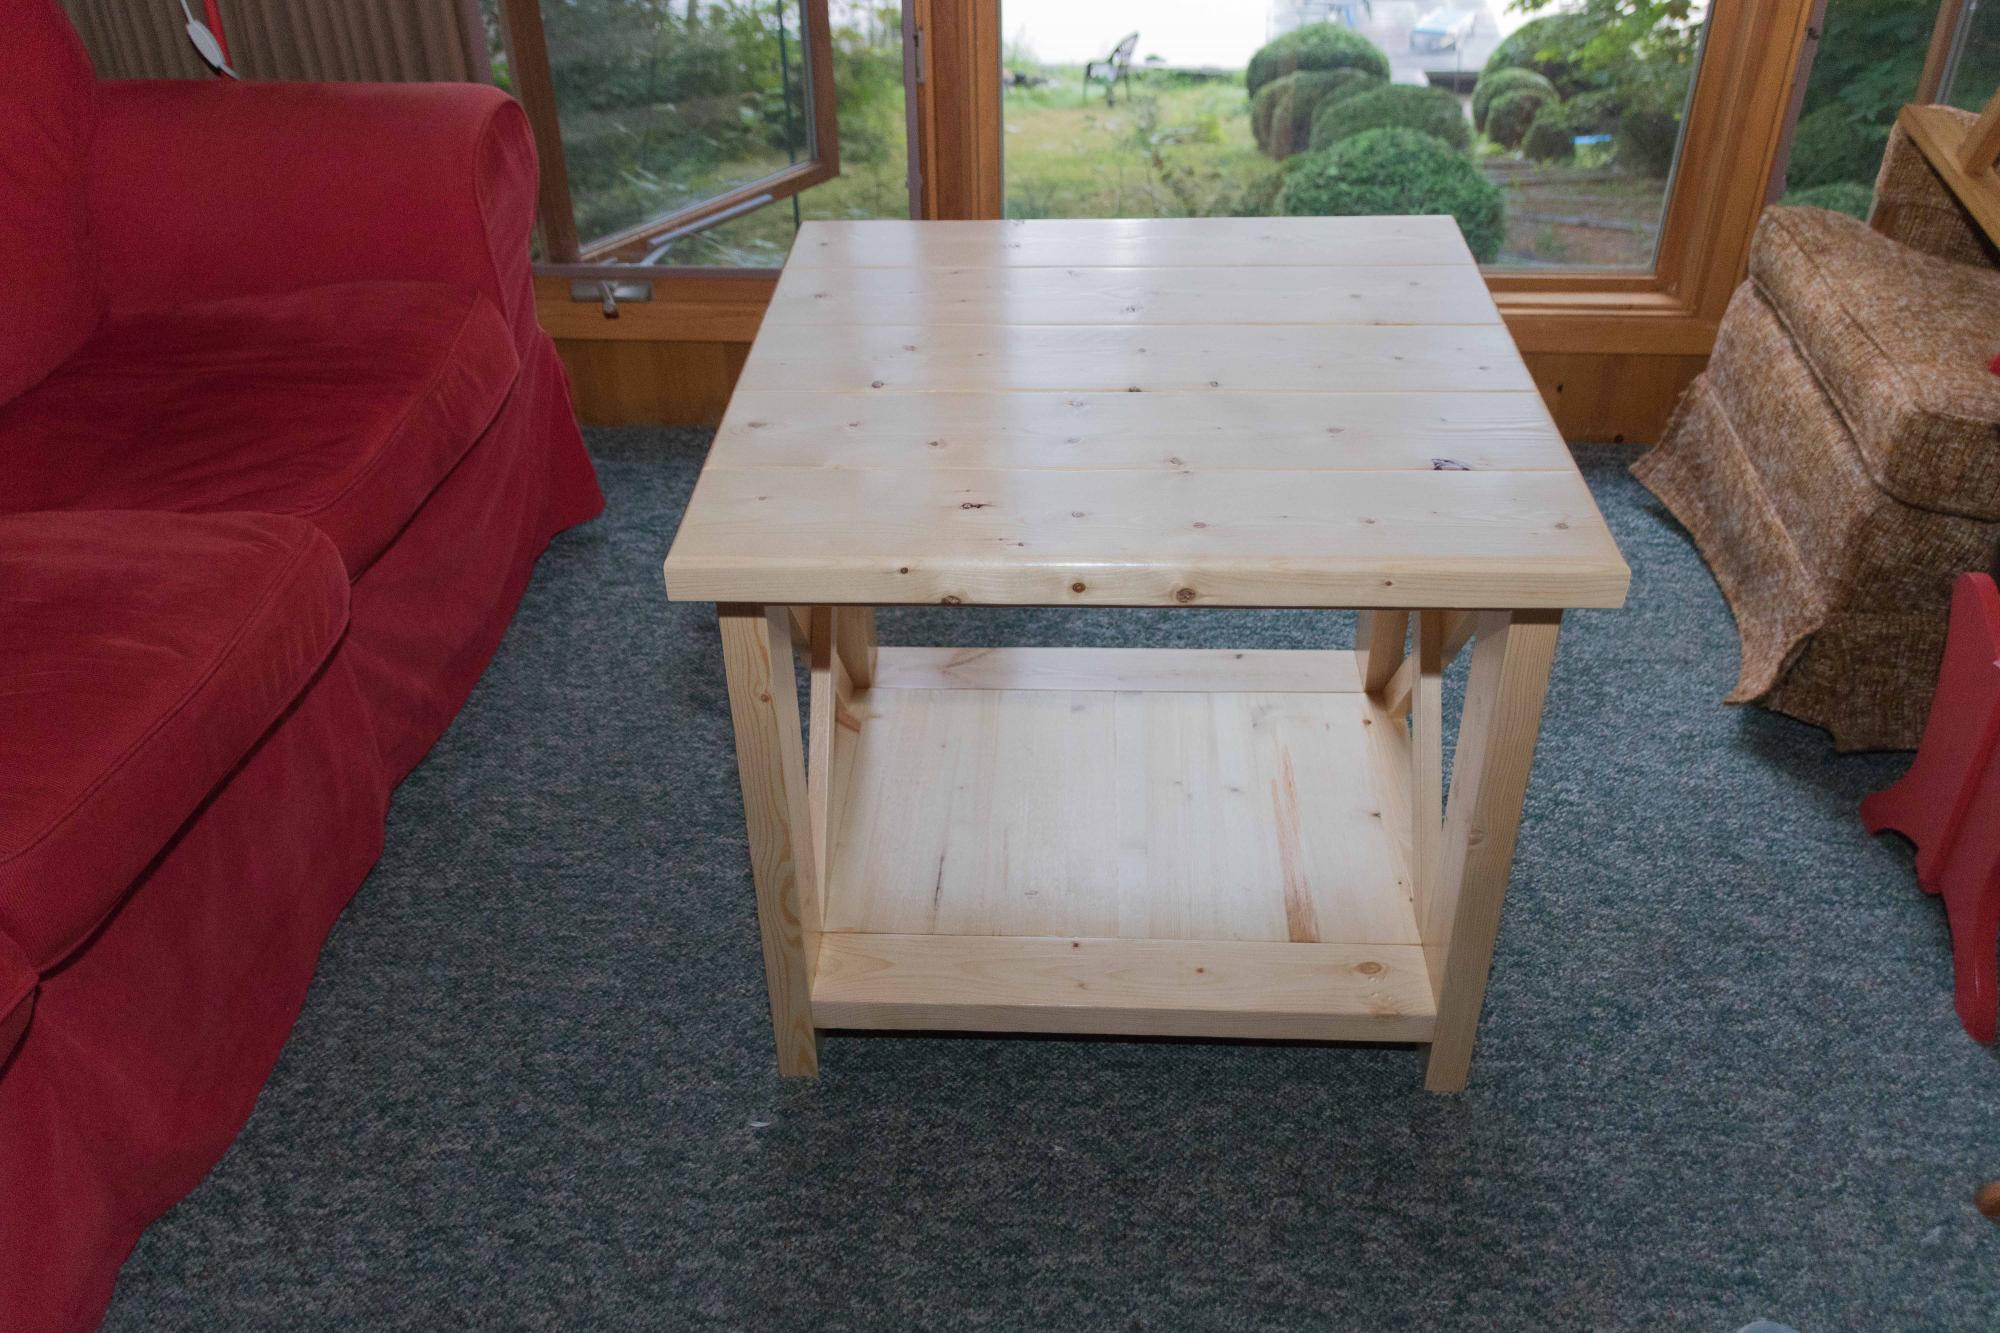
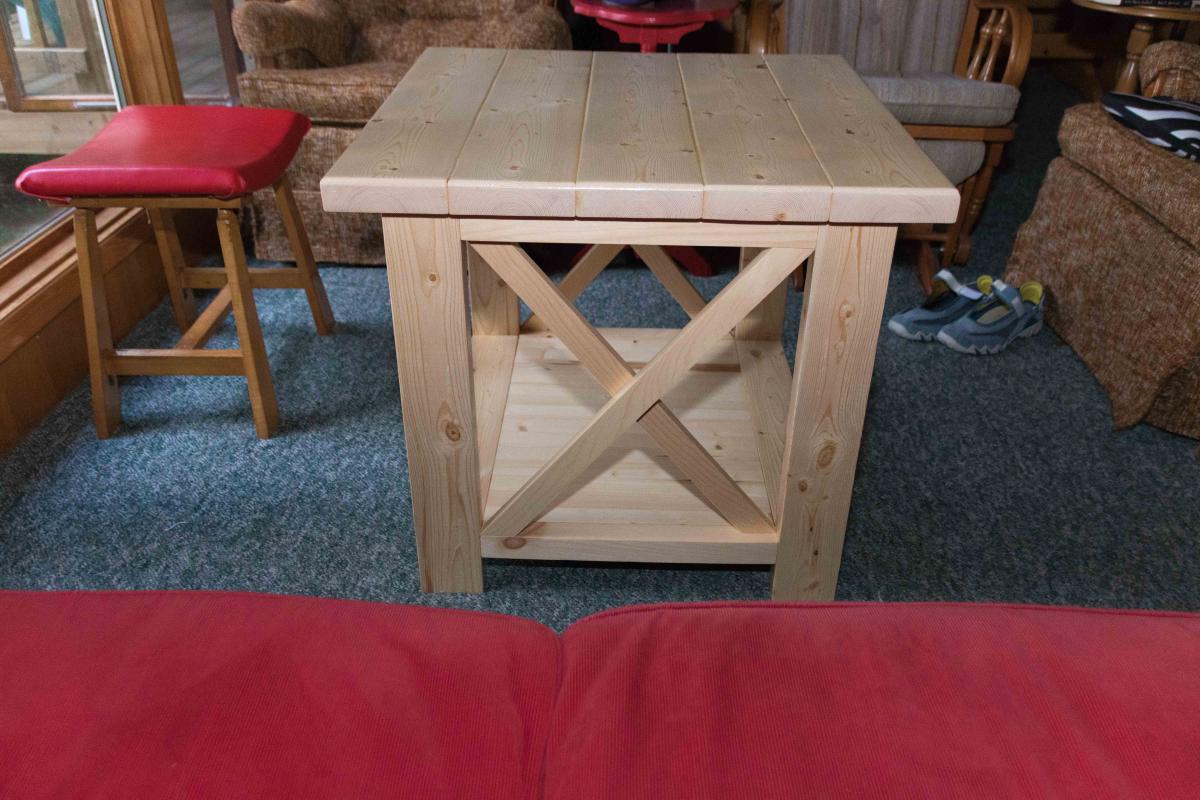
Community Brag Posts

Modern Adirondack Chair

Submitted by abbulone on Mon, 09/13/2021 - 13:35

First time making this type of chair. Your plan made it really easy to cut and assemble the frame. I just changed the back to different types of flags. I’ve made them for my friends in the fire department, police department, ems, military, and a corrections Officer. They are an absolute hit.

Comments

Pretty Blue Laundry Pedestal

Submitted by michelley on Thu, 05/02/2013 - 19:08

This was my first Ana White project and I couldn't be happier with the way it turned out! I didn't change any measurements. I did add trim along the top and bottom.

I was going to paint it white with blue trim but my white paint didn't look usable anymore. So I went all blue and I'm happy the way it turned out. I decided to leave the trim natural. I really like the blue pop in the laundry room!

Estimated Cost
$110
Estimated Time Investment
Afternoon Project (3-6 Hours)
Finish Used
A mistint paint I picked up at Home Depot. I painted with roller and brush. I sprayed with clear coat.
Recommended Skill Level
Beginner

Comments

Kernsberger

Wed, 05/27/2015 - 06:47

Hi, I am looking to build this and have the same washer/dryer set and wanted to know if you could tell me how tall this is from the ground to the top of the controls for the units. We currently have a closet these are in with shelving about the units so I don't have a lot of extra room. Thanks

jkread

Wed, 05/27/2015 - 22:32

That is the wonderful thing about building custom. You can build it to suit your space, machines and what you might want to store underneath. Machines can vary quite a bit so I'd suggest measuring your space, then you machines and find out how big you can build a pedestal.

Luiz Lisboa

Sun, 10/29/2023 - 14:18

Yes it's a nice job but i will tell you something ....... As appliance technician this kind of pedestal is a nightmare for us ..lol
I suggest put some wheels under the pedestal in order to move it around if need
Just an idea
But is a beautiful work anyways

Truss Beam Table

Submitted by firebug on Sun, 03/22/2015 - 22:08

I built this farmhouse table from your plans. It turned out great, I had to modify the plans and make it bigger to fit my needs. But we love the outcome and it was well worth it to do this project.

Built from Plan(s)
Estimated Cost
$300
Estimated Time Investment
Weekend Project (10-20 Hours)
Finish Used
Stain: Dark Walnut. Table Top Finish: Famowood Kit 1 Gal Size Glaze Coat Gloss Polyurethane.
Bottom and Benches Finish: Glossy Polyurethane.
Recommended Skill Level
Beginner

Comments

wy2ak

Mon, 03/23/2015 - 19:27

Outstanding finish! After seeing this, I might have to try it. Thanks for the inspiration!

Side street bunk beds

Submitted by Anonymous (not verified) on Fri, 06/23/2017 - 20:02

We just finished 2 sets of bunk beds using the side street bunk bed plans. The end result was gorgeous. We stained these in min wax classic gray. We also countersunk the bed slats on top and bottom.

Estimated Time Investment
Weekend Project (10-20 Hours)
Finish Used
Yellow pine and spruce. We stained the bed with min wax classic gray.
Recommended Skill Level
Intermediate

Kitchen islan

Submitted by Anonymous (not verified) on Sat, 10/02/2021 - 17:14

Used several plans to put this on together. Individual wood slats to build siding. 36”h. 32” d 72”l.

Built from Plan(s)

Comments

Teenage Mutant Ninja Turtle Bed

Submitted by KarahM318 on Sun, 05/05/2013 - 20:21

For this project, we followed the plans for the Firetruck Bed and also modified them a bit to fit our needs in the room. From start to finish, this project took two weeks to complete and cost us roughly $200 to build and $100 to paint. We were lucky though in that nearly everything we needed to purchase was on special or sale.

Built from Plan(s)
Estimated Cost
$300
Estimated Time Investment
Week Long Project (20 Hours or More)
Finish Used
Clark & Kensington latex paint & Minwax polycrylic clear coat (semi-gloss)
Recommended Skill Level
Intermediate

Comments

kim20904

Wed, 01/15/2014 - 07:33

can you tell me how you modified the plans to make this bed? I don't know much about building anything but I would like to build this for my son. Thank you Kim

Ninja turtle loft bed

Submitted by Kam428 on Wed, 03/25/2015 - 18:49

Made this bed using the Fire truck bed plane.. Thanks to the simple easy plan from you, made this build sure easy. About 9 hours tine to build and paint. Appox. Cost was about $280.

Estimated Cost
$280
Estimated Time Investment
Day Project (6-9 Hours)
Recommended Skill Level
Intermediate

Comments

5-Tier Wood Planter

This plan was easy to follow, accurate and came together in just a few hours. I used some reclaimed barn wood for the 2x6s and dog-ear pickets for the remainder.

I made it harder for myself than it had to be. I didn't follow the directions closely enough and cut the box ends at 5 1/2" instead of 5 1/4". That meant that the bottoms had nothing to press-fit against. So, I had to do a little workaround to fix that. I made a 1" shelf at each end of each box so that the bottom could sit on these little shelves. The upside to this mistake is that there was now a drainage slot all along the front and all along the back of each planter box. 

I stained and sealed it. Finally, I lined each planter box with weed matting that I'd cut to size and cut drain slits in. The matting doubles as a way to keep the planting mix from falling out of the long drainage slots while allowing water to drain through the little slits I poked in the fabric. (I poked drain slits only along the front edge so that water would drain into the planter box below instead of onto the ground.)

I'm happy with the plan and the finished planter!

Estimated Cost
$35
Estimated Time Investment
Afternoon Project (3-6 Hours)
Finish Used
One coat of Cabots Premium Stain and Sealer in Gingersnap. One coat of Minwax Helmsman Spar Urethane.
Recommended Skill Level
Beginner

Work Table

Submitted by Anonymous (not verified) on Mon, 10/04/2021 - 12:37

I started with a table bought at Harbor Freight and added the lift off front door, lower wood rack, and added wheels. It has worked so great for me.

Comments

My Little Princesses Playhouse

Submitted by sanmaurais on Tue, 05/07/2013 - 17:00

This was the first thing I have ever built, and I loved making the playhouse! I took pictures of every step I did! It was very rewarding to see the look on my girls faces with it was done!! They absolutely love it!!! Thank you for posting the plans.

Estimated Time Investment
Week Long Project (20 Hours or More)
Recommended Skill Level
Starter Project

Lowboard Entertainment Center

Submitted by Jihyun on Sun, 03/29/2015 - 12:38


Just moved to Germany and needed an entertainment center. Looked at furniture stores and everything was either extremely expensive or IKEA particle board junk. 

My husband and I found out about Hornbach, basically Home Depot or Lowes of Germany.

Found all the materials and some tools with the help of the English speaking staff. 

Used some pretty cool looking butcher block type wood they had that was reasonably priced. Didn't recognize any of the stain brands so picked a color and crossed our fingers.

Overall one of my easiest projects and a fun experience here in Europe. 

Estimated Cost
$200
Estimated Time Investment
Weekend Project (10-20 Hours)
Finish Used
No idea but cherry finish.
Recommended Skill Level
Beginner

one wall project

Submitted by Anonymous (not verified) on Thu, 06/29/2017 - 08:54

 My kitchen is huge but has little counter space since I pulled out two oversized peninsula(6'x3') island things in my kitchen that had no storage. I also found out there was an outlet behind each one. The only outlet on the wall I am showing was covered. I was relieved to find it. I decided to build the Farmhouse Kitchen Island & Bar Plans and put a few shelves over it for coffee and tea. I made one drawer and one flip down drawer face. I put a large bowl in the cabinet below the drawer to catch coffee grounds. I alos made the cabinet 4 feet instead of 6 due to the space. I also trimmed a 1x3 down to cover the bottom foot plate so stuff doens't collect under it. I also added wheels so I can move it out if we have a lot of company for extra seating. The drawer faces are recycled barn wood from my sisters property. They are clearing out what was a 100+ year old barn that had fallen over. The shelves are from the same wood (I used bronze spray paint to paint the brakets on the shelves). I sanded it down just enough to get the splinters off. I used 4x4's for the bar side and bought a pre-made butcher block from Menards for the top. I stained it with carrignton stain from rustoleum except the barn wood I just clear coated. Oh, I added 12 in drawer slides to the drawer. The mail sorter plan is from http://www.shanty-2-chic.com/2016/02/rustic-chalkboard-mail-organizer.h… I made it bigger to fit the space. The organizer took a day the shelves to a couple hours and the Island took a week off and on. The secretary is an antique passed down to me along with the chair. I am planning on making the full size Island later on, with a few adaptations.

Estimated Cost
5-6 hundred

Butcher block was $80, wood was around $350 and hardware was another $50-60.
Estimated Time Investment
Week Long Project (20 Hours or More)
Finish Used
Carrignton stain from Rustoleum, clear coat, Bronze spray paint, Butcher block oil
Recommended Skill Level
Intermediate

Modern Deck Chairs and Loveseat

Submitted by c.winks on Mon, 10/04/2021 - 12:59

Love, love, love your projects and plans! I have made 3 of the Modern Outdoor Chairs so far, as well as the Modern Outdoor Loveseat and they are amazing. I purchased both the seat and back cushions for my chairs before realizing that the back cushion had nothing to lean against, so I modified the design and gave the chairs alittle more personality. Keep those plans coming, I can't wait to try more.

Comments

Sarah's Perfect Bookshelves

Submitted by community-cont… on Fri, 02/25/2011 - 10:54

My husband is an aeronautical engineer and reads plans all day as a part of his job–even he thought your plans were fantastic. Great job! He did the building and I did the painting of the shelves. I did request that he add a back onto the shelves, so he left the trim off the backs of the shelves and fit in a piece of 3/4 MDF. It worked beautifully! We spent $75 on these two shelves–it would have been more like $50, except the additional MDF (for the shelf backs) added to the cost. Our only suggestion after doing this project is to go to a lumber yard for the pine. Ours is from one of the big box stores and, even though my husband went through a lot of wood, all of the choices were pretty bad. We went ahead and used this subpar wood, but I think our end result would be even better with better quality wood.

Thank you SO much for designing these plans for us. We’ve been planning on bookcases for quite awhile, but my husband hadn’t had time to come up with plans. When I found these plans on your site, I informed him that this was our weekend project! Soon he’ll be building a bed and trundle for our little boy–using your plans, of course!

Built from Plan(s)
Estimated Cost
$50 without backs
Estimated Time Investment
Afternoon Project (3-6 Hours)
Finish Used
White paint
Recommended Skill Level
Beginner

Santa is a cool guy... (Modified Train Table)

Submitted by TatafuFam on Thu, 05/09/2013 - 14:06

Santa decided to get come to Ana this year for some help with a train table instead of getting one from (insert big box toy store here). It ended up being pretty easy and a lot of fun, and our boys loved it! Santa decided he needed as much room on top as possible to put train and didn't need it to hide away so we skipped the cutting the top piece of plywood in half and left out the middle peice. We then added a track set and a few extras and painted the top. Thanks for the plans Ana! -(Santa)

Built from Plan(s)
Estimated Time Investment
Weekend Project (10-20 Hours)
Finish Used
Brush on primer and some Oops Valspar from the store, forgot which color!
Recommended Skill Level
Beginner

transitional bath room vanity

Submitted by Texalyn on Tue, 03/31/2015 - 07:14

I changed the height of the Connor Side Table to that of a bathroom vanity and added an apron to hide the underside of the sink.  I carefully built the vanity to be level, then discovered that the underside of the sink surround is wavy (apparently they are made by being poured into an upside down mold, hence the wavy surface).  I added trim at the top of the vanity to hide the shims stabilizing the sink top.  Thx to Rogue Engineer for the well-written plans, and thx to Ana White for your Kreg pocket hole jig video.  It made me feel confident I could pull this off!

Built from Plan(s)
Estimated Cost
$150
Estimated Time Investment
Weekend Project (10-20 Hours)
Finish Used
MinWax Golden Oak stain, two coats of MinWax Clear Satin Polyurethane, with light sanding with fine sandpaper between coats
Recommended Skill Level
Beginner

Comments

Farmhouse Table Complete!!

Submitted by Anonymous (not verified) on Sat, 07/01/2017 - 20:10

I've very happy with the results of my "Fancy X Farmhouse Table" project.  I modified the dimensions to fit our space; this meant making the table thinner and re-sizing the "X's" proportionally.  Also, for trimming the edges of the "X's", I came up with a combination of base board pieces at the end of the 2x4's.  I hadn't used wood stain in over 20 years because I had gotten such blotchy results.  This project reintroduced me to stain and I'm glad it did.  Turns out, the secret is proper sanding AND the use of a "pre-stain" product that sets up the wood for good(even) absorption.  Polyurethane was used as a sealant, while the base frame got white semi-gloss.  Cheers, good luck on all your projects!

-Robert
 Bellingham, WA

Built from Plan(s)
Estimated Cost
$125
Estimated Time Investment
Weekend Project (10-20 Hours)
Finish Used
Minwax Pre-Stain, Minwax "Early American" Wood Stain(2 coats), Minwax Polyurethane(2 coats)
Recommended Skill Level
Beginner

Cleaning Caddy

I wanted to build a cleaning caddy. Normally when I go to clean – I want to do it all at once. We have a bigger house – so I’ll be upstairs in the kids room – and realize I left the Windex downstairs – get upstairs – I left the paper towels downstairs….SERIOUSLY. So – hopefully this will stop that from happening!!!

So – here we have my Cleaning Caddy!! It was actually pretty easy to build. I had everything on hand. I had the dowels from another project – so that is how I based everything.

I took two left over pieces of MDF and made a design, cut it out with a Jig Saw. I wanted to make sure it was tall enough for the cleaning bottles.

Then I screwed the dowel to each side of the MDF sides.

I then measure the length I needed for the sides – I used scrap base molding we had laying around – I don’t even know where it came from!

Then came the bottom – I measured out the sides – and then I wanted it long enough to hold a roll of paper towels.

Glued and nailed everything in with the nailer (always use glue too – this thing is kind of heavy with all the cleaning supplies)

I screwed the dowel in from the bottom for the paper towels.

I painted it many times with white trim paint – used many different types of wood so I wanted it to look uniform.

Then for the finishing touches – I went to my abundant scrapbook paper collection – Mod Podged it all up. Love that stuff!!! On the front – I cut out “Cleaning Caddy” with my Cricut. And on the sides I trimmed it out with cording I had on hand, just used hot glue and did about a 6 inch section at a time. I hot glued buttons where my screws were on the outside tops. My counter sink bit was the wrong size, so they stuck out a little. Now it’s a nice decorative element.

Estimated Cost
Free
Estimated Time Investment
An Hour or Two (0-2 Hours)
Finish Used
Sanding, priming, painting, mod podge
Recommended Skill Level
Beginner

Counter height planter

Submitted by h.abbott on Sat, 05/11/2013 - 18:40

We needed extra garden space this year and I thought adding one of these planters would be a great addition. So far it has. It allows me to easily weed, which is my most despised gardening job. Added bonus that the dog can't dig it up, and bunnies can't nibble on my plants. It also makes a great art canvas for my son's chalk drawings.

Estimated Time Investment
An Hour or Two (0-2 Hours)
Recommended Skill Level
Starter Project

Comments

Janettx

Fri, 05/31/2013 - 04:25

Great job, glad you were able to follow my lame attempt at giving instruction! beautiful job!

pattyf50

Wed, 04/20/2016 - 12:55

Hi I live in north Dakota we get about 10 ft of snow every January, I am planning on making the counter height garden boxes, but how do I keep the snow in winter from crushing them. Patty

pattyf50

Wed, 04/20/2016 - 12:55

Hi I live in north Dakota we get about 10 ft of snow every January, I am planning on making the counter height garden boxes, but how do I keep the snow in winter from crushing them. Patty

Growth chart

My friends are all having kids these days, and I had a lot of scrap 1x6 kicking around. 

After applying a stain on the boards, I printed the letters and numbers as large as I wanted them. I used ''French Script MT'', size of font 185 and I cut them out to make a template.

I happened to have some chalk board paint, which gives it a nice mat color. 

I recommend to leave enough space for baseboards, in my case Ive started numbering the charts at 8'' high. A picture hook is set in the back to hang it on the wall, you could also simply screw it on the wall. 

Its quick to make and doesnt require a lot of cutting!

Estimated Cost
the price of a 1x6 board, about 6 feet long.
Estimated Time Investment
An Hour or Two (0-2 Hours)
Finish Used
The darker color is Minwax ''Colonial American''.
the lighter color is Minwax ''Natural''. I like it a bit better for these boards as I think it will be easier to see the lines that the family will draw to mark their kid's height as they grow.

I used a black chalkboard paint to paint the numbers and letters, I free-handed these after drawing them with a pencil, using a template for reference.
Recommended Skill Level
Starter Project

Comments

Entertainment Console with Barn Doors

Submitted by Anonymous (not verified) on Tue, 07/04/2017 - 12:03

This was an easy project. It turned out great. I made my own hardware from using the video on Shanty 2 Chic website. That's for posting the plans. 

Estimated Time Investment
Weekend Project (10-20 Hours)
Finish Used
Classic Grey stain and Dark walnut stain
Recommended Skill Level
Intermediate