4 Bright Little Adirondack chairs
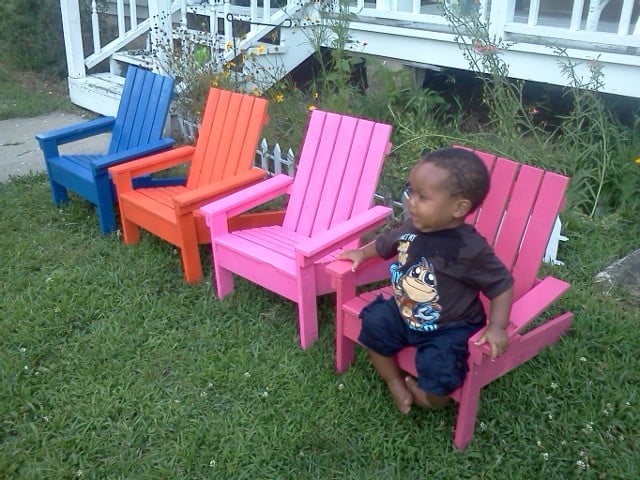
These 4 little chairs did not take very long to put together. But they did take me a while to sand, prime and paint. I hate that part of building-haha-so it always seems like it takes forever to get through with that and on to the fun part. They are very easy to make and inexpensive. My grandkids and others who have driven by and seen them out front have loved them!!
Built from Plan(s)
Estimated Cost
About 22.00 per chair(the spray paint was the majority of the cost). I think the chairs without finishing would be only about 10.00 apiece.
Estimated Time Investment
Afternoon Project (3-6 Hours)
Finish Used
I used Valspar indoor/outdoor gloss spray paint. Definitely use a primer and paint or stain before putting together.
Recommended Skill Level
Beginner


Comments
tonjacoy101
Fri, 07/22/2011 - 05:52
Cute!
What a cute little guy and cute chairs too! I bet the grandkids love them :)
maryfarmer1999
Fri, 07/17/2015 - 17:39
HOPE THESE ARE ETO MAKE
HOPE THESE ARE ETO MAKE