Nursery Bookshelves
![](/sites/default/files/image_686.jpg)
Built 3 shelves in pine with the same specs as the original plan. They're finished with a diluted Snow White milk paint stain.
I have a good size bedroom, but things kept cluttering. I needed somthing small where i could store a few thing's like, movies, x-box, and cable box. So decided on the bookshelf. It's the perfect addition to my bedroom set. Thanks Anna for your awesome projects.
Hey Ana! I just want to start by saying thank you for the great plans!! We are by no means builders but your EASY step-by-step instructions and photos enable us to fake it really well. I needed a laundry dresser for my very small laundry area and bigger bins (teenage twin boys). The round tubs on the floor were NOT working and were becoming a hazard. I have no access to pallets so we used 1x4's and furring strips. I also painted it the same color as my walls so it would blend a little better. SO very happy with it!! Thank you, thank you!!
I started with the plans for General Store Cubbies - and built them as record shelves . I love them and think they turned out great . They were my first Kreg Jig project and i learned a lot and cant wait for the next project. These are all pine - if i were to do it again i would use plywood.
This was not my first woodworking project, but first where I had to figure out angles and bevels. So I'm pretty excited that all the pieces turned into stable stools.
Cutting wood and putting stools together took about an hour or two each .... filling kreg jigs holes and staining took a few weekends though.
My husband and I love this bed design. The instructions were incredibly simple to follow and quite fun. Finished the whole bed in two days. Thank you for the tutorial!!!
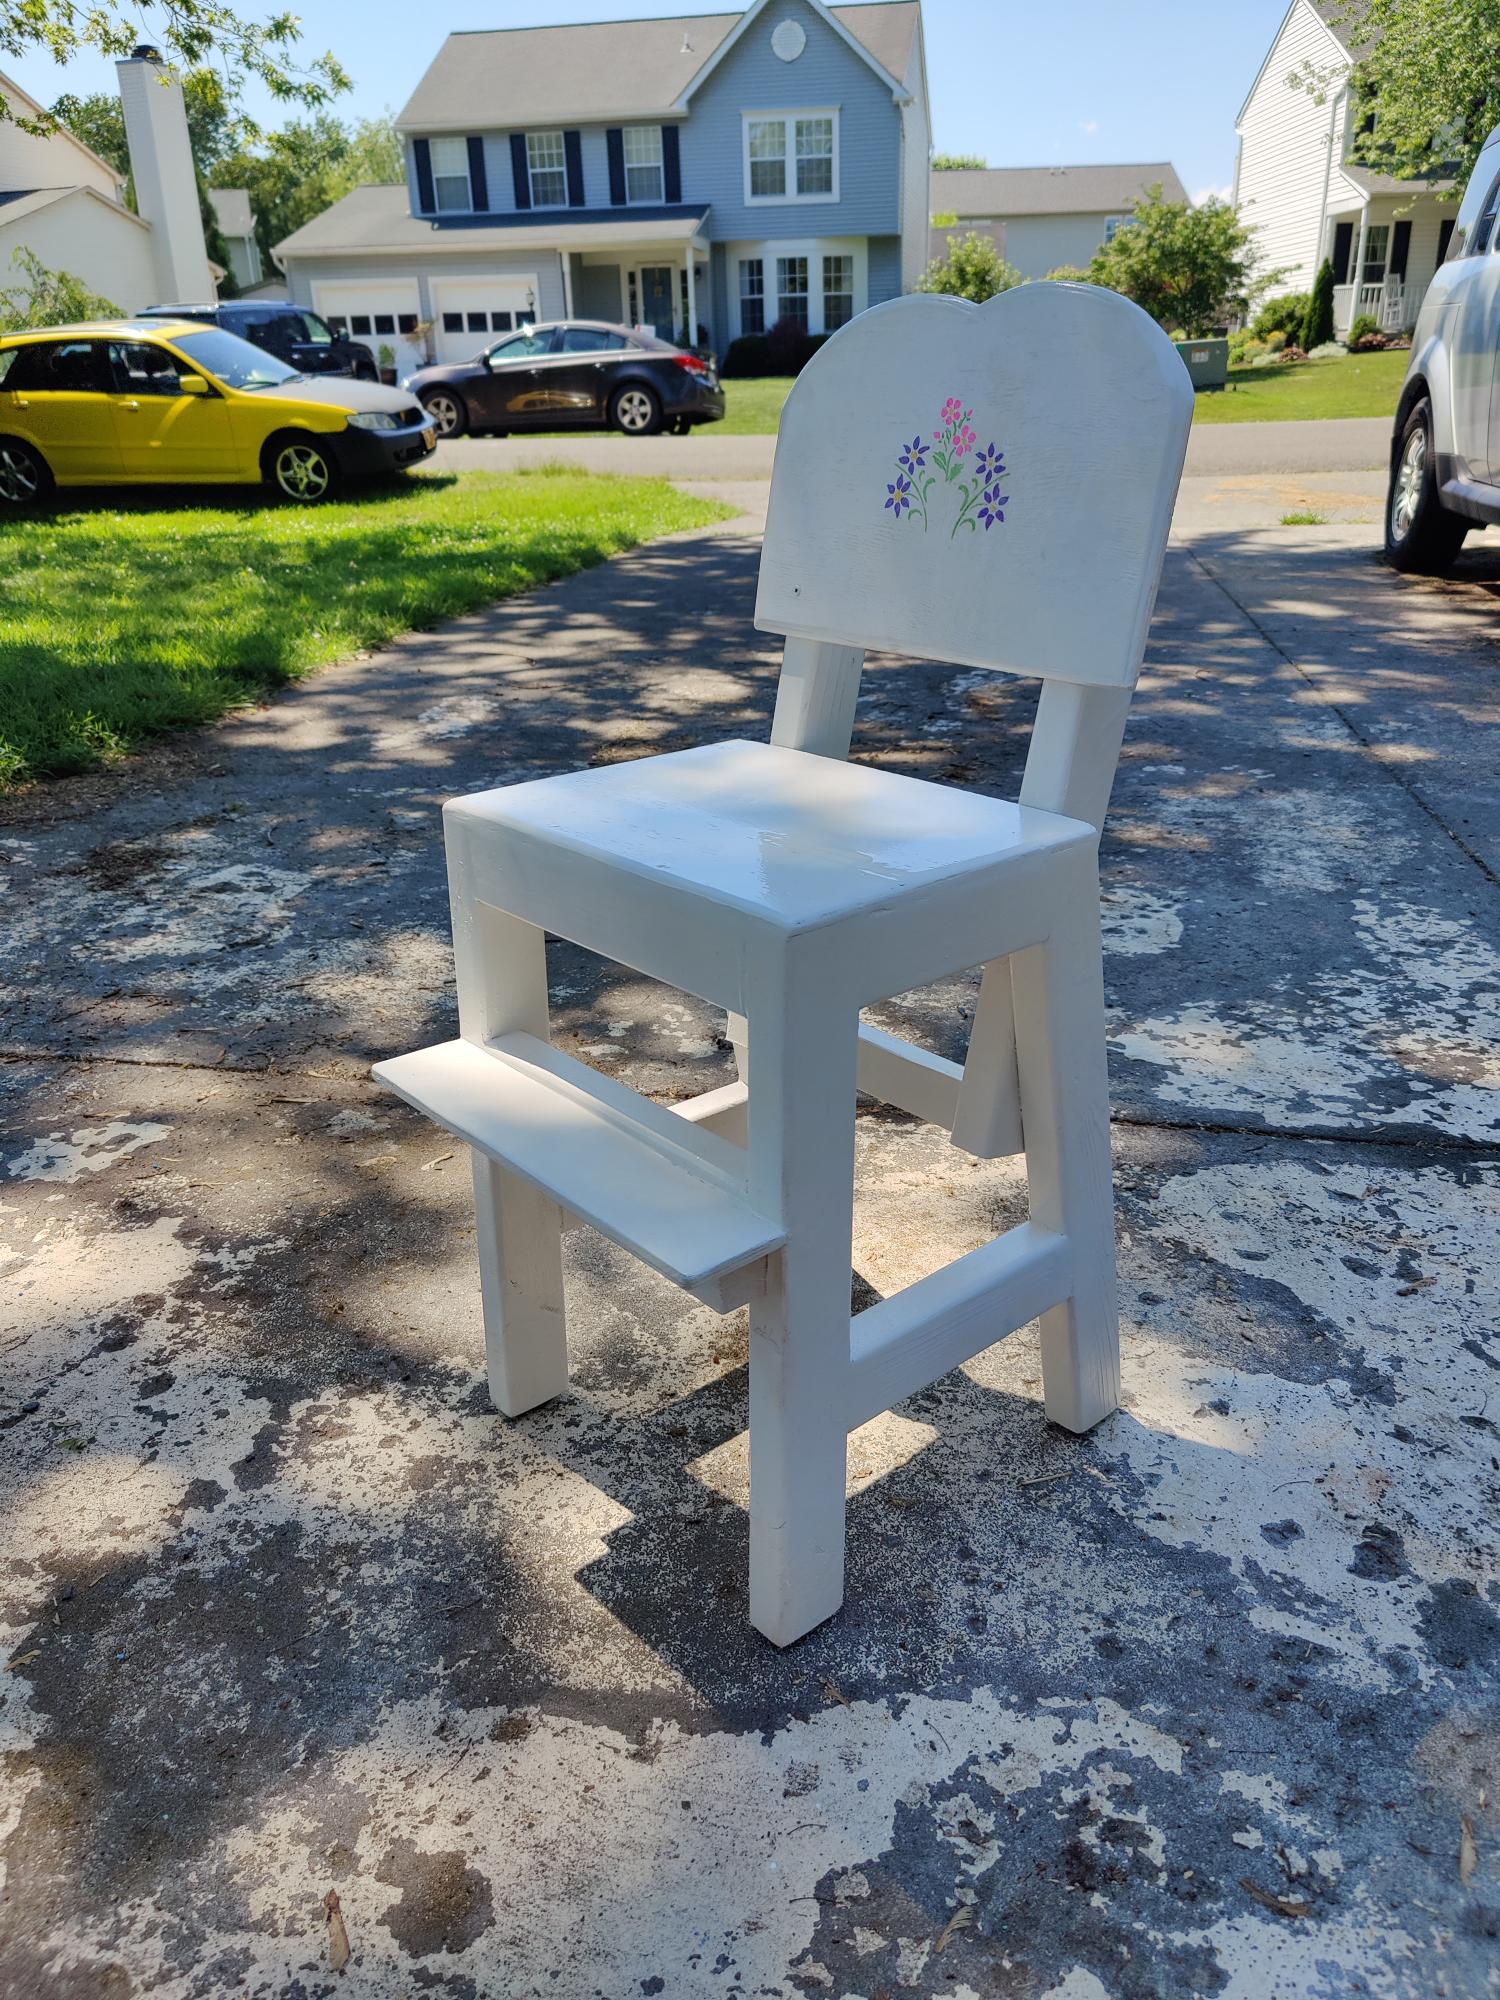
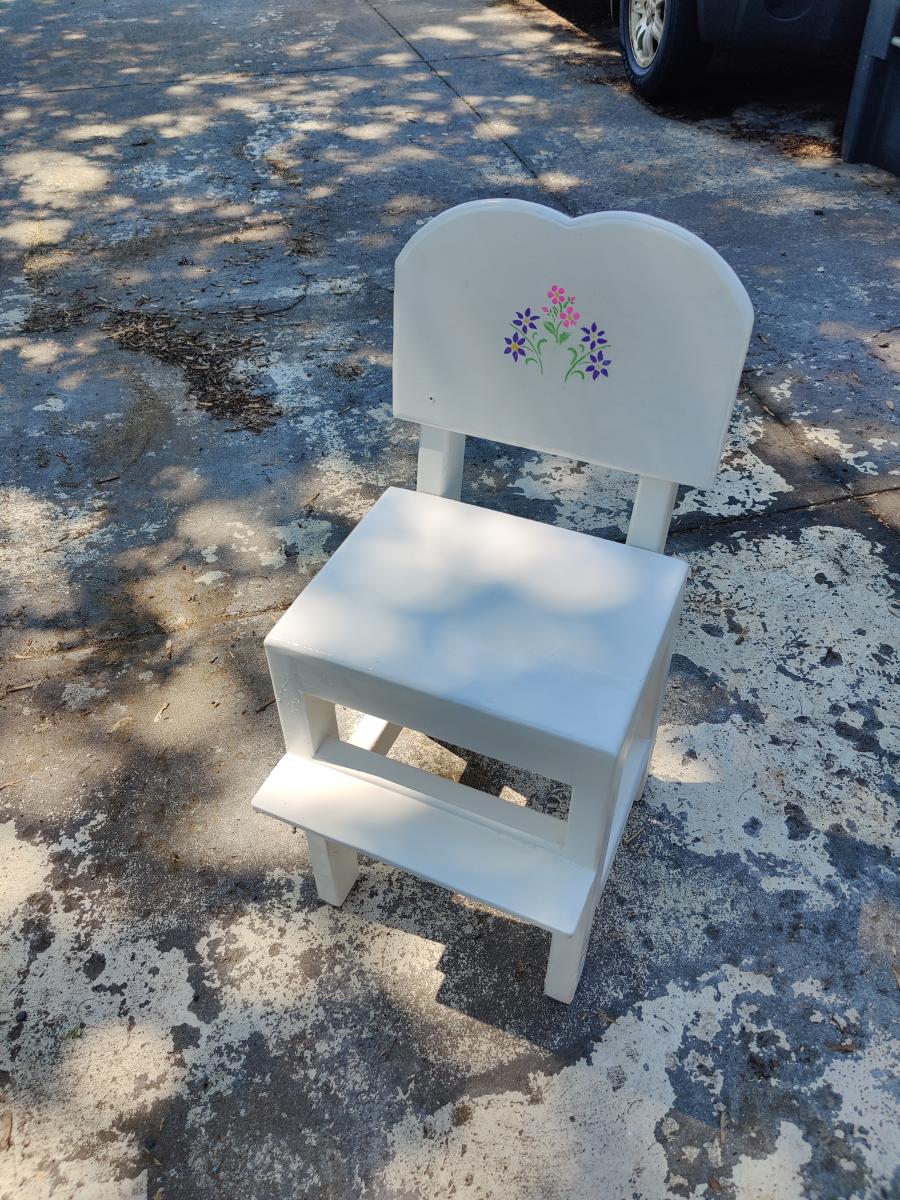
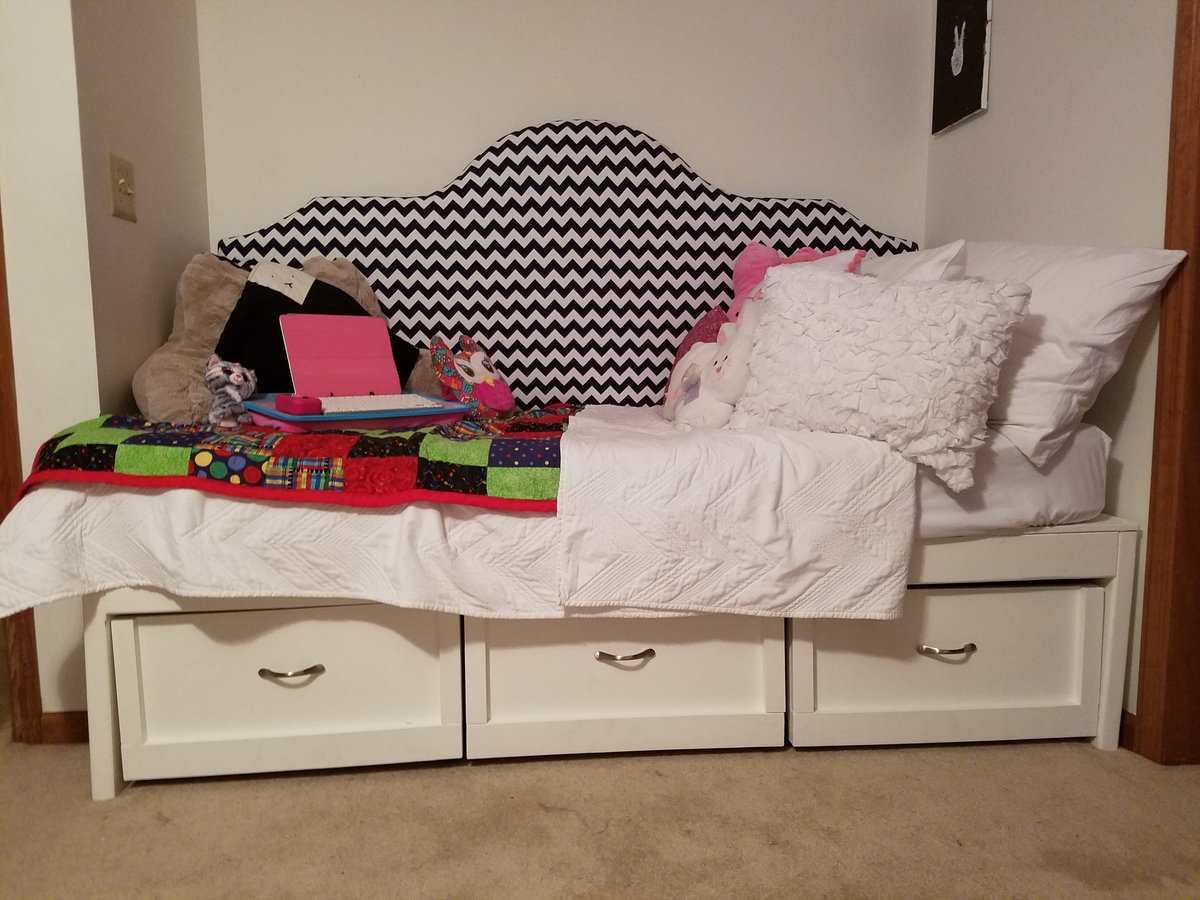
This is Harriet's higher chair, rejiggered with 2x3s because lumber is expensive and that's what I could find in straight lengths. Seat and back are made with plywood from a project panel. Tried to fill all my gaps and hide all my screws that would be visible from the outside and added a foot rest. Finish started out okay, but as I tried to tweak it and re-cover some things, I became less and less happy with how it came out. Note to self, "stenciling is hard". Next time we will most likely transfer pre-done graphics from the printer.
Most of the time in this is in the finish. Some of the dry times were 24 hours others were 15 minutes.
Edit: Roundover bit for trim router used on edge of seat and around the edge of the back. I found this a necessary addition, but it would have come out better on edge laminated 1x4s instead of the plywood I used.
As an aside, Ana's page was instrumental in my buying decision of an incredible lineup of Ryobi tools (2 drills, impact driver, circular saws, oscillating multi-tool, powered caulking gun, inflator, trim router, Evercharge hand vac, And a EZ-Clean... But there are more I want/need... :-D ), and a Kreg K4. They are worth every penny. A lot of Milwaukee tech is getting integrated into some of the latest Ryobi tools. Even more worth it is upgrading the clamp on the K4 to an auto adjuster. ;) Makes life so easy. Thanks for the inspiration, Ana!
For any beginners wondering: Glue AND screw things together. Screws hold better than nails, but are not enough especially when building something that is supposed to take weight, and kids like to wiggle in chairs. Modern wood glue makes a bond that is stronger than most wood. if you try to pry apart a glued joint, you will notice that the wood will split and break before the glue gives way. I'm 275 lbs and this chair I made for my toddler doesn't groan or squeak when *I* sit on it.
My father-in-law needed a place to display the remains of Great-Grandma after she passed away last winter. I modified the plans posted at Shanty-2-Chic to fit the space in his living room: http://www.shanty-2-chic.com/2013/02/diy-shelving-floating-ledge.html
I was looking to purchase a new coffe table when I found your tutuorial to build this Rustic X Coffee Table. I feel that I have a much nicer table than I could've purchased at a store. Or if I did find this table at a store, I'd imange it would cost around $400. So, thanks for taking the time to create and share these with us. I think it turned out nice. Also, this is the first time I've ever used a pocket jig, and I'm in love.
This year for Valentines Day, I wanted to do something special for my wife...
Rather than buying some THING, I decided to build a cedar ladder planter for her. I've built a few things now from Ana's collection of plans (a farmhouse bed for my daughter, a potting bench that I use for an outside cooking surface at our remote property in the woods, and outdoor chair and sofa from 2x4s)
I followed Ana's plan to the T and it came out beautifully! (Just like the other projects)
Obviously with the whole COVID craziness and subsequent wood prices lunacy it cost more than $20, but it was still EXTREMELY reasonable. A family friend said they'd seen similar ones (to not nearly as pretty) costing WAY MORE than what I paid for materials.
I've been meaning to put pics up here for a long time but, life, army, COVID craziness...
For the gift, I filled out with raised bed type potting soil and put "chocolate roses" and a gift card for the local nursery to buy whatever plants or flowers she wanted...
I think she was a little irritated with me the days leading up to it because I was spending all my time outside in my shed and not letting her come in... but the end result blew her away (and made her feel a tad guilty for thinking I was just trying to not spend time with her hehehe)!
Mon, 06/21/2021 - 09:09
It looks fabulous and it's hard to beat a handmade gift, well done!
This was my first Ana White Project and I think it came out well. I already had the chairs and needed a table to match the whimsy. The chairs are counter-height so I changed the dimensions of the table to match the height. I re-used an old oak table top to save some money. The top is painted all by hand and the messages on the apron read: "life is too short to drink bad wine", "sit, relax, and accept the crazy", "eat, drink, and be merry", and "frolic". To help the top from wear, I found a perfect-sized glass on craigslist.
Thank you, Ana, for the inspiration. I just finished the Kids Storage Leg Desk. Off to paint it now. :-)
Our two-year-old daughter's newfound hobby of washing her hands and brushing her teeth really took off a few weeks before Christmas. Santa left stools for her and her little sister to be used in different bathrooms.
My first build. Wanted something to put in front of my window for my cats to sit and look out on.
We have a wonderful rental cabin in Grand Lake, CO. I wanted to add some special seating outside. These chairs are perfect, comfortable, and even the moose came by to see them. They agree too that Ana’s design is wonderful. My daughter and I worked on these together, from beginning to end. We cut, sanded, stained, and finally put it all together. These are so comfortable, even my husband agrees!! Thank you Ana for the plans and video. I will be adding the table to go with them too. Jennifer
Wed, 07/07/2021 - 10:18
You and your daughter did a fabulous job, thank you for sharing! #mooseapproved :)
I am so so so proud of myself for building this great bench. I can' t wait to do the next project. I wanted something bright and fun to put in my entry way to put shoes on. I thought this was a great first project. I opted for orange, ( ) I wish it had been a different shade, it's pretty bright. When I ruffed up the edges with brown (with a toothbrush) that helped take the brightness down a bit. I chevroned the top to make it funner. Chevroning is a pain in the behind, it takes forever to tape it off but it's cute in the end. I noticed a few people said they did this in a couple hours, I don't know how. It took me two days! It doesn't take more than two or three hours to cut the wood and put it together but then you have to fill the holes, sand it, prime it, paint it, touch it up....
If you have all the tools already... Then the cost is low.
I spent:
$28 lumber @ Home Depot
$20 paint & primer @ Walmart
Now the only problem is I don't have ANY other orange things in the house. I'm going to have to rethink my decorating, or build another bench ;)
Thanks Ana!
Wed, 04/17/2013 - 11:02
I say add some other orange accents to your house. That bench is too cute to change out for something else!
I used the basic plans with two significant alterations. I made the dimesions slightly narrower, and I moved the entrance to the side. Both of these changes were made because of space constraints in the location we chose.
We needed a custom bed to fit a niche. We used the Daybed with storage drawers, but shorted the length by 1.5 inches to fit our space. Our daughter is very happy with her new bed.
Tego needed a raised dog bath. No, I needed a raised dog bath. Specifically, my knees needed a raised dog bath for Tego. So, after looking at Pinterest and Ana's plans, I decided what I really wanted to do was customize something to fit my needs (and knees) and build it myself. Overly ambitious for a first-time woodworking project, but hey, raise the bar.
I started by reading and rereading Ana's beginner's woodworking guide (very informative). I also learned so many other things along the way. There's a reason, besides looks, you need flat boards (they need to screw together tightly). Unfinished basement floors are so not level (especially near the walls). Screw lengths matter (need shorter ones for thinner boards). The big-box store doesn't make precise cuts (but they can make a lot). Planning for the finishes will save you time (know your basket sizes). Just to name a few.
It's going in an unfinished basement, so I wasn't going to tile and add glass doors. I wanted to keep it relatively simple, basic.
The stairs were the hardest to measure and build (math matters) - and I might re-do. I made the steps smaller, dog-sized, but she finds them awkward. I'd stick with typical riser heights, but it depends on the size of your dog.
Plumbing to link the tub drain to the utility sink drain was the most expensive. Probably I could have done it myself, but I decided not to learn both plumbing and woodworking for one project.
Overall, I'm pleased with the result - and Tego is learning to love it.
Thu, 07/22/2021 - 12:38
Love it, you and Tego are AMAZING! Thank you for sharing your custom build:)
My neighbour Bryan challenged me to make it. It was indeed a challenge as there is no strait bit to a wheelbarrow and I had no plans so I kind of made it up as I went along. From far the hardest thing I made so far.
Hi from El Salvador, Central America, this was a realy easy proyect but give this gift to your friends and you will touch their hearts, take the time and effort to build it with your own hands is very meaningfull to everybody. Thanx Ana great site!!
Tue, 03/10/2015 - 16:52
You are so right. People really do appreciate thoughtful, hand-crafted gifts, and yours is beautiful.