Community Brag Posts
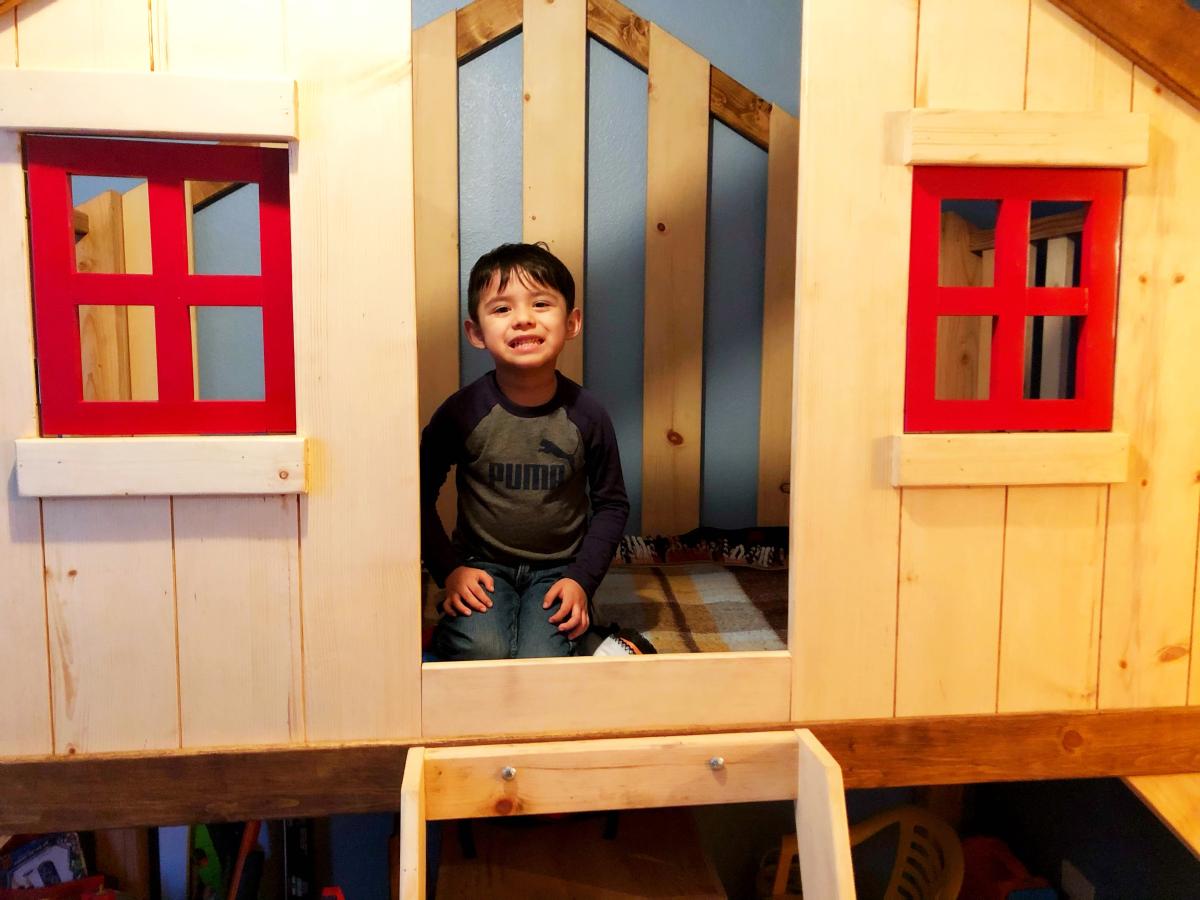
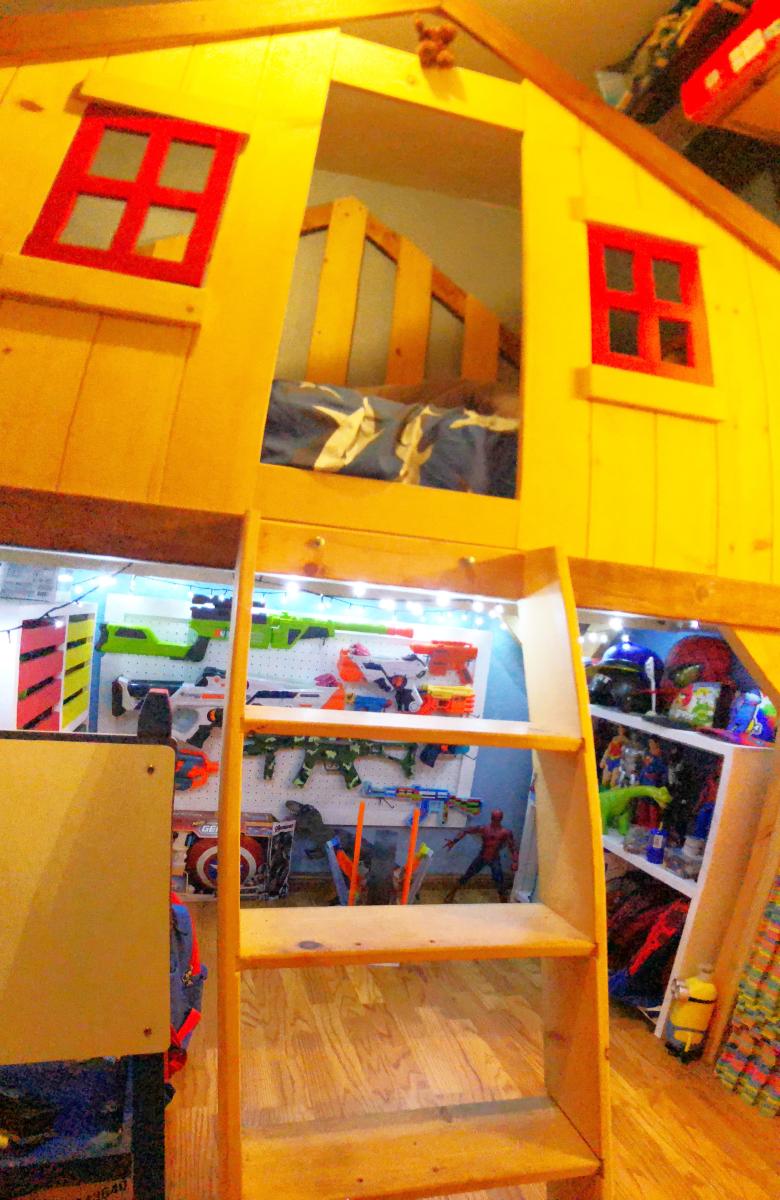
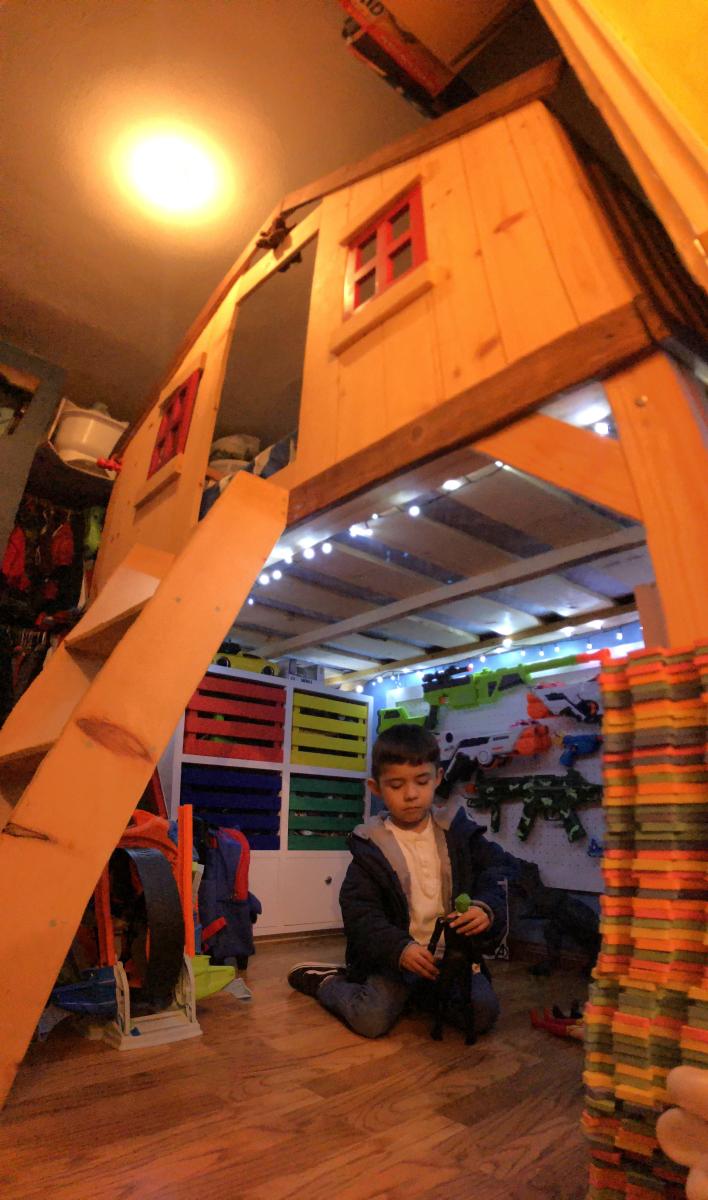
Kids Loft Playhouse Bed
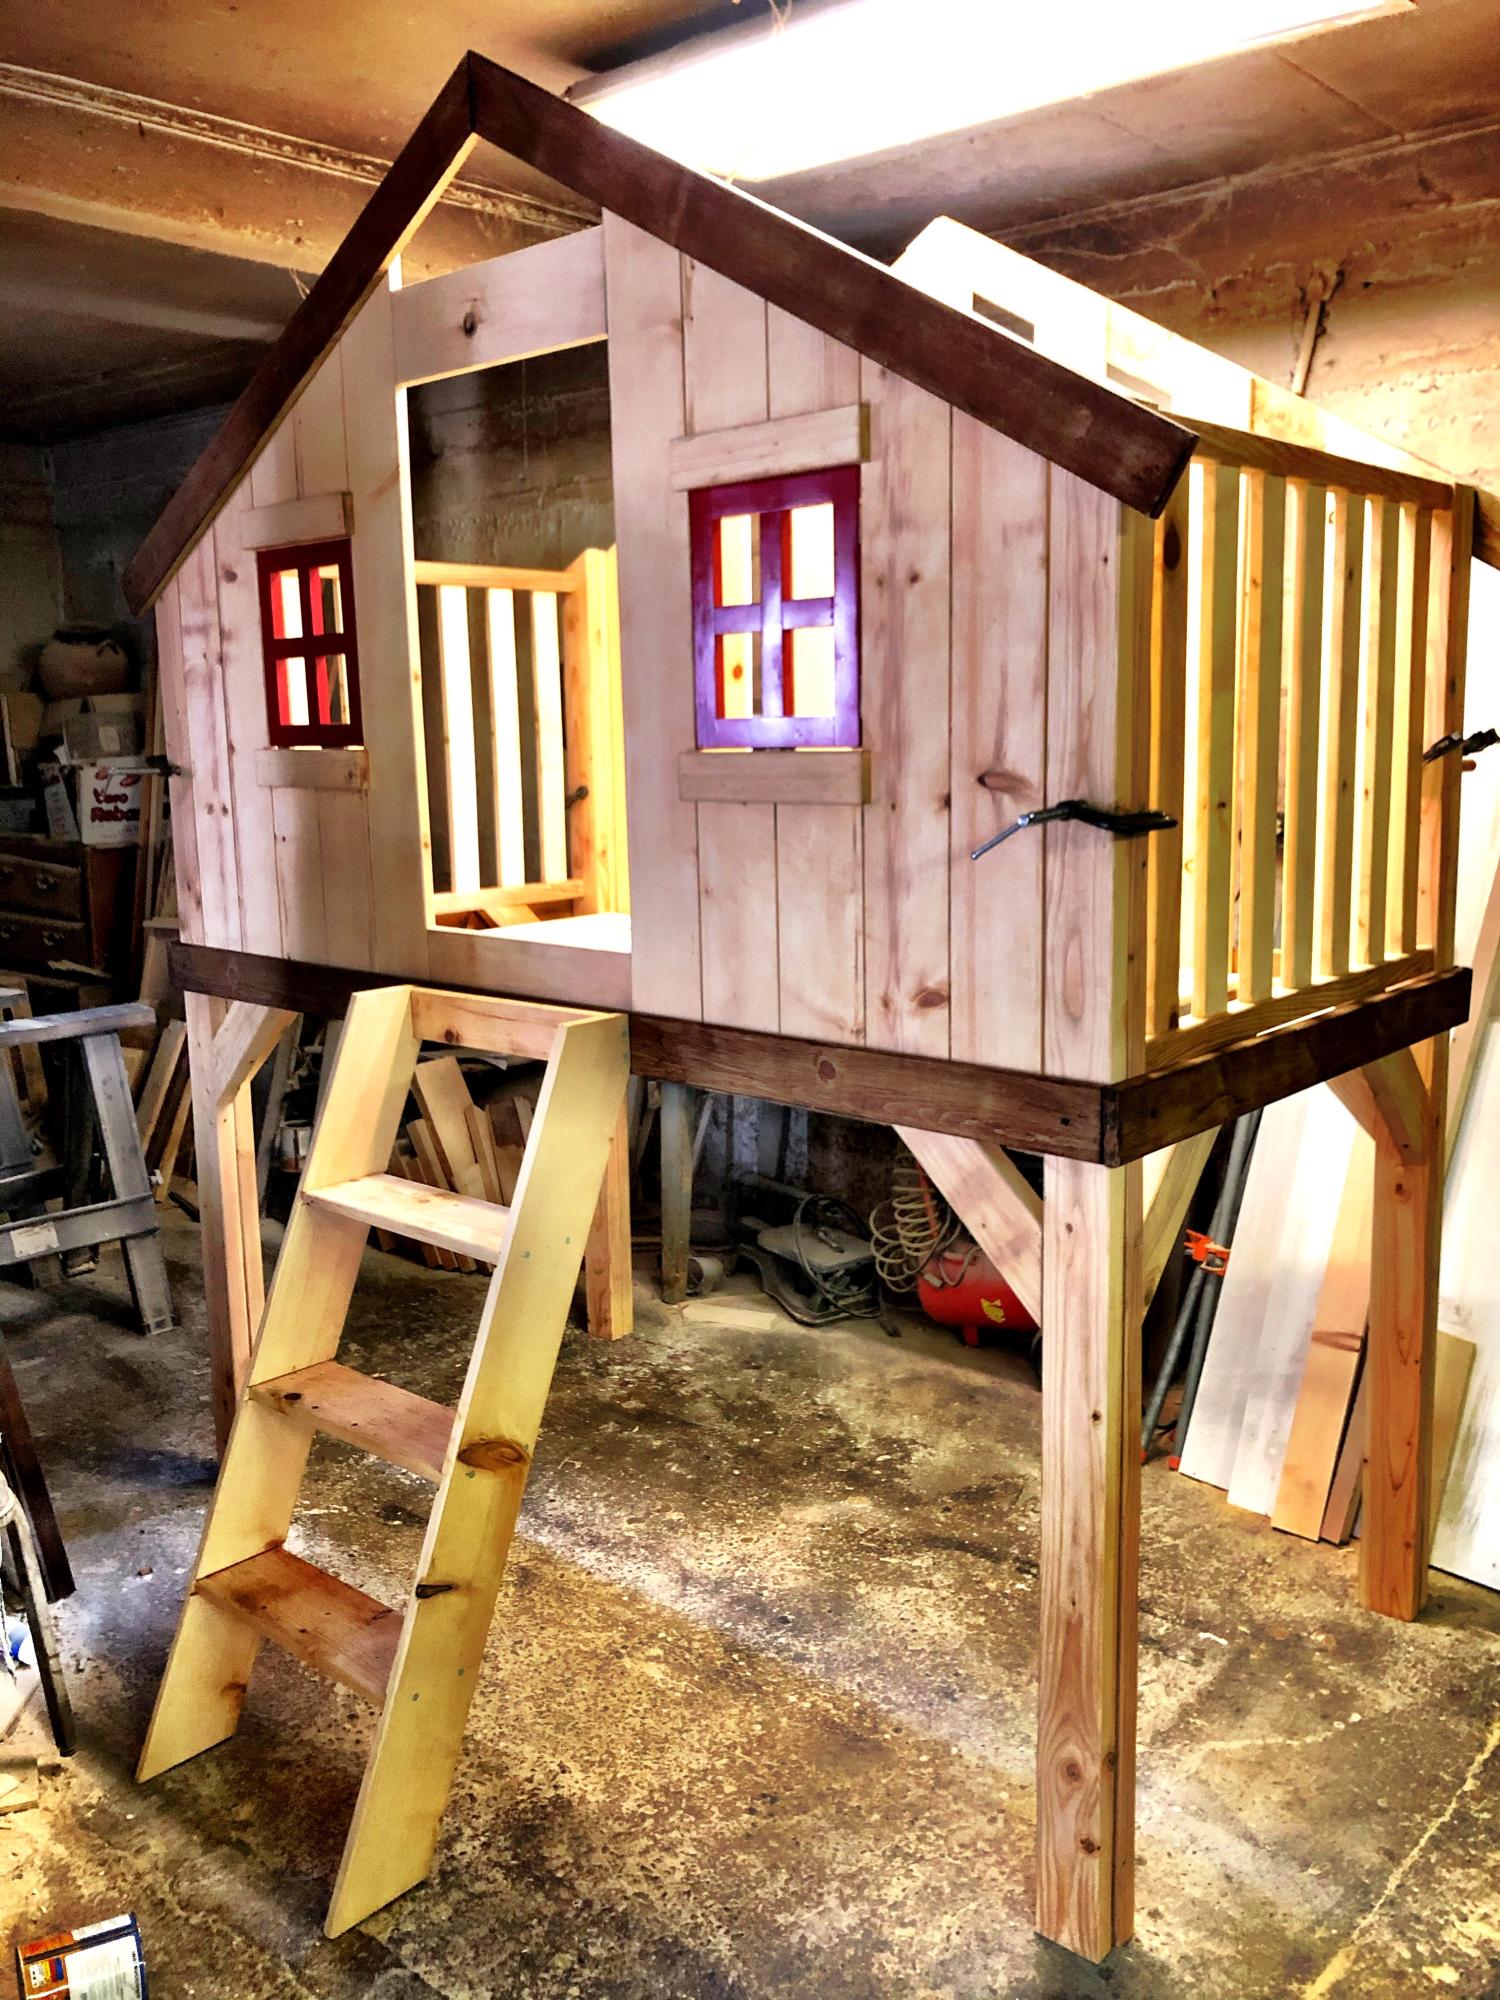
My Kid loved his new bed, I made an extra storage for his toys in the space under the bed so he can play.
Juan Carlos C.
Built from Plan(s)
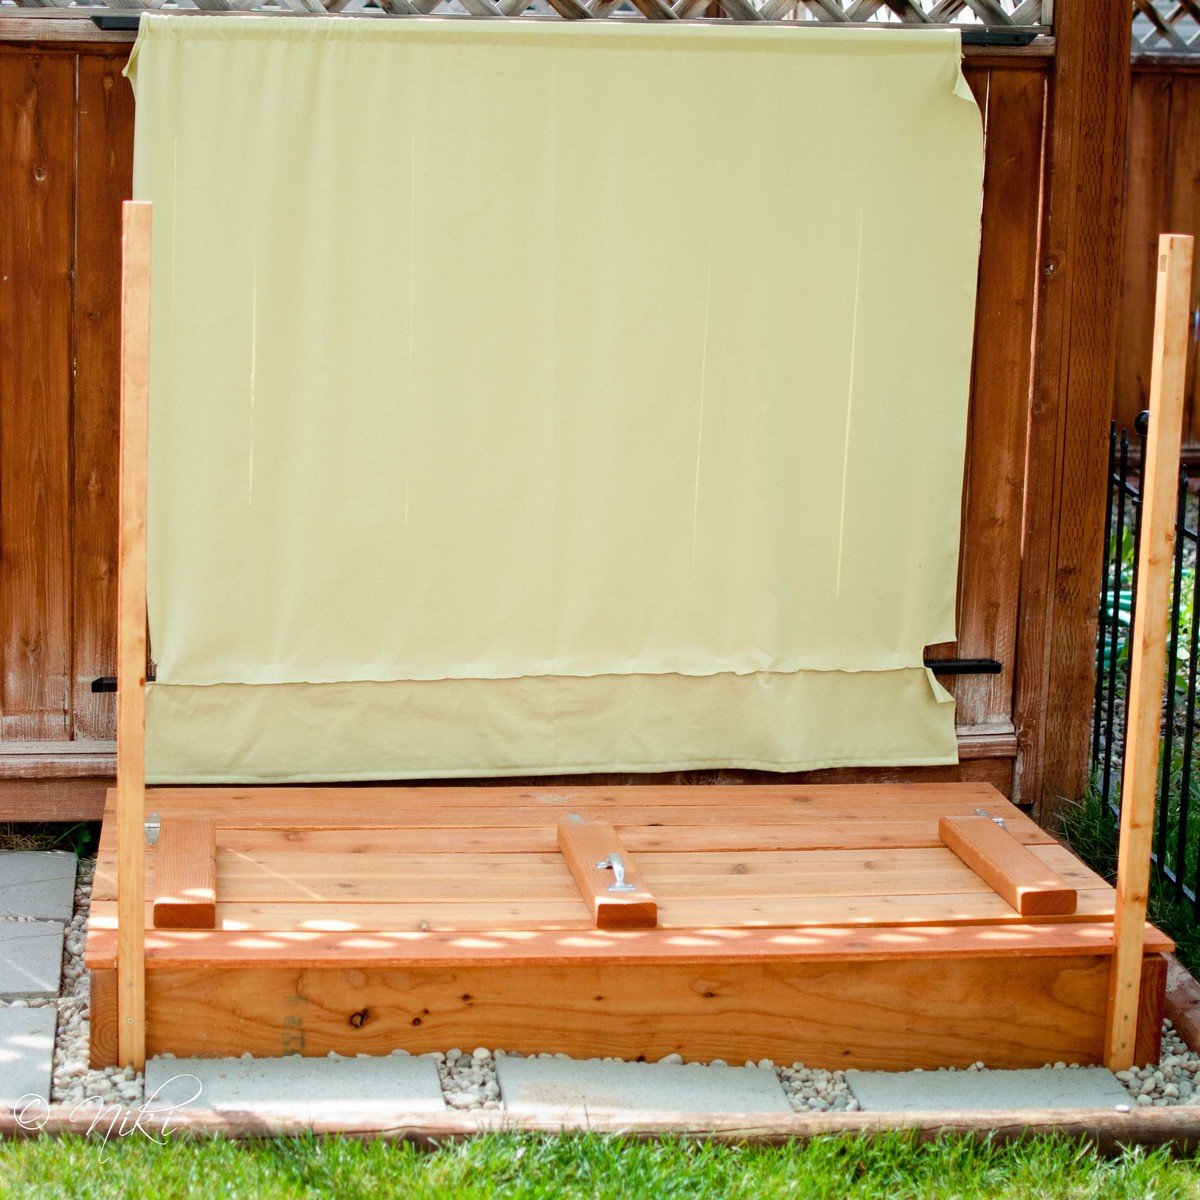
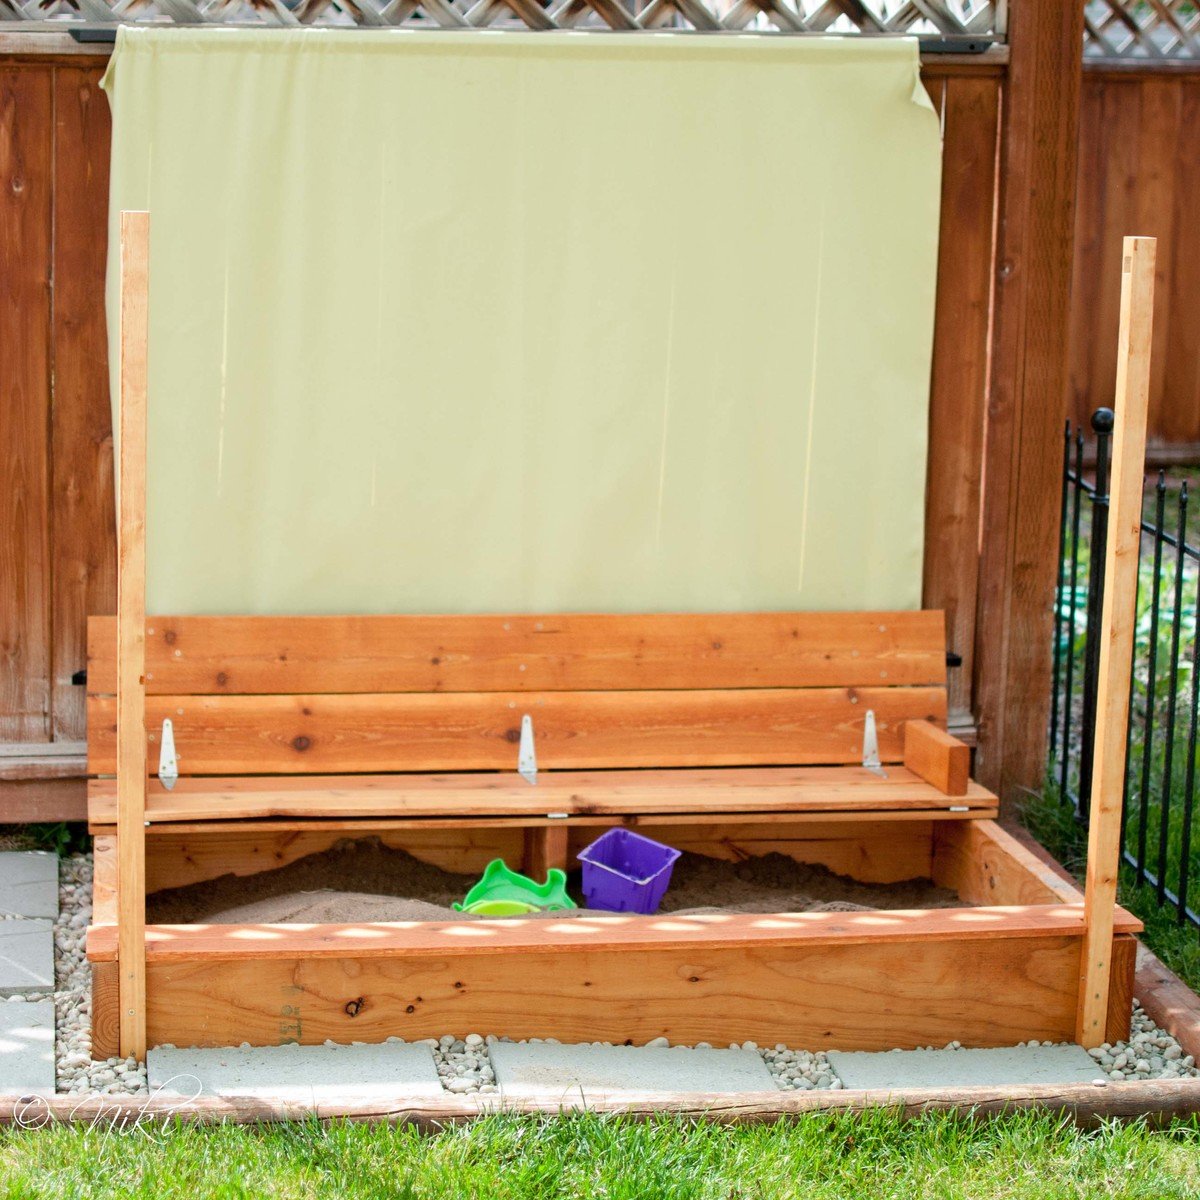
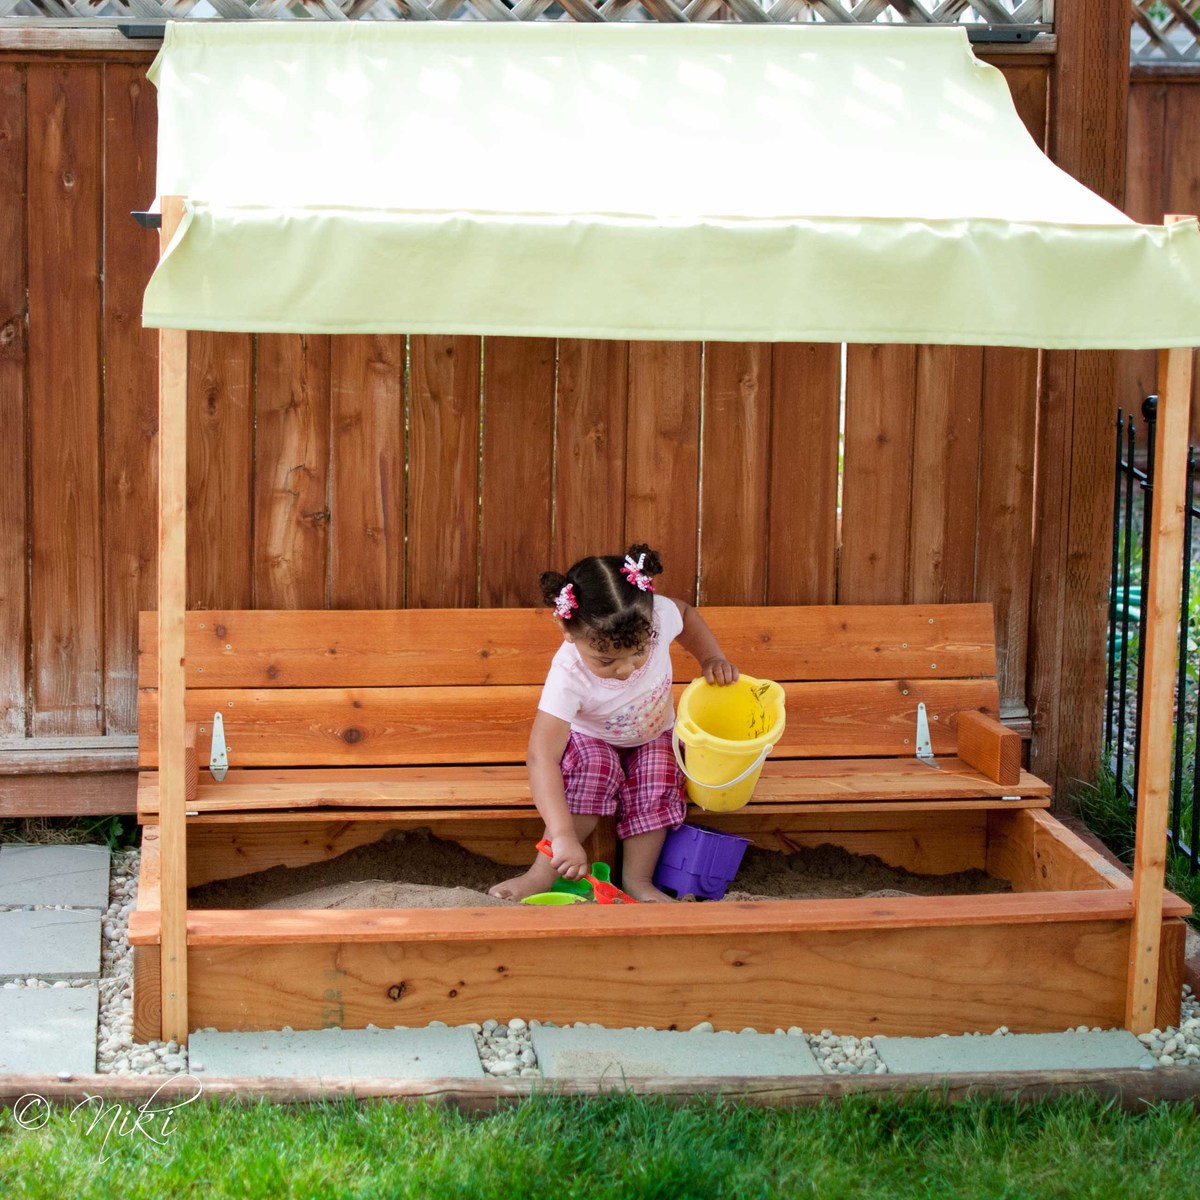
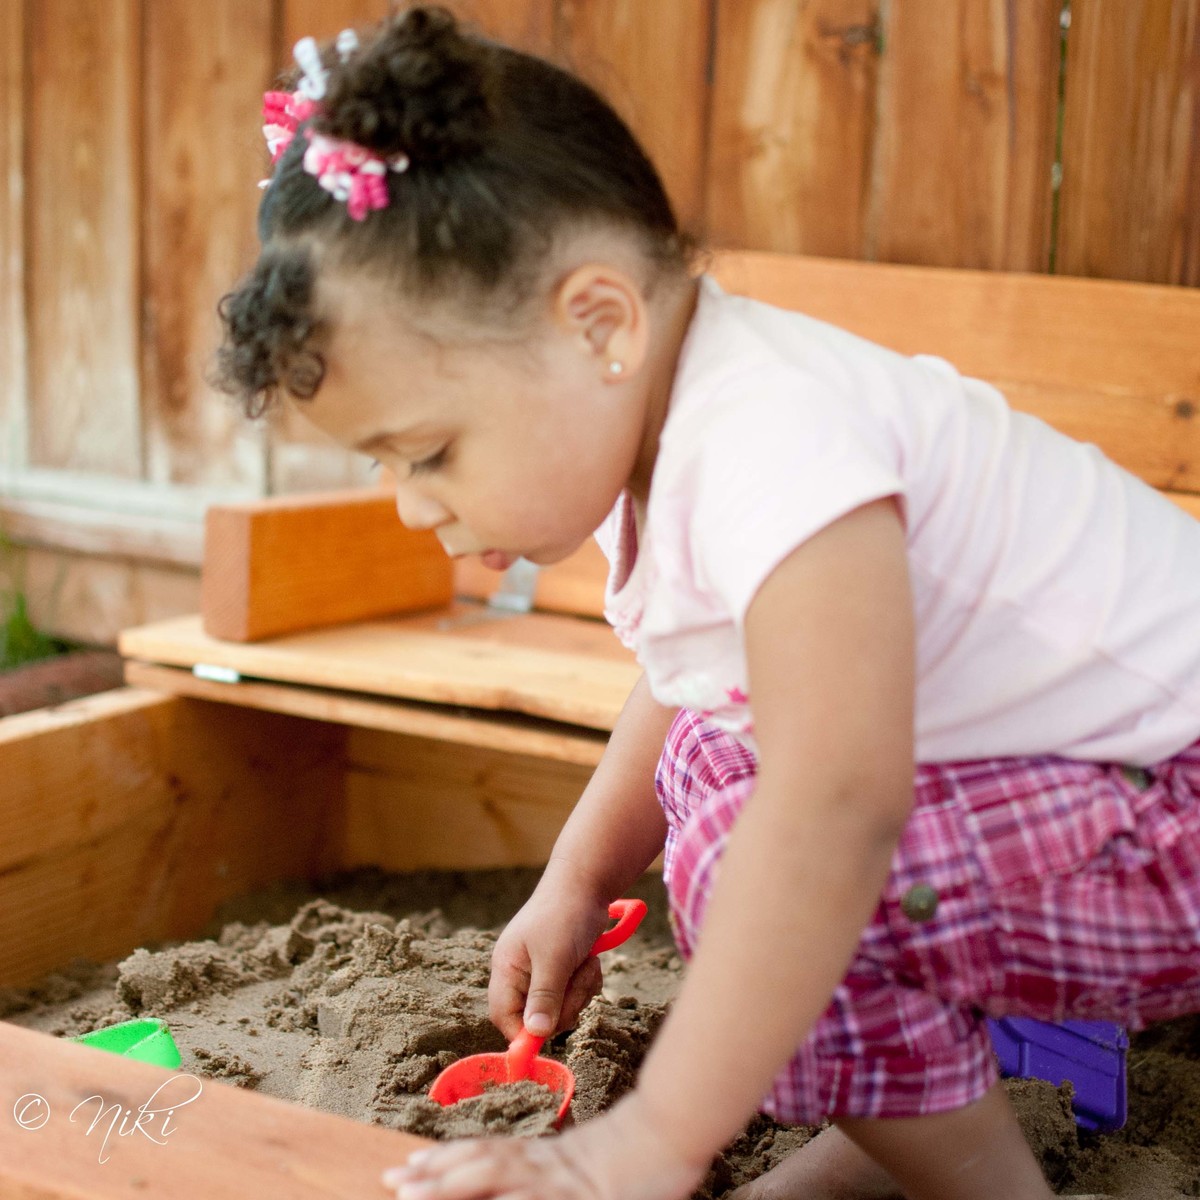
Modified Sandbox with built in seat
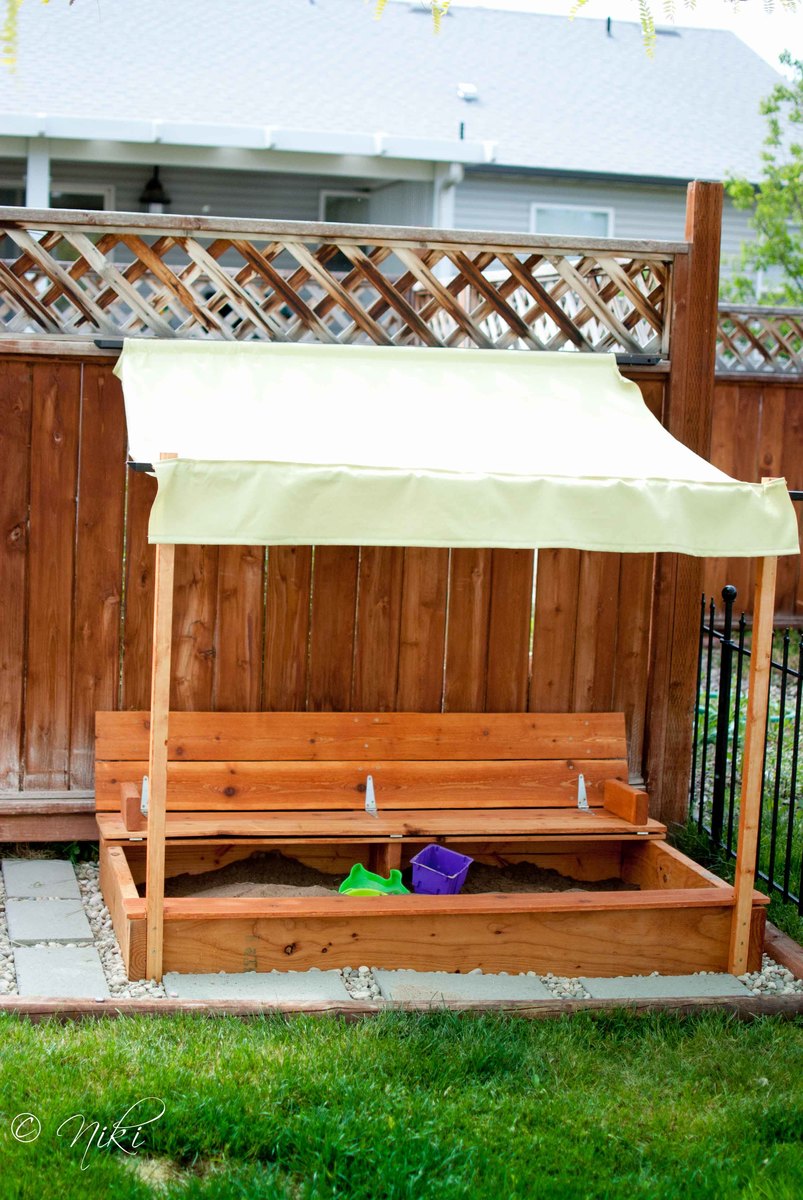
"Cellar? What cellar? We don't have a cellar... Oh, you mean the new sand box! Here, let me get some shade too."
I'm not sure why, but I can never seem to follow plans exactly. I guess that's not entirely true. I CAN follow plans exactly, but I almost never do. Maybe it's some sort of passive rebellion or something, but I usually have to put my own spin on the things that I build. Sometimes it works out in my favor. Sometimes not. This build was a little of both.
I decided to only build one bench in our sand box. This cut down on a lot of supplies. By making it longer a single bench and making it longer, it covers about the same amount of square feet, just in a rectangle instead of a square. When pricing lumber, I noticed that 2x8's were cheaper than 1x8's. So I went with those instead. It can't hurt to beef up the sides a little, right? This required some easy calculations on the cut list. I also decided to use 1x6 fence planks instead of 1x4 whitewood or pine. The fence planks were cheap, and I figured they would look nice in the back yard. They are also naturally pest and rot resistant. They required extra sanding to take the rough off. However, this is one place that I'm thinking the modification didn't work in my favor. The fence planks are not as thick as the whitewood. This combined with the increased length makes the the top pieces feel pretty weak. I put a little support piece under the bench. I'm quite sure the bench would not have held up well without the support.
Because this is an outdoor piece, I dry fit everything, and then stained everything before assembling it, to make sure all of the edges were well protected.
Cost breakdown (not including canopy)
Fence planks $14
2x8x8 $11
hinges $9
handle $2
stain $10

Built from Plan(s)
Estimated Cost
About $50
Estimated Time Investment
Day Project (6-9 Hours)
Finish Used
Preserva-wood in Pacific Redwood color (aka the cheapest outdoor stain I could find)
Recommended Skill Level
Beginner
Comments
Thu, 03/07/2013 - 08:49
LOVE your sandbox!!!
I just love the changes you made to this sandbox! Can you tell me what you used for the construction of the canopy? Thanks!
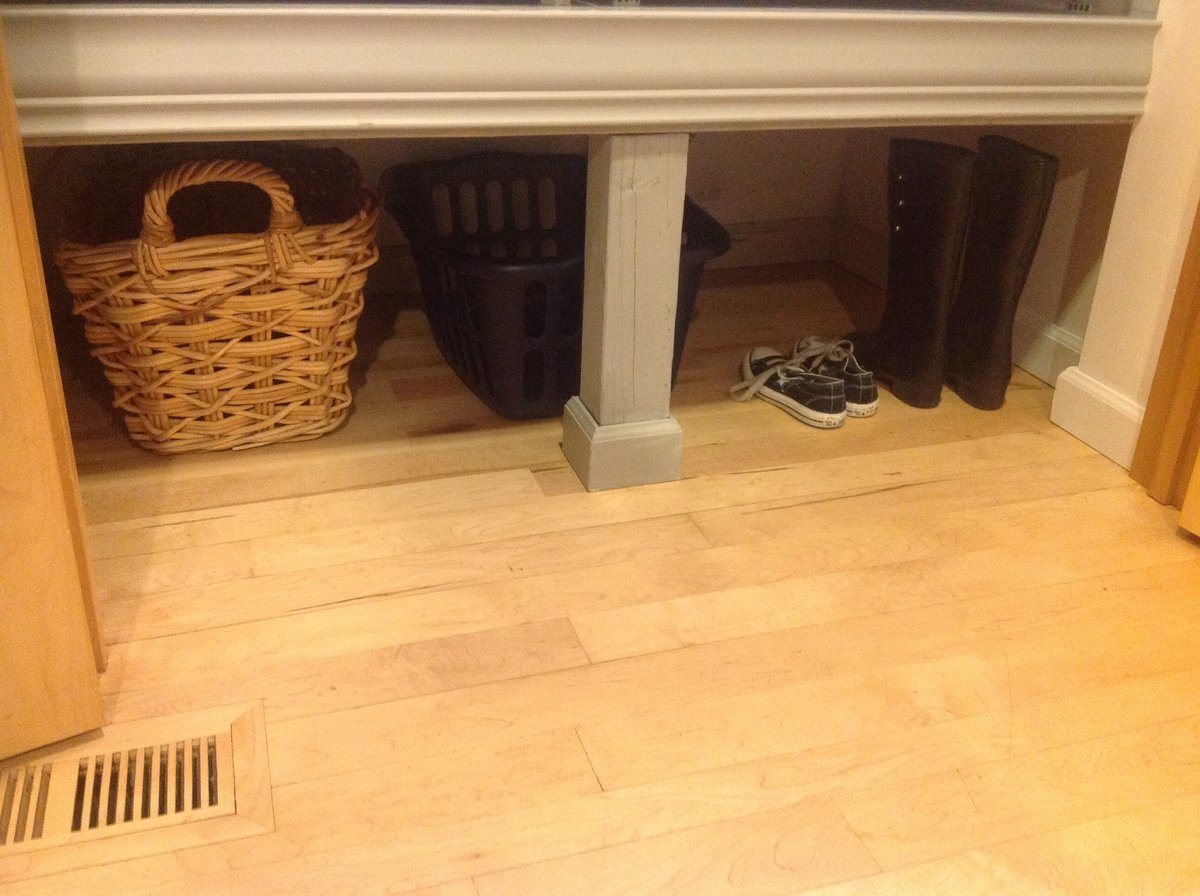
Washer & dryer pedestals
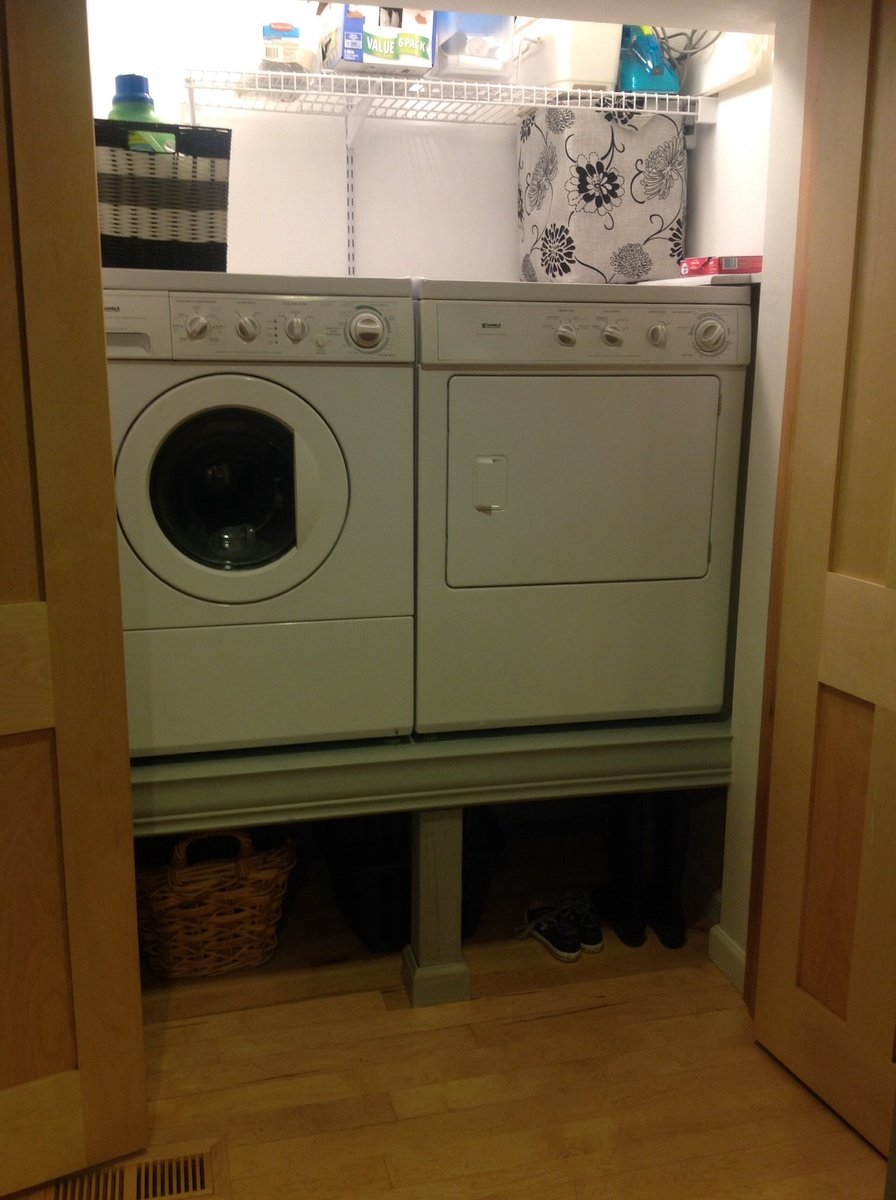
My hubby built this from saushas washer/dryer pedestal plans. He modified it a bit because we needed the storage taller underneath for shoes and baskets. Our closet is right by the front door and it was always a mass of shoes in front of the washer and dryer that you couldn't shut the door! It works great. We have beautiful hardwood floors (that was my hubby's trade for 12 years) and didn't want to cover them up either:)
Built from Plan(s)
Estimated Cost
About 10$
Estimated Time Investment
Afternoon Project (3-6 Hours)
Finish Used
Grey paint from ACE hardware. Name "seal point".
Recommended Skill Level
Beginner
Comments
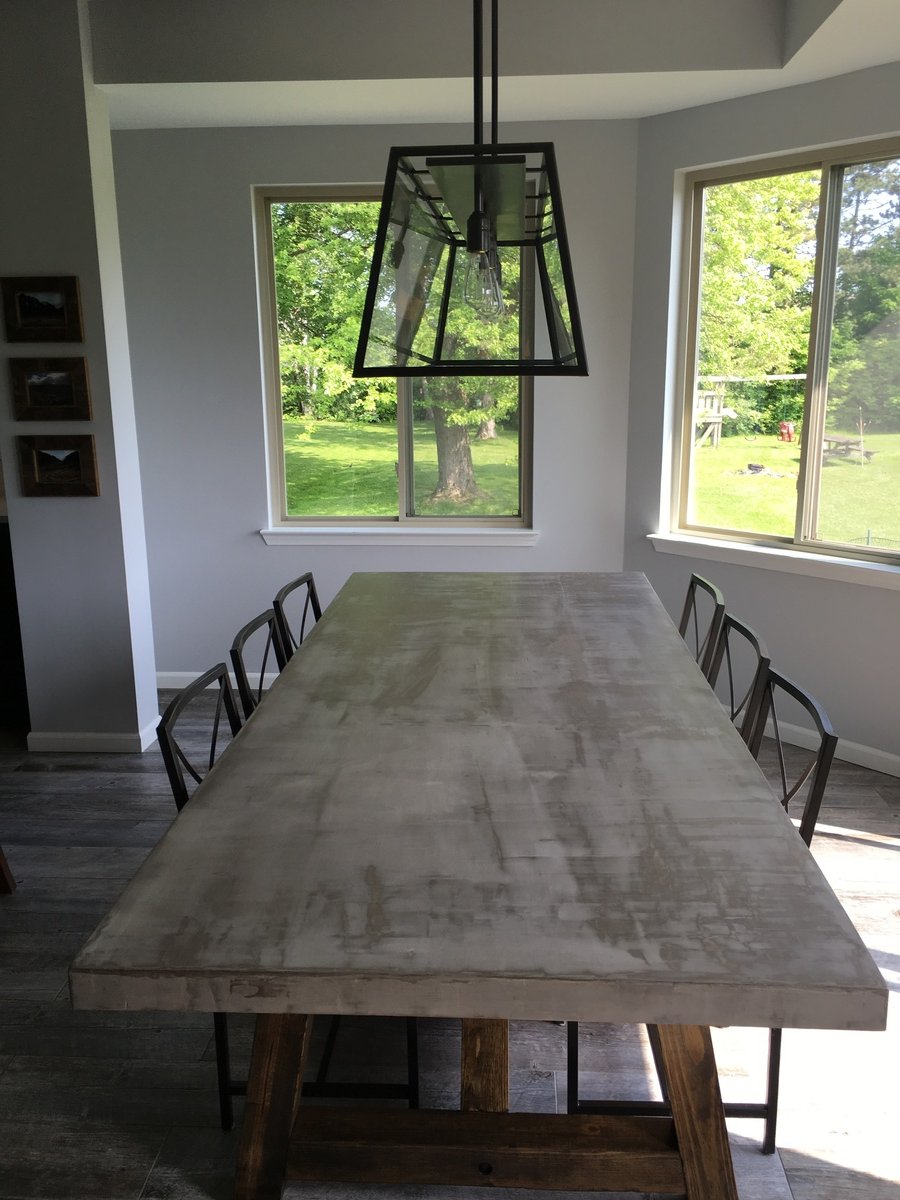
Cement top modification
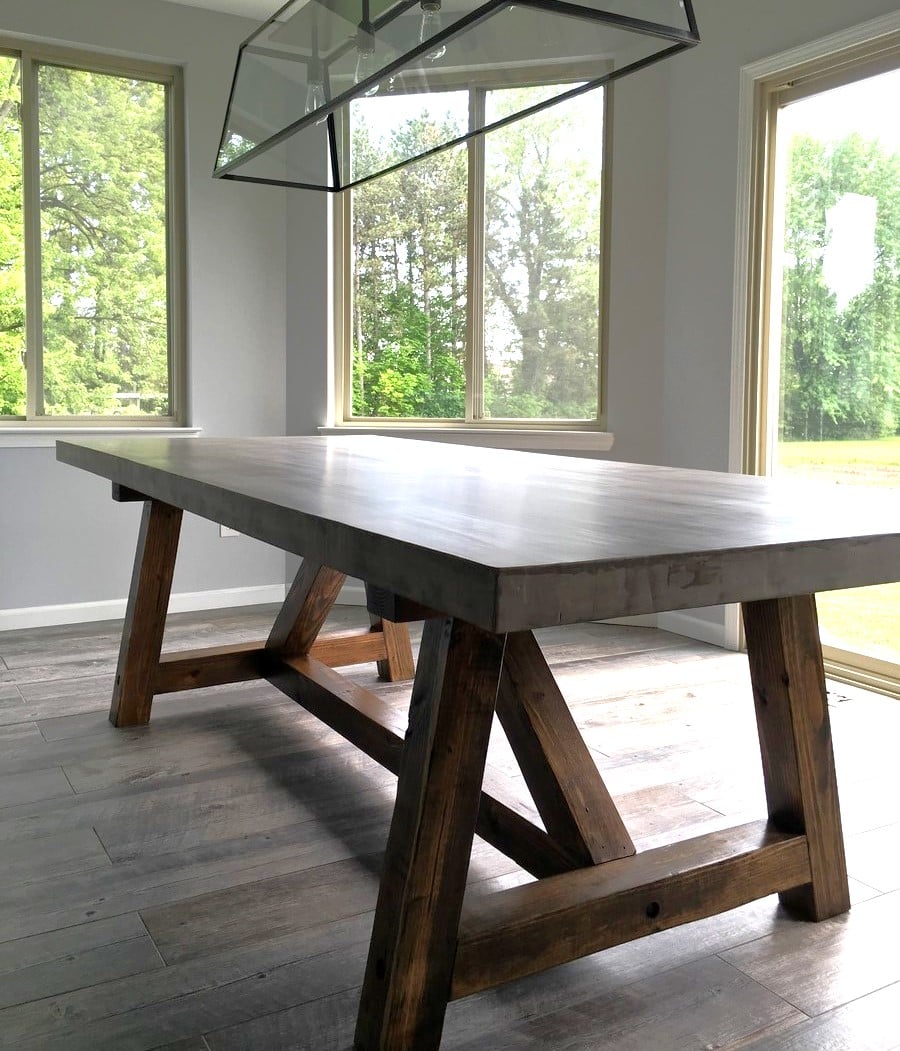
Instead of a wood top I used 2x 3/4" sheets of plywood plus 1/2" backer board to create a thicker top and used Ardex feather finish cement in 4 coats sanded and finished with Mexeseal sealant, recommended 4 coats of semi-gloss plus 2 coats of satin to get a matte finish (recommended by manufacturer) I followed the concrete countertop blog from "Young House Love" but used a different sealant when I contacted the safe coat manufacturer and they recommended their Mexeseal product.
Built from Plan(s)
Estimated Time Investment
Week Long Project (20 Hours or More)
Finish Used
Ardex Feather Finish Cement
Safe coat Mexeseal Sealant (4 coats semi-gloss plus 2 coats satin for a matte finish)
Stain on base: Minwax weathered oak and dark walnut
Poly on base: 2 coats of Minwax satin poly
Safe coat Mexeseal Sealant (4 coats semi-gloss plus 2 coats satin for a matte finish)
Stain on base: Minwax weathered oak and dark walnut
Poly on base: 2 coats of Minwax satin poly
Recommended Skill Level
Beginner
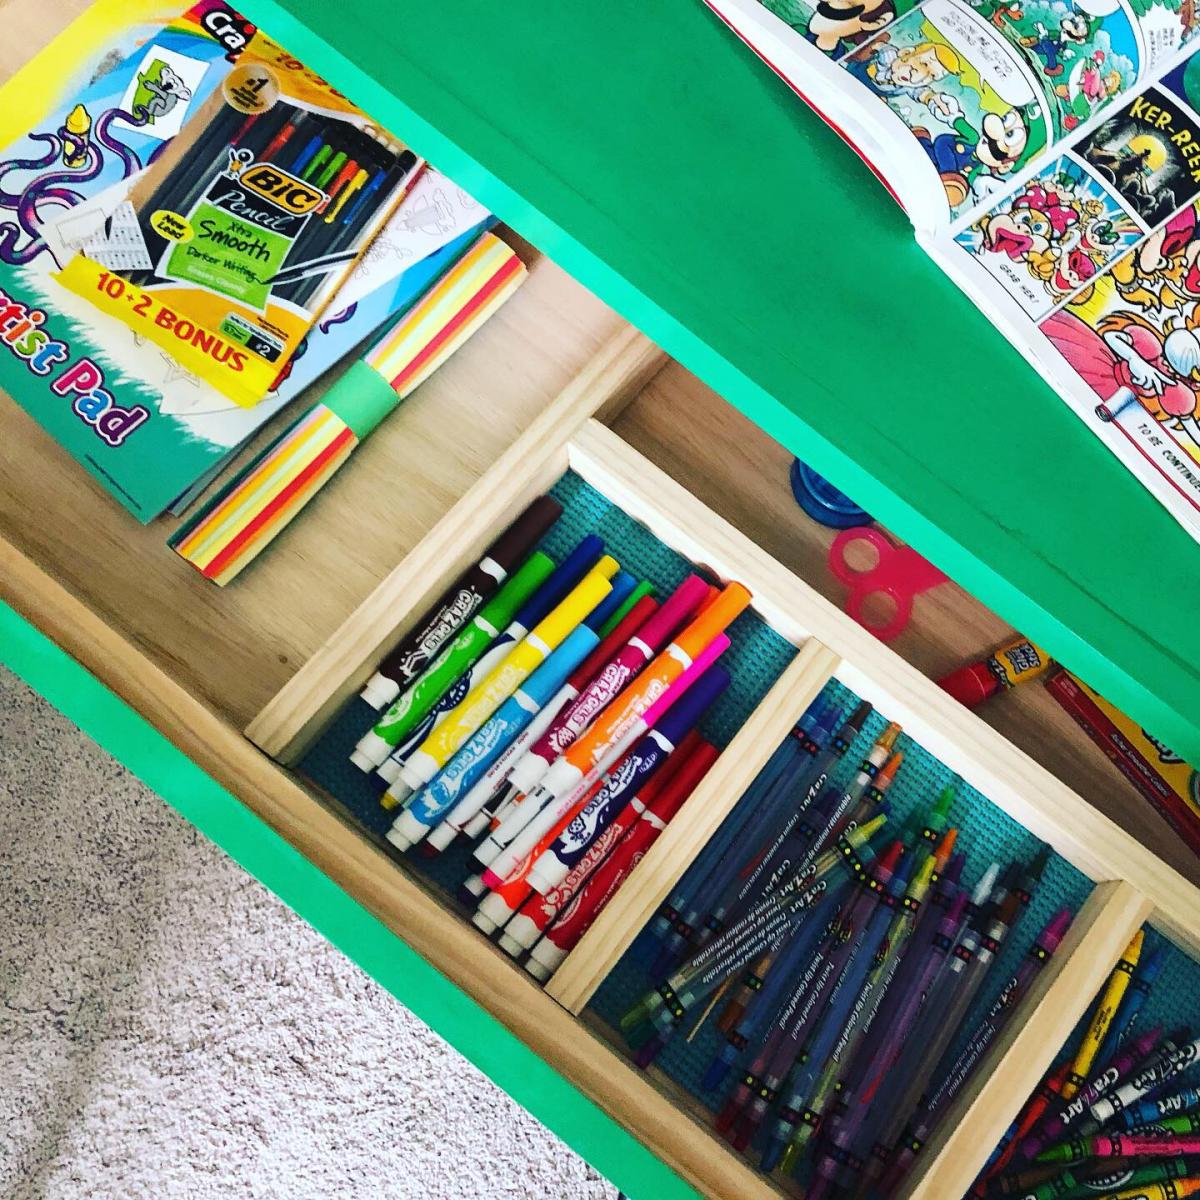
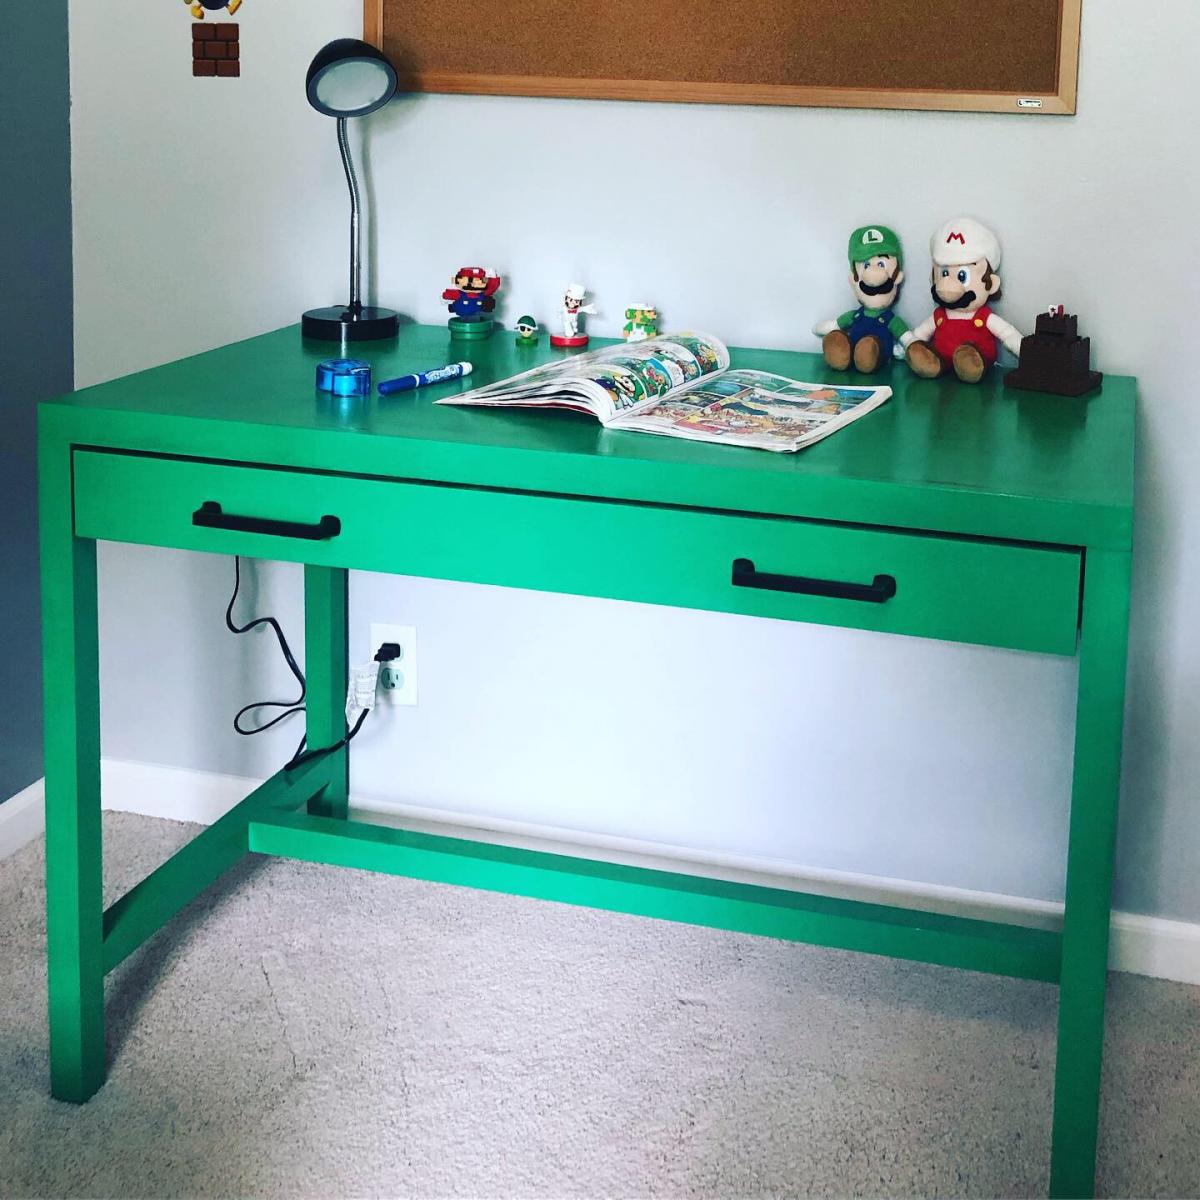
Super Mario Themed Simple Desk
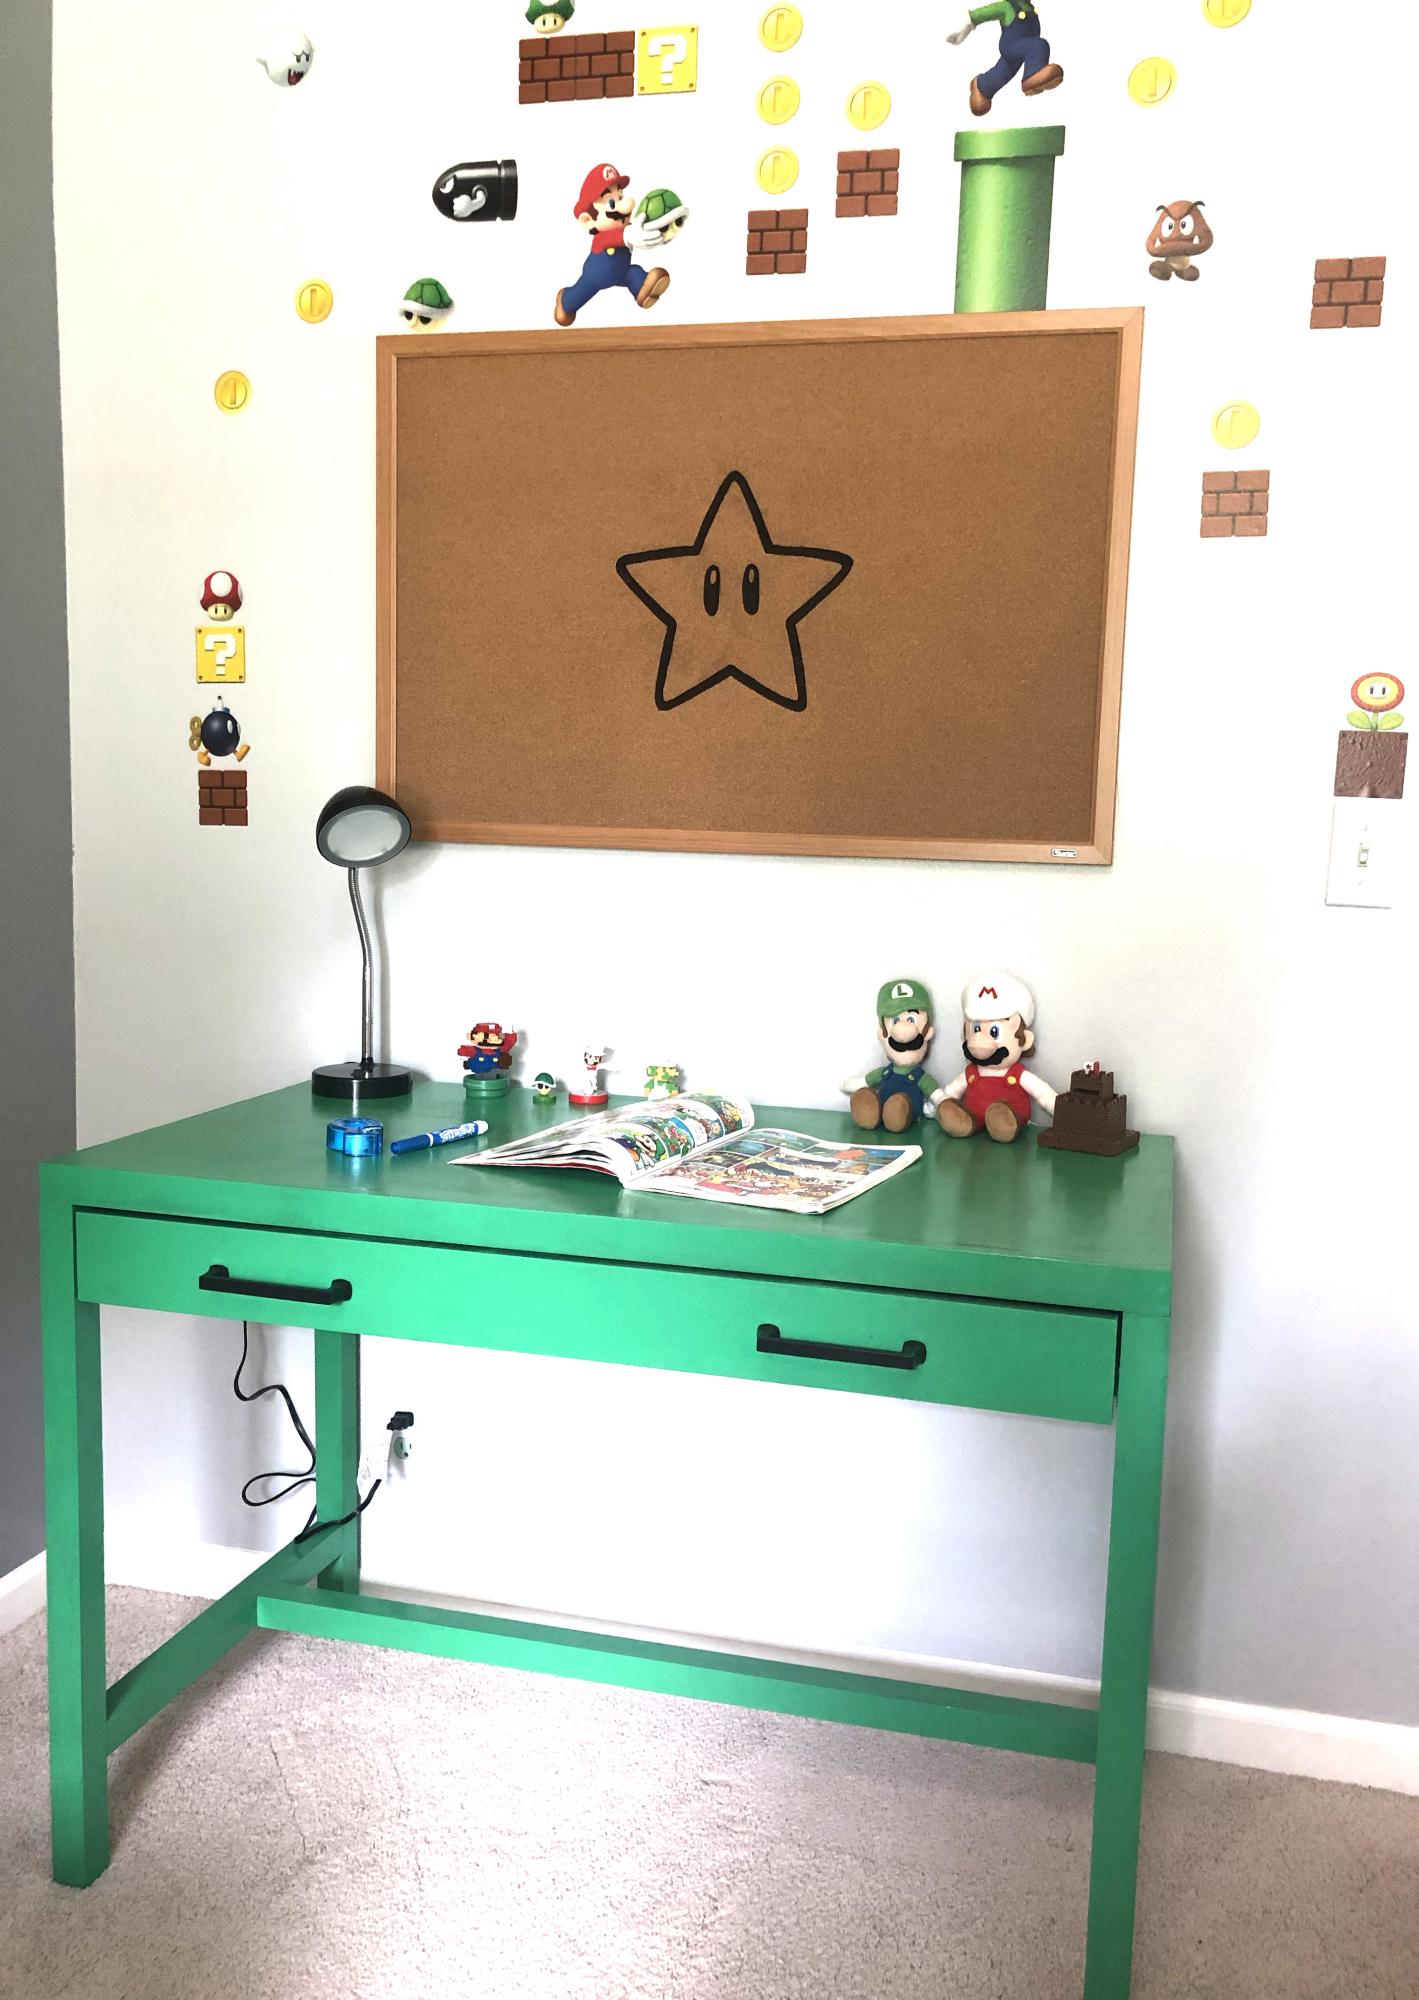
My youngest son is 6yo and he loves Mario! He is such as little artist so I thought it would be fun to surprise him with a Mario desk! I did not want to paint it red as he already has a ton of red Mario themed items in his room, so I chose pipe green instead! My little guy LOVED it! I even made some dividers to separate his crayons, markers, and other odds and ends in his desk. You will notice, I customized a normal bulletin board with a sharpie marker to make it go with the Mario theme :)
Built from Plan(s)
Estimated Cost
$100
Estimated Time Investment
Weekend Project (10-20 Hours)
Finish Used
Green Spray Paint and Polyurethane
Floating Wood Table Runner

I made one of these for my dining room table and my family liked it so much I made 2 more. The last one I made from a live edge piece of black locust and made the base out of black limba. The second one my daughter wanted a little wider so I used a 1X10 instead of a 1X8. A lot of fun to make and everyone really likes them.
Keith Ullrich of Windsor Woodworks


Built from Plan(s)
Seasonal And Holiday
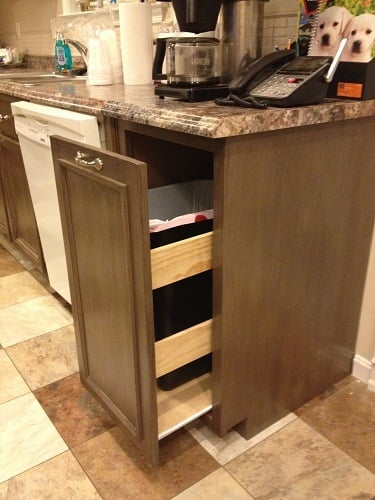
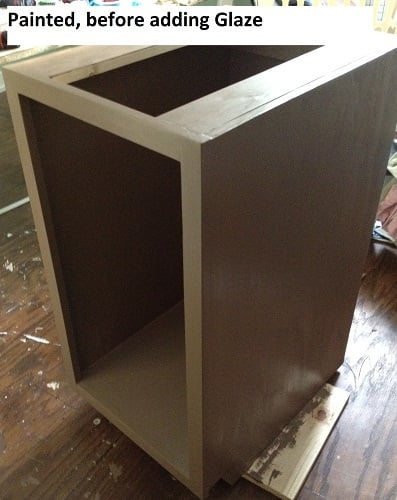
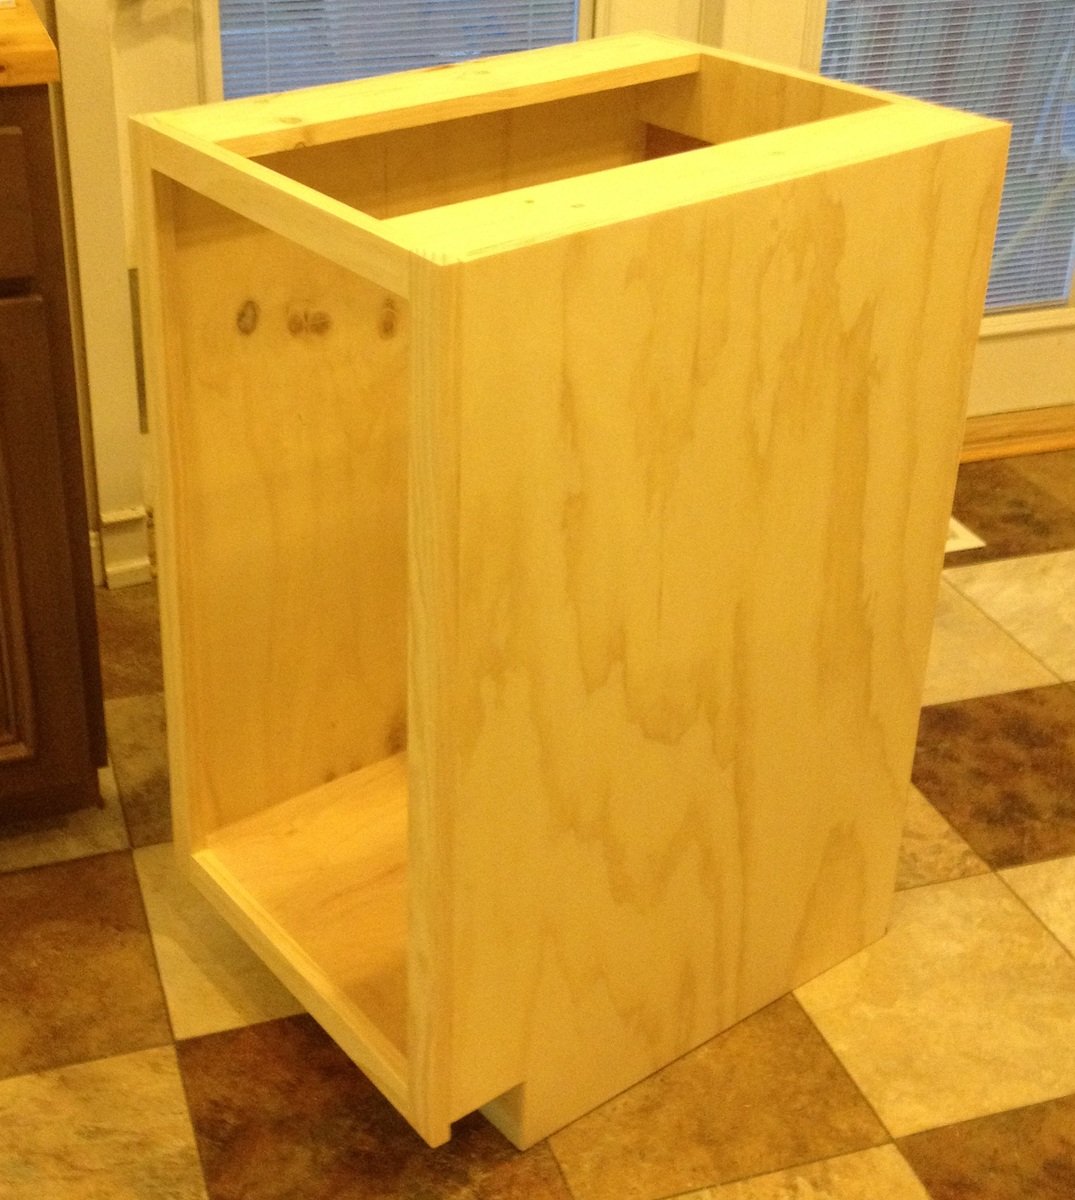
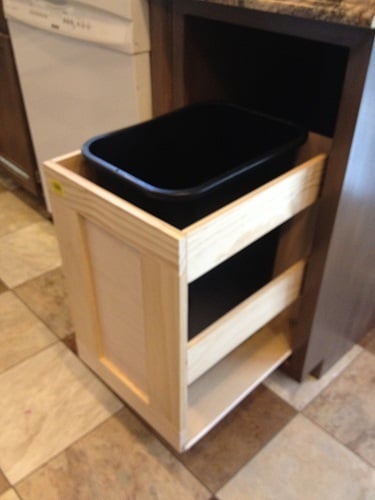
Kitchen Trash Pull Out Cabinet
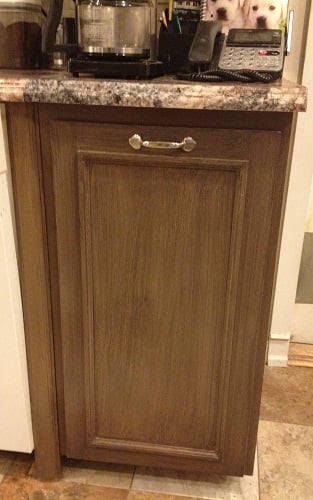
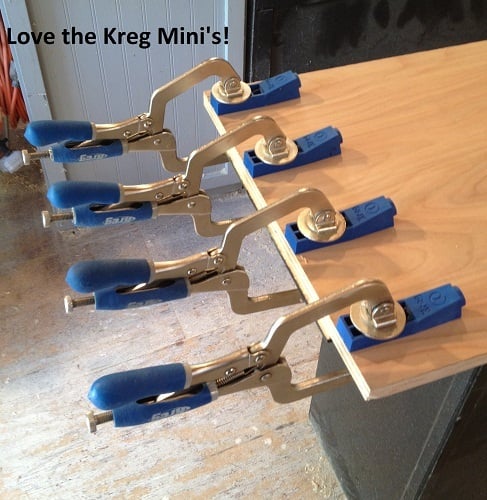
Plan was super easy to follow. Built a drawer type pull out so I could fit in odd sized trash cans. Made the pull-out part like an open sided drawer box, out of lightweight wood, and attached the door to it - used 75-lb euro drawer slides. Construction took a couple of afternoons, and finishing took a couple of afternoons. The finishing materials were all left over from other projects, and the plywood for the cabinet sides was left over from our kitchen island build. Topped with a leftover piece of countertop. The contractor who installed our new countertops said I did a good job on the cabinet build. I was very flattered! Ana, thank you for your wonderful plans!
Built from Plan(s)
Estimated Cost
$75
Estimated Time Investment
Weekend Project (10-20 Hours)
Finish Used
3 coats Benjamin Moore Aura paint in Spanish Brown (sanded between coats). Brushed on glaze (mixed 2 oz clear glaze + 1 TB flat black paint - lots left over), 2 coats of water based poly (satin) top coat
Recommended Skill Level
Beginner
Comments


Thu, 07/26/2012 - 15:16
Thank you!
Thank you Gina! Yep, I built the door too! :) This one is made from an edge glued Aspen wood panel (available from Lowes, ripped to size with the table saw), and then I added the wood mini-stop moulding 2" in from the edges (did these measurements and attached the trim before sanding). I did the glaze pattern over the paint so it looked like a frame and panel door when it was all done. This door is the same style we did for our pantry and island. I'm planning to do all the rest of my cabinet doors over (one at a time - ;0) to match this one. PS - I used the edge glued panel instead of plywood for the door so the edges wouldn't need any extra covering up, and also they are nice and flat and super smooth so they don't need much sanding. Aspen wood took the paint beautifully, and the grain doesn't even show through once it's painted. I had used stain grade pine panels for the pantry and island, but I think I'll stick with the Aspen for the rest of them, to save myself some sanding. ;)
Queen Farmhouse Headboard
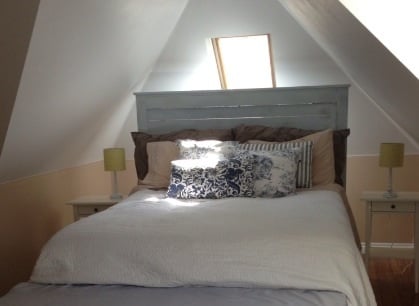
We made this for our master bedroom. We had wood that was already primed so it made the project go faster. Also, the wood for the back panelling isn't entirely straight which I like because it allows slits of lights to flow through and looks a little more rustic. I used a soft blue paint for the color called abracadabra. I hand sanded in some areas to give it a worn look and then I placed a stain over the top in which I almost immediately wiped off because I wanted it to be very minimal.
Built from Plan(s)
Recommended Skill Level
Beginner
Shed Ramp Build
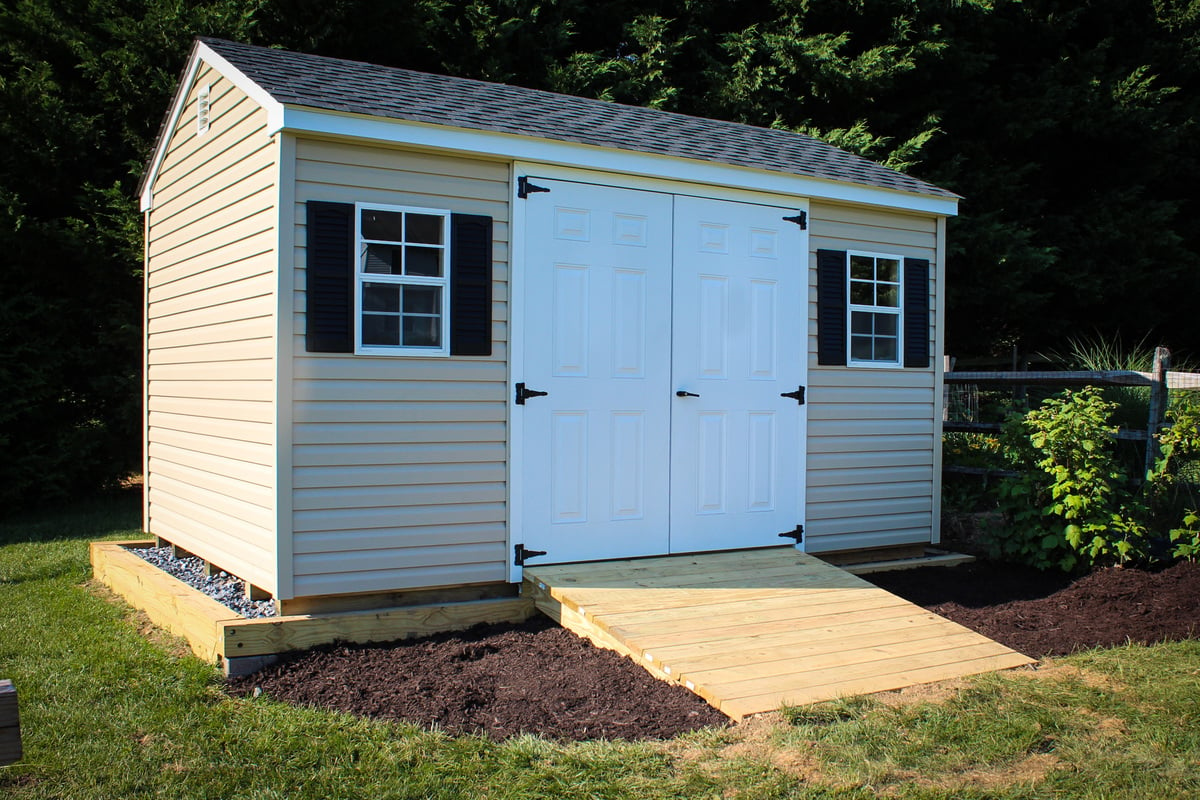
Build Instructions:
http://www.instructables.com/id/Shed-Ramp/
Video:
My garage was starting to get cramped so I decided I needed a shed for the lawn/garden equipment. I thought about building one but bailed and decided to purchase a 10’ x 14’ shed with 6’ wide doors from the nearby Amish community. To not be a total slacker, I decided I could at least build the foundation and ramp. I’ve never built a ramp so I did a little research online and found that there are an abundance of styles, both good and bad. Anyway, this is my attempt at ramp design. Hope someone finds it useful.
Estimated Cost
$100
Estimated Time Investment
Weekend Project (10-20 Hours)
Finish Used
None
Recommended Skill Level
Beginner
A Place for the Christmas Stockings
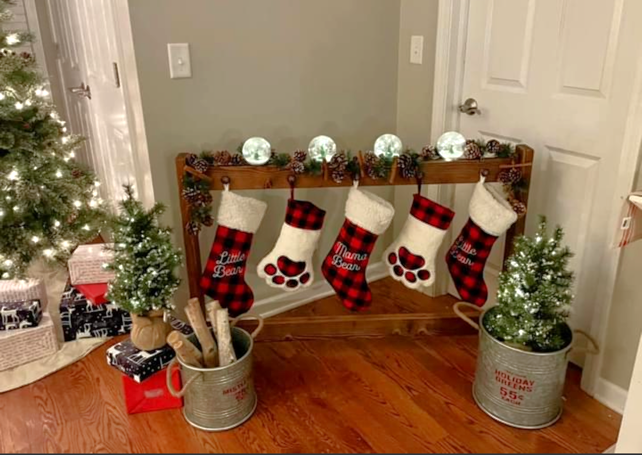
Christmas Stocking Stand by Julie Latham on Facebook.
Built from Plan(s)
Comments
Seasonal And Holiday
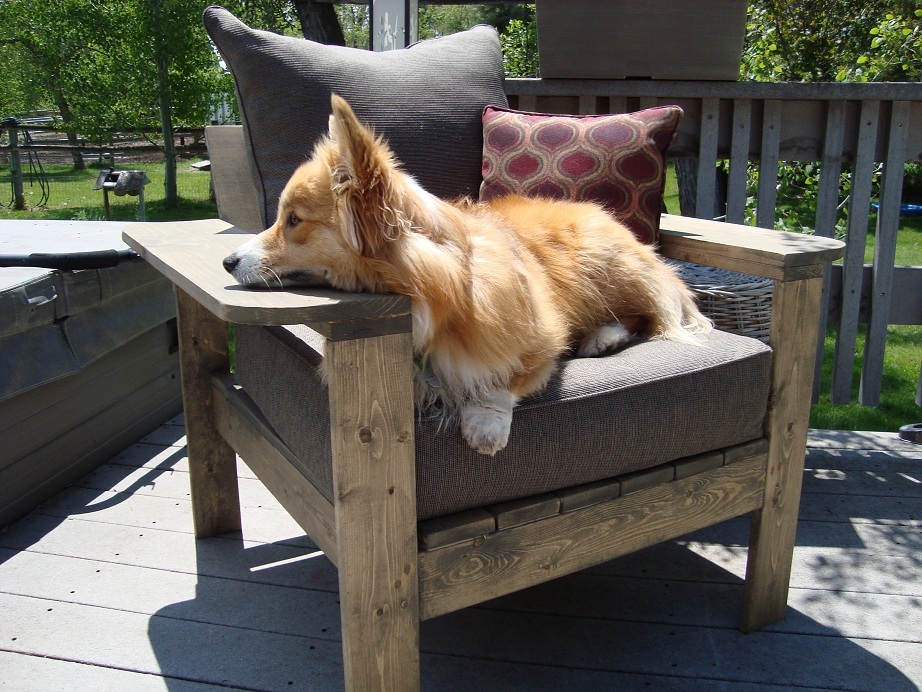
Deck Chair
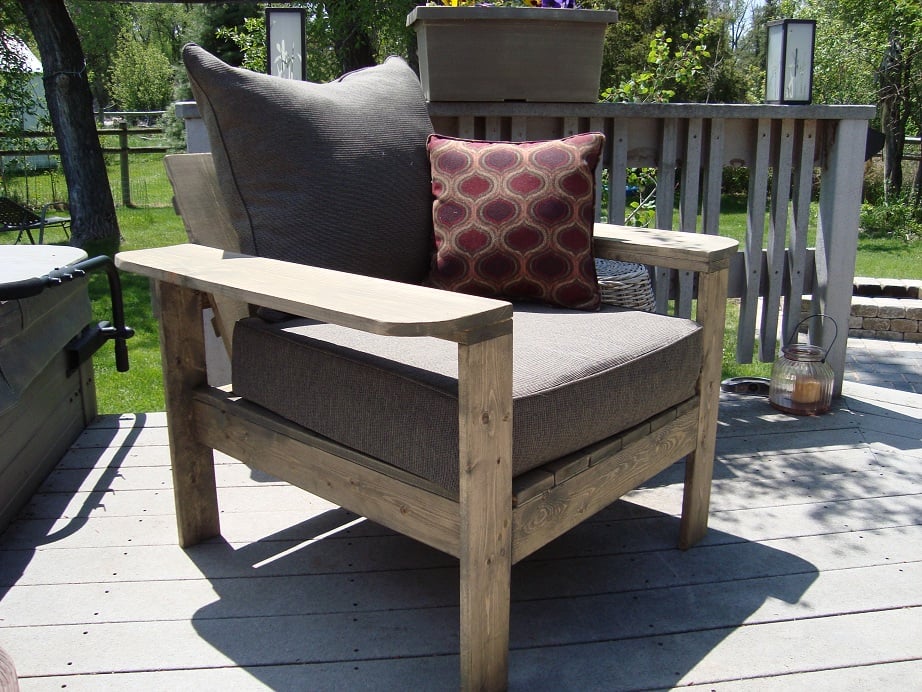
I used the plans for the simple outdoor lounge chair and just made the arms wider, the cushions came from Target.............the dog loves it !
Built from Plan(s)
Finish Used
Benjamin Franklin oil based Dragons Breath
Recommended Skill Level
Beginner
Comments
Thu, 05/31/2012 - 07:14
This is BEAUTIFUL!!! Nicely
This is BEAUTIFUL!!! Nicely done woodwork and cushions too!
Thu, 05/31/2012 - 07:15
This is BEAUTIFUL!!! Nicely
This is BEAUTIFUL!!! Nicely done woodwork and cushions too!
Thu, 05/31/2012 - 09:28
LOVE the wider arms
I love how you made the arms wider and rounded. Adirondack chair meets school desk! Bravo!
Sat, 07/28/2012 - 18:06
LOVE the wide arms!!
My husband and I love to sit outdoors and read with a hot cup of tea. The wide are will be perfect for us. Would you mind sharing the cost of your project?
Sun, 09/14/2014 - 22:04
Cushion Size
Hi! I would love to make this patio set but I am having some trouble with cushions. I noticed that Ana stated this chair will use a standard size 20x20 cushion. On your notes it says you got your cushions at Target, are they 20x20, I love the deep cushions but cant seem to find any that sized. Are yours 20x20, or did you modify you project? If so, what dimensions did you use? Thanks so much!!!
Sun, 09/14/2014 - 22:05
Cushion Size
Hi! I would love to make this patio set but I am having some trouble with finding cushions. I noticed that Ana stated this chair will use a standard size 20x20 cushion. On your notes it says you got your cushions at Target, are they 20x20, I love the deep cushions but cant seem to find any that sized for the bottom ones. Are yours 20x20, or did you modify your project? If so, what dimensions did you use? Thanks so much!!!
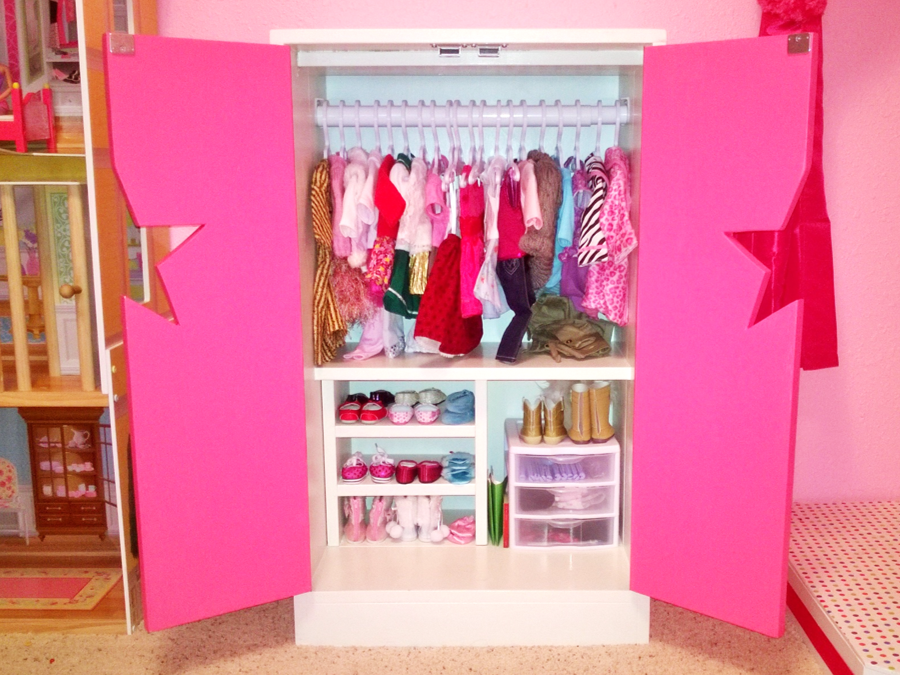
Custom Star Doll Closet w/Pink Doors

My daughter has been accumulating American Girl doll clothing and accessories since her birthday last summer (2013), and we were rapidly running out of room for all of it. Luckily, her Grandpa ("Pop") is a skilled carpenter and whipped up this awesome closet for her in a weekend (including the amount of time it took to pick out all the materials, paints, and paint everything/let it dry). She absolutely loves it and it is the perfect way to keep everything organized, while still looking great!
Estimated Time Investment
Day Project (6-9 Hours)
Finish Used
Latex acrylic paint in antique white for the main structure, and bright pink or the doors.
Recommended Skill Level
Beginner
Modern Bench - School Colors
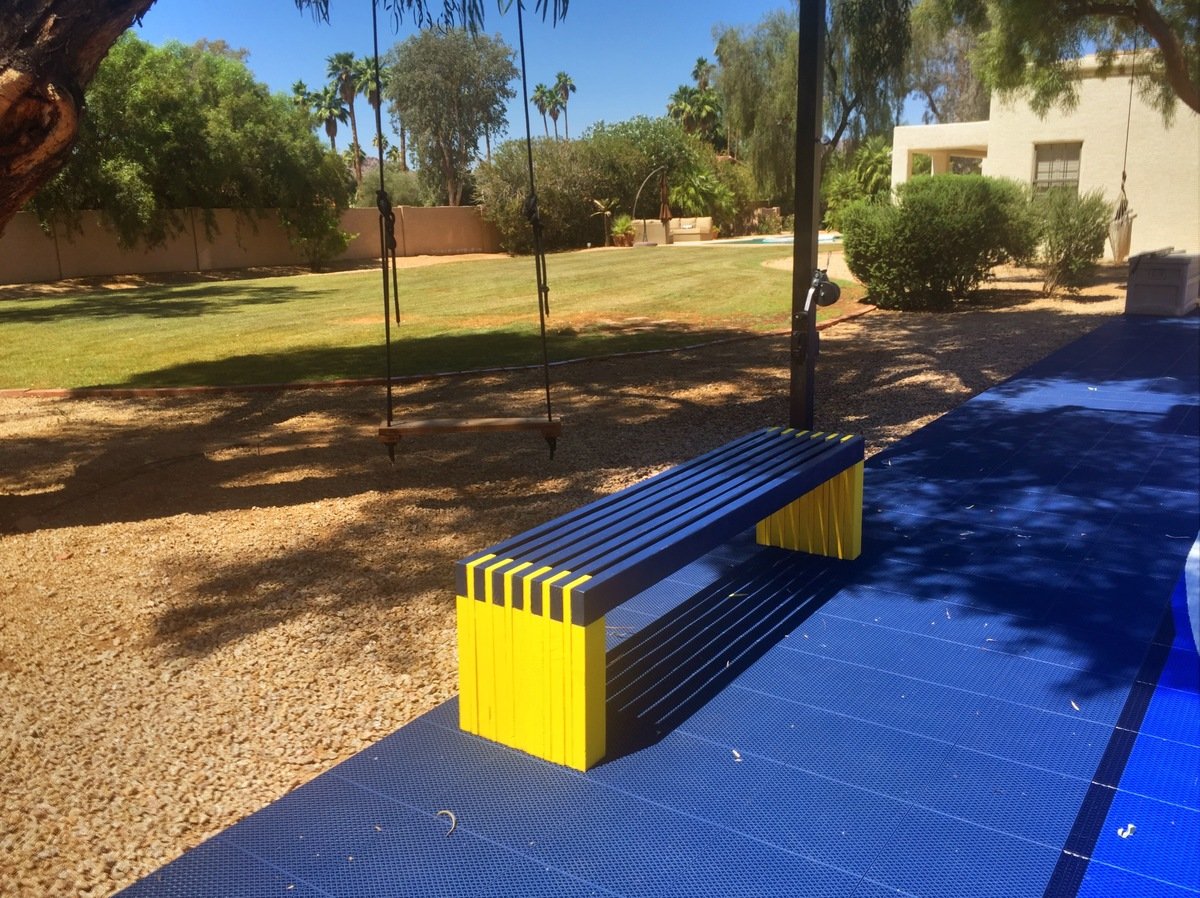
Great design and project! I am working on the second one in my wife's school colors. Thanks!
Built from Plan(s)
Estimated Time Investment
Afternoon Project (3-6 Hours)
Finish Used
Outdoor paint
Recommended Skill Level
Beginner
Kids Picnic Table
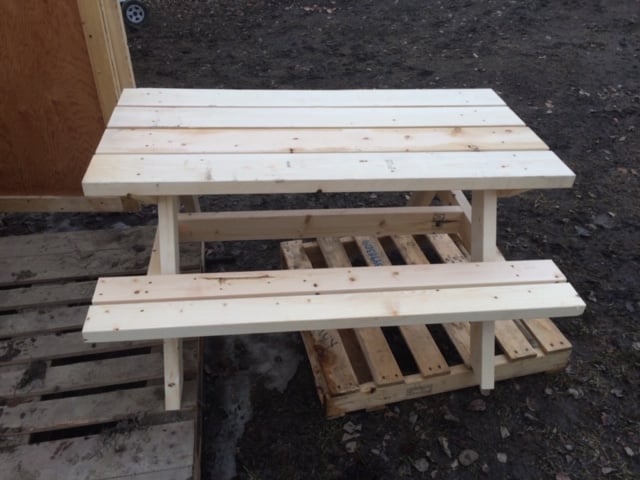
When my kids were stuck between that "baby" picnic table, and the "real" picnic table, we found the plan for this! It was the perfect size, and was a great addition to our backyard!
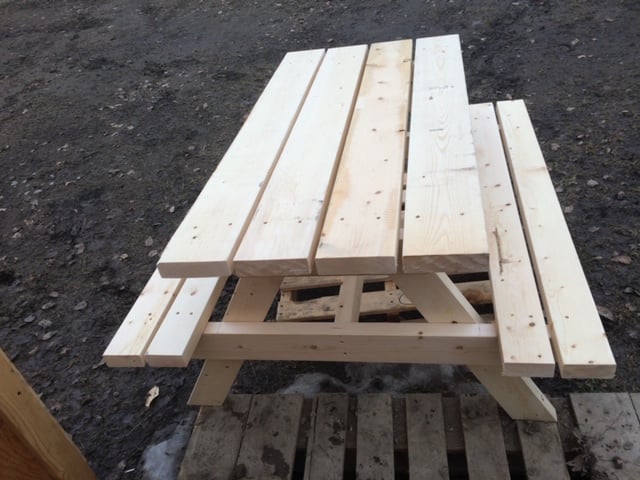
Built from Plan(s)
Estimated Cost
$30 CAD
Estimated Time Investment
Afternoon Project (3-6 Hours)
Finish Used
Minwax 2-in-1 in Natural
Recommended Skill Level
Starter Project
DIY Holiday Planters
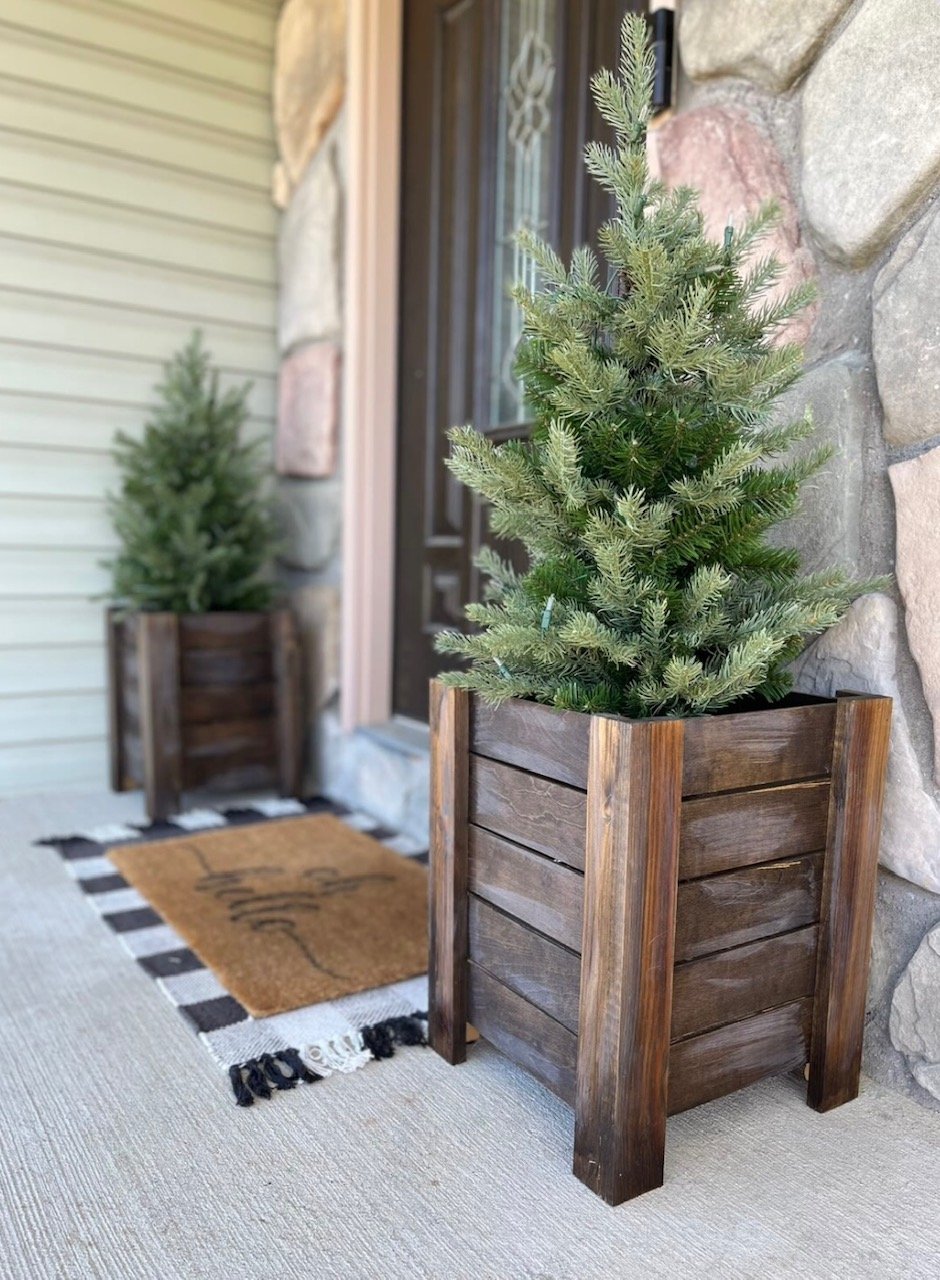
Modified planter size to fit these darling artificial Christmas trees by midmimomdiy on Instagram! Check out more details on her page.
Built from Plan(s)
Seasonal And Holiday
Child Beach Sling Chair

I used two towels to make the sling portion of the chair, instead of outdoor/decor weight fabric. Even though the towels were thick, I did not need to change the dimensions of the dowels or slits in the wood that hold the dowels.
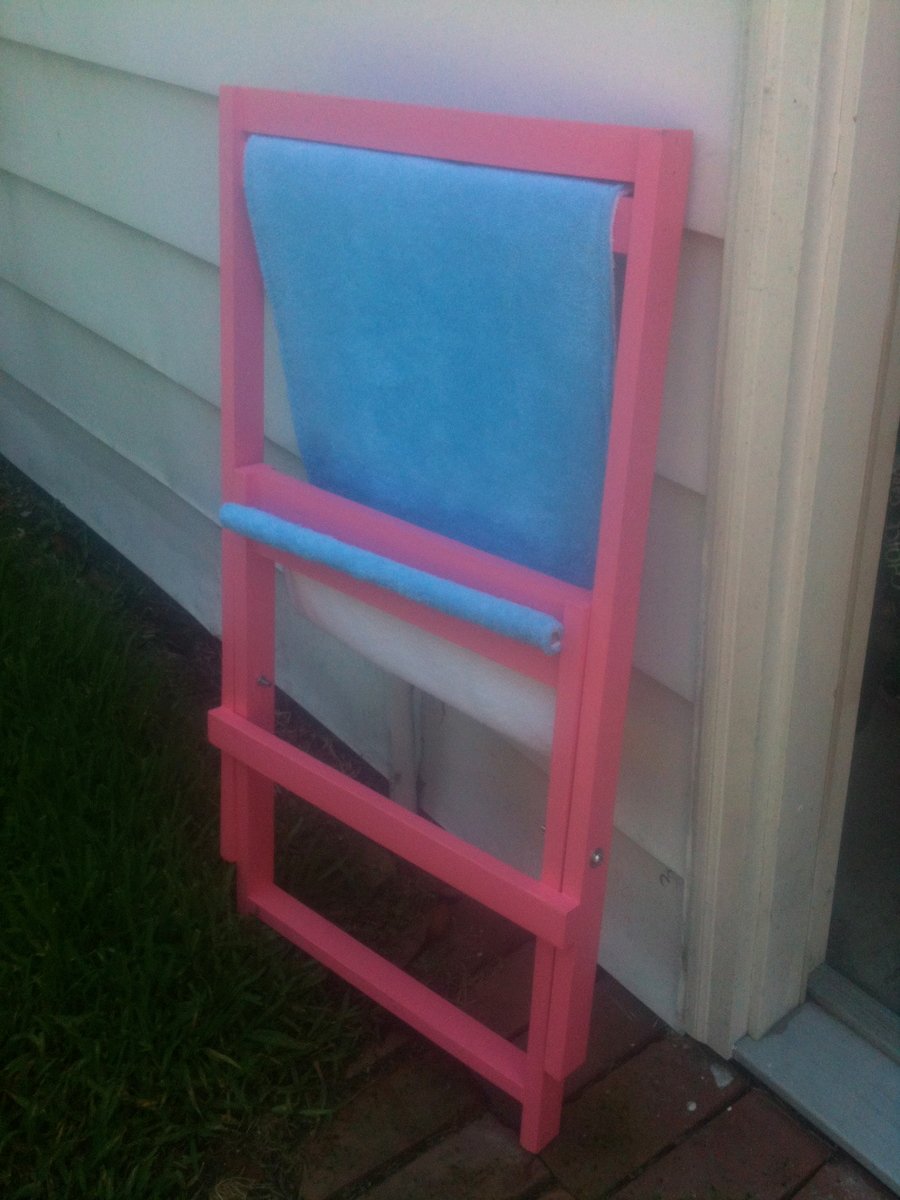
Estimated Cost
$1, I had the towel, hardware, nails, paint, and some scrap wood already.
Estimated Time Investment
Weekend Project (10-20 Hours)
Finish Used
Primed and then painted with leftover satin-finish paint. Lightly sanded between 2 coats of the final paint color.
Recommended Skill Level
Starter Project
Comments
Thu, 05/31/2012 - 16:59
What a great idea!
What a great idea to use towels. I have a few extra beach towels that would be great for this.
Thanks!
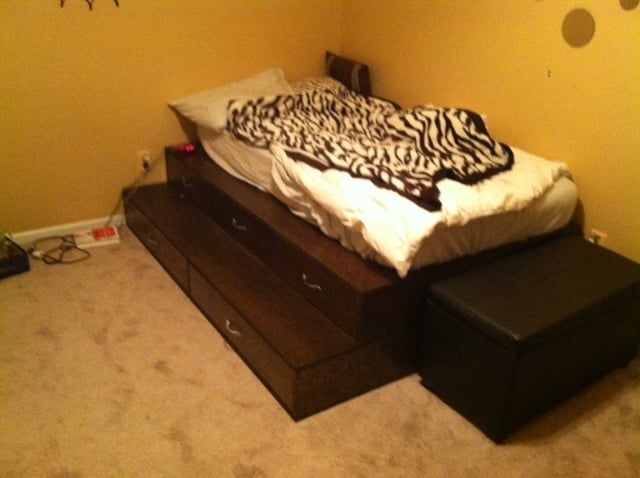
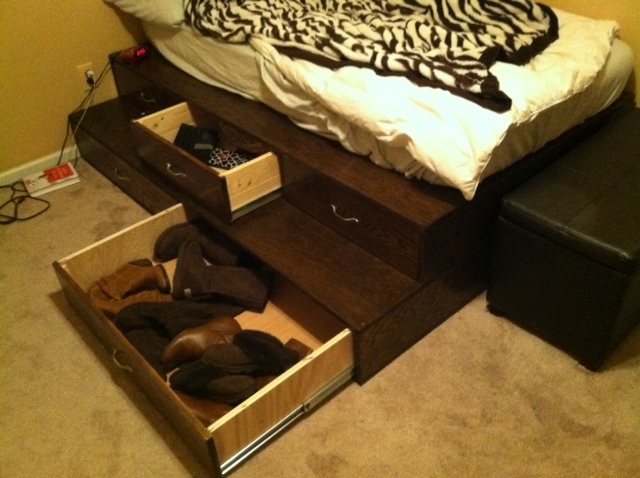
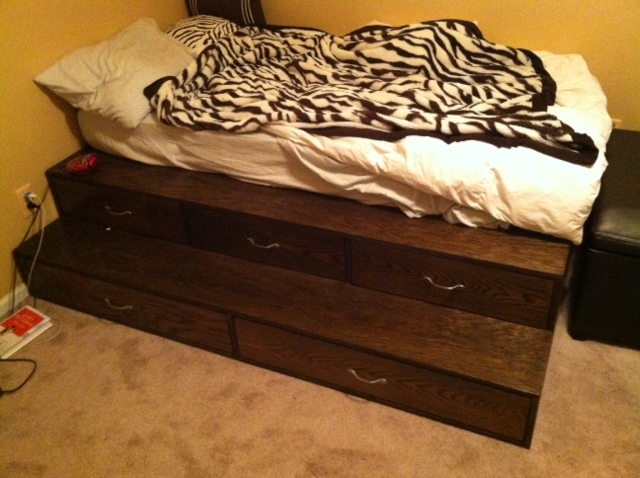
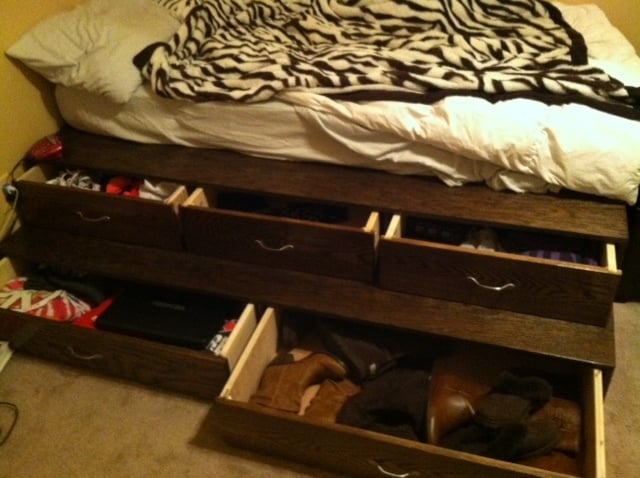
Step up bed
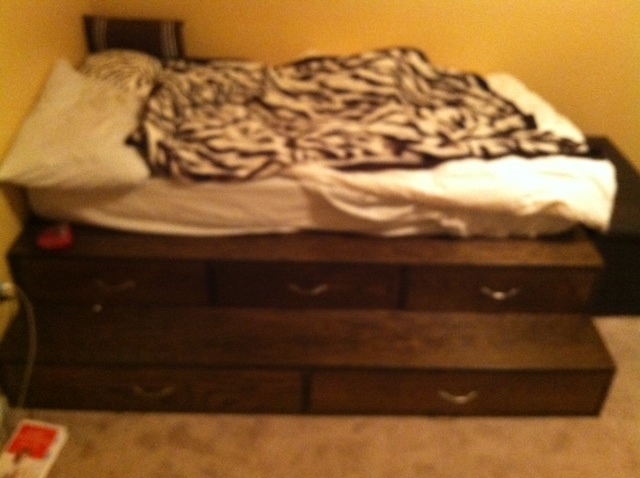
Base was easy to do, drawers were another story! very big drawers, plan a lot of time for these.
Built from Plan(s)
Estimated Time Investment
Week Long Project (20 Hours or More)
Recommended Skill Level
Intermediate
Comments

Fri, 10/10/2014 - 18:33
My daughter said that's
My daughter said that's AWESOME! :) I think it looks fantastic!!!
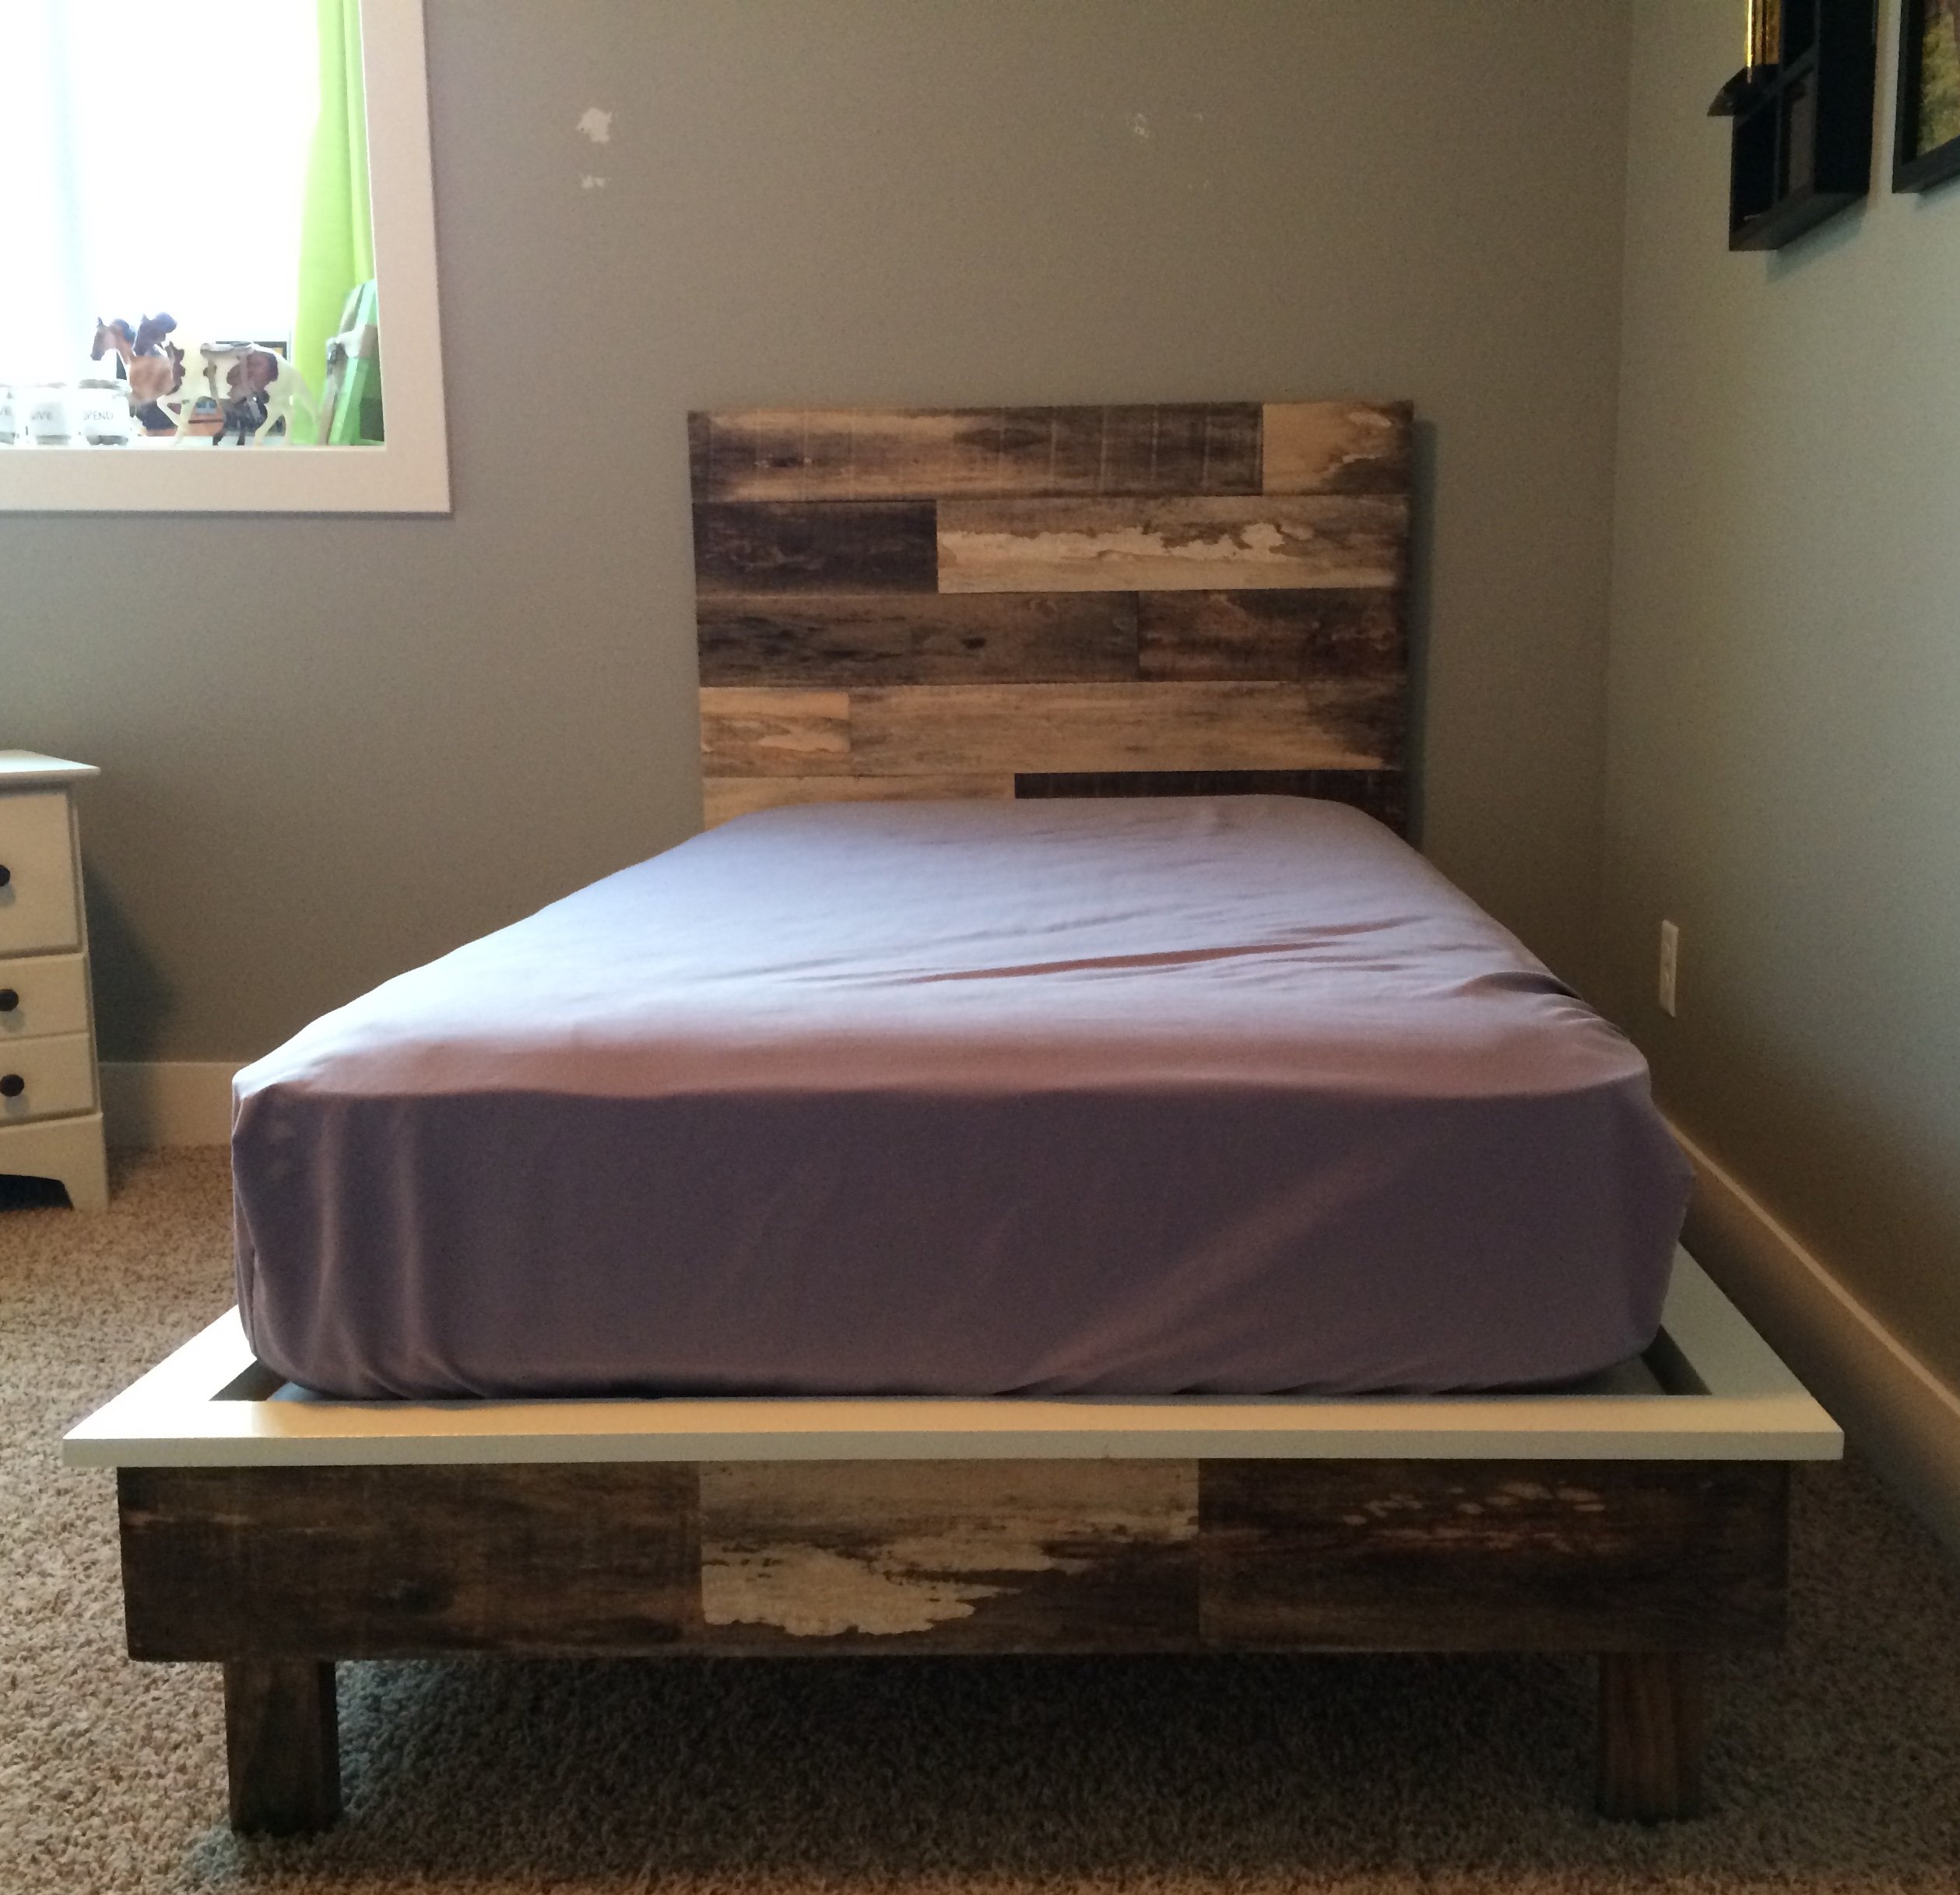
Fillman Platform Twin with Barn Wood Headboard
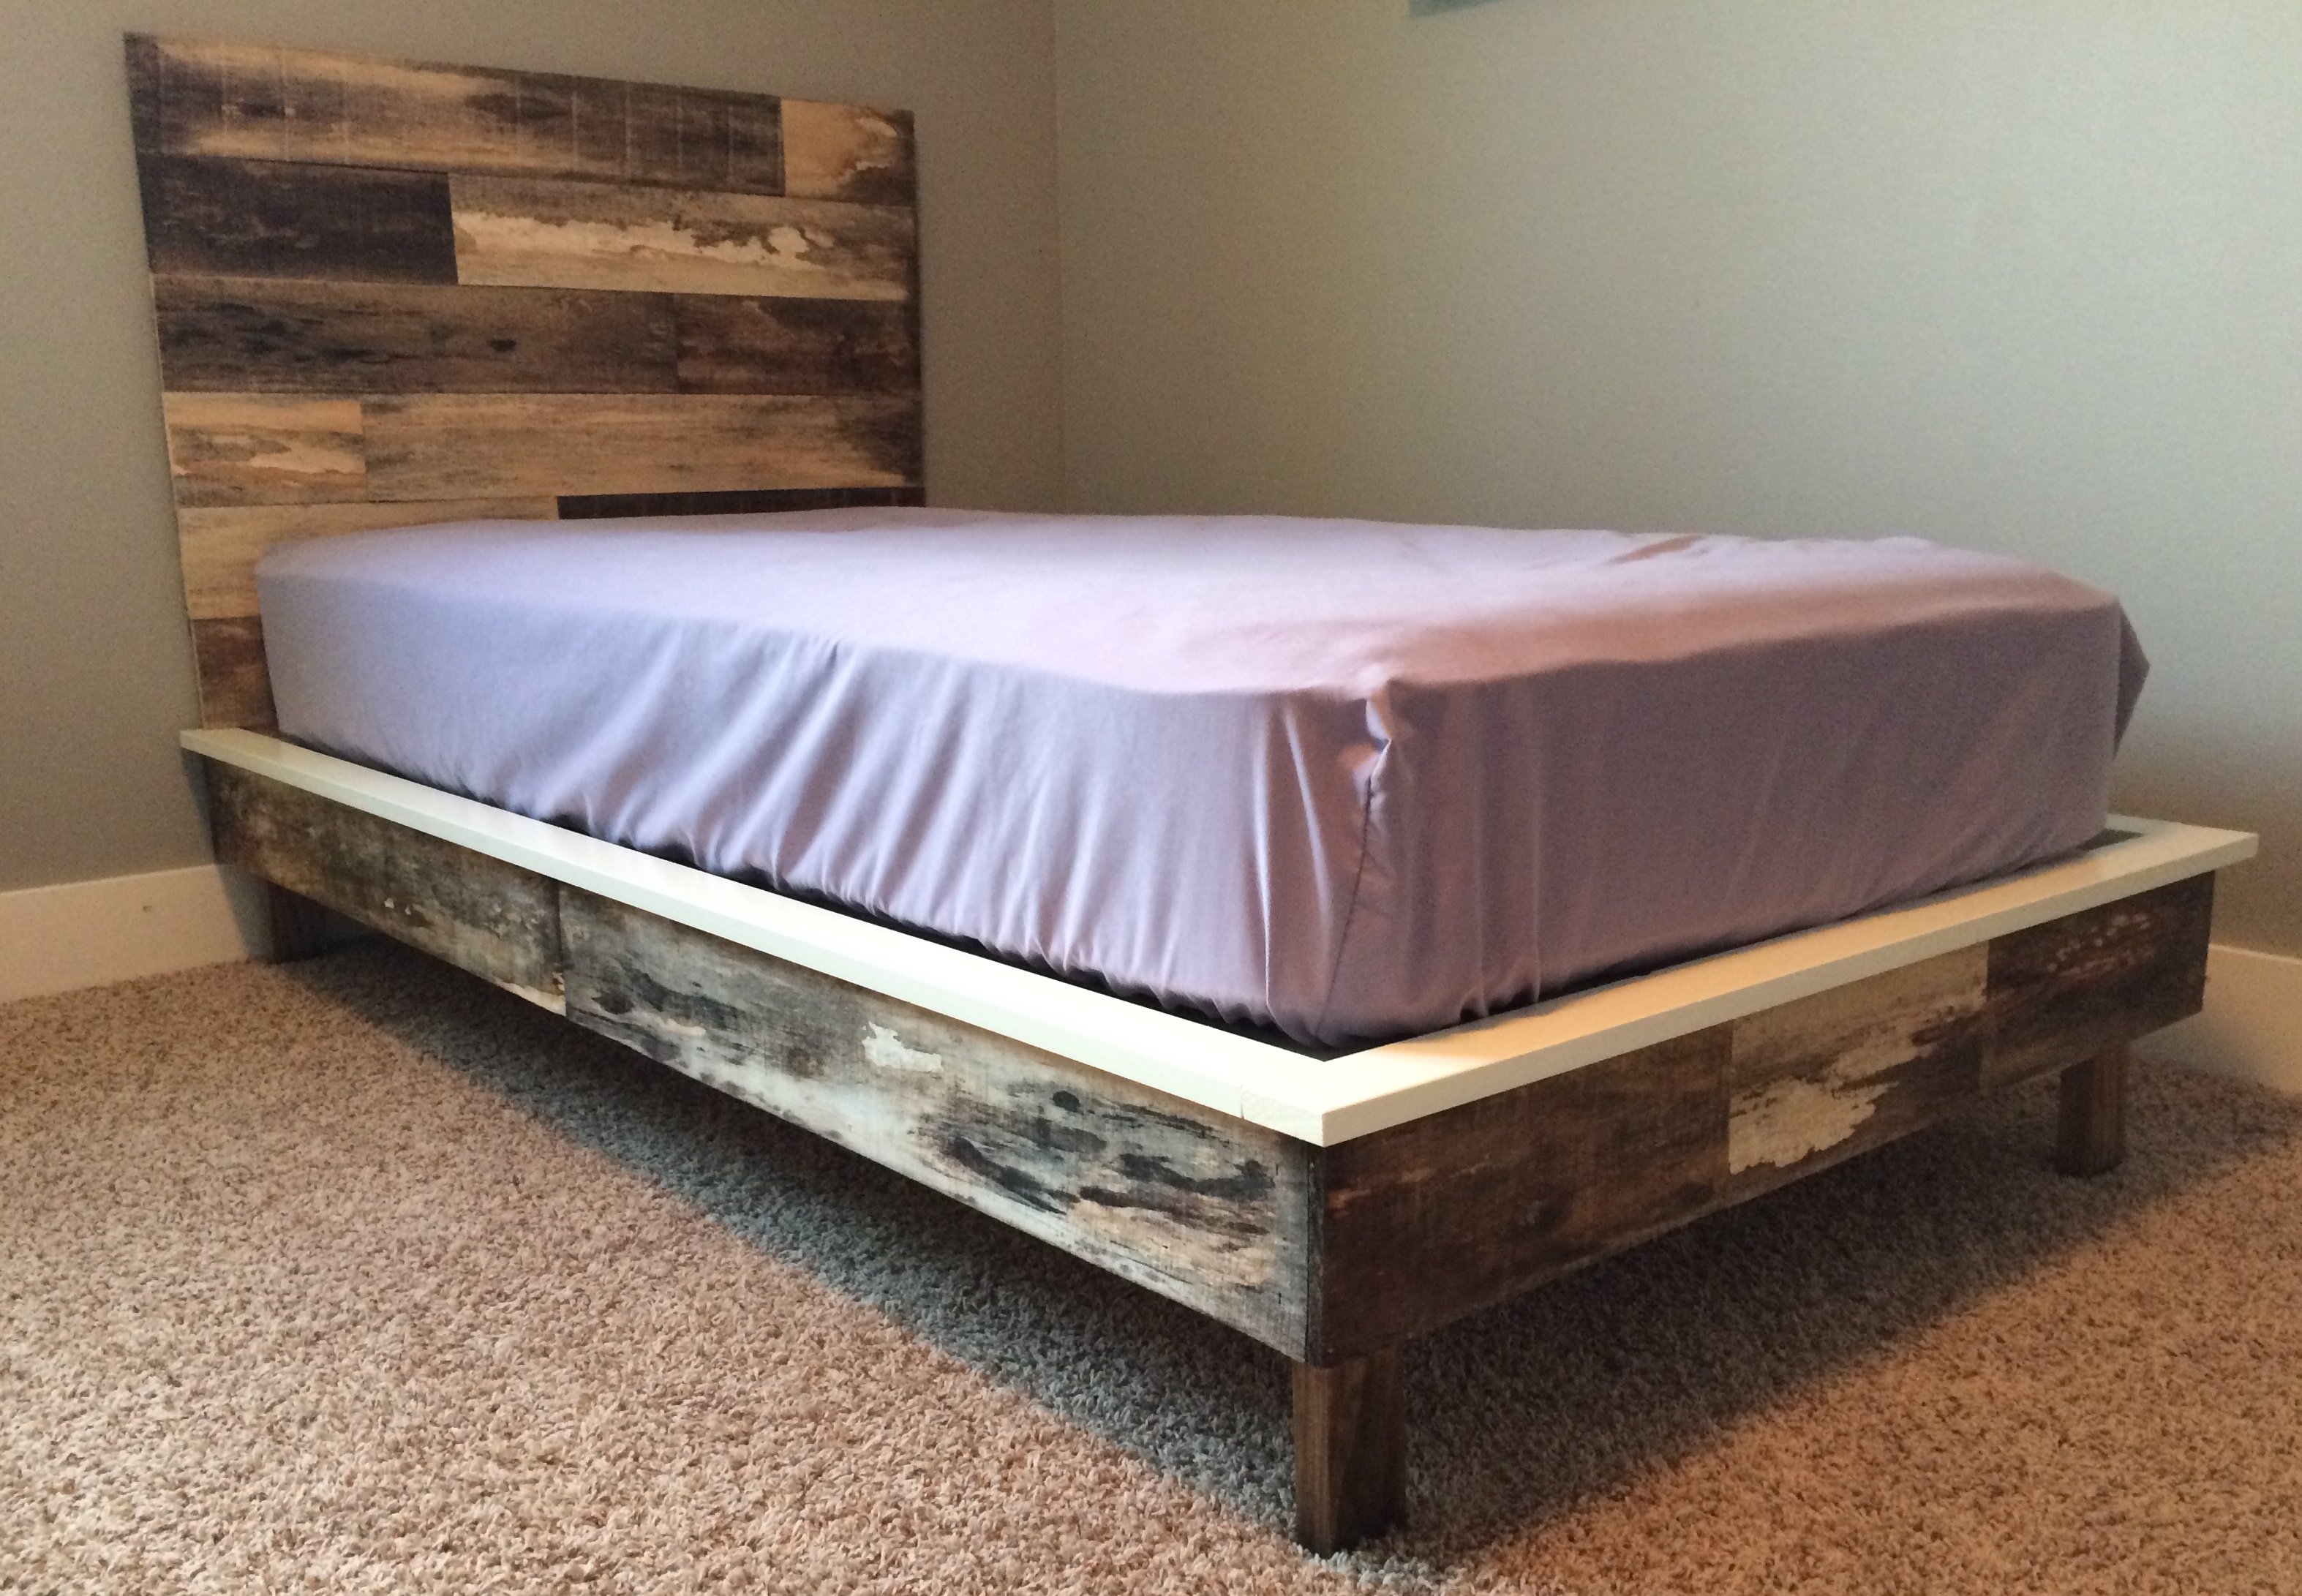
I started with the Fillman Platform Twin Bed plan and made a few modifications.
- I adjusted the size of the bed slightly to fit the mattress we purchased for the bed.
- I wanted the bed to be a little taller, so I simply added a few inches to the legs.
- I made the headboard from old barnwood and added pieces around the side and end rails of the bed to tie it all together.
- Used a bunky board instead of slats to hold the mattress.
- Decided to stain the legs and paint the top cap cream to match some other furniture in the room. Still not sure if I love it, but I thought it might be too much dark wood if I stained it like the legs.
With a mitre saw, Kreg jig and nail gun, this project is pretty simple to put together. Obviously painting or staining takes some time, but the bed itself can be put together in 1-2 hours.
Built from Plan(s)
Estimated Cost
$100
Estimated Time Investment
Day Project (6-9 Hours)
Finish Used
Espresso stained legs with polyurethane finish, Semi-gloss cream paint on top cap with polycrylic finish
Recommended Skill Level
Beginner
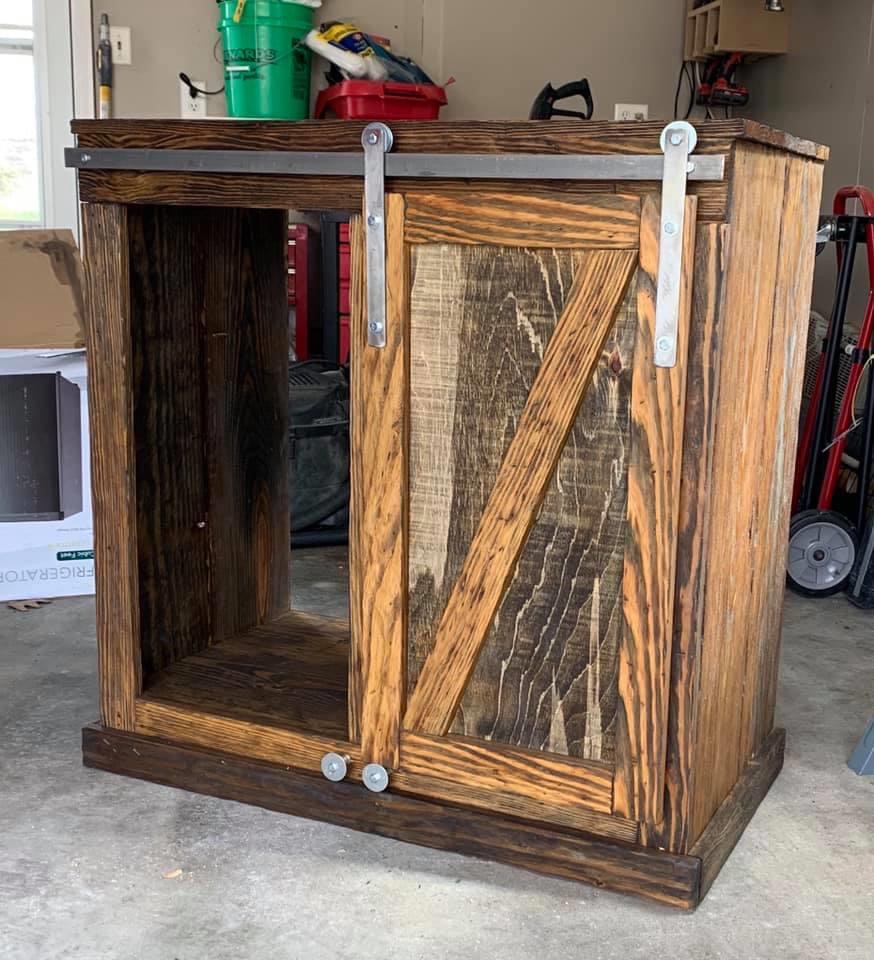
Coffee bar
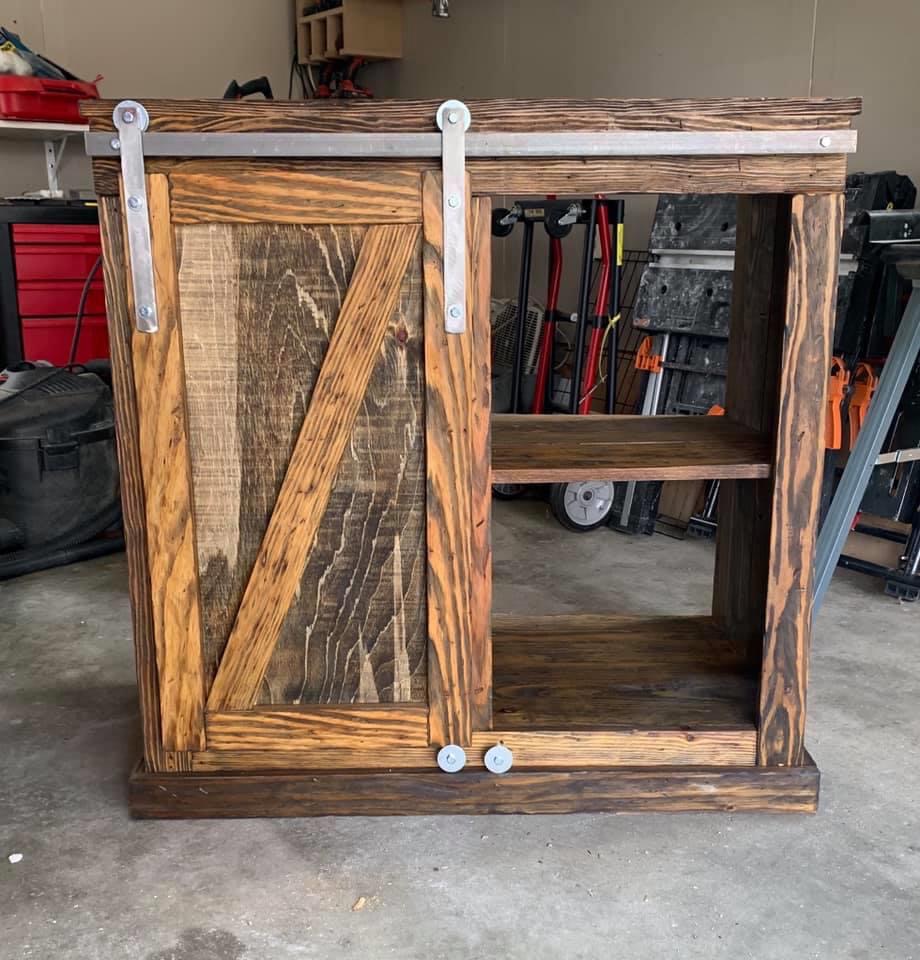
I used the plans for the mini frig/microwave cabinet. I modify the length and width because of the scrap wood I used. The wood I used was from our basement stairs that we retreaded. I used a cup wire brush on the wood to give it the rustic look. The barn door hardware was from Ana’s tutorial video (turned out great). First coat of stain was honey oak, I left it on for a couple of minute then wiped it off. Second coat was ebony, same technique as the first coat. Once the stained dried used a spray matte poly on the top, did 4 coats, sanding with a 800 grit between coats. Hope you’ll like it
Estimated Time Investment
Weekend Project (10-20 Hours)
Recommended Skill Level
Intermediate
Shiplap Built-in for Electric Fireplace
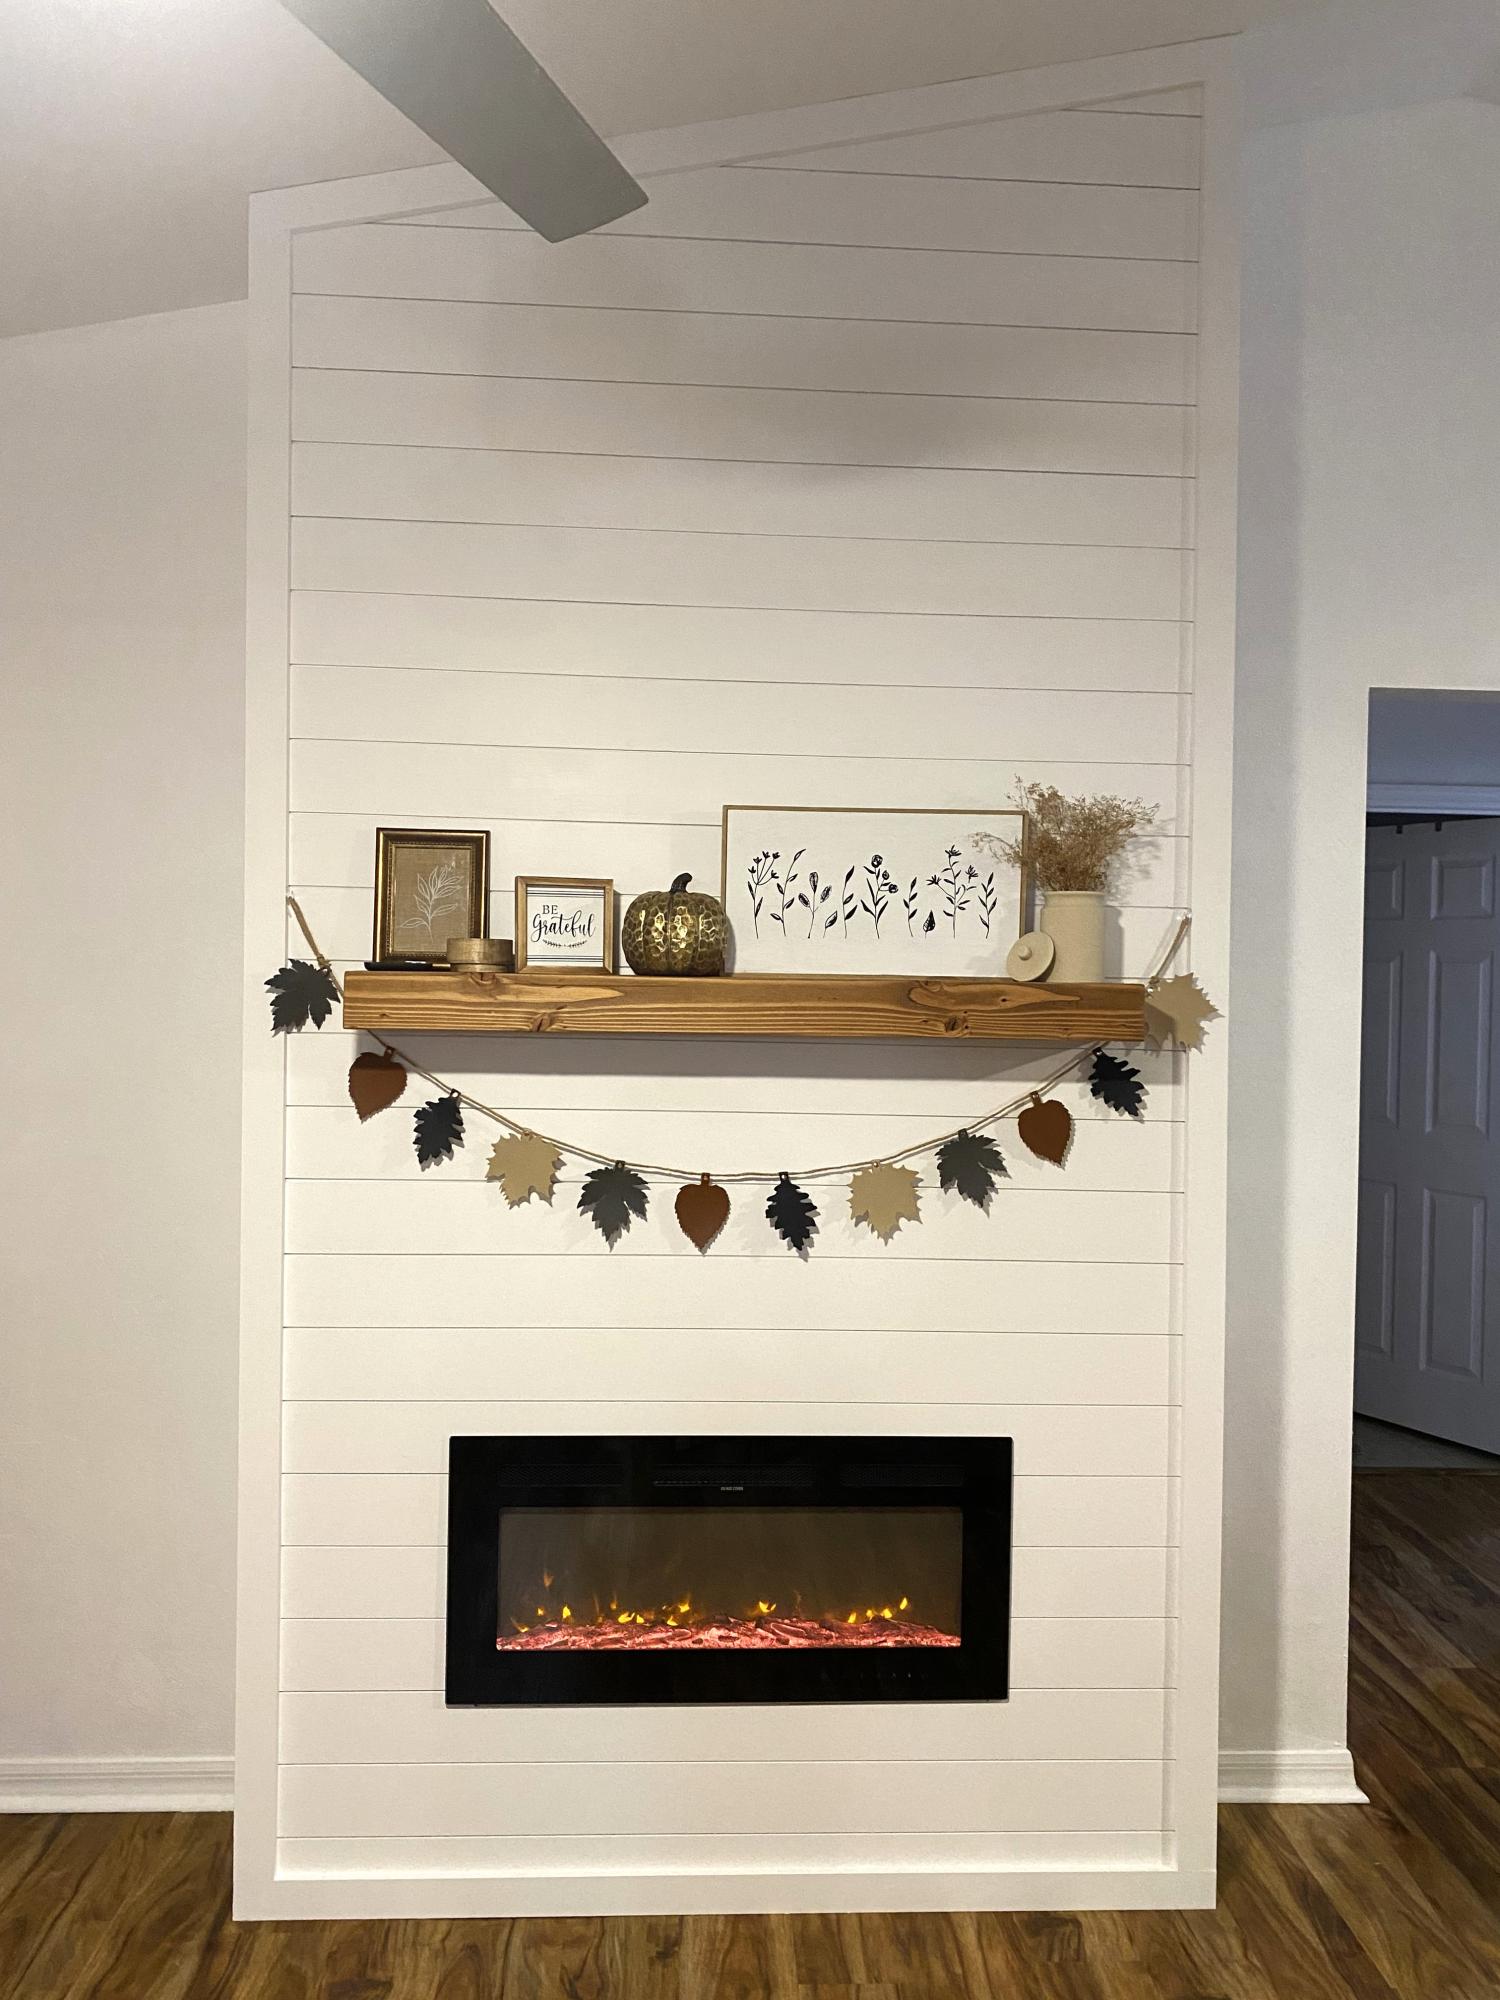
Some parts were challenging, but well worth the effort. My wife loves her early Christmas present. Thank you Ana for such useable plans.
Angel
Built from Plan(s)
Seasonal And Holiday