Community Brag Posts

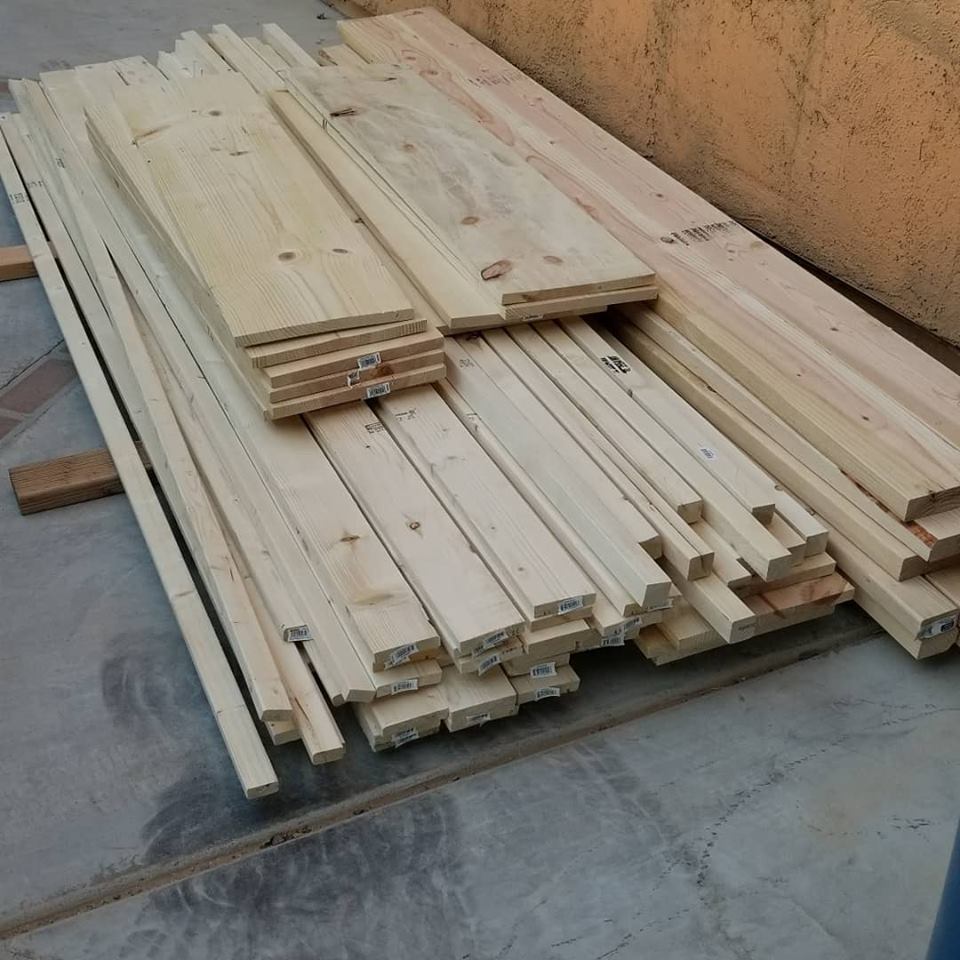
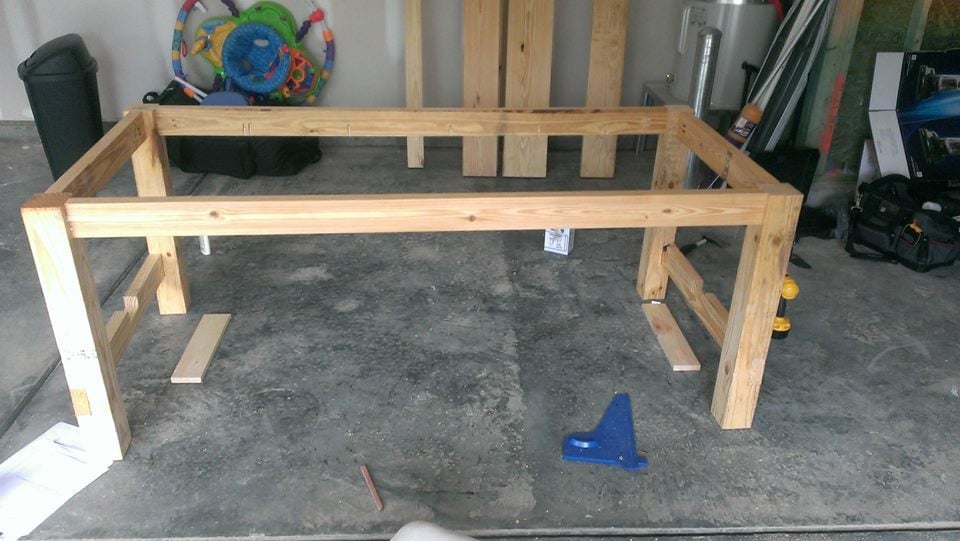
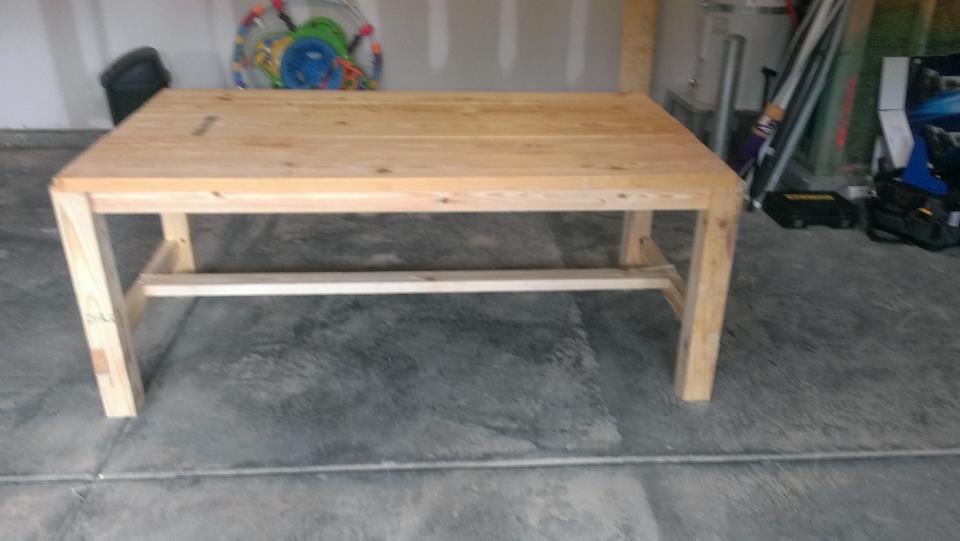
A Simple Sawhorse Table for my Work Room

I needed a surface to work on all of the projects I'm building from Ana's wonderful plans!
Built from Plan(s)
Estimated Cost
$40.00
Estimated Time Investment
Afternoon Project (3-6 Hours)
Finish Used
Oops Paint
Recommended Skill Level
Beginner
Planked headboard
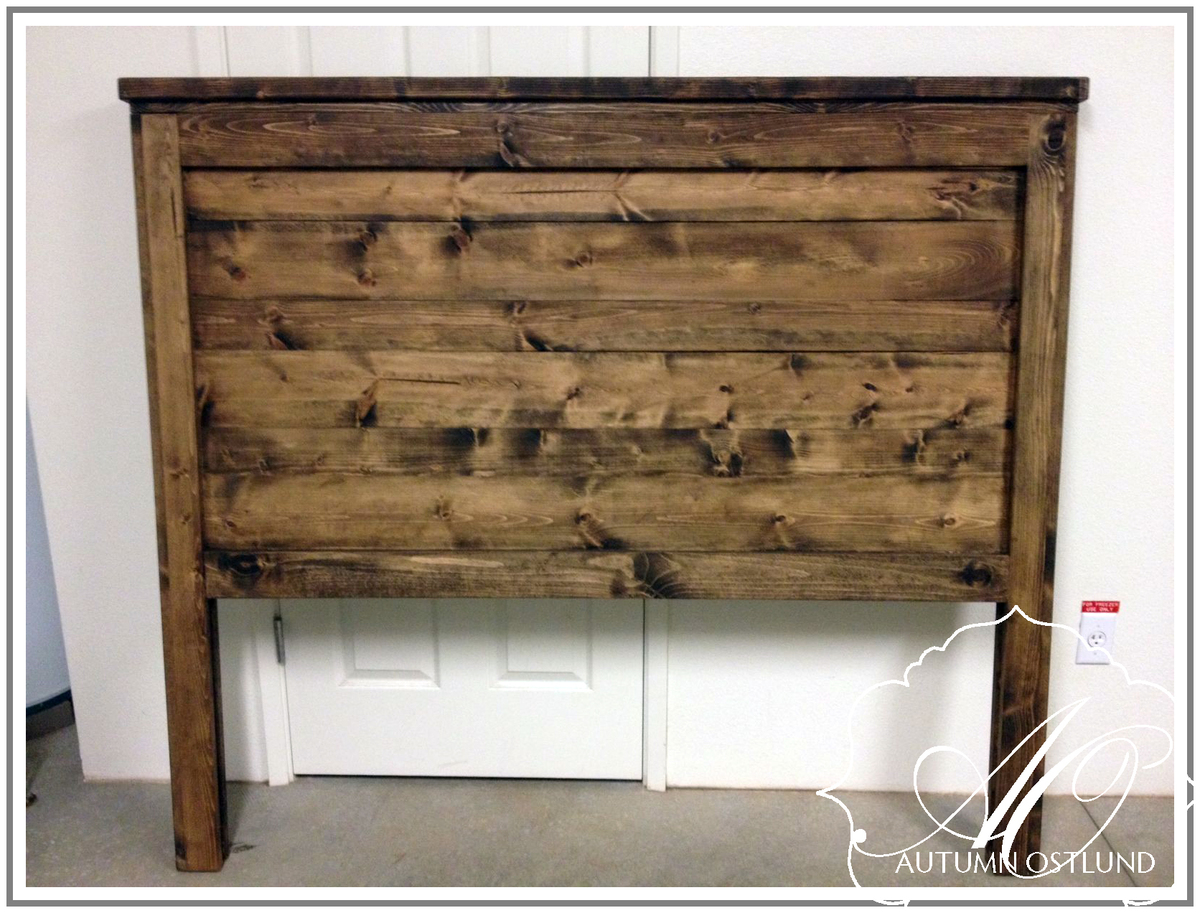
I love how the stain turned out on this one. Super simple project!
Built from Plan(s)
Estimated Time Investment
An Hour or Two (0-2 Hours)
Finish Used
I stained it dark walnut and then sealed it with three coats of matte polyurethane.
Recommended Skill Level
Starter Project
Comments

Wed, 07/17/2013 - 09:56
Hawai'i
I just clicked over to your blog, Autumn. I wanted to comment on your "Never ever" post, as I never thought I'd be building furniture and blogging about it, either. I live in Hawai'i as well, although I was born and raised here. =D I've added you to my bloglovin' list to keep track of your posts. Malama pono!
Wed, 07/17/2013 - 10:48
So glad you commented! I'll
So glad you commented! I'll also be following your blog. Good luck in your endeavors!
Autumn
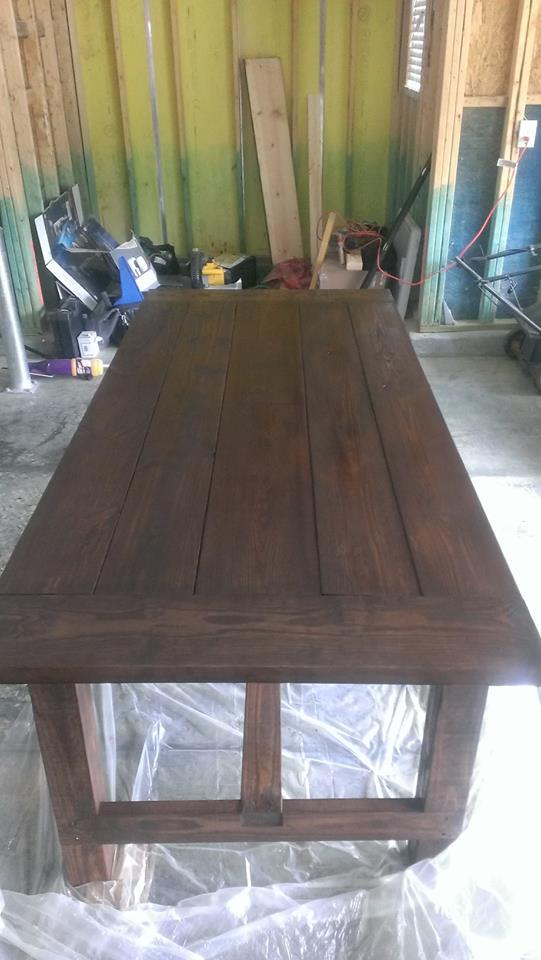
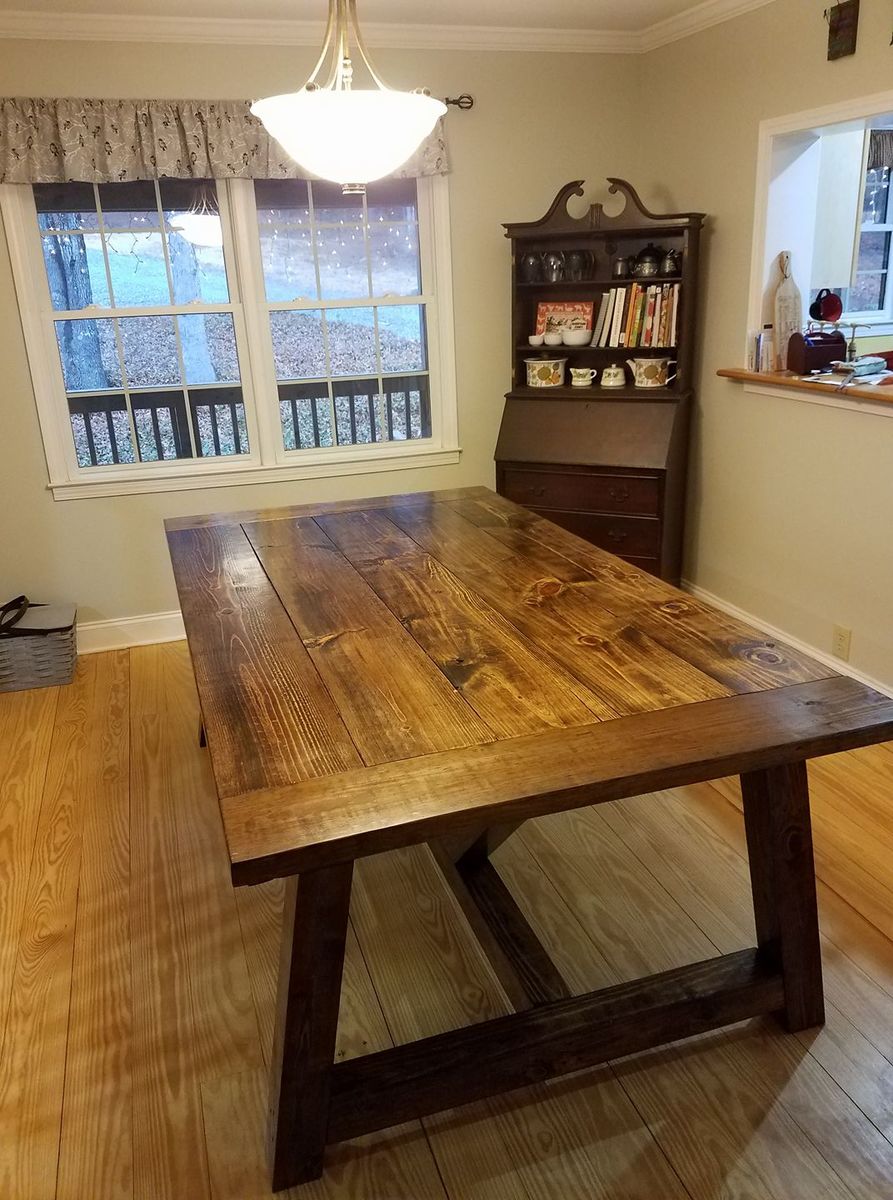
Ash Trestle Table with benches

The Ash for this table was sitting at a friends house out in a field for years. There were several 8/4 x 8' boards with various widths laying in the dirt. After many hours of planning and sanding I brought the Ash back to life.

Estimated Time Investment
Week Long Project (20 Hours or More)
Finish Used
Mix of Min Wax stains applied 3 light coats with a Waterbased poly (matte finish).
Recommended Skill Level
Advanced
Comments
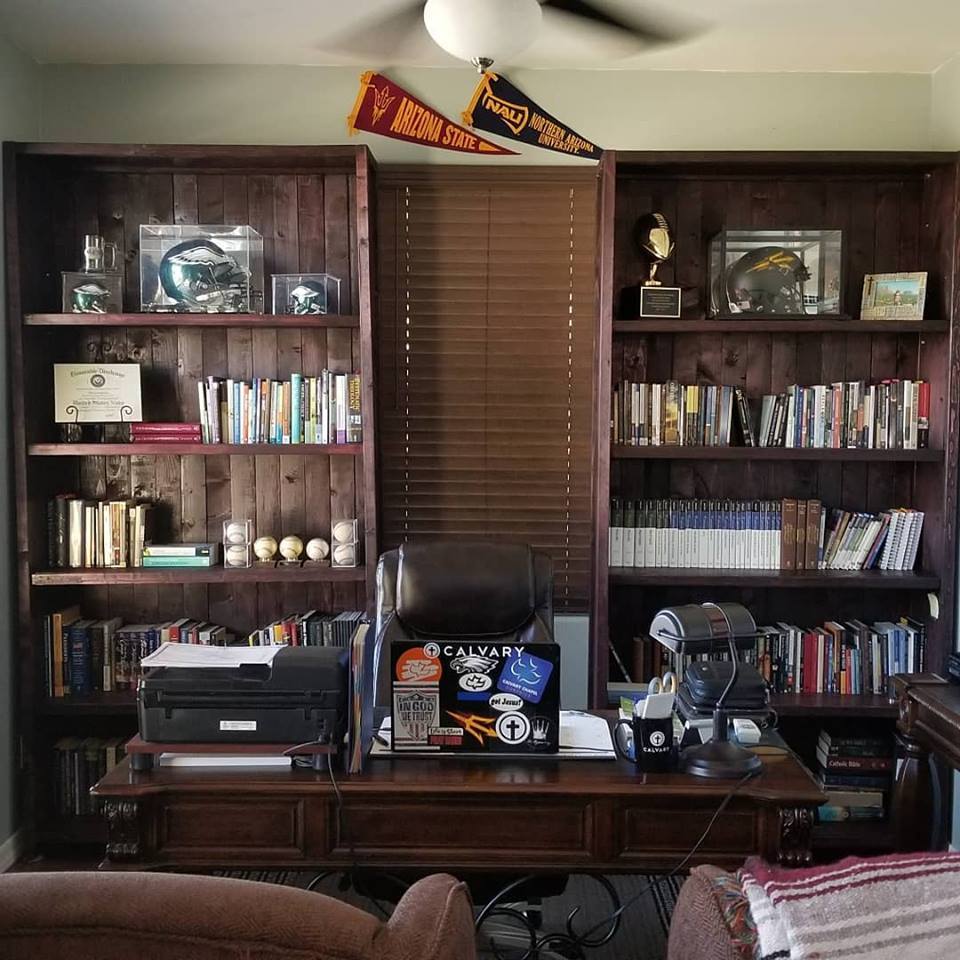
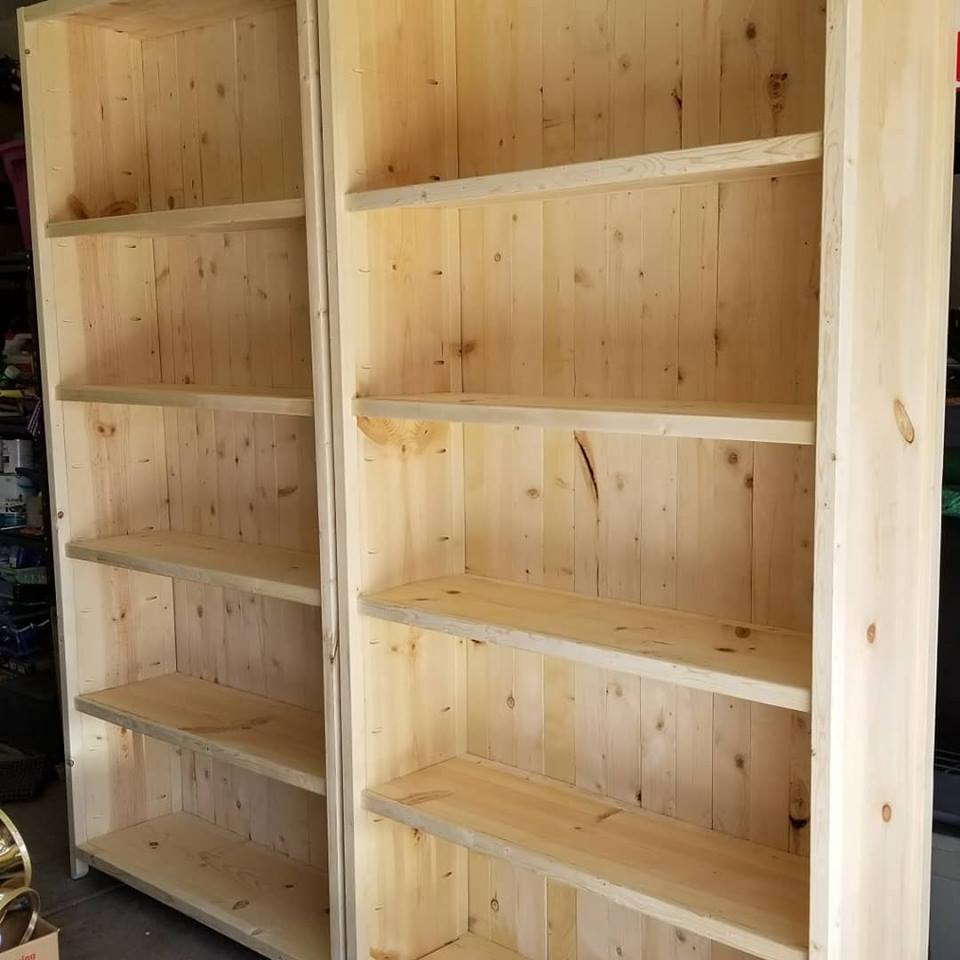
Kentwood Bookshelf
I had a few days a week to work on this project. I needed to modify them by the following:
Size was 92" H x 47" W x 14" D. I had two football helmet cases to place on these shelves and they had big cases above the standards shelf size. The top of the case did not overlap the project. I cut it to size. I used Cherry Stain and did not varnish it. I am not a fan. One thing I would change is the wood. I would have paid double for the premium select wood so that I know it is cut straight.
This was my first project and it didn't turn out bad. I never used the Kreg, but I think I became a pro after this one. I would recommend going out and buying all the size pocket screws and have them on hand. Also, buy the vises that you will need. Trust me, they will come in handy. I hate having to drive back to the store for things I should have had.
Overall, I paid about 240 for the wood. Since I only had the Kreg and no screws, I ended up shelling out a lot of money for the big buckets of screws and vises. Total for the both came out to about 350, from wood stack to finish. I would have paid more for one smaller piece at a store.
Built from Plan(s)
Estimated Cost
350
Estimated Time Investment
Weekend Project (10-20 Hours)
Finish Used
Cherry Stain. Did not use any finish.
Recommended Skill Level
Intermediate
Bar
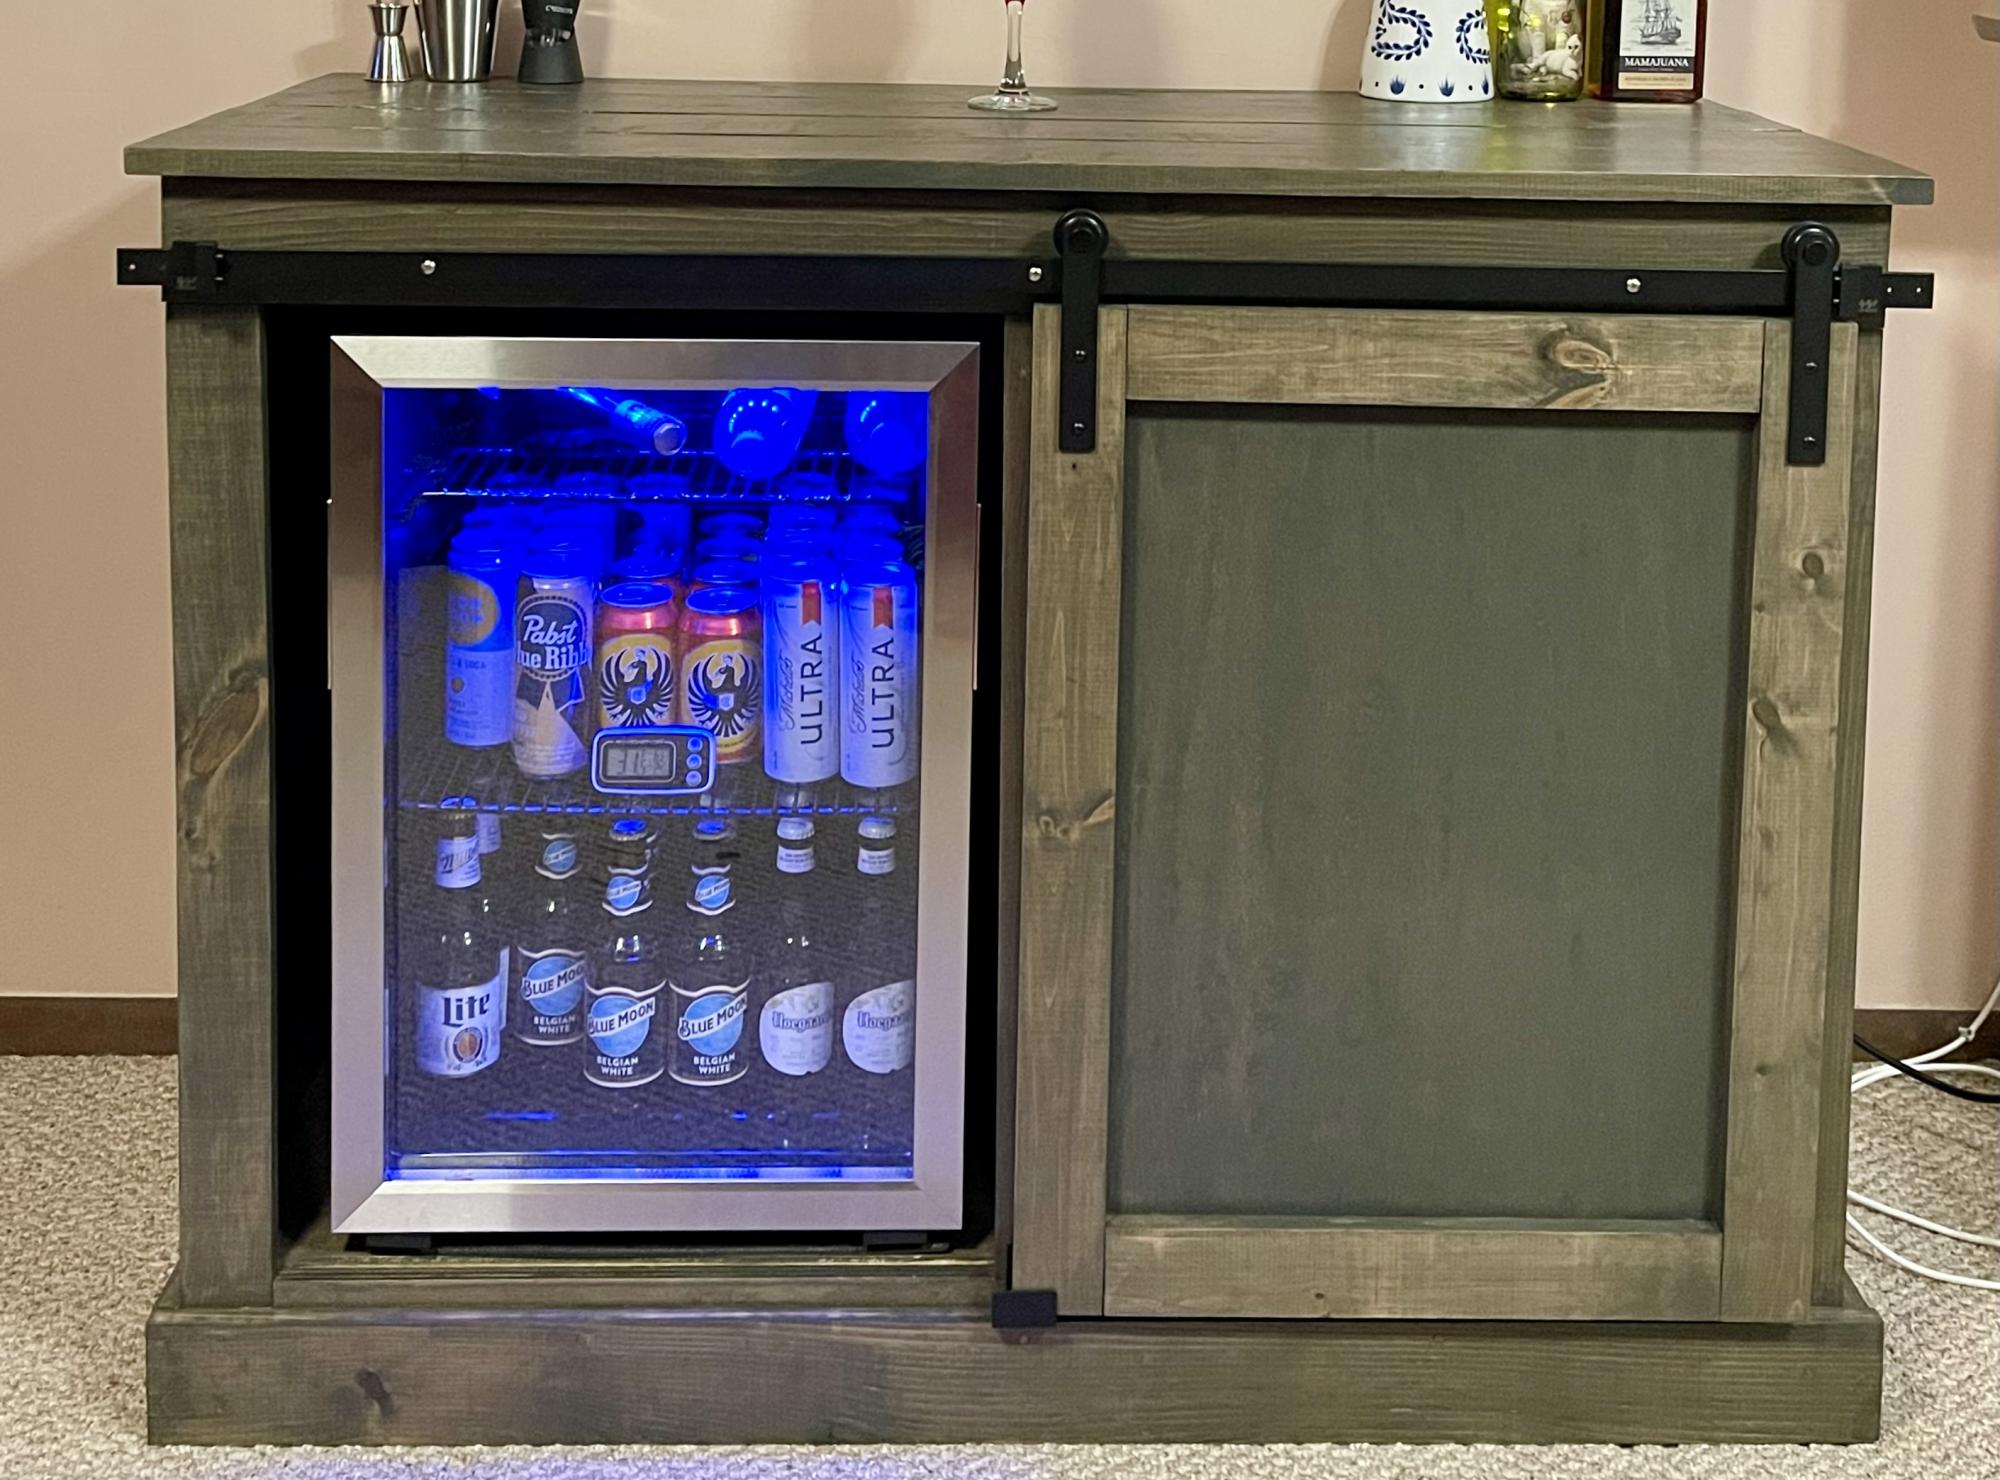
Built this exactly from your plans. Used aged barrel for stain. I love it!!!!
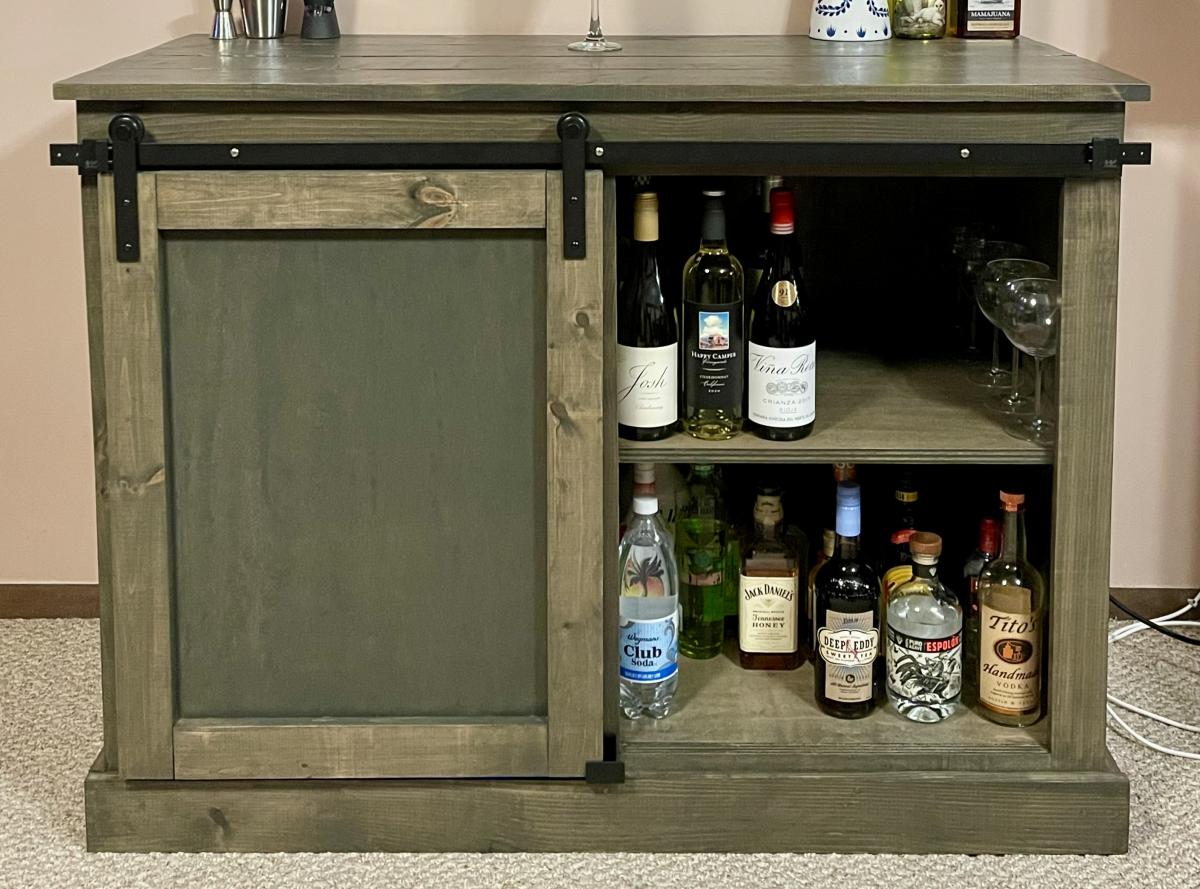
Built from Plan(s)
Comments
Mon, 03/14/2022 - 14:17
Sweet mini bar!
That's awesome, love the finish choice! Thanks for sharing:)
Farmhouse Table
First attempt at a project and I have to say I am pretty proud! It may not be perfect but I think the imperfections give it some character. I used a dark walnut stain and finished with poly two coats.
Built from Plan(s)
Estimated Cost
125
Estimated Time Investment
Weekend Project (10-20 Hours)
Finish Used
Minwax Dark Walnut stain
Recommended Skill Level
Beginner
Planked Wood Look Headboard
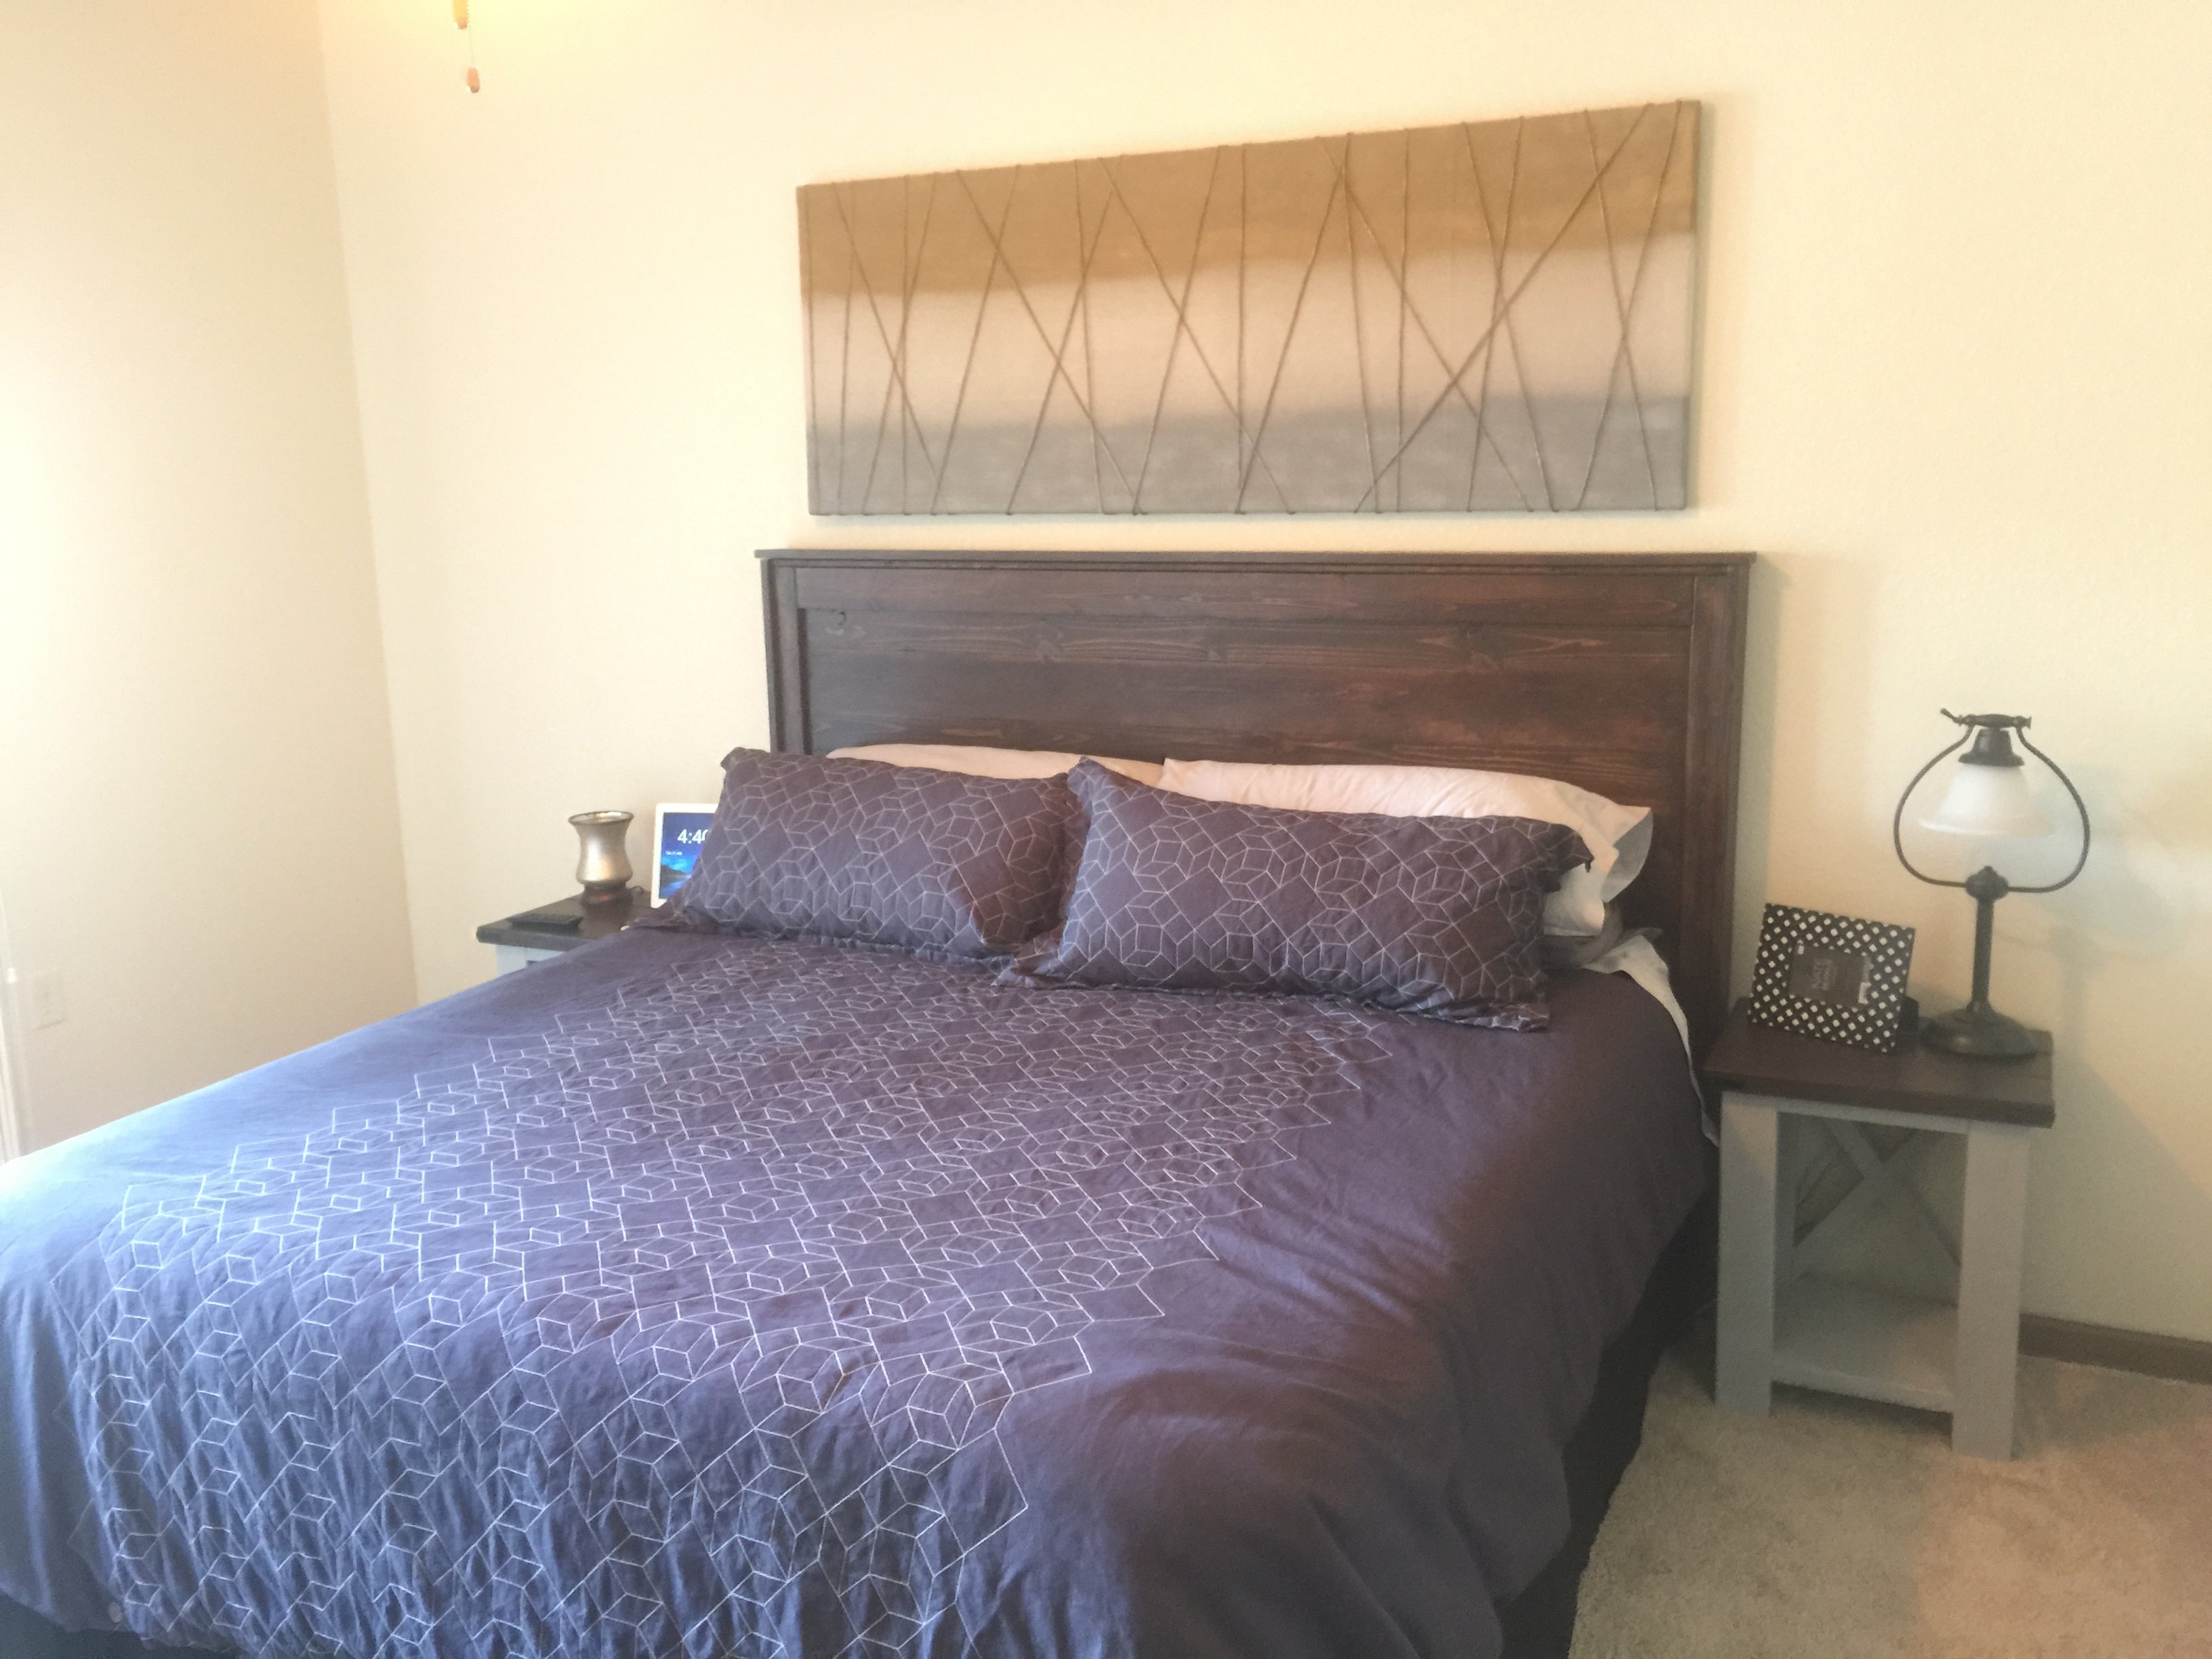
Really great and easy plans to follow. The only thing I would do different is replace all the 1x3's with 1x4's.

Built from Plan(s)
Estimated Cost
Under $100
Estimated Time Investment
Afternoon Project (3-6 Hours)
Finish Used
Rustoleum Dark Walnut
Recommended Skill Level
Beginner
Comments
Sun, 07/26/2015 - 10:03
Beautiful!
The bed looks great, and so does that nightstand! Thanks for sharing!
Entryway bench
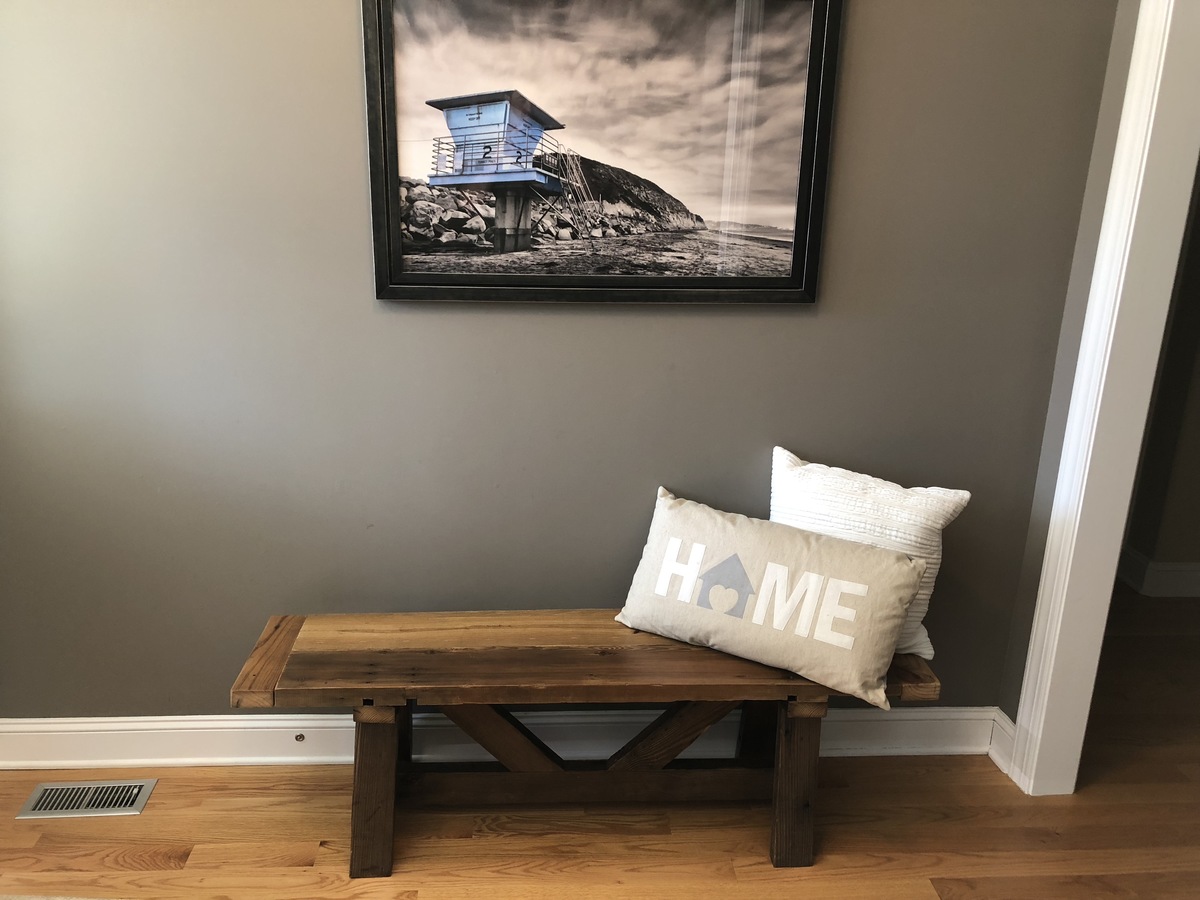
Entirely made of reclaimed wood. Sanded with 220 on a random orbital and applied two coats of polycrylic finish
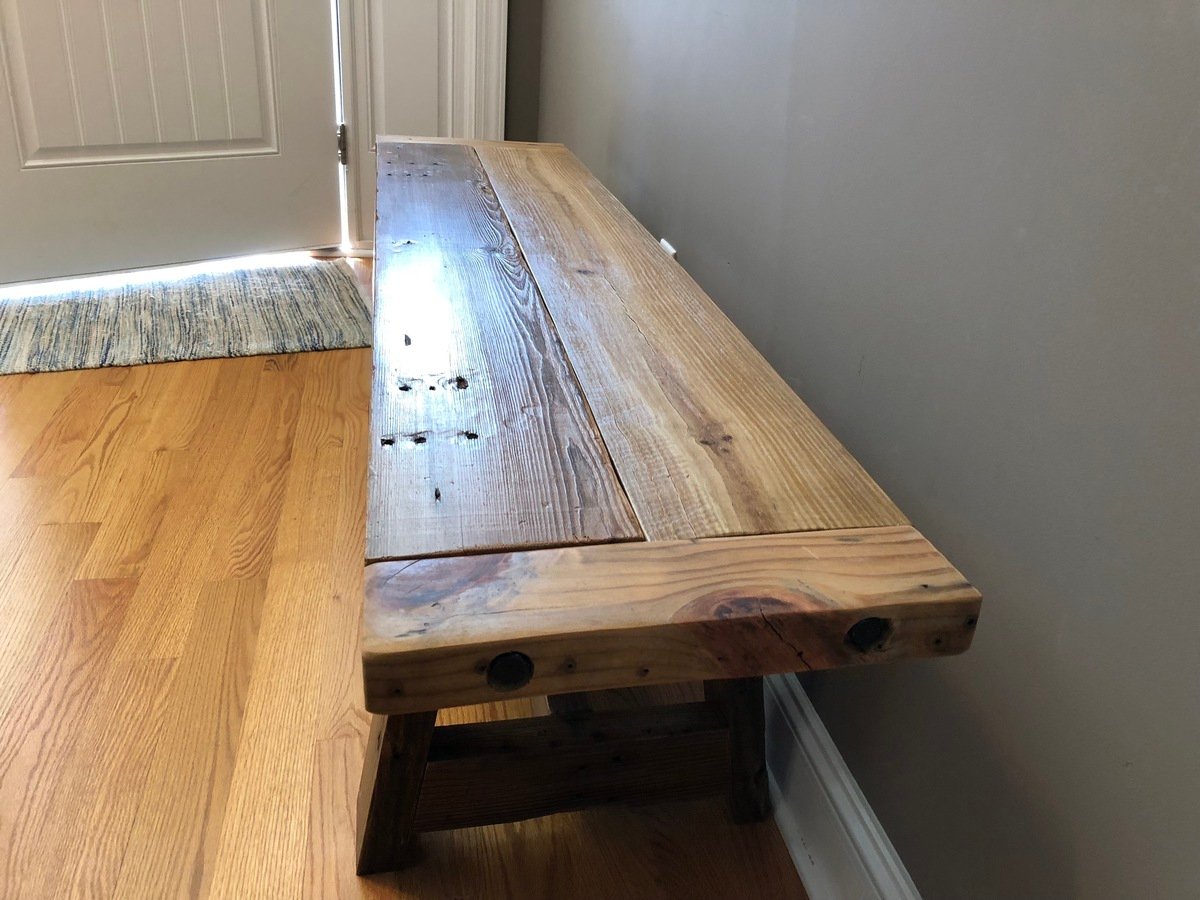
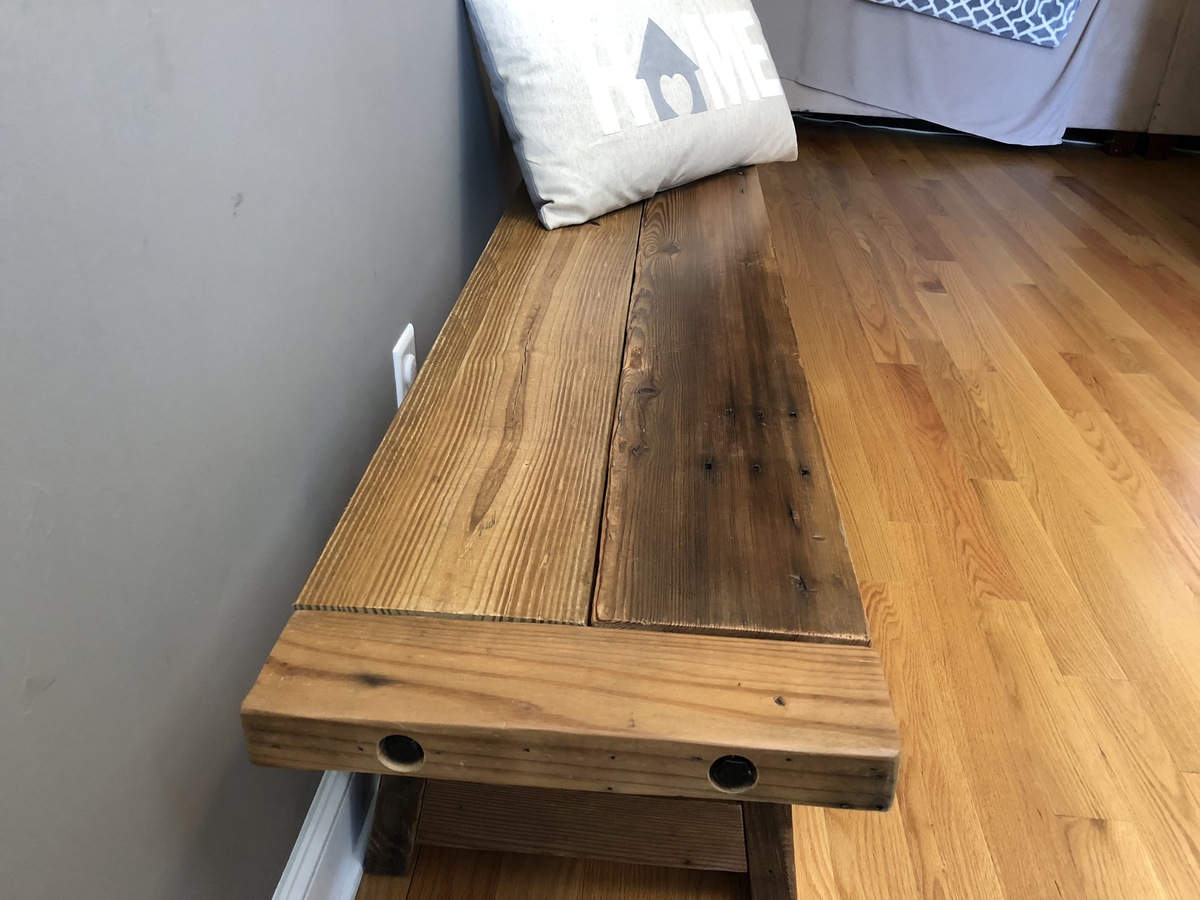
Built from Plan(s)
Estimated Cost
$20
Estimated Time Investment
Weekend Project (10-20 Hours)
Finish Used
Polycrylic clear matte
Recommended Skill Level
Starter Project
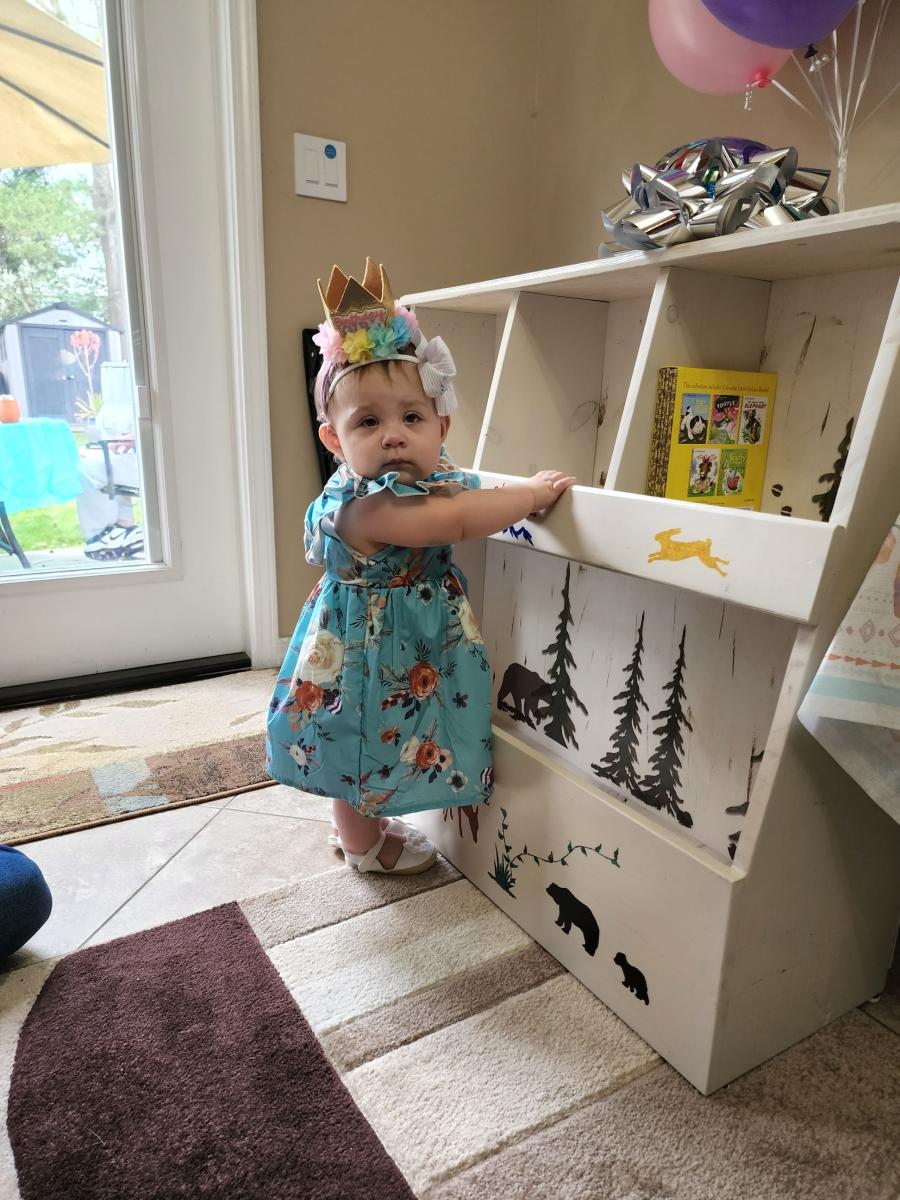
Toy Storage Bin Box
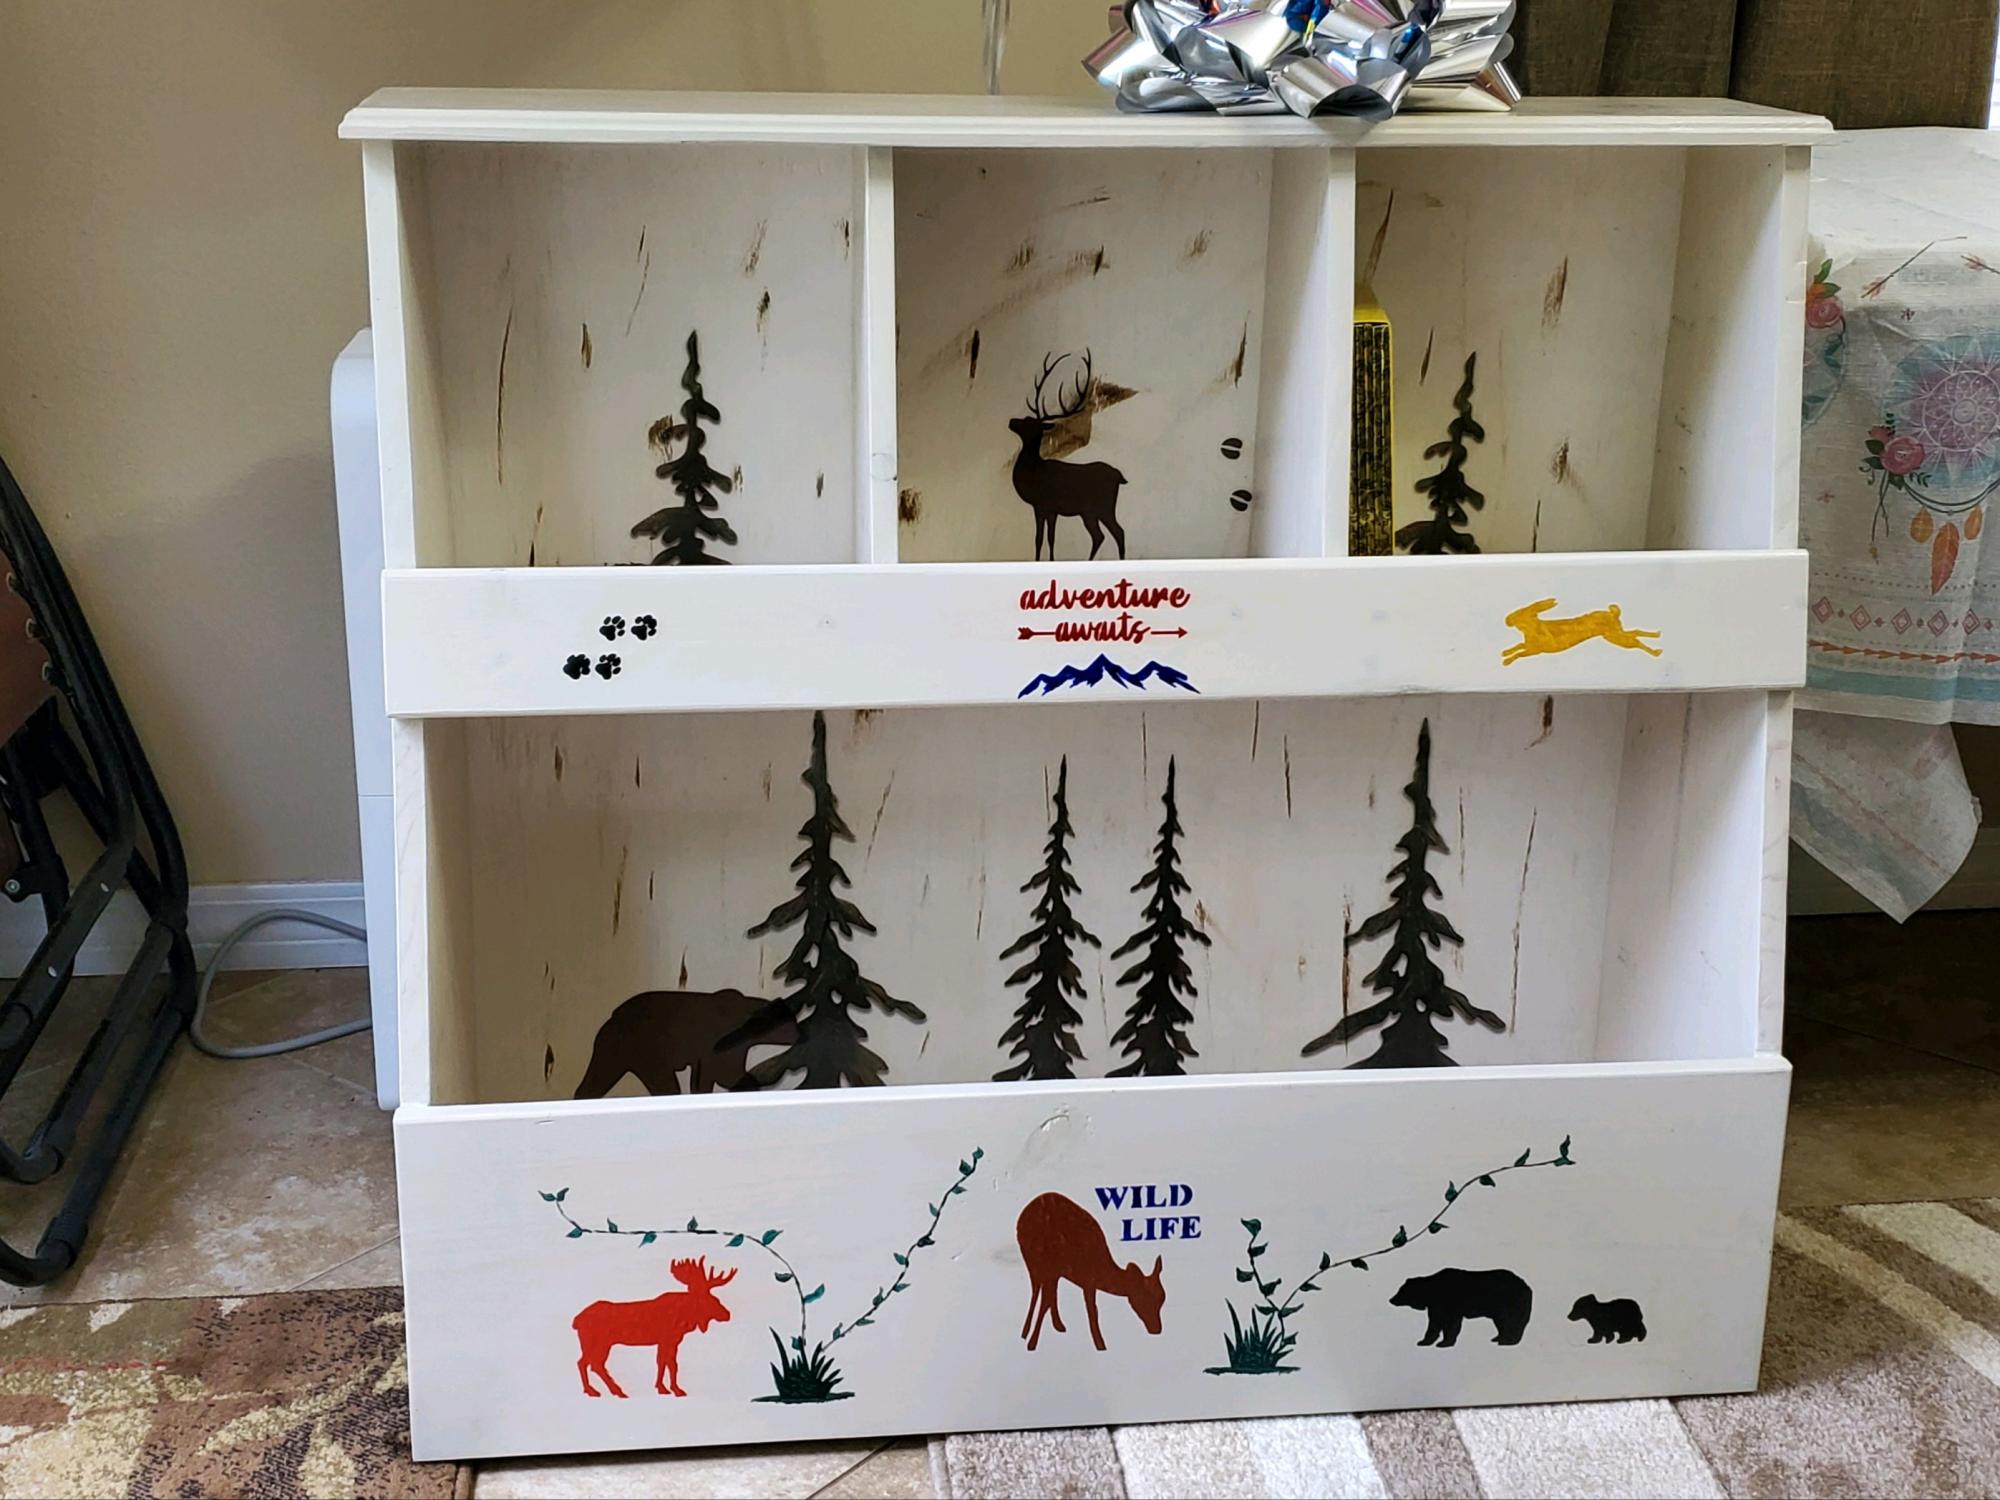
Tried to find a toy box for my Granddaughters 1st birthday. Ana White has the best plans so far. My Grandaughter’s room is wildlife themed, so I customized it for her room. Used semi-transparent white Minwax and added stenciling with acrylic paint before I added 2 topcoats of clear coat. In less than 10 minutes they filled it up, and so far, she seems to love it.
Comments
Sun, 04/03/2022 - 19:03
Very cute!
Thank you for sharing your awesome project, love the wildlife theme!
Hooray for the $10 ledge!
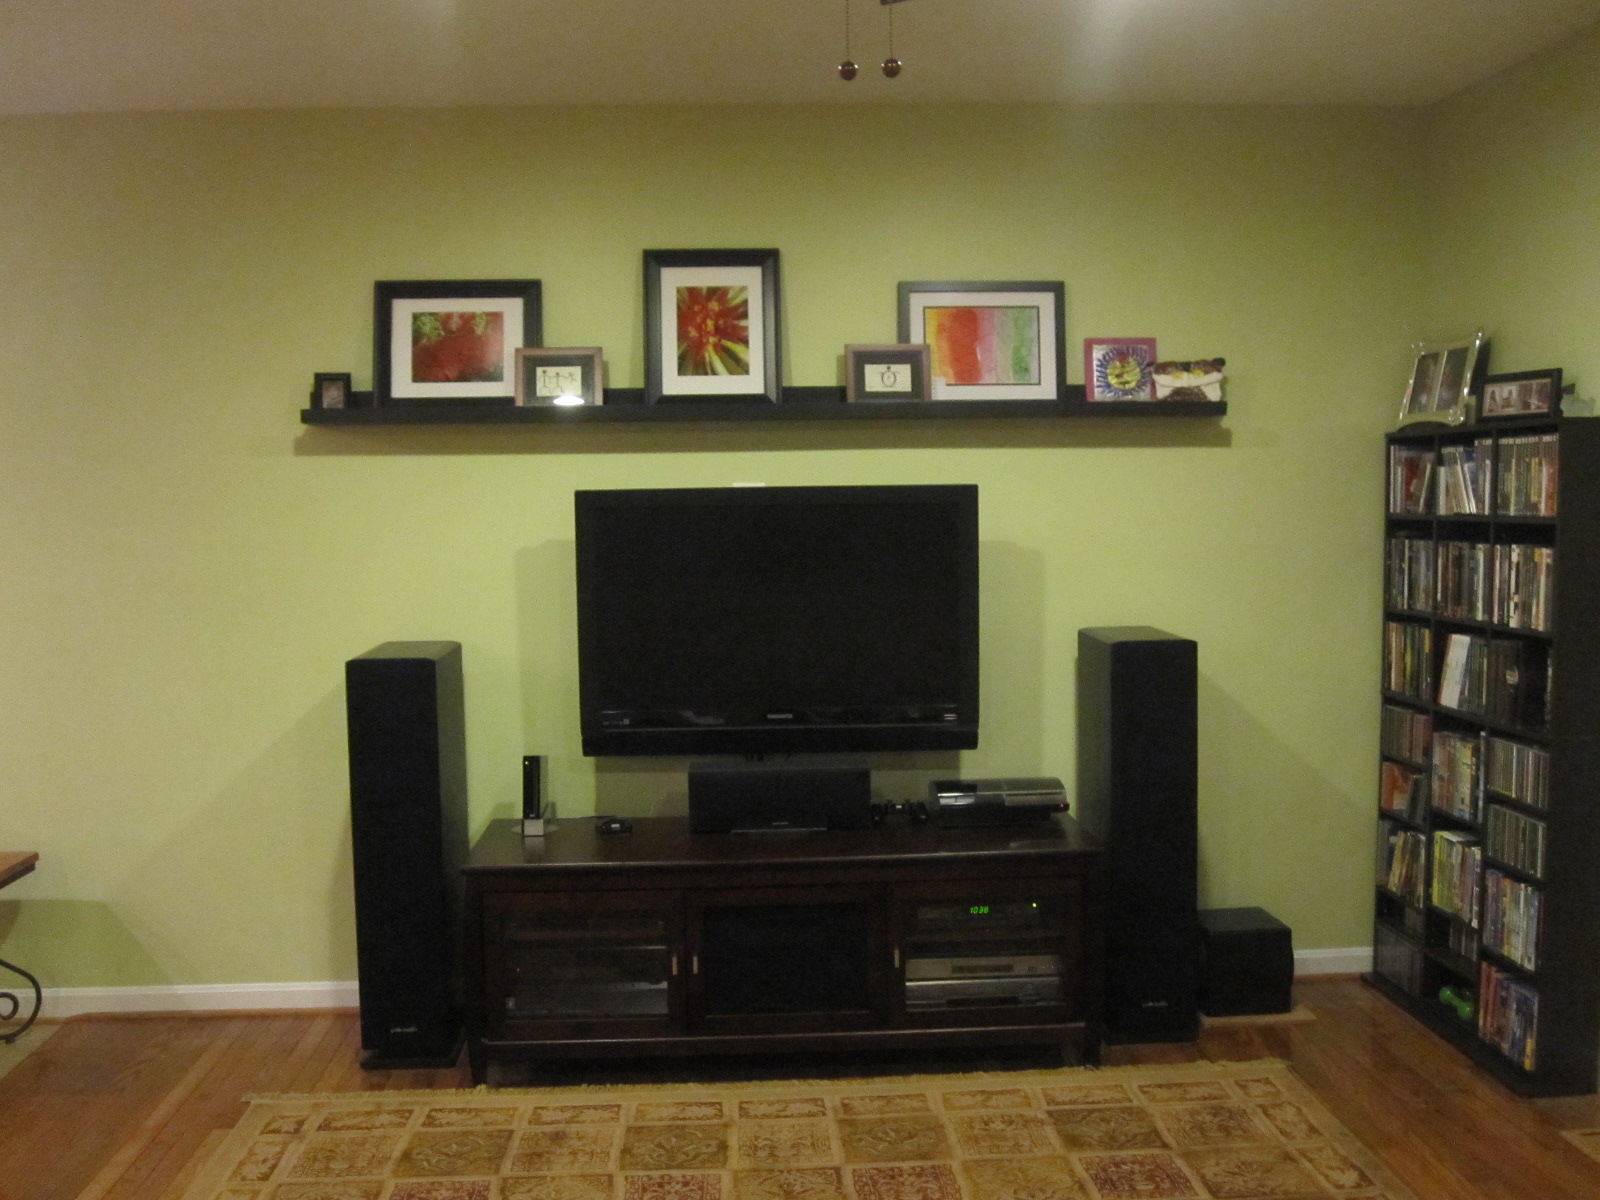
This project was so EASY and it is just what I wanted over the entertainment area. We had some So excited that it came out so well and looks great! Thank you for such easy to follow instructions!
Estimated Cost
$8 (had some supplies on hand)
Estimated Time Investment
An Hour or Two (0-2 Hours)
Finish Used
Paint Brand: Ace Hardware
Color: Ace of Spades
Finish: Satin
Color: Ace of Spades
Finish: Satin
Recommended Skill Level
Starter Project
Fort Bed
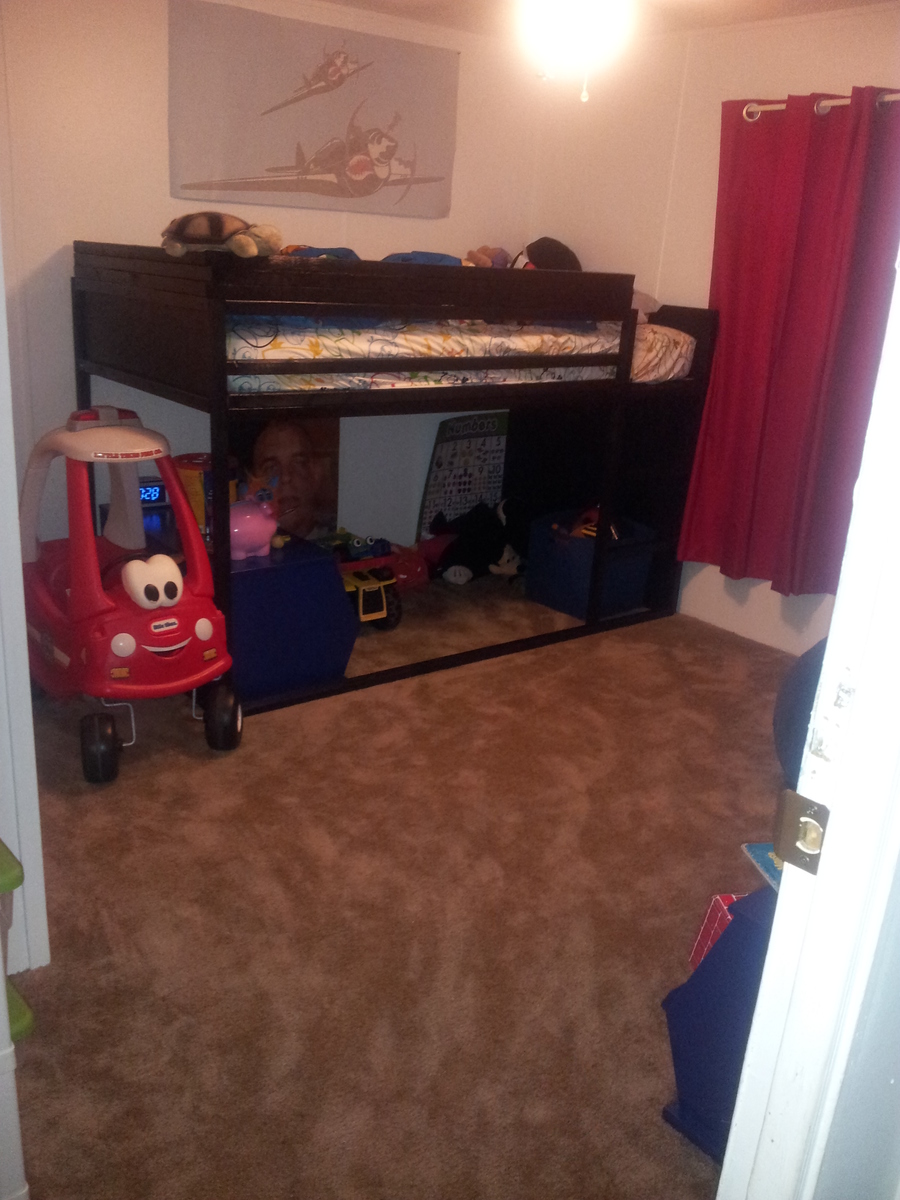
We're in a rental and the rooms are a good size, but on the small side of good sized. Thought this would be perfect to give my 4 year old a little extra play space. I added three extra 2x2s to the guardrail, it was a bit short for my liking. Other than that, stuck to the plans. It seemed when putting together the ladder that we were missing a piece and couldn't figure where it was in the plans, but I just ran to the store so we could keep the ball rolling. We love it!
Estimated Time Investment
Day Project (6-9 Hours)
Finish Used
Black gloss paint
Recommended Skill Level
Starter Project
First project - thanks Ana!
I built this for my daughter, and she loves it! Looks great and feels even better to relax in. Now I'll have to build one for me, 'cause she's not sharing ![]()
Built from Plan(s)
Finish Used
Dark cherry stain
Recommended Skill Level
Beginner
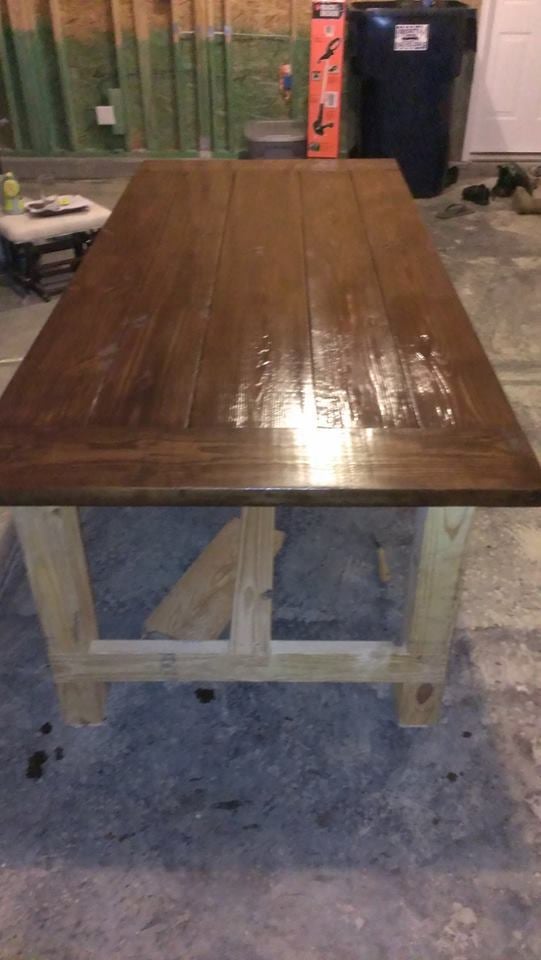
Dining Table SC
It took me a good 6 months to finish this since I started before summer, but it got too hot here in SC very fast. So I just finished it in January this year. It turned out great! Longest part was the finish work since many days it was too cold to put Poly on it. The actual building of the table went quick.
Estimated Cost
$200
Estimated Time Investment
Weekend Project (10-20 Hours)
Finish Used
Minwax Provincial
Minwax Polyurethane
Minwax Polyurethane
Recommended Skill Level
Beginner
Bed+ entertainment center
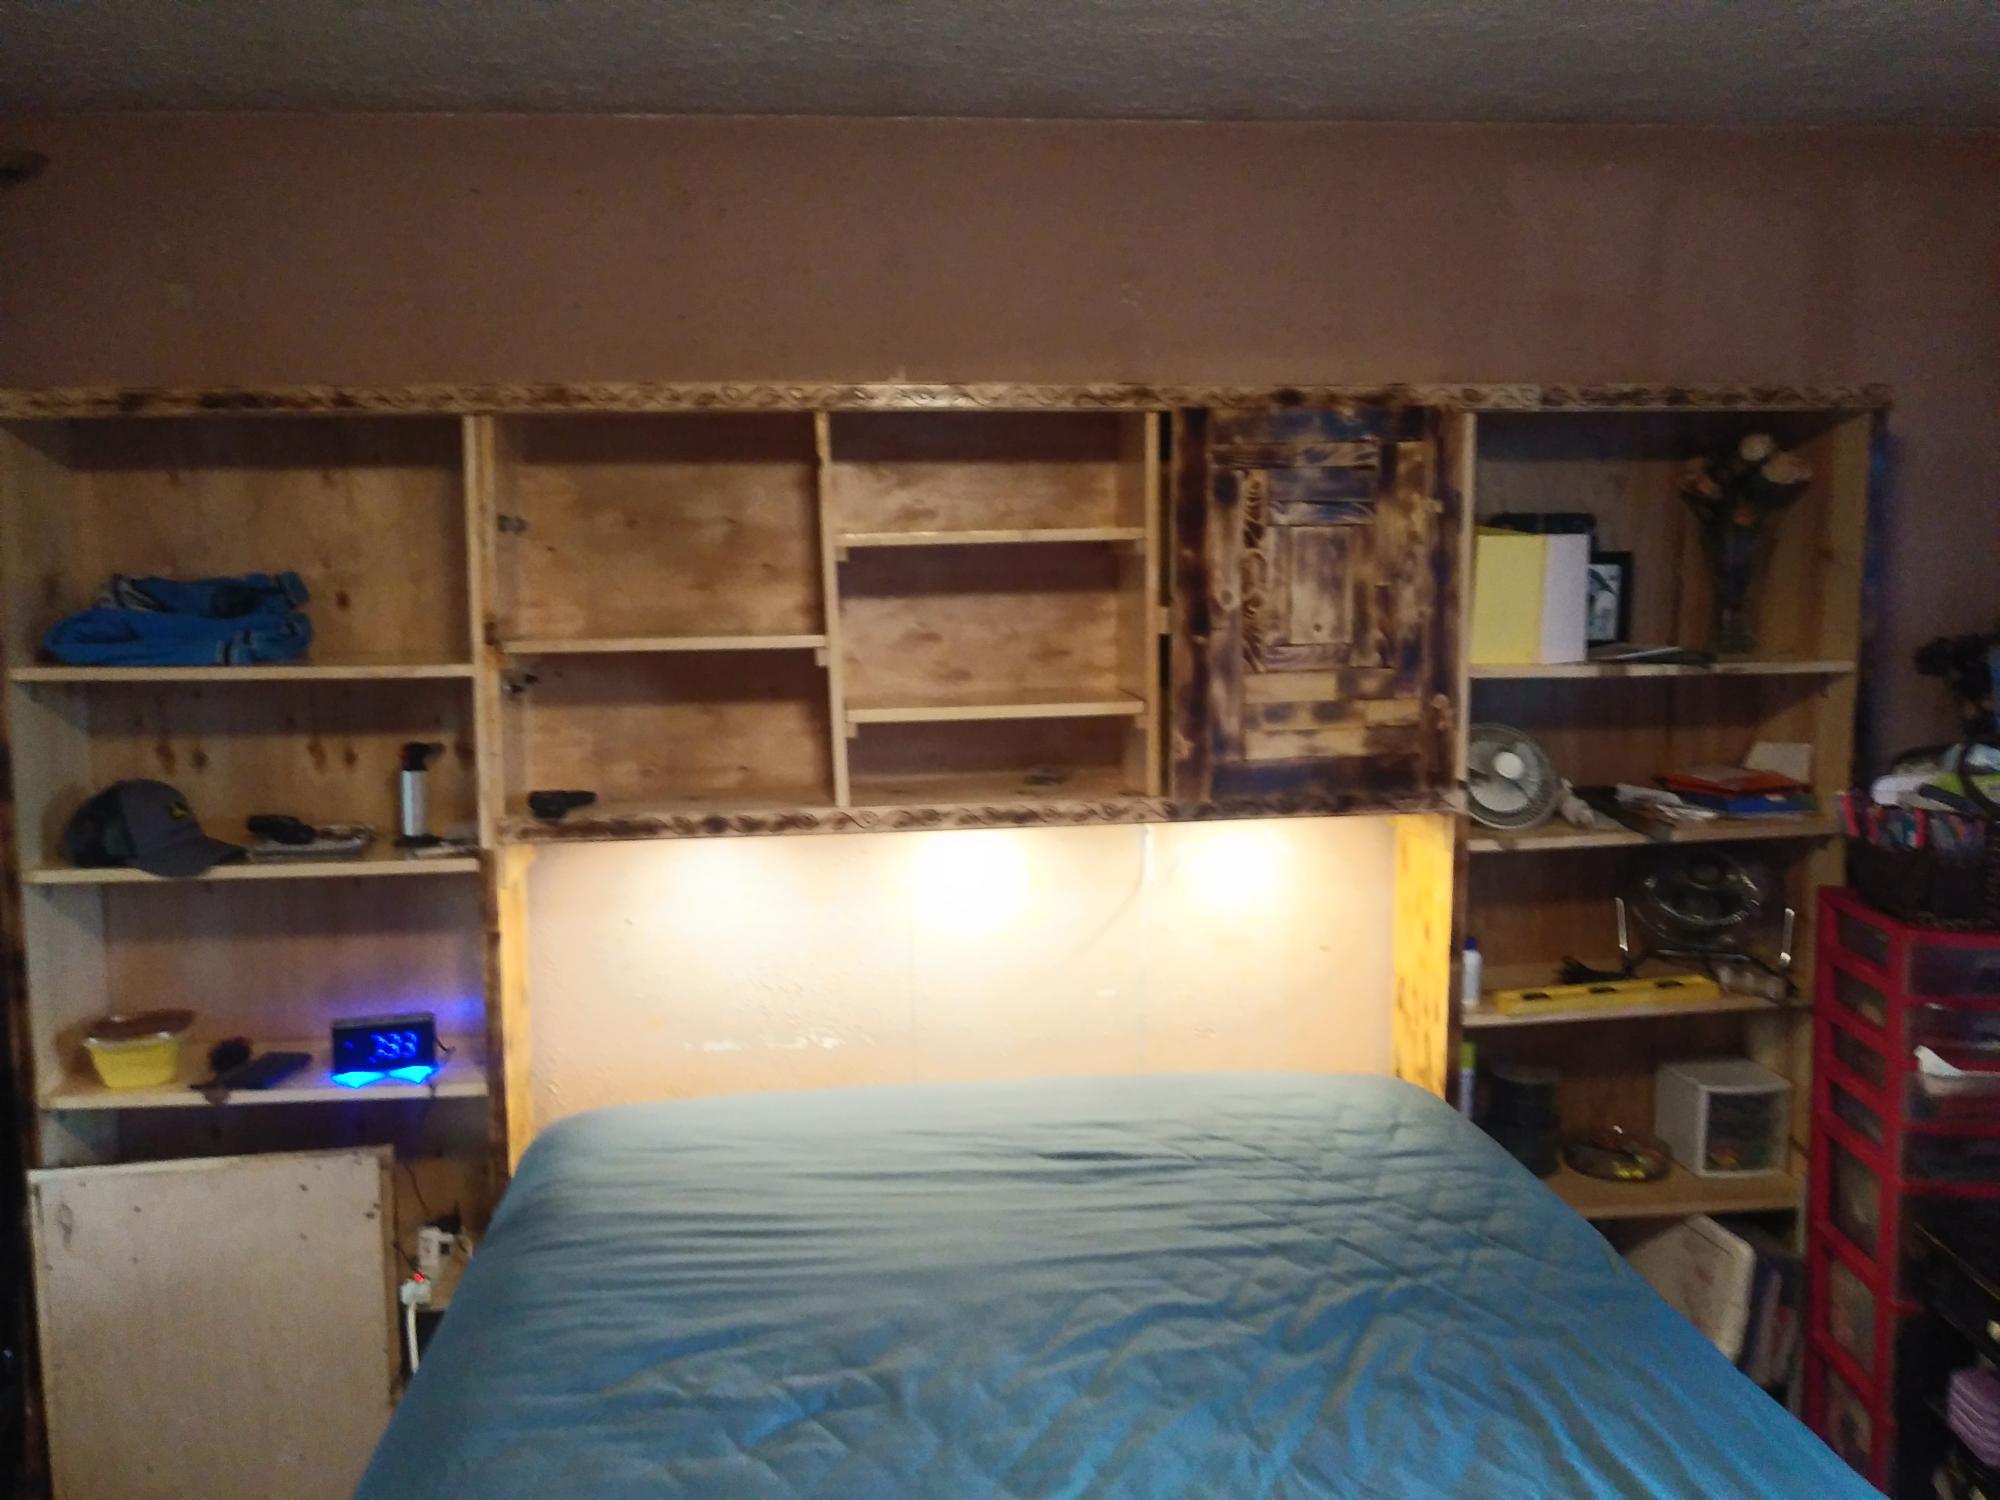
This is your storage bed and entertainment o r media center flipped upside down. I am self taught thanks to you. Thank you for making it easy to do and follow!
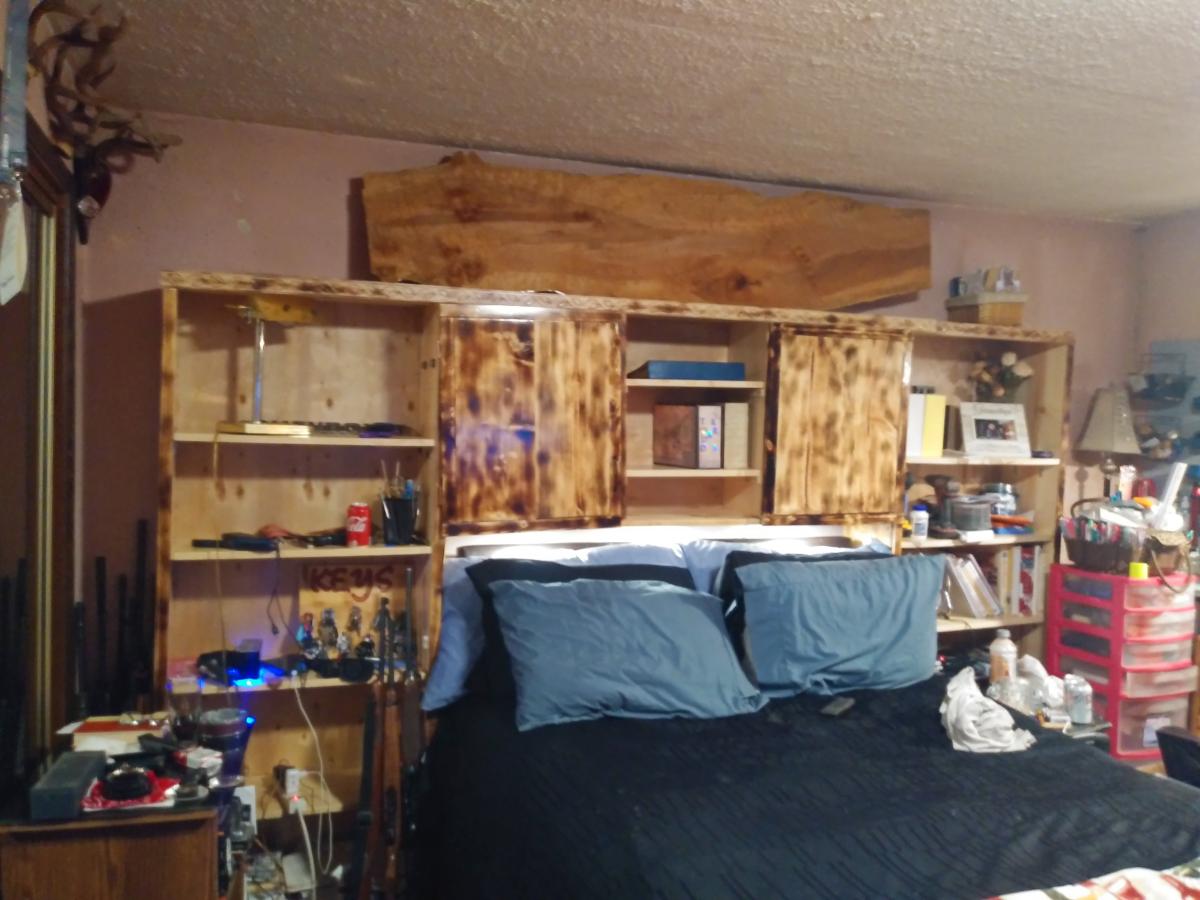
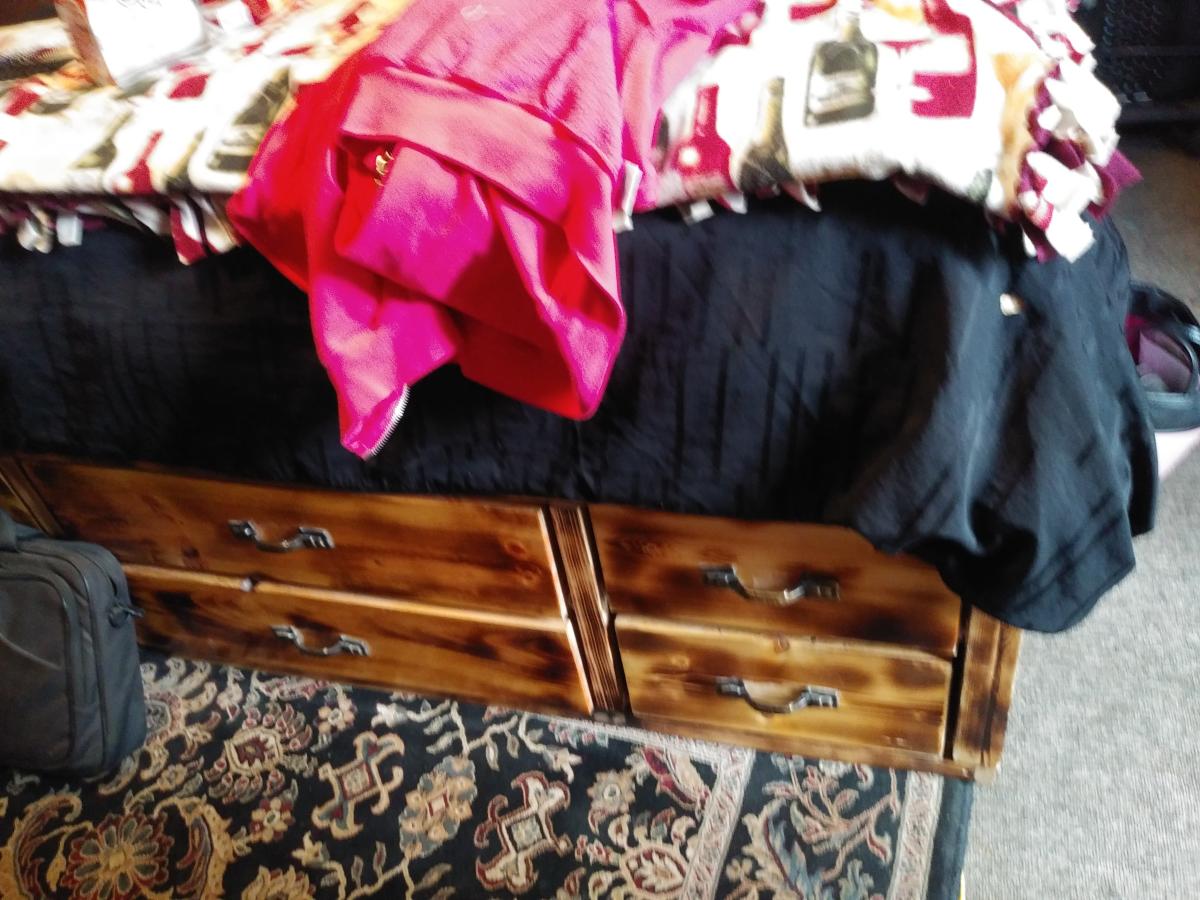
Built from Plan(s)
Comments
Music Stand for RoRo
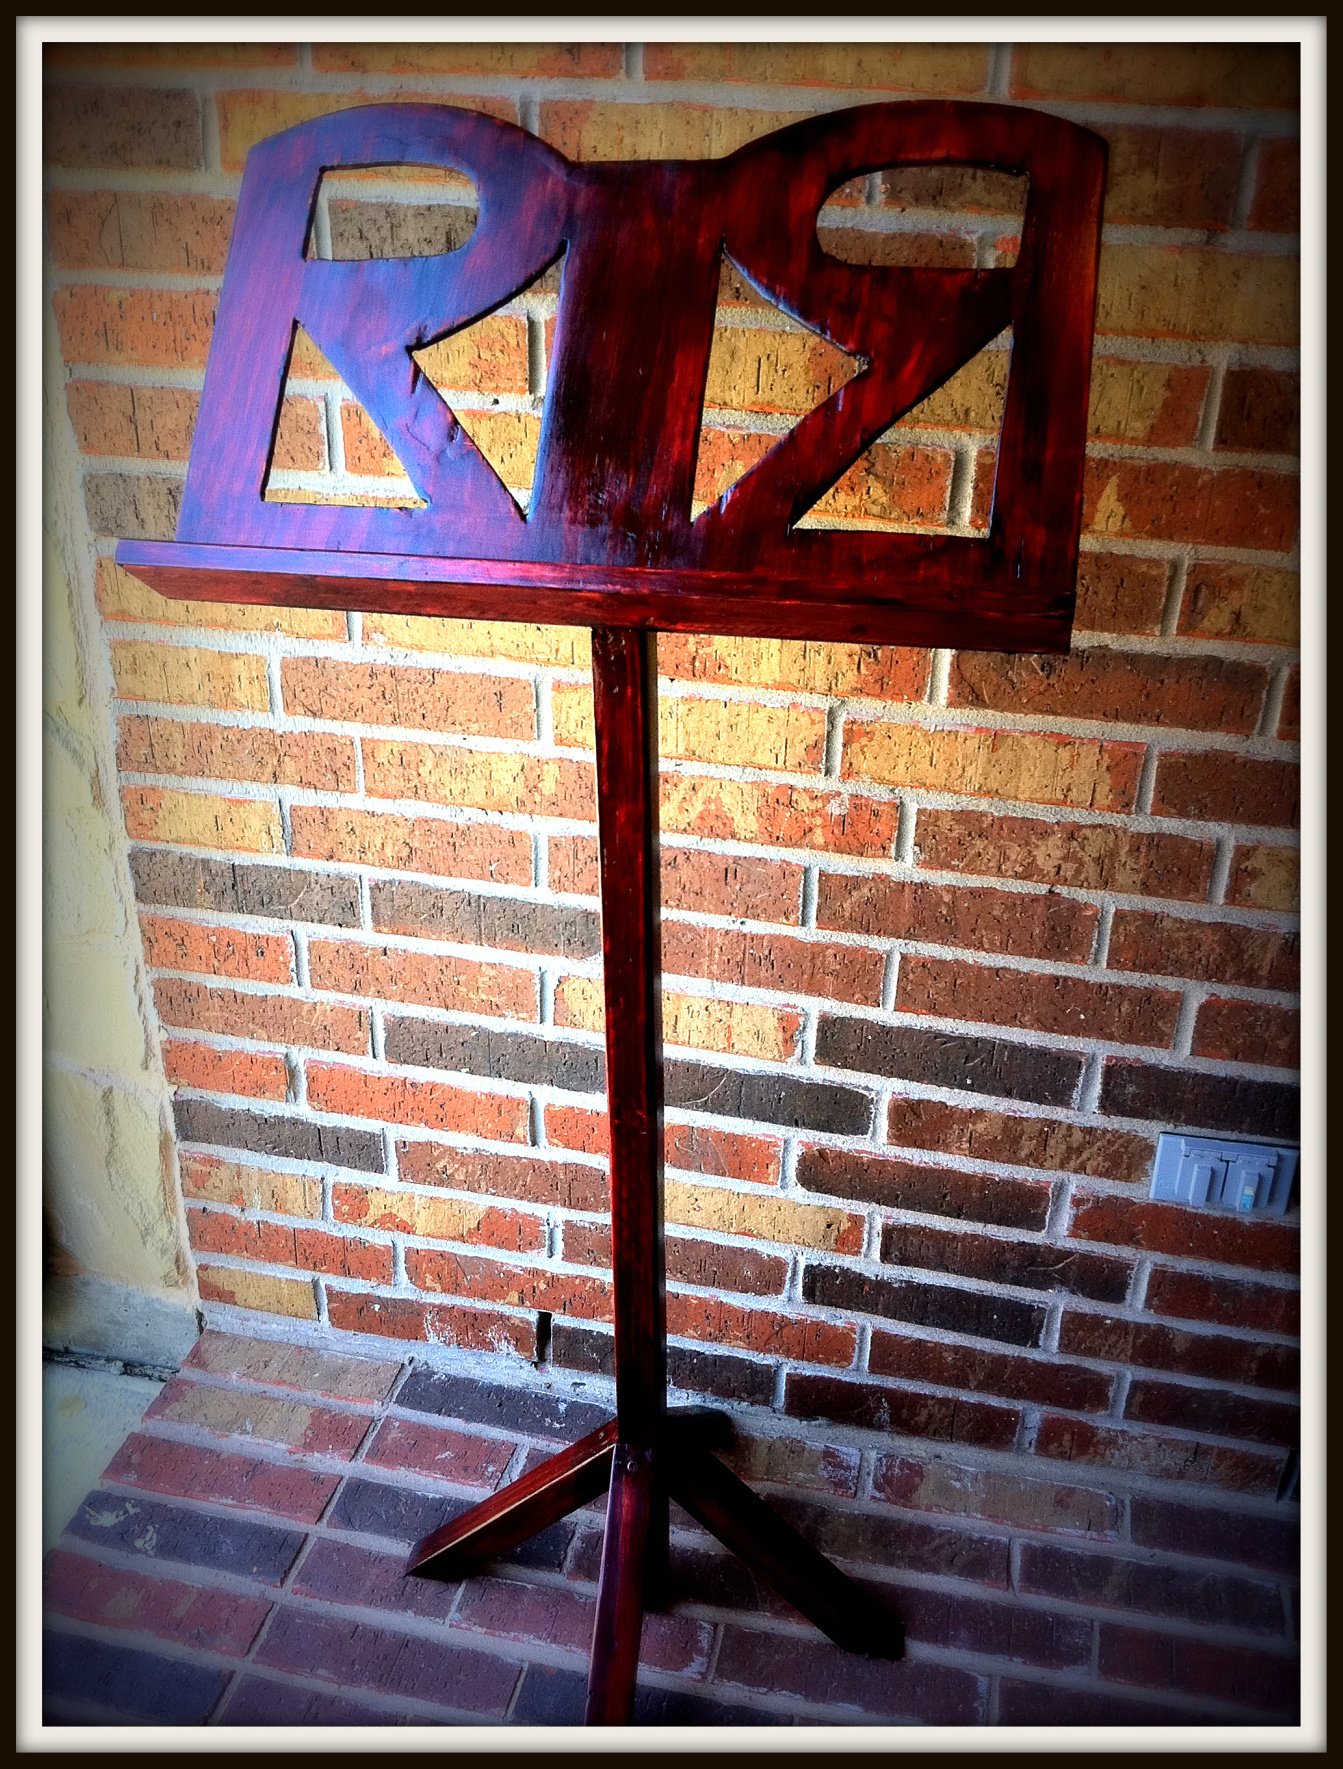
My husband's a music teacher and I had to build him this for our fifth wedding anniversary! I was looking and thinking about what to get him for a long time...then, I looked up what the "traditional" gift is for the 5 year mark. Wahoo, wood! Since I started dabbling into making things after discovering Ana's site last Fall, I thought, well no problem! Ha! Well, I had 2 evenings to build this thing with 2 toddlers helping me :-). I used the base of the stand from the plan for the Coat Tree. Then, I designed the top using the letters "R" & "R" for RoRo (what I call my Hubby). The top was cut using a jigsaw. Everything else, either a mitre or circular saw. The hardest part was affixing the top to the stand. Argh! Angles, drilling, messing up, argh! Somehow, it's put together and holding up, lol! Might I mention that when I first started building things, my hubby's first request was for a music stand. Well, there you go RoRo! Happy Anniversary!
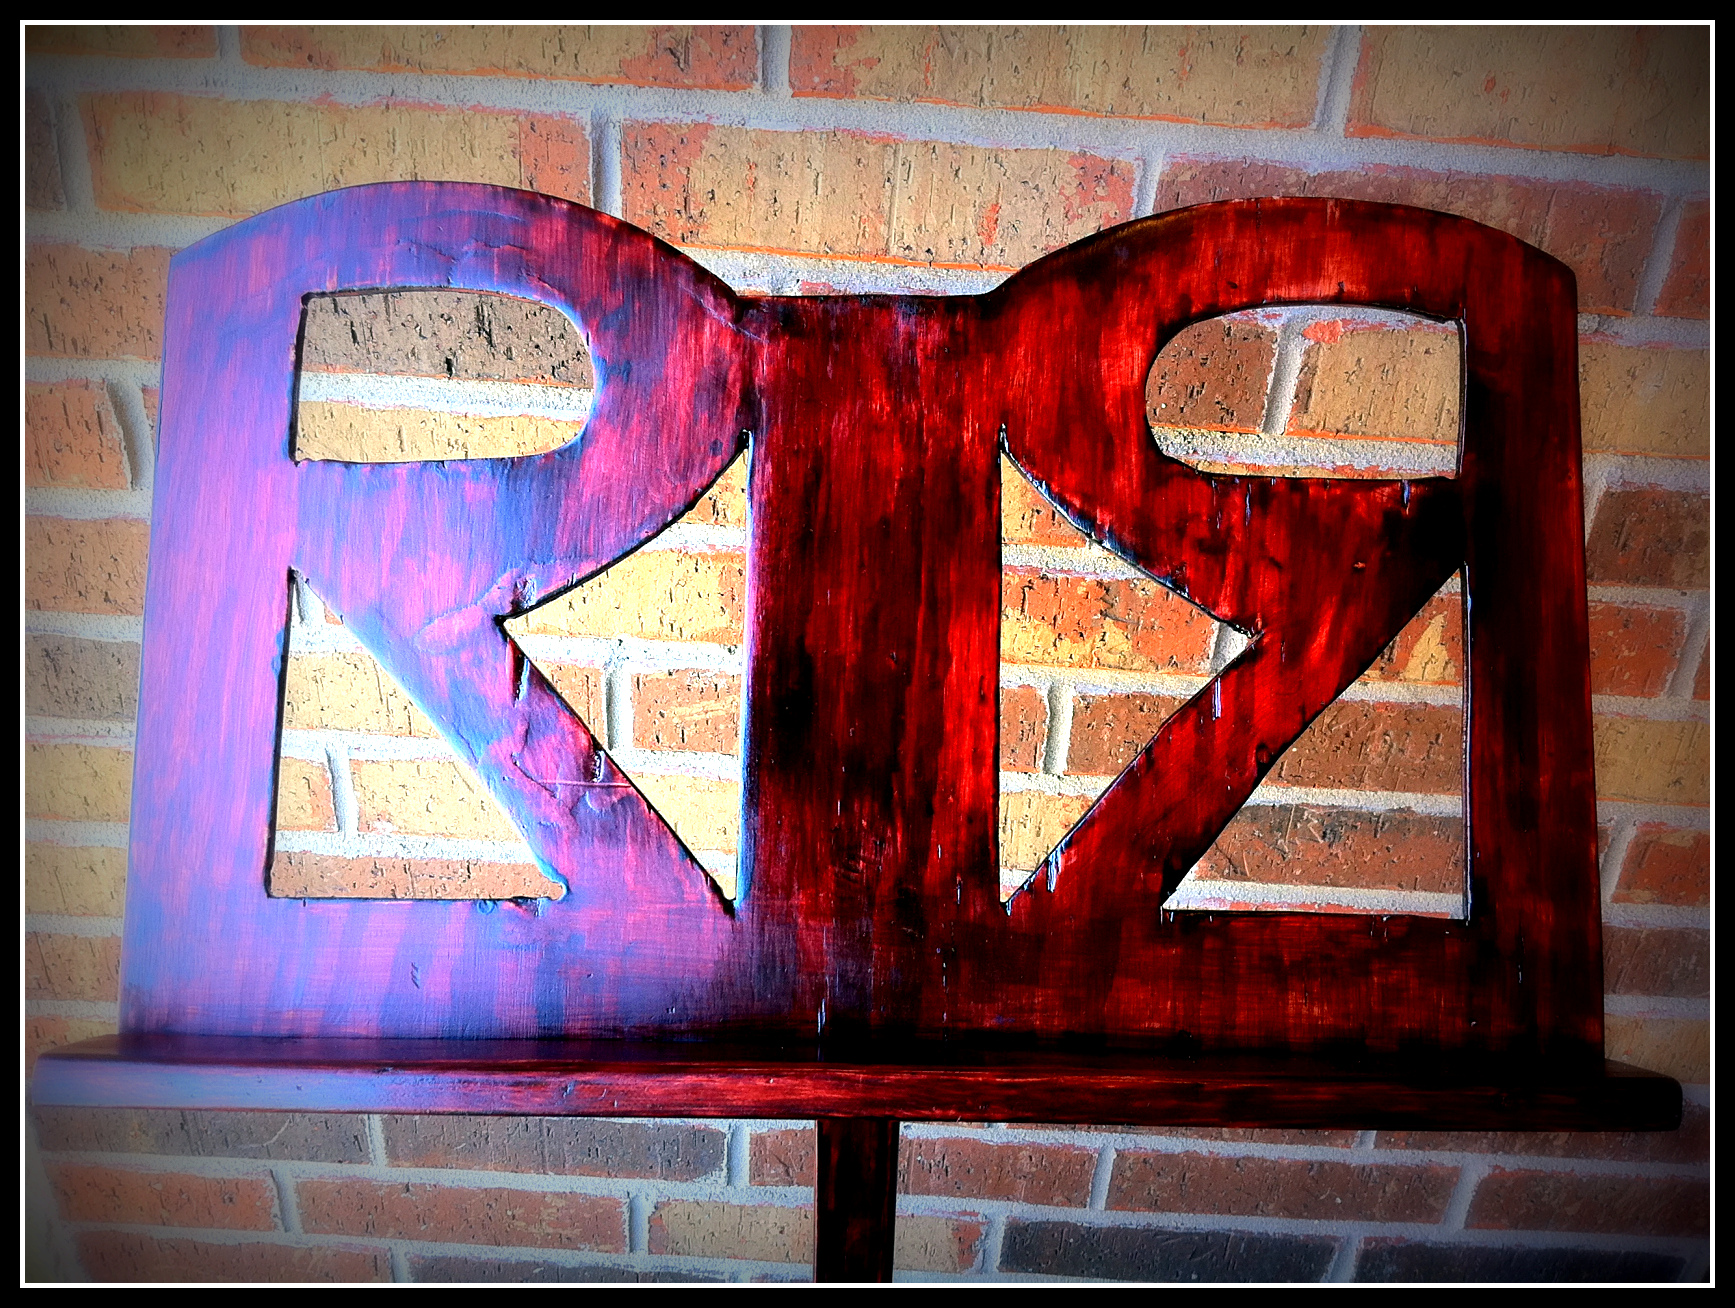
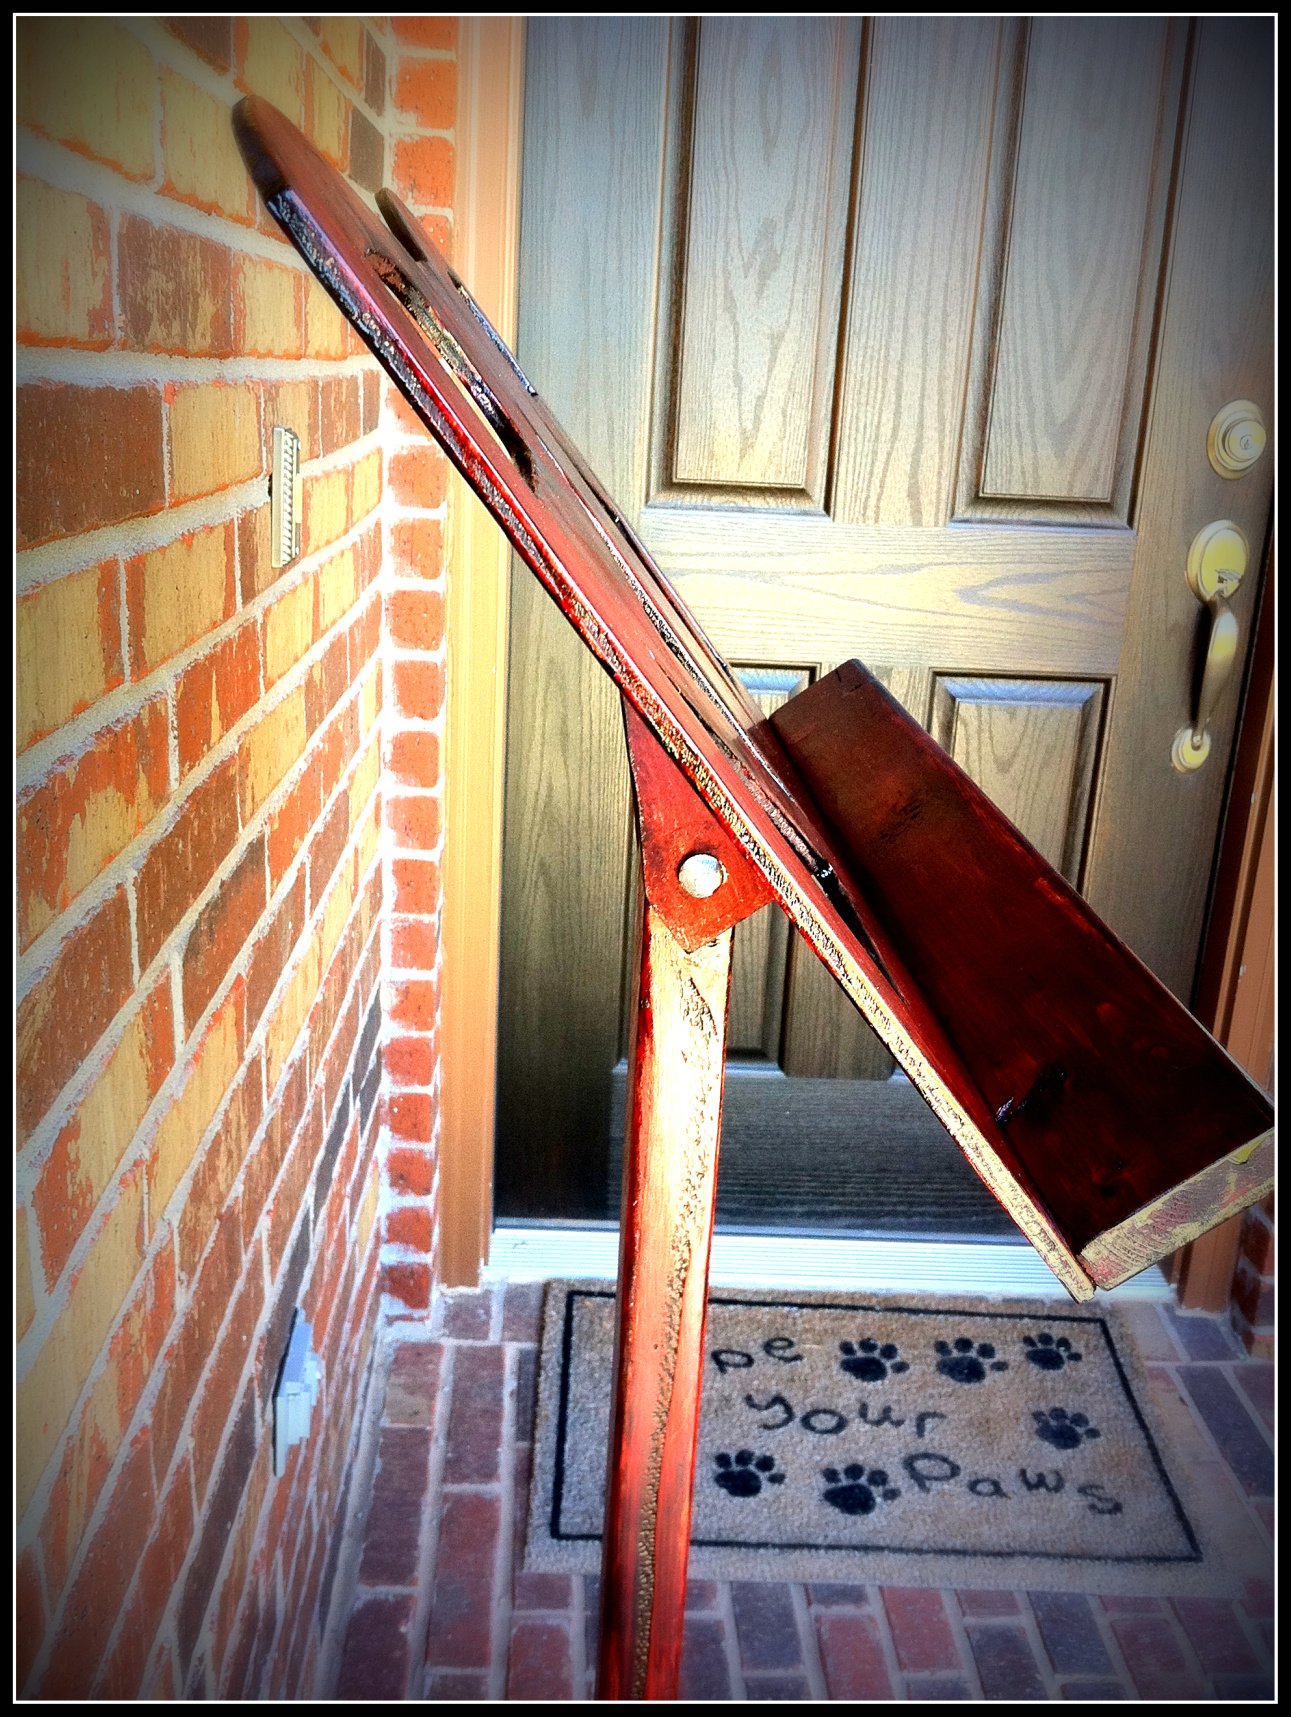
Estimated Cost
$15
Estimated Time Investment
Day Project (6-9 Hours)
Finish Used
rich cherry stain after sanding and using steel wool for smoothing out after the stain
Recommended Skill Level
Beginner
Traditional Toddler Bed with a few changes

This was basically my first ever wood working project. It didn't turn out perfect but I had fun doing it and my daughter likes it too! It isn't done yet, still need to figure out the color of paint I'm going to use.
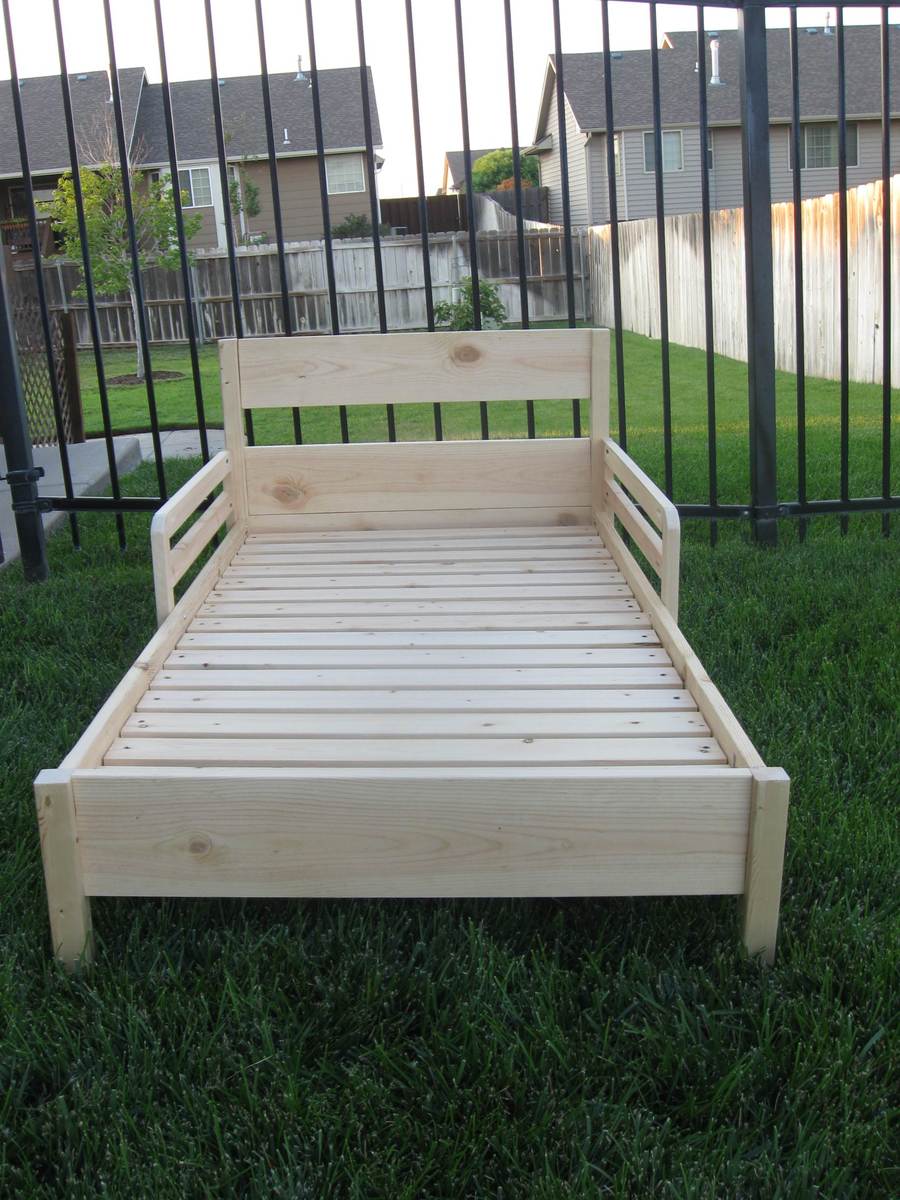
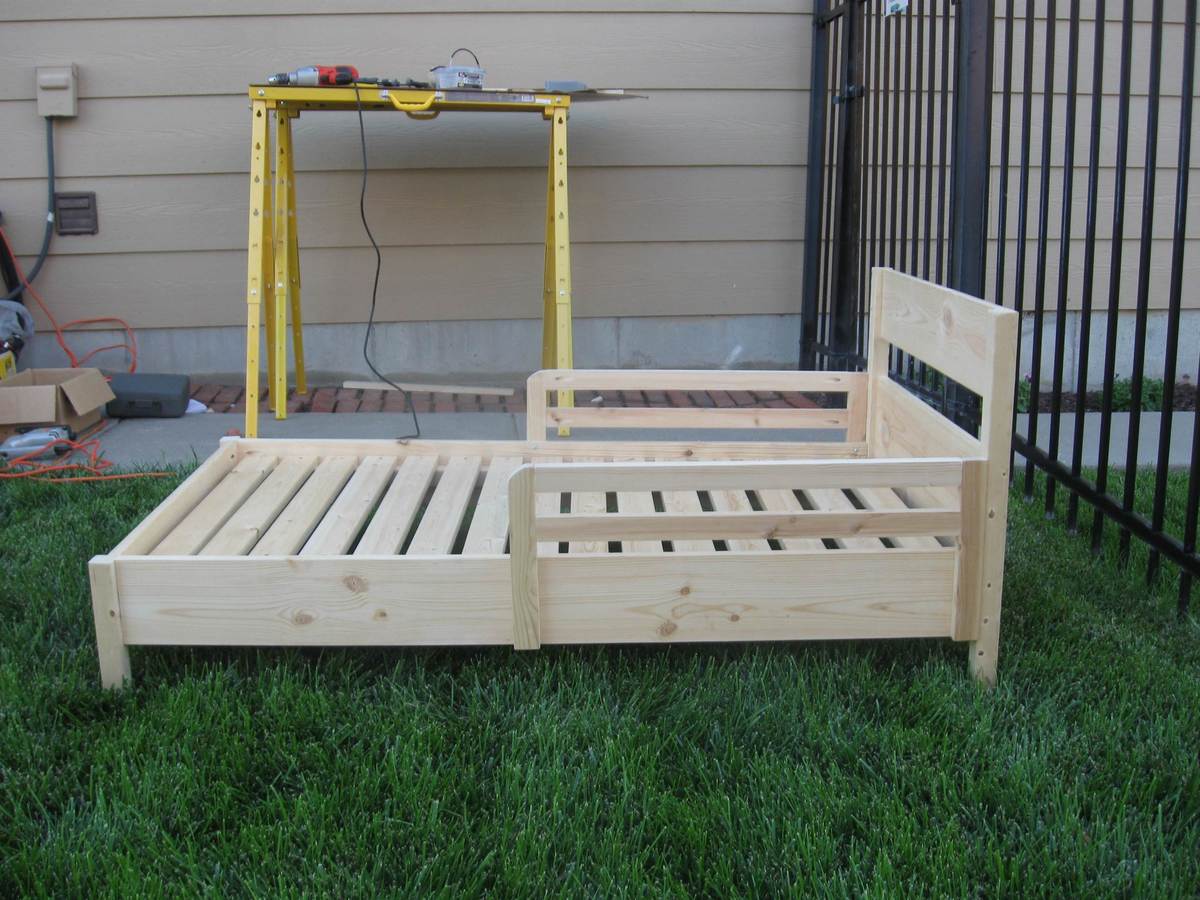
Built from Plan(s)
Estimated Cost
~35 for lumber, Kreg jig, screws, paint additional
Finish Used
Not finished yet.
Recommended Skill Level
Beginner
Comments

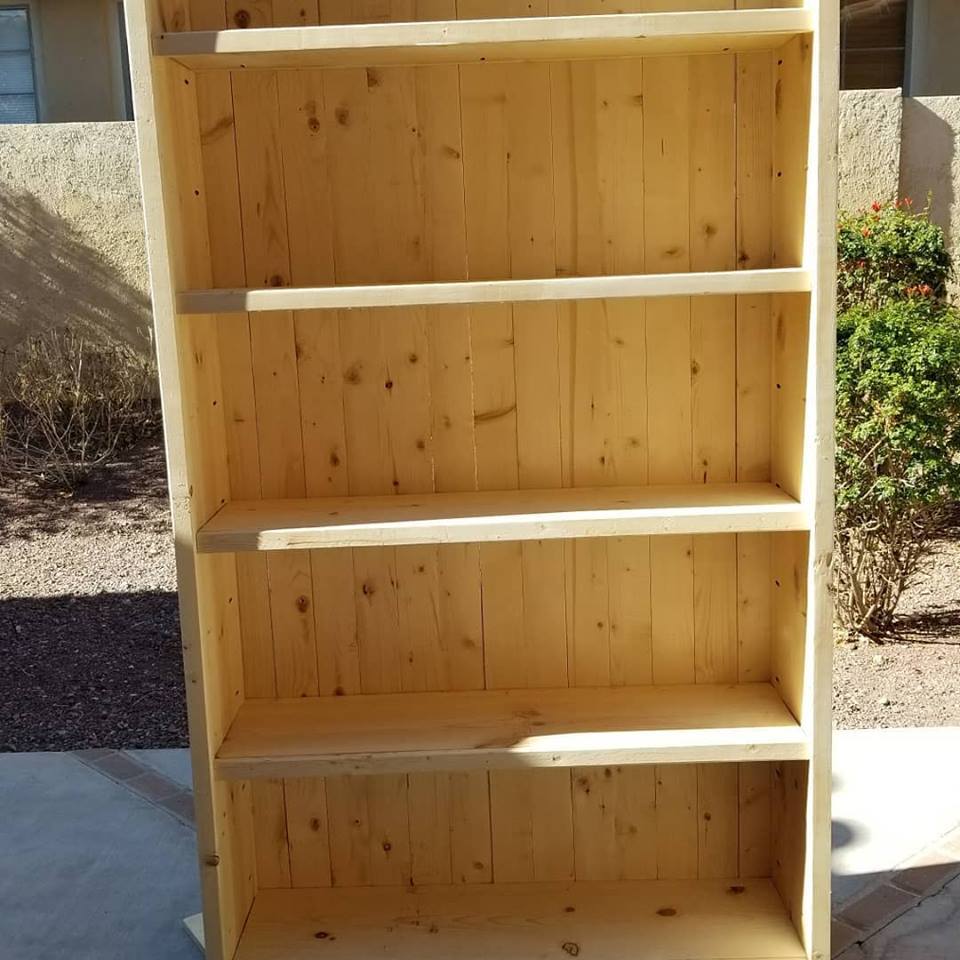
Bookcase
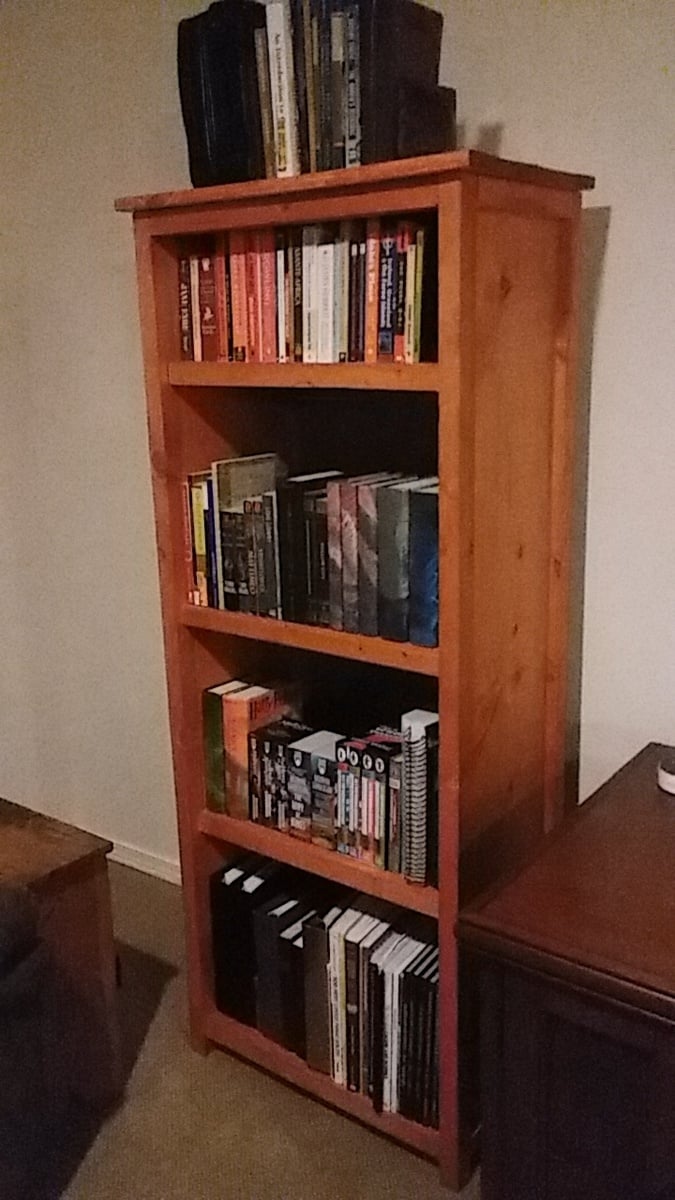
Took about a week working an hour or 2 a day, but for my first woodworking project I think it turned out pretty well!
Built from Plan(s)
Estimated Cost
$100
Estimated Time Investment
Day Project (6-9 Hours)
Finish Used
Minwood gunstock
Recommended Skill Level
Starter Project
Double Chair Bench
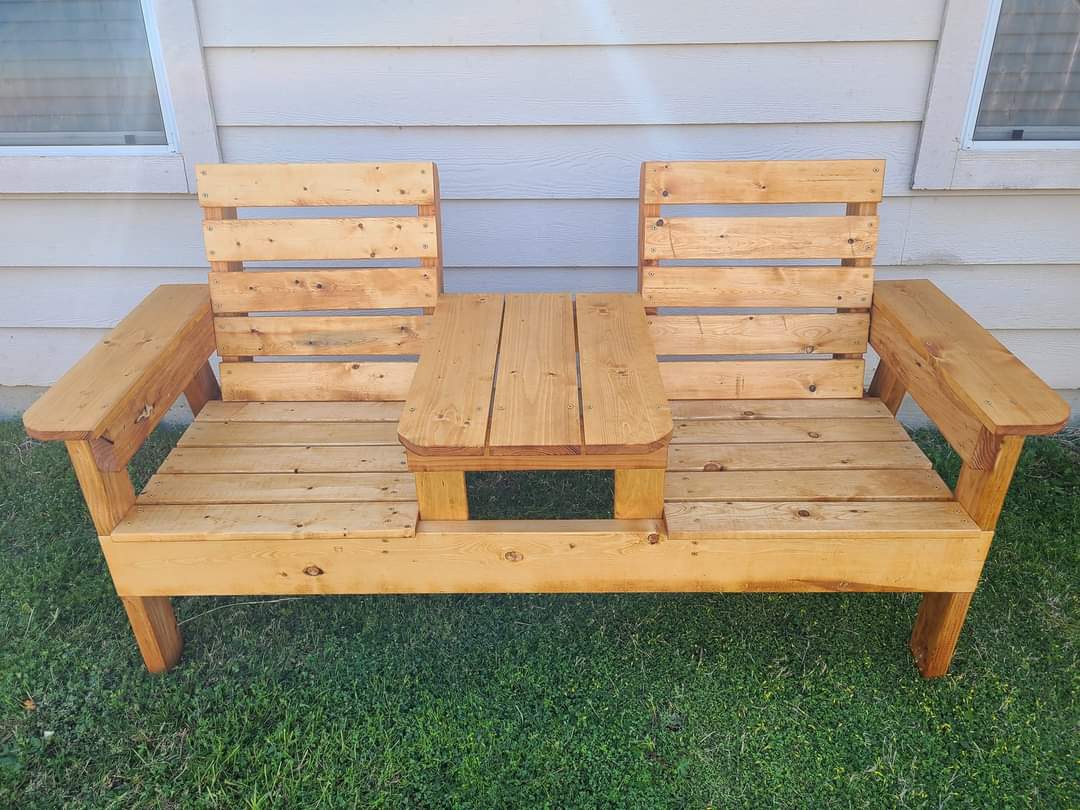
This was such a fun and easy project to do. The bench is super sturdy and I stained it with ready seal in the color redwood.
Built from Plan(s)
Dress Up on Wheels
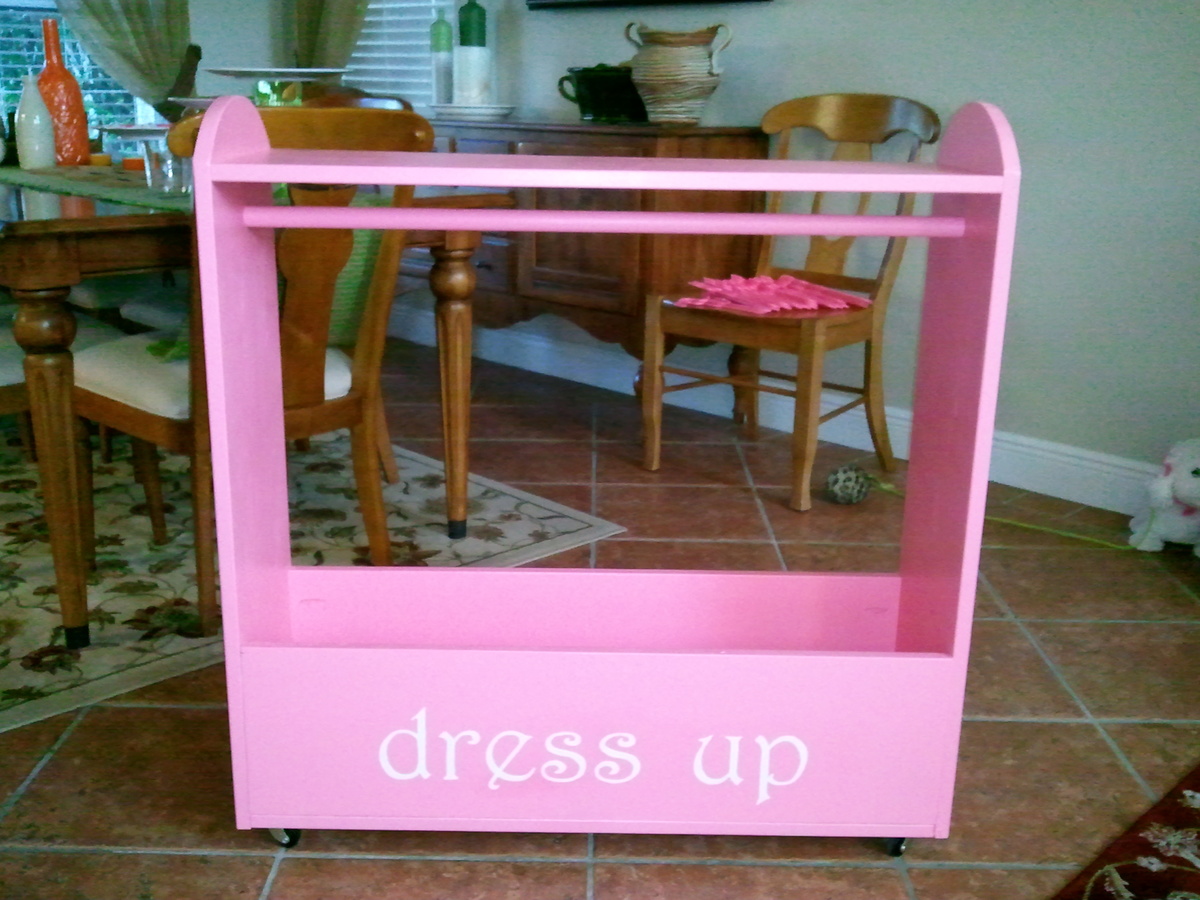
I've wanted to make this dress up storage since the moment I saw it; I planned to do this as my first building project. I finally got around to getting all the supplies and then I asked my father to assist me since i never really built anything like this before - well, he's not a patient man and he ended up building the whole thing without me (boo!) ... but I at least got to paint it! I absolutely love it and it looks fantastic in my girls' playroom.
Estimated Cost
$50
Estimated Time Investment
Afternoon Project (3-6 Hours)
Recommended Skill Level
Beginner
Comments

Tue, 06/07/2011 - 11:34
Just love it! The color is
Just love it! The color is fabulous! Paint job perfect! Thanks for sharing with us!
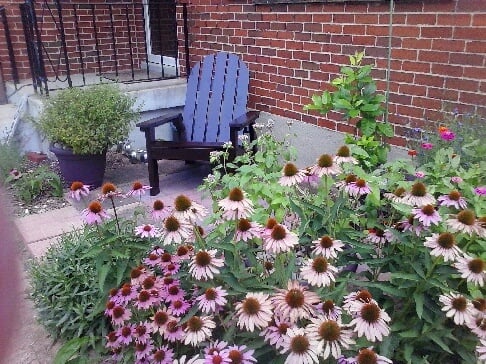
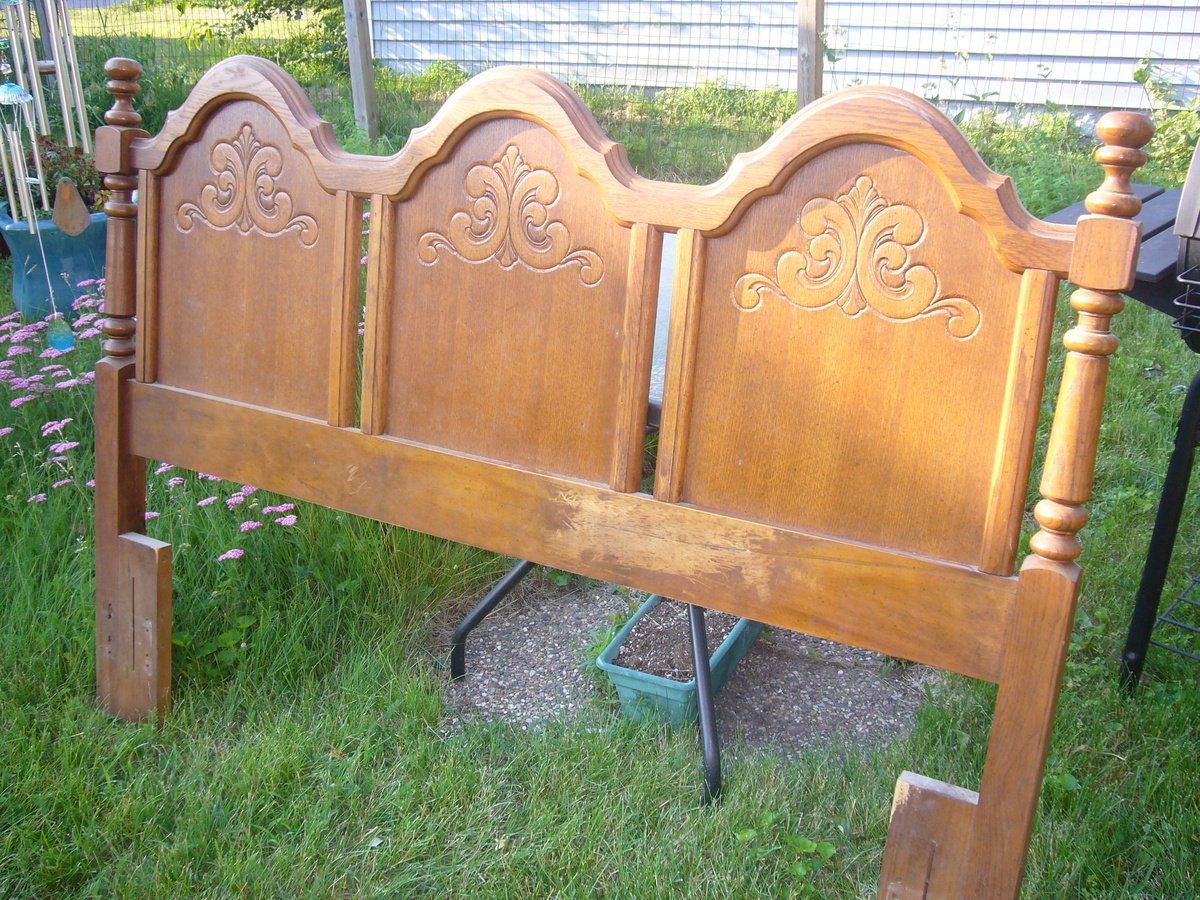
Garden bench
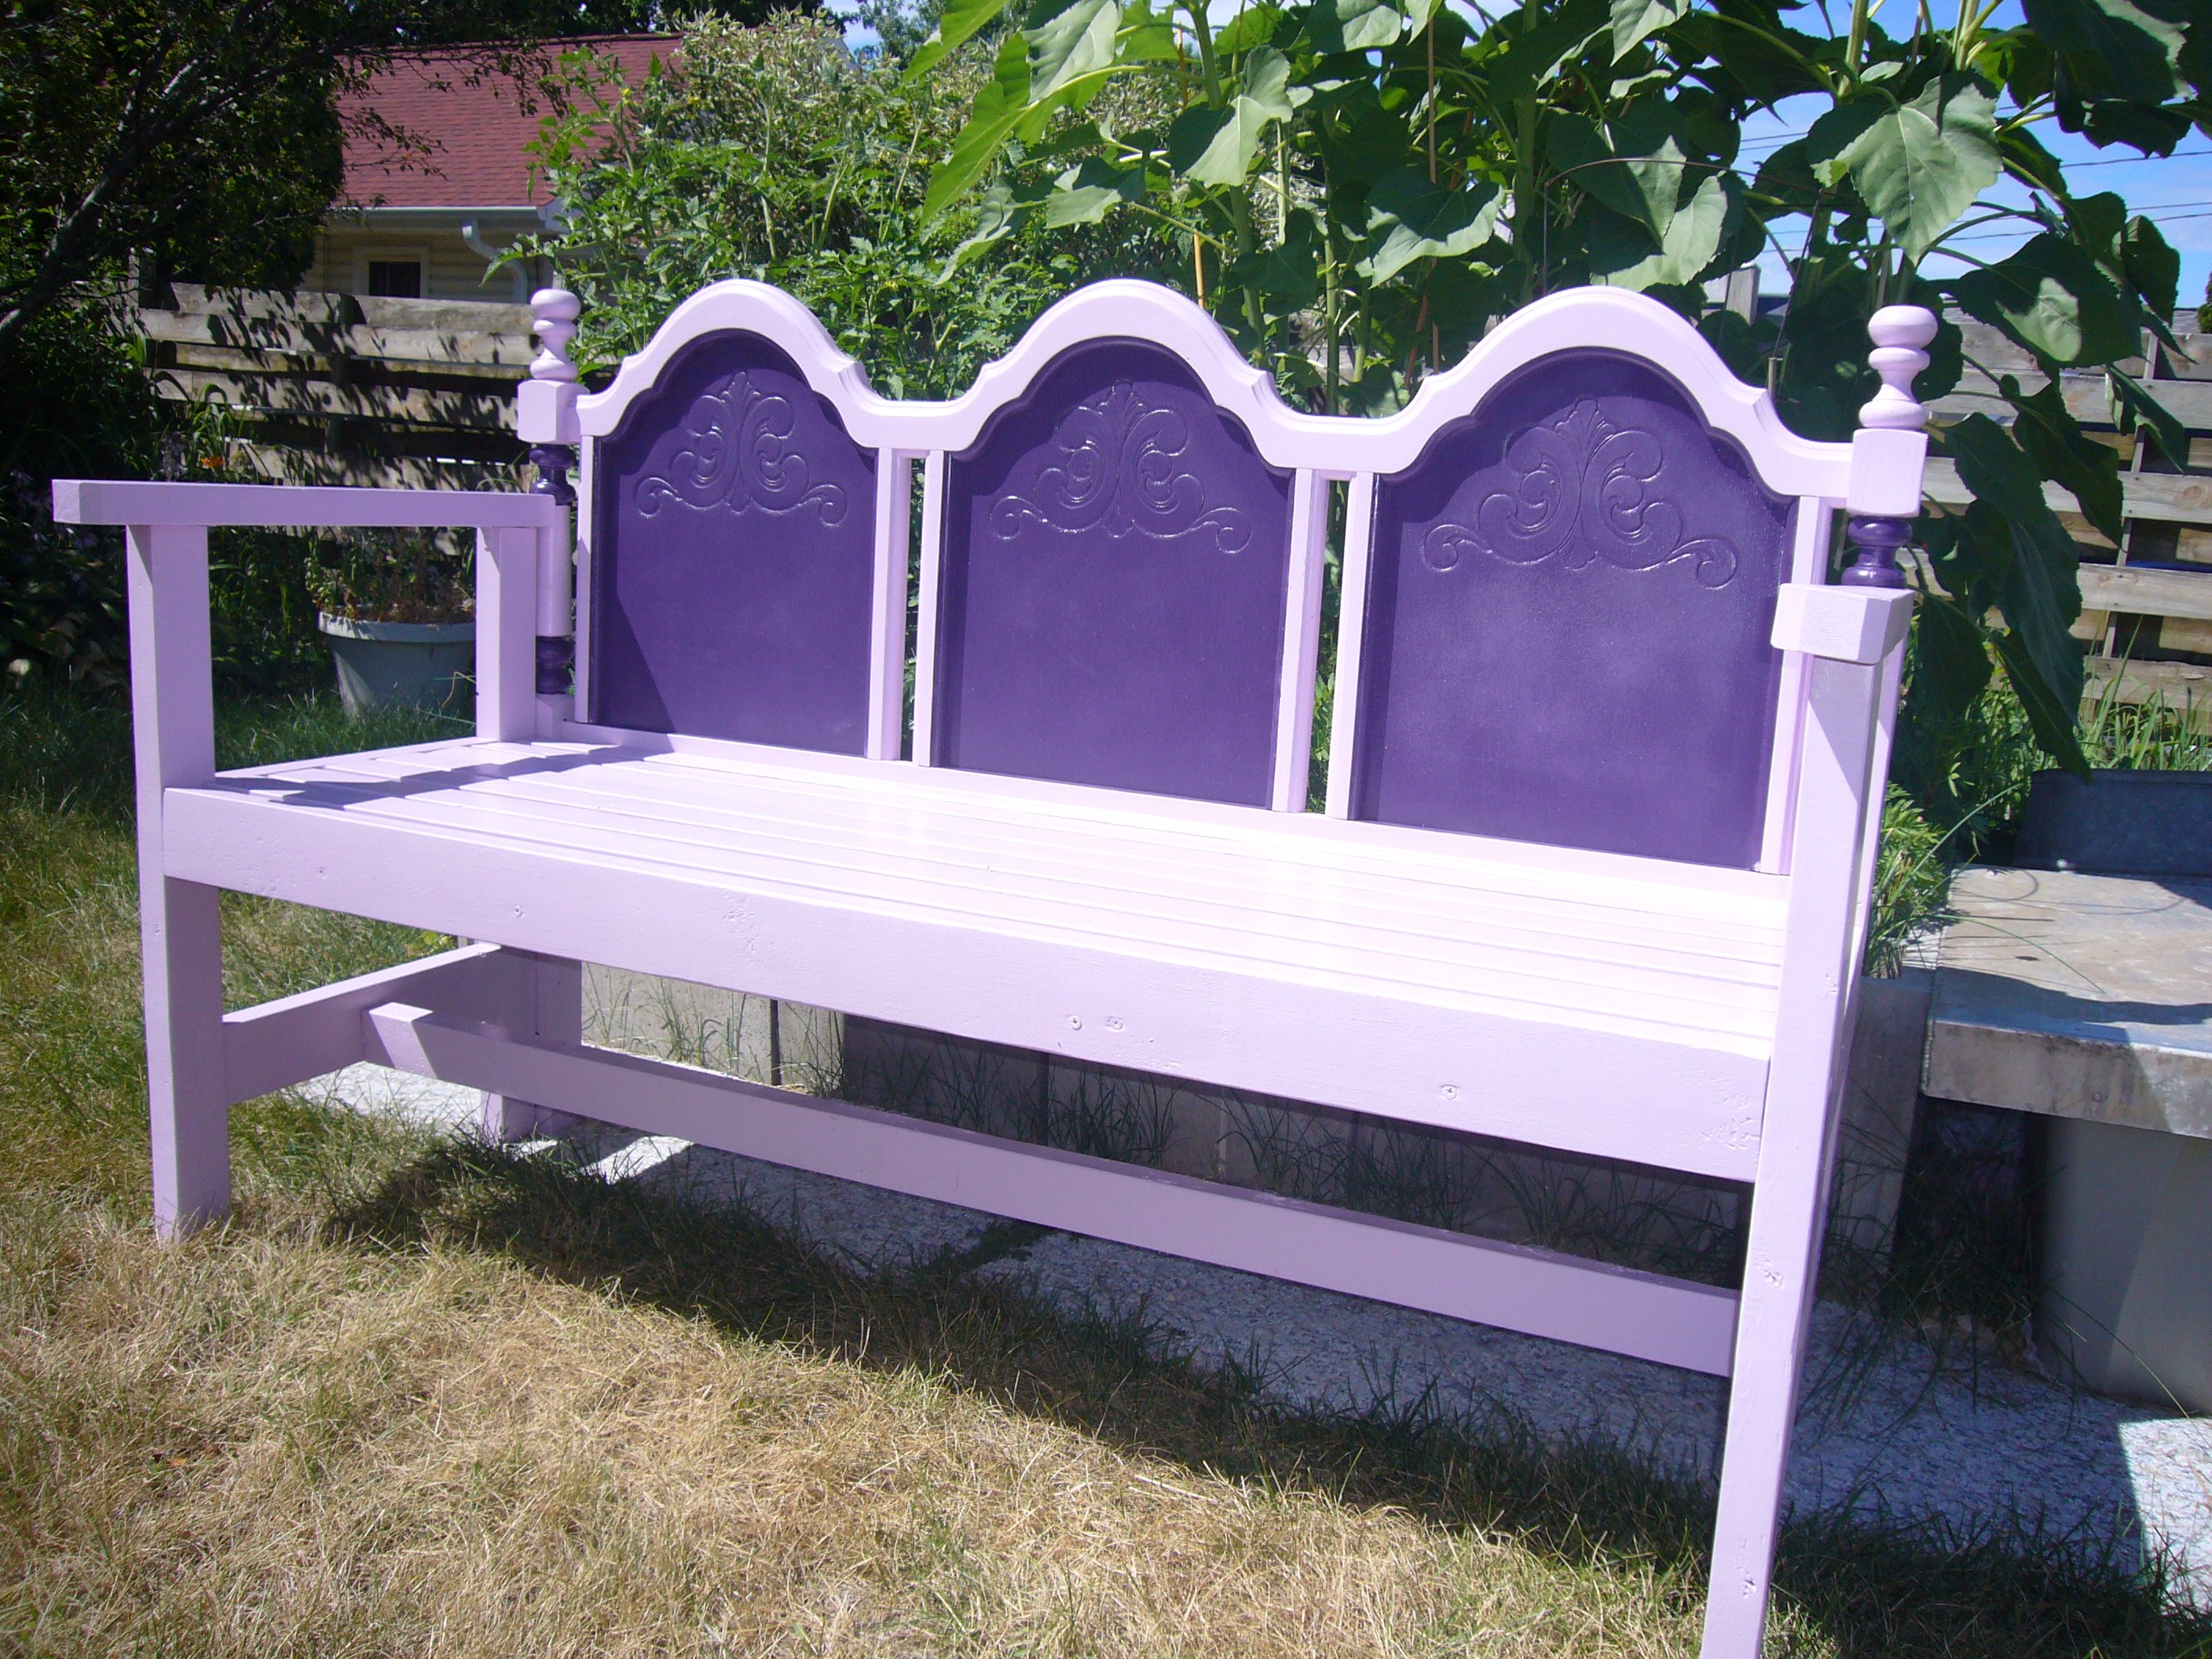
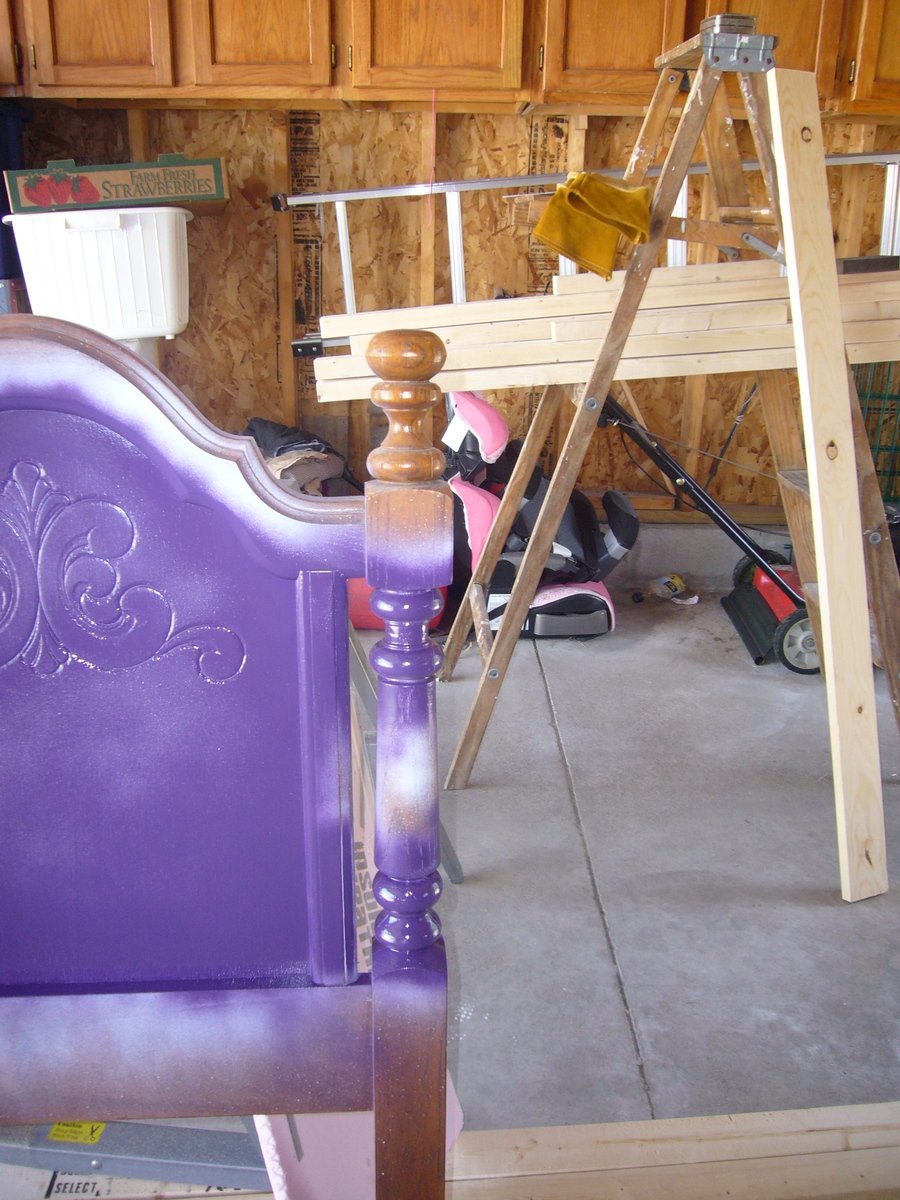
I used Ana's garden bench plan and had a blast finishing this project. The plans are well thought out and finished very square and sturdy. I altered the depth of the bench to 18 inch seat supports as I am short and felt the 24" span would leave me feeling like Edith Ann. (This also required shortening of the armrests to 24") I also was inspired by an abandoned headboard that had nice detail and some Oak spindles. My son, bless his heart, carried it on his back about 6 blocks so I could make this. (He knows how to stay on my good side.)
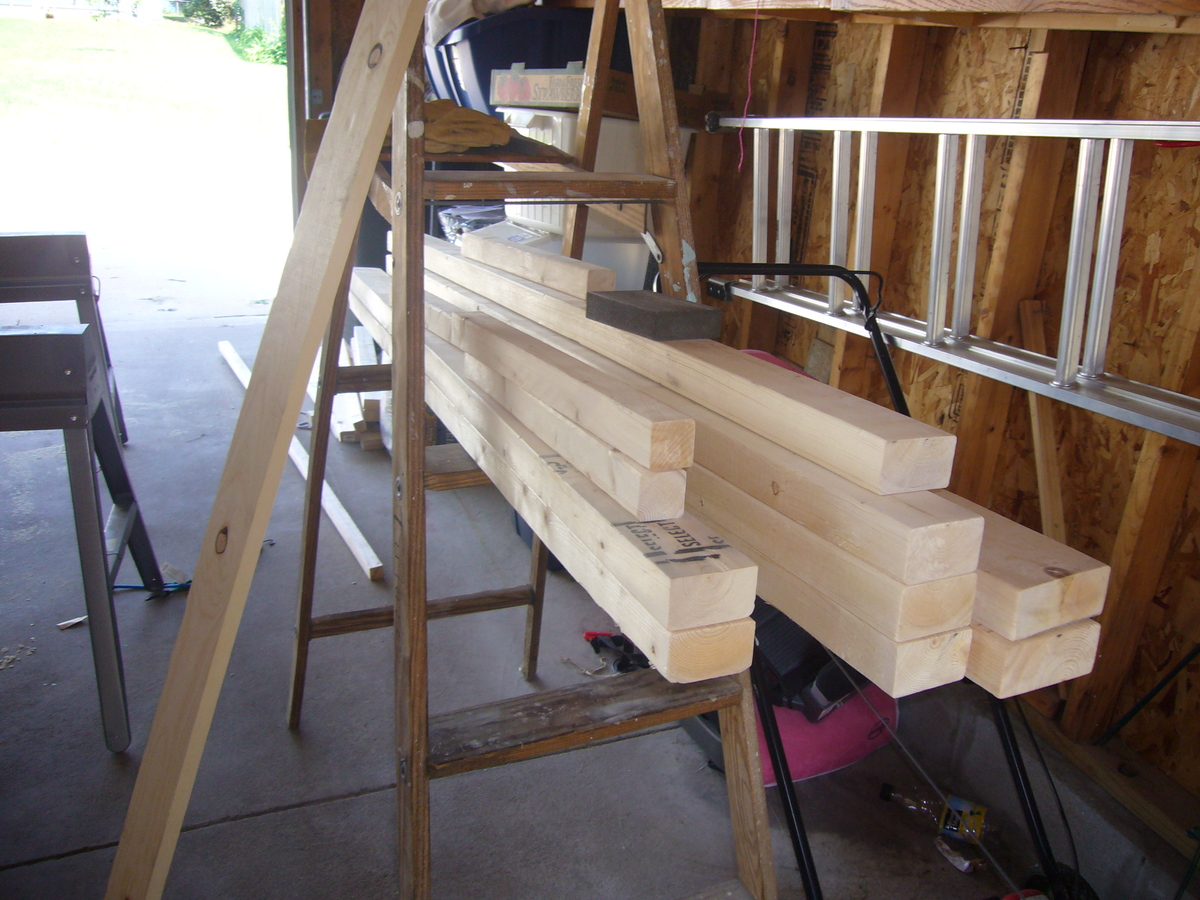
I spent more time painting the project than cutting out the boards. I prepainted all the pieces before assembly. I wanted it to withstand the Wisconsin weather so I diligently primed it and then did two coats of outdoor latex paint. I elected to tint the primer as I was not sure how much paint I might need. One quart of Zinsser 123 primer and one quart of Dutchboy Maxbond semi gloss paint in plum mauve was enough. The dark paint is Rustoleum spray paint in purple. If I thought it was cost effective I might have spray painted the whole thing but it was summer and I didn't want to deal with the fumes. Of course, I picked the hottest two weeks so far this year to do this project. My sewing room became my painting station.
The width is close to 62", seat height 20" and seat total depth is 22". I trimmed about 3" off the leg post of the headboard.
I am eager to pick another project from Ana's plans.
My cost is higher as I had no scraps to work from and needed all the screws and paint. I also bought $90 in cordless tools and some collapsible sawhorses. All of these items I will use again for other projects.

Built from Plan(s)
Estimated Cost
$75.00
Estimated Time Investment
Weekend Project (10-20 Hours)
Finish Used
Semi Gloss exterior paint Plum Mauve over Zinsser 123 primer. I tinted both paints the same color. I spray painted the spindles purple, then protected the spindles by wrapping them in plastic wrap and then just taping it in place. It is not perfect but I like the details.
Recommended Skill Level
Beginner
Comments

Thu, 07/25/2013 - 05:02
Good idea
Great job of recycling and incorporating it into a new build. Had to laugh at the Edith Ann reference. I did the same recently with a couch my hubby and I have on order as it's quite deep. Ha, I'm not sure Ana and those in her age group will get the reference. I, on the other hand, thoroughly enjoyed it!
Comments
Ana White Admin
Tue, 02/22/2022 - 08:12
Amazing table!
That is fantastic, thank you for sharing!