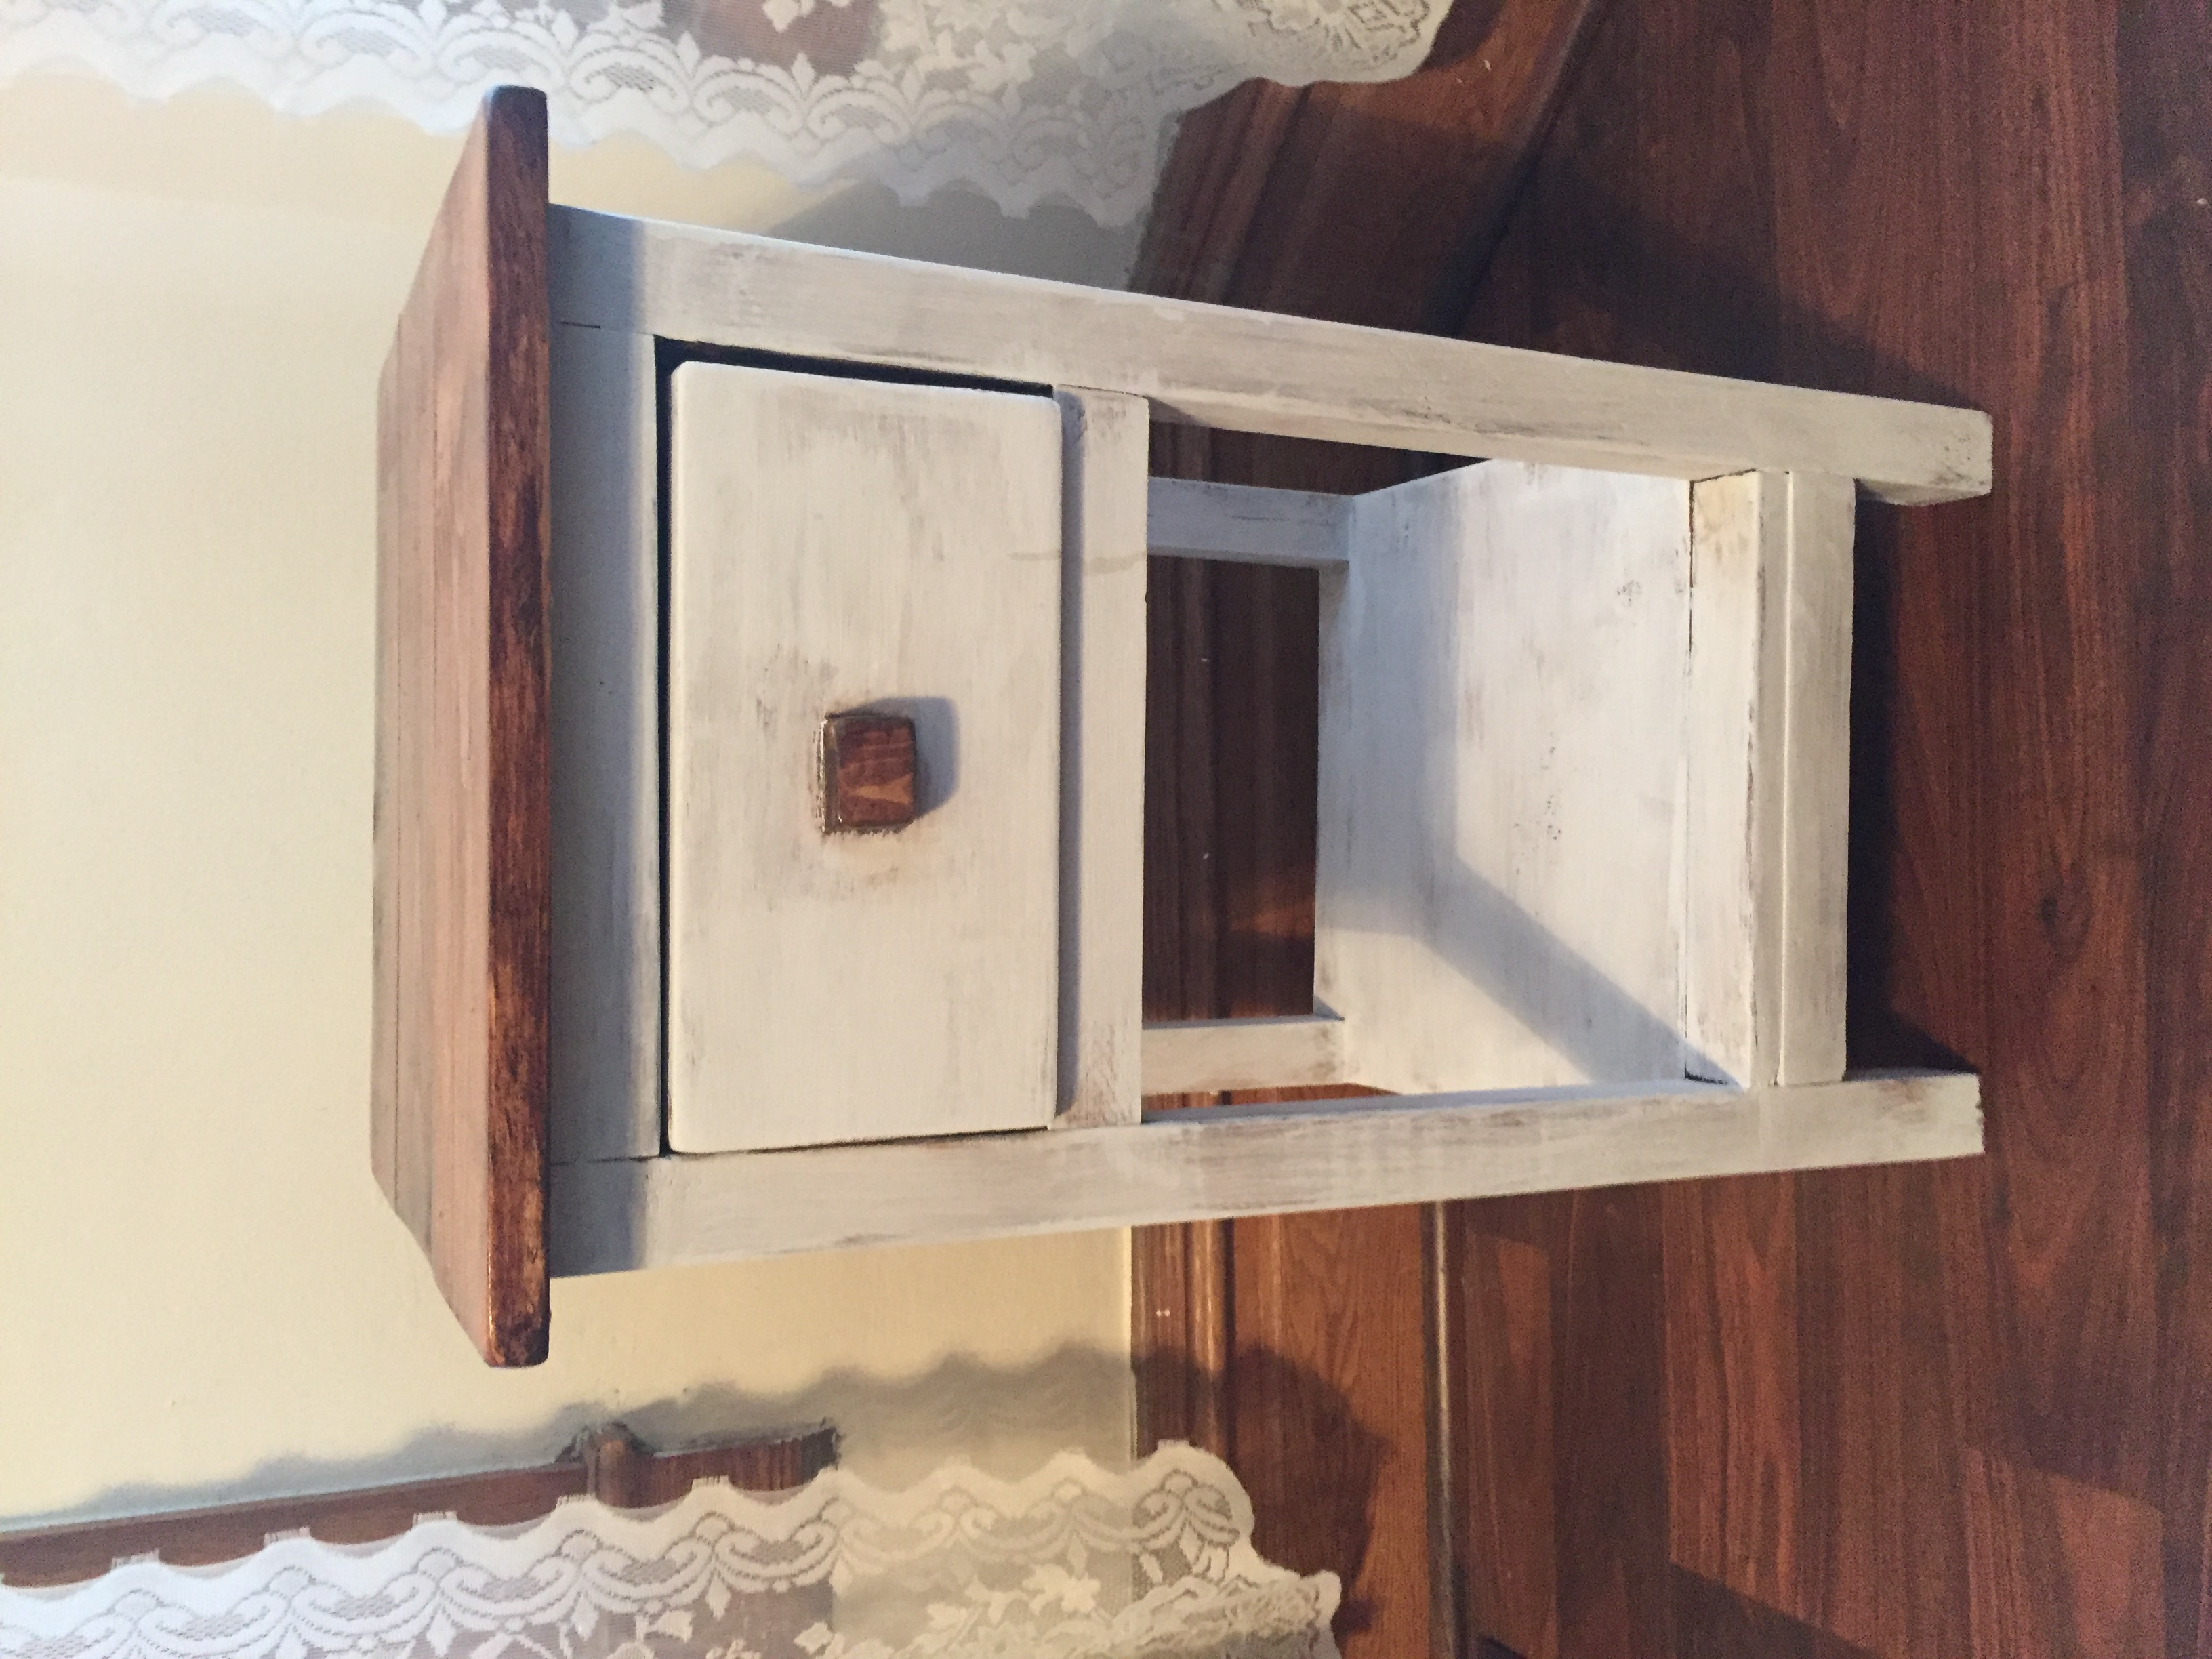
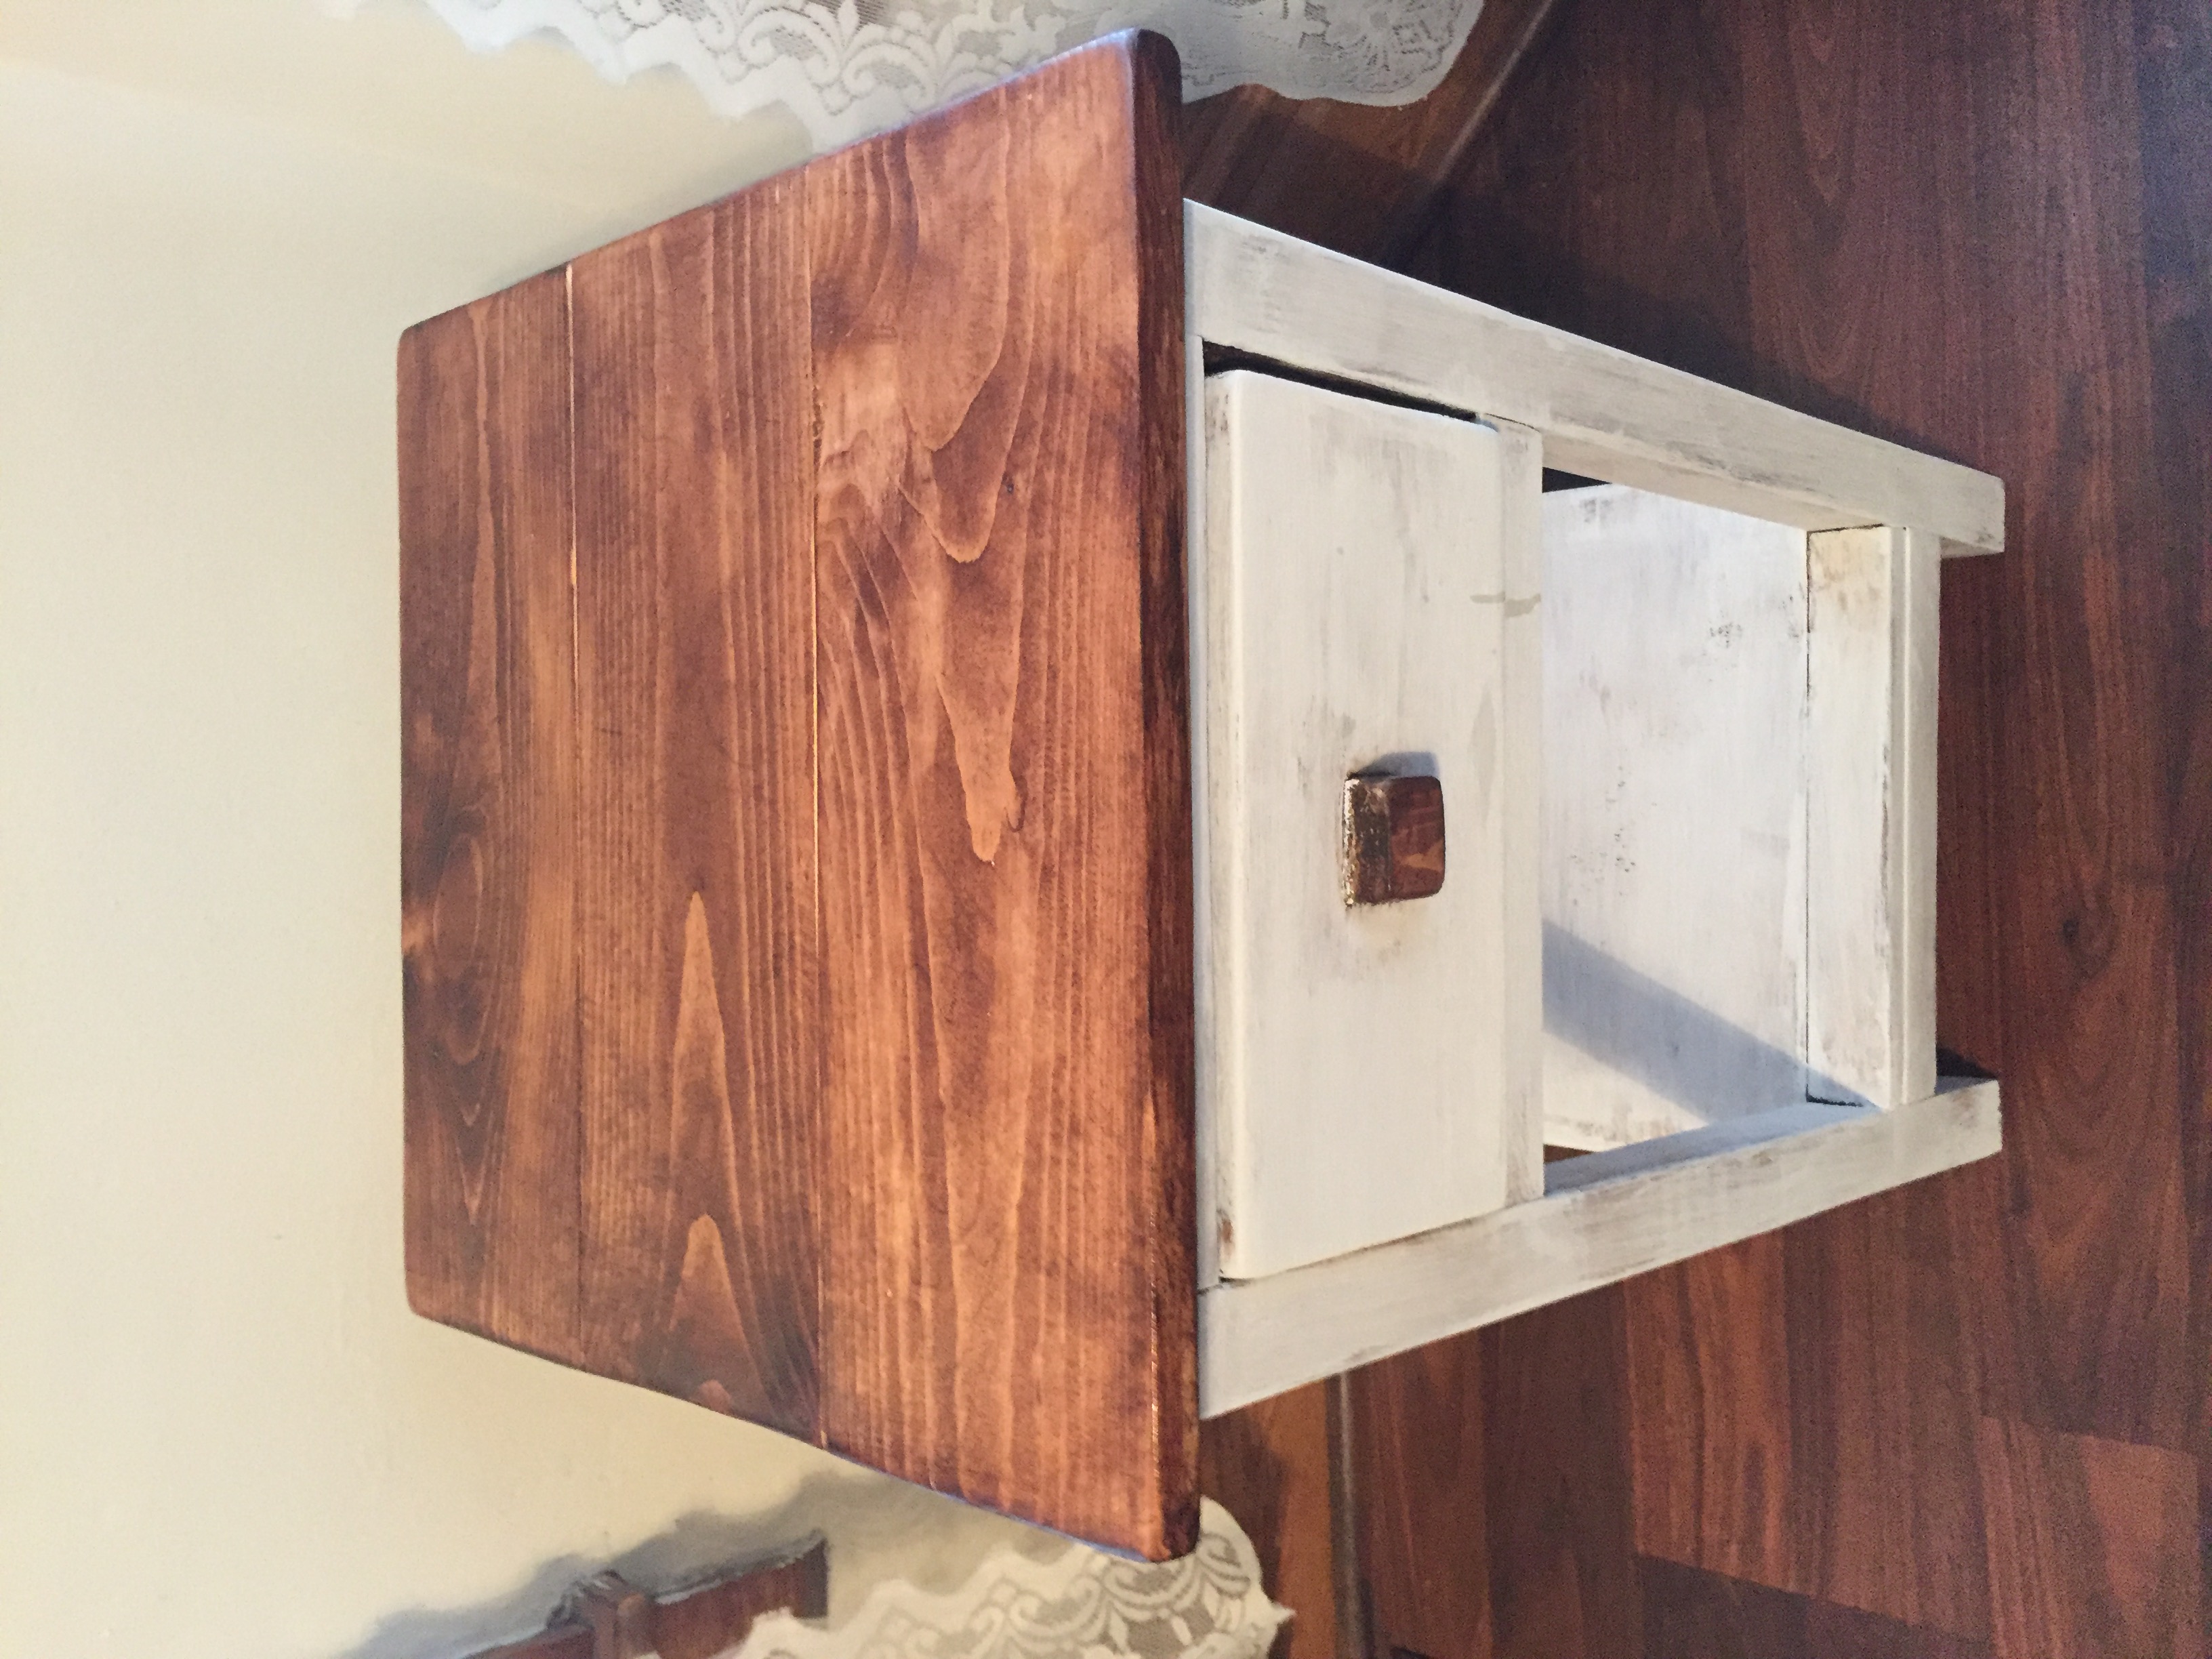
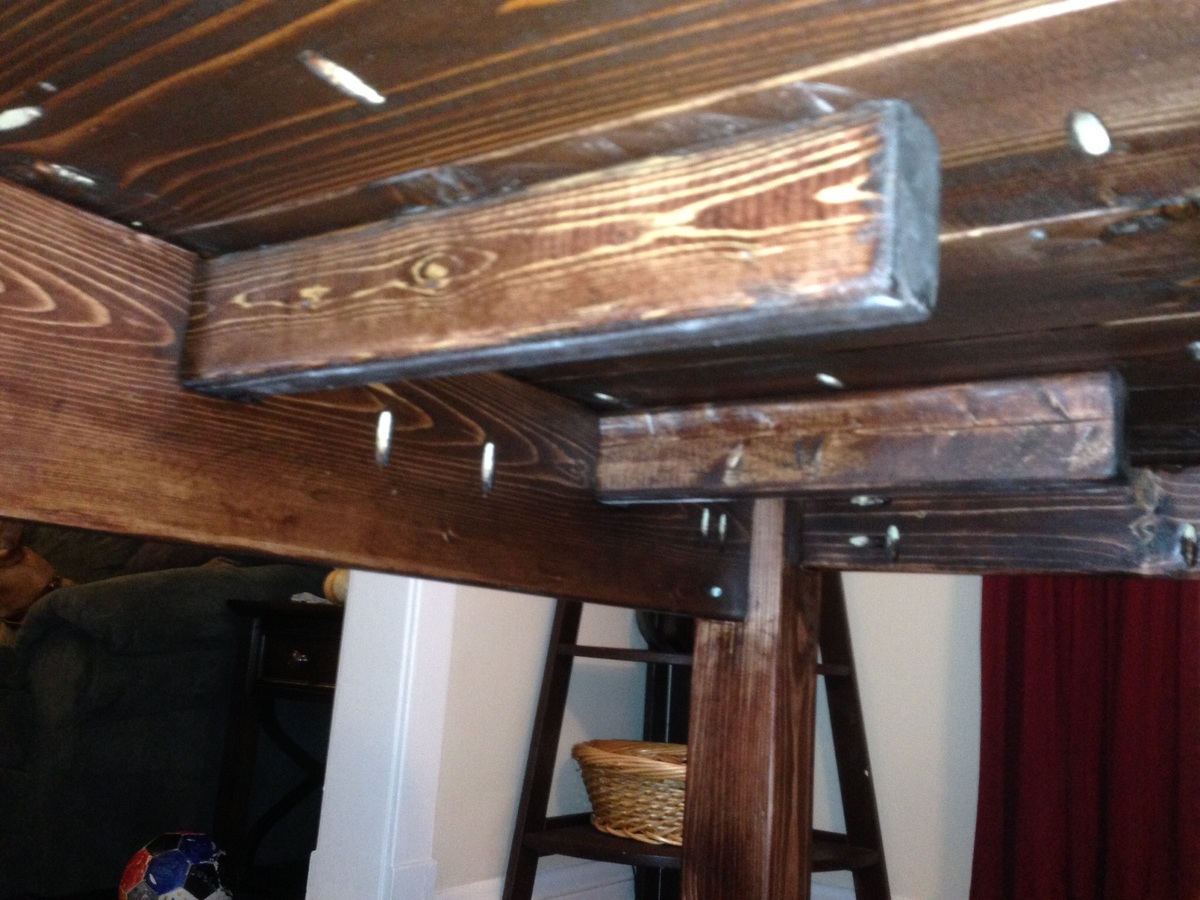
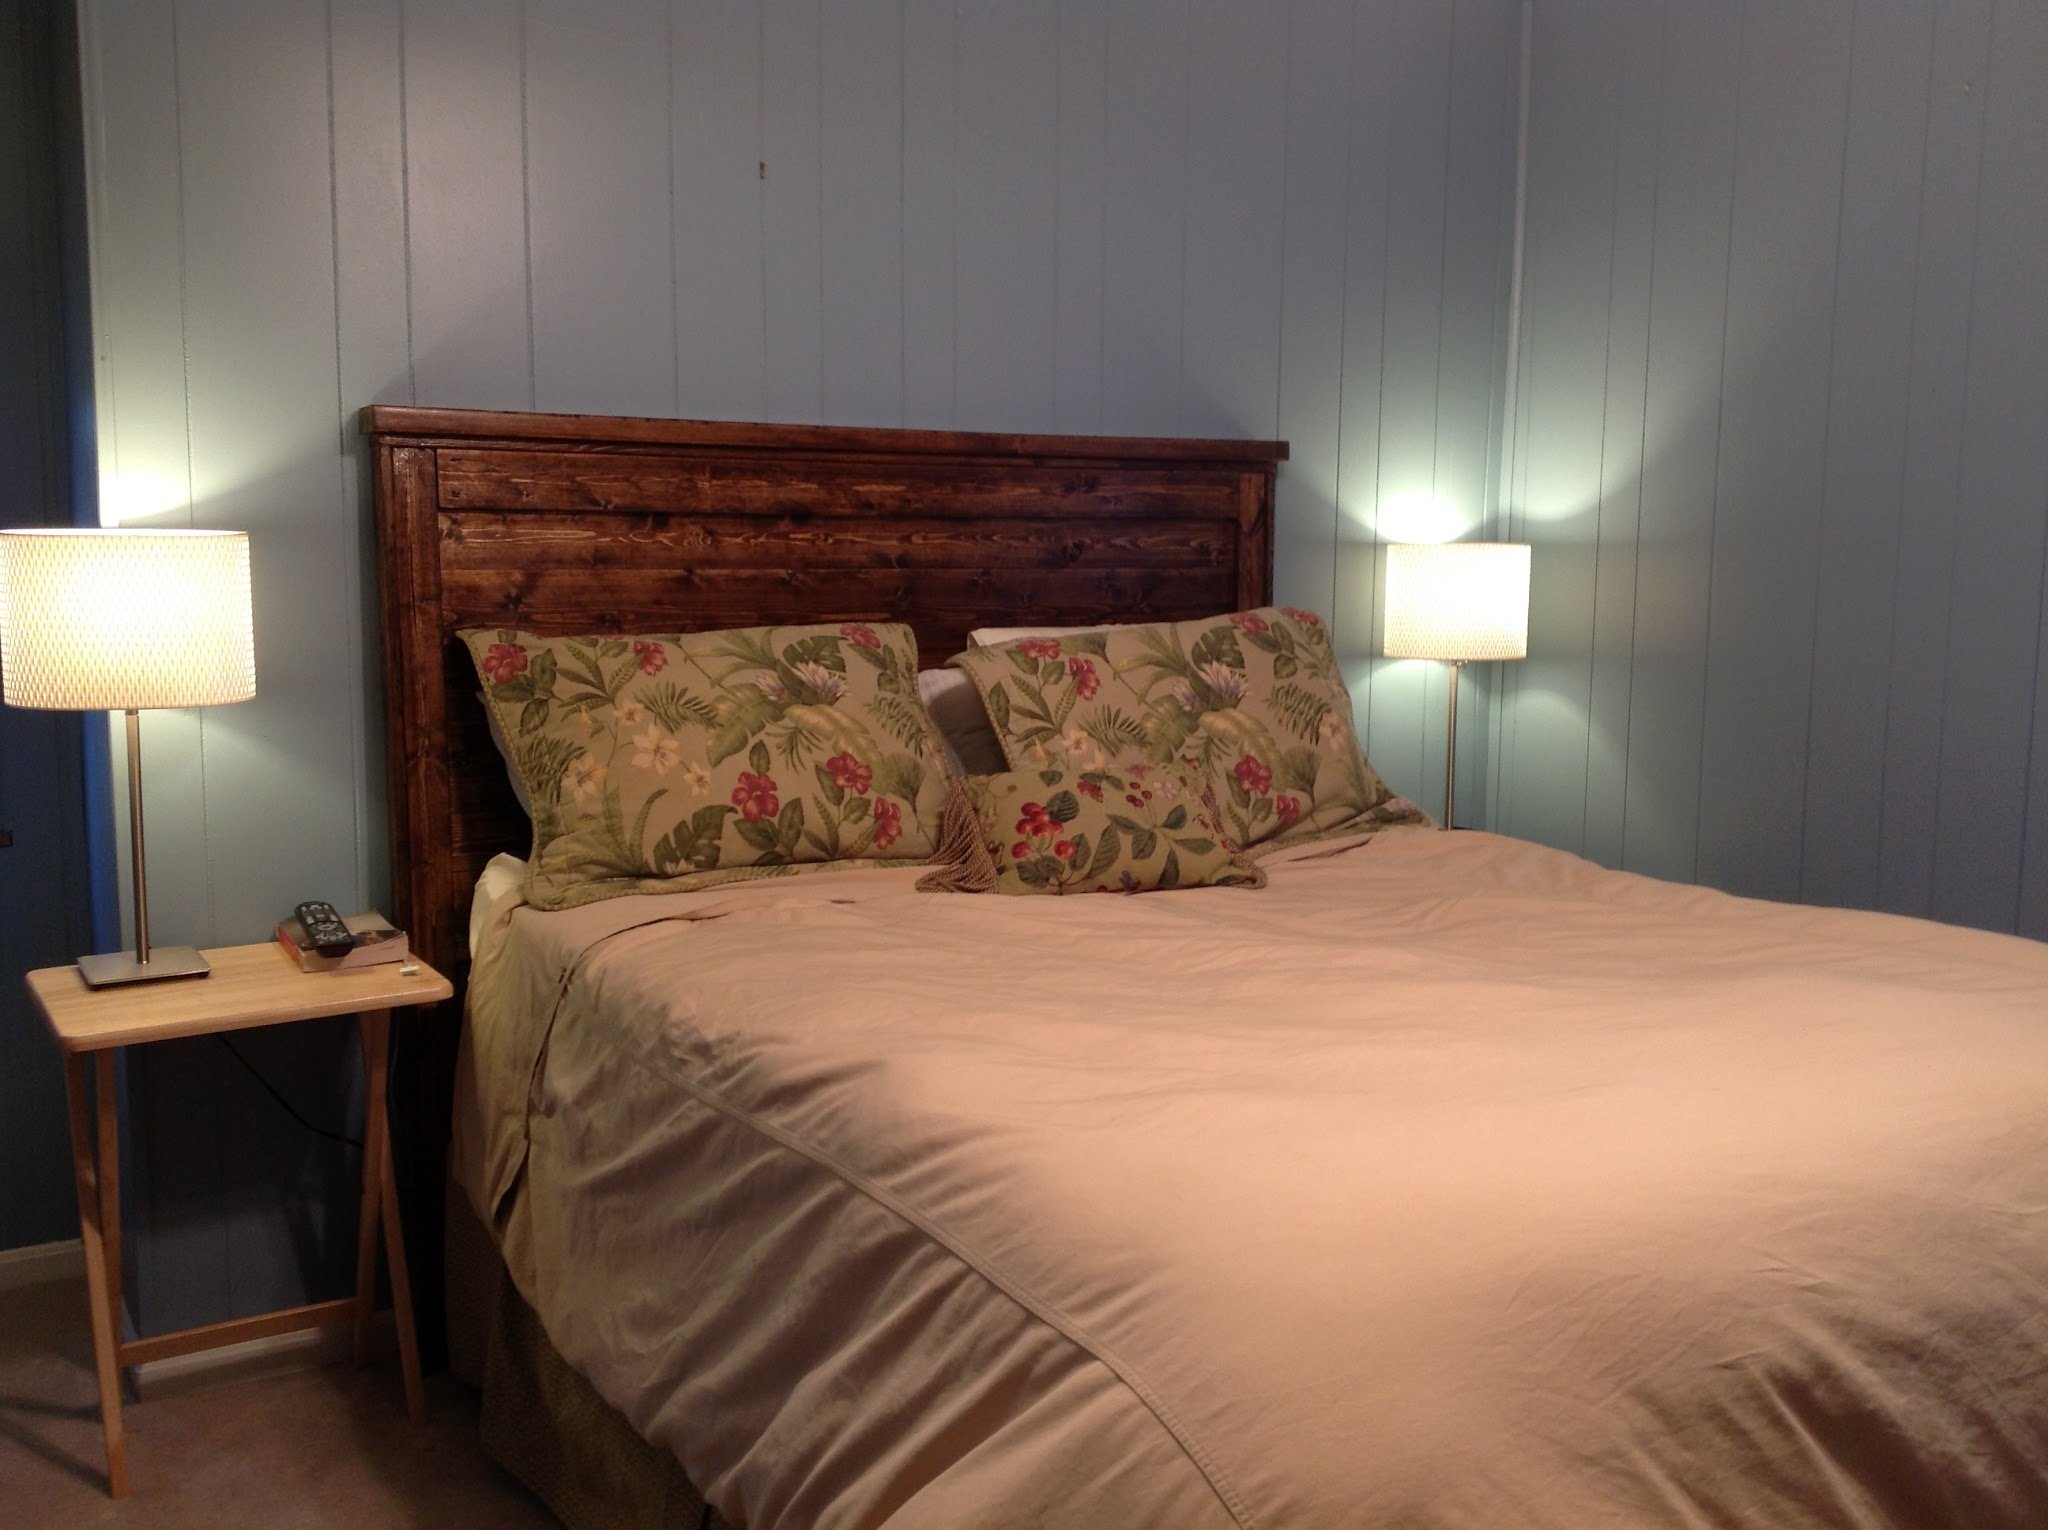
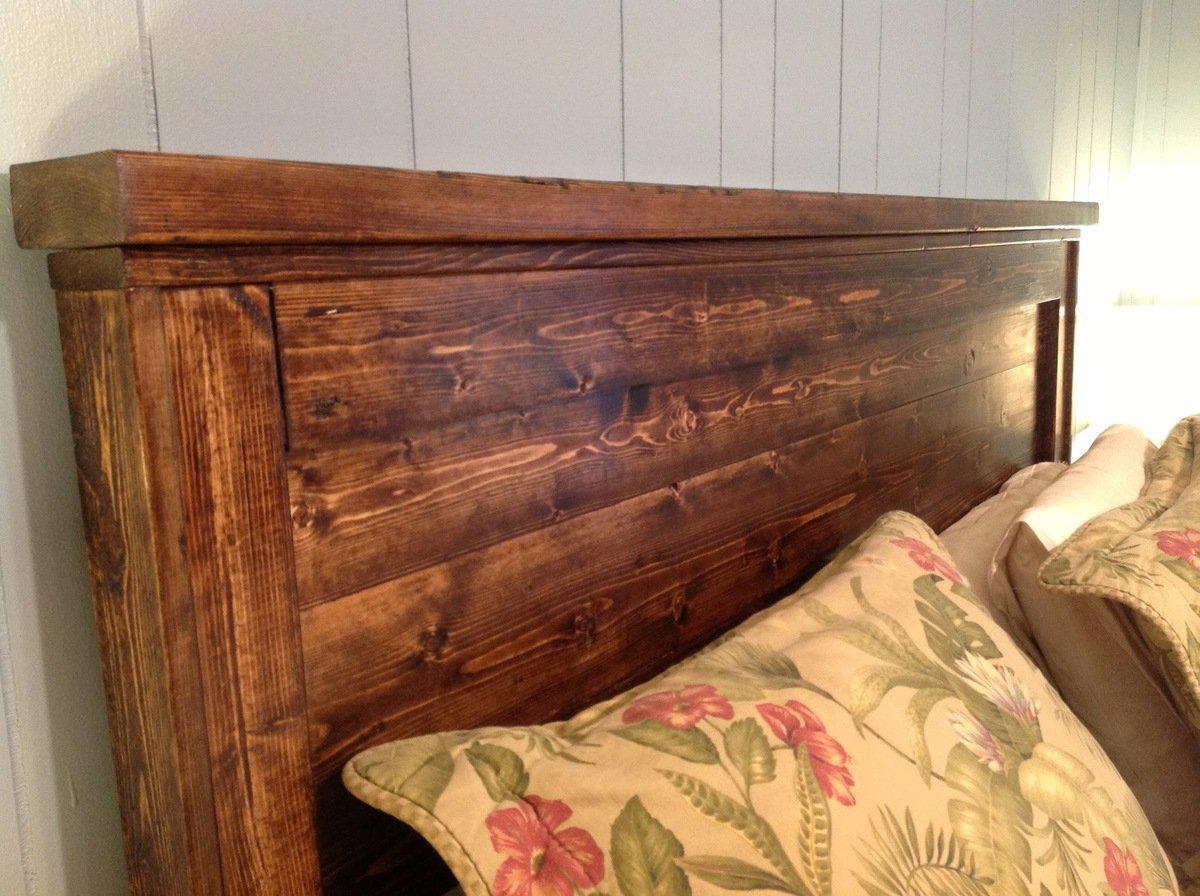
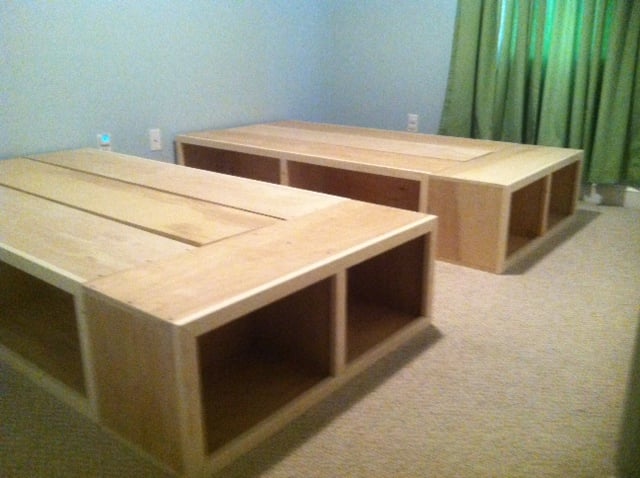
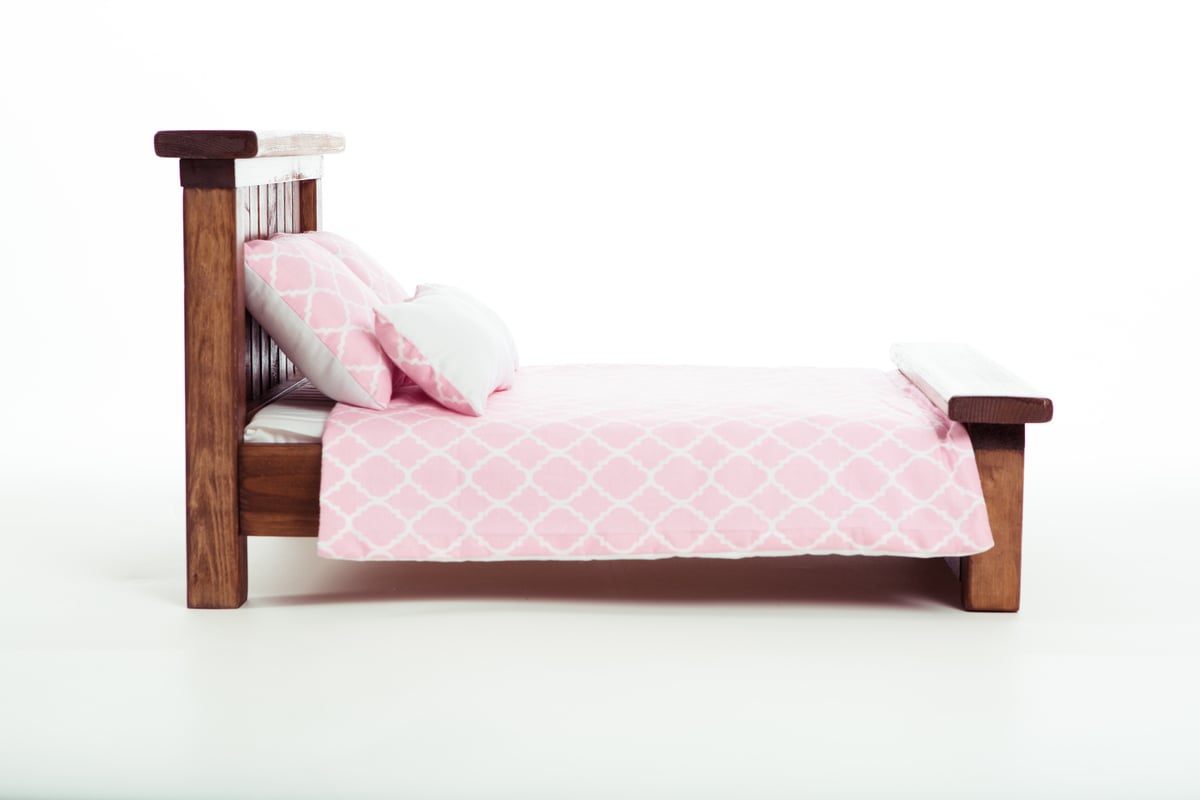
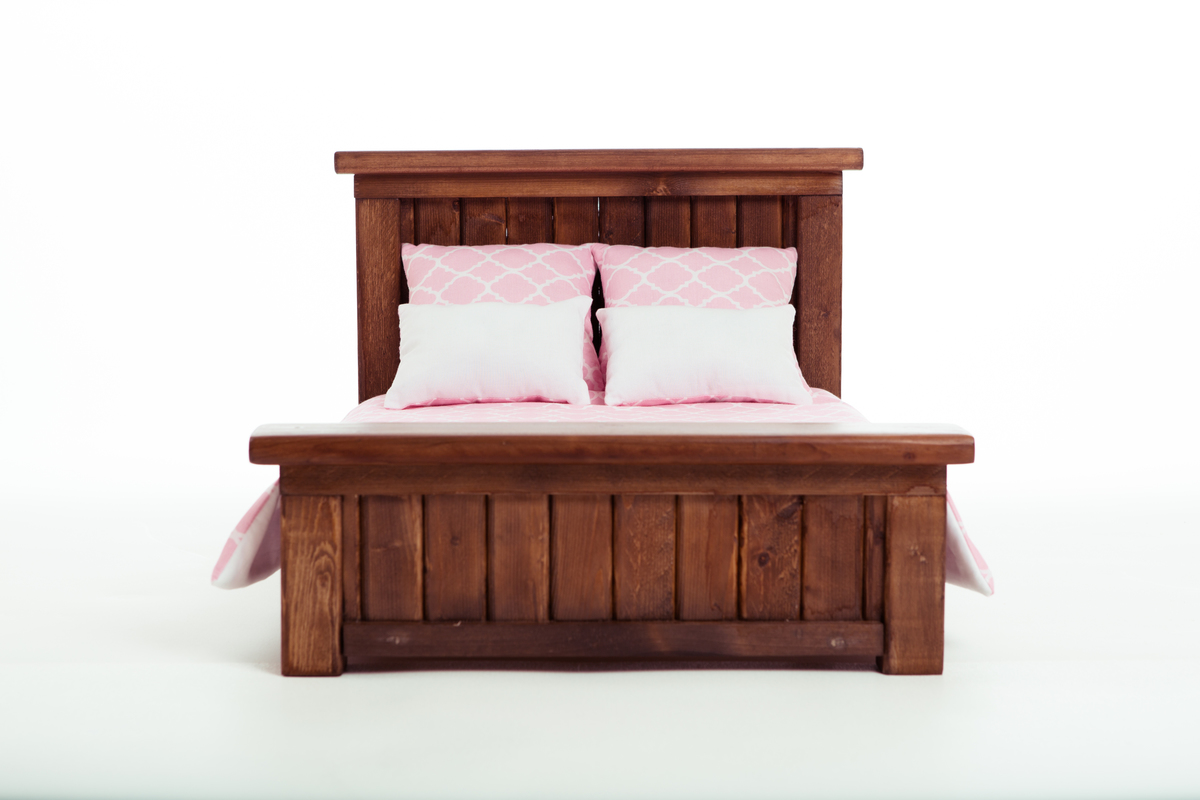
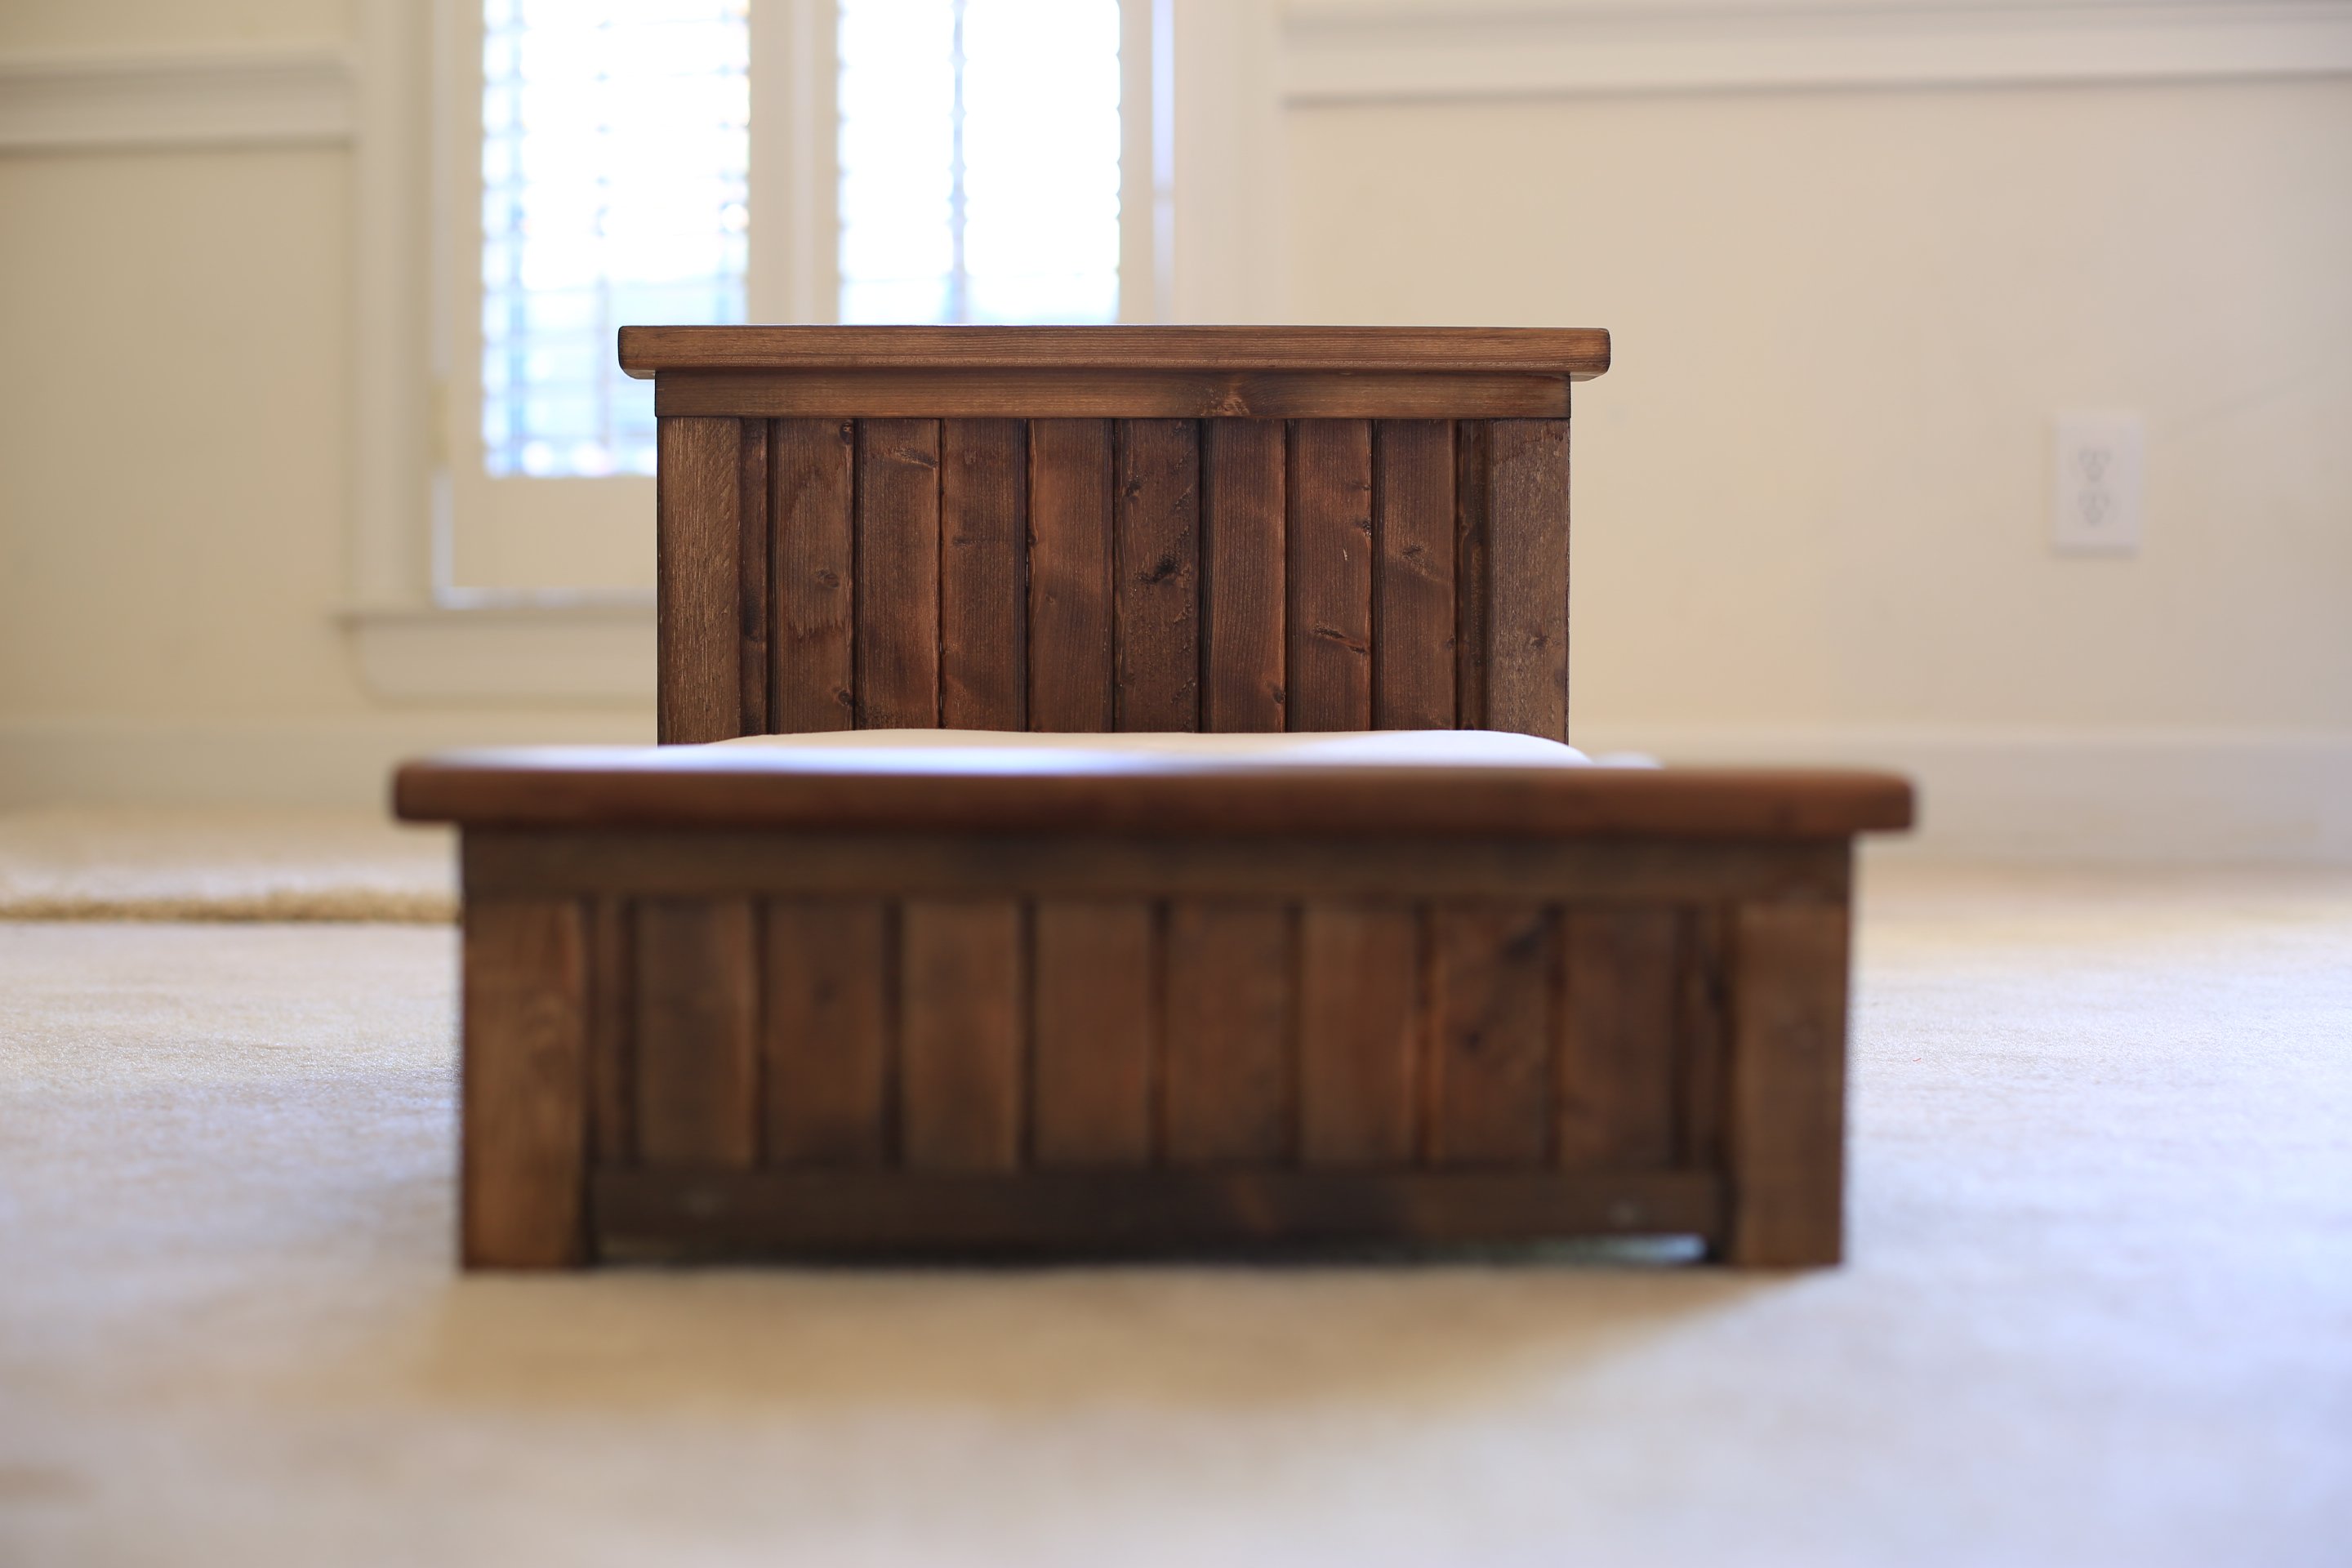
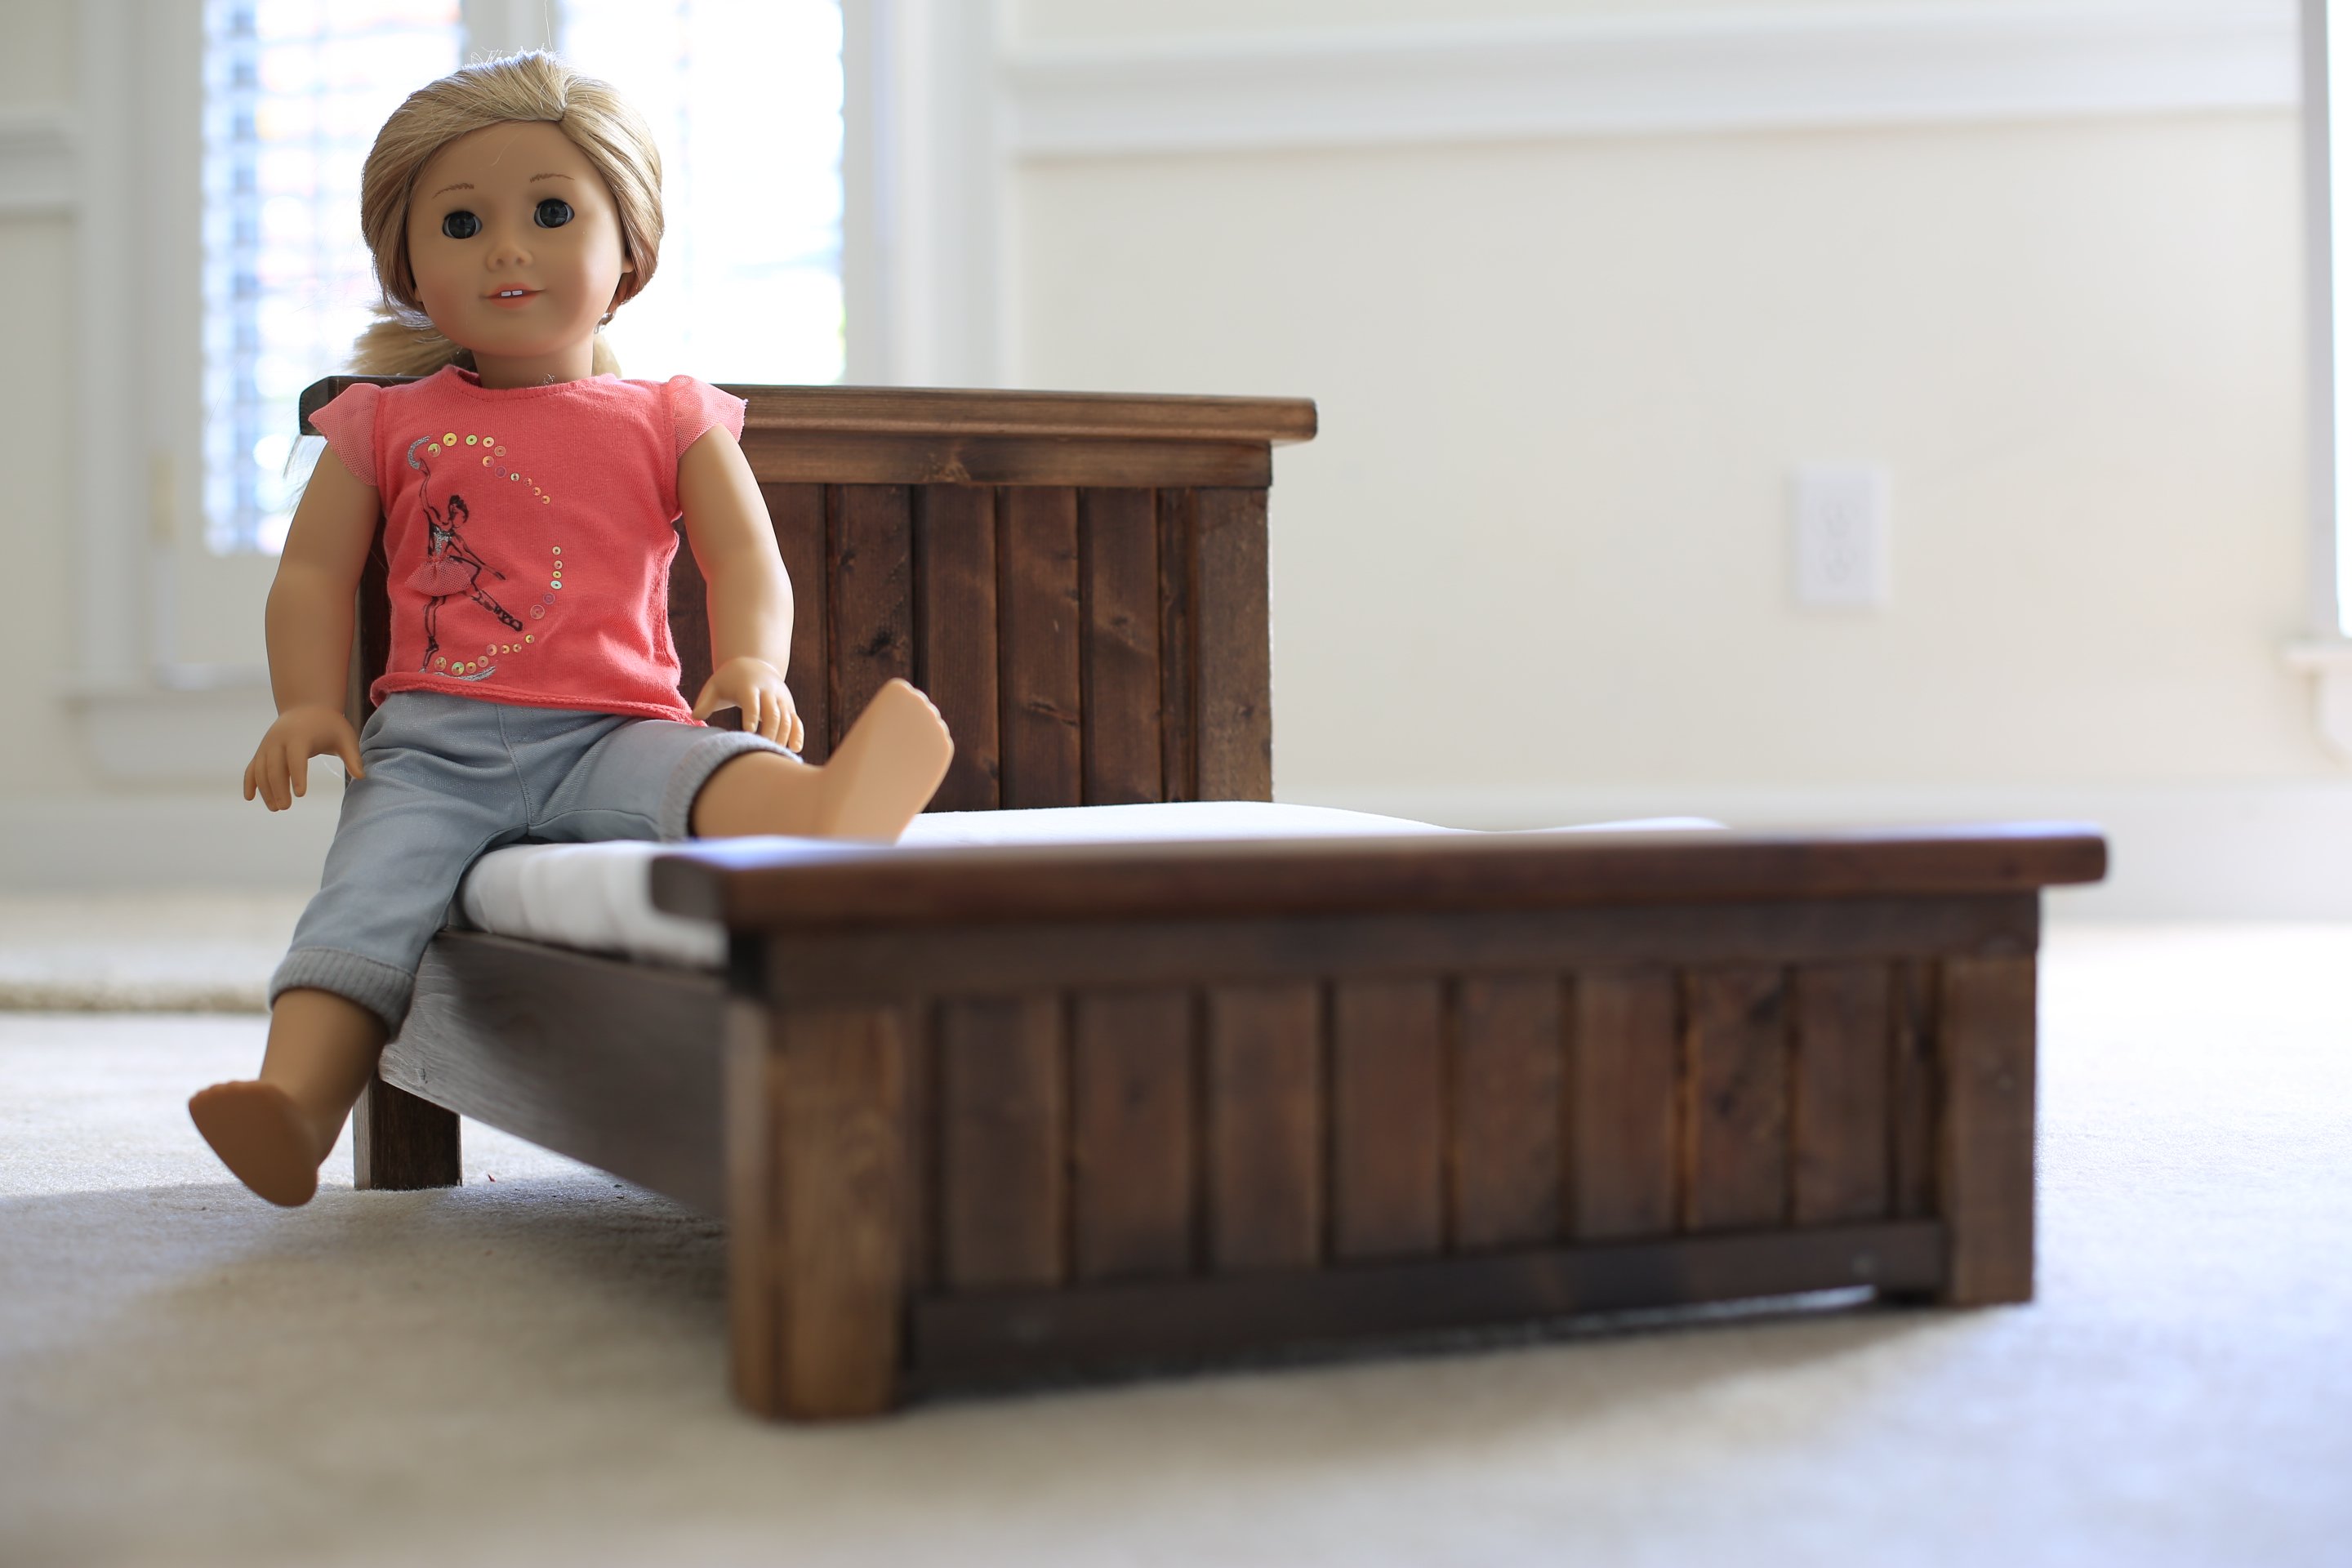
Community Brag Posts

Isabelle's Bed

Submitted by jvuijk on Fri, 11/07/2014 - 09:53

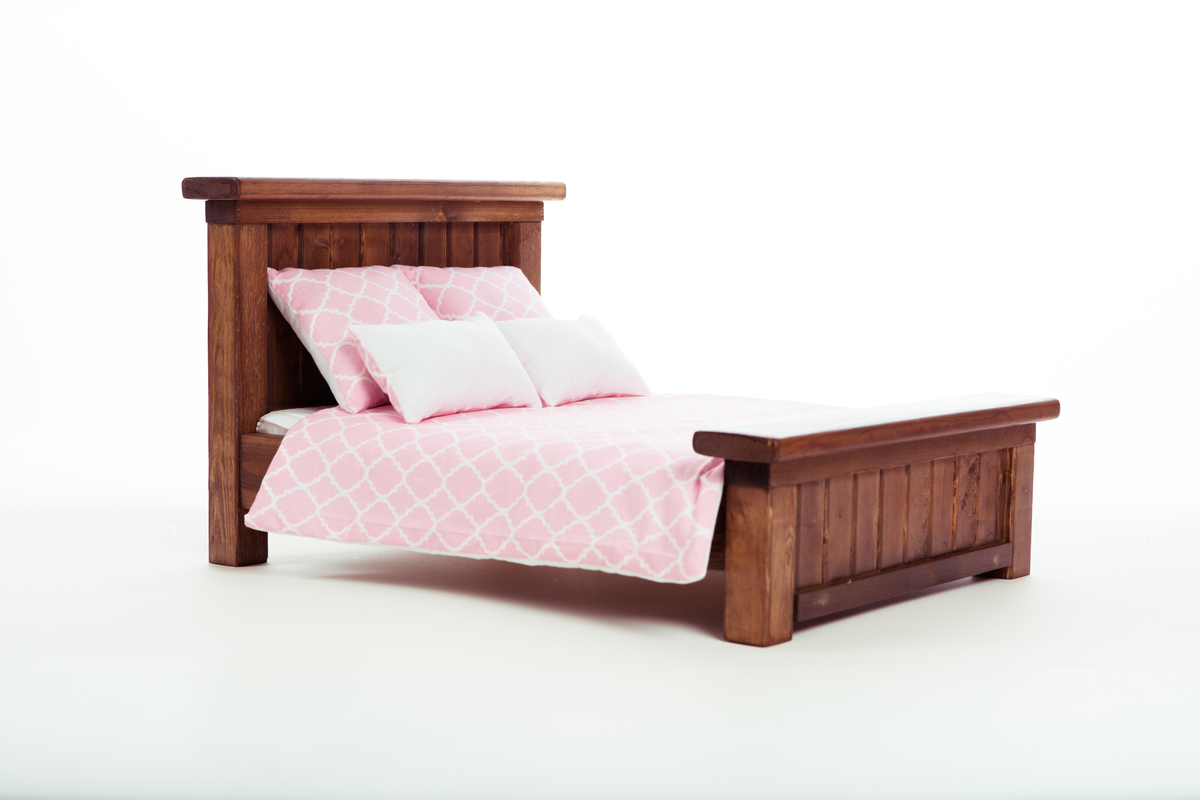
AG doll Isabelle is sleeping in style at our house thanks to a special little girl's daddy!

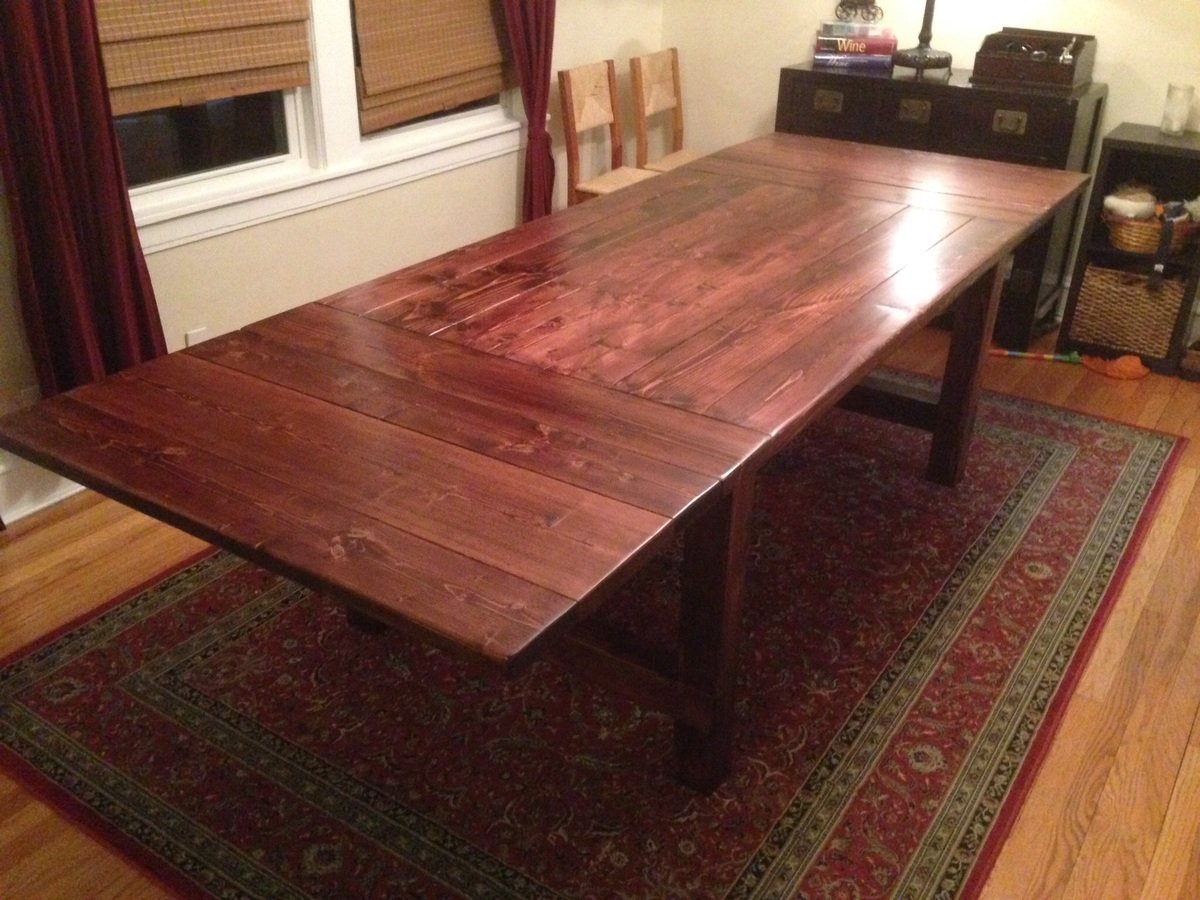
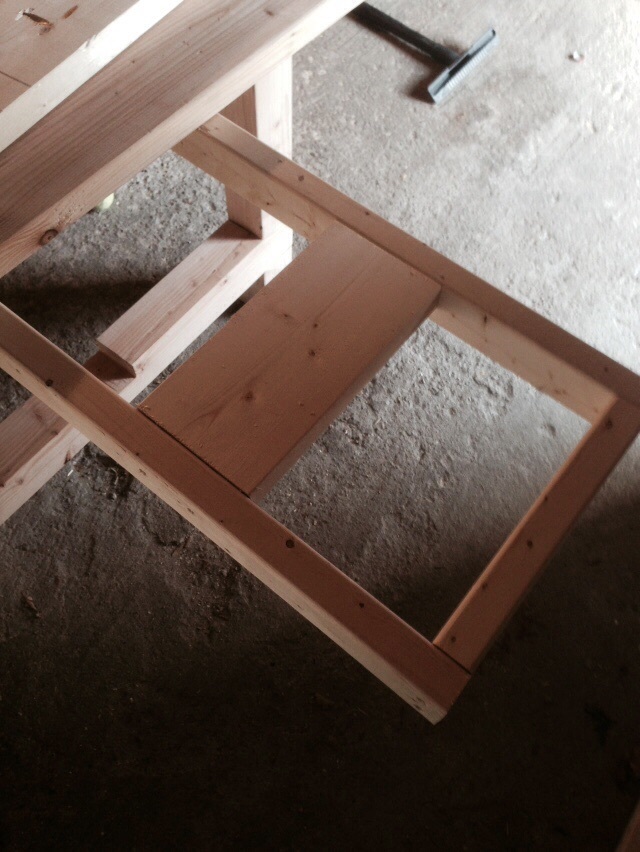
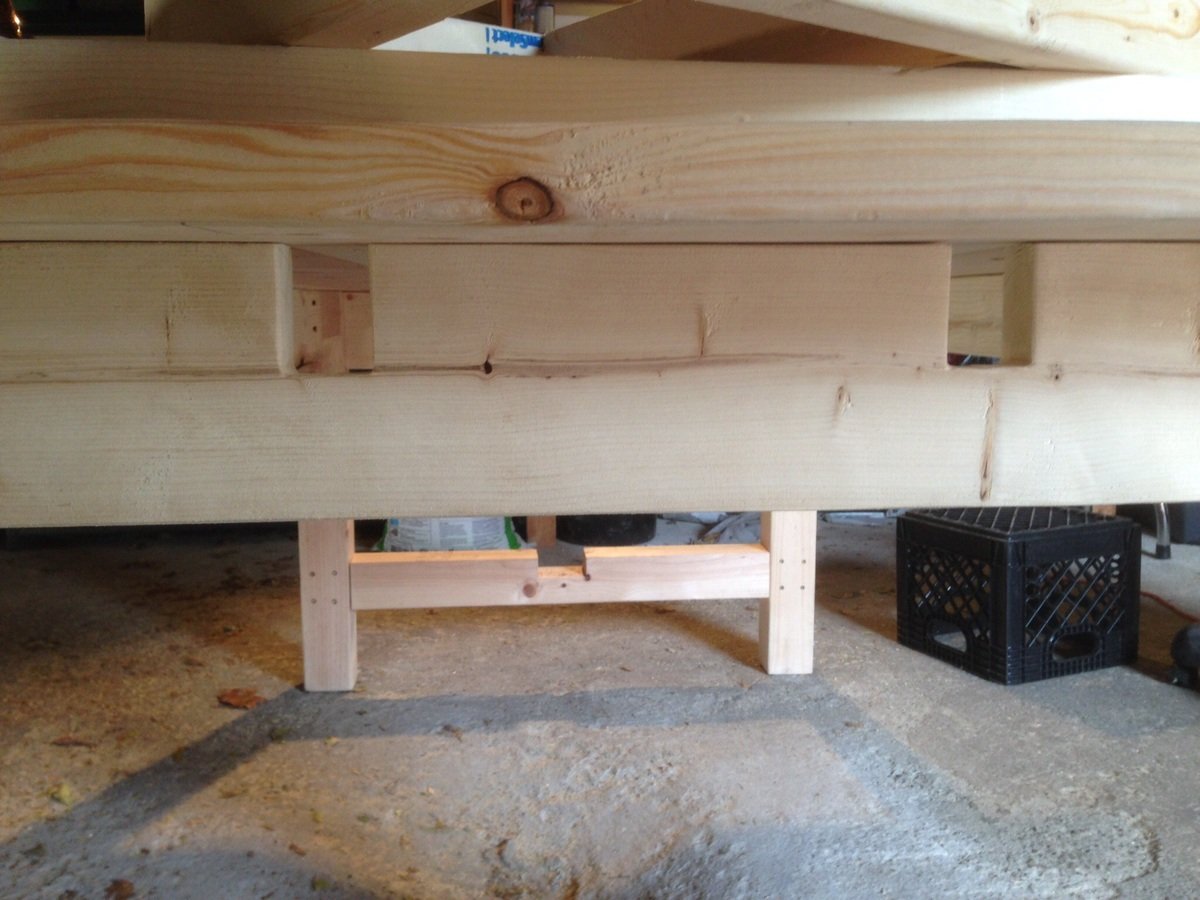
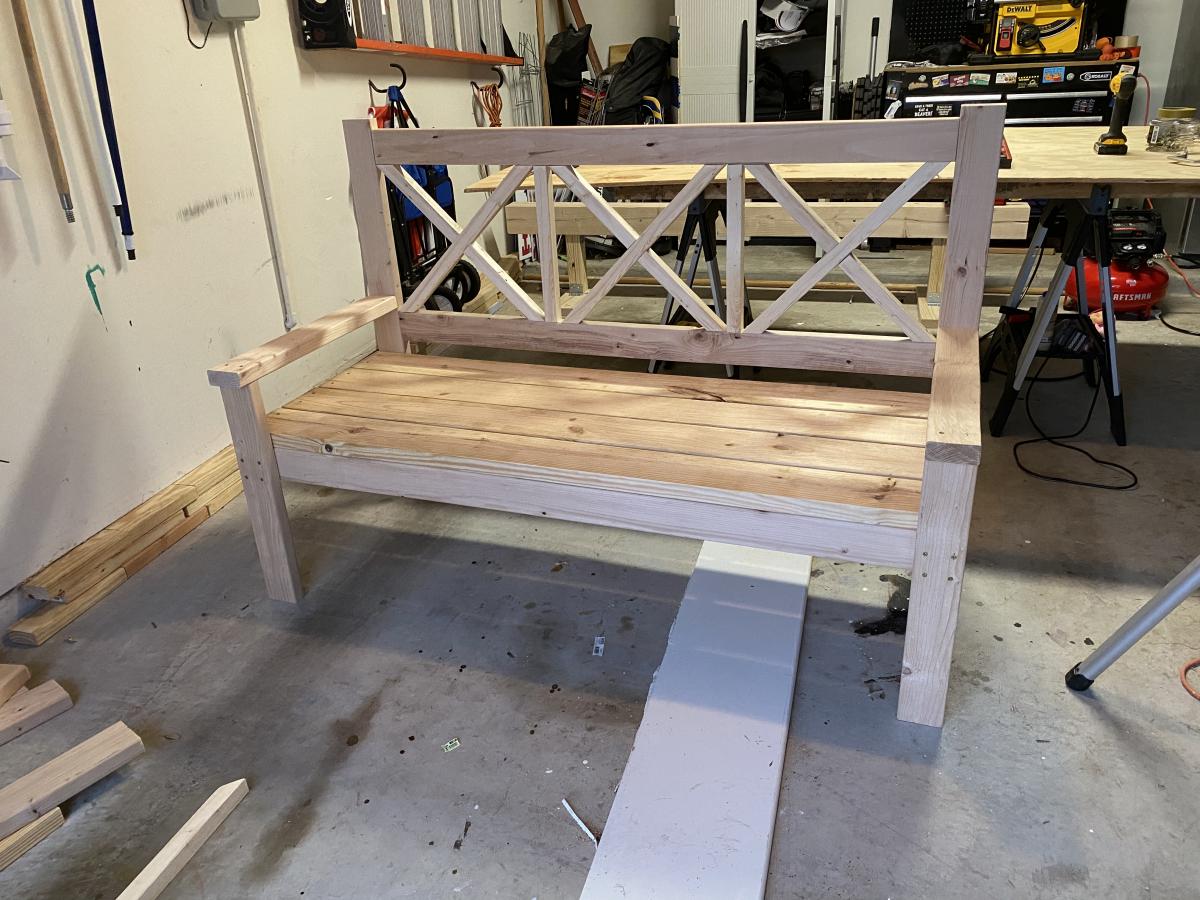
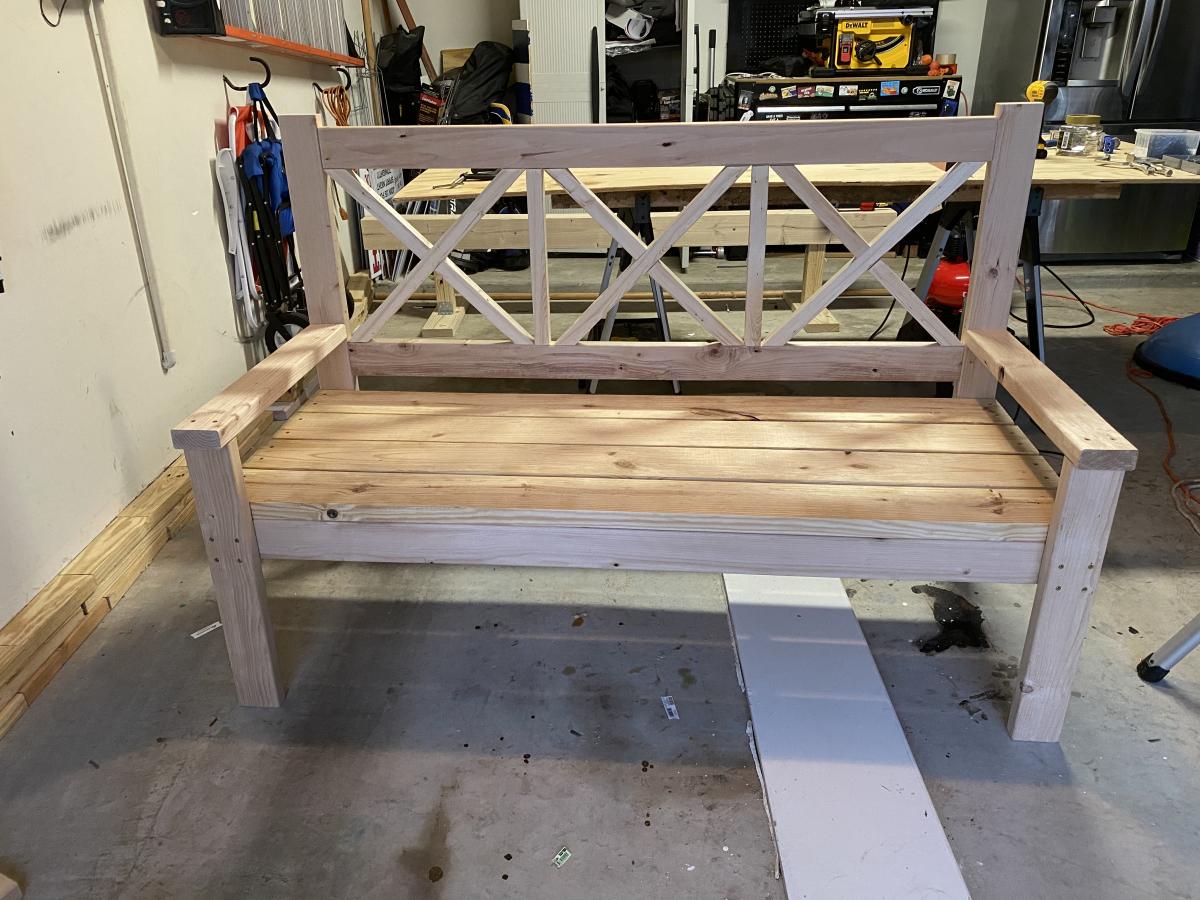
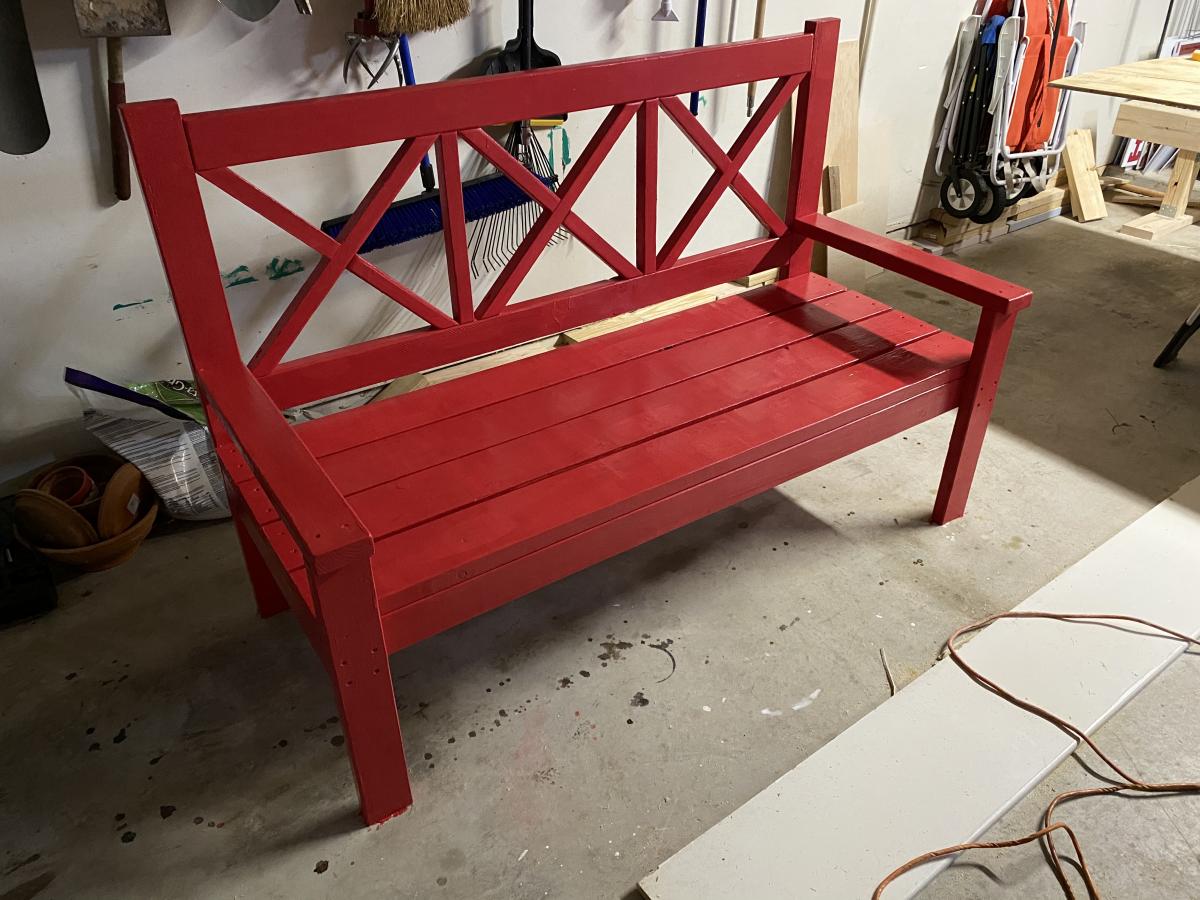
The bed was built completely out of scrap material and finsihes we have on hand.

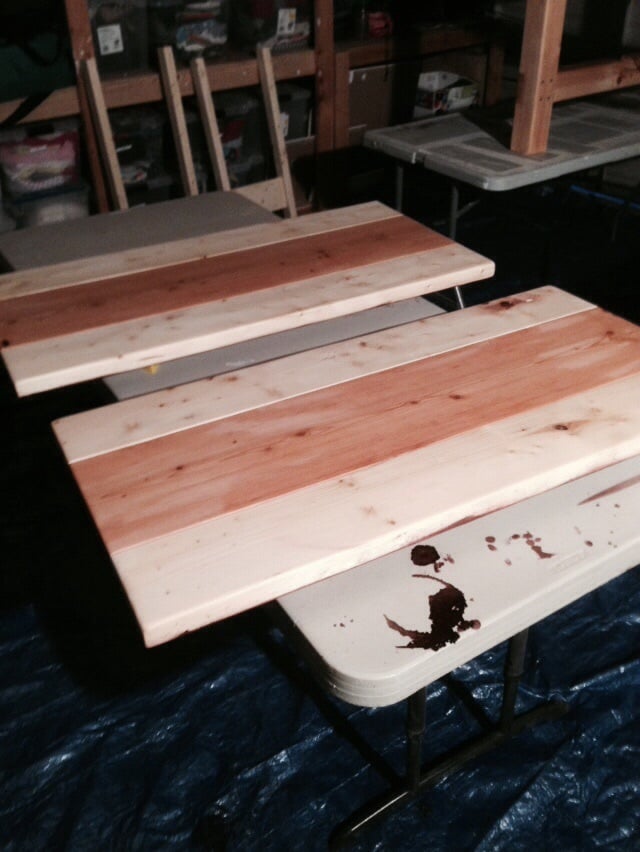
We used a vinegar & steel-wool stain with a tea stained base and clear coated with an enviromentally (and kid) friendly top coat.

This bed is solid and will last for years, maybe decades!

Estimated Time Investment
Afternoon Project (3-6 Hours)
Finish Used
Tea & Vinegar/Steel-wool Stain

First apply a good coat of black tea that is strong to aid in the chemical reaction of the aging stain. Once the has dried use your premixed (and aged) vinegar & steel-wool stain.

Allow to dry and follow with a clear-coat for protection.
Recommended Skill Level
Beginner

Farm style nightstand

Built in an afternoon for a friend 

Estimated Cost
$30
Estimated Time Investment
Afternoon Project (3-6 Hours)
Recommended Skill Level
Beginner

Customized TV table

Submitted by dtmak on Wed, 11/11/2020 - 19:23

I started with the Farmhouse Bedside Table stand to get the general dimensions and materials list. I adjusted the plan to get the height I wanted for a TV stand and left out the drawer where I could place the cable box or other AV equipment. It worked out really well. I used a router on the top to approximate the other furniture in the room. I finished it off with some adjustable height screw in feet for carpeting.

I added a lazy susan TV stand to allow the TV to adjust to different viewing angles.

Cutting and assembly was only a weekend's work. The painting and finish - to make it suitable for indoor furniture - required more time with multiple coats of paint, sanding, and polyurethane.

Thank you for sharing your plan!

Estimated Cost
$100
Estimated Time Investment
Week Long Project (20 Hours or More)
Finish Used
Rustoleum 2X spray paint and water-based polyurethane semi-gloss finish.
Recommended Skill Level
Beginner

Barn Greenhouse with Entryway

Submitted by MikeMc100 on Sun, 11/09/2014 - 19:46

This was built mainly as a place to bring our pond plants in for the winter. After looking at various kits we decided this was the best option for us and much cheaper.

The size was increased to 12 X 12 and the walls/ceiling were increased another 15" in height over the original plans. An entryway was added to block the cold wind as our original barnstyle door wasn't tight enough and ended up being too drafty. Also added an RV type autoswitching propane system and blue flame heater for backup. For the winter months we insulated the lower portion of the interior walls with spun fiberglass and 6 mil film stapled over it. 

This is a very utilitarian version that serves our needs well. Great original plans and easy to build.

Built from Plan(s)
Estimated Cost
$1200
Estimated Time Investment
Week Long Project (20 Hours or More)
Recommended Skill Level
Beginner

Comments

cmswebster

Mon, 11/10/2014 - 09:57

Did you have to change the angles for the roof beams?  If so, what angle did you use?  

Ana White

Tue, 11/11/2014 - 16:04

Wow, this looks awesome!  I love the arctic entryway (thats what we call them up here in Alaska) and all the mods!  Thanks so much for sharing!

Farmhouse Table Set

Finally finished this table, chairs and benches. Benches don’t slide under the table so I’m going to build another modified set and use these for outdoor sitting or something similar. Turned out great and love the look.

Estimated Cost
$500
Estimated Time Investment
Week Long Project (20 Hours or More)
Recommended Skill Level
Beginner

Comments

Sawhorse Desk

We were looking for a temporary desk to fit in a space next to our fireplace until we can build some built-ins. We modified the width and depth to fit. This was super easy. We love it.

Built from Plan(s)
Estimated Cost
$50
Estimated Time Investment
Day Project (6-9 Hours)
Finish Used
2 different contrasting stains
Recommended Skill Level
Beginner

Farmhouse Table

I used the Turned Leg Farmhouse Table Plans for the frame of the table, but changed the measurements to fit the table top from the Farmhouse Table - Updated Pocket Hole Plans. I also saved a little money by using a set of black turned legs from an old kitchen table. 

Estimated Cost
$70-$75 - Saved some money by using a set of turned legs from an old kitchen table.
Estimated Time Investment
Week Long Project (20 Hours or More)
Finish Used
I sanded the entire project with 150 grit and 220 grit sandpaper. I wanted the table top to be as smooth as possible, so I sanded it with 400 grit sandpaper. For the finish, I used Minwax Dark Walnut Stain and three coats of Minwax Satin Finish Polyurethane.
Recommended Skill Level
Intermediate

Adirondack Chairs

Submitted by Tbecker on Fri, 02/17/2017 - 18:06

I completed these chairs about 3yrs ago.  It was a great project and I learned a lot.  I really appreciate this site and have made a sofa and 2 benches as well.  Thank you Ana for the site and I wish HGTV or another station would pick up your DIY show!  

Built from Plan(s)
Estimated Cost
$37.00 each including paint
Estimated Time Investment
Week Long Project (20 Hours or More)
Finish Used
Outdoor Rustoleum
Recommended Skill Level
Beginner
Seasonal And Holiday

Tryde Coffee Table and End Tables

Submitted by jzacharuk on Mon, 01/21/2013 - 16:09

This set of tables is exactly what my fiance and I were looking for. Its rustic knotty look pulls the room together and glows a warm colour when the fireplace is on. Thanks Ana!

Built from Plan(s)
Estimated Cost
$150 for all three tables
Estimated Time Investment
Weekend Project (10-20 Hours)
Finish Used
Timberlox Varnish
Recommended Skill Level
Beginner

Comments

Joni

Fri, 02/01/2013 - 17:04

Very nice! Nice pictures. I love the knots in the wood and the natural finish. Nice job on all the custom sizing too. They look great in your room.

Benchright Table and Bench

My wife and I just purchased a new home with our first dining room. While debating the expense of buying new dining room furniture we decided that we should try a do-it-yourself project and were lucky enough to stumble on Ana's website. While we had never done any real woodworking (we made a cat tree once), Ana's plans and the accompanying comments were easy to follow and proved that even beginners can make cool furniture!

We built the bench first and managed to complete it in one weekend without much trouble. This helped us learn the basics of the tools we were using, especially the miter saw. The table followed.

We wanted a slightly larger table and bench than those in the plans so that we could host more people and fill out the room. Our table is 78" x 38.5".
Increasing the width required adding an additional 1" x 6" on the table top. The only other change that we made was to extend the 2" x 2" on the side of the table the entire length of the table as is required in the bench instructions. We thought that this provided more stability for the bread boards. We used a threaded rods and turnbuckles on both the table and bench for the accent piece between the legs.

While we certainly had hiccups along the way, but we really enjoyed the process, and love the dining room set that we built. It was a really rewarding experience and now we're looking forward to building most of our furniture!

Special thanks the Ana for her plans and website. We couldn't have done it without her.

Estimated Time Investment
Week Long Project (20 Hours or More)
Finish Used
Minwax Black Walnut and Minwax Polyurethane
Recommended Skill Level
Beginner

Comments

Loft bed

Submitted by Joep_erez on Mon, 02/20/2017 - 10:55

This took me about 1 1/2 week to complete.  I'm active duty military so my hours are always crazy.... I didn't get this from any specific plans. If anyone needs guidance feel free to get in touch with me.. you can also follow my work here...  

https://www.facebook.com/J0EPEREZ/

Estimated Time Investment
Week Long Project (20 Hours or More)
Finish Used
Weathered Grey and Polyurethane
Recommended Skill Level
Intermediate

Modified farmhouse table with extensions

Submitted by William E on Tue, 11/18/2014 - 19:28

Modified the main table by knocking down the length one foot. Slightly reduced width based on lumber used by about 2 inches. Added two extensions. Used 2x4s for side aprons and 2x6s for end aprons. This allowed me to notch 2x3 (lumber size) holes in the ends to slide extension arms in. Arms held by friction and torque so if you do this make the holes tight. Don't over stain or poly. Slide wax candle on arms to help them slide in. If lose you can install a latch on arms under table. All items from Home Depot. Last photo shows dry fit of extension prior to screwing on top from the bottom. Gave me best alignment.  If you haven't paid it forward for this great FREE site, do so by ordering Ana's book a Handmade Home. Making the coffee table I found in it this weekend. Good luck all and if you are wondering if you should? Yes, you should. 

Estimated Cost
150 minus kreg jig. Had all other tools.
Estimated Time Investment
Weekend Project (10-20 Hours)
Finish Used
Red mahogany left on for ten plus minutes. Three coats of mini wax oil based poly. Sanded in between with 400 grit. Final pending 0000 steel wool dipped I wood paste. Don't worry if you mess up. Just sand down and repeat.
Recommended Skill Level
Beginner

Comments

Large Wood Pet Kennel End Table

Submitted by Anonymous (not verified) on Thu, 02/23/2017 - 18:27

I used the plans provided. I made a small change to the windows and made the bigger. 

Built from Plan(s)
Estimated Cost
$140
Estimated Time Investment
Weekend Project (10-20 Hours)
Finish Used
Water based stain with water based sealer.
Recommended Skill Level
Beginner

Grammy’s bench

Porch bench for my parents’ new house.

Estimated Cost
$100
Estimated Time Investment
Day Project (6-9 Hours)
Finish Used
Exterior Valspar - Bright Red
Recommended Skill Level
Intermediate

Comments

Reclaimed-wood headboard queen

Submitted by dianek on Fri, 01/25/2013 - 07:25

Super easy project with huge results!

Took us 2.5 hours to build and about 2 hours of finishing work. Be sure to use a square as you position each panel.

Thanks Ana!

Estimated Cost
60
Estimated Time Investment
Afternoon Project (3-6 Hours)
Finish Used
Mix of dark walnut and golden oak and 2 coats of poly
Recommended Skill Level
Beginner

Truss Table from Heirloom

Submitted by ClemsonJoe on Fri, 11/21/2014 - 07:17

Here is my latest project completed. I took the table that belonged to my wife's parents and re-purposed it. Took it apart, stripped it, rebuilt it into a farm style table, and refinished it. Put it on top of a base that I built, painted and distressed. Turned out solid as a tank. Broke bread on it for the first time tonight. It should last for a couple more generations!

Built from Plan(s)
Estimated Cost
$50
Estimated Time Investment
Weekend Project (10-20 Hours)
Finish Used
Applied in the order listed.
Table Top - Minwax Early American Stain, Rustoleum Polyurethane Matte Finish, Minwax Paste Finishing wax
Base - Rustoleum High Performance Protective Enamel - Semi-gloss, Minwax Early American Stain, and Minwax Wipe-on Poly Satin Finish
Recommended Skill Level
Intermediate

Comments

Sideboard

Submitted by Anonymous (not verified) on Sat, 02/25/2017 - 19:59

Intermediate project. It is not specified how to attach the top but I would recommend using the Kreg Jigg on the outside ends. Beautiful and spacious amount  of storage. 

Built from Plan(s)
Estimated Cost
$200 in bought lumber
$50 hardware,stain & paint
(Hard to estimate BBC I used scrap wood I had Laying around)
Estimated Time Investment
Week Long Project (20 Hours or More)
Finish Used
Top- Mini-wax walnut
Enchanted chalk paint
Dark wax
Recommended Skill Level
Intermediate

Stocking hanger with added top

Submitted by stamhow on Fri, 12/11/2020 - 20:12

Started built from https://www.ana-white.com/woodworking-projects/stocking-stand plan.
My finished product is mostly the same, except I added a little to beef it up. I added decking board size wood for the feet to give it more stability. Santa leaves heavy things in sticking sometimes. I wanted to be prepared! 😁 I made the top 2x4 flush with the top of the sides and added a 1x6 across the top like a shelf. If I get to do it in time, I'm going to add a 1x8 (or 2x8) stained a dark wood color on top and may add a little trim between it and the 1x6 to beef it up. I love it! Might be able to repurpose someway during the rest of the year. Thanks Ana White for the plans!

Built from Plan(s)
Estimated Cost
Less than $20 because I had most wood and finishing materials on hand.
Estimated Time Investment
Afternoon Project (3-6 Hours)
Finish Used
I painted it with a gray color satin wall paint I bought from the sample section and after it dried, sanded it up to distress. I then wiped on a Chestnut Minwax stain for a short time and wiped it right off. After that dried I wiped it all over with the Minwax Wipe-on satin polyurethane.
Recommended Skill Level
Beginner

Beds for my girls

Rather than buying beds for two of our daughters, I wanted to take the opportunity to build them. I really had a great time doing. I used the plans from the Captains Storage beds, but modified it a little.

We ripped two 3/4 inch finished ply into 12in pieces.
That gave us all the sides, ends, and dividers.
The platforms are 12x12 3/4x
The ends are the same only sorter.

Rather than using slats for the middle support I just used the remain ply.
We finished the front with 6ft sections of 1x2 inch furring strips. A good sanding and clean up, and we are good to go!

Thanks for posting the plans! We really enjoyed building the beds and our girls love them!

Built from Plan(s)
Estimated Time Investment
Weekend Project (10-20 Hours)
Finish Used
unfinished wood
Recommended Skill Level
Beginner

Comments

sulu293

Fri, 09/20/2013 - 13:14

LOVE this! was looking for something other than the slats that would TRULY hold my polynesian kids, thank you for sharing! :-)