Wood cooler
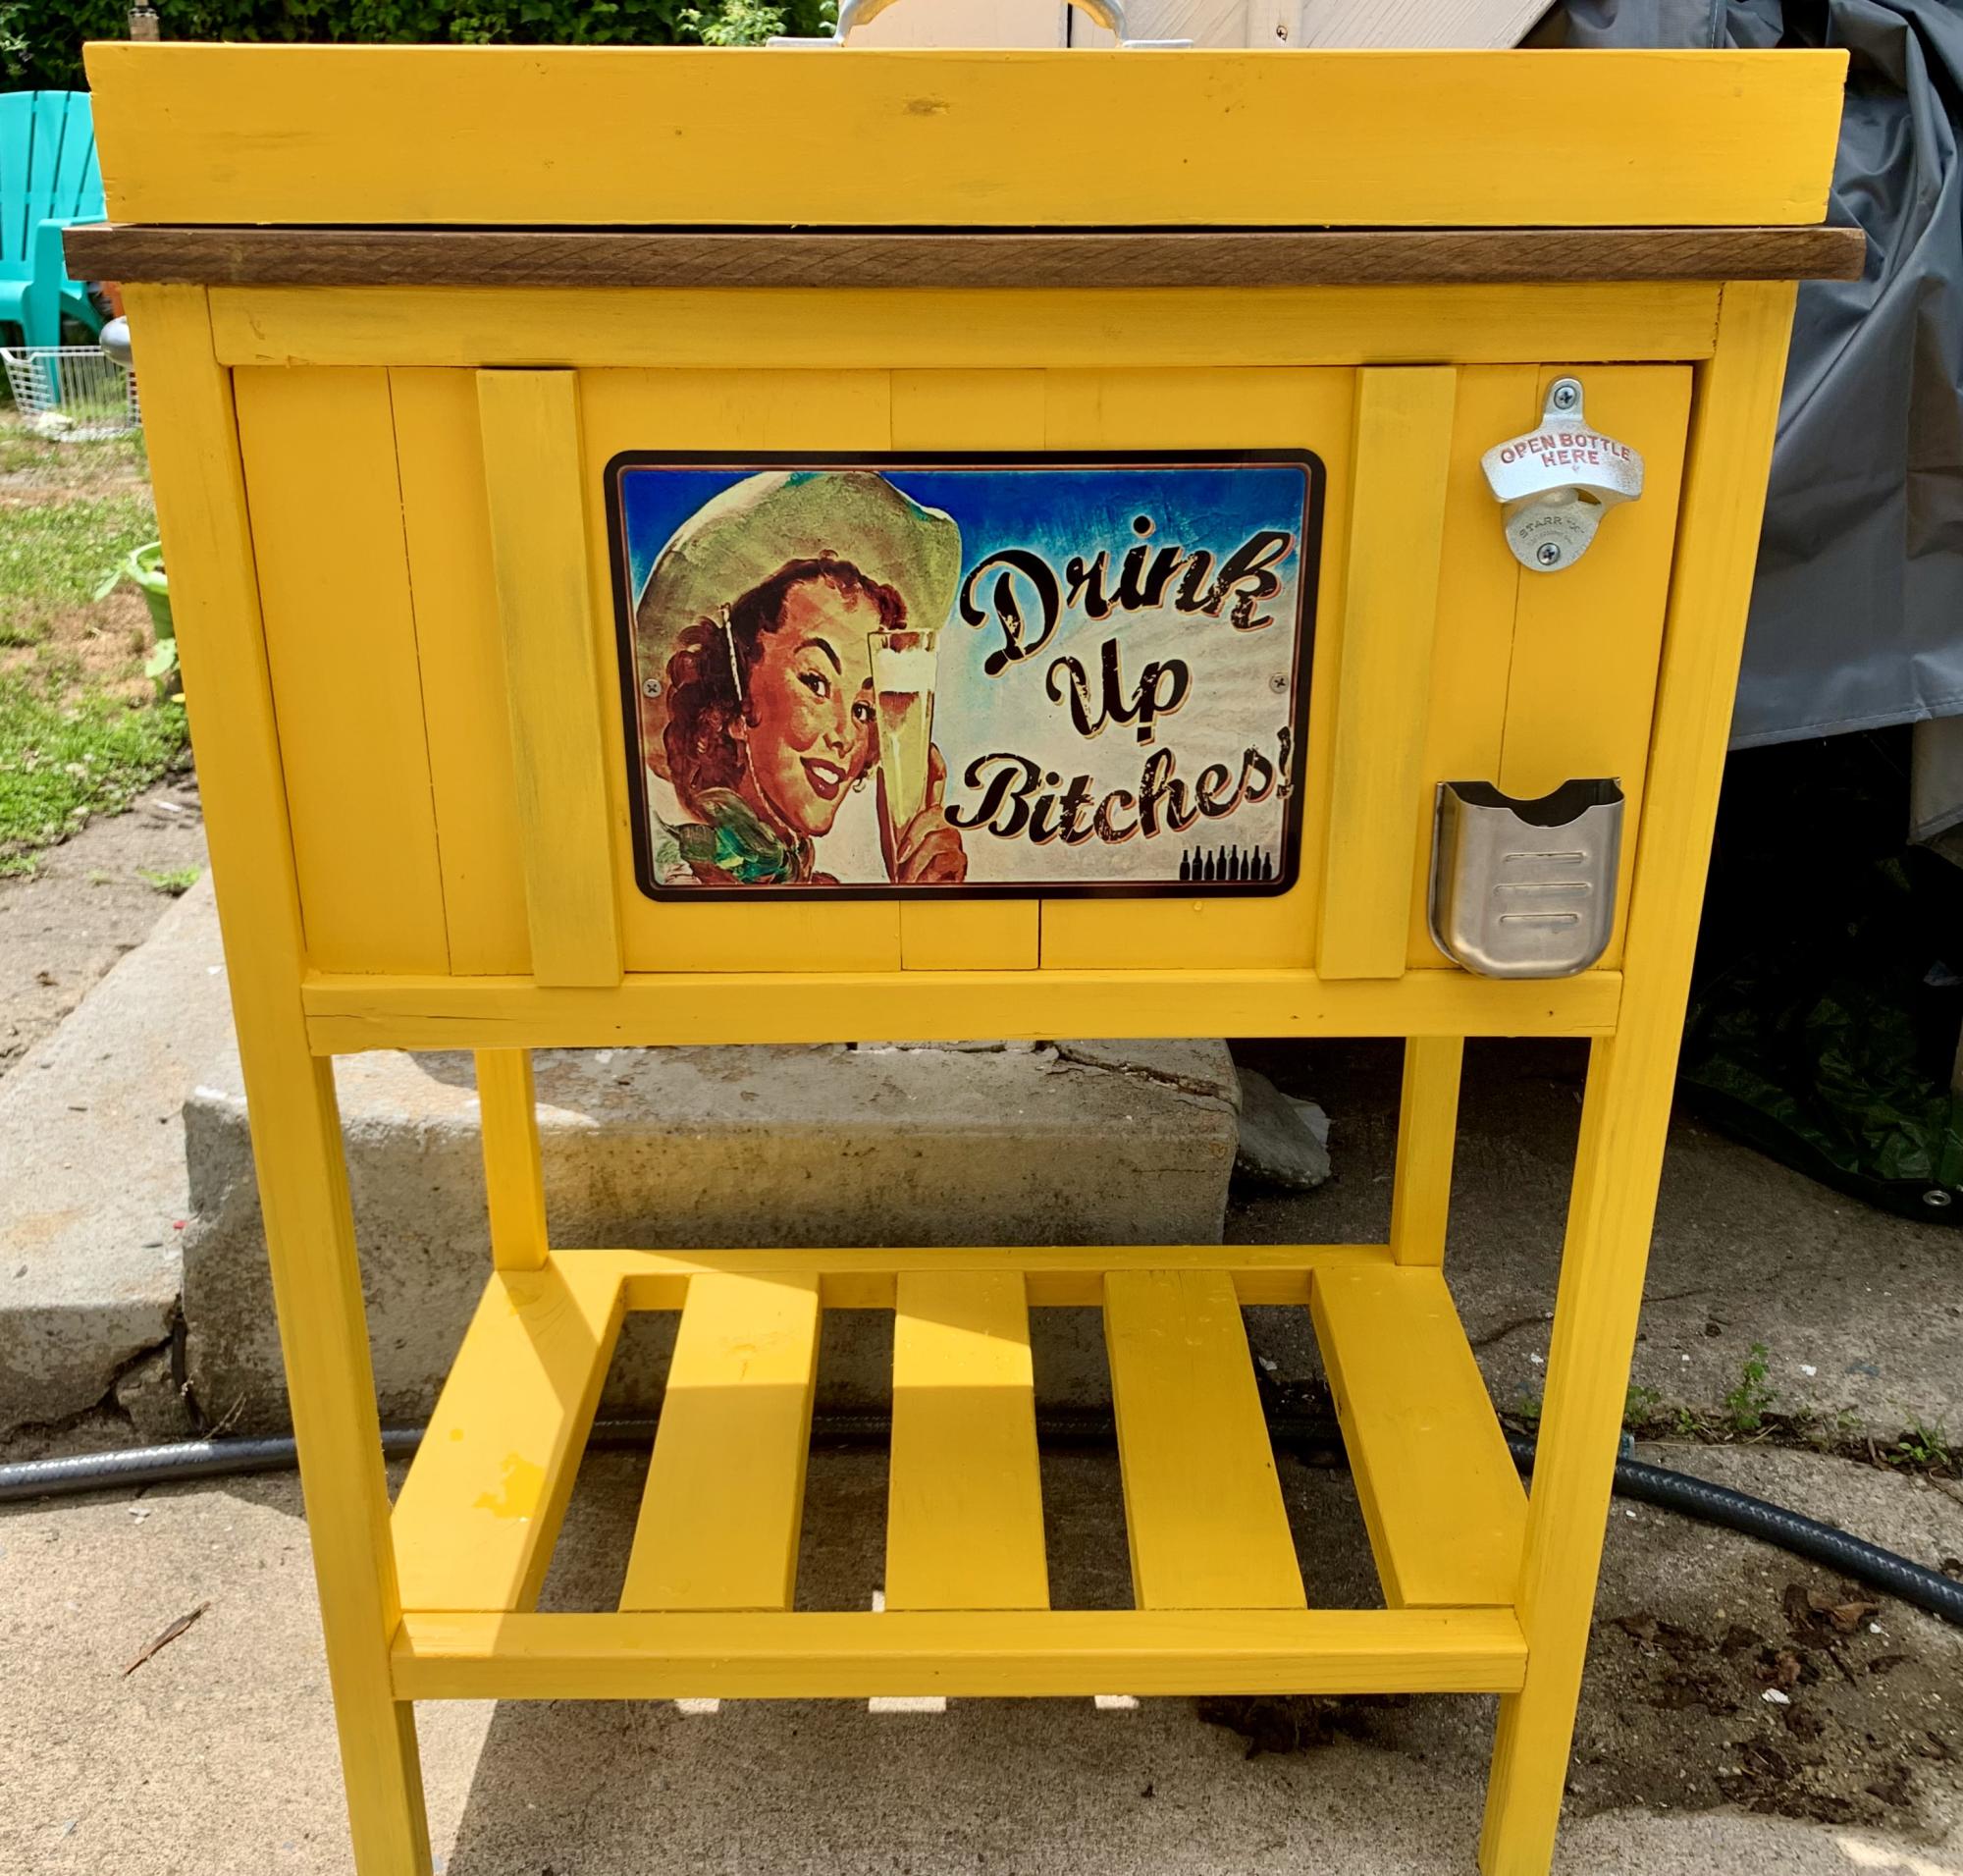
Love this cooler! Get so many compliments!
Built from Plan(s)
Love this cooler! Get so many compliments!
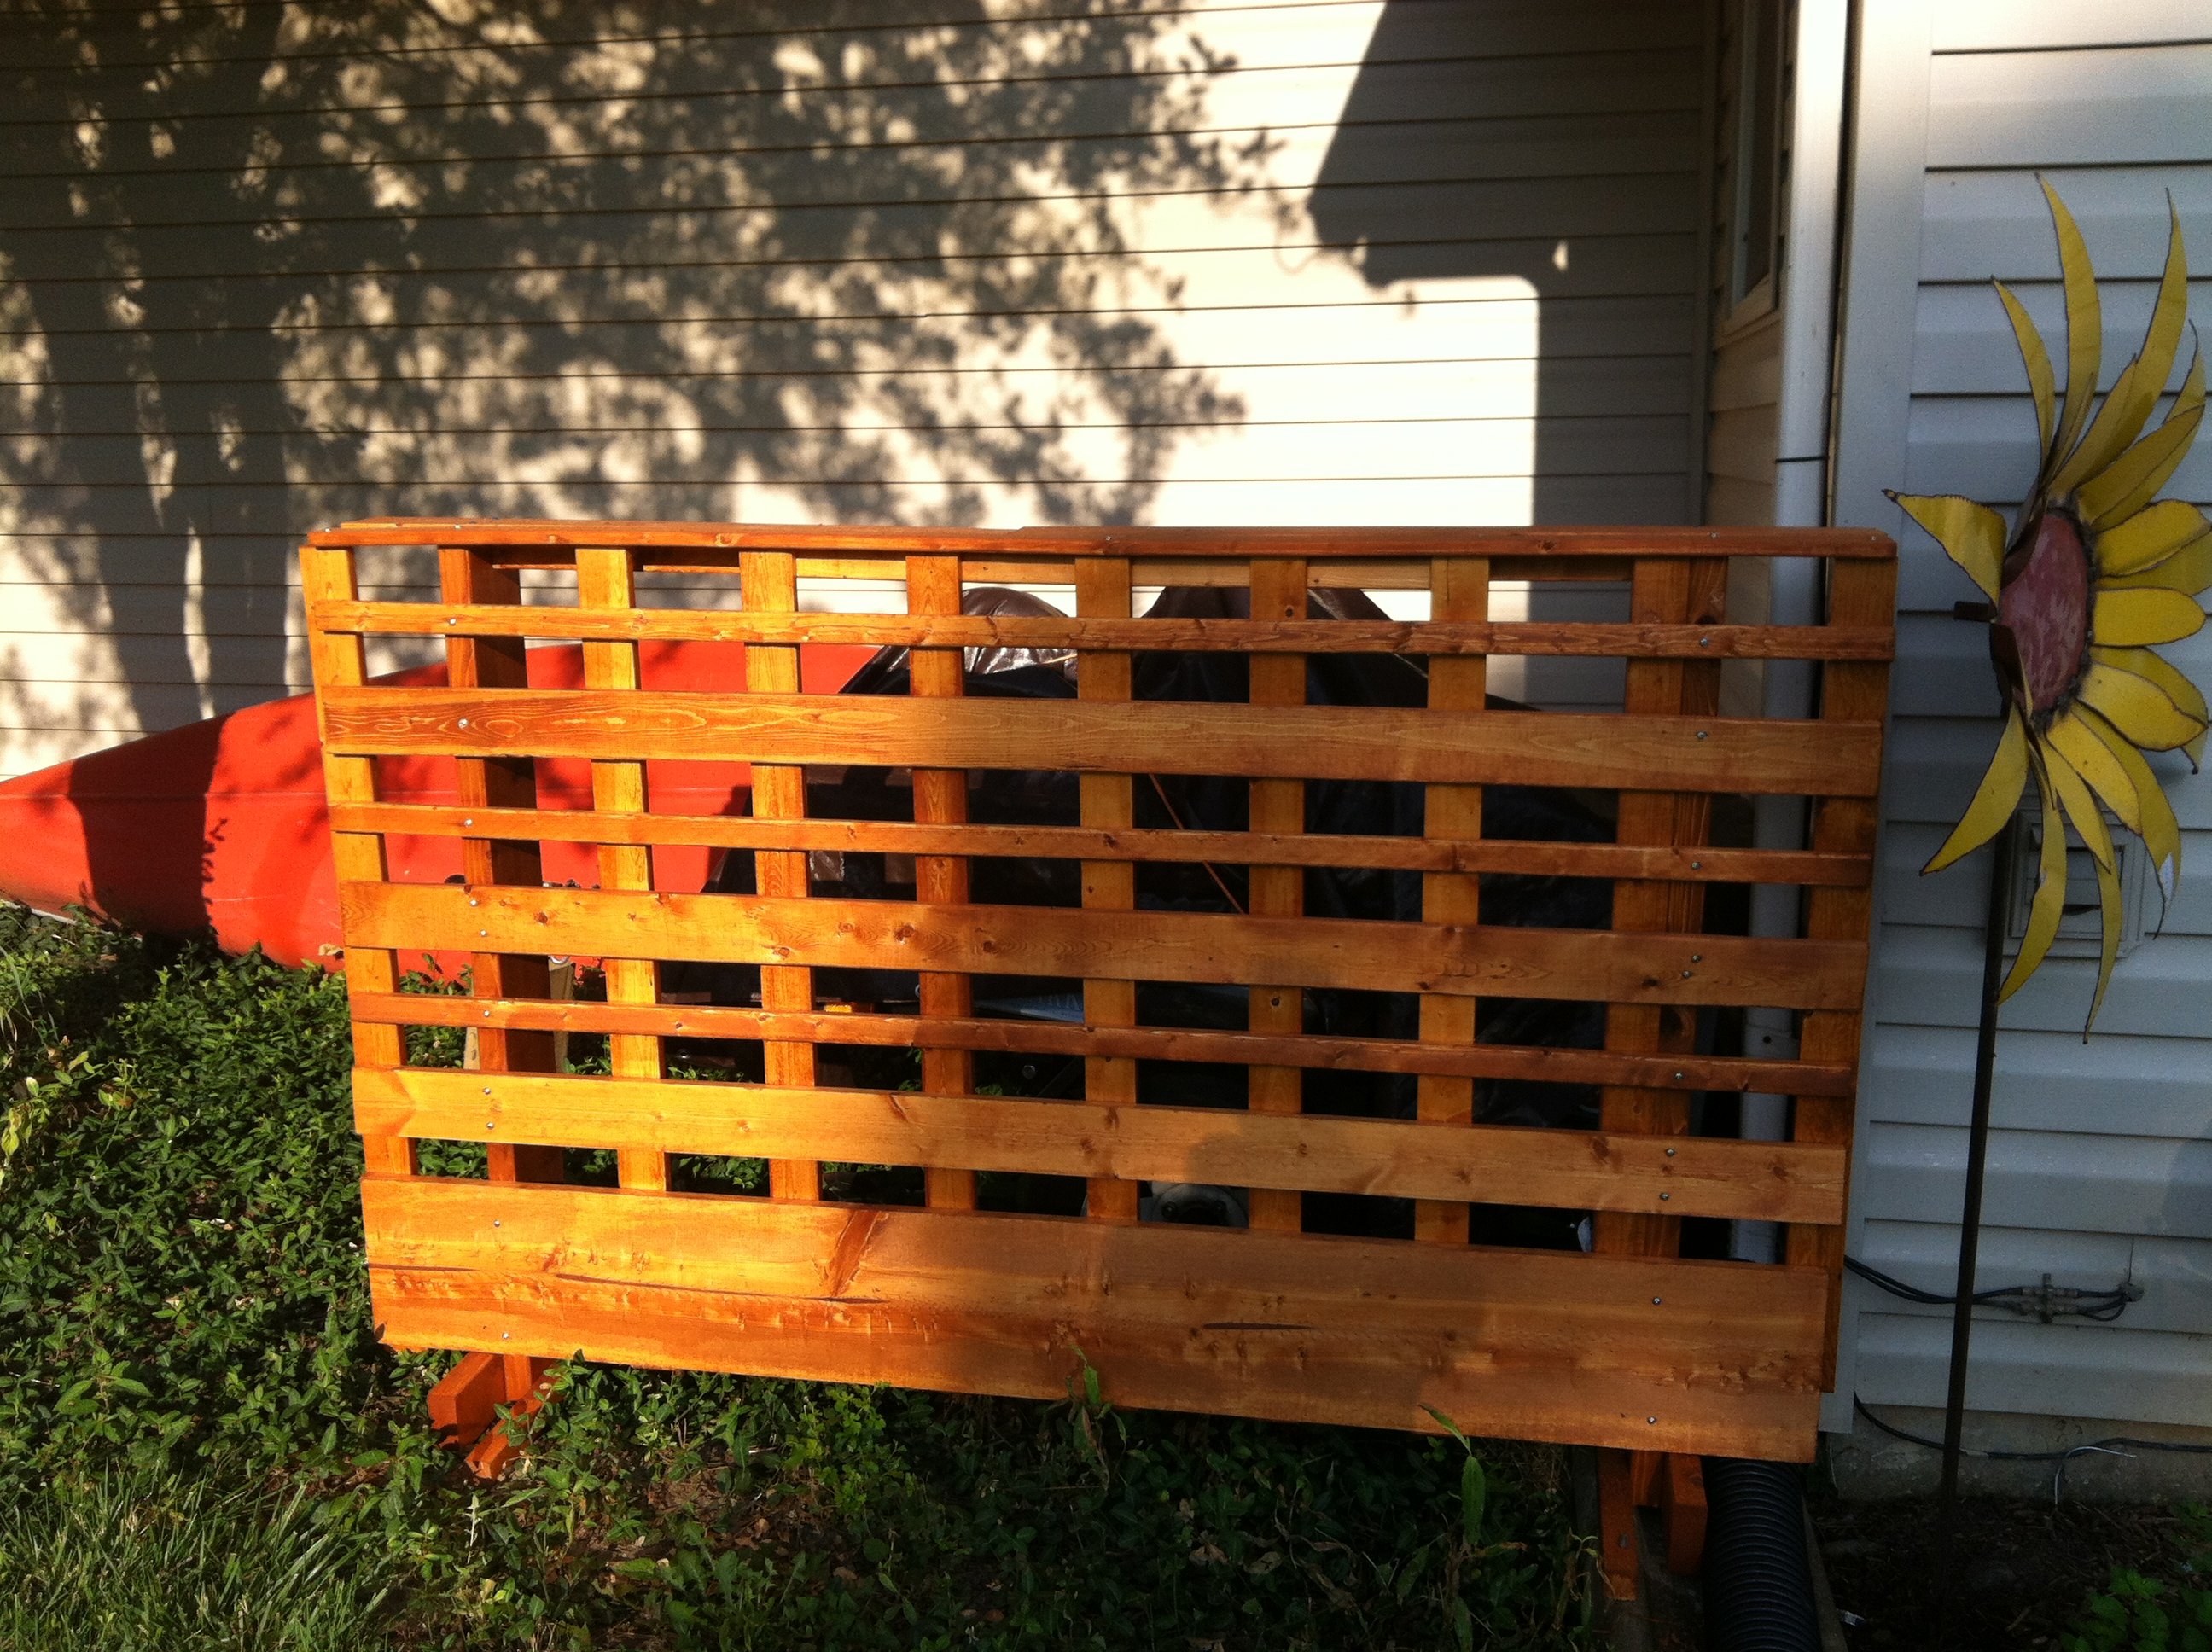
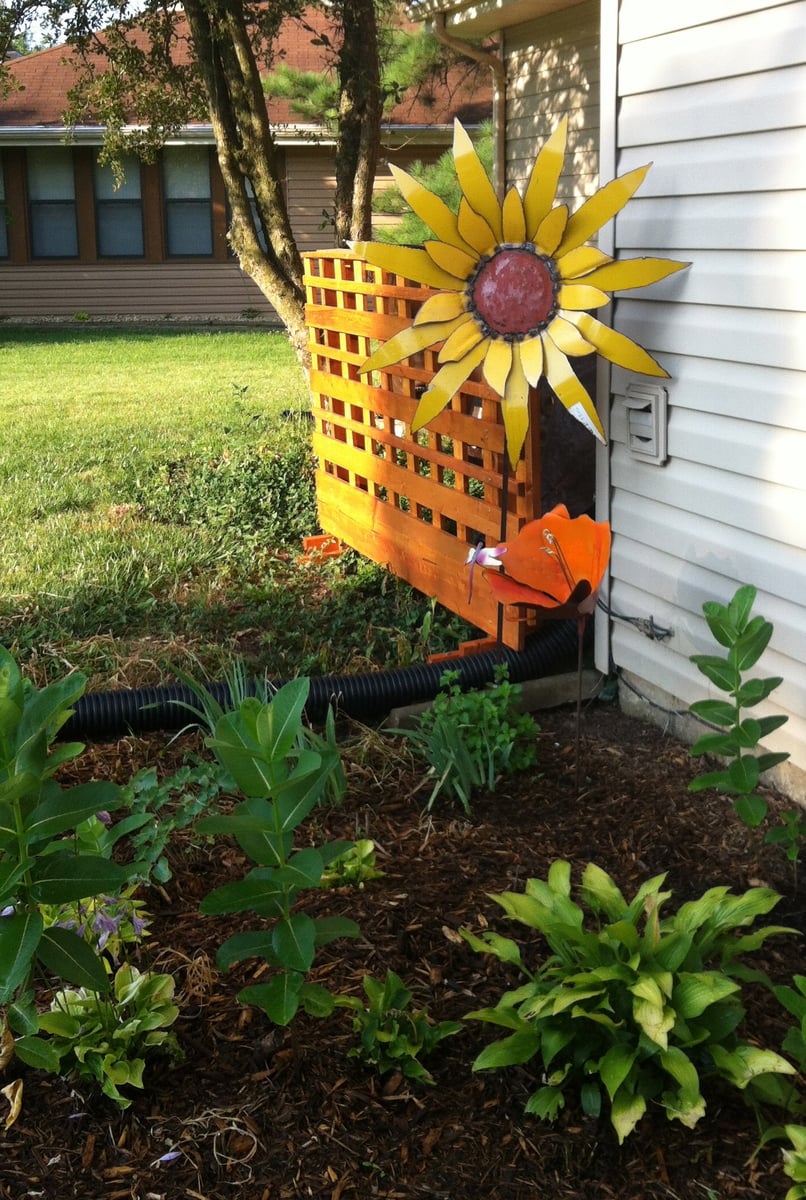
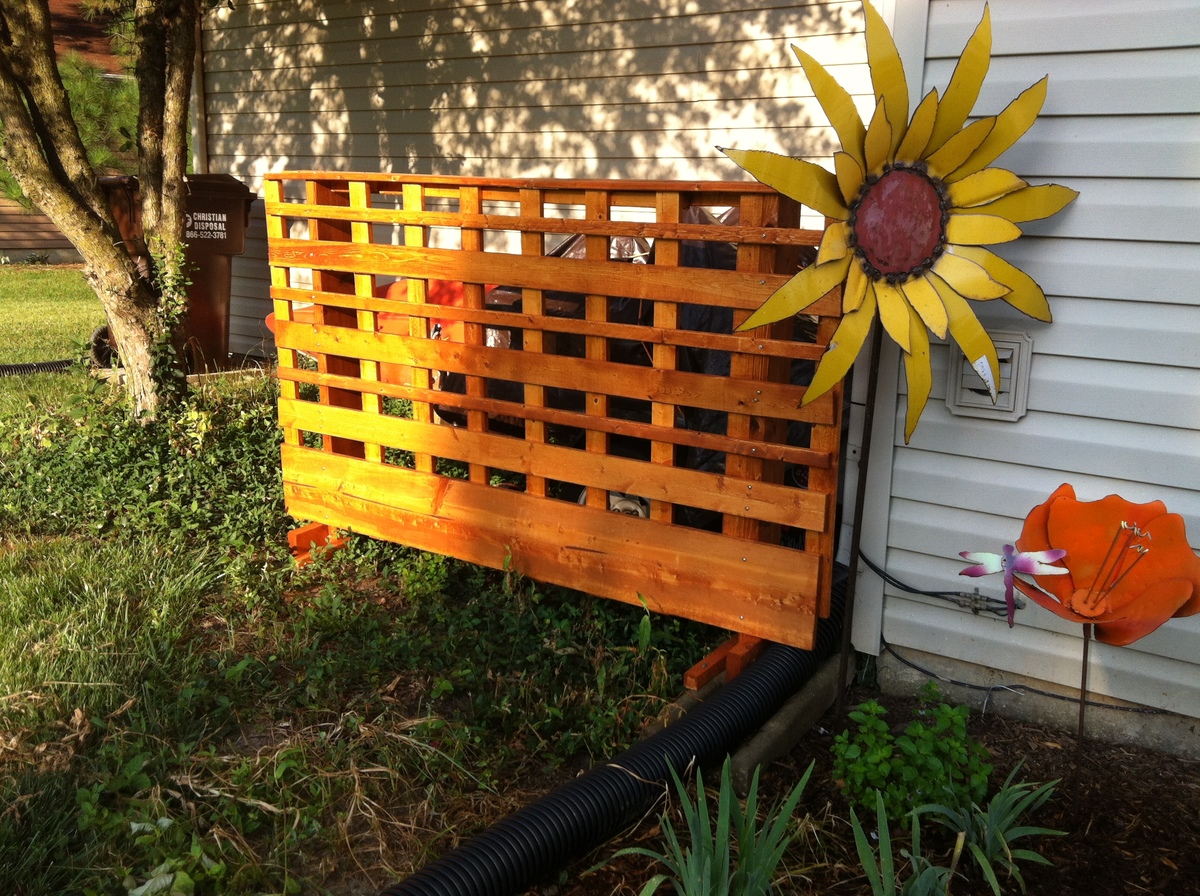
Technically, we are not allowed to store trailers or boats outside of our garage. Since our back yard faces a popular path for runners, pedestrians and cyclists, I came up with this solution and we have not been reported.
The size isn't ideal (peekaboo canoe), but I went with boards I already had. I didn't sketch this out ahead of time, just pieced it together using a 6" board as my vertical guide and a 3" board as my horizontal guide.
Instead of digging post holes, I built it onto feet so that it's free-standing and portable. We can move it any time we need to get the trailer out from behind it.
Next summer, I may put planter boxes on top and build a second panel as well.
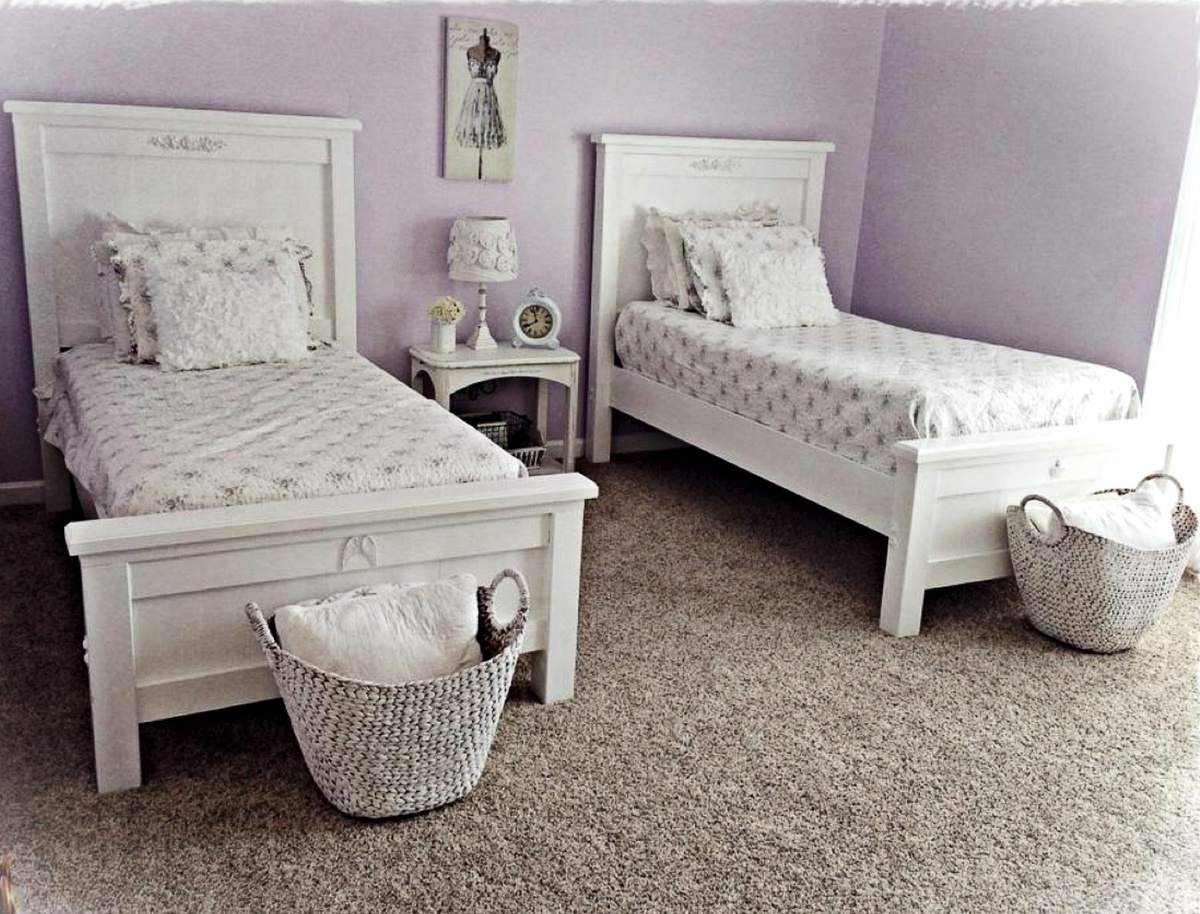
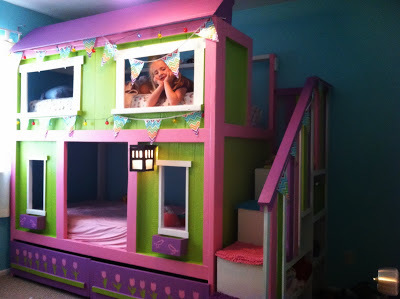
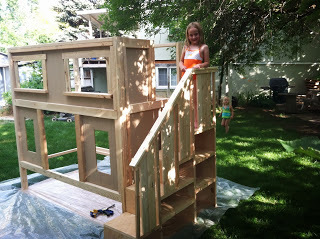
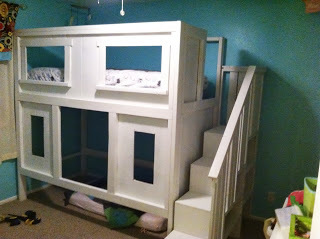
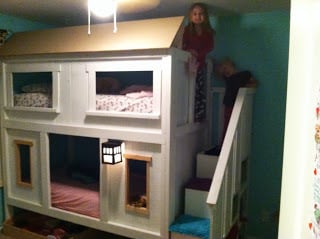
Made a set of beds for twin girls!

Wed, 07/22/2015 - 22:55
oh wow! This room looks so pretty! Awesome job on the twin beds and I adore the wall colors!

Thu, 03/15/2018 - 19:16
I love the little embelishments on the foot board and head board! did you add these on after or prior to painting?
Thu, 03/15/2018 - 19:17
I love the little embelishments on the foot board and head board! did you add these on after or prior to painting?

My wife had been asking me for quite some time to build a coffee table and I finally got around to it. What is the perfect size coffee table? That is a good question. I first thought it was 4ft by 4ft but then I realized I needed to think of the negative space in my living room. I discovered that 3.5 ft by 3.5ft would be the perfect size. The height of the coffee table is 19.5in. My legs are 4in x4in and the length of skirt on each side is 2ft and 7in. Here is a link to the video and my blog post where I giving you all the instructions you need. Feel free to message me with any questions.


Combined the Easy Three Cube Bench & Small Locker Cabinet plans to build a mudroom locker. Not quite finished as I need to attach the cabinet to the bench, add the trim and back to the locker cabinet , then stain and paint, but I couldn't wait to post. Very happy with the results, will add hooks to the lockers and should be very functional.
Thinking about staining the bench seat a dark mahogany and painting everything else white.
Tue, 04/05/2022 - 09:20
Will do, already got the trim completed and will be painting over the next couple of evenings. Struggling with whether to paint the bench before attaching the lockers, or wait until after I attach. Concerned about the glue that I need to put on the bottom of the lockers, if I paint the bench and then attach the locker, glue will get on the bench as I get the locker aligned. Just not sure if it will simply wipe off, or if I will need to do some paint touch up.
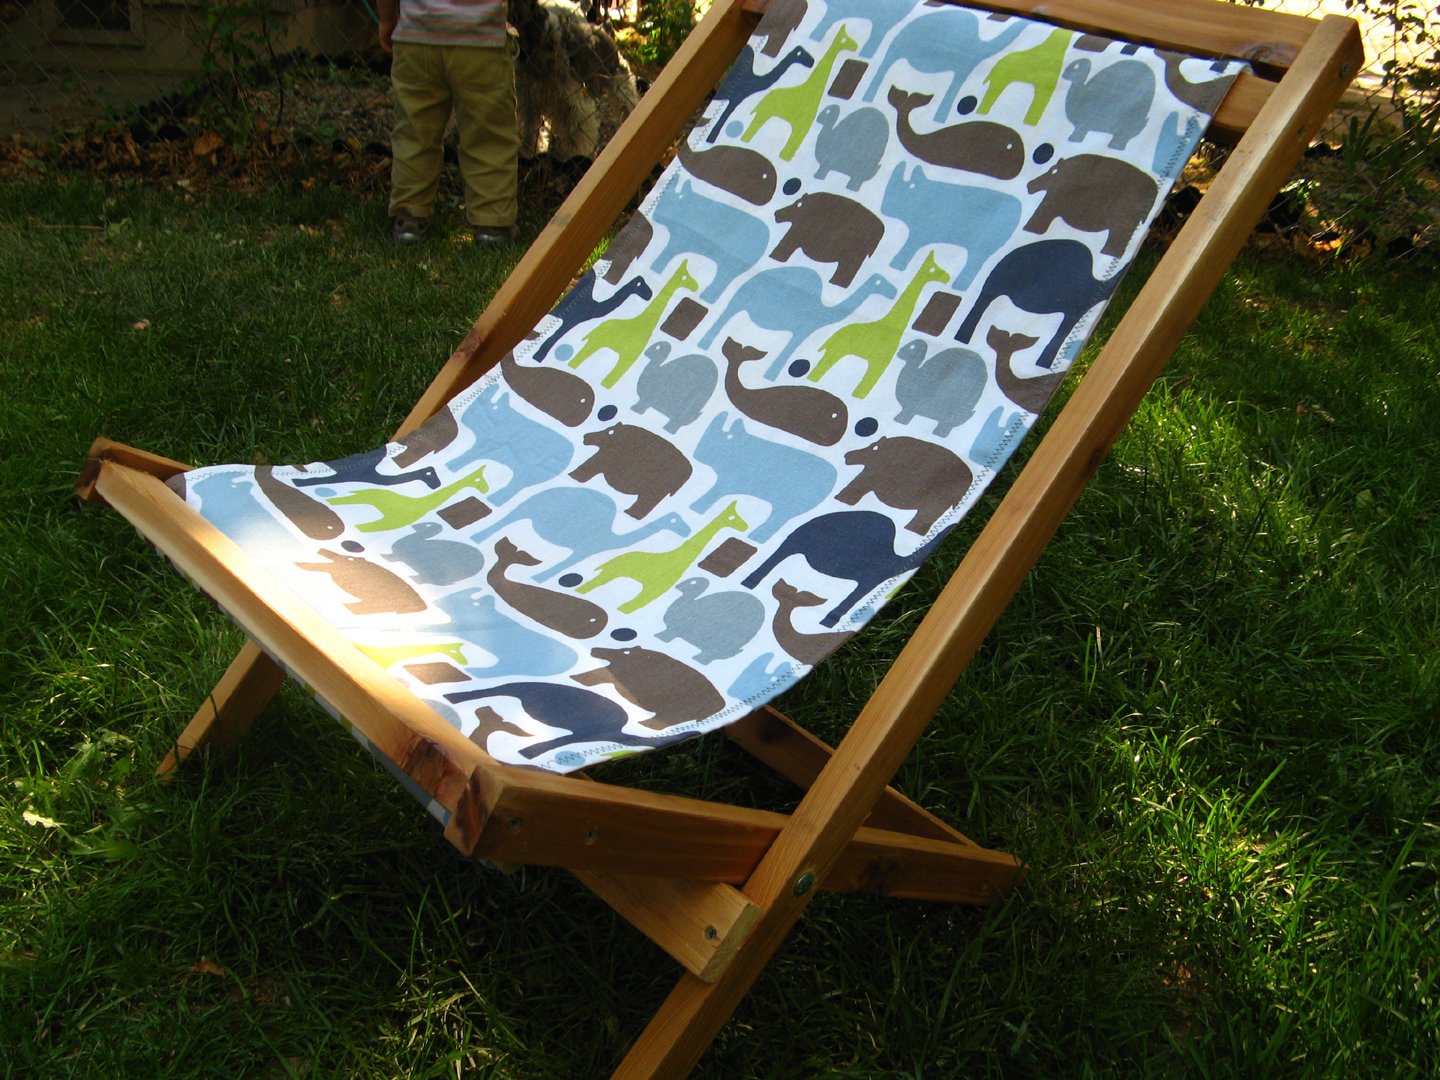
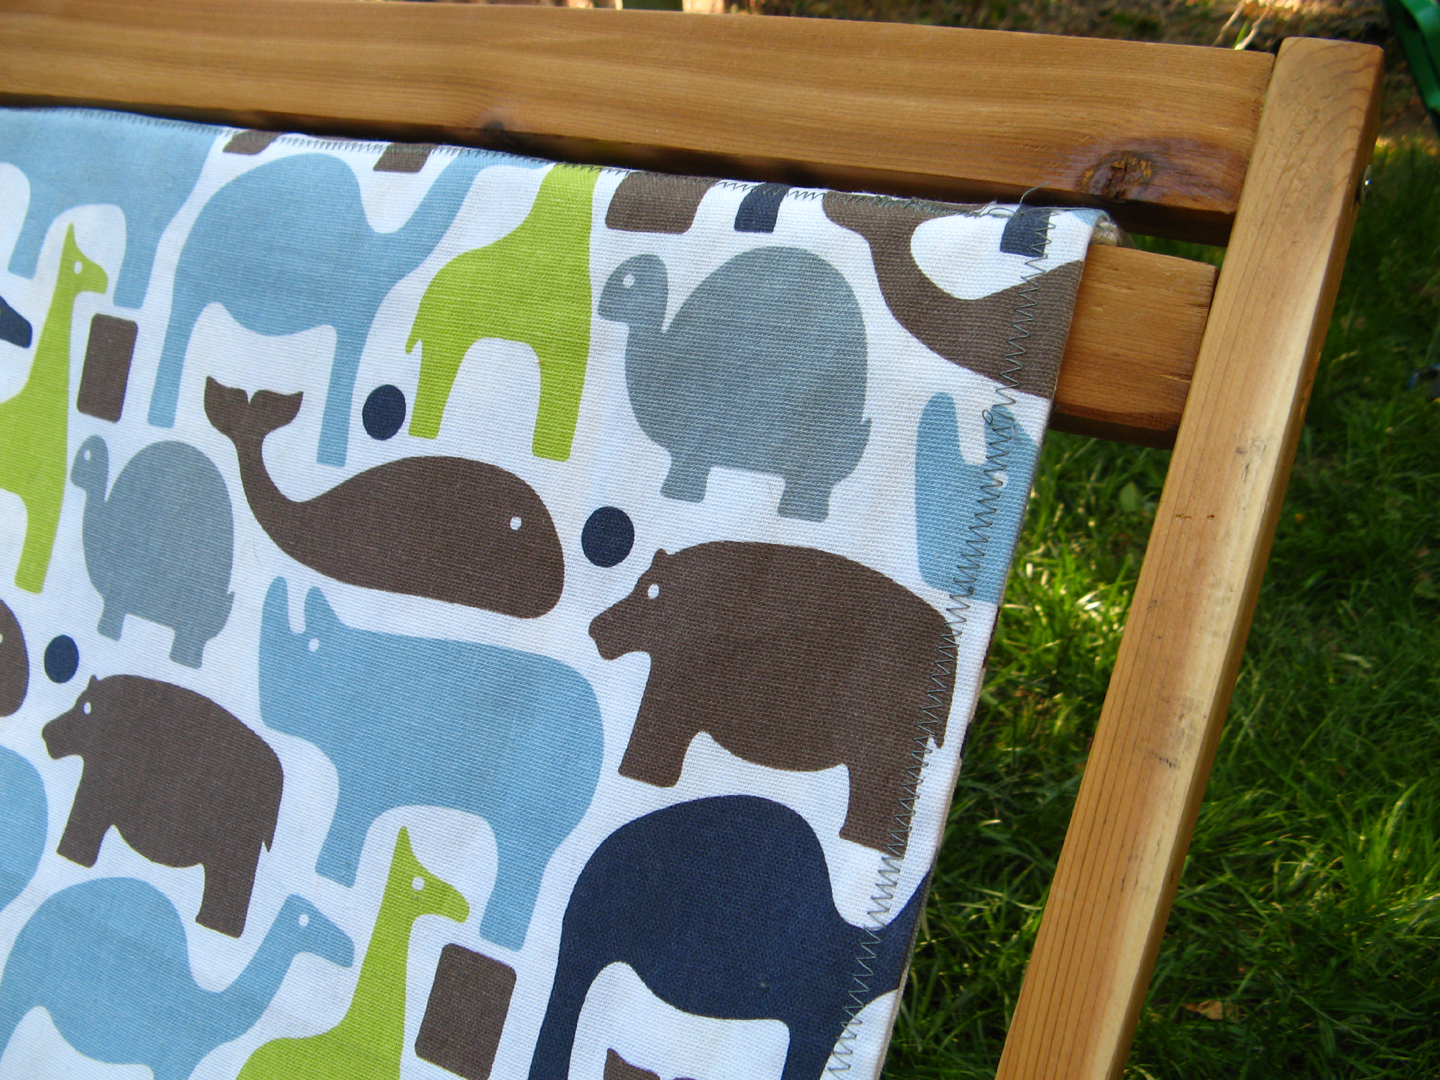
Couldn't wait to build this when I saw the post go up- I bought supplies right away! Got this chair done throughout one Saturday. The sewing part took the longest (I've only used sewing machines maybe 4 times in my life! I got one for Christmas 2 years ago.. thought maybe it was time to break it in!!) Got the fabric on sale at Joann's for $8 and spent about $8 on cedar 1x2's. Did the entire project with very little help- I am quite proud of myself! I am pretty excited that I was able to make the fabric sling portion!
My 2 year old was SUPER excited about this chair... he got so upset waiting for me to get the sling put in and was crying until it was ready for him to sit in! We had a movie night in the backyard and set up this chair under our tent canopy. He loved it!


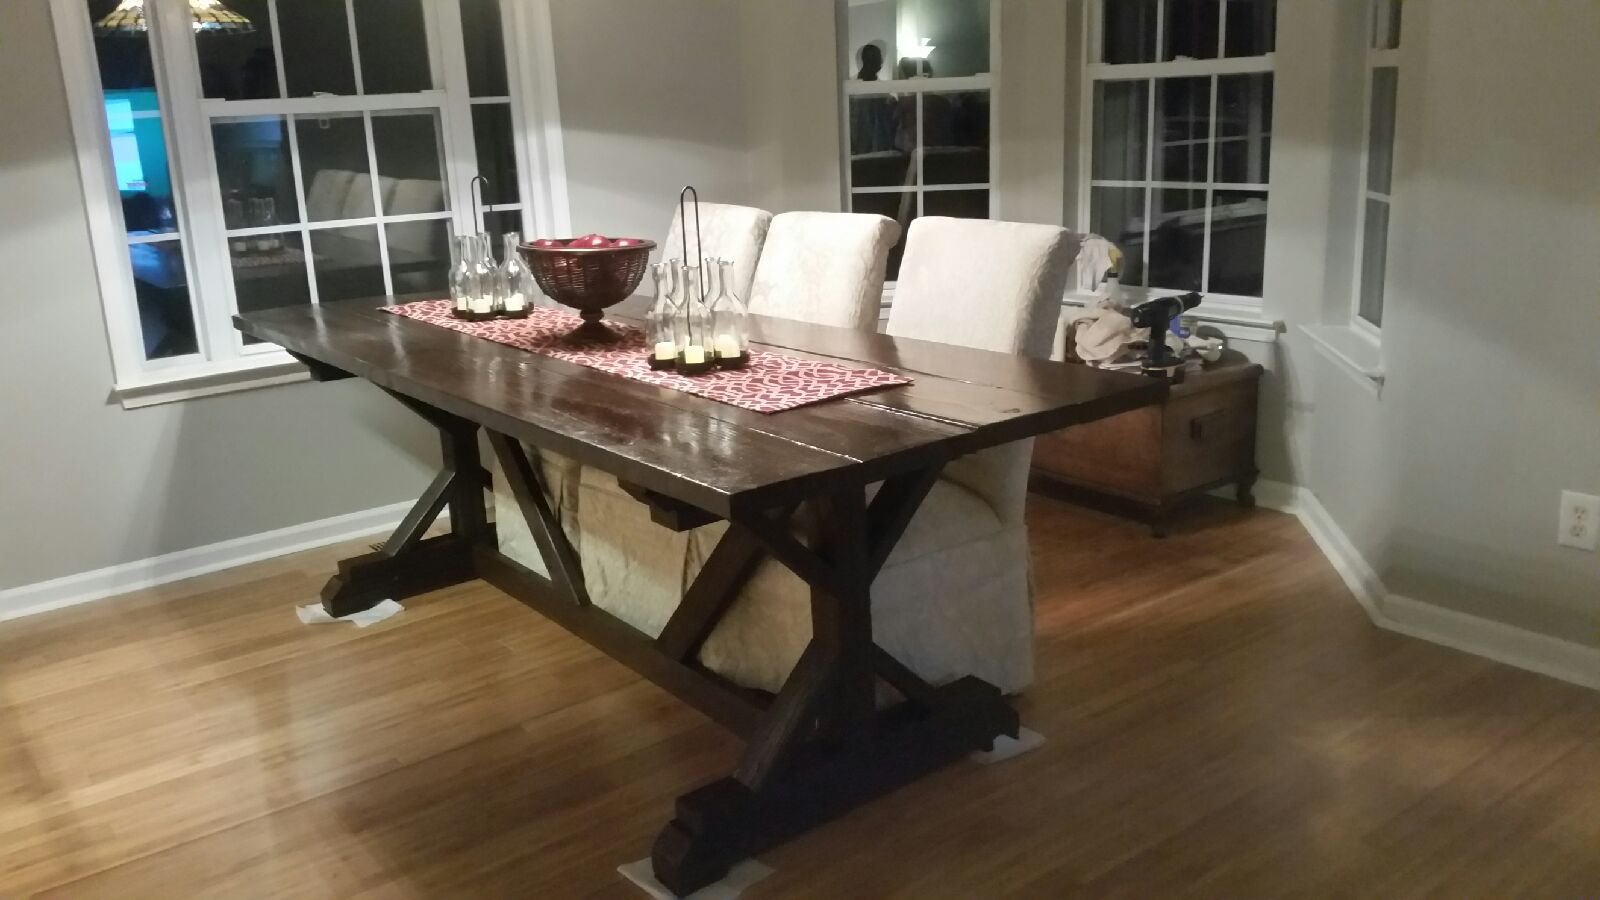
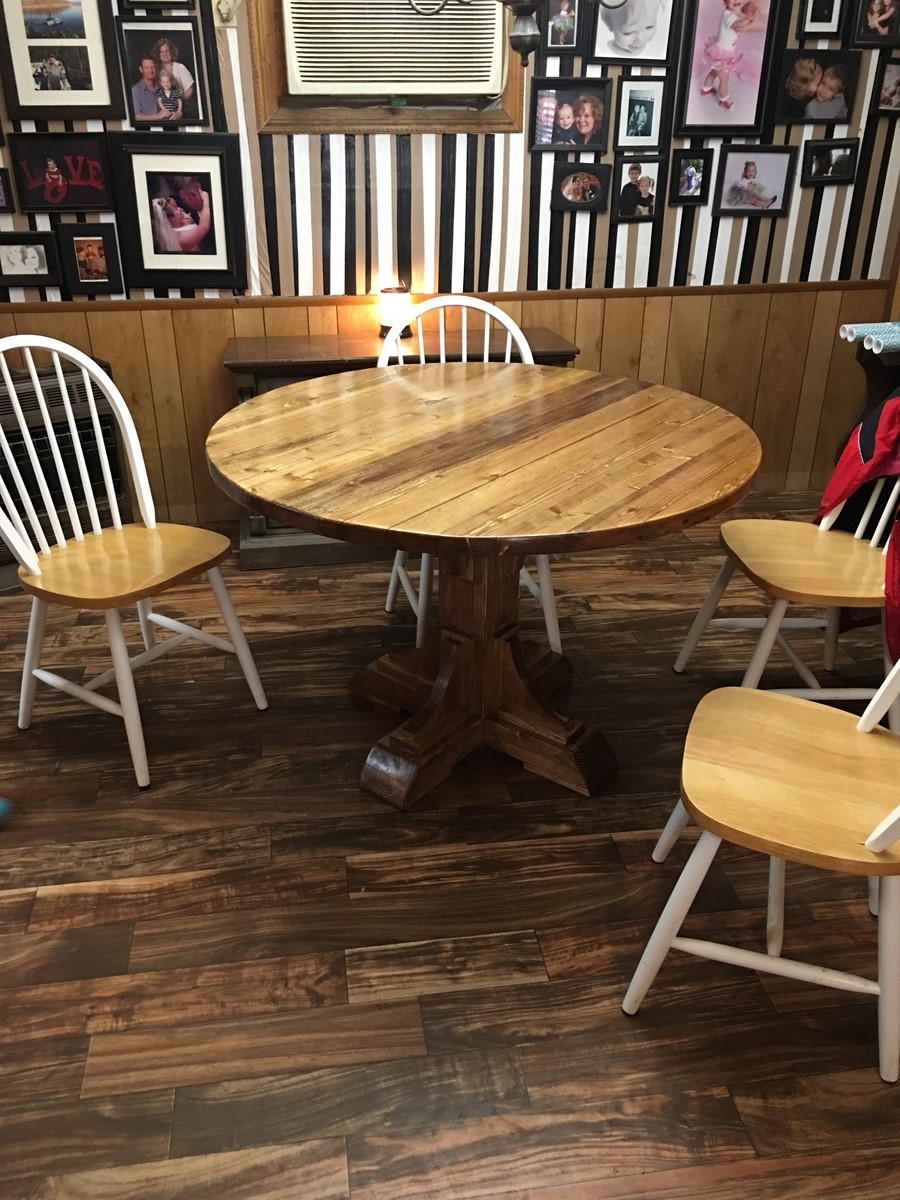
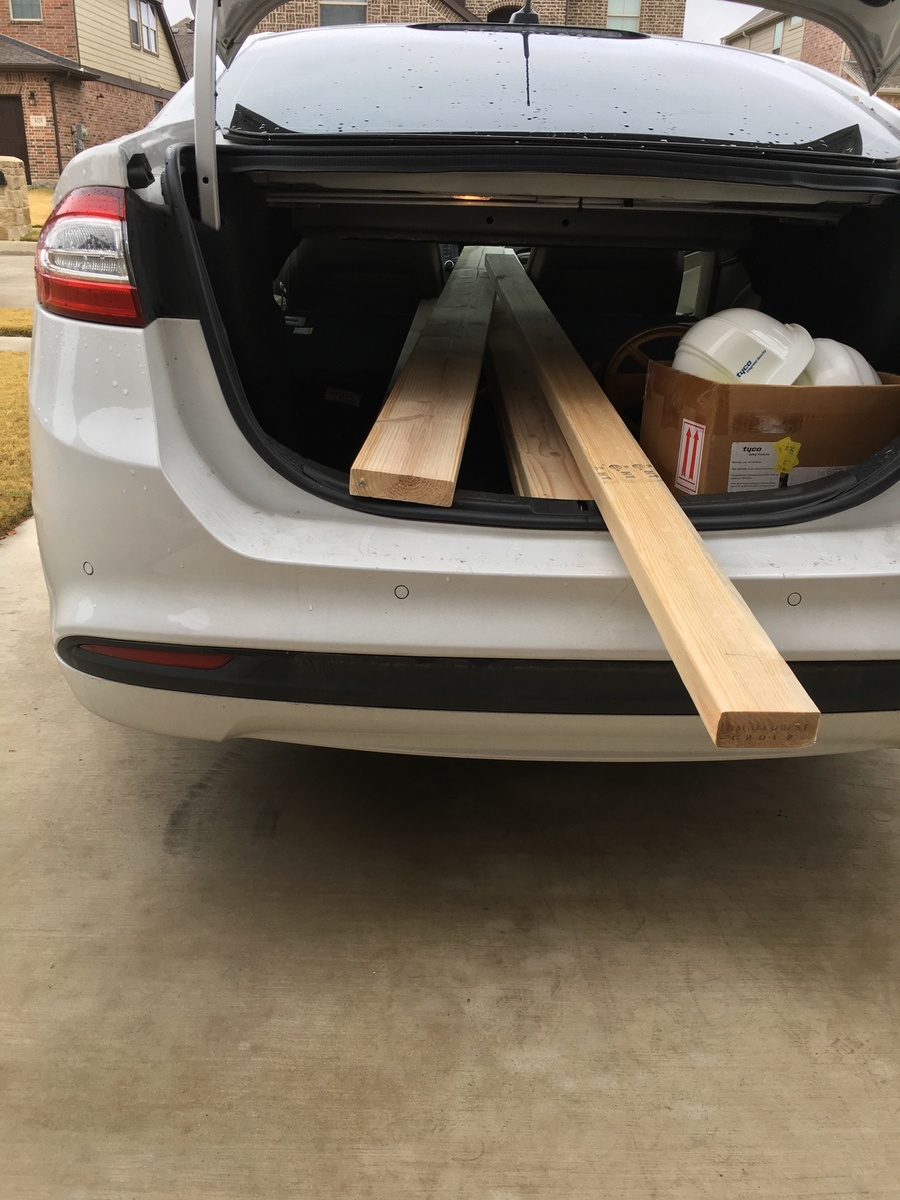
Saw this table after a few people did it themselves and absolutely loved the look. I decided on using the 4x4's for the stretchers because I really liked the heavy timber look it gave to the table. This is my biggest project so far and I'm very excited how it turned out. Now I just have to make the other bench to finish it all off.
Also have to give credit to http://tommyandellie.com/index.php/2012/01/13/new-and-improved-farmhous… - Definitely amazing step by step plans on here, I just modified it a little to add a little more space on the table top by adding another 1x8 in the middle
After I got the table done I saw the plans for the reclaimed soda crate caddy so I used some scrap wood to make a rooster centerpiece for napkins and silverware.
All in all I'm very happy with everything.


Sat, 11/23/2013 - 16:33
I used glue, pocket screws and a lot of clamps and luck
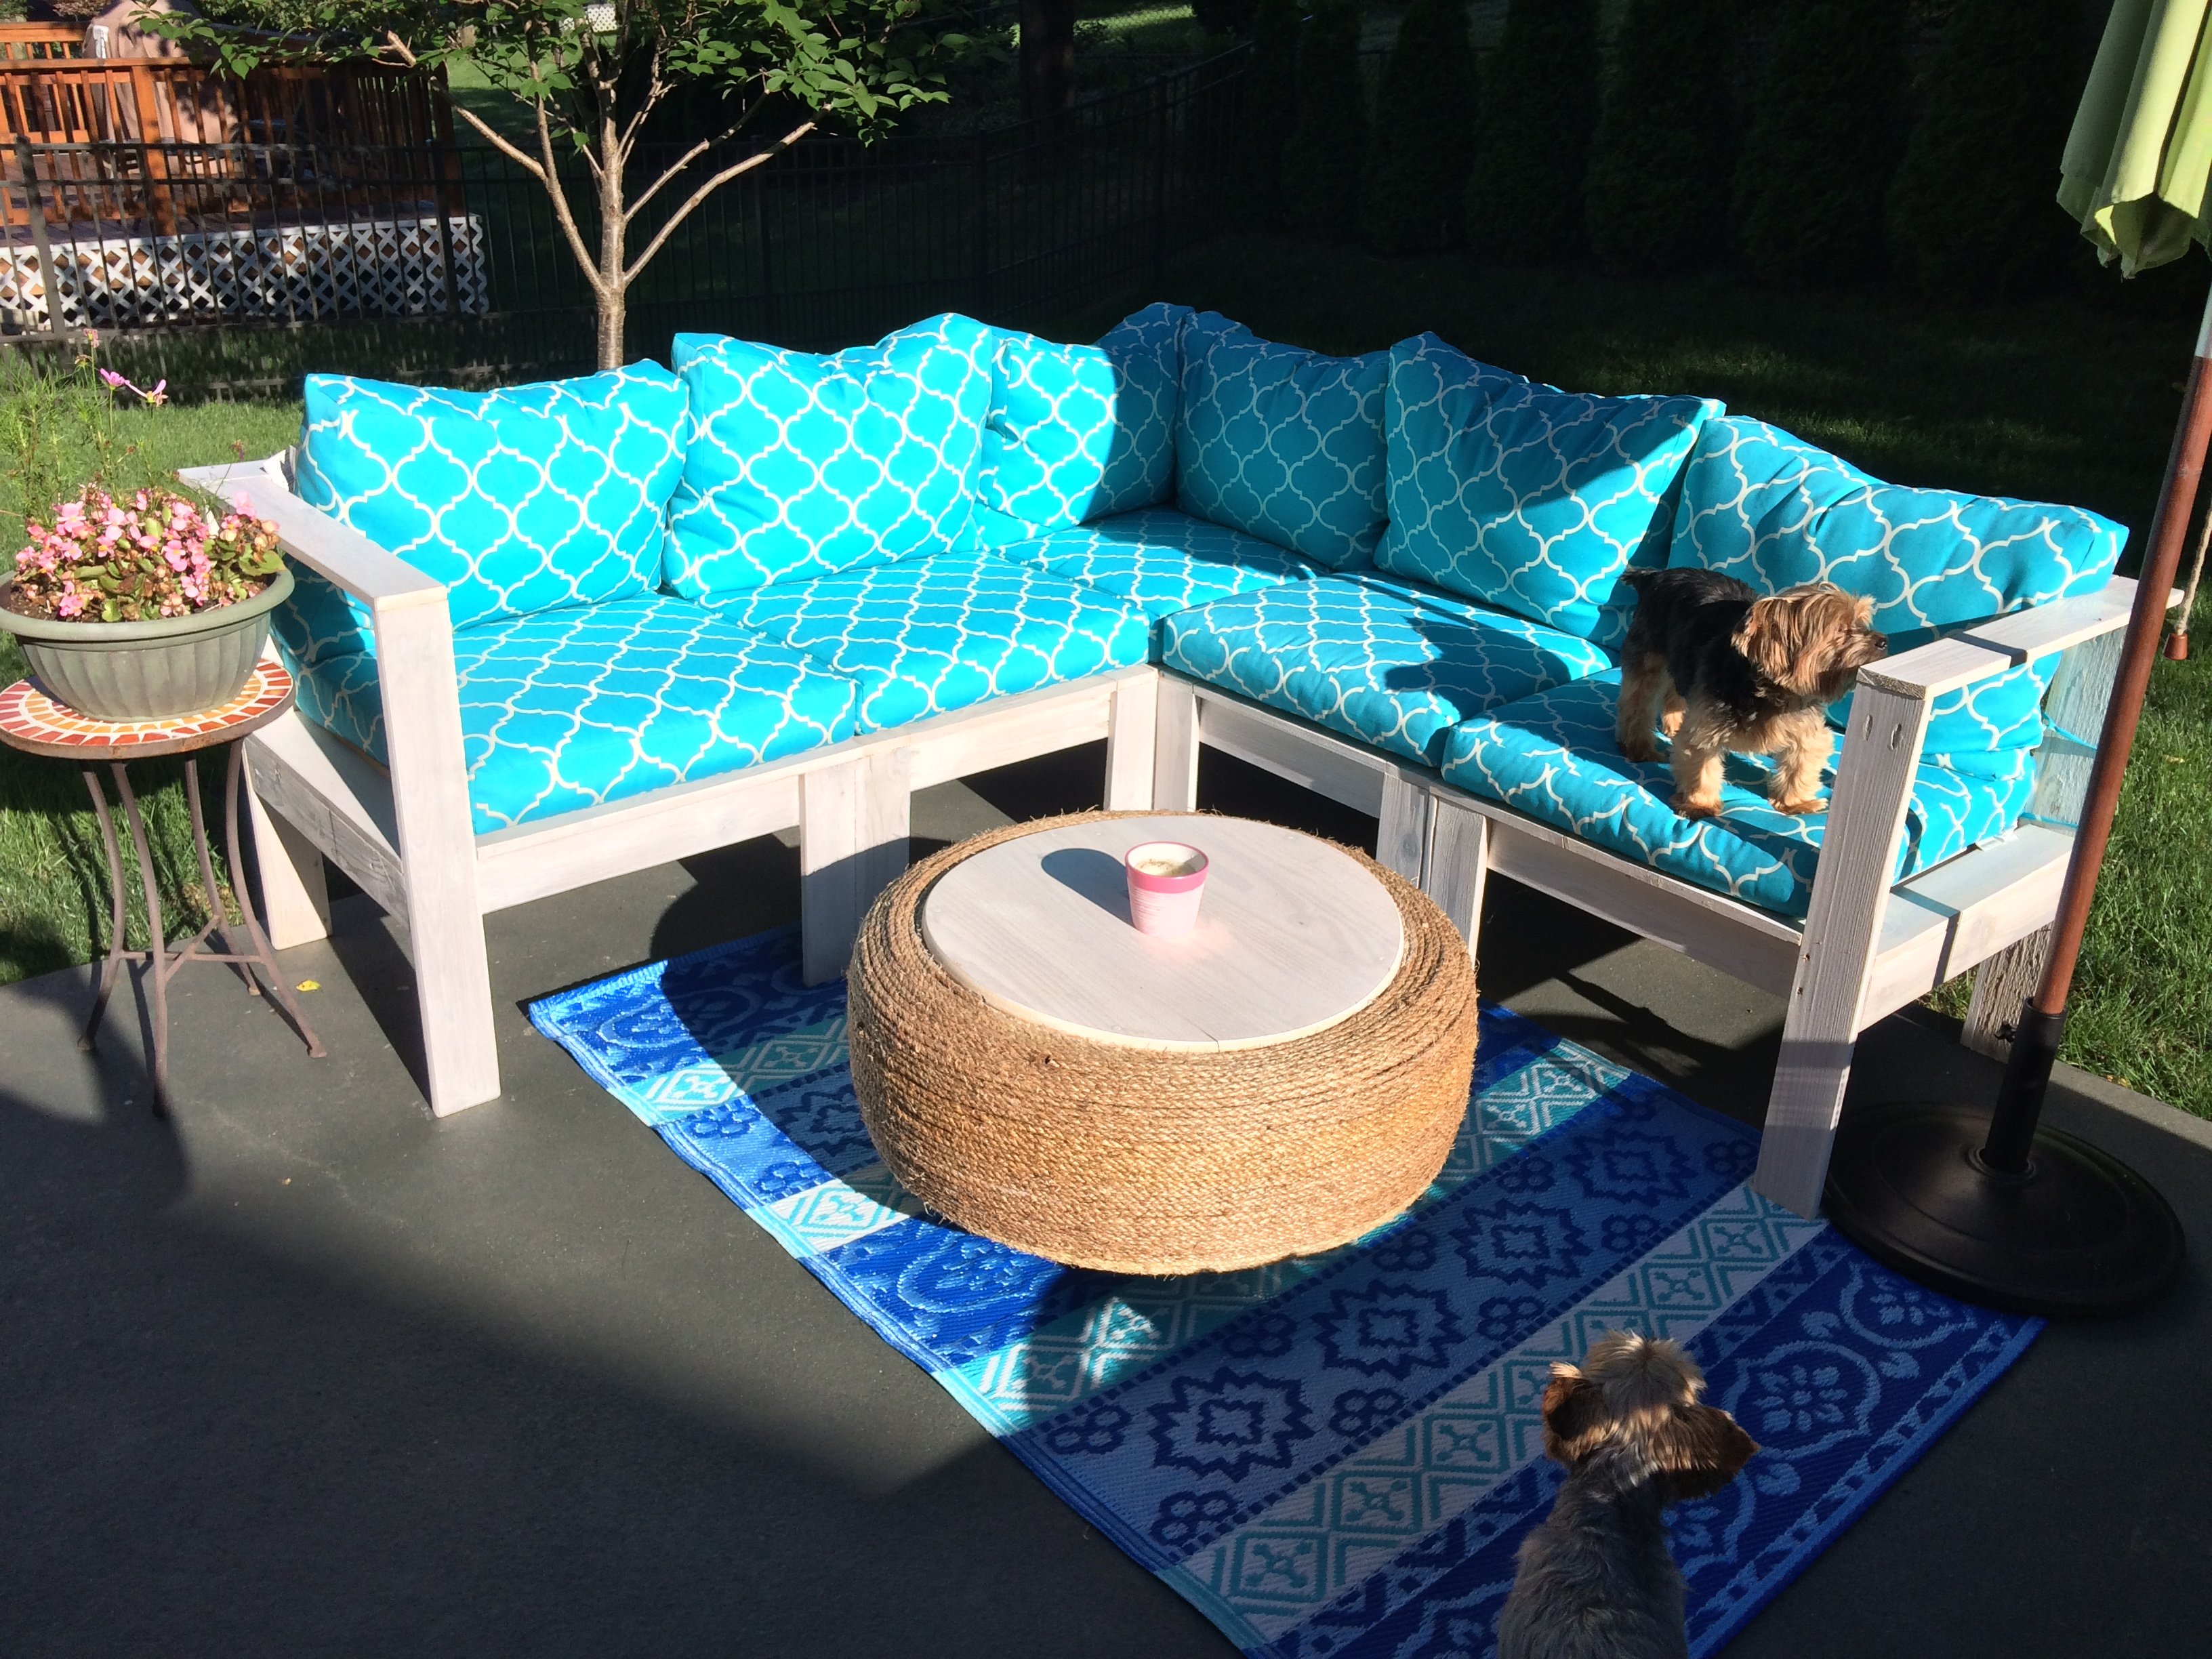
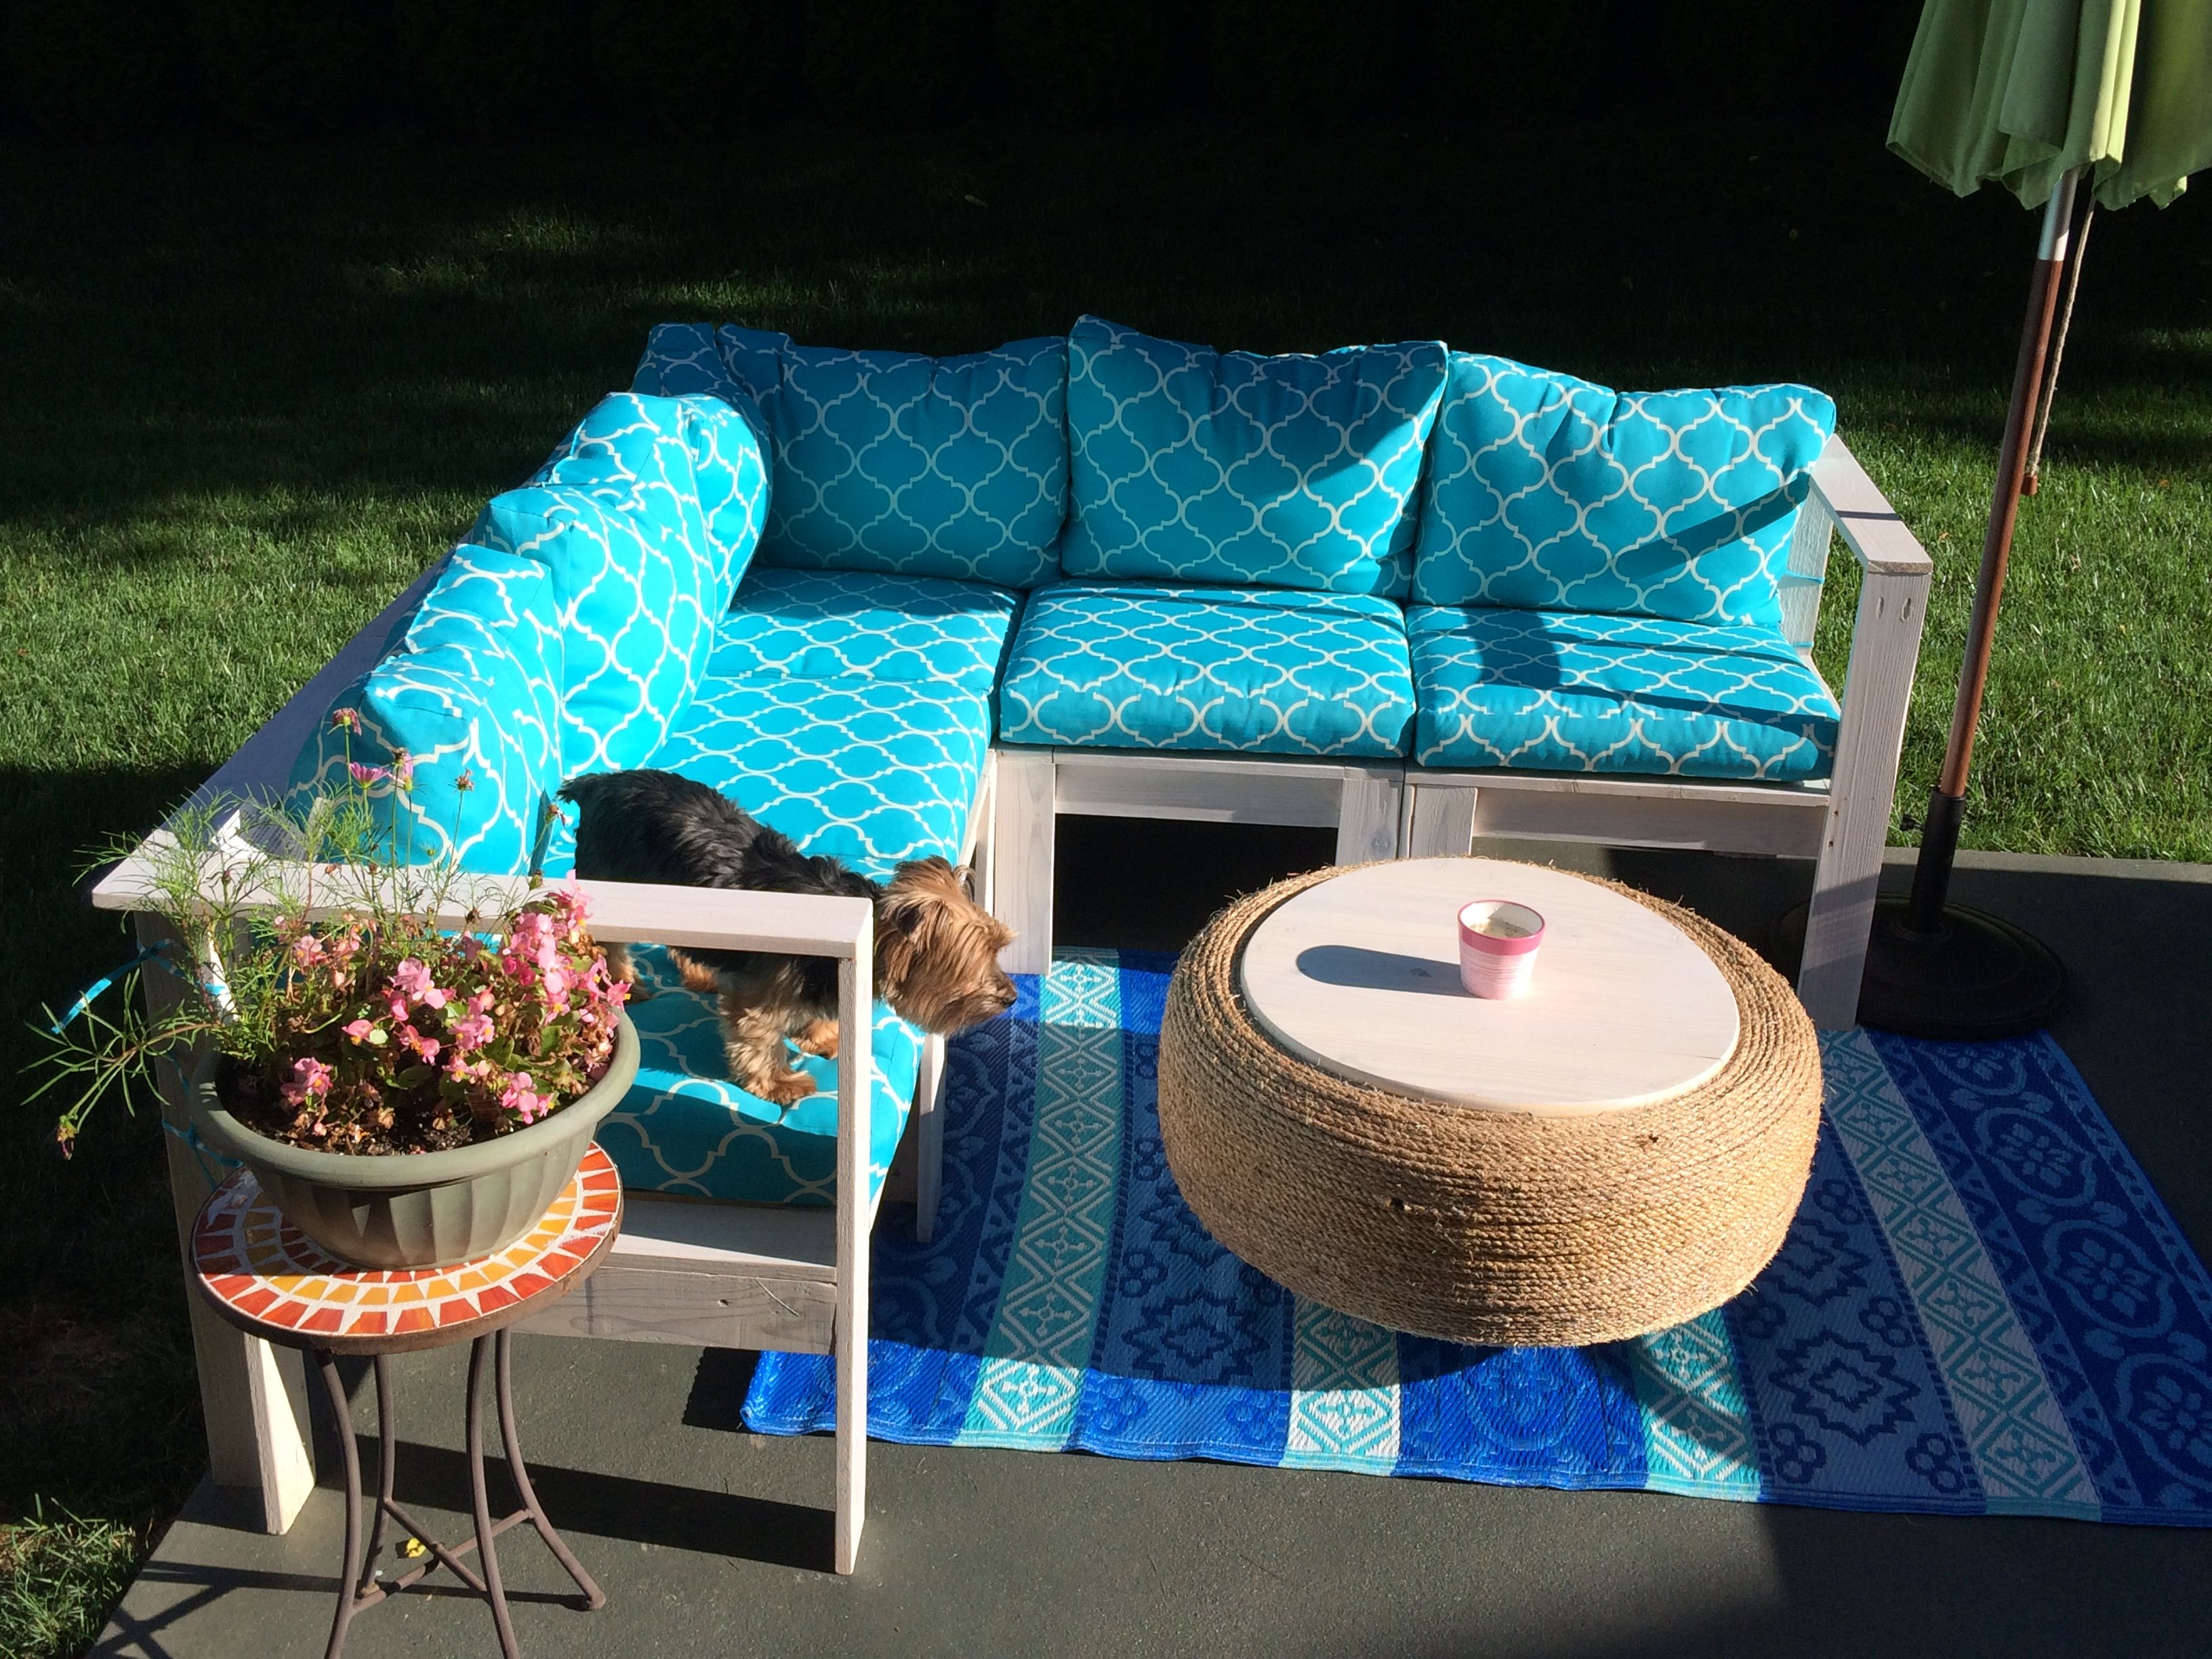
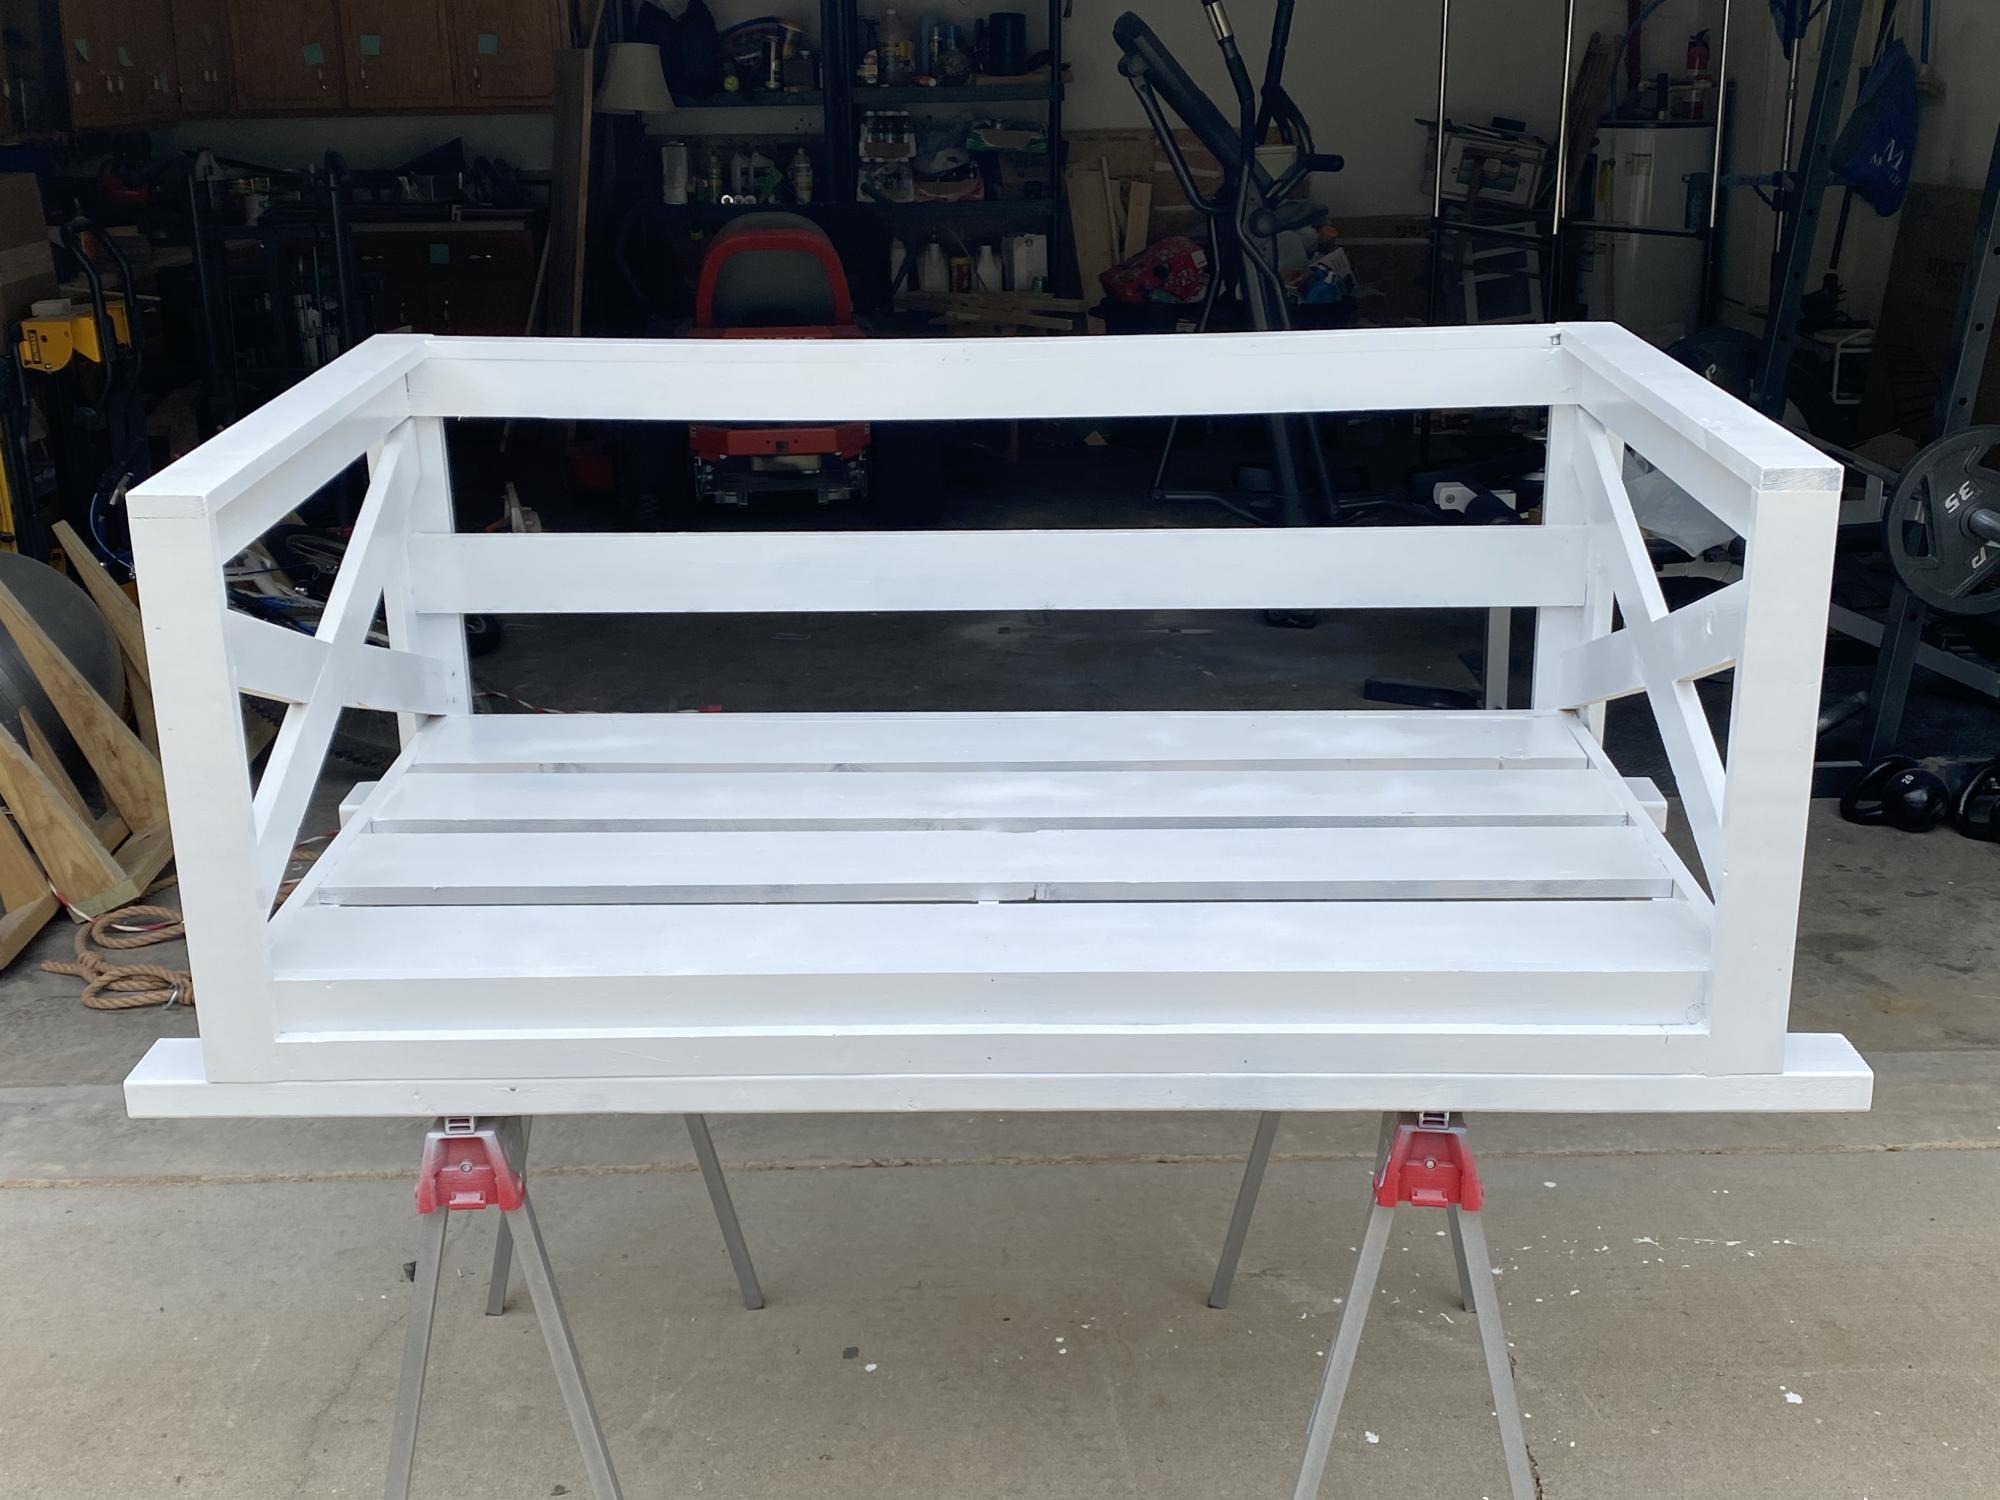
Completing this sectional was hard work and took us several weeks to finish (with full-time jobs and two toddlers under 4), but it was SO worth it! We used cedar 1x4s treated with Behr Semi-Translucent Deck Stain and Sealer in Pure White. The cushions are from Improvements Catalog, and they turned out to fit perfectly. The total price for the section with the cushions was around $700. We know if we had purchased it in a store that it would have cost much more, without being a customized the way we wanted it. The best part about sitting on our patio now is knowing that we did this ourselves! Thank you Ana for all the amazing plans!!
This is my first real project for someone other than family. I think it turned out pretty good. It’s a crib sized bed swing.
I really loved the outdoor daybed, but after discussing it with my husband we decided to go without the canopy feature. We, also resized the bed from a twin size to a toddler size (which happened to be almost the same dimensions as our love seat). In order to make the daybed without the canopy, I had to put the top pieces on last in order to have them go all the way from edge to edge. All in all, this was a super easy project, and I had a lot of fun doing it!
I got the crib mattress free of craigslist, and since a crib mattress is already covered with vinyl, I didn't do anything extra to waterproof it, and the fabric came from the home decor remnants section at our local fabric store for $4 a yard, which I applied a 40% coupon to. The throw pillows are not the ones we will be using, but I haven't made those yet, so these are just for looks :)


Mon, 06/06/2011 - 13:56
I love this! The fact that it's bench-sized, that it fits a waterproofed crib mattress, all of it! I'm totally doing something like this with the crib mattress we got secondhand.
Sat, 06/11/2011 - 00:13
I think now that I have done this one, I may do one with the canopy for my daughter's room... Ana has so many amazing plans, I have the hardest time making up my mind on anything! But, so far this has held up great.
Tue, 07/26/2011 - 11:33
Going to be making the outdoor daybed for my daughter this weekend and think this will make a very great reading bench for her room! We are going to make a bunch of throw pillows out of old sheets and just make it nice and comfy looking!
Tue, 07/26/2011 - 11:38
I absolutely love that idea, and the thought of re-using old sheets to make new pillows. For these ones, I used some fabric I had around and a bag of fill, but when I ran out I was in search for old teddy bears no longer being played with :) I would love to see pictures when you are finished!
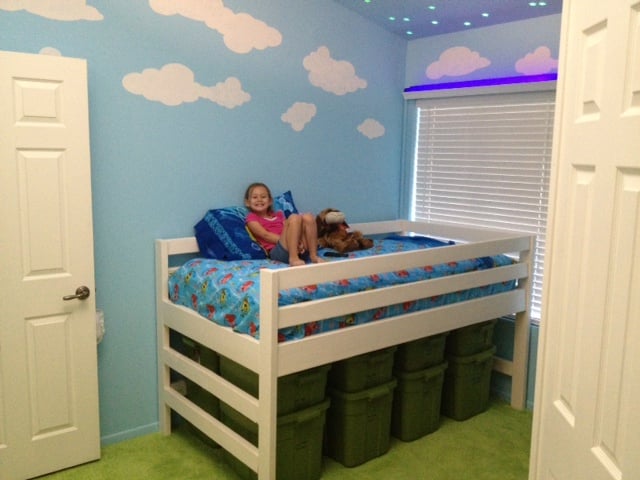
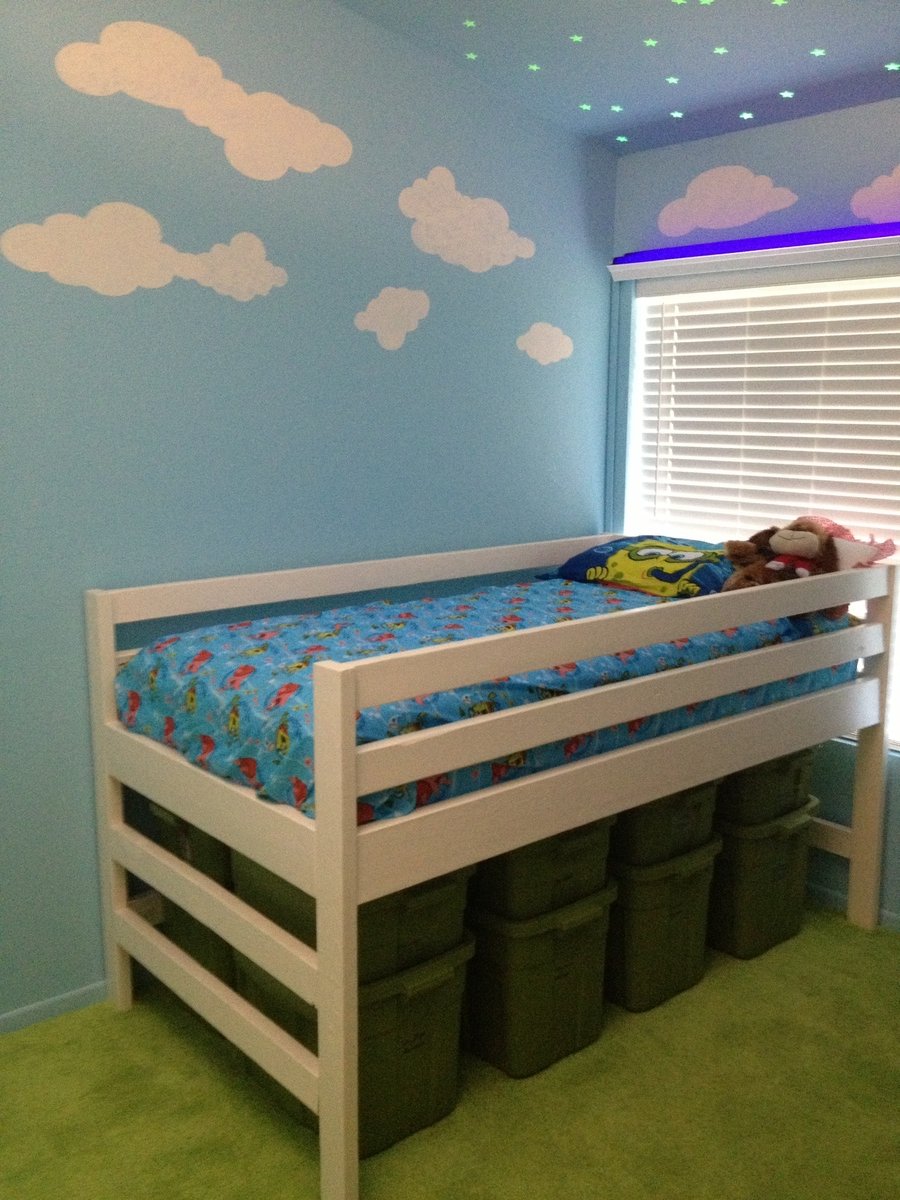
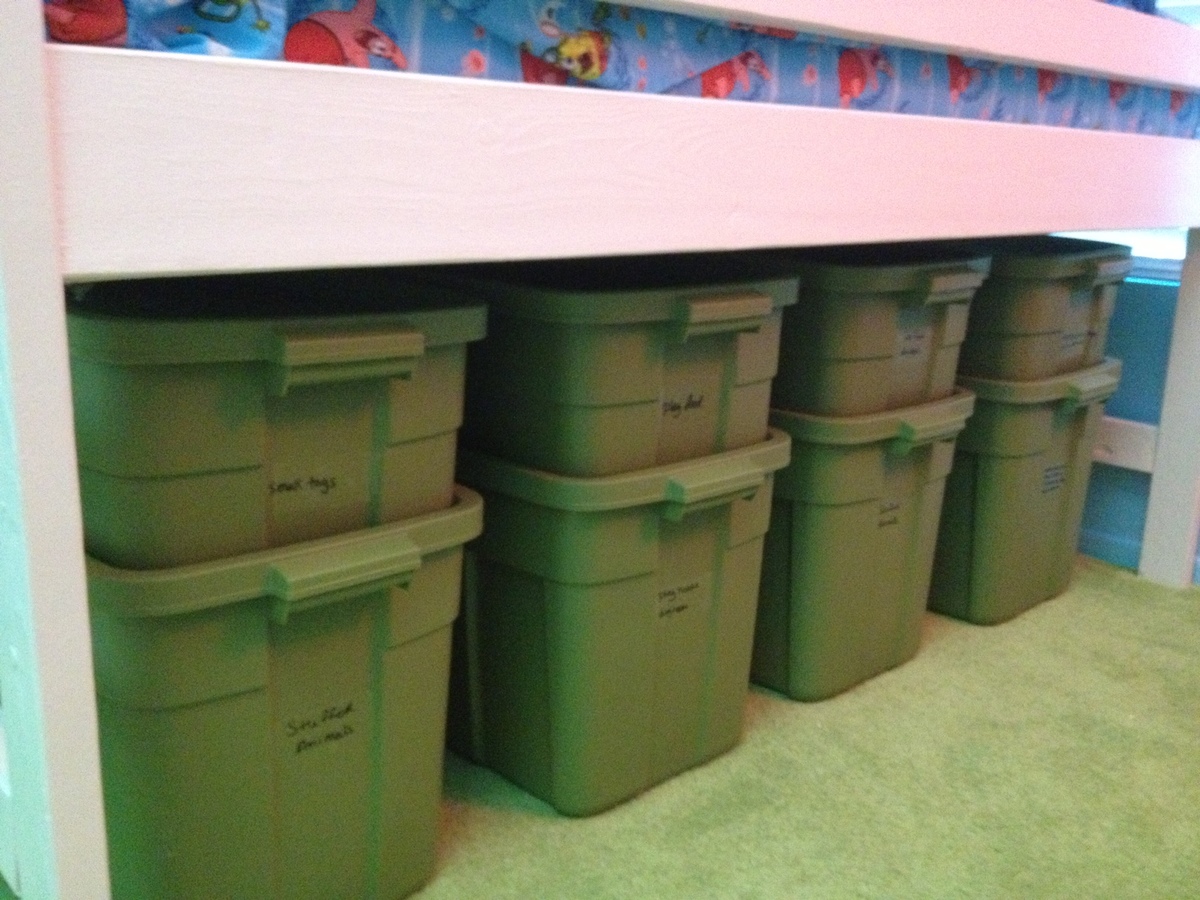
I used Ana's Camp Loft Bed plans but without stairs and lower to the ground. Our room is super small and there wasn't enough room for stairs. We also wanted to be able to lift her into the bed in case she falls asleep on our laps, etc. Our daughter is 5 and the ladder works fine. We needed as much storage for toys, etc. as possible we made it 44-1/2"H - that left 26"H underneath, just high enough to stack one 18 & one 10 gallon Rubbermaid container underneath (Home Depot). x7 = 196 total gallons of storage! She loves to lay sideways (with Shorty2) and a pillow to her back to watch SpongeBob on the TV mounted on the opposite wall.
I kept blowing out the pocket holes on the ends of the boards when I used the Kreg screws that I got at Lowes. They have a slightly larger washer head. I am a cabinet installer by trade so I used some other pocket screws (which have a trimmer head) I had on hand where I could. Their trimmer head didn't blow out as easily. For the spots that I had to use the longer Kreg screws I just grinded off the "washer" outer ring of the screw using my bench grinder. After doing that, they worked fine.
I reinforced everywhere I could (& where you couldn't see them) with L brackets. Especially under each step of the ladder.
I was originally going to put a curtain across the bottom but I did not allow enough clearance for the tubs to be slid out. It probably would have just ended up being a hassle to close and just left open all the time anyway.
My wife got the honor of painting - I hate painting!
Thanks Ana...Good Luck!
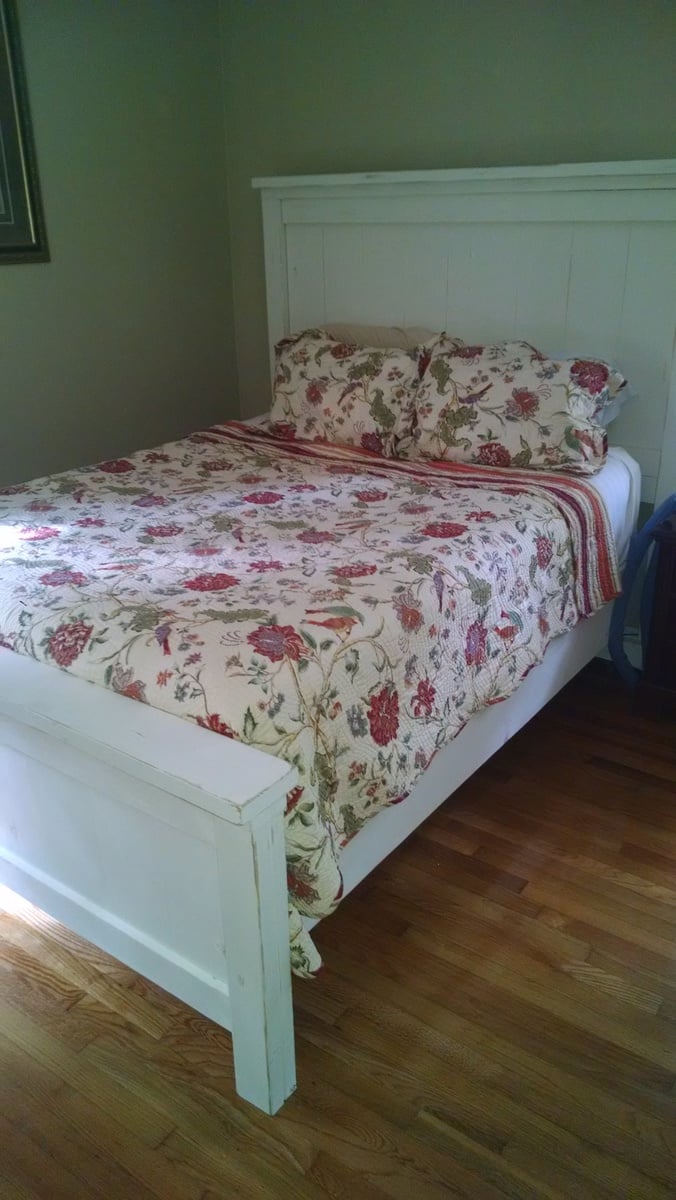
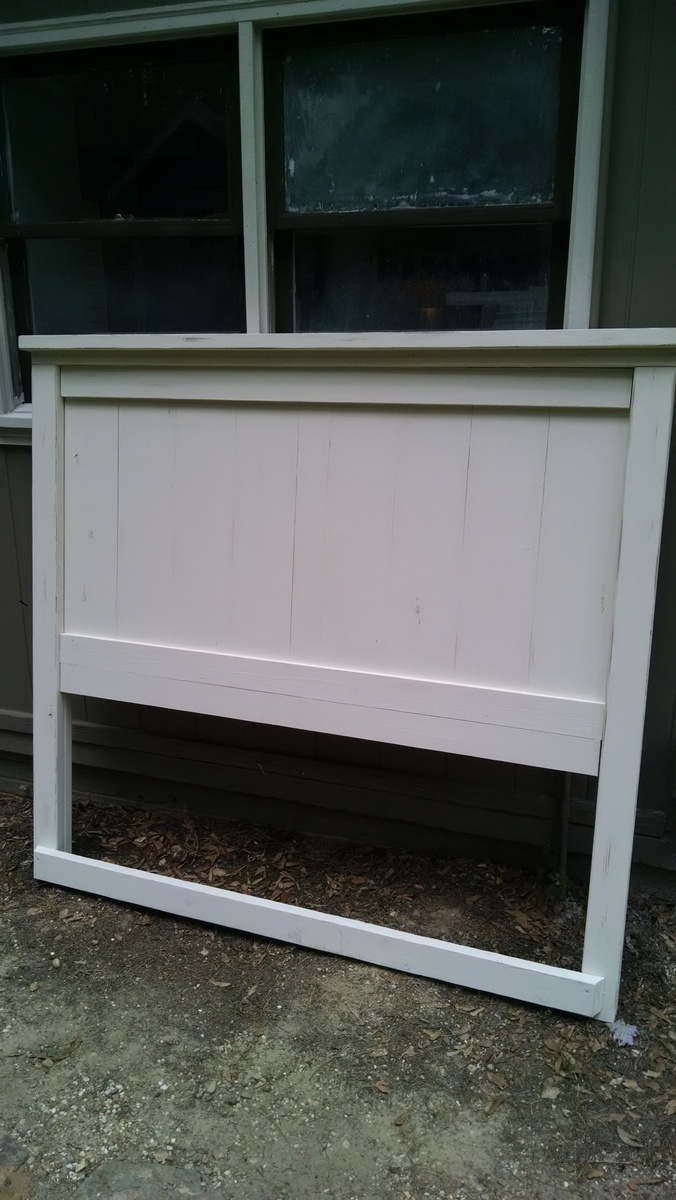
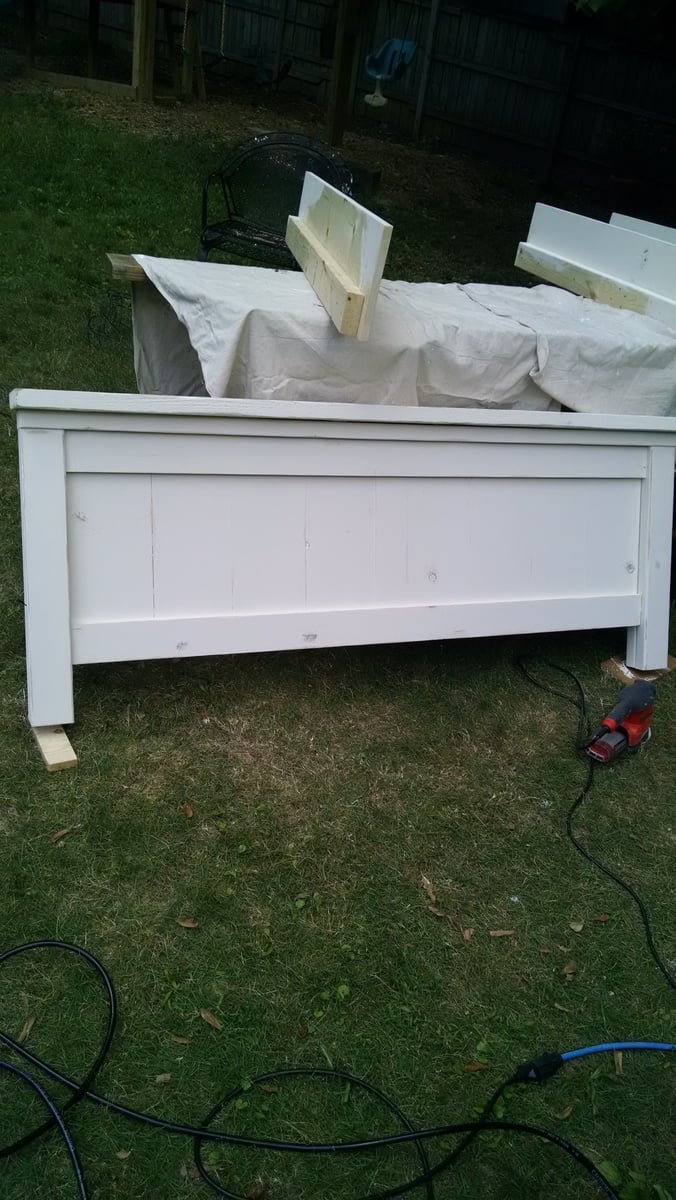
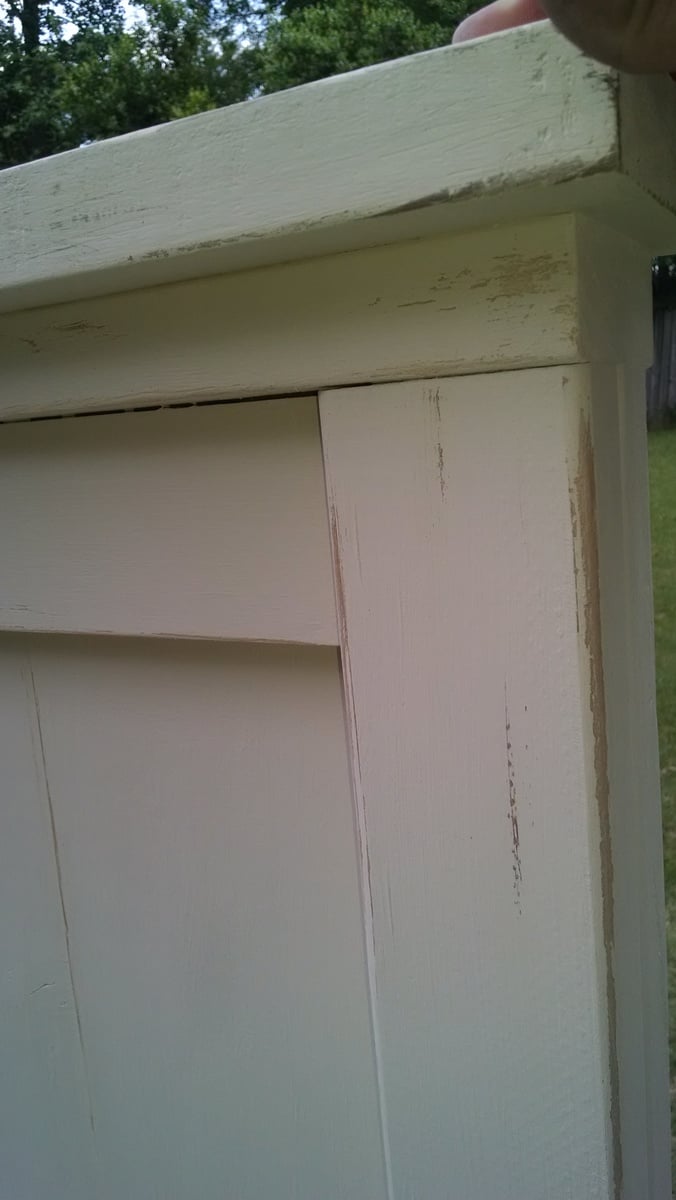
Modified for taller headboard and box springs. Also glued and screwed 2x4s together for post. Hard to find dry untreated 4x4 post. Antique white homemade chalk paint.

Rustic Simple Farmhouse Table
60”L x 36”W x 32”H
top: (3) 2x12”
legs: (4) 4x4
Frame: 2x4s
secured with pocket screws
varathane Kona stain
3 coats gloss poly sanded between each coat (final sand with 600 grit)


Built this cupboard for a customer from sycamore we reclaimed from her barn. The windows were also found in the barn .

Aside from a small train table and a vegetable garden, this is my first furniture build! Sadly, I was not able to move past the first step without the help of my husband. I chose this chair because it seemed like a very simple build, but it was quite challenging, even with the help of my hubby.
This chair cost me about $34 to build. I had to buy screws, a square, top coat, and eventually a right angle clamp. The next chair should cost me $4 plus the cost of the paint.
On the next chair, we will definitely switch up steps 6 and 7. It was very difficult to screw in the screws on the very back seat slats once we attached the back slats. Also, side note, it didn't saw in step 6 or 7 which size screw to use, so we used the 1 1/4 inch screws. We used a size 8 in width. My hubby thinks we should have used a 6. I didn't even know screws came in different lengths AND widths!
Our chair ended up a bit loopsided and rough in some areas. I wish I would have sanded it more before painting it. Also, I was way off on attaching the second back chair leg, so I had to cut off a little bit of the left over 1x2 and glue and screw it to the bottom of the leg (see pic below). Then, I shaved off some of the top of that leg with my mitre saw.
Also, I initially tried making this with pocket hole screws, but quickly learned that that level of woodmaking was above my pay grade. I switched back to the 2 inch screws and it was just fine. We used wood filler to hide the screws as much as possible.
Despite how difficult this first build was, and despite how imperfect it is, I am totally in love with the chair and with woodmaking! My husband and I really bonded and enjoyed our time together making this. My 2 year old daughter just loves it (and it didn't break when my children sat on it!). I've already bought the wood for the second chair and, after that, have plans to move on to the Elementary Trestle Table!


Wed, 06/08/2011 - 19:43
Hi - I also thought this would be an easy build for my first project but it wasn't!! I also had a hard time keeping the pieces together (so they could be attached) and I kept having to check where I screwed previously, so I wouldn't put another screw in the same path as the previous one. Nice job and love the dedication it takes to fix and see through things to the end.
I'm so thankful for these plans! I love how these beds turned out, my daughters love them too! Whenever they have friends come over, this is the first place all of them want to go (not necessarily a good thing, I know).
I wrote about the project on my blog: sharethepants.blogspot.com
This is my third project that I've attempted since finding this amazing website and it's certainly my favorite!
I ended up leaving off the pergola due to an overactive climbing two year old. We are planning on adding some additional decorations as we have ideas. Mailbox and house numbers on on their way.

Thu, 07/25/2013 - 16:18
Wow, this looks super! The craftsman details look awesome, and I love the colors!
In reply to Great craftsman style! by JoanneS
Thu, 07/25/2013 - 18:57
I thought our color scheme might turn out odd, but I love it. I was surprised by how many other things I've seen with these color combinations since we put it together!

Fri, 07/26/2013 - 22:26
Oh, and I love the carpet on the stairs too! Ours are getting dirty and thrashed, it's just what we need.
In reply to Oh, and I love the carpet on by birdsandsoap
Fri, 07/26/2013 - 23:37
I can't tell you how great your plans are! I am so impressed by all the details you put into it. I changed some things (like paneling instead of the charming 1X3's and 1X4's, and leaving the back open) but I was so impressed by how everything came together--especially the stairs. You did a fantastic job.
Super easy and adds such a nice touch!

I used recycled oak to build wagons for four kids that year. My son Dakota, his cousins Colt and JoJo. the last one I gave to a boy with cerebral palsy who was being raised by his father and they lost everything to a fire just before Christmas. That is him in the wagon
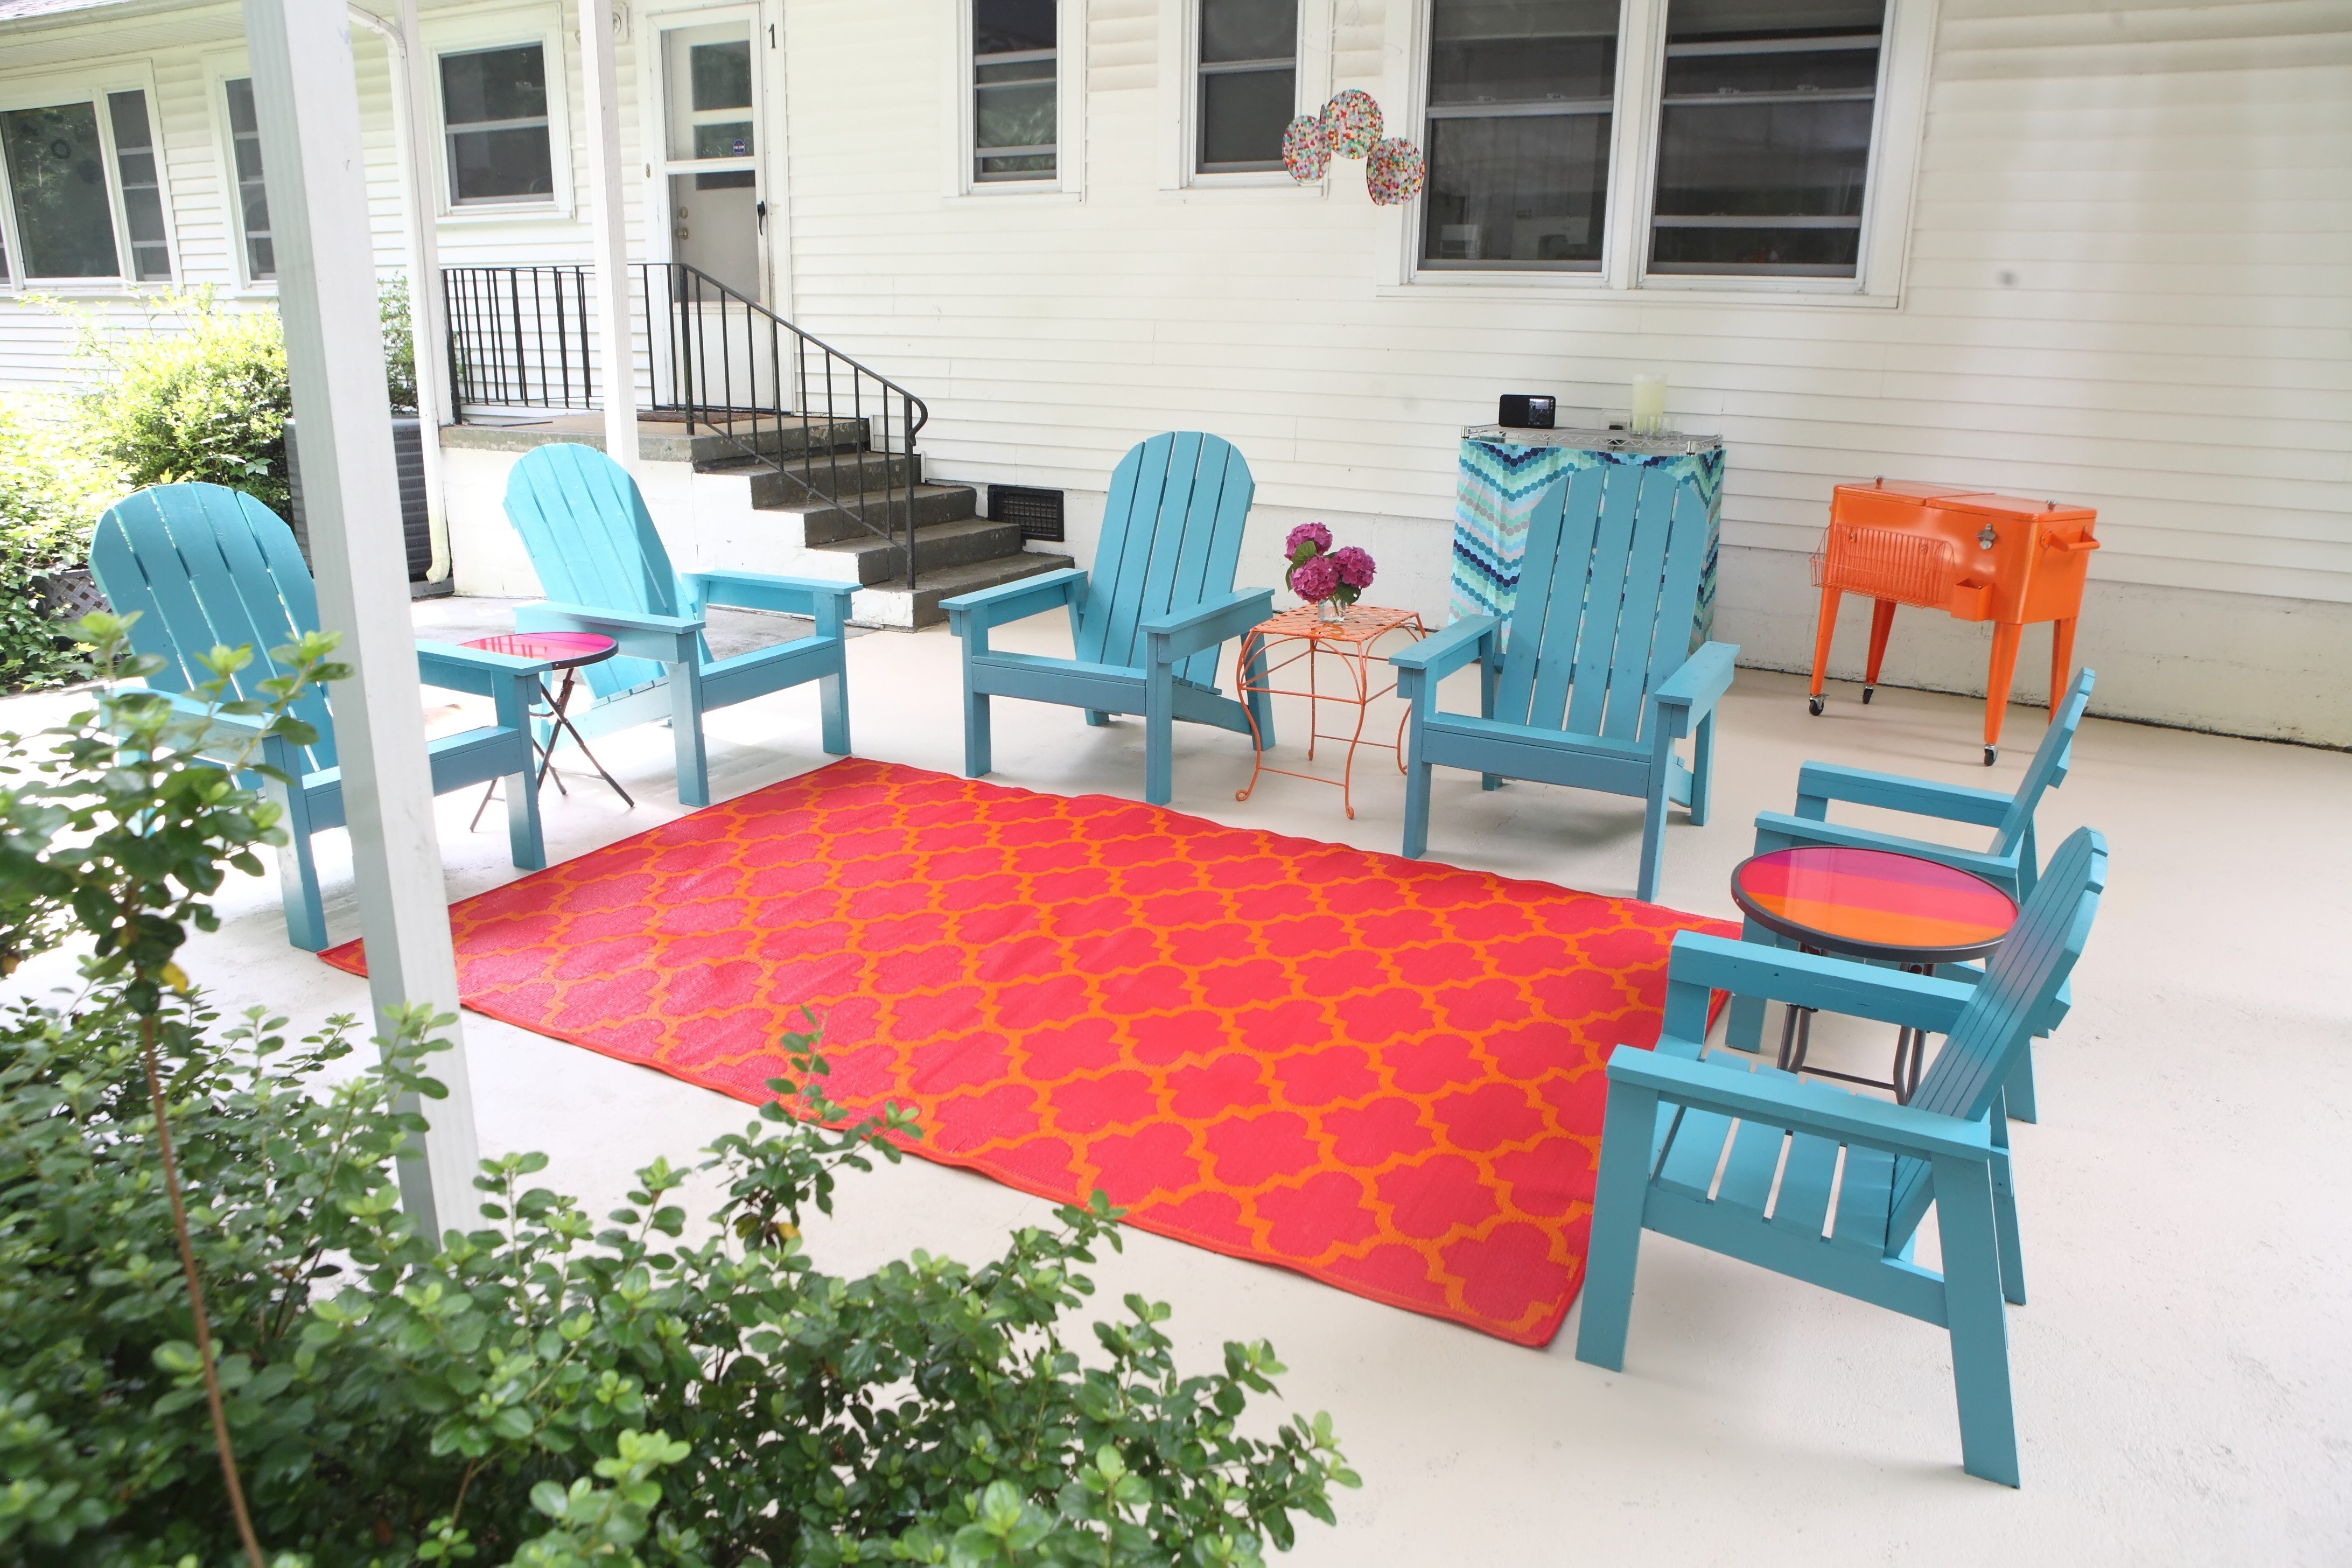
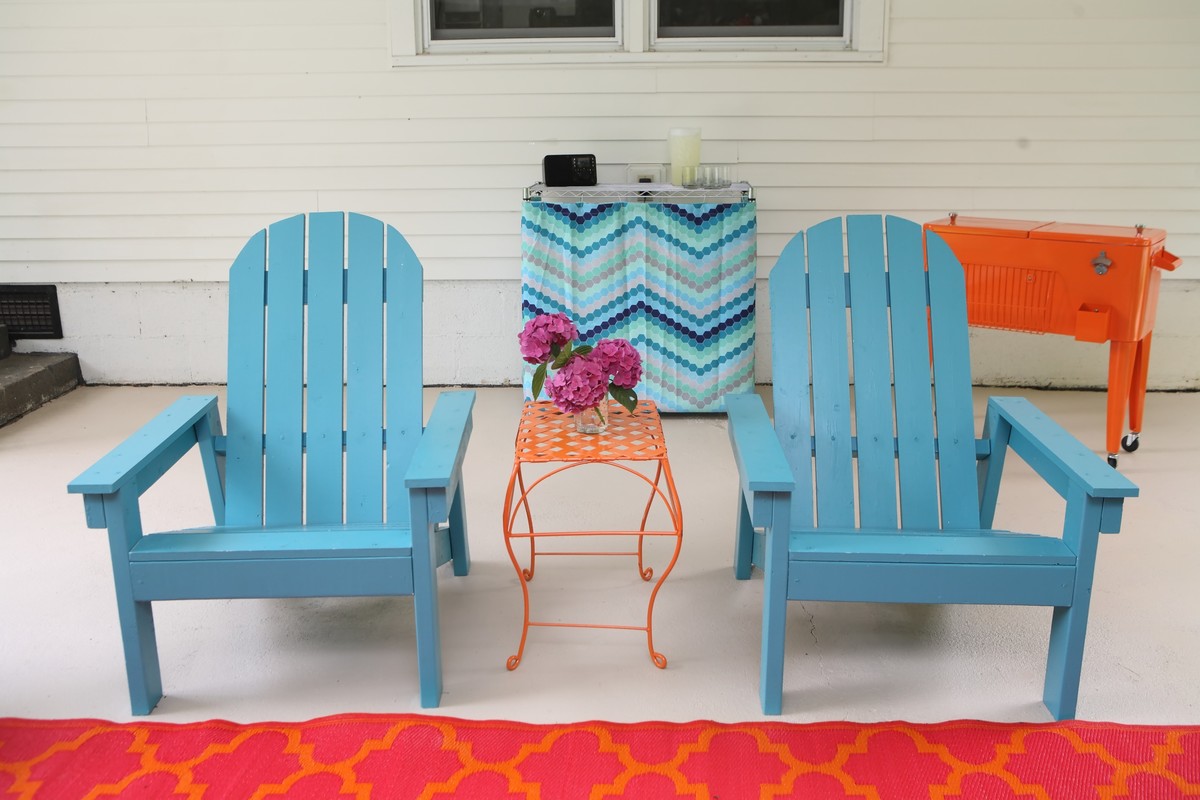
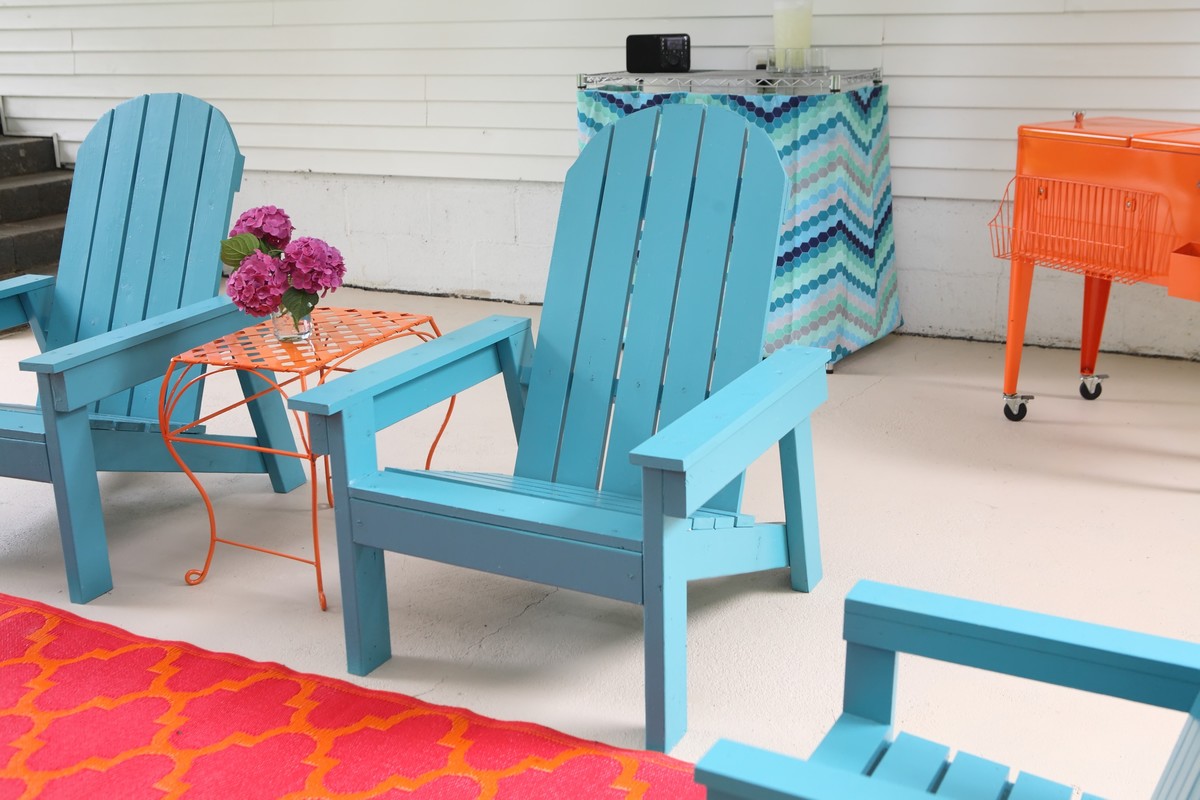
I pulled up the ancient green carpet on our patio, gave away our old cheap rusted table and chairs, and built four adult-sized Adirondack chairs from the Home Depot DIH plans and two child-sized ones from the plans in Ana's book. All are painted in Olympic's Schooner. This took forever, but I love the result! A friend dubbed it "the partio." :)
Sat, 07/27/2013 - 13:47
This is absolutely beautiful! Love your color combination. Great job!
Sat, 07/27/2013 - 14:08
This is awesome. Colors you choose is really good. http://www.assignmentshelptutors.com


Comments
Ana White Admin
Tue, 03/15/2022 - 14:13
Sweet!
So fun and bright, love it!