Community Brag Posts
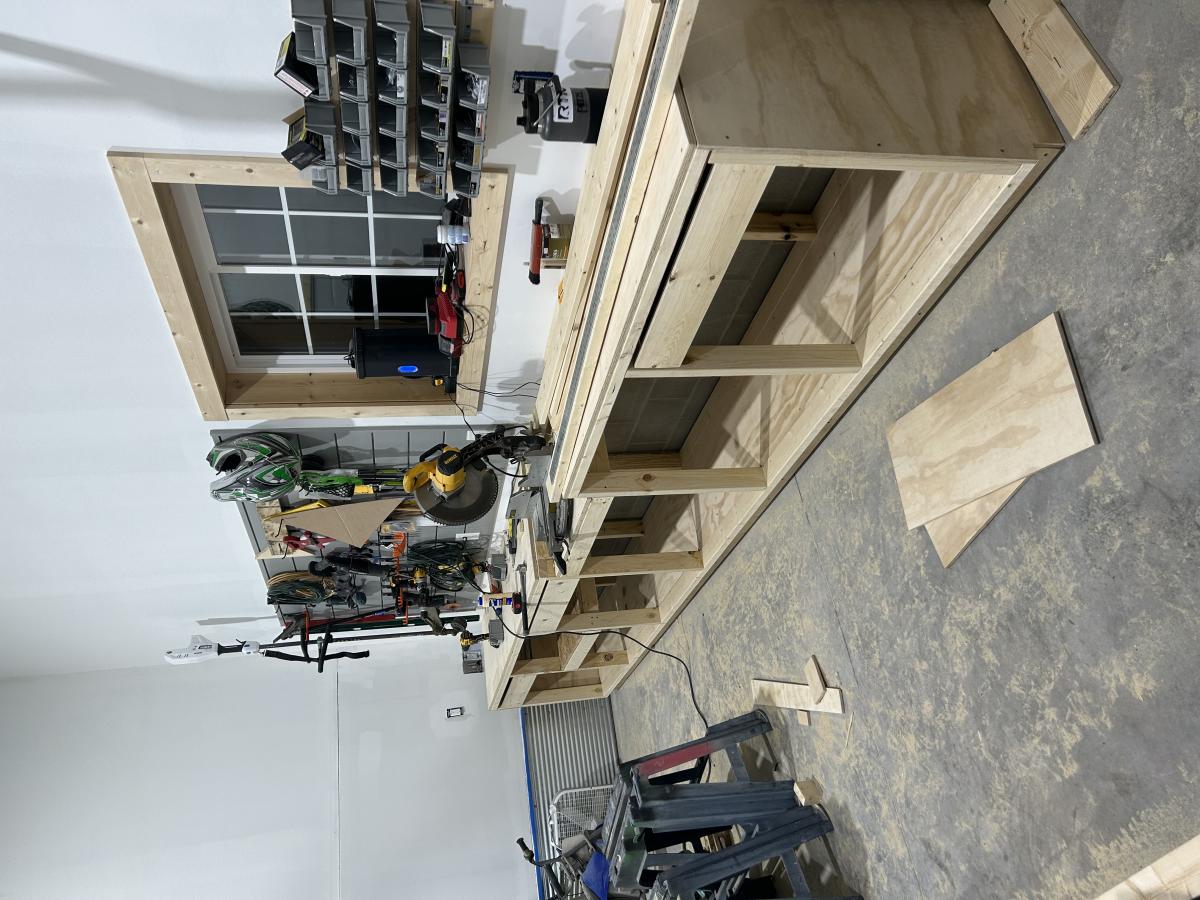
Workbench w/Mitre
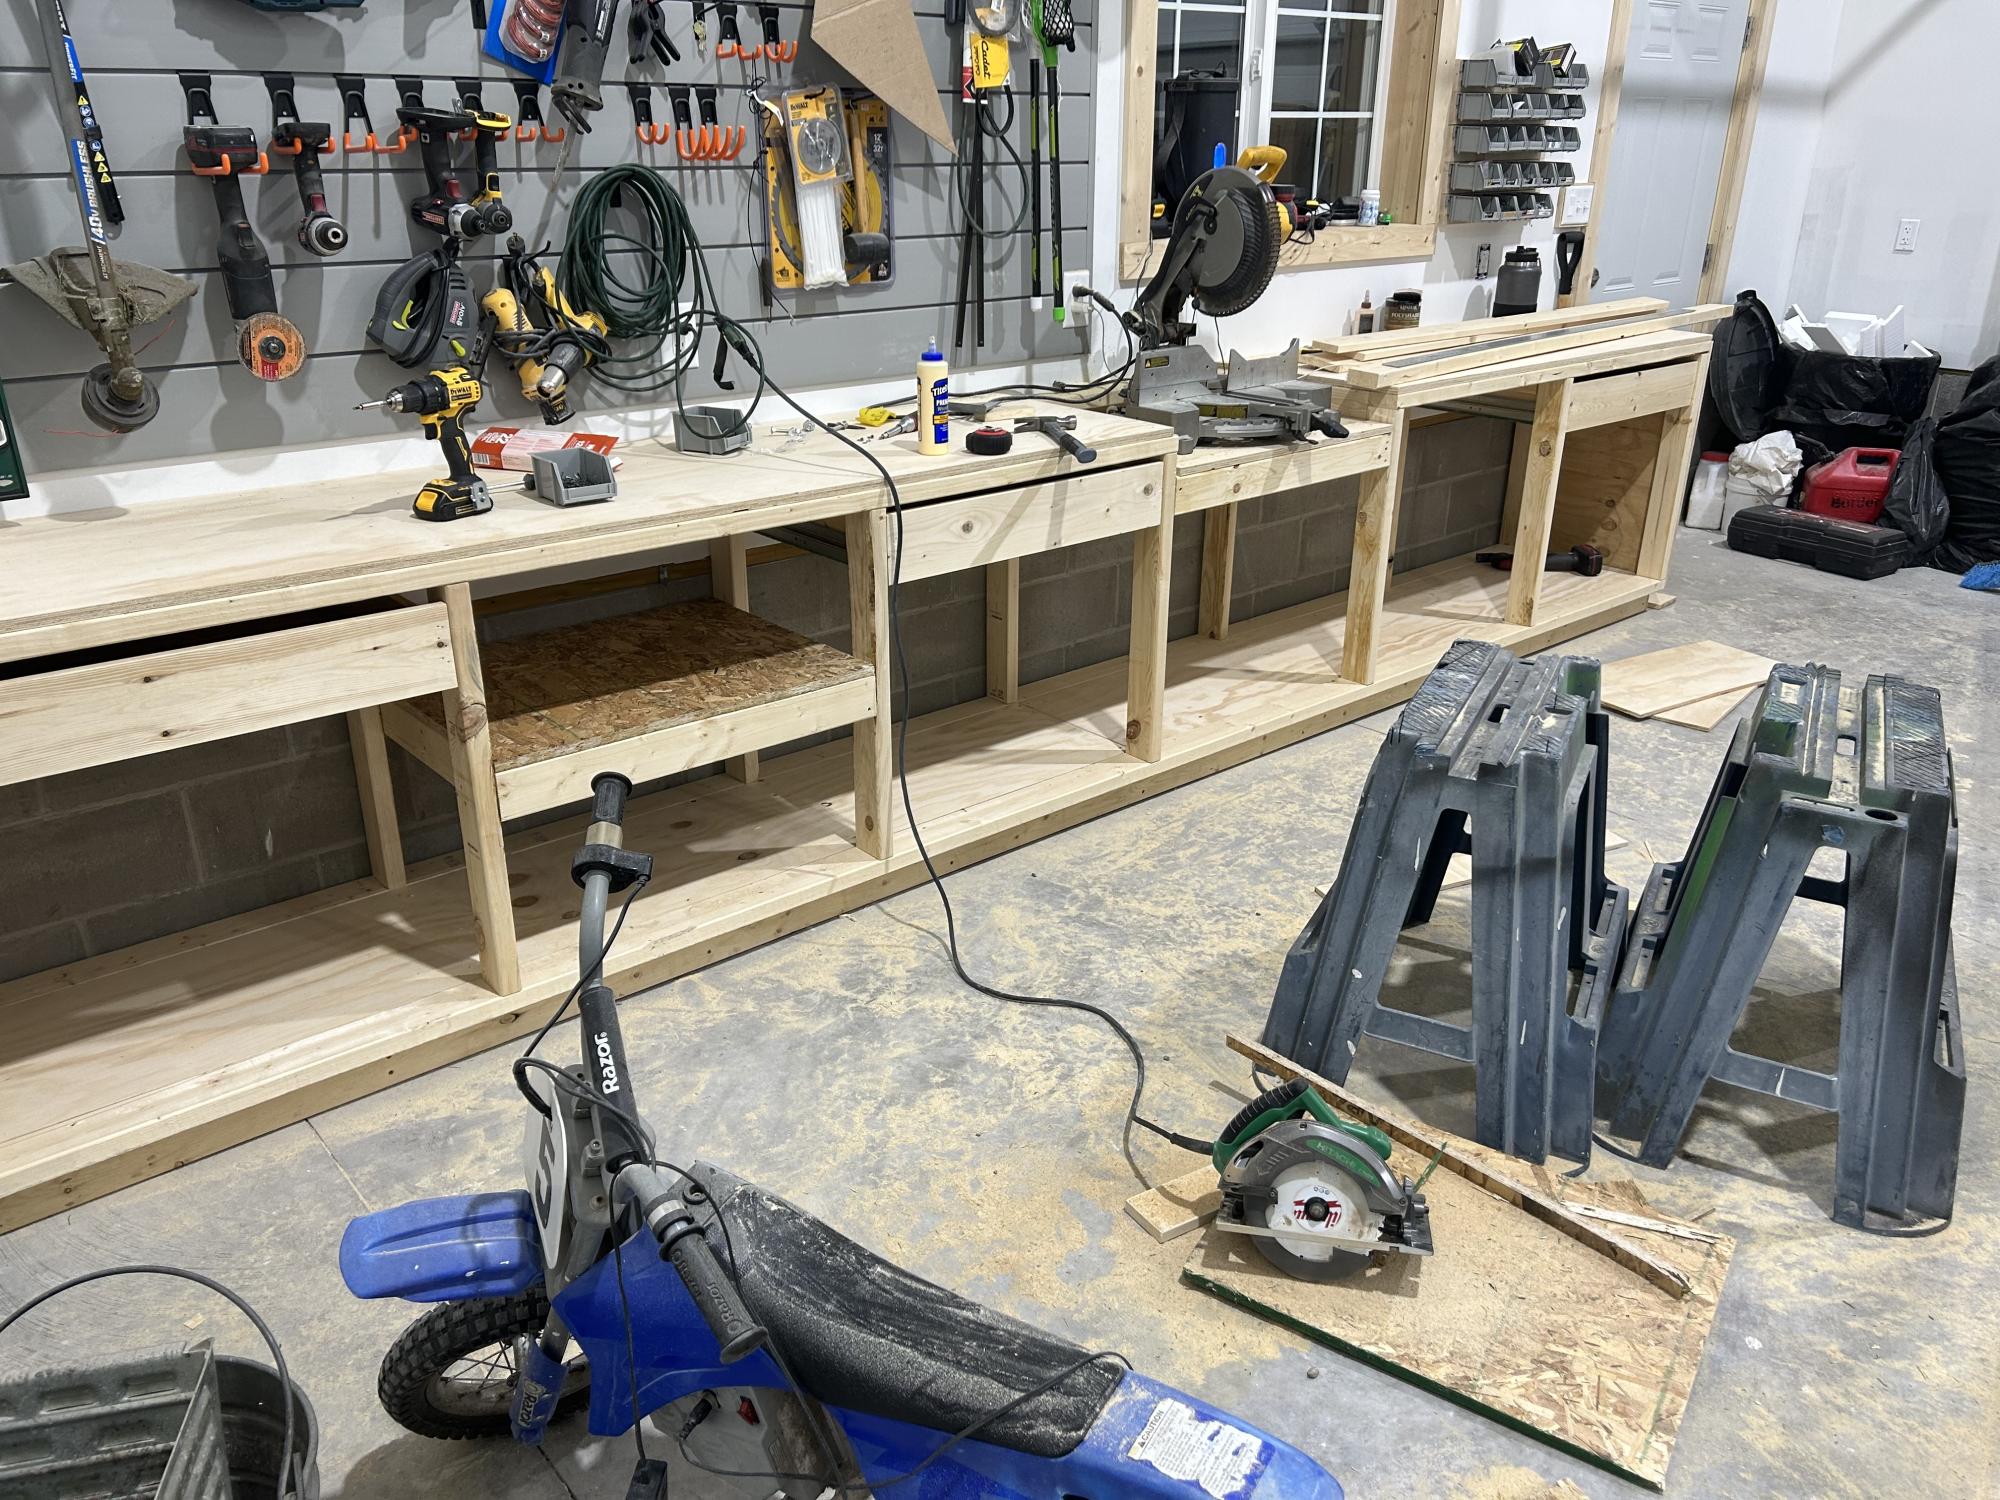
Still need a couple more drawers, plus stain and seel, but I just couldn’t wait to post. Took me most of the day (drawers suck), but it was extremely helpful to have the article and visuals to aid. Can’t wait to move on the the next project. I’m slowly becoming obsessed and a “wood whore”
Built from Plan(s)
Comments
Wed, 02/01/2023 - 09:21
Sweet Shop Space!
I would be excited too, that looks amazing! I can see some really great projects being built there, thanks for sharing!
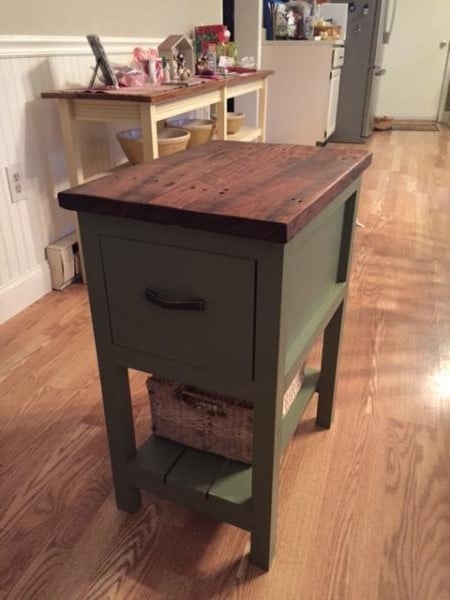
My New Coffee Table

I found a table on Pinterest that I wanted to make but I wasn't sure how to make the base for it. I used the Tryde Coffee Table plans to build the base but then I altered the plans of the top of the table to give my table the look I desired. I LOVE it. It's very sturdy and a beautiful addition to our living room.


Built from Plan(s)
Estimated Cost
$120.00
Estimated Time Investment
Afternoon Project (3-6 Hours)
Finish Used
For the base I painted 2 coats of primer and then 2 coats of high-gloss wood finishing paint. For the top boards I used 2 coats of Dark Walnut stain and a final coat of high-gloss enamel.
Recommended Skill Level
Beginner
Comments
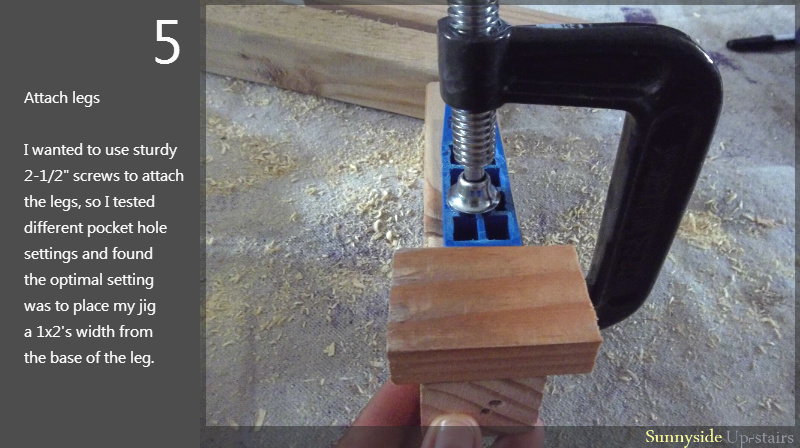
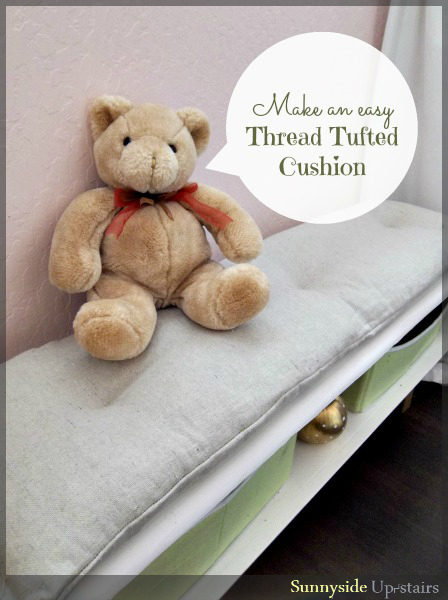
Easy Shelf Bench
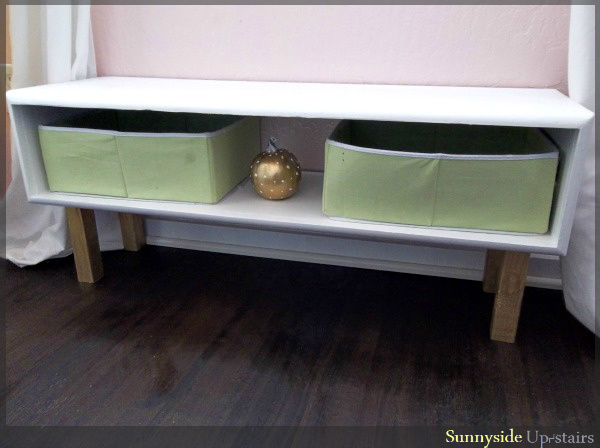
I used some leftover 3/4" maple/birch plywood for the box, douglas fir 2x2 legs, and free trim from a deconstruction warehouse to make this super simple shelf bench. We keep a select few books on ledge shelves for my daughter to read through for the week or so, and all the other books are stored in the bins in this little bench. :)
Simple building process in photos @ Sunnyside Up-stairs

Estimated Time Investment
Day Project (6-9 Hours)
Finish Used
Olympic No-VOC Semi-Gloss (un-tinted), gold spray paint for the legs.
Recommended Skill Level
Beginner
Comments


Sat, 10/12/2013 - 06:10
Glad you like it!
So pleased you like this, Joanne. I've been thinking about these builds for some time. It was nice to make very simple versions and use up some wood in our garage. :)
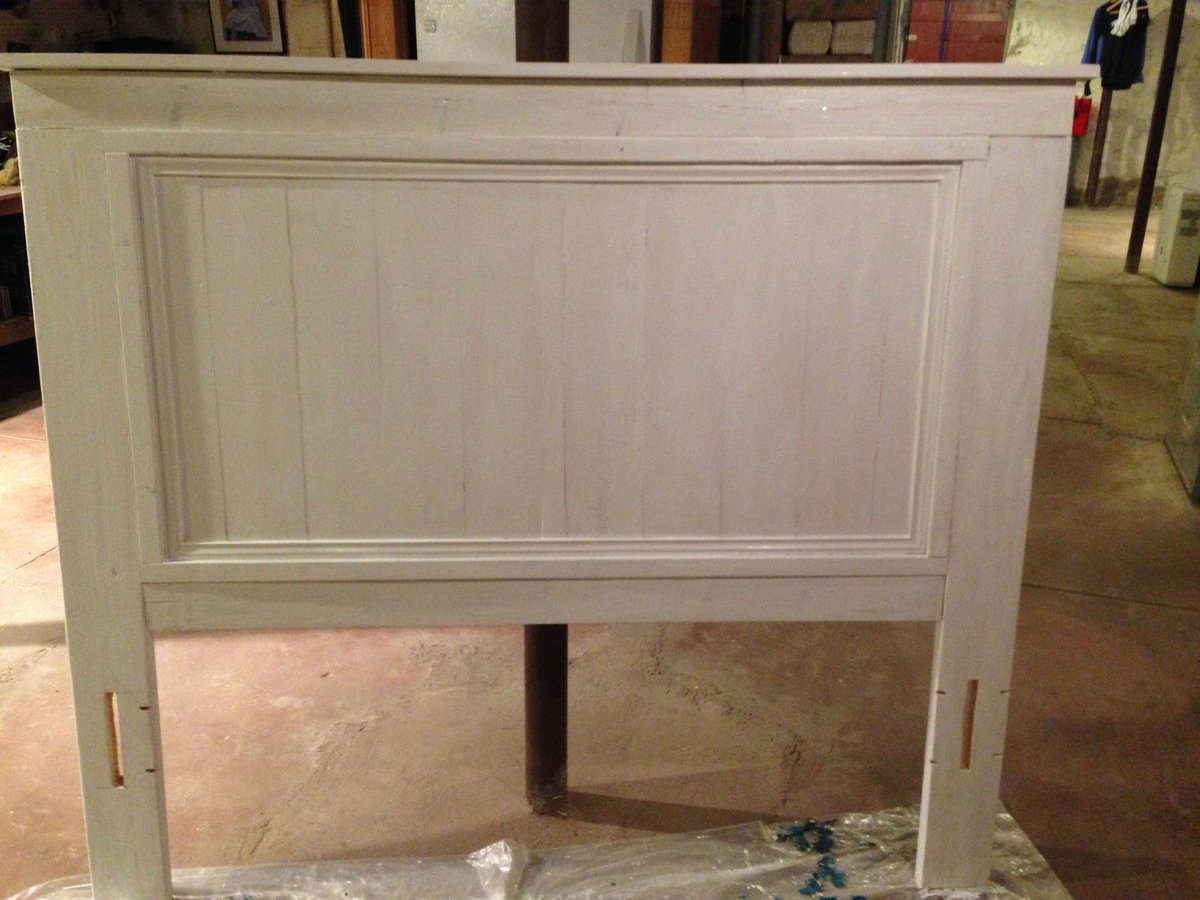
Farmhouse bed
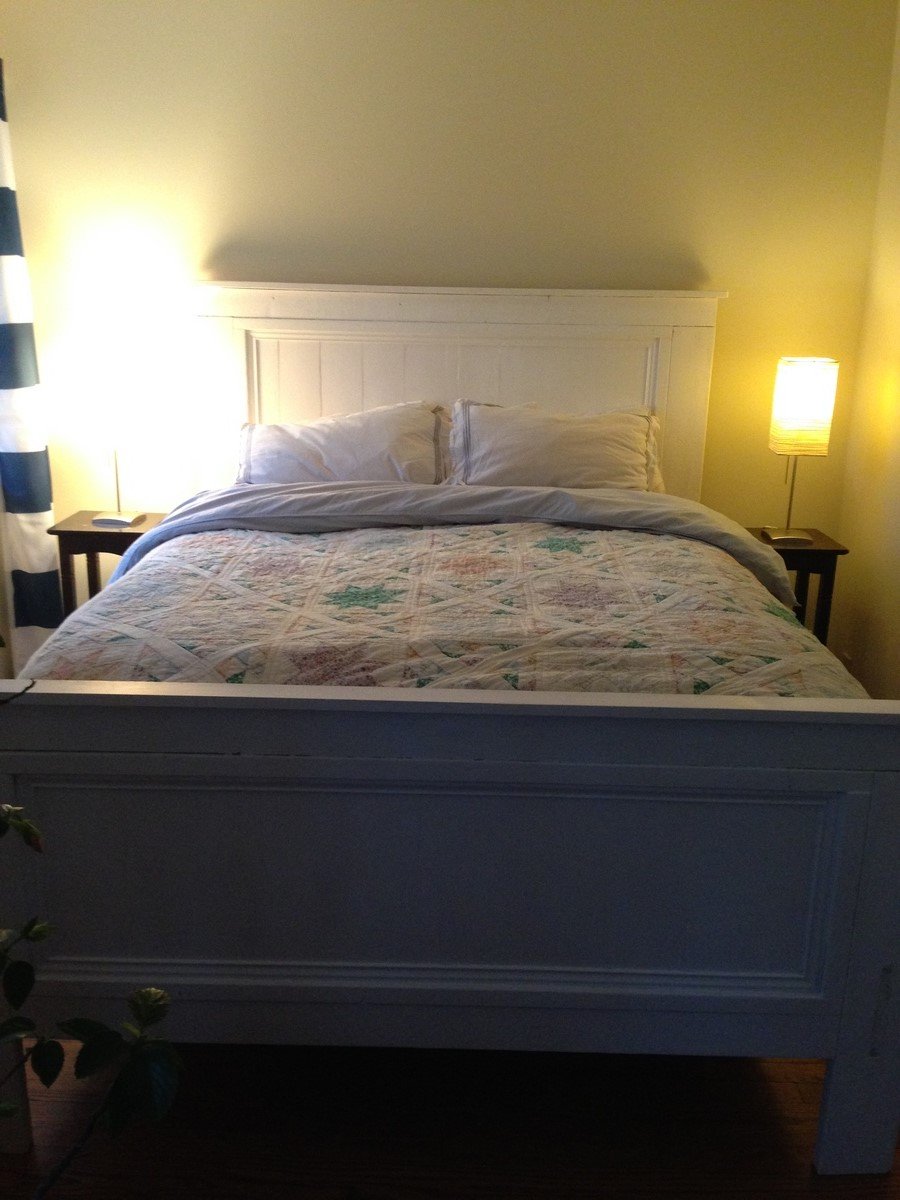
I wanted a mix of the two - detail with a footboard. I modified measurements to suit my project. Also, I did a though mortise for the bed rails and pocket screwed from the inside. Then I used 5 slats and a center raiser for three of them because it was a double box spring.
Built from Plan(s)
Estimated Cost
~$200.00
Estimated Time Investment
Day Project (6-9 Hours)
Finish Used
Glidden interior bright white in eggshell.
Recommended Skill Level
Intermediate
DIY seesaw
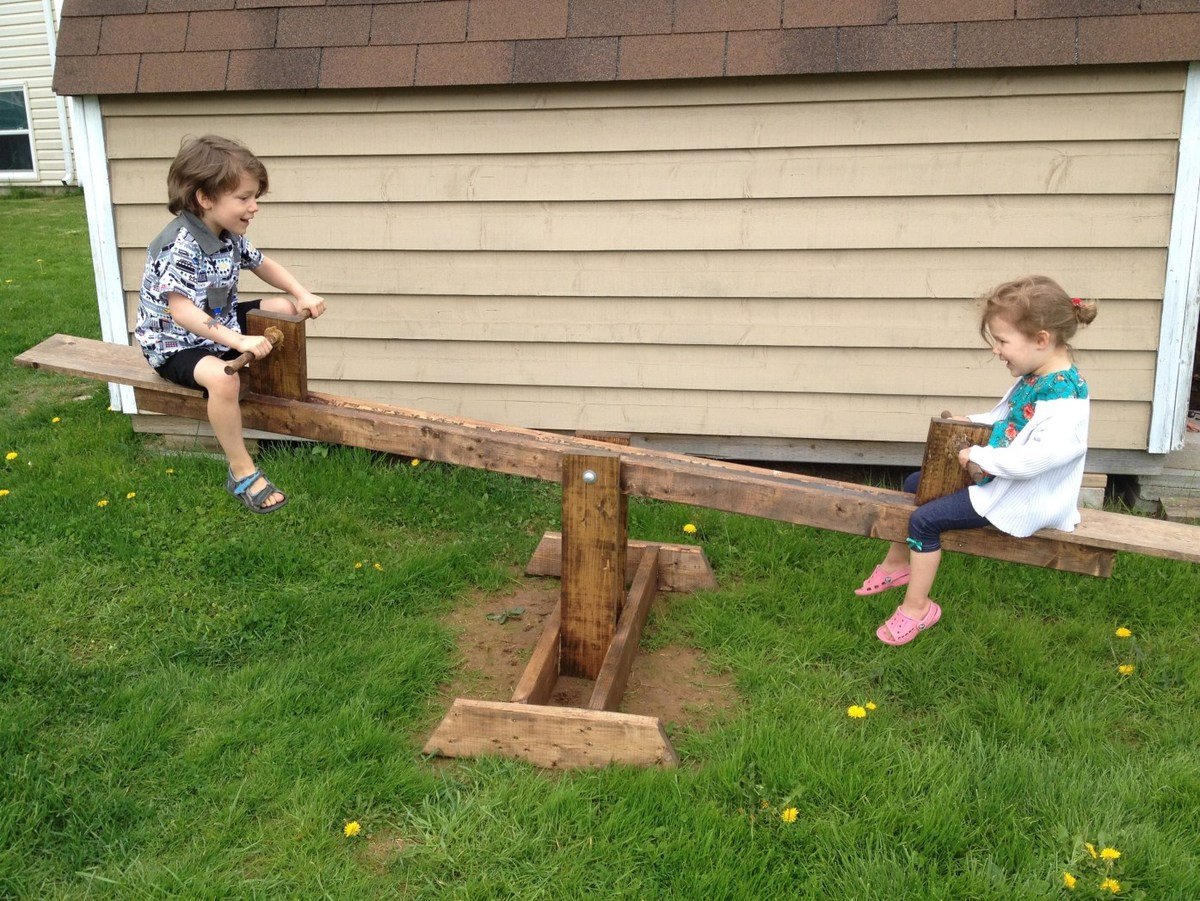
We were setting up our finished seesaw the same day we bought the project supplies, so this is a fun project without a lot of waiting around. It’s been a huge hit in the backyard and the extra-long seats allow a couple of kids to pile on each end.
Built from Plan(s)
Estimated Time Investment
Afternoon Project (3-6 Hours)
Recommended Skill Level
Beginner
Custom Playhouse Bunkbed
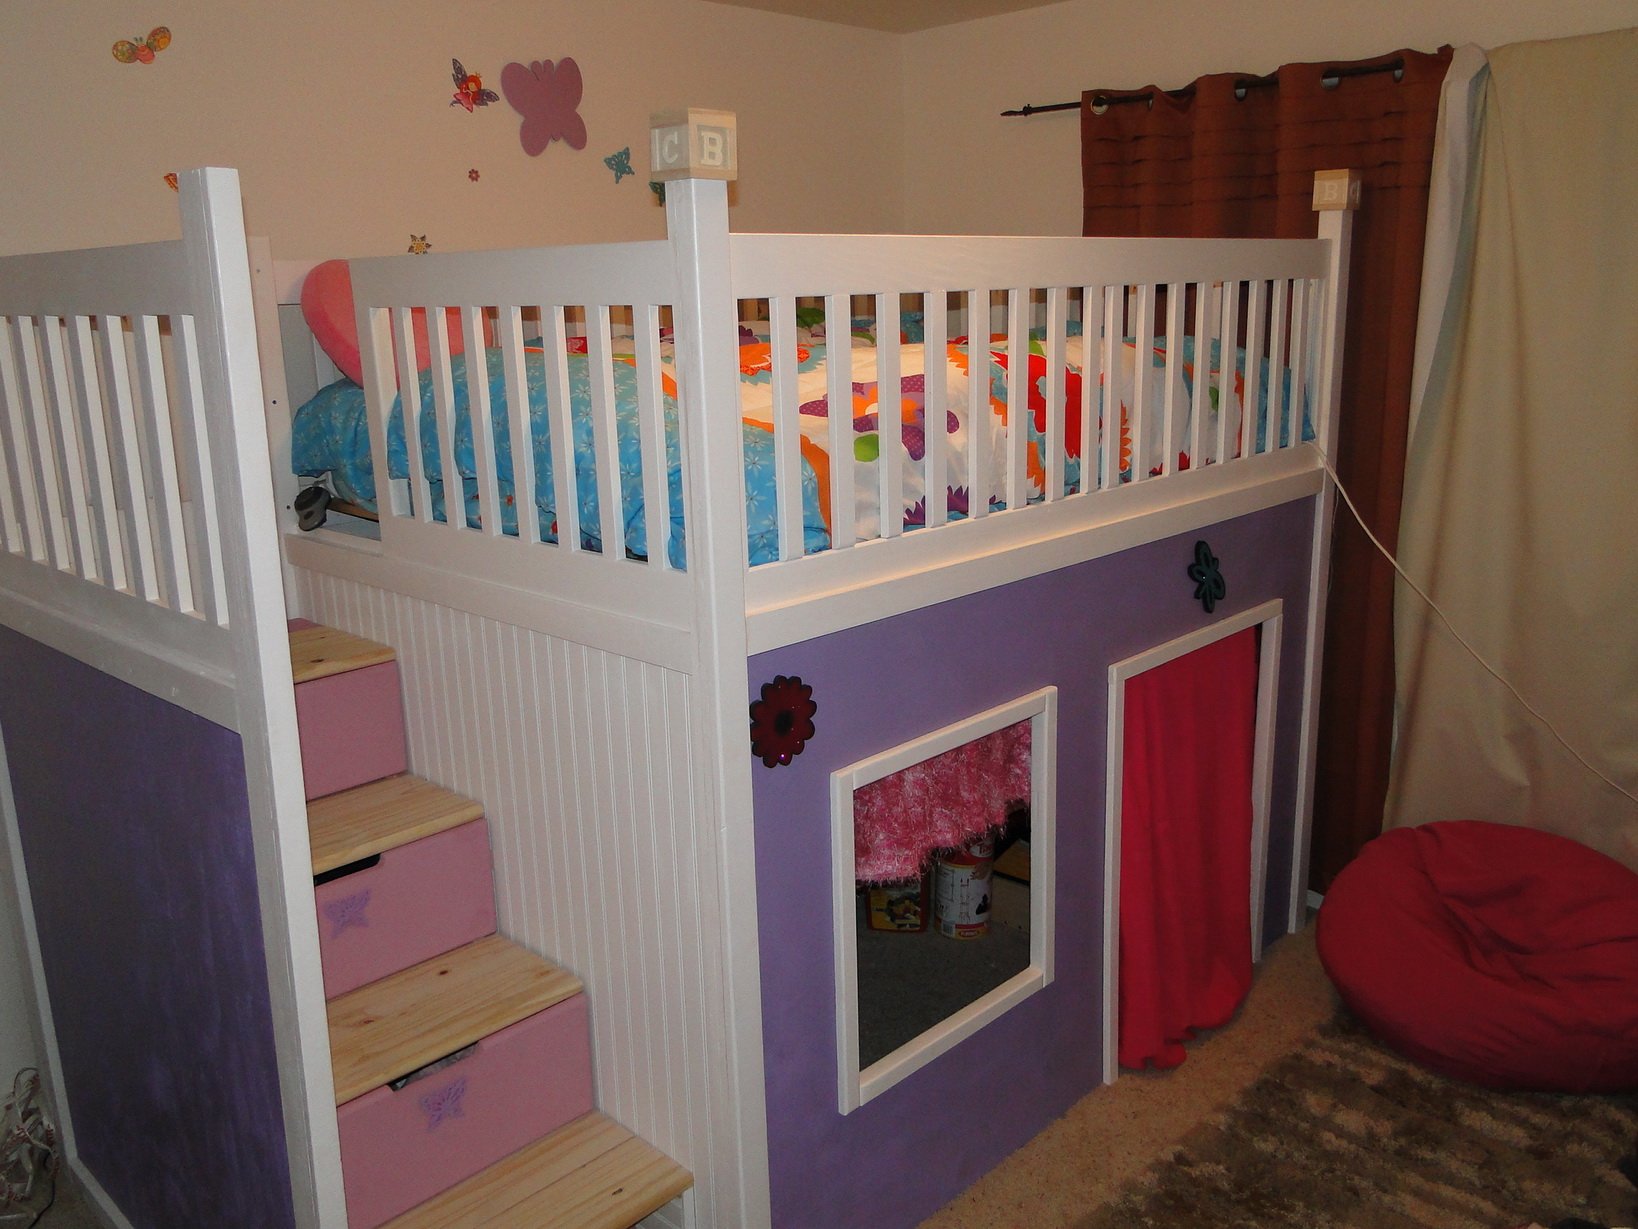
I wanted to create something for my 2 girls (6 & 4) that would make both of them happy, fit in a small room, and get it done within 3 weeks while they were away on vacation. It was a surprise as neither the girls nor their mother had any idea what I was doing.
I copied the idea from others on this site but then modified it a bit to get what I wanted.
I still have more touches to complete.
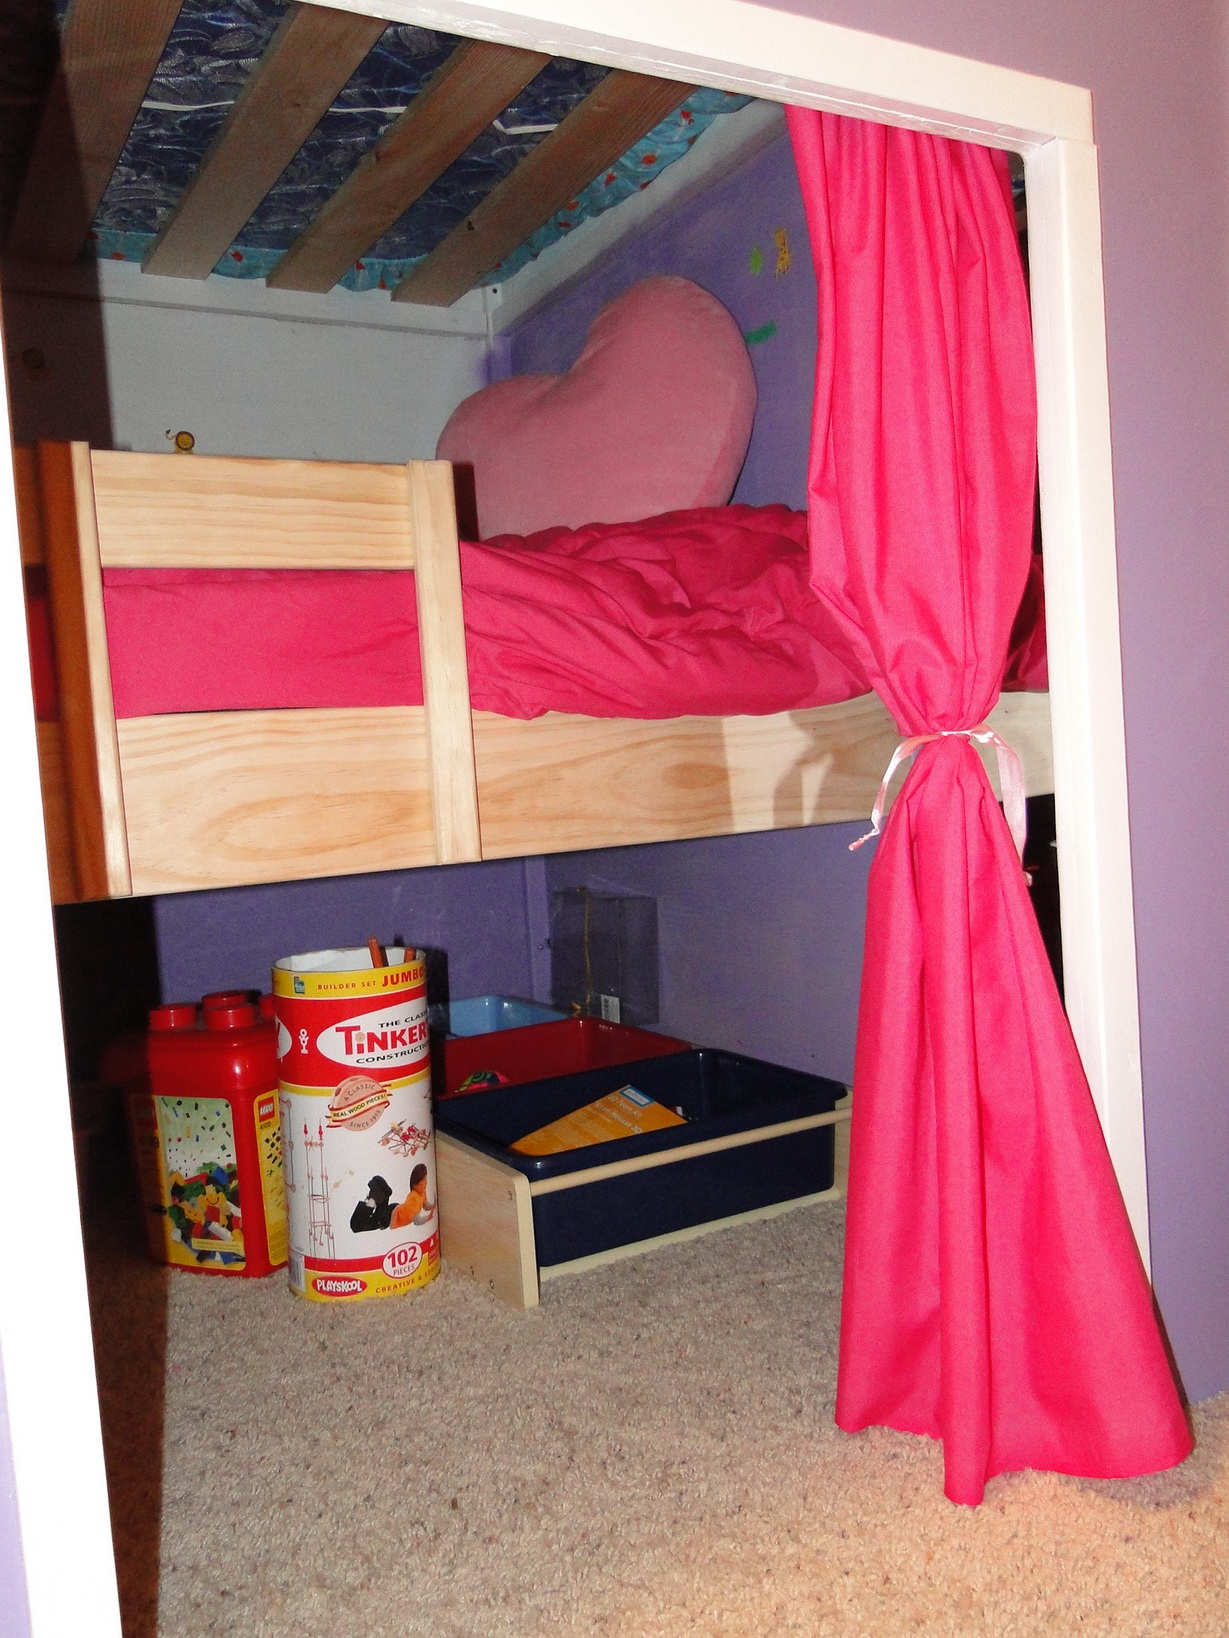
I didn't finish the inside for the sake of time. I might wallpaper the inside or just paint it when time allows.
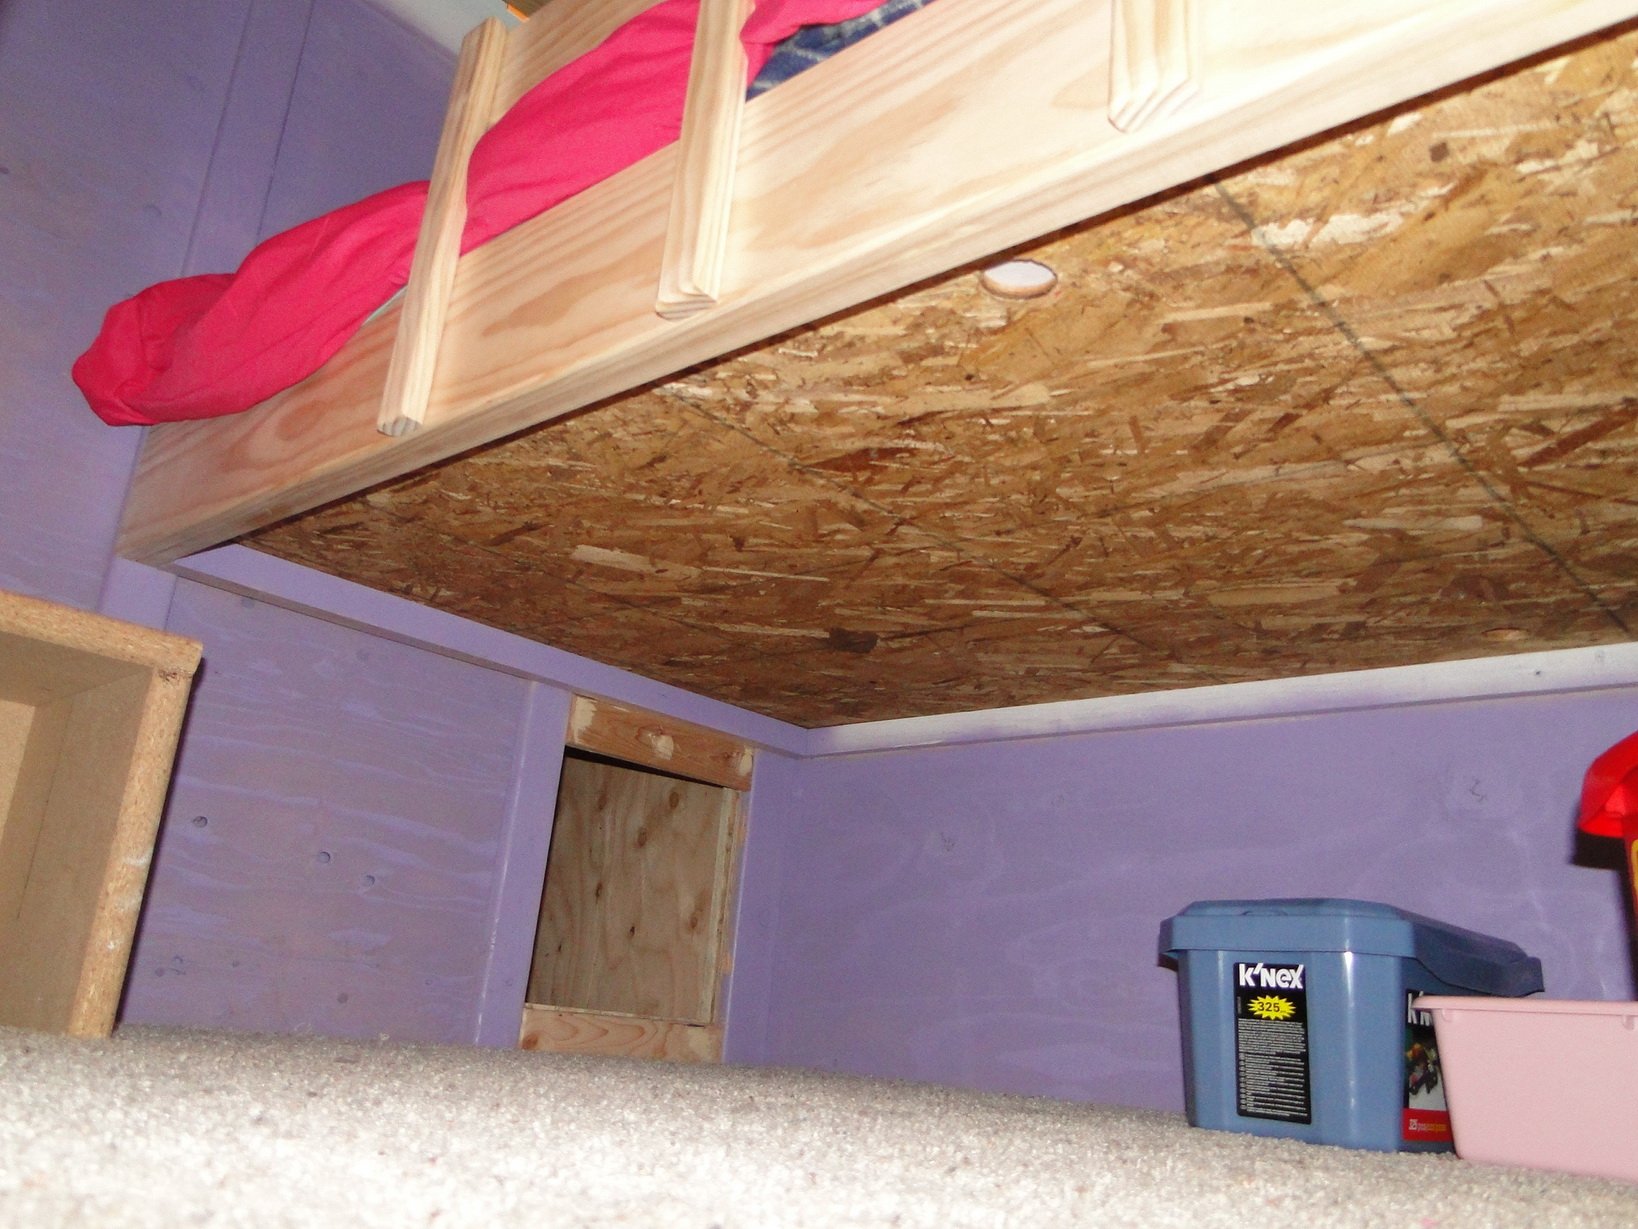
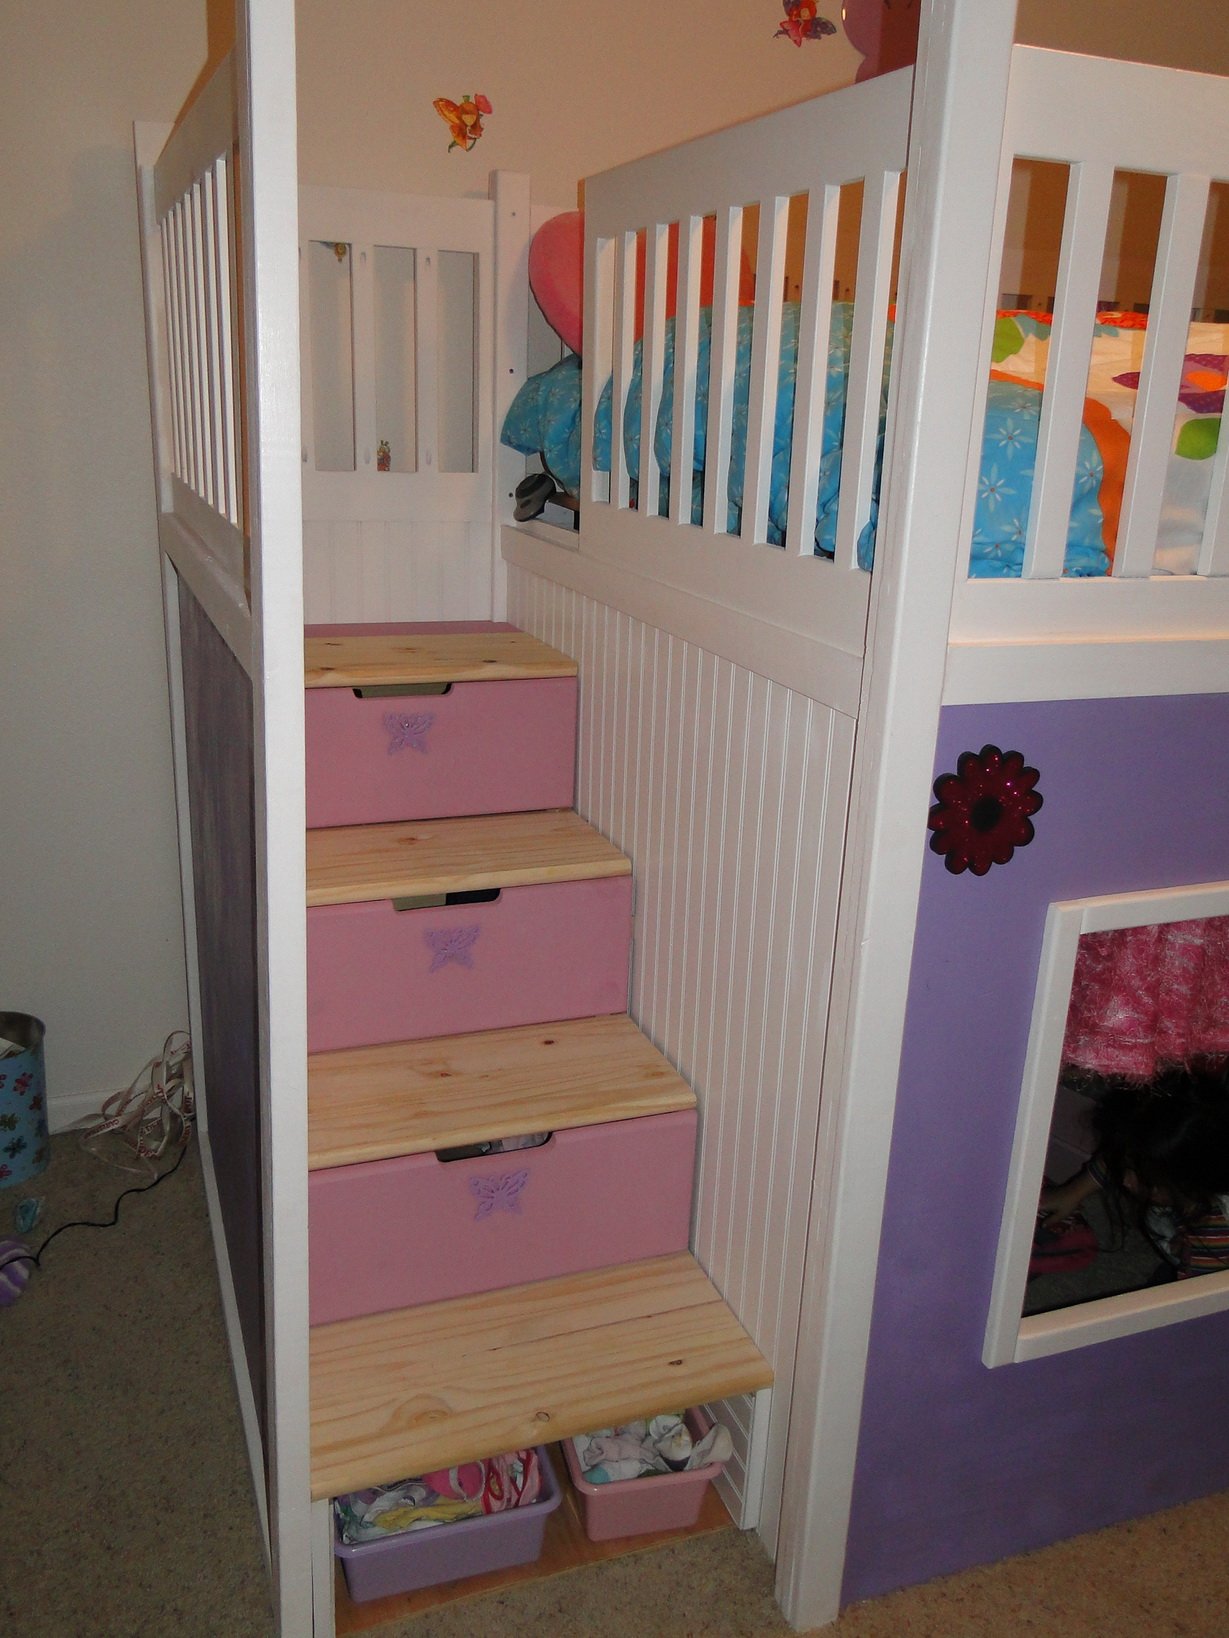
The top is a full size bed. The playhouse is enclosed with walls on all sides. There's a bed inside of the playhouse that's a Twin size with a simple stool to get on it (ran out of time - was going to create a 2 step drawer stairs).
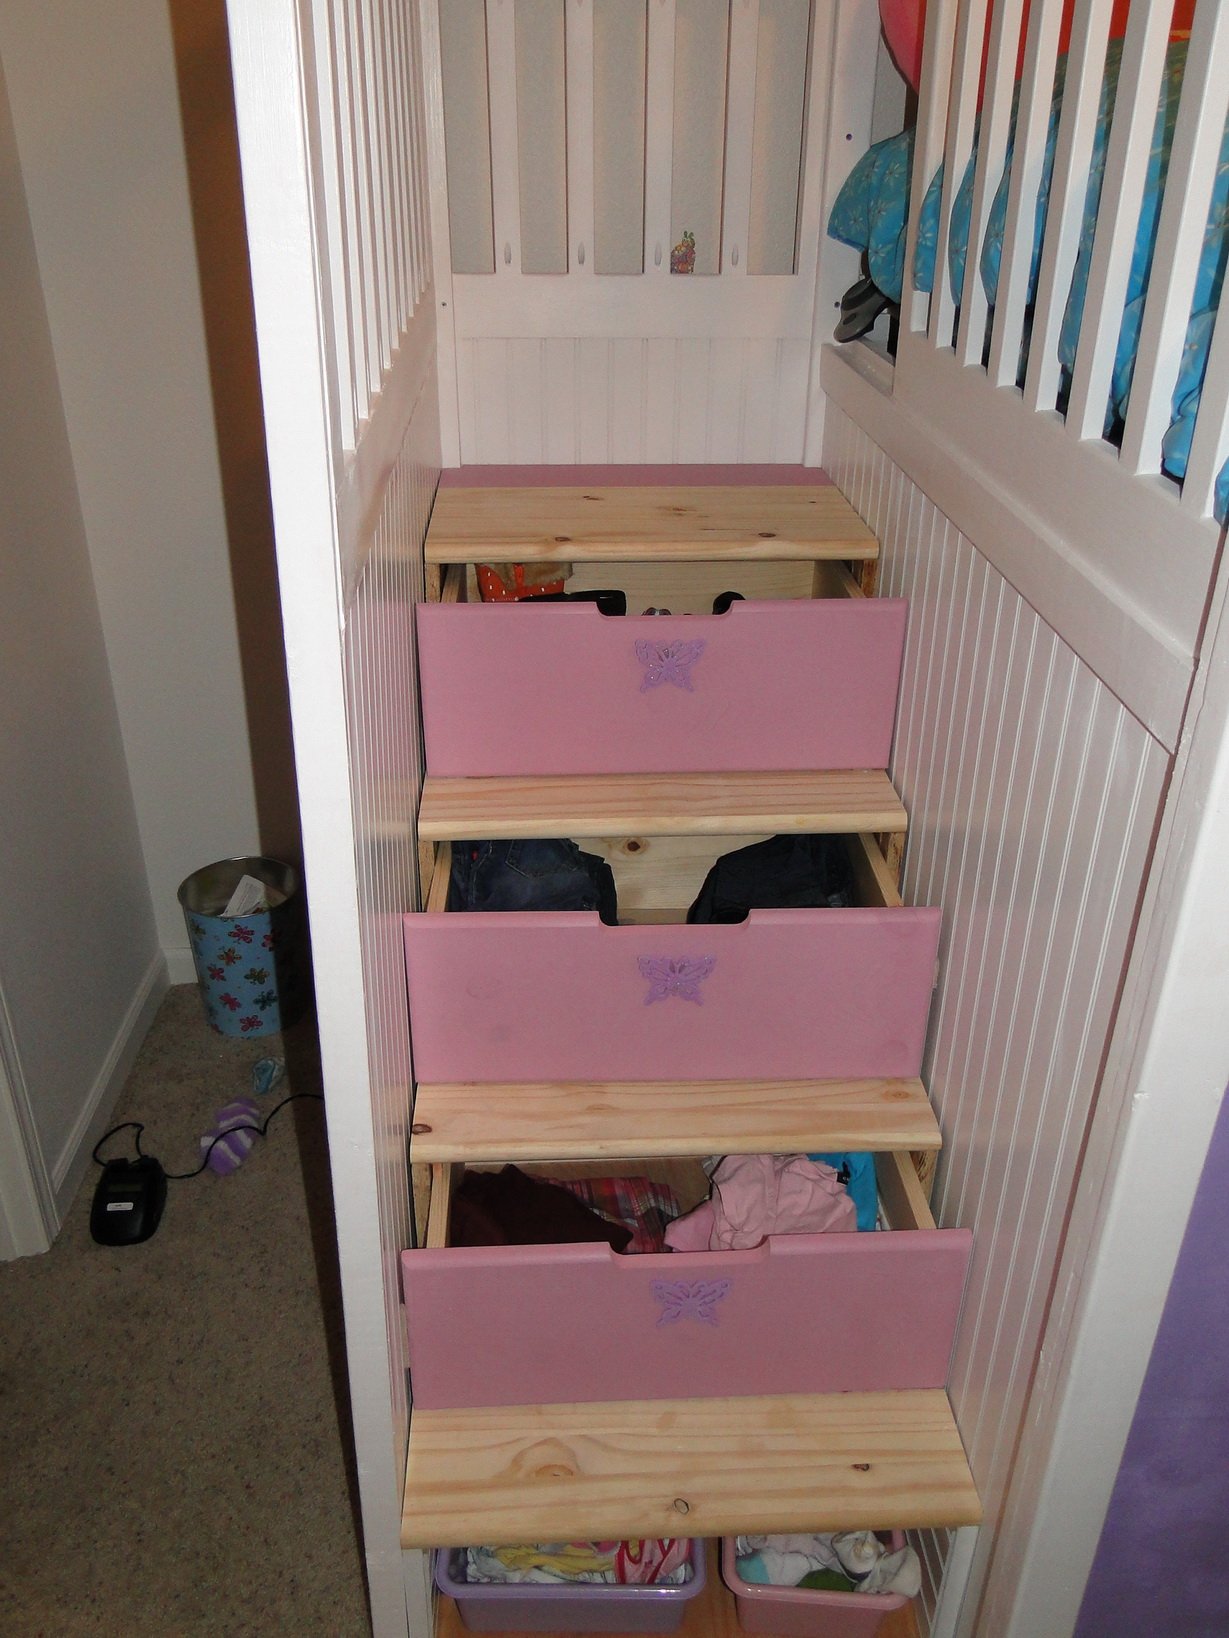
The stairs are drawers and there's a "secret" opening under the bed going into the stairs where the girls can hide stuff.
Left the first step open in order to use for totes. My 4yr old currently fits in there and can get in and out of the playhouse through that opening. I might put a flap there.
I worked on this playhouse for about 200hrs which includes tons of visits to hardware stores, furniture stores, finishing, touches, etc. Worked in the garage and built it such that it can be disassembled and re-assembled easily.
Wanted to make it more fancy but ran out of time.
Made the stairs a separate piece on its own.
MADE MANY ERRORS but was able to correct almost all of them. Learned a lot from this project.
I didn't follow any particular plan except for the concept since my dimensions were different. I made the rails higher for added safety since my girls almost sleep walk!
Accommodating the Full size mattress made this project very challenging and more costly since I had to get a full sheet for each side - total 5 sides.
Detailed Pictures and Dimensions:
https://plus.google.com/photos/103590147643813514240/albums/56496973048…
Stairs:
https://plus.google.com/photos/103590147643813514240/albums/57625265707…

Estimated Cost
$800 including mattresses & comforters
Estimated Time Investment
Week Long Project (20 Hours or More)
Finish Used
Base paint, Latex white & Latex colored
Paneling (optional)
Decorations
Paneling (optional)
Decorations
Recommended Skill Level
Intermediate
Comments
Wed, 10/19/2011 - 21:41
That is stunning. Please tell
That is stunning. Please tell us how mom and the girls reacted to your wonderful gift!!

Thu, 12/01/2011 - 13:08
The surprise!
Sorry just saw the comments.
After some 30hrs of travelling by air and land, they arrived exhausted. When they saw this they all got charged up with energy. The girls loved it and it's now a toy & a bed. Their mom loved it and all the storage and began using it right away.
Slight problem is that the younger one wants to sleep in the top large bunk so we settled to having them swap in the weekends!
One nightmare is making the beds!
Wed, 12/07/2011 - 07:53
This is absolutely awesome
Abzman this is the most wonderful thing I have ever seen. At first I thought I was gonna read where you got this from but when I saw you made this I just had to tell you what a marvelous job you did. I really wish I could buy something like this for my own girls (4 and 3). Thanks for sharing
In reply to This is absolutely awesome by Dimika (not verified)
Mon, 12/12/2011 - 08:44
Thanks...
Thanks for the kind comments. Very appreciated.

Wed, 12/21/2011 - 19:23
bunk bed
Hi, I'm building for a full size mattress as well. It looks like you are using 1x4 for the slats. How are they holding up? Did you have to reinforce them because of the added width?
Also, how high and deep are the stairs?
BTW, everything looks great.
Thanks for the help.
In reply to bunk bed by Guest (not verified)
Wed, 12/21/2011 - 22:10
Dimensions
Hi,
I just finished documenting some of my dimensions and included them in the photo album linked below.
I did use 1x4's and picked the hardest and straightest I could find. I tested all of them first at HD!
They are holding up well. I used 12 total. They are all a tight fit and that was good enough support. I didn't use additional support and I know they will hold up well for a 100+ lbs person but I still have it planned to secure a few of the slats. I laid down on the top bunk and it felt sturdy.
Note that some might not agree with the height of my top bunk rails. They are at 4' even!
As for the stairs, I included the measurements in the pics. Hope this helps.
I will be covering the inside walls with colored carpeting! It will also act as a noise insulator so the kids won't wake up early AM from street noise.
https://plus.google.com/photos/103590147643813514240/albums/56496973048…
Fri, 07/06/2012 - 23:08
Drawers
Give me your email address and I'll email you the pictures I have. I don't have dimensions but maybe the pictures can help. Since my staircase is removable I built the drawers outside of the bed then re-inserted the staircase. I did it the easy way using cleats and I installed felt padding under the drawers so they wouldn't scratch the steps.
Sat, 07/07/2012 - 10:15
Thank you! I'm planning on building the stairs separate as well. I've never built any with drawers in them before, and I can't find any plans for them. :-(
Sat, 07/07/2012 - 13:32
Stairs and Drawers
I just realized a better solution, I've posted the pictures to Google Photos. Hopefully that would help.
Basically, I built the frame of the drawers and made the front fascia separate which I attached afterwords. It allows for error correction in case the drawer doesn't come out straight and also allows for adjustments and fine tuning.
Go here: https://plus.google.com/photos/103590147643813514240/albums/57625265707…
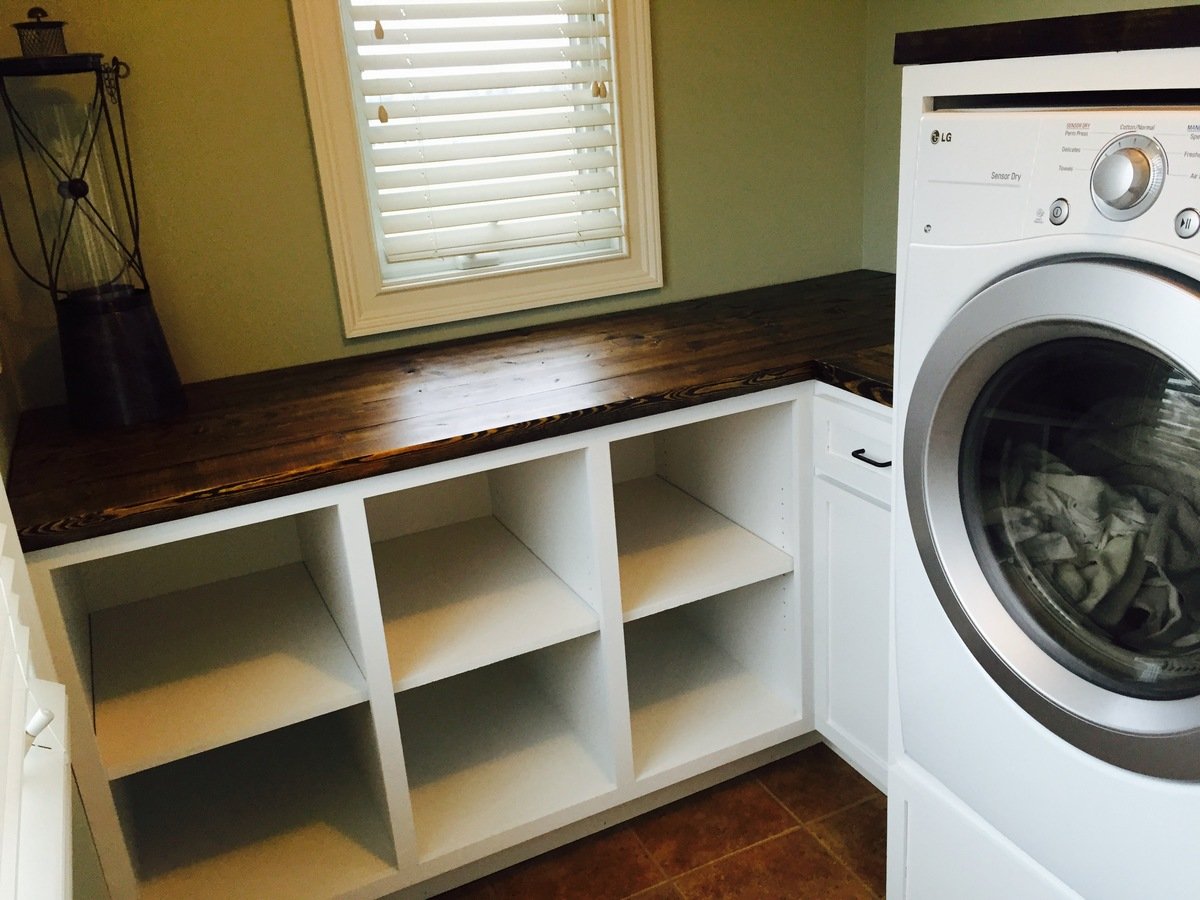
Laundry Room Cabinets
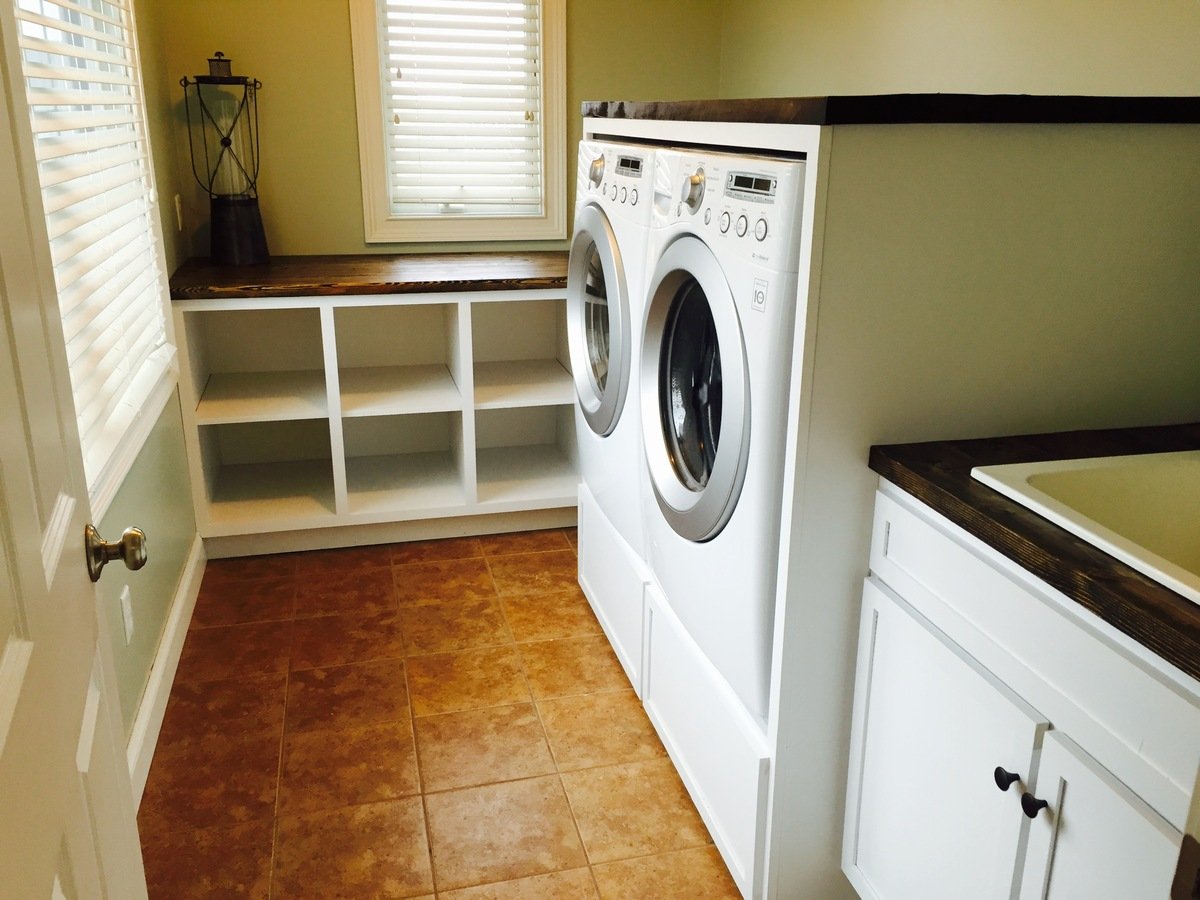
We are getting ready to list our house and the laundry room was the last room in the house that hadn't been renovated. I used the momplex cabinets as an inspiration and made a 6 cubby cabinet, small cabinet with drawer and door, laundry pedestal, and sink cabinet. The cabinets are made of MDF and face with pine and pine doors. The countertop is made of 2x6's.

Built from Plan(s)
Estimated Cost
$300
Estimated Time Investment
Weekend Project (10-20 Hours)
Finish Used
I sprayed the cabinets using a graco truespray with a high gloss white paint
The countertop was stained with Minwax Jacobean
The countertop was stained with Minwax Jacobean
Recommended Skill Level
Intermediate
Comments
Sun, 01/03/2016 - 08:23
Nicely Done!
This looks great, you might want to keep the house after that upgrade!:)
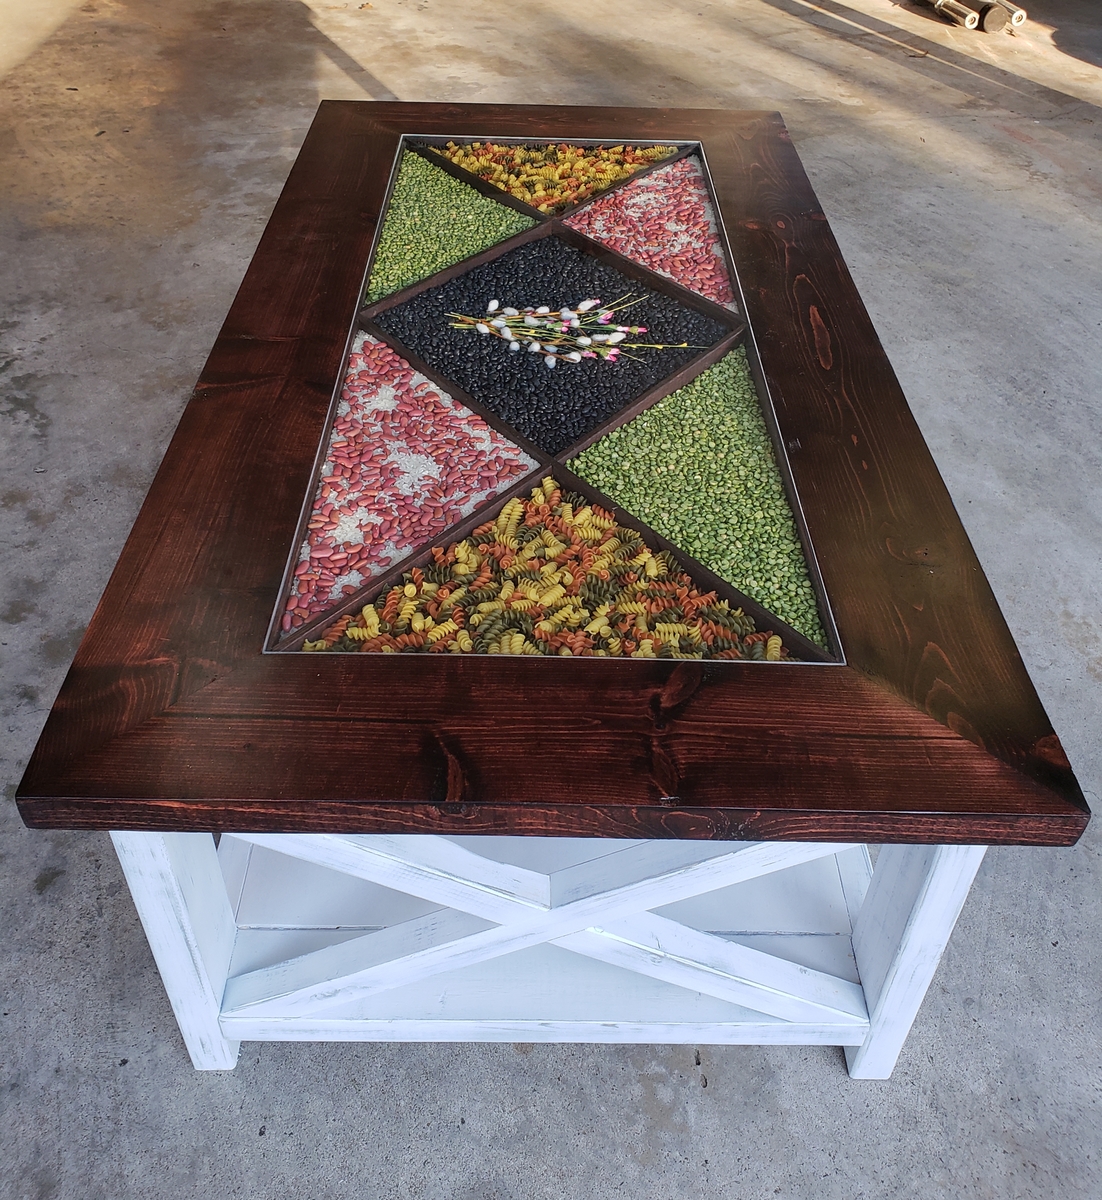
Rustic X Coffee Table

Plans were very easy to follow and it all went together nicely. The top was inspired by a cafe table my daughter saw at a street cafe in Chile. She liked it so much I made her one for Christmas. I wanted to do a similar coffee table since - the Rustic X Coffee table plans fit the bill perfectly!
Built from Plan(s)
Estimated Cost
$150
Estimated Time Investment
Weekend Project (10-20 Hours)
Finish Used
Top: Minwax Red Mahogany stain with satin spray laquer finish
Base: Flat white spray paint over a gray spray paint base
Base: Flat white spray paint over a gray spray paint base
Recommended Skill Level
Intermediate
Comments
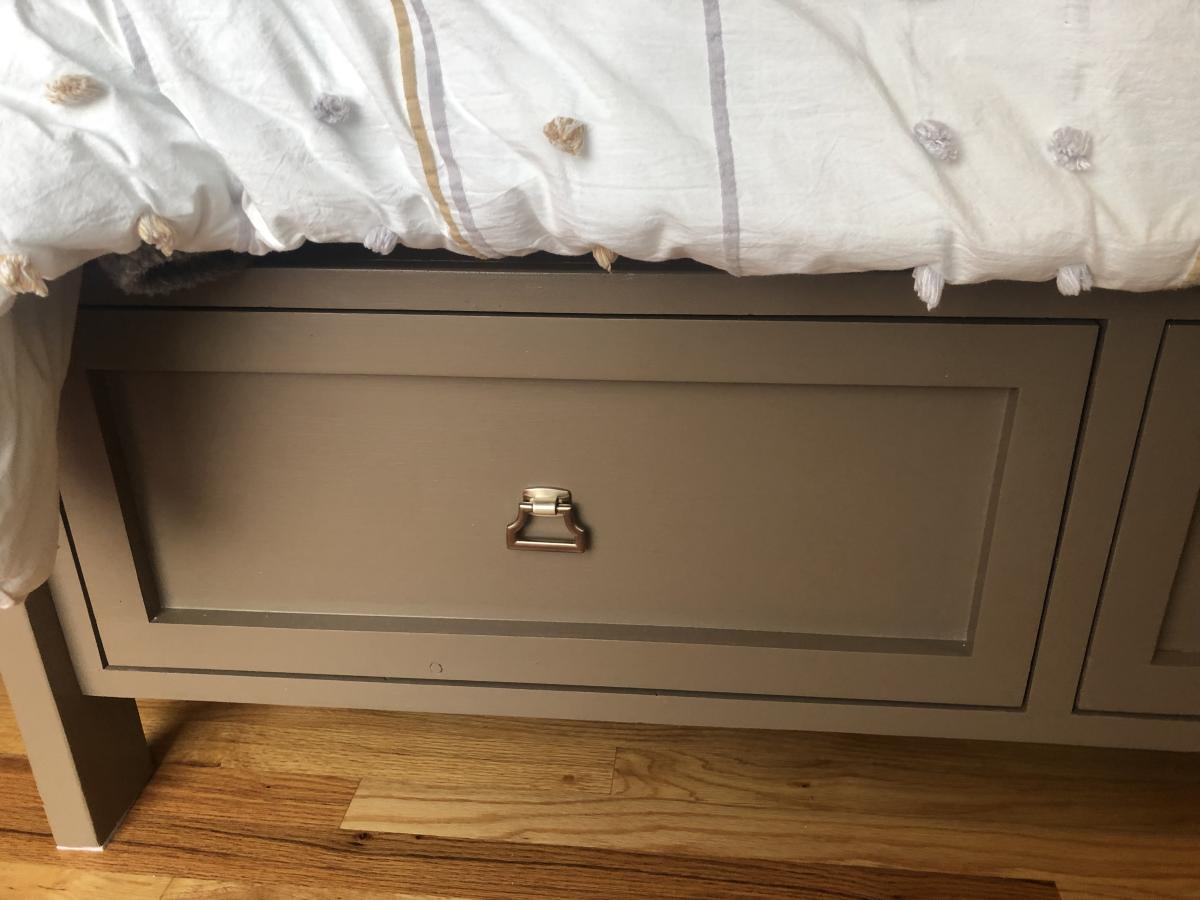
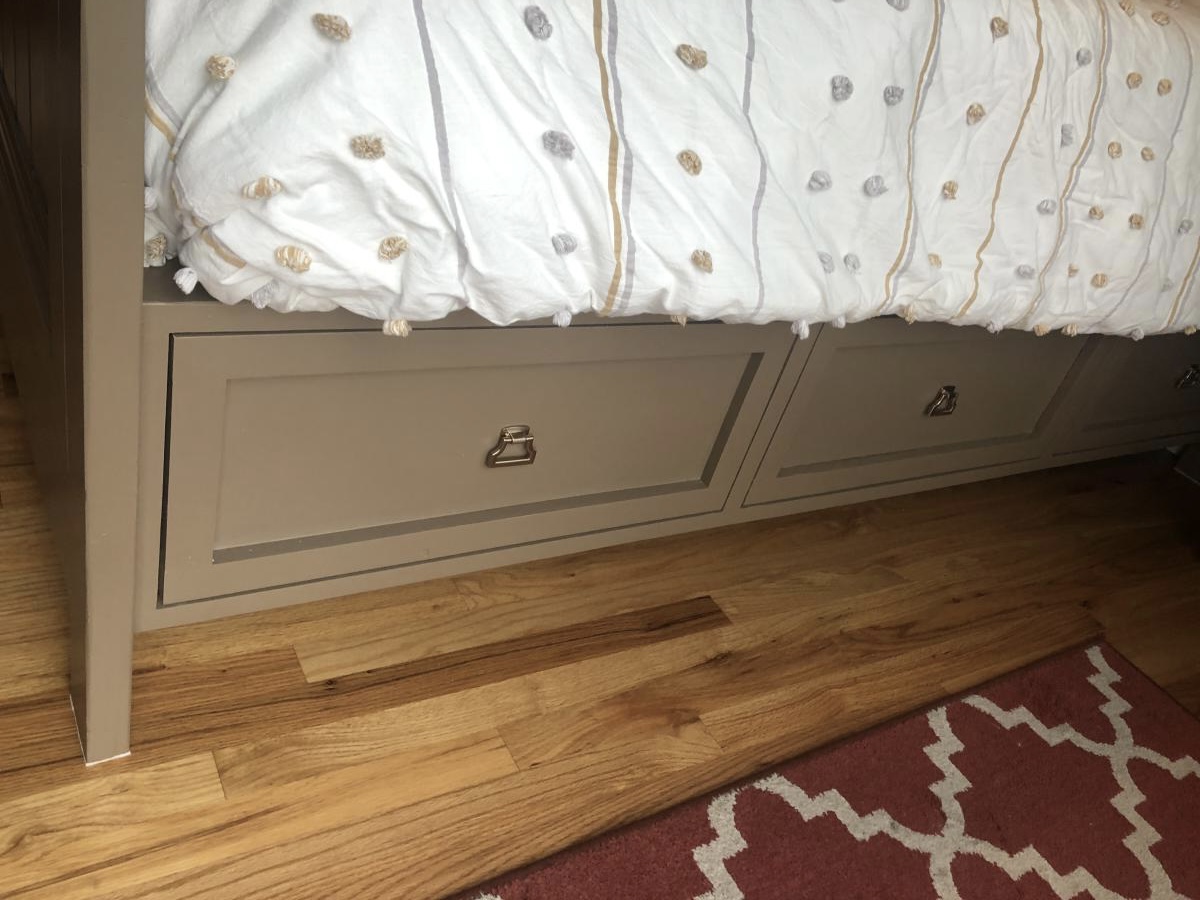
King Farmhouse bed with drawers

I started with your king size fancy Farm style head board and made it taller (67” tall”) and created a footboard using same pattern. Then added three drawer on each side adding supports for king size bed - followed up by installing 4 usb charging ports behind each side of headboard.
Built from Plan(s)
Comments
Modern Parsons Desk
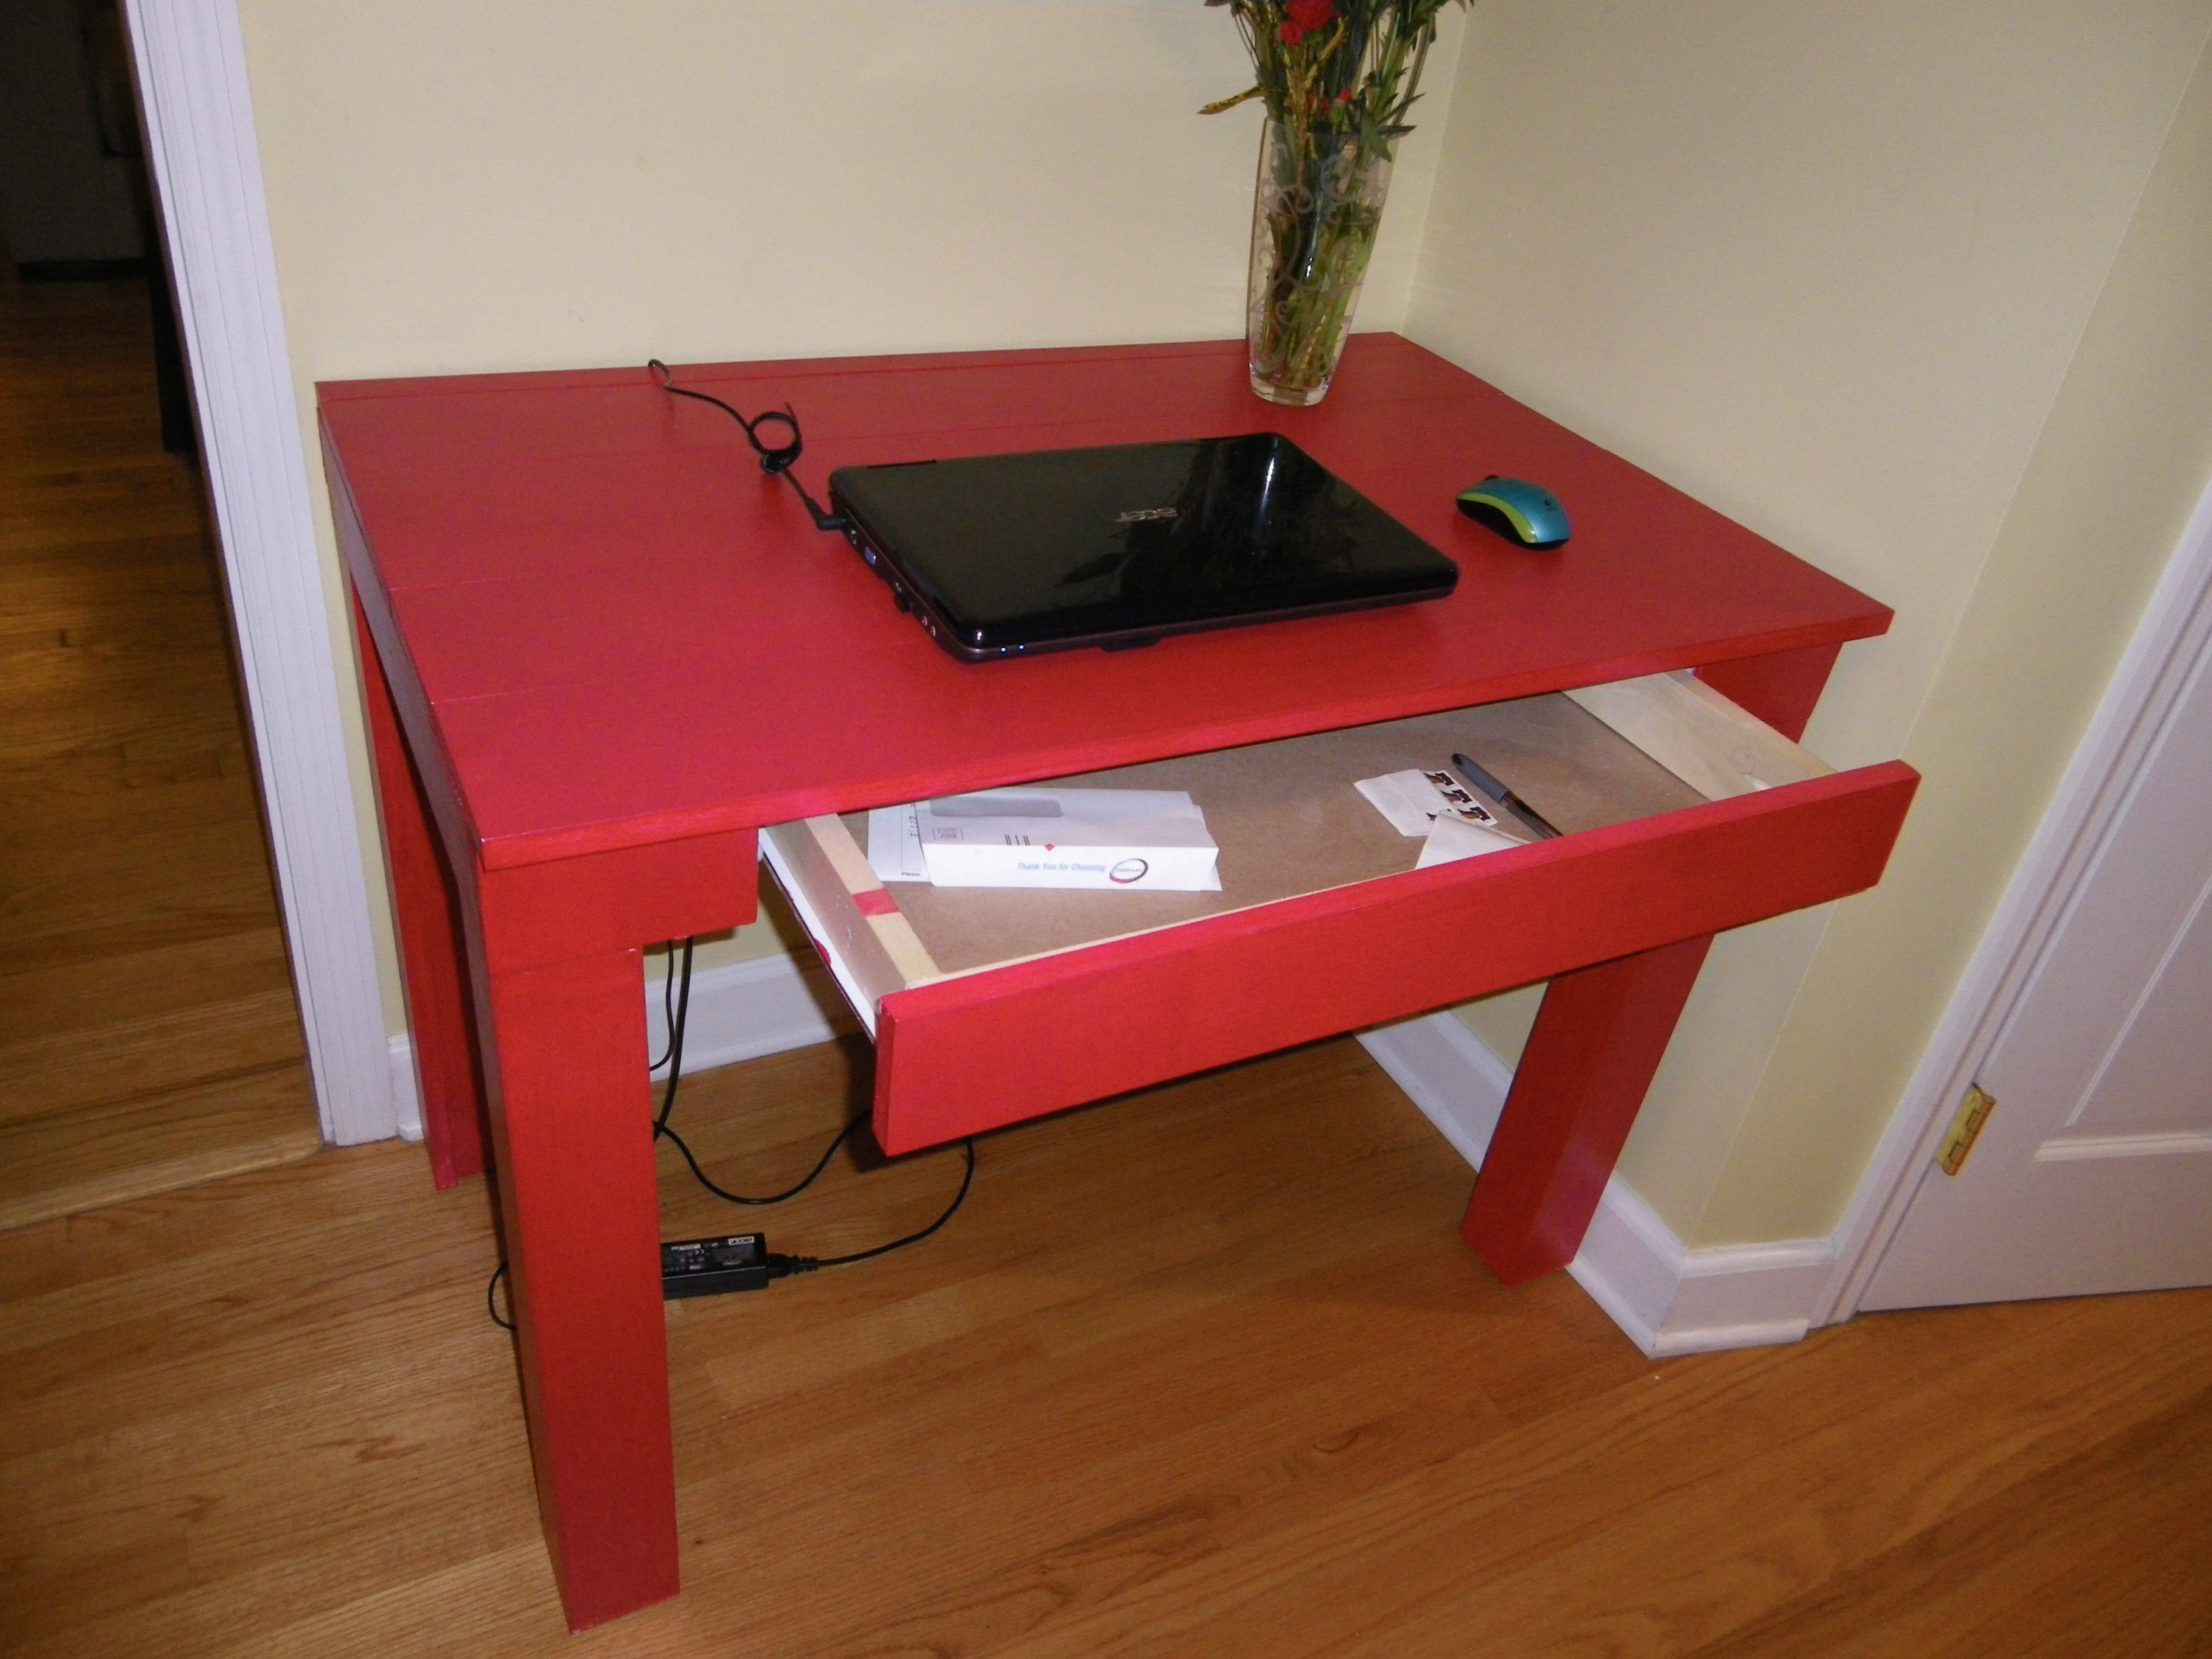
This was my first project - thanks Ana.
I had to shrink the dimensions from the plan to fit our space. Pretty happy with how it turned out given it was my first project.
http://our-big-house.blogspot.com/2011/10/project-build-desk.html
Built from Plan(s)
Estimated Cost
200
Estimated Time Investment
Week Long Project (20 Hours or More)
Finish Used
primer
behr water based indoor paint
spray on polycrylic
behr water based indoor paint
spray on polycrylic
Recommended Skill Level
Beginner
Comments

Mon, 10/24/2011 - 16:22
Why did you use poplar if you
Why did you use poplar if you were painting it?
Nvm I just saw the blog post, the first build is such a learning experience! Go for whitewood next time :p
Tue, 10/25/2011 - 10:43
In fairness...
the previous poster had my line of thought when I purchased the wood - Poplar looks great and would look fantastic with just a little bit of stain, right?
But I didn't know that staining poplar would be such a challenge.
So, yes, poplar paints well and that's why I painted in the end.
Kitchen Cabinet Refinish

These cabinets had 3+ layers of paint on it and I had been wanting to see what was underneath for awhile. I decided to, after my first project I submitted here, started to re-due/re-surface these cabinets. It took forever to sand all of these layers of paint off. I was super excited to find that the wood under the paint was actually really nice. I hope you like the results just like I did.


Estimated Time Investment
Week Long Project (20 Hours or More)
Recommended Skill Level
Starter Project
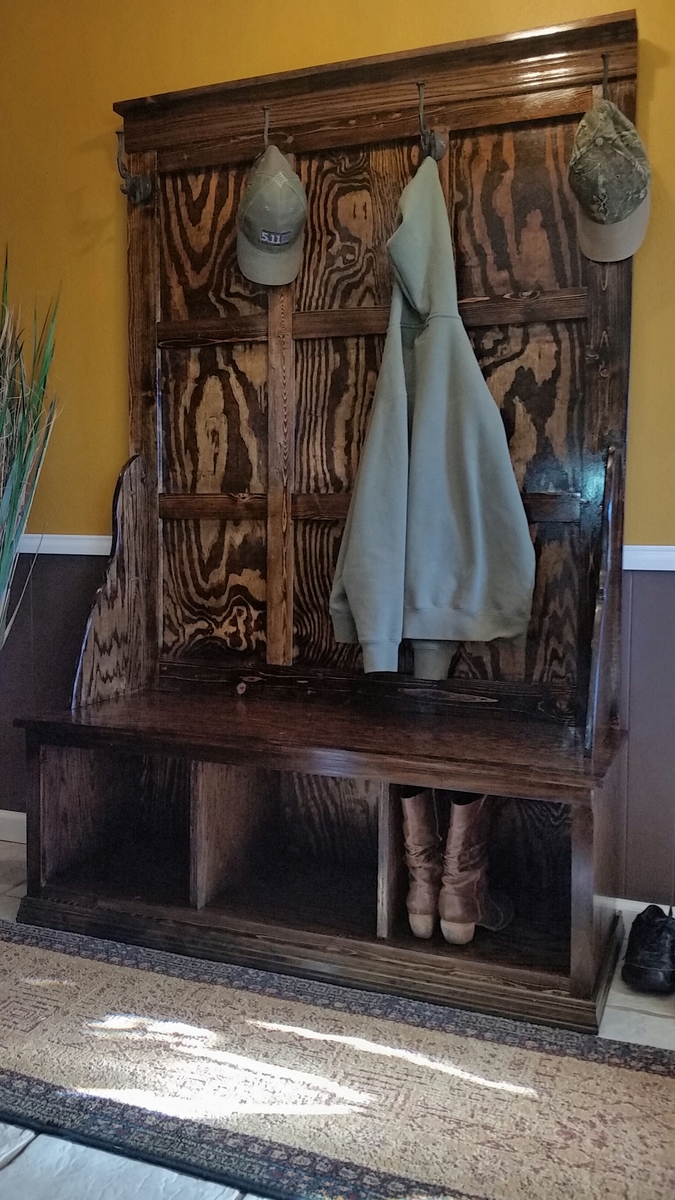
Fancy hall tree
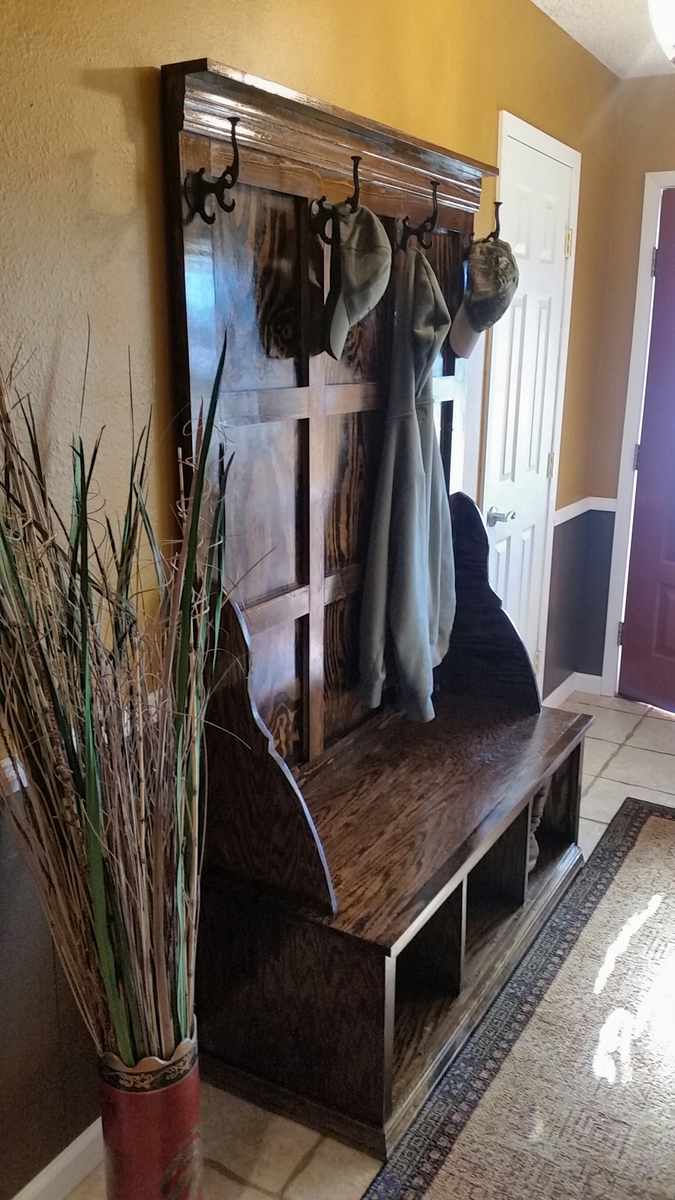
Plans were right on, didn't encounter any problems. Great weekend project.
Built from Plan(s)
Estimated Time Investment
Weekend Project (10-20 Hours)
Finish Used
Min wax espresso
Recommended Skill Level
Intermediate
Comments
Mon, 01/04/2016 - 20:01
Very Pretty!
Great job on this project, pefect for the space. Thanks for sharing!
Tue, 01/05/2016 - 07:46
Thank you for the compliment,
Thank you for the compliment, passed on to the husband. And thank you for all the plans you provide.
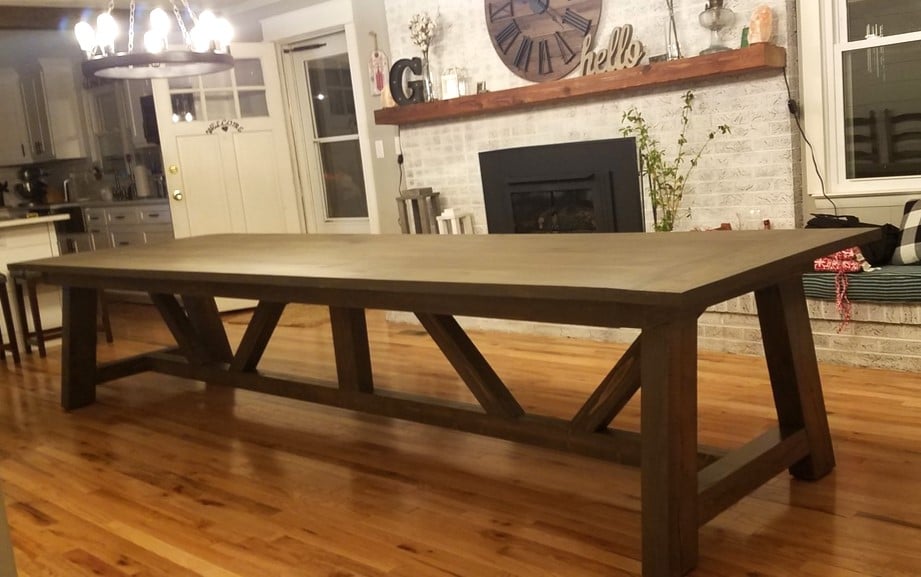
14 foot table

I made a 14 foot table using Ana's plans. I am remodeling my parents house that they built in 1966. I was able to use some 4x6's for the legs from walls that I took down.
Estimated Cost
300.00
Estimated Time Investment
Week Long Project (20 Hours or More)
Finish Used
Briarsmoke
Recommended Skill Level
Intermediate
Comments
Tue, 06/04/2019 - 20:07
Hi that looks amazing! I’m…
Hi that looks amazing! I’m looking to make the same size table. Could you please tell me the measurements of your legs? Also what length support boards did you use. Thanks
Storage Bench and Cabinets
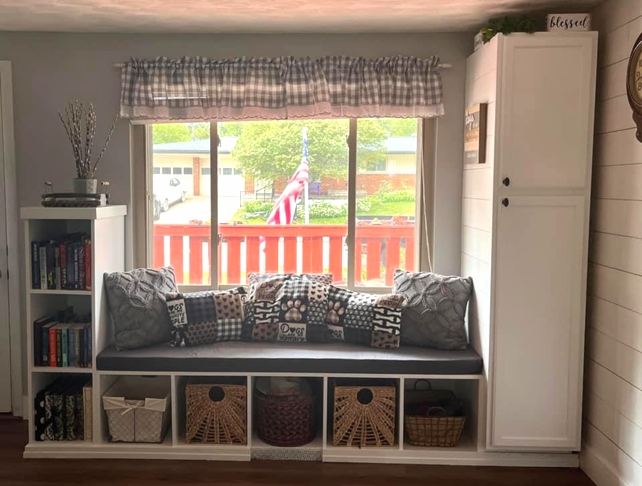
"Built this with Ana's plans, with a couple modifications. What was a dead space, now has purpose!"
Deb Klug Massar
Built from Plan(s)
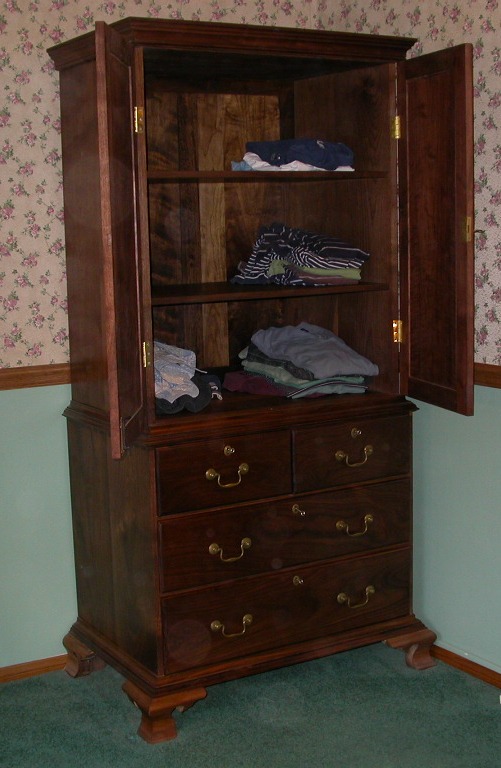
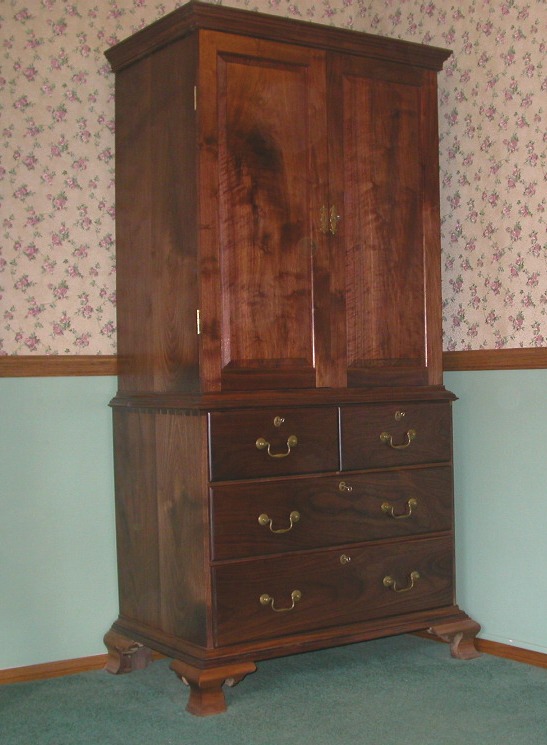
A Chippendale Clothes Press
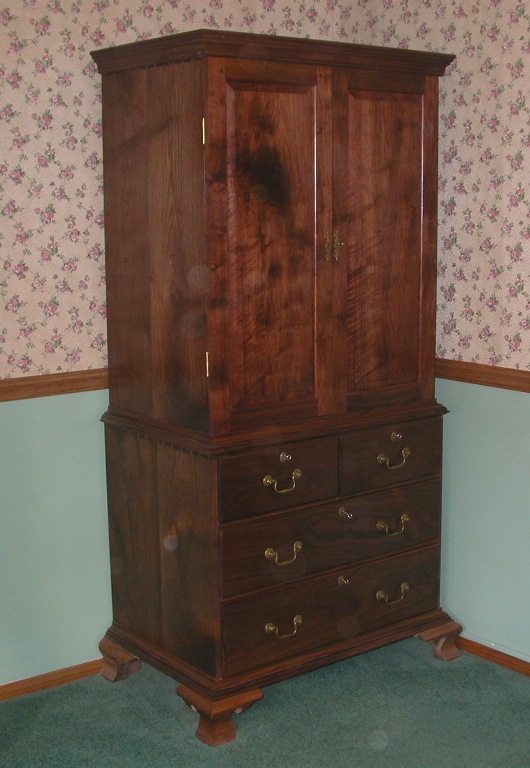
I made this from a design in Thomas Chippendale's "The Gentlemen and Cabinetmakers' Director". It has two internal shelves for storing clothes. All the drawers have working locks and the brass is from Londonderry.com brasses. Their motto is "When Authenticity Counts". It took about 250 hours. Wholly done with mortise and tenon (pinned) and dovetails. The carcass is dovetailed to avoid using any nails. The feet are typical Chippendale with ogee bracket feet. I used only rough lumber which I mill to final dimensions. The moulding is my own design.
Estimated Cost
$1200.00 plus $600 for the brasses and locks
Estimated Time Investment
Week Long Project (20 Hours or More)
Finish Used
Minwax Antique Oil Finish, Beeswax.
Recommended Skill Level
Intermediate
Comments
Sun, 10/30/2011 - 19:51
Wow - quite an heirloom!
Wow - quite an heirloom! I've always admired fine furniture, although I tend to go more rustic myself. Thanks for sharing!
Thu, 04/26/2012 - 16:00
Serving as an ideal cabin luggage, it has many
Louis Vuitton Urban Satchel Bag-Art or Hype dollars for a bunch of crap! Are you serious? At least for The Olsen twins who just signed an advertising deal mounting to astronomical figures for Louis Vuitton Urban Satchel Bag, this so-called the most expensive and ugliest handbag in the world is not [url=http://www.toplouisvuitton-outlet.com]Louis Vuitton[/url] CHOO Shoes,Prada Shoes,MARC JACOBS Shoes,Hermes Shoes,JC Juicy Couture Shoes,YSL Shoes,TORY BURCH
embellish the whole beach. Top.3-louis Vuitton Xl Surya, Shiny As The Sun Surya, a well-known Hindu mode of worship of the devotional movements, is done at the rising of the Sun, known as Skrya namaskra (Sun Salutation). He represents soul, will-power, fame, general vitality, courage, highly placed [url=http://www.toplouisvuitton-outlet.com]Louis Vuitton Bag[/url] save a lot of money. Some sites allow you to save even more money when you by more than one item
you look at the border of the bag carefully, you may find the fading effects made by float-stone. With the time of usage, the color of LV leather will be deeper and deeper, while the color of main-body will be shallower and shallower. Monogram Multicolore:A new revolution of Monogram canvas made by [url=http://www.toplouisvuitton-outlet.com]Louis Vuitton Bags[/url] Vuitton released new style wallet in classic Monogram Canvas called nsolite? The Insolite wallet
in Vogue Italia. Gomes was born in Perth of Singaporean and Portuguese heritage. Now grounded in New York, she has toiled with DKNY and was the face of the Sean Combs Unforgivable fragrance. Kathy Ward from Sydney's Chic Management, which represents Rutt and Gomes, does not like to label the pair. http://www.toplouisvuitton-outlet.com watches.Swiss engineering,precision crafted timepieces.We are manufacturers and sellers of these top
people like Madonna to promote their products. This is without any doubt one of their best market strategies. This process called the process of brand association is without any doubt the best market strategy. It is an advantageous process not just for Louis Vuitton brand but also for Madonna. In
Toddler Bed
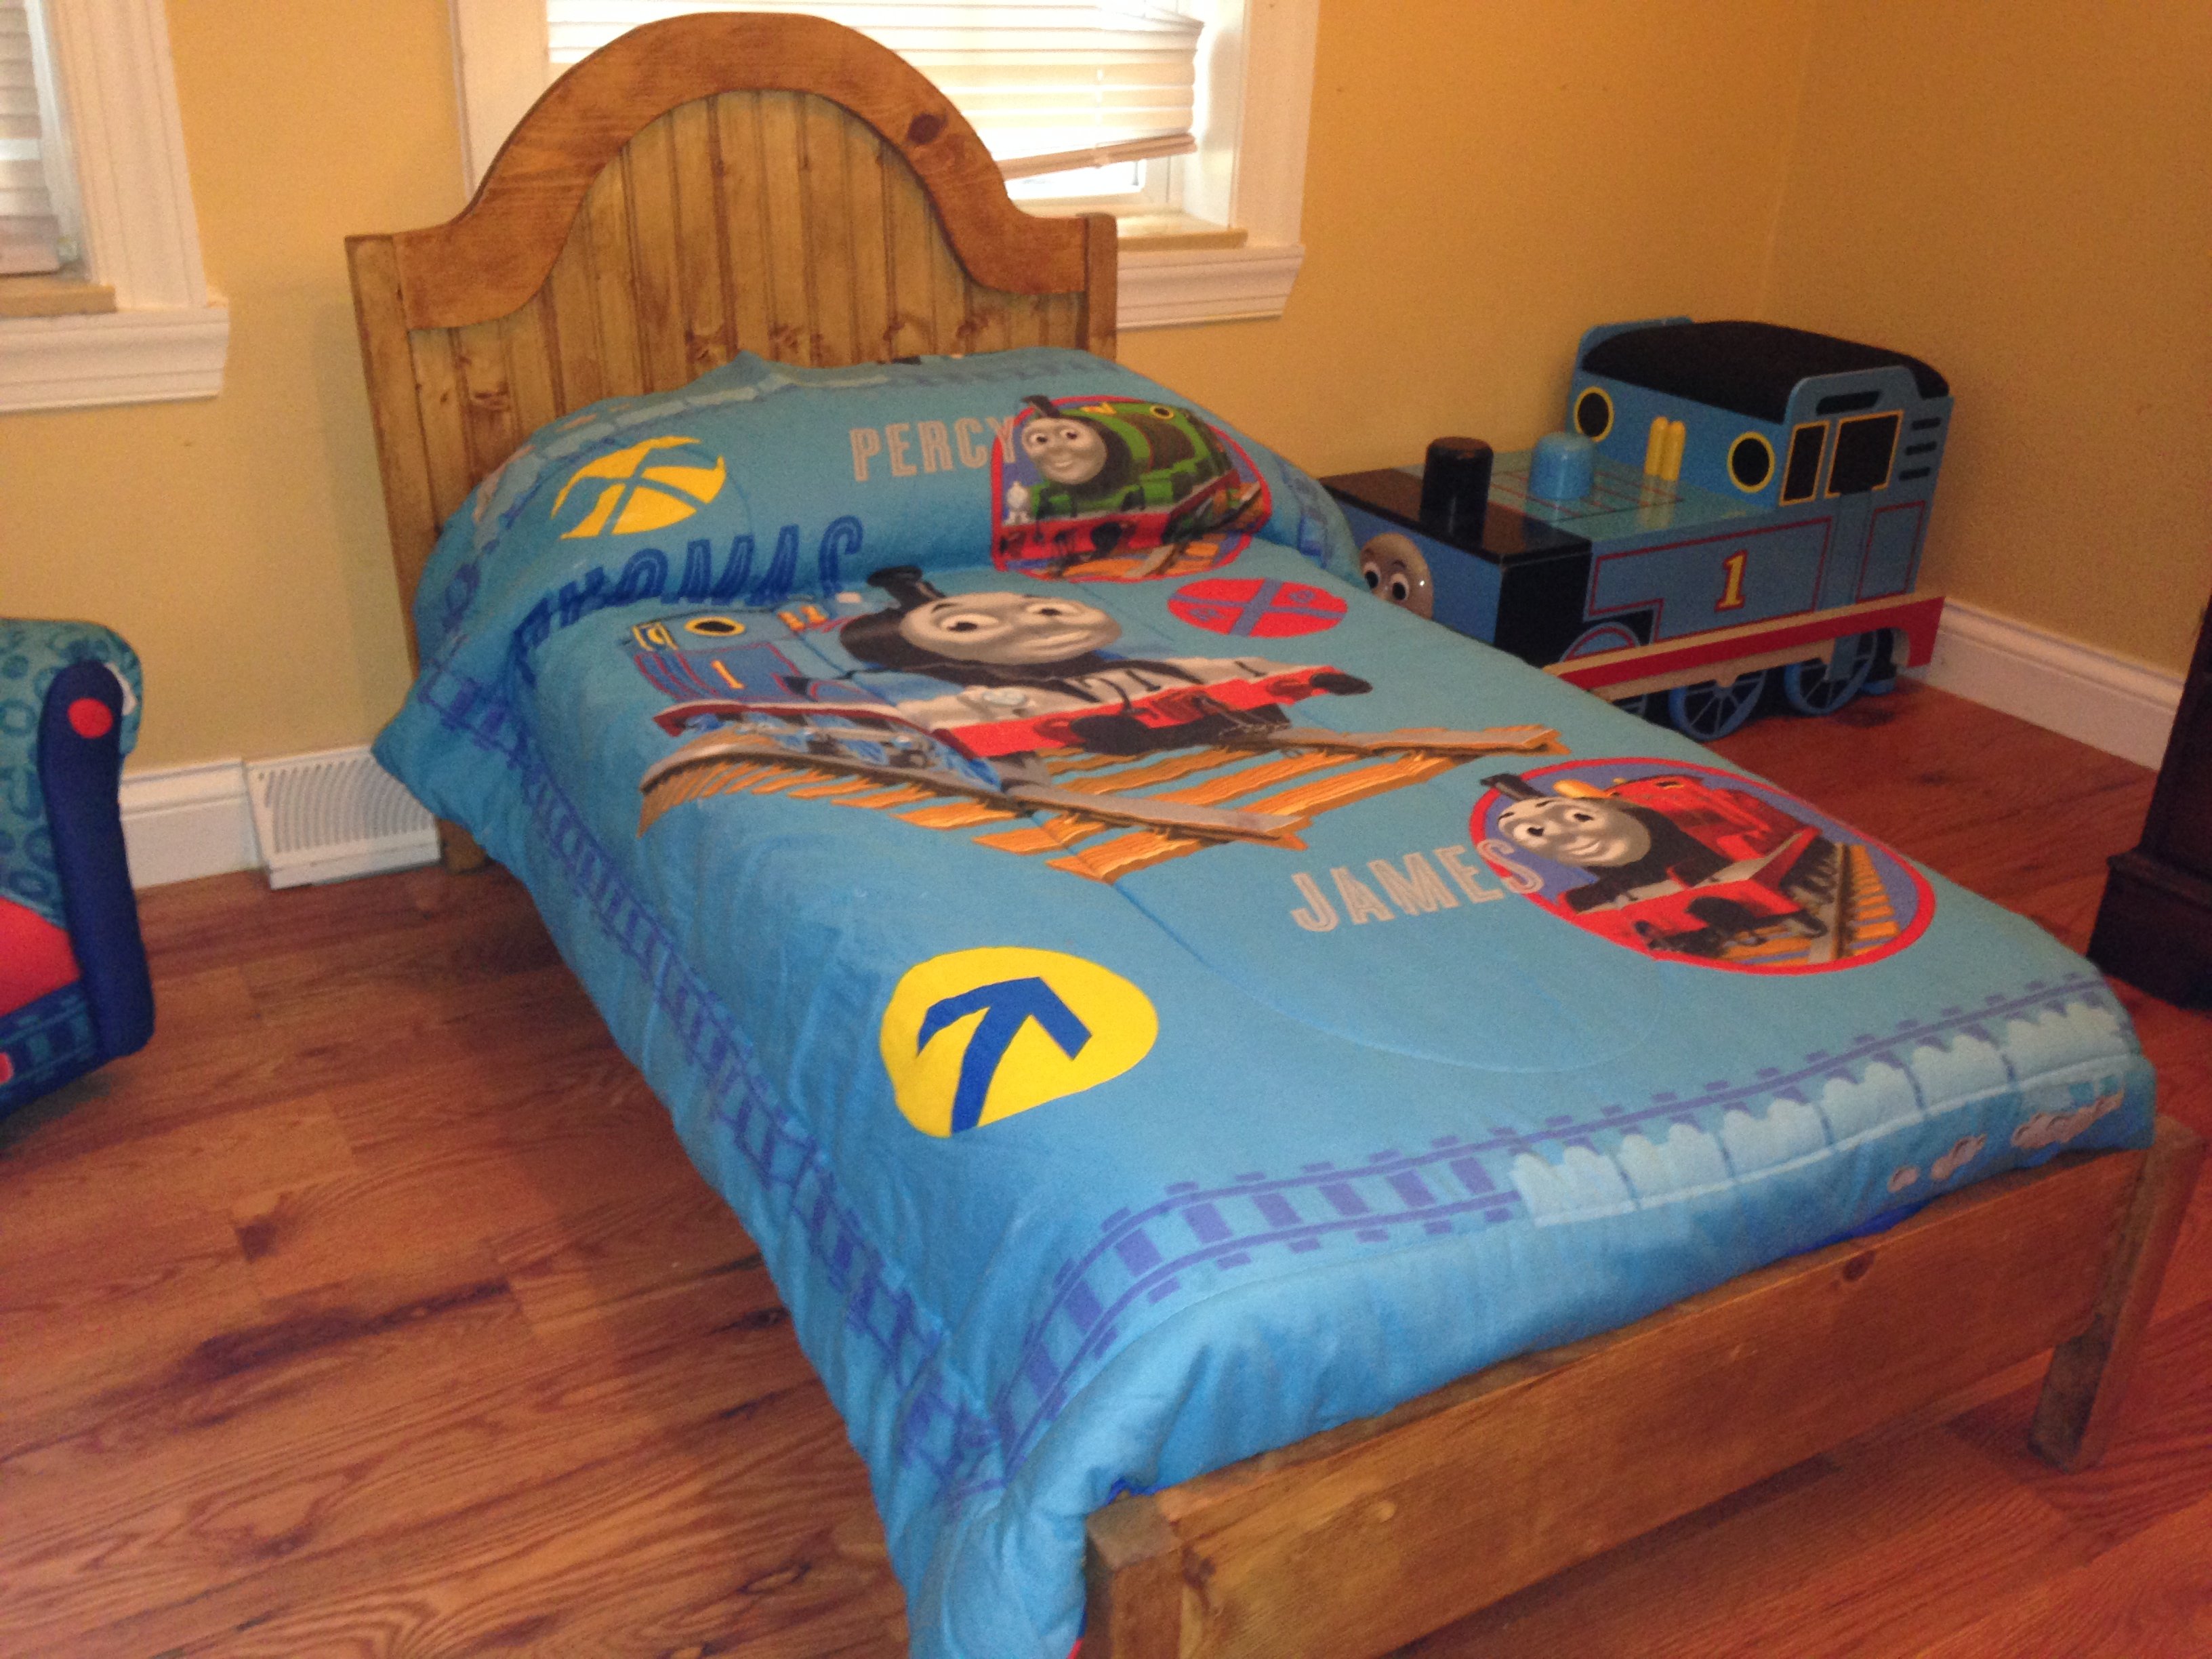
This is the biggest project I've tackled to date (I can count on one hand the little projects I've done before--stools, simple shelves, etc.). This is a beginner project, for sure. I made this bed one night when I couldn't sleep and it took about 4.5 hours to build the four main pieces: headboard, footboard, and two sides with the cleats. The next day I sanded, stained, added shellac, then assembled the 4 parts--"active" time about 1.5 hours. I used four simple L-brackets (about 50 cents each) to assemble so I will be able to easily take the bed apart... he'll outgrow it too soon.
Other than that, I followed the plans exactly as they were laid out. I like the overall look of the bed. For the guardrails: I attempted but did not like the guardrails from the plans. They were not the right size. Because his room is train-themed, I just wood-glued some extra train tracks in a crescent shape to a thin piece of scrap wood (cut and sanded to fit the tracks).
This is a fun little bed. If I had to give up my youngest's crib (so sad)... it could only be for something this cute.

Built from Plan(s)
Estimated Cost
$35
Estimated Time Investment
Afternoon Project (3-6 Hours)
Finish Used
Cabot "Golden Oak" ...random fact, happens to be the exact same color as Thomas the train tracks.
Recommended Skill Level
Beginner
Comments

Harlows Art Table!
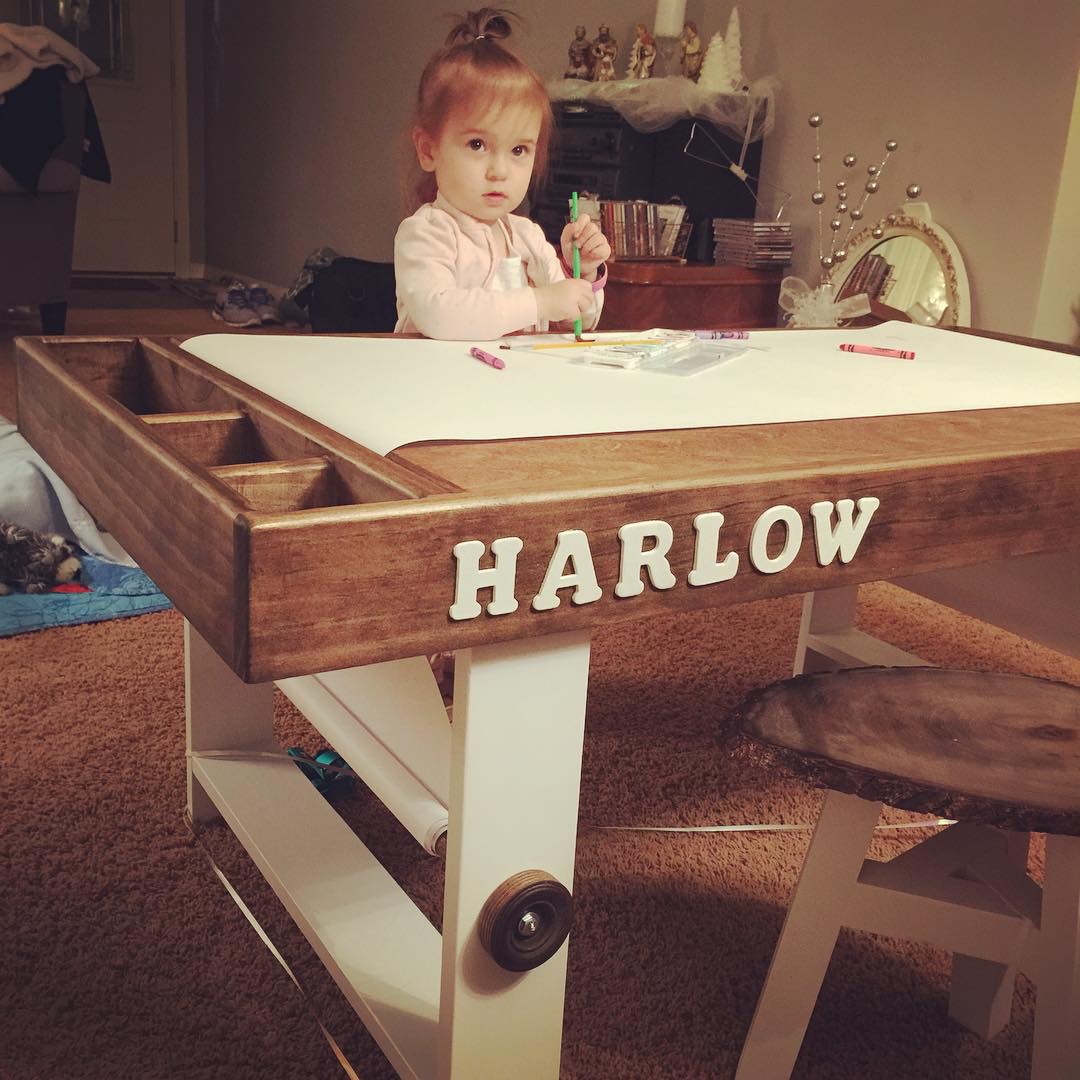
Followed an Ana White DIY to make a childs art table. Modified it a bit towards the end and I think it turned out OK!
Built from Plan(s)
Estimated Cost
100
Estimated Time Investment
Weekend Project (10-20 Hours)
Finish Used
Painted the base with white paint/primer in one (Rustoleum). Stained the top with Dark Walnut minwax stain and then covered it with Minwax spray on polycrylic spray (5 coats).
Recommended Skill Level
Intermediate
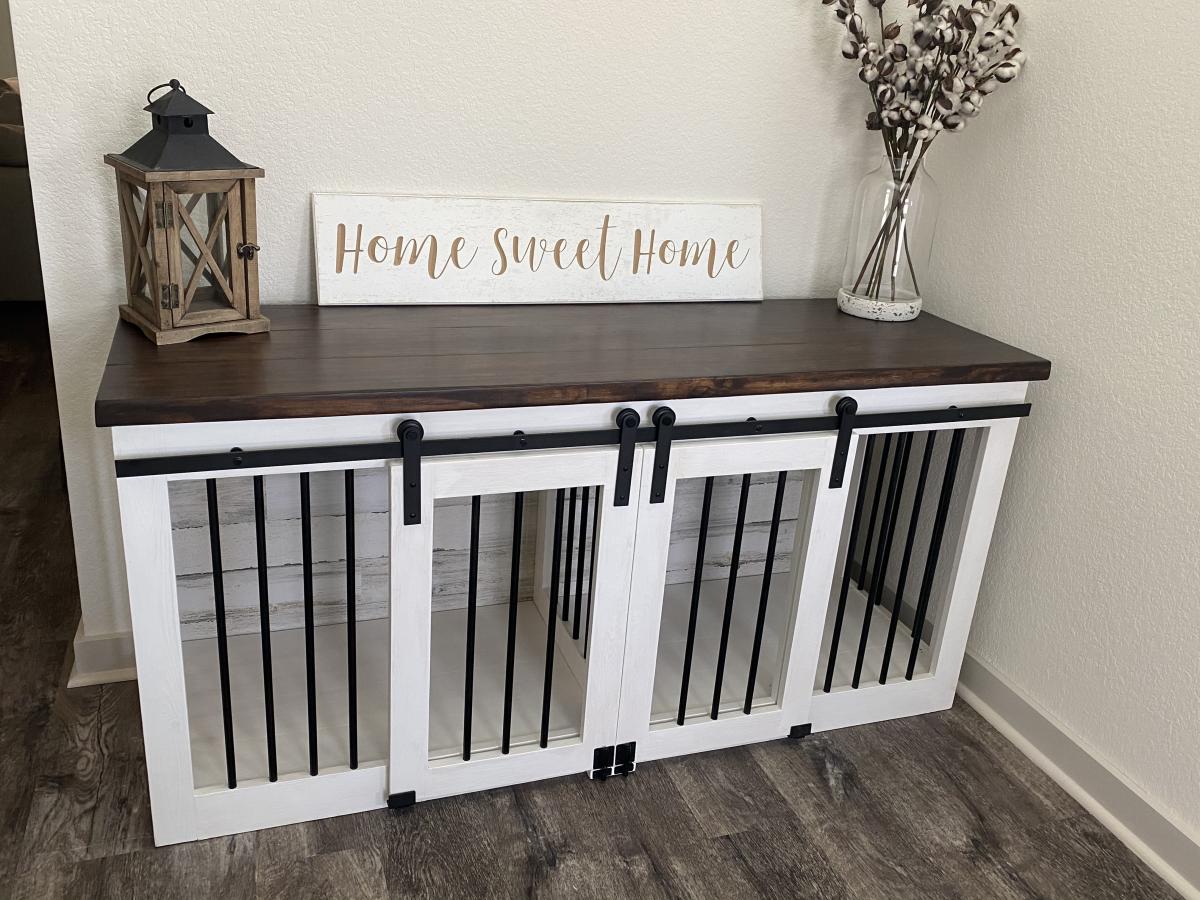
Dog Crate
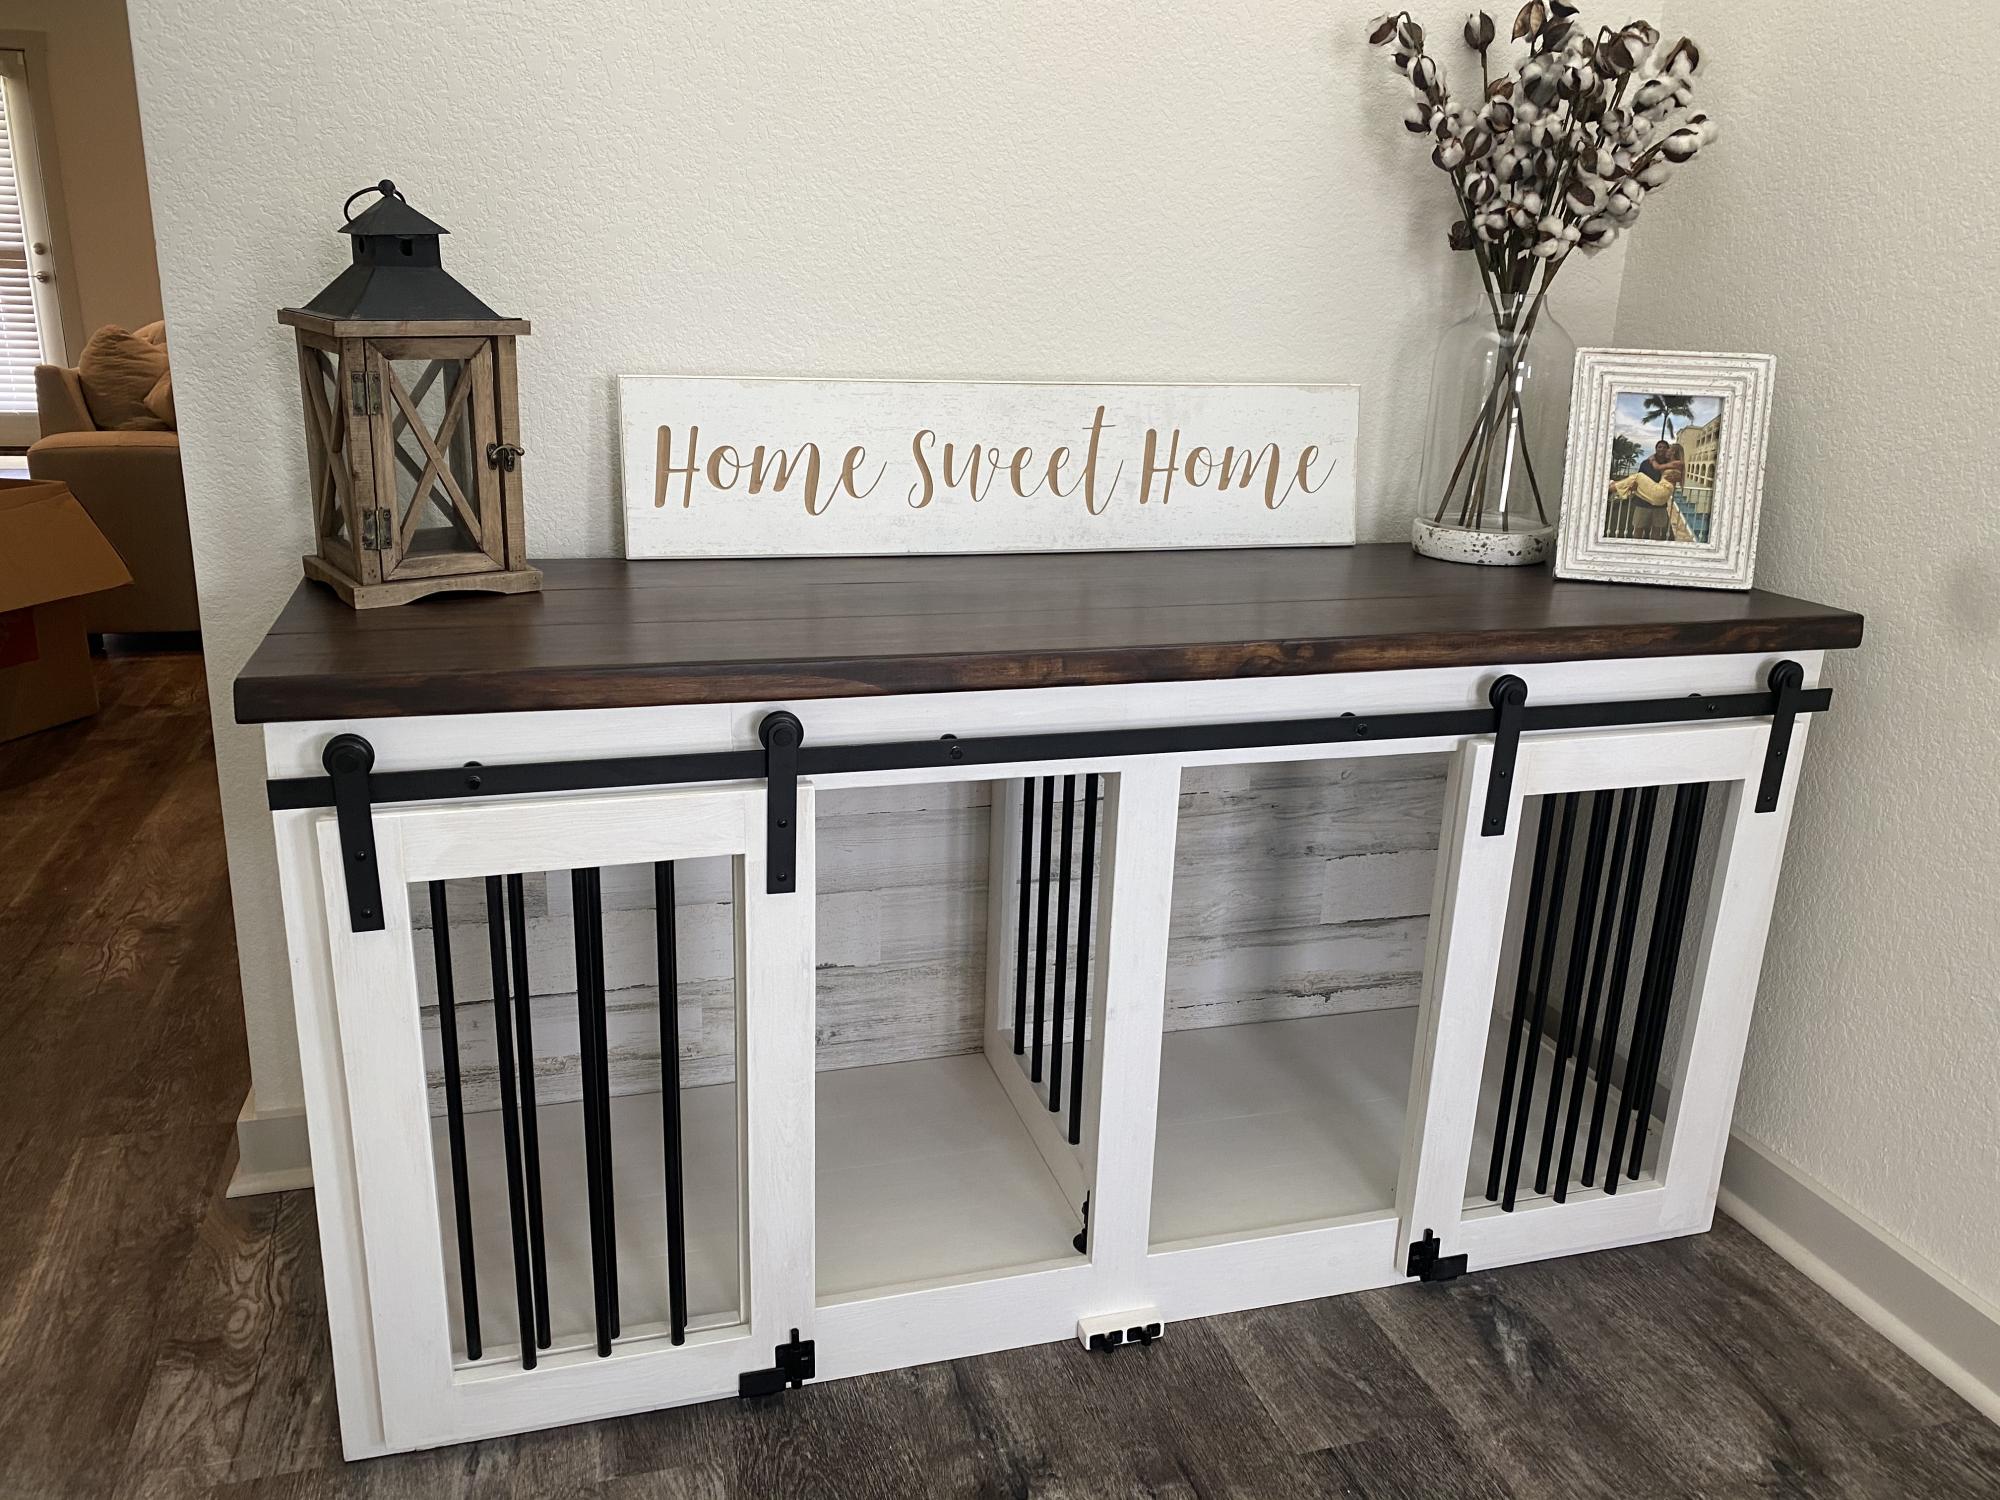
I modified the Grandy Console to be dog crates for my Grand Pups so we didn’t have to have crates set up in the house. Middle divider can be raised to make one big crate.
Built from Plan(s)
Comments
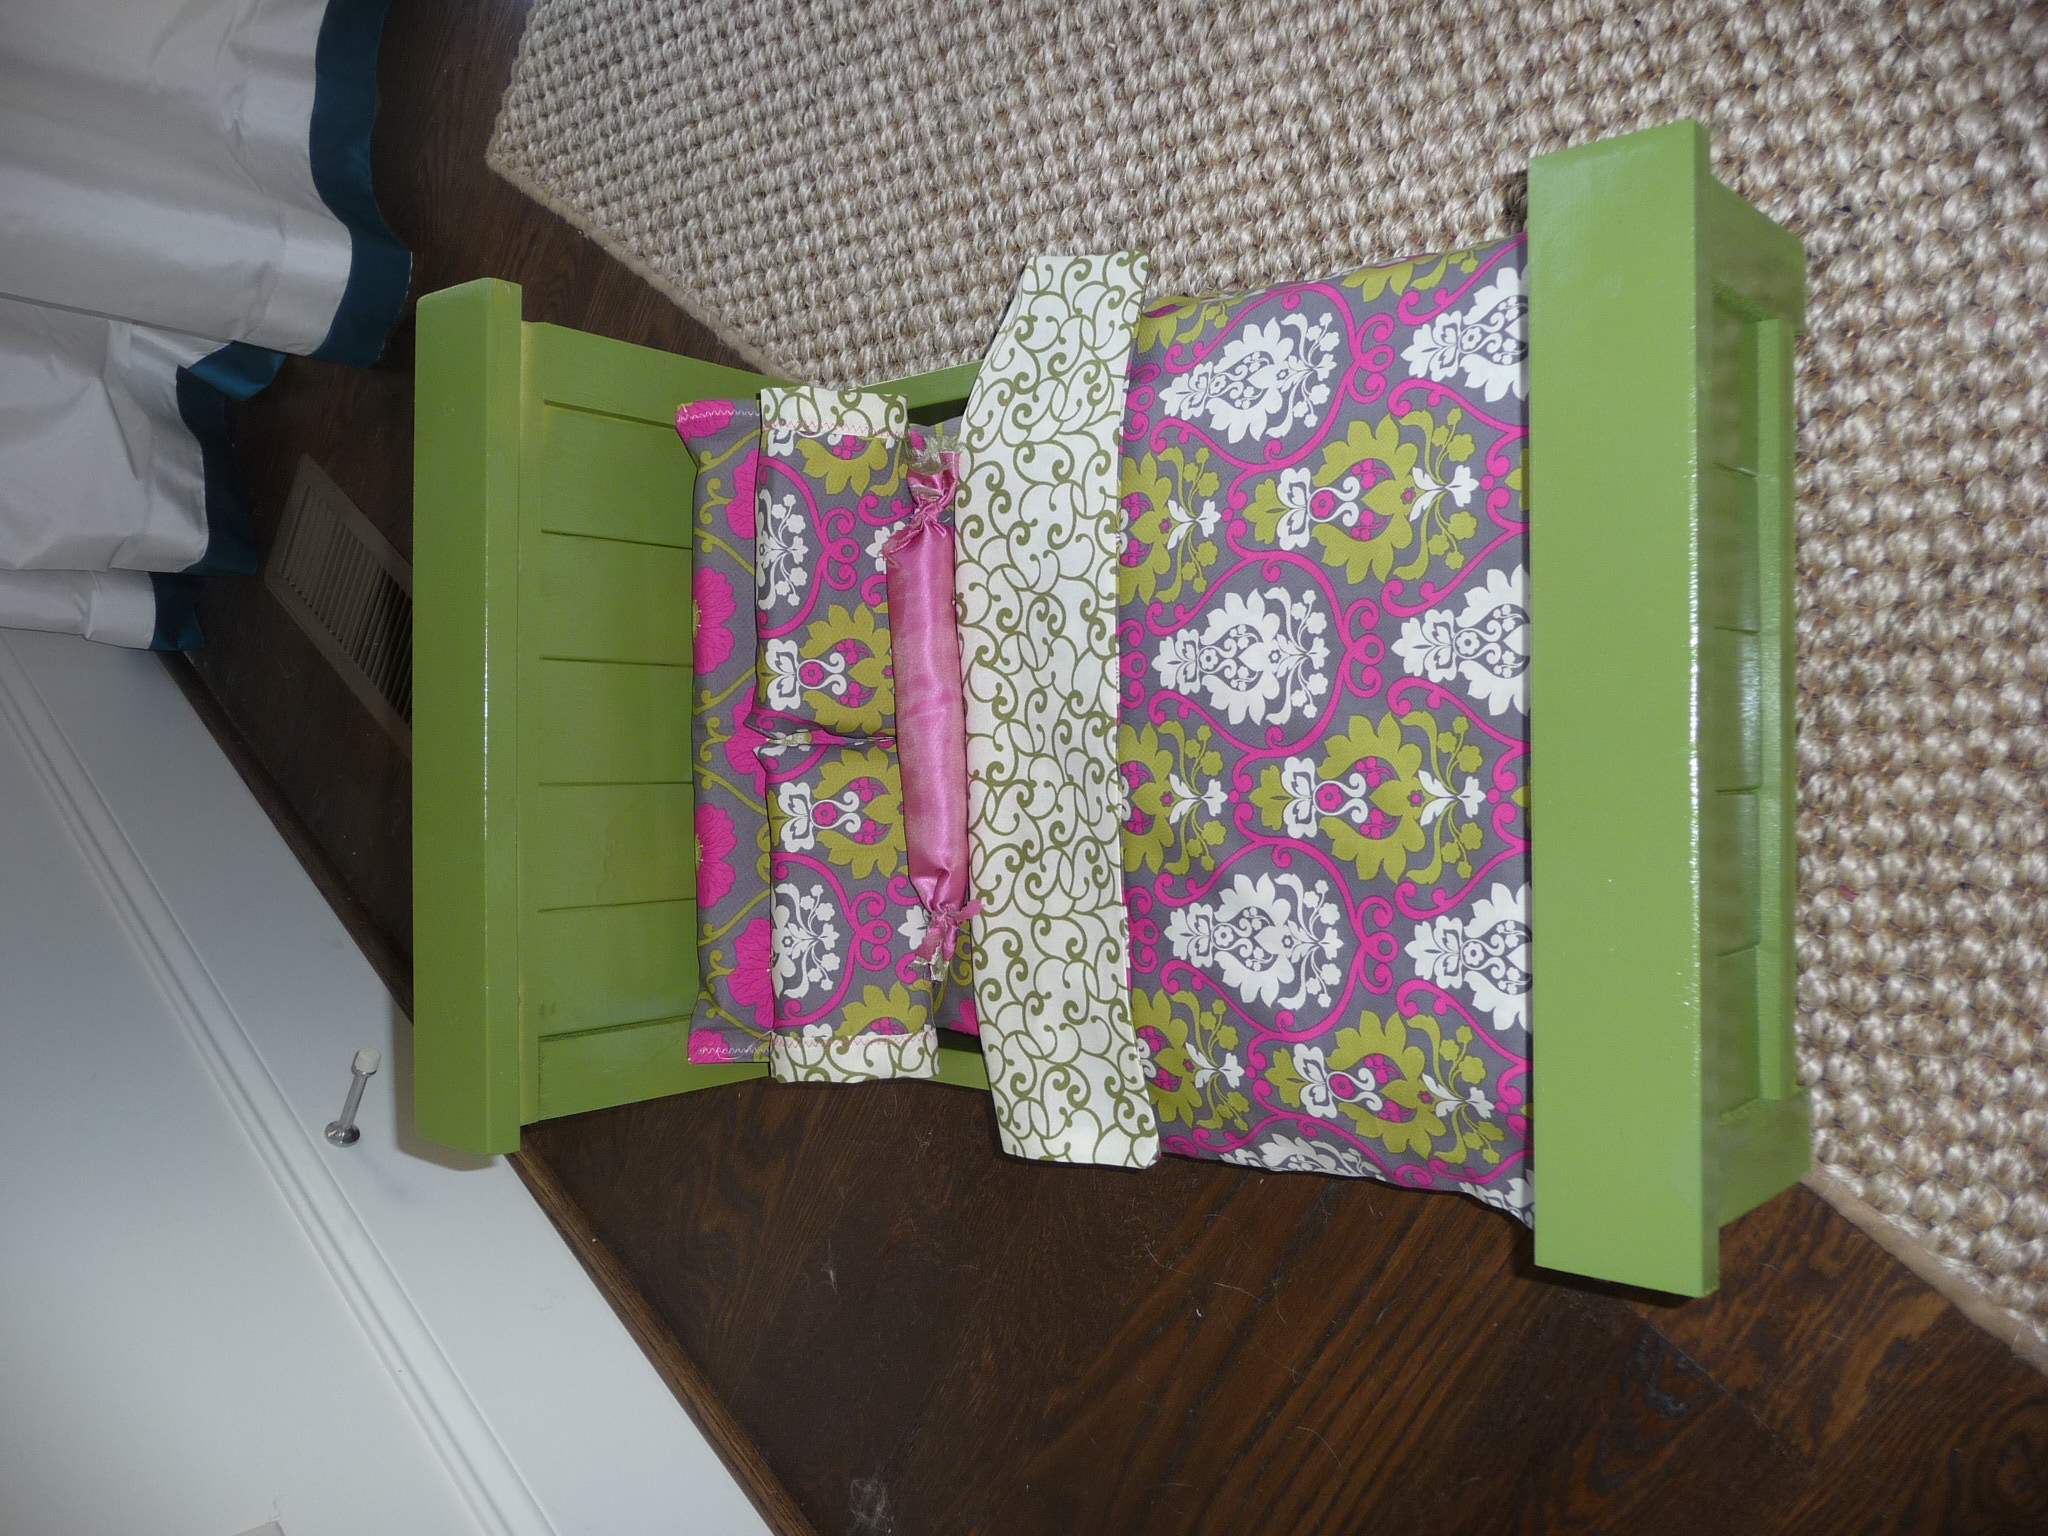
Caro's AG Doll Farmhouse Bed
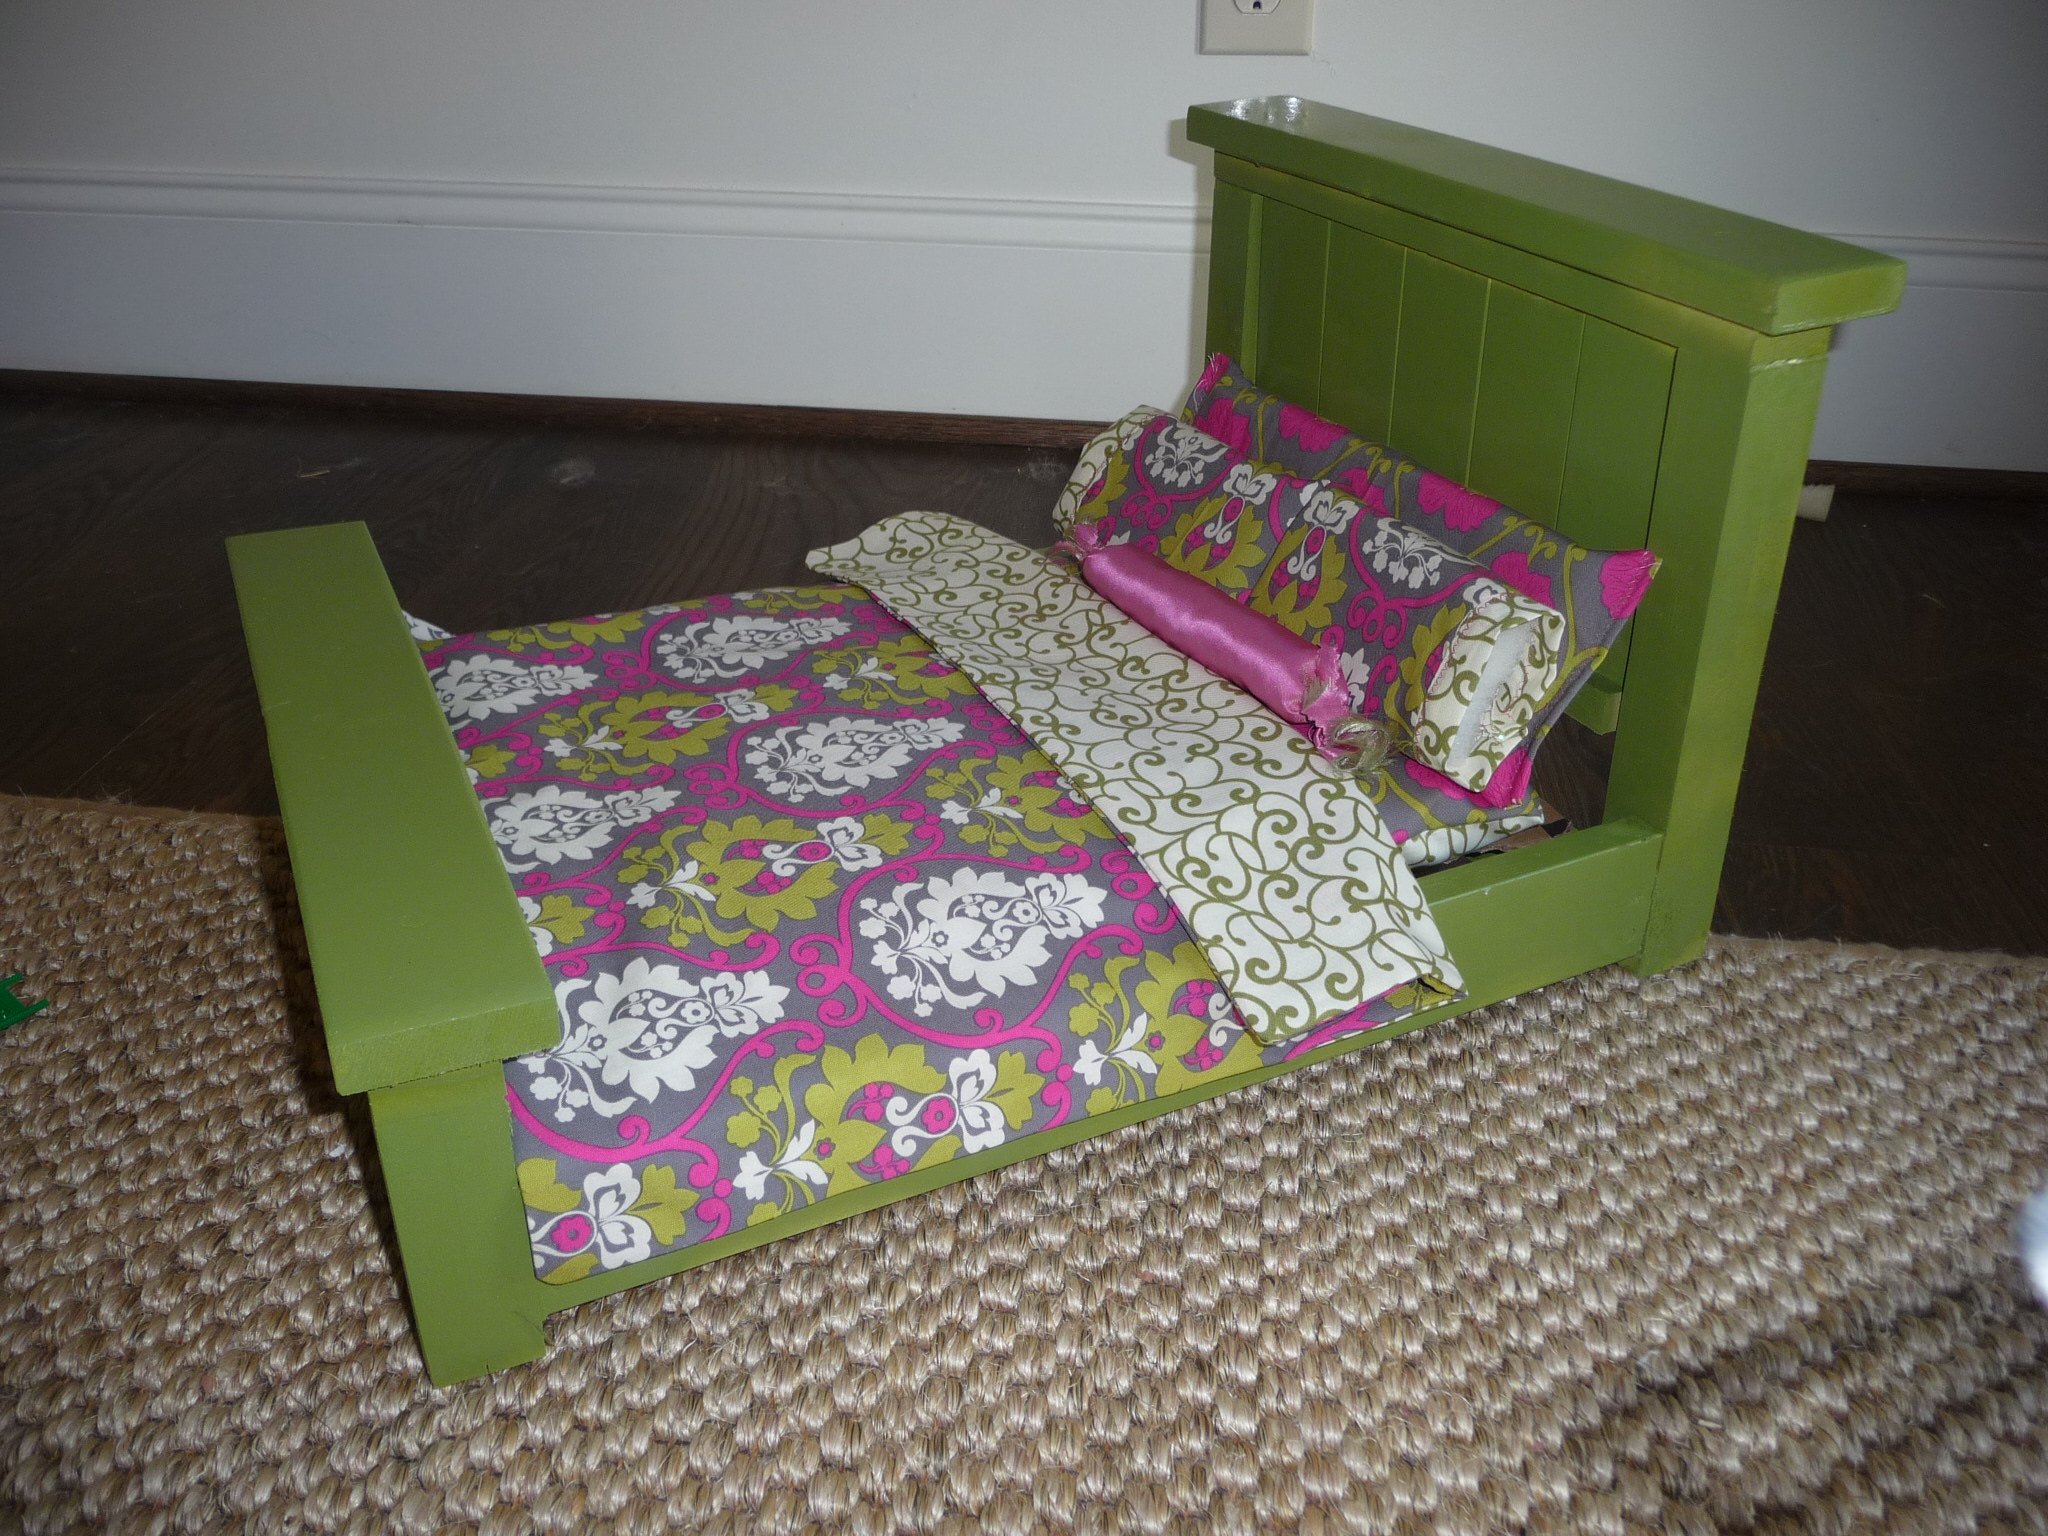
Third AG doll bed for my nieces - they are so much fun to make! I loved how the green turned out - I want to paint everything in the house this color!
Built from Plan(s)
Estimated Cost
$30 (includes paint & fabric)
Estimated Time Investment
An Hour or Two (0-2 Hours)
Finish Used
Rustoleum gloss spray paint in "Fern" (found at Lowes)
Recommended Skill Level
Beginner