Community Brag Posts

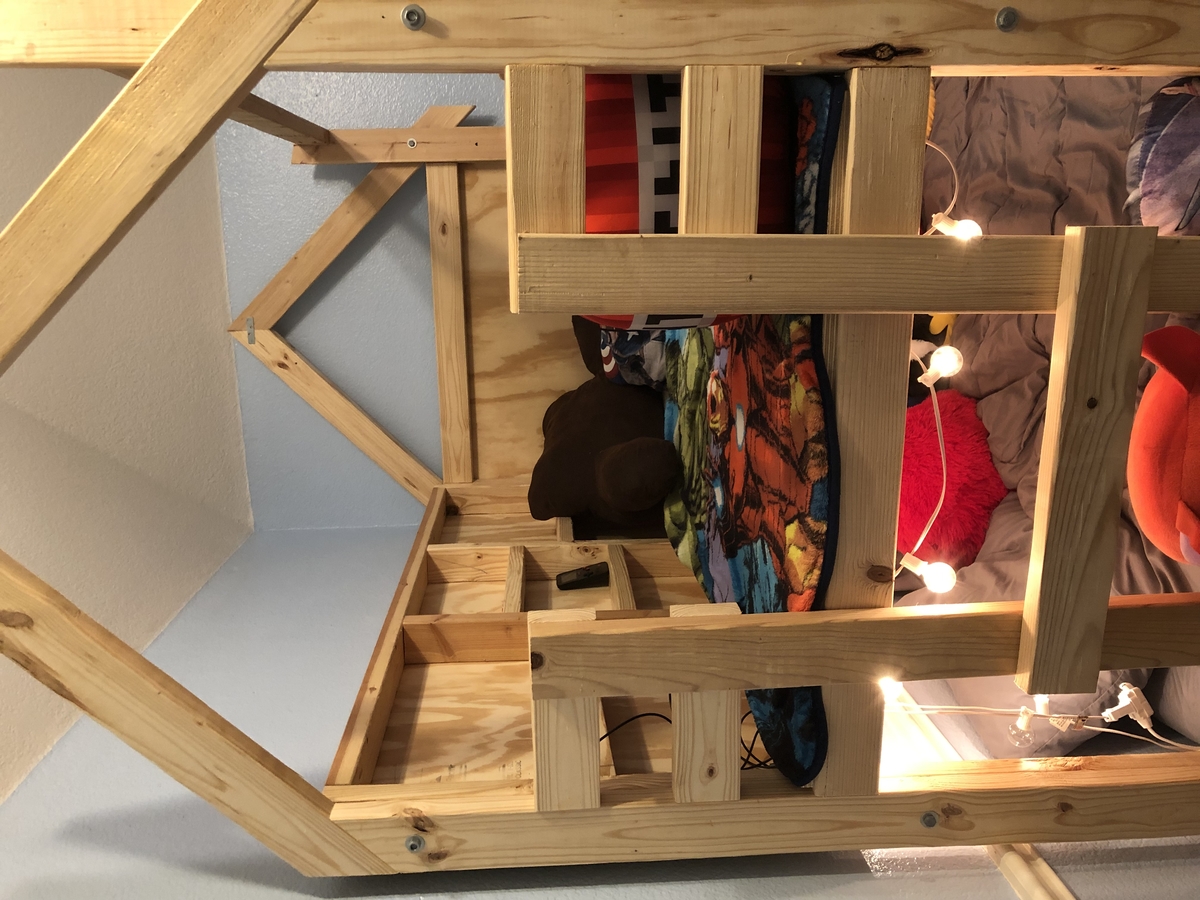
Over Bed Fort to fit a queen size mattress

Submitted by Anonymous (not verified) on Mon, 01/14/2019 - 12:35

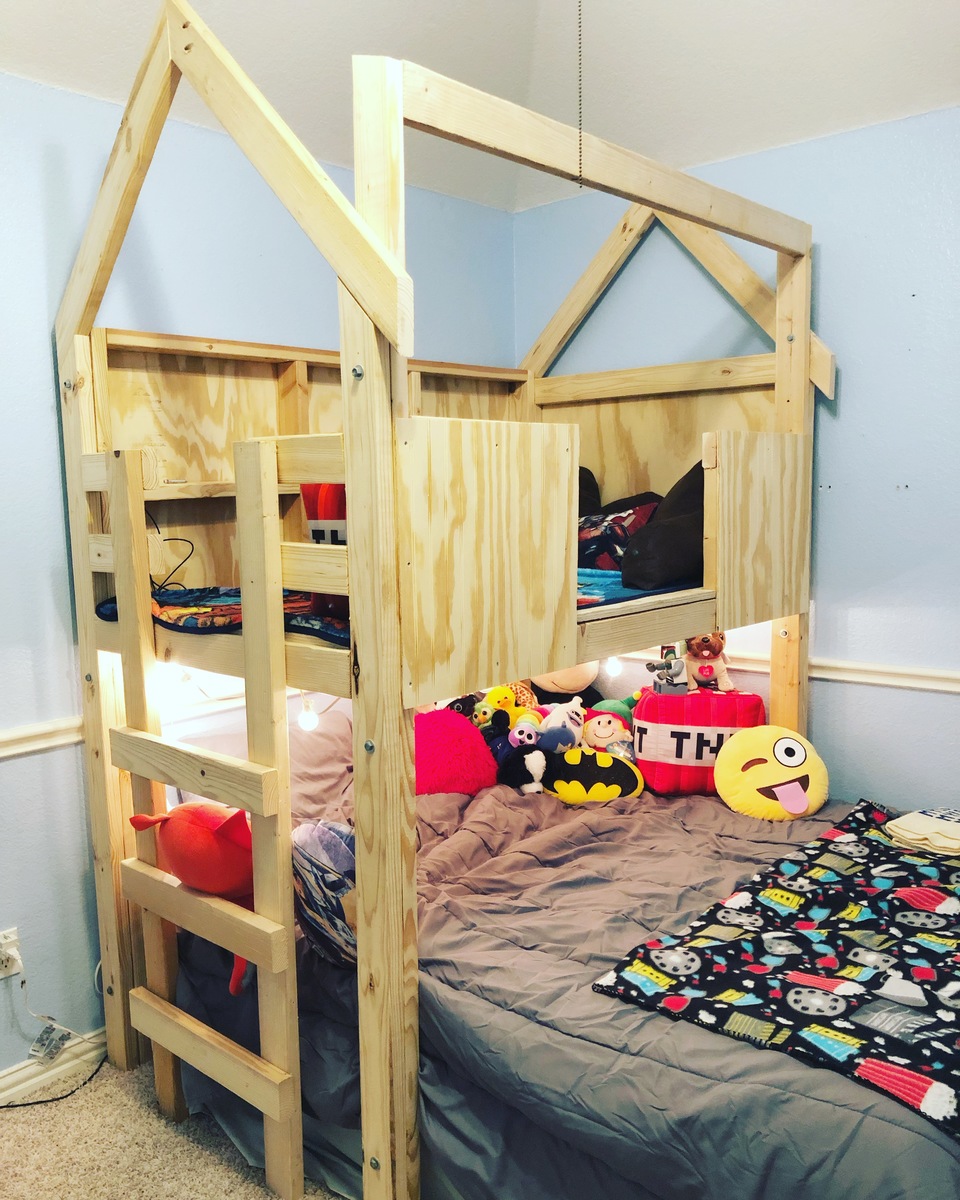
This is my first time building anything, and it was so fun, minus the million trips to home depot! I had to modify the original plans to fit over a queen size bed, and I actually built the roof that is part of the plans, but we decided to use fabric for the roof to let light in. For now, it's a convertible fort, ha! 


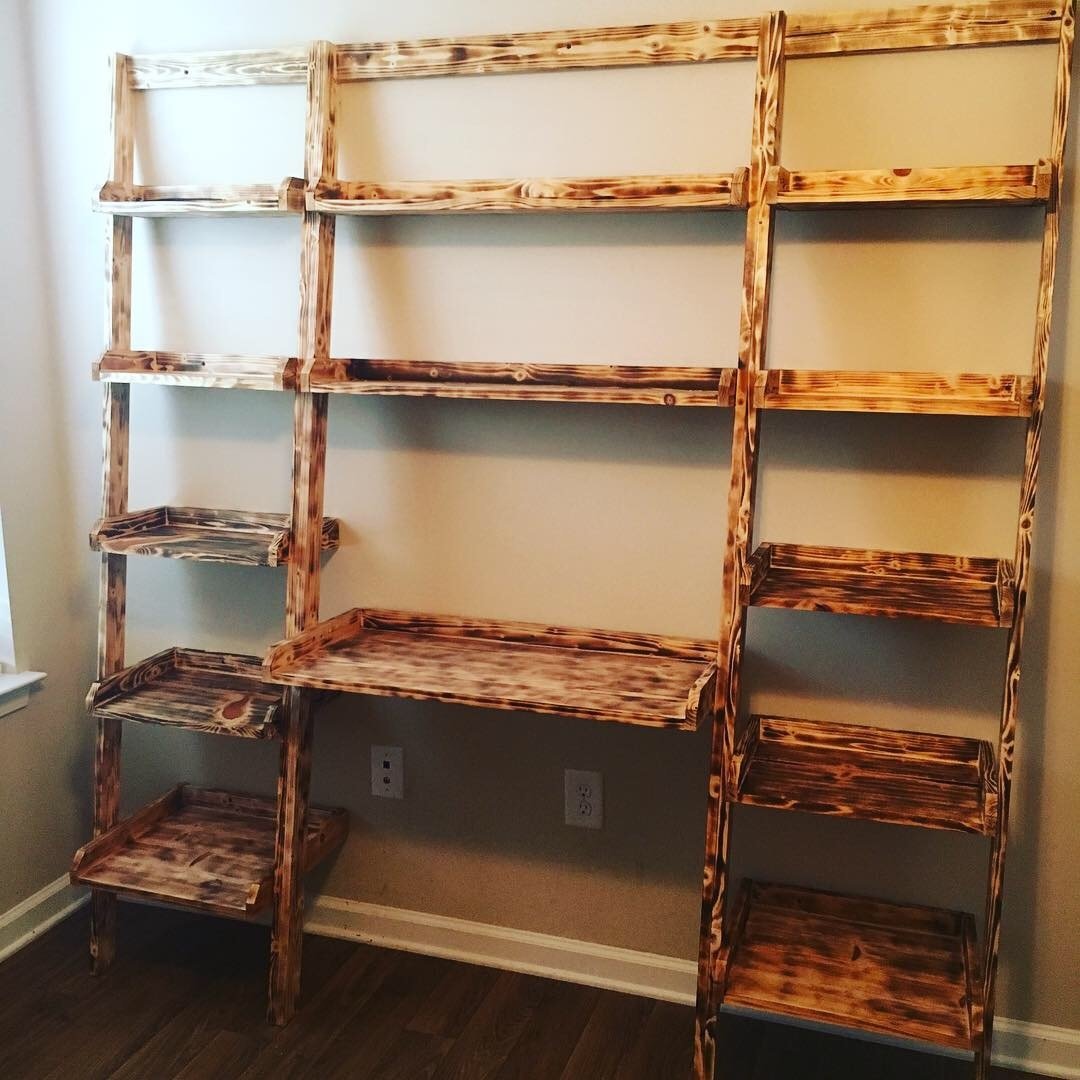
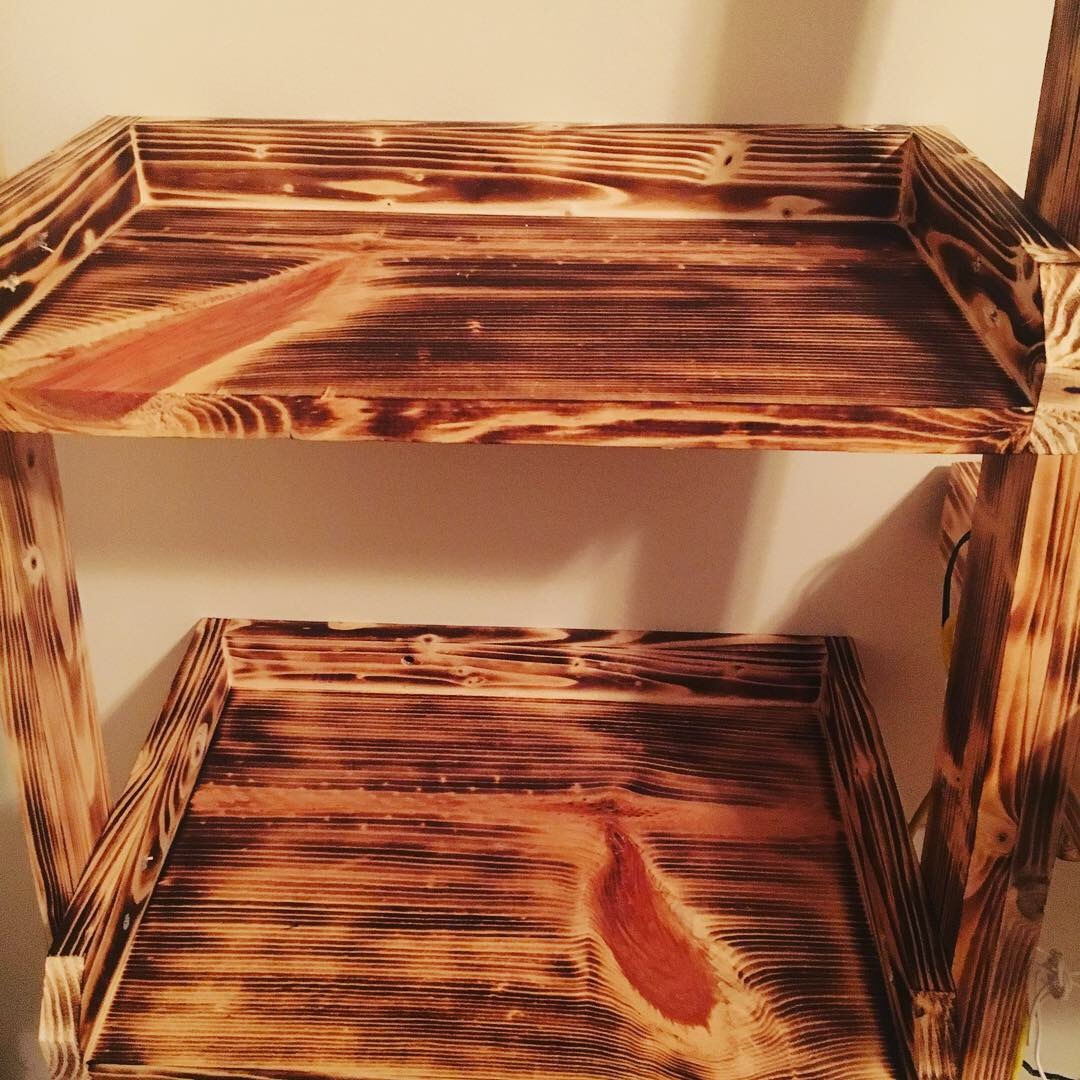
I also added shelves along the back wall, similar to the onces done by Jamie Costiglio. I thought it was a good way to incorporate storage for some action figures. Plus, I left a space in the front open so that my son could jump from the fort to his bed. Underneath I strung up some lights with small command hooks and they're connected to a smart switch so we can ensure they aren't left on all the time.


This took me significantly longer than it might take a skilled builder because it was my first time. It was a solid 3 days of work - a full weekend and then one day the next weekend. 


Overall this was such a fun build - now to add a rock wall on the side! :)

Estimated Cost
$300-$350 - but I had to buy a kreg jig and I used significantly more wood to make it fit a queen size bed. I had to buy wood - I didn't have much on hand.
Estimated Time Investment
Week Long Project (20 Hours or More)
Finish Used
I didn't add any paint or stain. I wanted it to feel like a tree house, so I thought the natural wood would work best.
Recommended Skill Level
Intermediate

Raised Pet Feeder - Small

Submitted by takahler on Wed, 08/31/2011 - 11:46

As soon as I heard my brother was going to get a puppy this month, I decided I was going to make this food and water dish holder. I LOVE IT! I am going to give it to him for Christmas. I made it with larger bowls for when the puppy becomes a full size Golden Retriever. She won't need it right away, so I've decided to wait until Christmas to wrap up and give to my brother. I had a lot of fun making this project. I need to make one now for our cockapoo.

Since I had to use larger bowls, I had to come up with my own measurements. I'm pretty proud of myself for tackling that all by myself. :-)

Coated it pretty heavy with the polyurethane to protect it from water spillage.

Built from Plan(s)
Estimated Cost
$9 for the bowls and about $6 in lumber--Total of $15
Estimated Time Investment
Afternoon Project (3-6 Hours)
Finish Used
Dark Walnut and polyurethane
Recommended Skill Level
Beginner

Comments

Lapdesk

Submitted by DogDoc25 on Sat, 09/21/2013 - 16:10

This was a pretty simple project and only took a few hours. I painted the bottom with some oops pain I found at Home Depot- I wanted the blue to be darker, but I still think it turned out ok and I will probably end up giving it to my nephew. I followed the instructions that one of the other builders had done on this project as far as making the legs shorter and leaving the compartments out to make it lighter. Happy with it overall!

Built from Plan(s)
Estimated Cost
less than $10
Estimated Time Investment
Afternoon Project (3-6 Hours)
Finish Used
painted the bottom with blue oops paint and used minwax golden oak (1 coat, left on 20 minutes then wiped off) and polycrylic for the top
Recommended Skill Level
Beginner

Barn door console

I made the sliding barn door console from your plans.  I liked it so much I made a 3 opening version for another wall.  I found patio door rollers to use instead of taking apart a pulley in the directions from the that's my letter plan.  I used old crates my parents had kept and scraps for my doors so it has sentimental value. 

Built from Plan(s)
Estimated Time Investment
Week Long Project (20 Hours or More)
Finish Used
Varathane golden pecan and espresso for the top. Vinegar and steel wool for the backing. Various colors for the doors. Min wax clear polycrilic finish.
Recommended Skill Level
Intermediate

Leaning Desk and Bookshelves

Submitted by Anonymous (not verified) on Sat, 01/19/2019 - 21:22

Used a handheld propane torch to “burn” the wood and it turned out amazing! 

Estimated Cost
$100 I didn’t have any wood on hand so had to buy all of it. The rest of materials I already had.
Estimated Time Investment
Day Project (6-9 Hours)
Finish Used
Propane to burn the wood
Recommended Skill Level
Beginner

Grid Mirror

Submitted by Anonymous (not verified) on Fri, 11/25/2022 - 06:05

Thank you Ana for your amazing easy to follow plans and videos! I’ve had so many compliments in the mirror and goes great with the table from Shanty2Chic. I went with 8 x 8 mirror tiles. We love it!

Comments

Storage Sofa with Armrests

When we bought our house a year ago, my husband was super excited to be able to get tools and start working with wood. At first, I didn't share his desire for DIY projects. It honestly wasn't until I found your website that I started to get excited. It was first a excitement of things that I could have my husband do/make as he had already made the coffee table that you see along with an entry table, 2 small bookcases, workbench, wall shelf, and storage shelves.

However, recently I started to get the crazy idea in my head that I could help and we could do projects together. When we decided that our couch was too big for our small living room space, we determined to buy a newer smaller couch. That was until I found the plans for this one. We decided that we would give it a try, and if it didn't turn out like I wanted it to, it could go in his man-cave.

Keep in mind, I am not a seamstress nor can I really sew in a straight line, but following Anna's plan made this project easy. My husband and I decided that he wanted armrests on the couch and came up with the armrests designs you see here.

I am already excited an working on our next project of a Farmhouse table that I have (not the hubby) done most of the work on.

Built from Plan(s)
Estimated Cost
$300
Estimated Time Investment
Week Long Project (20 Hours or More)
Finish Used
Early American, I believe. Fabric was the cloth paint drop cloth suggested in the plan which I love the neutral colors of and it makes things easier to decorate for the seasons.
Recommended Skill Level
Starter Project

Comments

Sammie

Thu, 01/02/2014 - 10:05

I love your couch! My boyfriend and I just started this yesterday too. Were the armrests hard to construct for the couch?

Factory cart coffee table

Submitted by Anonymous (not verified) on Thu, 01/24/2019 - 04:20

Awesome plan, used 10” boards and 6” wheels to add height. Also added hinges so that the top opens up for storage. Found some hardware to give it some personality. 

Built from Plan(s)
Estimated Cost
$85.00
Estimated Time Investment
Weekend Project (10-20 Hours)
Finish Used
Dark walnut & gray stain, layered.
Recommended Skill Level
Beginner

Extra Long Buffet Cabinet

Submitted by Anonymous (not verified) on Sat, 12/03/2022 - 19:29

My husband and daughter worked on this project together. They modified the extra long buffet cabinet to include a drop leaf on the backside. This project adds extra storage her tiny apartment while also providing a space for them to eat.

It still needs painted, however it looks amazing.

Built from Plan(s)

Comments

Modified farmhouse bed - my first time building anything ever!

Submitted by brittanie on Wed, 09/07/2011 - 13:06

Got a new (and larger, King sized) mattress this summer, and wanted to have a real bed/headboard for the 1st time ever instead of just using one of those metal frames. Looked online for awhile, and somehow stumbled on this site - and so so glad I did, it saved me tons of $$! I really liked the farmhouse beds from PB, so decided to modify the plans from here to look more like that one - with a solid headboard and footboard (I used plywood for it).

It took me a long time to finish because I did all the sanding by hand, and used a hand saw to make cuts that I didn't get done when I bought the wood (the only power tool I own is a drill - and prior to this I'd only ever used it for drilling to hang shelves on the wall).

I've definitely got the building bug now, and have so many ideas for other projects I want to tackle. Thank you so much for this site and all the inspiration! Even though its not absolutely perfect, I absolutely love my new bed!

Estimated Cost
600-700
Estimated Time Investment
Week Long Project (20 Hours or More)
Finish Used
I used 1 coat of General Finishes water based stain in Rosewood, and then 4 coats of their water based poly, sanding in between each with 320 grit.
Recommended Skill Level
Beginner

Comments

stcarroll

Thu, 09/08/2011 - 07:03

You should be very proud of this piece, it looks wonderful! Very nice work with the hand saw and sanding, you worked hard and it shows!

Lora (not verified)

Thu, 09/08/2011 - 11:46

I have been thinking about this project for some time. You should be proud this is a great bed.

Kitchen Cabinet

Submitted by rjustice21 on Thu, 09/26/2013 - 09:18

My wife and I needed space in our kitchen to store various items. This cabinet works perfectly for that purpose.

Built from Plan(s)
Estimated Cost
$100
Estimated Time Investment
Weekend Project (10-20 Hours)
Finish Used
Dark Red paint. I am not sure of the name.
Recommended Skill Level
Beginner

Comments

mybartmart

Fri, 09/27/2013 - 21:17

That paint colour is beautiful. As is the pantry, very well done. I wish you could find out the name and brand of the colour. It is stunning.

mybartmart

Fri, 09/27/2013 - 21:17

That paint colour is beautiful. As is the pantry, very well done. I wish you could find out the name and brand of the colour. It is stunning.

Thanks for the great plans!

Needed a good sturdy coffee table so now I've got one. Joined each 2x6 for the top together with pocket holes and it's solid. A lot of fun to build.  

Built from Plan(s)
Estimated Time Investment
Weekend Project (10-20 Hours)
Finish Used
Varathane Kona
Minwax Quick drying poly - Satin
Recommended Skill Level
Beginner

Comments

Ladder Vanity Shelf

Submitted by Anonymous (not verified) on Thu, 01/31/2019 - 12:39

I used the basic ideas of your project but sized it to the wall in the bathroom.  My first hardwood project.  Pretty pleased.

Built from Plan(s)
Estimated Cost
$100 for the wood and the mirror.
Estimated Time Investment
Weekend Project (10-20 Hours)
Finish Used
Watco Danish oil for the color, General Finishes water based topcoat.
Recommended Skill Level
Beginner

Hall tree

Submitted by Anonymous (not verified) on Wed, 12/21/2022 - 18:42

Saw this on Ana's YouTube and just had to make it for my Daughter.

Built from Plan(s)

Comments

Lydia Toddler Bed

Submitted by cdswhite on Sun, 09/11/2011 - 19:23

This bed took us a long time to make as my husband and I worked on it on weeknights and weekends when our daughter napped. We spent a lot of time making the plan/design, picking our materials and determining how to assemble and finish it. Thankfully, we actually finished it (completely) the day before we ended up having our second child - just in time!

We used the measurements of the Lydia Toddler Bed but our design was based more on the Lydia Daybed/Queen Bed. For instance, we used 1x3s and 1x2s for the legs instead of the 2x2s in the Toddler plans. We also used a solid piece of the Purebond formaldehyde free plywood to get a clean look for the headboard/footboard pieces.

Built from Plan(s)
Estimated Cost
More than I would like it to be but I don't remember how much
Estimated Time Investment
Weekend Project (10-20 Hours)
Finish Used
Flat swiss coffee with two coats of water-based poly
Recommended Skill Level
Intermediate

mason-headboard

I seen the Reclaimed-Wood Headboard, Queen Size plan and thought hey i can do that. Well this is the result and I'm happy with it. I did do it a little different like routering a slot for the boards to fit down in. I wood burned the image and stained the inside of it to look like that. It didn't take to long to make the most time was spent sanding and staining.

Estimated Cost
about $80-90 in materials
Estimated Time Investment
Weekend Project (10-20 Hours)
Finish Used
Provincial on all of it and jacobean for the design.
Recommended Skill Level
Beginner

Comments

wannabe woodchuck

Sat, 10/05/2013 - 16:06

I have a few friends that want me to make them one. looks like I'm making one for a hunter big stained deer in the headboard lol can't wait.

wannabe woodchuck

Wed, 10/23/2013 - 16:55

One day I'm going to buy a real woodburning kit though. I used 2 wal-mart cheap one's and it took me about 4 hours. Only the out line is done with the burner the inside is done with stain.

Adamski

Thu, 10/24/2013 - 05:36

I've been woodburning for about a year. I actually built the same headboard and really wanted to do some burning on it, but never did. I was using the 5-in-1 soldering iron/woodburner from harbor freight and it served me well. Last week I picked up a $30 from a craft store and it way better than the HF one. Good luck!

Edit*
Heres the one I just got. Its worth every penny.
http://shop.hobbylobby.com/products/5-in-1-woodburningtool-kit-with-cas…

King size bed with storage

Submitted by msemishko on Wed, 02/06/2019 - 05:51

We finally upgraded our queen bed to a king bed. I was able to talk my wife into letting me build the bed frame. We're are both super excited with how it came out. It took 2 full weekends, and time here and there during the week.

Estimated Cost
500
Estimated Time Investment
Week Long Project (20 Hours or More)
Recommended Skill Level
Intermediate

Farmhouse night stand

Submitted by Anonymous (not verified) on Sat, 12/31/2022 - 12:59

We altered the plans a bit to fit our space. It looks great - thanks Ana!

Comments