Community Brag Posts

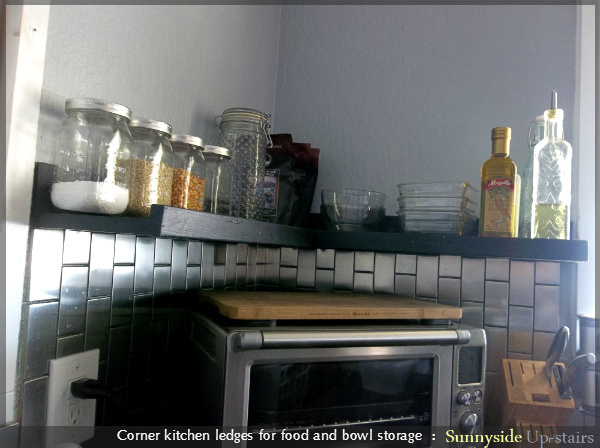
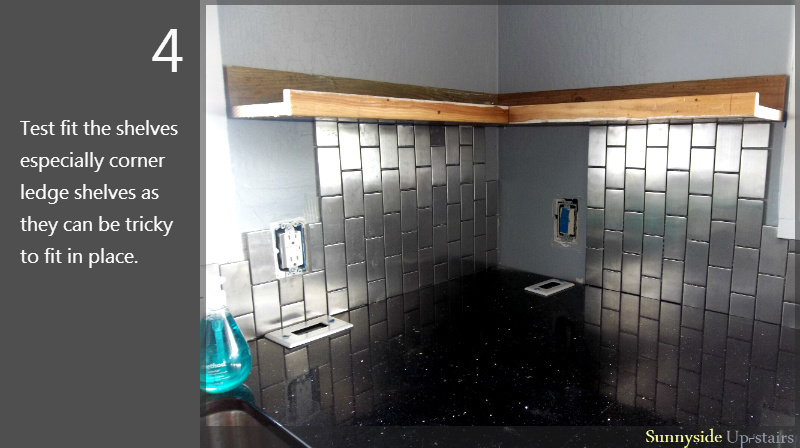
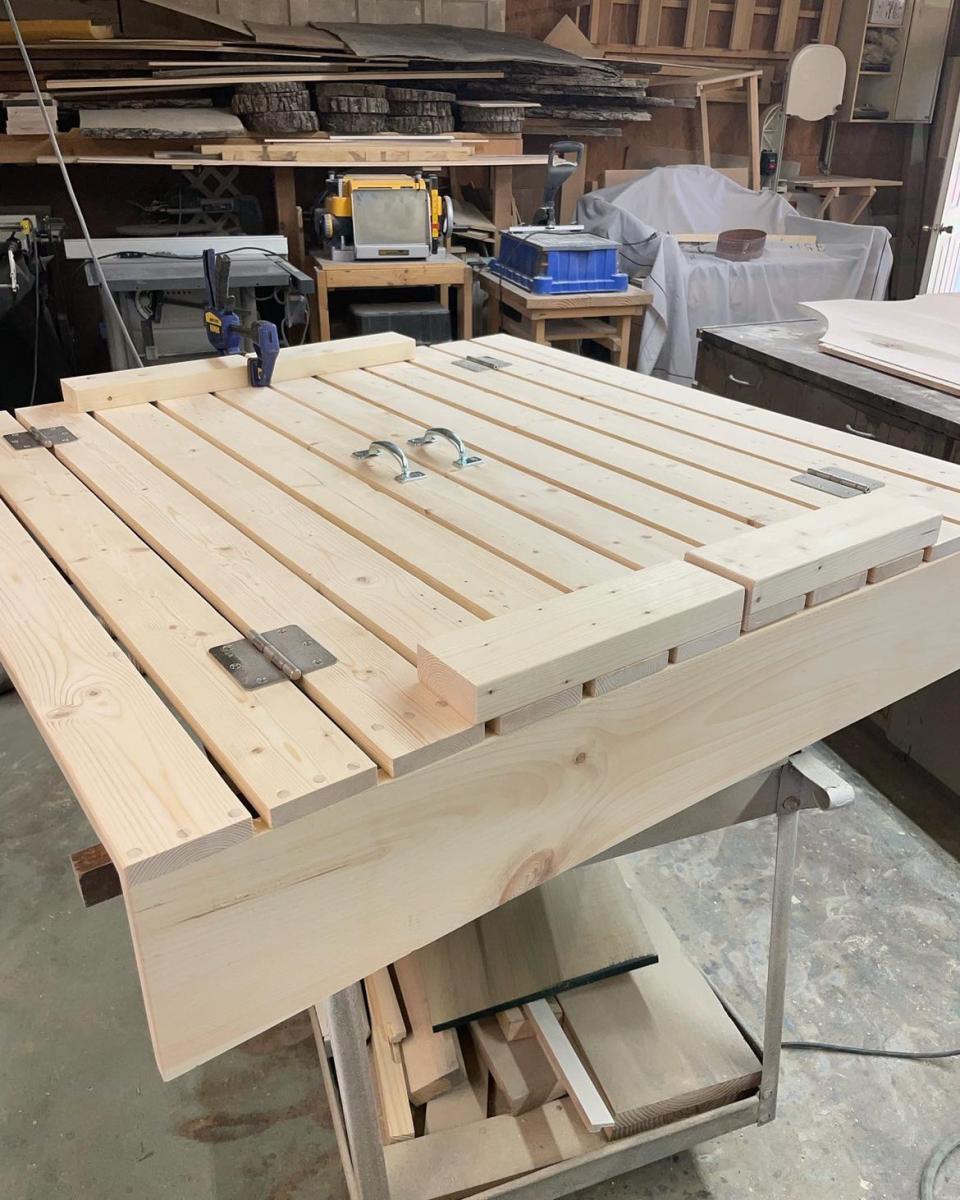
Kitchen Ledge Shelves

I built ledge shelves for our kitchen using reclaimed wood I painted teal, then silver, then flat black (Napoleon).

Love having them. :)

Built from Plan(s)
Estimated Cost
$5.40
Estimated Time Investment
Afternoon Project (3-6 Hours)
Finish Used
Teal semi-gloss latex undercoat, silver spray paint, matte black (Napoleon) latex paint top coat.

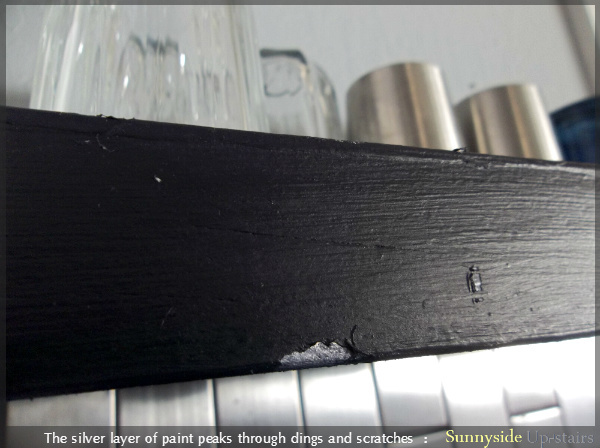
I wasn't sure what color I wanted. I didn't seal the shelves, just in case I changed my mind again, but I love how knicking it brings out the teal or the silver under the black!
Recommended Skill Level
Starter Project

Comments

JoanneS

Sat, 08/10/2013 - 19:19

Great looking shelves, and it's neat how you got these in the corner shape. It adds so much storage! The color looks perfect with the tile and counter. Love the little flecks of the other colors peeking through too! Great job!

In reply to by JoanneS

yurra-bazain

Sun, 08/11/2013 - 10:15

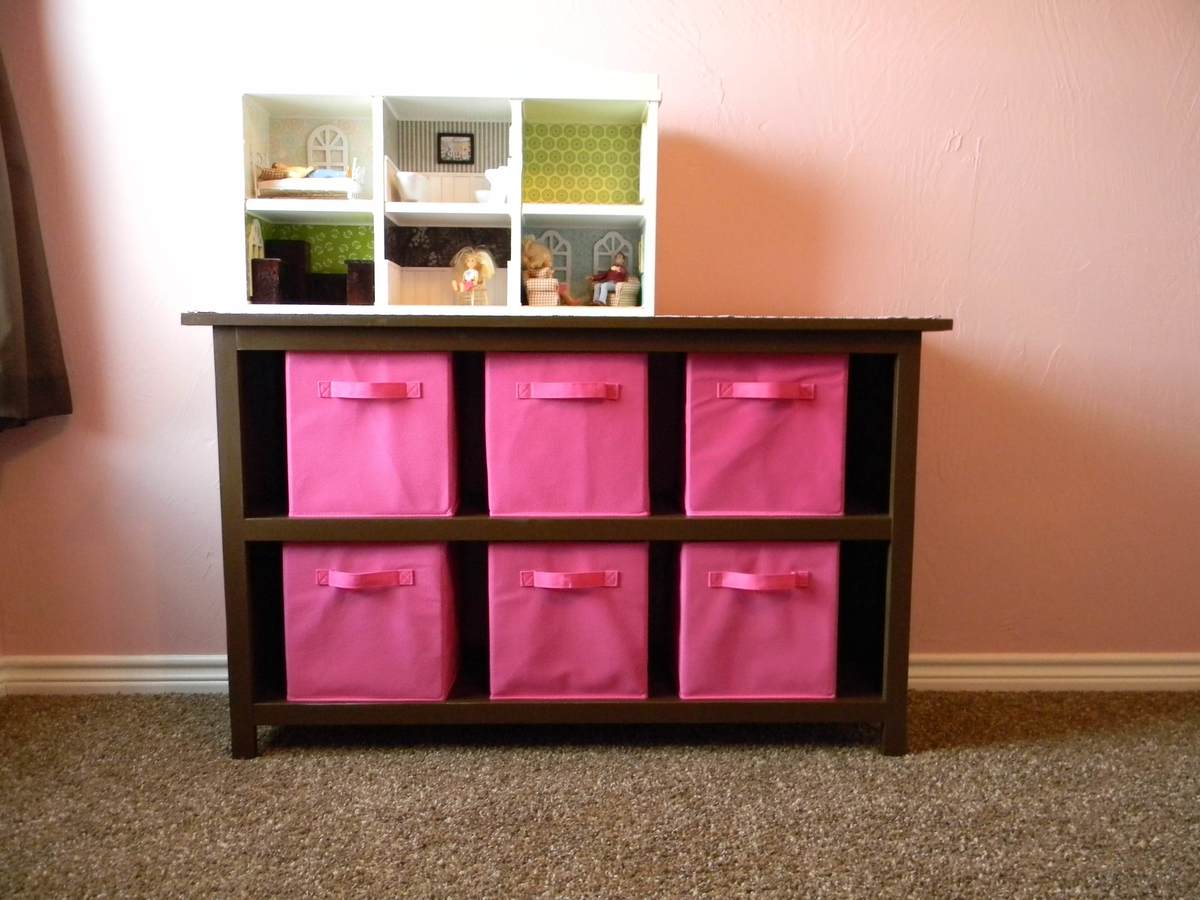
These ledge shelves really are my favorite shelves right now. I plan to add a few more to my daughter's room, but I'll wait to make those until after I build her dresser. :)

babysteps

Tue, 01/14/2014 - 11:42

I love your adaptation of the original design. I have been looking for an example of someone who made this plan into a wider shelf. Has it held up well? I was worried about the stress on the joints when you make it deeper. Has yours handled the weight? How wide is the bottom piece?

In reply to by babysteps

yurra-bazain

Mon, 04/21/2014 - 11:14

I've had the shelves up for about a year now and it's still in the same spot. The corner shelves are the most sturdy, most likely because it is supported by screws in two perpendicular walls. Its filled with mason jars (re-used, cleaned pickle jars) of pantry items, and there is no visible stress on the joints that I can see.

The smaller shelf is not as sturdy because I could not locate a stud (that didn't have electrical wiring close to it). I used wall anchors and it sags ever so slightly forward (about a millimeter). We only keep our drinkware on it, however.

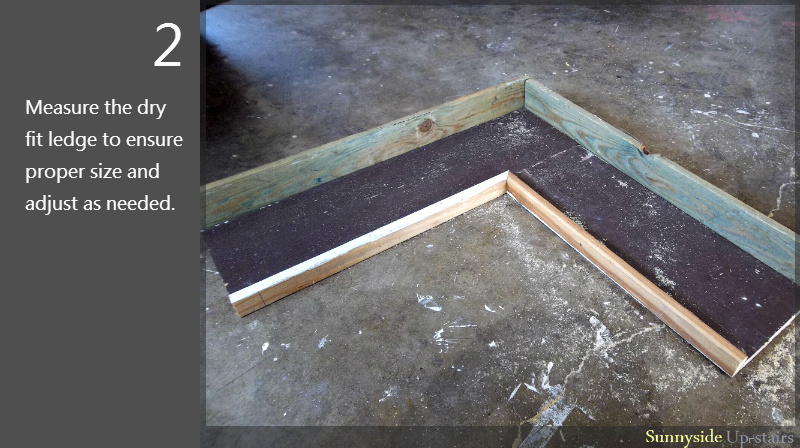
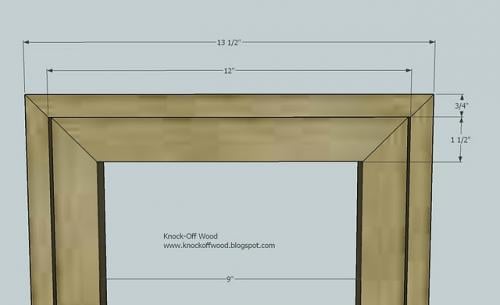
The base of the shelf is made from a 1x8 (7-1/4" wide). The full width of the shelf with the 1x4 back and 1x2 front lip is about 8-3/4" wide.

I hope this comment reaches you and that it helpful!

Hall tree from old doors

Submitted by E. Goode on Sat, 09/05/2015 - 18:27

Complete a long waited honey do.

Estimated Time Investment
Week Long Project (20 Hours or More)
Finish Used
Valspar Toasted Pecan
Recommended Skill Level
Beginner

DIY Rustic Industrial Bar Cart

Hi friends!
 

Jen Woodhouse here from the House of Wood. 

Today I'm sharing with you the building details for this beautiful Rustic Industrial Bar Cart.

This DIY bar cart has a lot of neat features: a bottom shelf tall enough to hold full size wine bottles and decanters, a hanging stemware rack, and a removable serving tray on top! What more could you need? 

Be sure to tag me @jenwoodhouse if you share photos of your build on social media. I'd love to see it!

You can get all the details for this build on my website www.jenwoodhouse.com.

Estimated Cost
$50-$100
Estimated Time Investment
Afternoon Project (3-6 Hours)
Recommended Skill Level
Intermediate

Grace's Bookshelves (Just One)

Submitted by aclayton on Sat, 07/09/2011 - 12:43

I just made one of the shelves instead of two like the plan calls for. It's painted a dark brown to match the bunk bed that I previously made for my girls. Mine was a little more expensive because I used 1x12's instead of plywood.

Built from Plan(s)
Estimated Cost
$50
Estimated Time Investment
Weekend Project (10-20 Hours)
Finish Used
1 Coat of Primer
2 Coats of Valspar "Barista"
1 Coat of Poly
Recommended Skill Level
Beginner

Comments

Debbie (not verified)

Mon, 07/11/2011 - 19:14

You did a beautiful job! Where did you get your pretty pink storage bins? I've been looking for some like them for my granddaughter's room.

King Farm House Bed

My husband designed this after the farm house bed. I wanted panels on the head board and foot board to "dress it up a bit" and storage drawers. He did a wonderful job. I don't think I have ever had a more prized piece of furniture. Now to find some tall night stands.

Estimated Time Investment
Week Long Project (20 Hours or More)
Finish Used
Off white oil based semi gloss paint
Recommended Skill Level
Intermediate

Comments

vanash2012

Wed, 09/23/2015 - 11:54

Any chance you or your husband would share the adjusted plans to include the storage under mattress?

Thank you so much! love your site and your work!

vanessalust

Thu, 01/21/2016 - 21:52

Hi Ana! 

I was wondering if you had the plans available for this bed with the drawers underneath and the head and foot board ? 


:) thank you!

vanessa

nateleejohnson

Fri, 02/10/2017 - 05:27

What a beautiful bed.  Like others I was looking for the plans for the headboard and drawers.  Are they available?

Thanks,


Nate

danthony313

Sun, 12/17/2017 - 16:03

the wife loves this design but are there plans for the whole thing yet?

Tacoma9596

Wed, 09/25/2019 - 10:40

Ana,

   Can you provide plans with pics for this bed?   My wife wants it and I got tasked with doing it.

Stove Top Cover

Stove Top Cover for more counterspace. 

Estimated Cost
$30
Estimated Time Investment
Afternoon Project (3-6 Hours)
Finish Used
Dark Walnut Stain
Recommended Skill Level
Starter Project

Comments

Simple Outdoor Table

Submitted by Kingsamui on Tue, 07/24/2018 - 17:24

Modifications to the simple outdoor table plan thanks to Finn’s dad. 

Built from Plan(s)
Estimated Cost
$200 -Found a place that had Cedar shorts “B quality”, but very few knots for an unbelievably cheap price. I ran all to boards through a planer to start and saved a bundle.
Estimated Time Investment
Week Long Project (20 Hours or More)
Finish Used
3coats Spar Urethane. I’ve heard the Spar doesn’t hold up well, so would have used something rlse if I knew that at the beginning.
Recommended Skill Level
Intermediate

Ultamate Roll Away Workbench

Submitted by Anonymous (not verified) on Fri, 05/13/2022 - 15:54

Adjusted the shelves slightly. Love the roll away portion.

Comments

Ana White Admin

Sun, 05/15/2022 - 11:55

This is gorgeous, thank you for sharing! Just shared on our facebook page, we'd love to give credit if you'd like to respond with your name:)

My first crack at it! Hyde console:)

First project for actual furniture ever. This stuff is better than a good book that you can't put down. I am so addicted!

Estimated Cost
100-125
Estimated Time Investment
Weekend Project (10-20 Hours)
Finish Used
Polyurithane black matte after wood conditioner just in case. I put the first coat on heavy with a brush let it dry for 6 hrs+ then distressed with a combo or 120 sand paper and 000 steal wool and then rubbed on a thin coat to seal it all up with an old t-shirt.
Recommended Skill Level
Starter Project

My Daughters Loft Bed and Room

Submitted by haddixml on Wed, 08/14/2013 - 19:52

This was a family summer project. I built the bed and furniture...my wife and daughter did all the painting and picked out the accent pieces!

Estimated Time Investment
Week Long Project (20 Hours or More)
Finish Used
Satin Behr Paint
Recommended Skill Level
Intermediate

Comments

spiceylg

Fri, 08/16/2013 - 05:30

Nice build! Love all of the colors and such. What a fun room!

Cabin Bunk Bed for Dima

My wife, grandchildren, and I have spent the last 8 months building 2 bunk beds from the site.  First we build this cabin version for my grandsons and then we built the sweet pea version for my granddaughters. I thank Ana White for using this website to enable amateur wood workers like myself a tool that enabled us to create a great piece of furniture that they use every day and collect childhood memories and know how much they are loved.  Thank you Ana White.

Estimated Time Investment
Week Long Project (20 Hours or More)
Finish Used
Sanded and stained.
Recommended Skill Level
Intermediate

Comments

Wife's Kindergarten Classroom

Been a while since I had time to actually build anything worth posting about! My wife wanted some items for her Kindergarten classroom this year, so built several items, most inspired by the Farmhouse family.

Estimated Time Investment
Day Project (6-9 Hours)
Recommended Skill Level
Beginner

Comments

Octagon Picnic Table

Submitted by Anonymous (not verified) on Thu, 05/26/2022 - 18:07

Just completed the Octagon picnic table. I added a couple of features to mine, namely a center hole for an umbrella and support blocks around the center point under the table to lock in the umbrella post on the lower base. Finished it in time to have lunch AND dinner on it today. This took from Monday through Thursday morning for me, but some of that time was me waiting for supplies along the way. In reality, I think this can be built in one day, with paint/stain curing overnight and final set up on the morning of day two.

Comments

Doll Farmhouse Bed

Submitted by canesa on Fri, 07/15/2011 - 00:22

When Ana posted the plans for the Doll Farmhouse Bed I quickly started thinking of all the little girls I could build this for. I ended up building 4 of them. The first one was definitely my learning curb, the other three went a lot smoother and just looked better!

Estimated Cost
$10
Estimated Time Investment
Day Project (6-9 Hours)
Finish Used
I painted two of the beds Antique White, lightly distressed the beds with 120 sandpaper and glazed them with Ralph Lauren Smoke glaze. I painted the third bed Antique White, lightly distressed it with 120 sandpaper and rubbed it with Minwax Dark Walnut Stain. I painted the last bed in white and lightly distressed it.
Recommended Skill Level
Beginner

White Wash Pickled Farmhouse Table

When we sold our last house, we sold the dining room furniture we had custom built with it. We did projects, homeschooled and ate off of a folding table for the first 7 months we lived in our new house. Until we built our new farmhouse table!

Estimated Cost
300
Estimated Time Investment
Weekend Project (10-20 Hours)
Finish Used
We chose to white wash/pickle our farmhouse table. All the instructions can be found here: http://www.akadesign.ca/white-wash-pickling-get-the-restoration-hardware-look-for-less.
Recommended Skill Level
Beginner

Comments

Locker bookshelf

Submitted by Tbpb4ever2 on Fri, 09/18/2015 - 09:14

This is our second Ana White project, our first was the loft bed which turned out great! With this project we used 16" wide boards for the extra room for backpacks and it fit perfectly in our space at the end of the hall.  We used Beadboard for the back panel and painted it with Valspar interior semi gloss paint I got off the reject shelf at Lowes at $10 for a gallon! This is my new favorite piece of furniture in the house!

Built from Plan(s)
Estimated Cost
$150.00
Estimated Time Investment
Afternoon Project (3-6 Hours)
Finish Used
Valspar interior semi gloss, not sure of colors name as it was a reject gallon at lowes
Recommended Skill Level
Beginner

Comments

Grid mirror

Submitted by Jtlarson12 on Tue, 09/11/2018 - 10:20

DIY grid mirror. Used exact plan. 

Estimated Cost
$60
Estimated Time Investment
Afternoon Project (3-6 Hours)
Finish Used
Minwax Dark Walnut 2716
Recommended Skill Level
Beginner

Comments

Twin Sleeper Chair

Submitted by Hoff7.62 on Sat, 06/04/2022 - 15:20

This was my take on your Twin Sleeper Chair. I made it into a full. I used 2x4’s where there was suppose to be 1x4’s because I changed the width. This was a very fun project, my first project actually. Thank you for the plans and idea.

Built from Plan(s)

Comments

Harriet Higher Chair

Submitted by glennj on Sun, 07/17/2011 - 08:04

Well I decided for my first project/projects to make chairs for my girls. They turned 2 and 3 last month. I also made a couple of chairs for friends of ours who have twin boys that also turned 3. Once I got the hang of it making the chairs didn't take to long but painting seemed to take forever. But I love how all the chairs turned out.

Built from Plan(s)
Estimated Time Investment
Afternoon Project (3-6 Hours)
Recommended Skill Level
Beginner

Comments

glennj

Mon, 07/18/2011 - 15:45

I am happy I made them too. The are super sturdy. Toddlers climb all over them and when they aren't looking adults sit on them. No problems. I am making a couple more but a little taller for our kitchen.

Grill table with stainless steel top

Submitted by krochelle on Tue, 08/20/2013 - 08:00

I made this table to go next to an outdoor grill to be used as a food prep area or just a surface for holding ingredients (instead of using the deck railing!). The top is stainless steel which fits tightly over 2 3/4" pieces of plywood laminated together. The bar/handle in front is made out of galvanized pipe. All wood was treated.

Legs - 4x4 posts
Bottom shelf - 1x6's
Sides - 1x4's
Top - 2 pieces of 3/4" plywood laminated together with a stainless steel top (custom fit) over top
Towel bar - galvanized pipe (cut and threaded to size at Lowe's), floor flanges and 90 degree elbows

Estimated Cost
$120
Estimated Time Investment
Day Project (6-9 Hours)
Finish Used
I used Kona stain but since it was over treated wood the stain did not take as dark as it should have. I will have to restain this piece after it has completely dried out.
Recommended Skill Level
Intermediate

Comments

spiceylg

Tue, 08/20/2013 - 09:07

Love this. Where did you get the stainless steel top? Did you have to special order to fit?

In reply to by spiceylg

krochelle

Thu, 05/15/2014 - 10:33

Sorry about the late reply! Yes, I just gave my dimensions to a local steel supplier and they made the top. I think I have about $40 into the stainless. They didn't weld the corners but I've never had an issue with them.

krochelle

Thu, 05/15/2014 - 10:46

No...I didn't have any plans when I built it but it's a very simple concept. I chose to use all treated wood since I knew it would be sitting outside unprotected. However, my 4x4 posts weren't square so this caused a lot of problems and everything was built to fit. I believe I just used 4x4's, 1X6s (for the bottom shelf) and 1x4s for the sides (top and bottom). For the top, I just laminated 2 pieces of 3/4" plywood together to bulk it up and then had the stainless top built to fit. It fit perfectly so I didn't glue it to the plywood. This makes it easy to remove and clean, if necessary. For the galvanized pipe (towel bar), I bought it at Lowe's and had them cut/thread it to fit my dimensions.