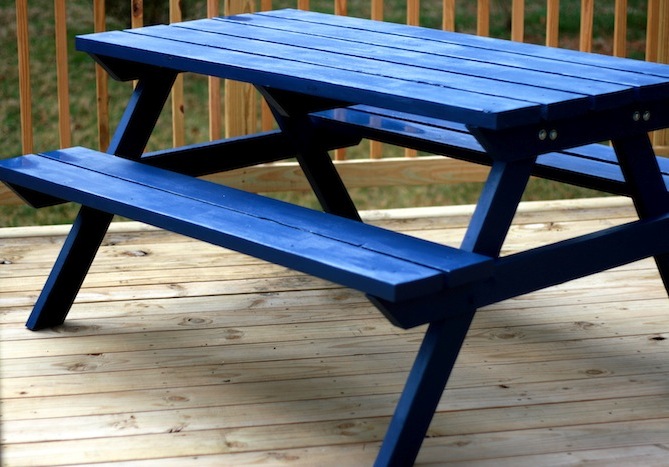
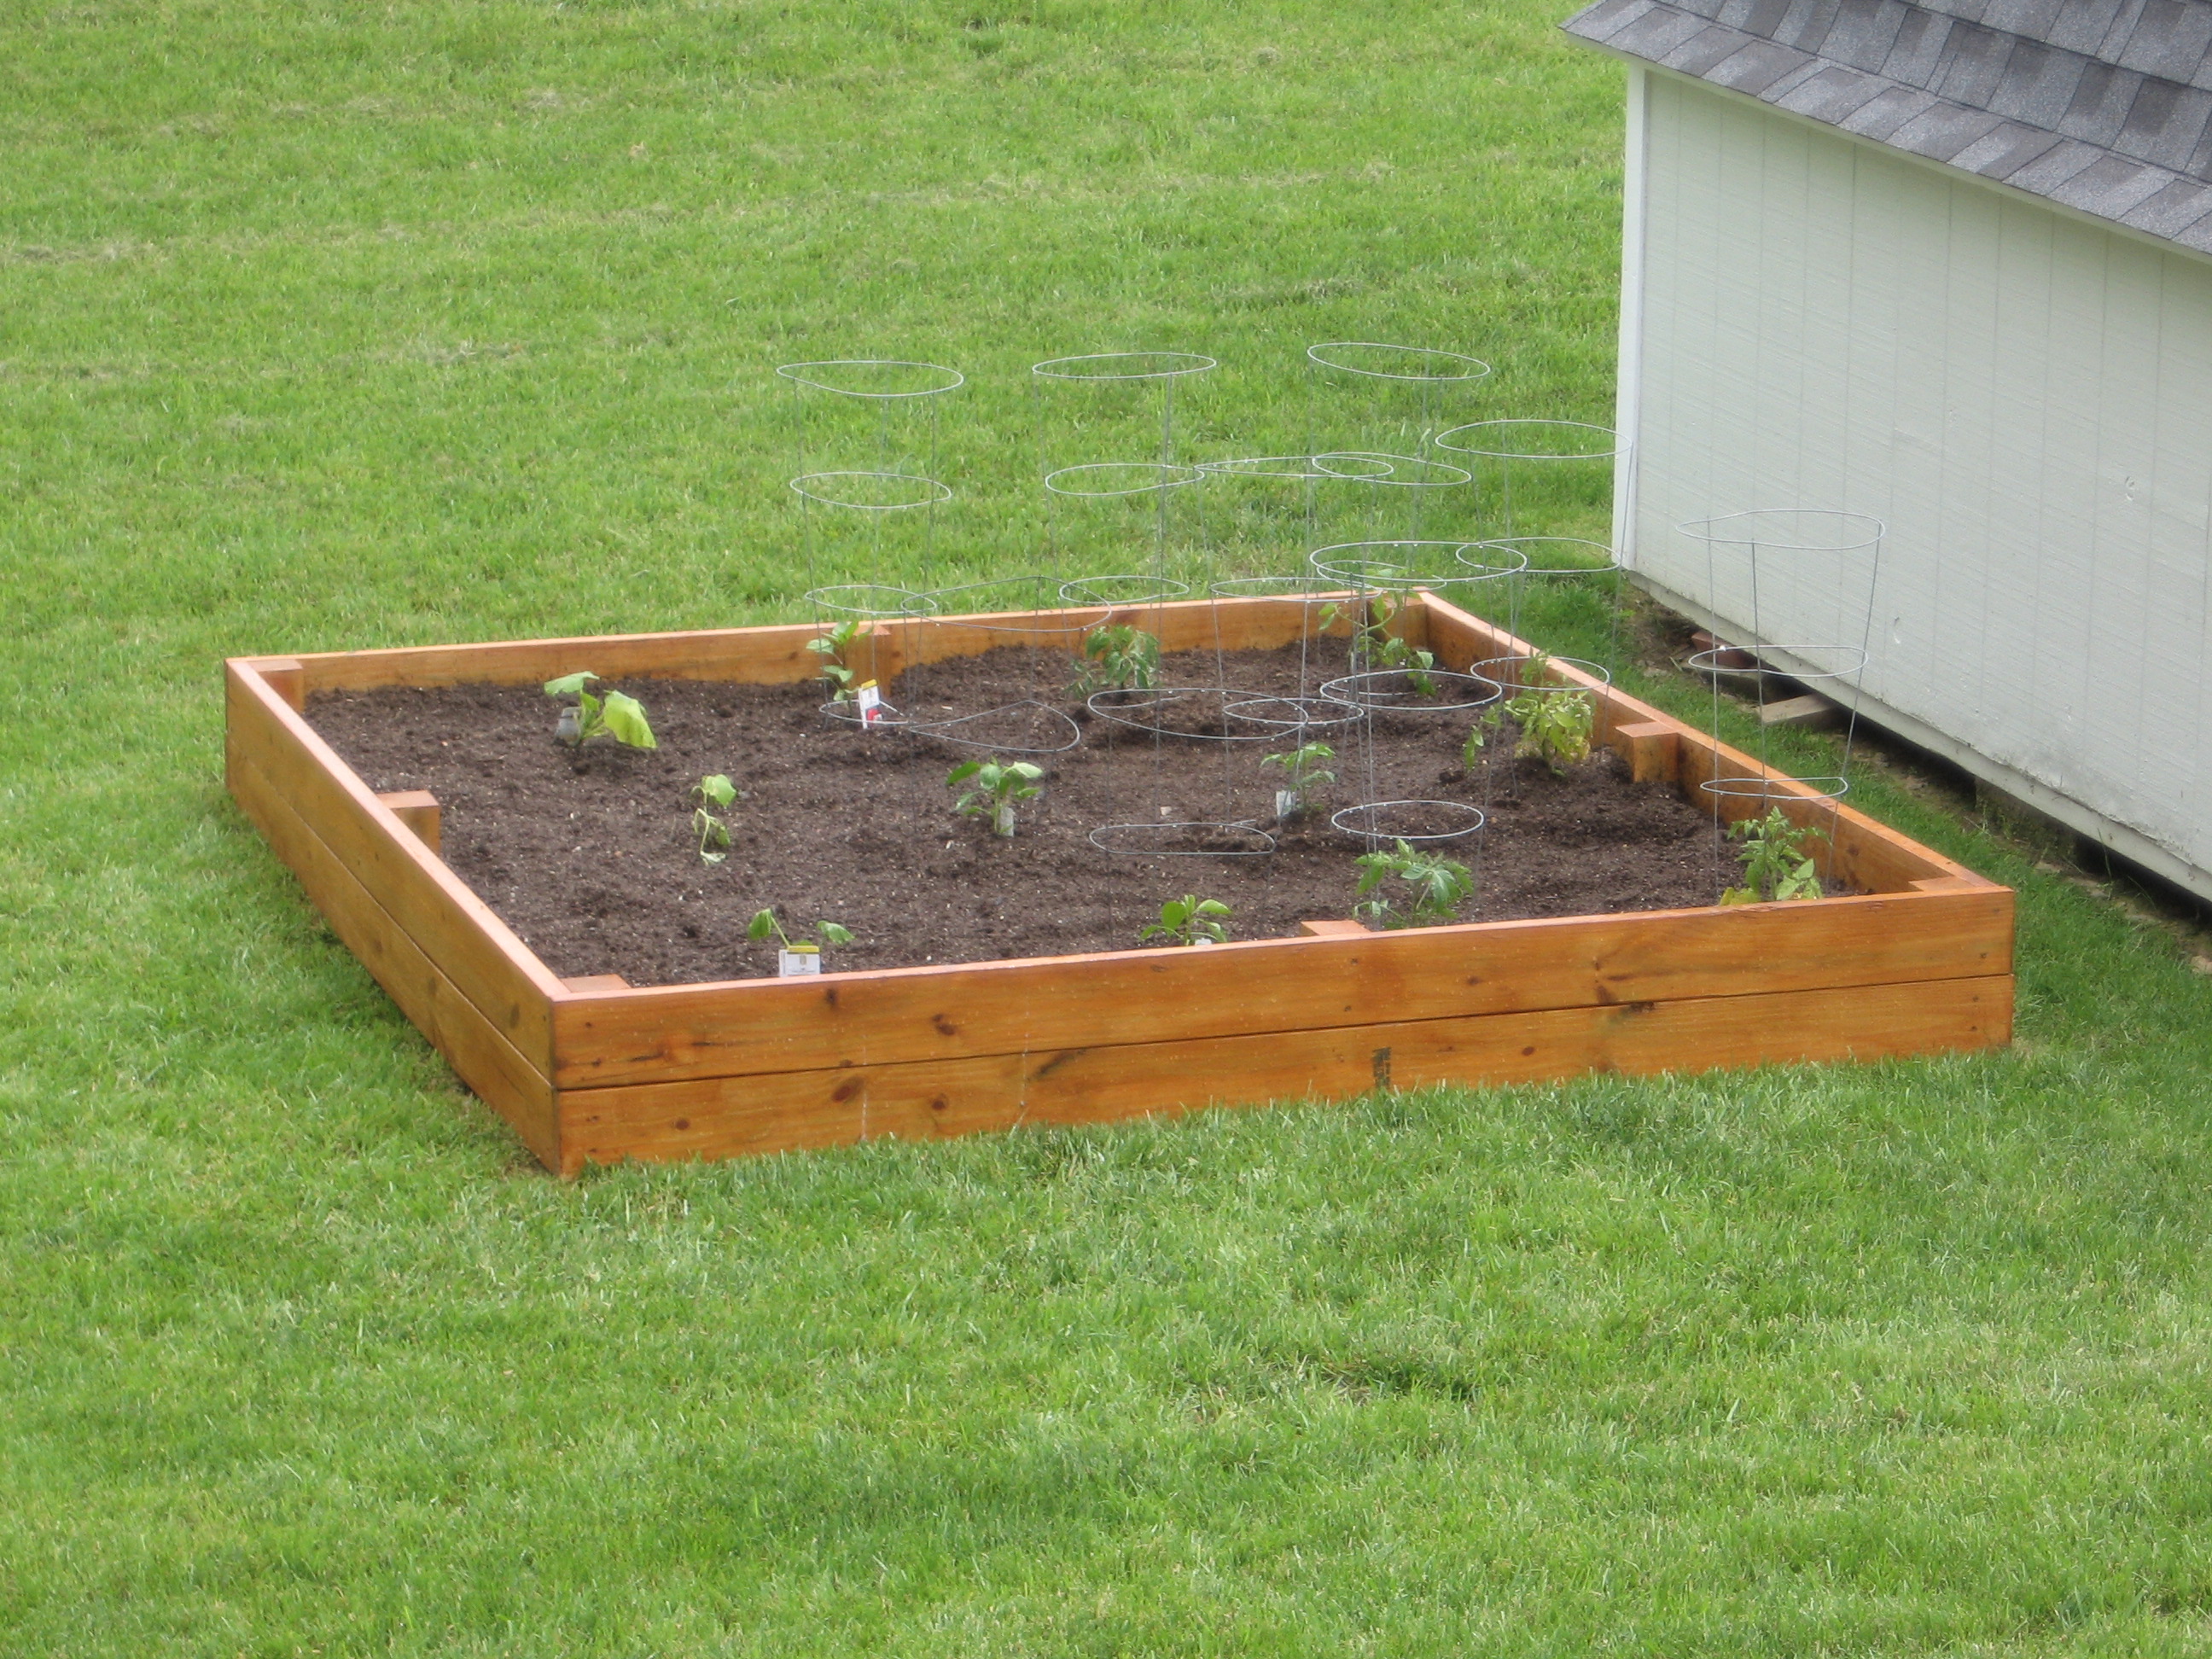
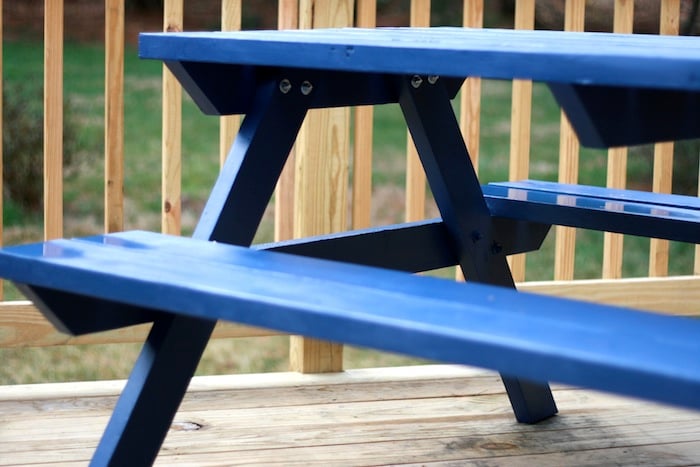
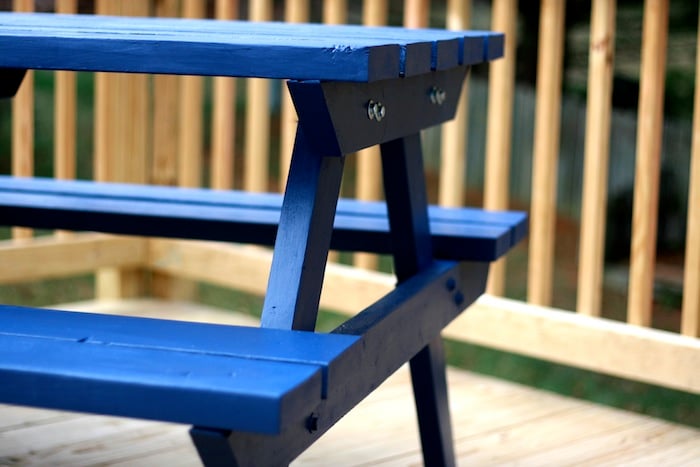
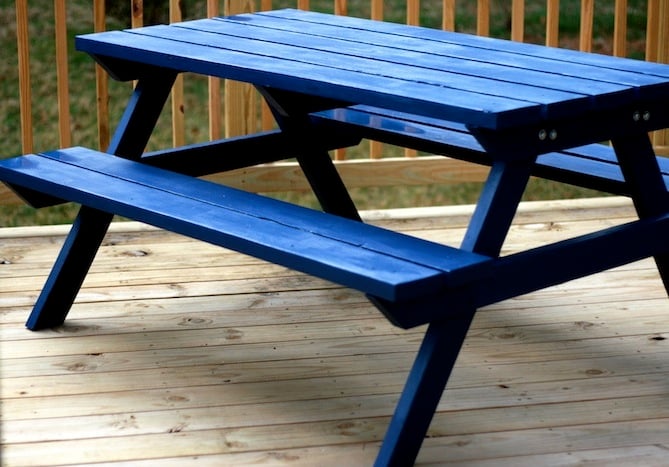
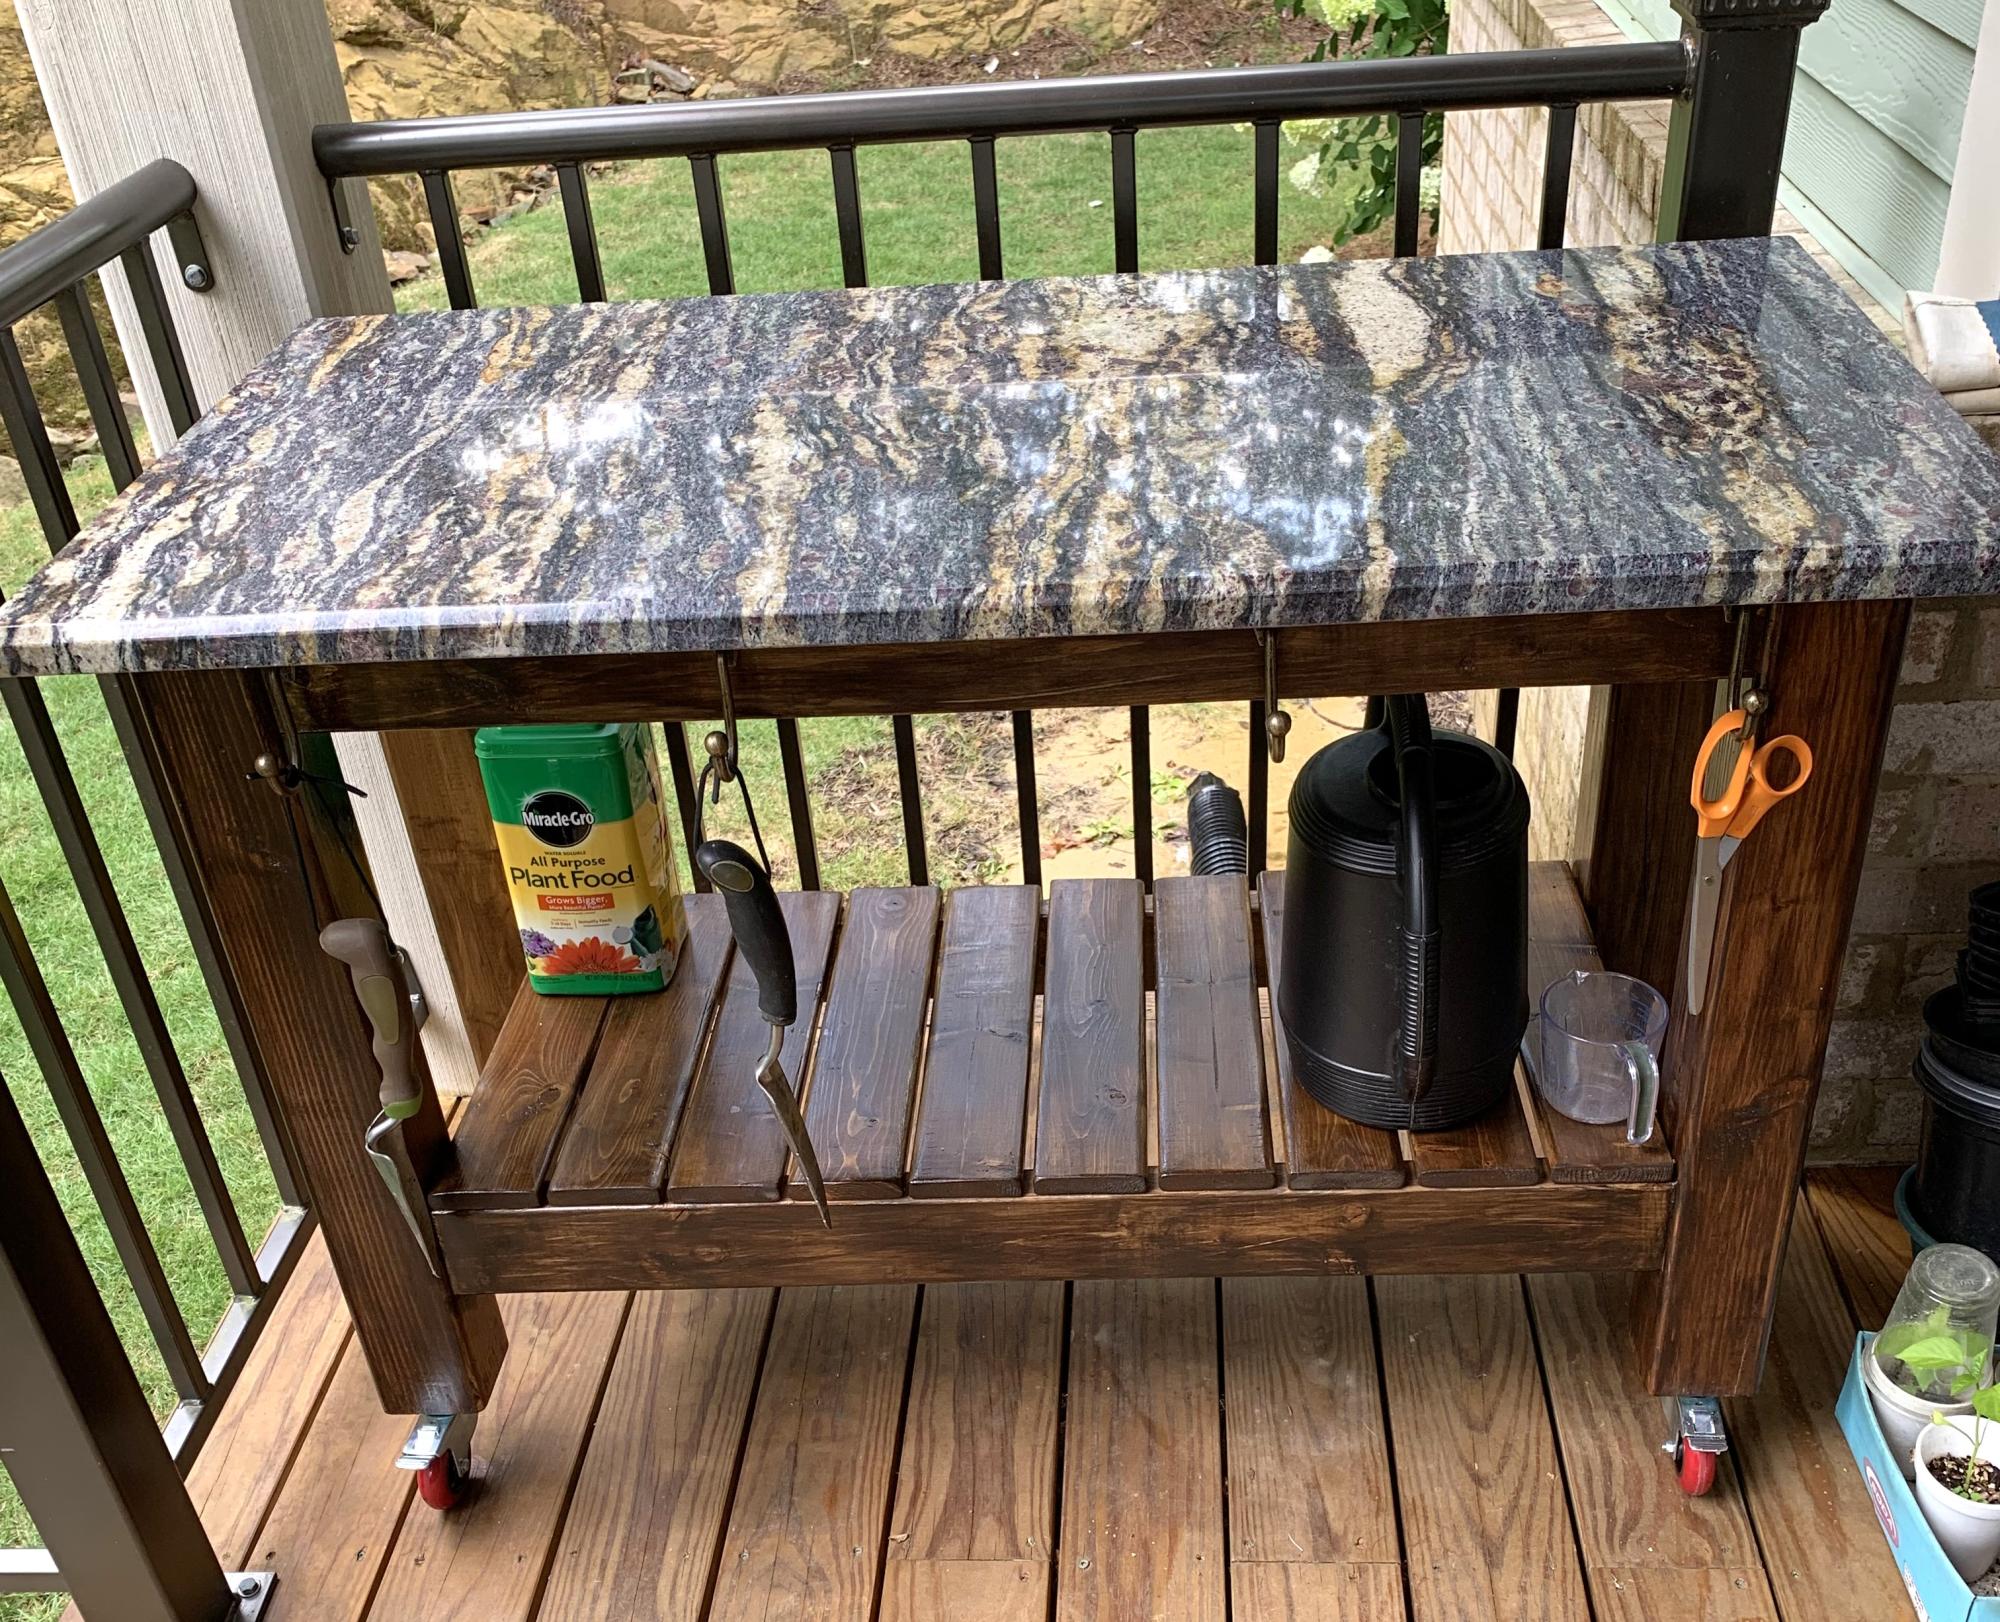
Community Brag Posts
Live Edge Farmhouse Dining Table
I was scared to try this project because it is listed as "intermediate" and I don't have that much furniture building experience. I originally wanted to do this with live edge, but when I saw how much it was gonna cost, I thought I would just do planks. Lucky me, I found 5 8ft live edge pieces (1 ft wide, 3 inches thick) for CAN $100. Some 2x4 and 1x4 and I was ready to rock and roll. I decided to make the table 6 ft long, so the legs are 5 ft apart. I made the connection a bit different than in the plans, just because I want to be able to stretch our legs underneath. It is as stable as can be. I love Ana White's plans. Great instructions, great cut list and almost no left overs.
Nicky Peeters https://www.facebook.com/nicky.peeters.70
Simple Beds
I used the basic design for this bed but altered it quite a lot to make the joins stronger, the edges smoother and the whole thing generally easier to take apart and put back together.
I used beech wood and completed the project at a woodworking club, so it's quite hard to estimate the time taken, as I only did it one evening a week and spent most of the time bringing the wood out, putting it away and clearing up each time I was there!
I am still undecided whether to give it an oil finish or to paint it white with chestnut wood stain on the headboard and footboard tops.
Outdoor sofa
I built the sofa and loveseat from 2X4's and used 1X4's for the top of the coffee table. I used standard patio cushions for the sofa and cut the tops off to use at the side for arm rests.
Family Cabin with Flip up bed
Always wanted an Alpine lodge, we live in London so a Garden cabin for the kids (and Dad) will have to do!
flip up bed and storage cabinet (for mattress)
sofa bed, foam cushions with leftover curtains
mini storage boxes from wine boxes
inspired by tiny house (especially the sofa!)
Still more to do. Desk on its way and bulk head lights fitted soon.
no real plans just rough sketches and trial and error
First Project Blanket Ladder
This was my first project and I am so pleased! The stain is beautiful and once I got the hang of it, so easy to complete. I am excited to try a new plan and keep going!!
Laura
Little Helper Tower
We decided to make a helping tower for my little guy for Christmas after I saw it on Pinterest. The curves were not the easiest, but I think they turned out fine. He's just finally starting to use it more as a helping tool rather than a playing platform. Definitely happy that it keeps him from standing on the chairs.
Thank you so much for this plan. I love this site!
Comments
Sat, 07/14/2012 - 13:57
Beautiful! Love the colour
Beautiful! Love the colour too. I will be attempting this as a beginner project myself: fingers crossed!
Sat, 07/14/2012 - 13:58
Beautiful! Love the colour
Beautiful! Love the colour too. I will be attempting this as a beginner project myself: fingers crossed!
Hall tree from lockers plans
We modified these plans for a customer down to two lockers. We also added a divider for the cubbies on the top per her request. We found the whole thing to be a bit top heavy and easy to get a wobble. Recommend securing it to the wall with a tether or L bracket. Also, it is CRITICAL to not skimp on the quality of wood and getting straight boards for this. We did not and it was seriously skewed for a while until we did a lot of adjusting...and it still has a bow! Also I recommend doing the build all in one day. I think since we broke it up into two days it allowed the wood to warp more than had it all been assembled and fastened/tightened at one time. Message us with any questions! The stain is Minwax Jacobean- one coat. We got the hooks from Home Depot. The customer wanted plenty of storage so per her request we used 8 hooks! Good luck with this build!
Our Kitchen Table
We wanted to build a new kitchen table for the home we moved into. I had just bought a new table saw and needed a project. We searched through a lot of plans and settled on the Benchmark Octagon Table that Ana White had. My 14 y/o son and I built this over a few nights in our garage and my wife did the finishing. We were thrilled how it turned out. It comfortably seats 8 adults (yes we have had 8 adults at it). My wife and I always sit in the bench that is pictured and we easily eat side by side on one end. It is a great project. I would recommend being very careful attaching the table top support to the base column and also reinforcing the joints of the diagonal upper and lower supports to keep the table top from twisting easily. All in all a fantastic project and people are shocked when I tell them my son and I built it, particularly from off the shelf pine.
Lavander Moon Bassinet
My daughter-in-law asked me if I could build a doll crib for my granddaughter. I had no idea how to do that, so of course I said "Absolutely!" Then I immediately came to the Ana White site!!
I found a few options and checked with my daughter-in-law to see what style she wanted. She chose the "Baby Doll Furniture Moon Bassinet" and said that it needed to be "lavander".
As usual, Ana's plans made me look like a hero! My granddaughter liked it so much she insisted on sleeping on the floor next to it during her nap!
Mudroom Bench with Locker Hutch
Garage bench with lockers. Plans and videos provided great inspiration and proves most anyone can do it.
Steve L. in Ohio
Comments
Fri, 09/08/2023 - 08:42
Great Mudroom Organization!
You did a fantastic job, love the added hanging option! Thanks for sharing.
Add Metal Accents to Furniture
Here's a small tutorial on how to add simple metal accents to furniture. We used something as simple as door knobs at your local home improvement store to make it happen!
Check out the tutorial here http://sawgrasshome.com/?p=1443
Comments
Wed, 03/25/2015 - 11:26
Add Metal Accents to Furniture
Hello,
I am very interested in this tutorial, "Add Metal Accents to Furniture", but it appears that the link provided, is a dead link. Do you happen to remember anything about this tutorial? Thank you!
Wed, 03/25/2015 - 11:25
Hello, I am very interested
Hello, I am very interested in this tutorial, "Add Metal Accents to Furniture", but it appears that the link provided, is a dead link. Can you please assist me in finding the direct link to this tutorial? Thank you!
Wed, 03/25/2015 - 11:25
Add Metal Accents to Furniture Tutorial
You can email me at [email protected]
Mon, 12/14/2015 - 20:36
found the article!
Wed, 06/02/2021 - 05:31
By the way, how do you do…
By the way, how do you do the initial analysis of the alloys to determine which metal is best to take?
My version of ten dollar picture ledges/galley shelves.
I think I get more compliments on these galley shelves/picture ledges than anything else I’ve made, and these were probably the easiest things to make!
It cost me about $25 a piece but they were nearly 8 feet long each. I used a paint sprayer to paint them, WAY easier than brushing on the paint! watch for drips though (my first time using a sprayer, treat it like spray paint, light easy coats!)
First project ever
I challenged my husband who is new to any woodworking project to make me this table! That he did!!
First Ever Woodworking Project - Modified Farmhouse Table
I modified the Farmhouse Table With Pocket Holes plans to make the table counter height for our views of the woods from the dining area. We also have large family gatherings every Sunday evening so made the overall length 95” and the width 46” using 2x10s instead of 2x8s. I also made a little extra foot room on the ends by moving the stretcher support to the inside of the legs. All of the lumber was run through a planer multiple times to get everything nice and even. Large knot holes where left by choice for character, and I filled them with epoxy and sanded smooth.
I started the project with lumber that was not completely dry. As a result, my tabletop width shrunk by nearly 3/4” over the first few weeks after completion. I would recommend bringing your lumber package inside for several weeks before you begin the build to allow it to dry and shrink. Do not bother to glue the table top if your lumber isn’t dry as it will simply pull apart like mine did.
This table is a BEAST, and will definitely be our shelter in the event of an earthquake. Because of the size, I had to build it in the dining area and I wish I had sanded everything to final finish before I built it. There was a lot of creative shopvac help from the kids.
Thank you for the great plans and inspiration to take on my first major woodworking project!
Our Bunk Bed
My husband and I are expecting our second child this April. We knew we wanted to move our 2 year old out of her crib and into a “big” girl bed so that the new baby could use the crib. I saw the Play House Loft Bed on Pinterest and fell in love. I showed it to my husband and convinced him it would be a great winter project for us. He of course started his research and had nightmares of our daughter falling over the top bunk. So when I saw the Sweet Pea bed I knew it was perfect. I pitched the idea to my husband that the bottom bunk could be her bed and the top would be her play area. He was sold. We went to Lowes and bought our first round of lumber and immediately realized this project was going to be more expensive than expected but we were still up for the challenge. My husband worked on the project two full days, I worked on it a half day and then together we worked on it a few hours over nap time or after putting our daughter to bed.
We made some modification to the plans, we liked the look of a flat front rather than 2x4’s so we used a flat sheet of ply wood. We added carpet to our stairs to help prevent any major injuries if fallen down. We left the roof off for now but may add it on later. We also decided to leave the bottom open for any size storage we needed. We added a fabric ruffle to hide the space.
Looking back we wish we would have done this project in the spring/summer and not dead winter. We had to park our cars outside and use our garage to cut and paint all the wood which meant space was limited. This also prevented us from being able to use a spray gun to paint. Had we been able to spray the paint this project would have moved a lot quicker!
Once the project was complete we were so happy with the outcome. Our daughter absolutely LOVES her new bed and loves her play area upstairs!
Comments
Wed, 01/29/2014 - 11:12
I love the color combo. This
I love the color combo. This is a great bed to transition to from a crib, we did that with my youngest daughter too. I hope she enjoys it, both kids will be sharing a bunk in no time!
Farmhouse Table
My husband built this following the plans for the farmhouse table and I painted and stained it using 2 different stains and a whitewash. We are so pleased with how it turned out.
King Size Bed
I love the farmhouse look and wanted to start changing out pieces in my bedroom. Good quality furniture is expensive, so I thought I would checkout DIY projects and came across Ana’s plans for a king bed. Her plans got me started and I changed a few things along the way. I LOVE the end result.
I used Knotty Alder and Danish Oil in Dark Walnut. Alder is an easy wood to work with and the Danish Oil brings out all the beautiful grain. I highly recommend both.
I decided to buy the metal frame and plywood to place the mattress on.
FYI: Danish Oil is very easy to work with and it made the grain of the wood “POP”. The great thing about this product is that it’s a stain/sealer combination and you apply it with a foam paint brush.
Rolling Sofa Table
This is the second project I have made from this website, which I LOVE! I needed some sort of table to use with a large sectional sofa because I refused to give up my huge ottoman for a coffee table! This is perfect. I loved the brag post with the shelf added so I used that idea also.
When it came to decoration, I used some apple barrel craft paint and found some scrapbook paper I really liked. This was my first use of modge podge so it was not as flawless as I hoped but I still think it turned out well. And best of all it will be used often!
FYI - by saving money on the particleboard shelf, I ended up spending a lot of time applying wood filler.
Modge Podge application of scrapbooking paper, sealed with Polycrylic