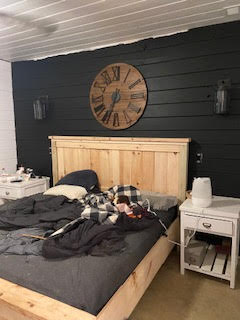
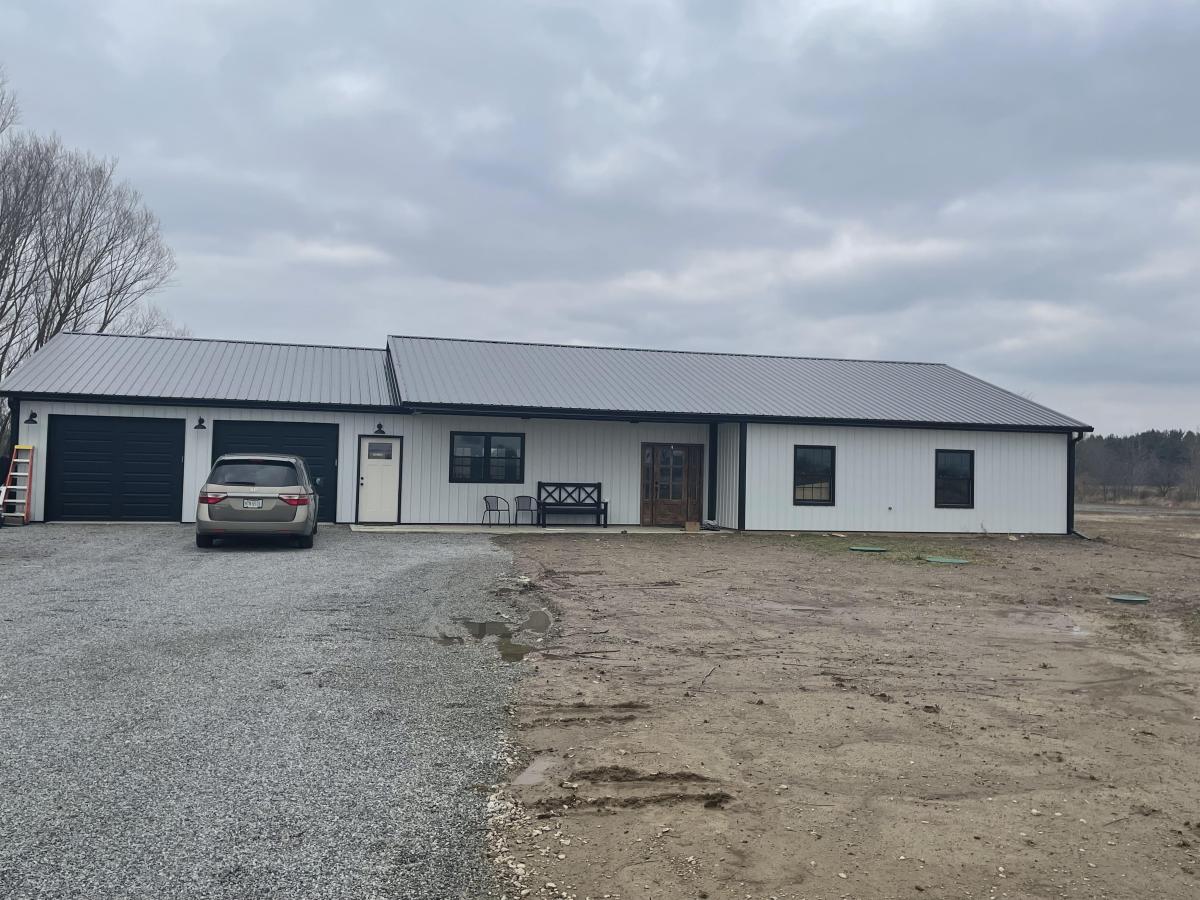
Lots of projects for our new house!
So many projects were built using Ana White plans.
Built from Plan(s)
So many projects were built using Ana White plans.
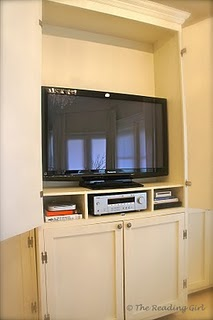
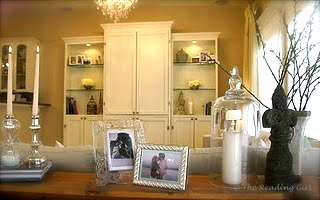
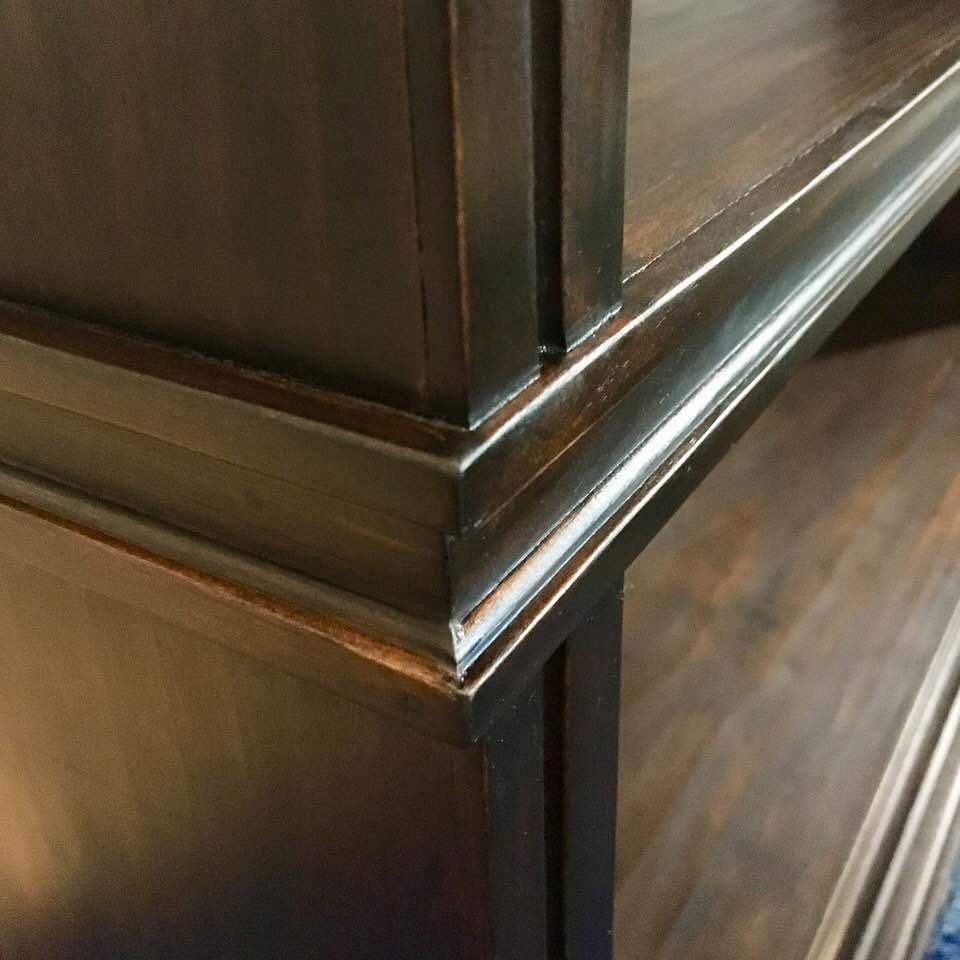
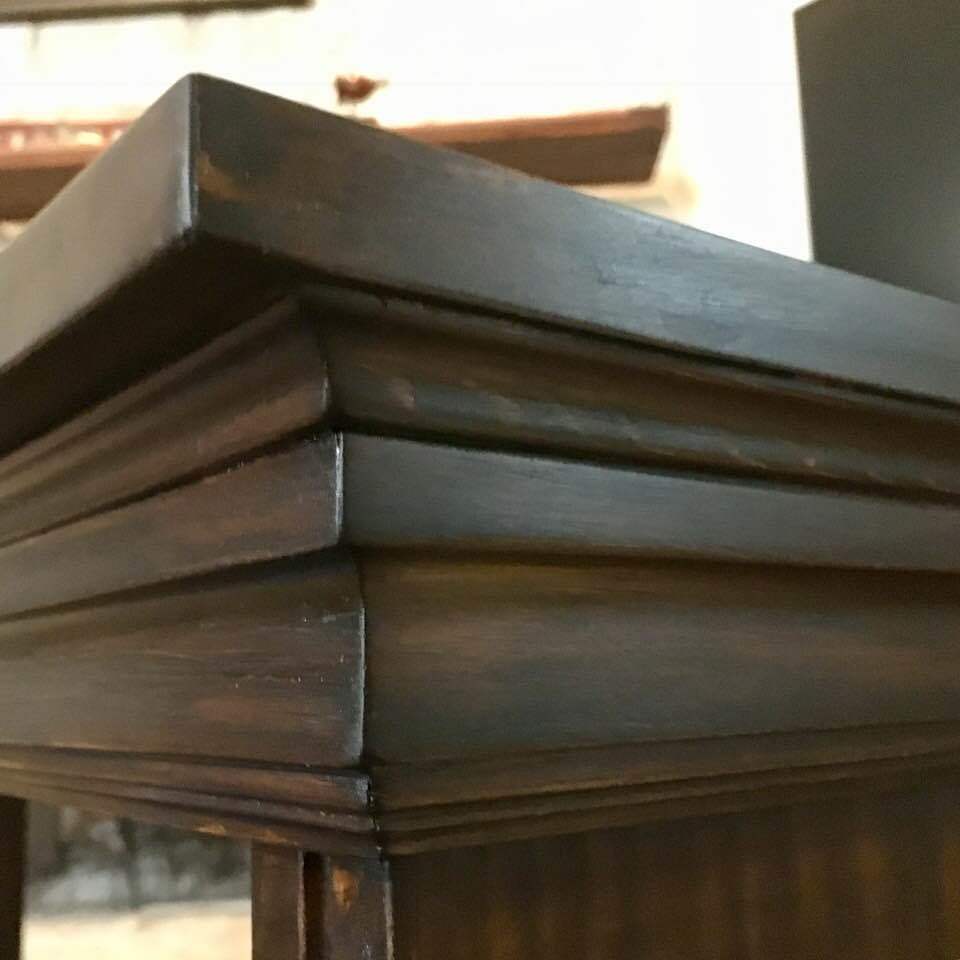
We used Ana's plans for simple bookcases and a larger but equally simple armoire to build a HUGE media center that could somehow manage to take some of the focus off of the television. We added doors everywhere that we could and lots of glass display shelving. The hubby is thrilled because his beloved flat-screen and infinite related electronic gadgets are within easy reach. And I smile every time I walk into our family room and don't have to see everything that is hiding behind closed doors!
Fri, 07/08/2011 - 22:57
Cbeach1717,
This is exactly what I want!
Can you provide the dimensions for the armoire and the shelves, please? Can you tell me also the paint color and how many coats?
Mon, 07/11/2011 - 08:52
Ana's "Nursery Armoire" is the best starting point, and here are our dimensions:
Armoire basic box structure:
2- 1x16"@ 8': (Sides)
2- 1x16"@ 42" (Top and bottom)
2- 1x16"@ 40.5" (Two shelves for television and electronics)
1- HUGE 1/4" plywood as the back and for support
*bun feet and crown moulding also add some height
We used a "Country White paint from--GASP- Wal-Mart! And it is the best off-white color I have ever used! We used one coat of primer and two coats of paint.
I hope this helps, but feel free to ask for any further clarifications! Best of luck :o)
Sun, 07/17/2011 - 16:30
That's exactly what I'm going to do. Thank you!
Sun, 01/15/2012 - 18:17
I am dying to get this built for our house! I see the cost estimate is listed at $150, is that for everything needed for all 3 units? I know it depends on what store is used and the location, just trying to get a better idea of what I need to save up. I was trying to find something similar on Craigslist that I could just refinish, but being able to make a piece that is exactly what I want for around the same price (or less) would be incredible!
I'd love to know where you got the glass shelves from if you don't mind sharing.
Mon, 01/16/2012 - 13:06
Hi Sarah,
I hope you'll give this plan a try! The $150 estimate definitely includes the wood and supplies for all three pieces and most likely includes the bun feet and knobs as well (I can't be absolutely certain since we built this nearly a year ago). The glass shelves were bought from a local glass cutter who also cut the glass panels for our kitchen cabinets. It really shouldn't be too expensive though!
Oh and the absolute best advice I could give you is to invest in or borrow a Kreg Jig. We did not have one ourselves until well after this project, but it would have been an immense help! I wish you all the best of luck--let us all know how YOUR masterpiece turns out :o)
Tue, 02/28/2012 - 21:39
I absolutely love this, my husband had been designing a unit very similar to this but this just made the job twice as easy not having to do all the hard thinking ourselves haha! Thanks so much for sharing, it looks fabulous!
In reply to LOVE THIS! by Guest (not verified)
Mon, 03/05/2012 - 06:23
Thanks so much! I wish you lots of luck with your project, which you'll barely need because it is really simple to make and provides for a stunning result :o)
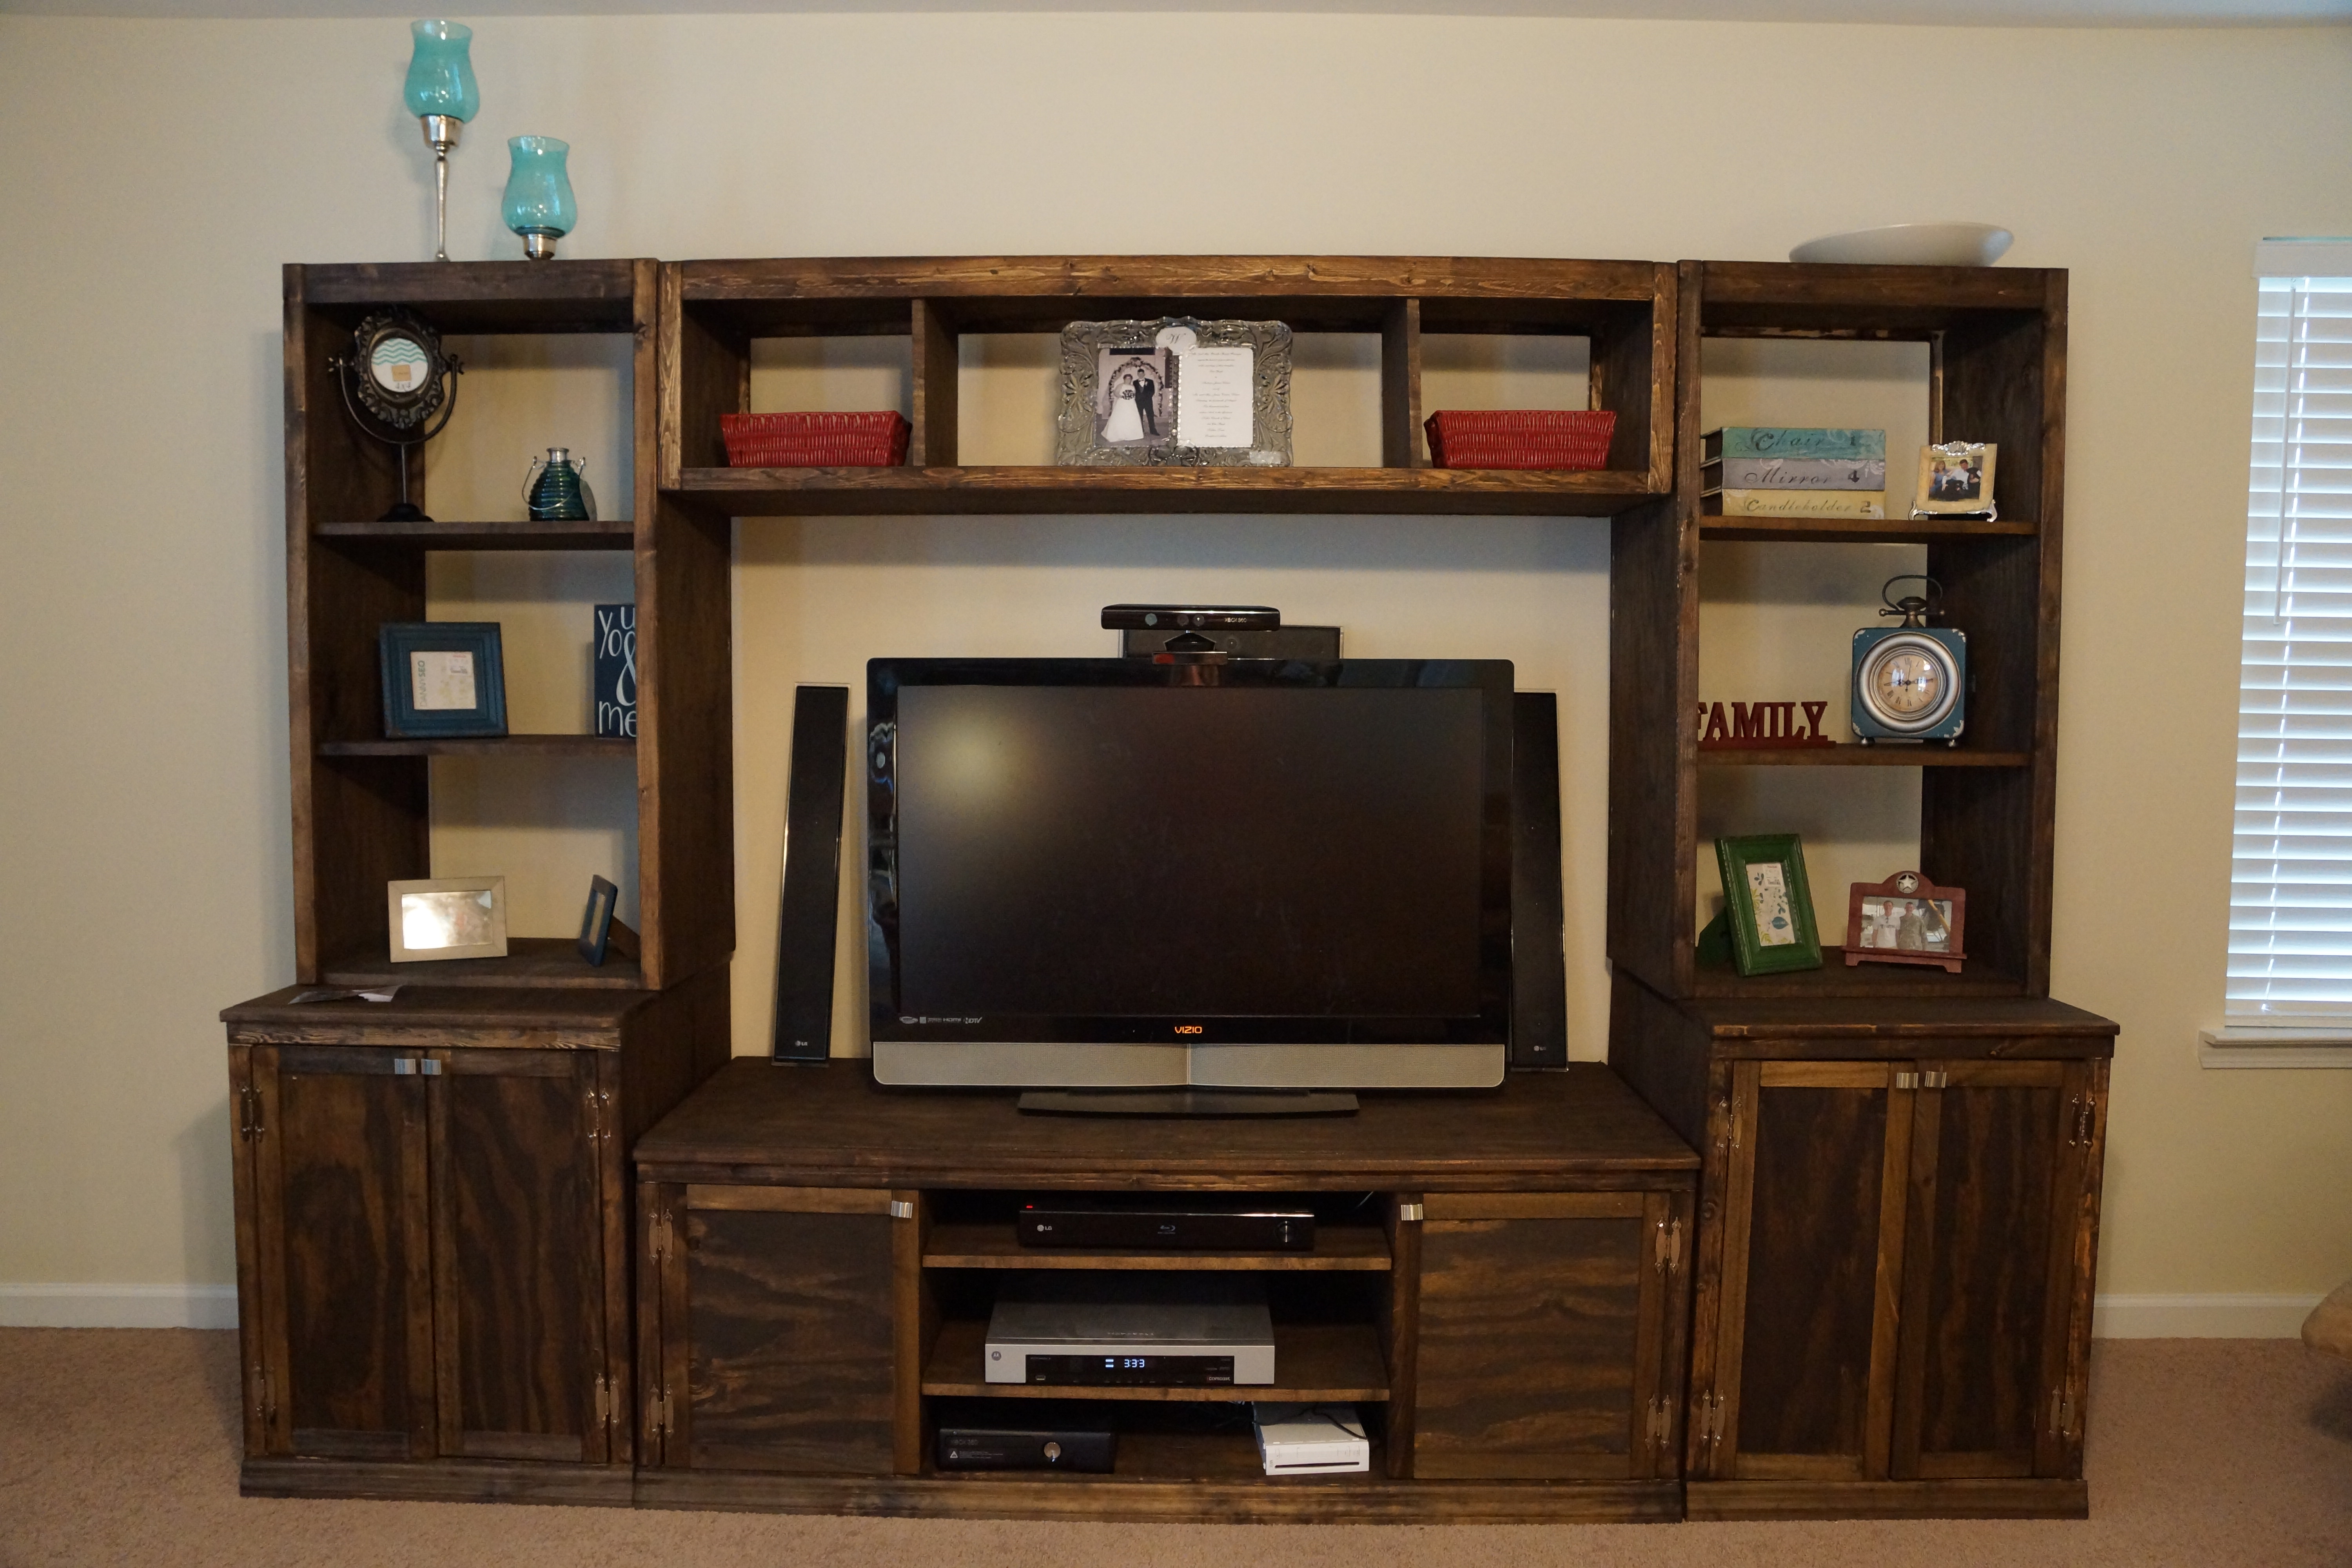
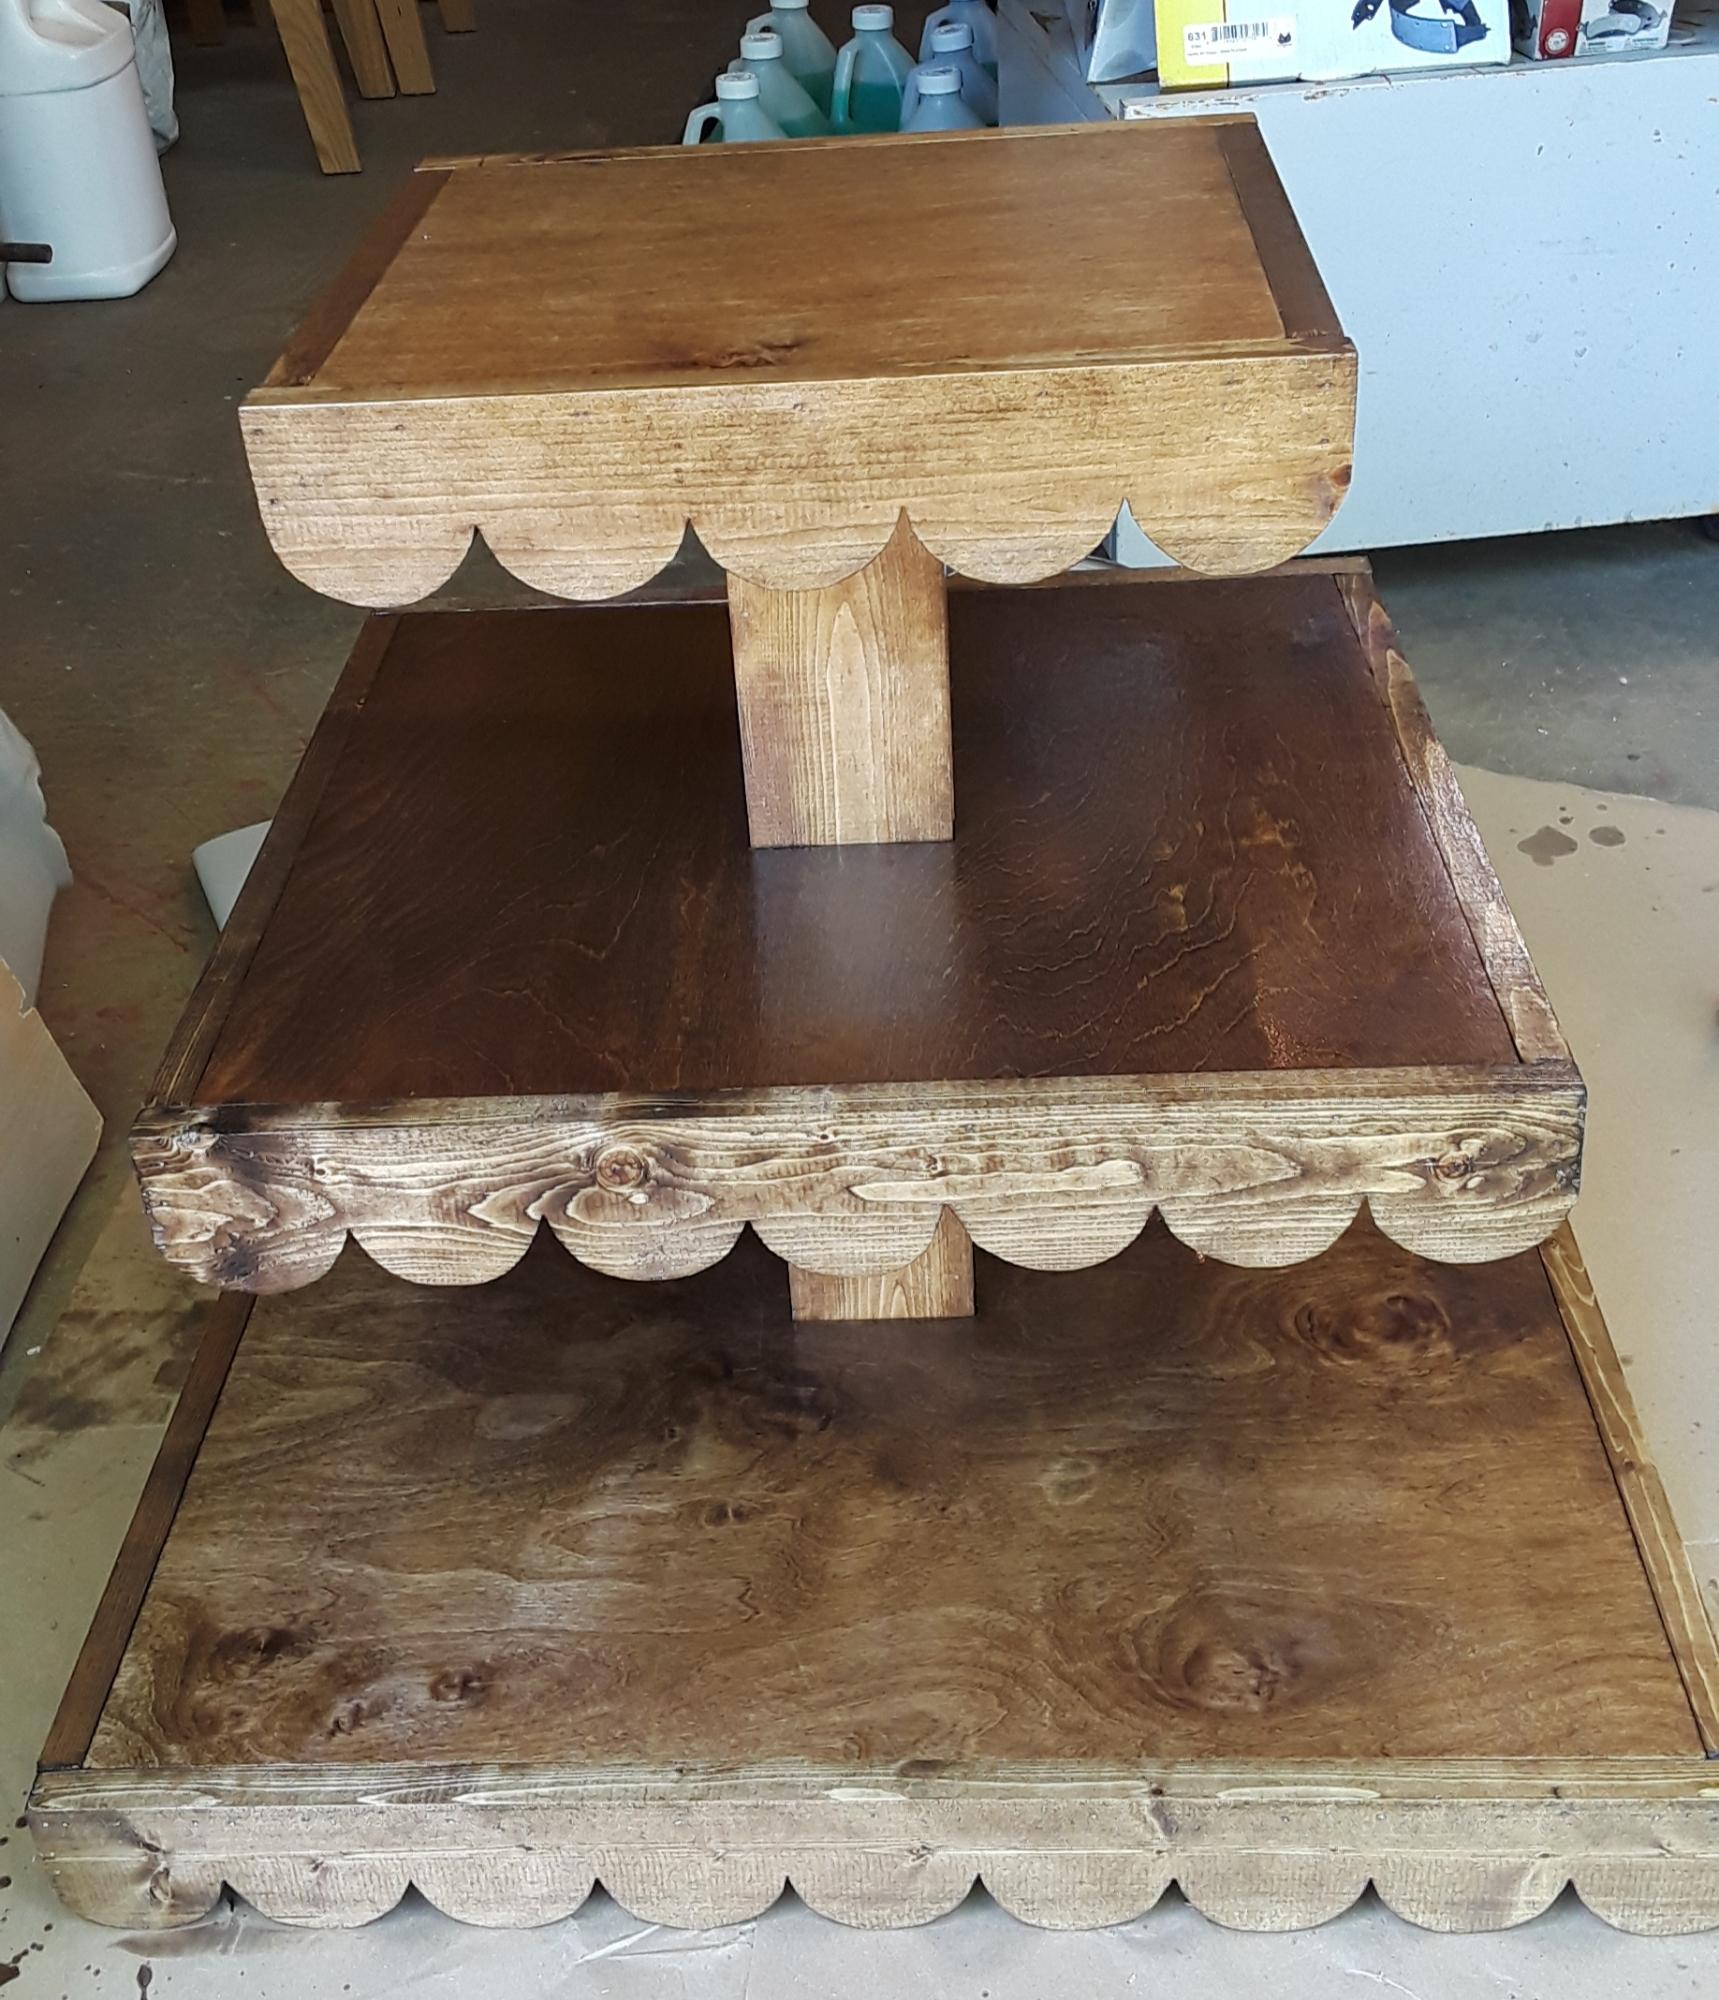
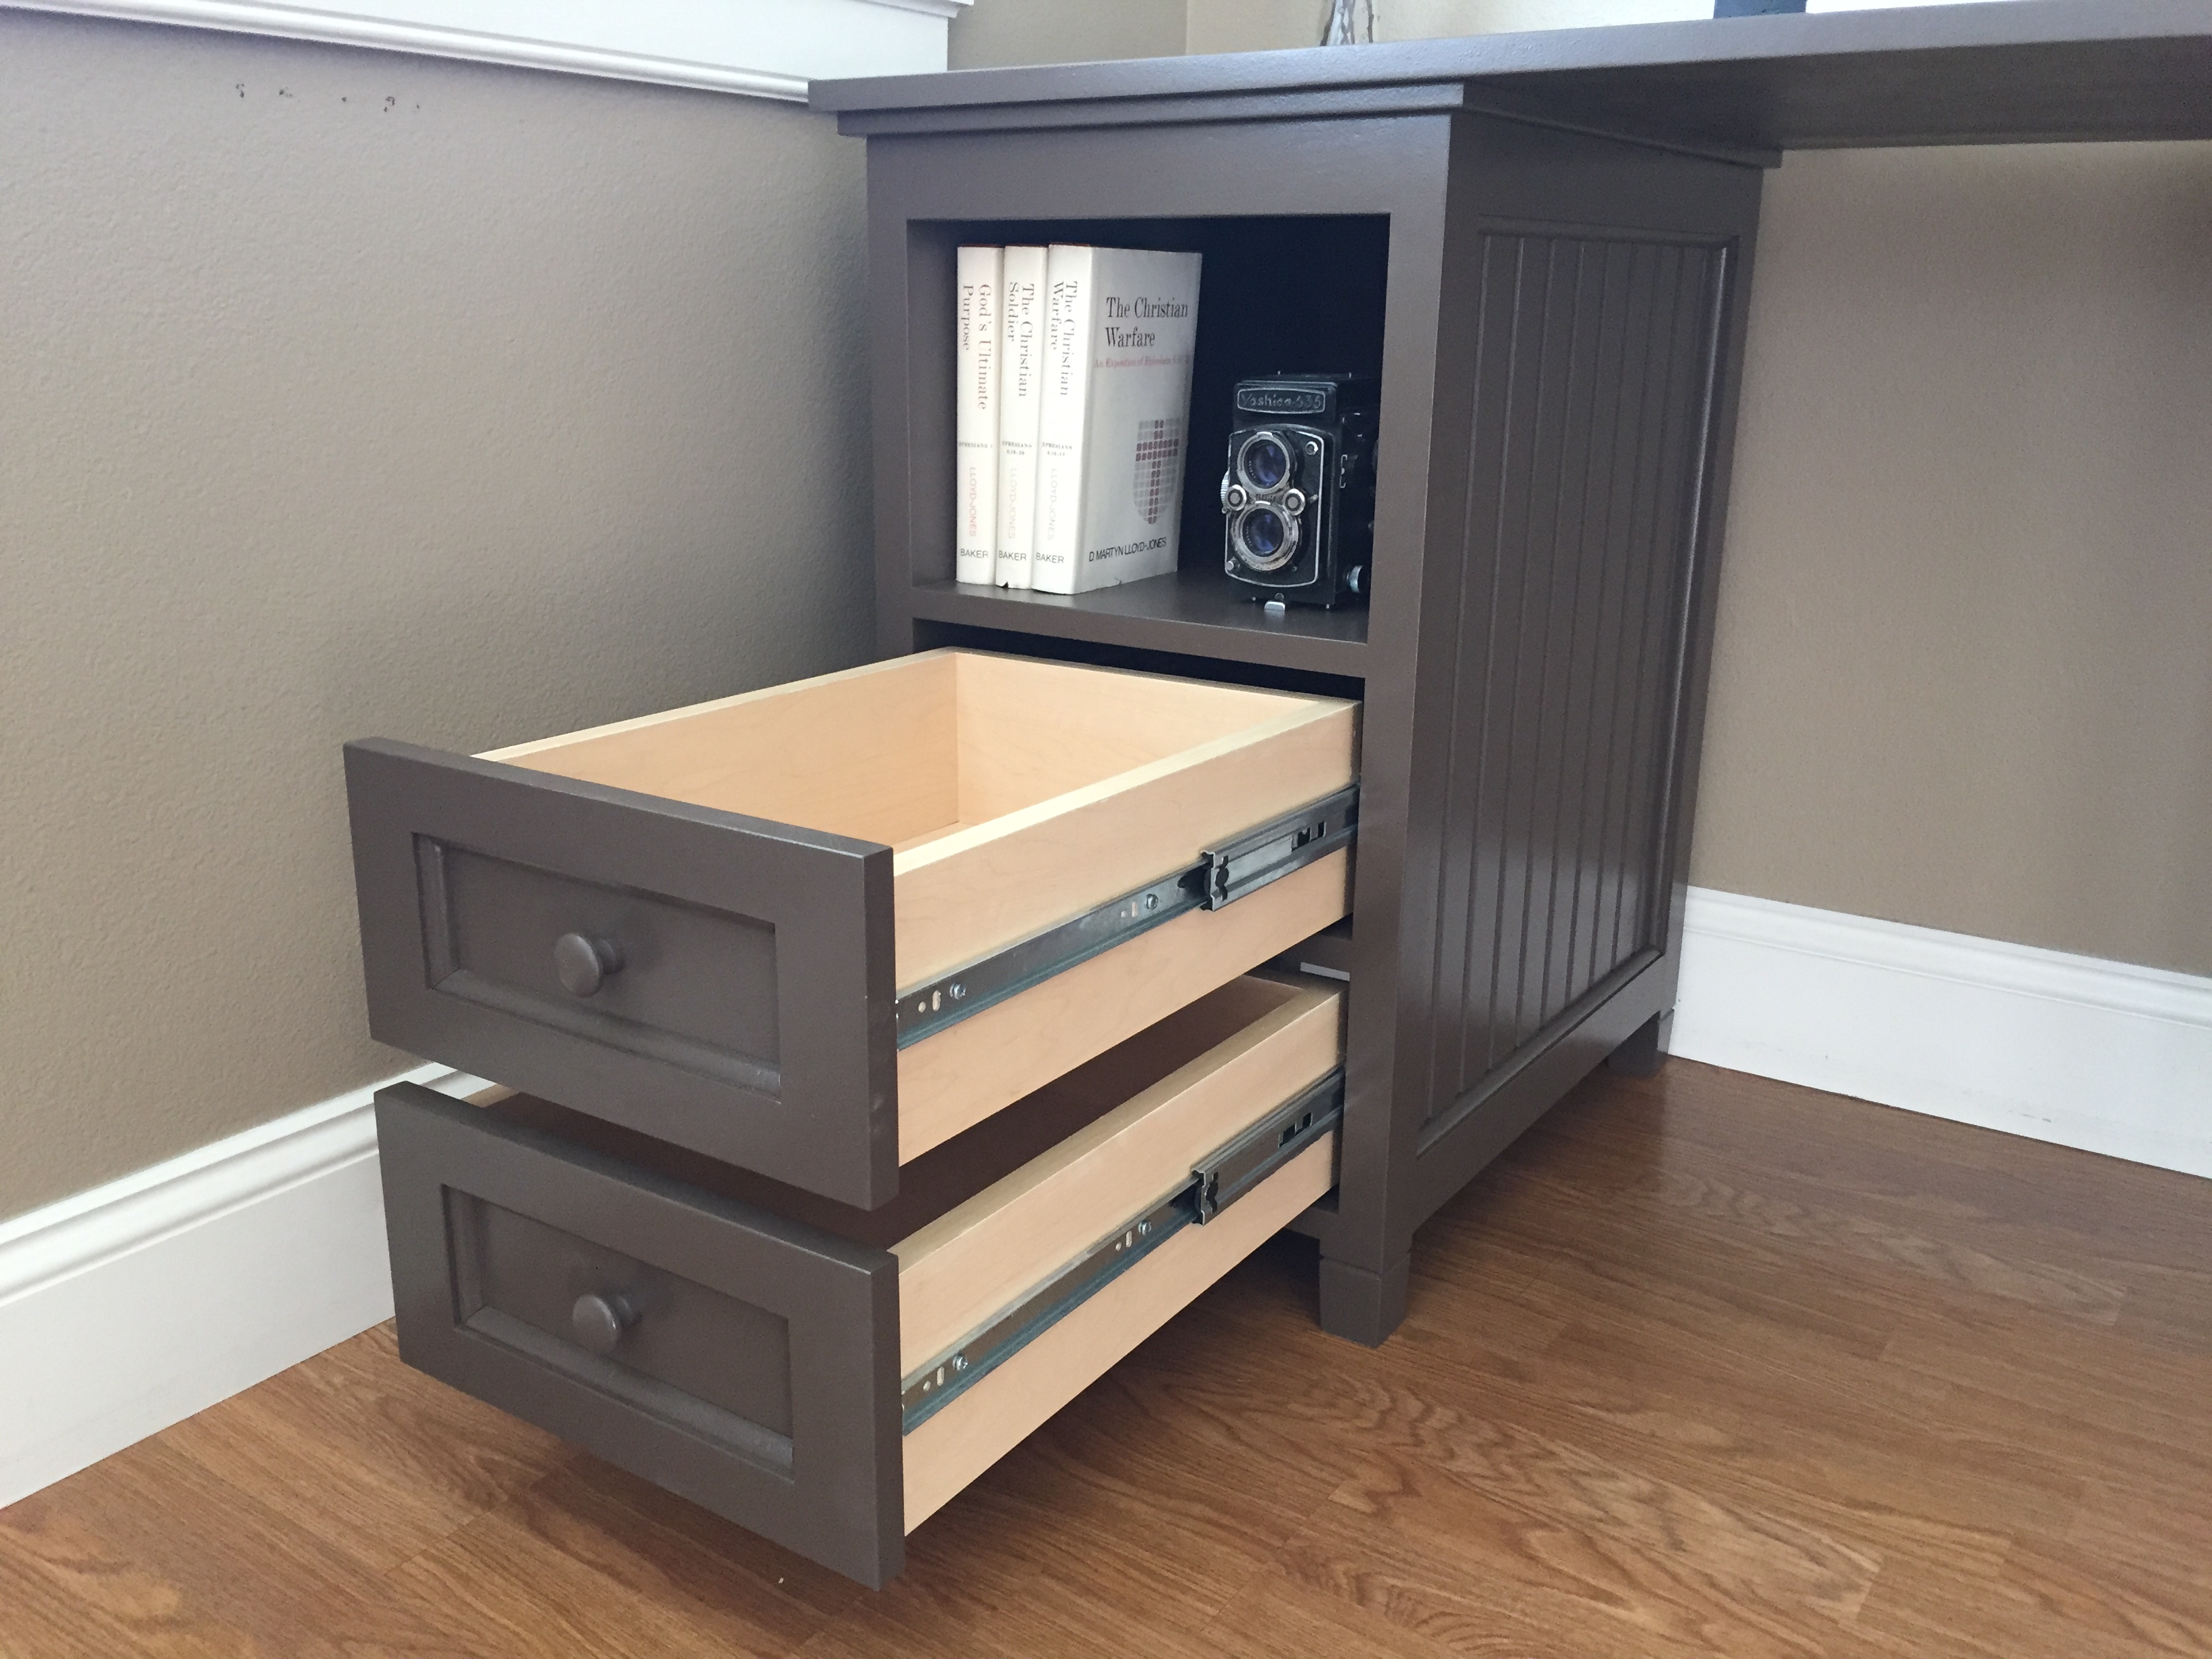
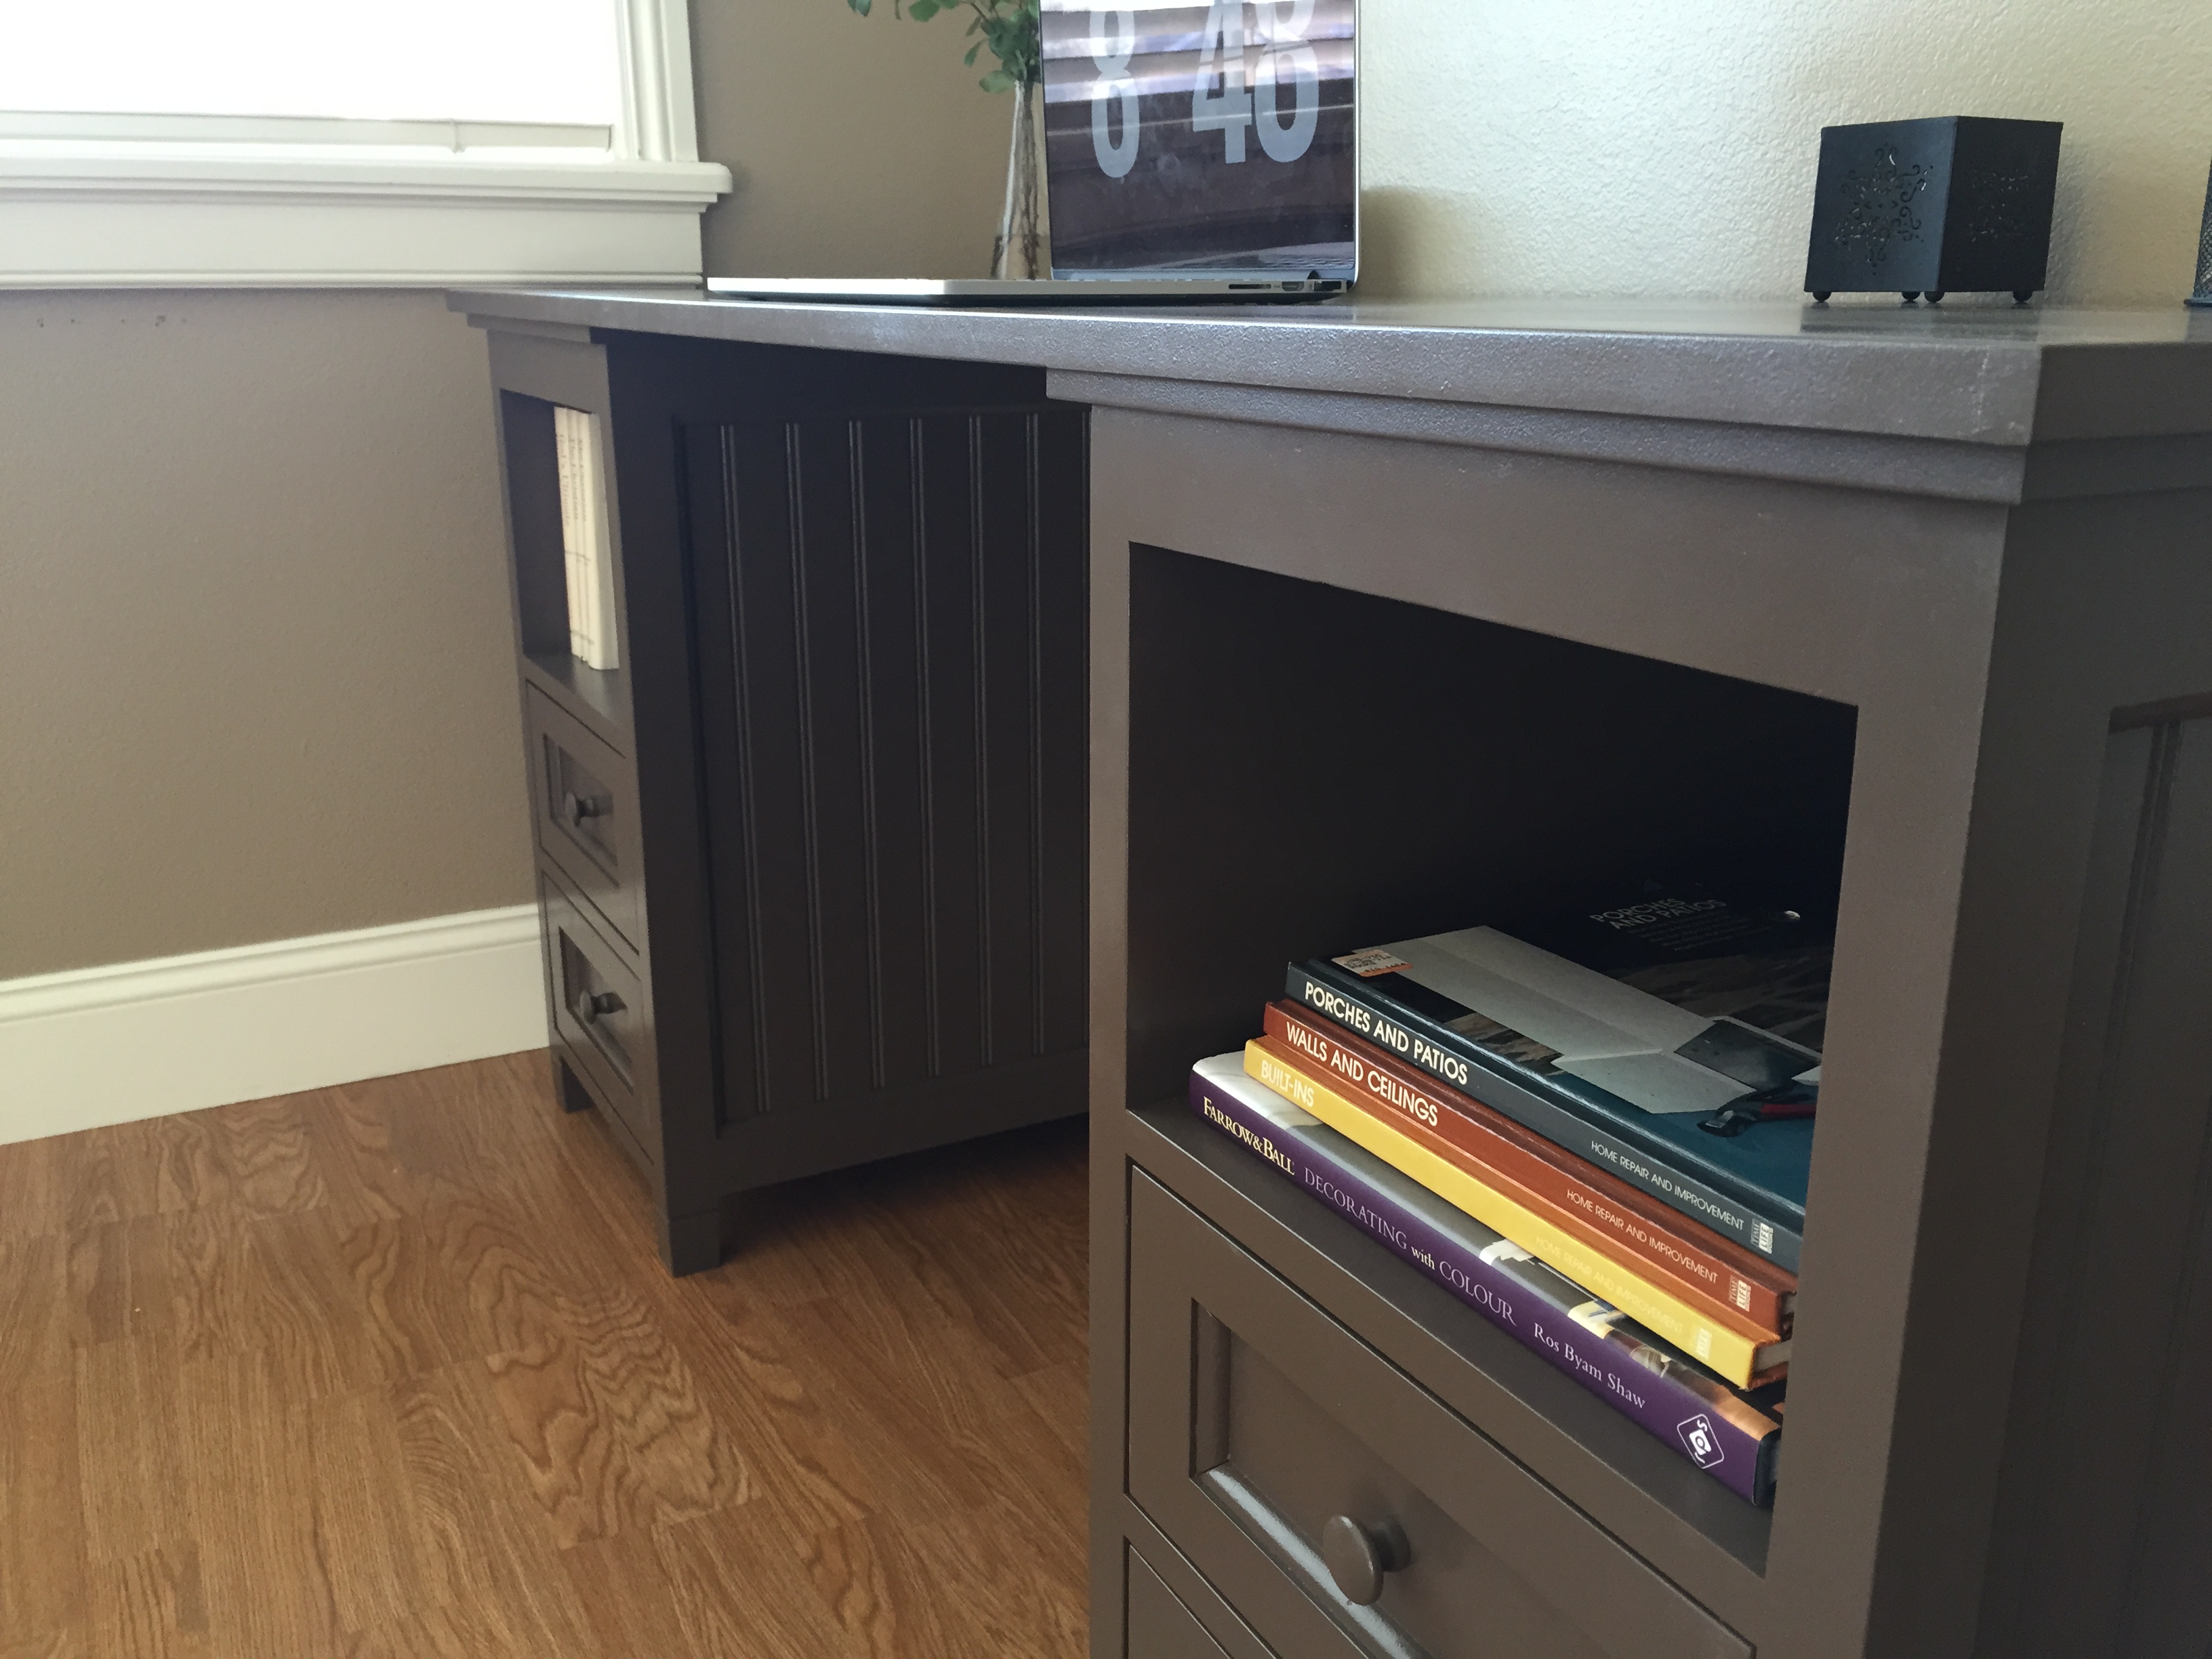
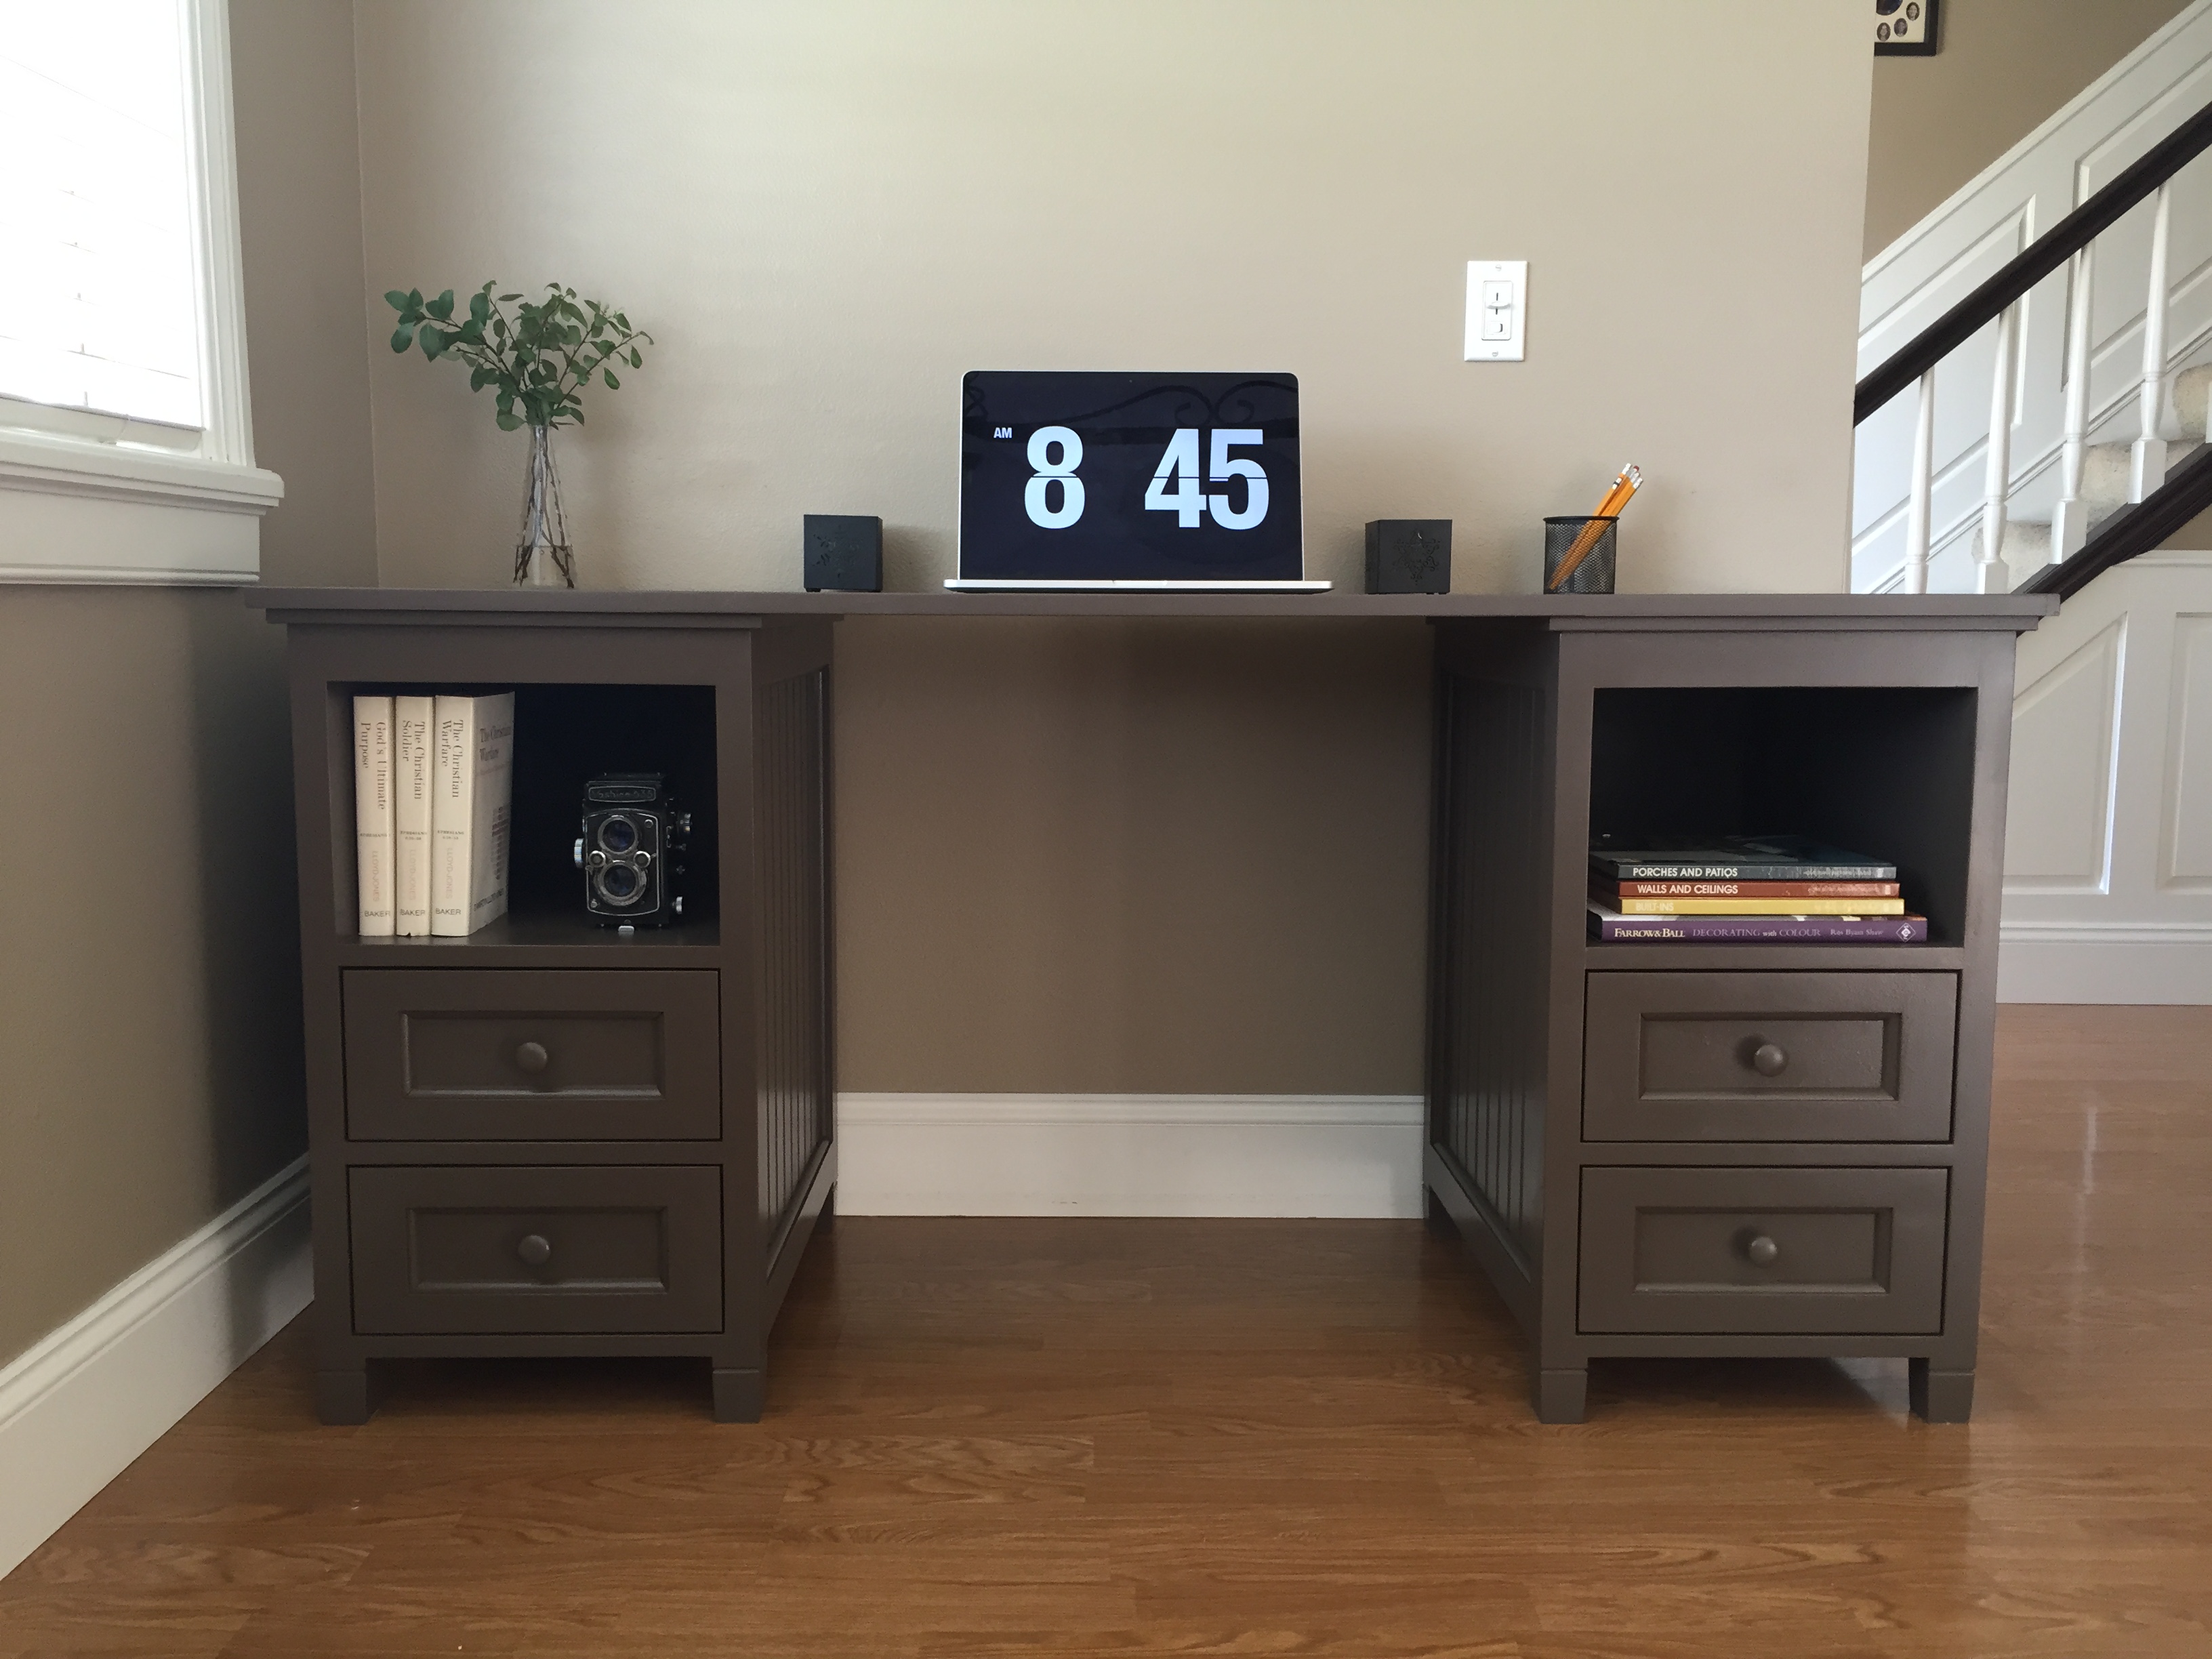
Since moving into our house almost 3 years ago, I have wanted a large piece to house the tv. The husband did not want glass, I wanted shelving on both ends and it had to hold a 60 inch tv (not pictured). To avoid paying thousands of dollars to a furniture store, I decided to build my own.
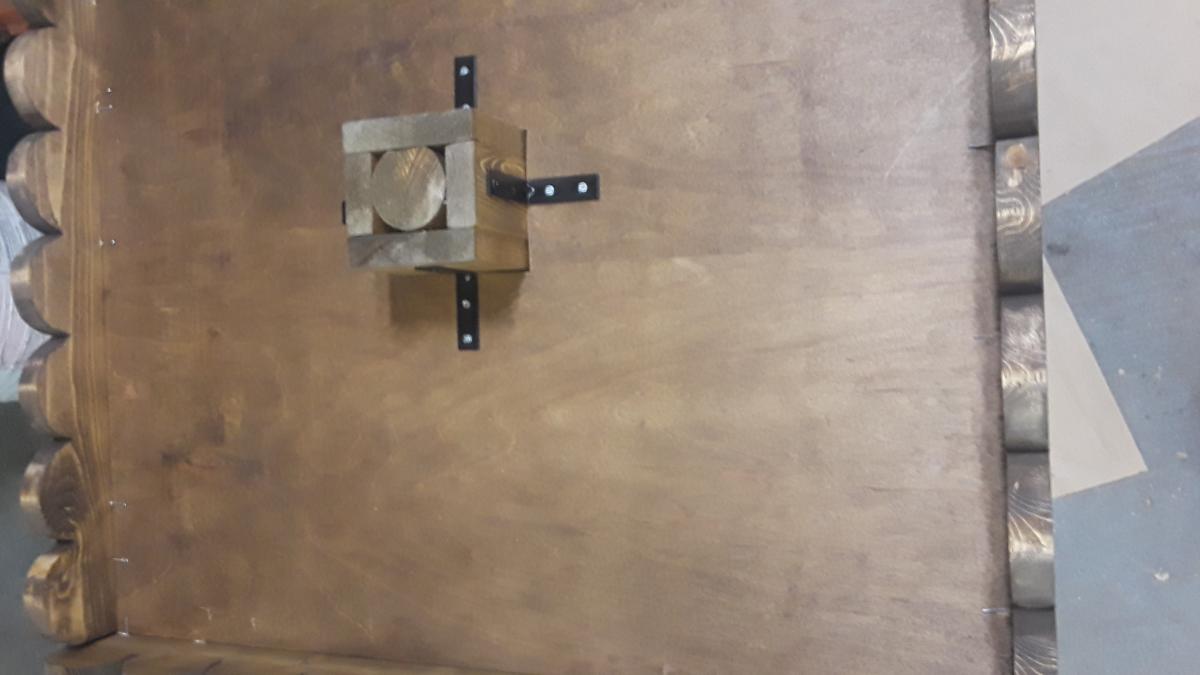
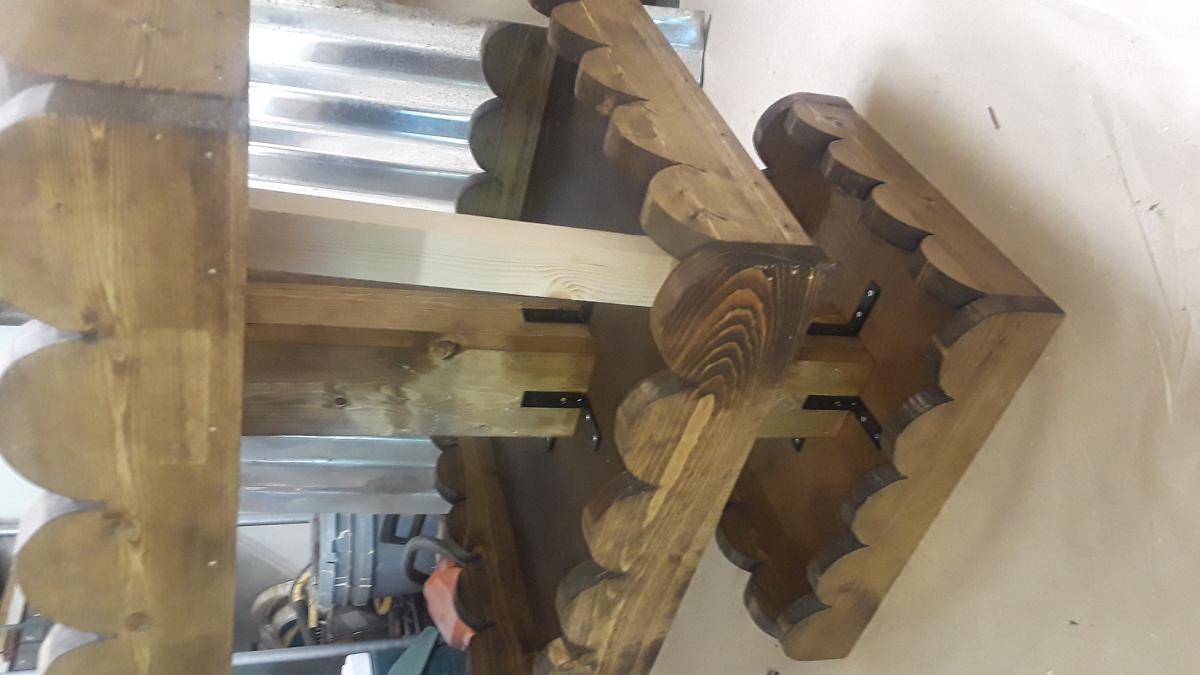
I used 1x2's, 1x3's, 4x8-3/4" plywood (sanded on one side) edge banding (super easy to use), nail gun and wood glue. I spent roughly a week building and staining, interrupted by 2 kids. The staining being the most tedious part. Cost was around $450 for all the pieces. I did attach the bridge piece by drilling holes through the bridge to the side hutches. I then installed nuts and bolts through the hole to attach it all together. Makes it easy to take apart when moved and I am not constantly drilling screws into the unit.
My husband is deployed so this was built solely by myself. My experience level is novice, this is only my 3rd piece of furniture, but I am hooked. The plans are easy to follow and use.
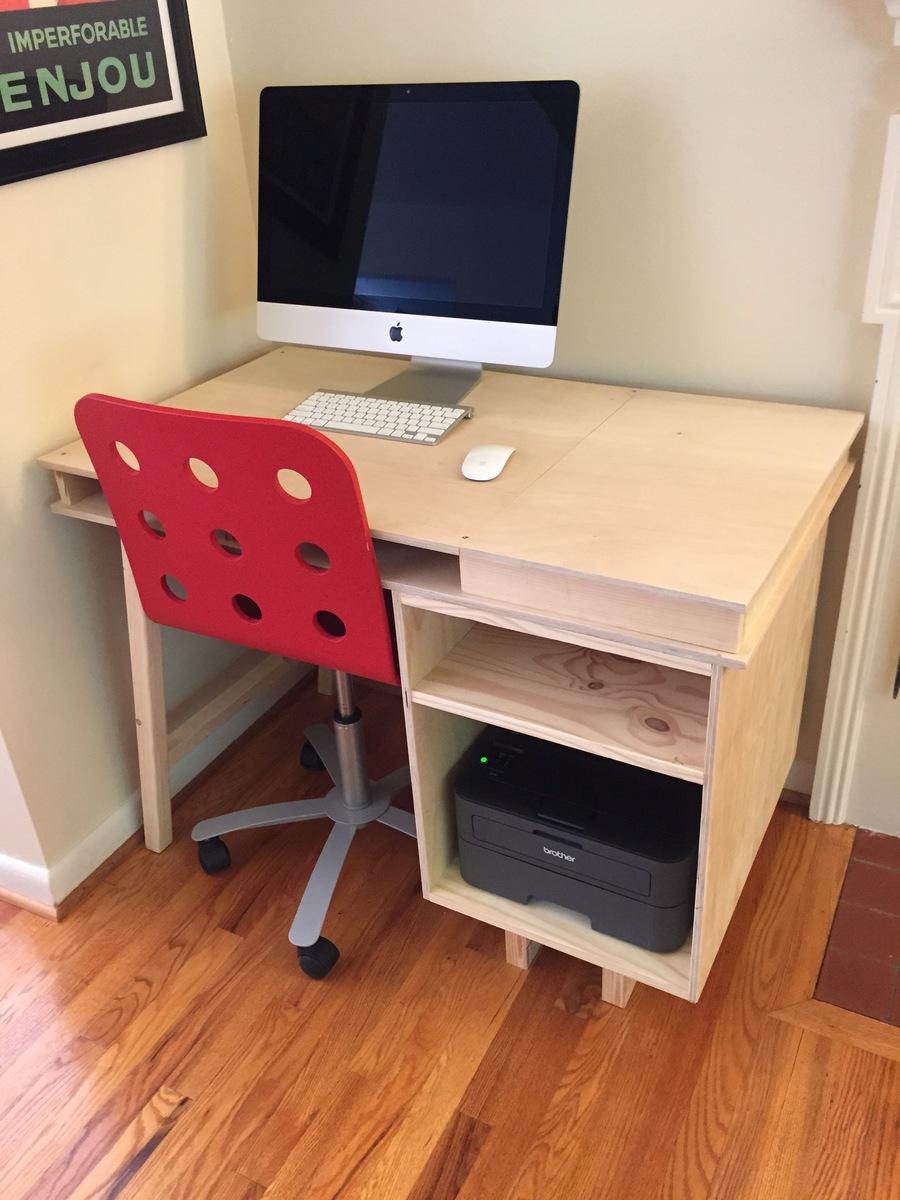
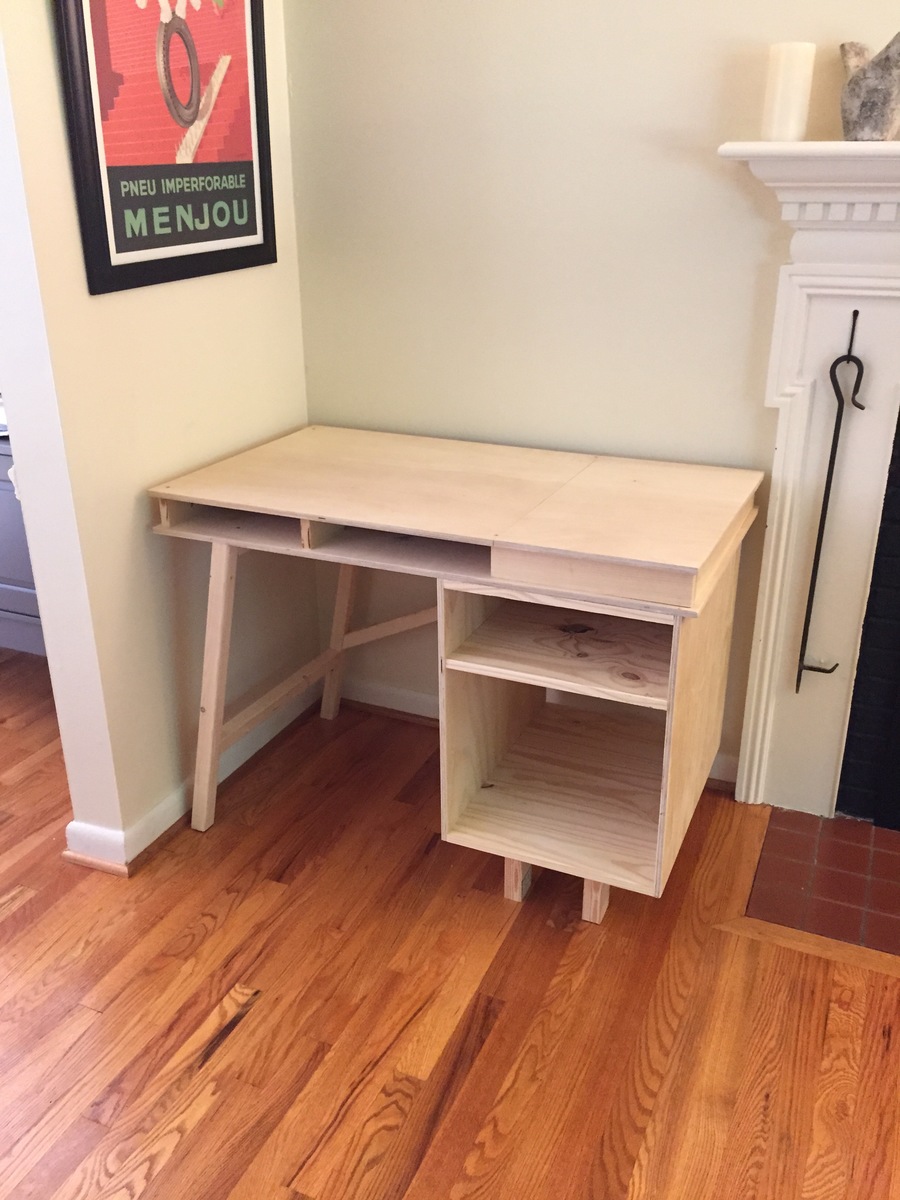
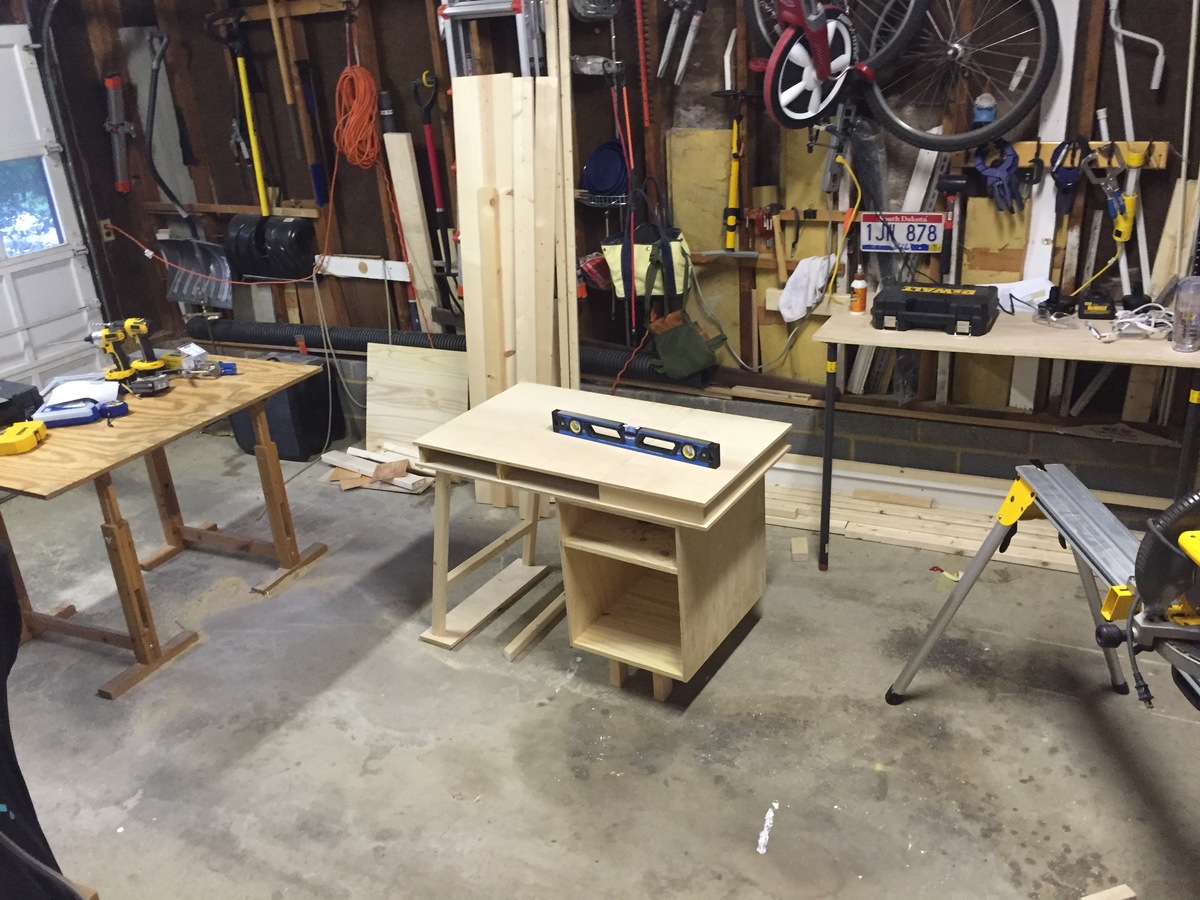
I modified the plans in several ways. First I made the desk smaller to fit the space. In doing so I decided it would work better to have only one part of the desk flip up for storage. I also made the box that makes up the base larger to fit a printer. That left a smaller space for a chair. Turns out the chair I had fit perfectly. I decided not to finish with paint, stain or varnish. I may do that later. Over all I am very happy with this project.
I started off following the plan, then decided I didn't want to put a full back on it. Then I decided it was a good time to learn how to use my new router, and the next thing you know, it had turned into this! I didn't know what I was doing, so I just made it up as I went along.

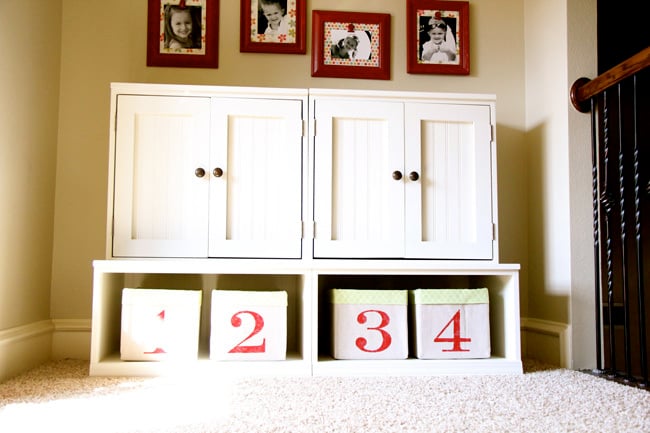
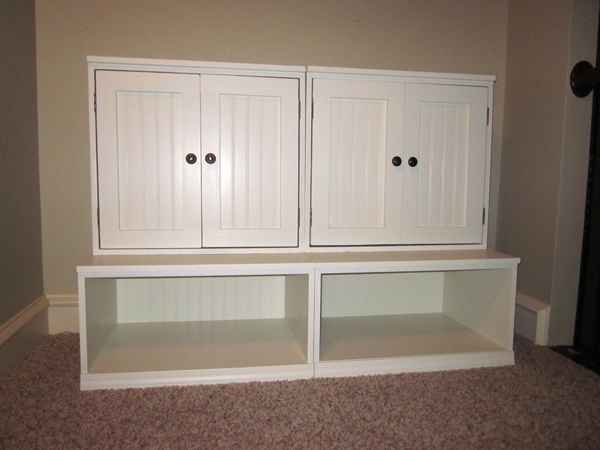
I used Ana's plans for the open cubby base and hutch with doors to create my storage system for the playroom. I had Lowe's rip my 2 sheets of 3/4" MDF and I made the smaller cuts with my miter saw. I used 1/4" white bead board panel for the doors and cubby backs. I built the pieces in 1 day and painted the next. It was simple and fun! You can see more details at http://www.shanty-2-chic.com/2011/07/storage-for-the-playroom.html!
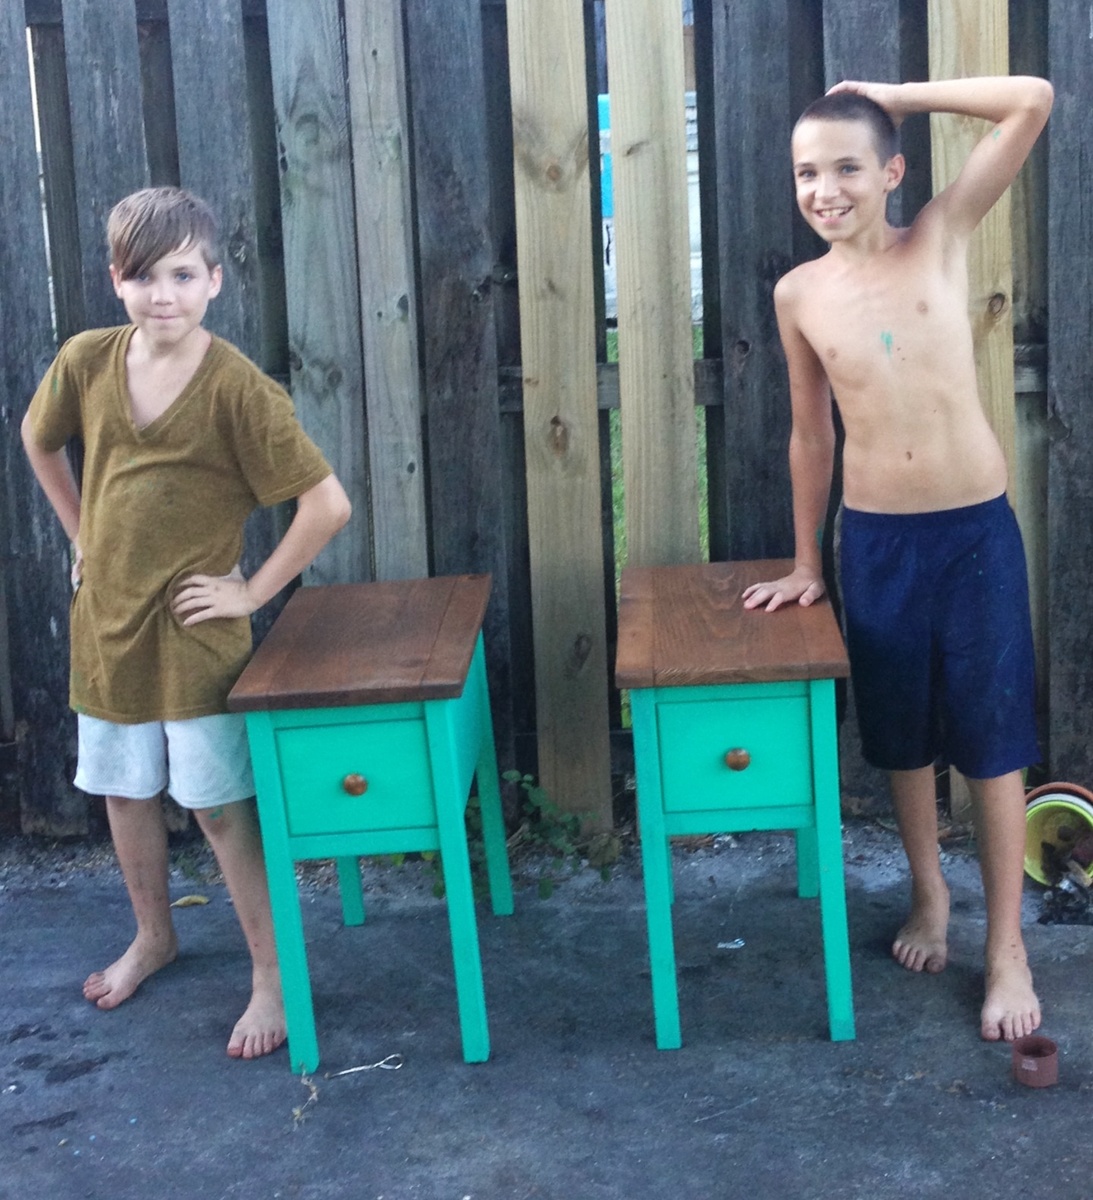
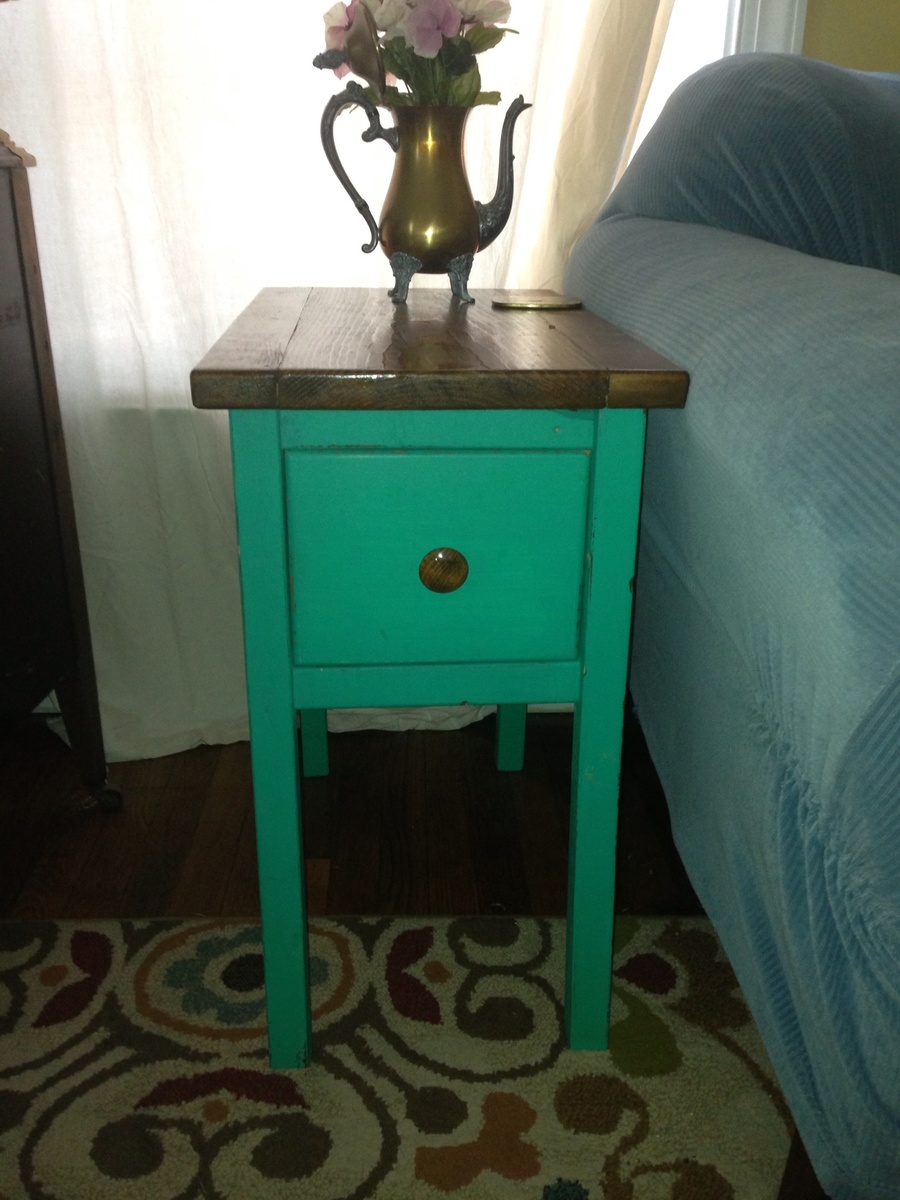
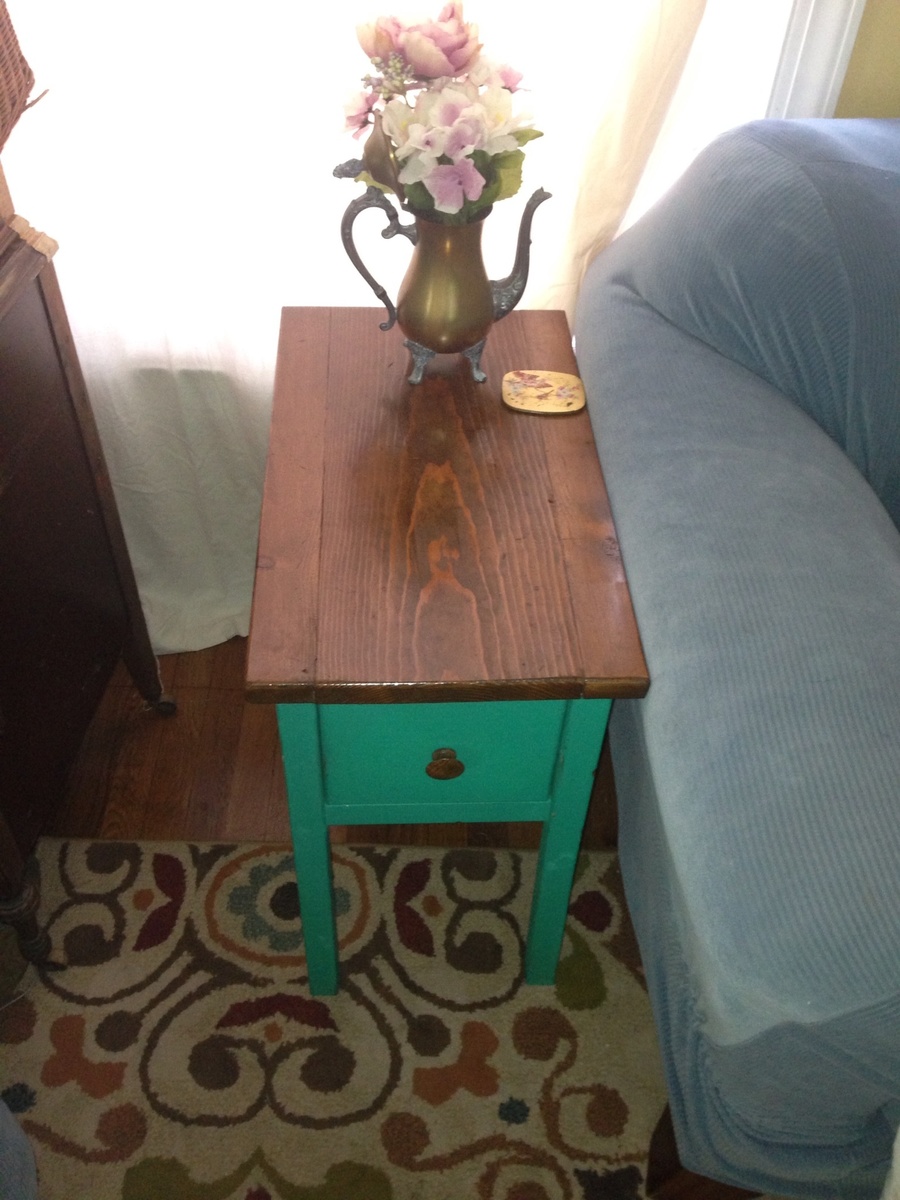
My kids (11 & 12) made these in about 3 days. We have to work during my 2 yr olds nap time so I would say 6-8 hrs total. We always have a lot of scrap wood lying around so this was a great way to use it up. Unfortunately, sometimes when using scrap wood, it is not always the exact measurements that you need but some plan reworking and measuring as you go can fix that. On this particular plan, the only thing we changed was the thickness of the top and a little fudging on the drawer box. We also used our router to round over some or the edges and we made our own drawer tracks along the bottom w/ scrap furring strips. Honestly, those studs you see in the picture, did most of the work and since their skill set usually involves a reference to the newest video game out, I would say this was defiantly a simple project! ;-)
Wed, 08/14/2013 - 16:47
Thank you! I showed them you comment. As you can tell from their studley poses, they are not lacking in the ego department ;-)
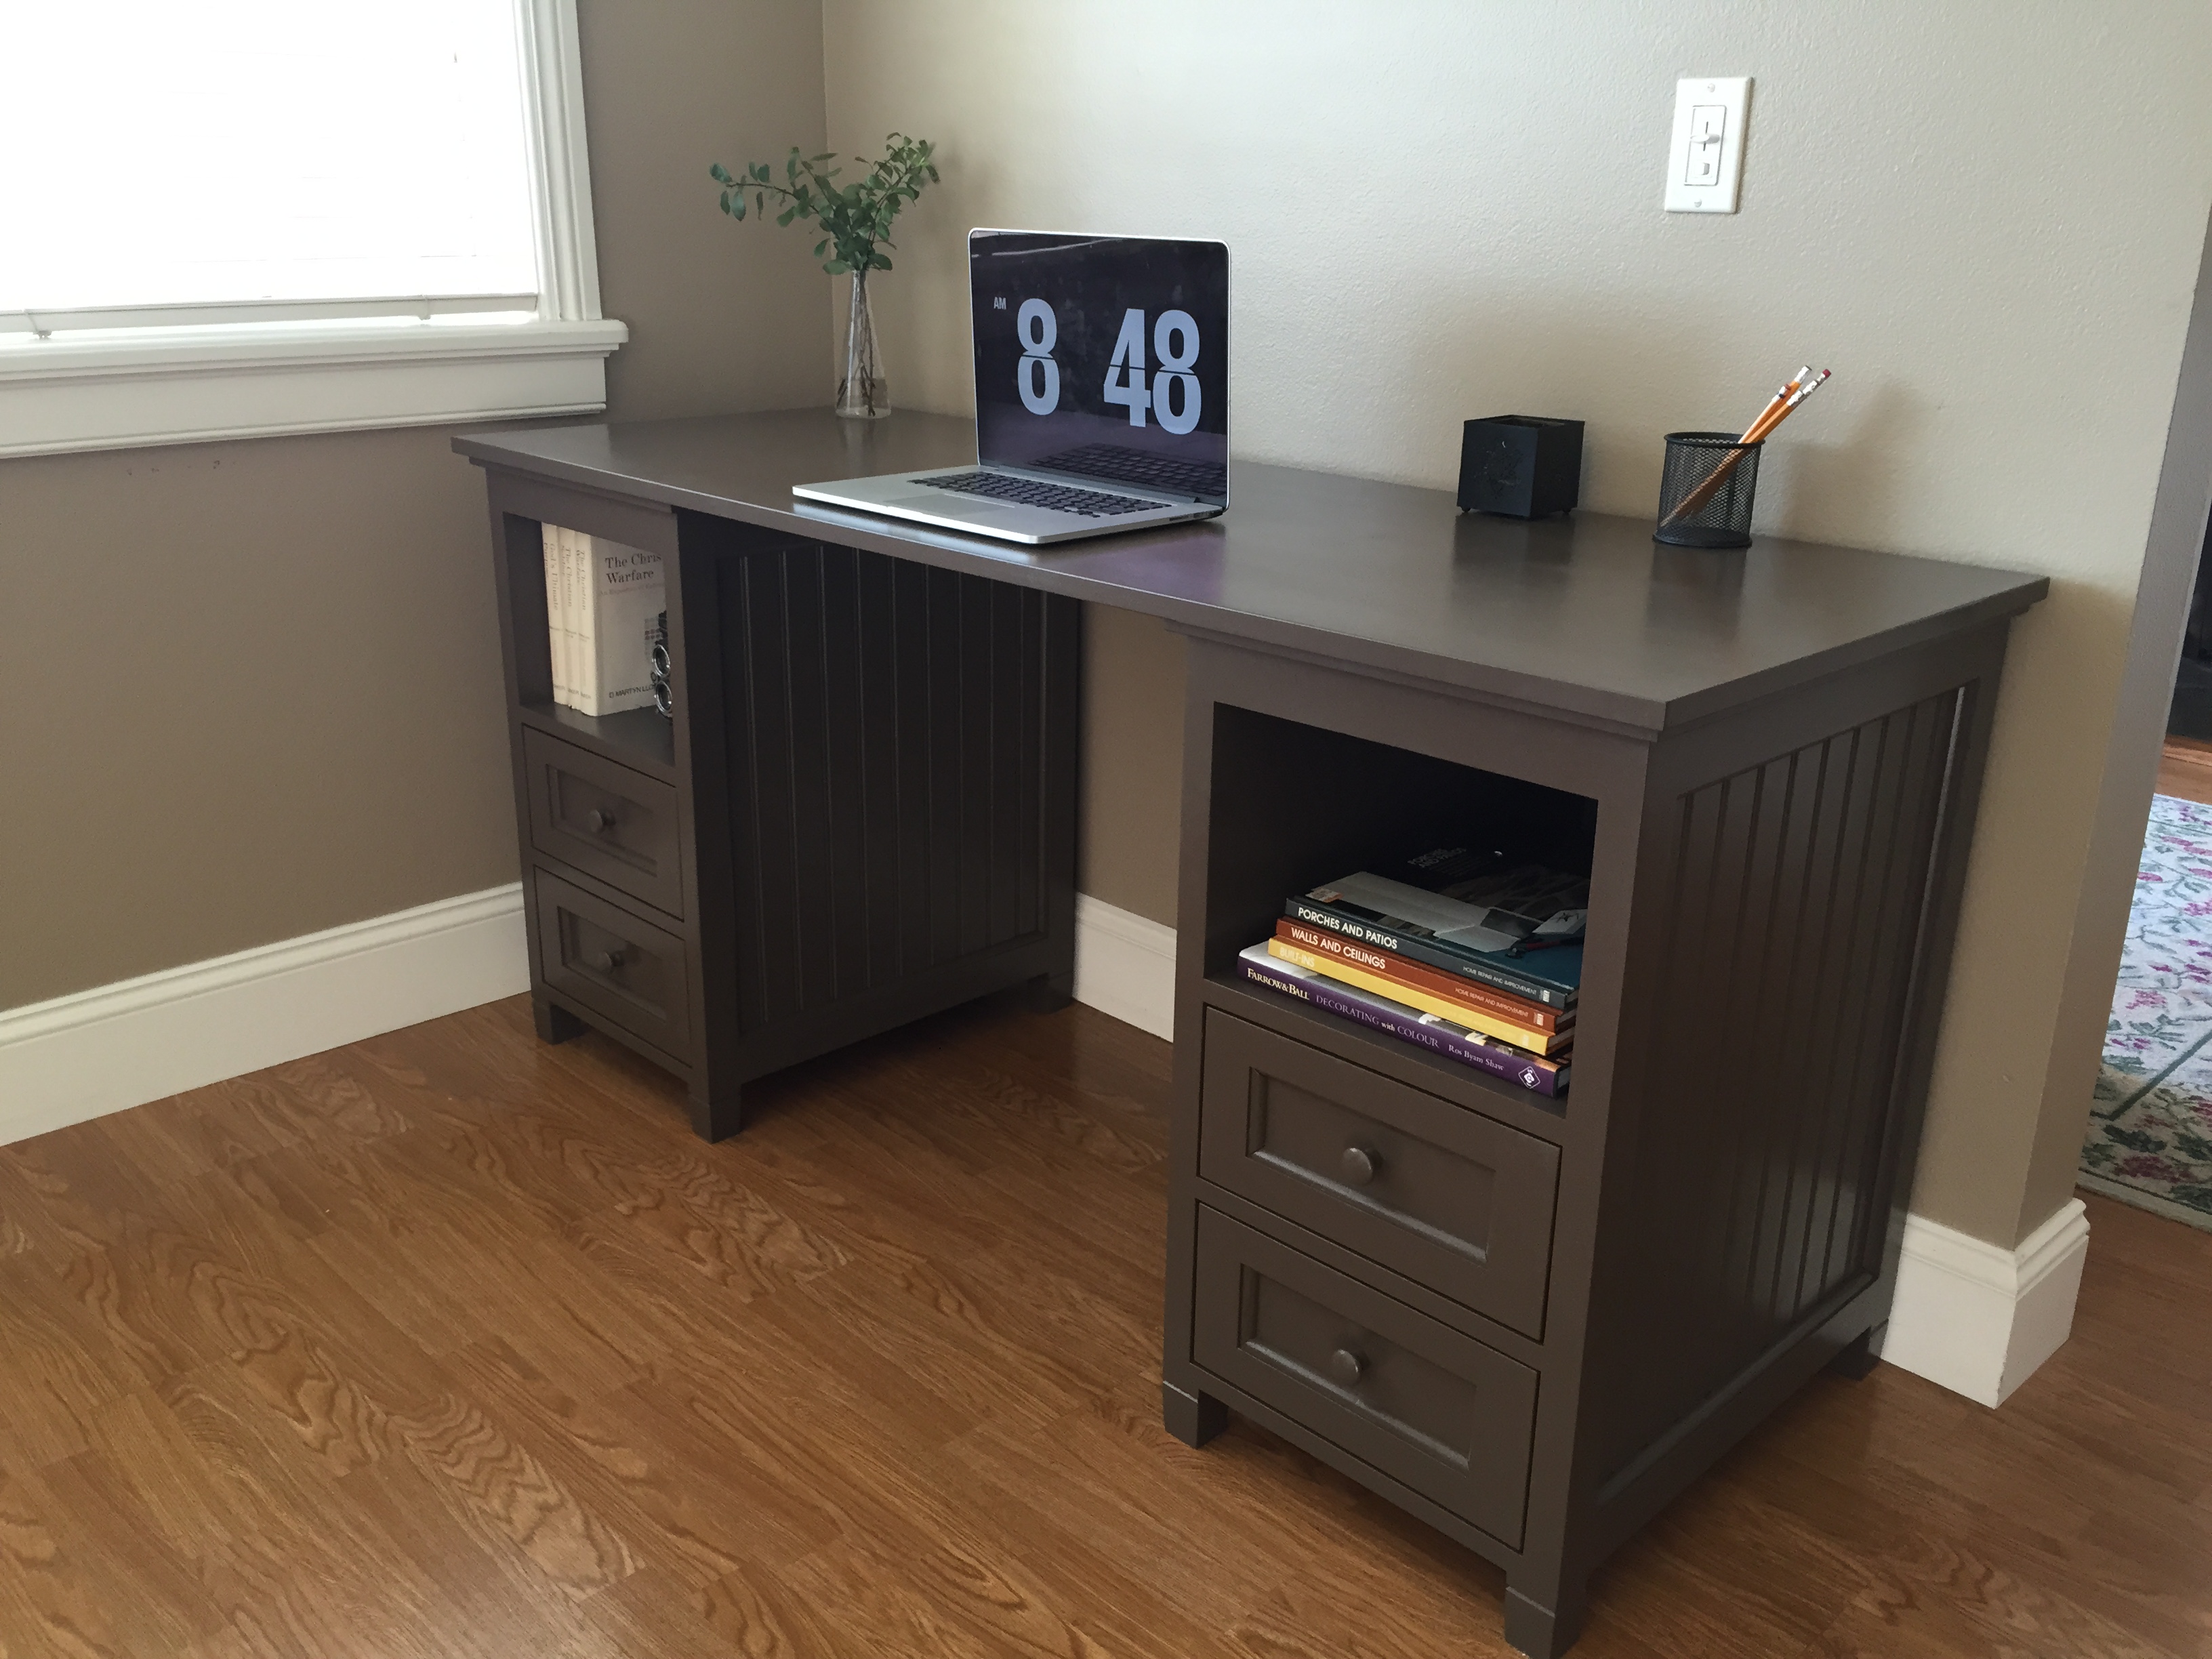
Here is a desk I recently built. It is a Pottery Barn piece. It features full extension drawers slides and simulated maple melamine drawer interiors.
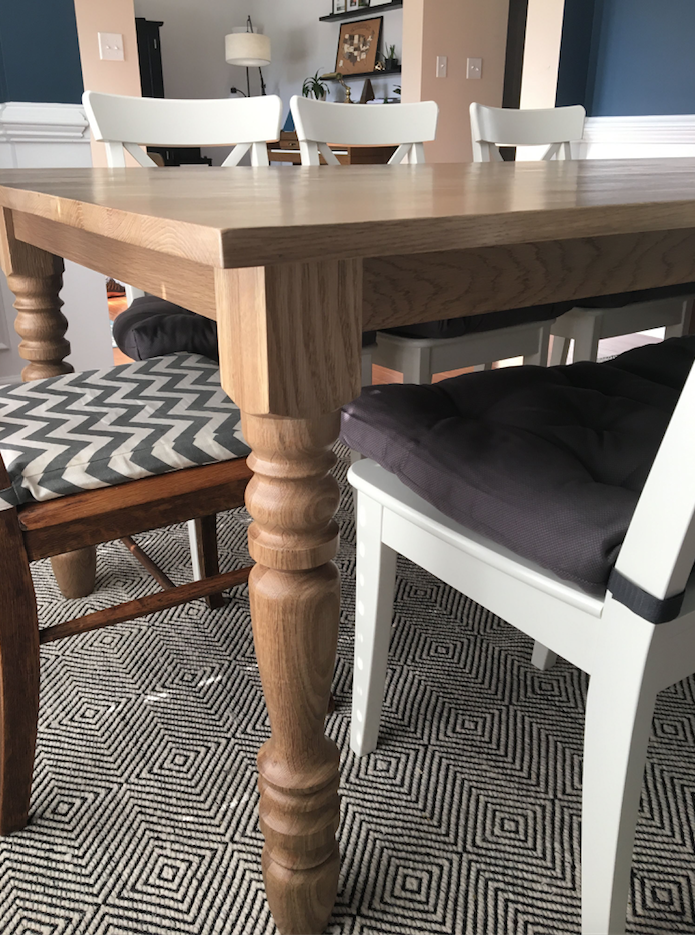
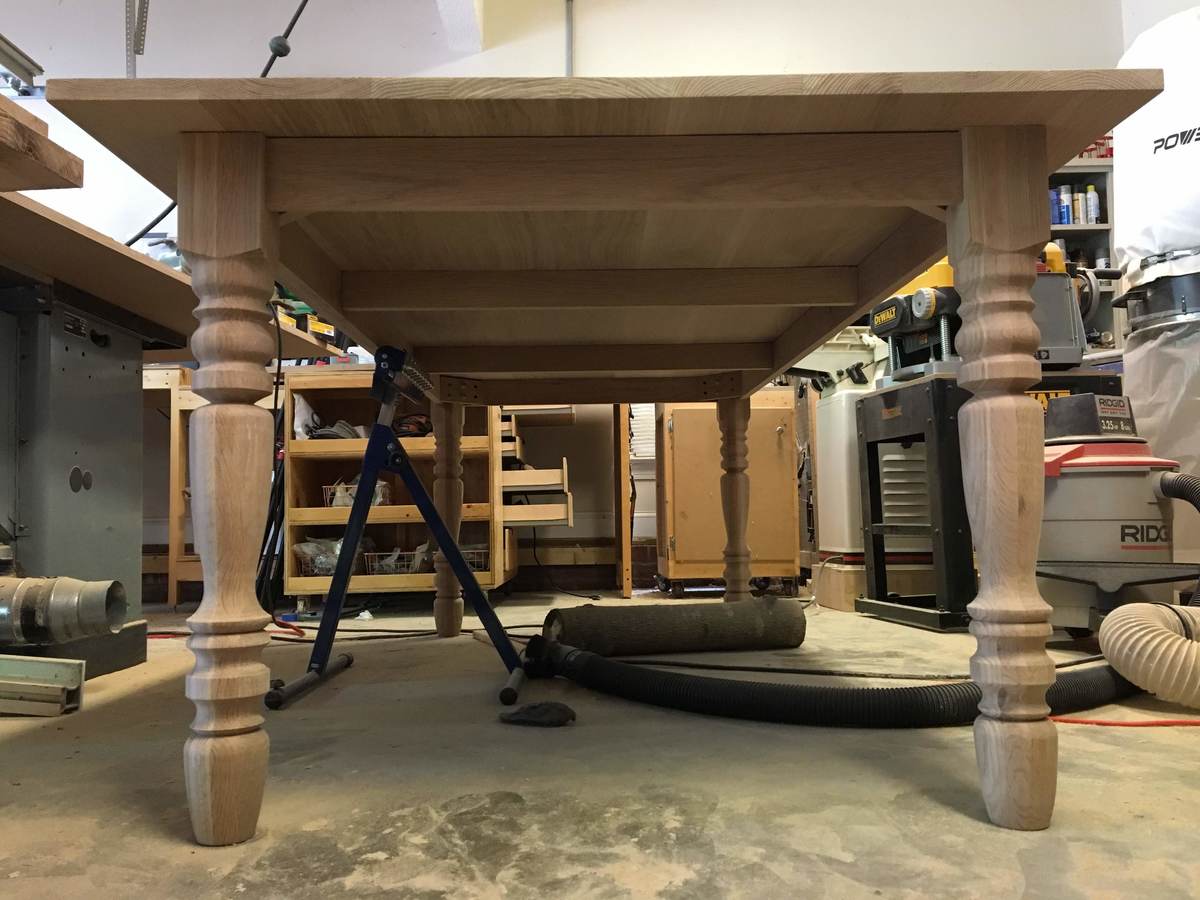
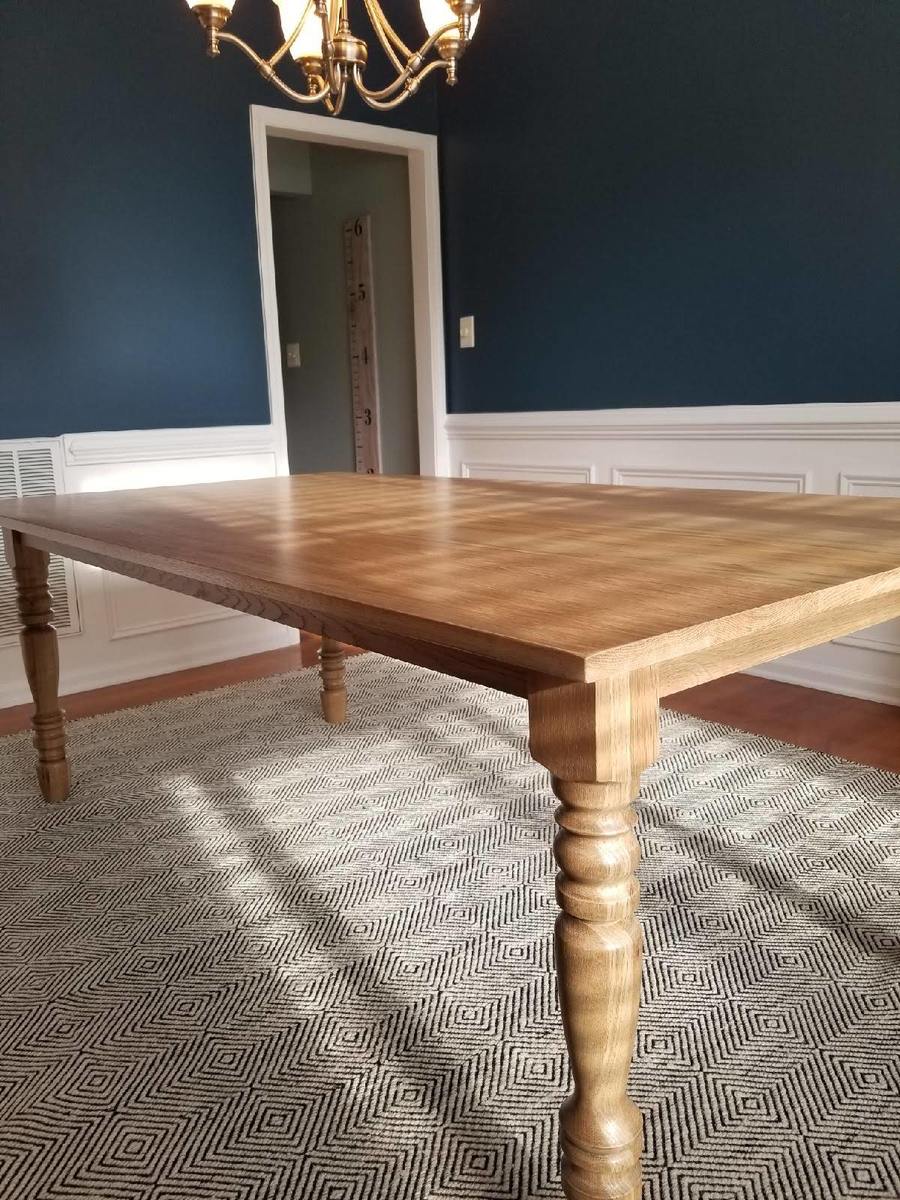
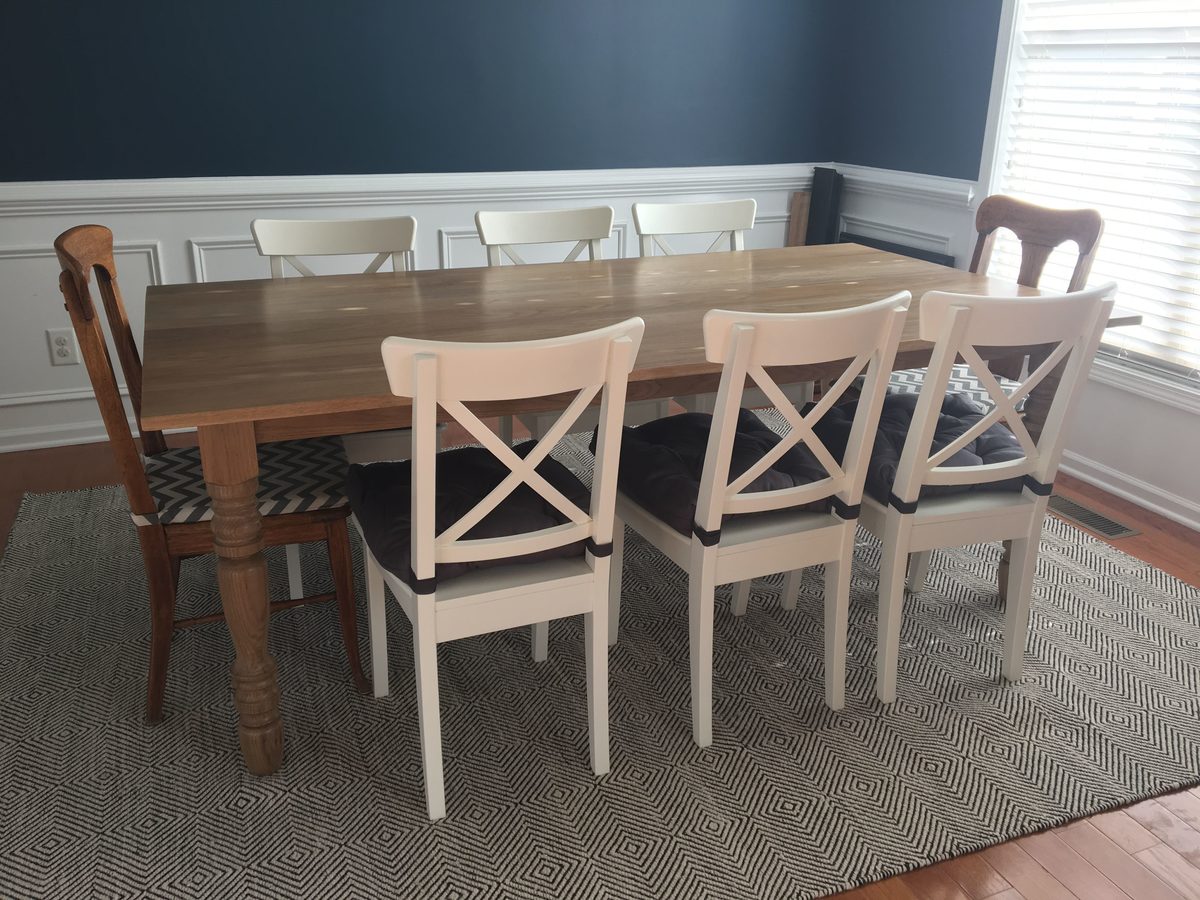
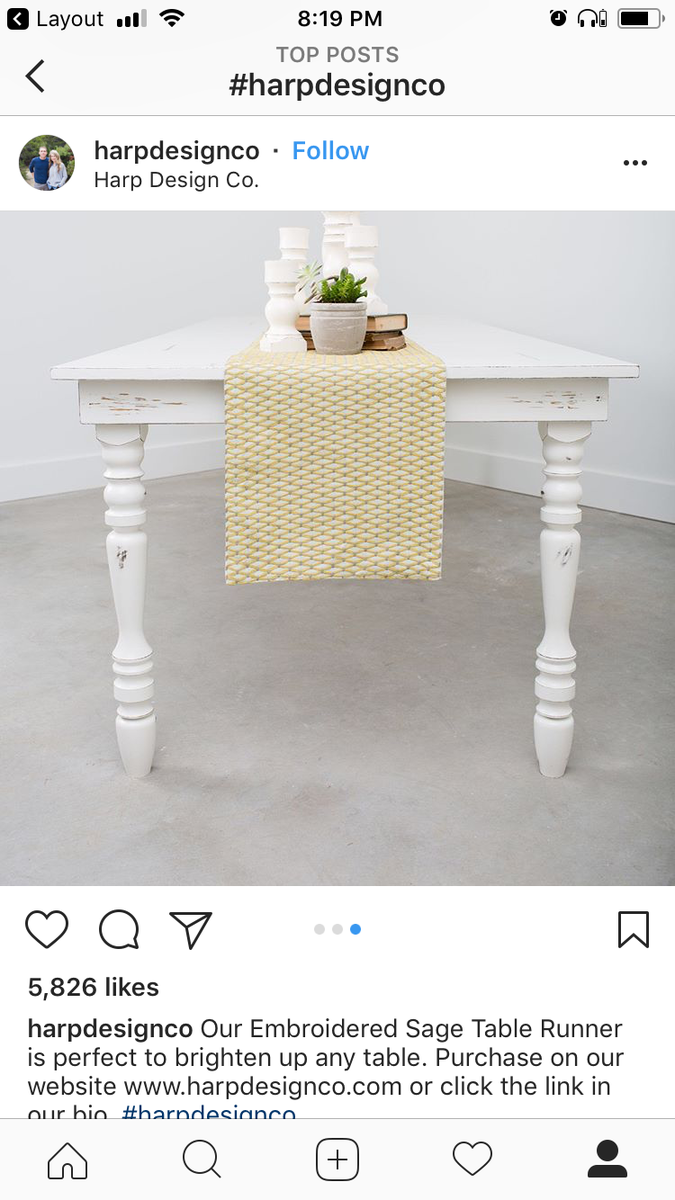
A friend of mine loves the tables by Harp Design Co. but she wanted changes made to it such as the apron being inset, removable legs, oak wood, specific finish, etc.
She hired me to make her one and it's been an exciting build! I built it from a pile of raw wood, turned the legs, etc.
My favorite thing to do is to inpsire others to reach beyond what they're comfortable doing - that's why I post about my projects through my website so other people will feel like they can do it too! https://theprojectlady.com/how-to-build-a-harp-design-table/
I'd rate the level of build as intermediate, but really anyone can make it easier or harder. The most challenging part is the legs - do something more simple, hire someone to make you some, order them online, etc. The posts I created for this table are in-depth but don't let that intimidate you!
Happy Building Friends!
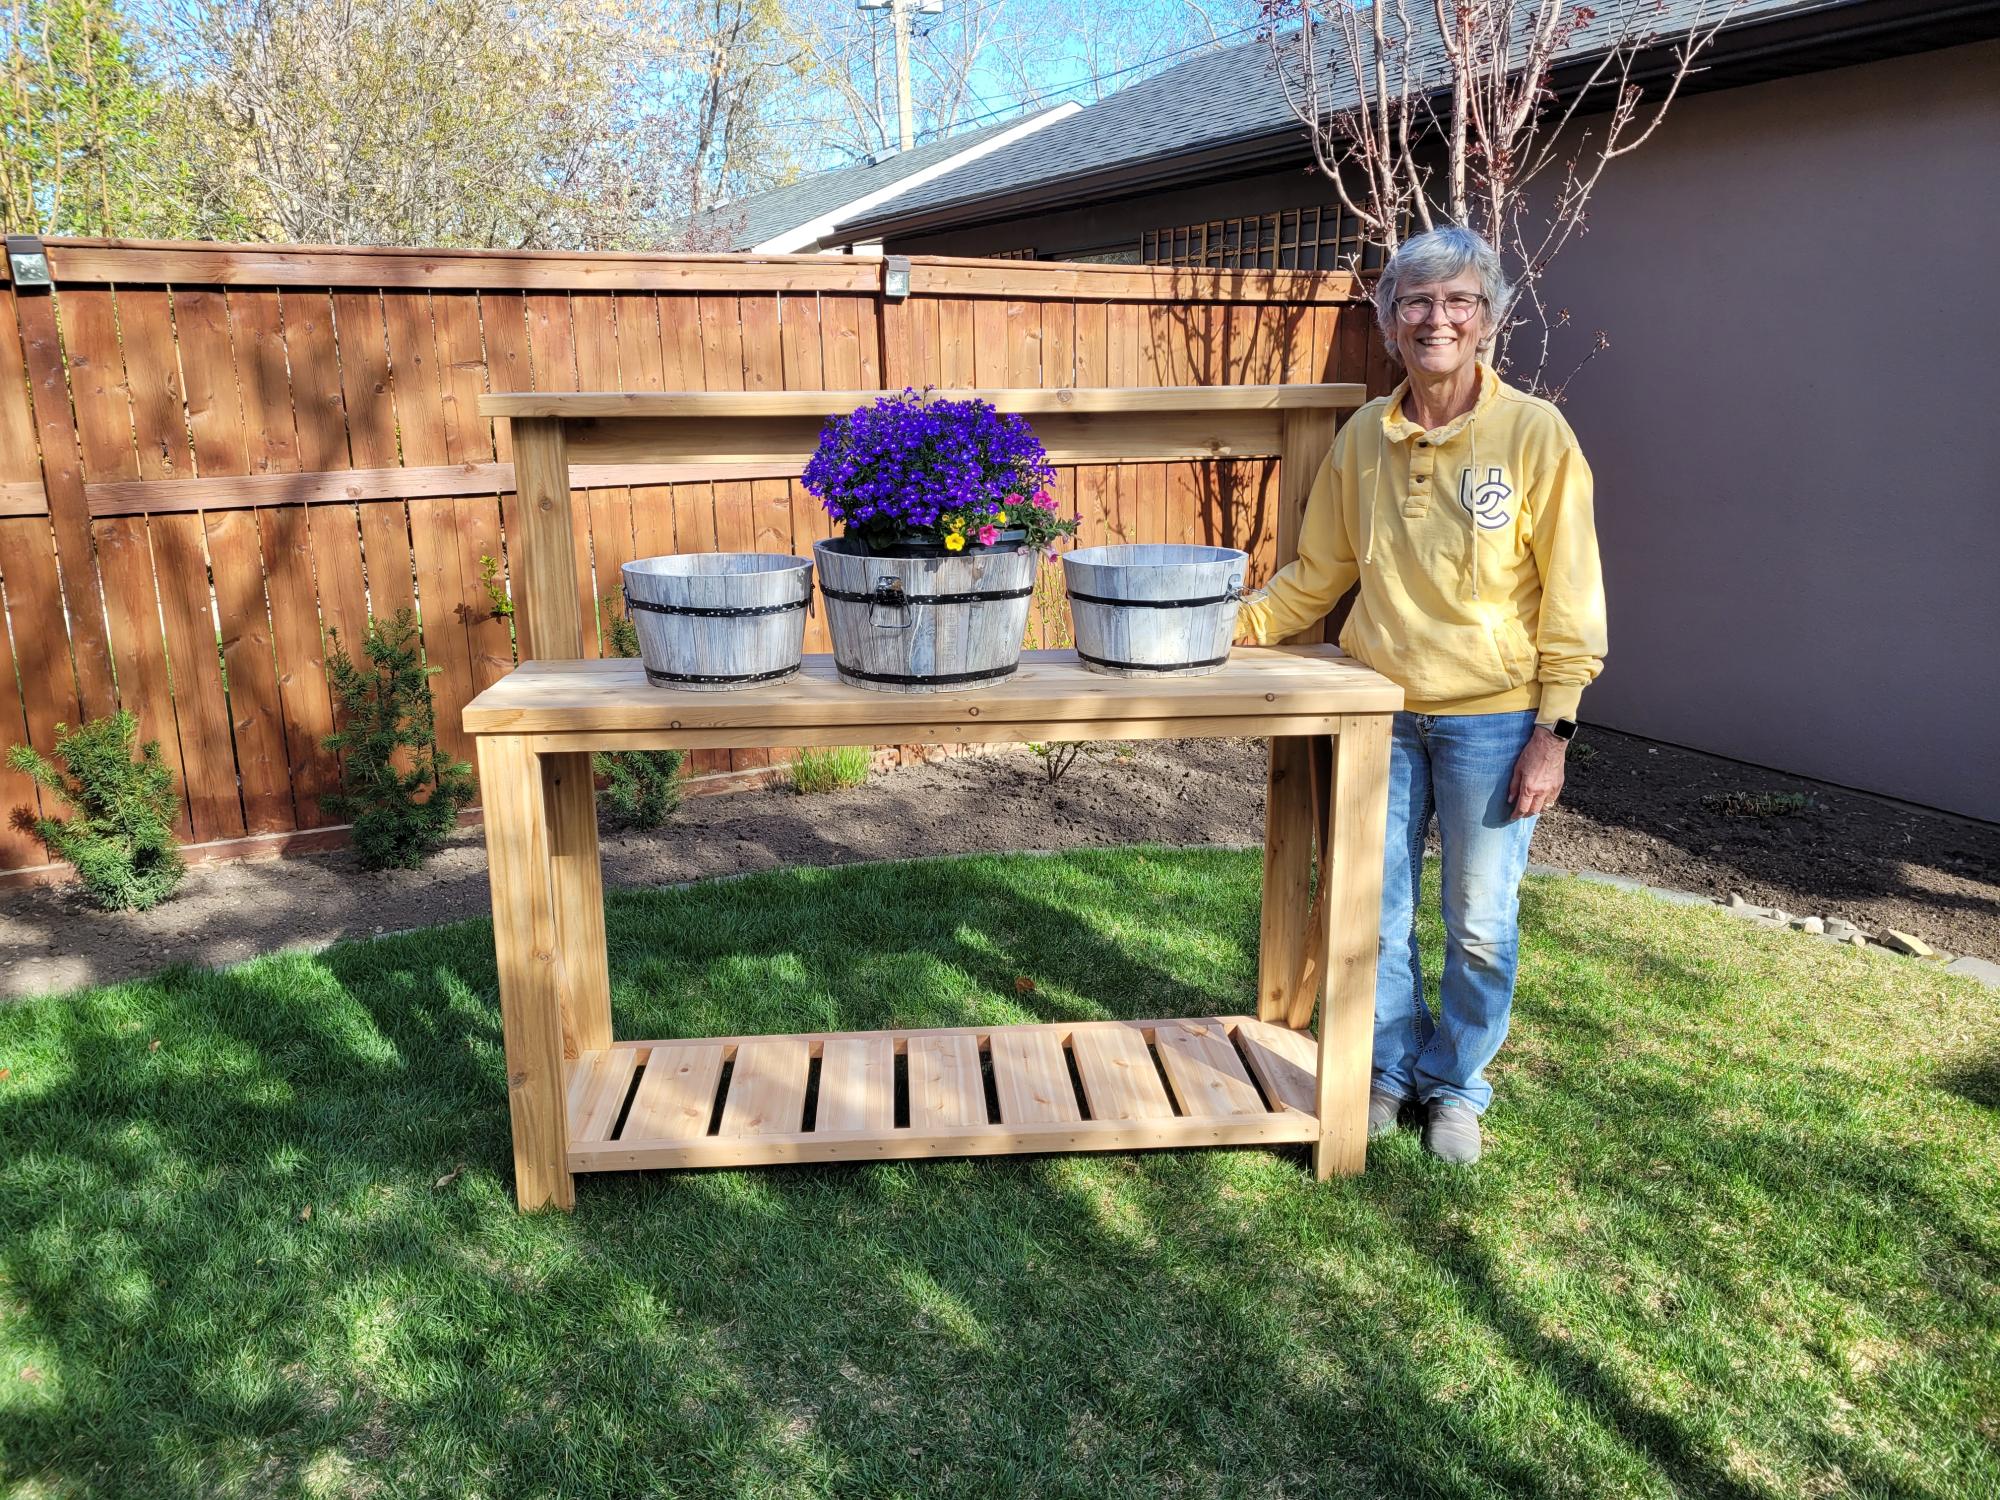
Used a light stain to feature the cedar.
by Lawrence and Pat!
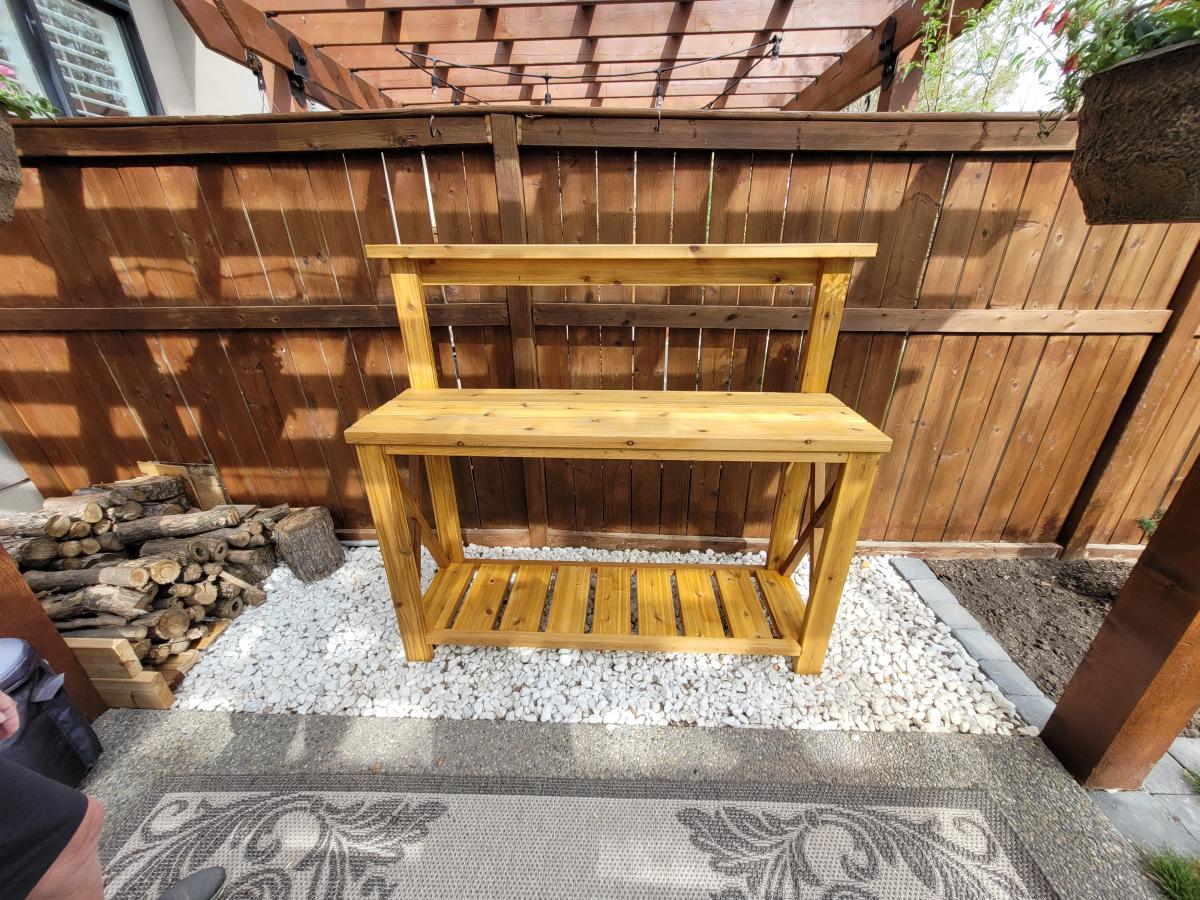
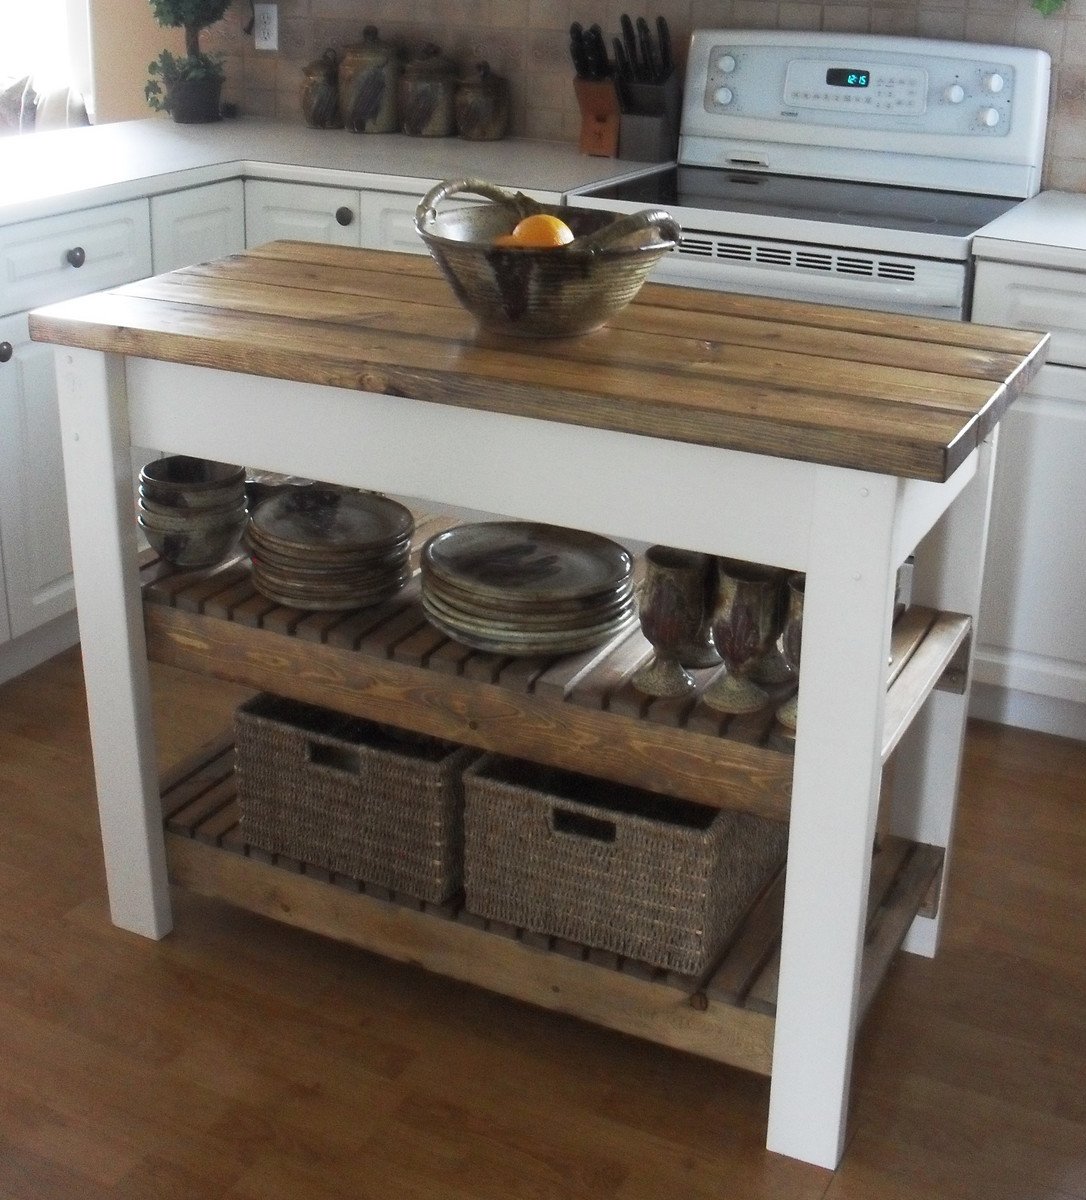
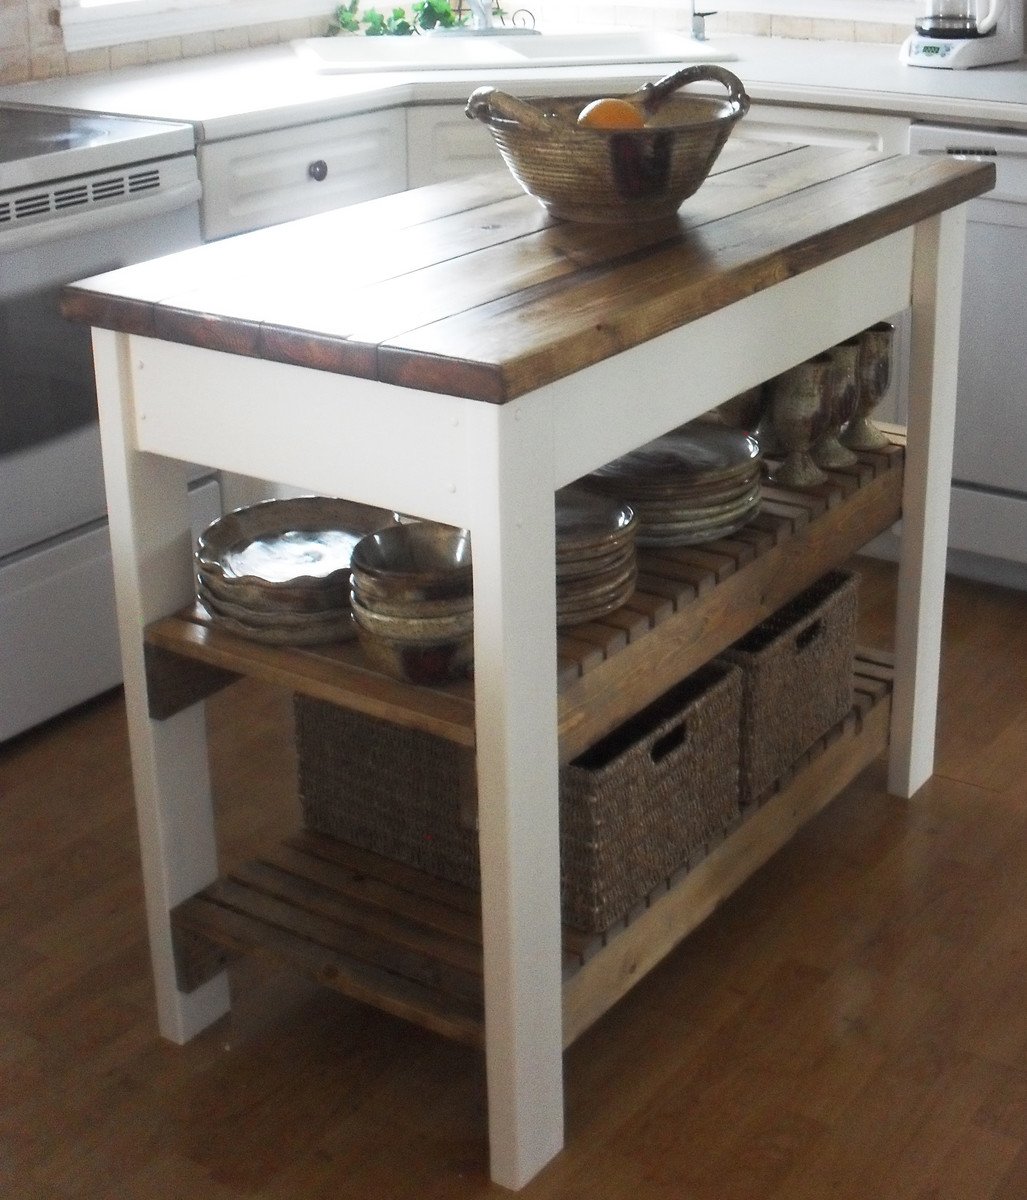
The plans were easy to follow. I modified my island to fit my space and cut it down to 44 inches in length.
Fri, 07/22/2011 - 14:13
i was looking for THE PERFECT ISLAND.. thank you so much for posting this. love it and can't wait to start building it. where did you find the shelves?
Mon, 10/31/2011 - 15:33
Your island is gorgeous, and I love the modification you made to the original plans on the shelving support! I would like to know what size the boards are that you used so that I can duplicate. Thank you!
Tue, 02/07/2012 - 19:43
I would think it would be basically the same build, just add brackets to support the extra wood.
Mon, 03/05/2012 - 15:20
I want to make this Kitchen Island but if can't find the Supply List. Would you mind posting it or emailing me please! This will work perfect in my Kitchen
Mon, 03/05/2012 - 17:46
Wow! Just a wonderfully simple project! I can figure it out by looking at it. I have a piece of Rock Maple Counter Top 24"x6'that needs legs. I'll probably use 4x4' for legs, six of them. But the shelves will be just like this. Thank you!
Mon, 03/05/2012 - 17:50
Wow! Just a wonderfully simple project! I can figure it out by looking at it. I have a piece of Rock Maple Counter Top, 24in.x6ft., that needs legs. I'll probably use 4x4s for legs, six of them. But the shelves will be just like this. Thank you!
Mon, 03/05/2012 - 18:59
I have enjoyed what I have seen so far. You are an awesome designer.
Mon, 03/19/2012 - 11:57
Do you have instructions on how to build this? It's awesome!
Wed, 04/04/2012 - 11:58
Just click on the link for the instructions. It's under the heading 'About This Project' titled as 'From Plan: Easy Kitchen Island Plans'.
Click where it says 'Easy Kitchen Island Plans'. When you hover your cursor over the words, you will see that is a hyperlink.
Sun, 05/20/2012 - 06:48
I love your island and I also have a small kitchen...would you happen to know the sizes of the boards you used? Thanks
Wed, 07/25/2012 - 14:31
Yours looks so different and so much better then the one that show how to make it, how did you do it? I really would love to build it but have no idea how...
Thanks so much!
Wed, 08/15/2012 - 13:08
This island is perfect. I love the shelves and the size. Any chance you could send me the dimensions of this island and details on how you did the shelves? Great job!
Wed, 12/31/2014 - 07:37
Hi, this is my first time building anything. I really like the modification made to the original plans. I like the legs facing the other way. I can't figure out how to modify the cuts on the sides and front and back supports for the top to adjust for turning the legs the other way. Are there modified plans. LOL I need instructions, I’m not quite there yet on doing it myself. Thank you
Sat, 06/06/2015 - 18:33
Hello, i love this island but maybe i missed it. What kind of wood is everyone using? Frosting said $47 but that could only be for pine right? Are people using pine to build this? I would like it to look just like the picture. Any help would be appreciated! thanks!
Fri, 08/14/2015 - 14:34
I wnat to kow how much wood and what size I need ans the saws i need to build this project
Fri, 08/14/2015 - 14:35
I need to know how much wood and what size wood and also what kind of saws do I need for this job
Fri, 08/14/2015 - 14:35
I need to know how much wood and what size wood and also what kind of saws do I need for this job
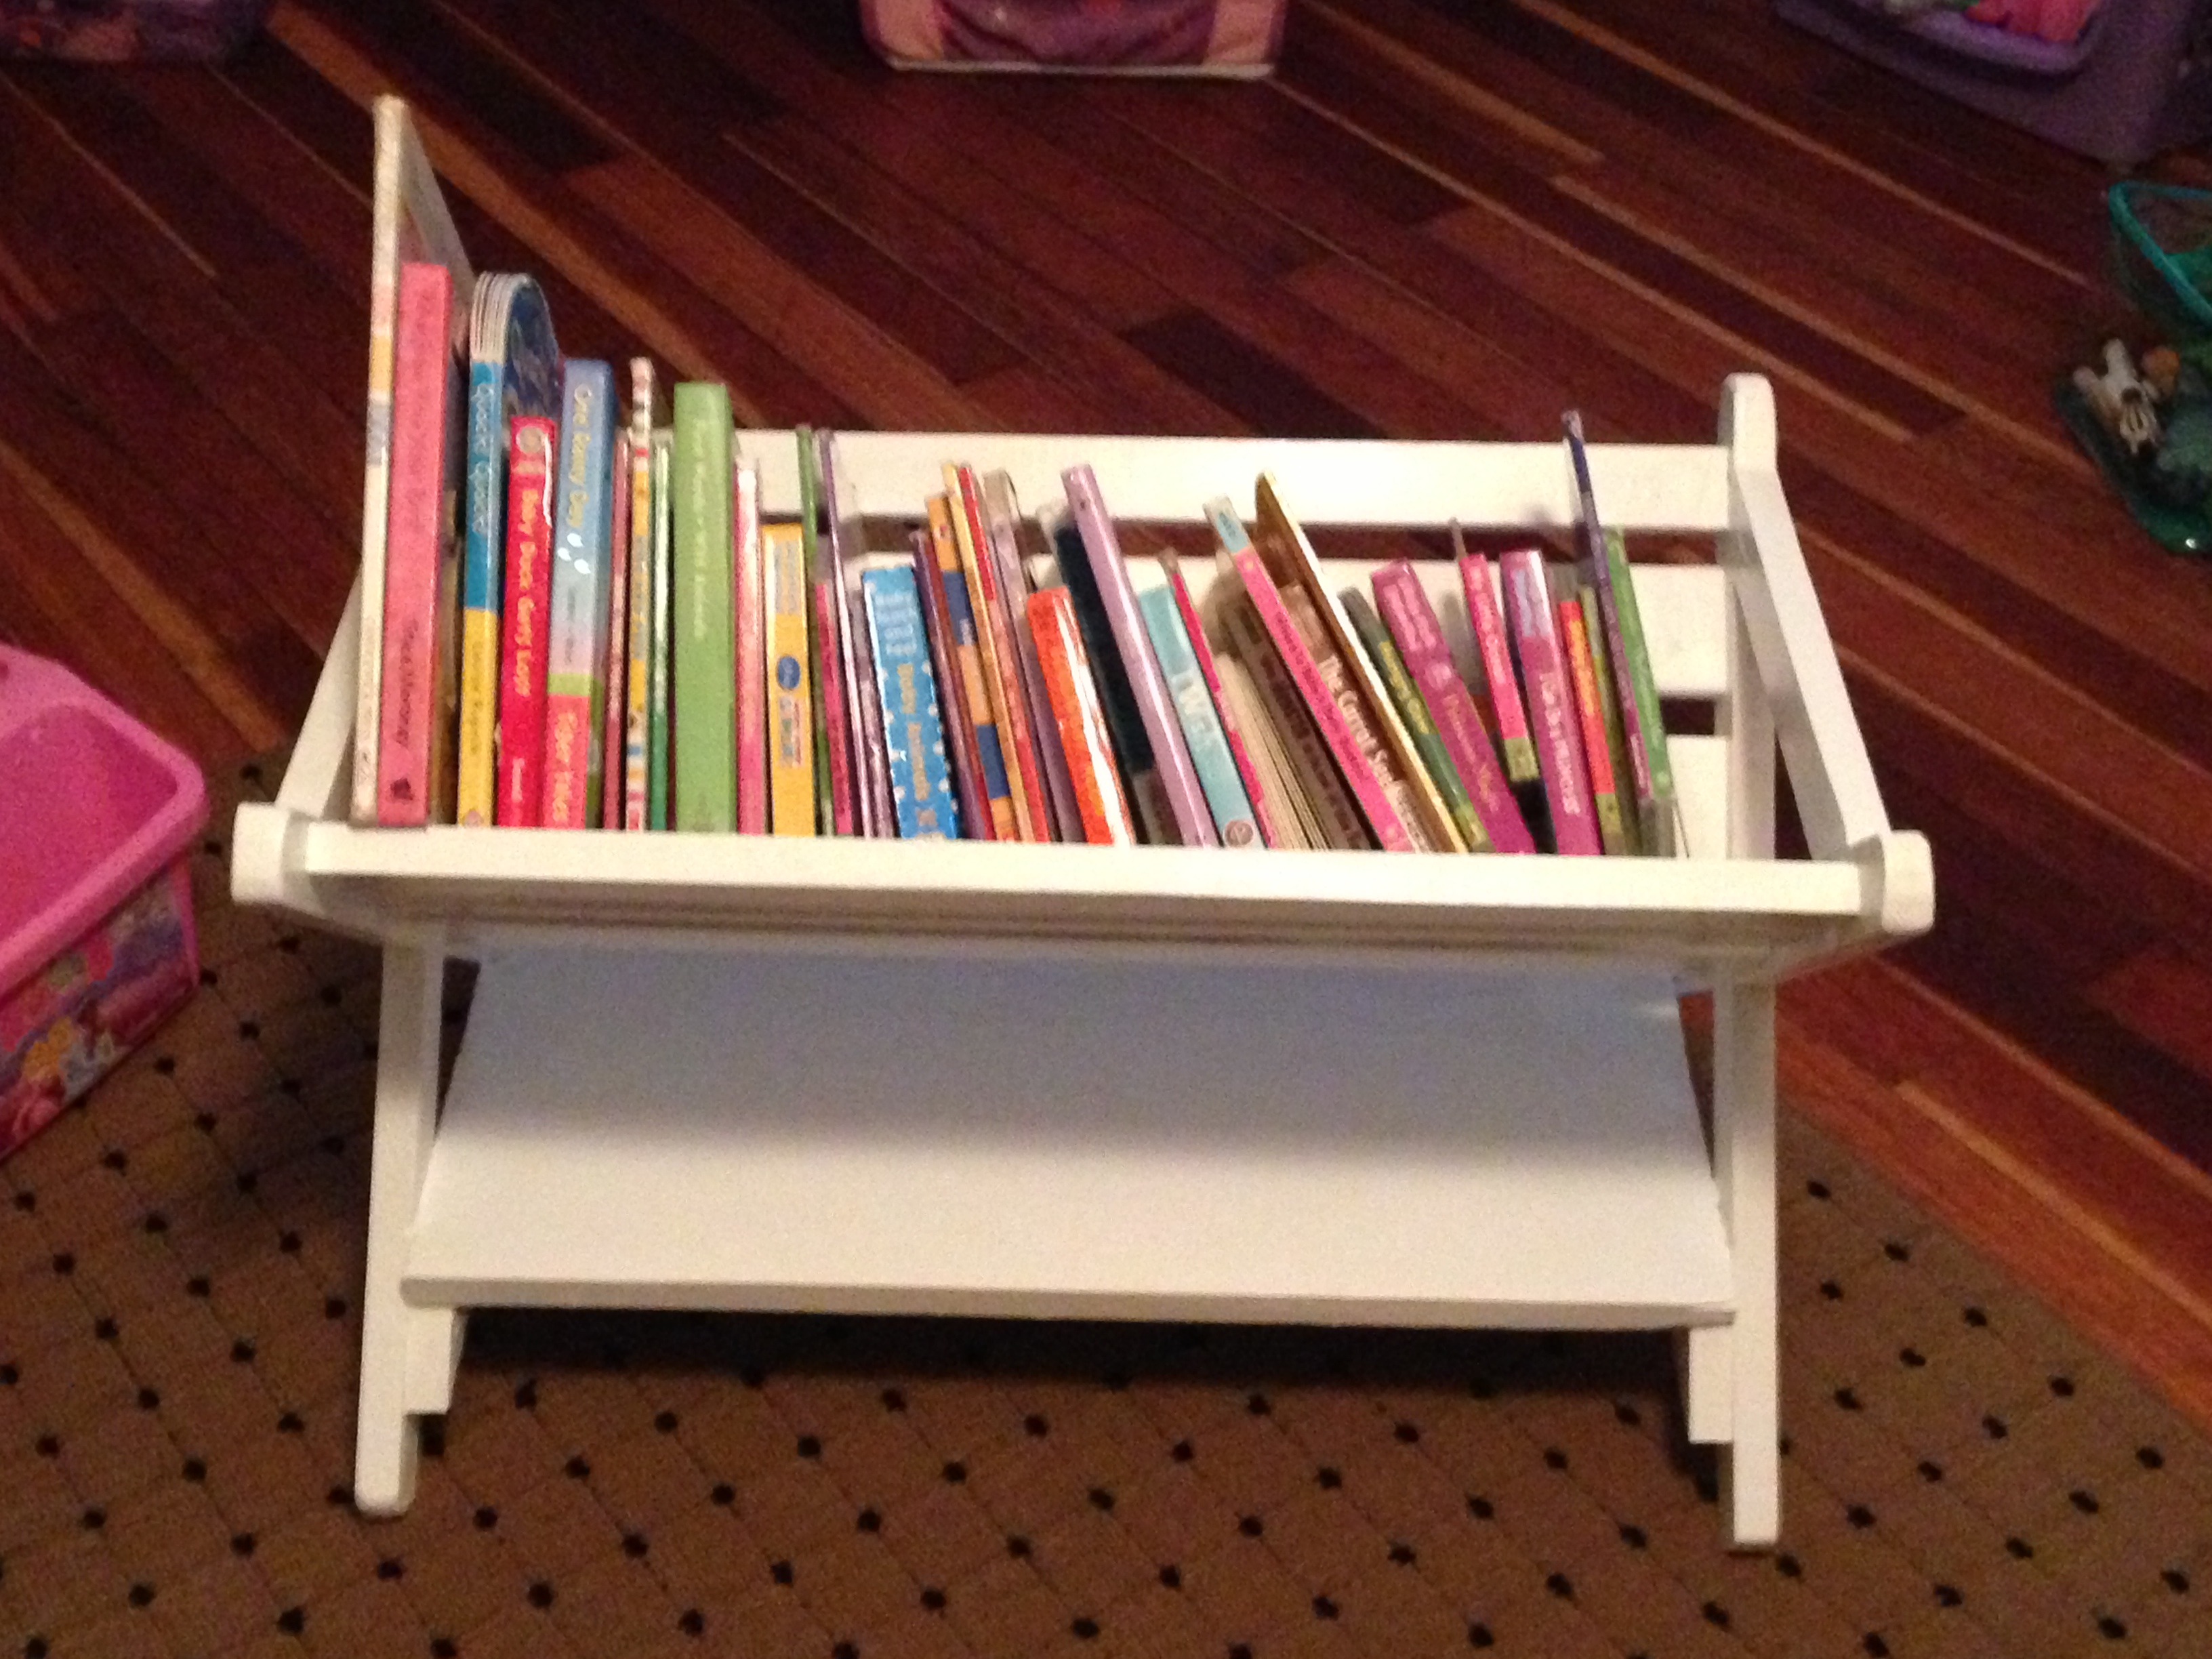
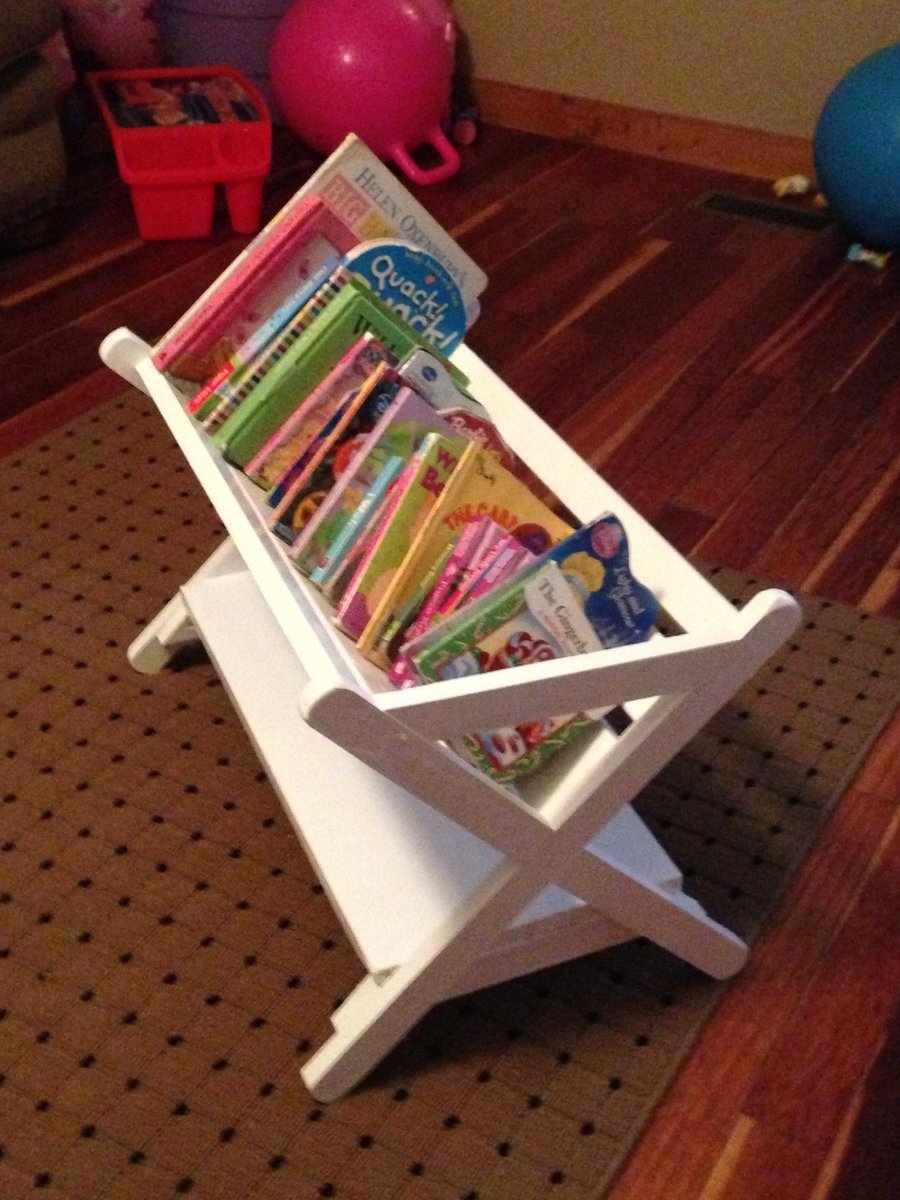
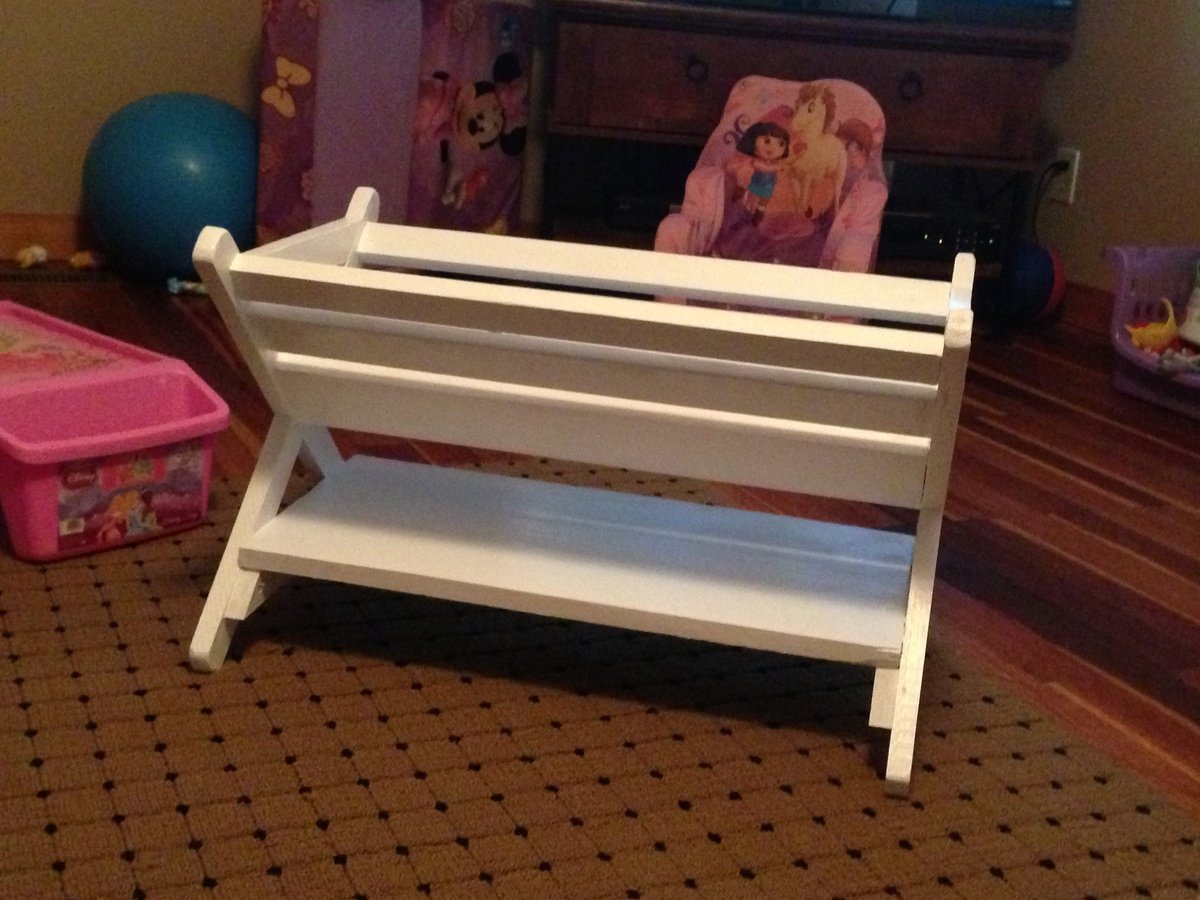
SImple and easy to make. I had leftover wood so all I had to buy was 1x2"s. I'd say the total cost was $15. It's sturdy and holds a lot of books.


Loved building this :) think it came out great. Only thing is i wish i had the screws ana talks abt bc the boards split over and over :( what kind of screws do u use ana? Also couldnt find 2 3/4 deck screws, only 2 1/4"

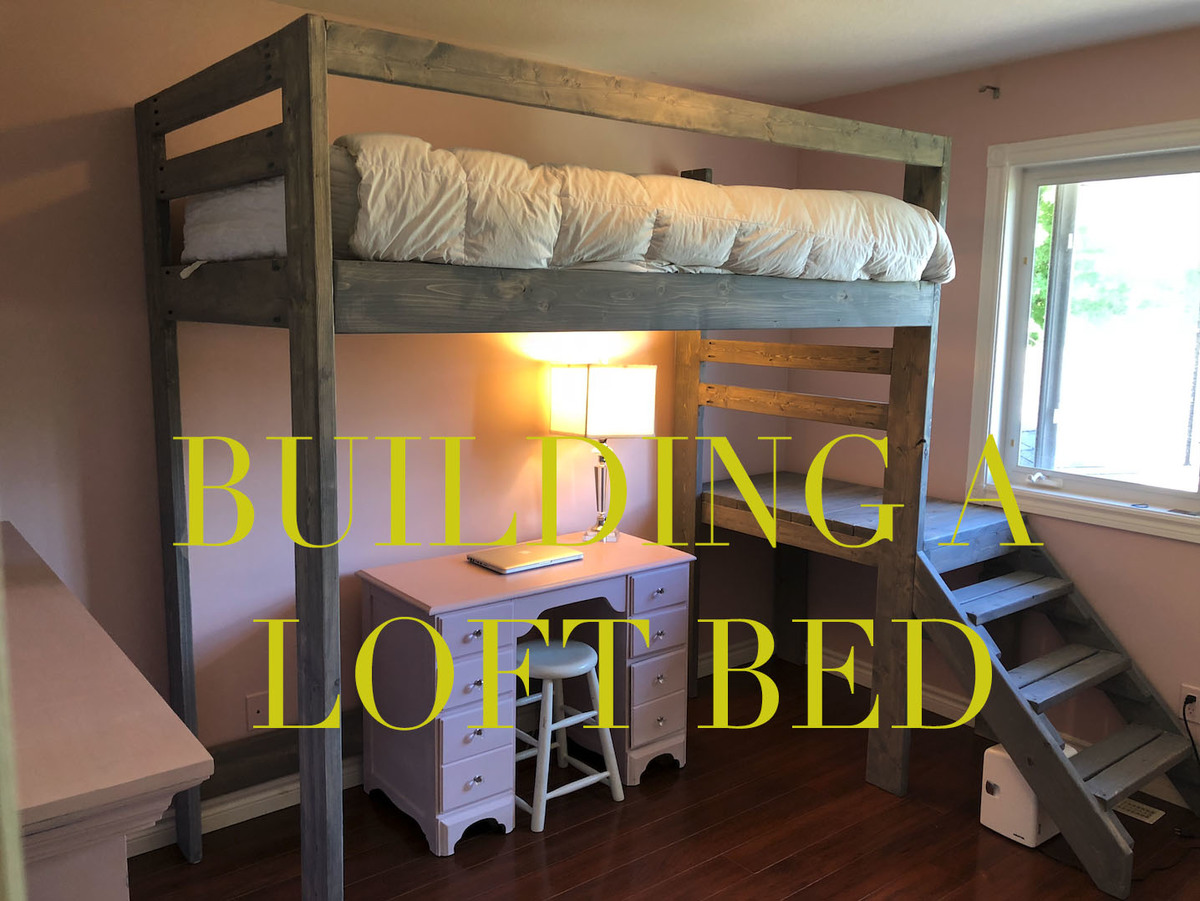
This is my youtube video of me building the loft bed.
Instagram: @gardners_garage
Thanks Ana for your plans. I used them but made just minor adjustments to the height to suit my daughter.
Having your website defenitly made things easier, from picking up the wood to the cuts!
Thanks!

Loved building these chairs. Last year I built 5 of the smaller ones for my grandchildren.
Carol Schiffman from West Orange. NJ
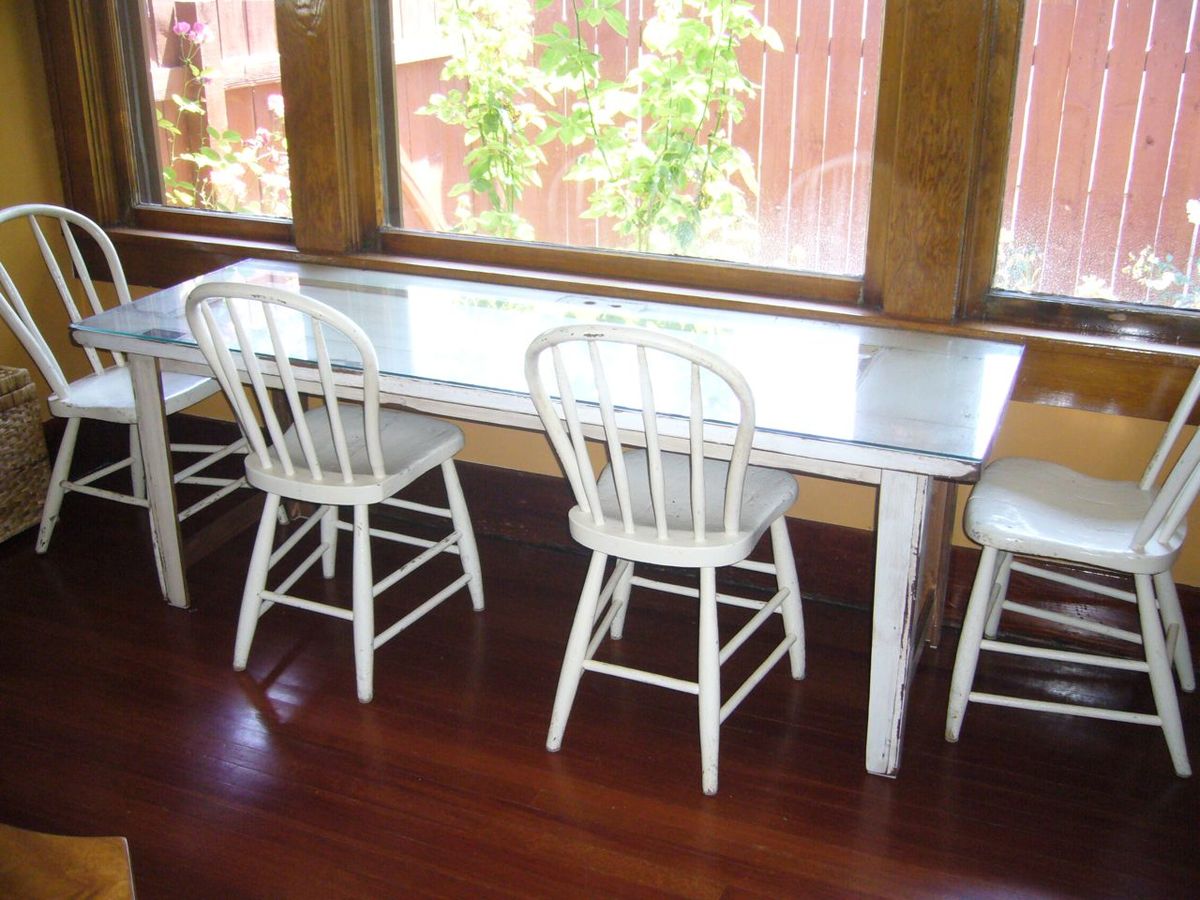
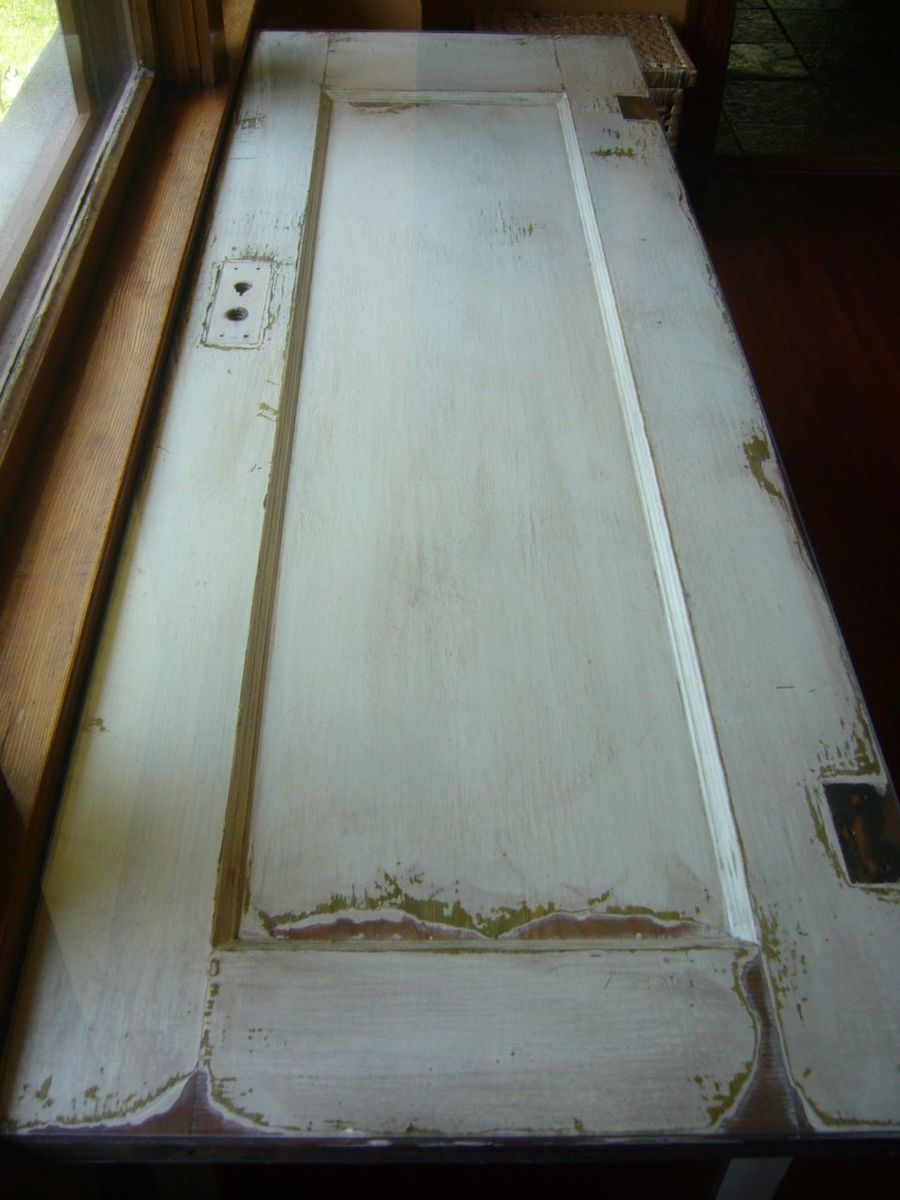
My husband and I took the Narrow Farmhouse Table and modified it for a school table for our children. We used two old doors we had left over from remodeling our 1925 craftsman home. One door is the top, and the rest is lumber culled from the other door. A fun, free, one-day project.

Sat, 07/16/2011 - 08:17
Did you put a glass top on this to make a flat surface? I was thinking that the recess in the center would make a good place for displaying artwork, etc. under glass.
In reply to Did you put a glass top on by Pam the Goatherd
Sat, 07/16/2011 - 13:24
Yes, the kids will be using the table for school, so we needed a flat surface. The inset from the door will have all kinds of fun things placed in it throughout the year!
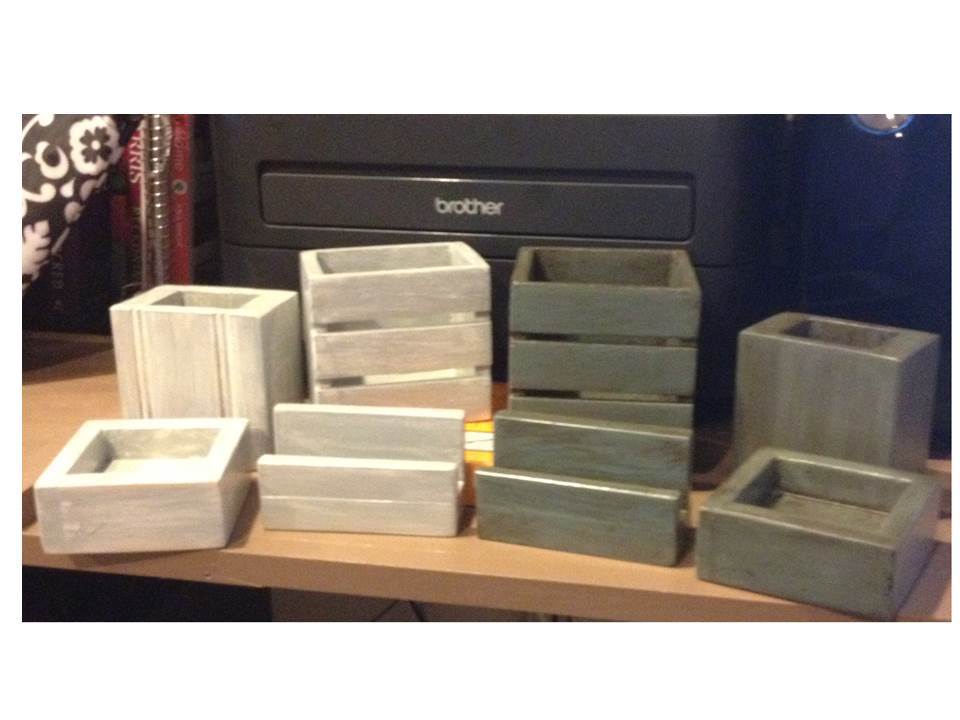
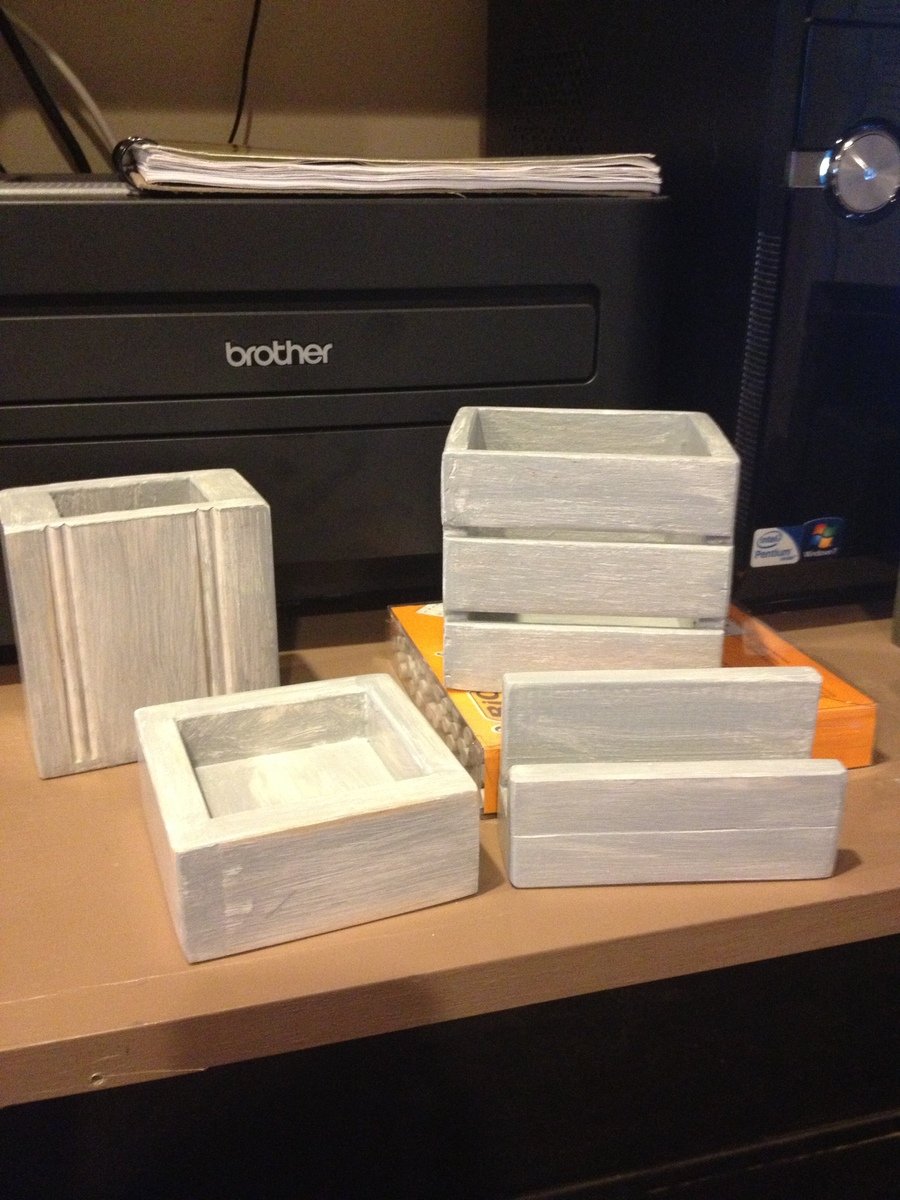
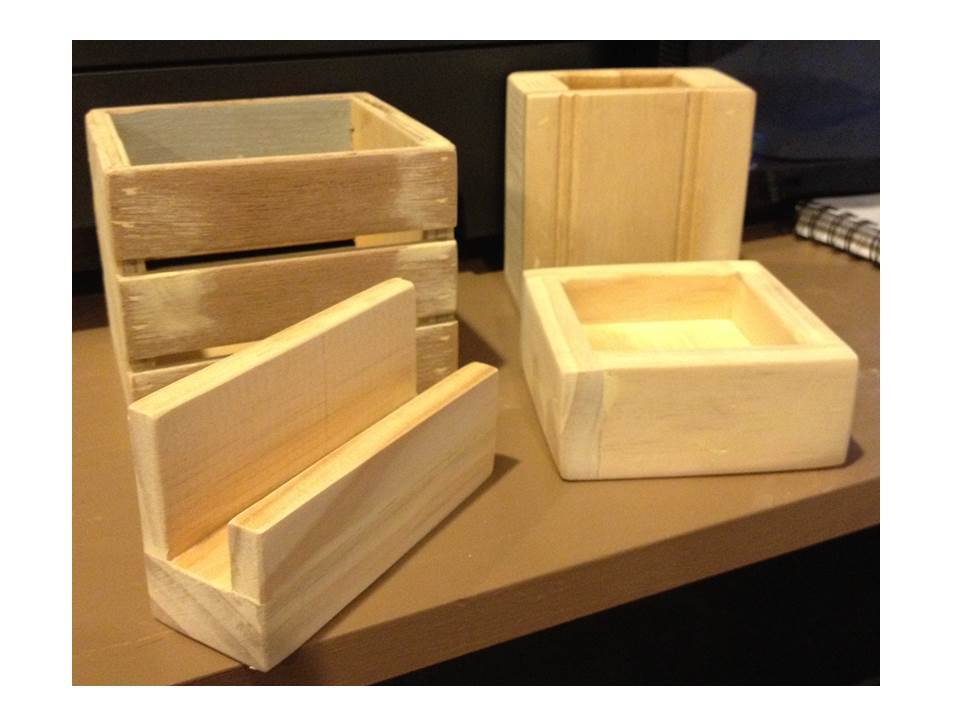
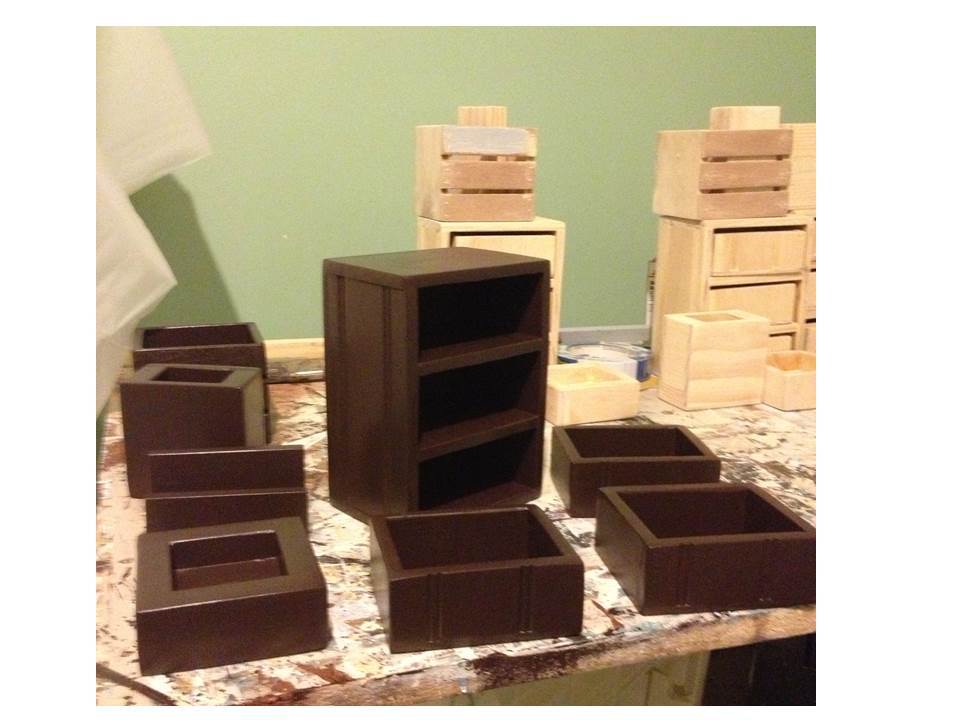
These were the inspiration pieces for the 1-Board cedar desk accessory set plan. These were made entirely of scrap wood. These sets are all painted, they will be gifts for the girls at work.
The wood for these is some 3/8" plywood (crate and pencil cup sides), 1x2 (bottom of business card holder and ends of pencil cup), some 1/2" x 1 1/2" craft board (sides of paper clip trays, business card holder), 3/4" plywood (bottoms of paper clip trays), some small squares of Wainscoat paneling (sides of gray pencil cup), some 1/4" plywood (bottom of pencil cup), some 1" strips of some old painted lauan (old project, pulled apart and the wood is being repurposed) and a couple of little pieces of 1/2" x 3/4" S4S (fronts of business card holders).
You can see the mishmash of different materials in the shot of an unfinished set, and also the stack of them waiting in the wings on my work table (it's starting to look like a Jackson Pollock painting :) heehee)
All the paints and materials were left overs from other projects. I hadn't decided on the finishes yet while I was building. These would be even easier to make if I had finished all the pieces first!
It was fun building these, it's great to be able to take something that may have gone in the bin, and make it into something lovely. I'm hoping the girls like these!
I've got a cube drawer plan in the works (a 1-board cedar with 2 drawers, and also have measurements for a 3-drawer from 3/8" thick craft board and 1/4" plywood, like the one on the table). I'll get to those soon.

Mon, 08/19/2013 - 20:40
Thanks for sharing your pictures and plans for the desk accessories and trinket box. What great ideas for inexpensive gifts for people on you list!

Tue, 08/20/2013 - 15:09
Thanks Linda! I've absolutely had a ball planning and working on these! I'm so glad you like them! :)

Fri, 08/30/2013 - 17:57
I love when something is functional and adorable (and affordable to boot)! This is great; I am sure you'll have very many happy recipients of these cute desk accessories!
Thu, 08/22/2013 - 13:25
Yvonne, thank you for the nice comment! :) I'm working toward my goal of finding things to make from all the left-over wood in my garage. I didn't realize how much had accumulated. Really I am having a ball doing this! I did go buy some more cedar pickets though, I'm going to work on the 1-board cube plan this weekend. :)
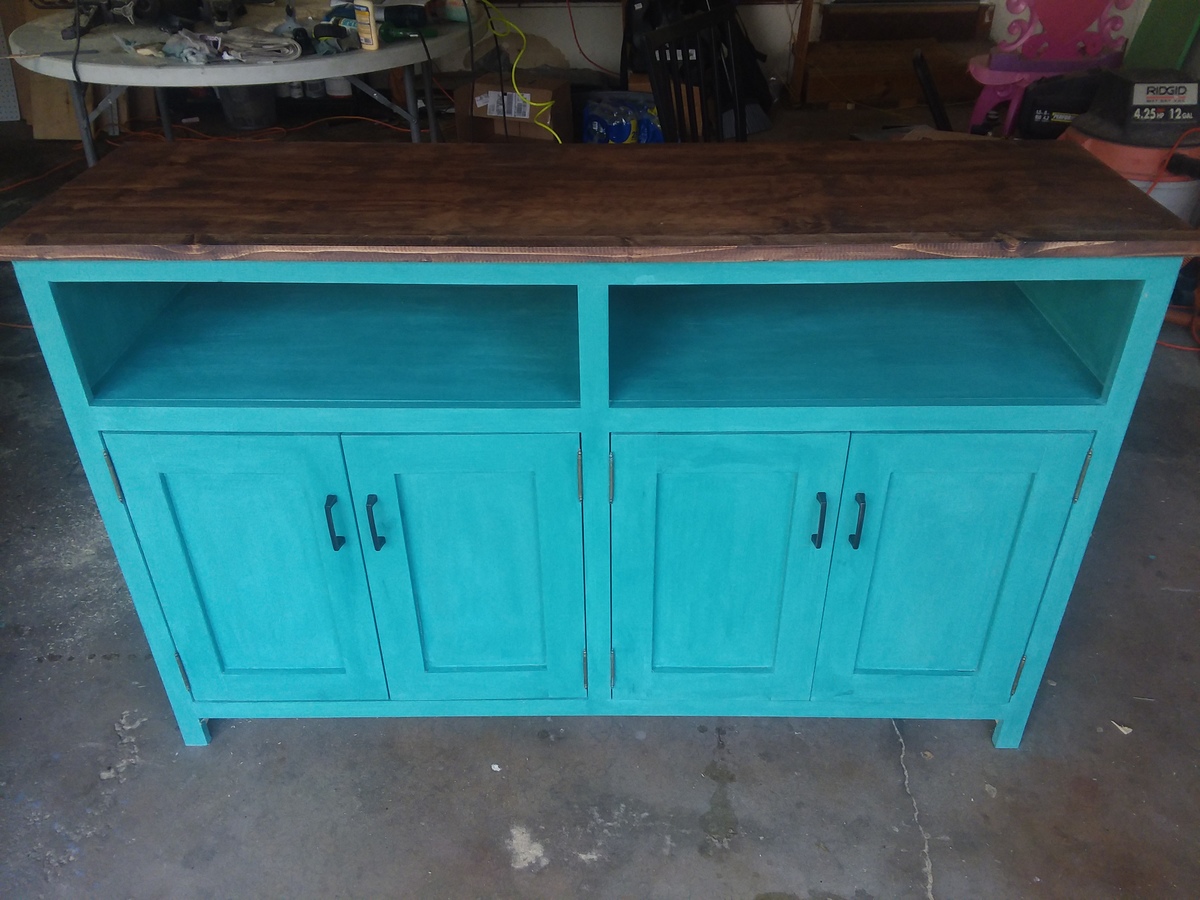
Entryway console without base pieces to more closely match my other furniture.
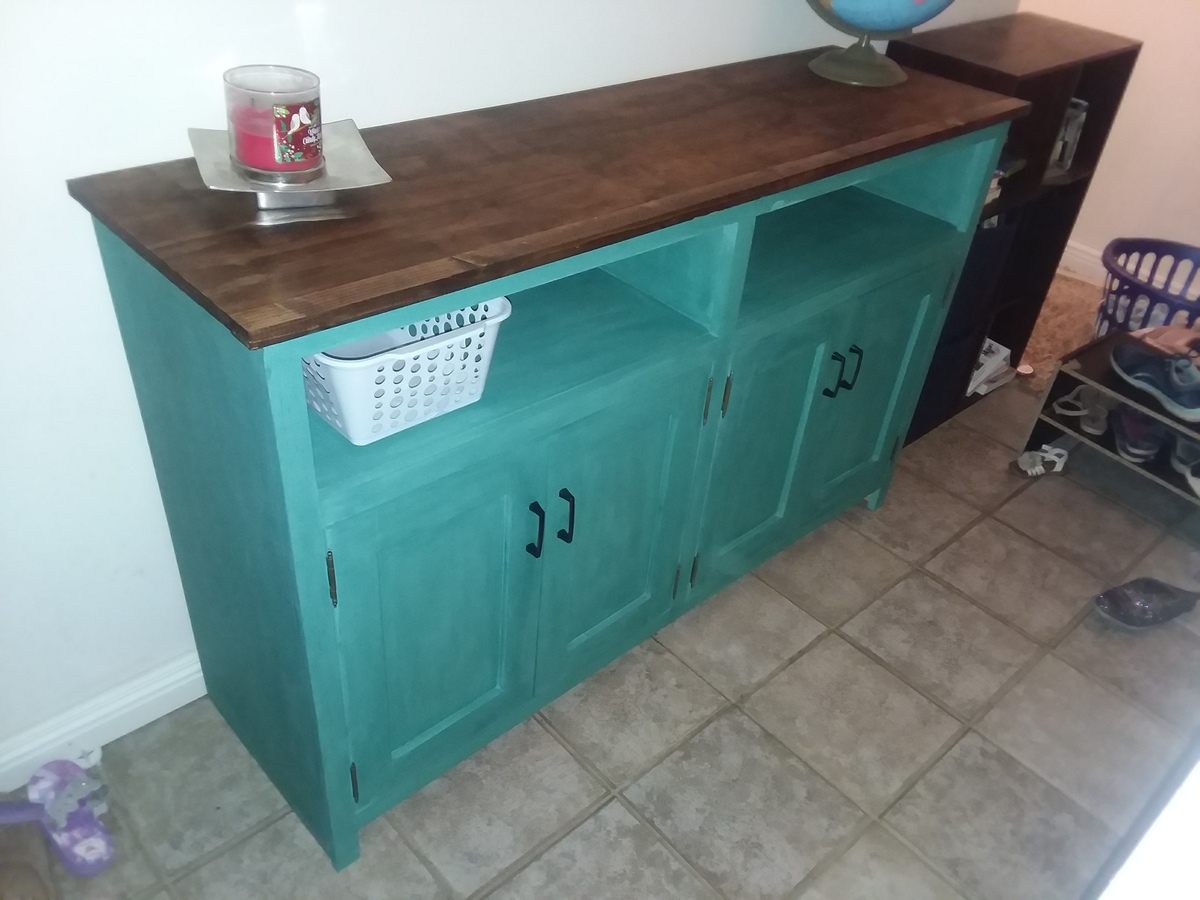
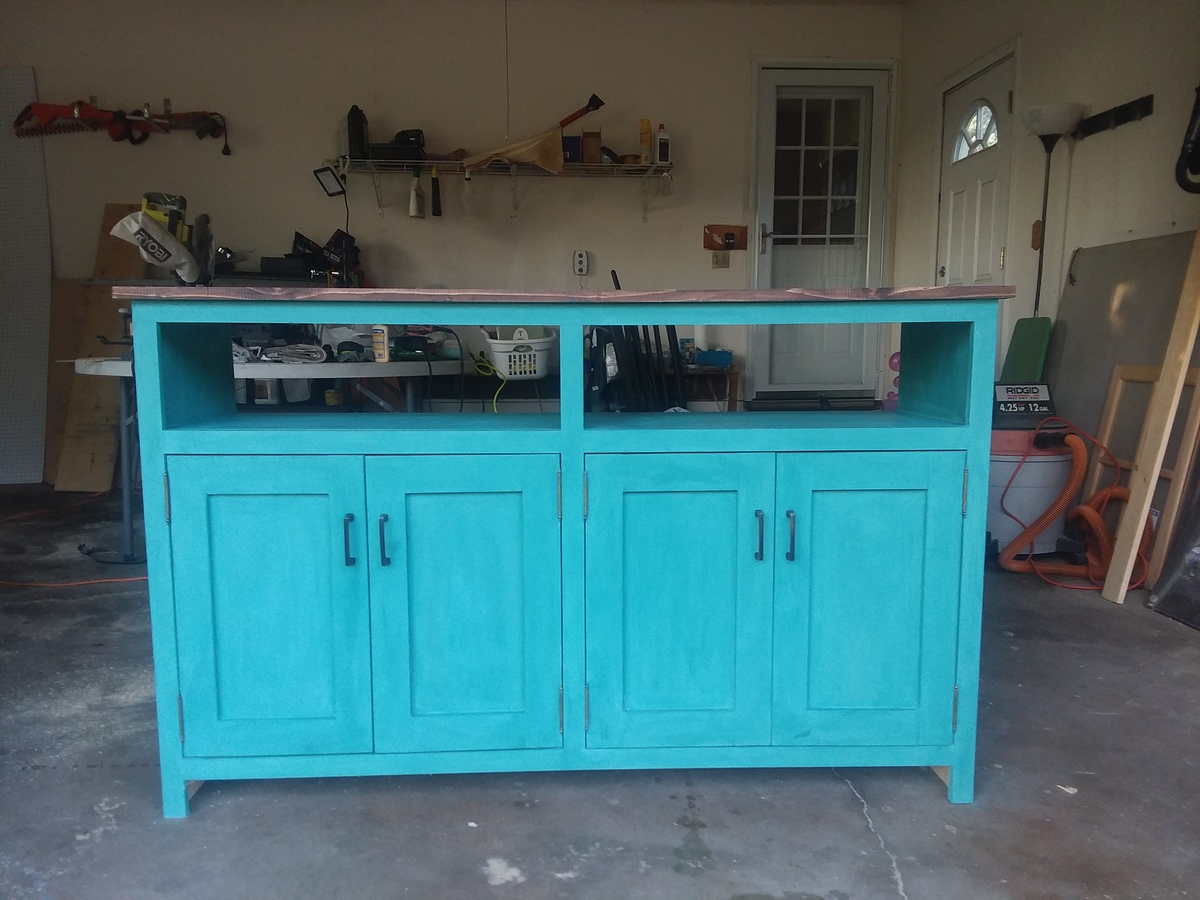
Love how this turned out! Thanks Ana!