Garage shelves
This is my first project ever built. I can't thank you enough for this site. I already have several other projects I want to build around the house because of this site. Thank you so much!
I got tired of sleeping on the floor like college kids, but I didn’t want to buy a junky particle board bedframe. My husband and I are novice woodworkers. Even still, we bought the lumber around noon and managed to finish the whole project in about 5-6 hours! We used a Kreg jig for the first time and it was pretty simple. I am really pleased with how this turned out, and I can’t wait to try more of Ana’s plans in the future.
Modified with a high back and modern adirondack arms.
The base of the chair is built exactly to the plan except that the arms are done in a modern adirondack style.
The back was made independently to fit inside the base and then attached to the plan base.
Very comfortable but very heavy chair even without the modified back.
Not stained yet obviously.
Cushions are hard to find I think I would make it slightly smaller next time and maybe even find the cushions first and alter the plan to fit.
Tue, 06/09/2020 - 09:11
Stained with Saman: Urban Grey mixed with some left over brown 4:1 and now has a companion side table
Wed, 06/24/2020 - 07:33
Do you have the plans for the table you built? Im a brand ne beginner. I am trying the modern outdoor chairs and live this table with them.
Hooray! I recently finished building a dining room bench. For this project, I used the Providence Bench plans by Ana White. I started this project in May, and two months later it is finally complete! I am really happy with how the bench turned out! It is pretty sturdy and makes for a nice addition to the dining room!
All of the wood is recycled from pallets. The hardware is also recycled from old kitchen cabinets. All sides of the cabinet are paneled with planks of pallet wood. The plans were awesome to follow! After a certain point though, I had to go rogue because I was using different wood.
I built a big kids see saw using 2x6's all around with a 2x8 seat. The center post is 30"h.
I needed new bar stools for our new bar that we designed and built in our basement family/entertaining room. Regardless of where I was looking, these things are silly expensive. I also wanted a little more of a country/rustic look that would suit my husband and my likes. I used the Vintage Bar Stool plans but my husband isn't a small guy and we have friends that aren't classified under the small frame category either, I needed more structure. After thinking about it for a few days, I liked the rustic X look and used that from so many plans. I also am all about comfort and the padded upholstered seats was a must. Can't wait for my next project. BTW. The cabinets behind the bar also came from here I simply modified for what we needed. We get compliments on it all of the time. Love this website, thank you so much for making simple to read instructions for things I actually want to do.
Mon, 06/26/2017 - 05:44
I need to build 24" bar stools with the rustic x look on the side. Do s anyone have plans to make them?
In reply to Rustix x bar stools by Daisypage
Sun, 07/01/2018 - 13:51
I am sorry. I just saw this. Honestly I don't make any plans, I kind of fly by the seat of my pants. The X's are measured out at the end.
Thu, 12/26/2019 - 03:49
These look great. I think that I'll add them to my build list that my wife seems to keep growing for me. How did you attach the back pieces? In the original design it showed pocket holes, but I don't see any on your work. Thanks for the help.
Tim
Sat, 06/06/2020 - 09:58
Could you please settle a discussion between myself and my husband? Are the legs notched out for the 1x4's to sink in , or are they just attached with pocket holes
This took me about 20 minutes! I love the look of it and that it can just be left out when the kids aren't doing art. A great little item to add to keep the kids busy and inspired. I made a couple of mods from the plan. I used glue and nails instead of pocket holes and I did that bottom board flat instead of on it's side. I also used a little bigger dowel, and bought two rolls of paper on Amazon for $14.I'm giving this to my daughter for her birthday with some fun art supplies, so I think it's a great gift idea for any occasion for those crafty people out there!
Tue, 04/02/2024 - 06:09
Sometimes, when working with papers, you might need to convert file formats, right? So, I recently came across this website https://pdfflex.com/webp-to-png It's super handy for converting. It's been a real time-saver for me, especially when I need to tweak documents for printing or sharing. I'd desided to share in case it helps someone else out there too!
The project went relatively well. Had to readjust in order to fit our king. I used 2x4s and 2x4 joist hangers to support the mattres.
This was my first project. I am pretty excited how it turned out. If I did it again, I would recommend sanding and painting prior to building.
Love this! My husband used this project to help boys learn to use power tools and work with wood. They made one and he did the others. THANK YOU!
Wed, 10/06/2021 - 10:15
Great way to get the kids involved, it looks very nice, organized and functional! Thank you for sharing~
I used your workbench plan to build my Brew Bench. I changed the measurements to fit my space and used a butcher block for the countertop. Very sturdy and pretty easy project. Took one day to build.
Scott R
This is the twin farmhouse bed and the matching trundle. We chopped about 8 inches off the headboard since we were not using a boxspring for our mattress. Other than that it's as written. I'm so thrilled to free up space in our girls' room!
Fri, 08/22/2014 - 16:27
This is exactly what I'm looking for!
My husband and I would like to begin building this ASAP. Could you please clarify for me that the original measurements for the Twin Farmhouse bed and the trundle bed will certainly be able to accommodate one another? I just want to make sure it'll fit! I think I saw someone else comment that they changed some of the measurements to make a trundle bed fit underneath, but they didn't go into detail.
We also won't be using a box spring.
Thank you for your help!
Shiplap fireplace build. Painted with Behr Marquee in color Calligraphy. My first building project ever!!
Jenn Lawson
A shape chicken coop built in just two days about 9 hours east to do. But heavy to move but everyone is loving it!!!!
Cecilamor
Basically I took Ana's plan and tweaked it to create a diy sofa, a love seat, and a corner piece to make a sectional. All 3 pieces have the same basic design and function (they all have a storage compartment), although the corner piece, because of its placement and the thickness of the seating cushions, doesn't open unless the couch is opened first. We purchased custom cut, 6" thick foam cushions for the seats (we bought the XL-38 foam from https://www.buyfoam.com/, but if we had to do it again, we'd go with the XL-28 as the 38 is VERY firm). We also used upholstery fabric instead of a paint drop-cloth to cover the couches. The foam and upholstery fabric upped the overall cost significantly. Other changes from Ana's plan, I used 15/32" OSB because the 1/4" plywood just felt too flimsy (I'm a large guy). I also added I bolts to the underside of the seat before the foam and upholstery so I could add a stress relief rope to prevent the kids from opening the top and dropping it and ripping out the hinges. I used piano hinges as they seemed to me to provide the most support. Finally, I ended up using 1x2s for the base trim since I couldn't find any 2x2s that were straight and finish-ready, then I added router detailing to provide some visual interest. I used 3" pieces of 4x6 for the feet and added matching router detail. Additionally, I used T-Nuts and bolts to make the feet and base trim completely removable.
Mon, 08/17/2020 - 07:46
It is superb blog and i really appreciate your blog. It is because i always like the informative blogs. You did a great job and thanks for sharing.I am impressed by your post. It contains very informative data and i gain a lot information from it. It is very useful for me. Thanks for sharing and keep on sharing that type of posts.The Mobile App Developer Dubai provides good service you visit here site https://www.mistersaad.com/
Followed your plan but added extra 1 x 2 trim to the sides, feet made from 1 × 3 and 1x 3 trim around the top
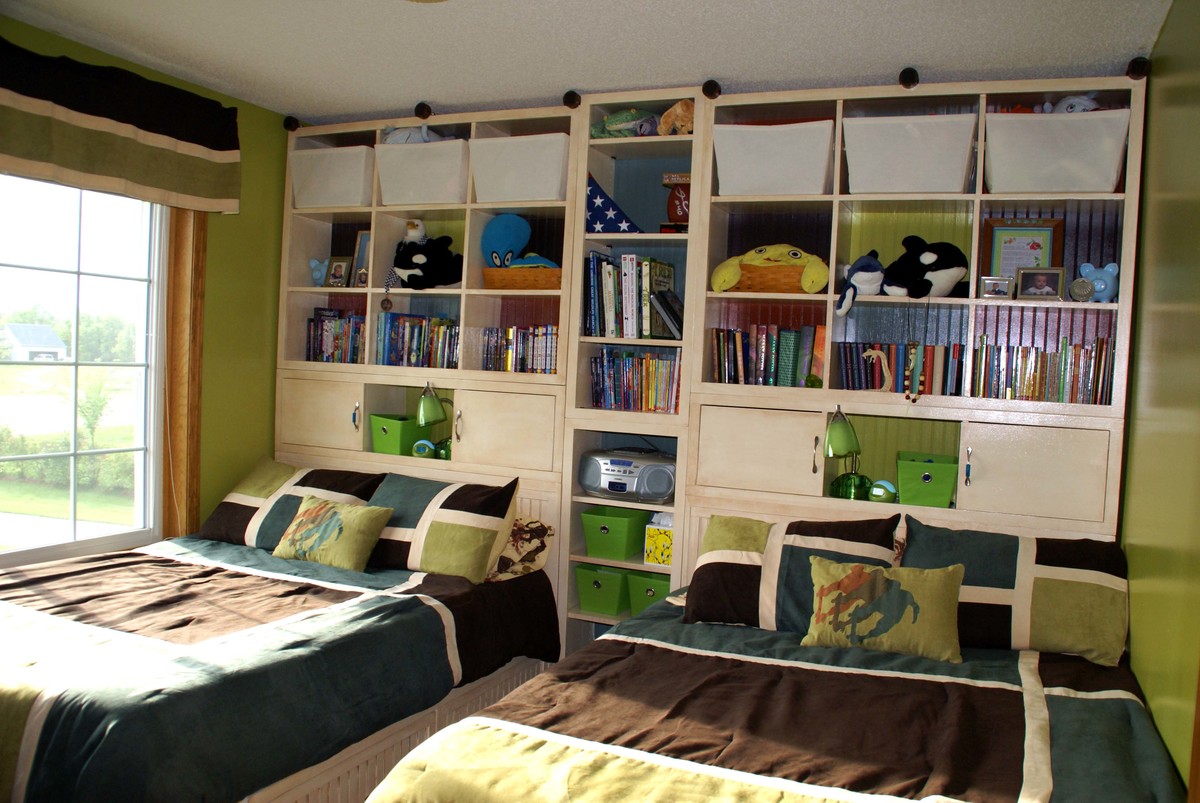
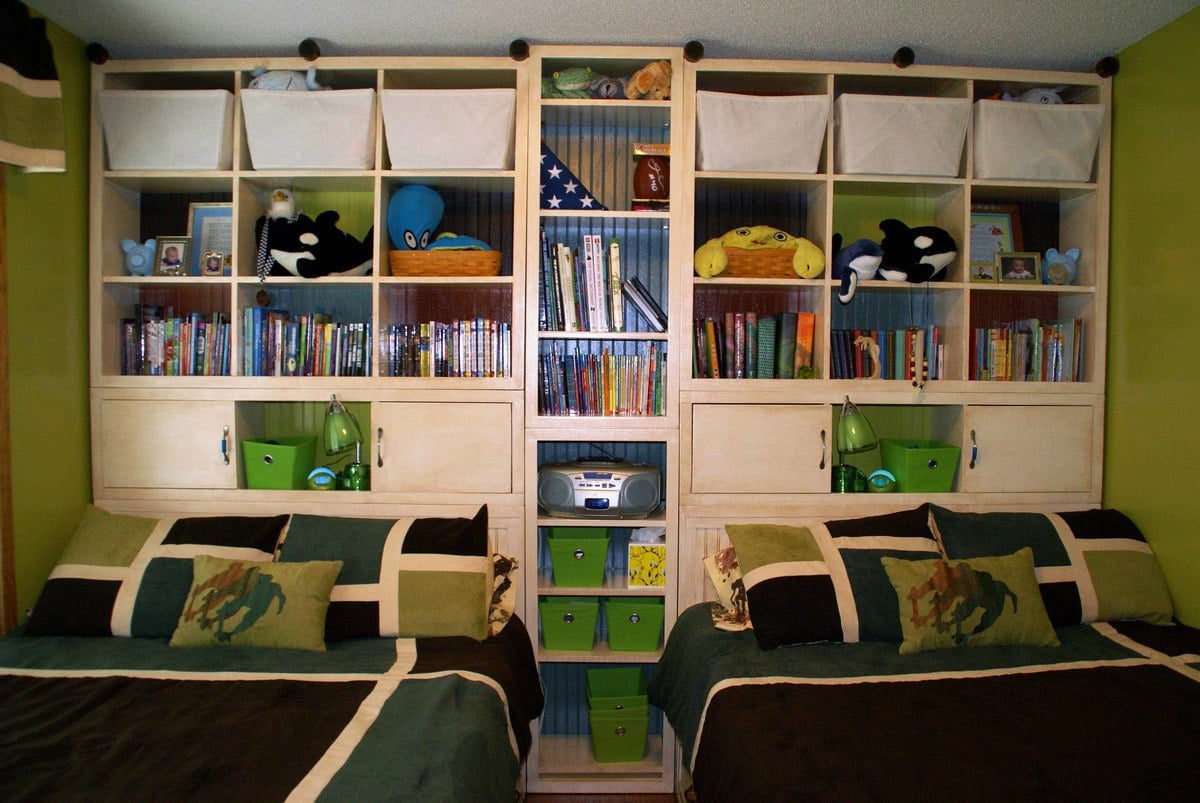
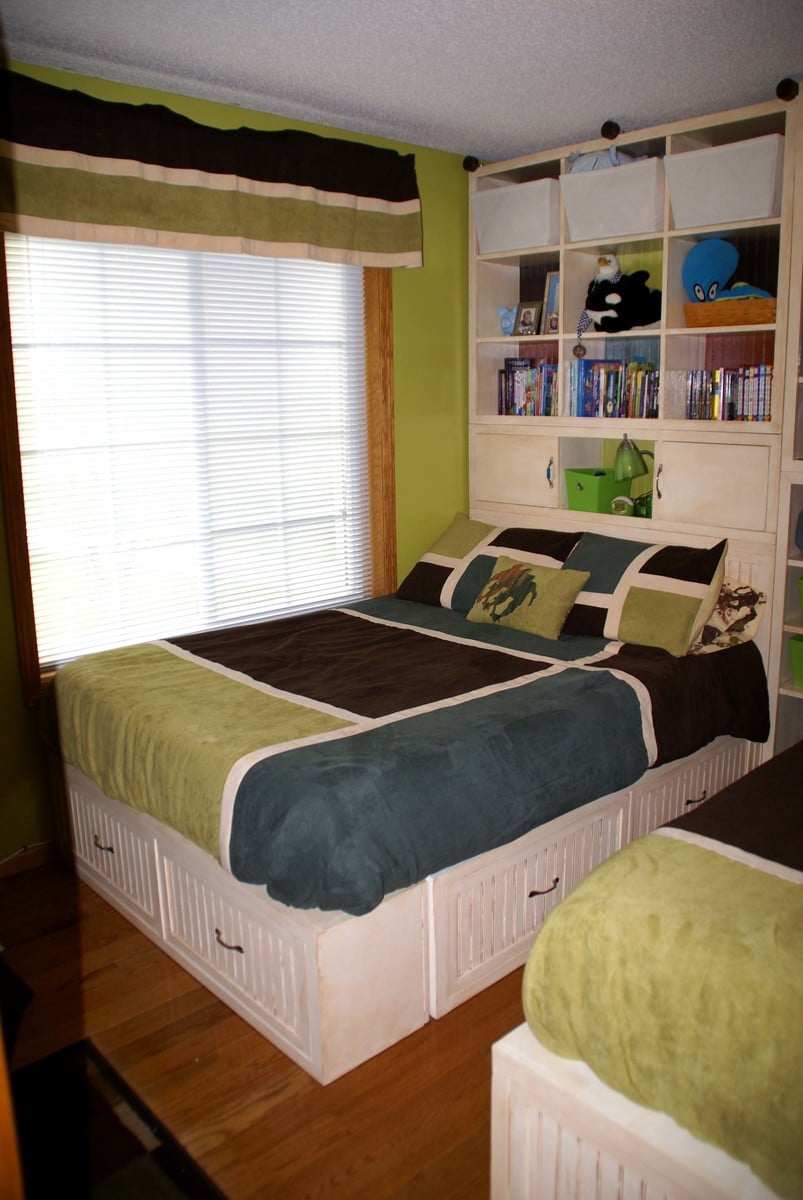
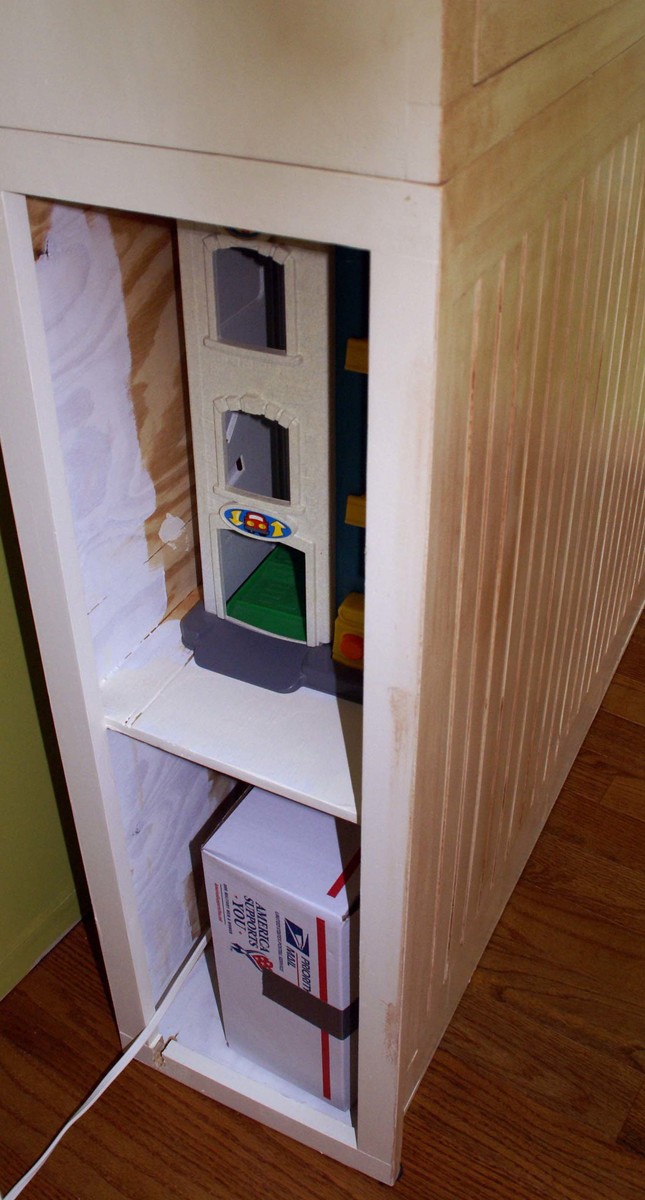
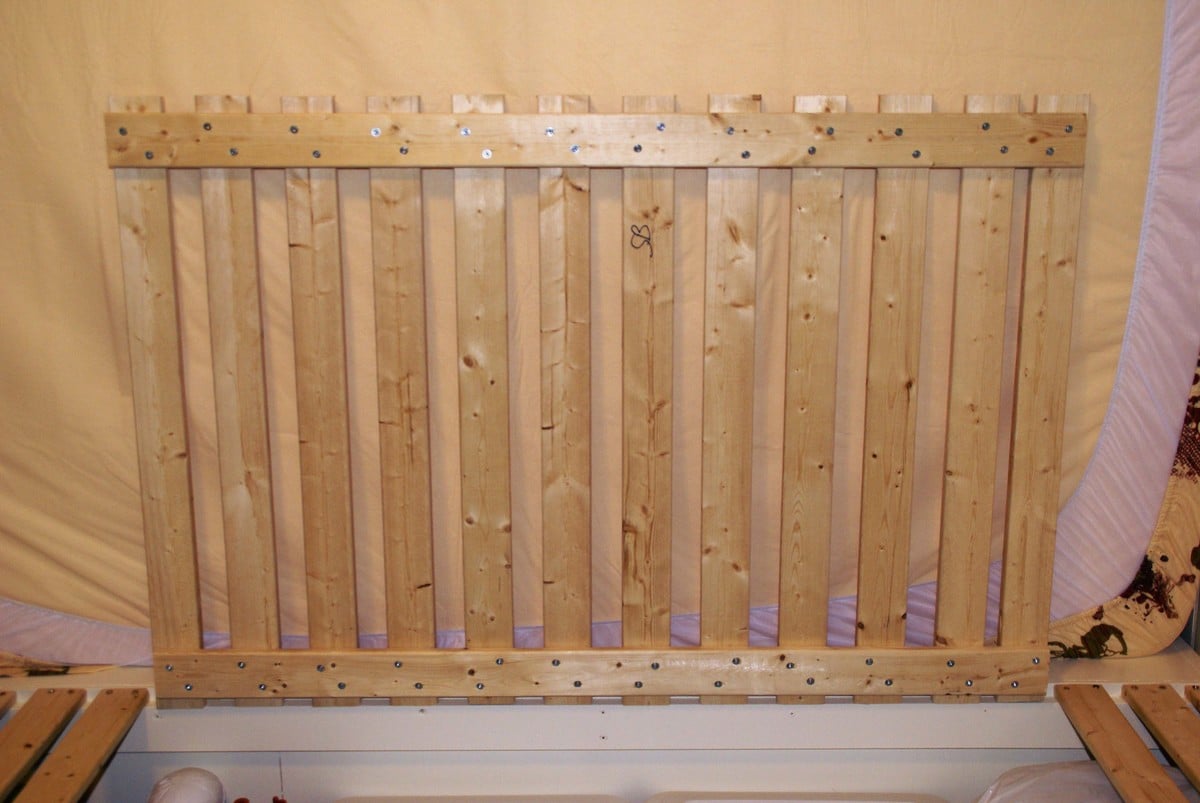
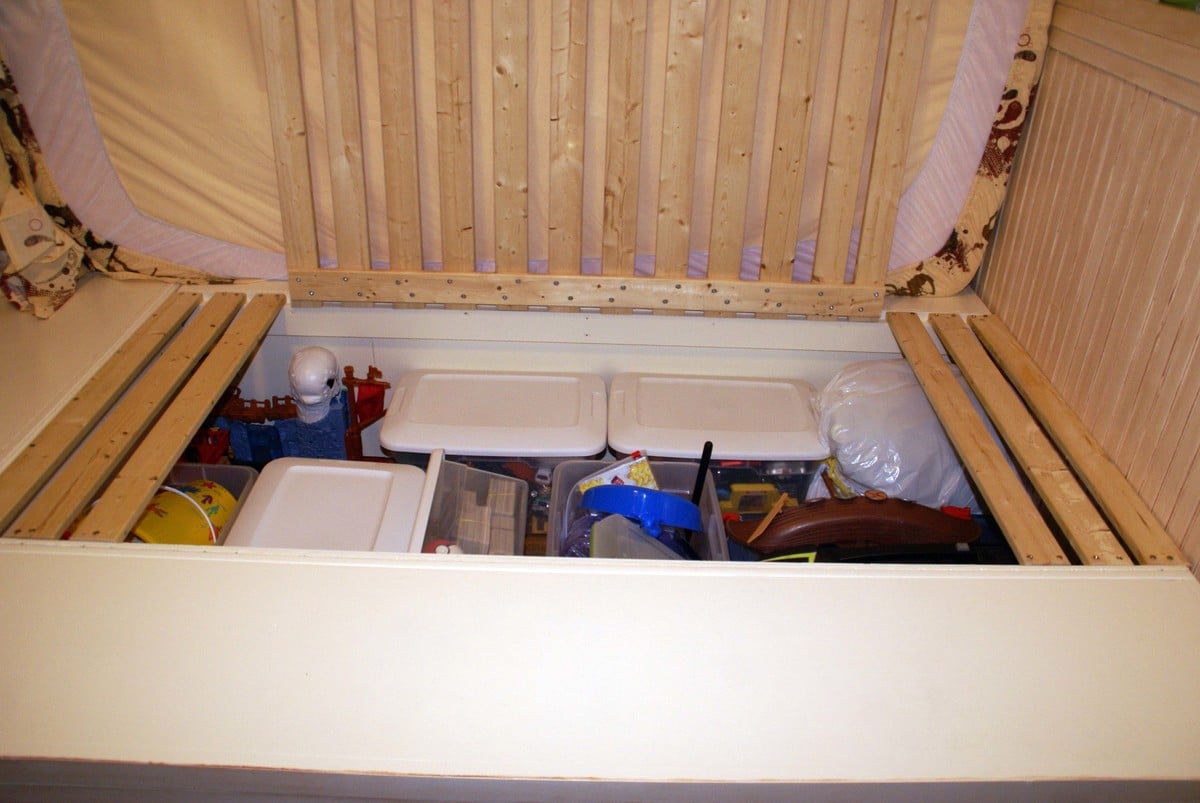
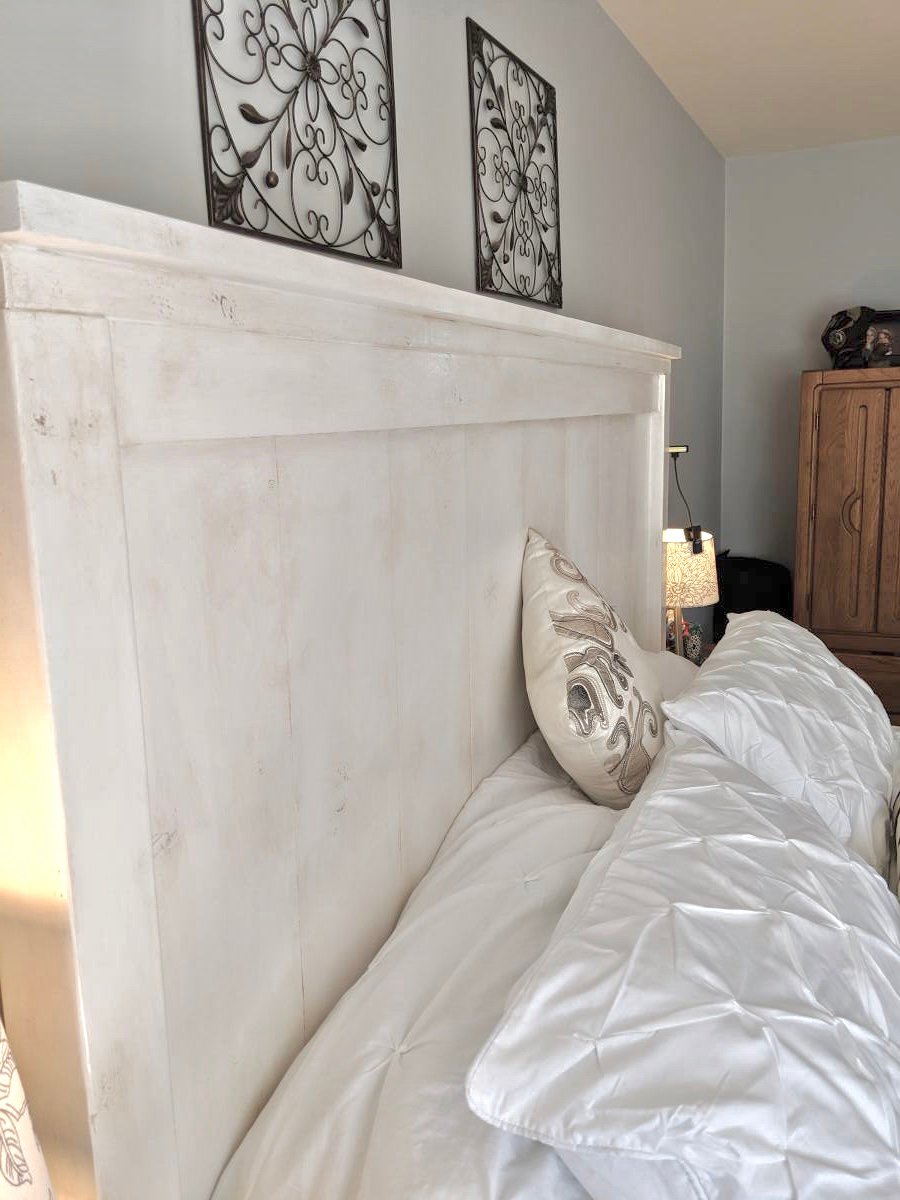
When my sons outgrew their twin sized beds and primary colored room, I had already fallen in love with Ana's storage bed collection. I was happy to see that a full size bed was included in the plans. Building it yourself means you can adjust any plans to fit your room exactly, and I planned to squeeze storage out of every inch of their 11.5 foot wide room. The first adjustment I made was to make the headboard taller, so that their pillows would not rest against the small hutch with doors. I also added height to the cubby hutch, making it a 9 cubby unit. The entire bed unit is 92 inches tall. The center tall bookcase is actually two 47 inch tall units stacked. I have watched too many home improvement shows where tall units are built off site only to not fit up stairs or around corners. The center unit is 94 inches tall and 19 inches wide, filling the wall exactly with only an inch of wiggle room to spare. I also added drawers to the open cubbies in the bed base. This was my first time making drawers, but Ana has instructions on the site, so it was no problem.The sides of the bed base facing the walls are just open cubbies as in the original plan. Beadboard paneling faces the drawer fronts, cabinet backs and the face of the headboards. Did I mention how much storage these beds have? The hollow headboards are not accessible once the center bookcase was in place, but that didn't stop me from filling them up. I had 6 Rubbermaid bins (18 gallon) in our basement full of stored Hot Wheels, Little People and other sets. All of the contents fit in the headboards alone. I also put some large saved toys in the under bed cubbies that face the wall. Yes, the Little People Garage will fit! My favorite modification was added an extra crosswise 1x3 that ties together a large section of the slats that support the mattress. This makes an easy lid allowing that you can lift to access even more storage under the mattress. We store their camping gear and off season clothes under the mattresses. I can't total the hours, I worked on this project on and off for about 9 months. When the building was nearing completion I started looking for bedding so I could match the paint colors to the bedding. I painted all the plywood back panels before attaching them to the cabinets. This was especially a life saver with back of the 9 cubby unit, as there are four colors in this section. After painting, everything was glazed with Valspar Translucent Color Glaze in Mocha. When this layer was dry I coated everything with a protective coat of Minwax Polycrylic. If you are wondering about dark circles are at the top of the unit near the ceiling, I had a great idea to use solar landscaping lights up there for a soft lighting effect. It looked great for a few nights until the batteries wore out. There is not enough natural light in the room to charge them. They have since been replaced with a couple strings of cheap colored lights. They are shoved way back towards the wall where you can't see the wires, but are on a timer, so at night they give a nice glow on the ceiling.
Sat, 04/20/2013 - 07:42
This is AMAZING! I will be moving to HI soon and will not be able to take any of my furniture with me. Was concerned about storage and usability issues, but you have sent my concerns totally out the window. I also like the idea with the solar lights. Props to you !!!!!
I could not find a frame which would accommodate my new adjustable king base. Modified Anna's plans by increasing the height of the headboard and footboard. Finished with chalk paint and antique finish for a rustic look. Side rails attached with mortises to allow for moving bed in 4 pieces if needed. Love my new bed
Sat, 11/30/2019 - 03:31
Hi! We are making this headboard this weekend. We want to increase the headboard height and footboard as well. Do you happen to know the cut measurements or how you adjusted the height of the 1x6 (or 1x8 as others used) to make it work? Yours looks perfect! Thank you in advance for any feedback!
Two projects that I recently built for my wife and my daughter. My wife wanted a tea bar and a beach vibe, my daughter wanted an outdoor couch so it is made out of cedar. They both loved them.
Todd Springer
Comments
Queequeg
Thu, 03/31/2016 - 14:36
Pictures
Didn't realize the photos were rotated. Can't figure out how to fix that! Oh well. :)