Community Brag Posts

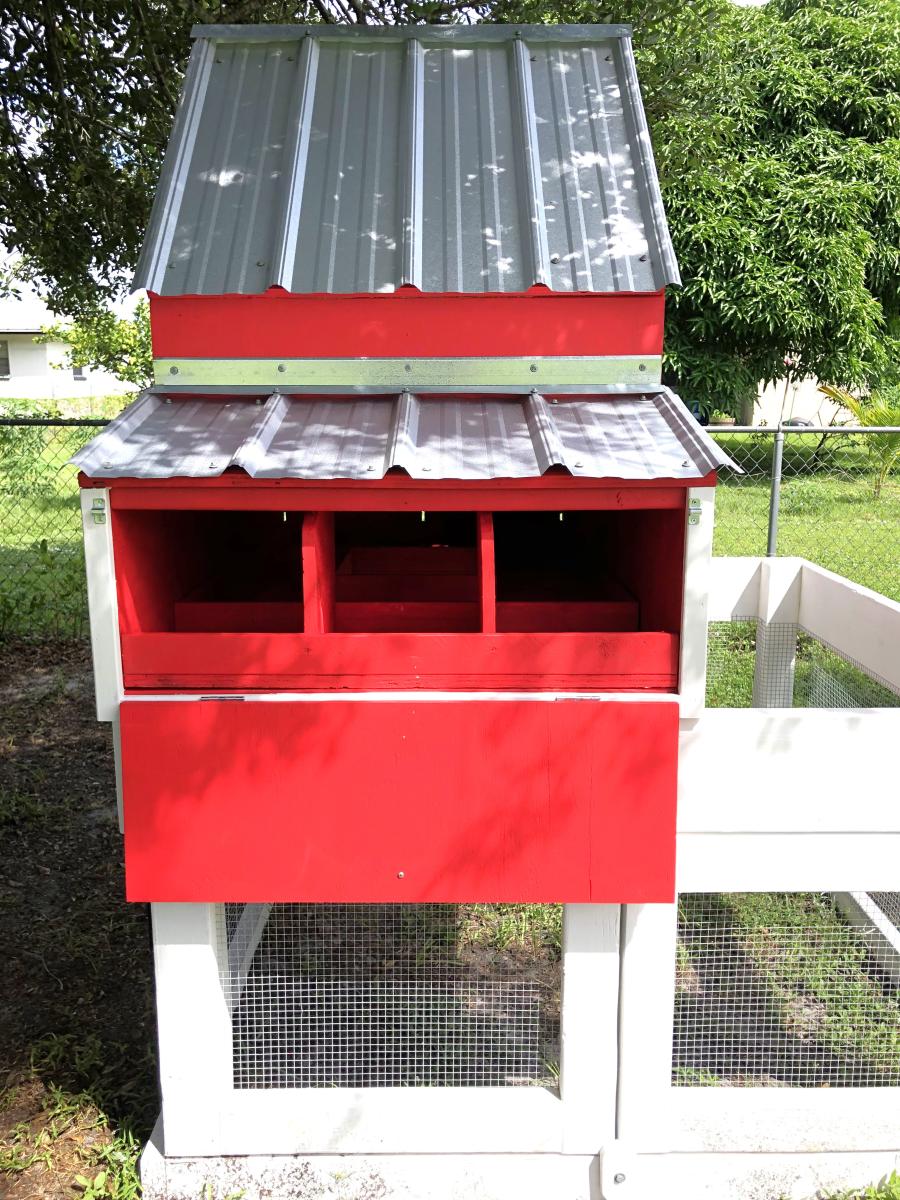
Red Chicken Coop

Submitted by Anonymous (not verified) on Tue, 12/19/2023 - 16:59

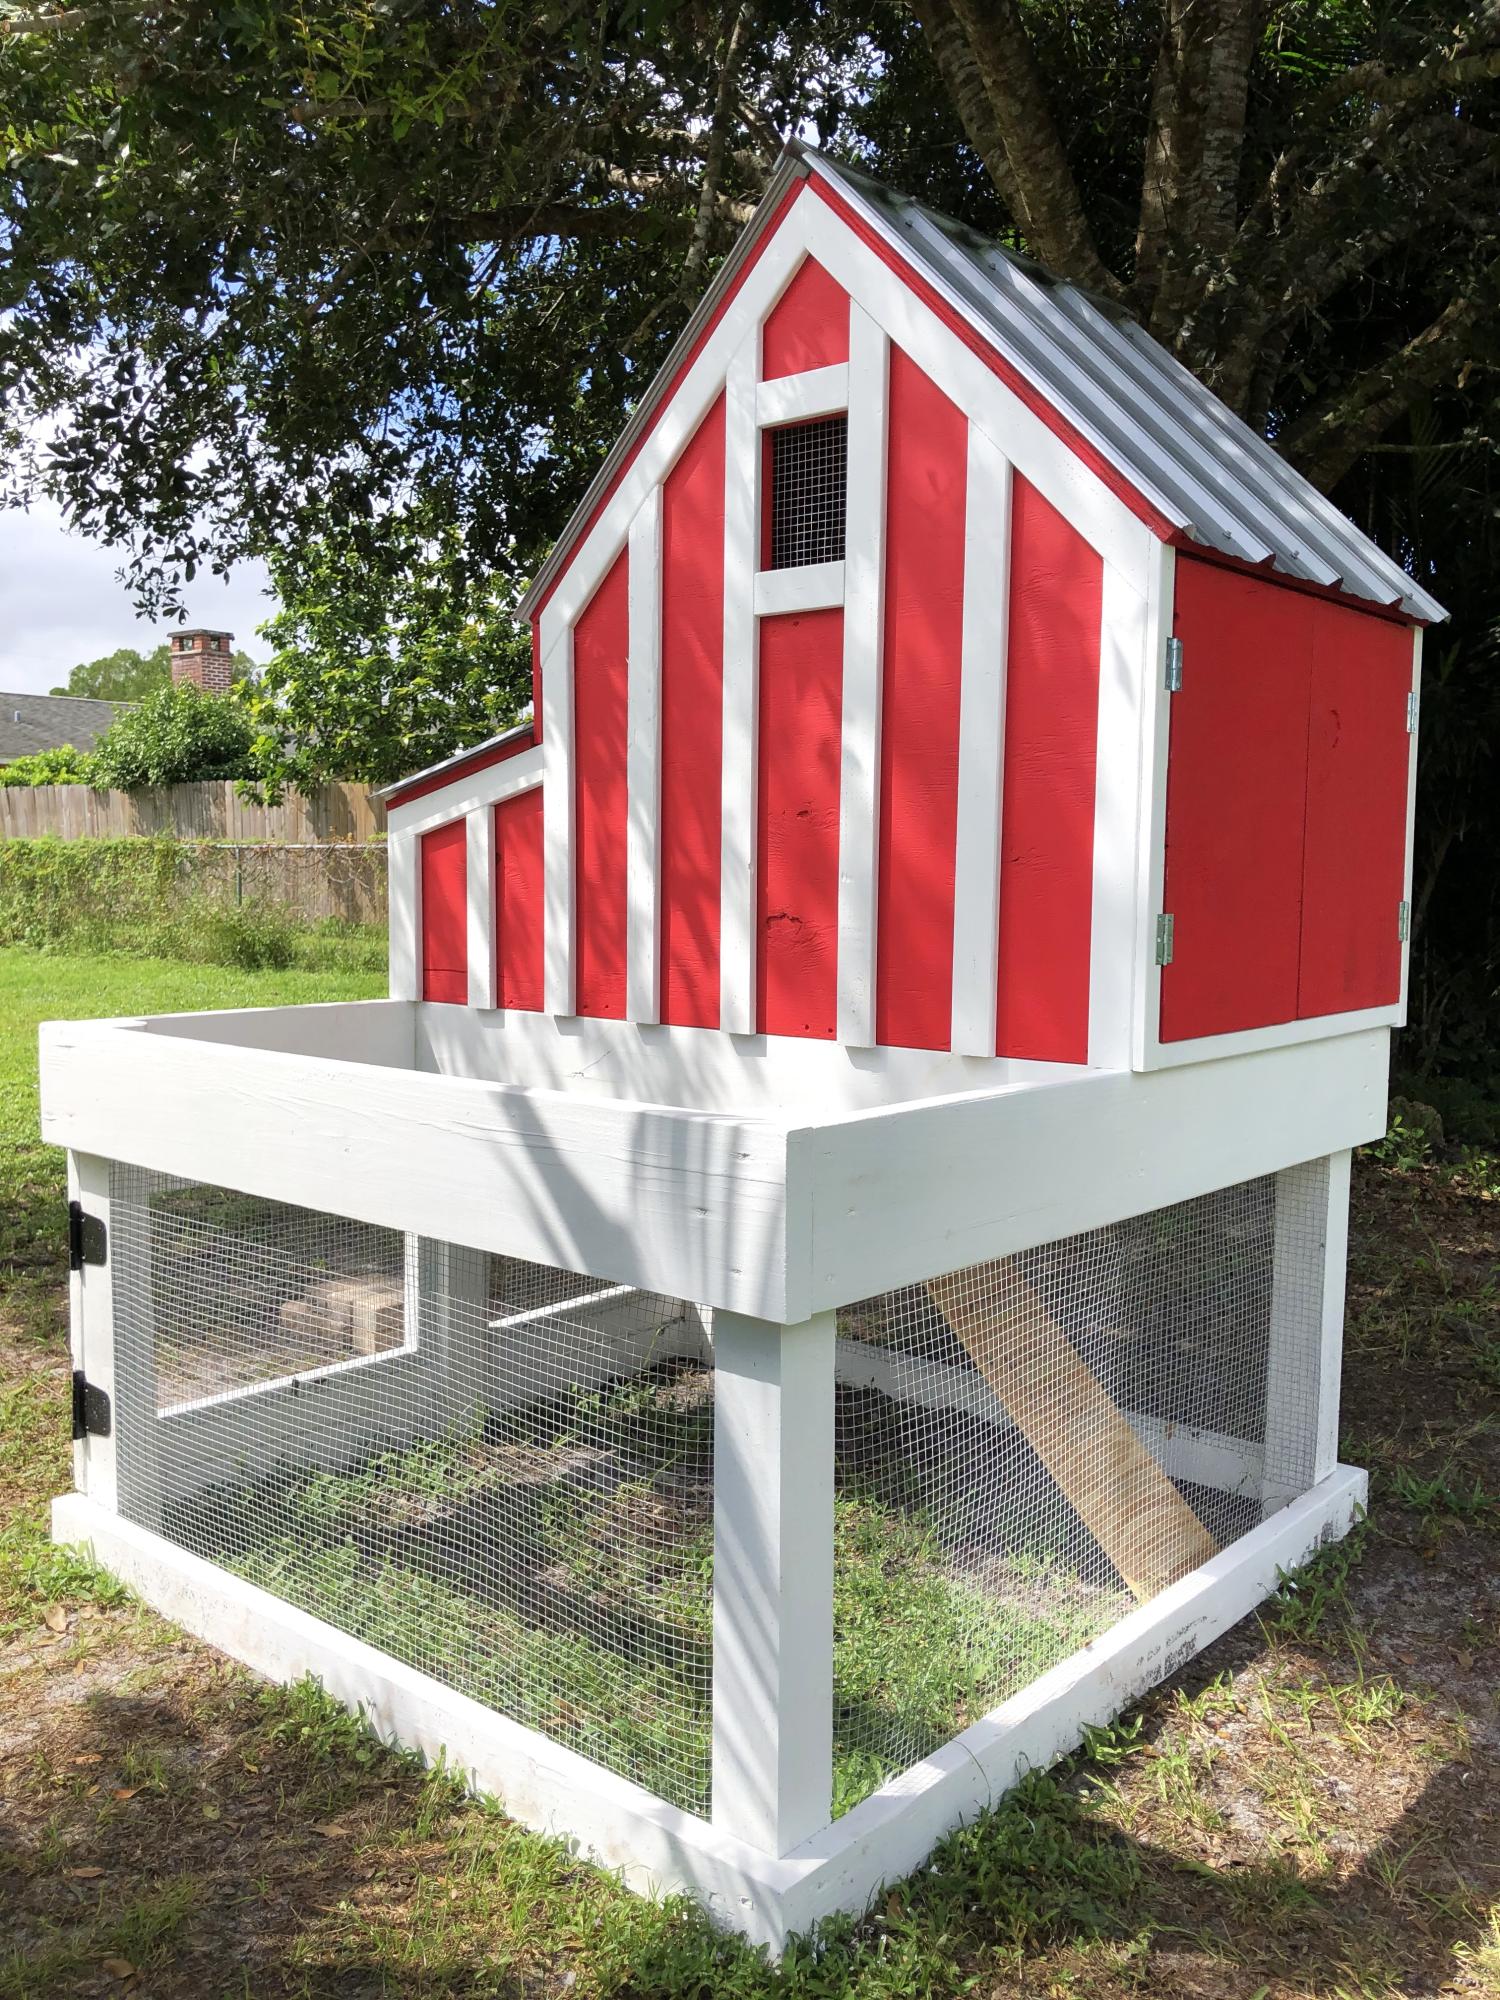
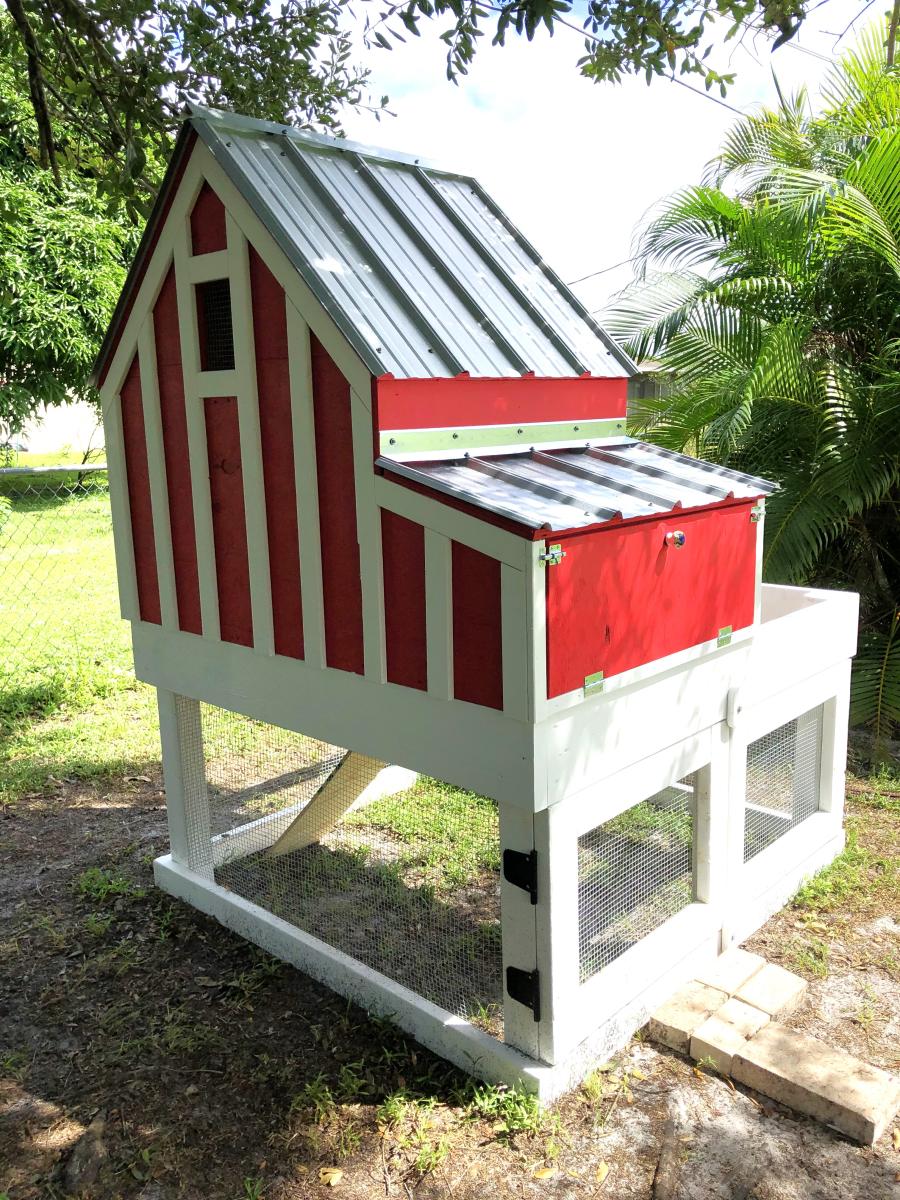
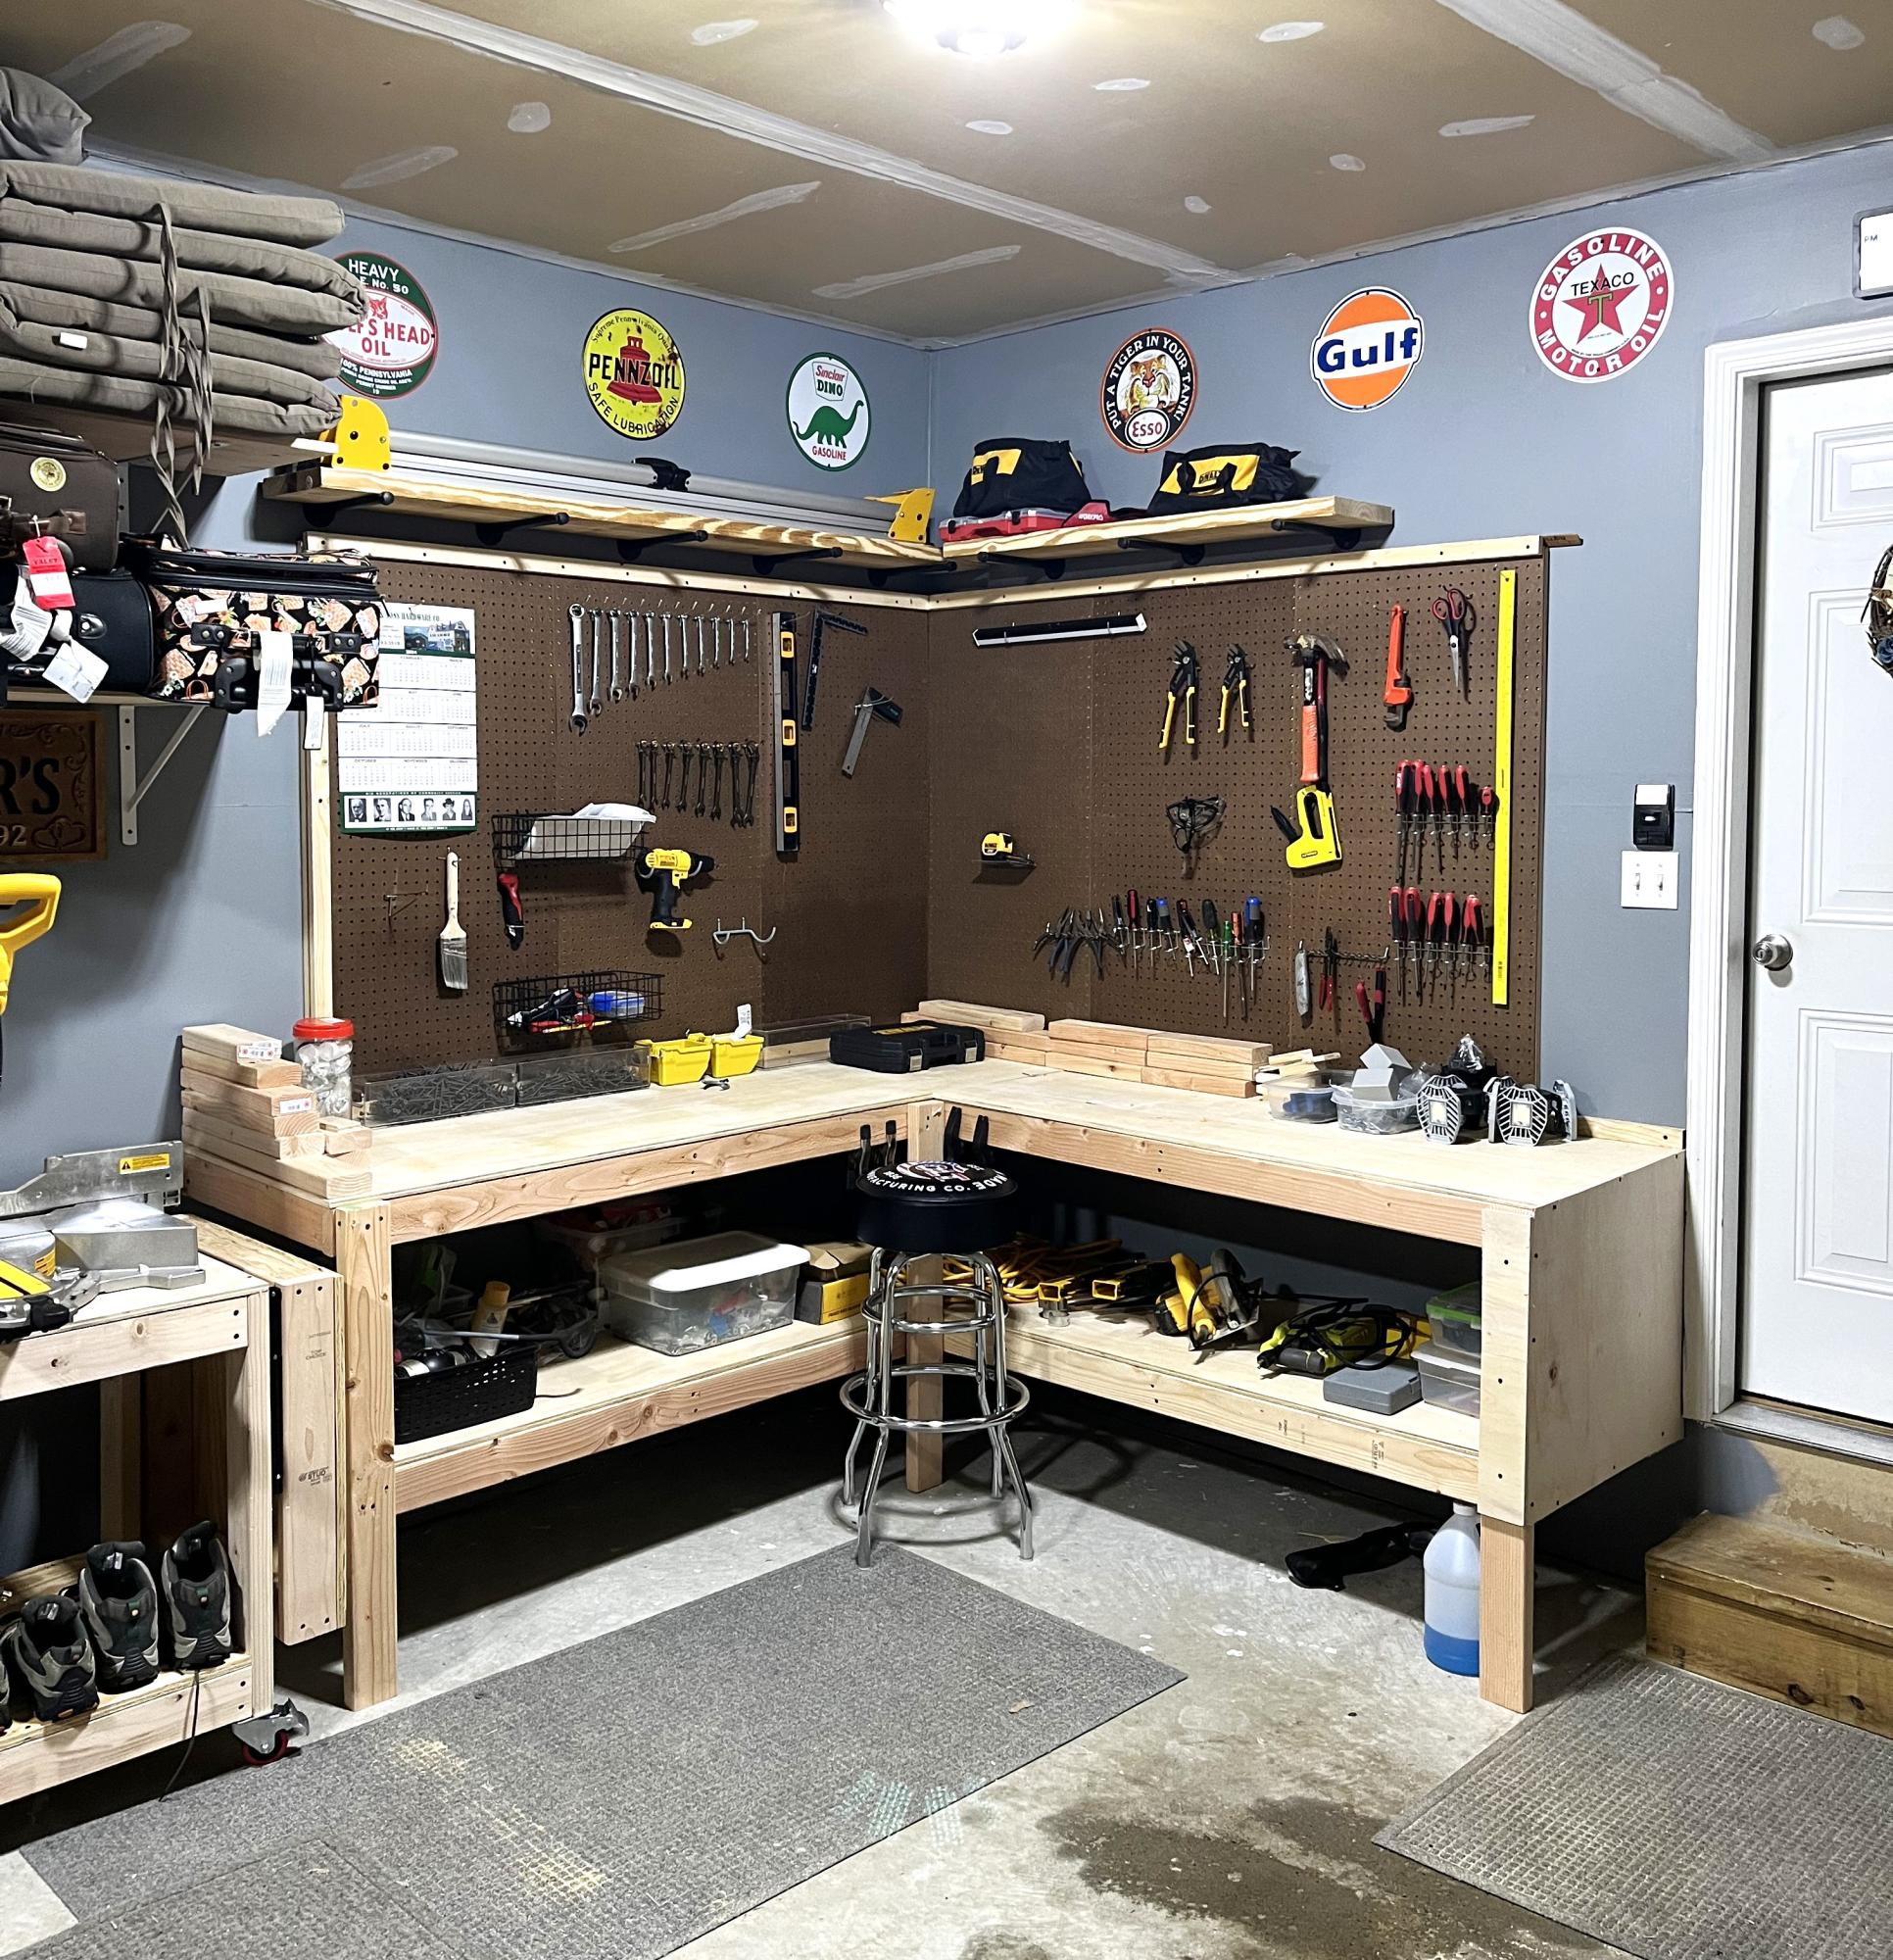
Ana, I want to say how inspirational you have been to me over some years. I think my first project found on your website was a chicken coop. More recently I have built the large garage workbench system with 2 rollout workbench/storage units (still in progress). In the past few weeks I have built the Adirondack chairs. The Adirondack chairs spurred me to continue building a “park like” setting in my small backyard. This includes a park bench (to match the Adirondack chairs), a park style grill, and a water fall. The waterfall is fairly simple (now that I have done it once - ha).

Ken Moody - Babcock Ranch, Florida

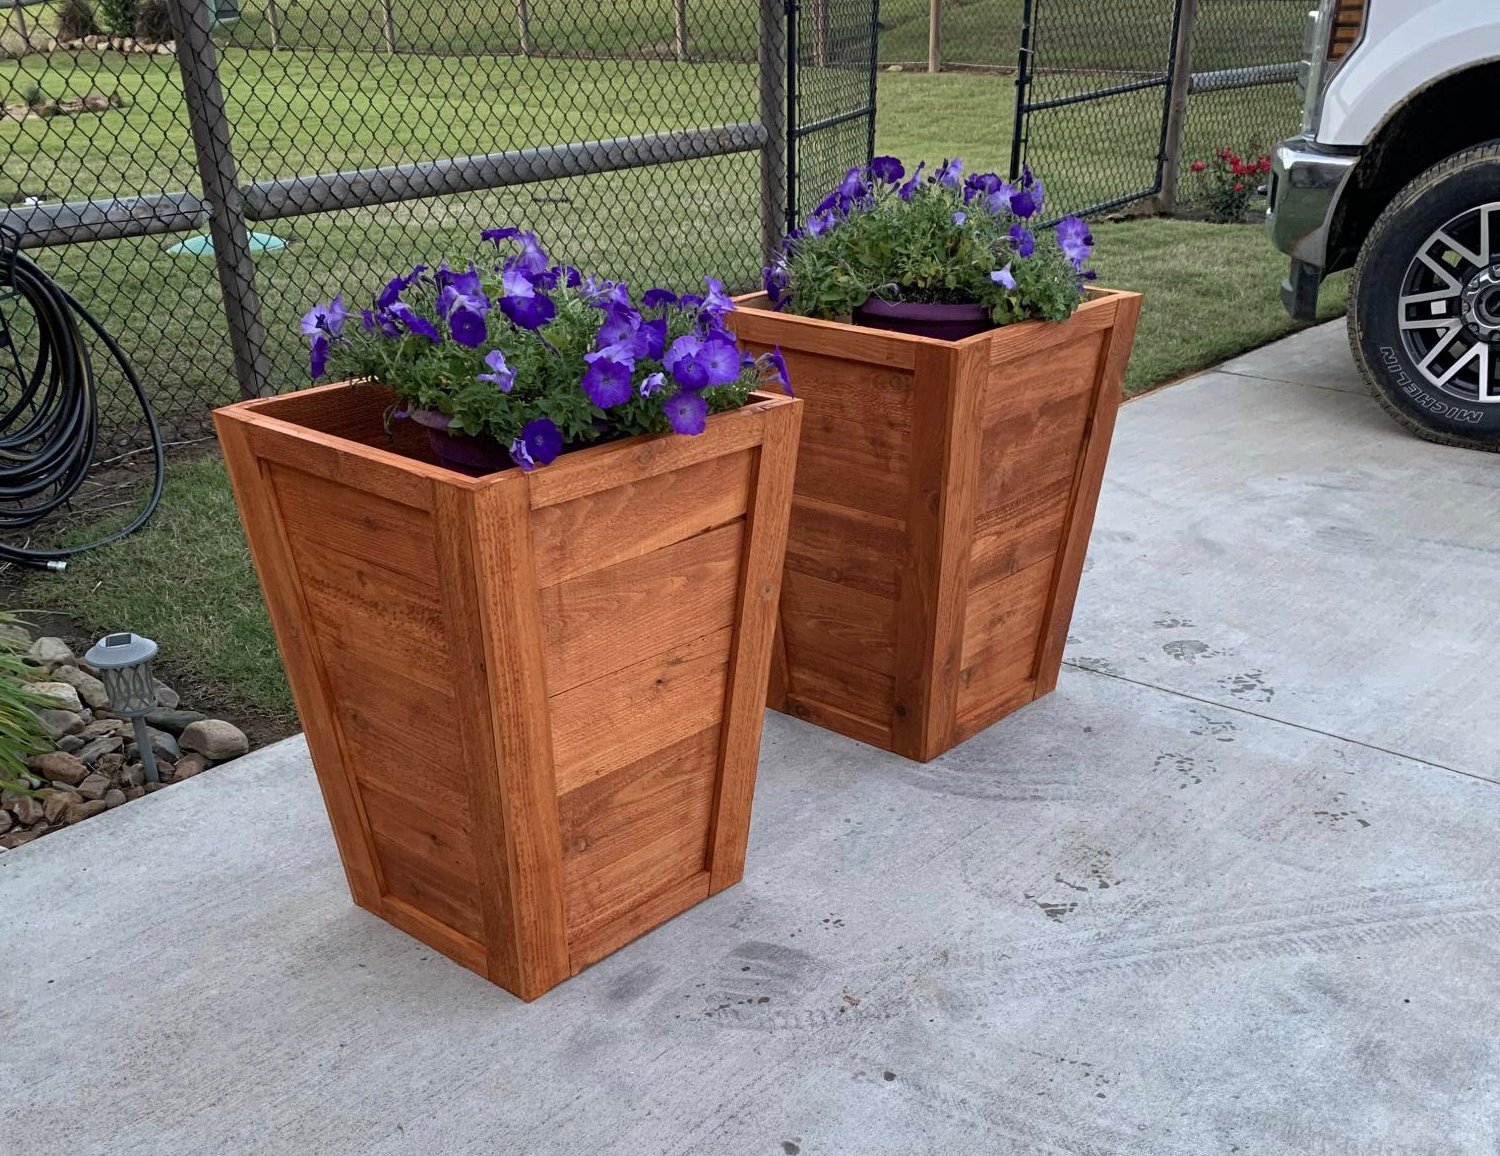
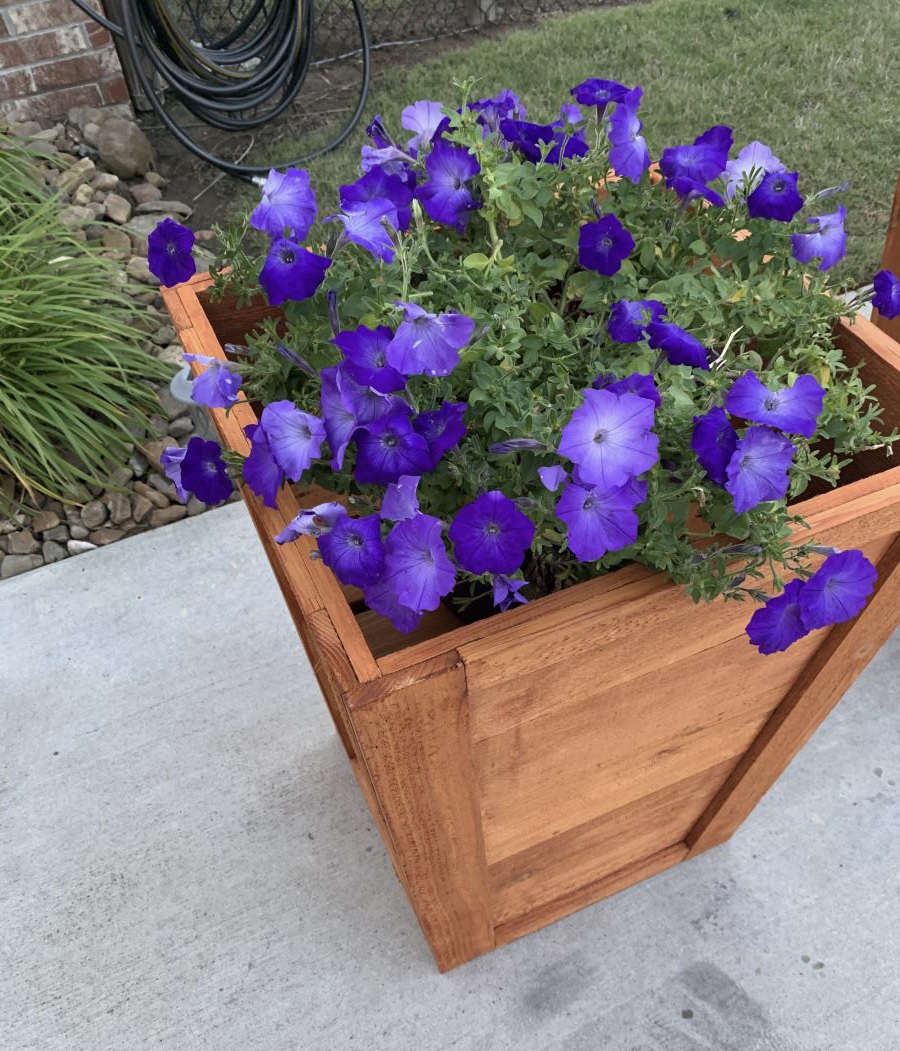
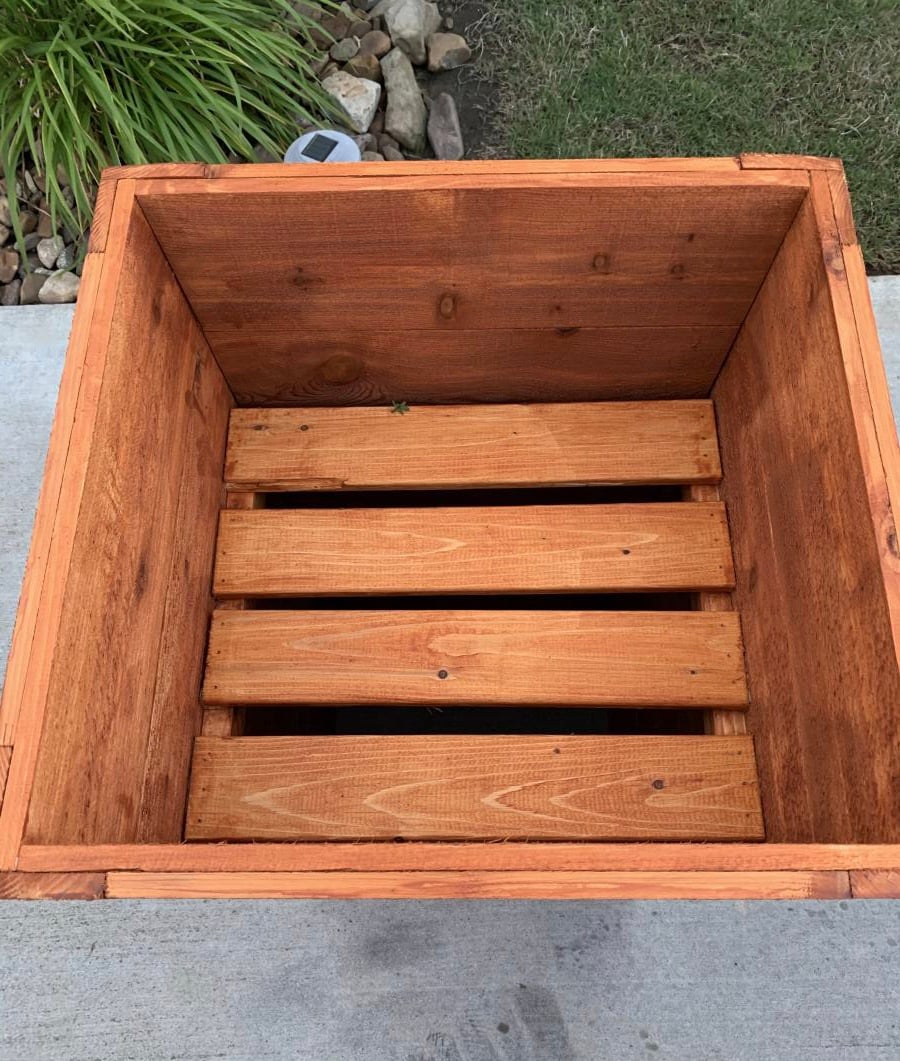
Tall Wood Planters

Submitted by Knuckles78 on Fri, 05/15/2020 - 05:27

Added some extra trim pieces to finish it out. turned out really nice!!

Built from Plan(s)

Comments

Farmhouse Storage Bed With Hidden Drawer

Submitted by Beekeeper on Wed, 12/10/2014 - 17:35

Ana, thanks for these plans! They inspired me to make my first bed build. I also want to thank all of you that added brag posts! They gave me ideas for some of the modifications that I made. I did this build by mixing your Queen Farmhouse and Queen Farmhouse Storage bed plans. I also added a number of modifications to suit my own preferences. The drawer boxes I changed by building a faceplate (I didn't want the plywood ends exposed), and by increasing in depth to maximize some additional storage. Since I increased the drawer sizes, I went with the euro roller bearing slides. I increased the foot-board height to be slightly higher than the mattress. I also designed the footboard to have a removable inner section with hidden latches on the inside. I did this because I wanted to make use of the "dead space" between the drawer boxes. I then used this space to house a hidden drawer, that is approx six feet deep (I couldn't help myself-I love hidden drawers wink). Because I added the hidden drawer, I changed the opptional center support to 4X4 blockes that were pocket screwed under the center of the boxes. I ended up using birch plywood and fir for this build. For my first bed build I'm fairly happy with how it came out. Thanks again!

Estimated Cost
I didn't keep exact track of the cost of this bed, but I think it was about $800.
Estimated Time Investment
Week Long Project (20 Hours or More)
Finish Used
I haven't got there yet, but I am planning on putting a mahogany stain and then a polyurethane. All
Recommended Skill Level
Intermediate

Comments

spiceylg

Thu, 12/11/2014 - 07:41

This is your first build and you did all of those awesome modifications?! Really impressive and it looks perfect! Congrats and welcome to the community!

In reply to by spiceylg

Beekeeper

Sun, 12/14/2014 - 06:03

Thanks for the compliments! It was a fun learning experience. Making all the modifications definitely slowed down the build, but also made it more rewarding!

beckbg

Fri, 12/12/2014 - 13:18

I just started my bed (mostly out of Baltic Birch) and am wondering where you were able to find such nice 4x4s. Your bed is gorgeous! No luck here. I bought redwood, but really wanted fir for the sharper edges. It's my first project, too. I also bought same drawer slides, but the soft close. Didn't want the slam. I figure building it will be the easy part compared to procuring nice 4x4s! Hope you can help!

In reply to by beckbg

Beekeeper

Sun, 12/14/2014 - 06:01

Thanks! The 4x4s I found at a place called Better Living Building Supply. They had a pretty nice assortment of fir, including the 4x4s, so that is why I chose it for the build. Finding the 4x4s slowed down my start on the build. Our local Lowes only had them in treated pine.

athingvall

Sat, 09/05/2015 - 20:47

Thank you for the pictures, the bed turned out Awesome.  I was wondering about the latching system for the foot of the bed.  Do you think a piano hinge on the lower would work too?  Also on the center drawer did you use rollers or is it just friction?  Can't wait to start the build.

Thanks

Codding58

Mon, 02/15/2016 - 14:11

This is excellent!!!   I really like this, so much in fact that the wife is going to have to get used to it too. lol   But really, GREAT work!    Any chance you could post a pic and or comment about how you attached that removeable end?    i think this is the best part!    Cheers!

Kmaynard19

Tue, 12/10/2019 - 08:42

Beekeeper,  Awesome build!!!  Have you posted your altered plans anywhere?  I'm very interested in your build, I was wondering about some aspects of it and how you approached it.  Plans would clear it up instead of bothering you with all my questions.

NinjaPinky

Sat, 06/20/2020 - 09:06

I, like many others, have been wondering if you'd share your plans for this modification. It just looks so great!

tammis50401

Mon, 11/16/2020 - 15:42

Bed turned out awesome. I was wondering if you have the plans for the bed with a list of supplies it took to make this bed. I so want this bed it's just what we are needing

Great job

Sandbox with Benches

Submitted by cscottrun on Mon, 04/13/2015 - 10:33

We altered the original plan by enlarging the sandbox (approx 5' x 6') which made for wider benches that can comfortably seat an adult.  The benches and back rests are three boards deep instead of two.  We added 2x12 supports under the benches for additional support, as well as another 2x4 support in the middle of the backrest.

Built from Plan(s)
Estimated Time Investment
Day Project (6-9 Hours)
Finish Used
None
Recommended Skill Level
Beginner

Comments

Seasonal And Holiday

Double Loft Bed

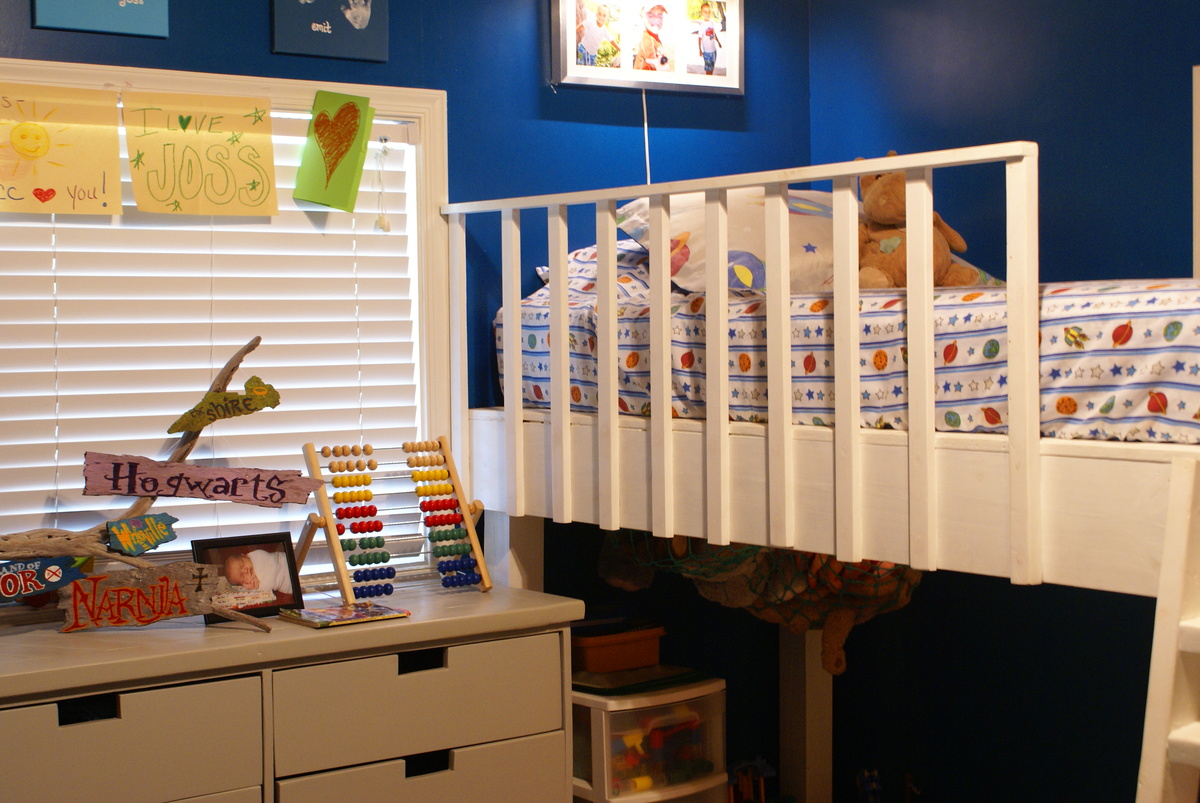
I saw the idea for this bed on Pinterest originally. It linked to a blog that had the step by step plan (http://www.thehandmadehome.net/2011/08/how-to-build-a-loft/). However, I would have never even approached the idea or project without a few of Ana's plans under my belt first. I have gained so much confidence in my building on this site, and will always be a HUGE fan here :) Thank you Ana for all the fantastic plans you continue to share!

I still want to finish out and make the under bed area more fun and creative with curtains and such, but we LOVE having the full floor in the room for our play area. My boys absolutely love their bed!!

Estimated Cost
Less than $150 (a little higher than usual because of where I live)
Estimated Time Investment
Afternoon Project (3-6 Hours)
Finish Used
The hardest part about this project was lifting the bed platform up onto the legs in order to secure them in place. We built it with very little room to spare against the wall, and it made it very tricky to get up into place with some of the window frames and such. Be sure to have friendly neighbors or friends helping out when you get to that part, and lift with your legs...not your back ;)
Recommended Skill Level
Intermediate

Comments

sgilly

Wed, 10/02/2013 - 13:07

I'll bet the boys are thrilled with this. It's great to have that extra play room!
I am curious, though, how the center of the loft bed is supported.

In reply to by sgilly

exuma_momma

Wed, 10/02/2013 - 18:38

Hey Sue, I went and found the old link to the plans for this and added it to the brag post. Or here it is also: http://www.thehandmadehome.net/2011/08/how-to-build-a-loft/ Underneath is a bunch of 2x4's spaced to support the platform, but the big 2x8's are the main strength. They are monsters! We've had a bunch of kids and adults up there for story time, and never once has it felt unstable or wobbly. Hopefully the link will help. It has way more photos that I have here.

bhoppy

Thu, 10/03/2013 - 16:24

Reminds me of the bed my dad made for my sis and I when we were little:-) SO sweet!

Ramholmes

Thu, 07/28/2016 - 15:47

I am going to attempt to make this bed in a couple of weeks for my daughters. The handmade home directions only show the rope ladder. We want to make the ladder similar to your pictures above. Could you tell me how you made yours please and thank you?

Chunky leg bedframe

Submitted by Anonymous (not verified) on Tue, 02/12/2019 - 17:43

I got tired of sleeping on the floor like college kids, but I didn’t want to buy a junky particle board bedframe. My husband and I are novice woodworkers. Even still, we bought the lumber around noon and managed to finish the whole project in about 5-6 hours! We used a Kreg jig for the first time and it was pretty simple. I am really pleased with how this turned out, and I can’t wait to try more of Ana’s plans in the future.

Estimated Cost
$100 including the cost of pockethole screws and finishing nails.
Estimated Time Investment
Day Project (6-9 Hours)
Recommended Skill Level
Beginner

DIY Children's Picnic Table

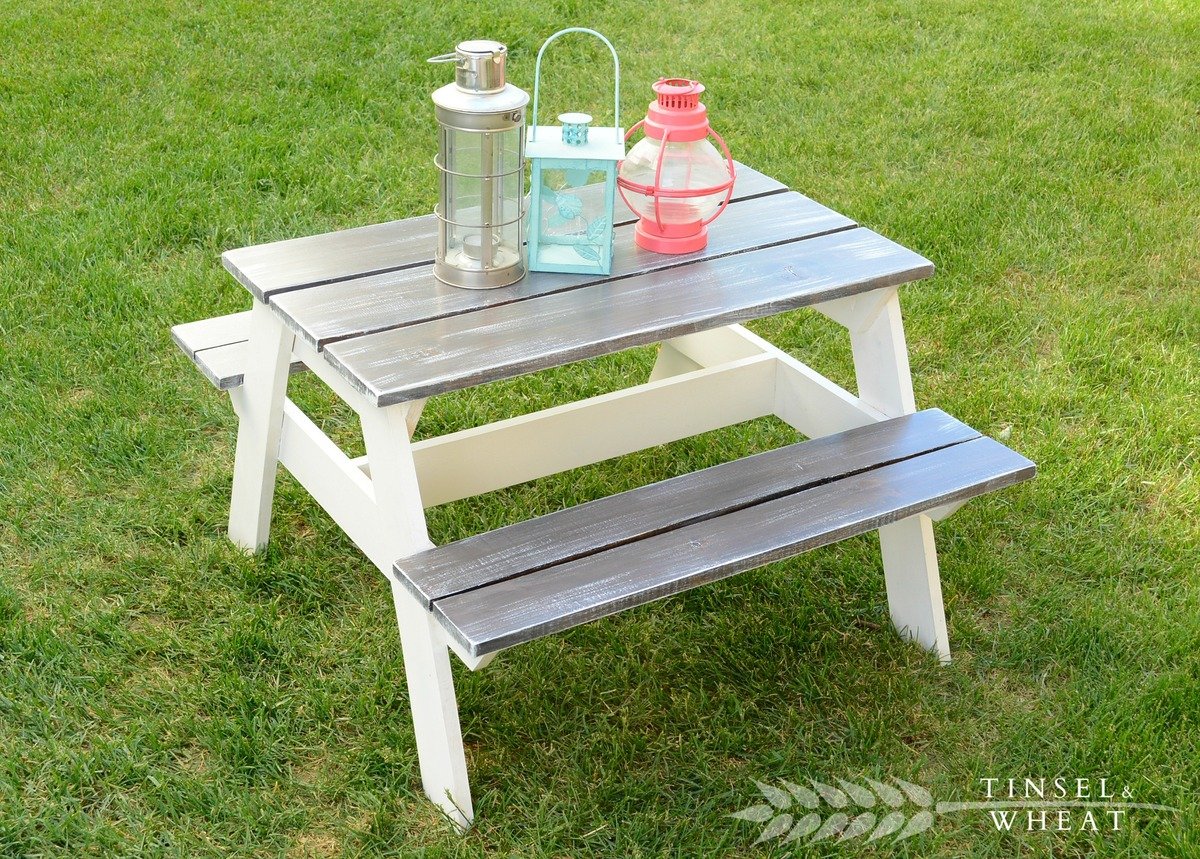
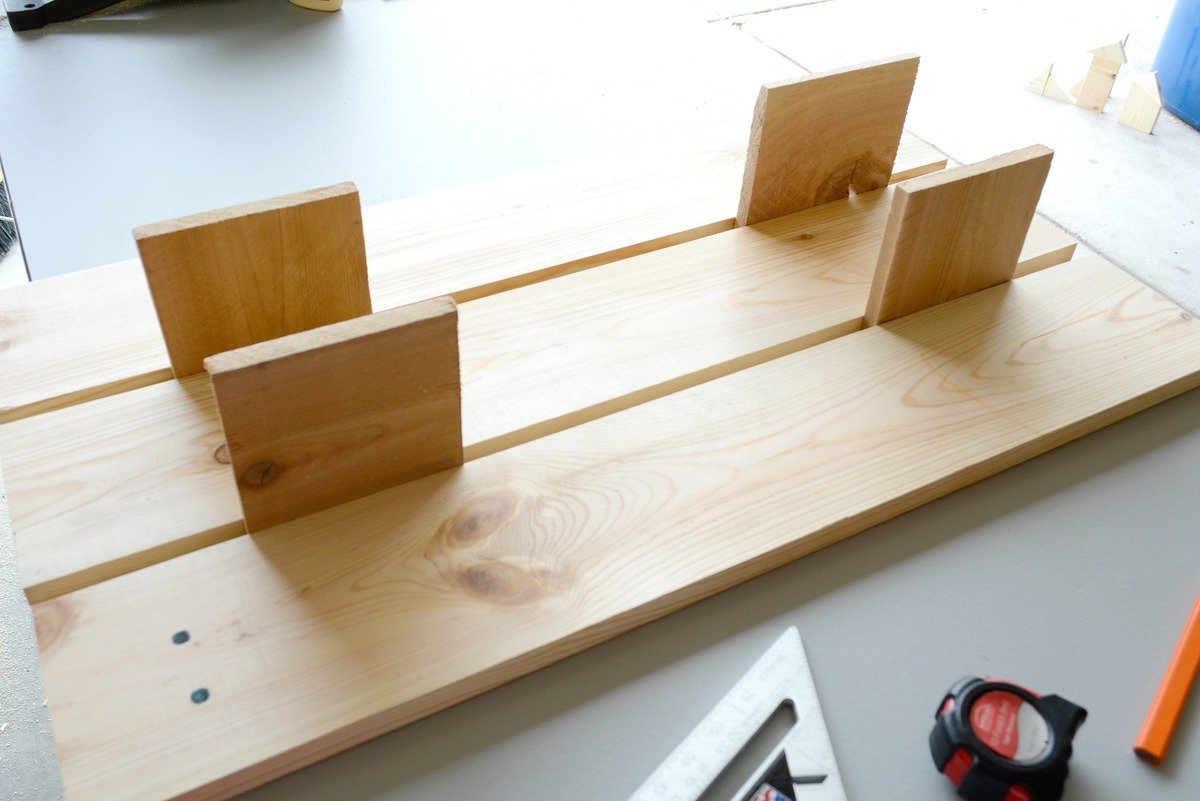
My first truly functional build! I love how it turned out, but even more importantly my kids are loving it - we are literally using it for every possible meal and snack right now. Perfect summer project, and bonus - we get to keep all the eating messes outside! 


Built from Plan(s)
Estimated Cost
$22.50
Estimated Time Investment
Afternoon Project (3-6 Hours)
Finish Used
For the first table I sued a combination of stains.. Minwax Jacobean and Weathered Grey with a white latex paint wash. White semi gloss Behr for the legs and bottom half of table.
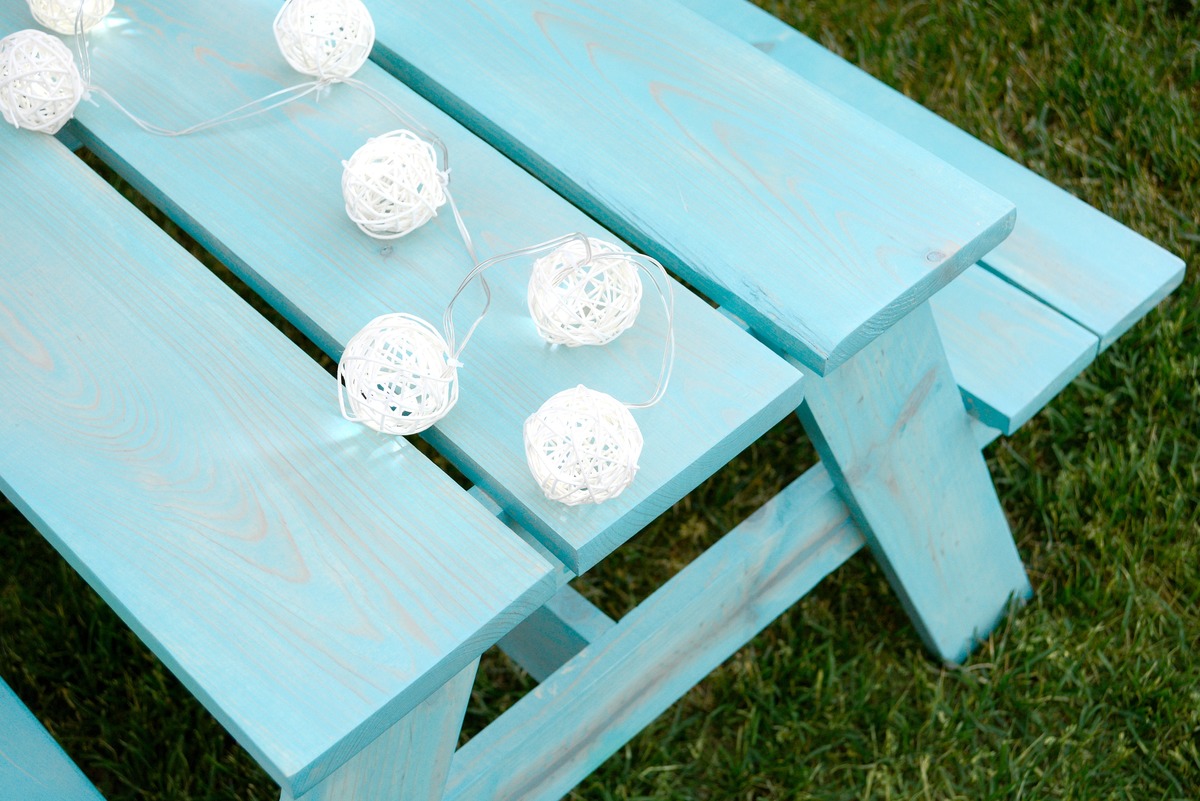
Second table I used Varathane's Vintage Aqua and I sealed both tables with 4 coats of Varathane's SPAR- Urethane.
Recommended Skill Level
Beginner

Play Structure & Swing Set

Submitted by Colby032 on Fri, 04/18/2014 - 11:52

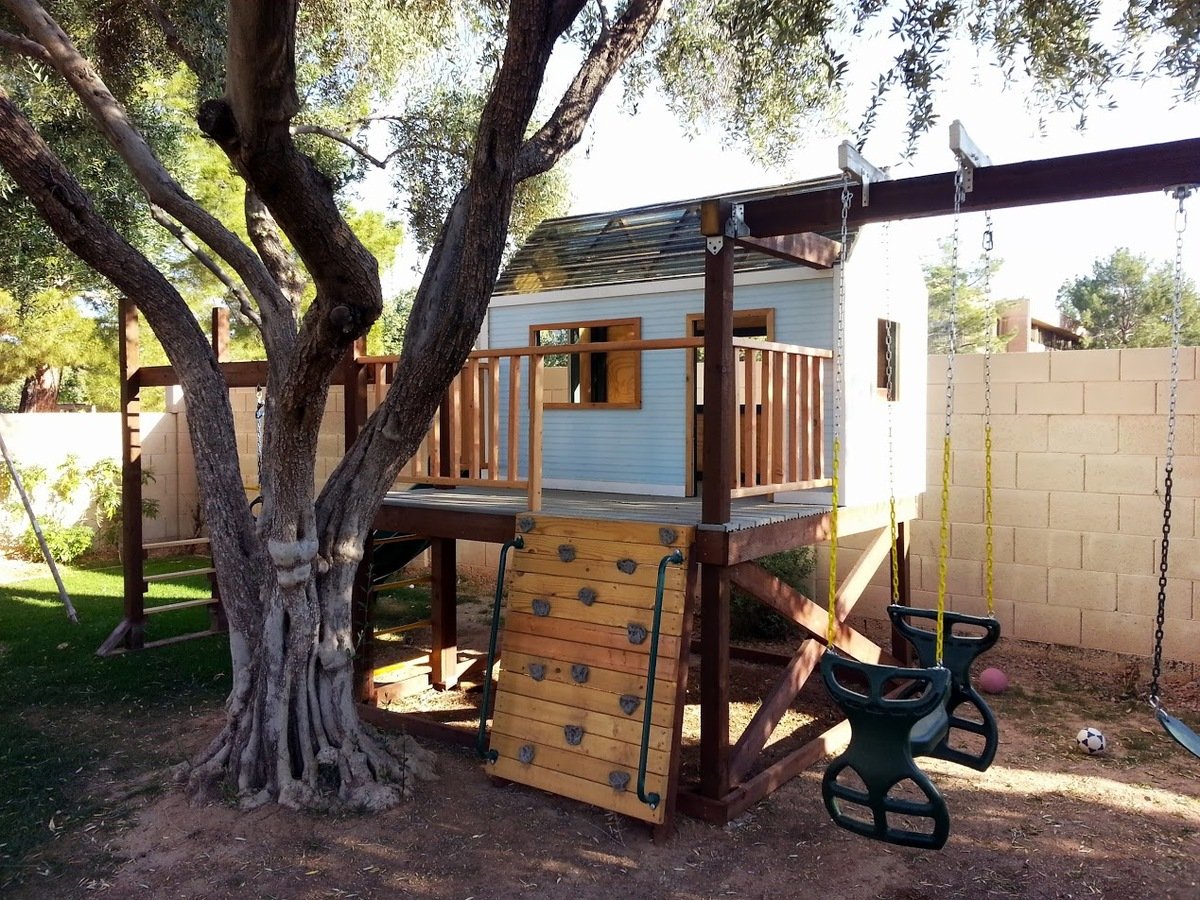
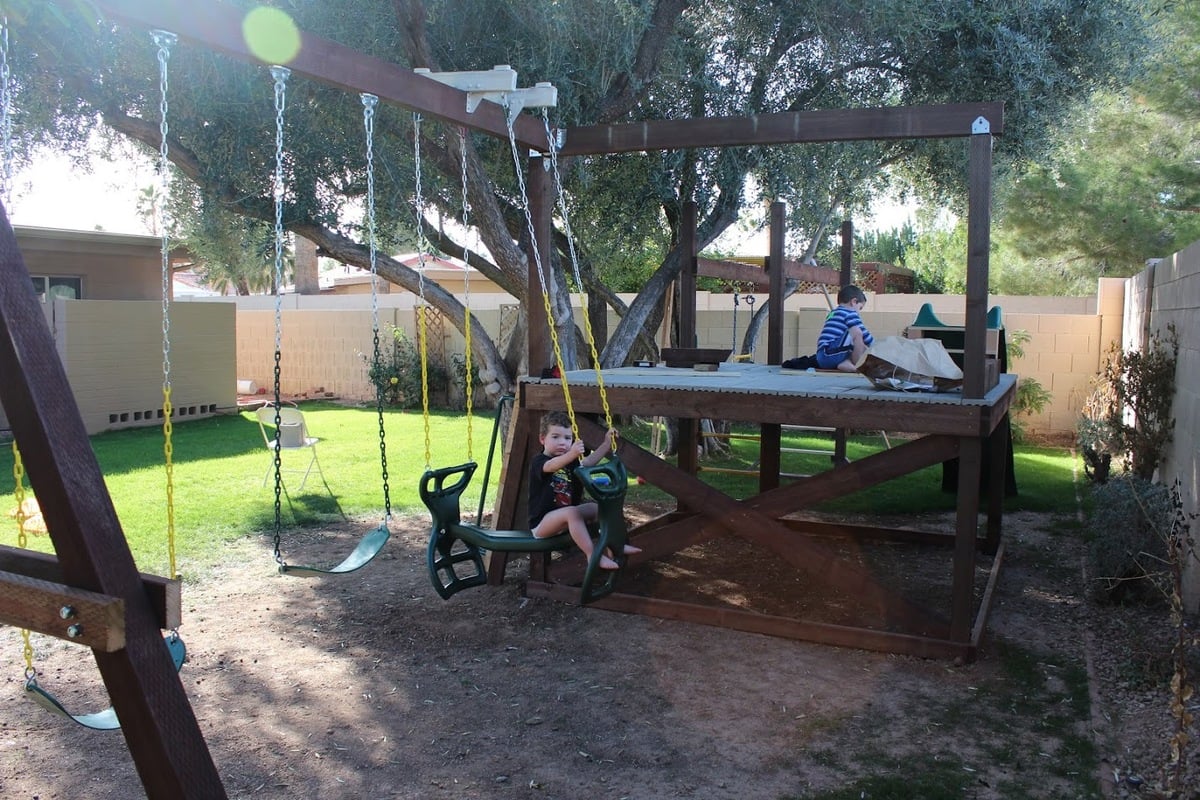
My second building project... this one took quite a while, building in the evenings after the kids went to bed.

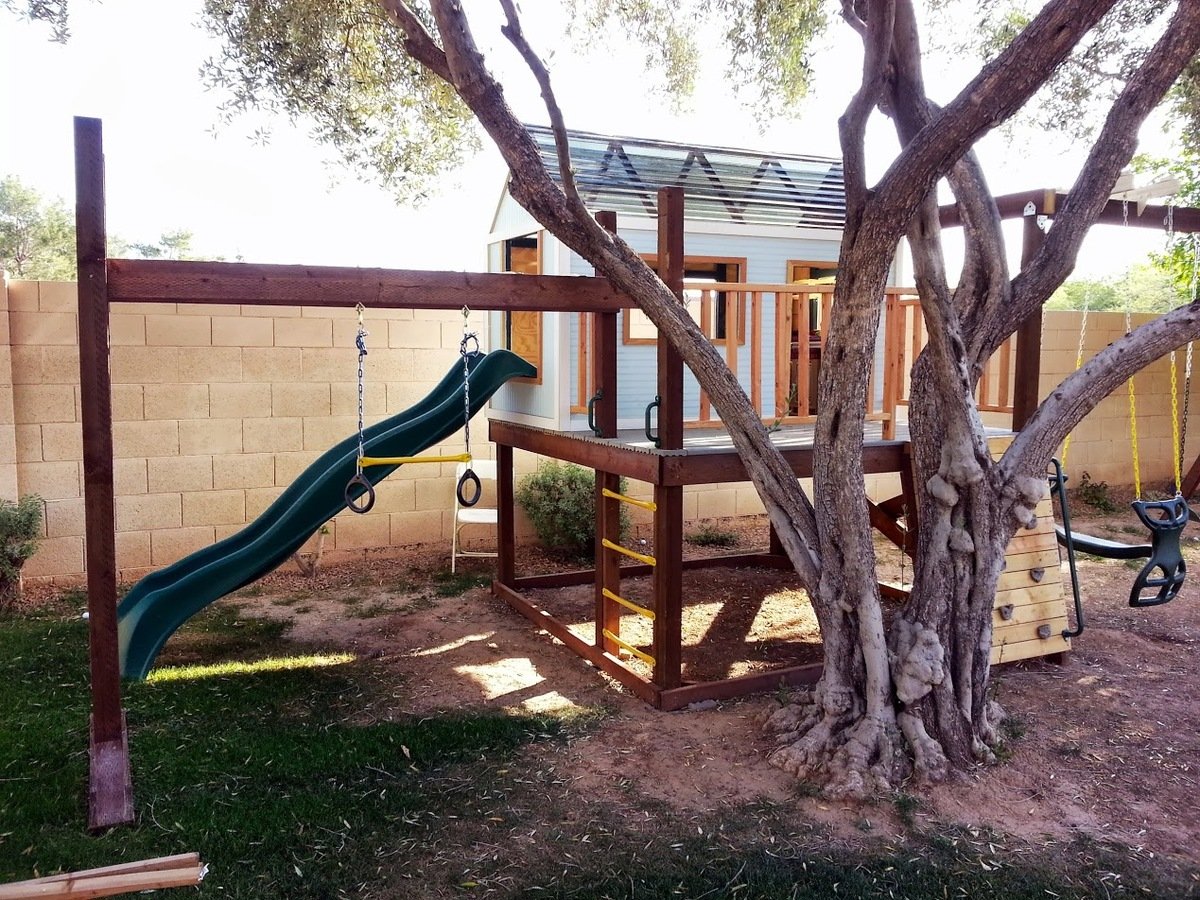
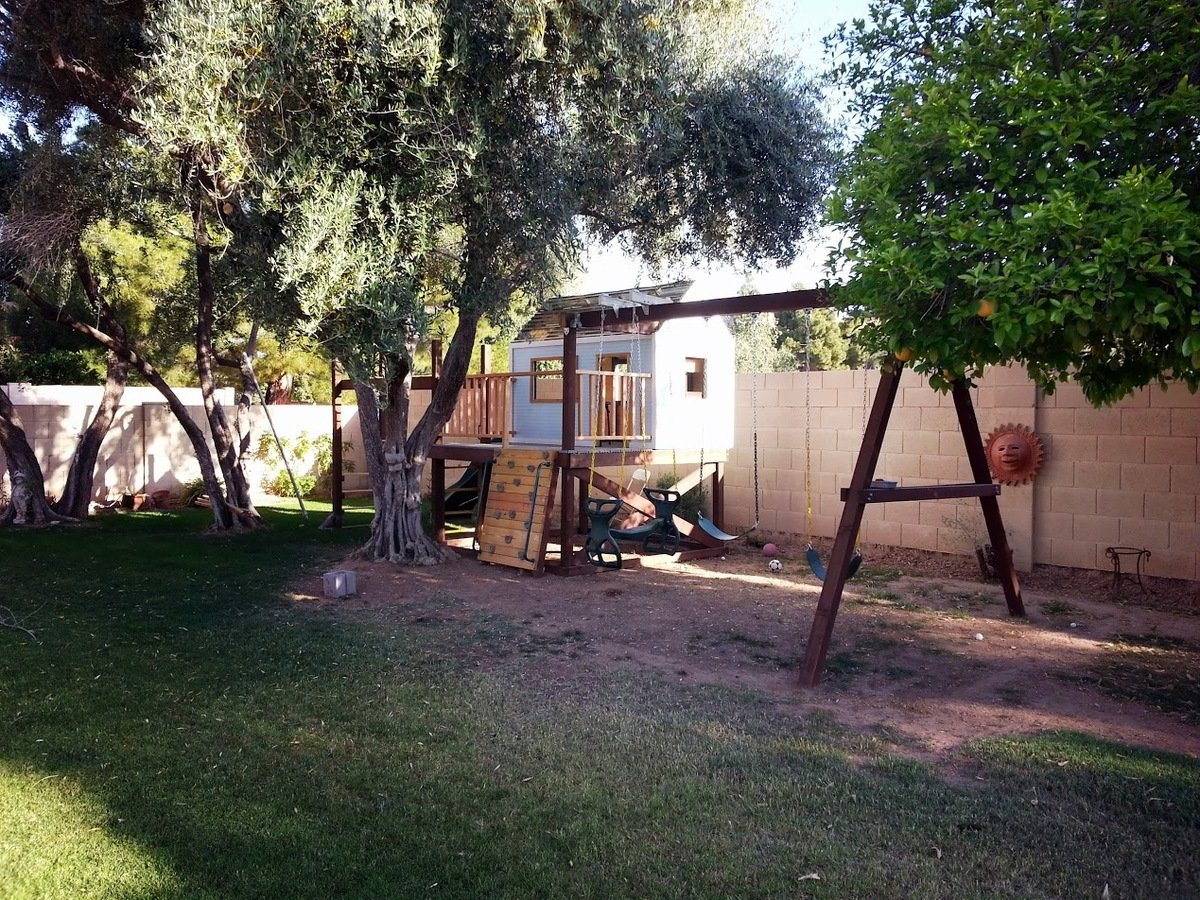
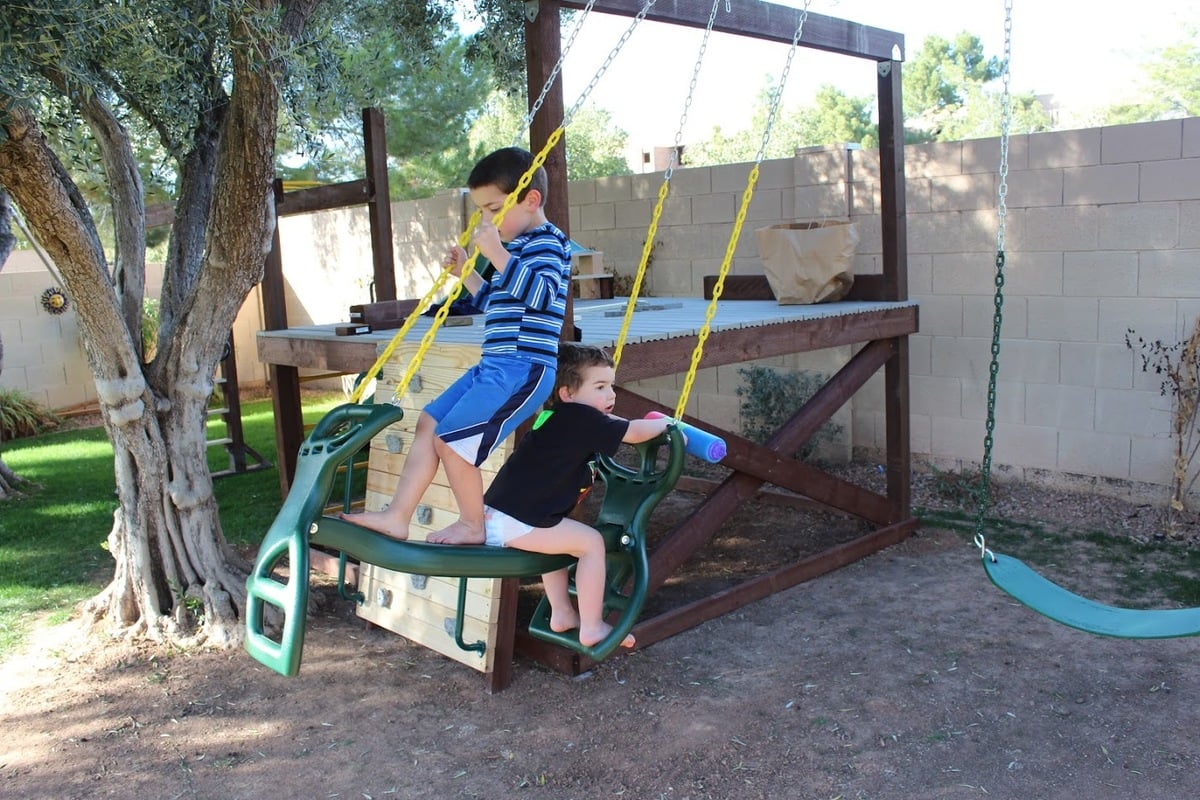
The playhouse is based off of Ana's Playhouse Building series, with some modifications to fit the space in my backyard and accommodate climbing wall, monkey bars, and slide.

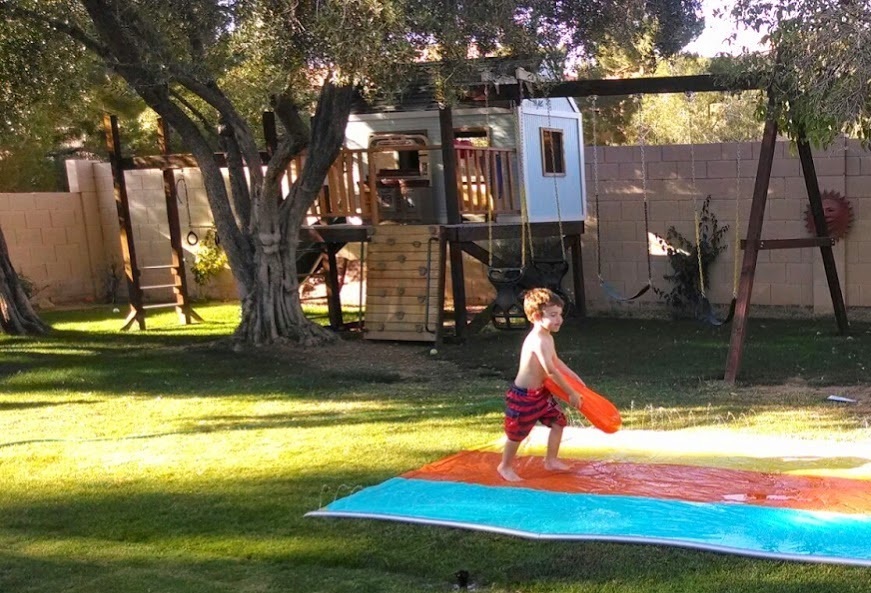
To put the main deck structure into the ground for sturdiness while protecting from moisture, I dug out 5 holes to fit single hole cinder blocks (4 corners plus an extra 4x4 for the monkey bars; you can see an leftover block on the ground in one of the pictures). I placed some brick in the holes, then the cinder blocks on top. I then partially filled the cinder blocks with sand, put the pre-built deck in the cinder block holes (with help - it's heavy!), and then filled the rest of the cinder block holes with sand. It's worked remarkably well - the deck has been up for about a year now. I also sprayed some clear waterproof sealant on the bottom part of each beam near the ground for extra protection (deck, monkey bars, climbing walls, and swingset A-frame). This has allowed me to still run sprinklers near/around the playset and even grow grass underneath the swings!

Materials used:
* Playhouse: pine, plywood, Suntuf solar grey polycarbonate corrugated roofing panels (I live in Arizona, so little rain to worry about but lots of heat - the sheeting lets light in but blocks most of the UV rays, corrugated shape also provides venting at top when placed sideways)

* Deck/Swingset/Monkey bars: treated lumber, composite decking, pine for railings, monkey bars purchased from Amazon

* Climbing wall: pine, treated lumber, handholds/railing bought off ebay/Amazon

* Swings/slide/bongos/wheel, telescope: purchased from Amazon

Modifications:
* Turned playhouse 90 degrees to be in back of the deck, with swingset coming off the side. This meant the support beam for the swingset had to pass through the playhouse - modified the frame for that wall slightly and created a notch for the beam to pass through.

* Slide comes out one end of playhouse - made the "window" on that end larger than the plans called for in order to give room for the slide.

* Monkey bars come off one side of the deck - used extra 4x4 here to create support for the bars, and used extra bars to make a ladder on this side

* Climbing wall instead of ladder for main entrance

* Put large window in back wall of the playhouse

* Added cross bracing to side of decking on swingset end to make it more solid/cut down on sway when swinging
Estimated Time Investment
Week Long Project (20 Hours or More)
Finish Used
Paint on playhouse, water seal on railings
Recommended Skill Level
Intermediate

Comments

yubbie2

Tue, 04/29/2014 - 20:41

This is phenomenal - just the plan & design we've been looking for. Can you upload a few more pictures? Any sketches you can provide? Shopping list? Really great job - I hope your kids love it. It looks awesome.

JeremyFox

Wed, 04/30/2014 - 04:53

Love it! I like the way it sits right next to a tree - I thought it was a tree house at first.

Colby032

Wed, 09/10/2014 - 14:03

Thanks! It's certainly nestled in right behind that tree - I originally was going to place it in between that tree and another one but then decided to just place it behind them in order to take better advantage of shade (critical in AZ) and fit in everything I wanted to put on it (monkey bars, swings, slide, climbing wall)

masons_momma2015

Mon, 07/08/2019 - 00:48

We've  been looking at these type of players for our son, and good grief! Prices are astronomical for playsets that are NOTHING like this. This absolutely an amazing  place for those boys to make memories. You're  amazing!  Do you mind if I ask what it cost once it was finished? I never imagined  that it would cause a tic in my eye to look at the kids from Lowe's or anywhere else for that matter.

Colby032

Tue, 08/20/2019 - 10:14

I don't remember how much it cost in the end... but probably around $900?  That may include getting some tools that I needed but didn't have at the time.  The slide was the most expensive single piece I bought - I think I got it from Amazon.

When it was all done, I remember thinking that what I got for my money was *way* beyond what I would have gotten by purchasing a kit or a pre-built play structure.  Plus, by going my own way, I was able to build it to fit my space and the needs/abilities of my kids.

While the whole thing is big and looks like an intimidating build, it really isn't bad - the platform is a fairly blank base to design everything else off of, and is incredibly sturdy.  Everything else is a discrete part that branches off of the platform and can be planned out as you need.  Adding the monkey bars required putting in a 5th upright (the first 4 are the corners), but that was an easy modification since I knew I wanted it before building the platform.  The playhouse just sat on top of the platform (screwed down, of course).


patelscope

Sat, 08/01/2020 - 20:40

Hello. This is pretty cool, probably the best modification that I am looking for from Ana's default plans. Could you please add some more detail on the right side wall, and how you incorporated the support beam through the playhouse? (with maybe a picture from inside of that wall). And secondly, if you can add the dimensions for the monkey bar setup on the left side of the deck? Thanks, much appreciated

Dining Room/ Home Office

Submitted by kristen on Sat, 02/21/2015 - 11:33

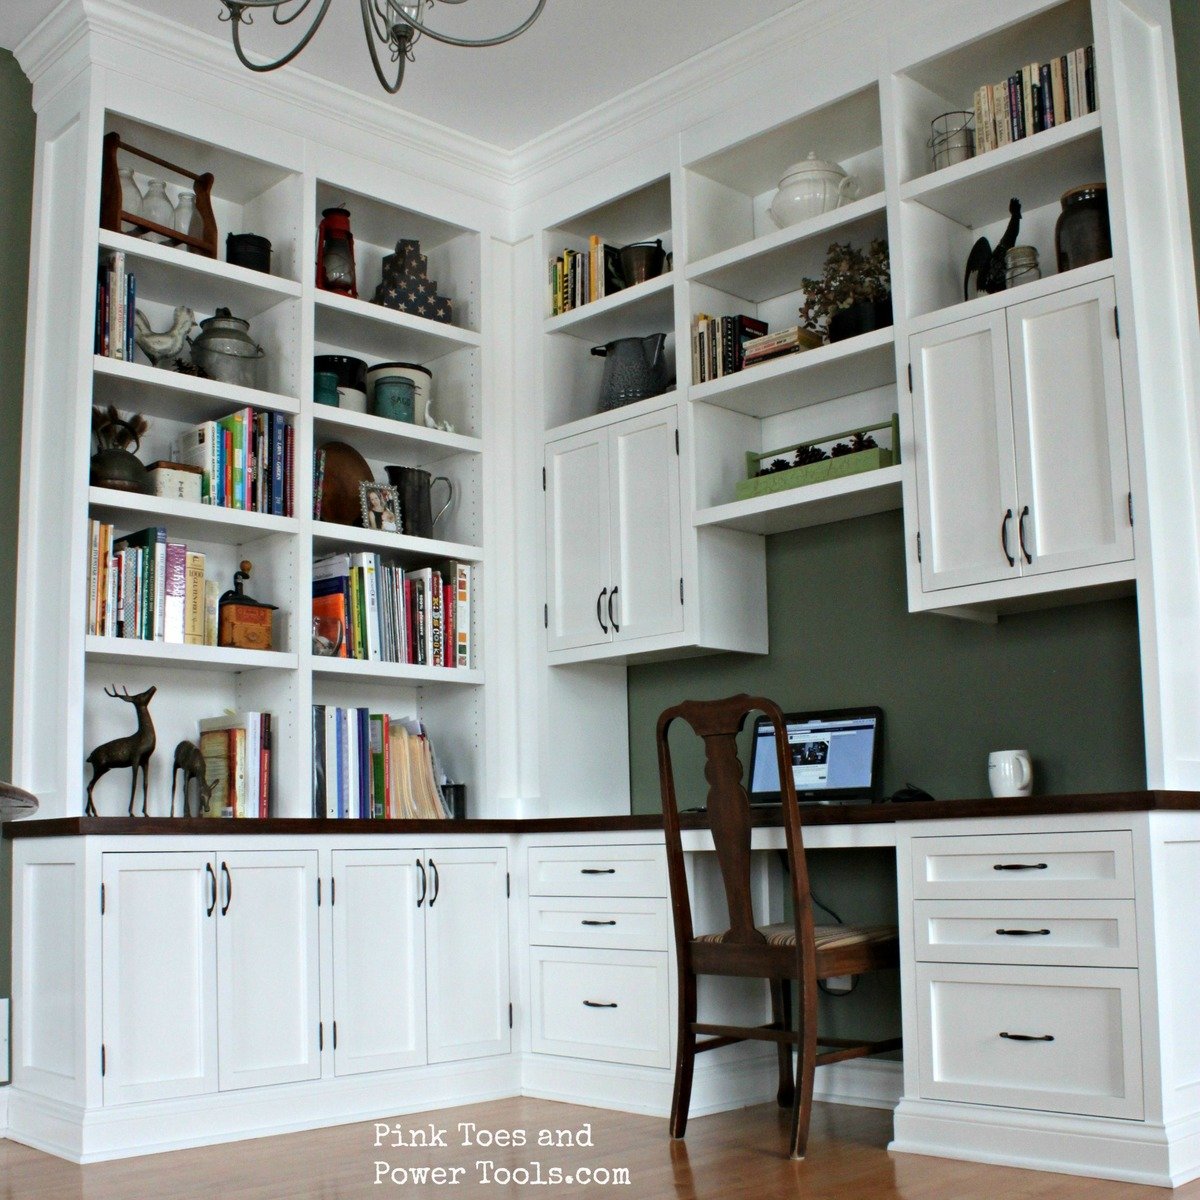
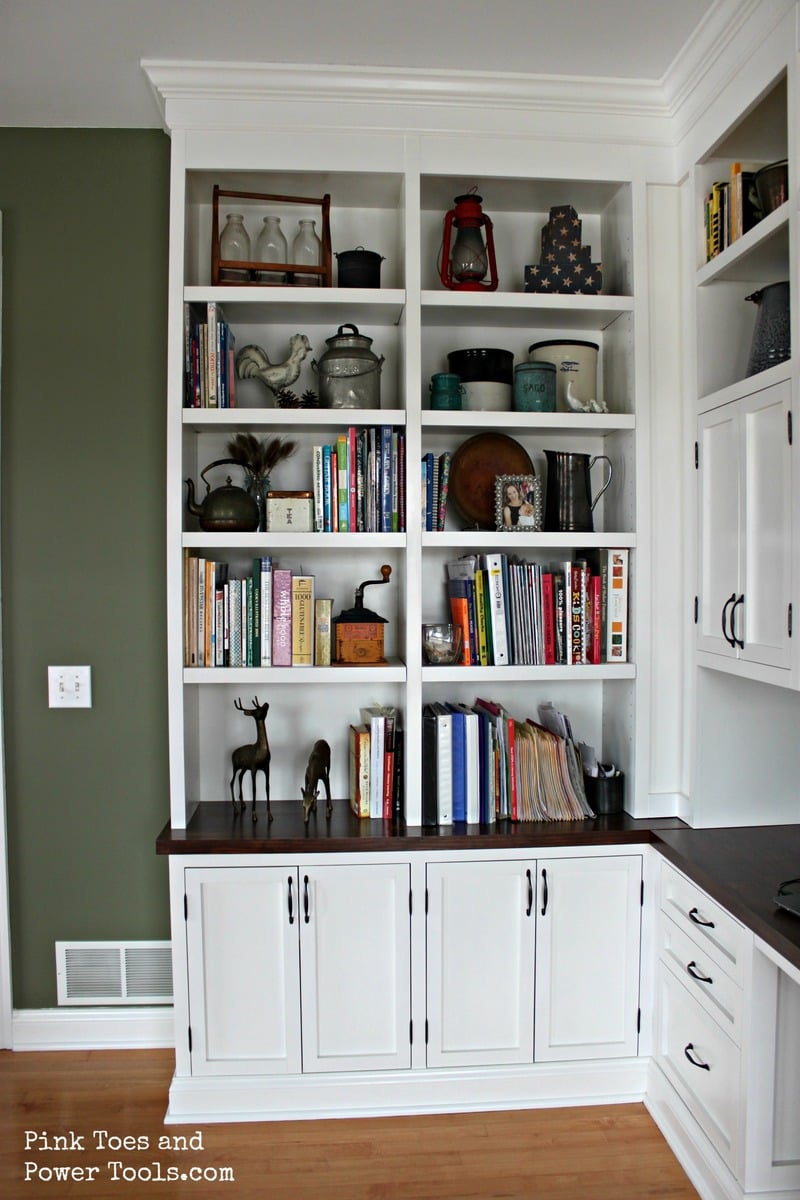
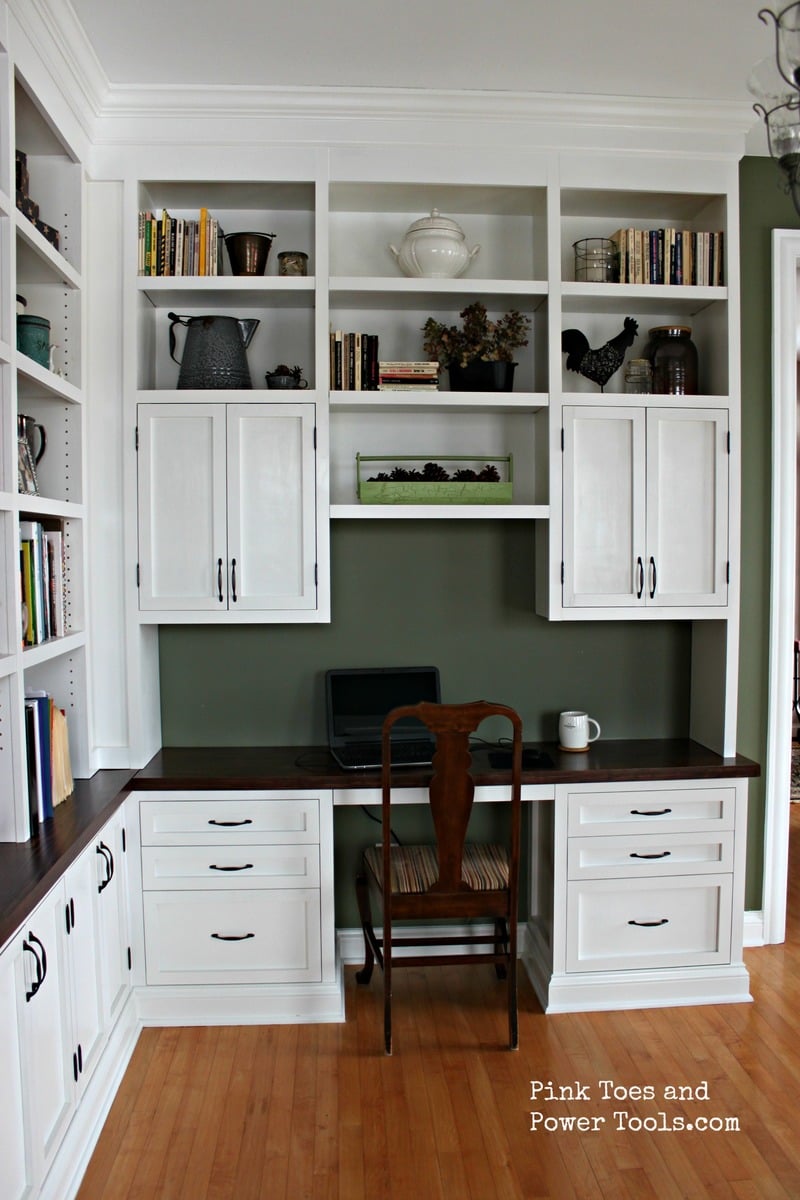
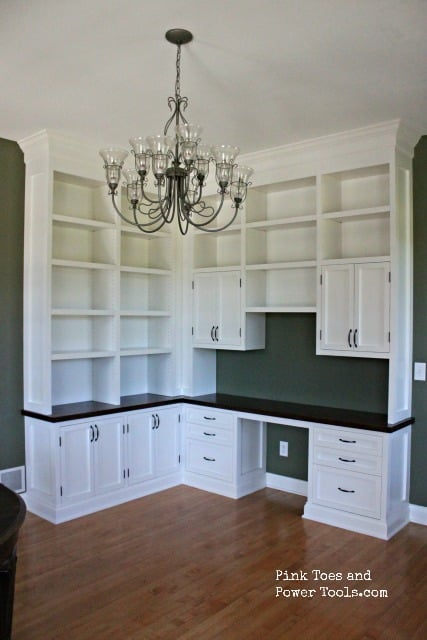
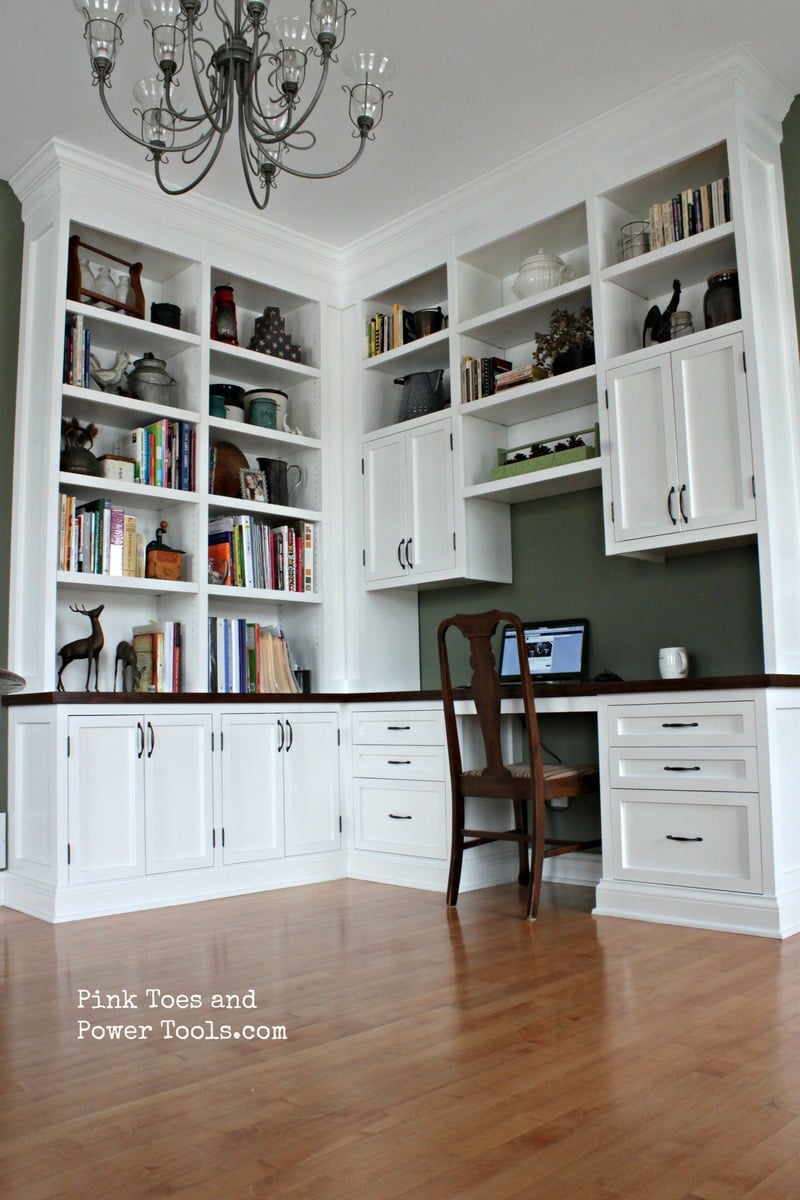
I didn't really follow any specific plan from Ana to build this project (I've become better at creating my own plans after putting together several of Ana's project plans--I owe Ana big time for getting me started in building!), but I did study her kitchen cabinet plans in order to put this together.  Up until now I've done mostly stand-alone projects and this was more like a small kitchen plan than anything I've done before.  This took a LOT of time to complete, but it has been a fantastic addition to our home for organization and aesthetic appeal. 

It is constructed of plywood and pine faceframes.  I used a Kreg Jig to construct most of it, including the drawer and door fronts.  The desktop has a 3/4" plywood base with a pine edge-glued panel on top of that with a pine edging. 

The estimated time investment was way more than 20 hours!  It took every minute of free time for 2.5 months to complete this.  But I was working alone, so you can cut that down significantly with help ;)

The link to my blog about this project contains links to all the posts I wrote up during this build. 

Estimated Cost
Approximately $900
Estimated Time Investment
Week Long Project (20 Hours or More)
Finish Used
White paint with a satin polycrylic topcoat. Sand well before the first coat and then with 220 grit sandpaper between each coat of paint (1 coat primer, 2 coats white paint). Sand with 320 grit between each coat of topcoat for 3 coats. I did use a HVLP sprayer (Woodcraft's $35 version with a large air compressor) but I have finished other projects using a foam roller and foam brush that gets really close to the spray finish--it just takes longer.
Recommended Skill Level
Advanced

Comments

Michael K

Mon, 02/23/2015 - 03:52

The time and effort you put in to this project was well worth it! I'm inspired.

Jelly Cupboard

Submitted by emilyr on Mon, 04/02/2012 - 18:15

Ever since I saw this cupboard, I wanted it. So when I got a free day I jumped at the chance to build it. I love it! The only problem is trying to figure out where I want to put it.

Built from Plan(s)
Estimated Cost
$30-40
Estimated Time Investment
Afternoon Project (3-6 Hours)
Finish Used
Porter's Prussian Blue and black spray paint
Recommended Skill Level
Beginner

Comments

tommyc325

Thu, 02/19/2015 - 19:11

Hi Ana - I dont mean any disrespect but how do you figure this project costs $30-40. I bought just the boards no hardware or plywood and its cost me $60. Pine #2.

Please let me know your thoughts and where you buy your wood from.

Bander

Fri, 02/20/2015 - 12:00

The cost estimate is from emilyr, posted almost three years ago. Lumber prices fluctuate, but $30-40 is still quite low. I estimate about $100 to buy the lumber (pine) on the shopping list from Ana's plan at current prices in my area.

Fireplace Mantle with Drawers and Hidden Storage

Modified plans to include game storage drawers, a flip open mantle for DVD player and hidden charging port, and hidden cupboards on both sides for DVD storage. I scoured the Internet for months before drawing this up to fit my space and tackling all on my own! I love it and all of my other Ana White inspired projects!
Casey O.

Seasonal And Holiday

Kids Twin Beds

Submitted by amichener on Wed, 05/27/2020 - 08:29

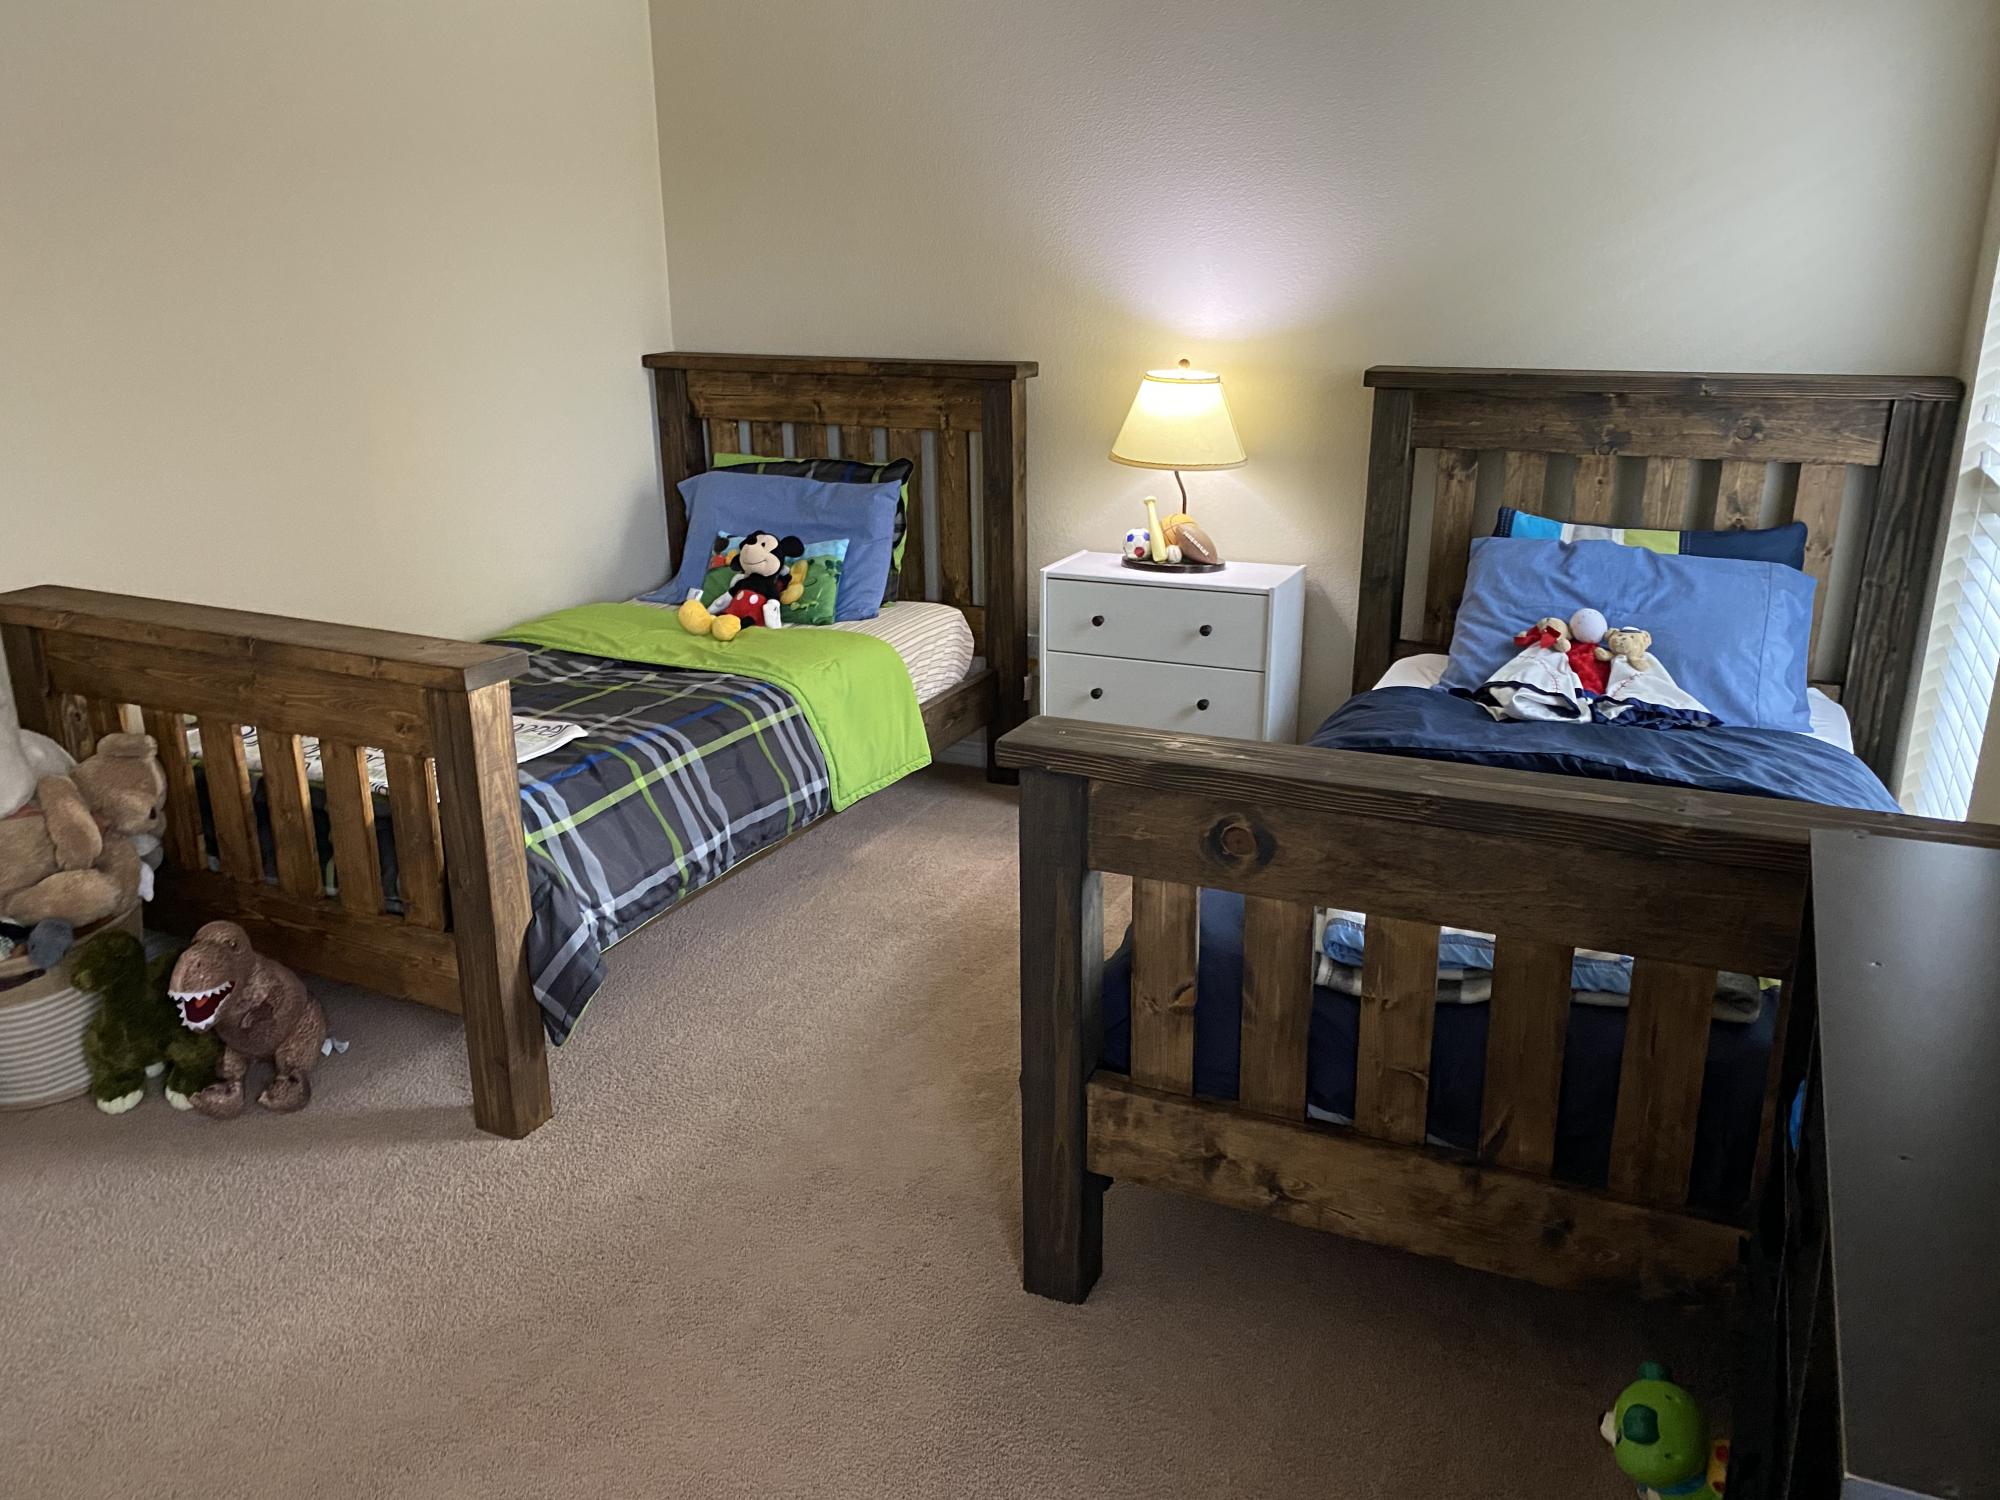
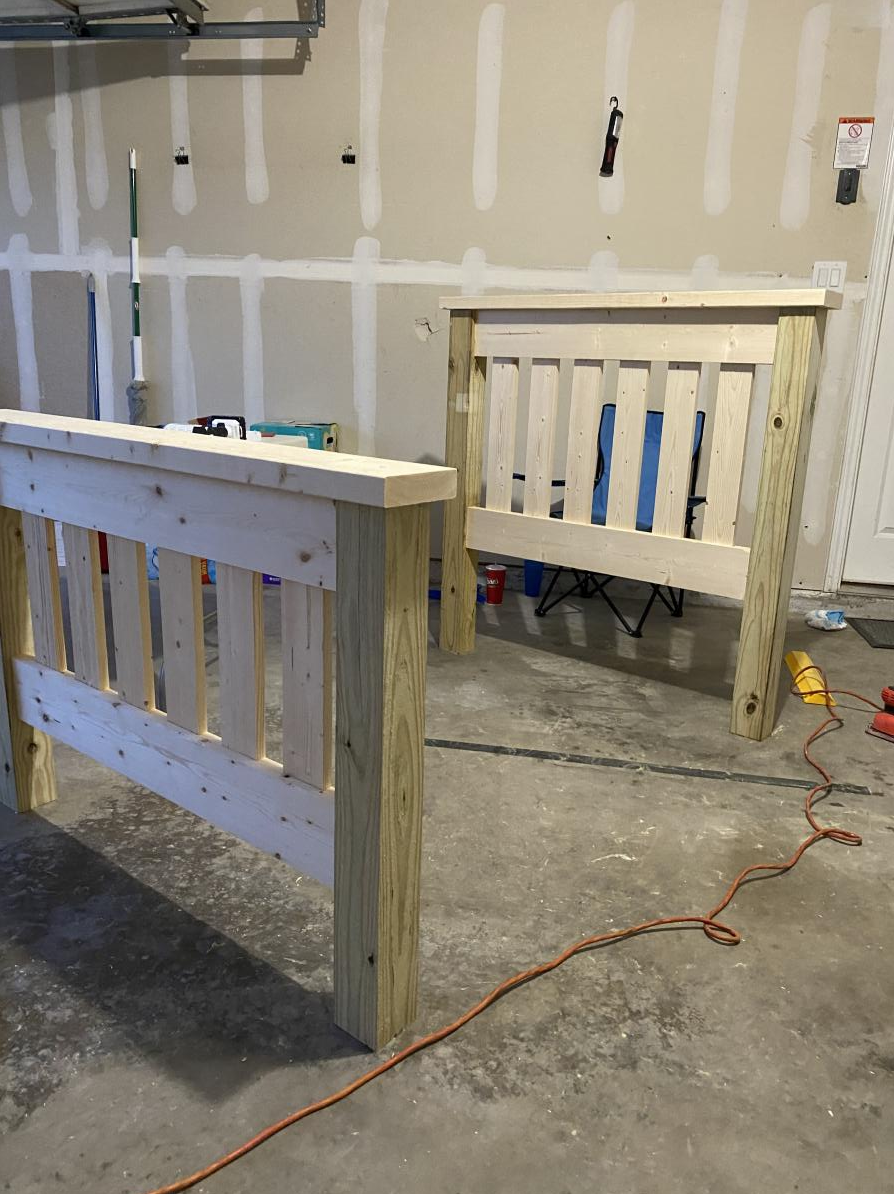
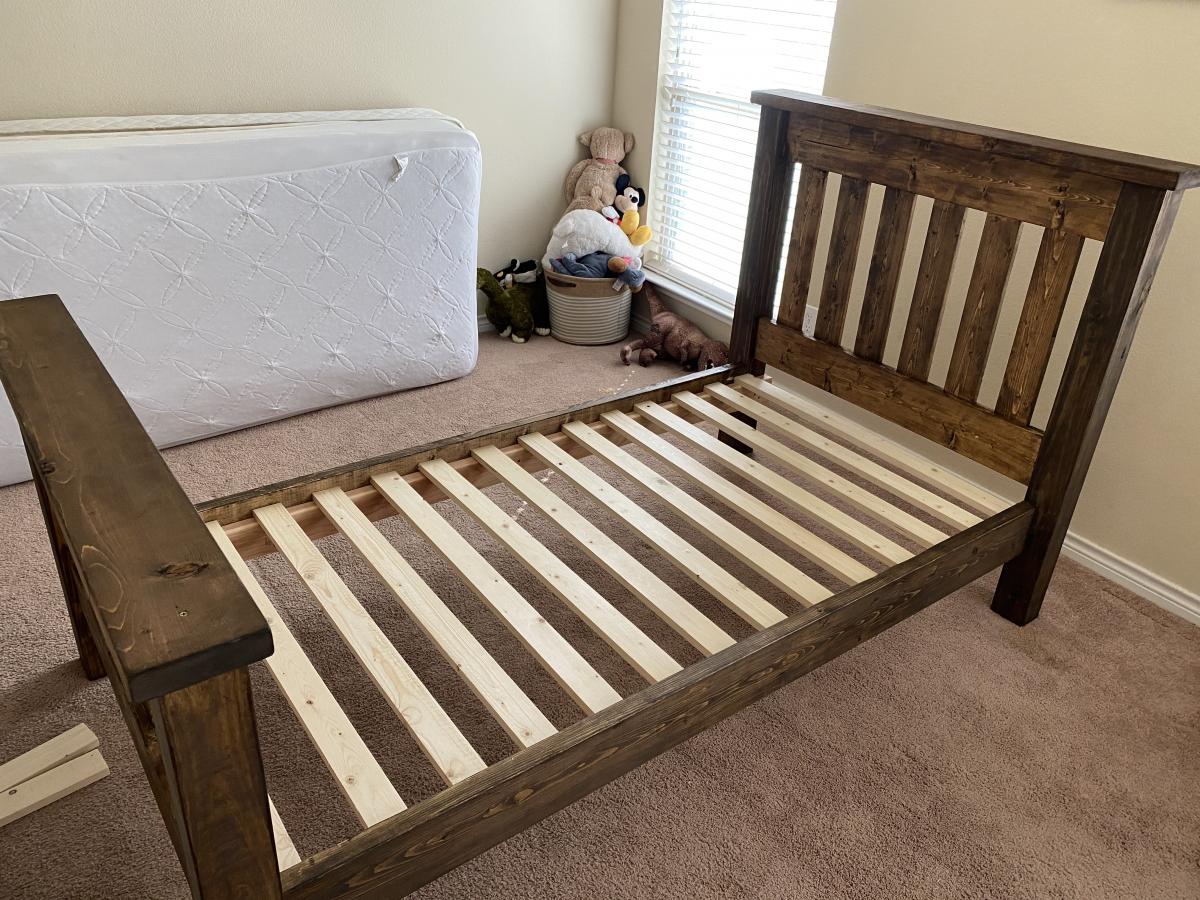
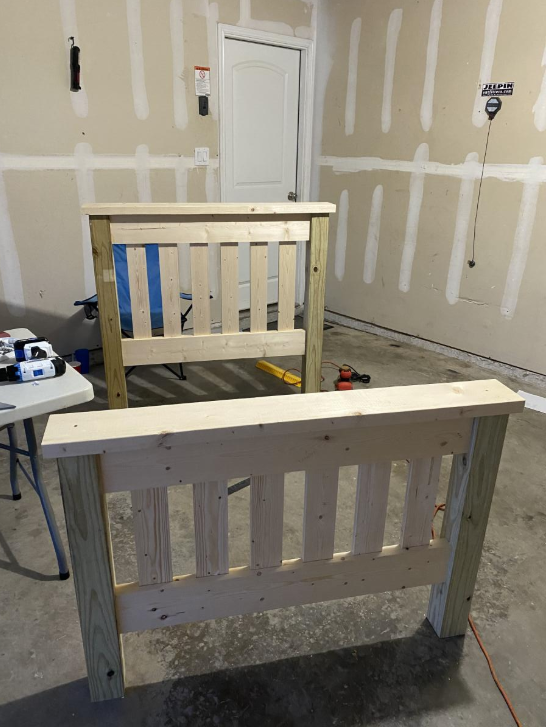
This is my first wood building project and I love the way they turned out. Took my about a week of work here and there on the first one and the second one I built from start to finish in two days. This is called the Simple Twin Bed and it's a great plan, very sturdy. Pocket holes work GREAT on this build. I added pocket holes to the side rails in to the posts for extra support.

Built from Plan(s)
Estimated Cost
$135
Estimated Time Investment
Week Long Project (20 Hours or More)
Recommended Skill Level
Beginner

Modern Farmhouse Bed Frame

Submitted by SofiaTaz on Thu, 01/06/2022 - 23:15

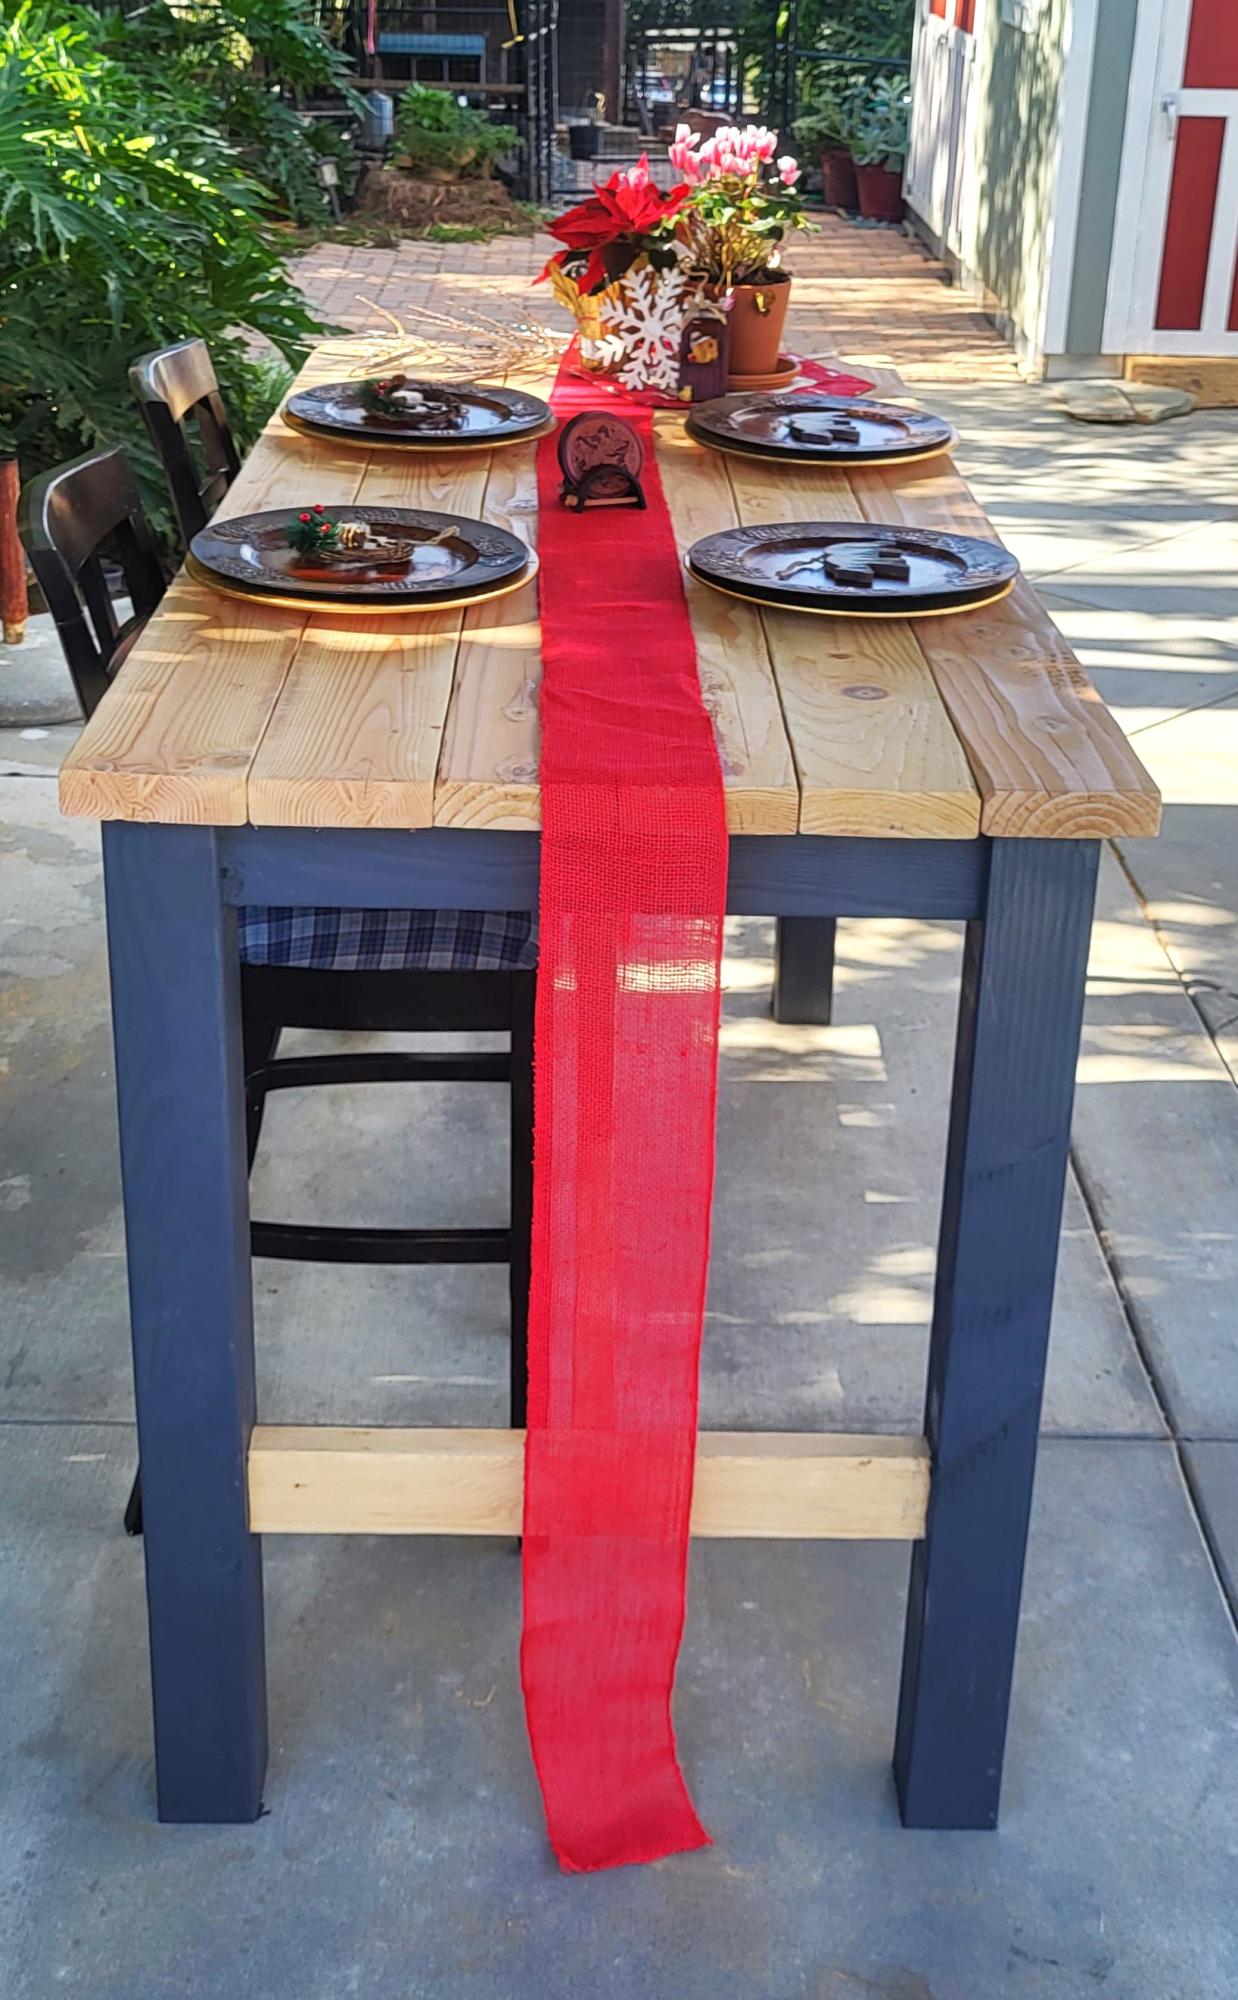
I love how this bed frame turned out! Everywhere that has stain is cedar and the rest is all scrap spruce. Thanks for another great plan Ana!

Built from Plan(s)

Comments

Modern Park Bench

Submitted by TaylorMade on Tue, 03/08/2016 - 18:42

HI Ana! Just wanted to tell you thank you for sharing all your knowledge. I really got inspired reading your book and looking through your website. I was quite intimidated but I finally completed my first build. It feels amazing and I am so grateful for your help! XO Sarah Taylor

Built from Plan(s)
Recommended Skill Level
Intermediate

Comments

Petra's Doggie Day Bed

Submitted by Joni on Sat, 08/25/2012 - 10:33

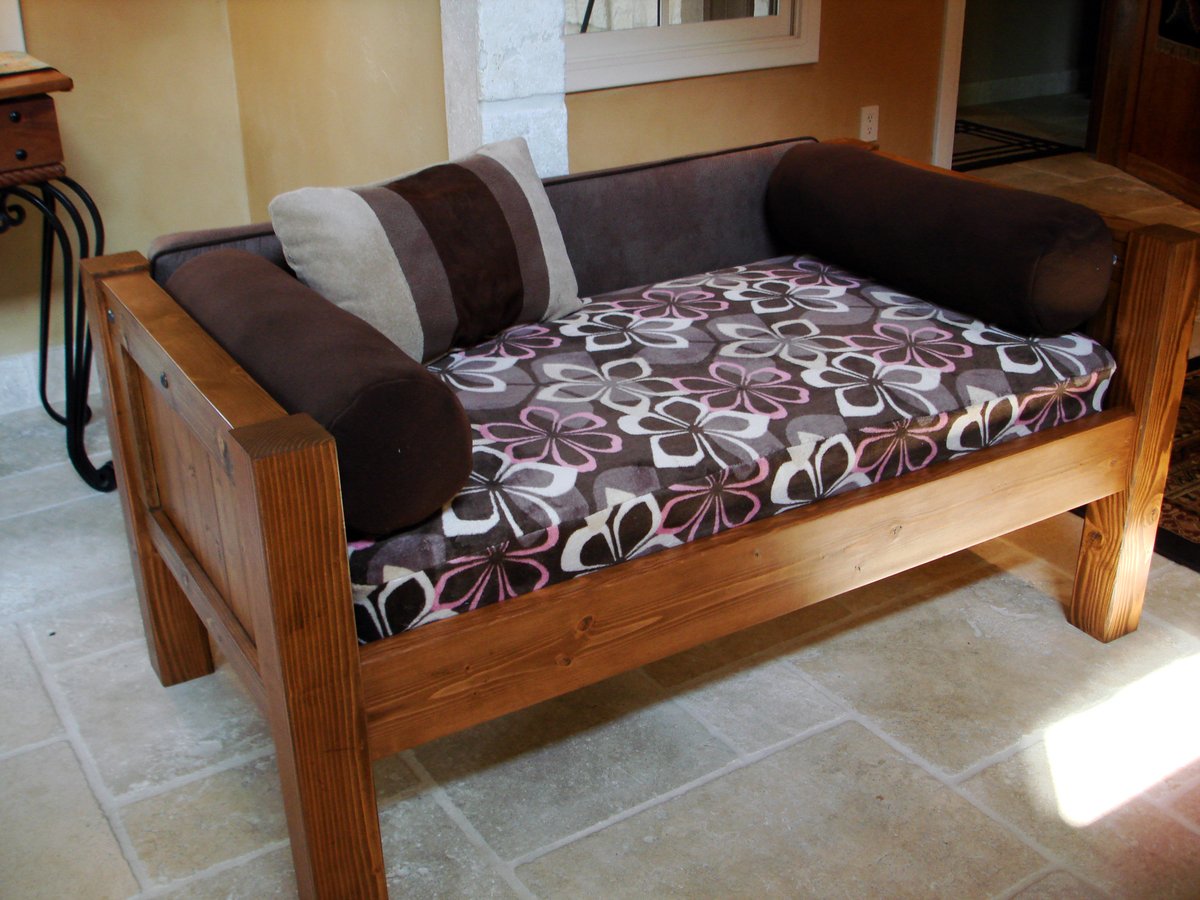
Yes, my husband and I share our bedroom with 6 dogs and an occasional cat (or 4). Our older dog (Petra) has slept on our bed for over 10 years, and she's getting too old to jump anymore. We didn't want her to feel like she was getting kicked off the bed, so I made Petra her very own bed at the end of ours so that she wouldn't feel left out. I was inspired by MurdaRae's dog bed (http://ana-white.com/2012/06/doggie-daybed), and thought it was genius to use a toddler/crib bed. So I went looking for plans on Ana-White, and came up with a mixture between a couple of twin bed plans. I love that the plans are easy enough to modify my sizes, and come up with exactly the custom solution that I need. This was my first big project using Bri-Wax. The last one was kind of a disaster when the wax changed the stain color to something not-so-great. With this project, I learned to wait at least 2 weeks before attempting to wax it. I was blown away with the results. It is a beautiful subtle satin finish that feels great to the touch. Plus, I can easily touch up all the dog fingernail scratches that will inevitably occur. When I re-assembled the bed in my bedroom, I actually nicked it in a few places. No problem -- slap on some more Bri-Wax! My Bri-Wax was 11 years old, and pure liquid. I tossed it in the fridge (per Bri-Wax's recommendation), and it was as good as new. The only real problem I had with this project was leaking sap from one of the 4x4s. I'm still fighting this today. In talking with Rustoleum/Zinsser reps, they said that no sap could penetrate their "Seal Coat" shellac product. After 5 coats, the sap is still penetrating, but only if I turn it on it's side or upside down. I'm still baffled. I made the mattress cover out of a dog blanket, and made the cushions from some remnant fabric (suitable for dogs and weekly washing), so this was a fairly inexpensive project. It was a success because Petra slept in her bed from the fist night and loved that she had all the room to herself, and no boston terrorists (I mean terriers) attempted to bother her.

Estimated Cost
$65 for Wood, $60 for Crib Mattress, $7 for stain, $9 for Decorative Clavos
Estimated Time Investment
Weekend Project (10-20 Hours)
Finish Used
Combination of Minwax Water-based stains: 6 parts Colonial Pine: 1 part American Walnut, followed 4-5 Coats Bri-Wax (Light Brown)
Recommended Skill Level
Beginner

Comments

spiceylg

Sat, 08/25/2012 - 18:41

You did an amazing job! Looks professional and at first glance, you definitely can't tell it's a dog bed.

StacieM

Sun, 08/26/2012 - 10:24

It matches the woods in your bedroom so well and looks great! Also, I love the bolster pillows around the edges. That is something I need to make for our dog bed. Thanks for sharing.

8 Foot Picnic Table

Submitted by milleall on Wed, 07/22/2020 - 12:07

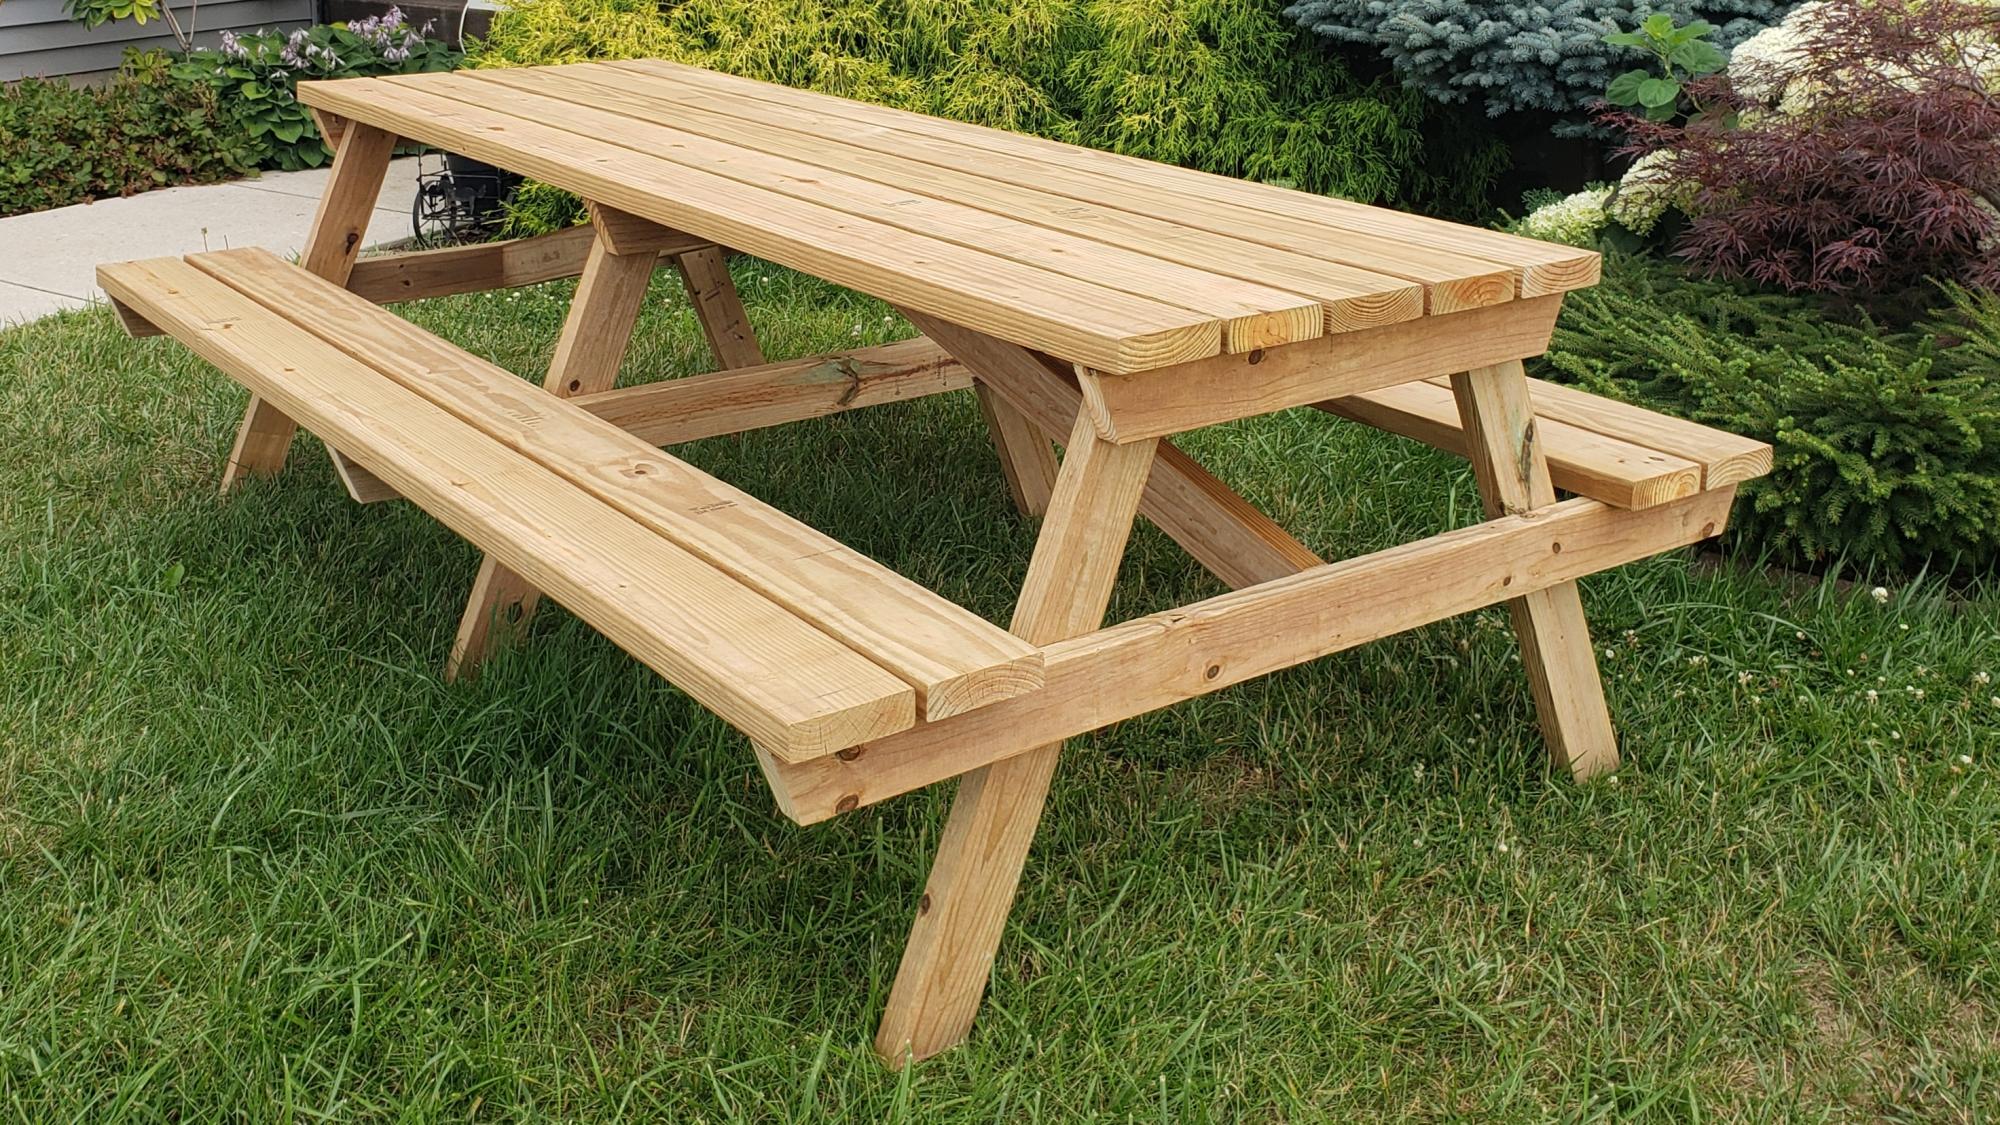
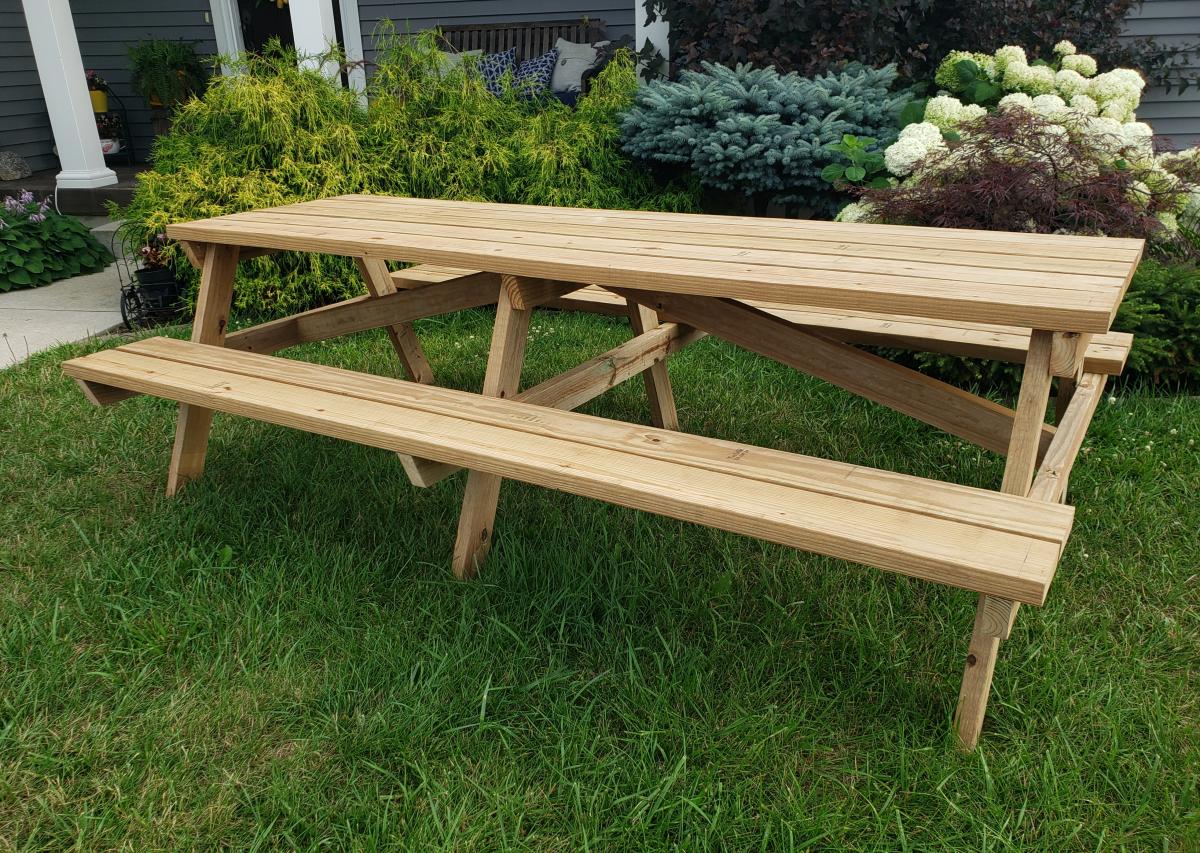
My teenage son and his father took over the bulk of the building duties this time. We chose to use treated lumber as untreated lumber with finish applied doesn't do well in Michigan weather in my experience. We made it more beautiful by using the treated lumber in cedartone. We used pocket holes to attach the top and seats to the supports to make for a smooth appearance. This is one large and heavy table! The plans were accurate and the build was fairly simple, but having many hands made working with the large piece easier.

Built from Plan(s)
Estimated Cost
$150
Estimated Time Investment
Afternoon Project (3-6 Hours)
Finish Used
None
Recommended Skill Level
Intermediate

Comments

Seasonal And Holiday

Footstool

Submitted by MandyM on Sun, 09/20/2020 - 14:22

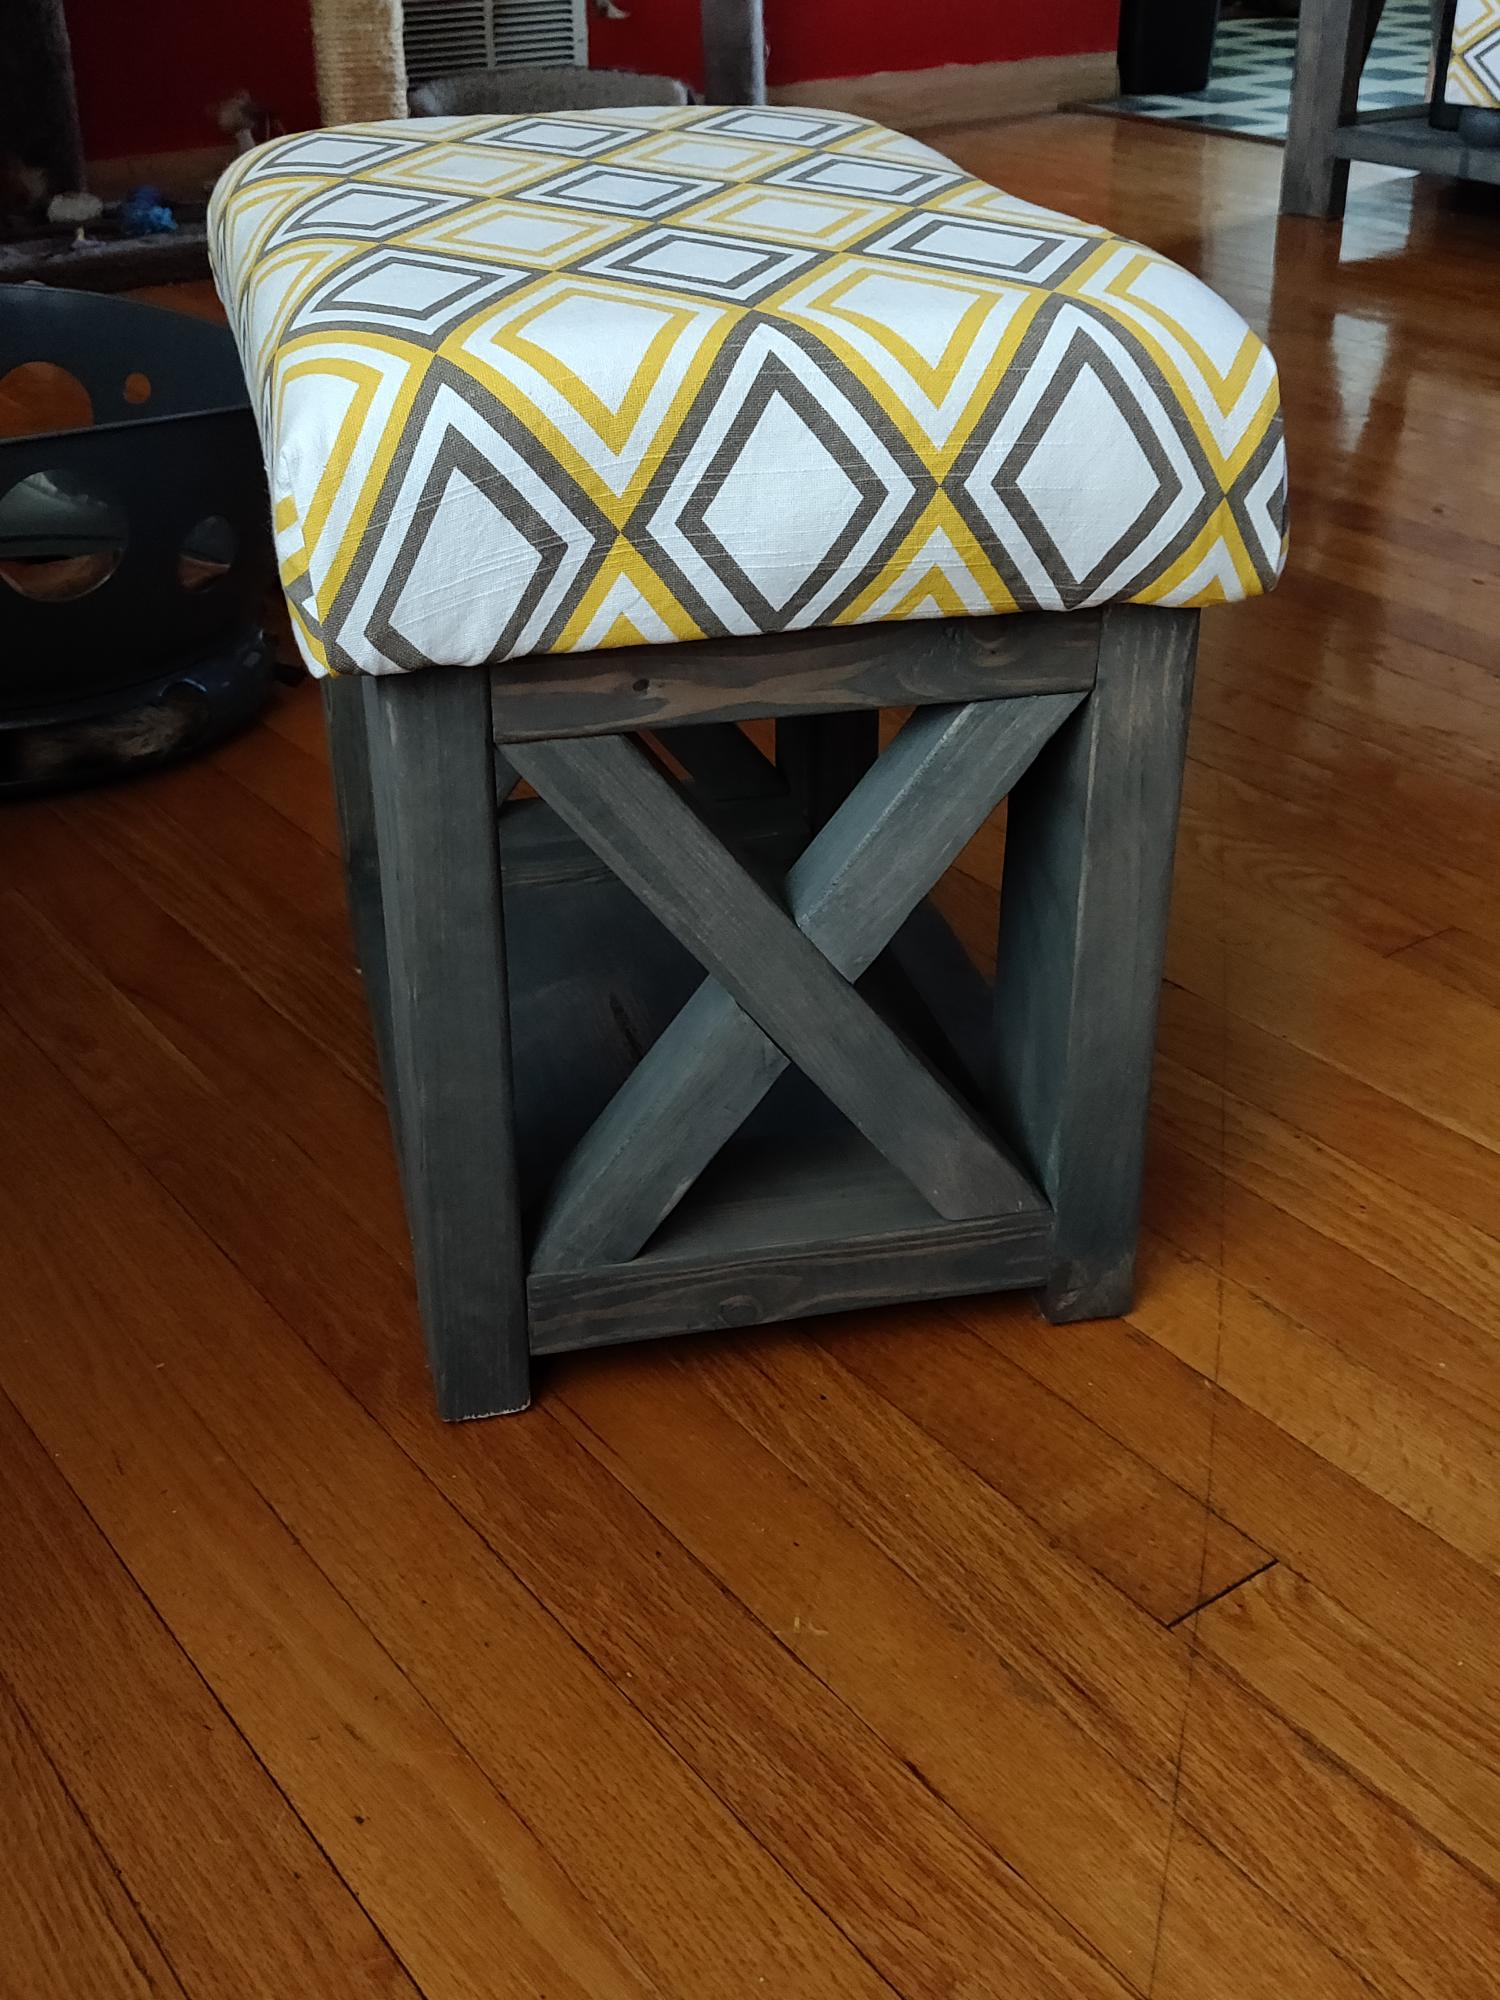
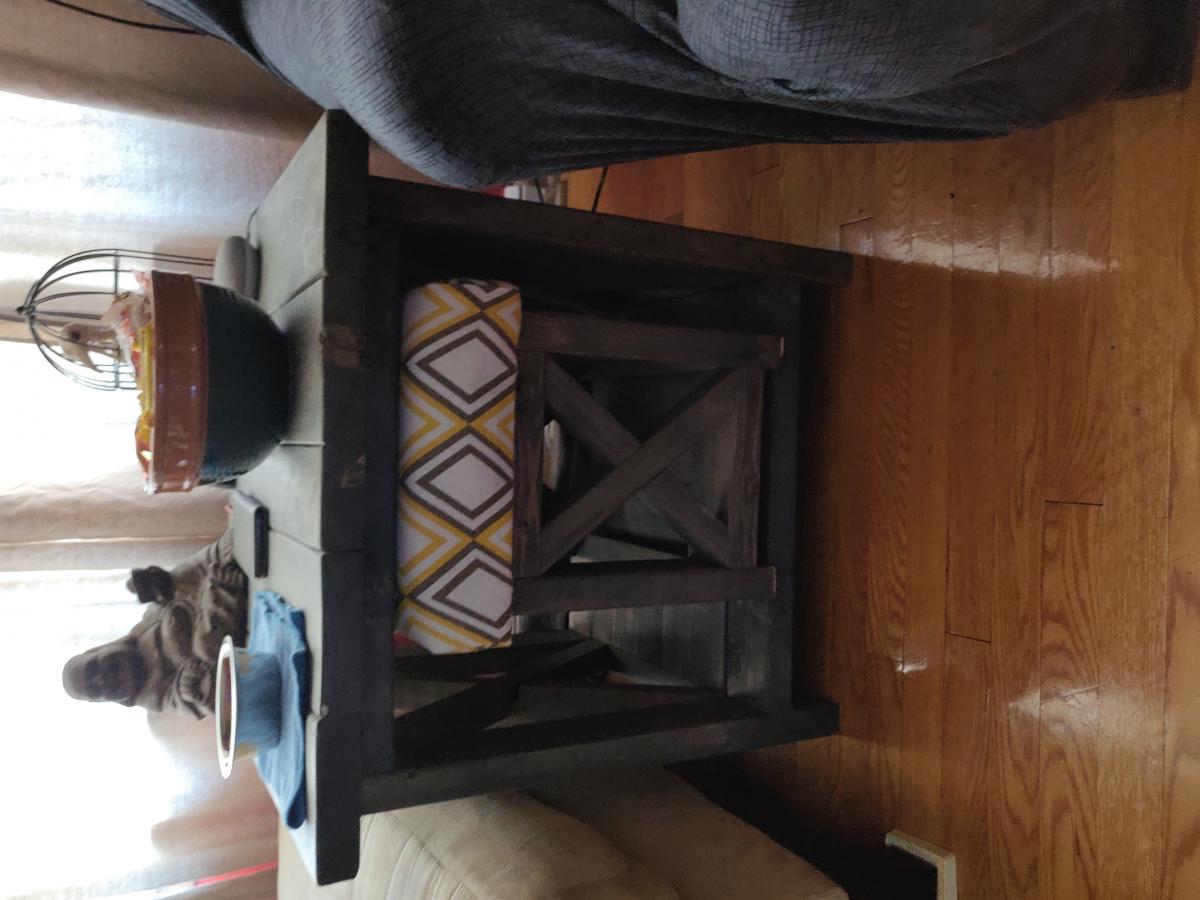
Made a footstool by modifying the rustic X end table plans. I used all scrap wood, foam, and fabric from my various stashes so this was free for me to make. Also, on all of my x tables, I use a dado blade so the exes are intact and not cut and screwed.

Built from Plan(s)
Estimated Cost
$0
Estimated Time Investment
Afternoon Project (3-6 Hours)
Finish Used
Charcoal grey stain

Comments

Golf Club Locker

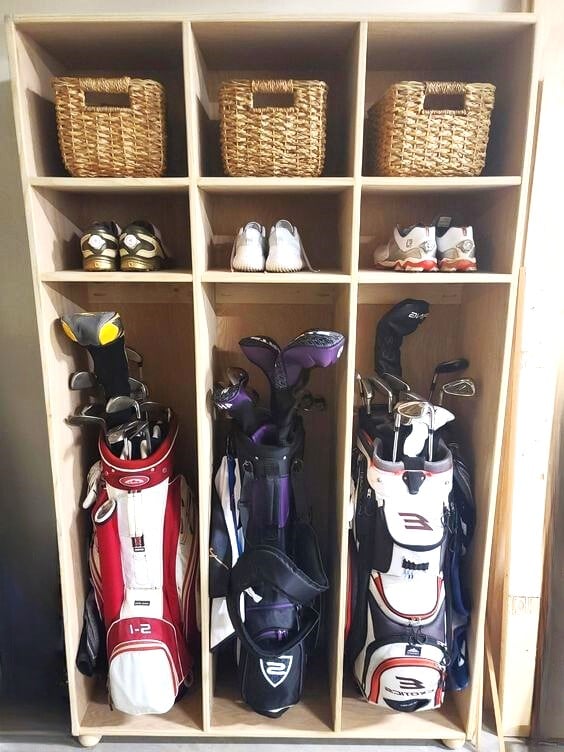
Utilized the plan for the Locker Book Shelf-Full Size and modified it a bit to convert to a golf club locker. Definitely keeps all the clubs, shoes, and accessories organized and eliminates the clutter. My wife loves it, course she added the baskets, which makes it look awesome! Actually this is how I stumbled upon Ana White's website. I was looking high and low for a plan for golf club lockers, and found Ana's website as part of the process. Best google search I've ever done!

Built from Plan(s)

Comments

Back