Community Brag Posts
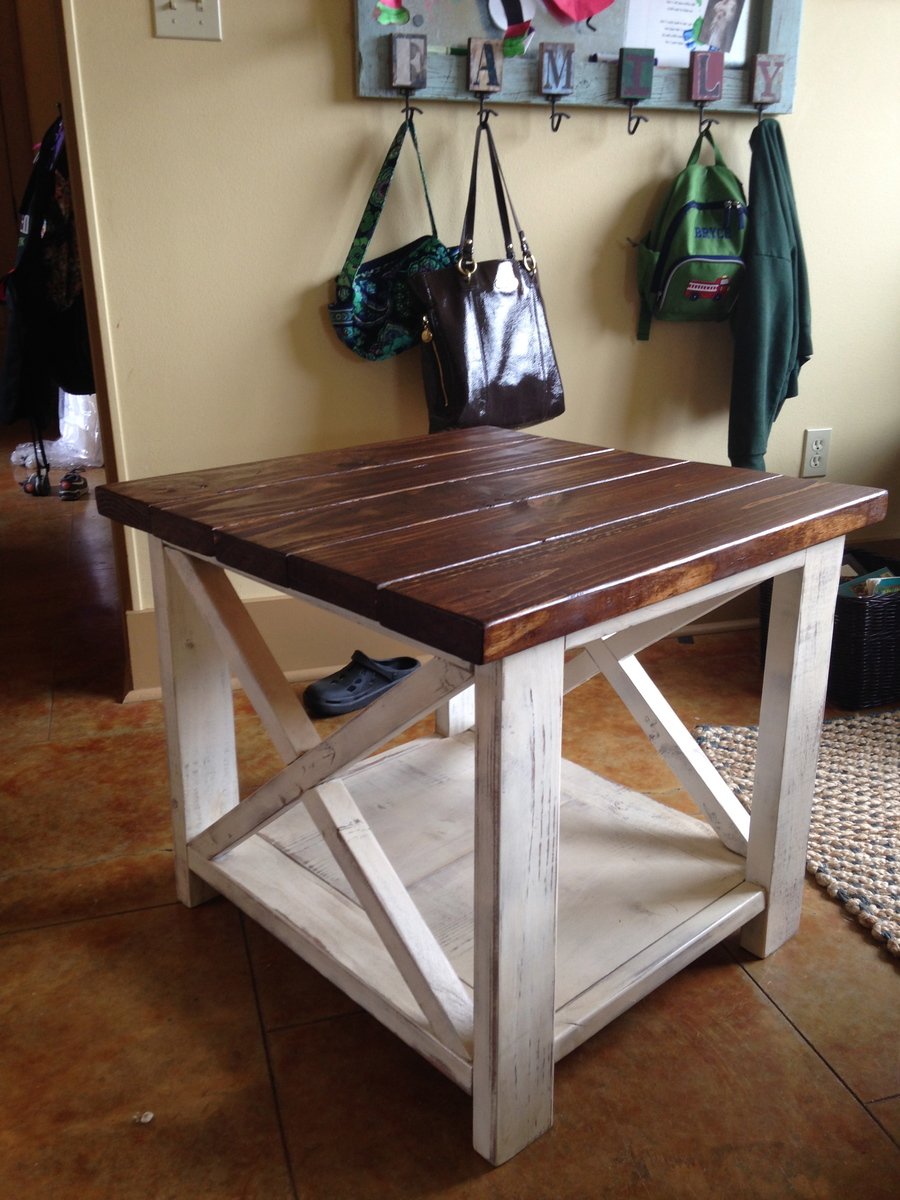
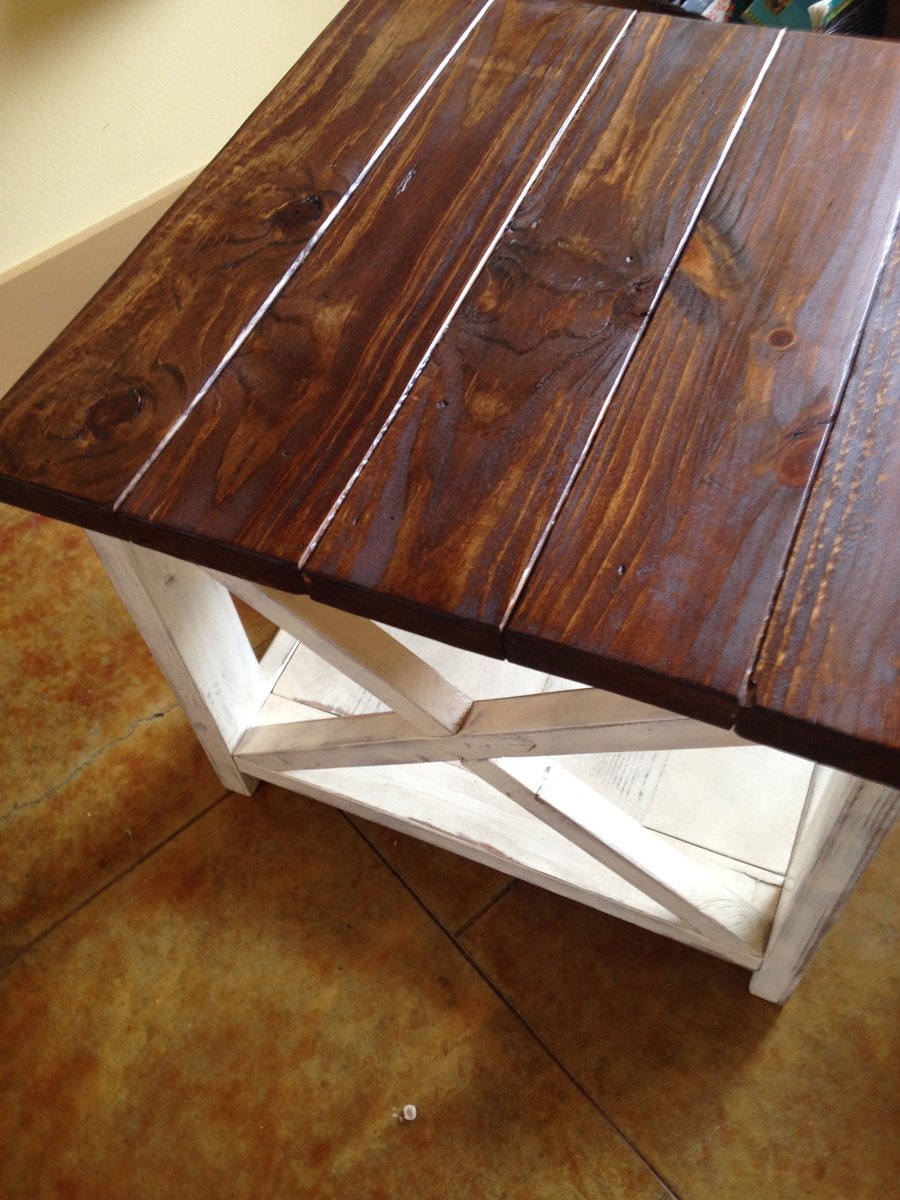
The Rustic X side table
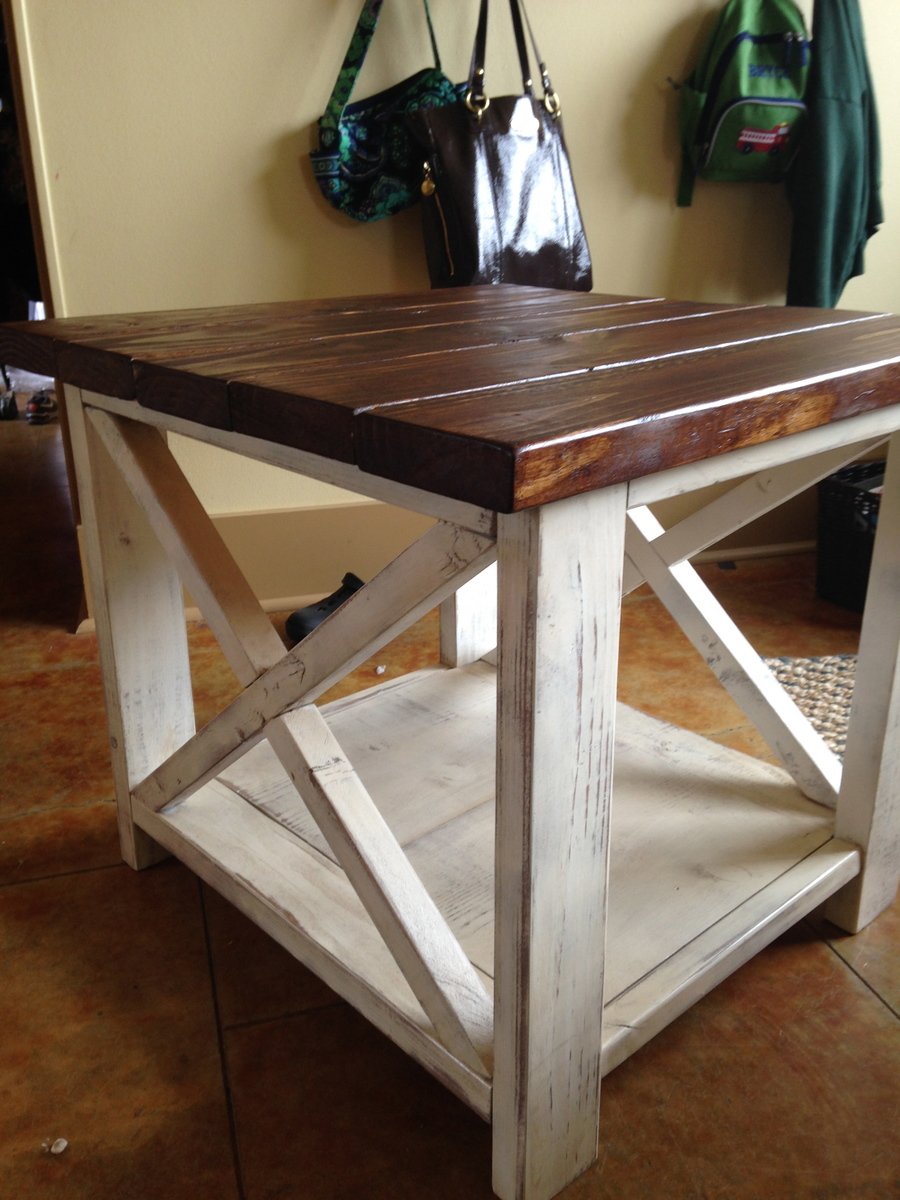
This is my first EVER project, but I have already made several more!! I love this site and the new found confidence I have to make things for my home! Keep the plans coming!!!
Built from Plan(s)
Estimated Cost
Nothing! I used only what we had!
Estimated Time Investment
Day Project (6-9 Hours)
Finish Used
Early American top and Heirloom white base, sanded with stain rubbed on the edges!
Recommended Skill Level
Starter Project
Grandy Console/Couch Table

Thank you for the plans!
I used the following for the wheels, they are AMAZING and dont require you to tear apart any pulleys. These wheels have bearings in them too, which make them slide super quiet and smooth!
Tony S.
Estimated Time Investment
Week Long Project (20 Hours or More)
Finish Used
Early American
Recommended Skill Level
Intermediate
Comments

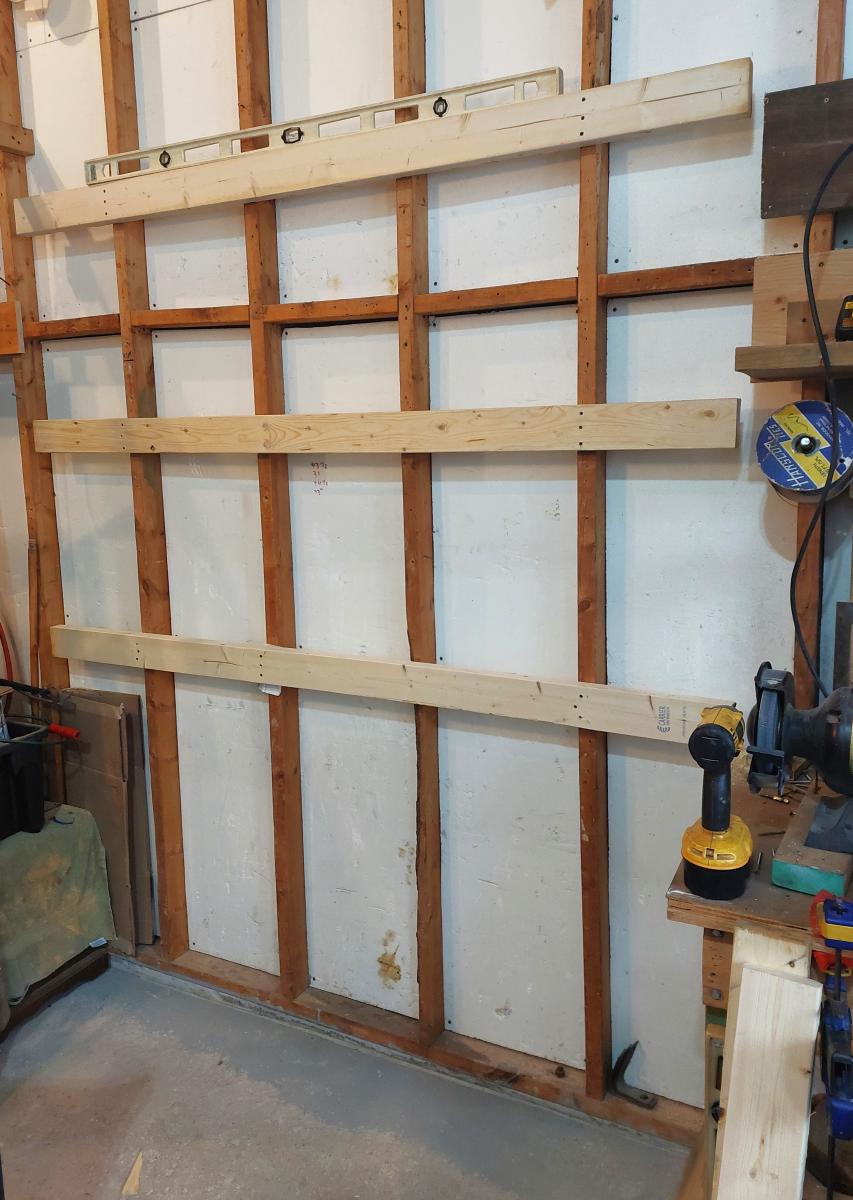
Small Garage Shelves
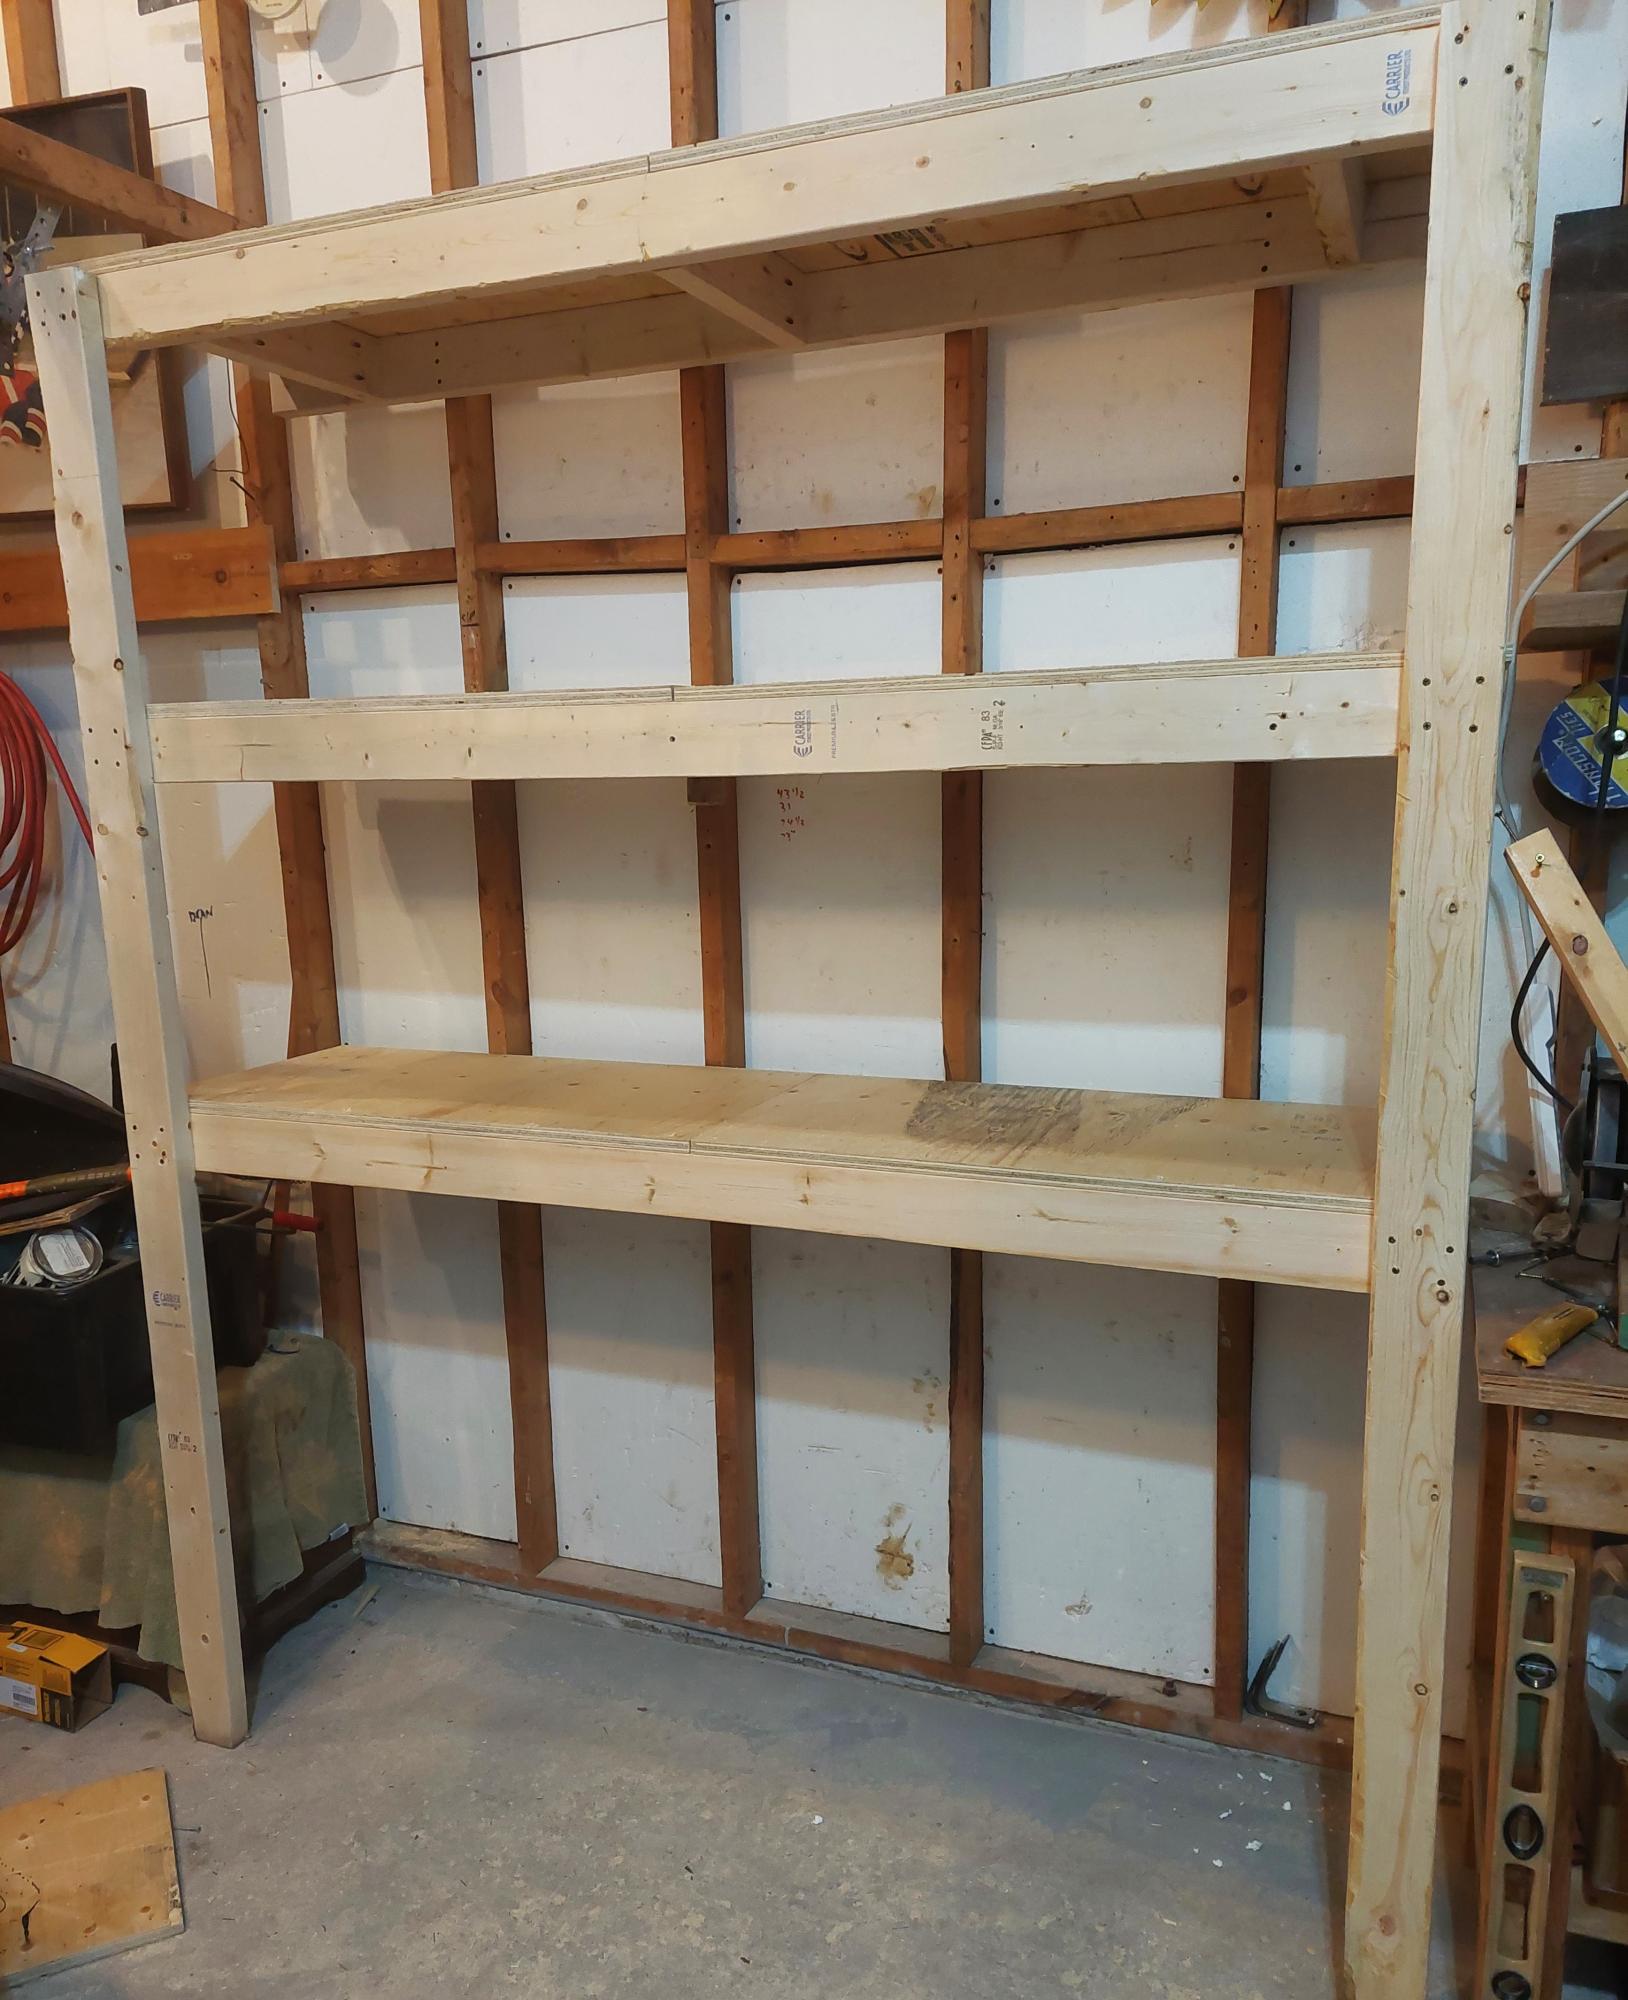
6' long x 18" deep
Dean Clarke in Bobcaygeon Ontario
Built from Plan(s)
Bar Stool
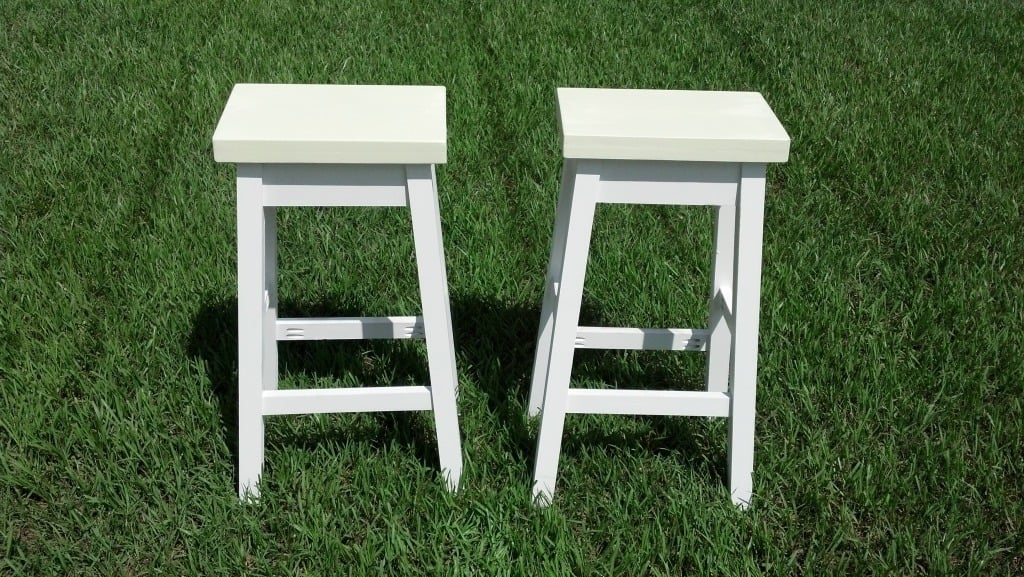
My wife and I needed bar stools for the kitchen and could not find ones we liked. Also, finding ones that were the height we wanted was a challenge. So, after seeing the plans for the Simplest Stool we decided to make them. It was really quite simple with the plans given. Even the angle cuts were not that bad. Thanks for the plans for this awesome stool.
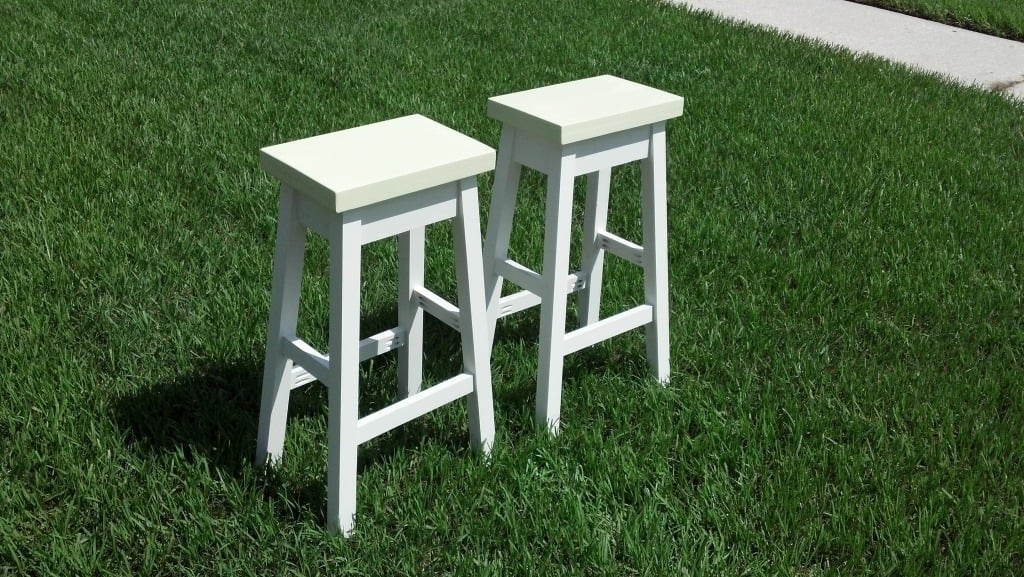
Built from Plan(s)
Estimated Cost
<$50
Estimated Time Investment
Afternoon Project (3-6 Hours)
Finish Used
Painted with urethane top coat
Recommended Skill Level
Beginner
Comments
Wed, 01/02/2013 - 10:37
Hi there My wife loves your
Hi there
My wife loves your design so guess I'll be donning the old tool belt soon .......!
Are there any plans of these to get me going?
Jelly cabinet
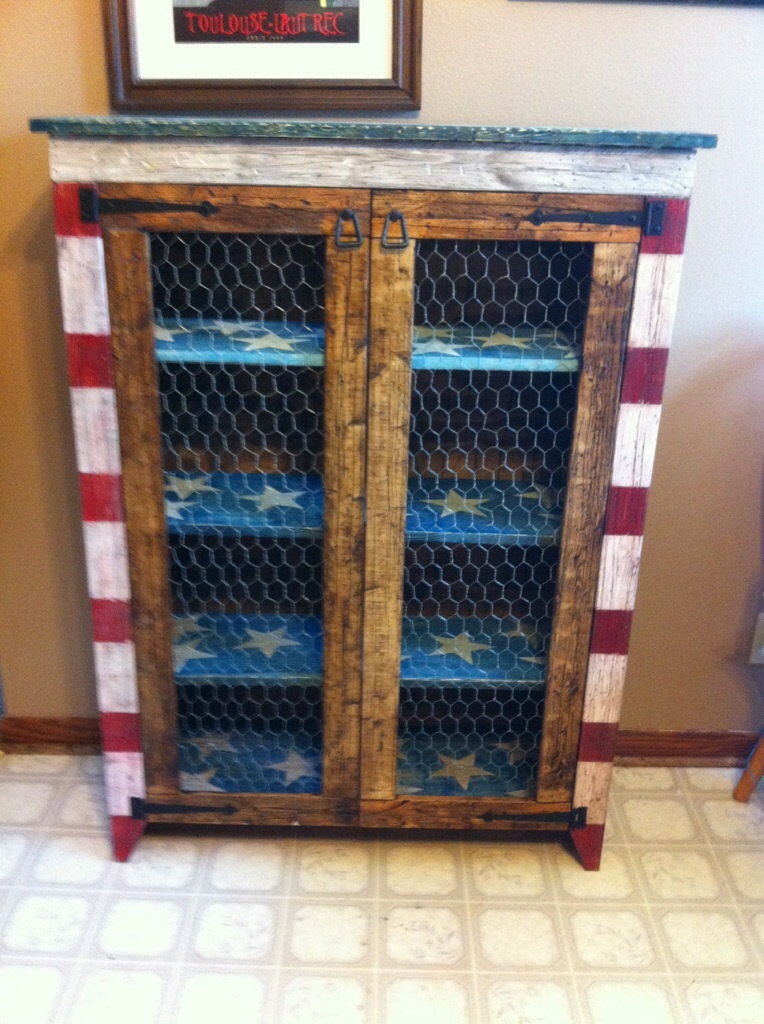
My patriotic pie safe
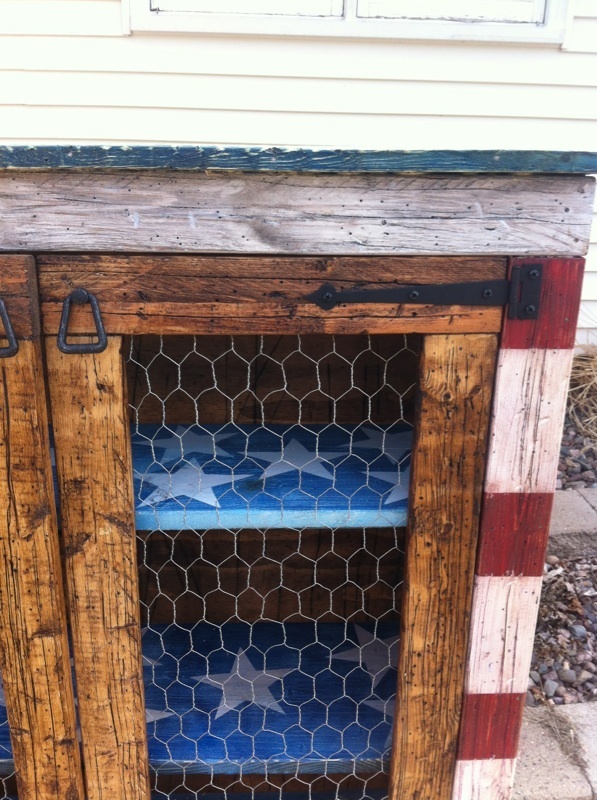
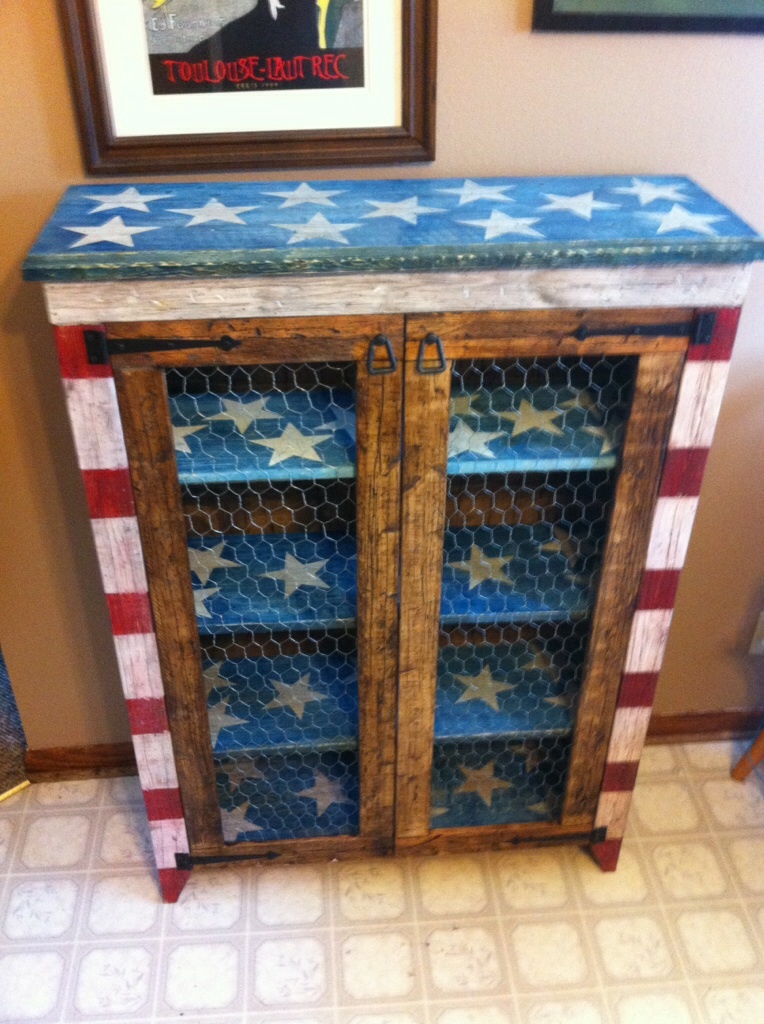
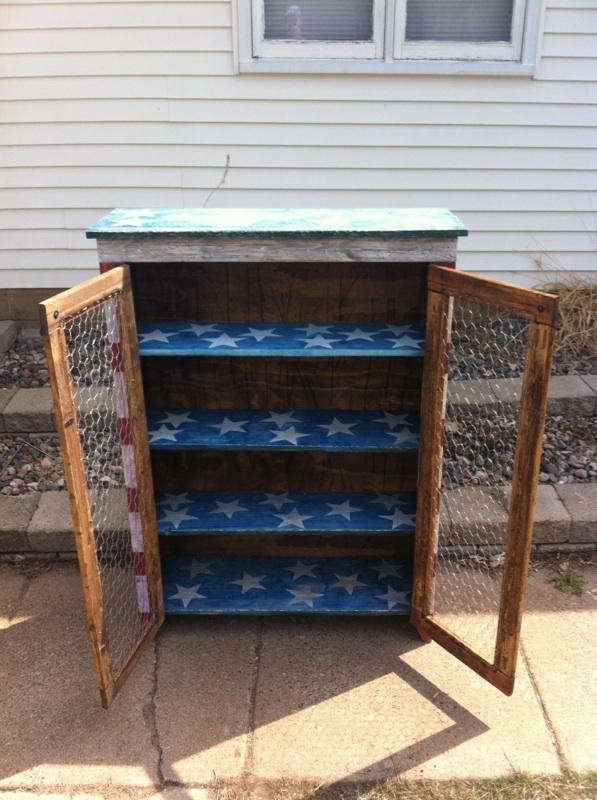
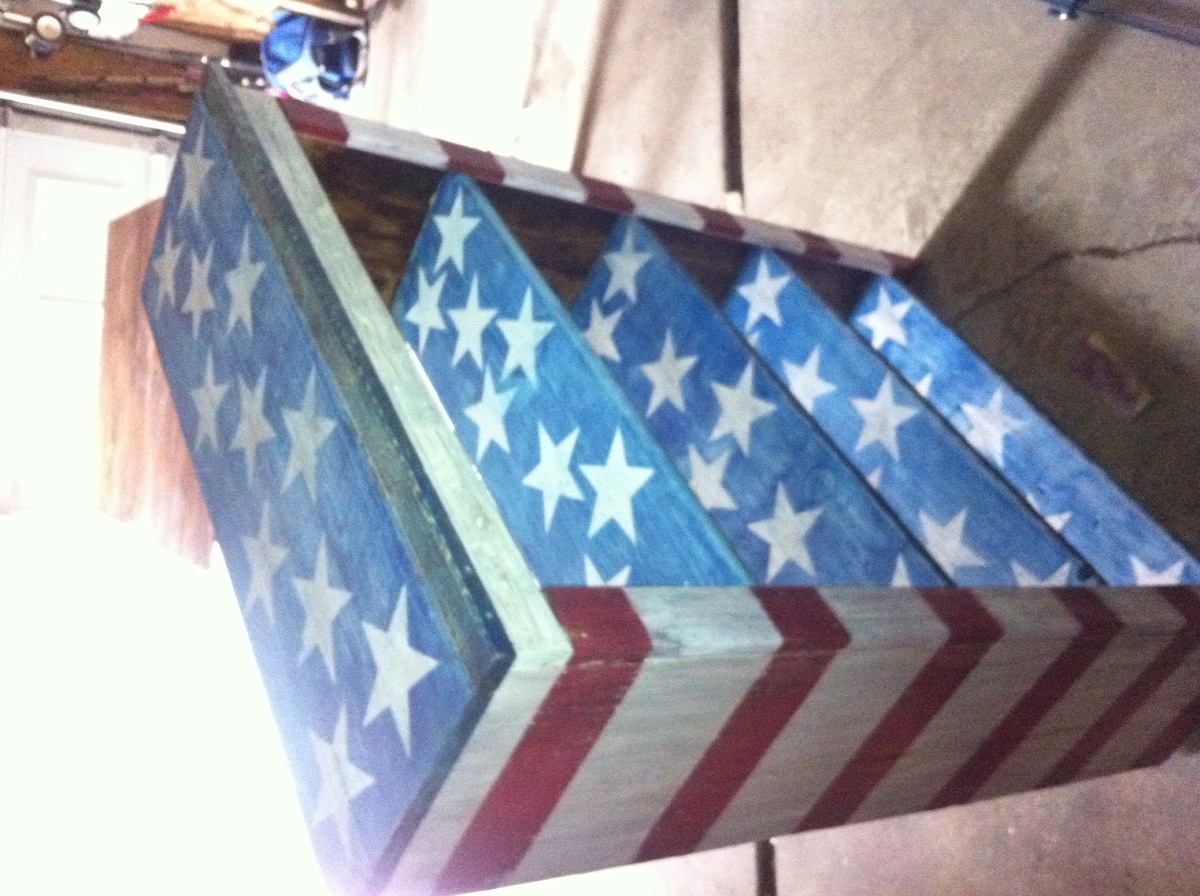
Built from Plan(s)
Estimated Cost
$45
Estimated Time Investment
Weekend Project (10-20 Hours)
Finish Used
Vinegar and steel wool and stray paint
Recommended Skill Level
Intermediate
IGBuilders Challenge Bailey Console
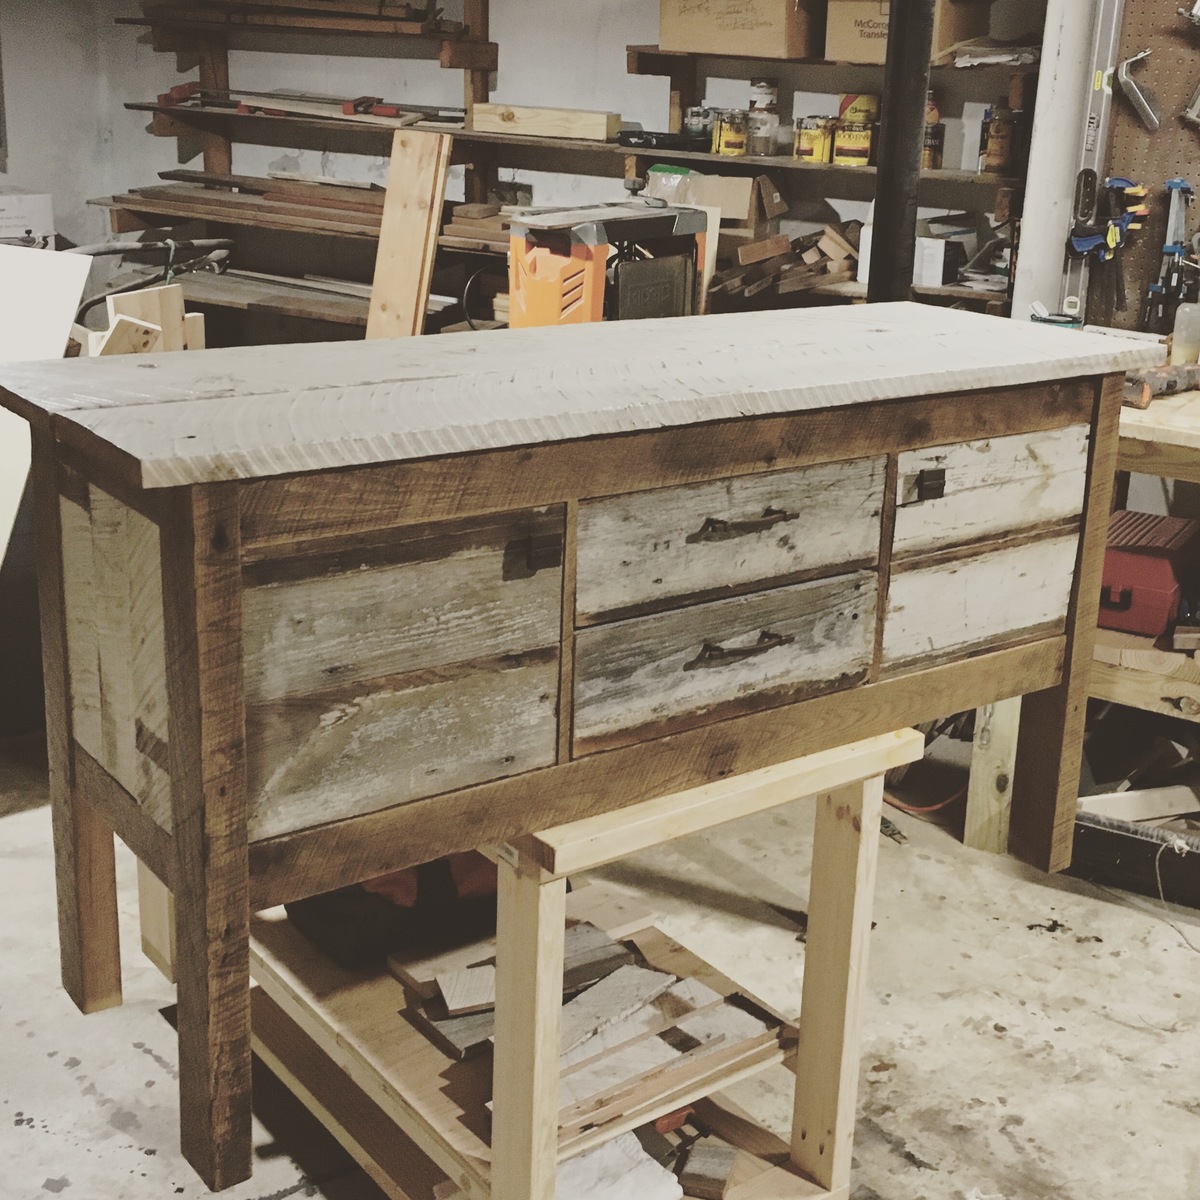
My entry into the IG Builders Challenge. Modified the Ana White Bailey Console a few ways. Instead of 2 large drawers, I installed 2 doors on each end, with 2 drawers in the middle. Century old barn wood used throughout. The legs are reclaimed oak floor joists, front stretchers are oak, rear stretchers are poplar. Heart pine planks users as door and drawers fronts. Heart pine front the same barn used as the top as well. Barnwood skins used on each end and the middle of the backside. Reclaimed shutters were used on the door compartment bottoms, and the rear. I may eventually add a lower shelf with some of the leftover poplar and barnwood skins at a later date.

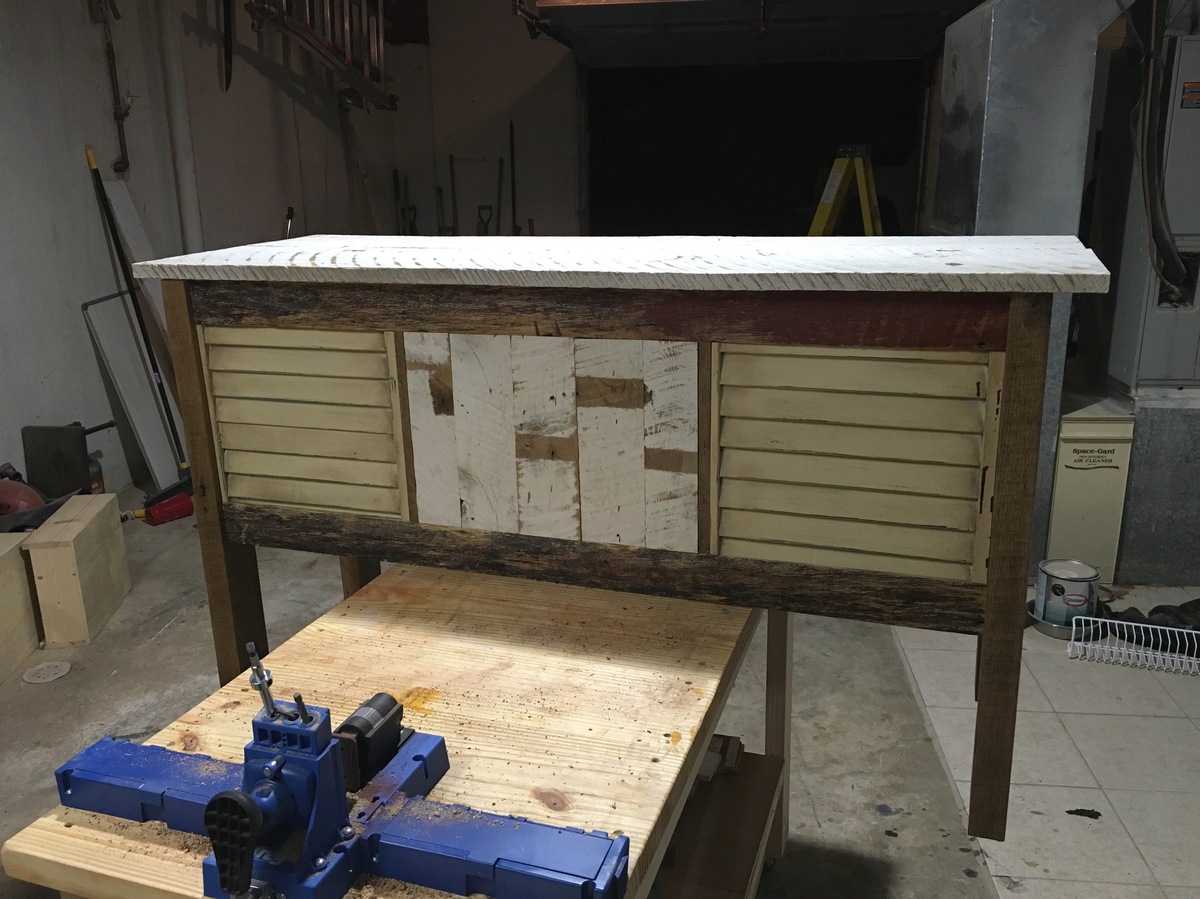
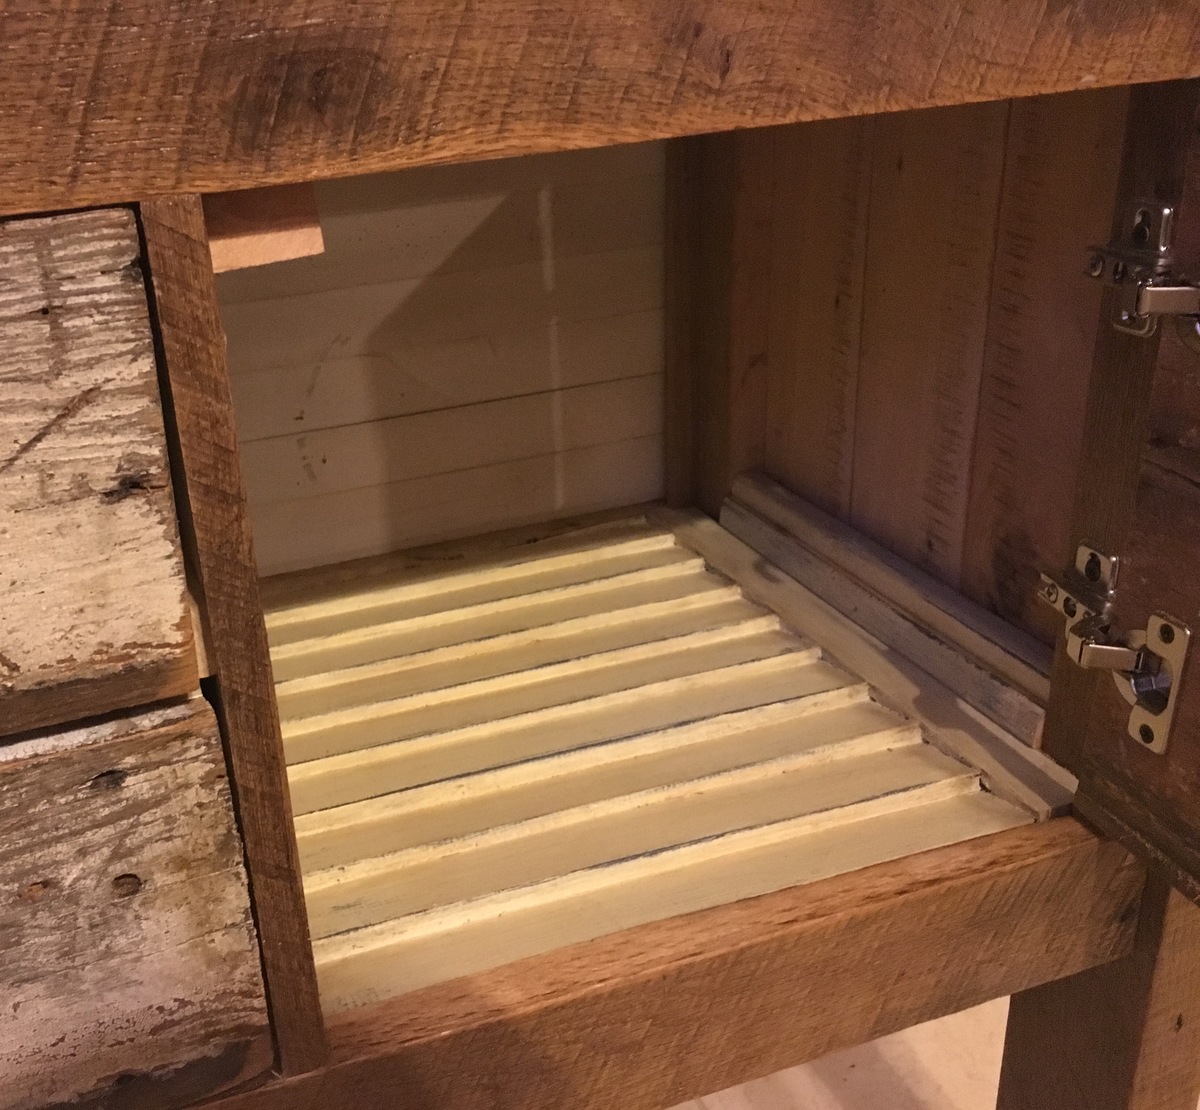
Built from Plan(s)
Estimated Cost
$85
Estimated Time Investment
Weekend Project (10-20 Hours)
Finish Used
Minwax polycrylic.
Recommended Skill Level
Beginner
Scrapwood garden markers
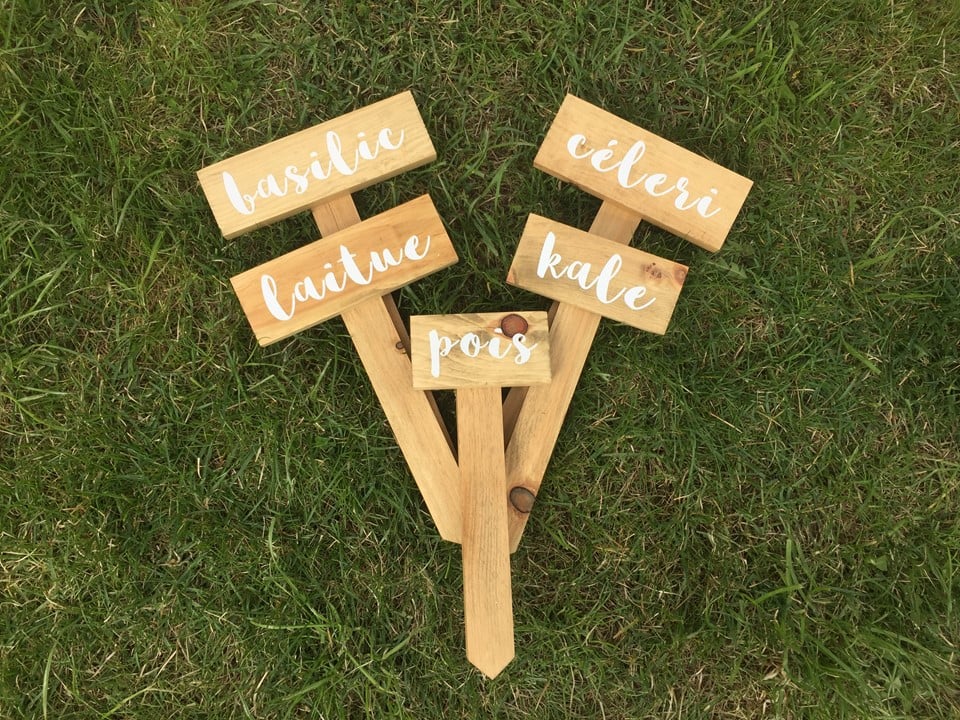
Who doesn't like a great scrapwood project? I made these beautiful garden markers with pine, but cedar would have been even better! I just didn't have any on hand. I used 1x3 to put the name of my vegetables and 1x2 for the pickets. I screwed them with 1 1/4 inch exterior screws.

Estimated Cost
0$
Estimated Time Investment
Afternoon Project (3-6 Hours)
Recommended Skill Level
Starter Project
Outdoor Counterheight Farmhouse Table
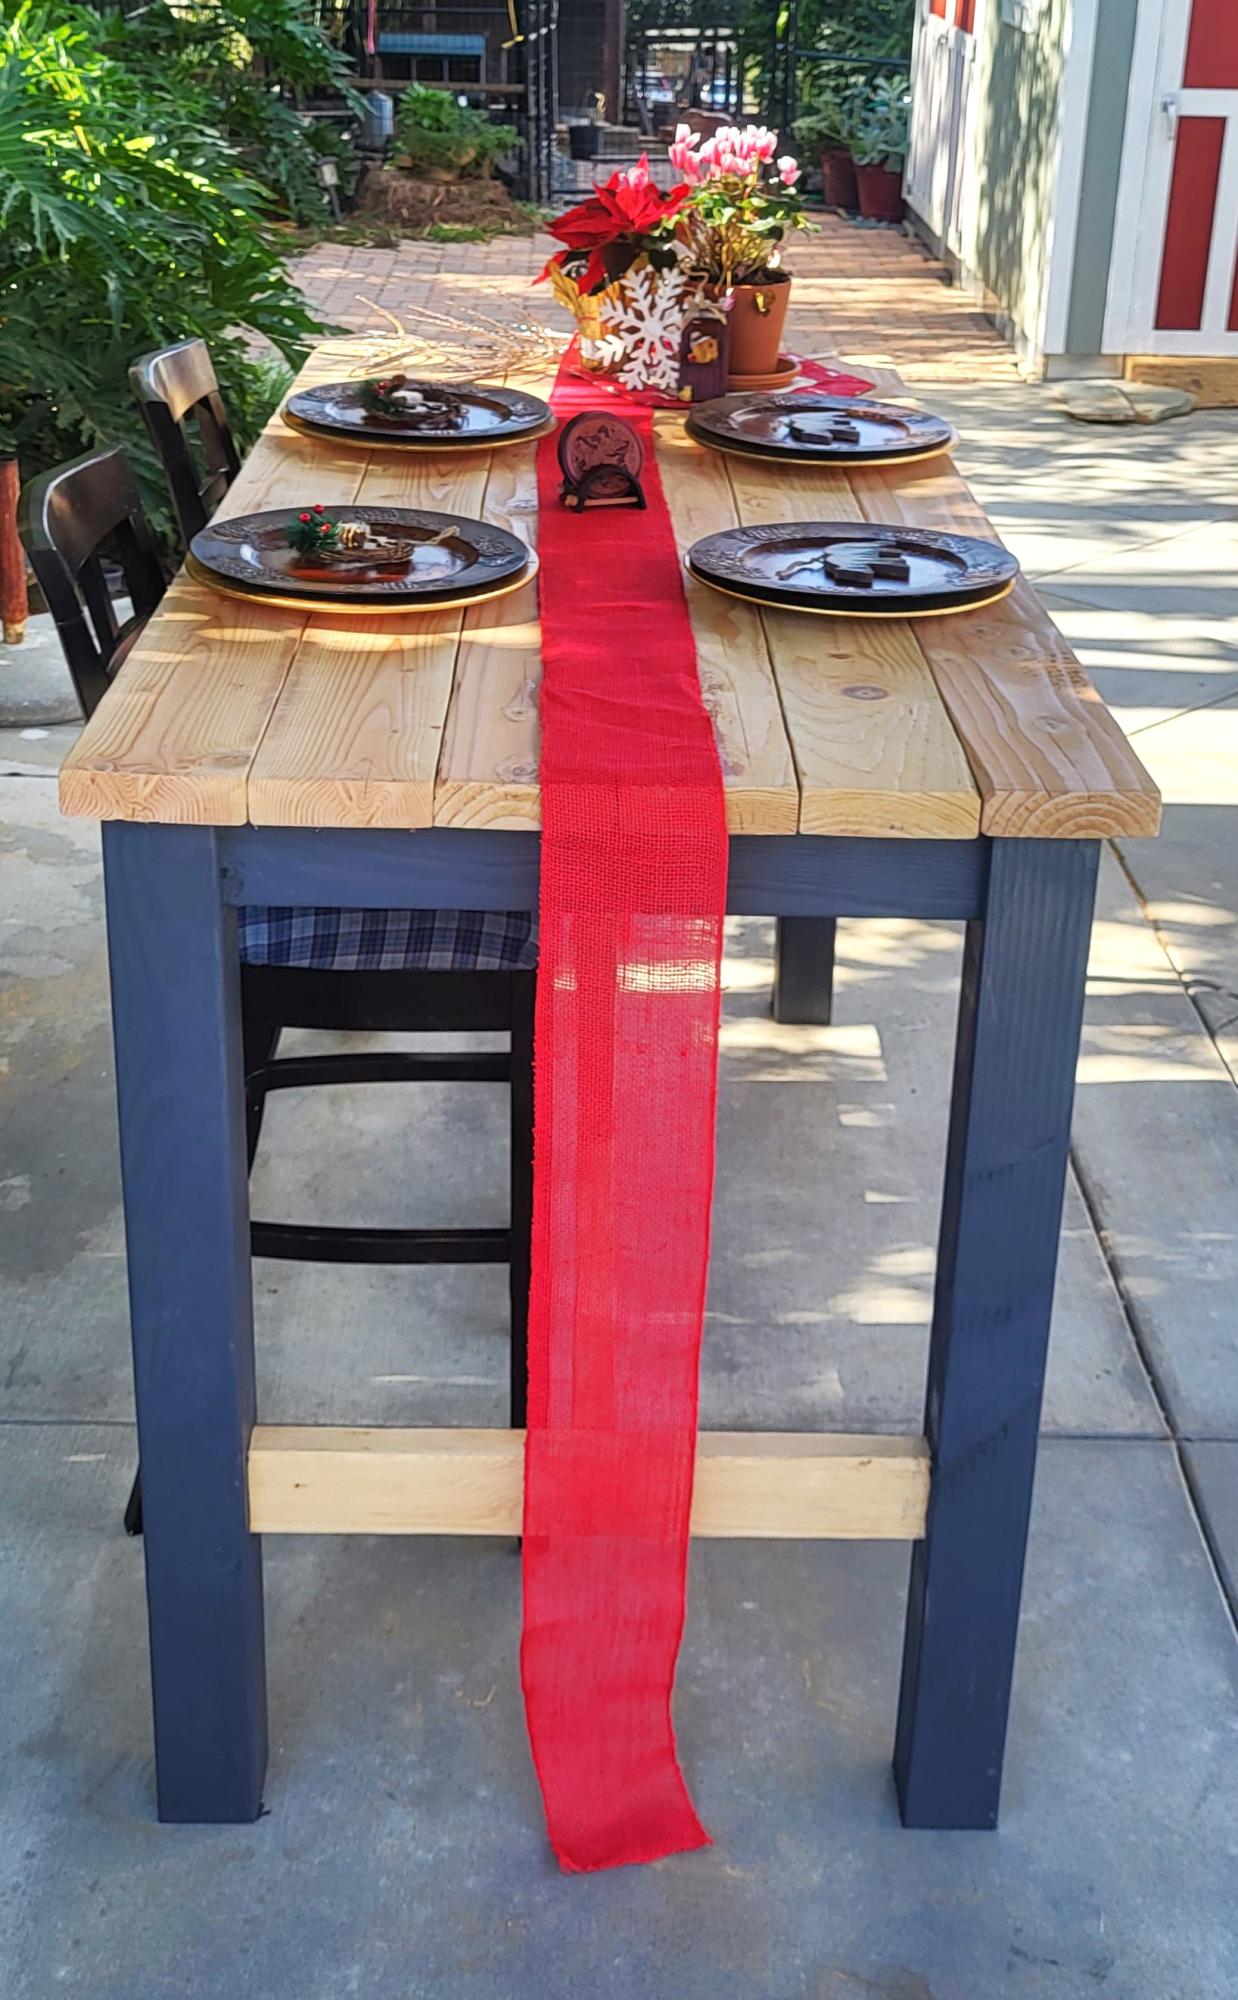
I had so nuch fun making this table. I love how it turned it out.
Mrs. Lasley
Built from Plan(s)
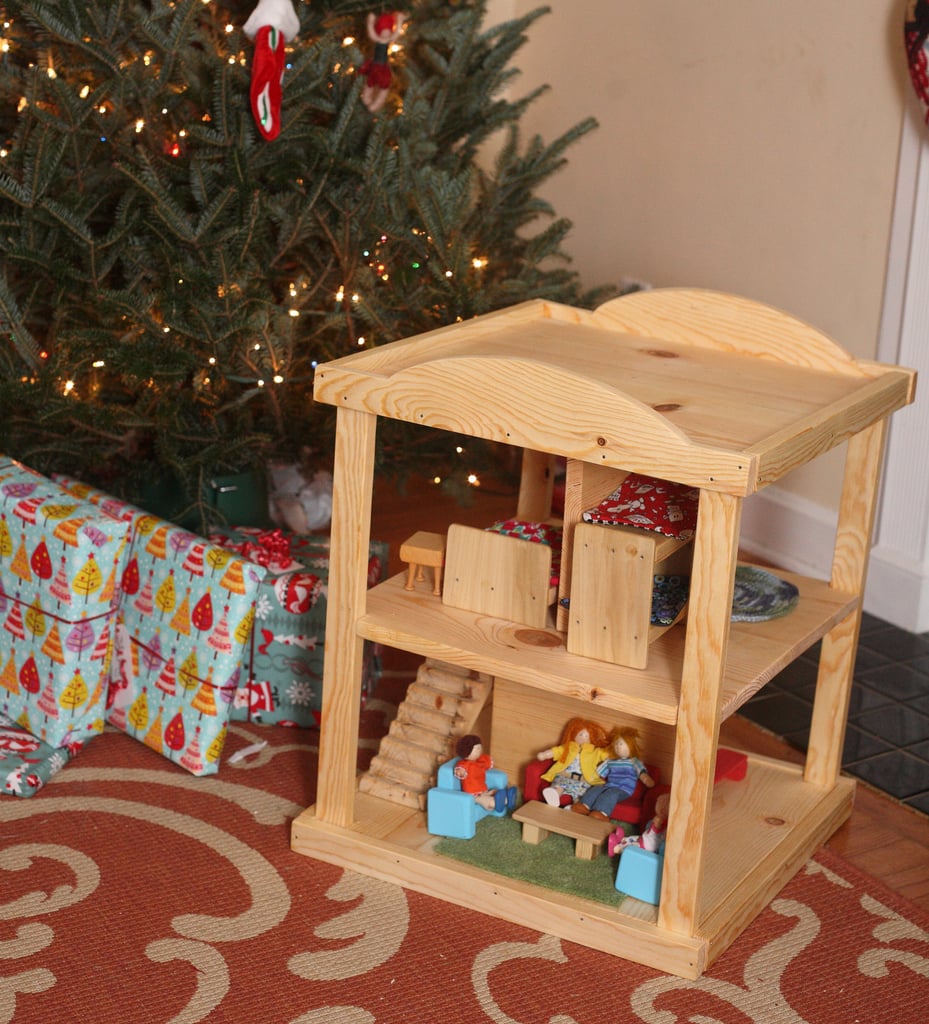
Dollhouse
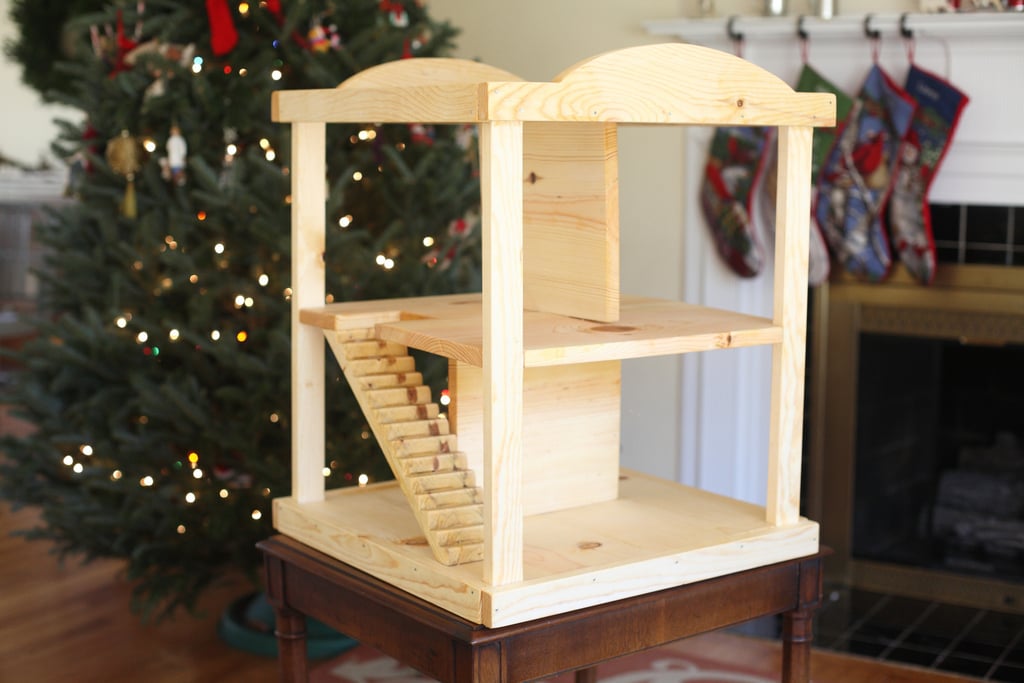
I combined my favorite elements from three of Ana's dollhouse plans to make this dollhouse for my kids. My favorite part is the stairs, which I cut from a 2x4 with a miter saw. I made this project from start to finish in one day while the grandparents took the kids, and it was ready for Christmas morning! I made simple furniture for it, too, which you can see in the second picture.
Built from Plan(s)
Estimated Cost
~$20 (I used some scraps)
Estimated Time Investment
Day Project (6-9 Hours)
Finish Used
linseed oil
Recommended Skill Level
Intermediate
Comments
Wed, 02/11/2015 - 06:35
Furniture
Is there any way you could email me the plans you used for the furniture? or just individual pictures of the furniture? [email protected] (you may wanna copy and paste that people always get it wrong, haha).
I LOVE THIS
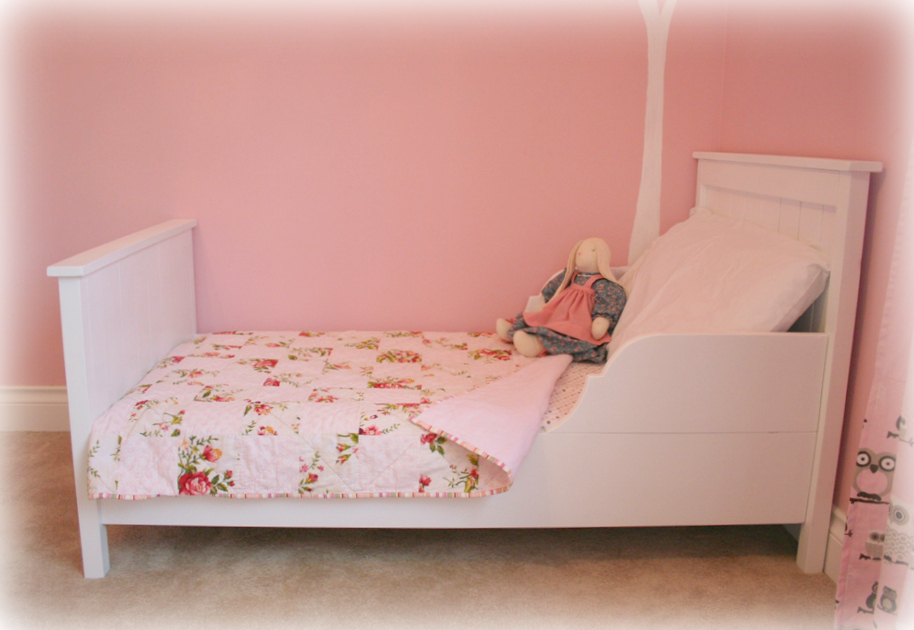
Our Farmhouse/Lydia Toddler Bed
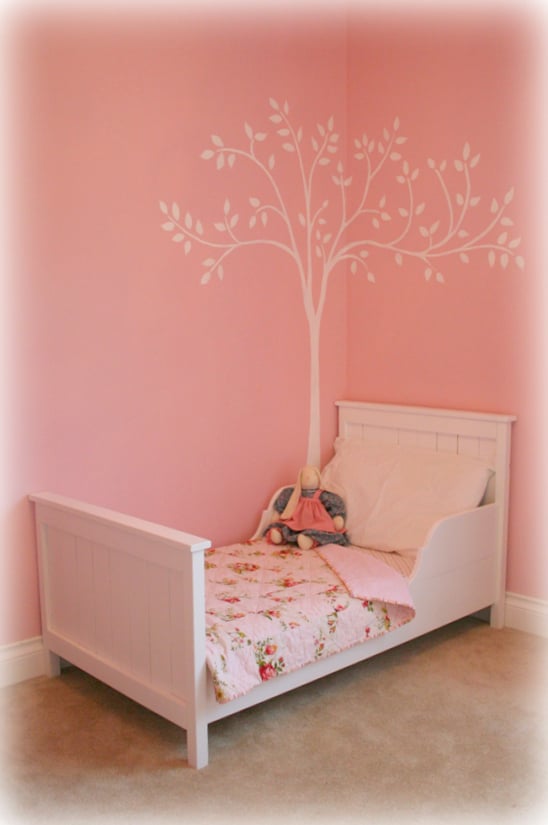
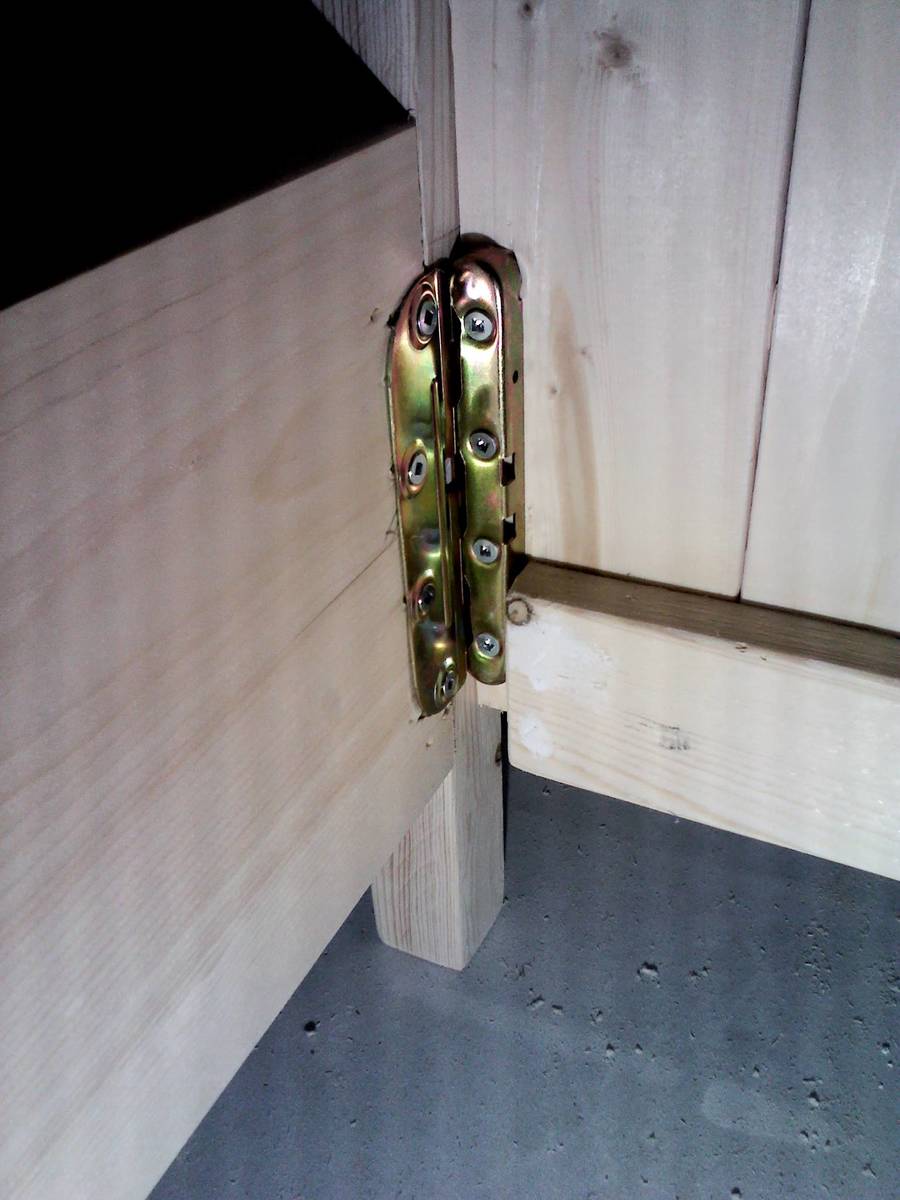
I fell in love with the Farmhouse Toddler bed, but decided to stray a little from the plan and made a couple changes. I chose to use 2x2 lumber for the legs and purchased mortise-free bedlocks from Lee Valley Tools so I could disassemble the bed to make moving it easier.
I lengthened the height of the headboard so it was flush with the bottom of the bed and also lowered the entire bed so it's only 4-1/2" off the ground.
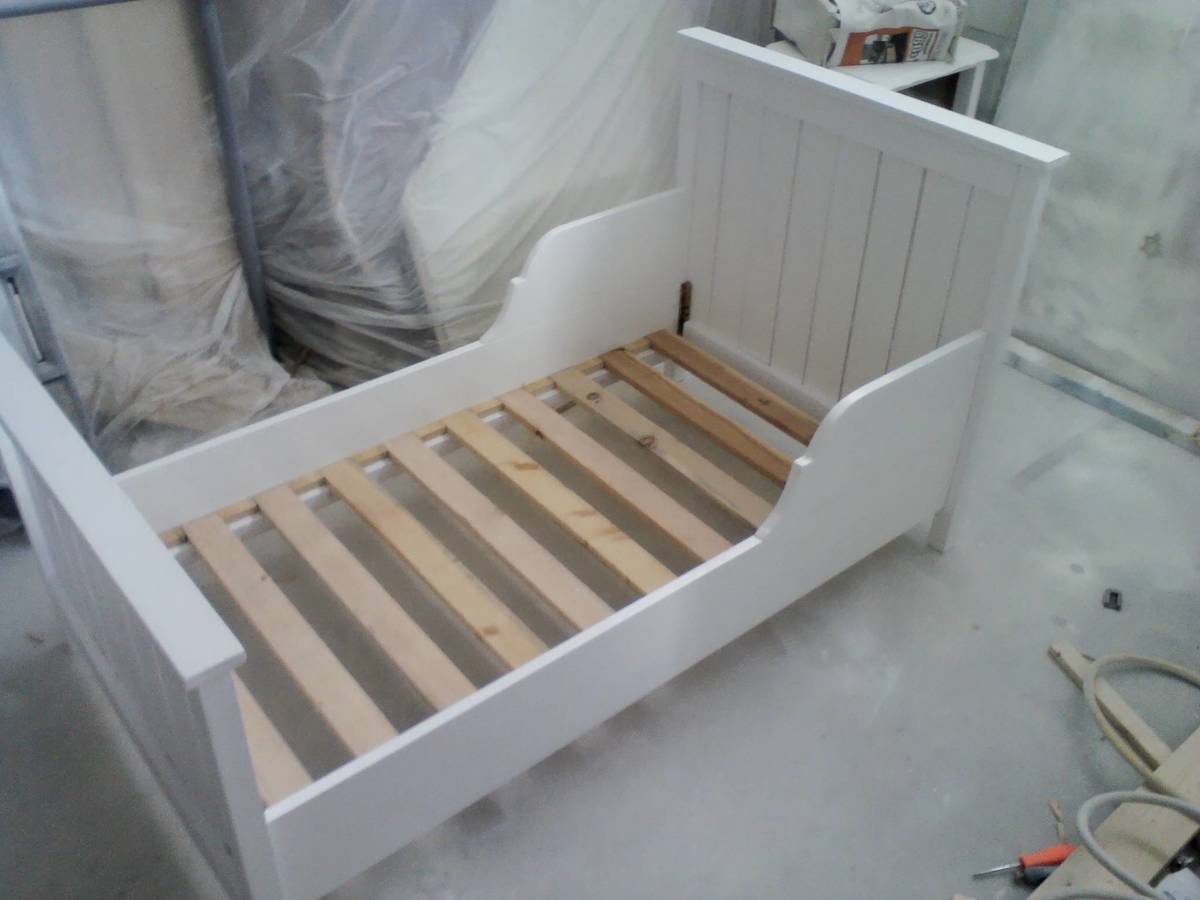
Rather than attach the wood mattress slats, I cut and nailed small wood "spacers" that the slats sit between. This keeps the slats from shifting, but makes them quick and easy to remove to disassemble the bed.
I loved the look of the curved rails on the Lydia Toddler bed but extended them a bit further than the original plan.
The mattress we have was a different size than the orignal plan was based off, so I ended up using all 1x4 lumber and then just trimmed off about half an inch on each side before attaching to the legs with pocket hold screws.
I'm thrilled with this little bed and so far our daughter seems to enjoy it as well.

Built from Plan(s)
Finish Used
Primer, white latex paint, polycrylic clear coat
Recommended Skill Level
Beginner
I HEART Ana White Outdoor Chaise
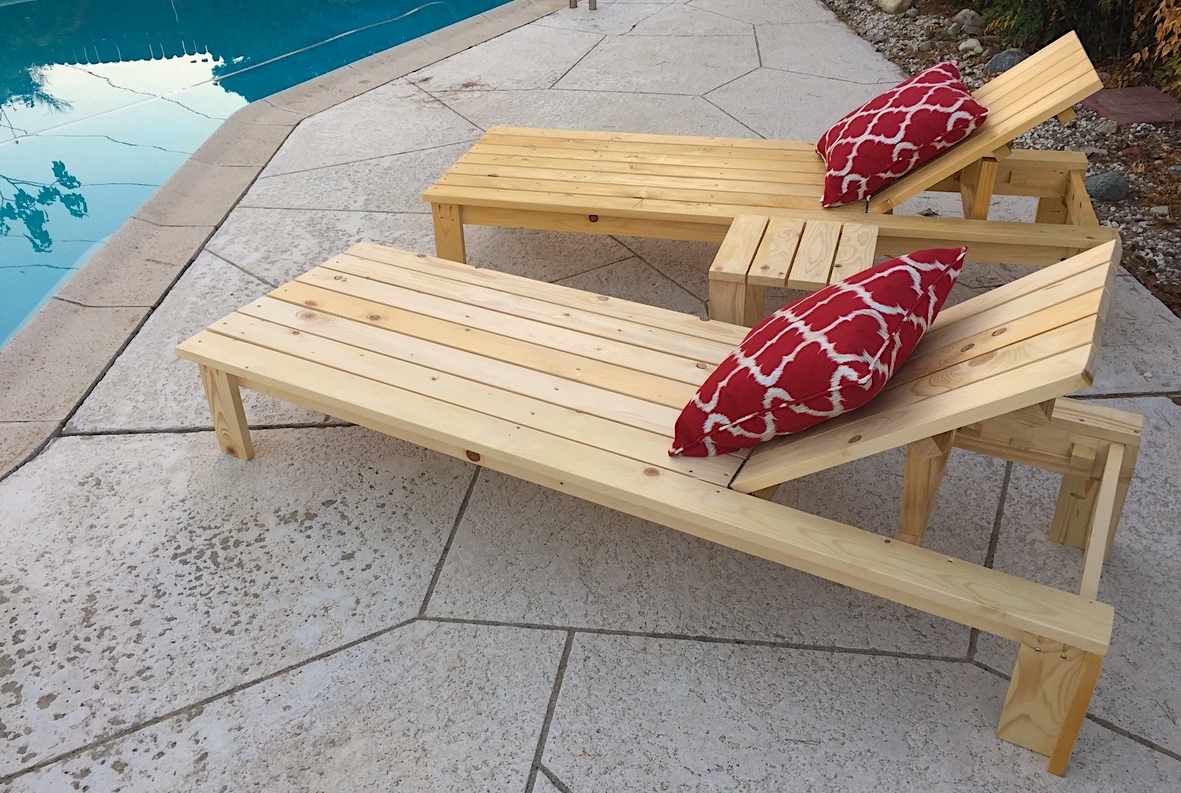
THANK YOU ANA FOR ALL THE GREAT PLANS!!
I am in southern california (mild weather) so i just used pine and coated them with urethane.
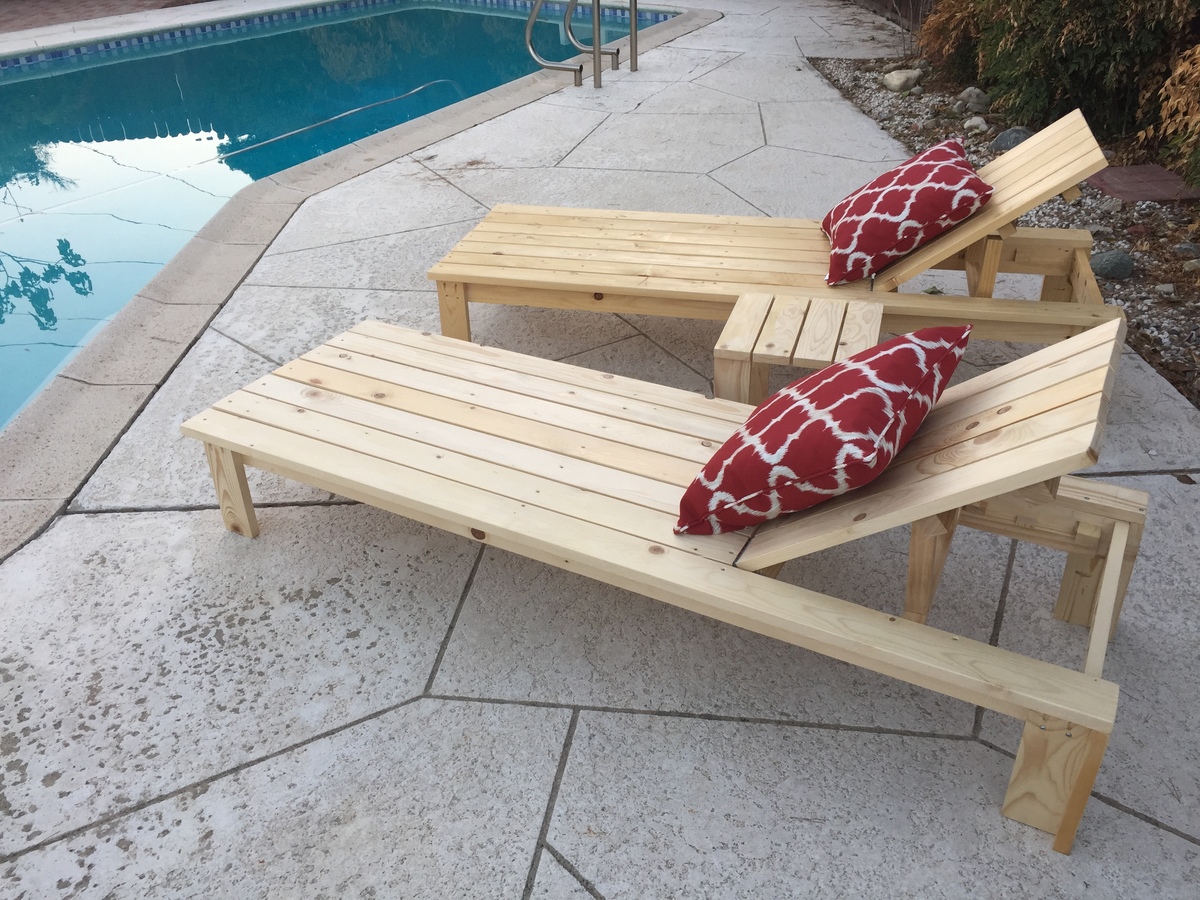
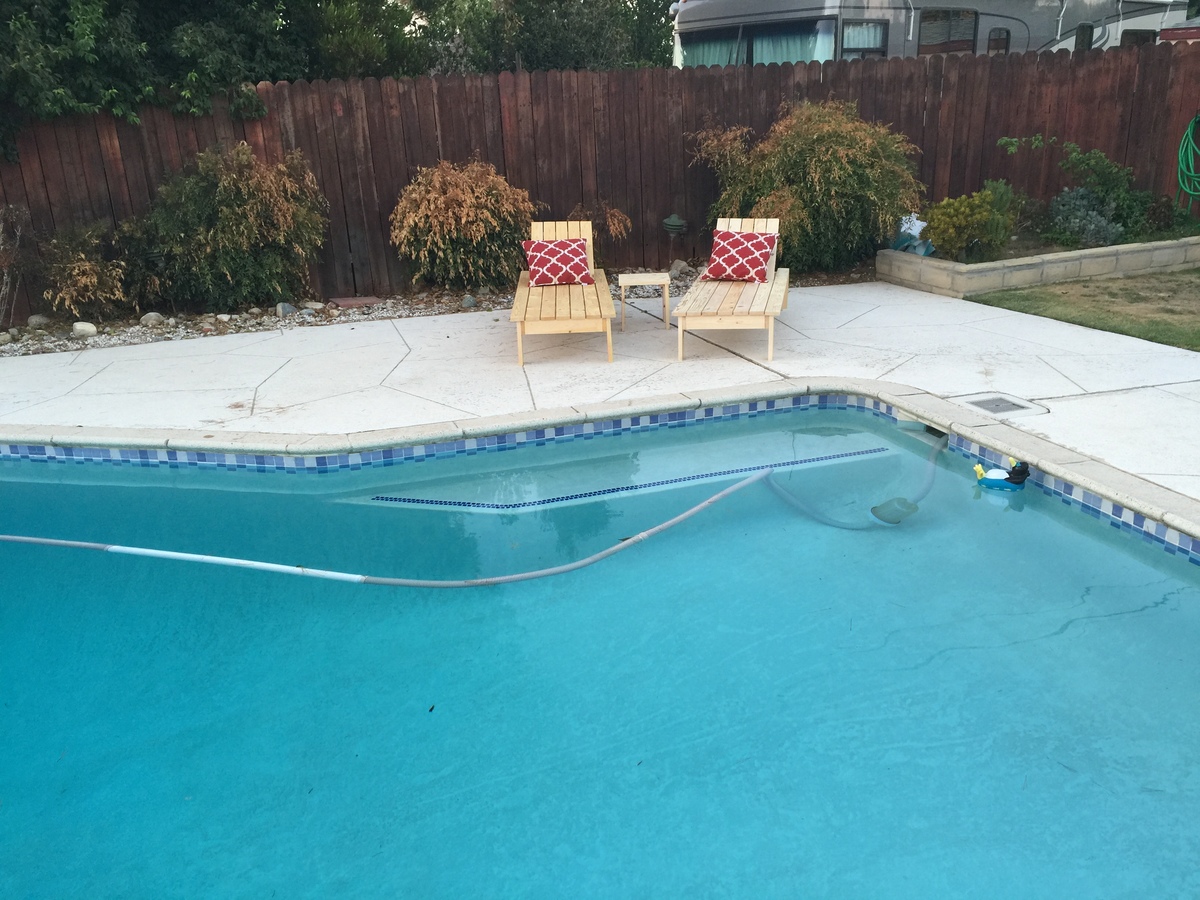
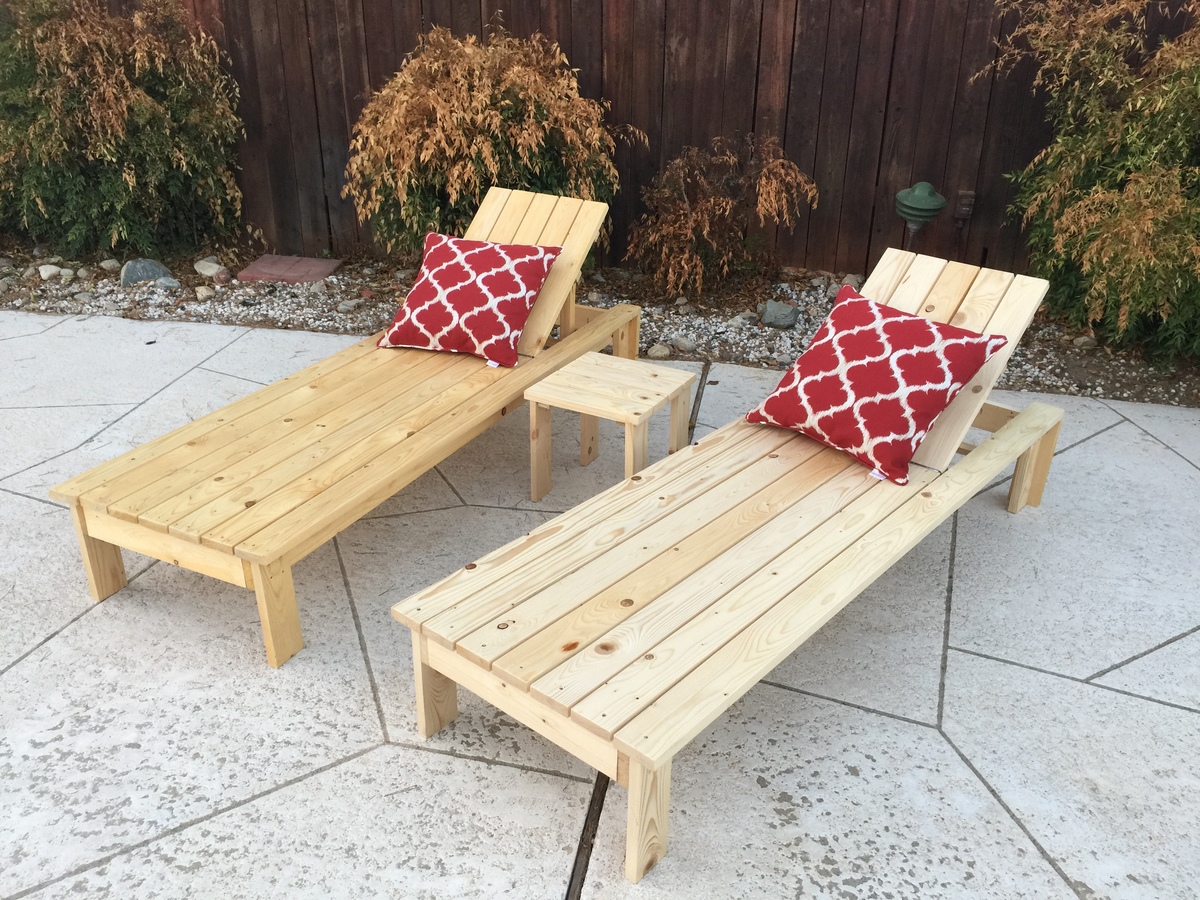
Built from Plan(s)
Estimated Cost
$60 each
Estimated Time Investment
Day Project (6-9 Hours)
Finish Used
Urethane
Recommended Skill Level
Beginner
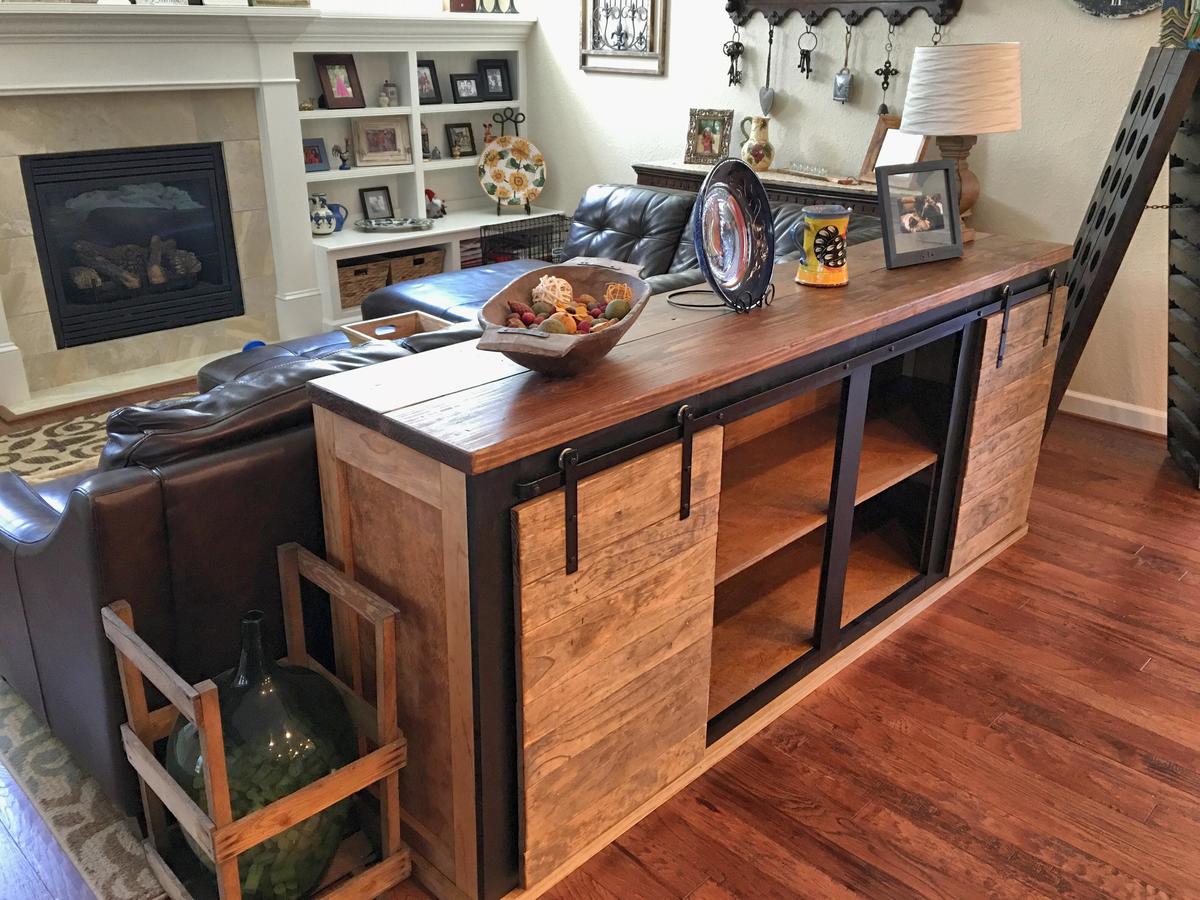
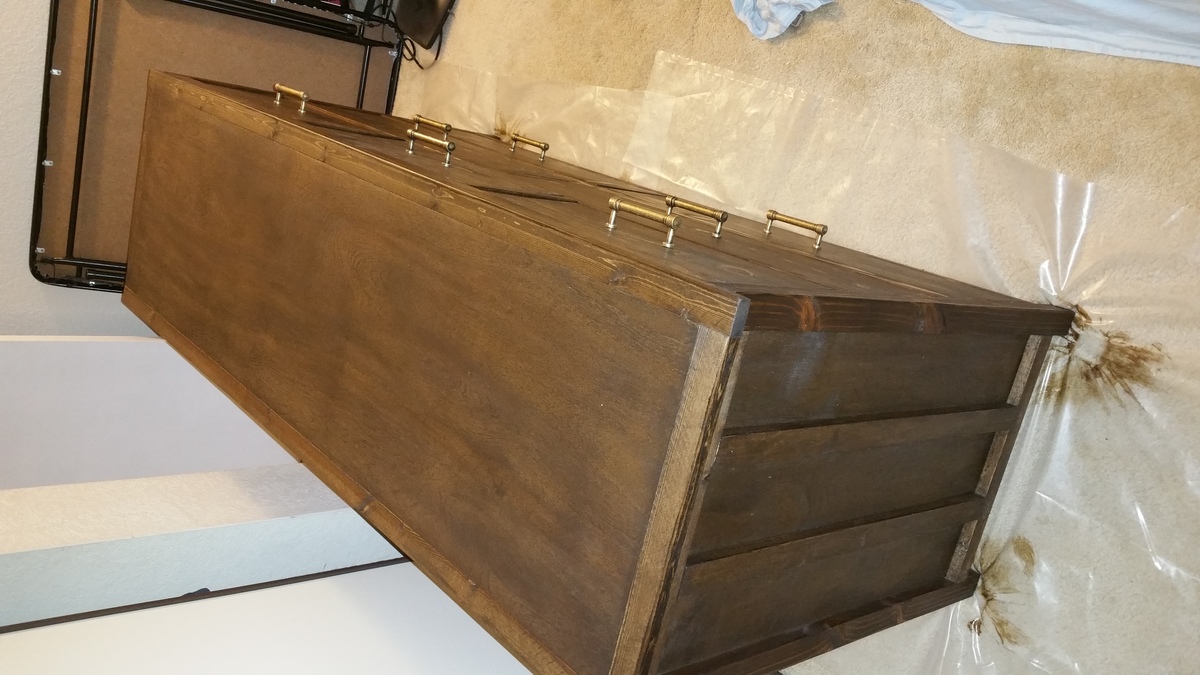
Planked Wood Sideboard
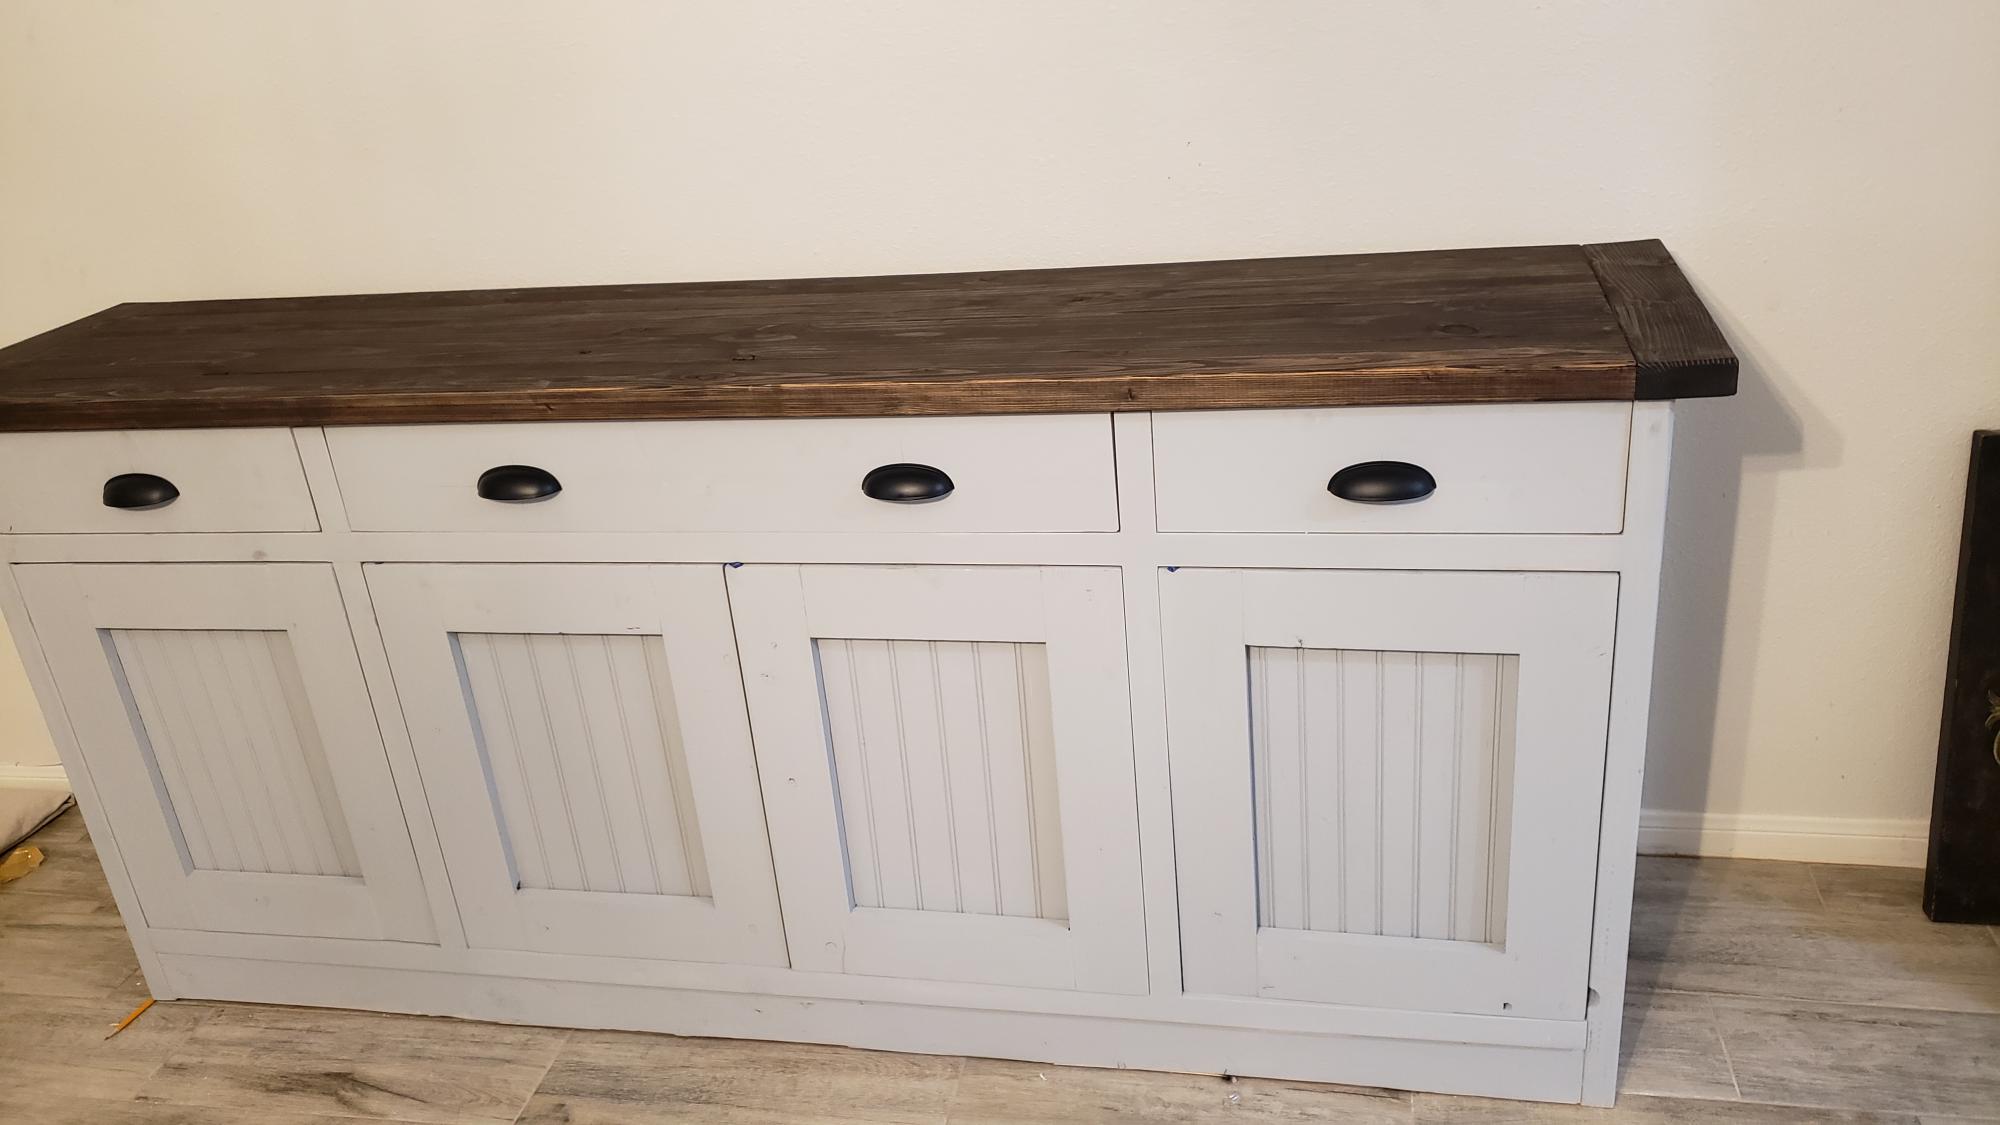
Build was very satisfying. It did present some challenges and a decent learning curve. Drawers almost drove me mad, my own doing, buffet wasn't level and top had not been attached and the drawers wouldn't line up. Failed to ensure i was level on the tile floor I was working on.
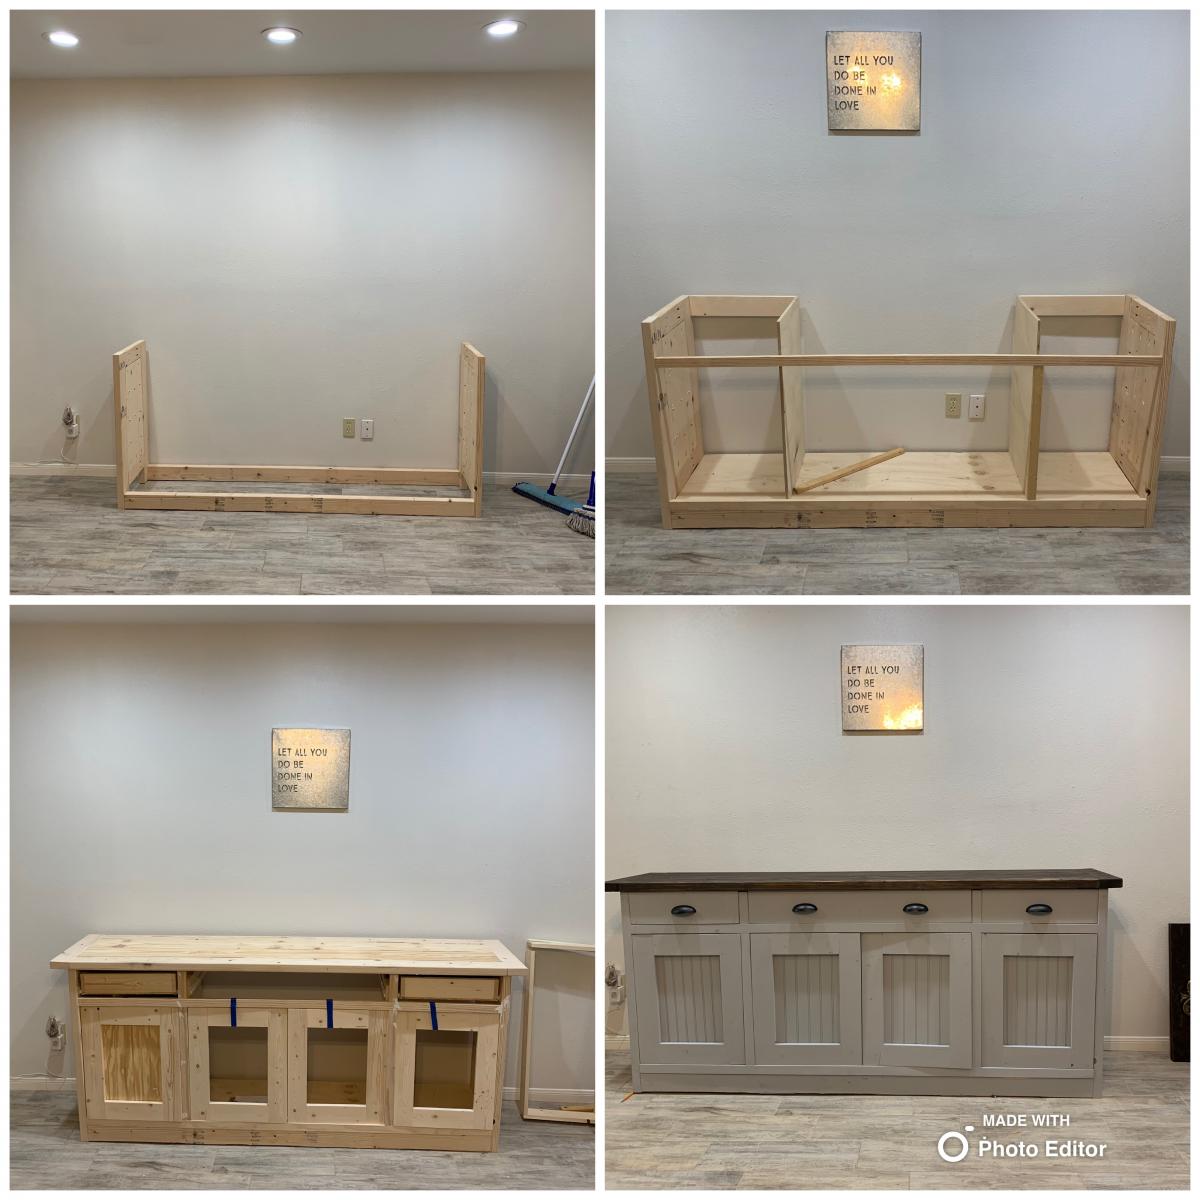
Built from Plan(s)
Estimated Cost
$300
Estimated Time Investment
Week Long Project (20 Hours or More)
Recommended Skill Level
Advanced
Shed Style Coop - A First Woodworking Project!
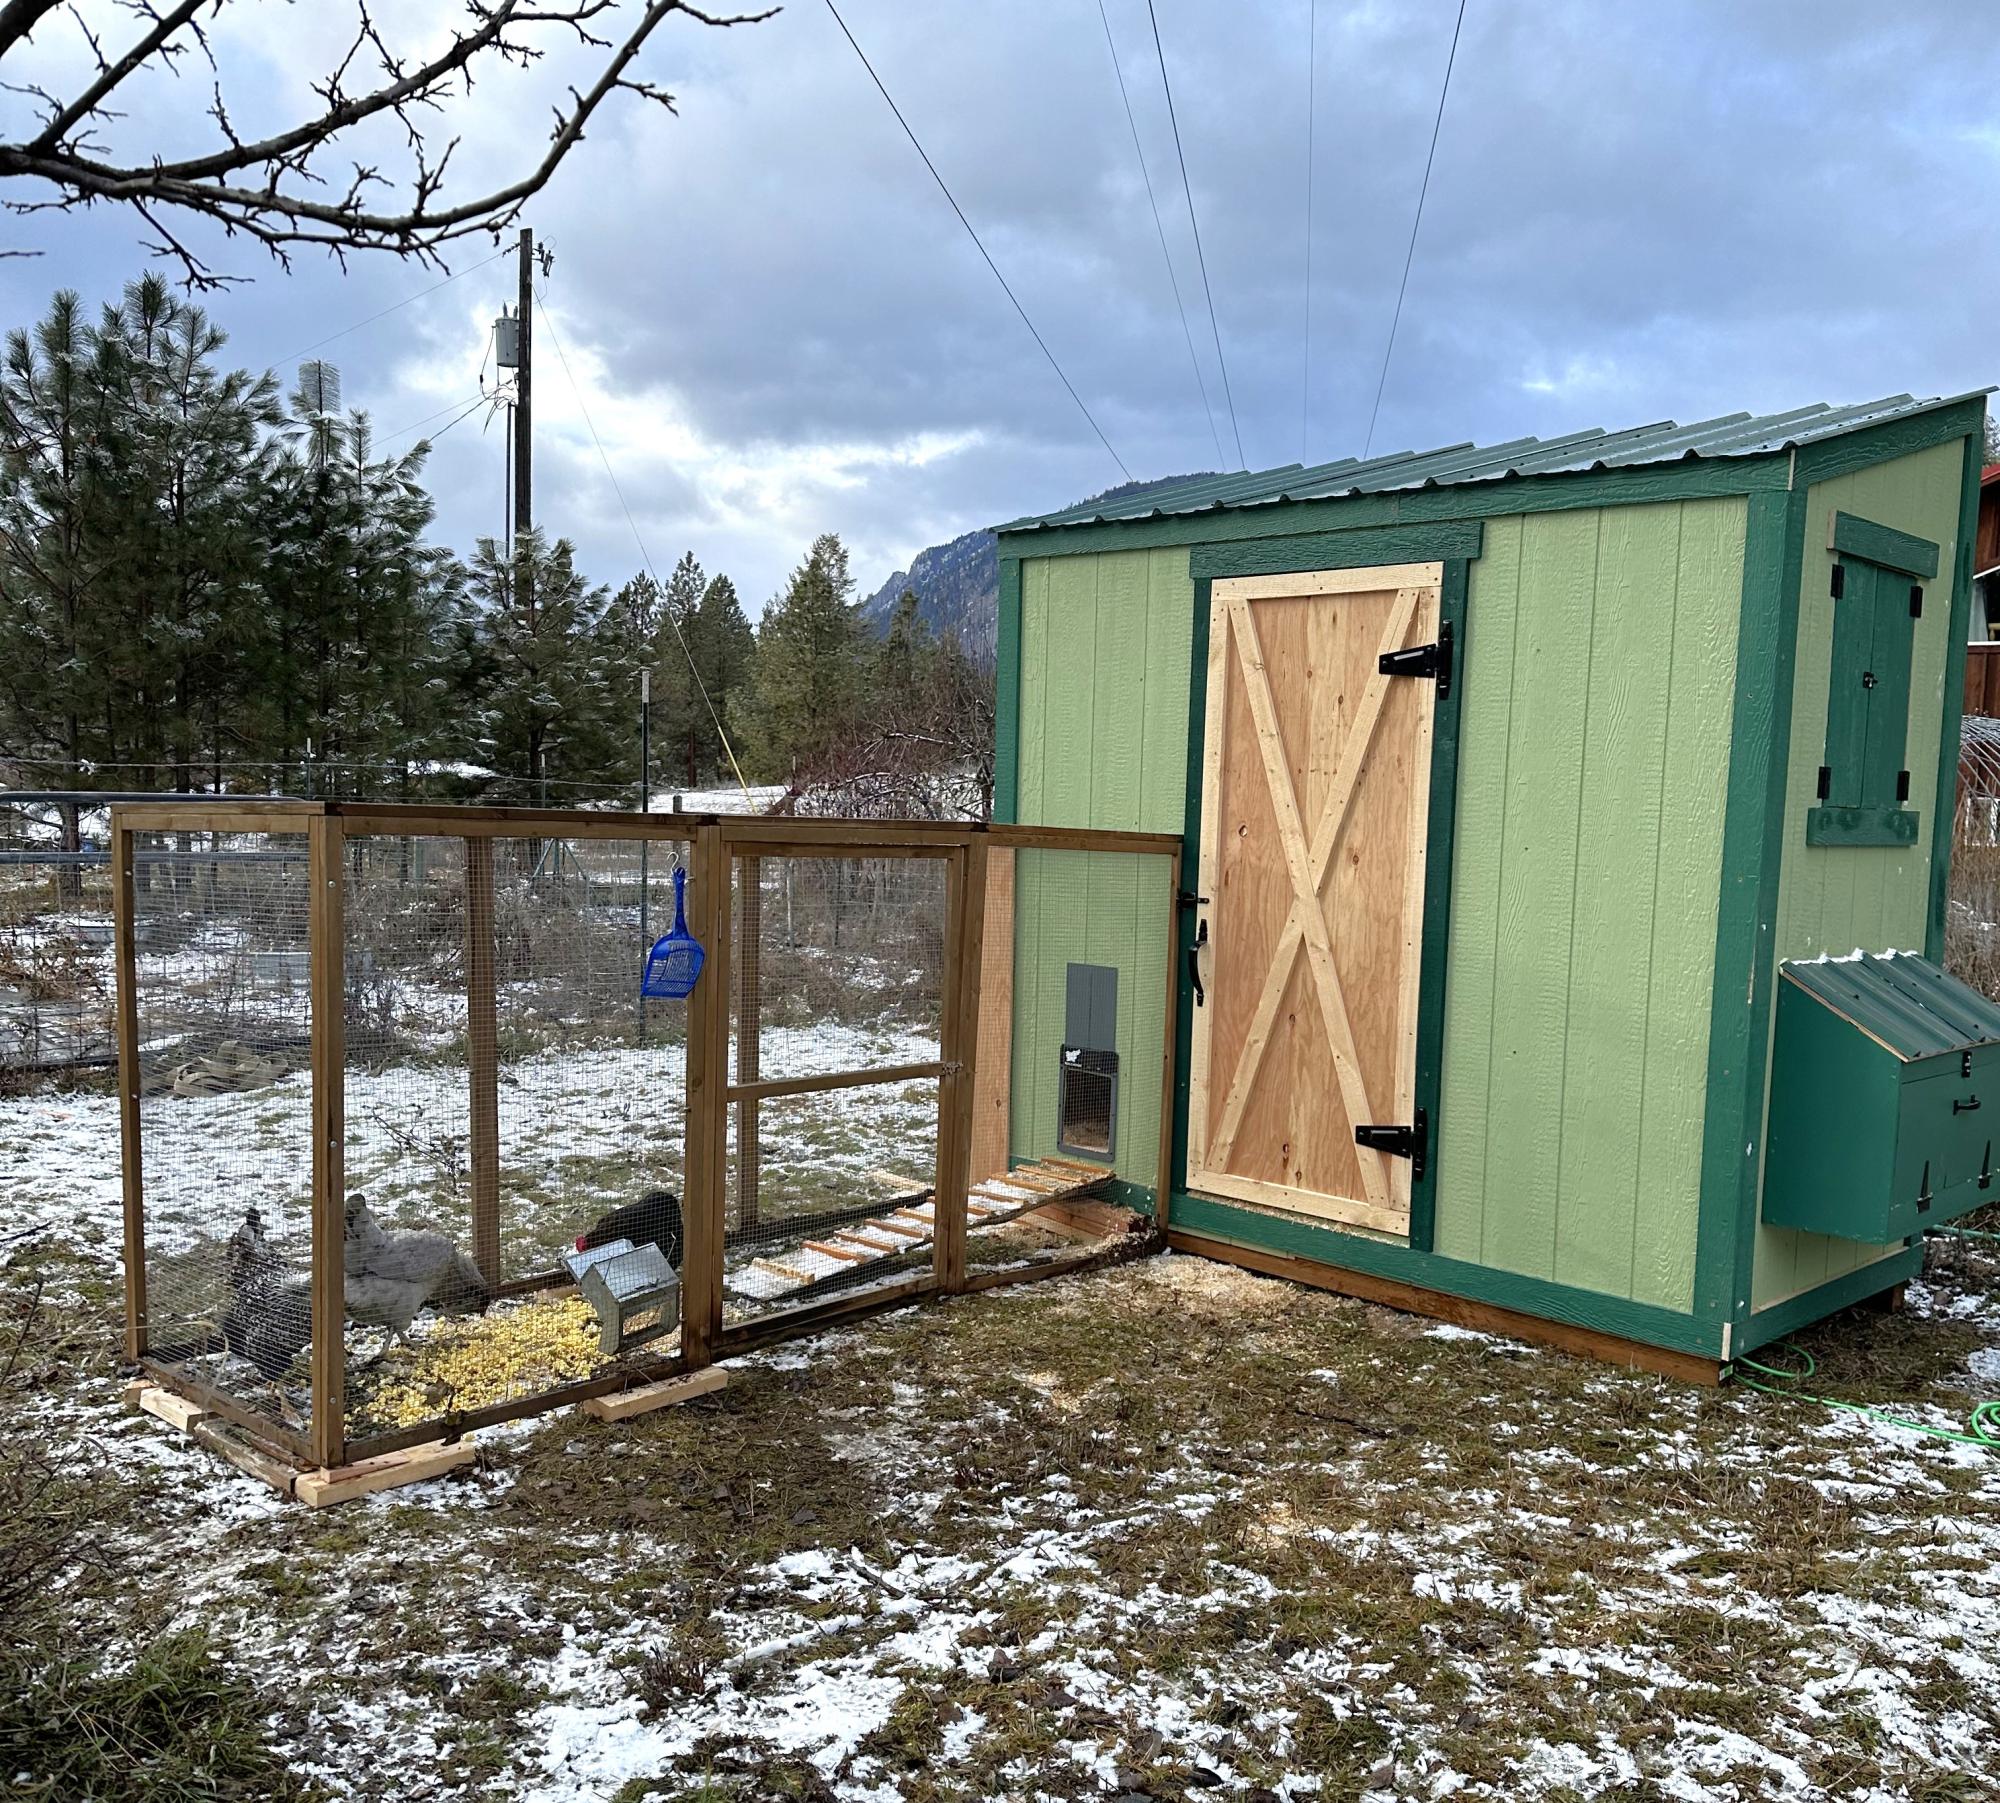
I started this project on my own never building anything before. It was so fun. My husband helped me get the roof on and the trim work.
Sharon N
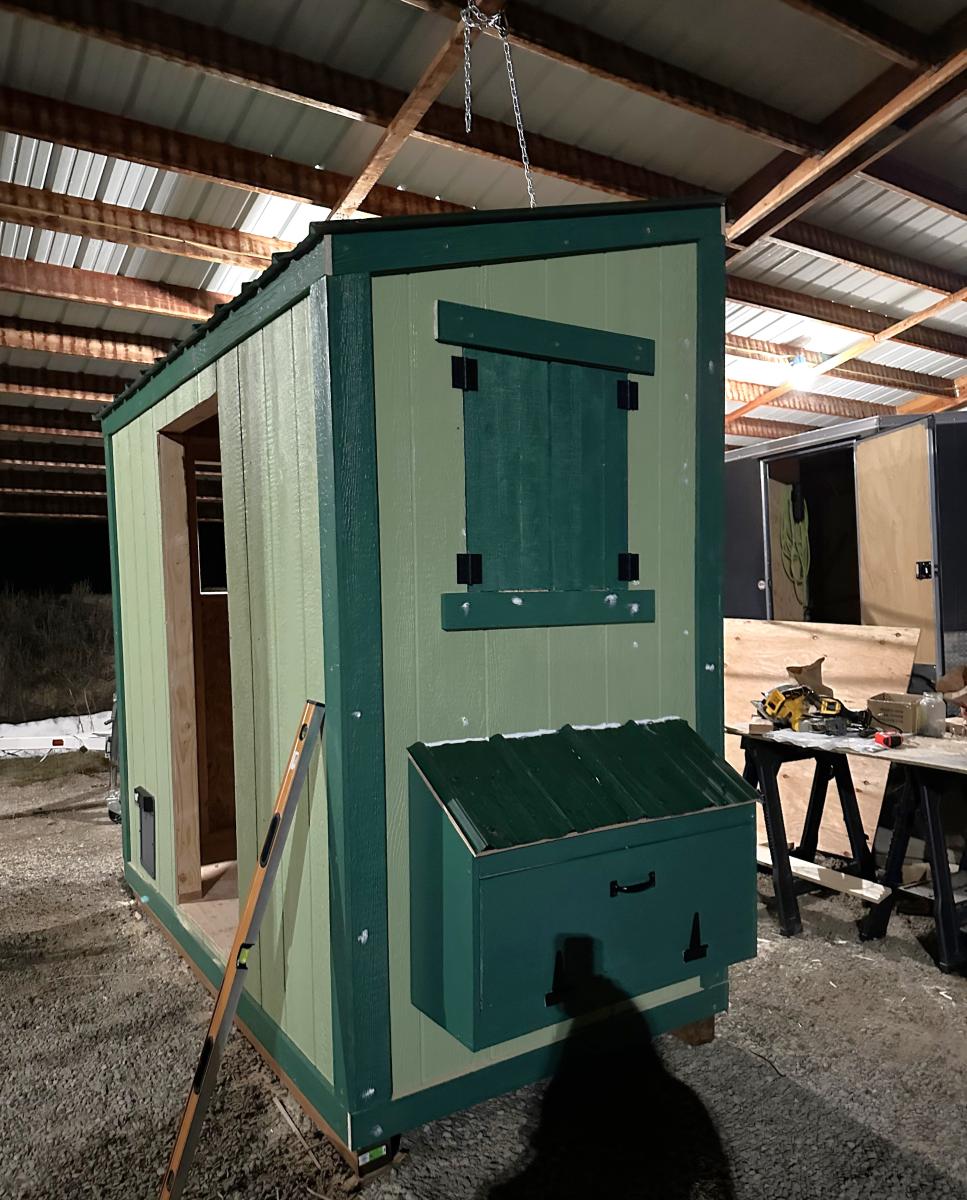
Built from Plan(s)
Farmhouse bedside tables
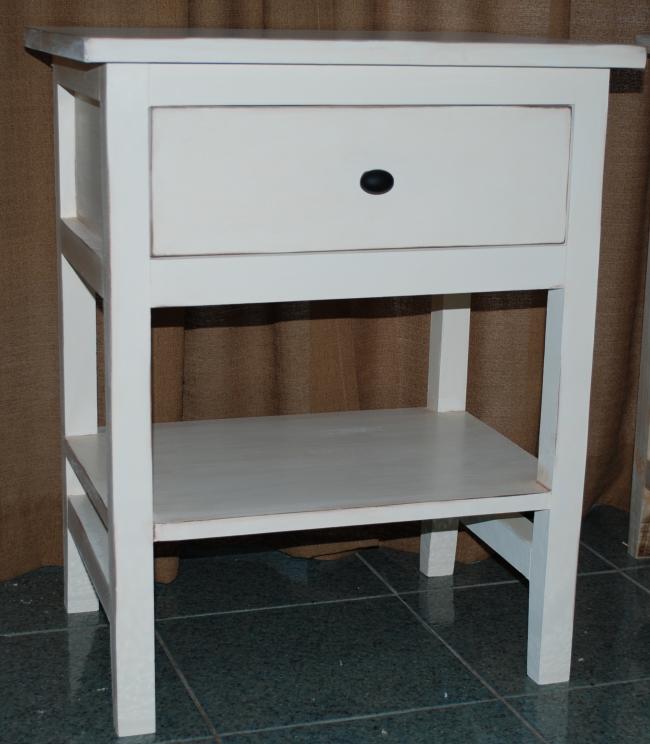
Took 2 weekends to build 2 of them, they have a gently distressed finish.
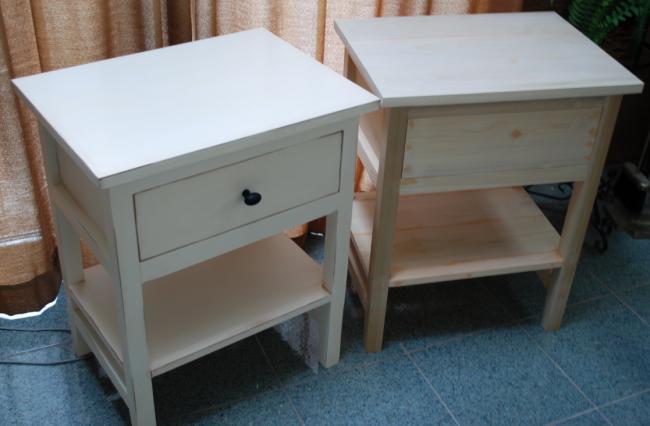
Built from Plan(s)
Estimated Cost
$80.00
Estimated Time Investment
Week Long Project (20 Hours or More)
Finish Used
Paint cottage white, distressed with stain and waxed
Recommended Skill Level
Intermediate
Comments
Mon, 07/09/2012 - 16:00
LOOK GREAT!
I really like the farmhouse style furnature and the finish you used turned out really good.
Personalized Little Crate Group Gift
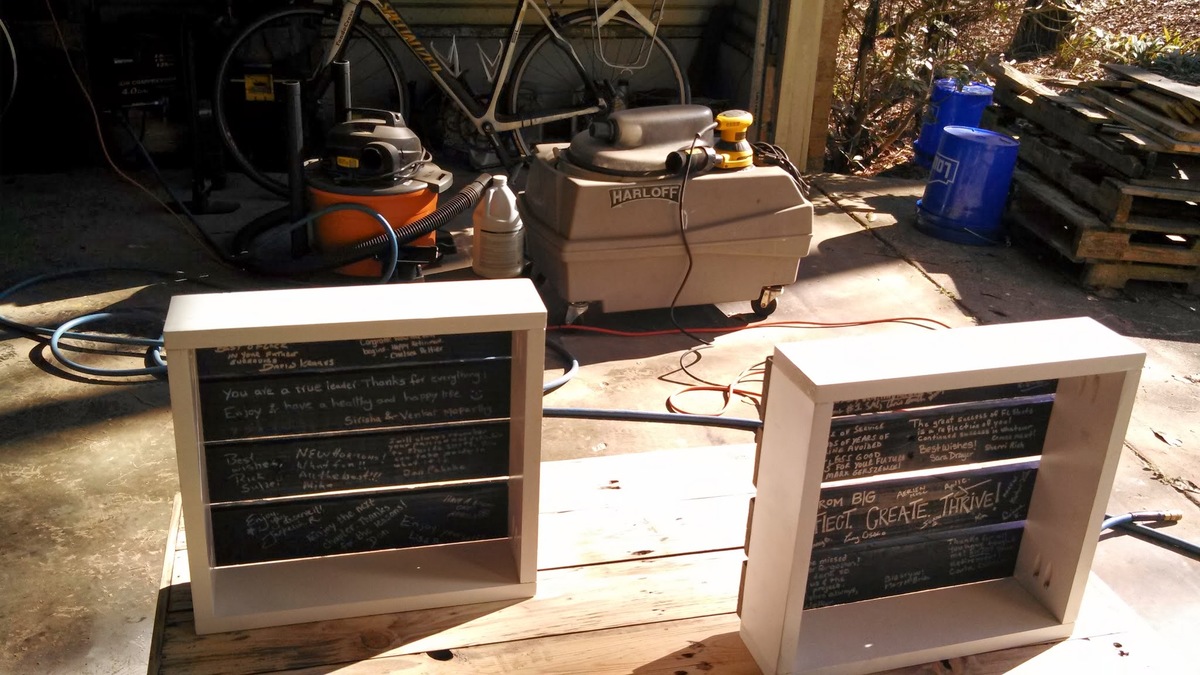
With inspiration from Ana’s Little Crates, I prepared crates frames and slats separately so employees of a retiree may write on the slats. Once the writing was complete the slats were attached to the frames and presented as a personalized gift with examples of hanging or tabletop use.
Thanks
Estimated Time Investment
An Hour or Two (0-2 Hours)
Finish Used
Frame – White enamel paint
Slats – Black Latex
Writing – Sharpie, next time I may use Jell Pens.
Slats – Black Latex
Writing – Sharpie, next time I may use Jell Pens.
Recommended Skill Level
Beginner
My first real project
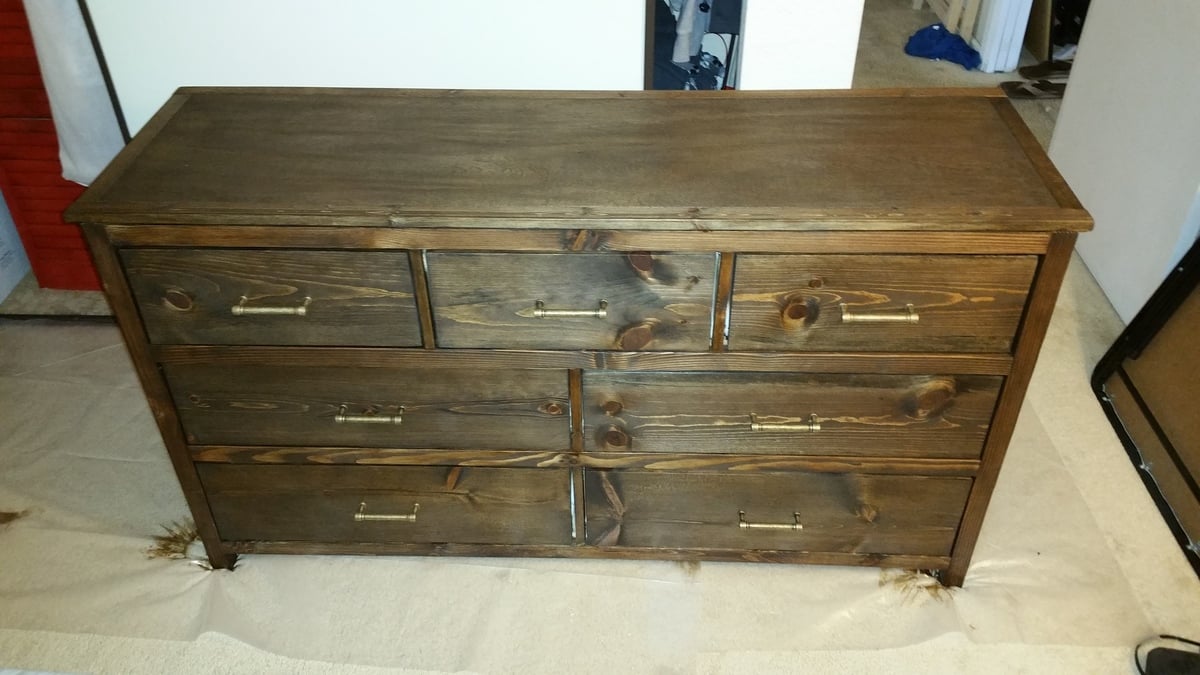
I started woodworking about 6 month ago and I love it!
I made our kitchen table and nightstands.
This was a real test! The drawers took as long as the frame, if not longer.
It's all worth it when it turns out this good though!
Thank you for all the wonderful plans, my wife practially has all the furniture in our house in line to built by me.
Built from Plan(s)
Estimated Time Investment
Week Long Project (20 Hours or More)
Finish Used
Minwax Jacobean
Recommended Skill Level
Advanced

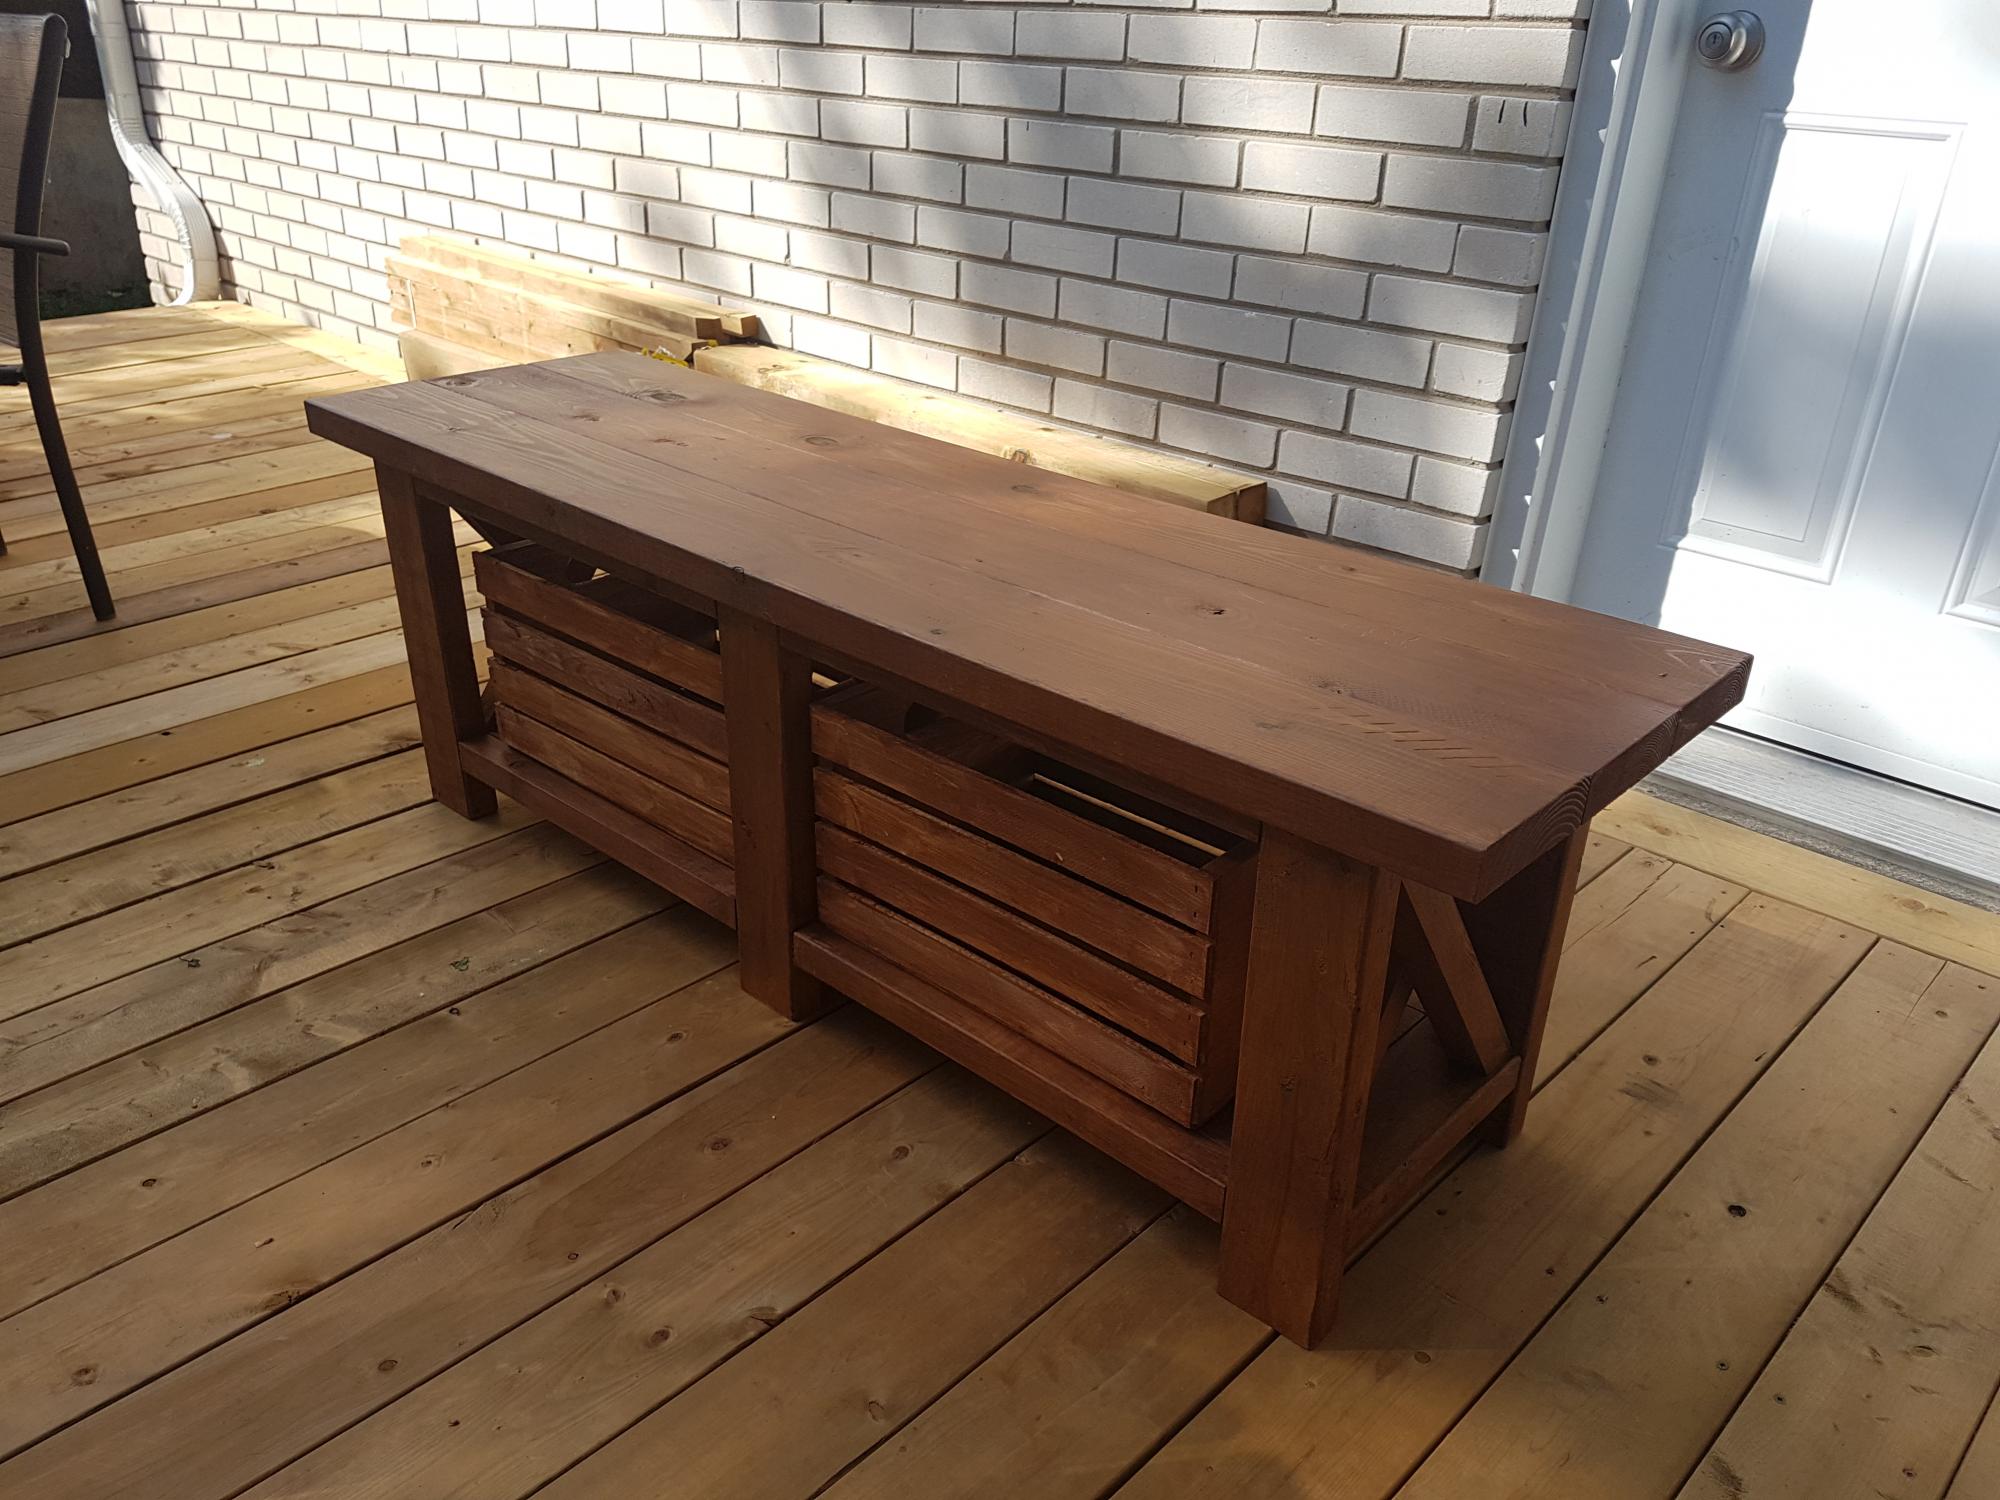
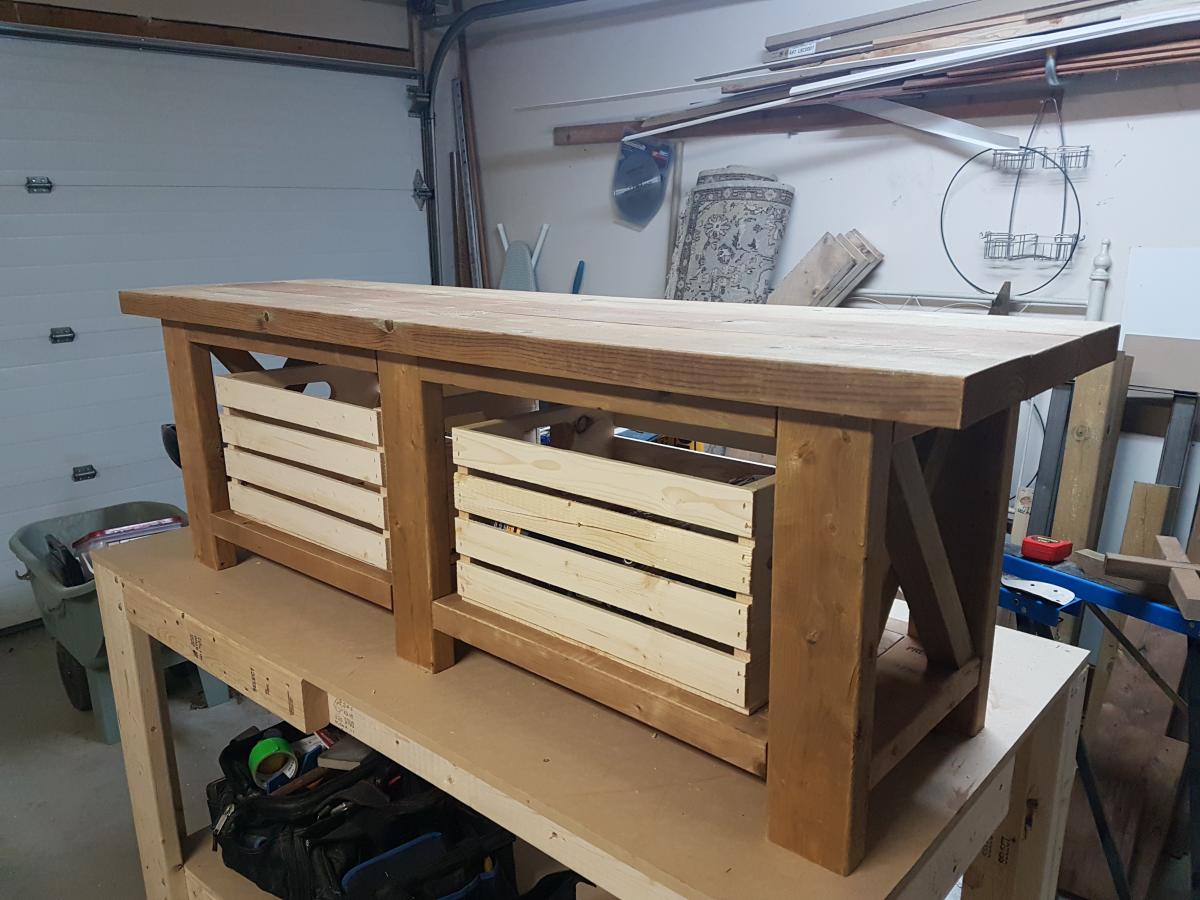
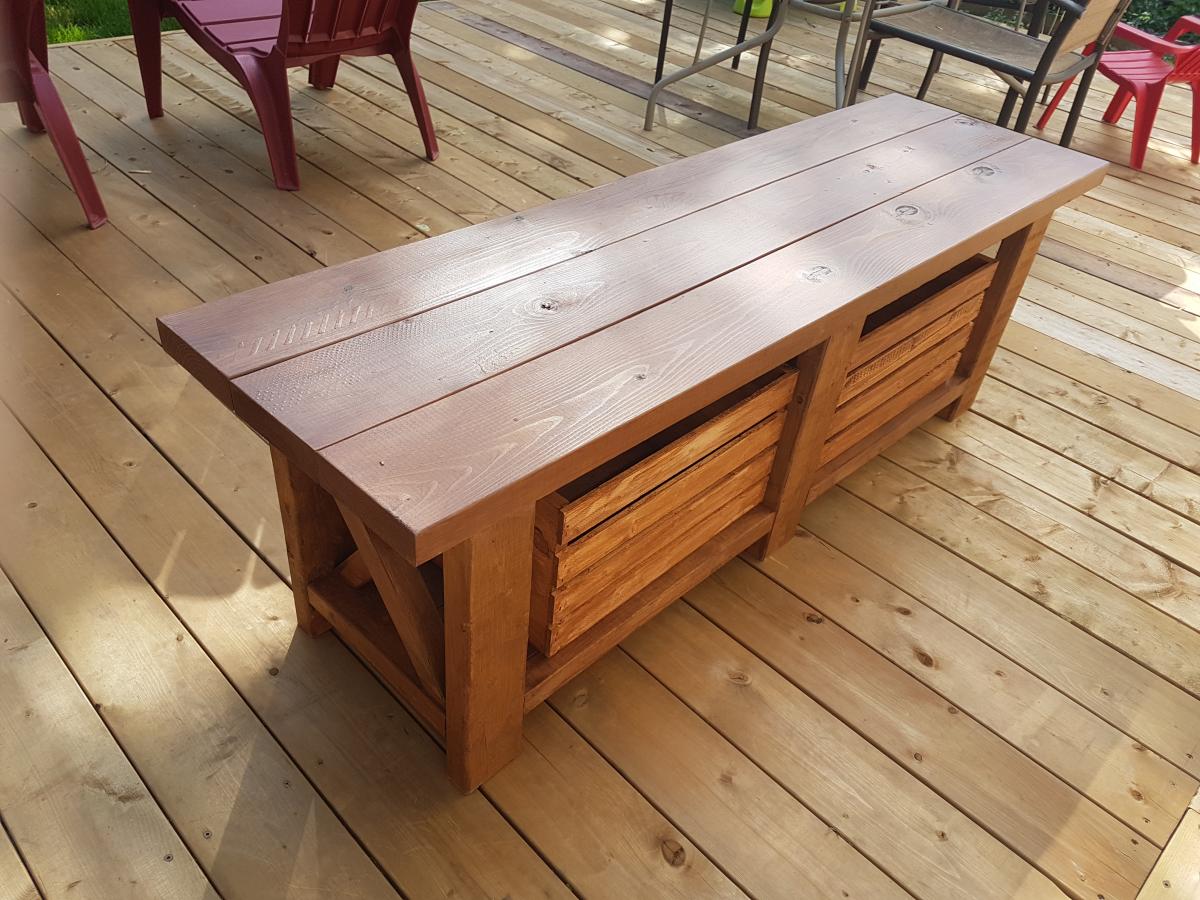
Coffee Table with Drawers

Built this for my daughter. Plans were excellent and I needed them because I am not an advanced woodworker. Going to try for a matching end table. If you have plans that would be greatly appreciated.
Jim Carr
Built from Plan(s)
After school storage
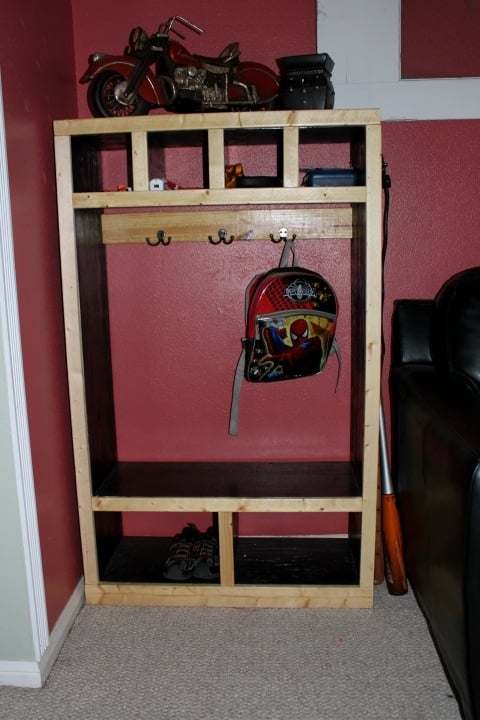
I loved the idea of the charging cubbies and the storage area in this plan!
I needed something a little shorter, for my three younger boys to be able to reach the hooks, though. I modified the plans a bit for this. I also opted out on the drawers and just left the cubbies open. With my boys, the more simple something is to use, the more likely they will make the effort ;)
I added a 2x4 to the back for hooks. I wanted the wall color to show through the back, so I didn't use a back piece.
Built from Plan(s)
Estimated Time Investment
Afternoon Project (3-6 Hours)
Finish Used
valspar black and natural wood with satin poly
Recommended Skill Level
Beginner
Comments
Thu, 08/30/2012 - 22:28
Dimensions please?
I am very new to building. I was looking all over the site for something exactly like this. Is there any way you could post your demensions? I know I should be able to figure something out, but yours looks perfect. I love it! Great job and thanks for sharing your project!
In reply to Dimensions please? by kimara
Fri, 08/31/2012 - 09:07
Dimensions
Kimara,
I'm so glad you like this! It has worked out perfect! Even my four year old uses his hooks!
The dimensions had to be specific for myself. Otherwise, it wouldn't have worked in the game room.
31 1/2"(L) x 12 3/4"(W) x 51"(H)
Let me know if you have anymore questions...
God Bless :)
Mon, 08/19/2019 - 03:43
You have shared a nice idea…
You have shared a nice idea to use this storage and make it more useful after school. The topic of this post is very interesting and I am enjoying while reading it. SEO Dubai is a leading company providing services related to marketing to the clients from all over the world.