Community Brag Posts

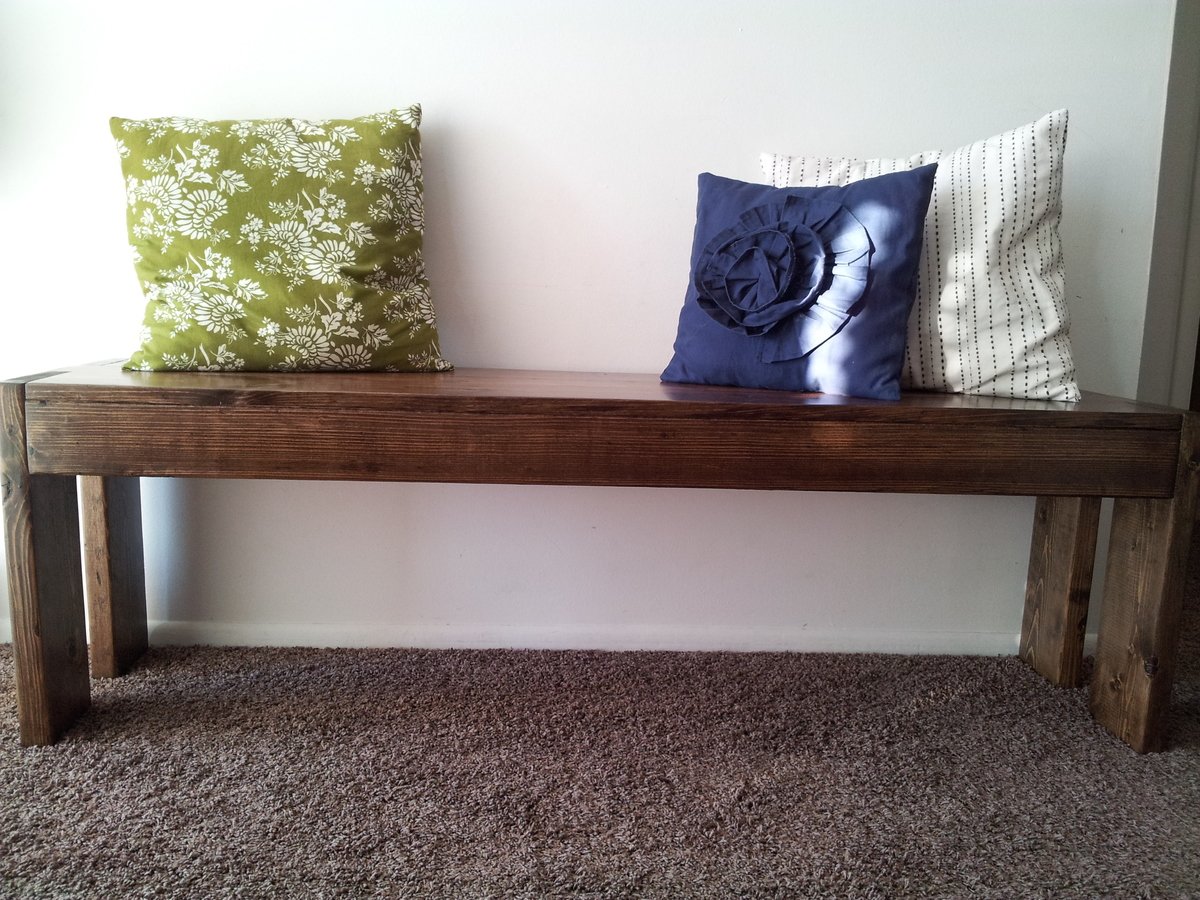
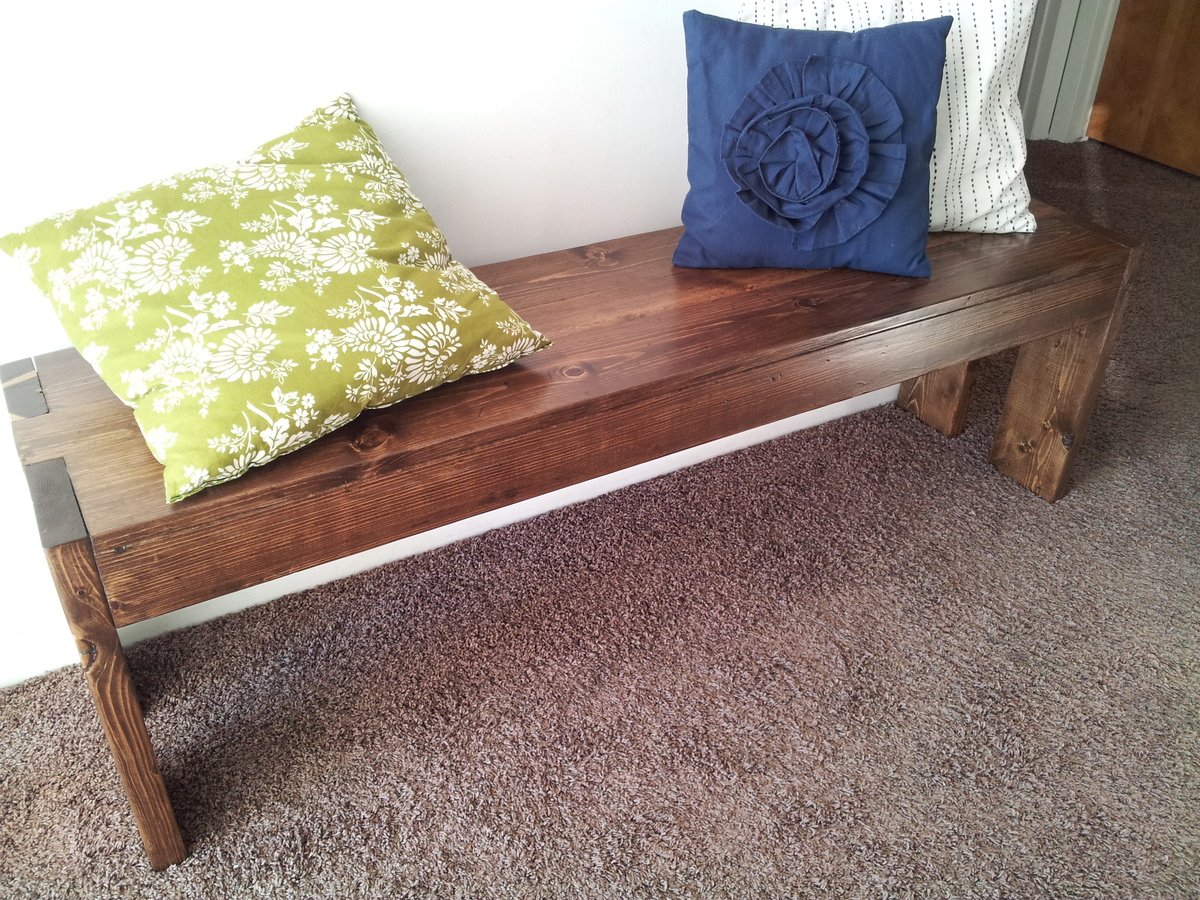
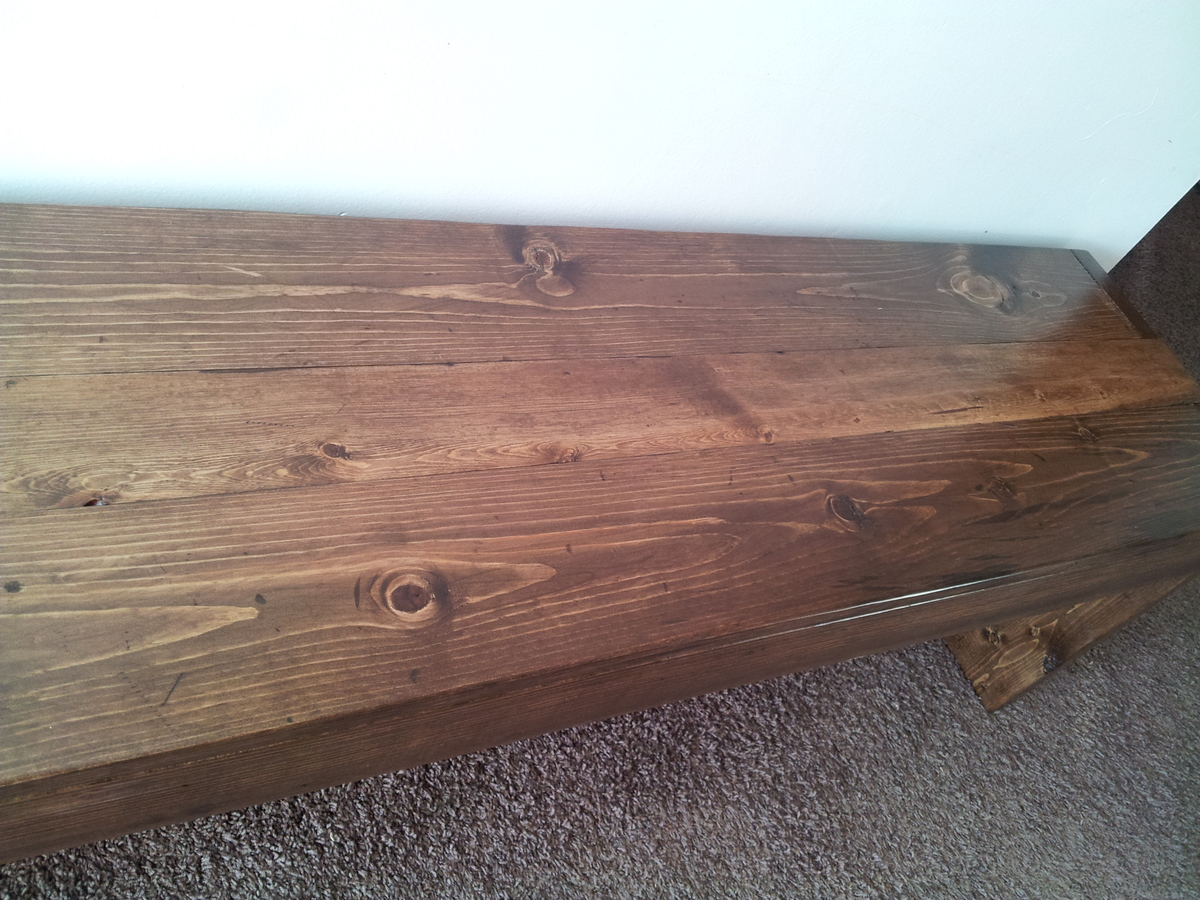
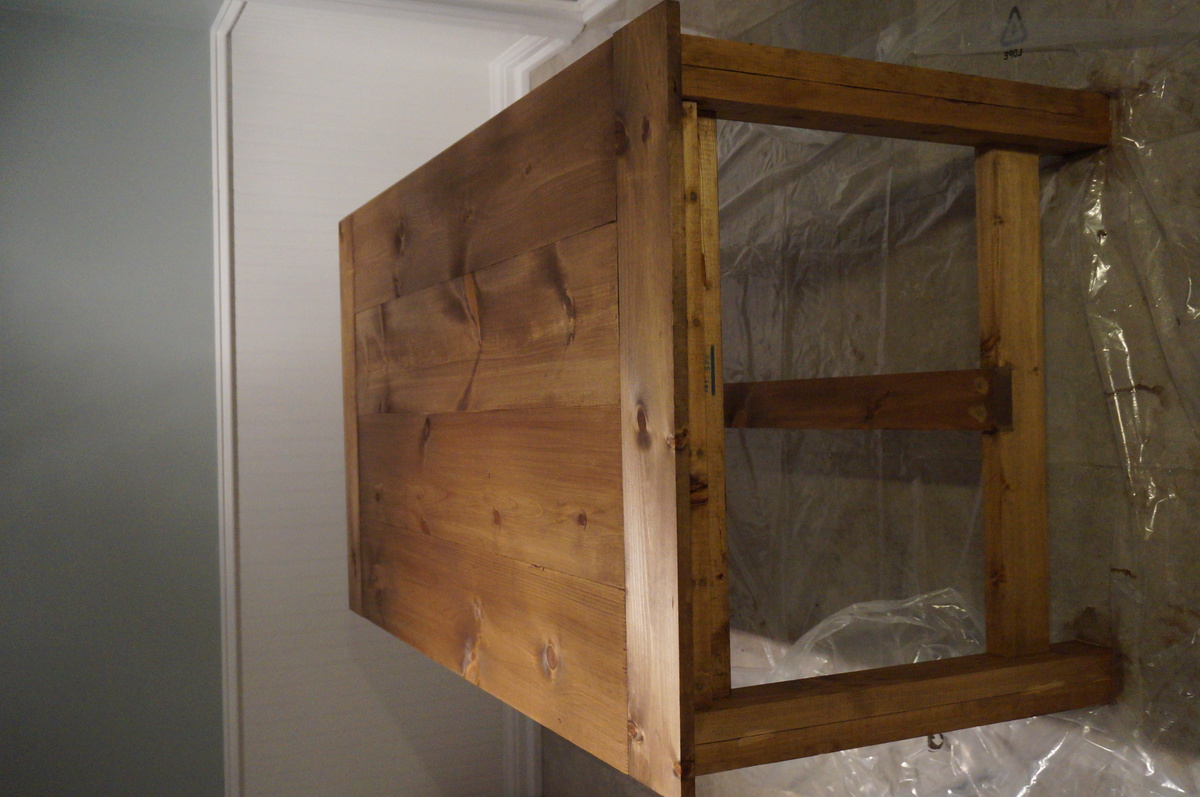
Benchwright Dining Table

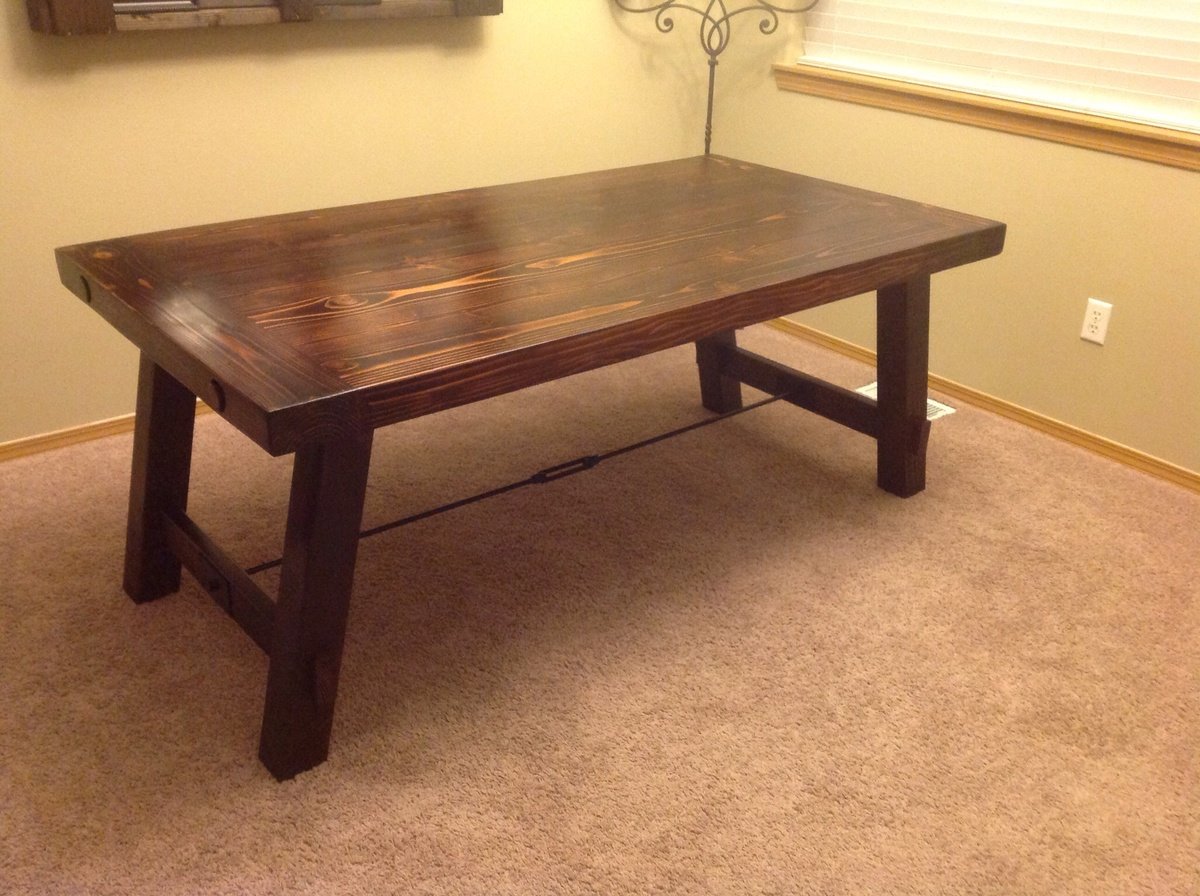
This was my first project and I completed it all by myself! I think it came out well :) My husband did not like the original table despite my love of it. I asked him if I made the table if I could then have it. So what started out as a dare (my husband thought I would not be able to do it) became a reality. I am really excited to tackle more projects and have gathered quite a few upcoming projects to complete.
I did a slight variation of the plans, I used 2x6s for the top and 4x4s for the legs. I located a planer and was able to remove the rounded edges of the boards. I wanted the thickness of the PB table so the thicker boards were my choice. I also used a solid welding bar threaded on both ends for the rod.

Estimated Cost
100.00
Estimated Time Investment
Weekend Project (10-20 Hours)
Finish Used
Minwax Red Mahogany satin finish polyurethane
Recommended Skill Level
Intermediate

Comments

Adam Martin

Mon, 06/09/2014 - 23:04

I like your version of this!

How did you attach the table top to the leg supports? Or aka, what does the underneath of the table look like? And how did you attach the breadboards to the long boards of the tabletop?

My email is [email protected], since that is probable faster than commenting back and forth on here.

MrsCoreyOrvold

Thu, 01/01/2015 - 21:12

To get the wider top I glued two 2x6 together than planed them so they look like one solid piece. I didn't really follow any plans just kept building a little at a time. I don't really think you can mess anything up if you just keep doing a little at a time. Let me know if you have any other questions! Love to help :) Happy building!

Farmhouse X Coffee Table

Submitted by Anonymous (not verified) on Mon, 04/04/2016 - 15:50

My husbands second build and it turned out AMAZING! Great plans :D

Built from Plan(s)
Estimated Time Investment
Day Project (6-9 Hours)
Finish Used
Stain and semi gloss off white by glidden
Recommended Skill Level
Beginner

Serving Tray/Caddy

Submitted by LampAtFeet on Mon, 12/09/2019 - 11:49

I recently saw a similar tray on Pinterest and decided to come up with my own version. It's approximately 20 x 12 3/4" and is made from a scrap 1x12 and 1x4s. The removable insert fits 3 pint mason jars for holding silverware and 18oz plastic cups. The handles were purchased from Hobby Lobby.

Tray cut list:

1x12 cut to 18"

2 1x4s @ 11 1/4" (cut to fit short sides)

2 1x4s @ 20" (cut to fit)

- glue and nailed with 1 1/4" brad nails

Removable Insert cut list:

2 1x4s @ 8 1/4" (sides)

1 1x4 @ 12" (top)

1 1x4 (divider) cut to fit, a little less than 10 1/2" (center divider is positioned 3 1/2" from bottom opening)

Glued and nailed with 1 1/4"  brad nails

Estimated Cost
$10
Estimated Time Investment
An Hour or Two (0-2 Hours)
Finish Used
Rustoleum matte black spray paint and 2 coats of satin wipe on polyurethane
Recommended Skill Level
Beginner

Outdoor Sectional Using 2x4

I saw Ana's plans to build an outdoor sectional and thought it was genius for our patio so I decided to make one myself. With a little extra help from my hubs we were able to complete the entire project in about 2 days. It's tough work but was SO worth the effort. We can't wait to have a party and put it to good use, but for now it's perfect for laying around enjoying the beautiful spring weather!

Estimated Time Investment
Weekend Project (10-20 Hours)
Finish Used
Behr Exterior Latex Paint
Recommended Skill Level
Beginner

Comments

GUEST (not verified)

Tue, 03/27/2012 - 06:54

I love this! Great work. Did you make the cushions or buy them? If you made them, I would love the link or instructions!

storchinsky

Tue, 03/27/2012 - 07:54

I just came back from your blog post. I love that you used 2 x 4s and it still turned out so great! I was considering the same thing for the same reason (1 x 4s are much more expensive!), and now I have proof that it works!

Cindy from Indiana (not verified)

Tue, 03/27/2012 - 08:30

I love that you used 2x4s and it looks so fantastic! Great job!

Christina Bare (not verified)

Tue, 04/17/2012 - 09:54

I love your cushions! They look so comfy! Where did you get them? Thanks!

Number 1 Shelves

Submitted by Stacie on Wed, 01/15/2014 - 07:05

These two Number 1 shelves (or maybe it's one Number Eleven shelf!) were built for Christmas gifts. I left the backs off so the wall color shows from behind.

I used a 1x8 10' for each shelf, and adjusted my measurements as instructed. Also, the plans had to be adjusted slightly to make the project fit together properly. I'll put the changes I made in the comment section to help others. This was an extremely simple build and went together quickly. They were great gifts! Thank you for the plans.

Built from Plan(s)
Estimated Cost
less than $20, including finishing materials
Estimated Time Investment
An Hour or Two (0-2 Hours)
Finish Used
Minwax Early American, brushed on and wiped off, followed by two coats of polyurethane.
Recommended Skill Level
Starter Project

Repurpose Fence and Vintage Windows Console

Submitted by hawkeye77 on Wed, 04/06/2016 - 20:34

Used the plans from grandy sliding door console. Decided to use old fence boards that I got for free and used vintage old wooden windows instead of the sliding door. I also trimmed fence boards so you did not see any raw edges.

Built from Plan(s)
Estimated Time Investment
Week Long Project (20 Hours or More)
Finish Used
Used white paint from lowes and minwax stain and laquer.
Recommended Skill Level
Intermediate

Comments

Modern Farm Bench

Submitted by TeamCraven on Fri, 01/17/2014 - 15:54

This bench came together fairly quickly, and was easy to assemble. Clamps are your best friend to get everything level and straight. We plan on next building a farmhouse table for this to go with, but in the meantime, it's in our entryway. I am very happy with how it turned out, thanks to these simple, straightforward plans. Thanks Ana! We used the cheapest whitewood at Home Depot, and to finish I used a pre-stain conditioner, 2 coats of Minwax Special Walnut stain, and 3 coats of Helmsman Spar Urethane because I have 3 young kids and one more on the way... so I know how many spills this will take, & I didn't want any moisture getting under my finish.

Estimated Cost
< $20 in lumber
Estimated Time Investment
Afternoon Project (3-6 Hours)
Finish Used
1 Coat pre-stain wood conditioner, 2 coats Minwax Special Walnut (leaving on 15 min before wiping off each coat), 3 coats Helmsman Spar Urethane (sanding with 220 grit sandpaper and wiping down between each coat)
Recommended Skill Level
Beginner

Garden box

Submitted by Anonymous (not verified) on Sat, 04/09/2016 - 21:42

Pretty easy plan to follow and very sturdy 

Estimated Cost
$60
Estimated Time Investment
An Hour or Two (0-2 Hours)
Finish Used
None
Recommended Skill Level
Beginner

DIY Wood Headboard

Submitted by Anonymous (not verified) on Thu, 08/24/2023 - 12:10

Thank You for this Headboard Plan. It was very easy. Other than painting it I completed it in less than 3 hours. A nail gun sure saves some time. Everyone loved it. They wanted me to put clear coat on it because it looked really good, but I ended up painting it to match my other bedroom furniture which is Black.

Scott Boyd

Farmhouse Table

We recently moved and wanted a larger table. My wife came across this website and it had the table we wanted! I have never built anything before so this was my first attempt at something like this and we are very happy with the results! More builds to come.

Estimated Cost
$200-$250
Estimated Time Investment
Weekend Project (10-20 Hours)
Finish Used
A minwax conditioner
Started off with a coat of Minwax Weathered Oak but found it was too light so the next coat we used was Minwax Special Walnut. For the final protective coat I used Circa 1850 Antique Paste Varnish.
Recommended Skill Level
Beginner

Comments

Family stocking stand

Submitted by kjoslyn78 on Tue, 12/24/2019 - 14:33

We have a vent-less gas wall heater, but had no mantel for hanging stockings. Thanks to the new plan, we have the perfect solution! We already had the 2X4s left over from the simple panel bed project, so we only purchased hooks and stains for this. 

We shortened the width to accommodate 4 stockings instead of 5 (we cut the 2 cross pieces 9 inches shorter). We also decided to add a large 2X6 cap to mimic a mantel, which really seems to tie it all together much better. We love this and have ideas now on how to make slight changes so it will more easily slide "over"/around the wall heater

(yes, we are not keeping it that close while stockings are hung, so as to not risk catching fire)

Built from Plan(s)
Estimated Cost
Under $20 (if you need to purchase wood/stain, we did this for under $10)
Estimated Time Investment
Afternoon Project (3-6 Hours)
Finish Used
Rust-oleum: Kona
Recommended Skill Level
Starter Project

Bed and Breakfast birdhouse

My wife found a birdhouse she liked online, so I did my usual and made one with my own flare and design. This is a two story birdhouse with and feeder on the side. Welcome to the Bird Bed and Breakfast.

Built from Plan(s)
Estimated Cost
15.00
Estimated Time Investment
Afternoon Project (3-6 Hours)
Finish Used
Cream and black paint with green stencil/sign
Recommended Skill Level
Beginner

Comments

Hanging Basket Column

Submitted by mtairymd on Thu, 04/14/2016 - 15:01

More Info / Build Instructions:
http://www.instructables.com/id/Hanging-Basket-Column/

This project is an expansion from my project (Pallet Planter Box) posted 2+ years ago. The pallet planters are holding up great but the finish was looking dull after a couple of years in the sun. I decided to refinish them with a darker walnut stain (vs. original red oak). At the same time, I thought it would be a good time to upgrade the planters. To provide flowers for the deck, my wife had been talking about a hanging basket column that could be placed in the ground or in pots. We found something we liked in a catalog; but to me, the price of $86 per column seemed pretty high for something so simple. So, I created this very simple project from 4x4 lumber, end caps, base plates and hangers. I made it a little more complicated by cutting down the 4x4s to match the decorative end cap dimensions but that isn’t really necessary. We are very happy with the results and the cost; it was less than $20/post to make. Now we have hanging baskets and the planters to provide seasonal flowers

Estimated Cost
$20 per box and column
Estimated Time Investment
Weekend Project (10-20 Hours)
Finish Used
walnut
Recommended Skill Level
Beginner

Entryway Drop Zone

I used the Mudroom Bench with Easy Drawers plans and adapted the bench to fit the area I had. Previously, the walls had chair rail moulding and some hideous wainscoting. The whole thing, including painting the bench and walls, took me about 3 weeks. Some days I worked an hour, some days 7 or 8 hours. The build was the easiest part of the project and I was finished with the unpainted bench in a weekend. I had an issue with one of the drawers not closing flush and wasted a lot of time trying to fix it but ended up building a whole new drawer. The finish work took the longest. I spent about $300 on materials and another $300 on tools I needed/wanted (Kreg jig, paint sprayer, etc.) for this and future projects. 

Built from Plan(s)
Estimated Cost
$300
Estimated Time Investment
Week Long Project (20 Hours or More)
Finish Used
High-gloss white paint
Recommended Skill Level
Intermediate

Comments

Simple White Outdoor Sofa and Loveseat

Submitted by Peoriajess on Mon, 04/09/2012 - 08:48

I built this set from the plans of the Simple white outdoor sofa. I did make a few changes to meet my needs. My original idea was to make 2 sofas but after doing some measuring I realized a loveseat would be better so I just took about 24" off of the length. I also did add slats to the arms, just to give it a different look. I found this project to be pretty easy with the plans that are provided and I used the link that is attached to the page for sew mama sew to make all of the cushions! I built the side table from the plans for the Ottoman or Accent Table for Simple Modern Outdoor Sectional although I made the table larger width wise (24 x 24) to fit nicely between the sofa and loveseat.
The only thing I would do a bit differently if I were to build it again would be to use a slightly better grade wood so I would have to use less wood filler and sand less ( That is what took the most time ) otherwise this could have been finished in half the time it took me. This is a great project that really transformed my back patio!

Estimated Cost
300.00
Estimated Time Investment
Week Long Project (20 Hours or More)
Finish Used
Dutchboy exterior white gloss
Recommended Skill Level
Intermediate

Comments

sgilly02 (not verified)

Mon, 04/09/2012 - 19:29

Fantastic job. It looks nice enough to be "inside furniture". I love the slatted arms, too.
I'm in total agreement with you about using a better grade of wood for some of my projects. For the time it takes to make the "cheap" wood paintable (forget staining it with all the filler and glue marks), it is so worth it for me to spend a bit more and have a finished product that looks so much better and took much less time!
Again, I love your finished project! Great job.

PA PA B

Mon, 04/09/2012 - 19:58

Are you concerned about using pine for outdoor use? I would like to do the same but I am not sure how to protect the wood from the elements here in Wisconsin. Any ideas would help

Peoriajess

Tue, 04/10/2012 - 05:37

Thanks so much for the compliments! I have used pine in other outdoor projects and have found that if you use a good quality exterior paint they are protected enough to endure the weather. I live in Illinois so I know what you mean about the elements but so far they have made it through just fine :) just use 2 coats of paint and make sure all of the exposed pine is covered with the paint. I also put plastic protectors under all of the feet so that no water will be absorbed that way. Good luck!

wishingbee

Mon, 08/26/2013 - 14:06

So I need new furniture inside the house and your photo has convinced me to build these for my living room. I've got a smaller home (670 sq/f) so it's a challenge to find furniture that fits- two loveseats of this design would fit well in our space. Beautiful job, well done, and thanks for the push I needed to get started.

Peoriajess

Fri, 11/08/2013 - 07:29

Hi,
To attach the side slats I countersunk long thin wood screws to the top and bottom rails. I put one screw at the top and bottom of each slat then filled the holes with wood filler. To be honest, if I were to do it again I would definately have used a Kreg (which Anna recommends for most projects) because it would have been a lot less time consuming. The sanding of the wood filled holes took a long time to get filled and sanded just right so there was no sign of the holes. Good luck!!!

SavannahSmiles

Sun, 11/10/2013 - 05:10

Thank you! I hope to have side arm slats installed tomorrow. I am going to 'frame' the slats with 1x2's and then insert the framed set into the arm. :-) we'll see how it goes.

6 Laundry Basket Dresser

Submitted by Anonymous (not verified) on Mon, 04/18/2016 - 06:51

Took the plans from the laundry dresser and adjusted them so it would hold 6 laundry baskets. My wife wanted a counter she could throw the clothes on and fold right there so this worked well for our needs. Added some trim to the end to match the shoe bench we built in our drop zone right outside laundry room.

Built from Plan(s)
Estimated Time Investment
Day Project (6-9 Hours)
Finish Used
Sand, Primer and Latex Satin Enamel
Recommended Skill Level
Beginner

Comments

Ultimate lumber and plywood storage

Submitted by Anonymous (not verified) on Thu, 01/02/2020 - 16:00

I followed the plans for the wood storage rack pretty closely. The shelf brackets made from 2x4's are quite sturdy. The entire rack is easy to move around on the 4 inch casters. This project took about 4 days to build and was well worth the time and money. All my wood is in one place now- sheets, long boards and short boards. Everything is easy to find and my shop is a lot neater, now.

Estimated Cost
$100
Estimated Time Investment
Week Long Project (20 Hours or More)
Finish Used
unfinished
Recommended Skill Level
Intermediate
Back