Community Brag Posts

Closet Makeover

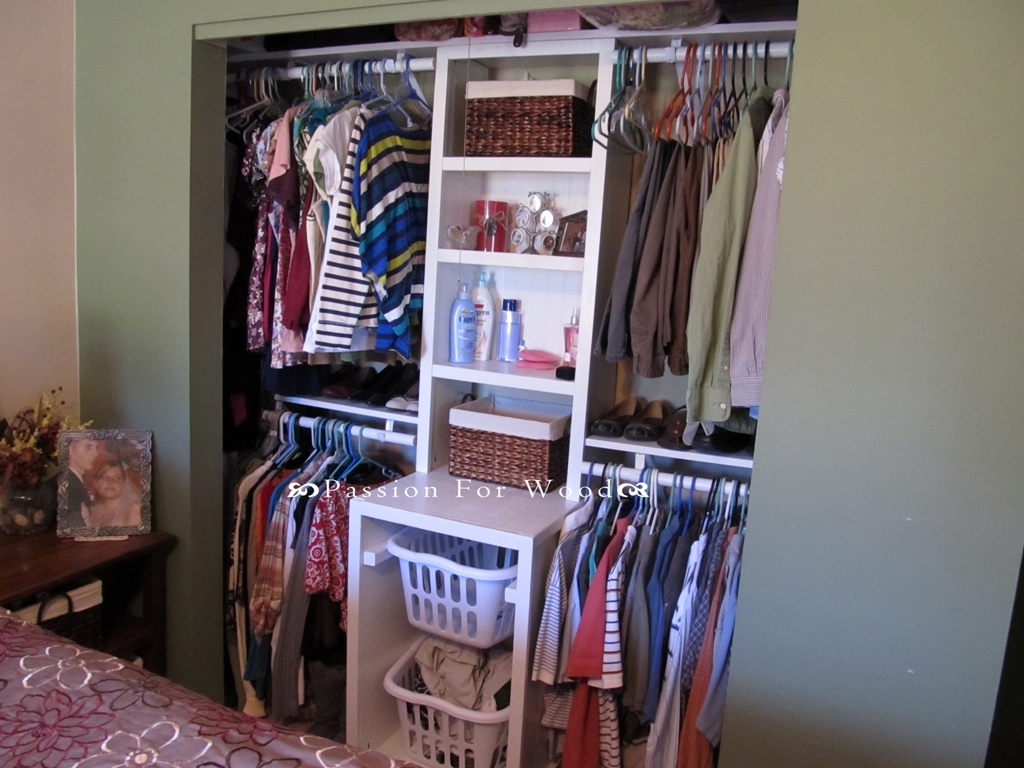
I hated the way my bi pass closet doors wasted so much precious space, as well as only having a single rod for hanging. I can't even post my before photo because of the embarrassing mess billowing out. On the both sides there are two bars based on the height of our own clothing and space needs. On the left side I made the bottom bar about 18 inches shorter than the top so that dresses can hang in that space. I also attached spare 1x12's to the rod brackets and am using them for shoes.

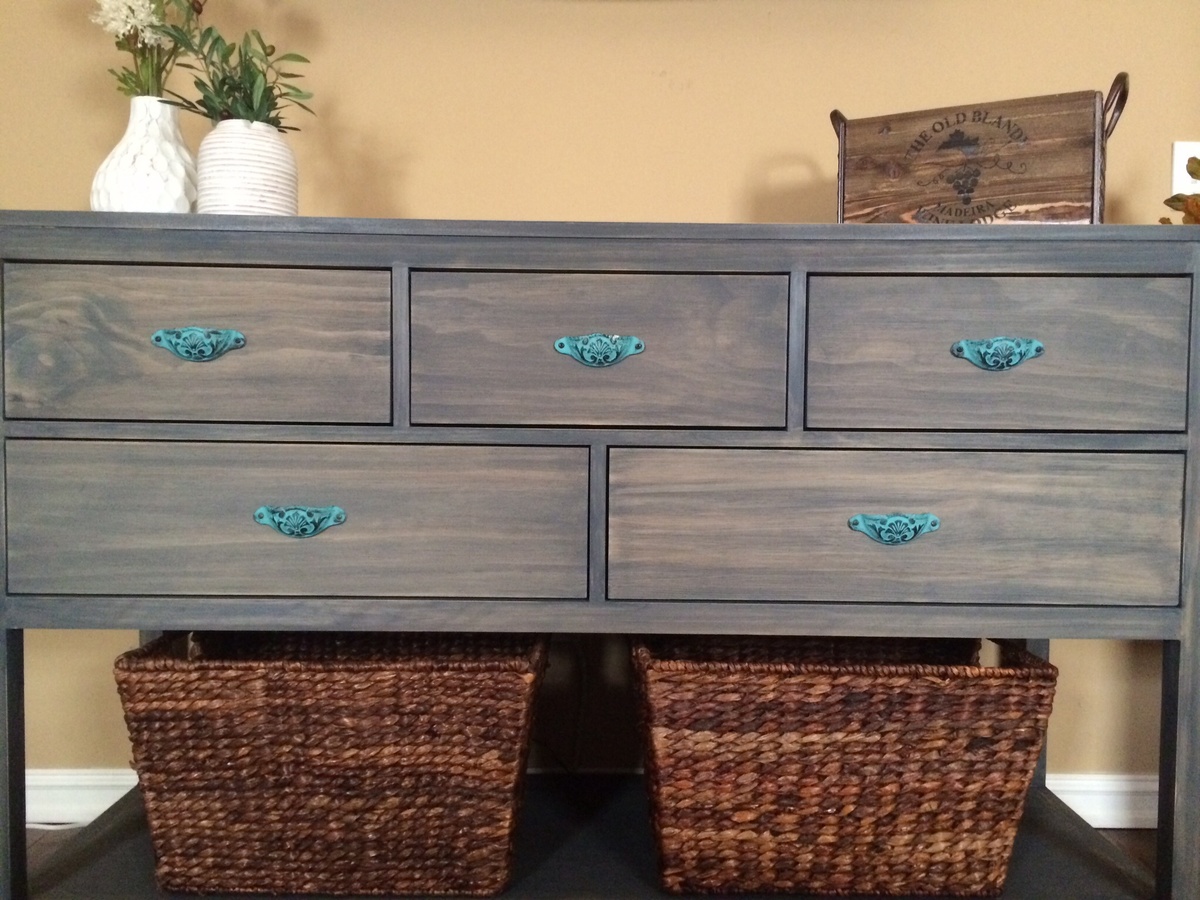
Another great thing about this closet system is my dirty laundry sorter! Before we just had random baskets in another part of the room for this job. Now we have a nice tidy spot and it really helps be keep up on our laundry.

Estimated Cost
Under $50
Estimated Time Investment
Weekend Project (10-20 Hours)
Finish Used
Sand smooth, prime, 2 coats of white semi-gloss paint.
Recommended Skill Level
Intermediate

Comments

Jaymee (not verified)

Sat, 03/31/2012 - 14:40

Closet makeovers on our to-do list as well, and I was wanting to incorporate the laundry dresser in them as well. Glad to see this done !

Rhyan Console Table

Submitted by Stacie on Wed, 01/15/2014 - 10:37

I built this console table for my son's room, and added a matching hutch for additional storage and display. It's a versatile piece of furniture. He uses it for games, books and collectibles, but it would be great for a tv and game system too. Thanks for the plans!

Built from Plan(s)
Estimated Cost
$75
Estimated Time Investment
Afternoon Project (3-6 Hours)
Finish Used
Minwax Ebony stain with several coats of polyurethane
Recommended Skill Level
Beginner

Comments

moosmani

Wed, 01/15/2014 - 12:52

Great! Thank you so much! I think this will be the perfect size for what I need. Yours looks so nice that I'd like to copy it. Did you use any plans to build the hutch or did you just make it up? I just love how yours looks! Thank you so much for posting!

Stacie

Wed, 01/15/2014 - 14:09

Moosmani, I made it up just based on a very simple hutch. Two days later, Ana posted plans for the School Desk Hutch. :/ A plan to follow would have been nice but honestly, the hutch was a very easy build. Good luck building yours and I look forward to seeing pics.

Dining Room Table

Submitted by RetroFit on Thu, 04/07/2016 - 18:18

This is our first real furniture project. We wanted a large enough table to be able to sit 10 people comfortably around without the table legs getting in the way of the people on the corners. We are really happy with the way this turned out. Each leg was joined with a double floating mortise & tennon. The overall dimensions are 47" wide by 80" long by 31.5" tall.

Estimated Time Investment
Week Long Project (20 Hours or More)
Finish Used
Danish oil and Polyurethane.
Recommended Skill Level
Intermediate

Comments

Brandiville

Sun, 04/10/2016 - 04:26

I would be very interested in the plan for this table. Do you mind sharing? It is beautiful!

Custom cornhole

Submitted by mandee on Sun, 12/15/2019 - 15:21

I made this custom cornhole game for my brother for Christmas. I drew the Texans logo freehand as well as the “M”.  

Estimated Cost
50
Estimated Time Investment
Weekend Project (10-20 Hours)
Recommended Skill Level
Intermediate

Hanging Bed

Submitted by cecimoreno on Sun, 04/01/2012 - 08:05

Hanging bed for my daughter built from the "Easiest Hanging Daybed Plans". Super easy to do and looks and feels great!

Built from Plan(s)
Estimated Cost
$60
Estimated Time Investment
Weekend Project (10-20 Hours)
Finish Used
Benjamin Moore Latex Paint in Early Dawn and topped with Minwax Paste Finishing Wax
Recommended Skill Level
Beginner

Comments

cecimoreno

Sun, 04/01/2012 - 12:26

Thanks! We just hung it up last night, so I can't say for sure yet- but putting her to bed last night was a breeze (at least compared to most nights :))

Birdie (not verified)

Sat, 08/18/2012 - 17:56

Love this bed! You did a great job! Quick question, did you screw this to the wall, or just leave it swinging free? I'm curious if it bangs agains the wall when your daughter gets in.

Thanks!

DIY Outdoor Living Room

Submitted by Anonymous (not verified) on Sat, 08/26/2023 - 12:09

I wanted a bar lounge on my patio so I built it from your plans. We had a July 4th party for the my family. It was so nice.
Everyone was surprised I had done it myself.
I also made a corner table but unfortunately it doesn’t show in pictures.
Thank you! Your plans are amazingly easy.

Donna-Tennessee

Built from Plan(s)

My Ottomans

Submitted by Angie5483 on Wed, 04/04/2012 - 14:33

I decided to make these awesome ottomans that were featured on Shanty to Chic. I love them so much. I am new to the DIY world but loving it. You can catch my adventures trying to make this bad boy at my blog at ifshecandoitsocani.blogspot.com

Built from Plan(s)
Estimated Cost
For both of them $40
Estimated Time Investment
Afternoon Project (3-6 Hours)
Recommended Skill Level
Beginner

Rustic 'X' Desk

Submitted by jphysc on Sun, 01/19/2014 - 18:45

This was a great project. I had some trouble with getting the X's perfectly connected (due to off square boards) and had to use some wood filler here and there. Beyond that, everything came together really well. The longest part was getting the finish just right.

Built from Plan(s)
Estimated Time Investment
Weekend Project (10-20 Hours)
Finish Used
For the base I used Miniwax Jacobian, spray painted in white, and painted in an off-white SW color. Used 80 grit sandpaper to get the look and finish just right. The table top is just jacobian. Everything has 2 coats of polyurethane.
Recommended Skill Level
Beginner

Rustic X Coffee Table

Submitted by dsteinberg on Wed, 01/22/2014 - 09:11

- made directly from the plans
- decorative hardware was spray painted "flat black"
- there are decorative bolts in the legs, they were installed after these pictures were taken.

Built from Plan(s)
Estimated Time Investment
Day Project (6-9 Hours)
Finish Used
- Brushed on black tea
- Brushed on solution of vinegar and steel wool that sat for 72 hours
- Vermont Natural Coatings Wipe on PolyWhey
Recommended Skill Level
Beginner

Large dog table crate

Submitted by Kimly831 on Fri, 04/15/2016 - 14:23

I am so ridiculously proud of myself... This was my first wood building project and now I think I'm addicted !!!! Next project a bookshelf!!

Built from Plan(s)
Estimated Cost
$165
Estimated Time Investment
Weekend Project (10-20 Hours)
Finish Used
Cherry mahogany
Recommended Skill Level
Starter Project

Full-size Farmhouse Bed

Submitted by Anonymous (not verified) on Sat, 12/28/2019 - 17:08

Such a great sturdy bed! Daughter loves it.

Built from Plan(s)
Estimated Cost
208.00 for wood
Finish Used
We primed and painted with BM Alabaster. I then sanded edges and grooves and applied Matte Poly.

Cubby Bookcase for a big girl!

Submitted by ferbit on Mon, 04/09/2012 - 18:36

My youngest needed a new bookcase so bad! All she had was an old baby bookcase that hardly fit her books anymore. I was so excited to see Ana's plans for the simple cubby bookcase. Yay! I made it a smidge narrower to fit the space and taller so she could have more adjustable cubbies. :)

I used pine 1x12 boards for the box and pine 1x2's for the trim. I used my Jig-It Adjustable Shelving Jig and drilled every other hole. Didn't feel like I needed quite as much "adjustability" for books. :-)

I wanted a more rustic look, so I left a lot of brush strokes on purpose and didn't fill any obvious knots in the wood. I really like how it turned out. :) When we were putting all of the shelves in, my daughter was so cute - she made sure all of the knots were facing OUTWARD so she could see them. She thought it looked neat that way.

Estimated Cost
$60
Estimated Time Investment
Day Project (6-9 Hours)
Finish Used
Behr semi-gloss off-white
Recommended Skill Level
Beginner

Custom Bird Cage Stand

Submitted by Mamabear2 on Thu, 01/23/2014 - 10:33

I wanted our bird's cage up higher and on something that the kids wouldn't be able to tip over. So my Husband came up with this. Its car siding. and stained. it has 2 hinged doors and a shelf.

Estimated Time Investment
Weekend Project (10-20 Hours)
Finish Used
I purchased a stain in color of choice and clear coat
Recommended Skill Level
Starter Project

Modified folding table/benches

Loved doing this build, I have been thinking of making these for a while.

Based off of a few of the comments I read, I modified the plans a little bit. Instead of using three 2 x 6s for the benches, I used two 2x4s with one 2 x 6 in the centre. Shortened up the bench support length by 3" to make up for the difference. This allowed for a smaller seat, which is easier to get in and out of when in table mode, but still plenty to sit on when used as a bench.

I am trying to come up with an alternate system for pinning the table in each position. I have found that after only a few uses, the table has some wiggle in the top, most likely from the bolts going in and out repeatedly. I would love some ideas on how to get these to hold nice and snug when in each position!

I posted a few pictures of these on my Facebook page, where I now have been asked how much I am selling them for and have about 3 orders already placed! Looks like the spring will be busier than expected!

Estimated Cost
For the two, 8 foot benches, about $80 for the lumber, and $10 bucks for the hardware. So totaled at about $90.00 Canadian for the 2, prior to any staining.
Estimated Time Investment
Afternoon Project (3-6 Hours)
Recommended Skill Level
Beginner

My version kids play grillKids wood play grill

As in a lot of plans I made them to fit my needs. This one was no different. I love Anna and her site. Sometimes things are not always clear. With simple knowledge you can solve most of the problems. I made this version for my 5 year old niece for Christmas. I decided to use 1x12 in place of the plywood . It was easier  to work with and made it much stronger With the solid wood I think I lost 1/4 inch in height. I also had extra 1x3 boards I used them for bottom shelf. For the dials I used what I had. I used my hole saw and filled in center with filler. It was cheaper than buying a dowel. I think it is easier to mount the shelf before you put the sides on. Top grill I stayed with 1x2 I thought it looked much vetter that 1x4 board. I finished it off with castors I think that put the icing on the cate and made it even better. She loved it.

Built from Plan(s)
Estimated Cost
$70
Estimated Time Investment
Weekend Project (10-20 Hours)
Finish Used
Satin Spray paint
Recommended Skill Level
Intermediate

My Bookshelf Dollhouse

Submitted by wmaughan on Wed, 04/11/2012 - 22:26

After much deliberation, I decided to make a dollhouse for my daughters Christmas gift. The aesthetics of the bookshelf-style dollhouse appealed to me over the more intricate and fancy designs. I took the literal meaning of the style and incorporated an actual bookshelf/DVD rack into the dollhouse. On the apposing side I built a magnet board for my daughters given that my refrigerator is not magnetic. About the project: I knew my design would end up being heavy so I started by building a basic frame out of construction grade 2x4's. The frame is placed on four casters and is concealed by the baseboard. When on carpet, the casters are not visible and have come in handy. Working upward, the majority of the construction consists of 3/4" cabinet grade plywood which you can find at Home Depot. The "carpet" I chose was an inexpensive bathroom rug that I purchased at Walmart. The scale & thickness of the berber seemed appropriate for the dollhouse and I attached it using carpet glue. For added security I tacked the perimeter with some staples. For the bathroom tiles, I cut some groutable adhesive tiles into squares on the table saw (use a cross cut sled if you have one) and attached them to the bathroom floor. Make sure your surface is free of dust, and a heat gun or a propane heater will accelerate the drying process and create a better bond. Make sure to use unsanded grout for the joints. To make the shingles, I cut a 4'x8' (used about 2/3 of the sheet) piece of 1/4" mahogany veneer into 2.5"x4' strips. The cuts were made perpendicular to the wood grain to give the desired aesthetic. This gave me a robust shingle construction with the look of shake shingles. I then cut about 3/4 of the way through the strips with approximately 1 1/4" separation between each shingle. Attaching the shingles was easy. I didn't want to wait for glue to dry so in addition to some wood glue, I also tacked the row of shingles in place with 3/8" brad nails. When placing the shingles, make sure to start at the bottom and work your way up to the pitch of the roof. This will allow you to overlap the shingles about 3/4" to cover the uncut portion to give it the appearance of individual shingles. You will also want to offset your rows to change the vertical alignment of the shingle spaces. I marked each row with a pencil prior to cutting the final width. You may also consider which side of the shingles you want facing up. I opted for the rough side to give it a more weathered look. With some of the extra shingle material I made hardwood floors for the kitchen.The veneer I purchased was mahogany on one side, and oak on the other which allowed me to alternated sides and give it a unique look. Attach the floor using wood glue and allow 24hrs before sanding. Place weights on the floor to secure it while drying. I applied both a stain (Minwax Golden Oak) and some wipe-op polyurethane for the finish. The storage bins are Ikea boxes that can be easily removed to allow for additional play areas. The piece of sheet metal I used for the magnet board was already cut to the desired size at Home Depot. I attached it using some 3M spray adhesive, then secured it with some poplar strips. I also used the 3M construction adhesive to attach the craft paper/wallpaper. With all of the chaos surrounding Christmas I wasn't able to quite finish it. Here is still what's in progress: - Painted white ladder to loft - Stained mahogany stairs to family room - Kitchen cabinets - Cobblestone chimney - Closet doors

Built from Plan(s)
Estimated Cost
120
Estimated Time Investment
Week Long Project (20 Hours or More)
Finish Used
Stain for shingles & wood floor was Minwax Golden Oak. Wipe-on poly for wood floors. Paint was Behr paint.
Recommended Skill Level
Intermediate

Comments

ferbit

Thu, 04/12/2012 - 08:29

Oh WOW!!! This turned out amazing! So jealous my kids are too old for a bookcase like this! You did a fantastic job!

jeff womack (not verified)

Fri, 04/13/2012 - 15:18

How did you make the railing? It looks great, but wouldn't it be fragile? What did you use for trim and molding throughout the house? Did you use a dremel to work with the small details? This is an amazing looking doll house that my daughter would love. I just may need to do this sometime before Christmas.

birdsandsoap

Fri, 04/13/2012 - 20:38

Looks like an intricate design, and whoa! All of those little shingles by hand? Good job. I love how you incorporated the bin storage into the bottom.

wmaughan

Mon, 04/16/2012 - 17:32

It gives the appearance of individual shingles, but I actually just cut strips with grooves in them. I have seen several dollhouses with shingles that have fallen off so I wanted to avoid that :)

Milca (not verified)

Fri, 06/08/2012 - 20:32

Super duper good job on it :) Wish I had time to make one like that for my 4 yo. She's so particular, can't let her see the pictures ah ah. Lucky girls! Talented mama!

Wide Cabin Dresser

Submitted by Amynikkel on Sun, 01/26/2014 - 20:03

Wide cabin dresser from pine, charcoal grey wood stain, soft-close drawer slides, and turquoise hardware.

Recommended Skill Level
Beginner

Comments

Back