Community Brag Posts

Wardrobe

Submitted by MERCMAN on Mon, 03/05/2018 - 08:44

Made from Mirroed Door Wardrobe Plans. Built from pine shelf boards at a cost of approx $7.00 per board. Light grey cabinet paint, primed with Bins primer as it also seals the knots. Used a kreg jig and glue to attach boards to each other to get then wide enough. No ply-wood was used. 

Estimated Time Investment
Week Long Project (20 Hours or More)
Finish Used
Bins Primer and Cabinet paint.
Recommended Skill Level
Intermediate

Craft Lair

Submitted by Anonymous (not verified) on Thu, 04/21/2022 - 13:51

I used the plans for barn door TV cabinet and adapted it to make a craft area cabinet in a small loft space.

Built from Plan(s)

Comments

Corner Desk

Submitted by bryantxst on Sun, 06/12/2011 - 08:15

a variation of the corner desk plans. for more pictures visit: http://www.facebook.com/media/set/?set=a.10100136762454037.2548324.2960…

Built from Plan(s)
Estimated Cost
150
Estimated Time Investment
Weekend Project (10-20 Hours)
Finish Used
mahogany stain with poly sealant coating
Recommended Skill Level
Beginner

Comments

Ryan (not verified)

Fri, 02/24/2012 - 22:02

Hey i love the elevated platform, can I get you to post dimensions & Cuts?

kuwaitrepair

Wed, 08/11/2021 - 04:20

Immersing yourself in your own area significantly improves productivity and motivates you when you decide and select best design of corner table admin should allow everyone to share their best comments for help to find best experenice
This is great topic

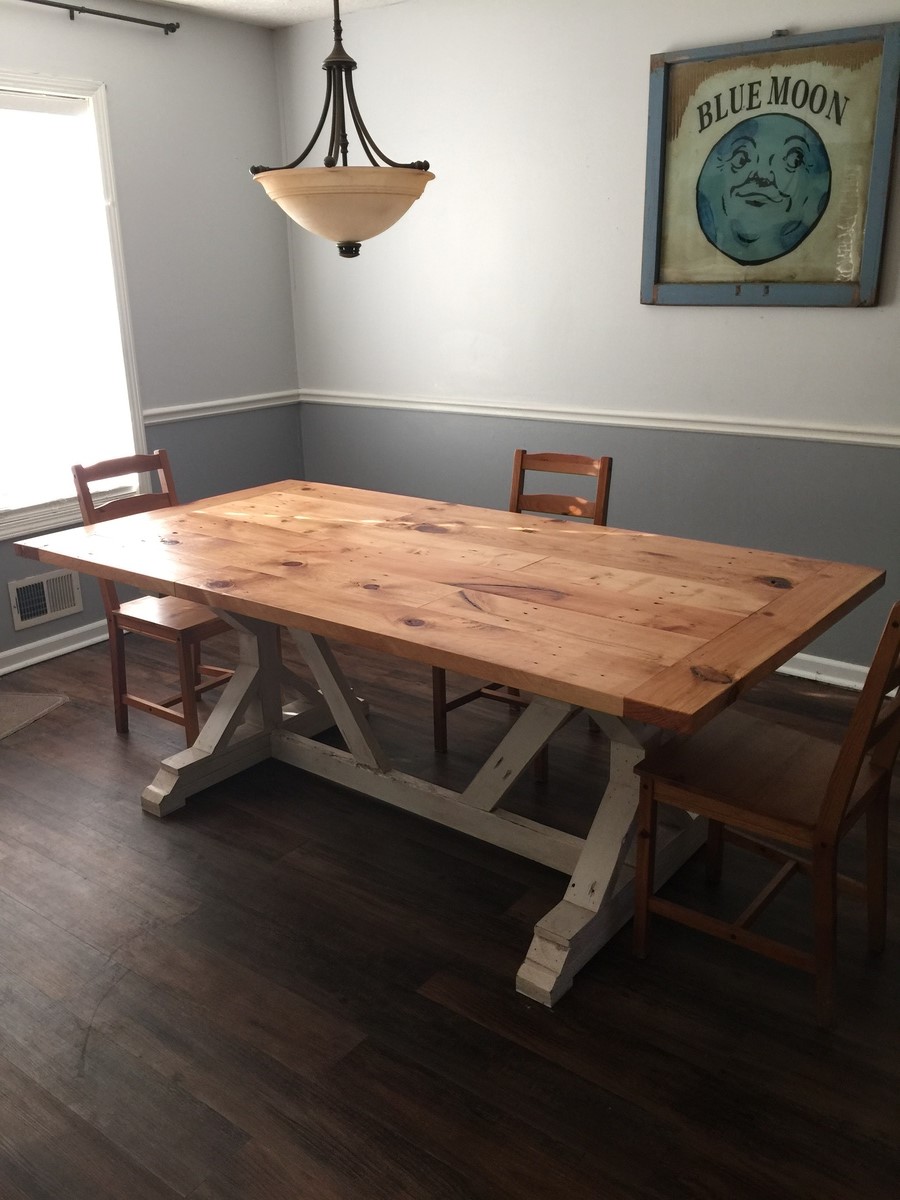
Classic Grey Fancy X Dining Room Table

Submitted by collins814 on Sat, 07/27/2013 - 19:56

I recently made the end table and console table from the "Rustic X" collection and those were my very first wood projects that I have EVER done. I think I am addicted now! I have had NO experience in working miter saws, kreg jigs and barely drills before this. If I can do it, anyone can do it :)

My husband and I made this table over a weekend and I am very excited about how it turned out. I was inspired by the color and size (and chairs!) of Sawgrasshomegirl "weathered grey fancy x farmhouse table with extensions" and I used the classic minwax stain. Thank you so much to Anna White and Sawgrasshomegirl for their plans, ideas, and inspiration!

Built from Plan(s)
Estimated Cost
$100
Estimated Time Investment
Weekend Project (10-20 Hours)
Finish Used
Minwax Pre-stain, Minwax Classic Grey and Minwax Polycrylic Protective Finish
Recommended Skill Level
Beginner

Comments

camkin02

Mon, 08/12/2013 - 20:40

Those chairs are beautiful(table also) where did you find them.

collins814

Tue, 08/13/2013 - 05:37

The chairs are from Pier 1 (Kubu hand-woven dining chair). They have a hint of grey in them too which I love!

Glider

Submitted by Seansg5 on Sun, 08/09/2015 - 20:24

The bench was easy to build with great instructions. I had Home Depot make my cuts for this first project and then I went and bought a miter saw and other power tools for future ones. So much fun. 

Built from Plan(s)
Estimated Cost
$100
Estimated Time Investment
Afternoon Project (3-6 Hours)
Recommended Skill Level
Beginner

Comments

Cross35

Mon, 03/14/2016 - 08:35

Great work.  DId you do anything different to the swing itself?  How did you build the frame.  I'm looking to do this exact thing for my patio.  I don't have anywhere to hang the swing.


Thanks for sharing any info.

mbarland

Sat, 06/13/2020 - 16:54

Made the chair and then built the glider frame for it just eyeballing the picture. I can't figure out how to upload a photo of my design, but can try to describe it.

I made mine with a 4x4 on the base of each leg, but a 2x4 would work as well, it was just what I had on hand. The base board on each leg I made 48". From there I put two 48" vertical boards. The vertical boards were centered and from the front edge of the first board to the back edge of the second board. Two 16" boards were then used at the top and bottom of the vertical boards to hold them in place. Cap it off with a 30" board on top of the verticals. This is where you'll attach your eye bolts. I put both eye bolts 3 1/2" back from the front (a scrap of 2x4 works well as a guide). To join the two legs, I used two 52" boards on top of the base 4X4 of the verticals (one in front of the legs and one behind).

Around the corner, outside

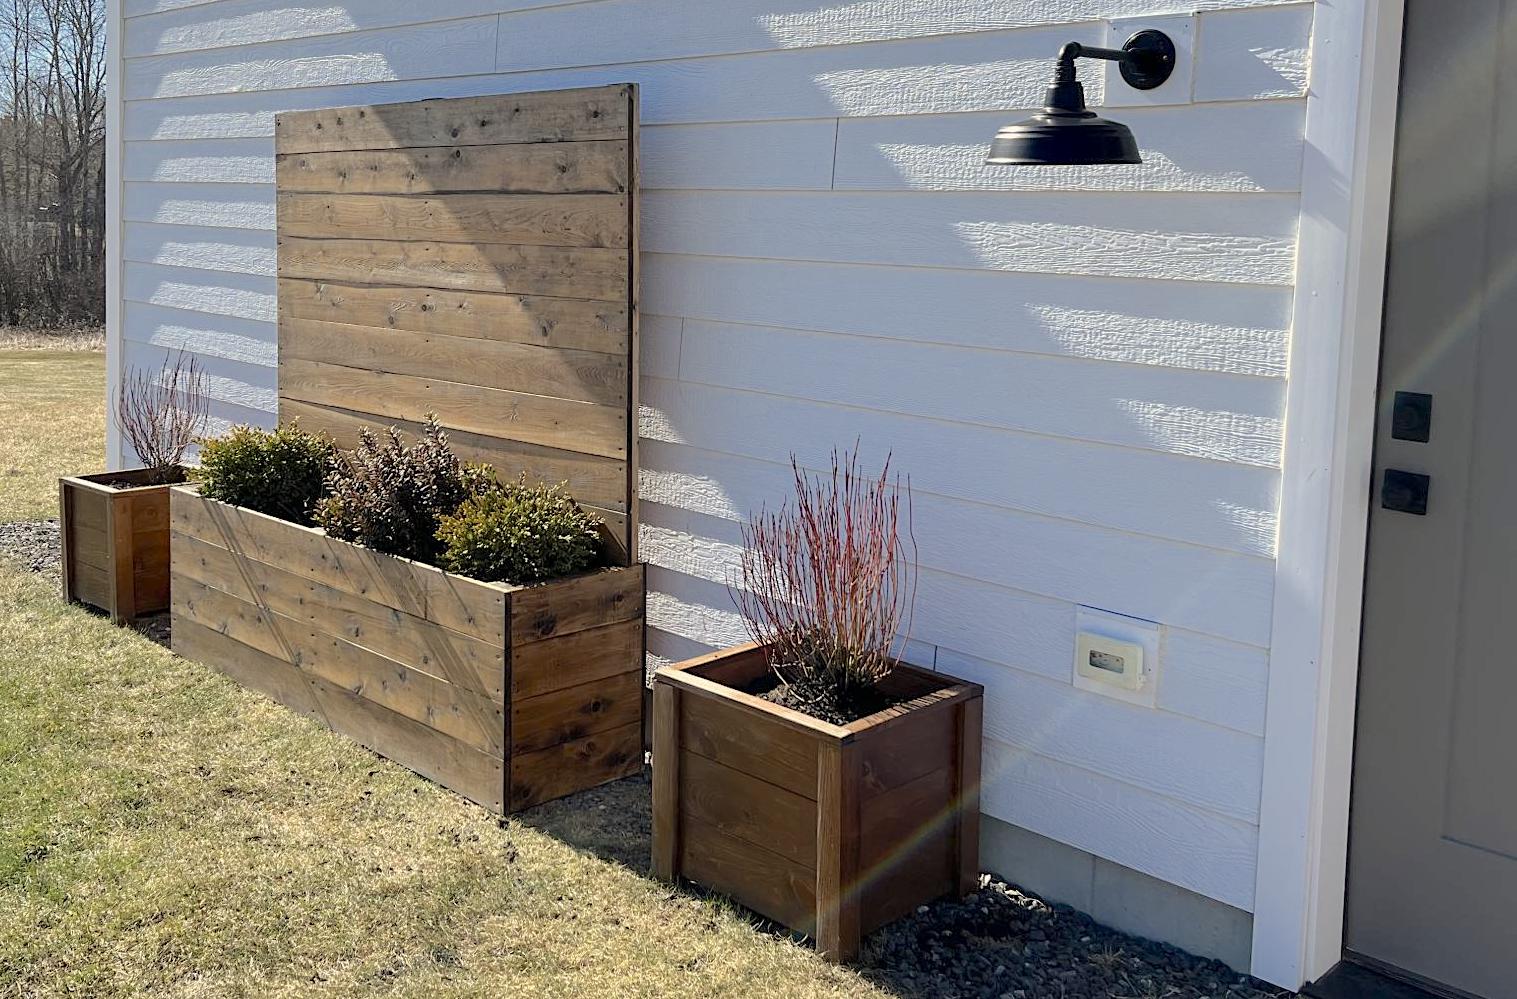
First of all, sorry for my english, i'm french and i don't speak english often in life, so i don't know now if i still speak and write it well enough to be understood.


We needed some space outside our appartment to room bootles.

When i found the plans on this website i decided to start this project.

It was the first time i used my device "undercaver jig" to assemble or link all the wood pieces together.

Once all the "wooden wall parts" made, i strated assembling the whole wooden furniture.

Then i painted them and once the paint was ok, i protected the wall furniture (painted parts and unpainted parts) whith an uncoloured protective product.

After that the inside was done to be able to store milk and water bottles.


The last part to be done was the upper part. I decided to make it in 4 indepedant concrete parts to be abble to replace it in case it breaks.

Estimated Cost
150 Euros
Estimated Time Investment
Week Long Project (20 Hours or More)
Recommended Skill Level
Intermediate

Japanese Inspired Black Walnut Stool
Submitted by Anonymous (not verified) on Fri, 04/22/2022 - 08:06

As my first piece of furniture, I made a Japanese design inspired dining stool. The motivation was requiring a few extra seats around the dining table when we exceeded the seating capacity of 6.

This stool is all black walnut. I started with a template for the curve, made from 1/2” mdf. This template was used to curve the legs (curves on both outer faces), the long and short stretchers, and also the bench style 18x12” seat. Joinery was done with mortises and floating tenons (dominos). The stool was finished with two coats of Odies Universal Oil. 
Console Table

Submitted by jrees09 on Wed, 06/15/2011 - 07:22

This was my first attempt at building anything. Ever. I am fairly pleased with how it turned out. There was a bit of uneveness on the back side of the table, where the top joined with the back and where the back joined one of the side pieces. They were hardly noticeable and I was able to sand it down. All joints on the front side of table were prefectly aligned, though. I don't know if the wood was uneven or if it was just an error that was likely due to my less-than-ideal work space. You can check out my blogspot for pictures of the completely finished project.

Estimated Cost
About $50, for a first time builder who needs basic supplies....
Finish Used
painted, distressed, then stained.
Recommended Skill Level
Starter Project

Comments

Crib for Ella

My husband recently designed and built our daughter's crib. After looking online and measuring another crib to make sure he had the rail spacing just right he came up with a plan and built it over a few weekends. He also built the changing station and will later build an armoire for her room as well.

Built from Plan(s)
Estimated Cost
$250
Estimated Time Investment
Week Long Project (20 Hours or More)
Finish Used
Rustoleum American Walnut on rails and frame
Minwax Gunstock on oak plywood (head and foot)

Recommended Skill Level
Intermediate

Comments

Pabs

Tue, 07/30/2013 - 18:53

Beautiful!, I've been searching the web for plans to build a crib and haven't found any, would you mind sharing yours?, I think it looks amazing!

Potting table

This is our version of the potting table all made with free materials. We love it!!!

Estimated Time Investment
Afternoon Project (3-6 Hours)
Finish Used
Teak stain
Recommended Skill Level
Beginner

First Coffee Table

Submitted by anmillard on Tue, 08/18/2015 - 21:39

Inspired by the Pottery Barn benchwright square coffee table, I made this approximately 36'' square with one large drawer.

Estimated Time Investment
Weekend Project (10-20 Hours)
Finish Used
Rustoleum Dark Walnut stain with Minwax Satin Polyurethane
Recommended Skill Level
Intermediate

Comments

New side table for our guest space

Submitted by Tbacks on Sat, 03/17/2018 - 04:57

I was making a set of side tables for my daughter and decided to make an additional one for our spare room/guest space.  I love to try new wood treatments so I used Apple Cider Vinegar applied with a steel wool pad on this table.  Let the steel wool soak for about an hour and then applied.  Sanded after dry to even out the finish and then applied a gloss finish to give it a beautiful shine.  

Built from Plan(s)
Estimated Time Investment
Afternoon Project (3-6 Hours)
Finish Used
Apple cider Vinegar applied with Steel Wool Pad
Recommended Skill Level
Intermediate

Kendall Dresser

Submitted by PRBarnette on Sat, 04/23/2022 - 19:19

Here’s a pic of the Kendall Dresser I built for our spare bedroom. The drawers are finished in contact paper so if we want to change the decor we can remove the contact paper, do a little sanding and re-apply. 
 

Built from Plan(s)

Laundry Dresser - 6 the short way

Submitted by VegasLove on Tue, 06/21/2011 - 21:46

As the Superkids are getting older, I'm slowing trying to reclaim neglected areas of our home and make them a bit more stream lined and organized.
(I love organization! It is another true passion of mine.)
Anyway, while Stumbling I ventured upon the site Ana-White.com loaded with FREE easy furniture plans. Upon seeing a laundry storage option, my heart fell for a clean and crisp laundry basket sorter.

Previously, in my laundry area was this chrome rolling cart which housed my mismatched laundry baskets and other miscellaneous items. It was sturdy and served it purpose.

Now, I have all beautiful white baskets all lined up ready to sort all my laundry. Thank you to Superman who surprised me on Father's Day by cutting all the pieces for me so we could get it all screwed together. I love it!

- Purchased 6 laundry baskets at Wal-Mart @ $2.75 each.
- Scrap Melamine in white left over from another project.
- Left over drywall screws.
- Some light weight Spackle.
- 1 small bottle of craft paint from Hobby Lobby on sale after the holidays for 19 cents.

Built from Plan(s)
Estimated Cost
Less than $20
Estimated Time Investment
Day Project (6-9 Hours)
Finish Used
White Malemine Finish & White paint for cut edges.
Recommended Skill Level
Beginner

Comments

Denibell

Wed, 08/24/2011 - 11:07

I love this one in the other direction. I also love that the baskets are set back a bit in the cubby so that a spring rod with a curtain can be placed across the front to hide the whole thing from company.

Will you post your measurements on here so I can duplicate it?

thanks!

Buglady11 (not verified)

Mon, 06/25/2012 - 22:07

I have a rolling cart with 4 bags that my family can just drop their Clothes in. I've been admiring these baskets dressers for some time. I notice you left a little more room between each basket. How is that working for getting dirty clothes sorted for you? How much extra space did you put between them compared to Ana's original plan?

Fancy X Farmhouse table with built in copper cooler

Submitted by J Dixon on Sun, 08/23/2015 - 01:54

My version of Fancy X Farmhouse table with a built in copper cooler!!

Built from Plan(s)
Estimated Time Investment
Weekend Project (10-20 Hours)
Finish Used
Dark walnut colored danish oil base with satin poly top coat.
Recommended Skill Level
Intermediate

Comments

Codding58

Thu, 05/12/2016 - 12:27

VERY nice build!   How did you make the copper cooler, if you don't mind me asking.    Great Idea and love that you can hide it away!  Cheers

Sausha’s Washer/Dryer Pedestals

Submitted by Kisha41474 on Sun, 06/26/2011 - 13:07

I feel in love with these plans as soon as I saw them, but didn't have front loading washer at the time. So...I talked hubby into buying me a new house, which meant I had to have new washer and dryer, now I have my pedestal..and I LOVE it. It was soo easy to build. The hard part was getting heavy washer on it, thankfully hubby and teenage son are strong!

Estimated Cost
100
Estimated Time Investment
Weekend Project (10-20 Hours)
Finish Used
First I primed, then I painted it a shade of grey that I had left over from painting my halls. After I got it all painted, I realized, I didn't like it that solid grey, and didn't think it would go so great in my laundry room, so I sanded it down some, then I stained it with a mixture of jacobean and something else that I already had mixed, wiped it down, then sprayed it with poly.
Recommended Skill Level
Intermediate

Comments

sgilly

Thu, 07/14/2011 - 10:32

Good job. And I love how you finally got your pedestal! My daughter fell in love with this, too. It's on my build list for my next visit!