Community Brag Posts

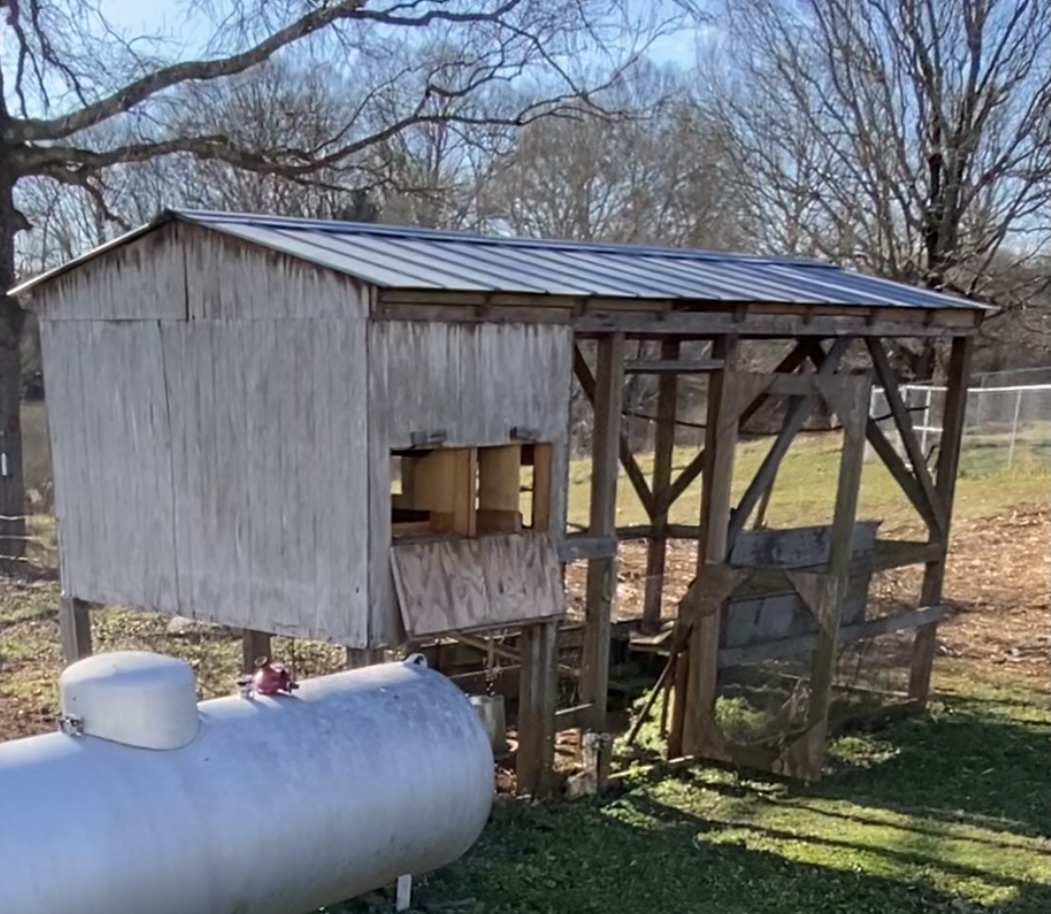
Chicken Coop to Greenhouse
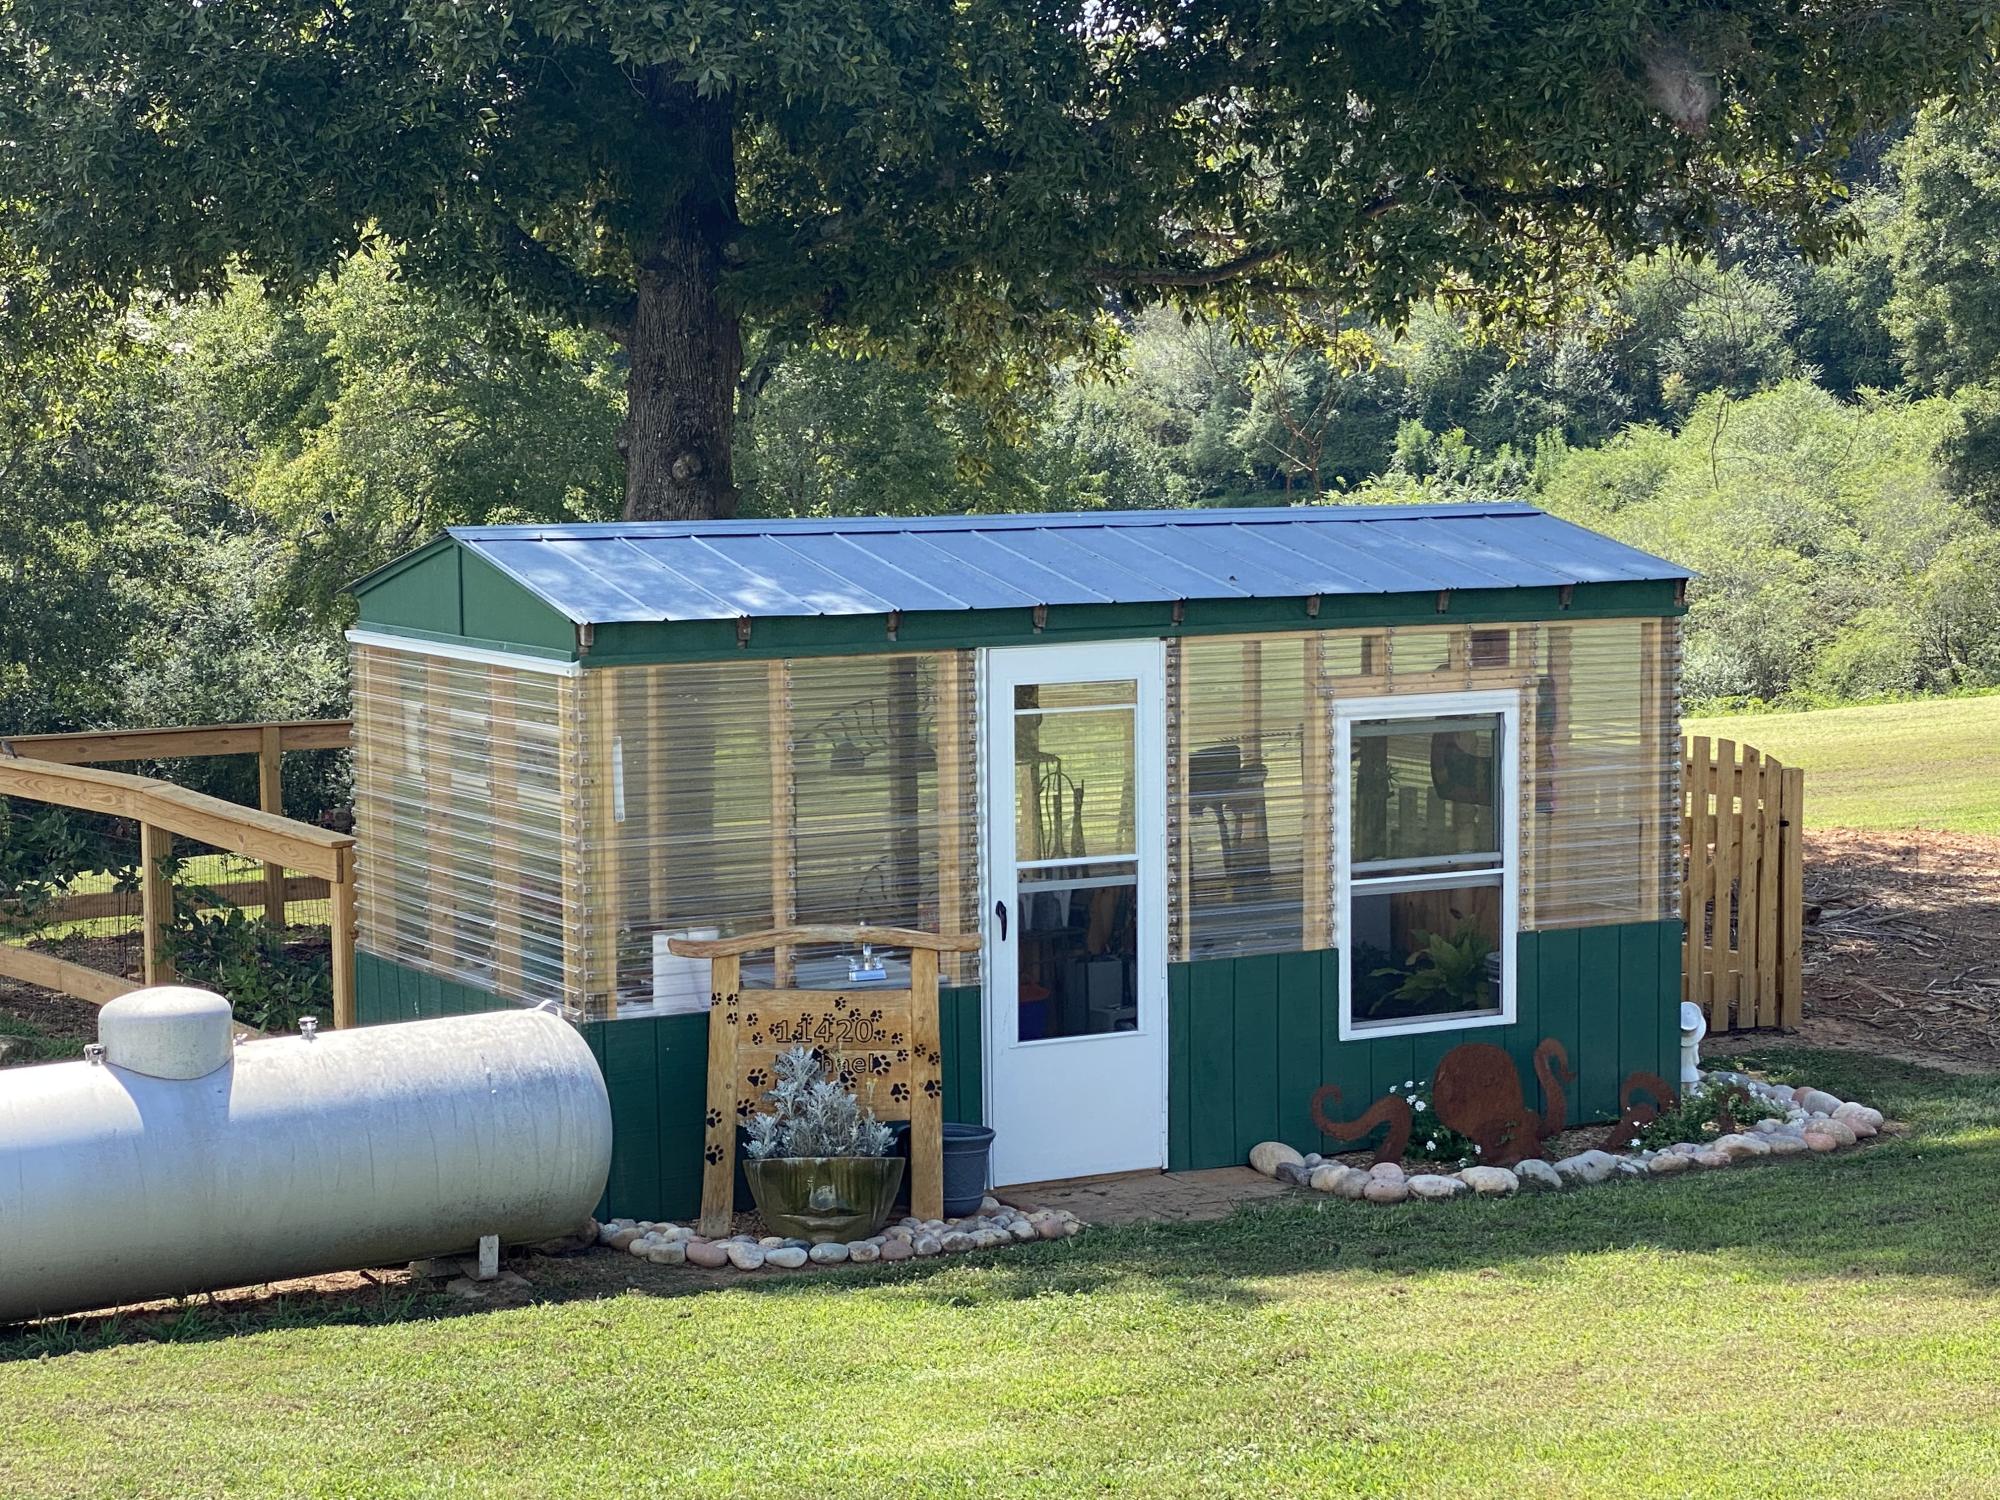
Using a couple of the Ana White Plans and YouTube videos, converted a run-down, Carpenter Bee infested chicken coop into a functional greenhouse with running water and electricity.
Comments
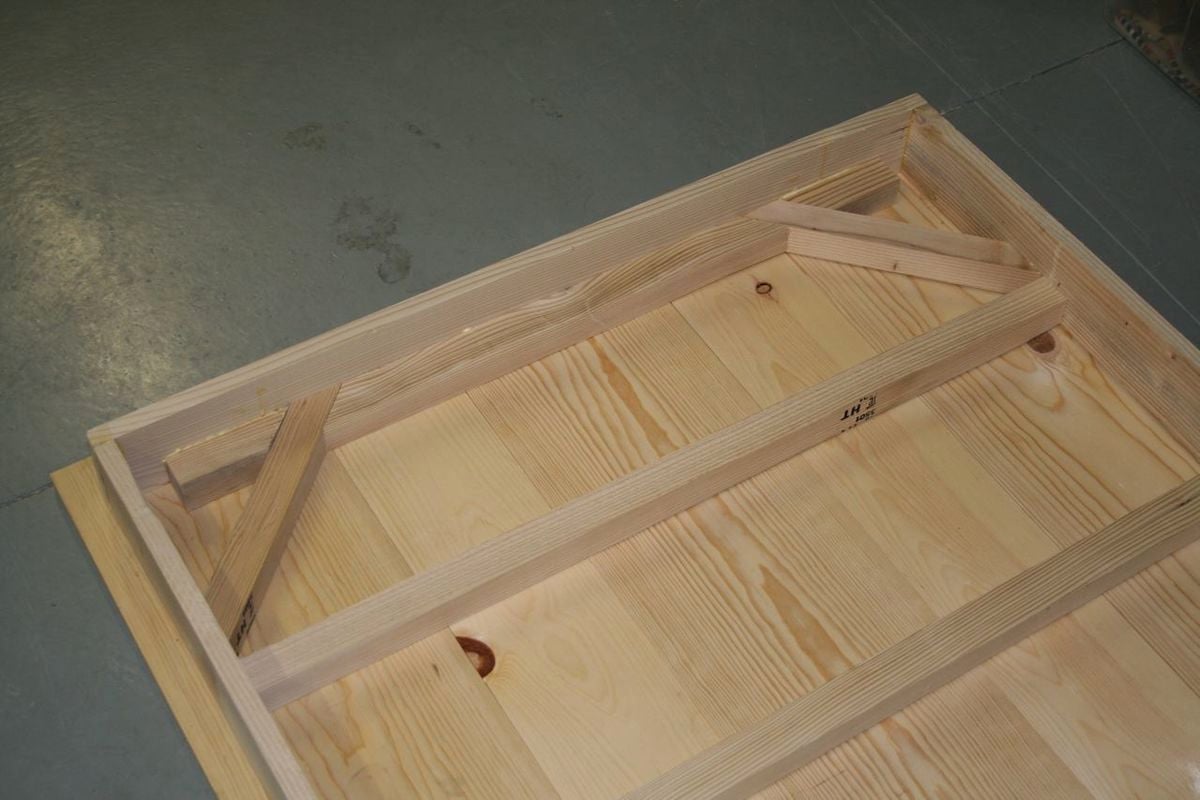
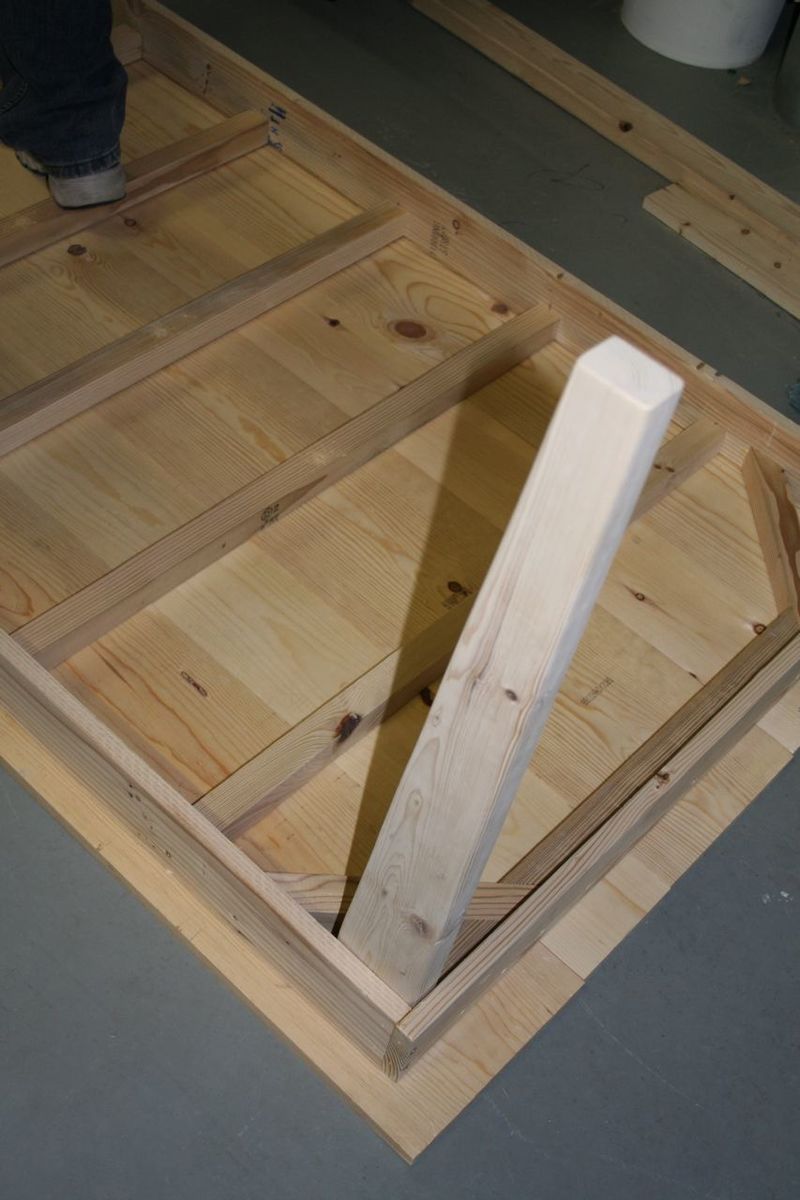
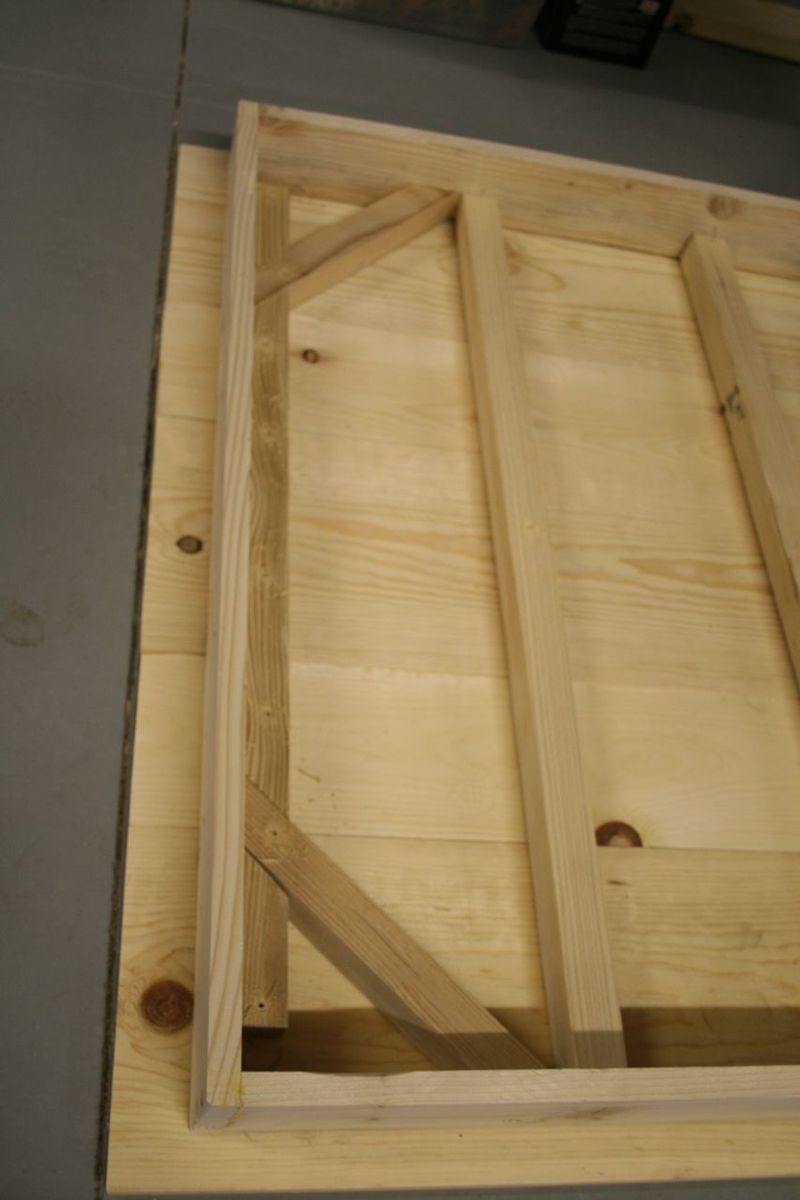
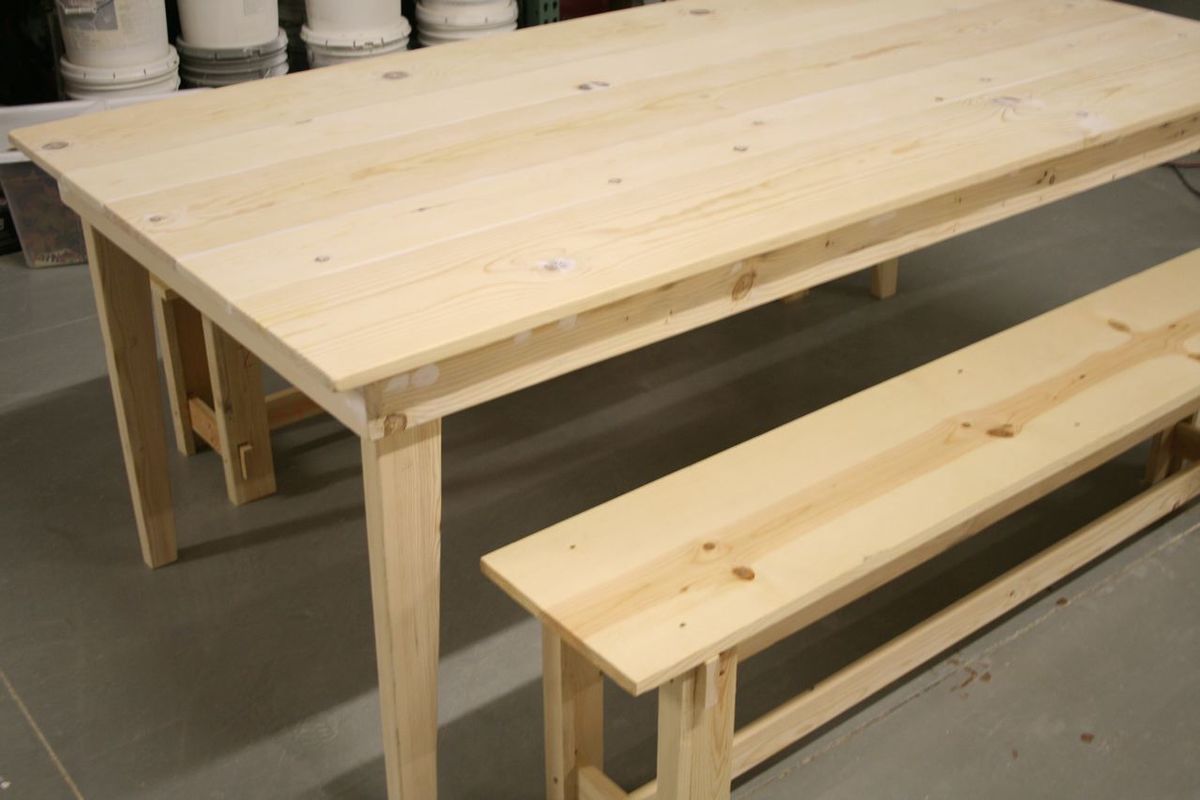
Rustic Farm Table and Benches
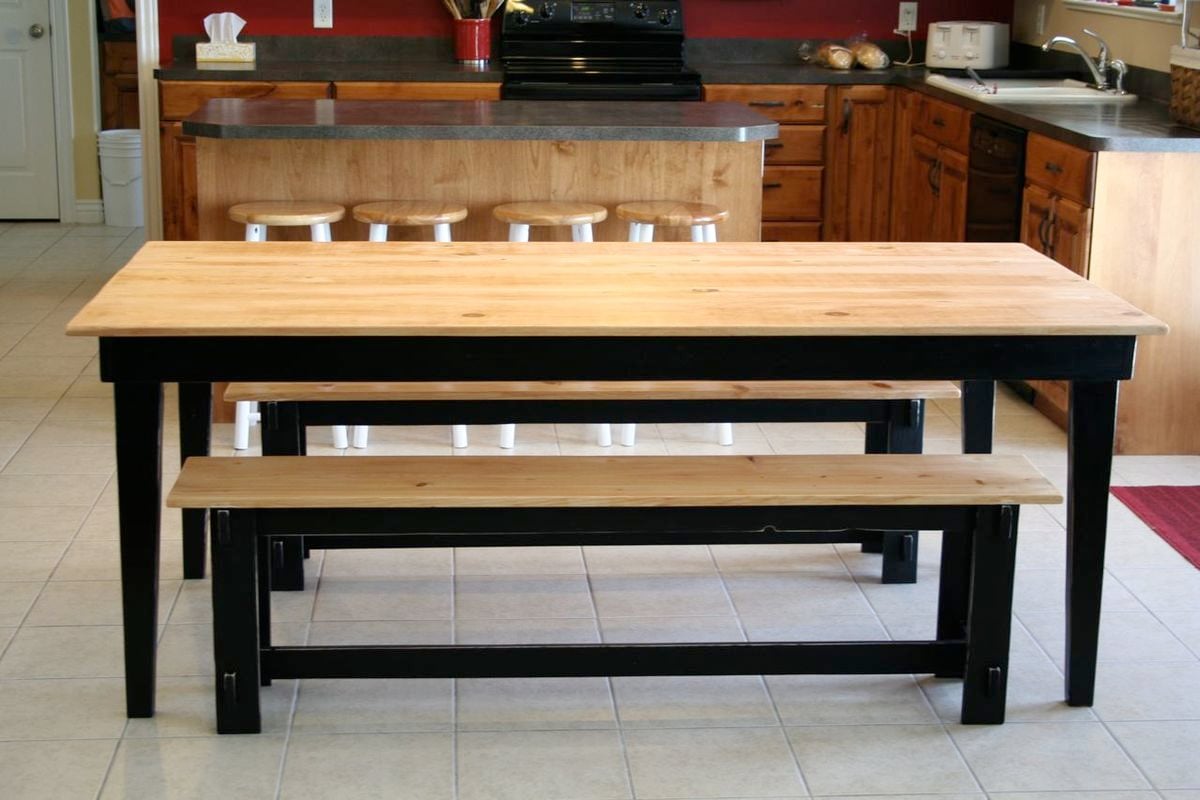
We shortened the table and lengthened the benches - you can see all our details and changes in the blog link.

Built from Plan(s)
Estimated Cost
120
Estimated Time Investment
Afternoon Project (3-6 Hours)
Finish Used
Paint & Minwax stain (finish took way longer than building!)
Recommended Skill Level
Intermediate
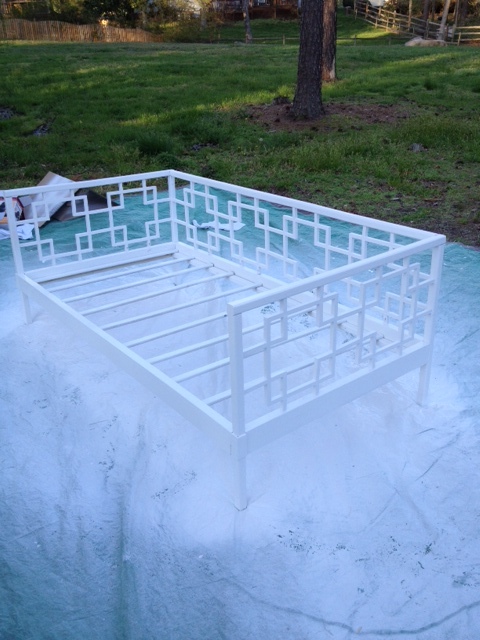
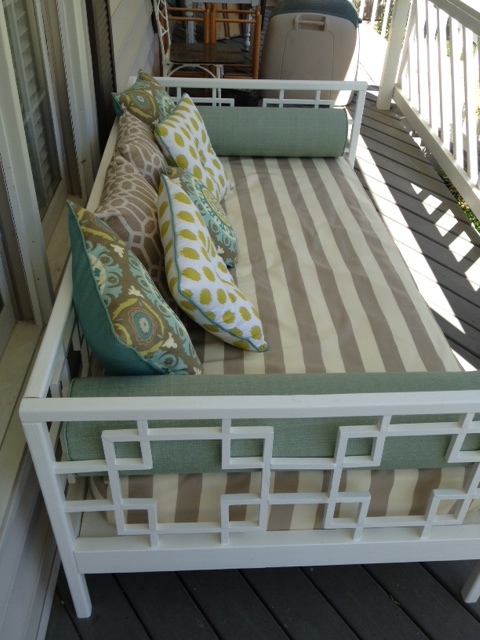
JRSMRS's $50 Daybed Brag Post
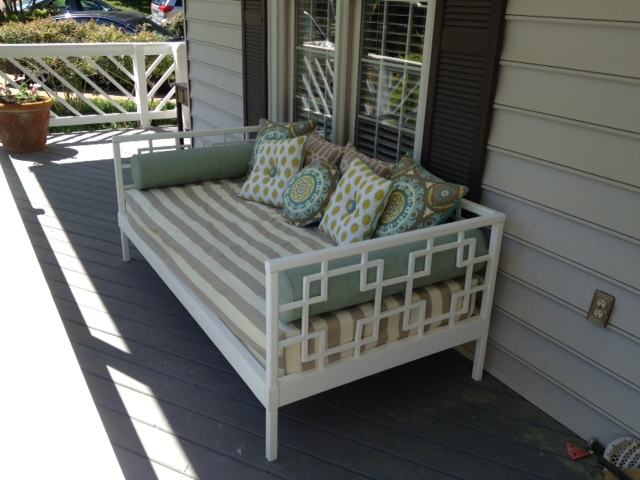
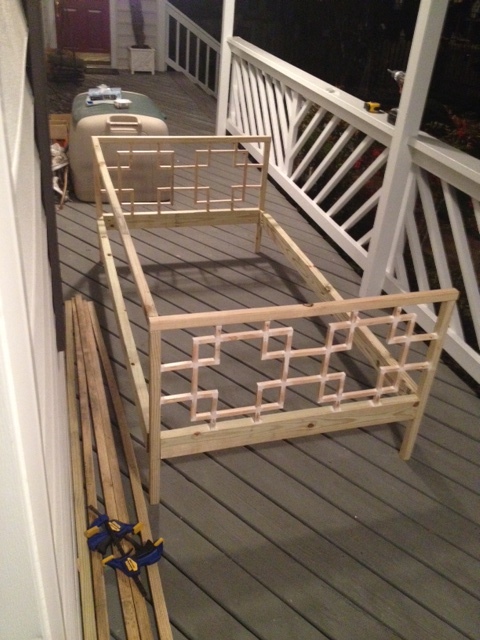
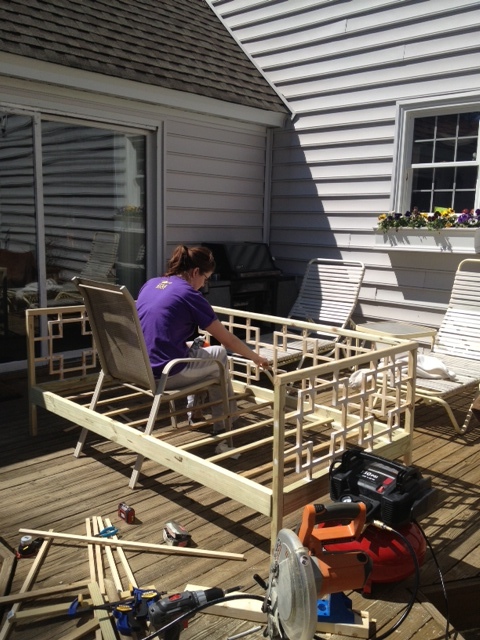
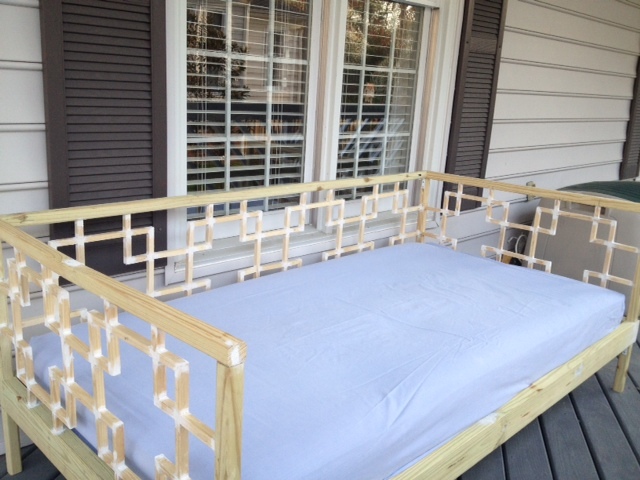
The daybed took about 4 weekends, and started with a lot of trial-and-error. Around the 3rd weekend, and a lot of "redo-ing", it started taking shape! This daybed will go on our screen porch, along with the homemade outdoor pillows and mattress cover. This project was definitely frustrating at times, but has been well worth the effort.
Estimated Time Investment
Week Long Project (20 Hours or More)
Finish Used
Pressure treated lumber for the frame, and 5/8" wooden dowels for the design.
Recommended Skill Level
Intermediate
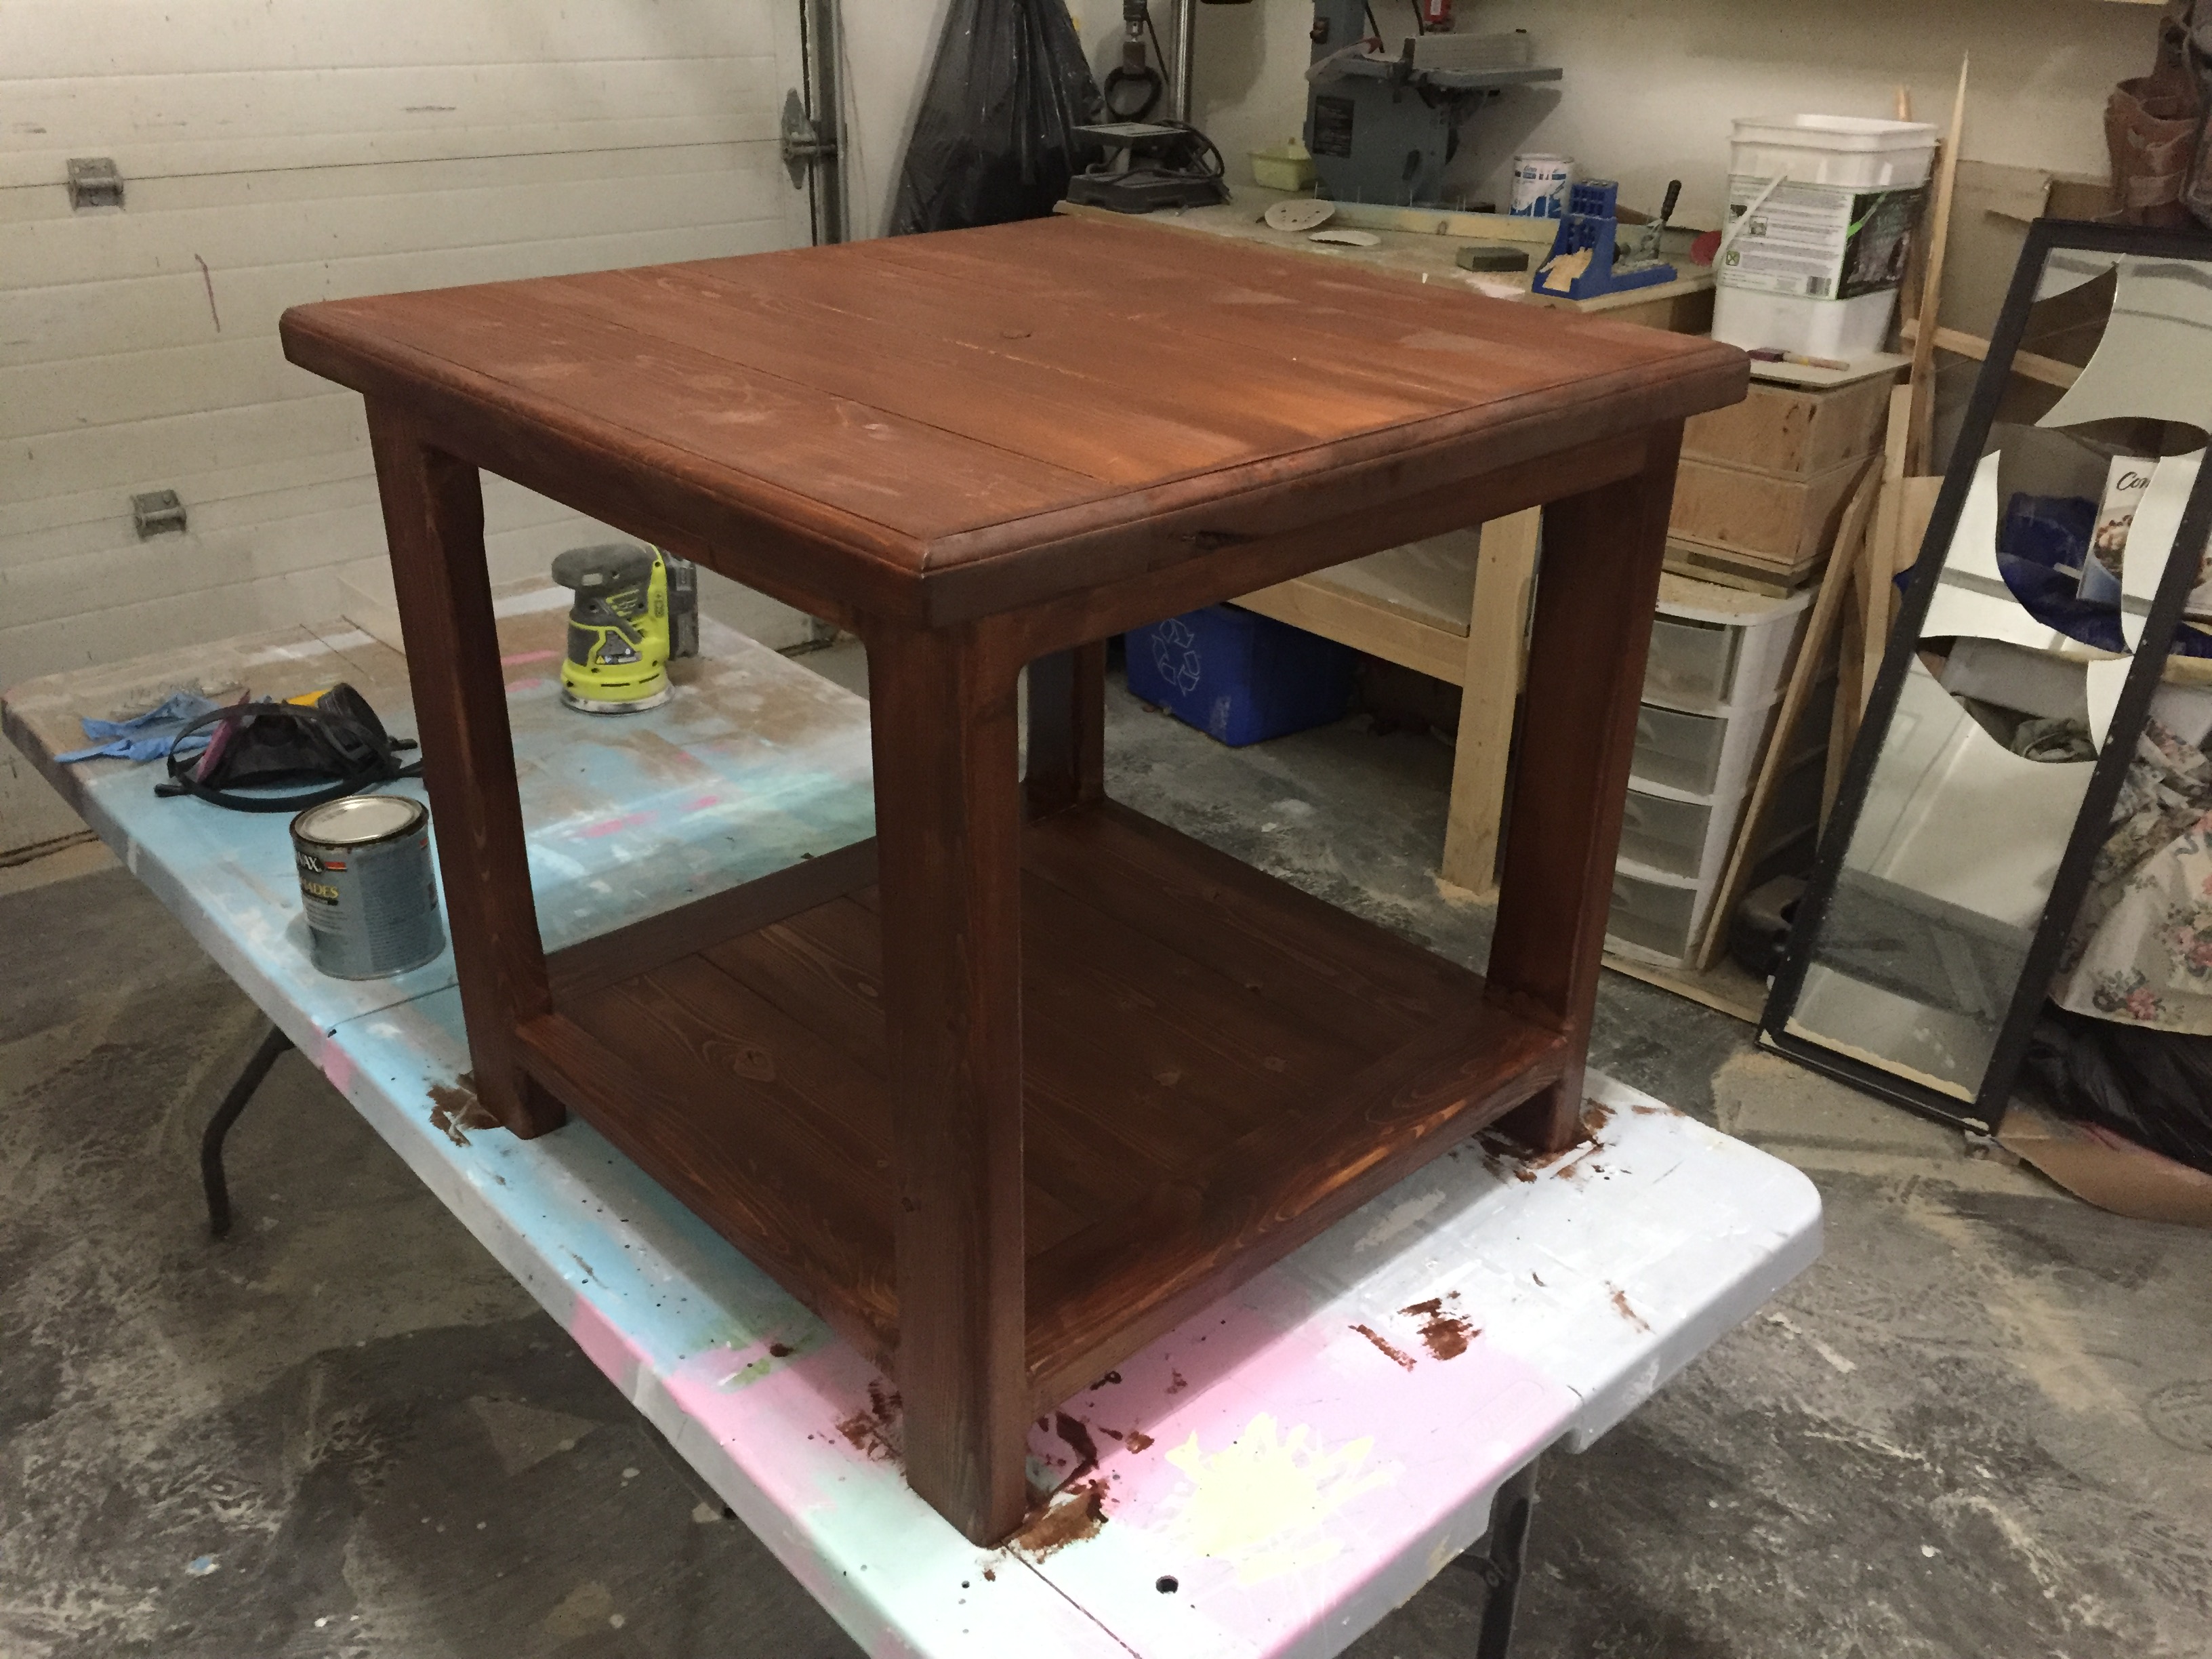
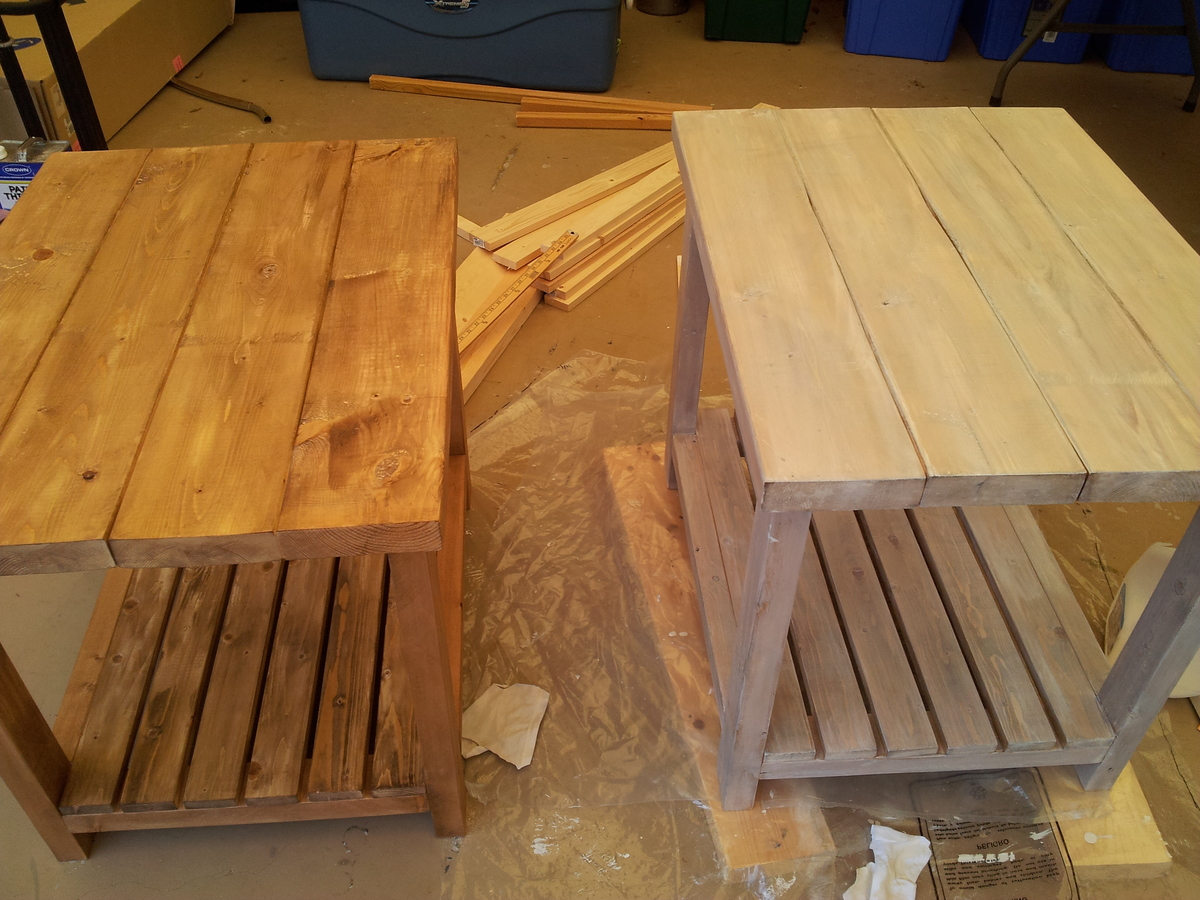
Rustic X Console, Coffee and End Tables
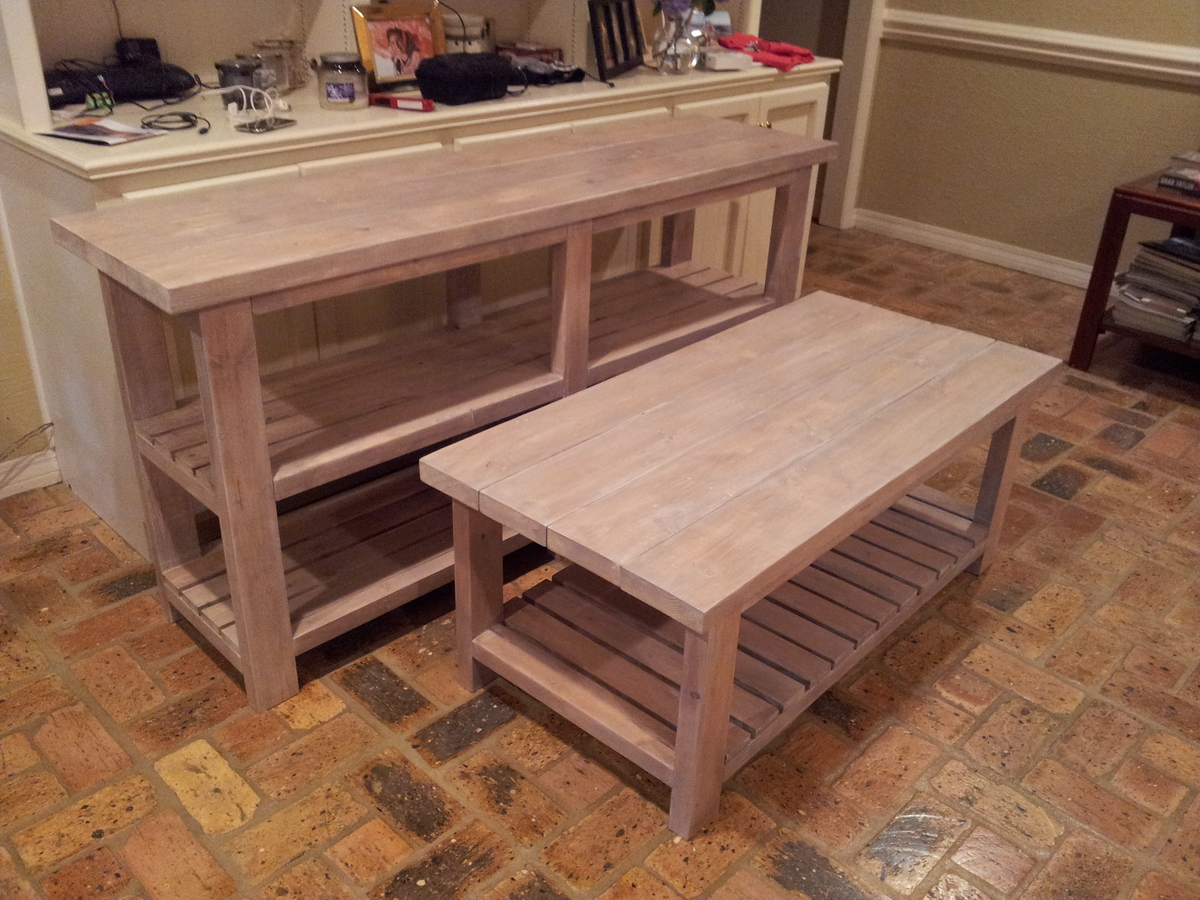
I modified the Rustic X plans by removing the X's on the sides and using 1x3in slats on the shelf. They were made for a beach condo so I wanted a more open look. I wanted a white washed finish and after trying several ideas from the internet I came up with this process: First, I used rags to rub on Minwax Special Walnut stain as lightly as I could. Second, I diluted latex satin white paint, at least 50-50, and brushed it on a small area and immediately wiped it off with a clean rag. I used Minwax Polycrylic as my protective layer.
Built from Plan(s)
Estimated Time Investment
Week Long Project (20 Hours or More)
Finish Used
Minwax Special Walnut stain, white latex satin paint, Minwax Polycrylic Clear Satin
Recommended Skill Level
Intermediate
Comments
Mon, 07/20/2015 - 14:57
The Rustix X plans use the
The Rustix X plans use the hidden pocket screws using the Kreg Jig tool. It really makes a strong joint. All the hidden pockets are on the underside of the trim pieces. The top and slats are screwed on with normal wood screws, again from the underside.
Bedside End Tables
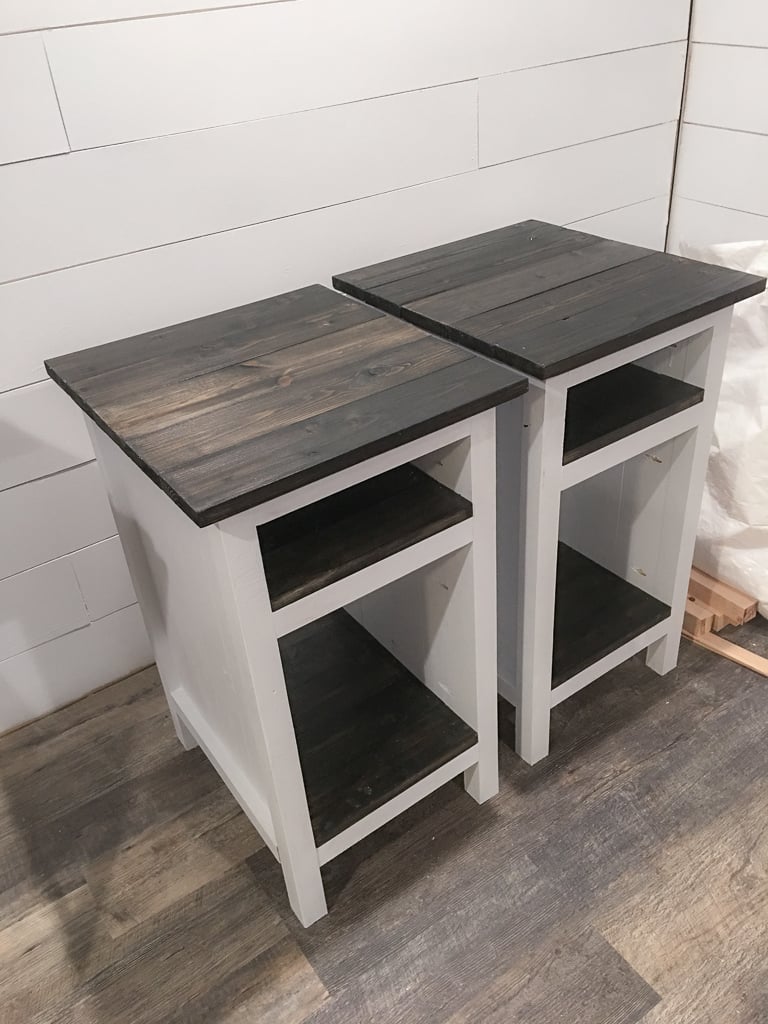
These are made from the three drawer plans but modified the size to meet our needs and used planks for shelves instead of drawers. Painted white and black gel stain.
UPDATE FROM ANA - We have received MANY requests for this plan and have created a plan inspired by this post here.
Shopping List (for ONE bedside table) + Tools
- 1 - 1x2 @ 6 feet long
- 5 - 1x4 @ 8 feet long
- 2 - 2x2 @ 8 feet long
- 1-1/4" and 2-1/2" pocket hole screws
- 1-1/4" brad nails
- wood glue
- Kreg Jig
- Compound Miter saw
- Drill
- Brad Nailer (18 guage)
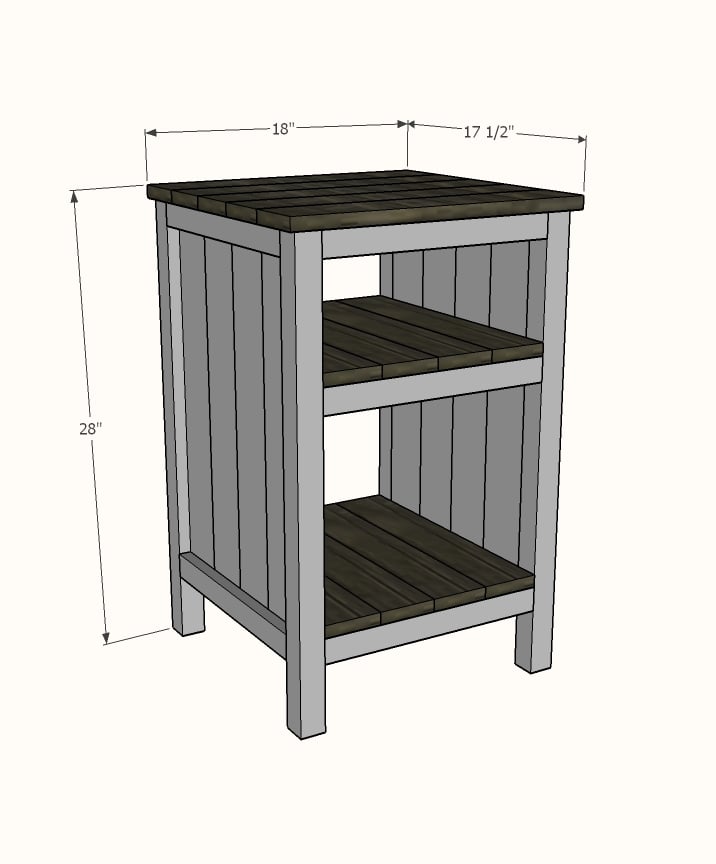
Cut List (for ONE bedside table)
- 4 - 1x2 @ 14" - Side panel trim
- 8 - 1x4 @ 23-1/4" - Side panels
- 4 - 2x2 @ 27-1/4" - Legs
- 6 - 2x2 @ 14" - Shelf support
- 8 - 1x4 @ 17" - Shelves
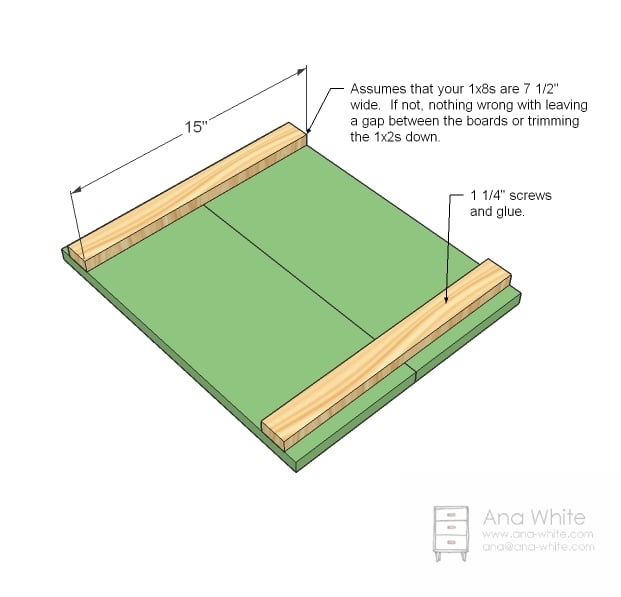
- 5 - 1x4 @ 18" - Top
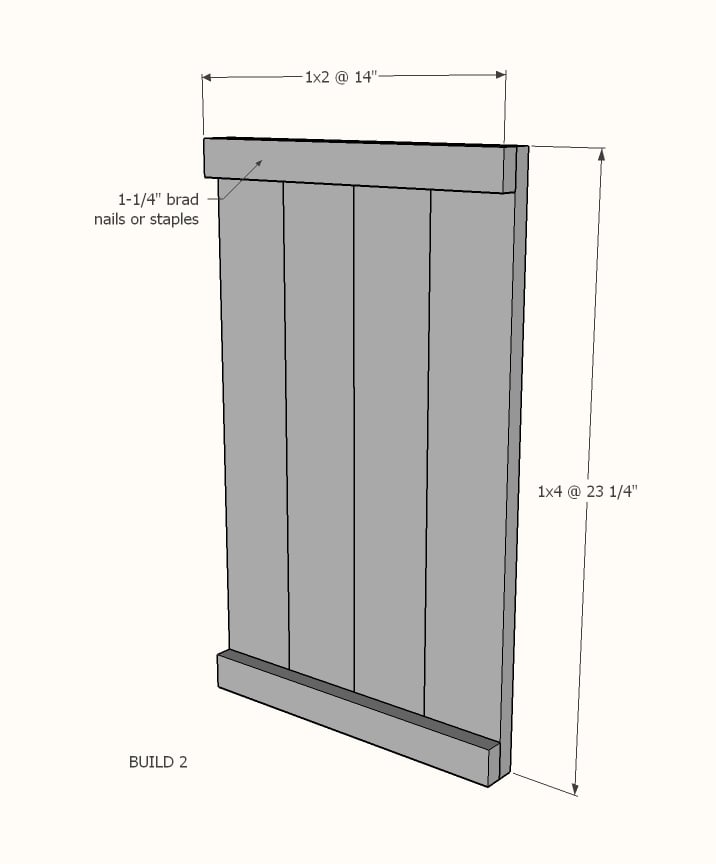
Cut 1x4s and 1x2s with miter saw. Layout side panel 1x4s as shown above. Measure and cut 1x2 to length. Nail the 1x2 to the 1x4s, two nails per overlap with glue. Make sure your side panels are square. Build two.
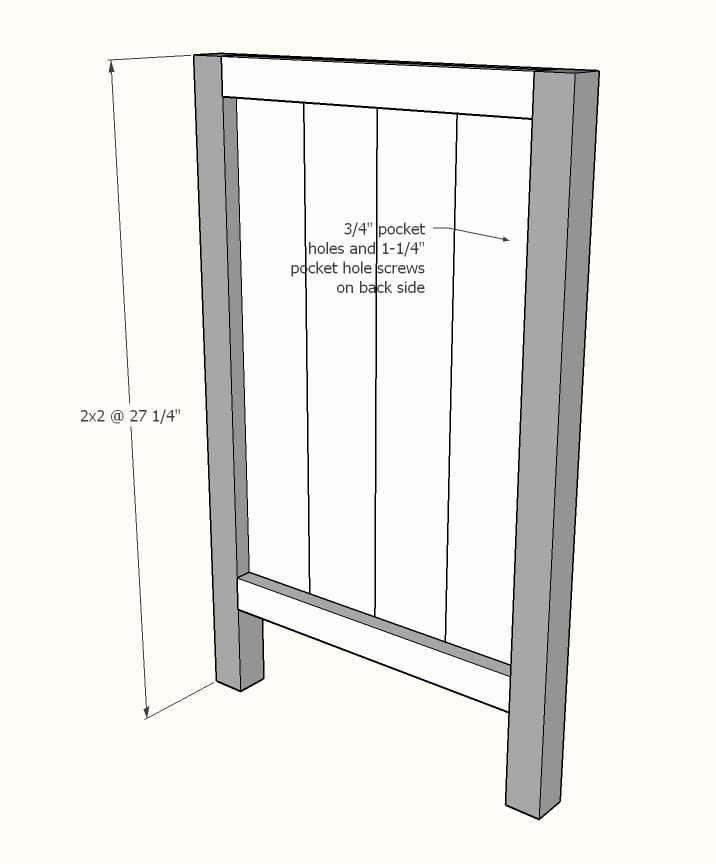
Drill 3/4" pocket holes on inside edge of 1x4 ends as shown above. Cut 2x2s with compound miter saw. Attach to the 2x2 legs with 1-1/4" pocket hole screws.
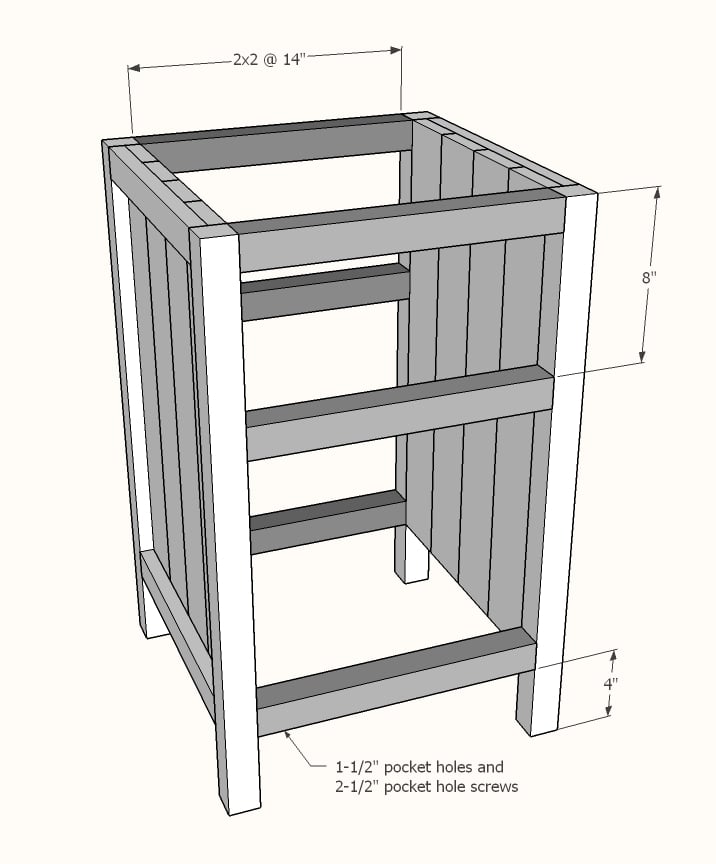
Set Kreg Jig to 1-1/2" setting. Drill 1-1/2" pocket holes on end of each 2x2, one per end. Attach to 2x2s with wood glue as shown above.
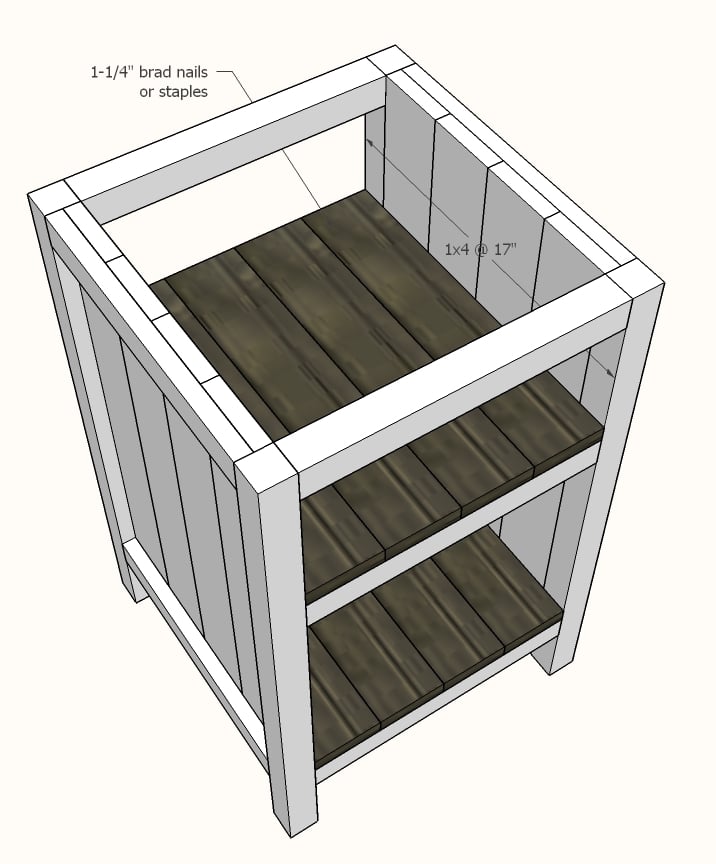
Cut 1x4 shelf boards with compound miter saw. Nail and glue to the inside of the project as shown above.
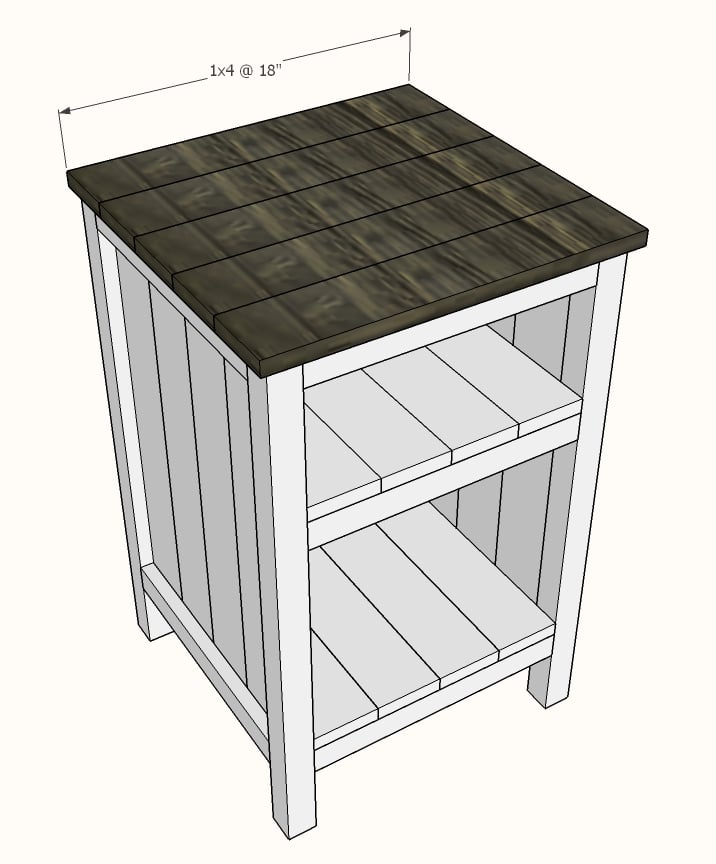
Cut 1x4 top boards with compound miter saw. Nail and glue to top with 1-1/4" nails and wood glue.
If you wish to add a back, measure and cut from 1/4" plywood and attach with 3/4" brad nails.
Built from Plan(s)
Estimated Cost
100.00 for both.
Estimated Time Investment
Weekend Project (10-20 Hours)
Finish Used
One coat of eggshell white PPG
Two coats of ebony gel stain
Two coats of ebony gel stain
Recommended Skill Level
Beginner
Comments
Mon, 02/12/2018 - 16:24
Is there plans for this one?
Is there plans for this one? Its gorgeous and I'd love to build it!

In reply to Is there plans for this one? by laurahamer07
Thu, 06/07/2018 - 15:37
Nightstand plans
Hello, this nightstand was built using these plans http://www.ana-white.com/2011/06/reclaimed-wood-look-bedside-table instead of adding drawers the builder added shelves. The shelves can be 3/4" plywood or 1x boards.
In reply to bedside end tables by karenlouder
Thu, 06/07/2018 - 15:40
Nightstand plans
Hello, this nightstand was built using this plan, but instead of drawers, simply measure and cut shelves to fit from 3/4" plywood. http://www.ana-white.com/2011/06/reclaimed-wood-look-bedside-table

Wed, 07/24/2019 - 09:24
Bedside Tables
It's taken us a couple of weekends, but we finished our bedside table. We made two, but one still needs painting.
Thank you for the plans. We had a great deal of fun and learning experience making these.
Want to see it? https://www.facebook.com/photo.php?fbid=2830583376957272&set=pcb.283058…
Child Size Adirondack Lawn Chair
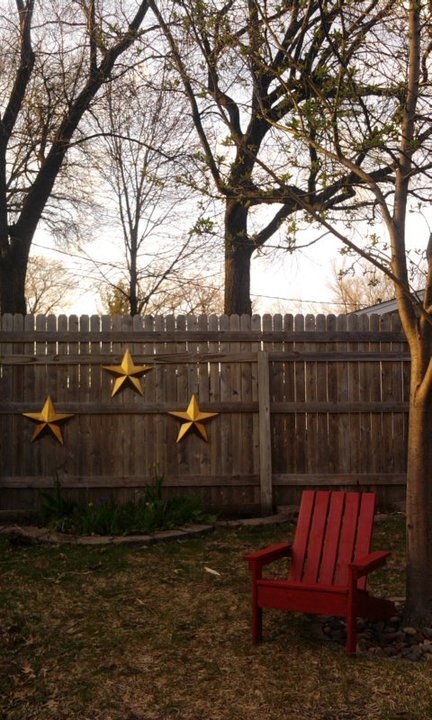
This was a very simple build, but to do it again I would attach the arms to the arm supports at a 90* angle before attaching them to the chair itself. My kids love this style of chair and are thrilled to have their own nice loungers out in the yard!
Built from Plan(s)
Estimated Cost
$10 each ($30 for 3 including paint, wood filler, sandpaper....)
Estimated Time Investment
Afternoon Project (3-6 Hours)
Finish Used
Rustoleum's American Accents in Colonial Red. I finished each board after cutting but when I build this chair the next time I will paint the board prior to cutting and then just touch-up the cut ends before assembly because it is much faster to paint 3/4 long boards than 25ish small ones!
Recommended Skill Level
Beginner
Toy 2x4 Cubicle Shelf
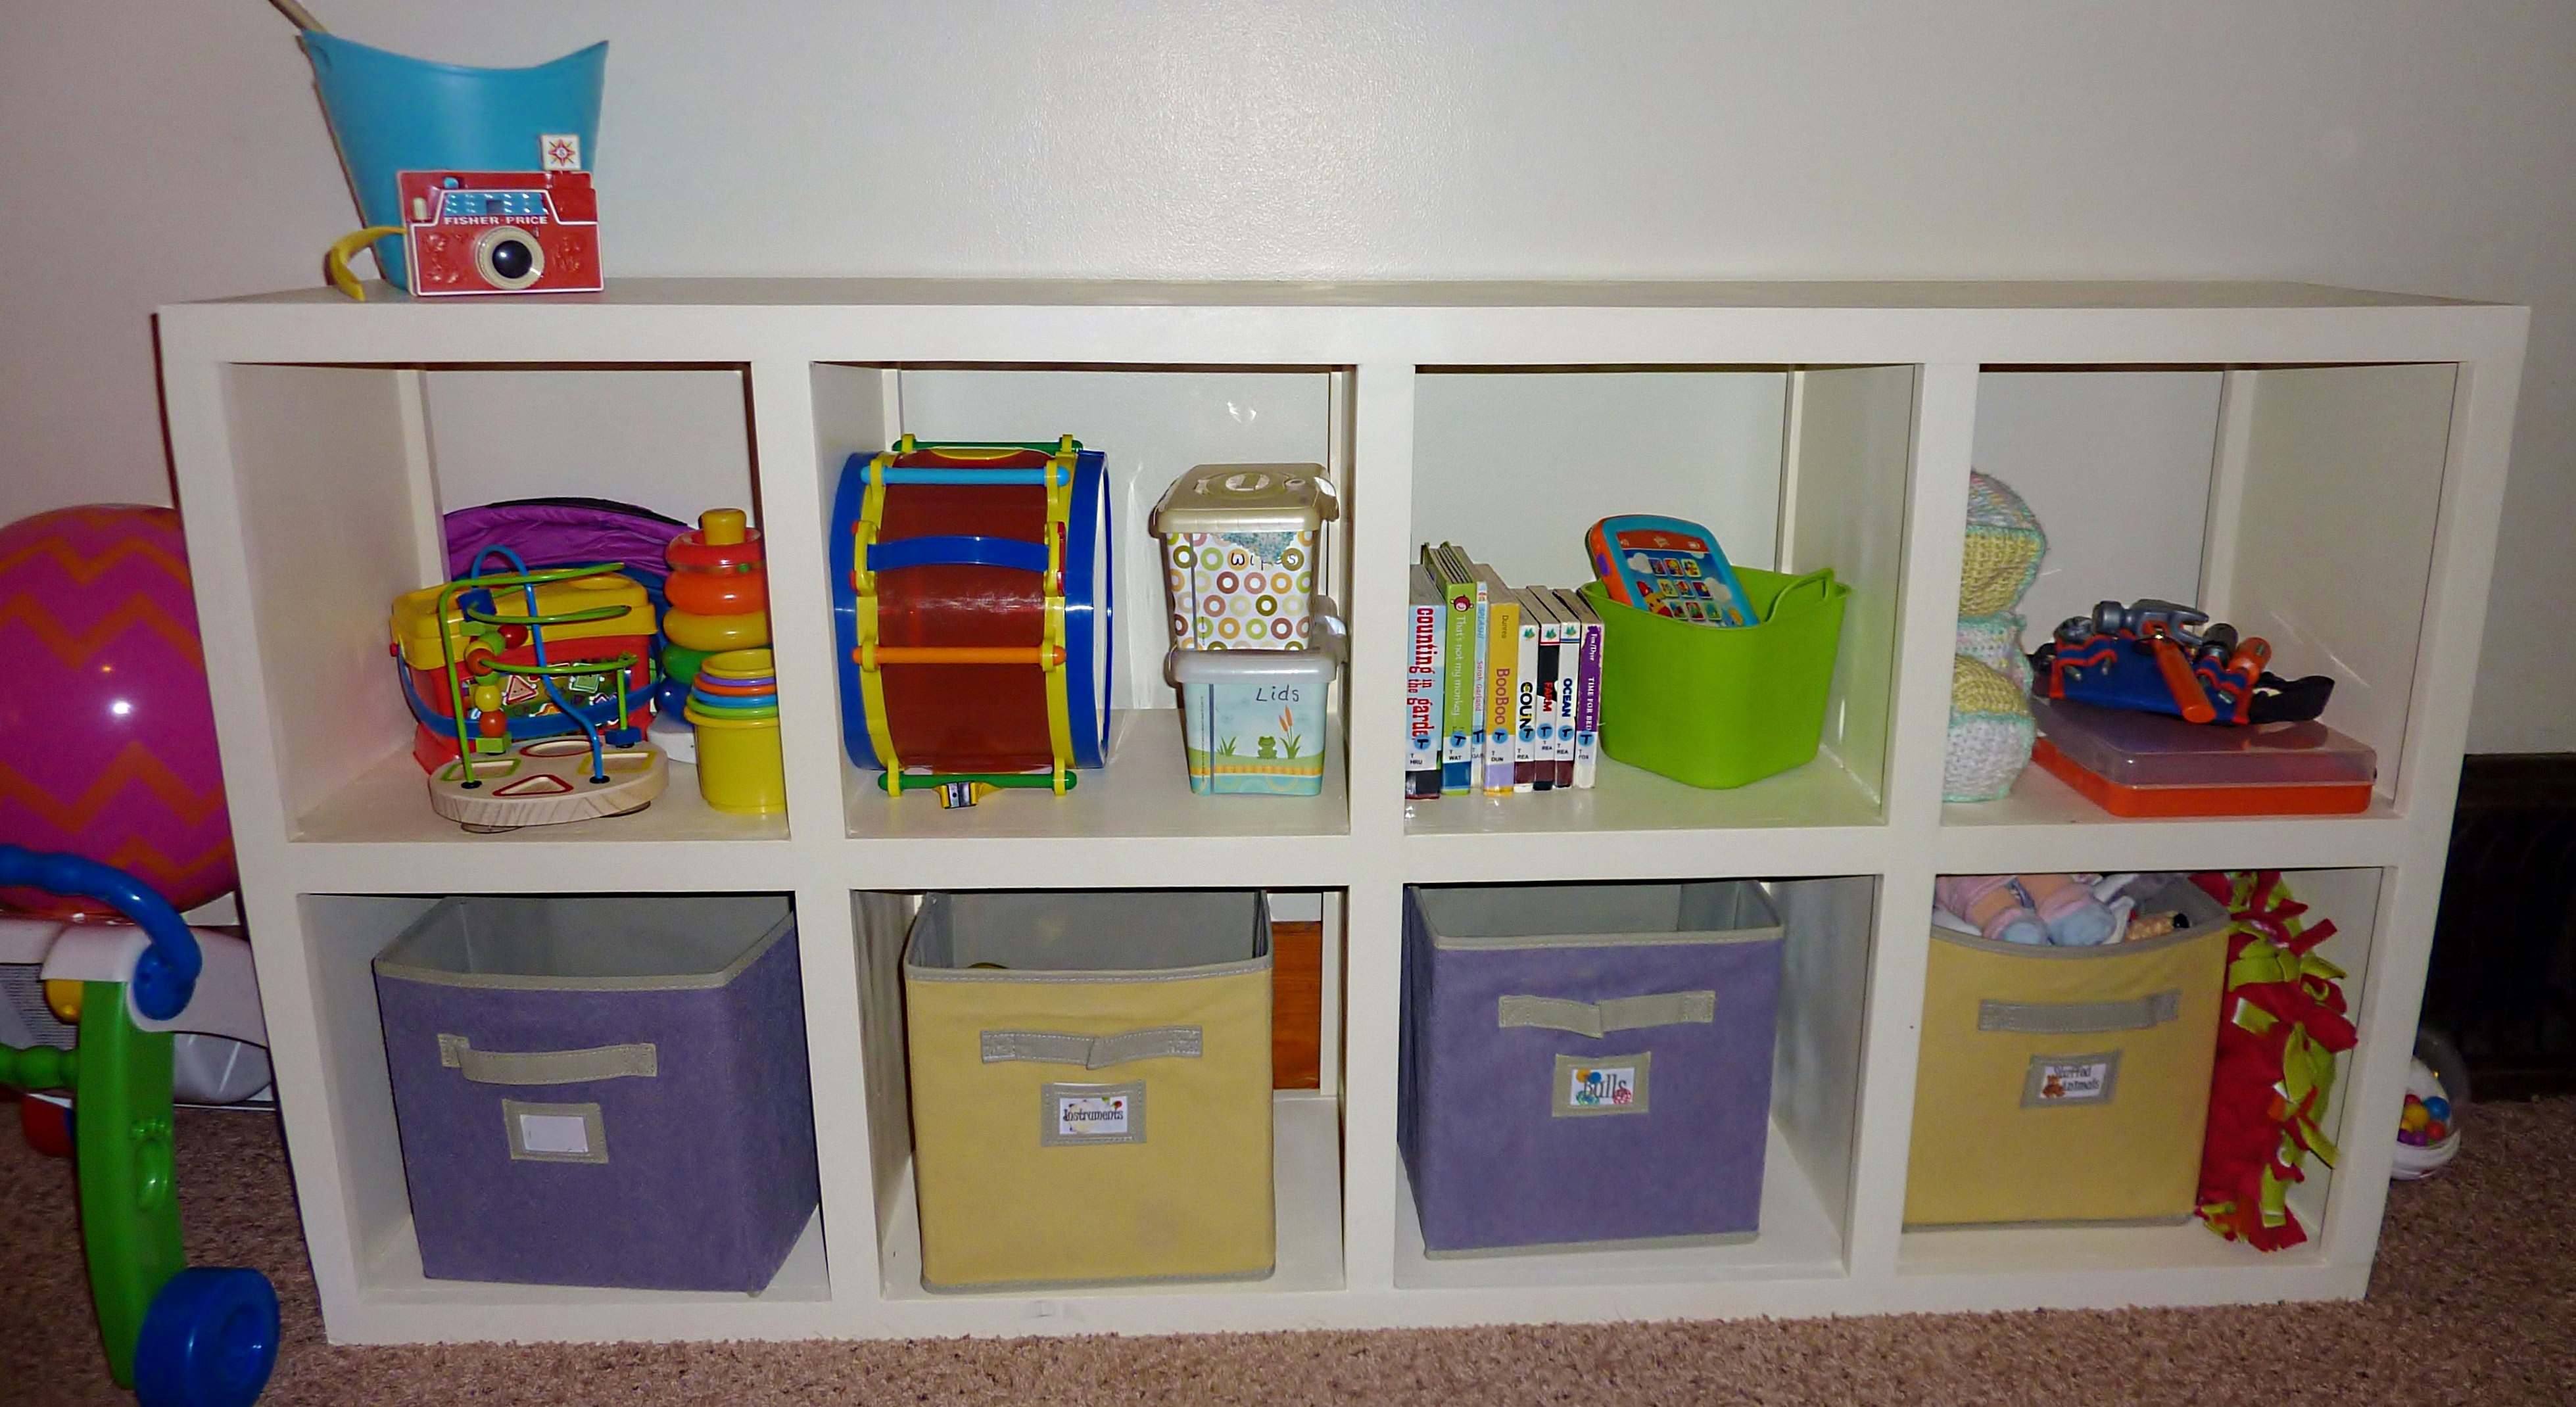
This was the first project my husband and I attempted. I'm new to building but he has lots of experience. Went real well, I should have taken the advice though to measure and cut trim at the end. I did it at the start to get it sanded and we ended up needing to redo it all with new wood. So happy with the end result though, tons of storage for baby's toys.
Estimated Time Investment
Weekend Project (10-20 Hours)
Finish Used
Painted
Recommended Skill Level
Intermediate
Comments
Pottery Barn Bench Knockoff
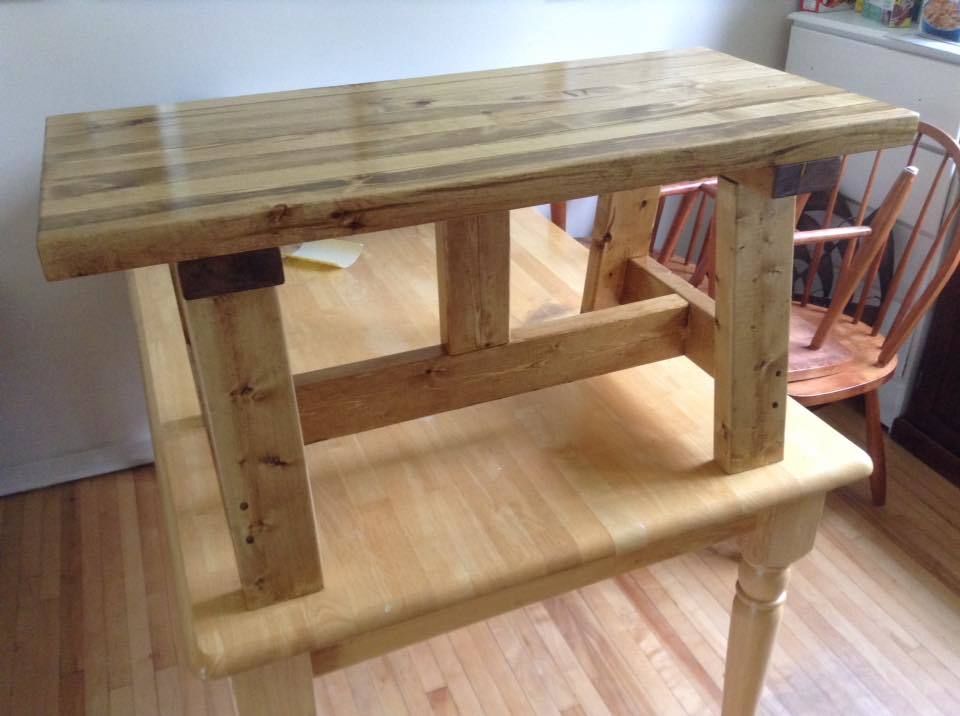
My neighbours had noticed the things I build and asked if I could build them a nice bench. I had some very nice pieces laying around that I thought would be amazing to laminate for the top. After completing the top which was alot of elbow grease, I needed to build the base. I cannot for the life of me find the link, but I know it was from Shanty Chic. It is absolutely beautiful, one of my best pieces of work.
Estimated Time Investment
Day Project (6-9 Hours)
Finish Used
Minwax (Walnut)
Recommended Skill Level
Beginner
Comments

Tue, 07/21/2015 - 09:42
Nice!
It looks like a recent post from Ana's site: http://ana-white.com/2015/07/free_plans/2x4-truss-benches-alaska-lake-cabin
Mon, 02/20/2017 - 08:12
Sort of
I don't remember which plan I got the base from, but the top is of my own design, and I spend awhile figuring out what kind of base I wanted, but it is suppose to be representative of an old design from Pottery Barn, was built for some friends that needed something heavy duty.
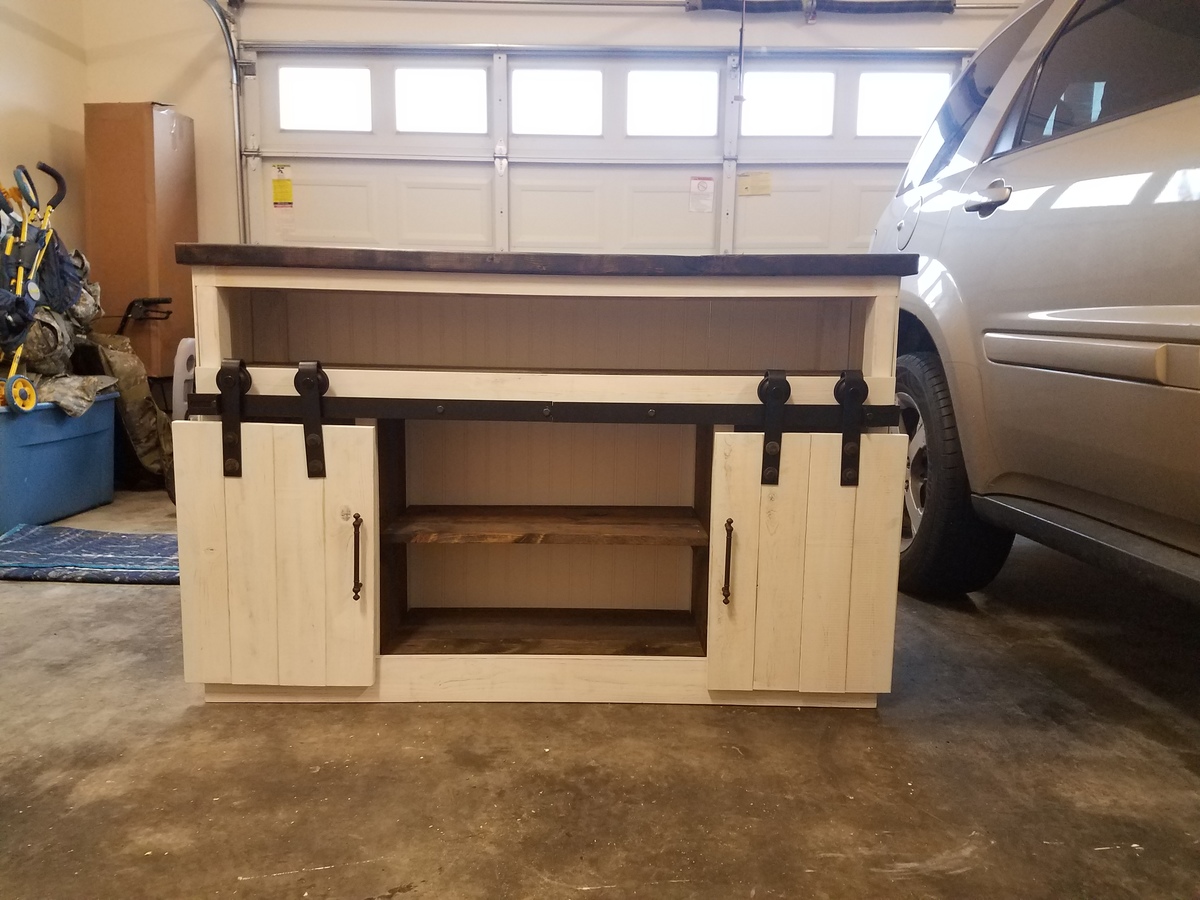
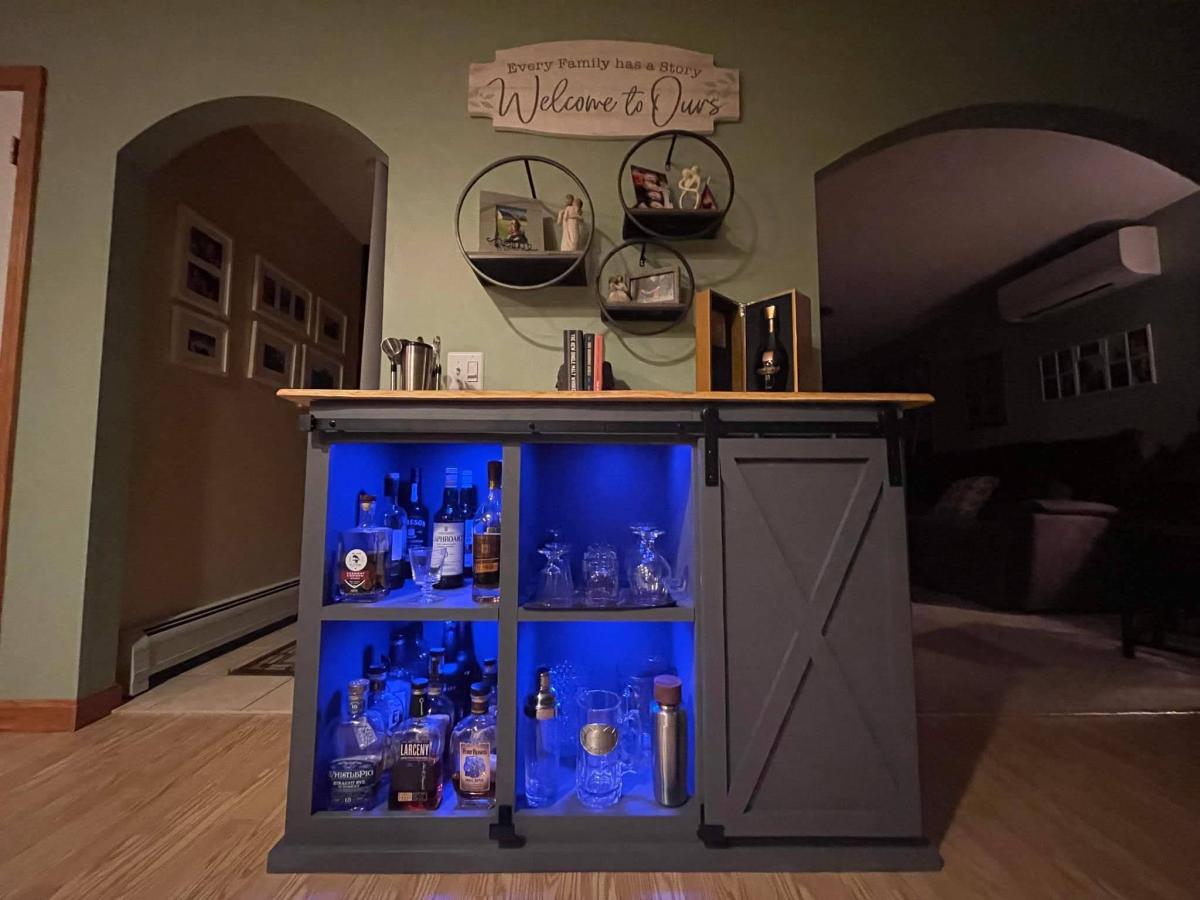
Modified grandy console
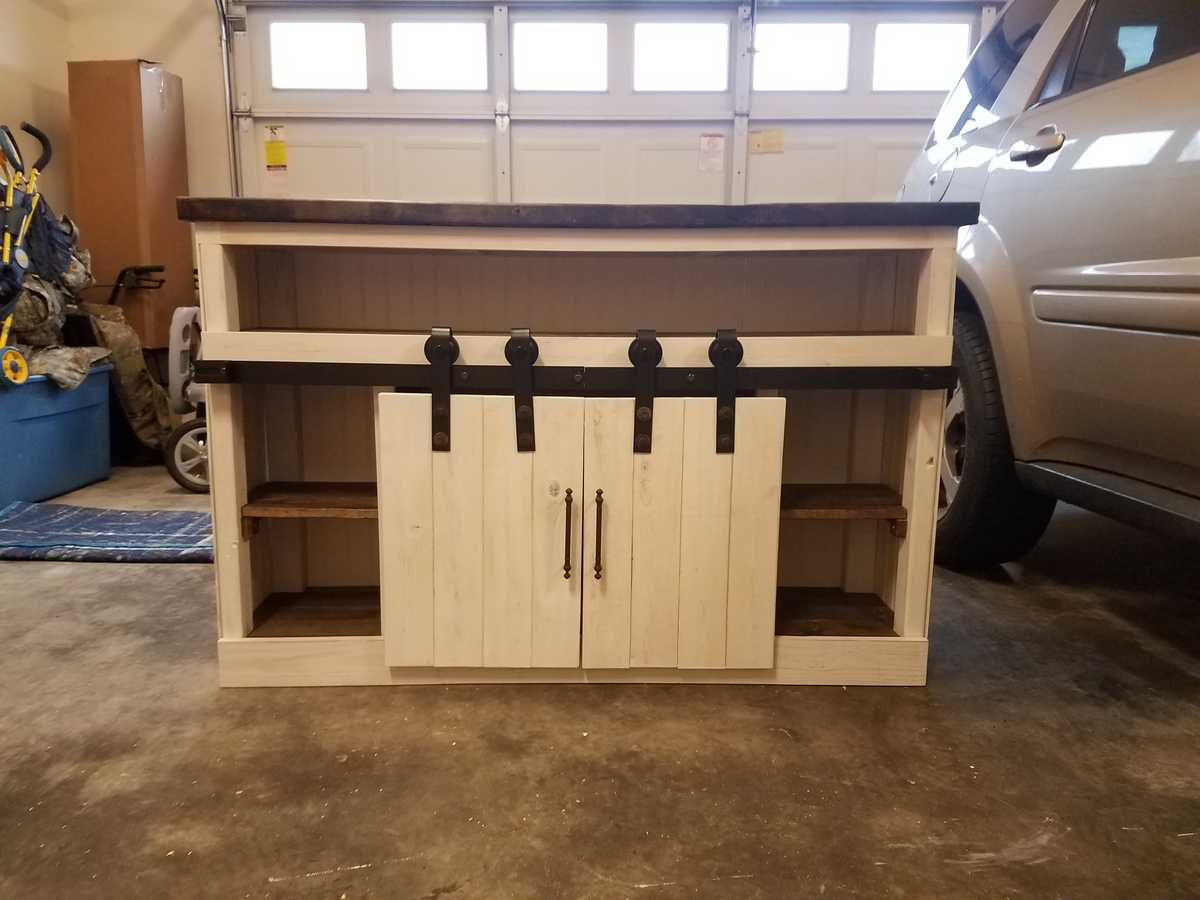
Built a smaller version of the grandy console with slot in the top for a sound bar. This was my first time using barn door hardware. Was a good time.
Built from Plan(s)
Estimated Cost
250 (includes barn door hardware)
Estimated Time Investment
Weekend Project (10-20 Hours)
Finish Used
Jacobean stain anf white paint
Recommended Skill Level
Intermediate
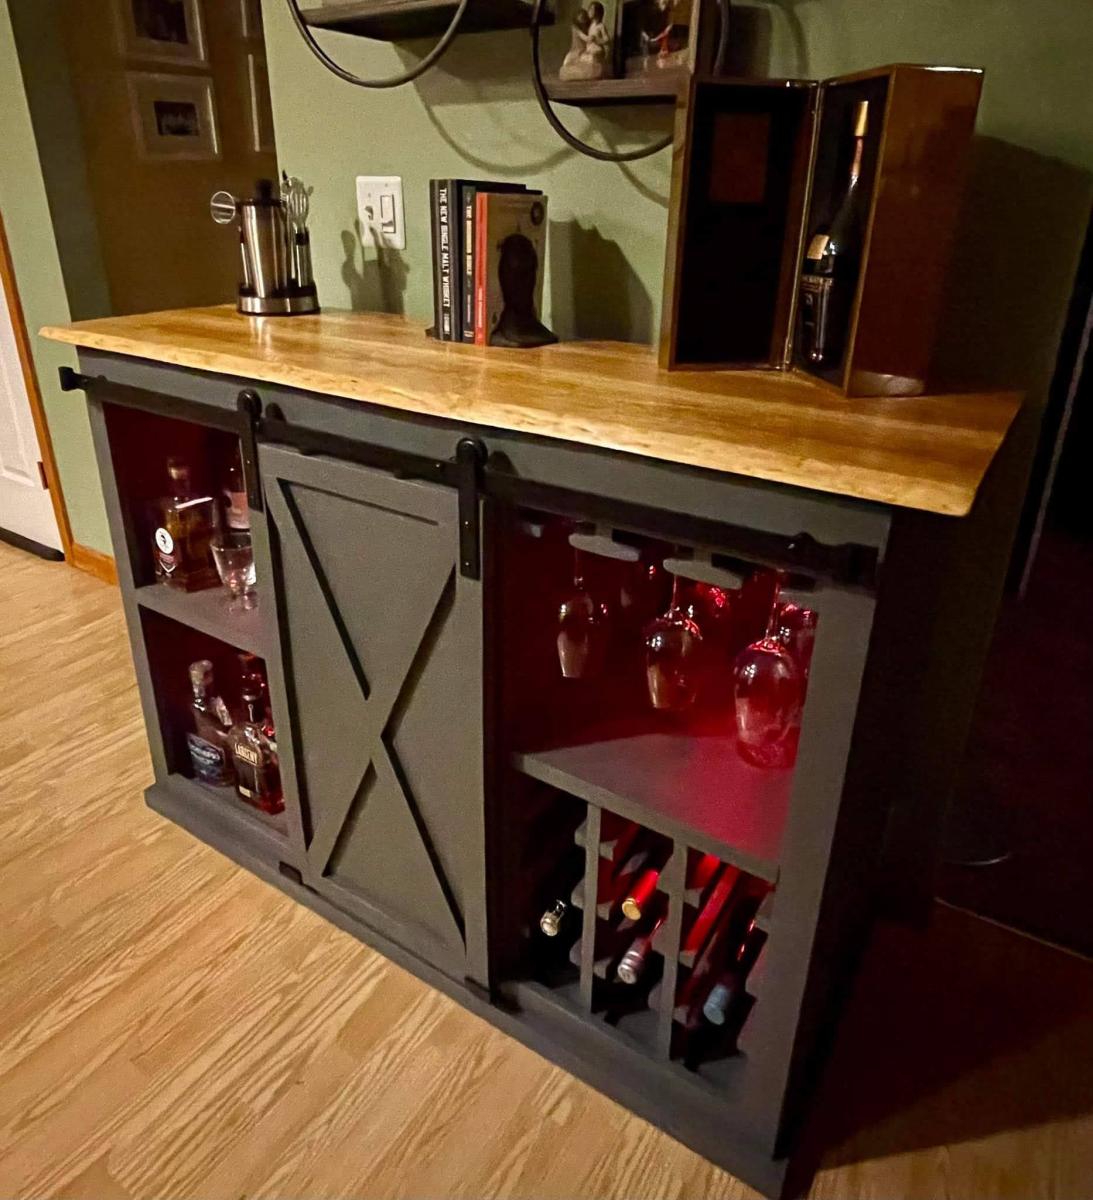
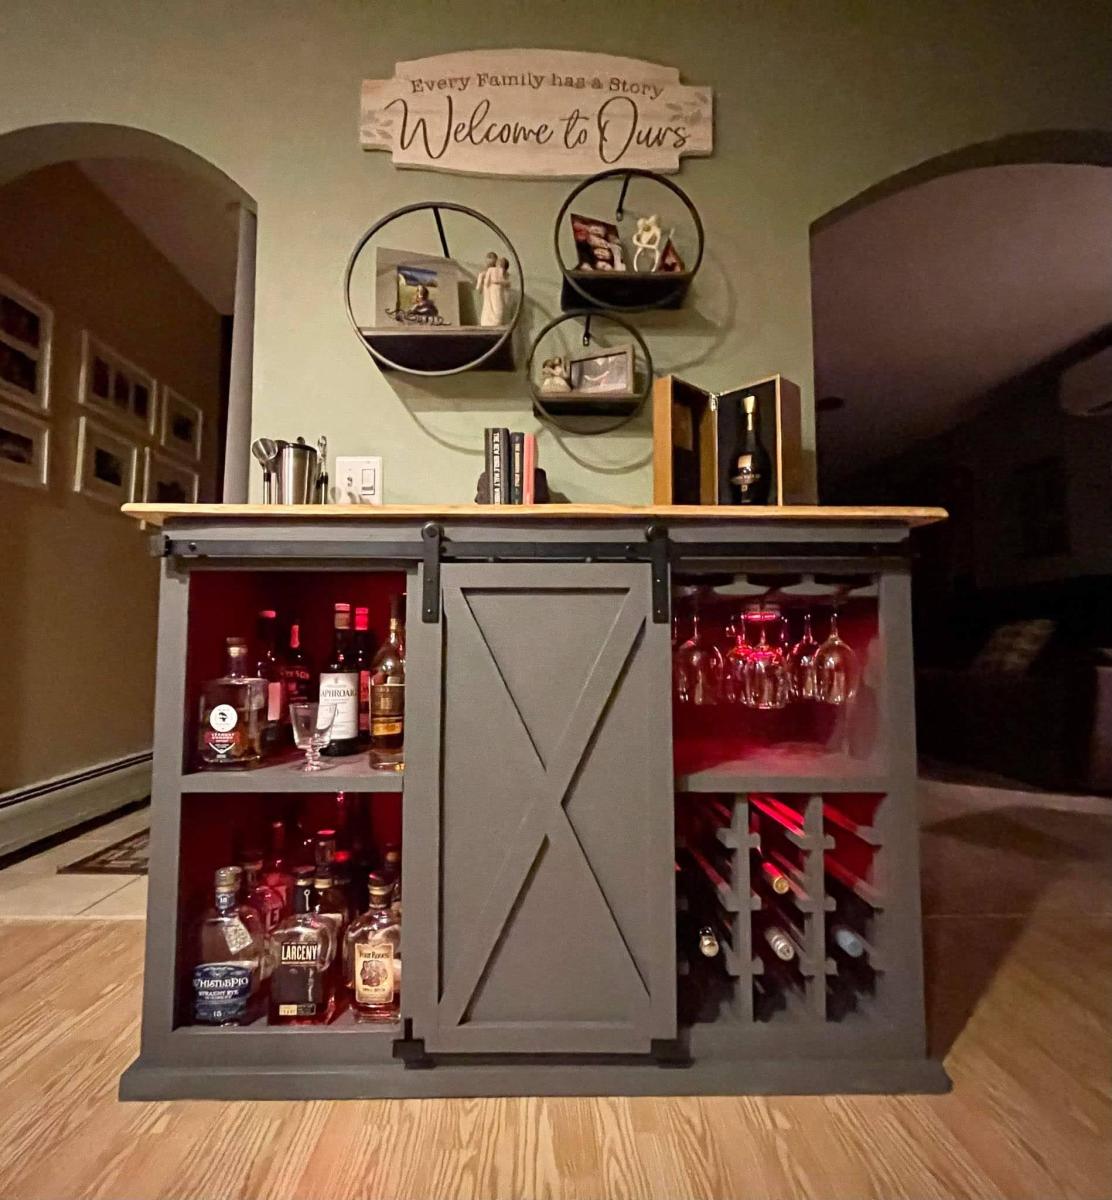
Whiskey/ Wine Bar
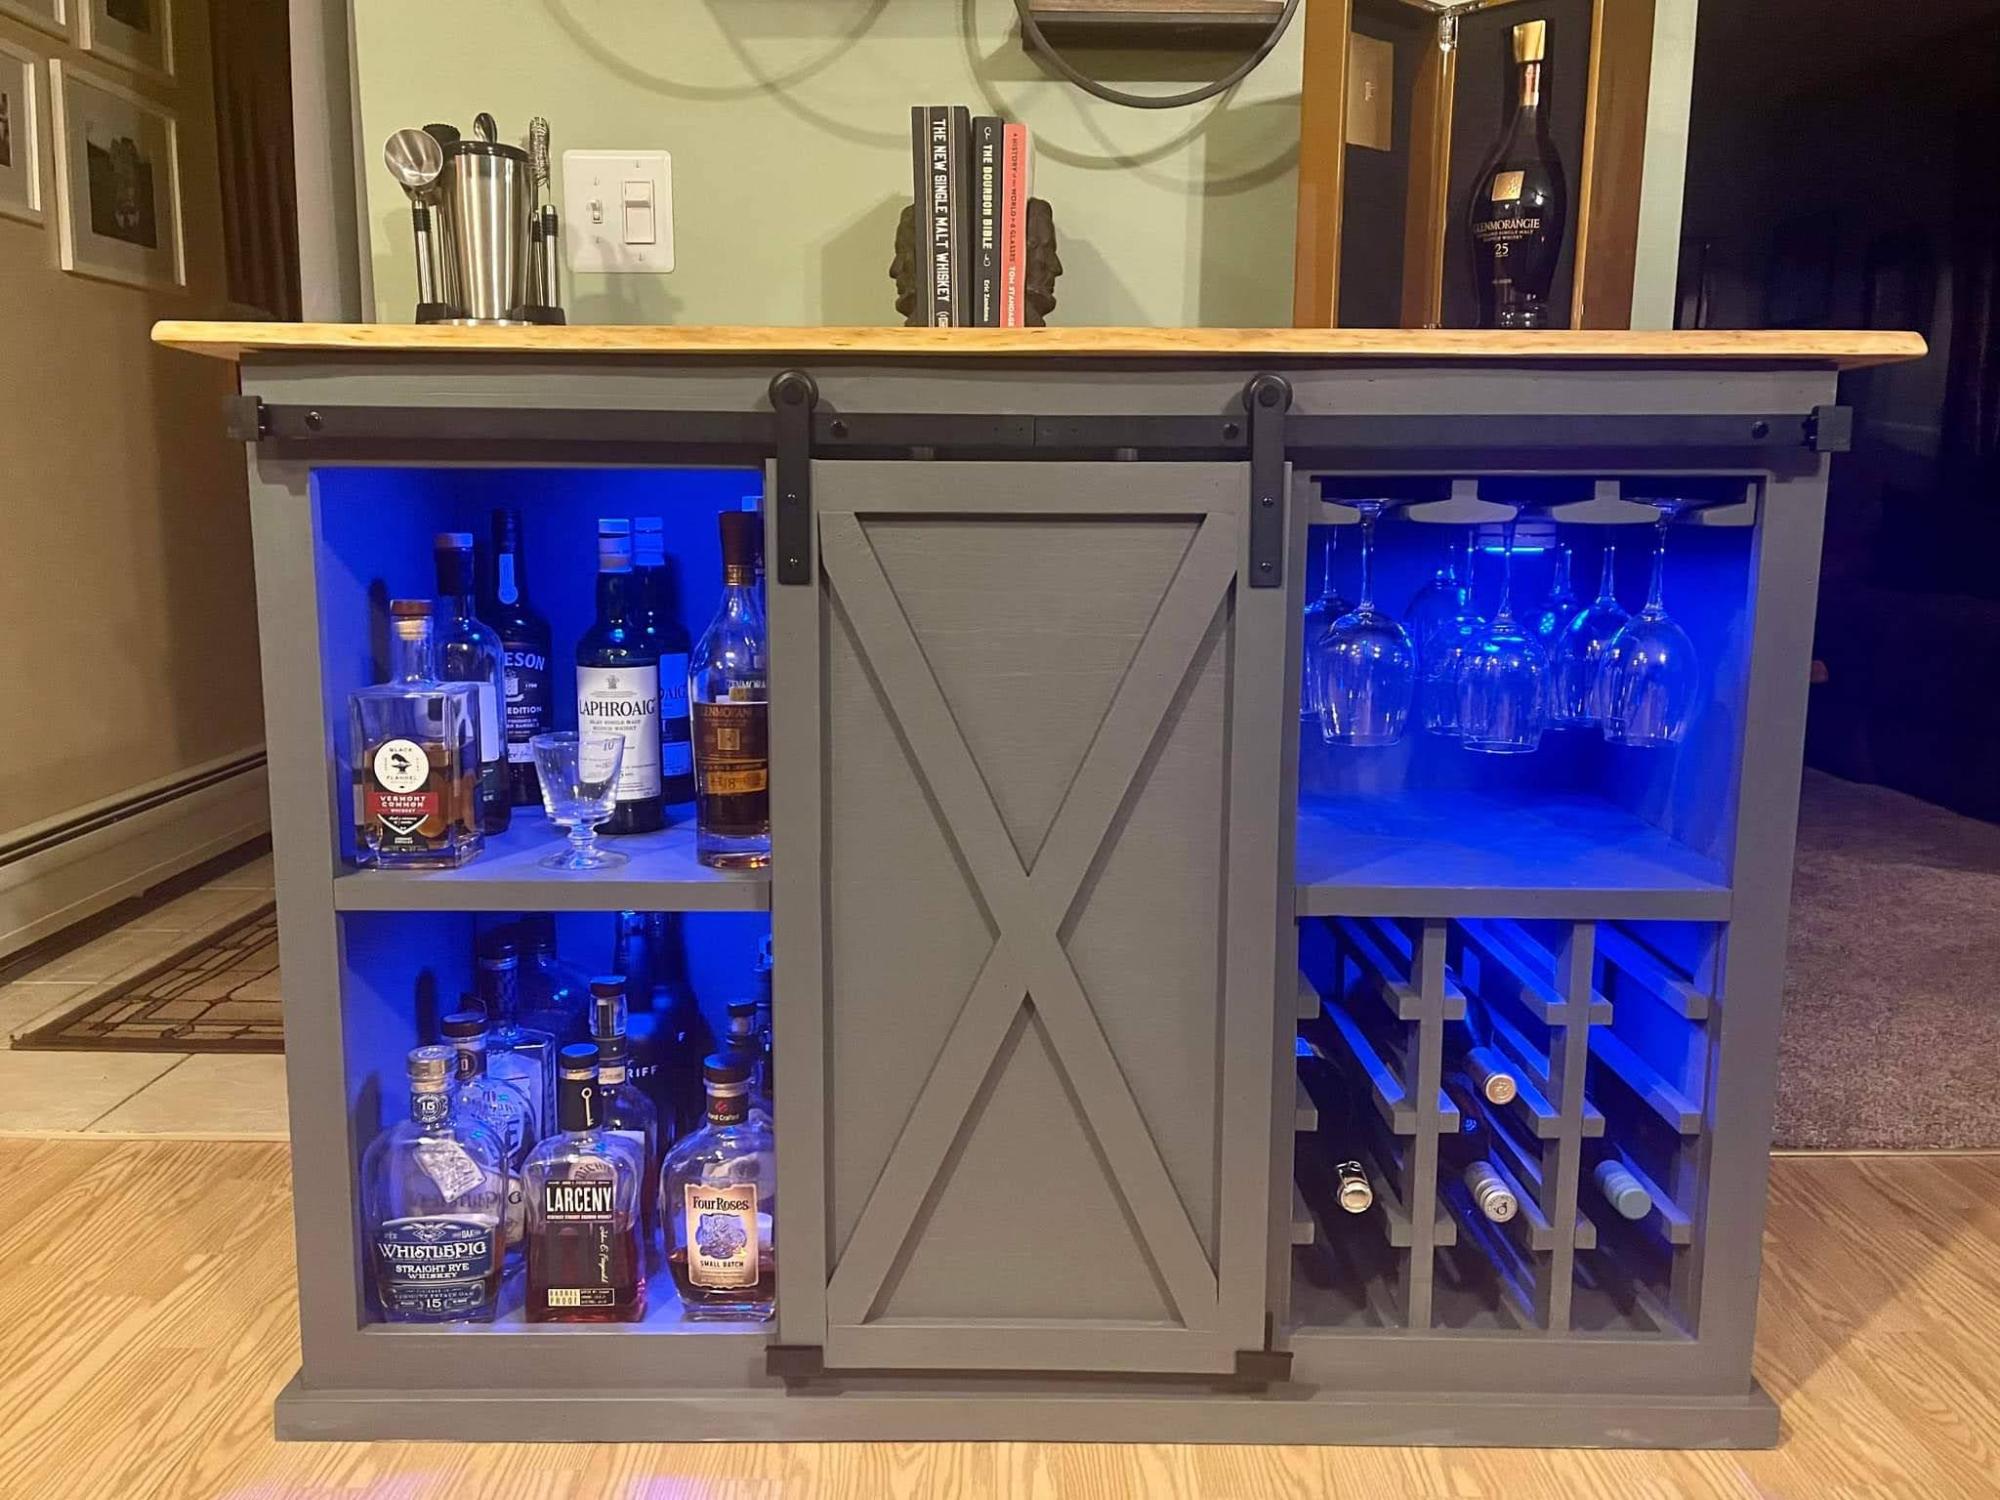
Whiskey on the left, Wine rack & glass holders on the right with storage in the middle. Frame built mostly with Pine, painted with Peppercorn Grey. Cherry tabletop with live edge. Finished with boiled linseed oil and semi-gloss polyurethane. A whiskey Bar should be fun! Stick on lights in each bay battery powered, comes with remote with many color options.

Built from Plan(s)
Comments
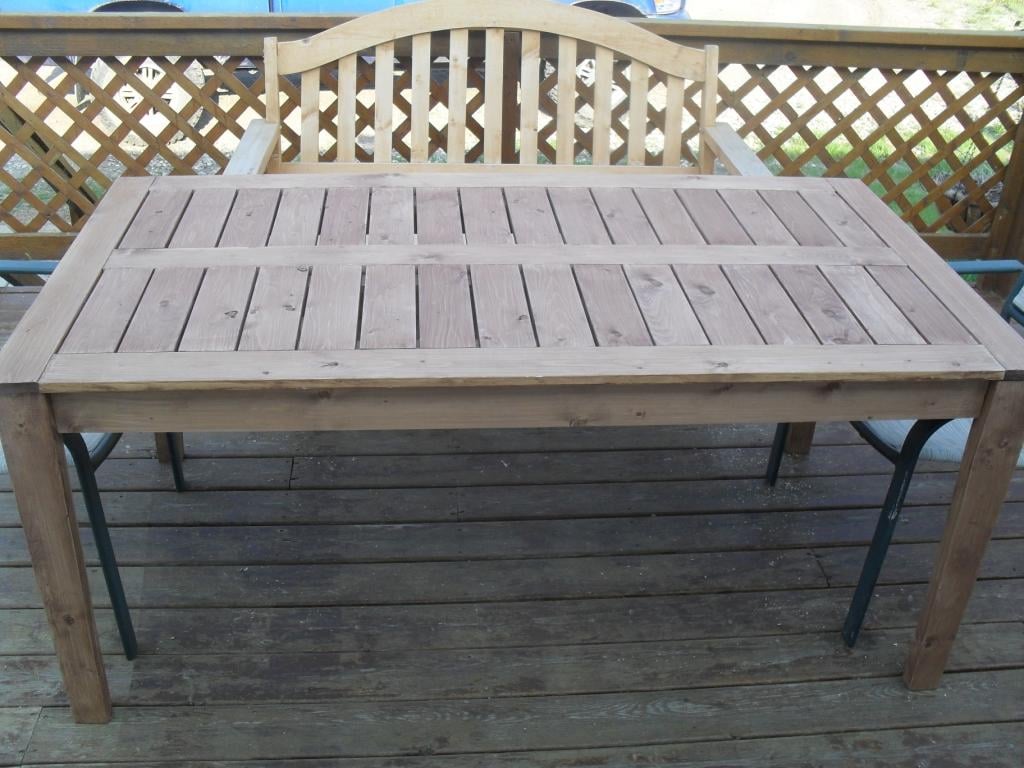
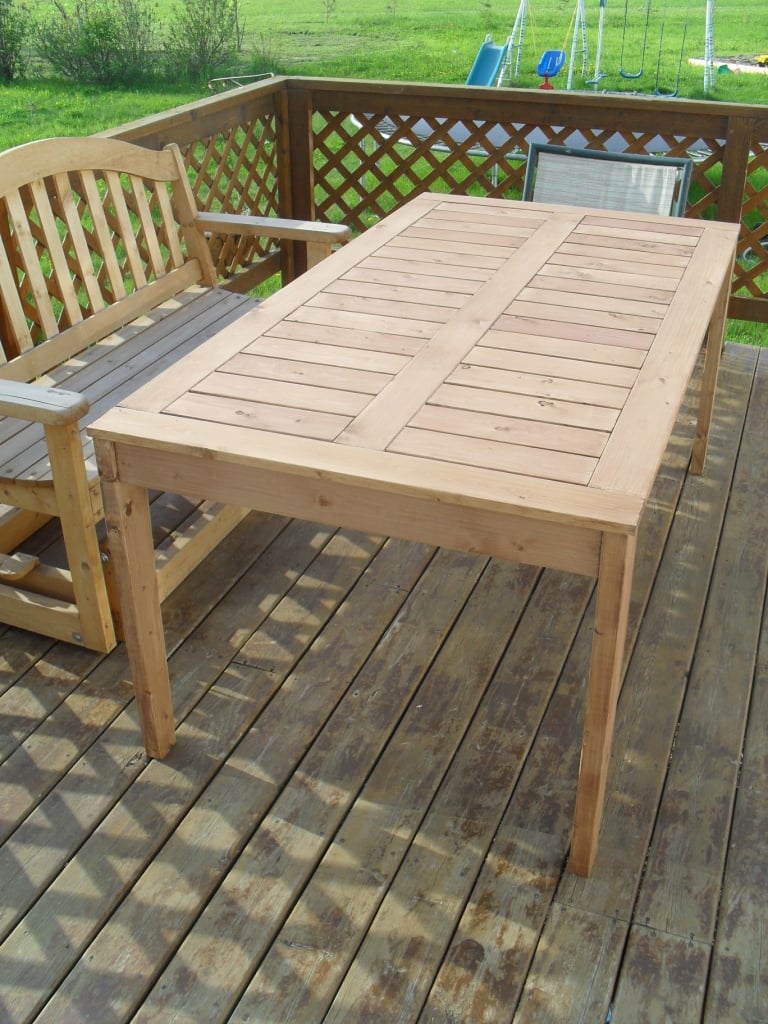
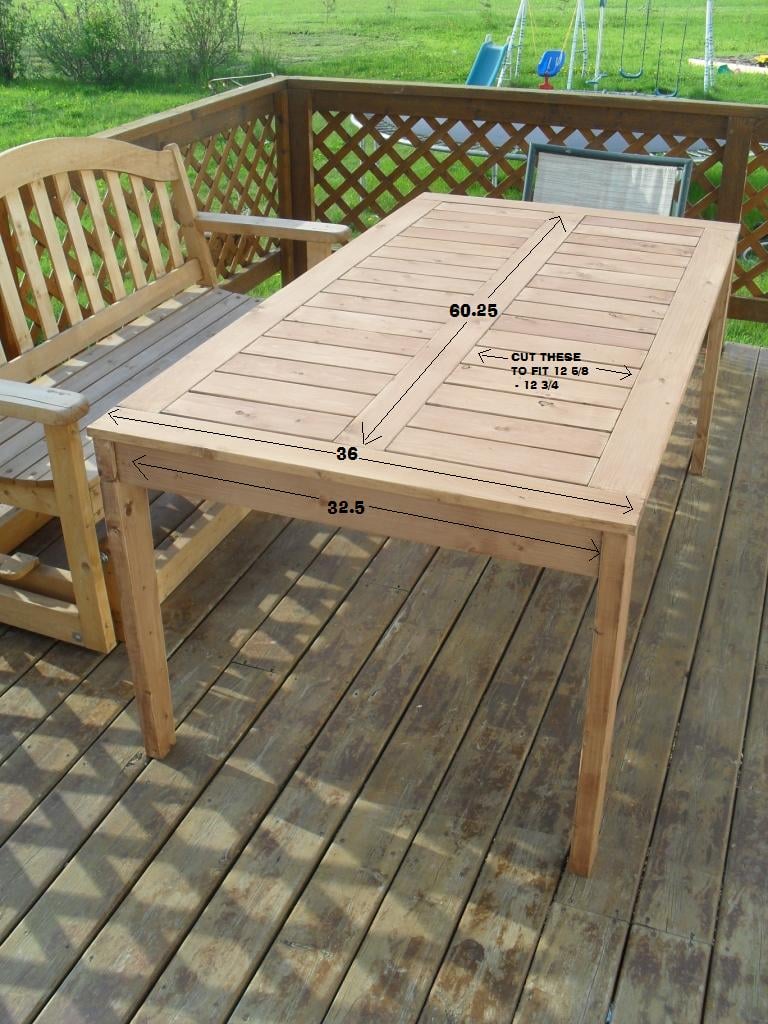
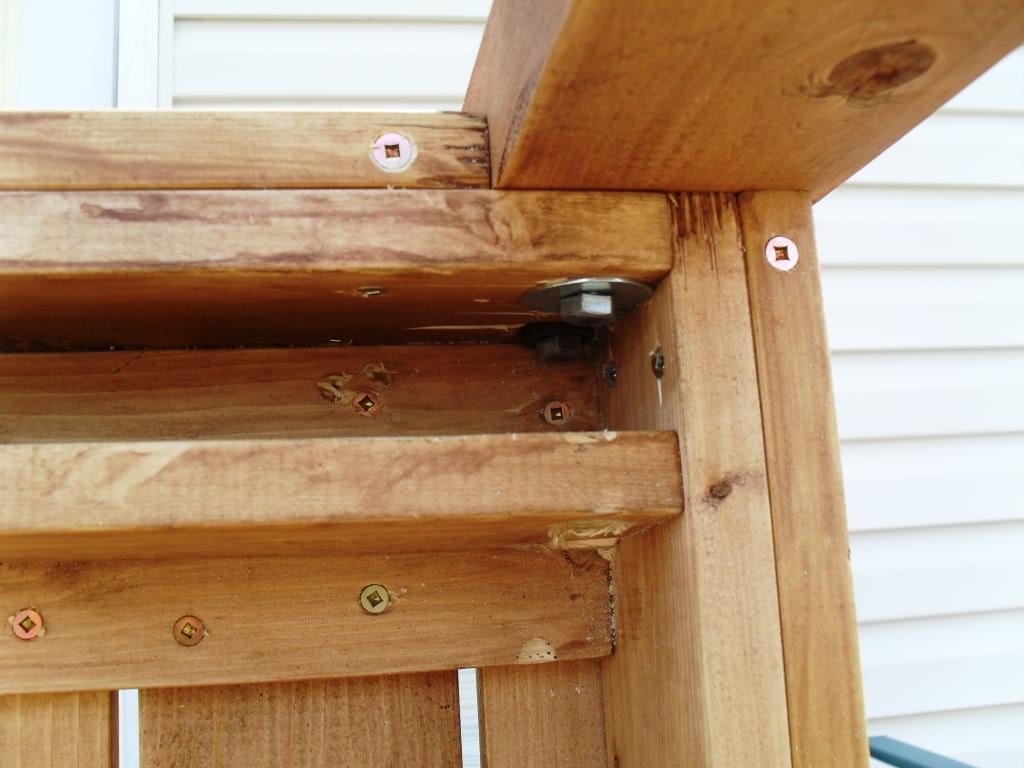
Modified Simple Outdoor Dining Table
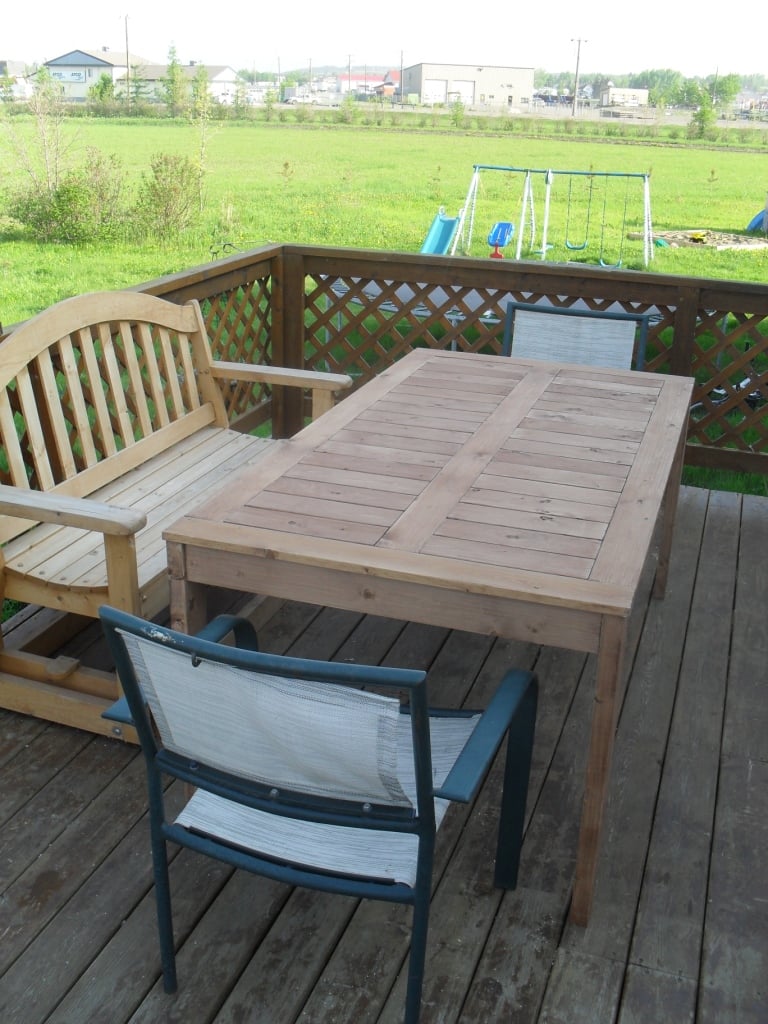
Wanted a Patio table and when I saw the plans on this site I really liked it; I just changed the plan a bit. Everything was screwed from the underside of the table, also I attached the legs with 2" lag screws.

Built from Plan(s)
Estimated Time Investment
Weekend Project (10-20 Hours)
Recommended Skill Level
Beginner
Comments
Rustic x console table
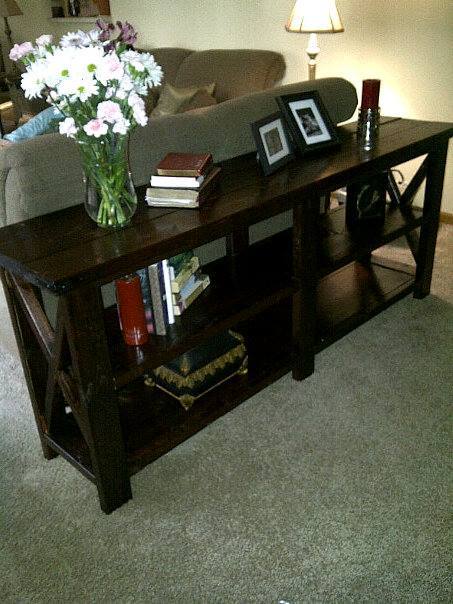
This was my first project! I love how it came out. Now my husband want the matching end tables. Can't wait to get started
Built from Plan(s)
Estimated Time Investment
Weekend Project (10-20 Hours)
Finish Used
I followed the plans exactly. The stain that was used was minwax red mahogany and then I coated with a couple coats of polyurithane.
Recommended Skill Level
Beginner
Dressed up Mini Farmhouse Bedside Table
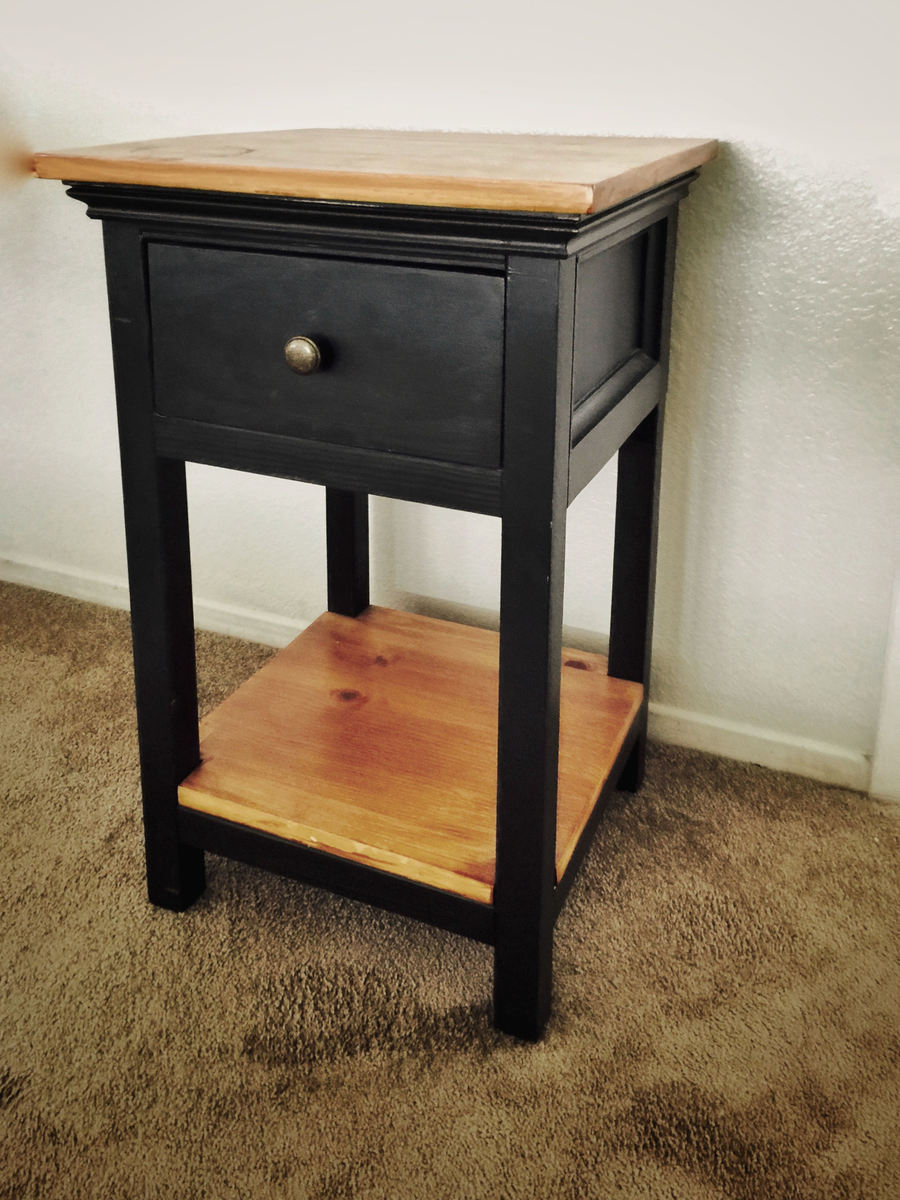
I added some decorative trim to the top of the table and also to the sides of the table.
Built from Plan(s)
Estimated Time Investment
Weekend Project (10-20 Hours)
Finish Used
Black paint and pecan stain
Recommended Skill Level
Intermediate
Comments
Outdoor Sectional (modified park bench)
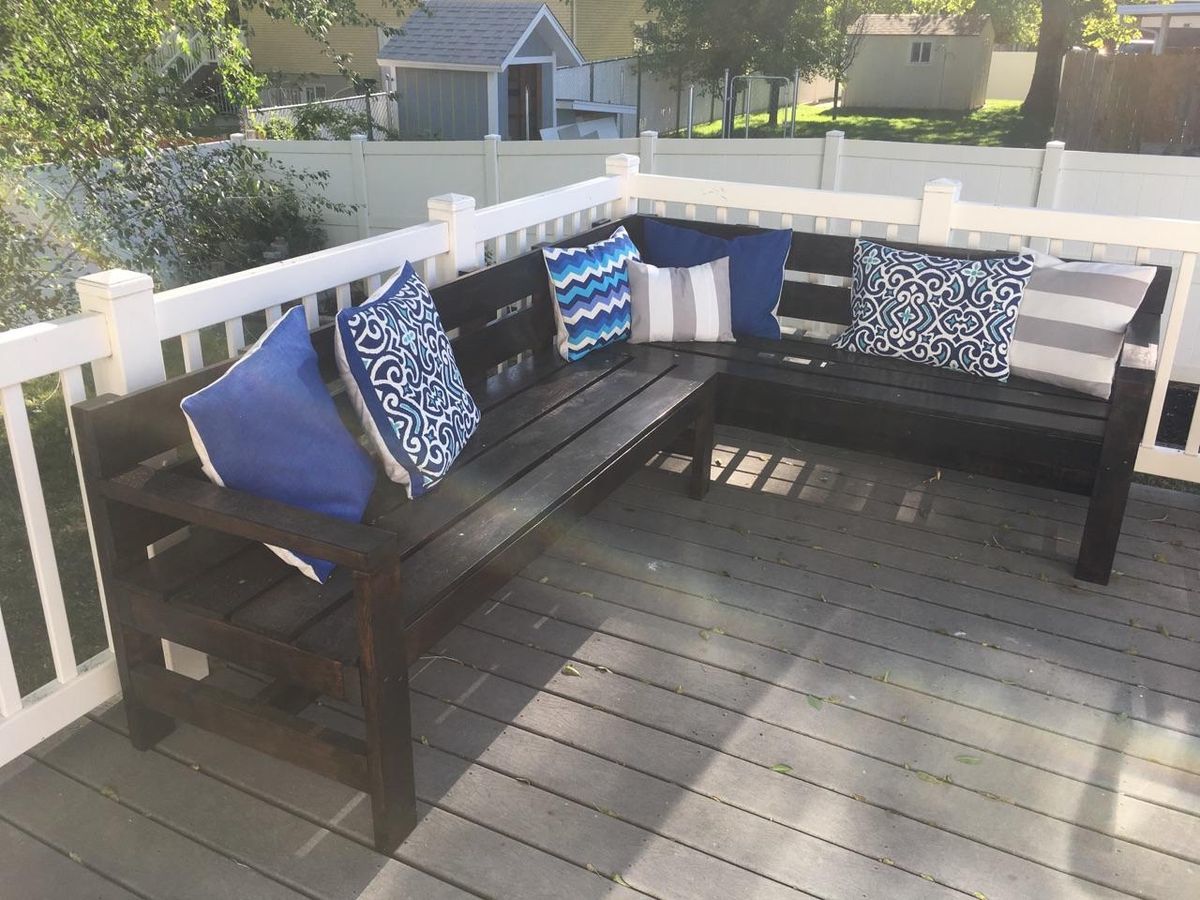
This is a modified version of Ana's park bench. Had a large deck, with plenty of room for a sectional.
I basically built two benches. One with an extended back (to create the back for the side of the second), and modified the front leg to sit under the frame, to allow the second bench to sit flush. I used lag bolts to attach them together on the seat base. Using lag bolts allows it to be easily taken apart for moving.
Built from Plan(s)
Estimated Cost
$100
Estimated Time Investment
Day Project (6-9 Hours)
Finish Used
Finished with Minwax Espress Polystain.
Recommended Skill Level
Intermediate
Comments
These Chairs
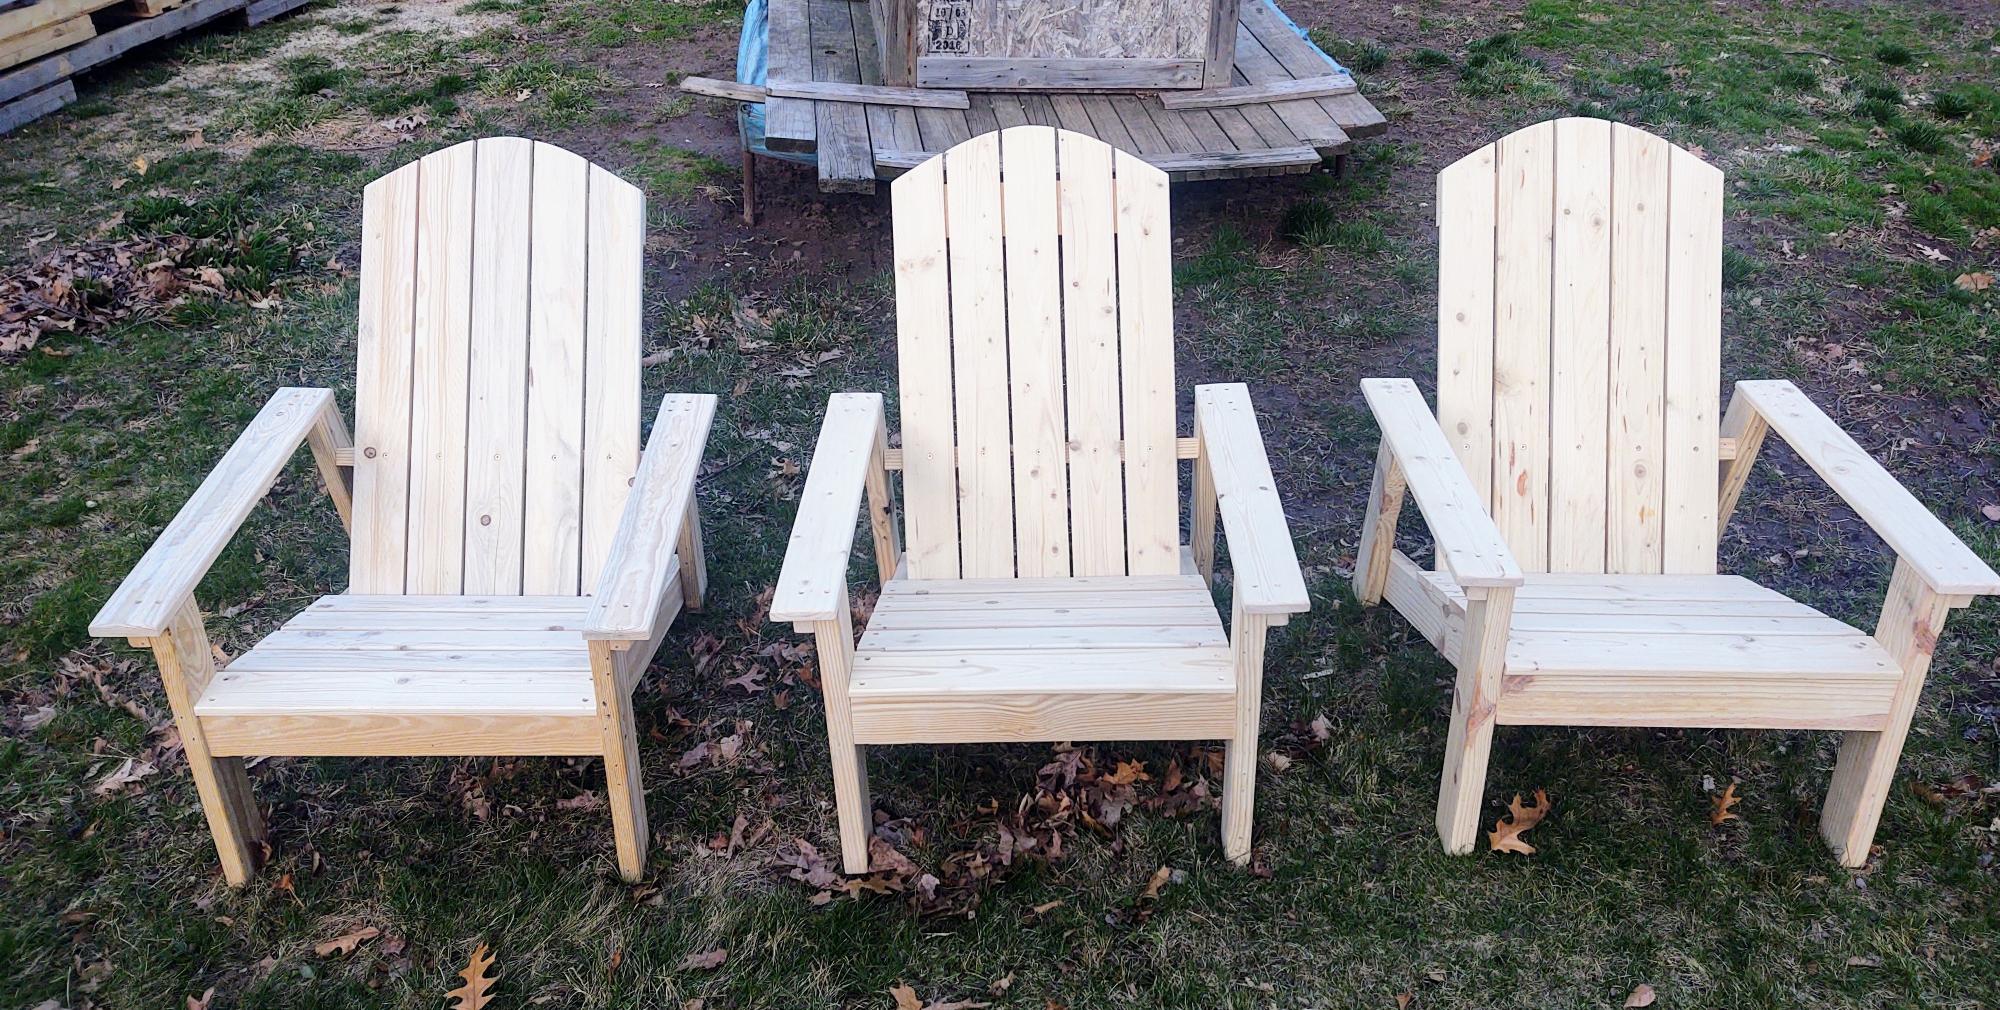
Love these chairs!!!
Comments
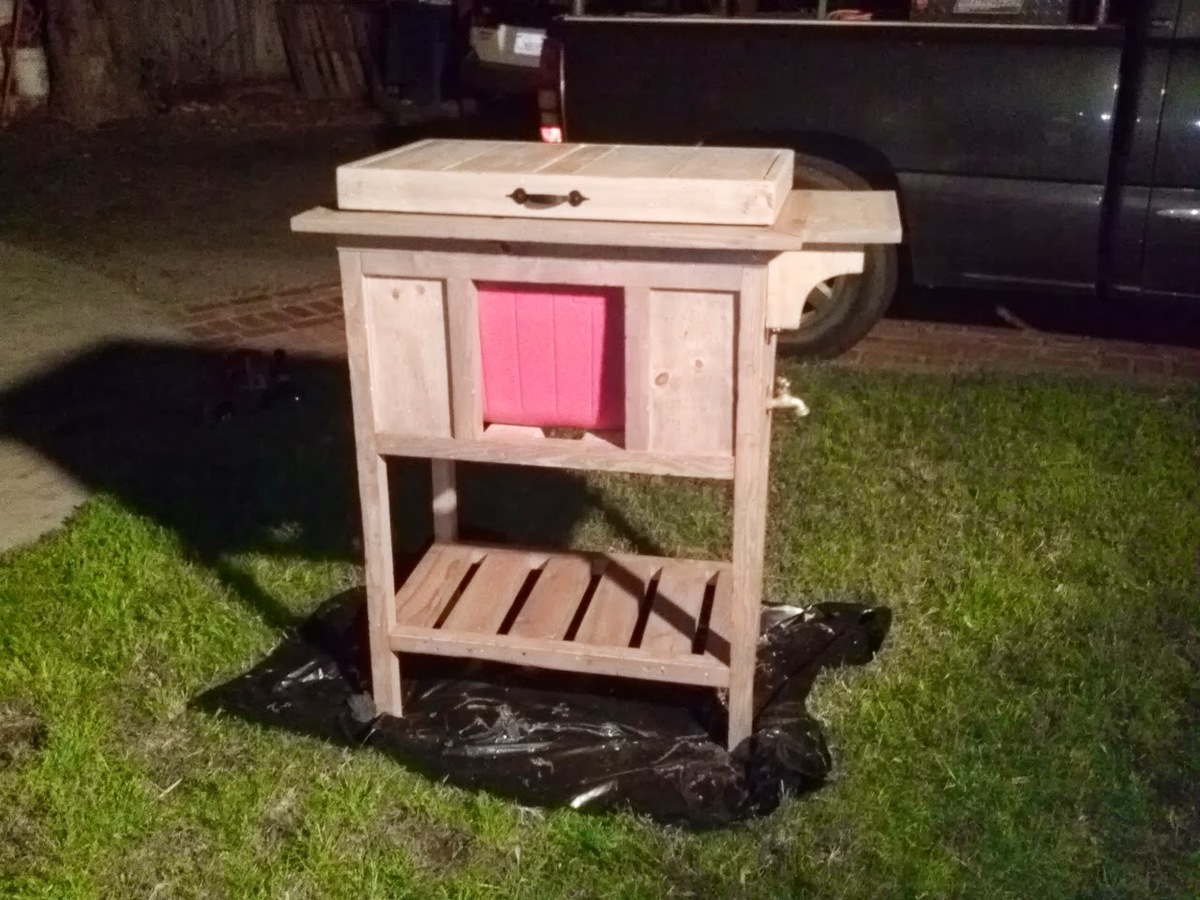
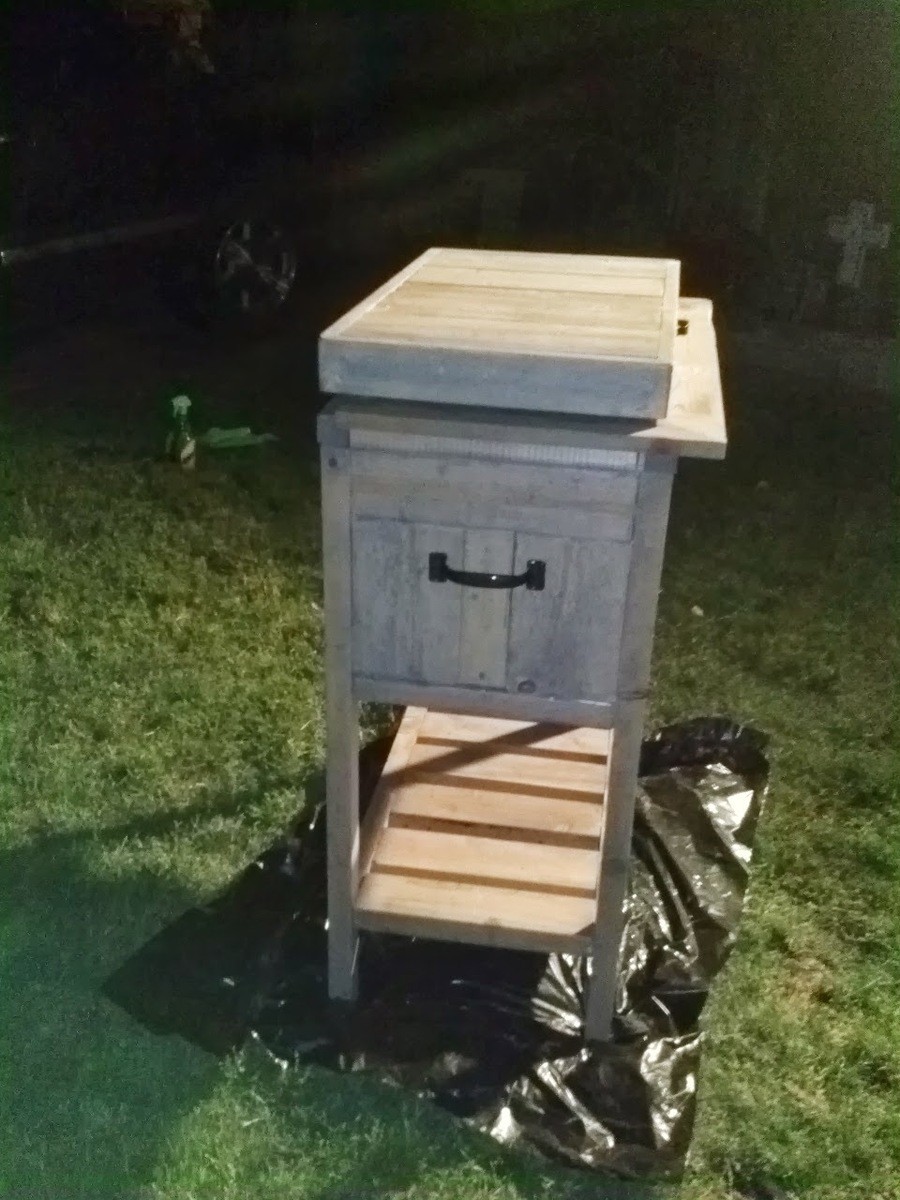
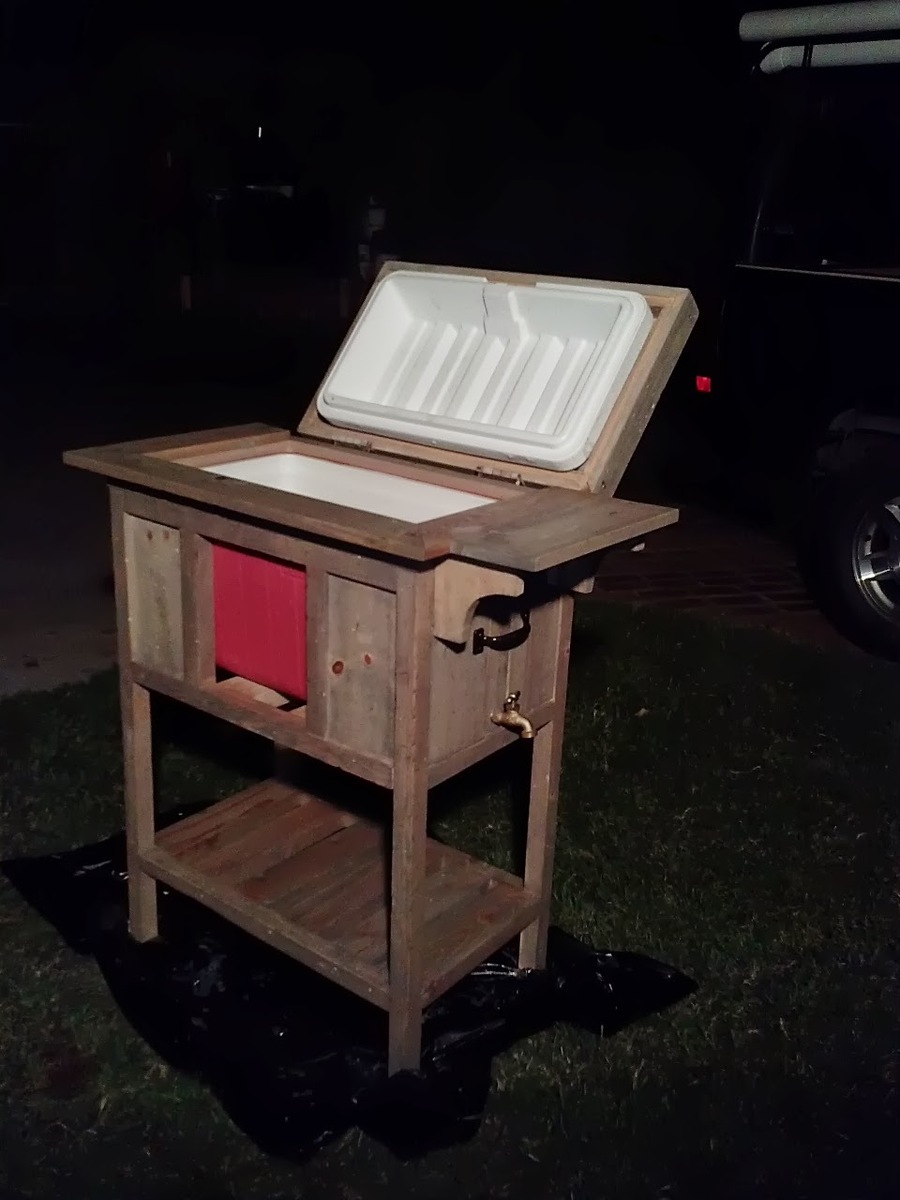
cooler for dads day
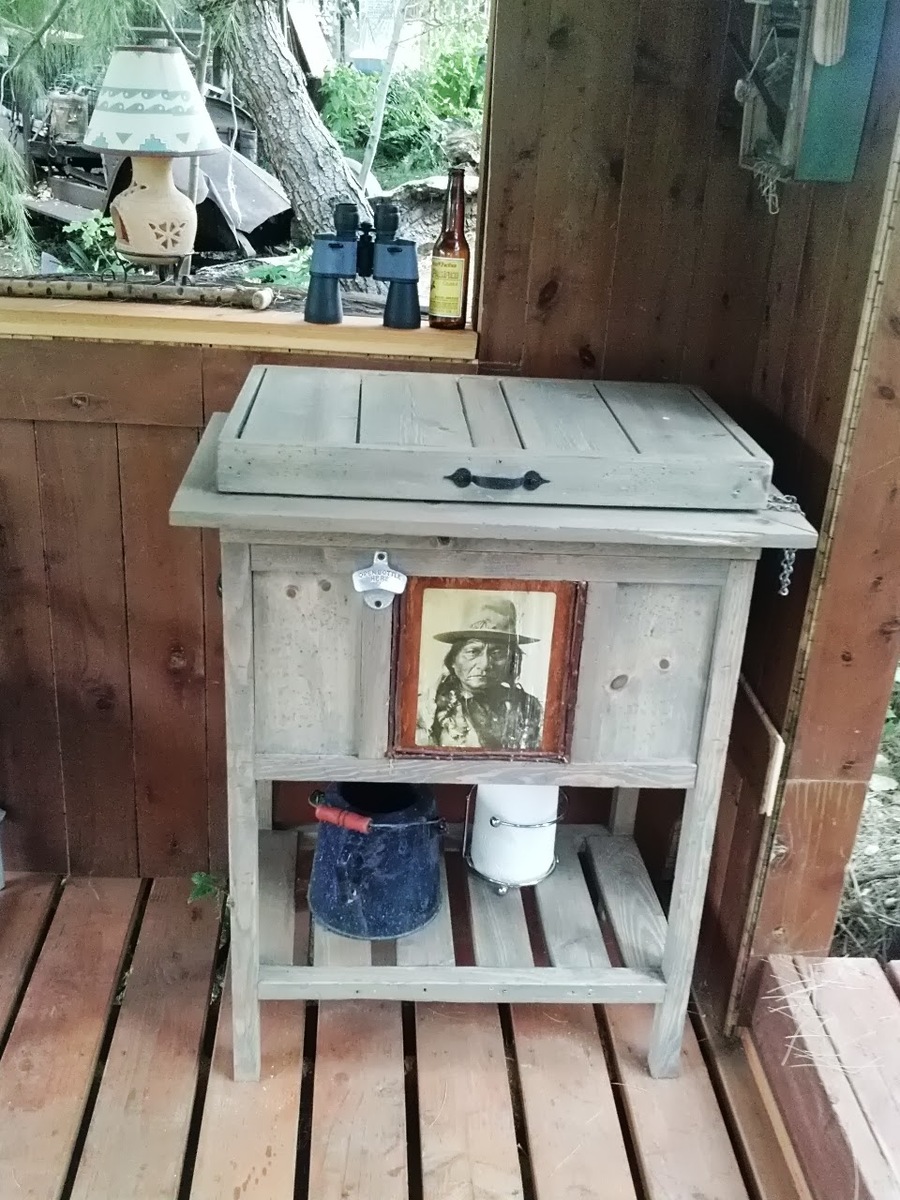
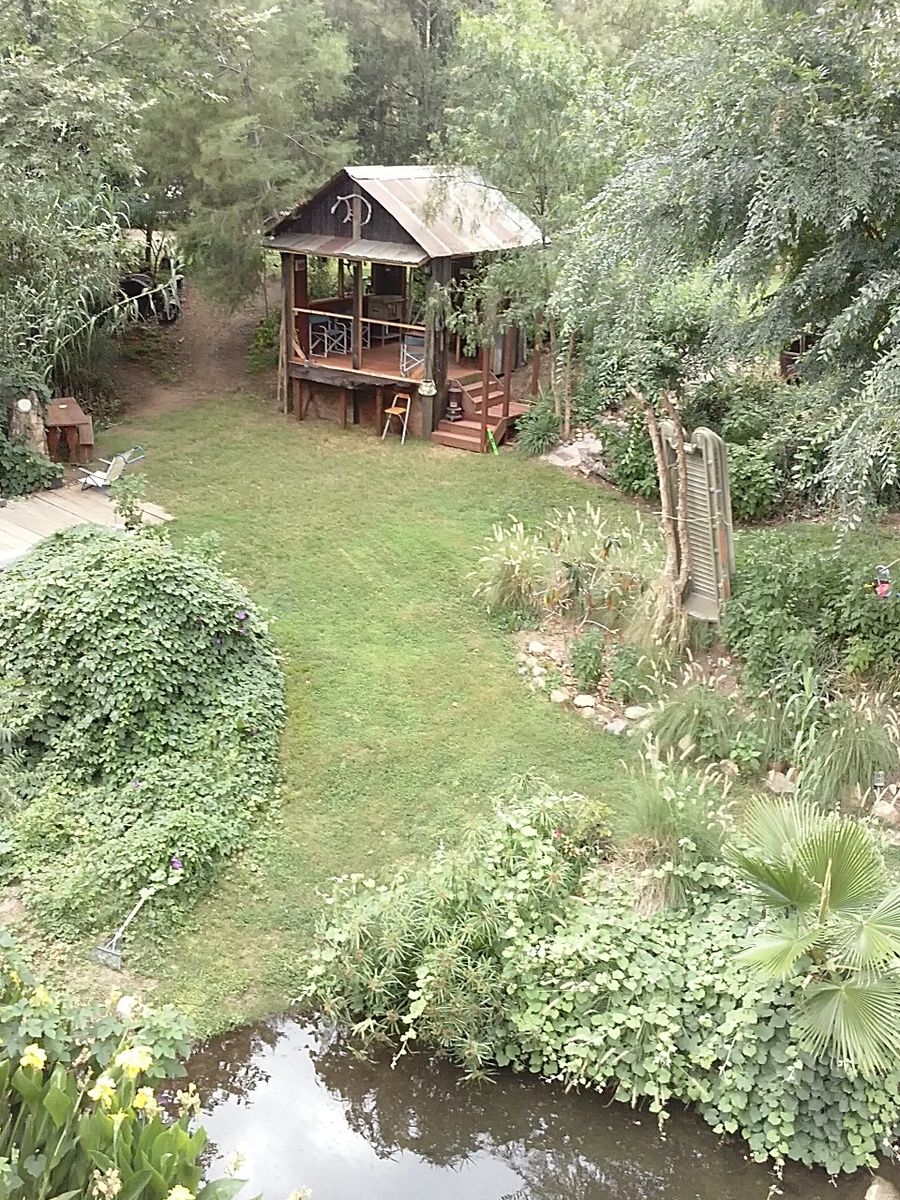
My dad made most everything I have ever had in life including the house I live in. So I wanted to make him something this dad's day that he could really use and enjoy. He just built a hang out place in his back yard that I call "his fort" Since he's in his 60's now and a little more mellow, he has a lot of little parties with friends, family, basically anyone who wants to come hang out in his back yard. lol. (He claims to have made the fort a covered stage for my 12 year old and his band. But I know the truth. hehe. it's his fort :) ) So I thought this cooler stand would come in handy. He saw me working on it a few days before fathers day and told me he was afraid I was gonna make his something girly. hehe. He's such a man's man. I love my pops and am soooo happy he likes my gift. Its already in use in the fort. hehe

Built from Plan(s)
Estimated Cost
about $80 for wood, stain, polyspray and hinges and handles. I had the cooler and faucet spout and plastic tubing and screws already
Estimated Time Investment
Afternoon Project (3-6 Hours)
Finish Used
Minwax "weathered oak" 3 coats on the pine 2 on cedar. Sprayed with Vurathane spray polyurathane in a spray can. I love it. The sheen is satin so you can hardly tell its there, no gloss at all.
Recommended Skill Level
Intermediate
Comments
Mon, 07/22/2013 - 20:43
Thanks
Thank you Sue :) his fort is so awesome. both my sister and I have houses on my dads property. The picture of his fort is from my balcony and I can see my dad in his fort every day. It makes me so happy to see him over there just relaxing (with his cooler hehe) looking around the yard at the trees, creek and all of his hard life's work. Everyone needs a grown up fort in my opinion.
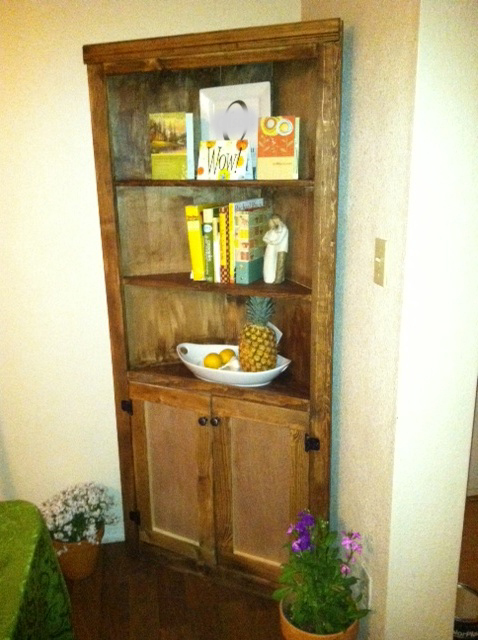
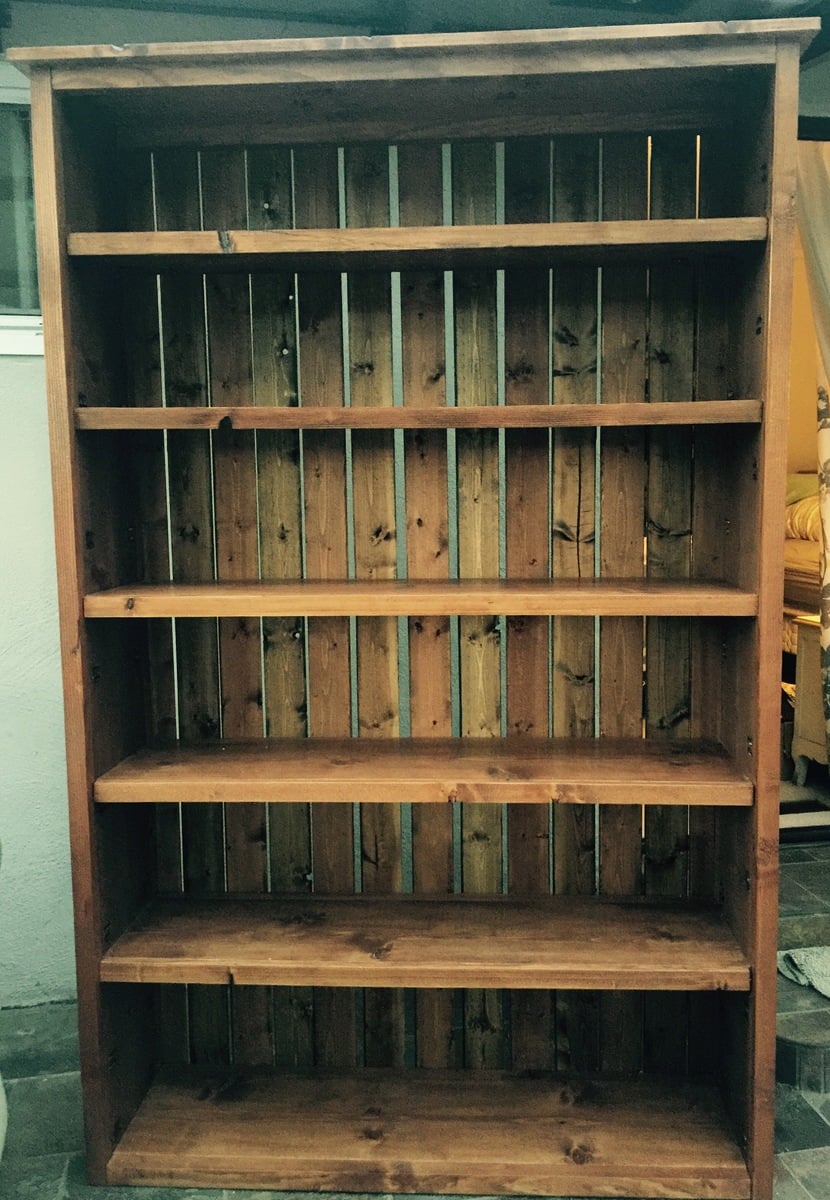
Rustic Kentwood Bookshelf
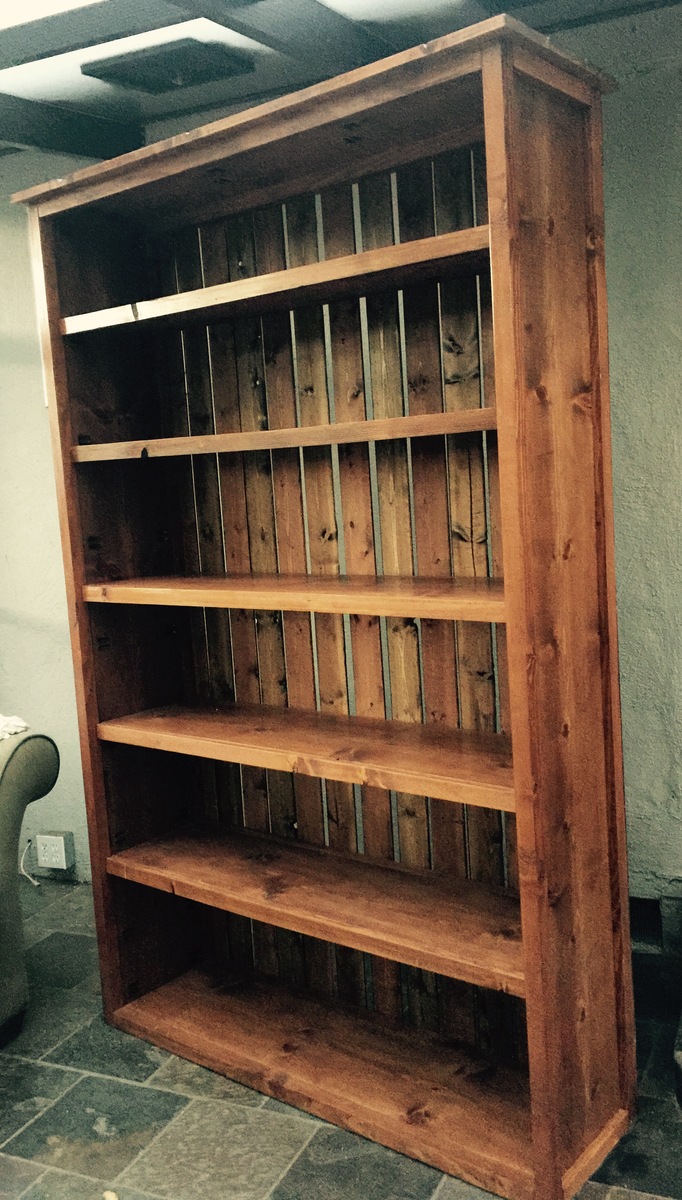
I wanted to build as big of a booshelf as I feasibly could so I altered the sizings in width and height to create this monster. The planks in the back did not fit perfectly in the new sizing so I spaced them a little bit and I think it turned out nice. The spacing gives it more of barn-like look to it. I also alternated stains on the planking between American Walnut and Dark Walnut because this thing took more than a can of stain and I thought the look was neat. The majority of the piece is in American walnut which turned out a little redder than I hoped, but overall I am happy how this turned out.
As always, thanks for the plans!
Built from Plan(s)
Estimated Cost
$150
Estimated Time Investment
Week Long Project (20 Hours or More)
Finish Used
Varathane American Walnut stain, Minwax Dark Walnut stain, Vermont Natural Coatings PolyWhey Satin clear coat
Recommended Skill Level
Intermediate
Comments

Mon, 07/27/2015 - 17:09
Great bookshelf!
You did a great job on this bookshelf! Love the plank back and the barn-like look it gives, and the alternating colors for the back. Looks beautiful!
In reply to Great bookshelf! by JoanneS
Tue, 07/28/2015 - 07:39
Thanks! Always good to hear
Thanks! Always good to hear you are not the only one that loves your piece after all the blood, sweat and tears :)

Wed, 11/02/2016 - 00:14
Measurements
Hello, would you be able to provide the exact measurements you used to build this beautiful piece? It would make my life a whole lot easier lol Thank you :)
Thu, 01/19/2017 - 10:29
Final dimmensions of the
Final dimmensions of the bookshelf ended up being 51"W x 16.5"D x 81.5"H. I would suggest measuring out the space where you would like to put the shelf and see how much room you have.
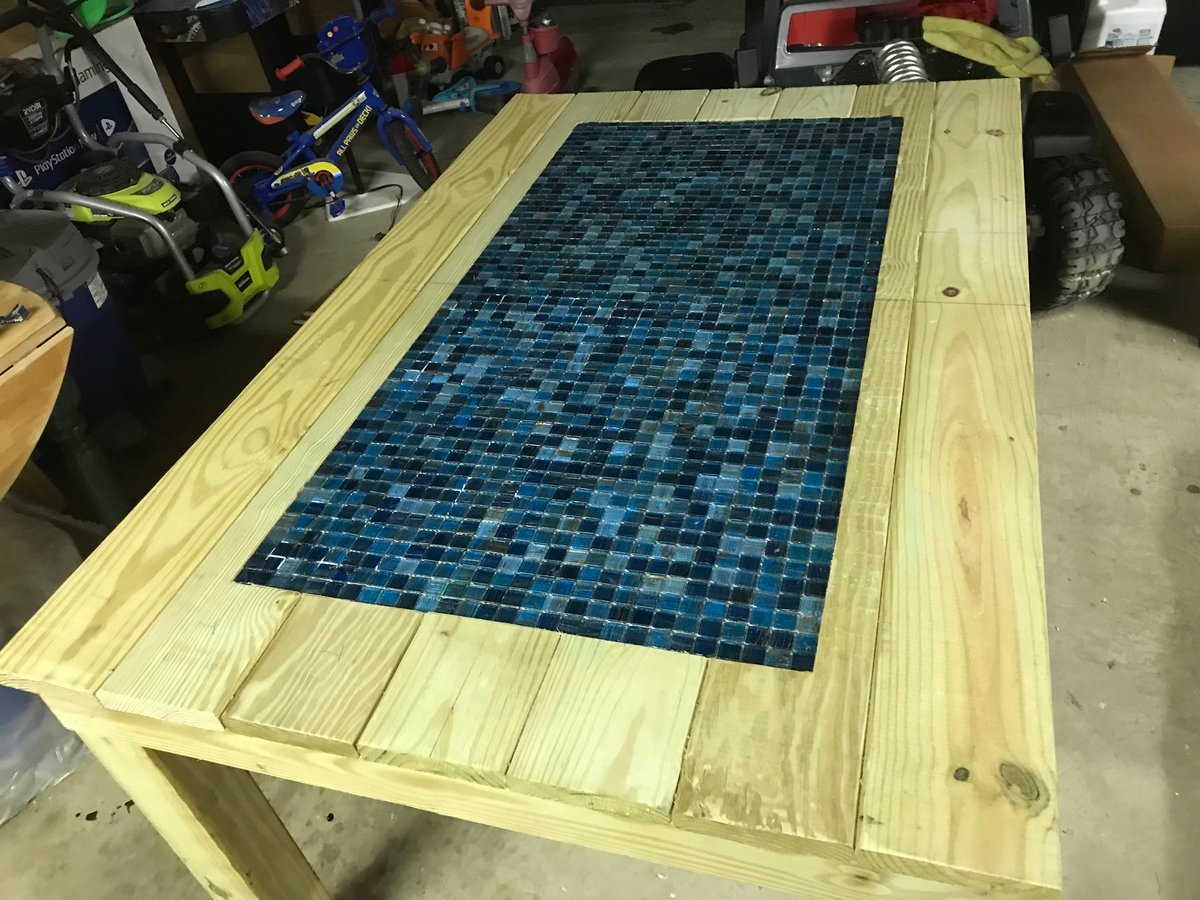
Patio table
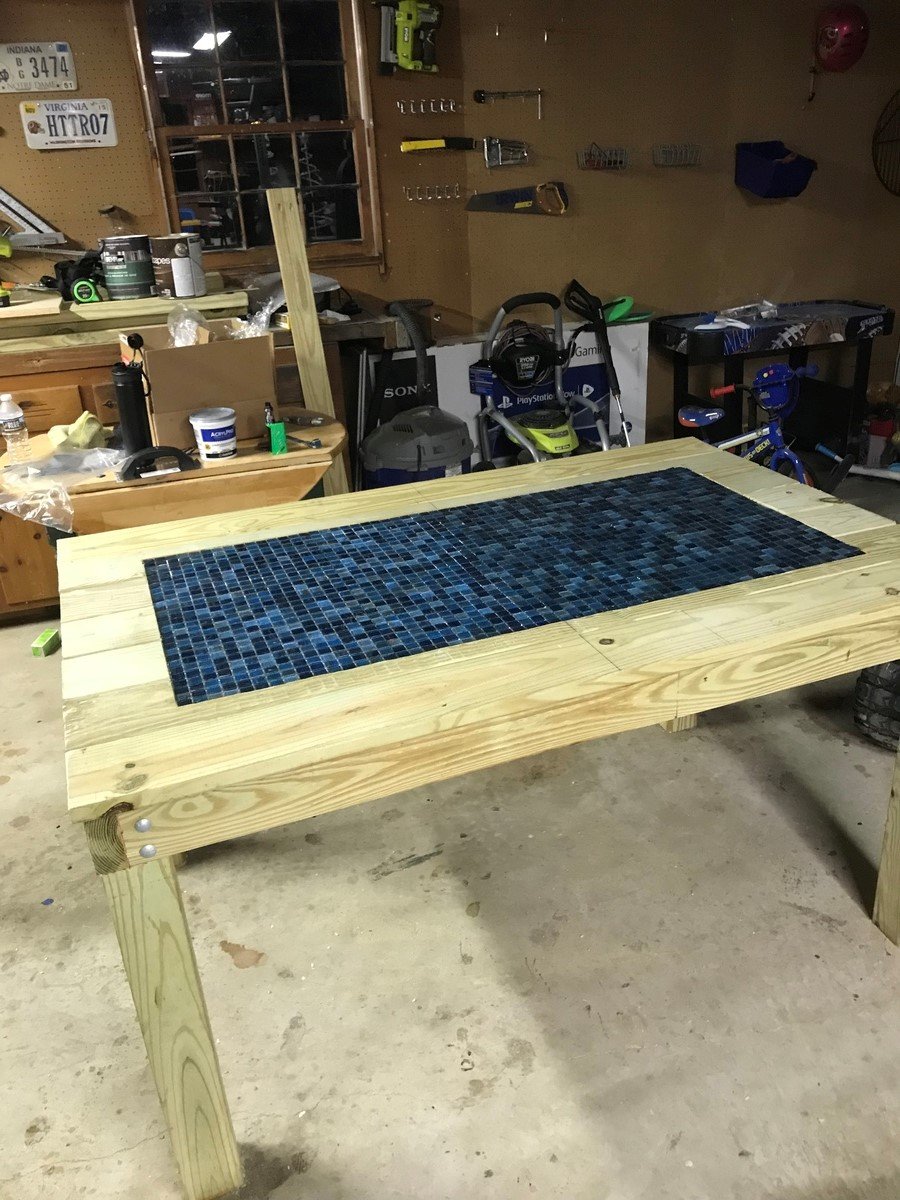
Thanks for all the ideas. Wanted to share my build with everyone.
Built from Plan(s)
Estimated Time Investment
Weekend Project (10-20 Hours)
Finish Used
None yet will be applying sherwin Williams river birch in future
Recommended Skill Level
Beginner
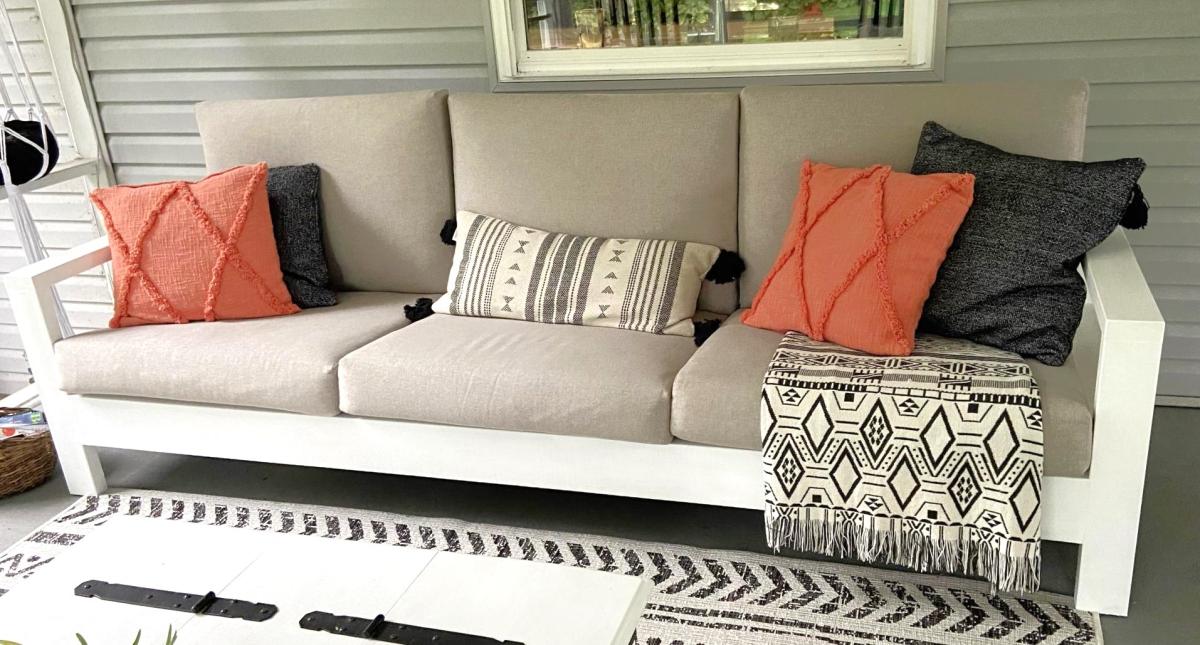
Outdoor Sofa
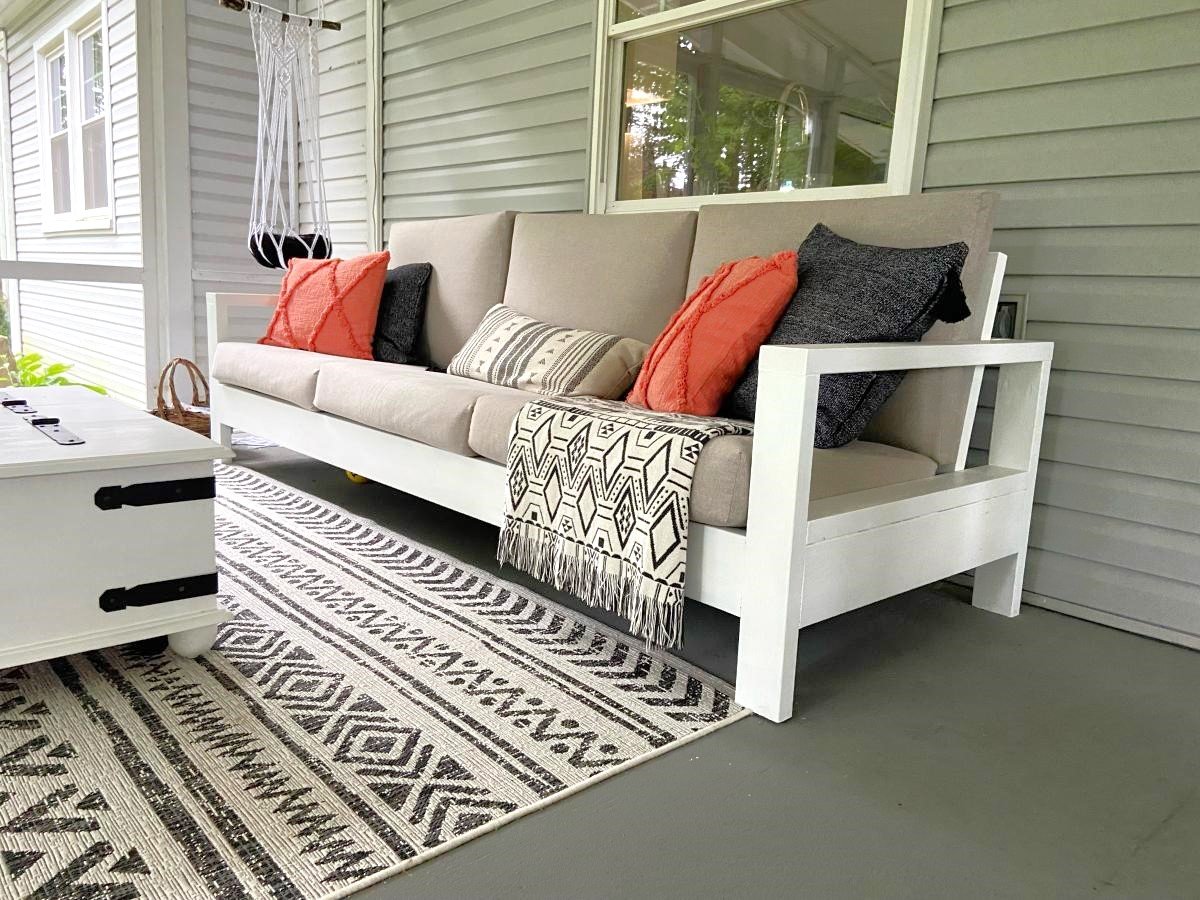
This was our first big project with our Kreg Jig. We adapted the plans to make the sofa 8' long. On Friday night, my husband did all the cuts and I pre-painted everything. With the help of our son, we had the whole sofa built in a few hours on Saturday morning. I puttied the visible holes, did a second coat of paint, and made custom cushions. The plans were very easy to follow. I followed the others' advice about pre-painting and assembling the back on a perfectly level surface. It came out better than I expected and it's super comfortable!
Built from Plan(s)
Comments
Sun, 04/10/2022 - 10:33
WOW Gorgeous!
Thank you for sharing, it looks amazing! Would love to hear how you made the cushions.:)
Mon, 04/11/2022 - 07:44
I want this one
I want the plans for this one! I like this style a lot better. I really like how the bottom cushions are at a slant. I suck at modifying plans.
Seasonal And Holiday