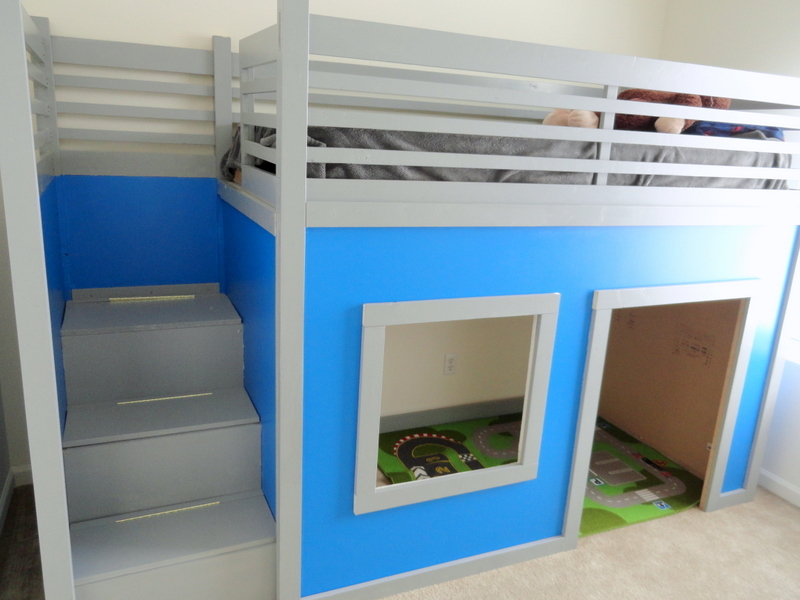
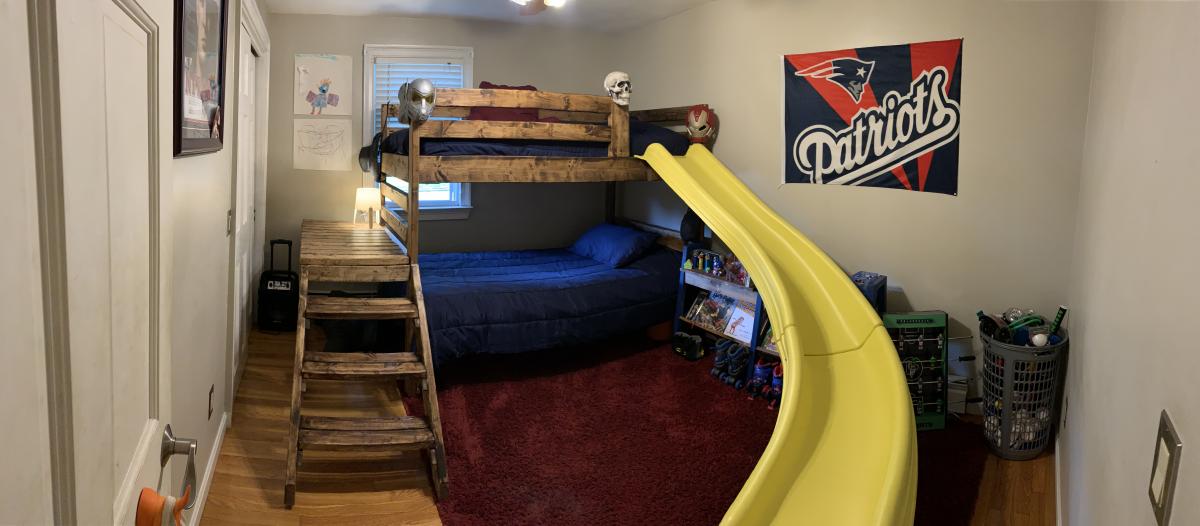
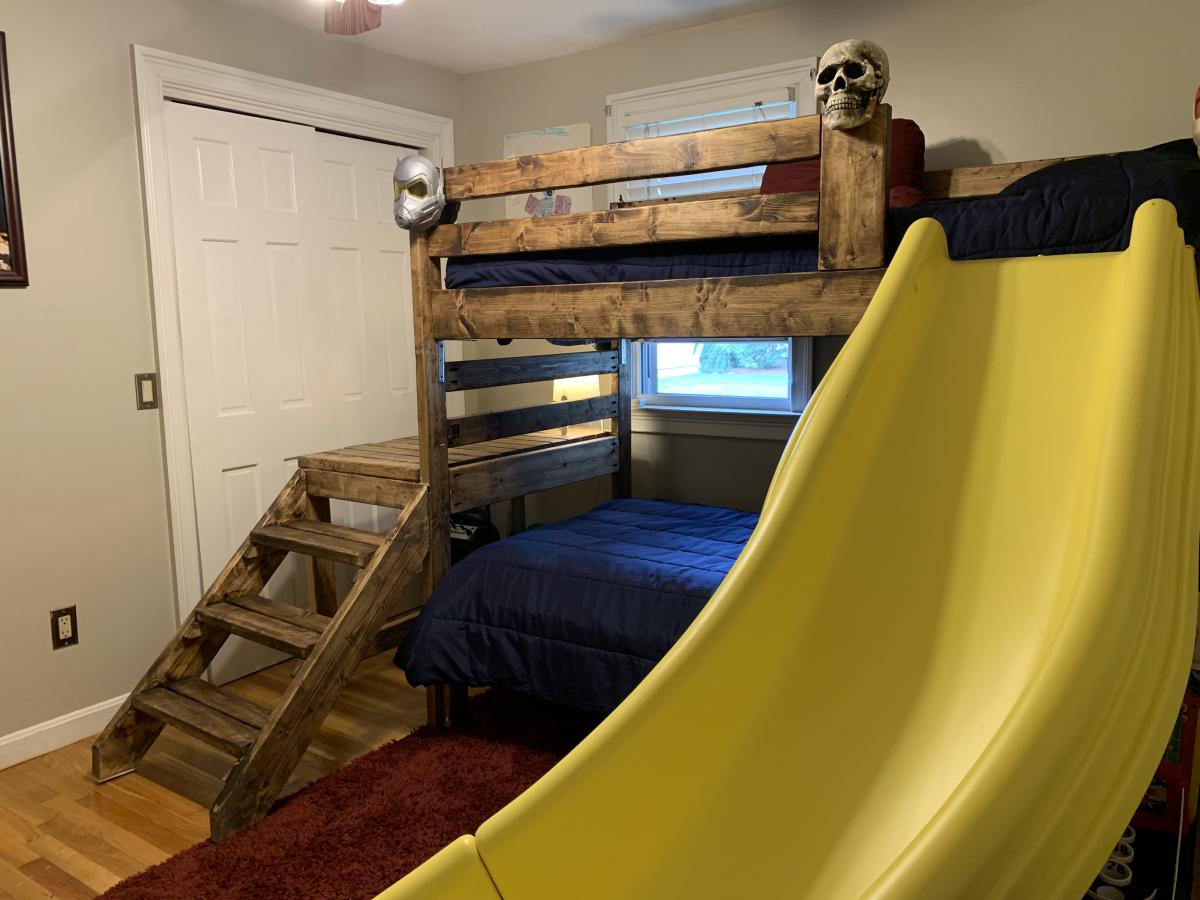
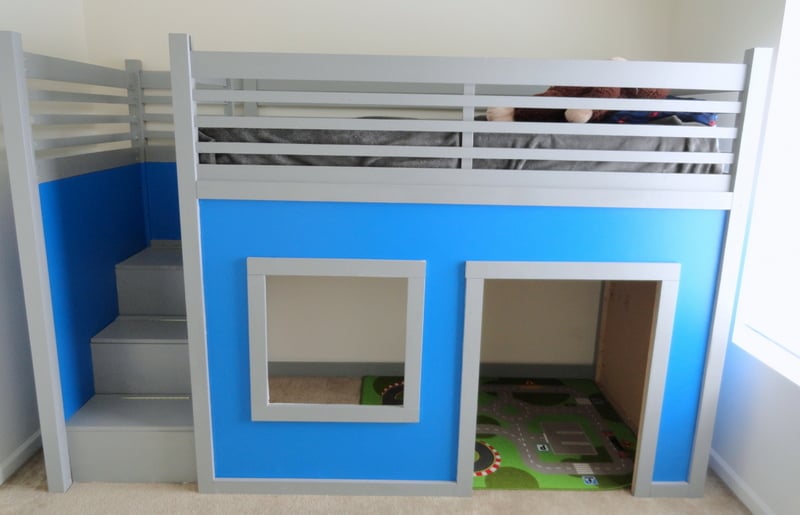
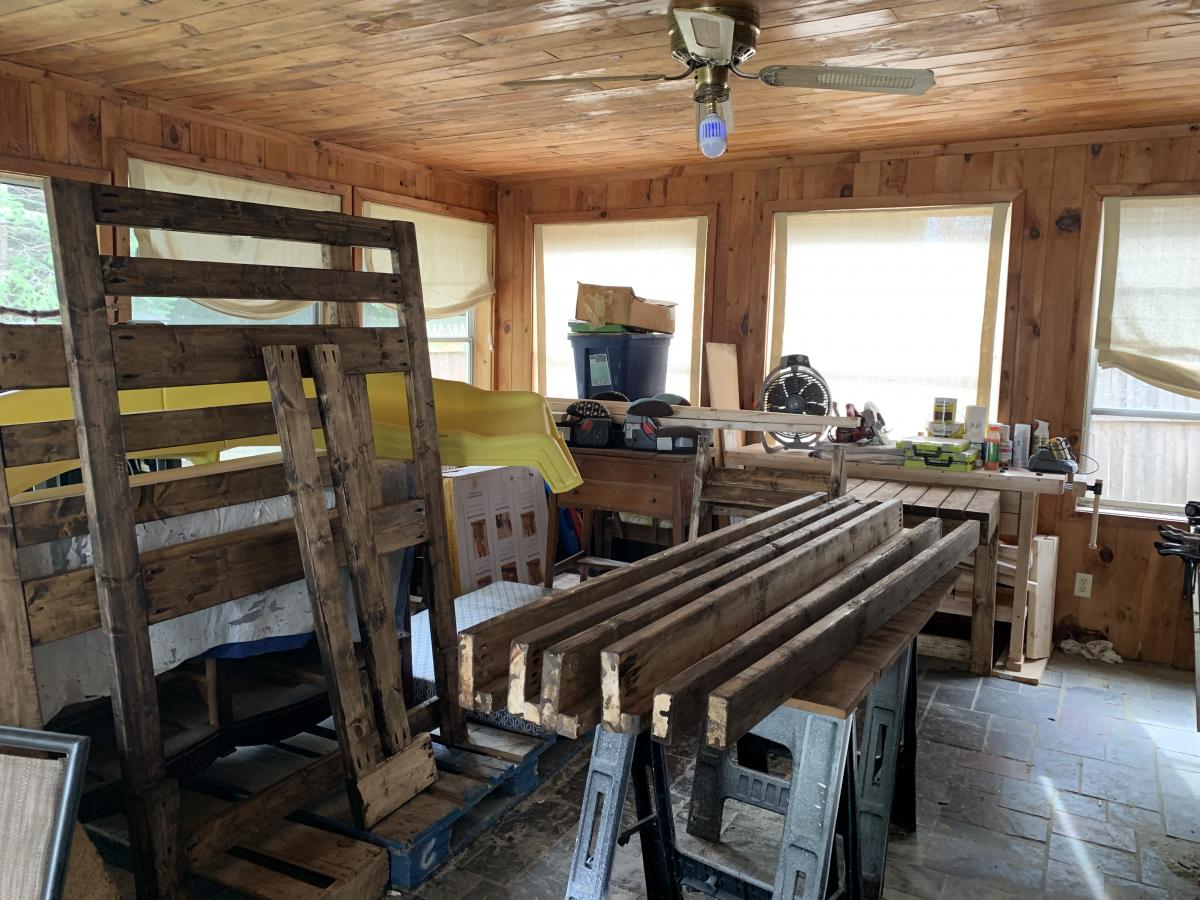
Community Brag Posts

Knock off Hyde Console Table

Submitted by Sherri1230 on Mon, 06/03/2013 - 14:28

I am cheap and I have expensive taste. I love, love, love Pottery Barn. I also love Michael Kors, Coach, Gucci, Jimmy Choo, and all things pretty. Especially pretty shiny things.

So I regress...

Anyways, I have had this bare spot in my living room and it has slowly been driving me crazy. Through much painstaking research I have decided that I wanted something like the Hyde Pottery Barn Console Table. Okay, not something like.... I wanted the Hyde Pottery Barn Console Table, but it also would cost $500. Hahaha. $500 for a console table. That's just ridiculous says my cheap, fugal self.

So I look at ebay and craigslist... nope, no one selling my dream table. And then a miracle happens.... I stumble across Ana White's blog. I think I've found my new blog BFF!

I followed her plans exactly and I decided to paint the bottom off white and stain the top walnut.

This was my first ever furniture build and I'm so excited by how it turned out!

Thanks, Ana!

Estimated Cost
$50
Estimated Time Investment
Day Project (6-9 Hours)
Recommended Skill Level
Starter Project

Comments

Clubhouse Bed -Full Size with Slide

Submitted by Heatherdee on Sat, 05/02/2015 - 17:44

Thank you Ana for the clubhouse bed plans! I added 15" to the width of the rails to accommodate a full size mattress. On the other side I made a slide platform! I chose a standard plastic slide because I couldn't find a way to make a wooden slide at home with the swoop at the bottom to keep the kids from hitting the carpet hard :). We couldn't have a green outdoor-looking slide, am I right? I used Rustoleum  spray paint made for plastic in French Lilac color.  After the paint I used a top a coat of Minwax 3x polyurethane. I also used the Rustoleum spray paint for the window grids. 

To accommodate the slide specs I needed to raise this bed 5".  I just made each leg 5" longer.  Also, the ceiling in my daughter's room slopes down so I cut the point off the back of the bed.  Totally not noticeable.  I needed to do this even if I hadn't raised the bed :)

I also added full window frames around the window to make the bed a little more girly!  One unexpected result is that the bedroom looks BIGGER with this bed in it. She had a twin size step 2 plastic castle bed before but now there is so much more room to play. Win!  Changing the sheets isn't too bad but you need to get in the bed to do it.

I built this bed by myself. Don't be afraid, you can do this! Once the panels are assembled they get a bit heavy so you have to be sort of creative to drag them across the garage floor :)

Next up: mailbox for the bed, shelves under the slide and window boxes!

Built from Plan(s)
Estimated Time Investment
Week Long Project (20 Hours or More)
Finish Used
Valspar Flat White Paint in Glacier; Minwax 3x Polyurethane (I would maybe use wax or something next time! Maybe even semi-gloss paint)
Recommended Skill Level
Intermediate

Comments

Slat Bench from Palettes

Submitted by jetpad on Fri, 09/15/2017 - 06:32

This was made from several heavy duty palettes that were used for delivering stone. Because of the wood I could get off the palettes, I switched the thin and thick pieces so that the slat gaps were where the 2x4 pieces were missing instead of the 1x4s. 

Estimated Cost
$10 (for glue and screws)
Estimated Time Investment
Afternoon Project (3-6 Hours)
Finish Used
None
Recommended Skill Level
Beginner

Original farmhouse bed-King

Submitted by AngelaJB on Sat, 10/09/2021 - 11:05

This is the kingsized original farmhouse bed. The bed was pretty easy, I didn't bother with pocket holes and assembled it pretty quickly with some help. It is sturdy and beautiful and makes me smile every time I walk in my room. I LOVE it and can't thank you enough for sharing your plans! Angela

Comments

Armoire for Repurposed door

Submitted by JES on Sat, 03/19/2011 - 11:05

This is modified from Ana's Simplest Armoire plan, re-sized to fit the door (already had this, from another project -- I couldn't part with it when that room was remodeled- that gallery glass insert took me so long to make) and deep enough to hang clothes.  Used my favorite new toy, the Kreg jig for this.

Such a fun project, now we're hooked!  We've made a bedroom full of pieces to go with this one, and still making more.

Ana, thanks for the inspiration!

Built from Plan(s)
Estimated Cost
110.00
Estimated Time Investment
Day Project (6-9 Hours)
Finish Used
1 coat Zinsser primer, 2 coats Ace Royal High Hiding white in semi gloss
Recommended Skill Level
Beginner

A Big Patio Planter

Submitted by Jake on Tue, 06/04/2013 - 17:47

I have a really boring backyard patio so I thought I would spice it up with flowers but I could not find a plan for a large right angle planter. So I made up my own.

The planter is made from cedar fencing but pine for the top trim and the corner legs. The legs have grooves that the sides slide into and are not screwed or glued in place. That is so you can remove the top trim and then just pull the sides out to replace them as needed or to even change the size of the planter.

This planter is 18" high so it is comfortable to sit on but that also means you will need a lot of soil to fill it up. Mine took 26 40lb bags which is over 1/2 ton of soil. Add water and that planter is here to stay. But it also means that there is a large tendency for the sides to bulge along the bottom so I placed stop blocks along the bottom base and screwed into the base.

I planted Angelonia for color and sage, oregano, and thyme for spice. It was fun to build and came out well but it was expensive as the soil along was nearly $60. Add another $50 for lumber and screws and you have exceeded the magic $100 mark. Still a good deal, however.

Estimated Cost
$110
Estimated Time Investment
Weekend Project (10-20 Hours)
Finish Used
Painted the top trim and legs with Behr water-based enamel and left the cedar to mellow on its own.
Recommended Skill Level
Intermediate

Comments

Rustic X Coffee Table First

Submitted by ShaunEDM on Mon, 05/04/2015 - 20:45

Came across this plan as my first wood working project. Took the corner brackets to a different level, spoke with a local blacksmith who created the brackets for me to give it a more rustic feel.  Created the nails, same way they were done in the early 1800's.

Total time took me longer than normal since this was my first project.  Otherise I could see hammering out one of these a day (excluding waiting for stain to dry)

Very excited to keep going, thanks for the great site Anna!

Built from Plan(s)
Estimated Cost
$75 dollars roughly
Estimated Time Investment
Weekend Project (10-20 Hours)
Finish Used
Used Miniwax English Chestnut with Minwax® Polycrylic® Protective Finish.
Recommended Skill Level
Beginner

Coffee Mug Tree

Submitted by LampAtFeet on Wed, 10/13/2021 - 15:11

Very simple project, but extremely useful! Decided to not put a knob on the top, spray painted it black matte and distressed the edges. The hooks are from Walmart. Great project to use up some scrap wood! Makes great gift!

Comments

Dresser

Submitted by smettauer on Sat, 05/09/2015 - 06:18

My wife and I are expecting our first child, a baby girl, in September. I decided that I was going to make as much of the furniture as possible, and started with this dresser/changing table.

This is the first project I've made with drawers, and they were a bit of a challenge. Other than that building the dresser was straight forward. The drawer fronts are made from up-cycled deck boards and the knobs are from Anthropologie

Built from Plan(s)
Estimated Cost
The wood wasn't that expensive but the hardware (drawer pulls and slides) drove up the cost. In total probably around $300
Estimated Time Investment
Week Long Project (20 Hours or More)
Finish Used
oil-based white paint
red mahogany Varathane stain rubbed with black shoe polish
Recommended Skill Level
Intermediate

Comments

smettauer

Sat, 05/09/2015 - 06:21

Sorry the pics are upside down - when I created the post they were shown as being correct. I will try to update later

Square benchright

I really like the legs of this table but wanted a square, planked top.  I also used a stencil that I got from amazon for the design.

Built from Plan(s)
Estimated Cost
$30 each
Estimated Time Investment
An Hour or Two (0-2 Hours)
Finish Used
Eider White on legs and a mix of dark walnut/weathered oak on top.
Recommended Skill Level
Starter Project

A Bright and Simple Changing Table

I built this changing table with a friend who wanted an easy introduction into building. I already had the MDF for the shelves gifted from a friend looking to get rid of a large pile of sheets, so that really helped cut down on cost. I spent $15 on the furring strips and screws for the rest of the piece. I already had the sanding and finishing supplies as well as paint. I added two strands of white cording from Hobby Lobby ($1 per roll on half off days) to hide the gap created between my trim and the top changing piece. I also modified it to fit a 16" wide changing pad.

I would totally recommend using Mod Podge as a sealer on work-horse pieces of furniture. One, it's completely fume-free and non-toxic (which was perfect, since I'm about five months pregnant and need to avoid VOC's) and it's got a really thick, clear glossy finish that's super easy to clean. You only need one coat of it, as well. Just be advised that it's a lot easier to see brush strokes, so I wouldn't use it on your fancy stuff. But for changing dirty diapers, or on a kids table? It's perfect!

Estimated Cost
$20
Estimated Time Investment
Afternoon Project (3-6 Hours)
Finish Used
Three coats of semi-gloss white, three coats of semi-gloss lime (for the top, color matched to a fabric). Sealed with non-toxic Mod Podge.
Recommended Skill Level
Beginner

$55 fancy x desk turned kitchen table

I was making the fancy x desk, and my wife suggested building a bench to go with it to make it a bar style kitchen table to take up less space in our kitchen. So I looked up plans for a bench on here (providence bench looked best with it), and built it. I painted it with rust-oleum American accents spray paint for wood, metal, and plastic in glossy black and surprisingly it looked amazing!

Estimated Time Investment
Afternoon Project (3-6 Hours)
Finish Used
rust-oleum American accents spray paint for wood, metal, and plastic in glossy black. used 2 coats and it gives it a nice look and smooth finish
Recommended Skill Level
Intermediate

Magazine rack

Submitted by kwhitt on Tue, 05/12/2015 - 08:05

This is my first project, just to see if I could actually build something. I used some wood and paint we had lying around the garage, since I didn't want to put money into something I might screw up! This turned out to be pretty easy, despite the wood being a little warped from sitting in the garage for years. It's not perfect, but now I have a place to store my husband's golf magazines that were cluttering up the bathroom -- and the courage to try something bigger!

Estimated Time Investment
An Hour or Two (0-2 Hours)
Recommended Skill Level
Starter Project

Comments

Mini Bedside Table

Submitted by RITWood on Sun, 10/22/2017 - 11:30

My take on the Mini Farmhouse Bedside Table using a combination of new and repurposed pine.  Using a 3/8” round over bit and router I softened the edges of the top and the shelf.  I substituted a ‘plank’ look on the sides instead of the solid flat which the plan calls for.  Finished with a scuffed paint and contrasting dark stain which makes the piece stand out.  

Estimated Cost
$20 each
Estimated Time Investment
Afternoon Project (3-6 Hours)
Recommended Skill Level
Intermediate

Toy Box

Submitted by frmoody on Mon, 11/01/2021 - 08:37

This was a pretty simple build. I got the soft close hinges at Lee Valley for only $12.00 CAD. Stained the dark areas with three coats of Minwax Ebony stain and then finished with three coats of Varathane Satin. The only thing I would change in the next one is to secure the front and back board with pocket screws in a couple of locations to keep them straight.

Built from Plan(s)

Comments

Our first Build!

Submitted by jbaby13 on Tue, 03/29/2011 - 15:10

This was my husband and my first try at building furniture.  It took most of the weekend to build, paint, sand etc, but it looks great in my son's room and has much more room then his old bookcase.

Estimated Cost
$50
Estimated Time Investment
Day Project (6-9 Hours)
Finish Used
Flat paint and clear coat finish
Recommended Skill Level
Starter Project

Rustic X End Table

Submitted by dzubakj on Mon, 06/10/2013 - 08:40

I altered the dimensions slightly so that it wouldn't be overbearing in my living room. It is much shorter than the plan suggests, and the length and width are also changed. I used framing 2x4 and 2x6 lumber, so I had to sand the heck out of it to make it nice and smooth. It looks great next to the console table. Good plan.

Estimated Cost
60
Estimated Time Investment
Weekend Project (10-20 Hours)
Finish Used
I went with the steel wool in vinegar finish with two coats of light brown Briwax over that (applied with steel wool). I really liked the steel wool and vinegar finish, but if you have never used it before be careful, it is a bit tricky to apply evenly. Also, it goes through several changes while it dries. I started panicking a little before it was fully fry because it was not turning out how I suspected at all. After a few more minutes it looked much better, and the wax brought out just enough brown to make it exactly what I wanted.
Recommended Skill Level
Starter Project

Castle Bed

Submitted by AndyH on Wed, 05/13/2015 - 08:00

Friends asked me to design a princess/castle bed for their daughter. It needed to fit a single/twin size mattress and fit a 61 inch space they had so I designed the overall width to be 60 inches.

It is all made from solid planks apart from the two big shelves in the headboard which are plywood.

They wanted the sides close to the headboard to be raised as well so their little girl didn't roll out the bed.

Not added the slats yet as it is off to the paint shop to be sprayed Pink!! I will post more photos once painted and will also post plans soon once finished them.

Hope the little girl likes it when she sees it.

Estimated Cost
$350
Estimated Time Investment
Week Long Project (20 Hours or More)
Finish Used
Will be spray painted pink. I will post more pictures once painted.
Recommended Skill Level
Intermediate

Comments

Farmhouse potting bench by Rocky Acres Woodworks

Submitted by Anonymous (not verified) on Sat, 11/06/2021 - 07:17

I used 1x4 for the top and stained with dark walnut danish oil

Built from Plan(s)

Comments

First nightstand

Submitted by juliec on Sat, 04/02/2011 - 13:24

We used ana's plan but modified the top

Built from Plan(s)
Estimated Cost
$35
Estimated Time Investment
Weekend Project (10-20 Hours)
Finish Used
We will use espresso general finishes and several top coats of poly.
Recommended Skill Level
Intermediate

Comments

bridgetschaefer

Thu, 05/30/2019 - 13:00

This is EXACTLY what I'm looking for but I can't find the plans that were used to build it. Do you happen to still have the link for them?