Closet Drawer Tower
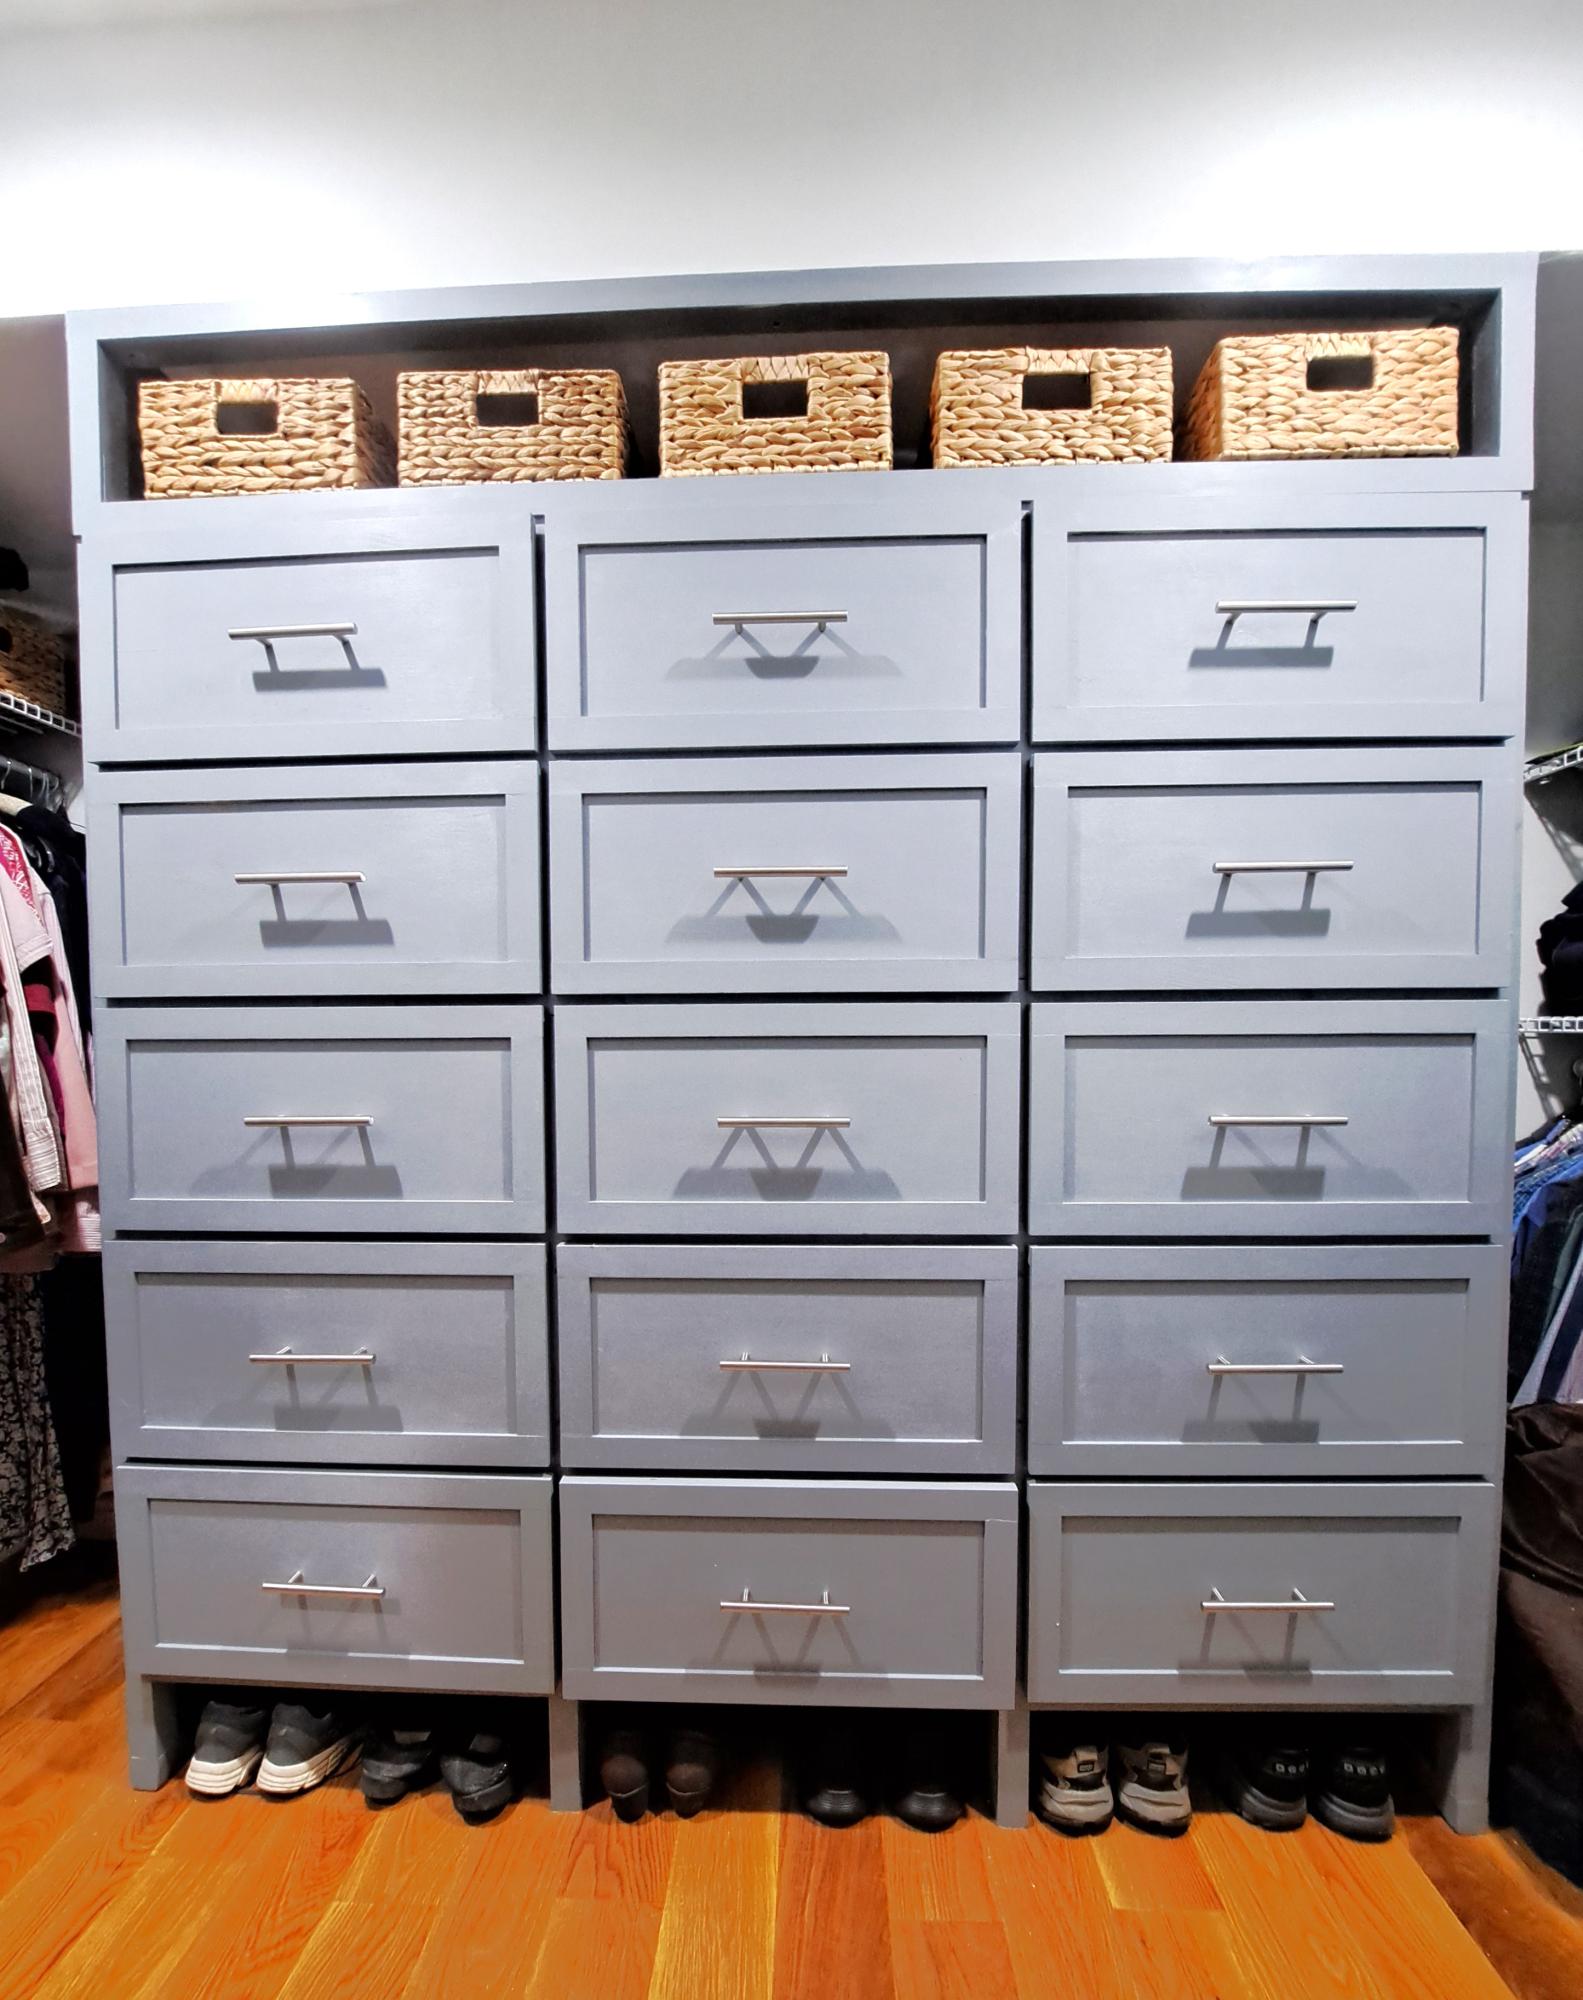
Using Ana's methods of drawer construction - 15 Drawers in the Primary Bedroom Closet - with tote storage above and shoe storage under.
Phil F. *Ana's secret drawer slide trick for full extension drawer slides
Using Ana's methods of drawer construction - 15 Drawers in the Primary Bedroom Closet - with tote storage above and shoe storage under.
Phil F. *Ana's secret drawer slide trick for full extension drawer slides
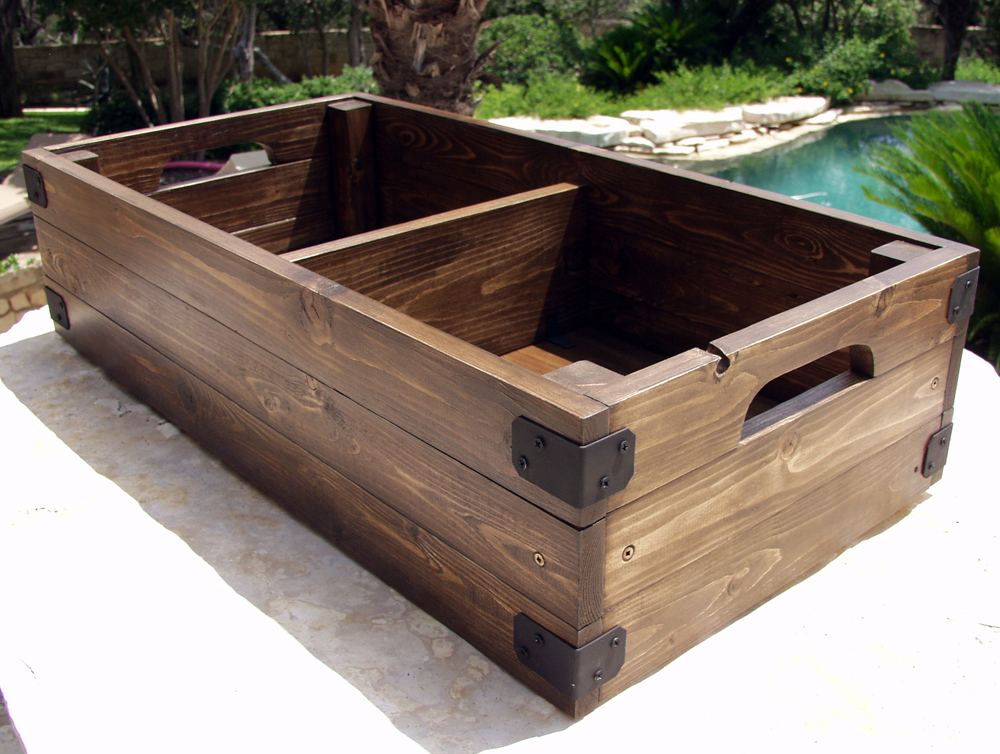
I needed a large box to use at the base of my stairs for shoe storage, so this is it! I made 2 compartments, and put handles on the side for easy moving. Being solid wood, this thing is heavy and a lot larger than it looks.
I wanted to do Bri-wax as a test on a smaller project before possibly messing up a larger one. Bri-wax advised me to wait a week to let the stain 'cure' prior to using the product. The stain was beautiful prior to using Bri-wax, but didn't look nearly as good when the wax took off some of the stain and kind of changed the color. I love the look of the Bri-wax finish, but probably won't be using it again (unless the finish has been cured for a long time). Bri-wax also told me not to use it over varnish or poly, as it would damage that surface. I would be interested in hearing from you guys who have used it successfully on top of other finishes.
Sat, 07/14/2012 - 21:00
Hello Joni,
I've used Briwax over a clear, satin poly finish without any damage, though typically, I apply a 100% Briwax finish on the majority of my pieces as I prefer the natural finish and find it's complimentary to the reclaimed wood I use.
Simply a personal preference.
Looking at your other projects want to commend you on your table too. Nice color distinction and accents. Very nice!
Mike
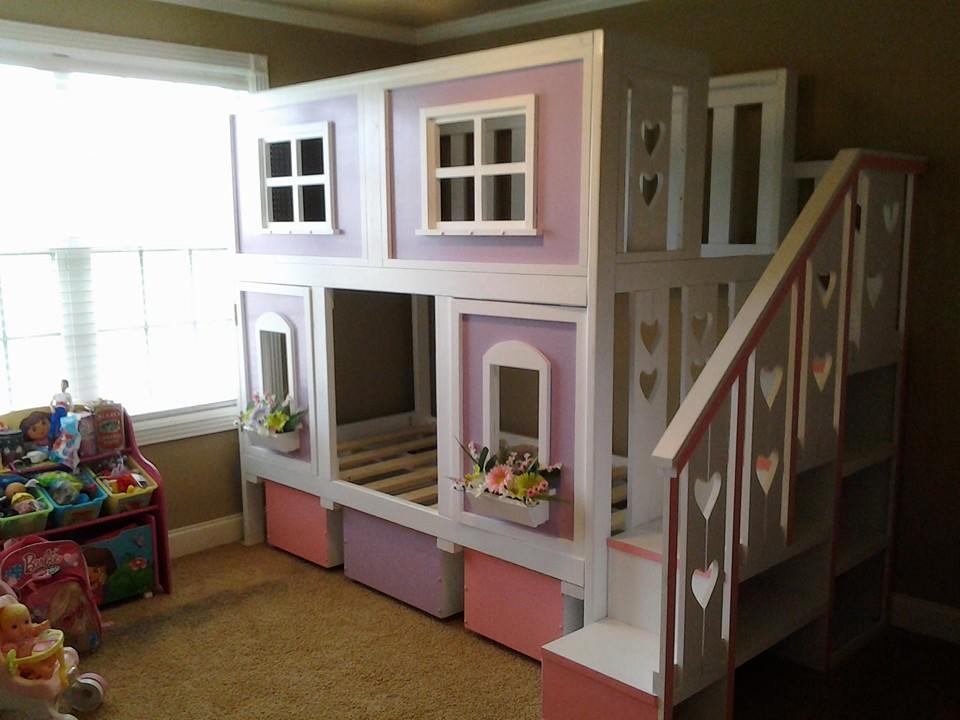
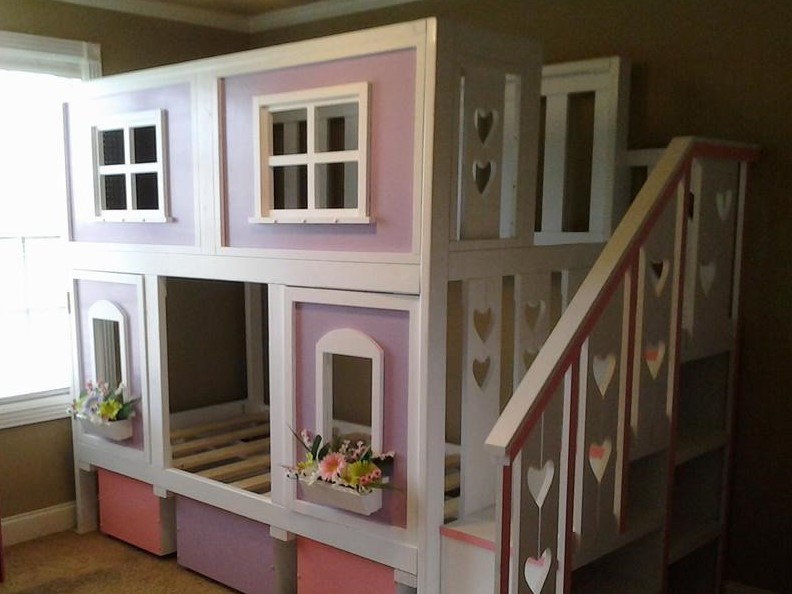
My dad built this for my daughter.
Thu, 05/01/2014 - 11:11
Your father is an artist. Excellent craftsmanship. Your daughter is a lucky little girl. :)
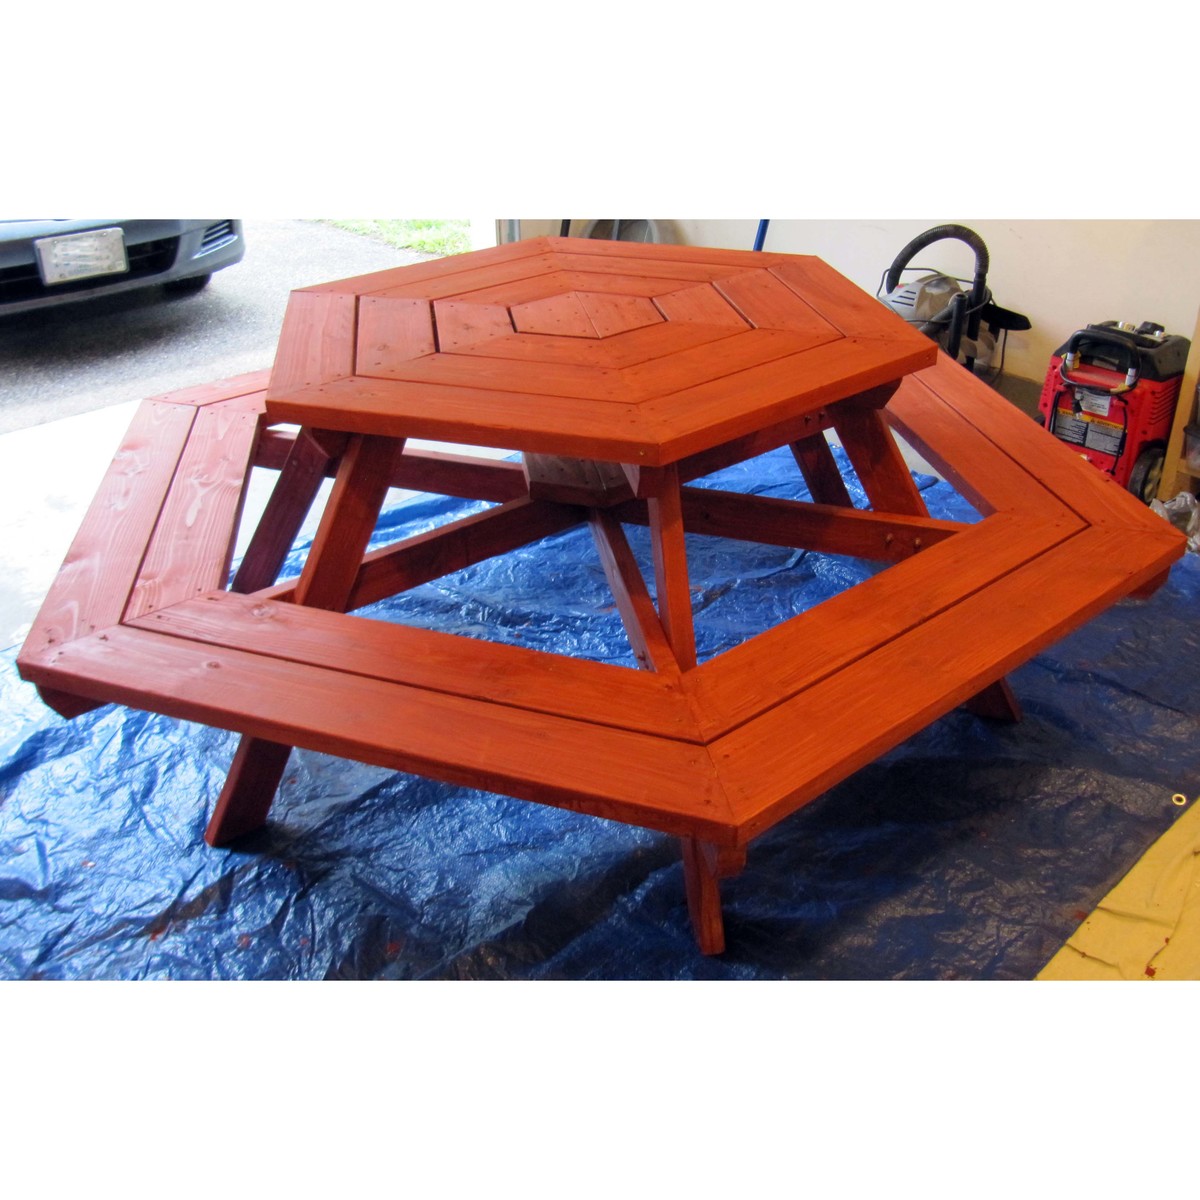
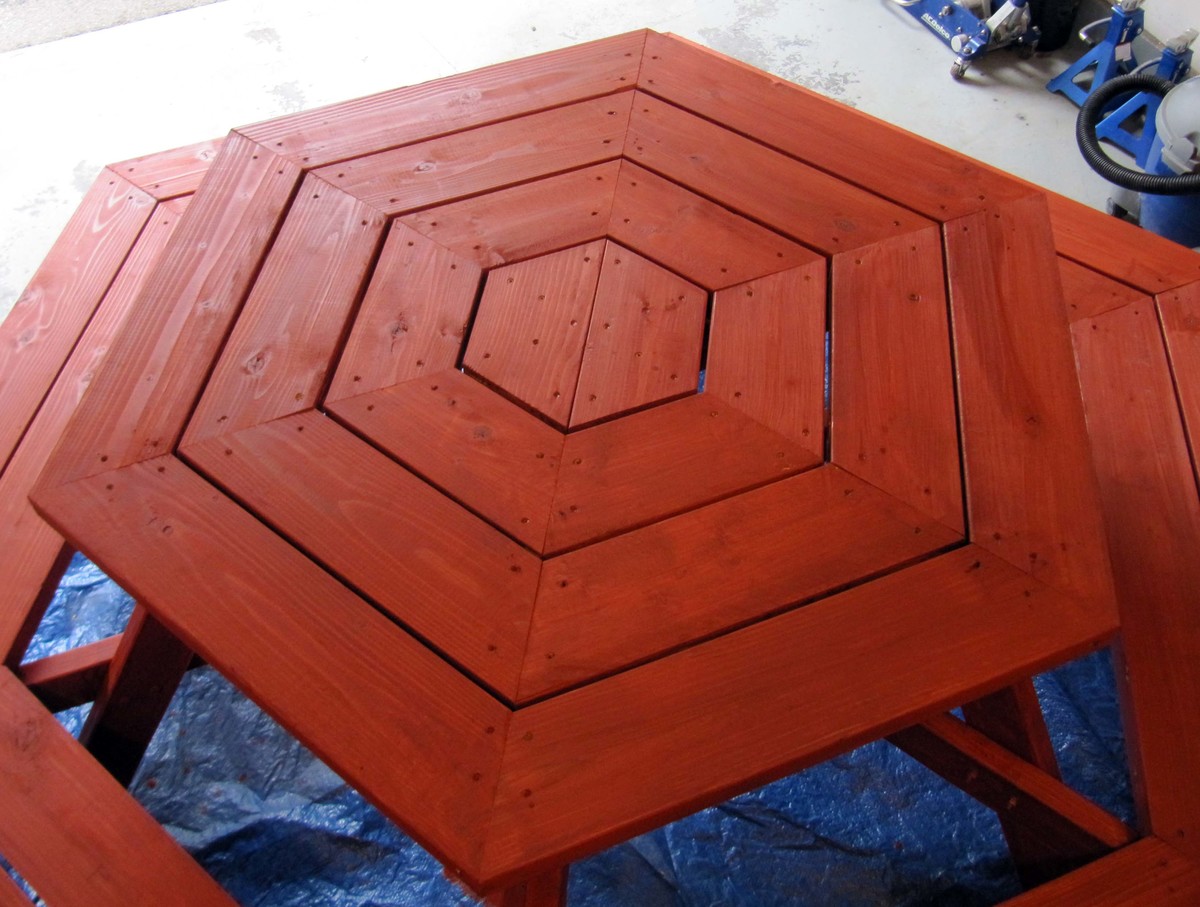
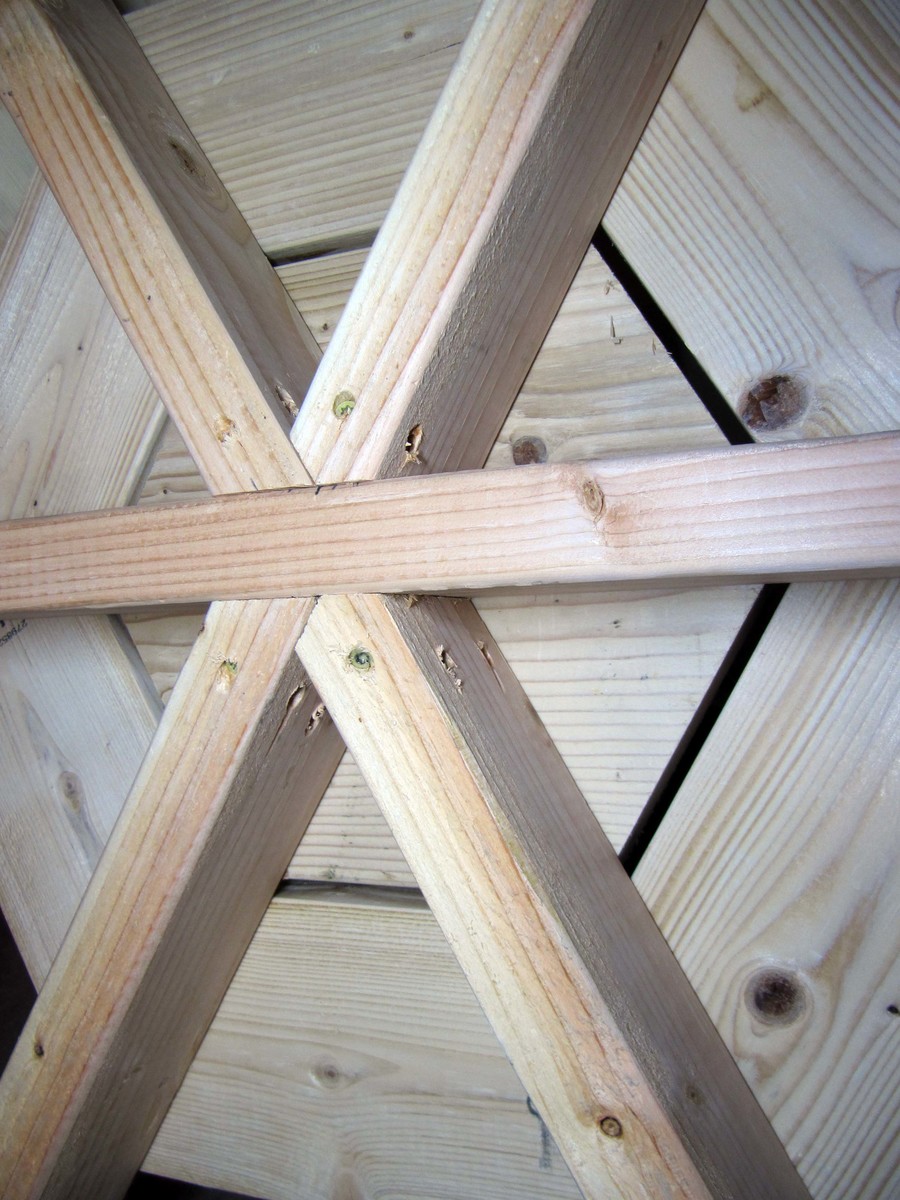
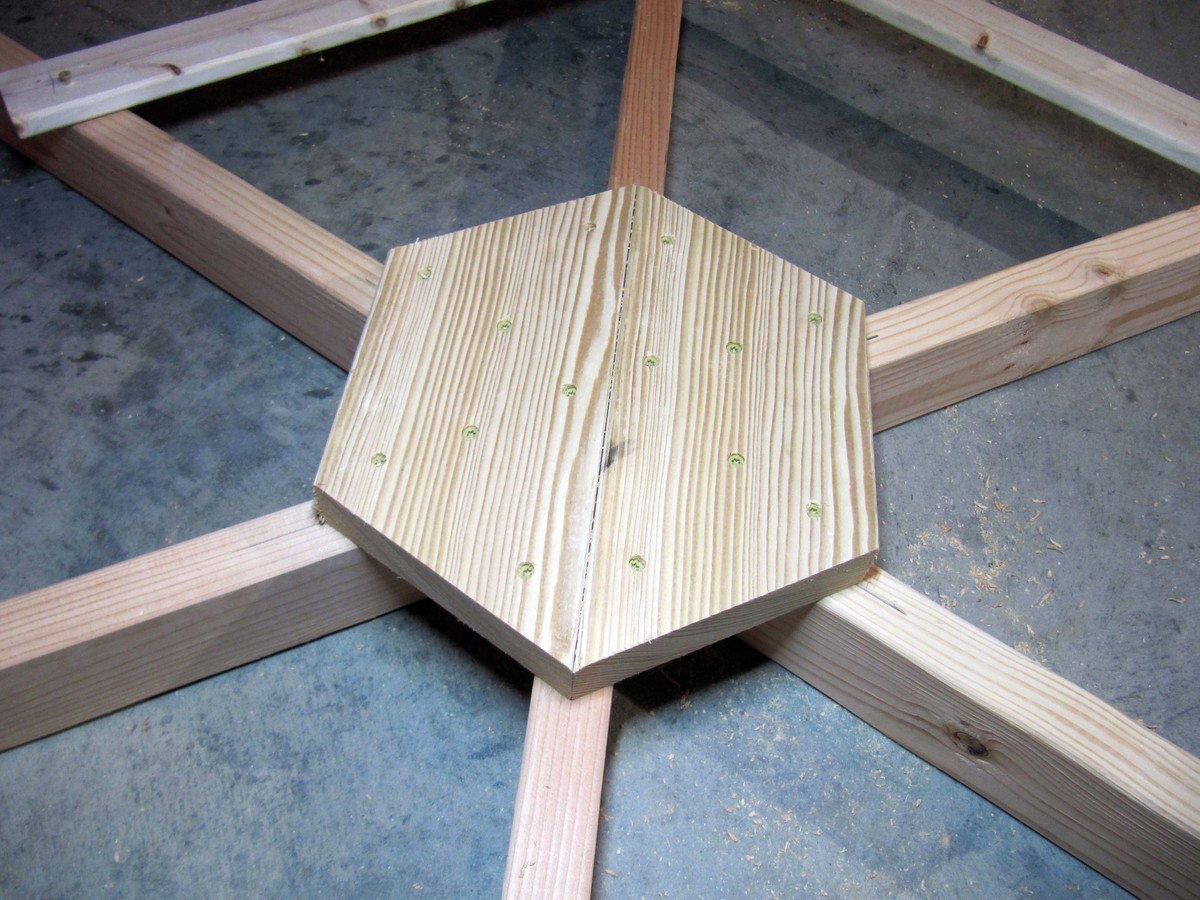
Thanks for the plans. My little brother from Big Brothers Big Sisters and I made this table and had lots of fun doing so. We made a few modifications which might be useful to others:
1. We modified the center joints (at the lower and table level) so that one 2x4 could continue across the entire diameter of the table for greater strength (see pictures for details).
2. As recommended we extended the seats out 4". This made it very comfortable to get in and out.
3. We started the center with 2 pieces of 2x6 rather than 6 with the thought being that this would help strengthen the center of the table. (see pictures for details).
4. We added a stiffener at the center 6-way joint on the lower level to help really strengthen that center joint. This was made out of 2 pieces of 2x6 as shown in the pictures.
Thanks,
John


Floating Shelves
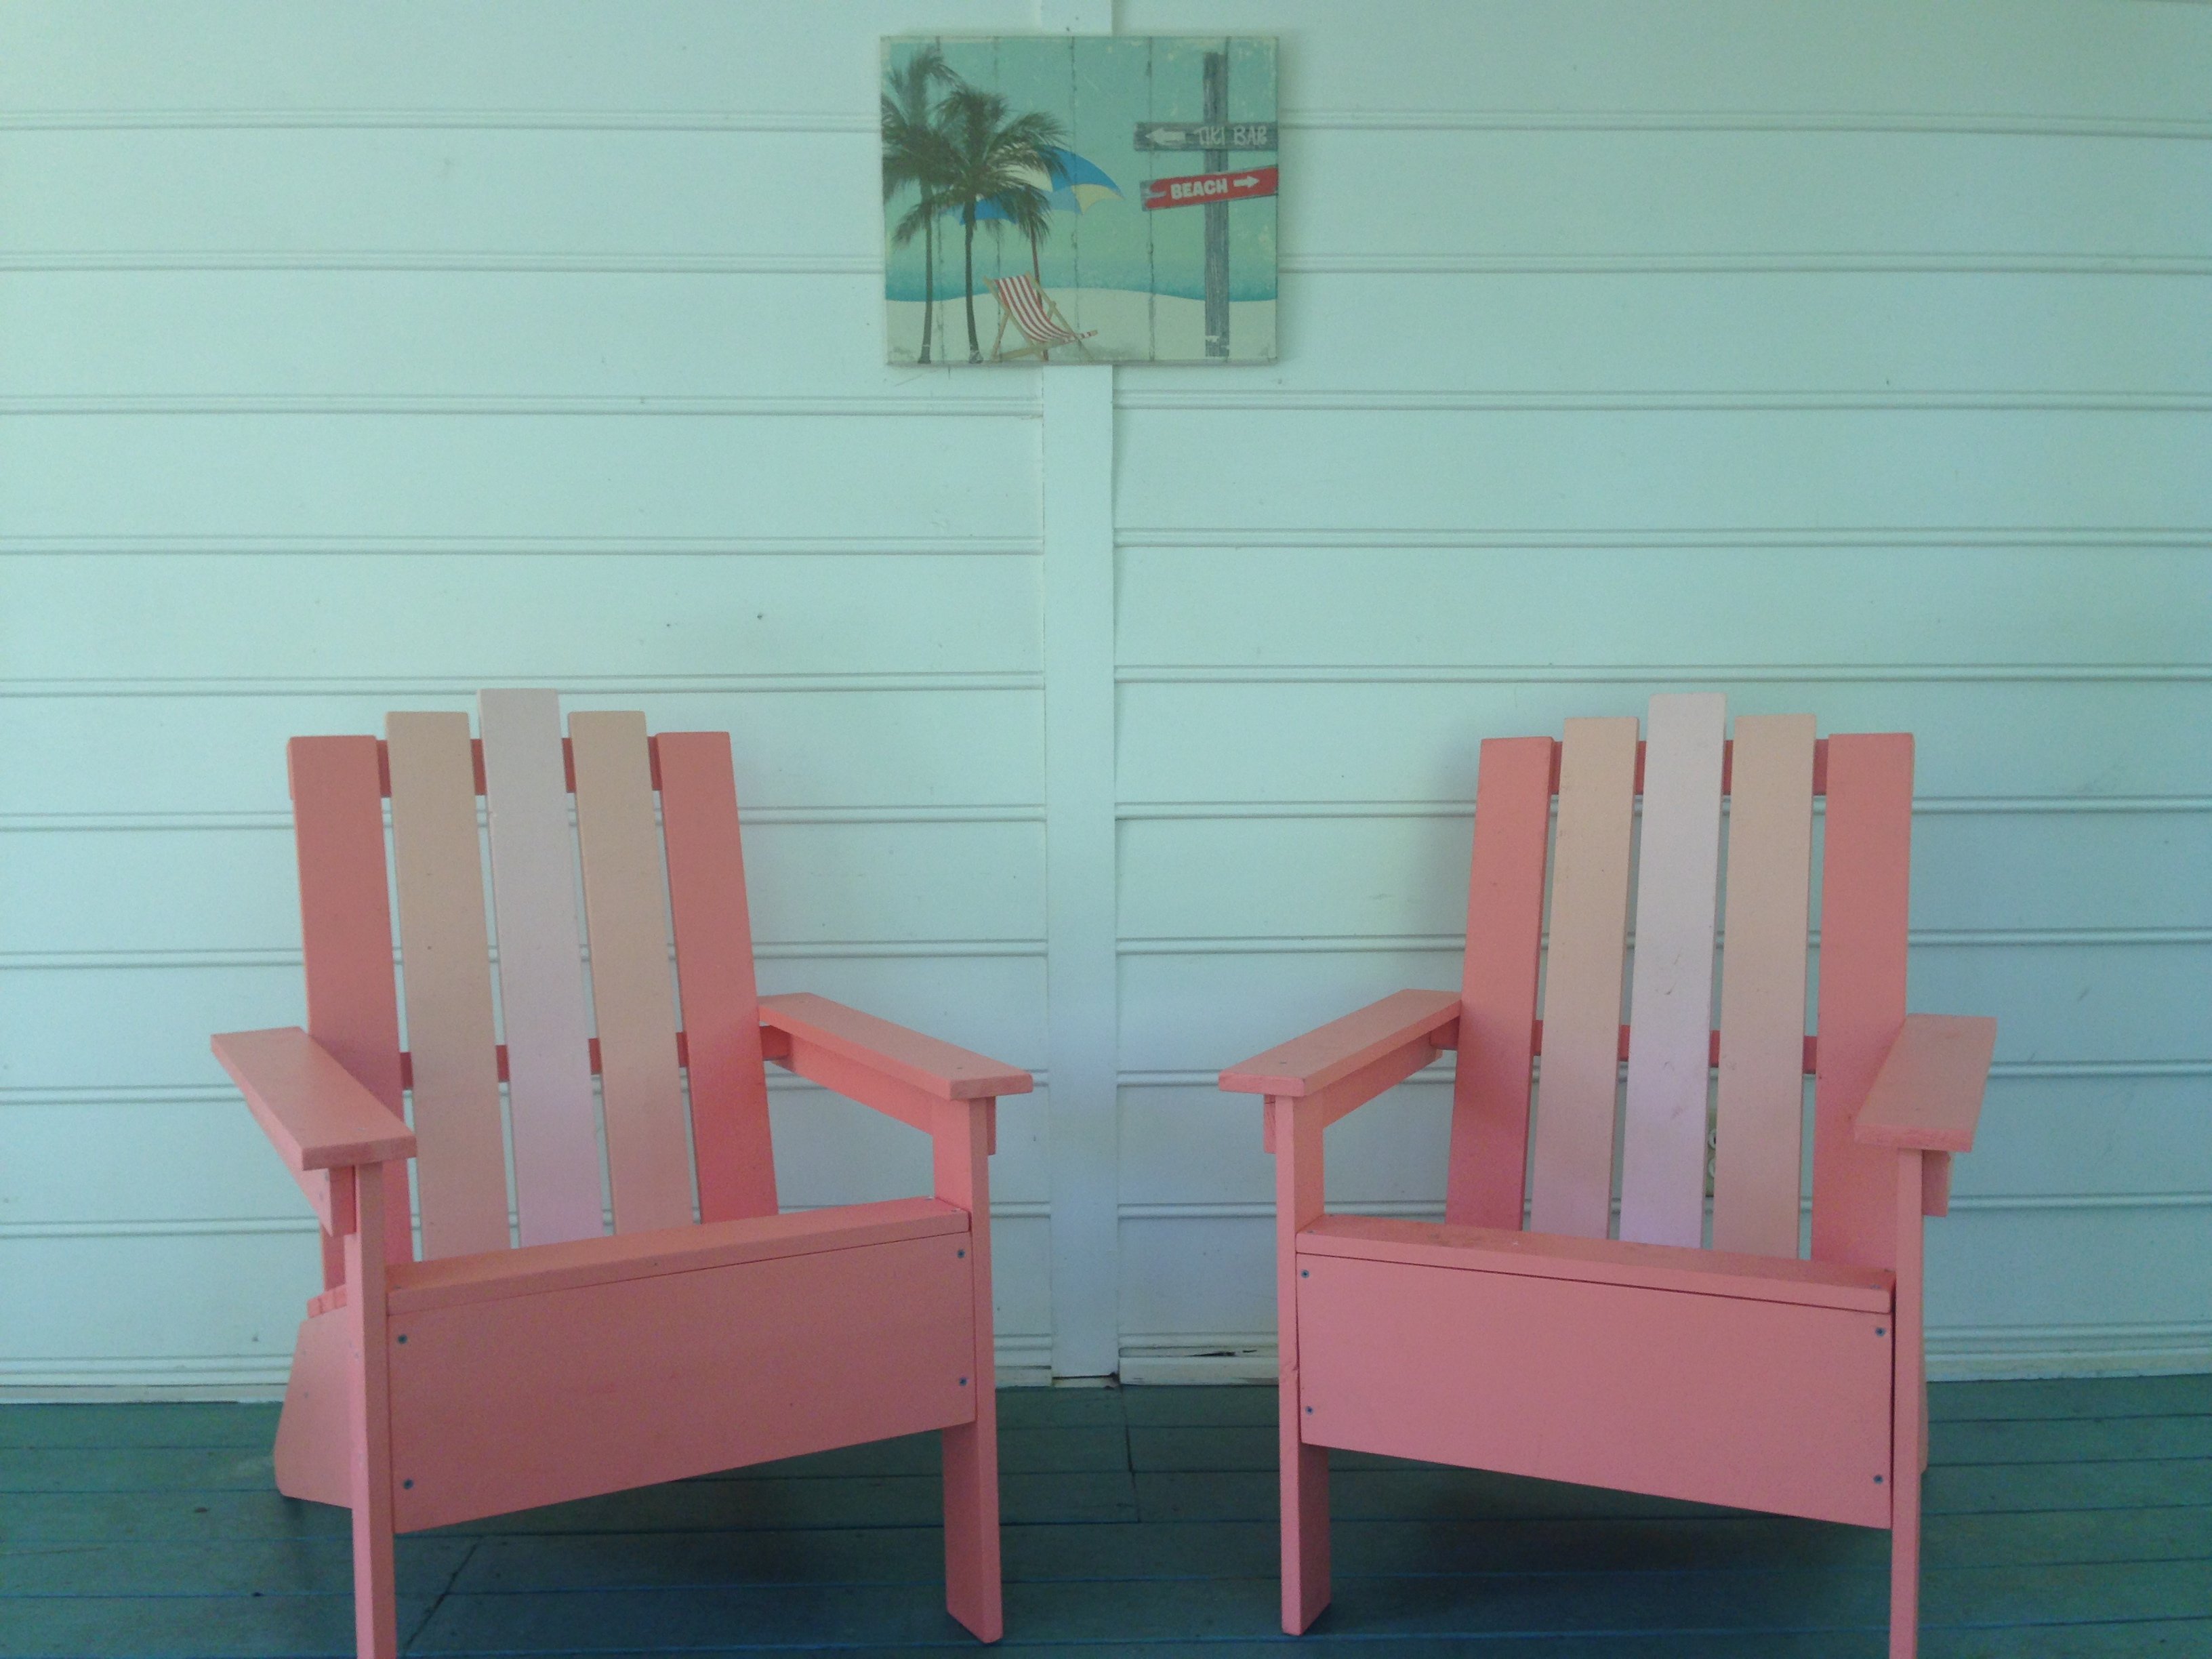
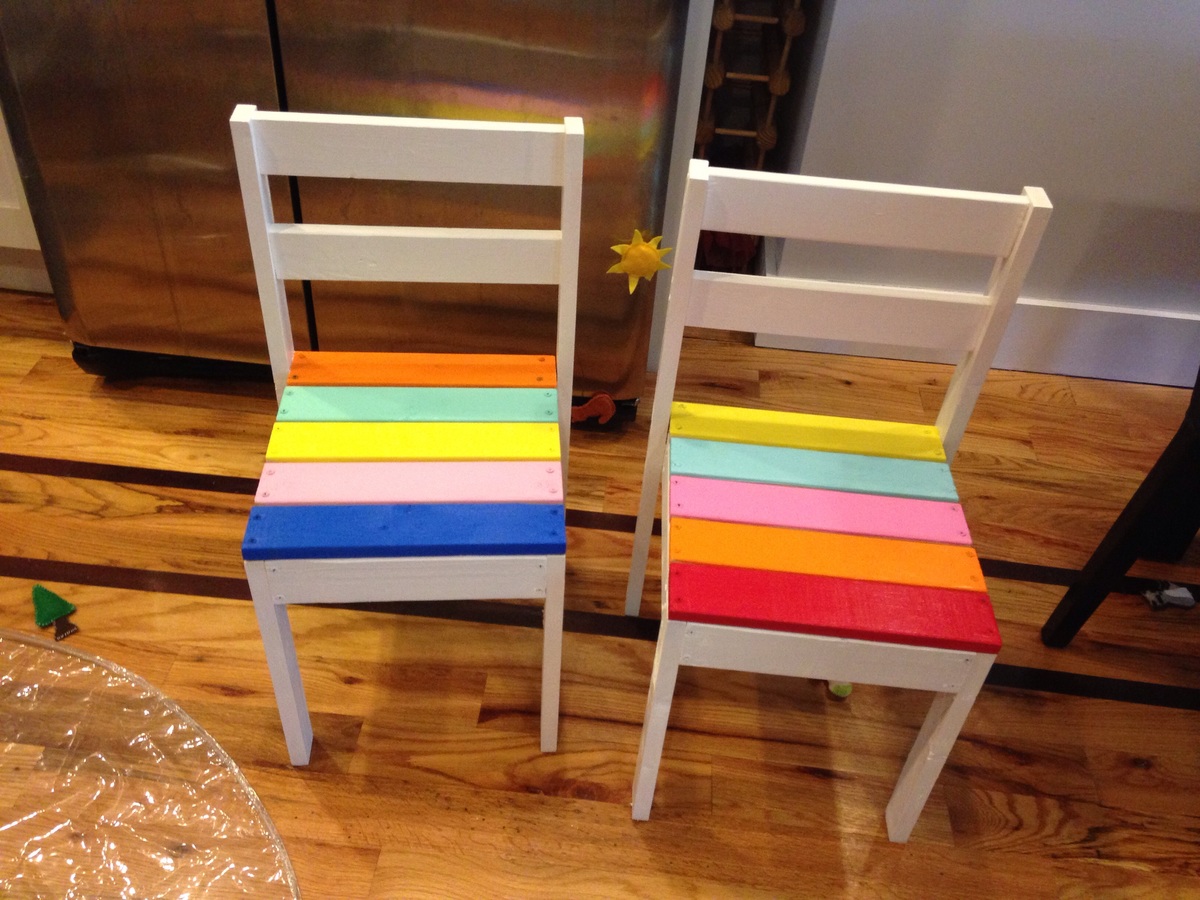
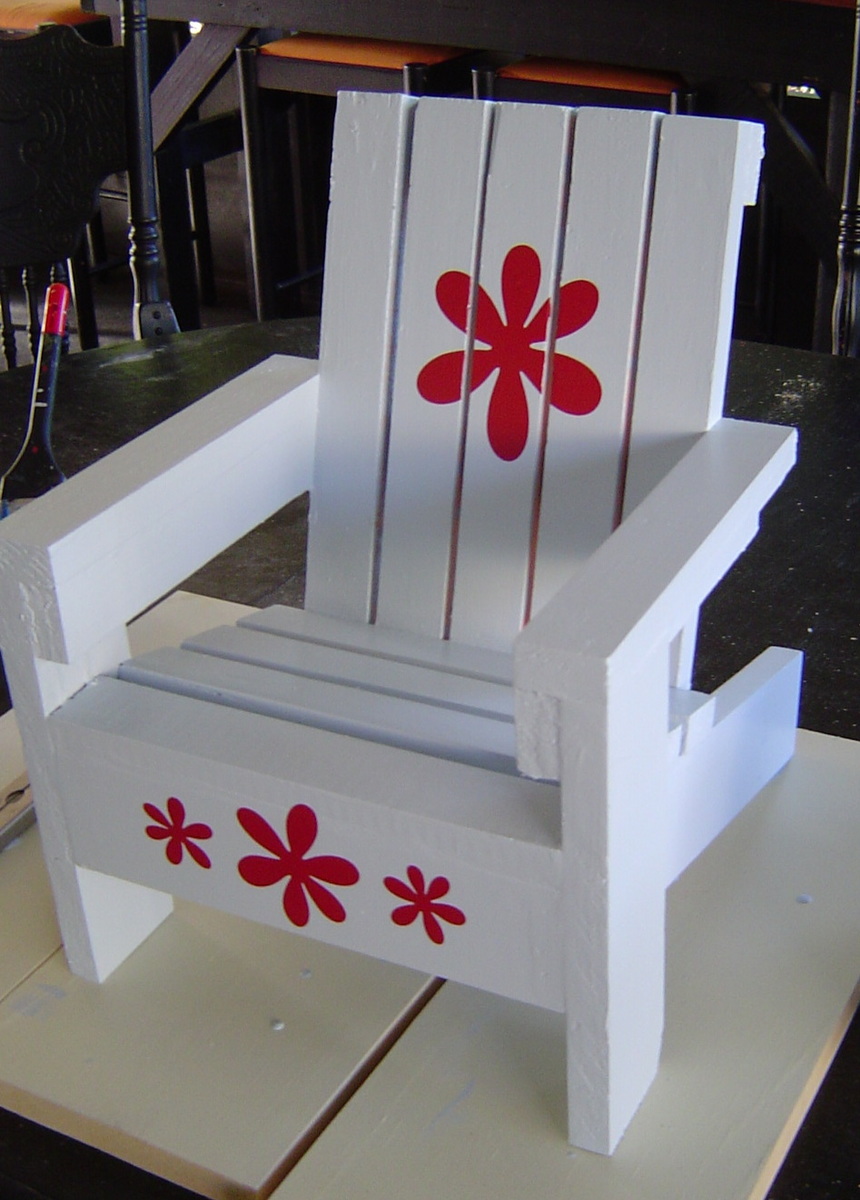
"Beginner" doesn't begin to describe me! I didn't know the difference between a skill saw & a miter saw before starting this project, but thankfully, my husband is a Mechanical Engineer & knows his way around a few tools. We're very happy with the end result, but they're not perfect. We learned a lot & I'm confident that the next project will be better. A couple of things I learned along the way--no need to buy exactly double the wood for two chairs. Probably obvious for those that are experienced, but I bought exactly double & could've saved a little $$ if I knew what I was doing. Not counting the investment of the saws & other equipment (that will now last my lifetime!), the chairs were less than $50 each for the wood, paint, screws, etc. We used the cheapest wood (whitewood, per the recommendation) available & now that I'm a bit more knowledgeable, I'll upgrade for my next project. The paint is regular Glidden Exterior, & the Home Depot reps were kind enough to mix samples of the two lighter colors so that I didn't have to buy a quart for such a small amount. Colors are Peach Crayon, True Peach, & Tropical Coral. It should be noted that samples aren't available in exterior, but the chairs will be used mostly on a screened porch--out of the direct sun and rain--so I didn't worry too much about it.
First piece of furniture using your plans for inspiration. Keep those plans coming I am learning as I go along.
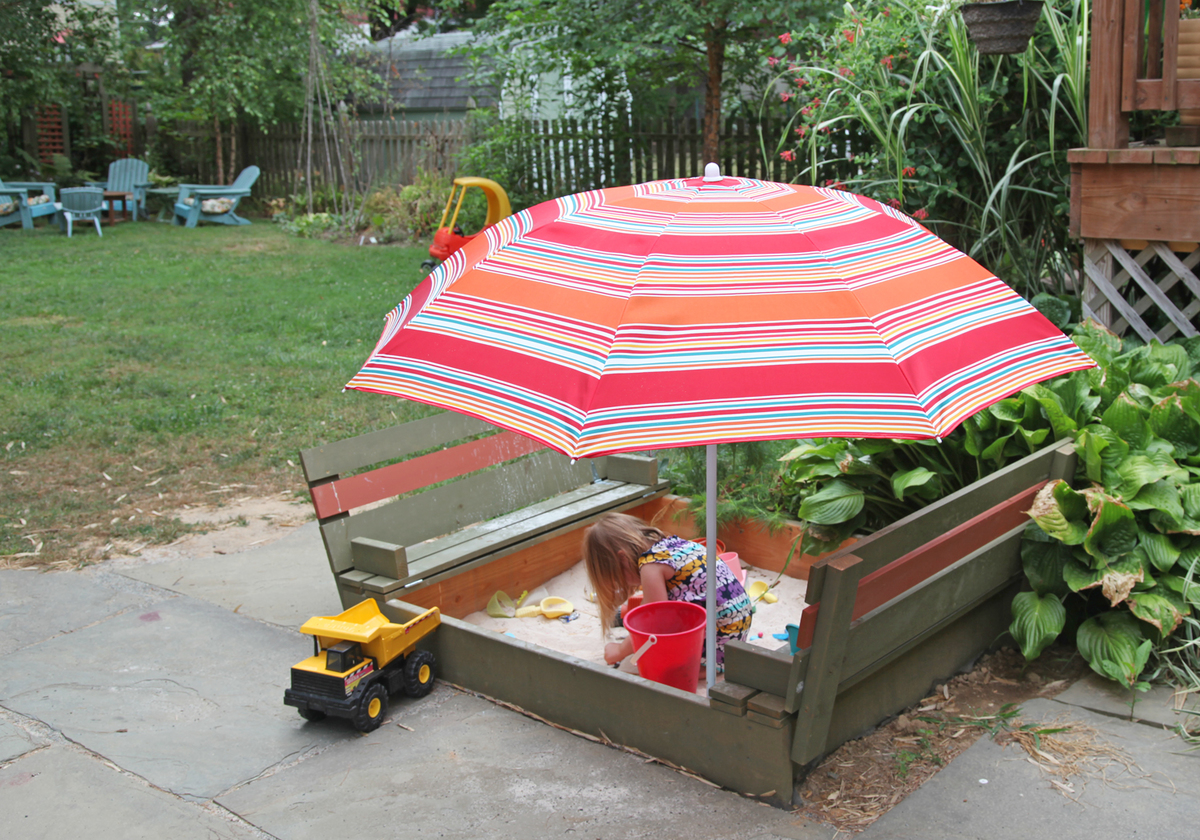
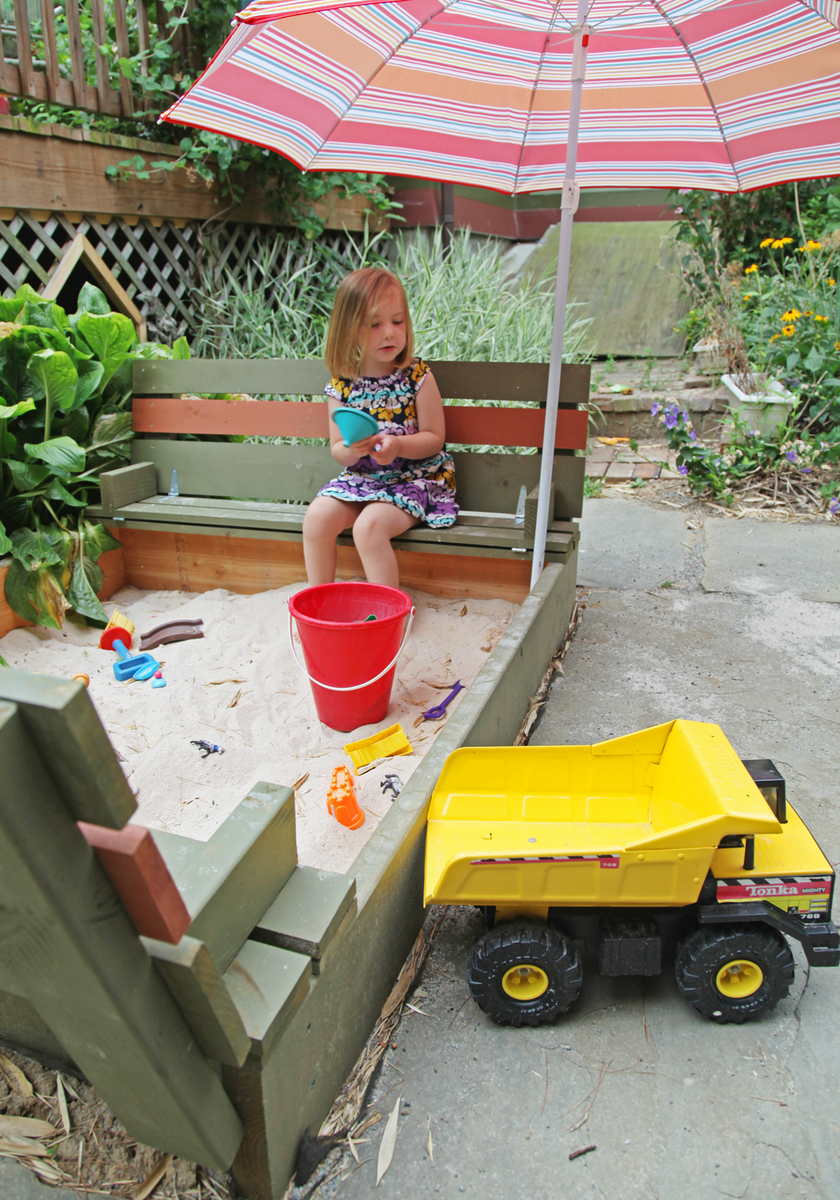
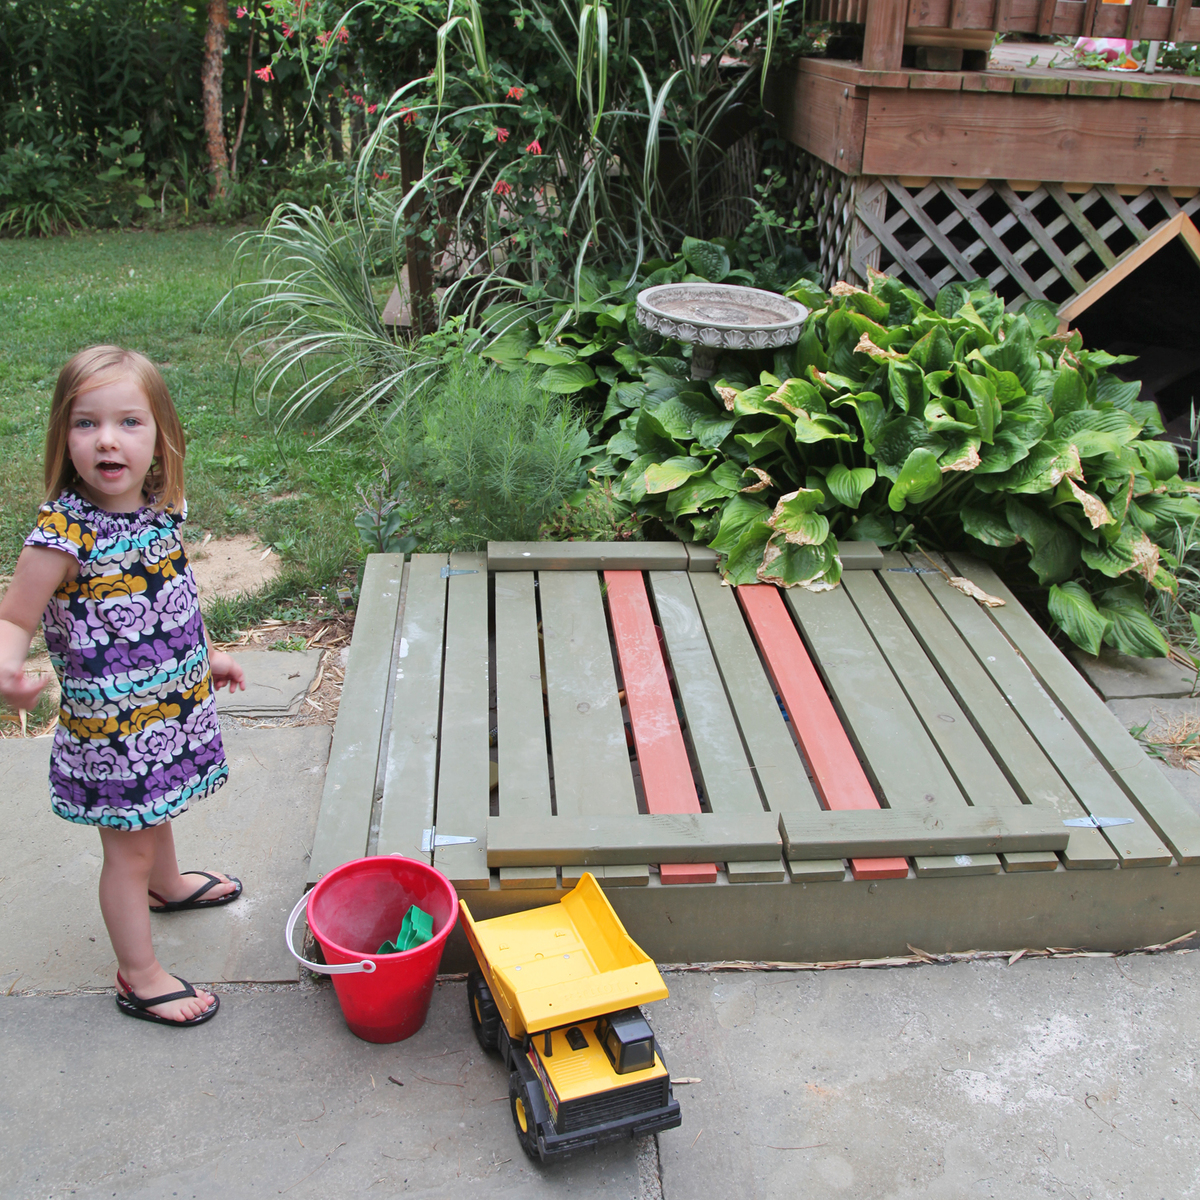
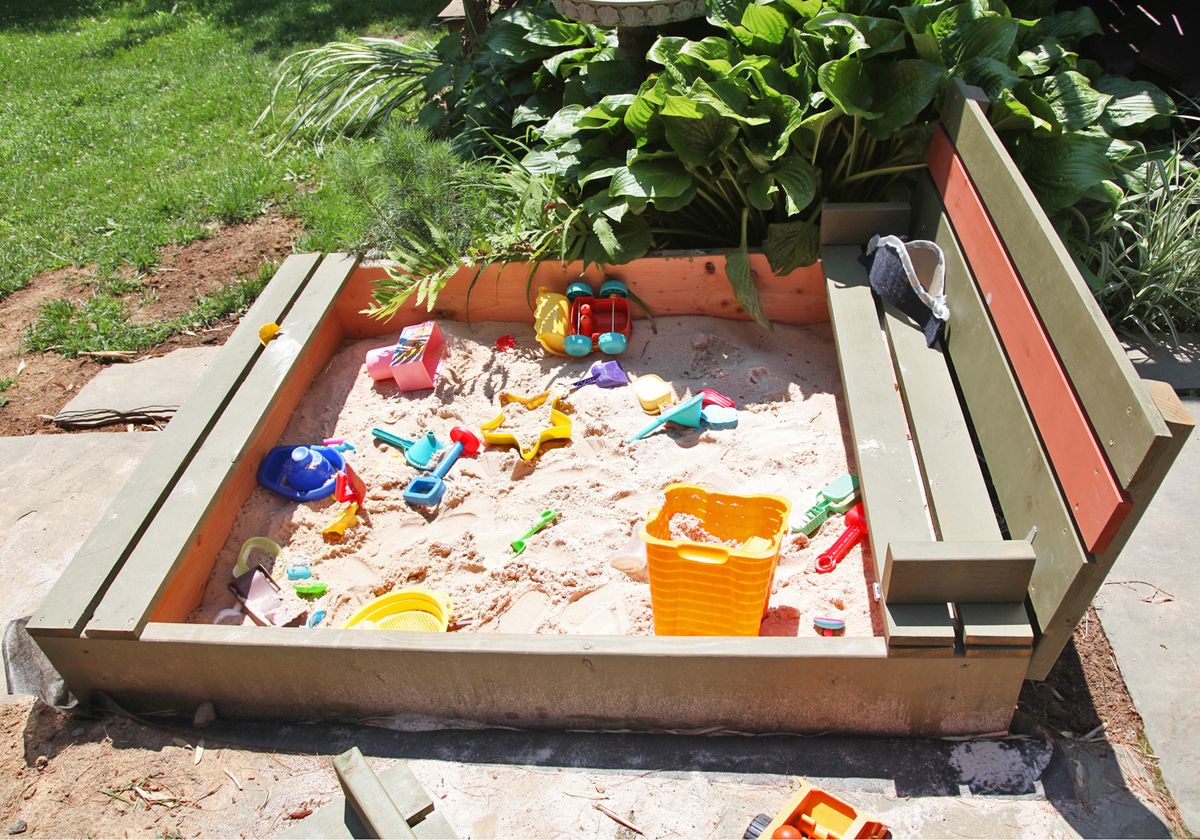
I followed lady goat's instructions but made the seat back taller and the sandbox wider (4'x5'). I have more details here:

Wed, 07/18/2012 - 22:06
Maisie looks like she loves it, too! Love the umbrella addition :-)
In reply to Looks amazing by Lady Goats
Thu, 07/19/2012 - 05:02
The kids do really like it but it has been so hot it hasn't gotten much use yet. I am hoping once the weather cools off they will be out there more. The one other addition that I haven't gotten around to is adding a pvc pipe on the inside so that the beach umbrella will stay in place better.
I had my dad and father-in-law come help with this project. We are all pretty much beginners, but have done some building in the past.
Because I'm not experienced, I didn't find the plans to be in depth enough. Some parts weren't not fully explained and took some guesswork.
I also didn't know what a Kreg Jig was or how expensive it was! This upped my cost by $100. It was well worth buying however, and will be used again in future projects.
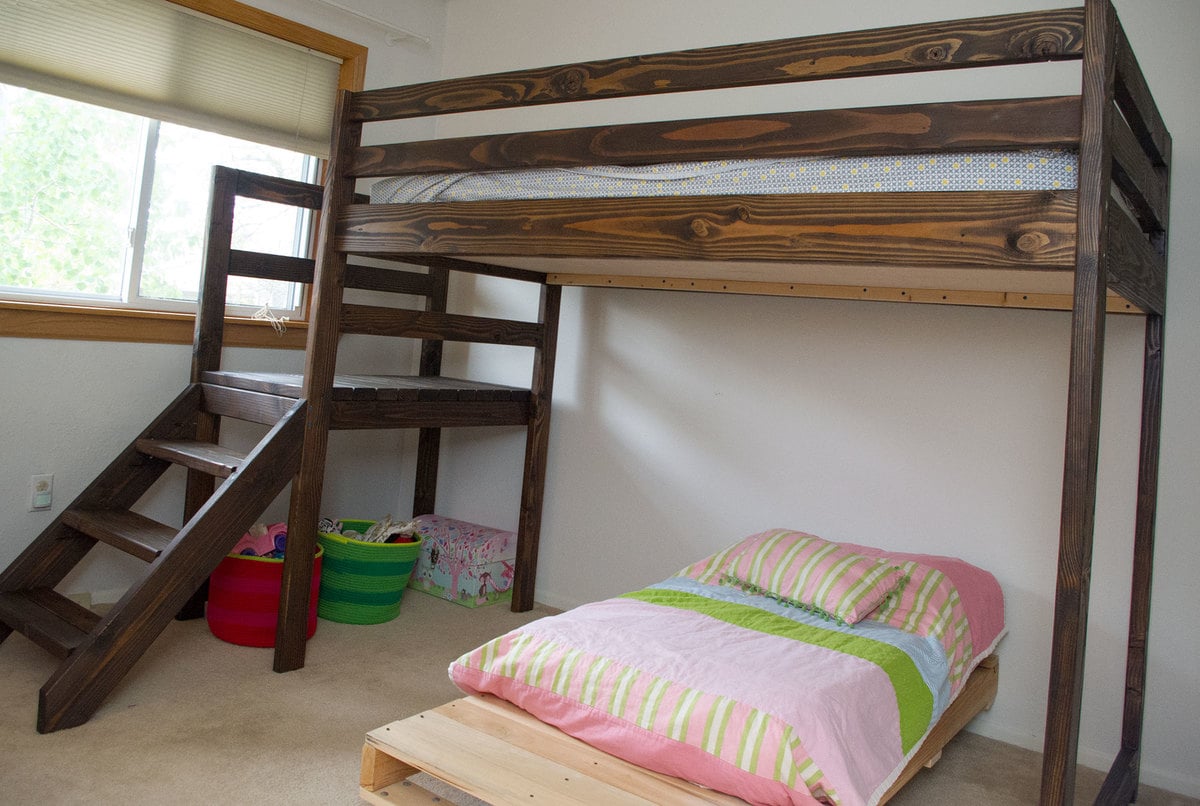
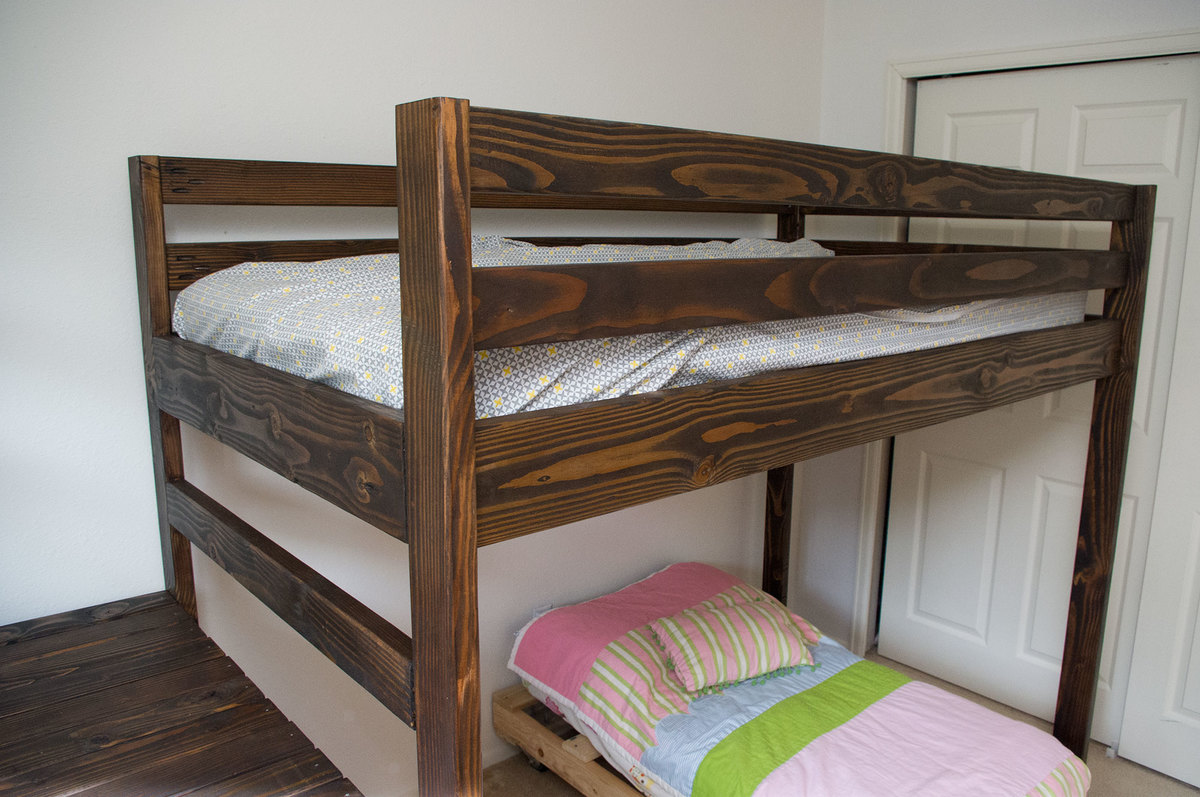
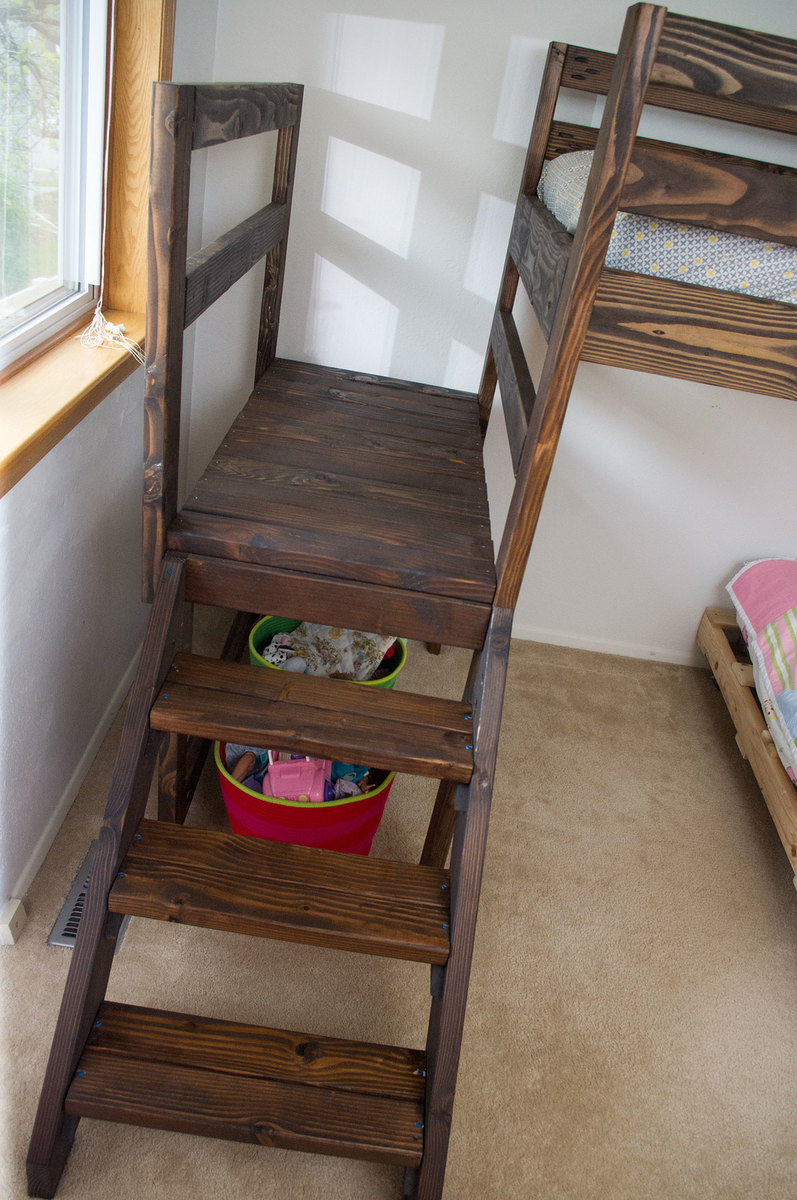
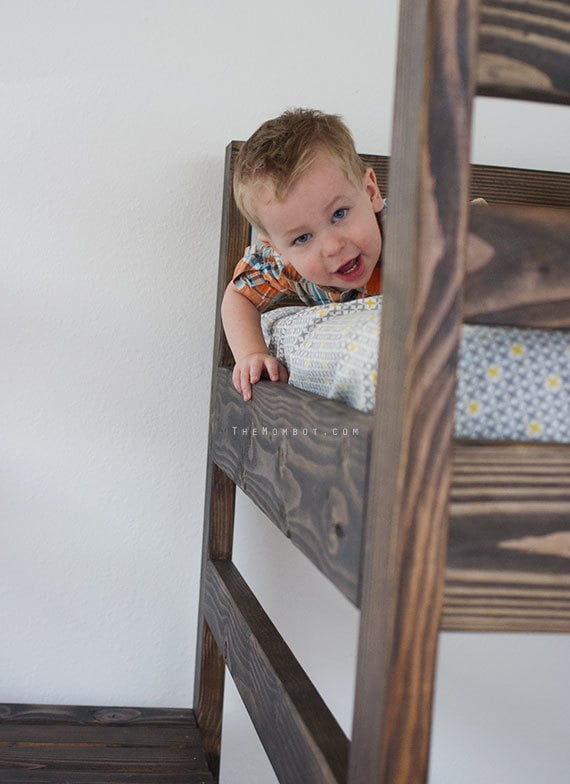
We added a railing to the platform since the bed is up against a window with a screen. If the kids were to fall off the platform and hit the screen, they could fall 2 stories. The railing is just screwed into the side of the platform and can be removed at any time.
Overall, I love how it turned out and so do my kids! It fits the toddler-sized DIY bed that my husband and I built right underneath so my 4 year old and 2 year old can now share a room.
More details and pictures are on my blog: http://themombot.com/crafting/2014/05/09/details-our-diy-bunk-bed
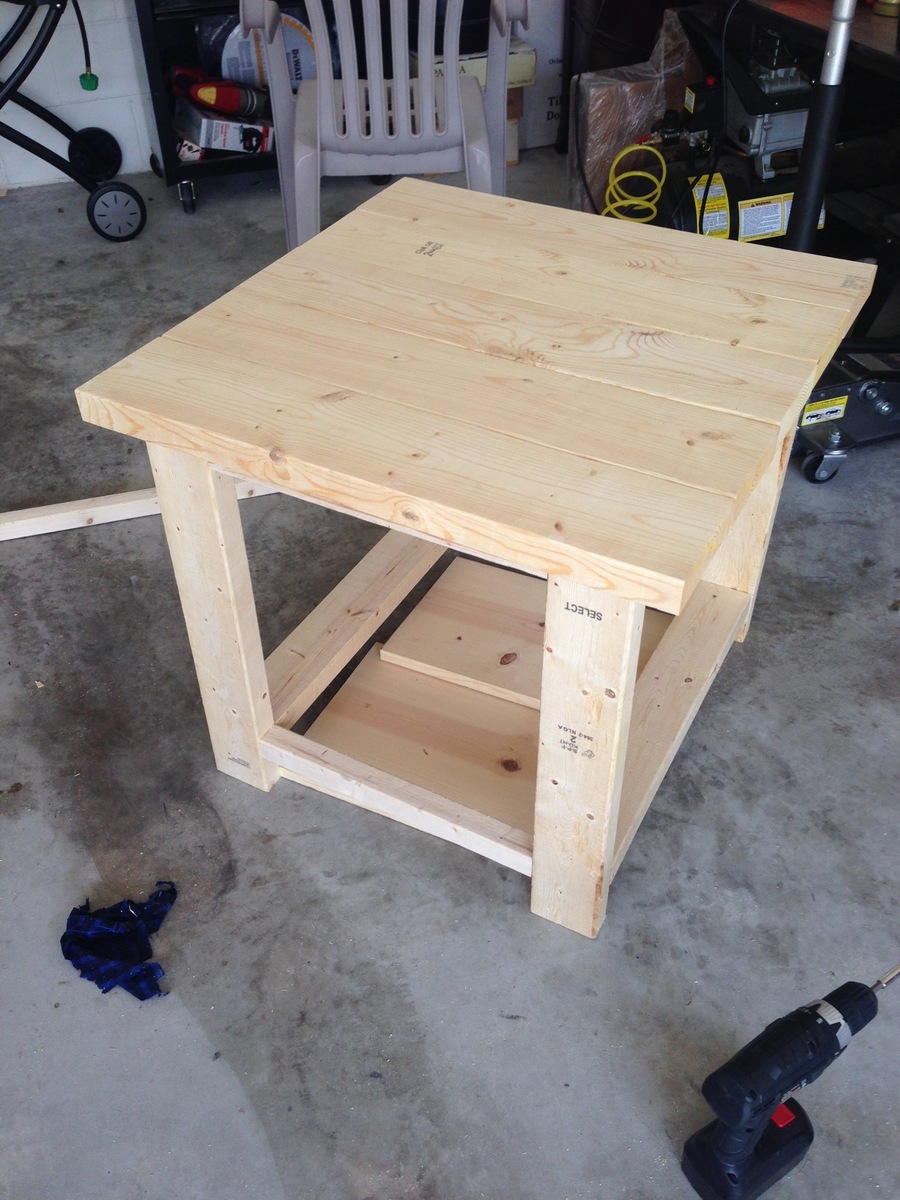
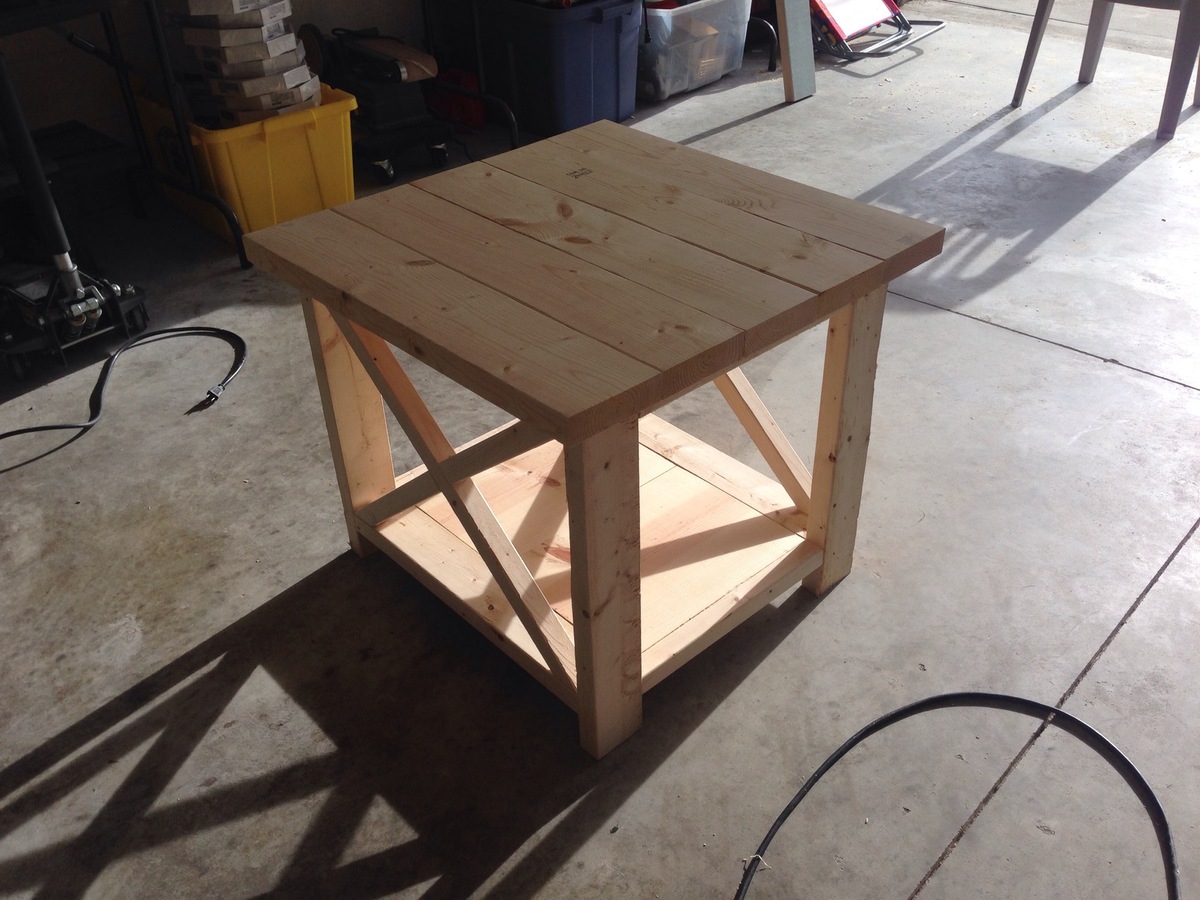
Very straightforward build. Lowes didn't have many 2x4's that didn't have some sort of warp or bend in them so the bottom shelf had to be trimmed slightly to fit.
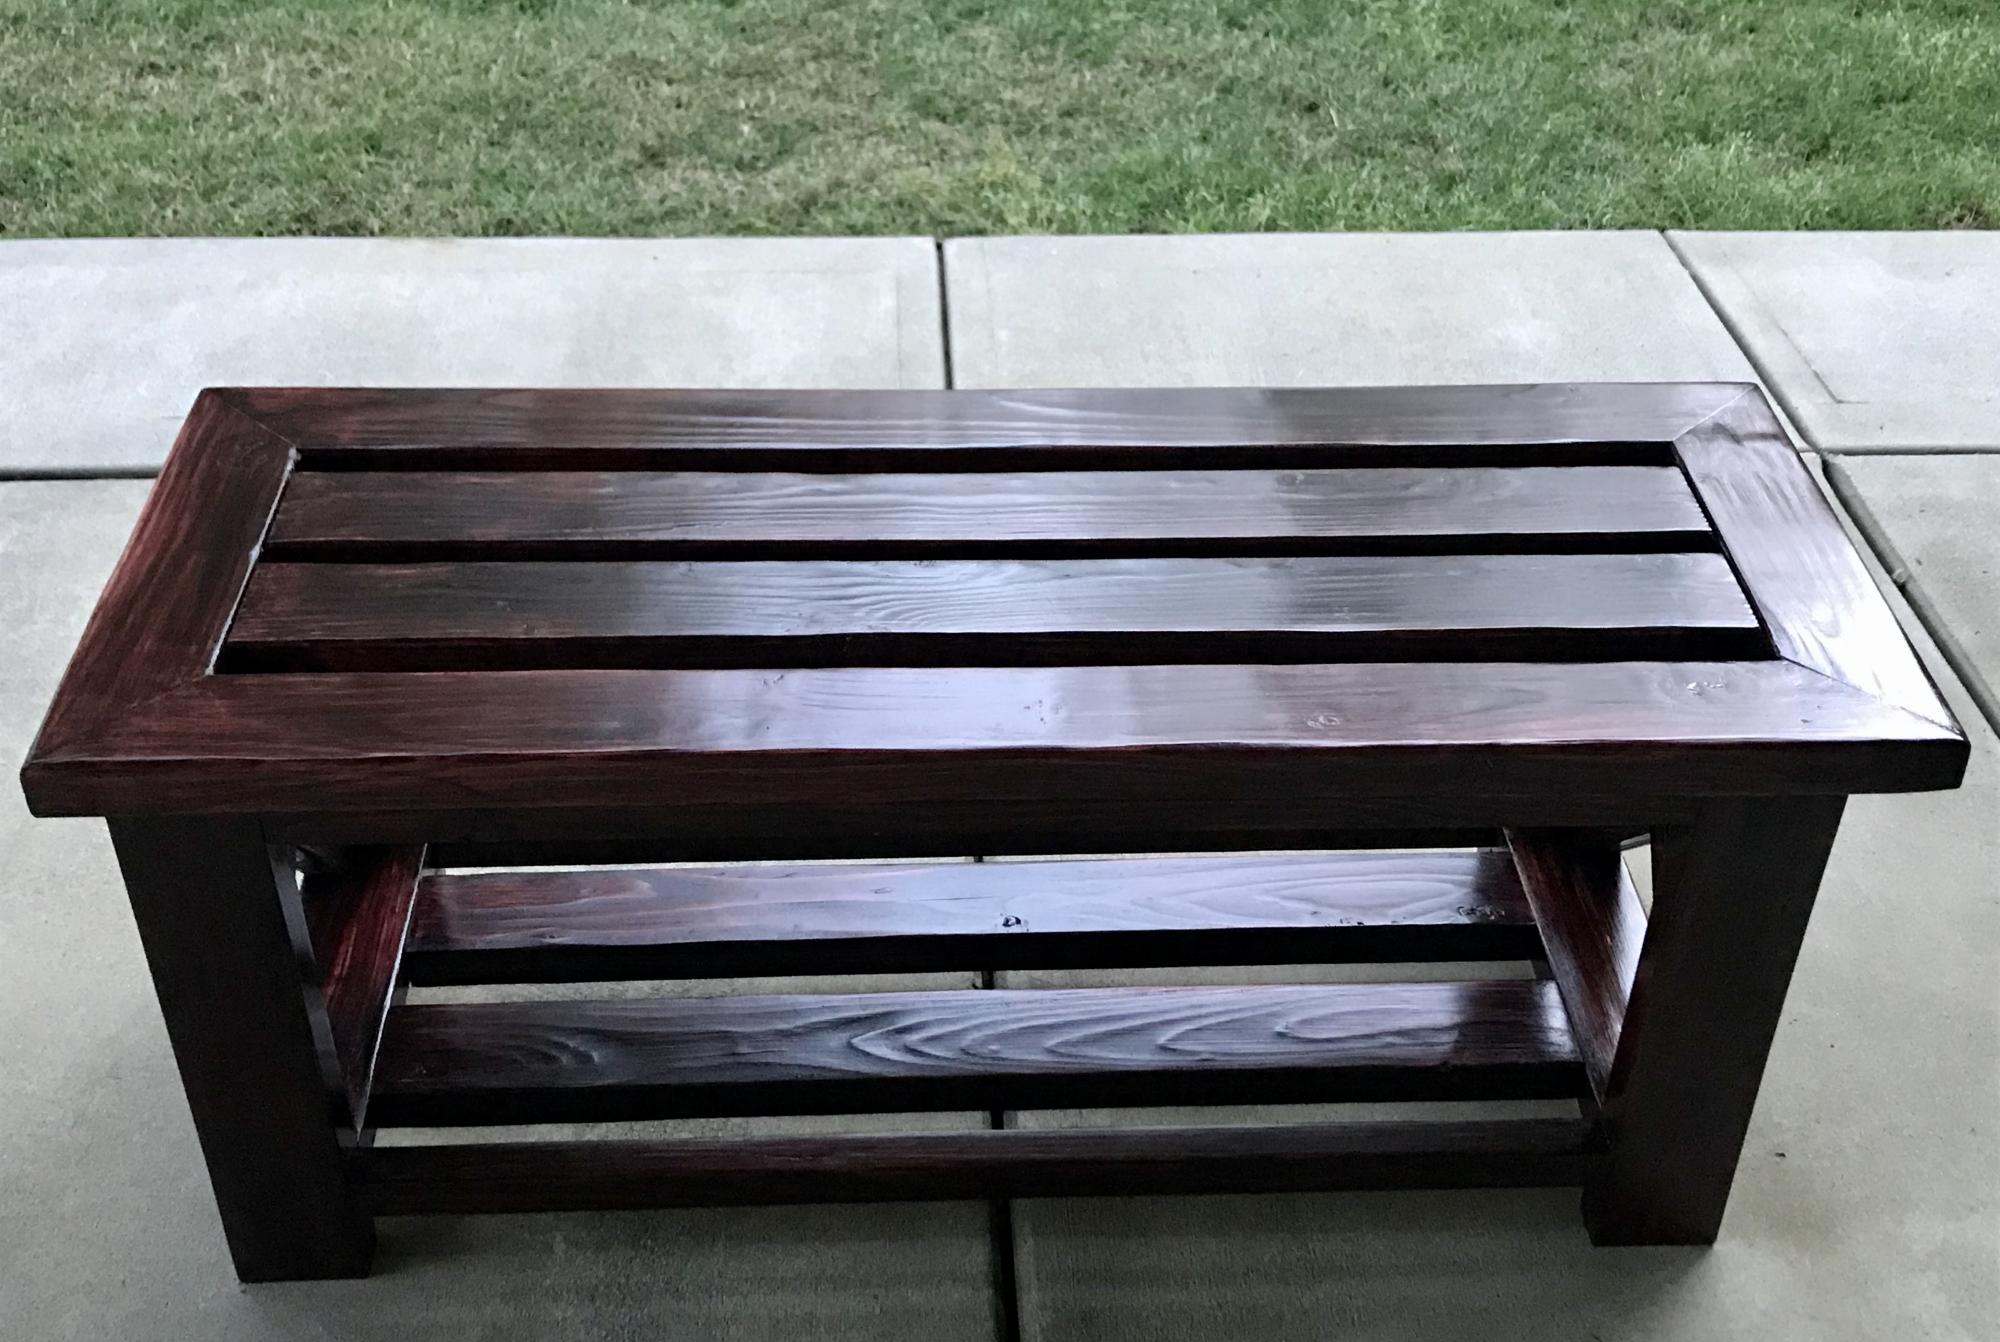
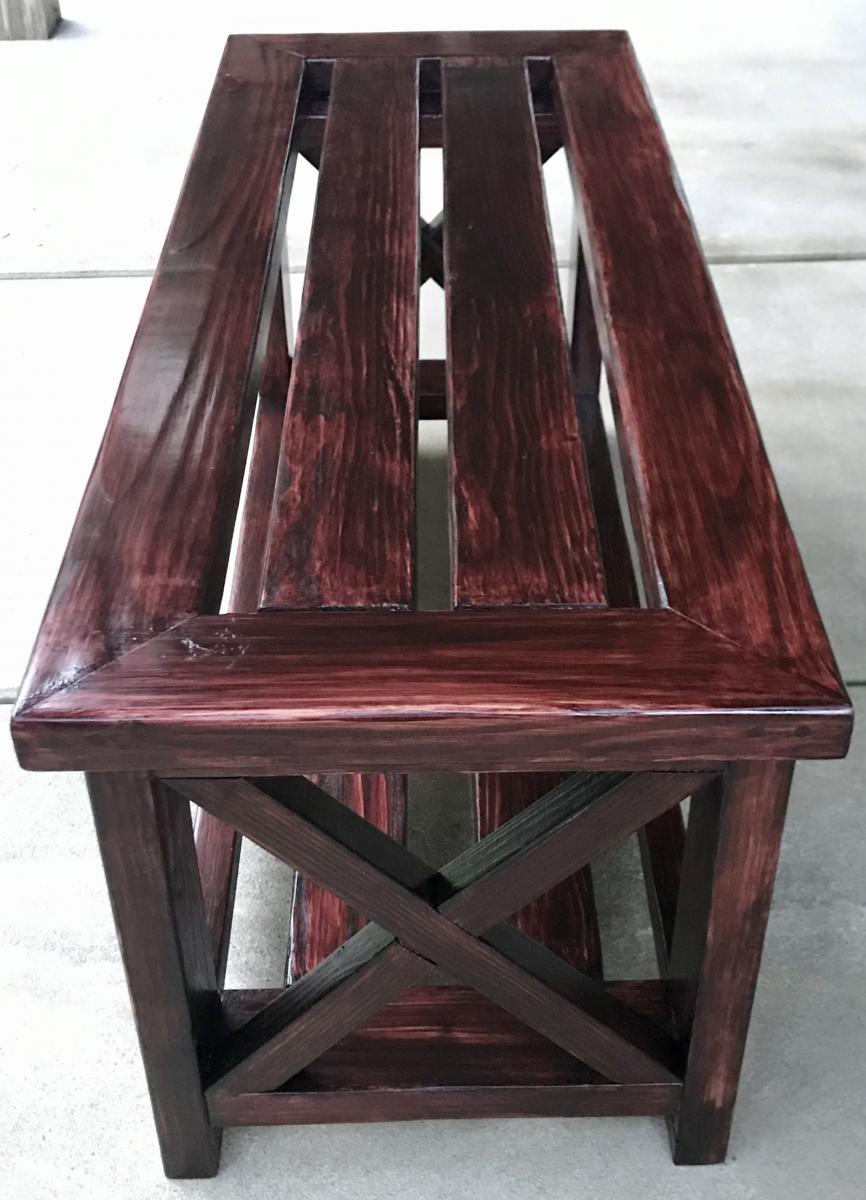
There is a sweet spot with the vinegar/steel wool that takes some mixing and testing to find. To strong a solution and the wood turns nice and brown to weak and it's a hardly noticeable light grey. My advice is get a strong 3-4 day old solution and mix 50/50 with vinegar and test on scrap, wait and hour or so to dry and adjust the mix from there until you love it.
I finished with minwax polishing wax.
Corner accents are on order, but I'm happy with the thing as is. Went with colonial maple instead of golden oak and wow the thing pops. Put together was pretty easy for a beginner. I do recommend predrilling some of the edge/angle holes - the pressure treated wood can be unforgiving.
Great plan! Great table! Thanks!!
Lumber was $37. Screwes, glue, stain, etc cost extra, but those add up in your garage overtime - so, sunk costs. All in all, I spent about $60 and finished the project in less than 4 hours.
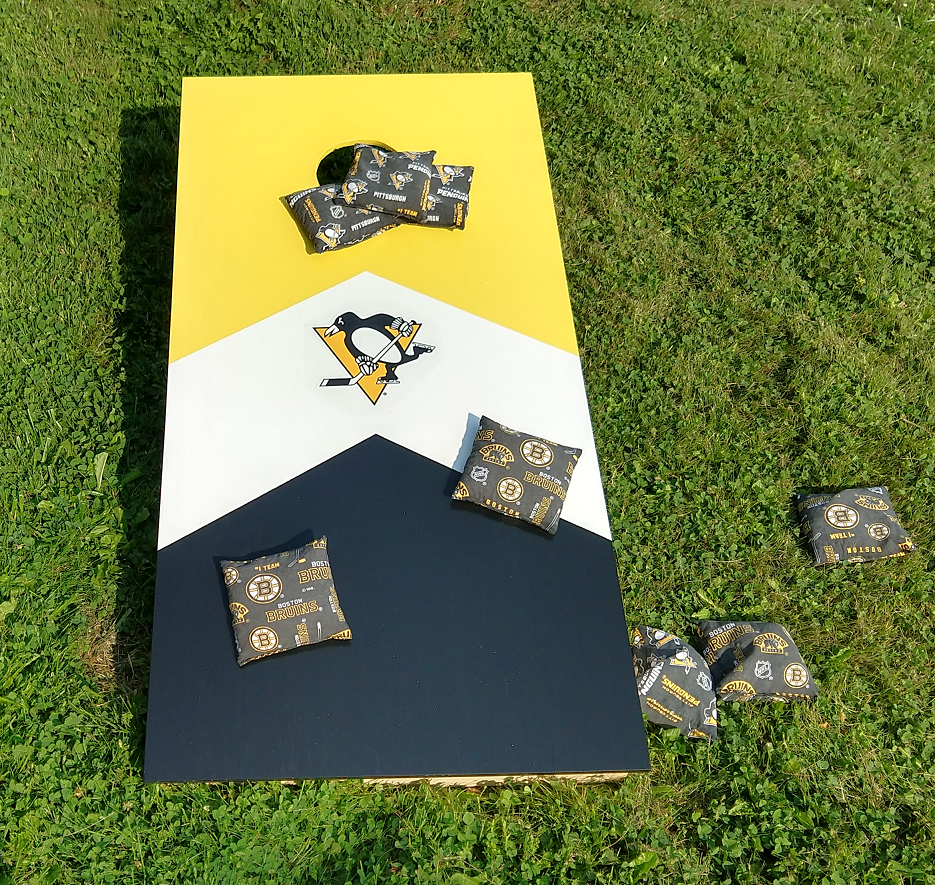
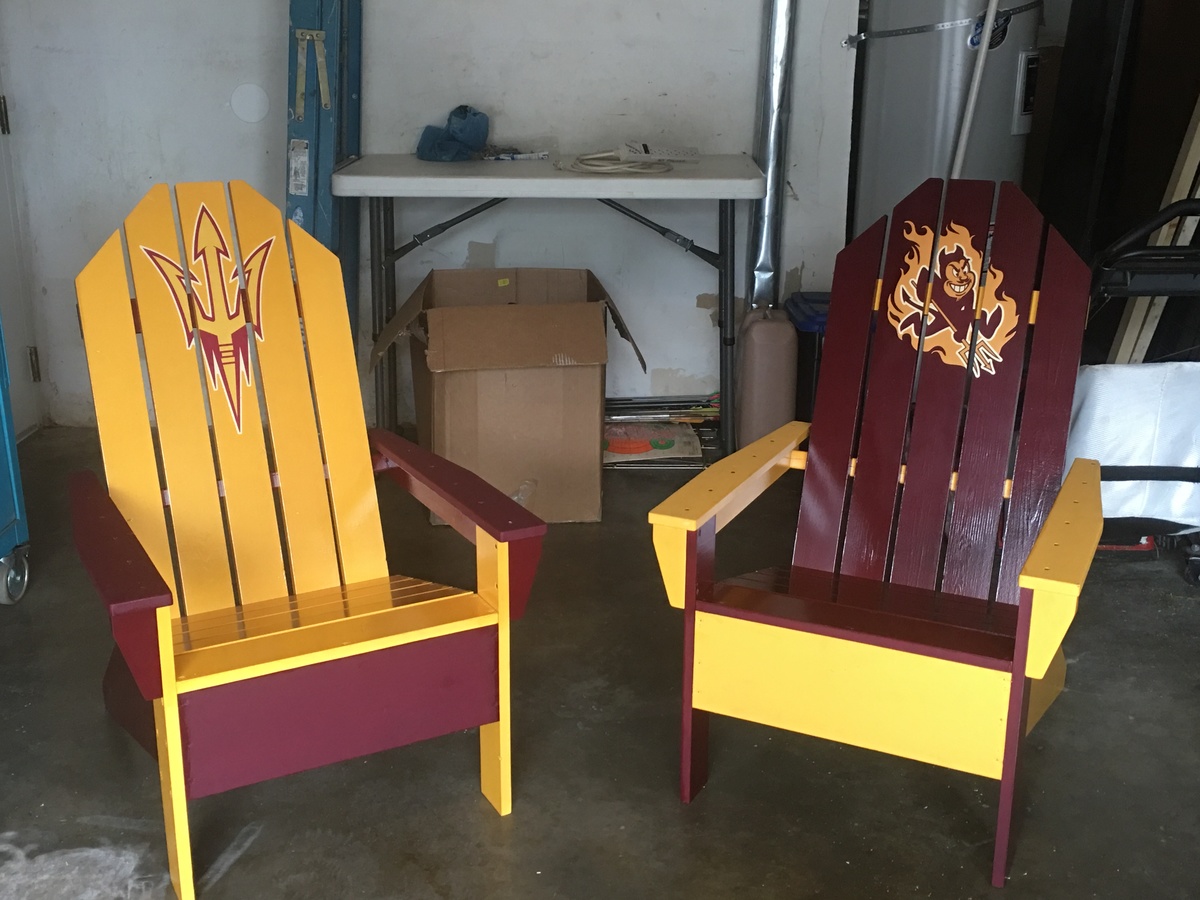
Did one with Bruins as well. Wife made the bags. Did another set with LA Rams for my brother.

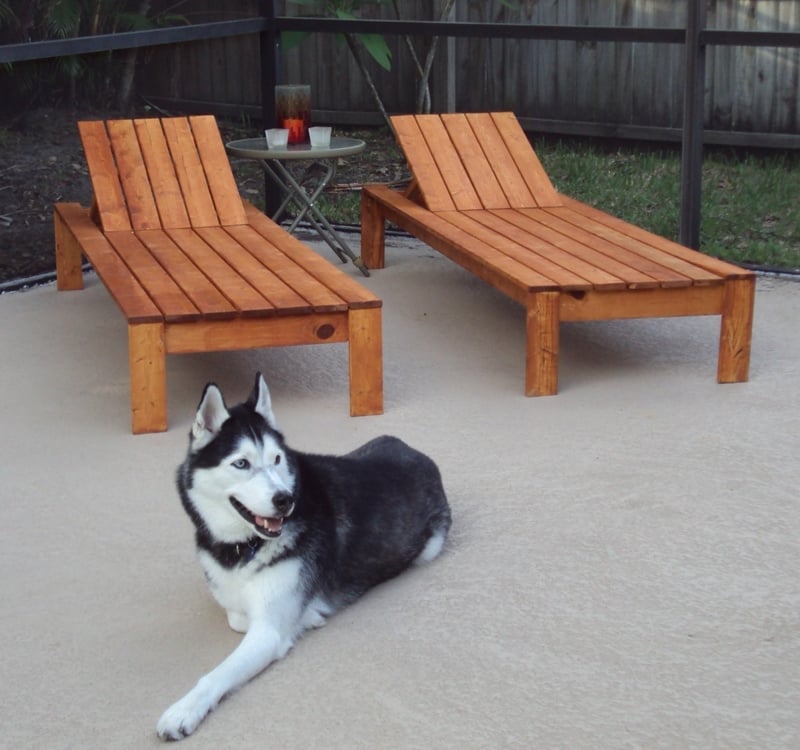
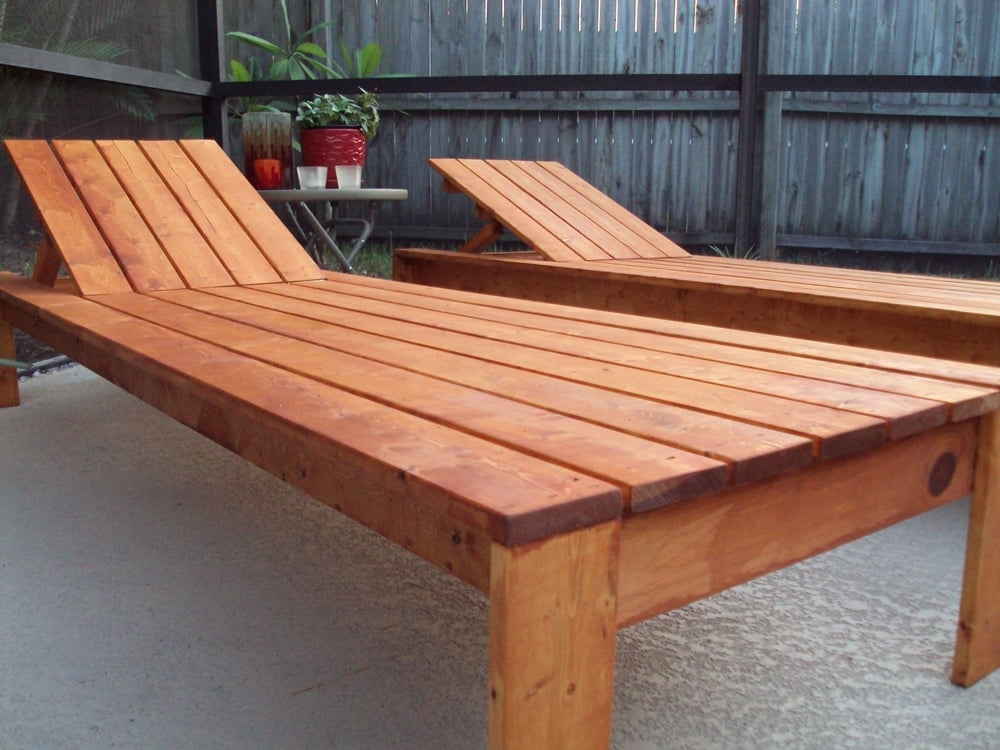
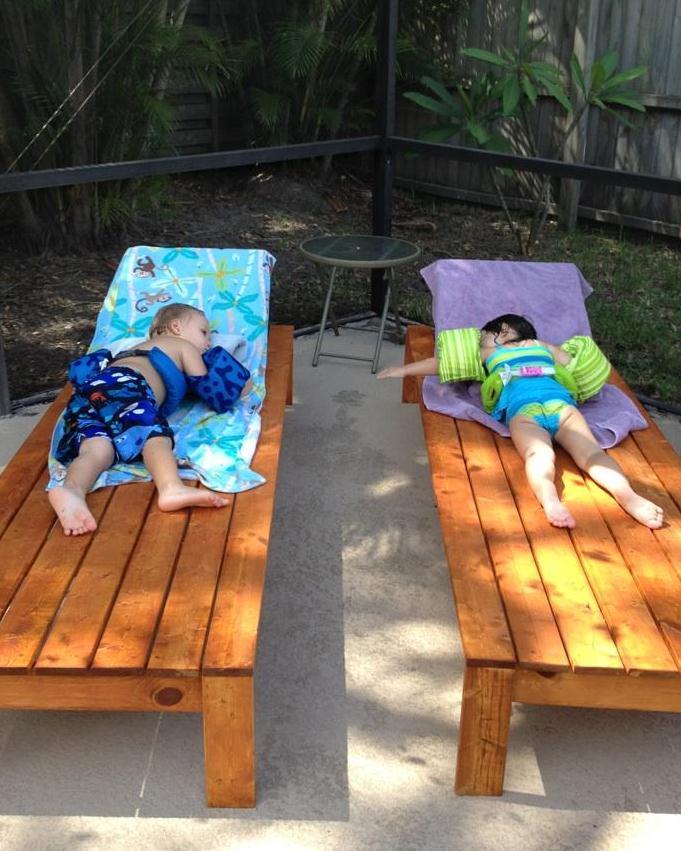
This was a very straightforward and easy build. As soon as they were compled, I wanted a dining table and chairs to coordinate. These chairs were intended to be used without cushins (is there anything better than laying out on a warm lounge chair when stepping out of the pool?) so I recessed the hinge completely below the deck. They were cut adn assembled in two evenings after the little one went to sleep. As you can see, my daughter and her friend approve.


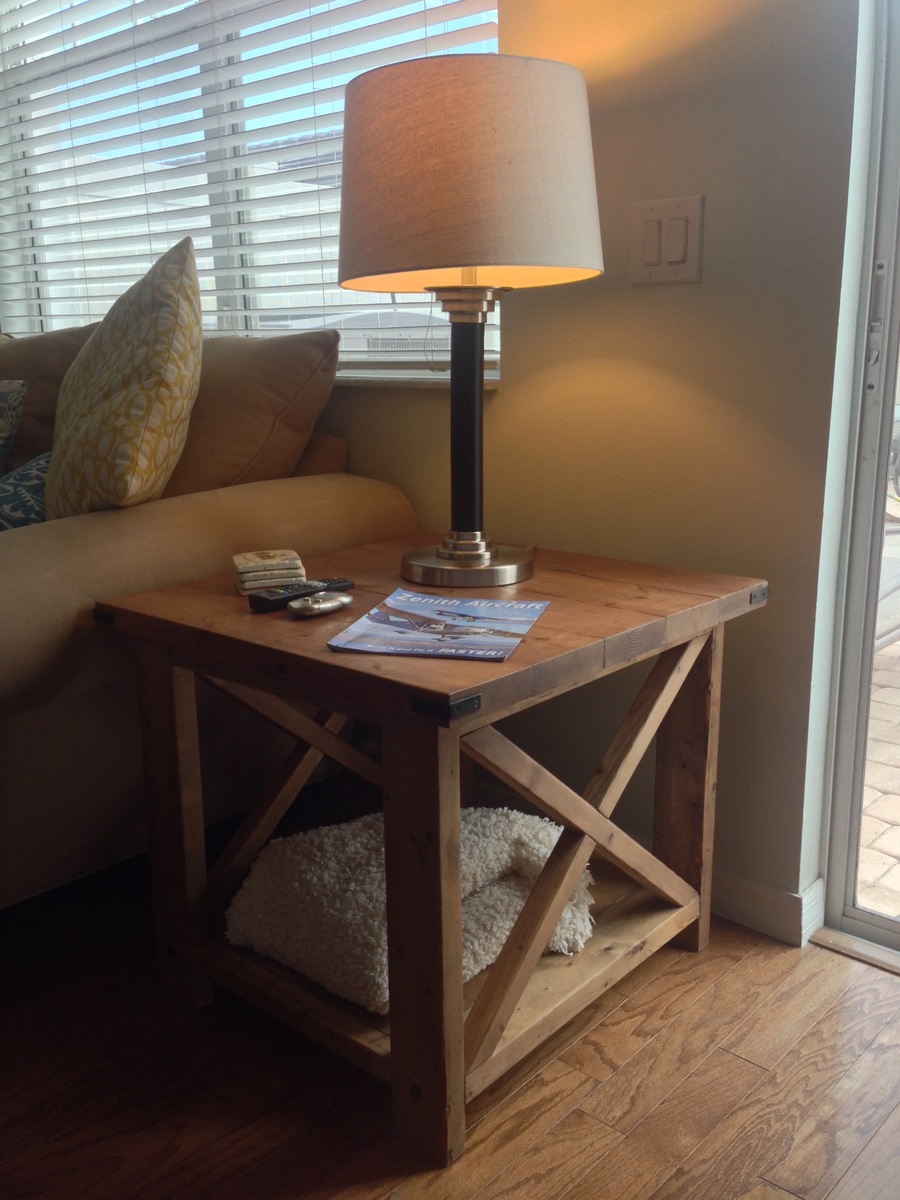
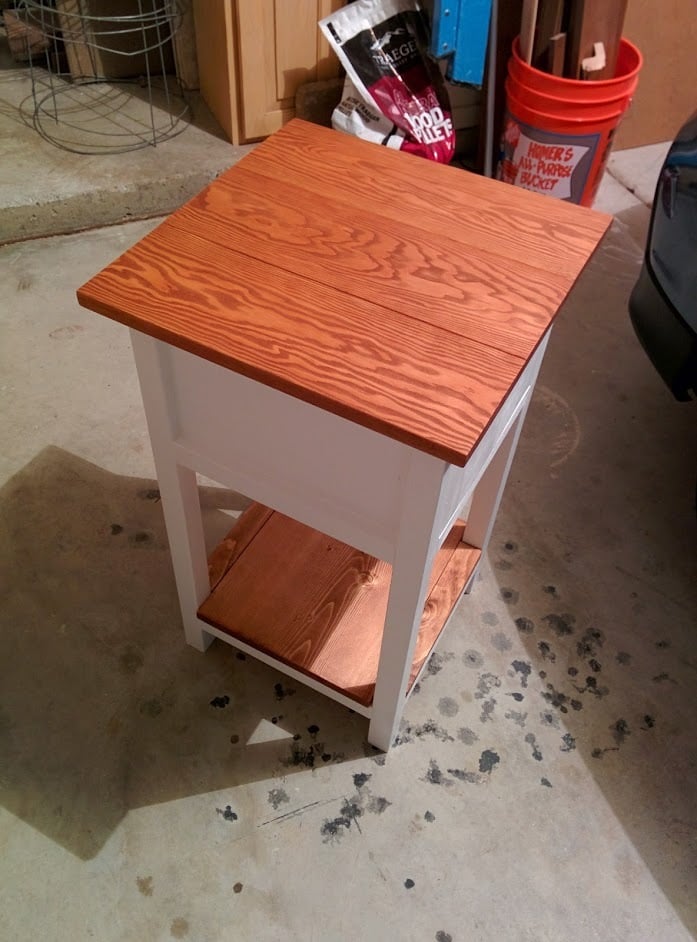
I made this for my Mom for Mother's Day. She has been wanting a little table to put next to her recliner (where she knits, reads and watches TV). For the top and drawer, I used Douglas Fir from Lowes. The rest is whitewood and redwood (legs). Overall the wood cost me about $50. I painted the body with high-gloss white paint and the stain on the wood is a mixture of min-wax Golden Pecan and English Chestnut. The finishing took the longest, but the build went very quickly.
I did notice that the cut list is a little off. You need 4 of the 1x2 pieces for the sides, not just two.
I may put a layer of varnish on it, but as of now it is not varnished.

Made a set in Kansas, moved em to Texas with us and couldn't move them to Kentucky, so I had to build another set! I know, such a shame right! Lol. These ones turned out better than the first! The first set was just stained, I got a little more crafty with these!!

Love your projects and videos! Thank you for the plans Ana.
Fun project!
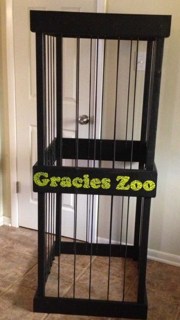
I had a friend ask me to build this for her daughter. The bars are bungie cord that you can order by the roll. I made 3 frames the same size then put 2x2's on the inside corners and counter sunk the screws the stapled the bungie cord at the top and the bottom. I would highly recommend securing this to a stud in the wall incase a little one tried to climb on it.
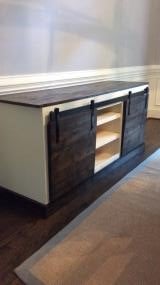
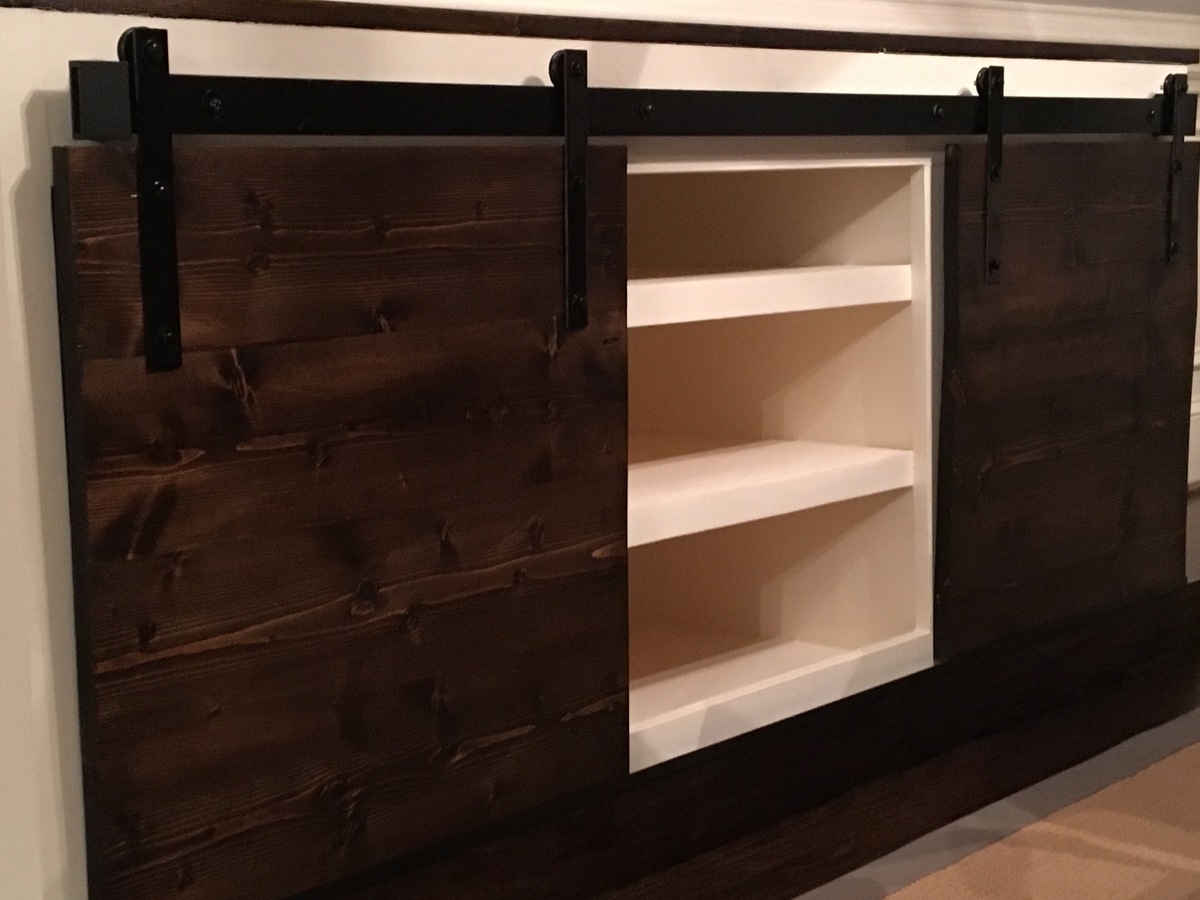
Sliding barn door console