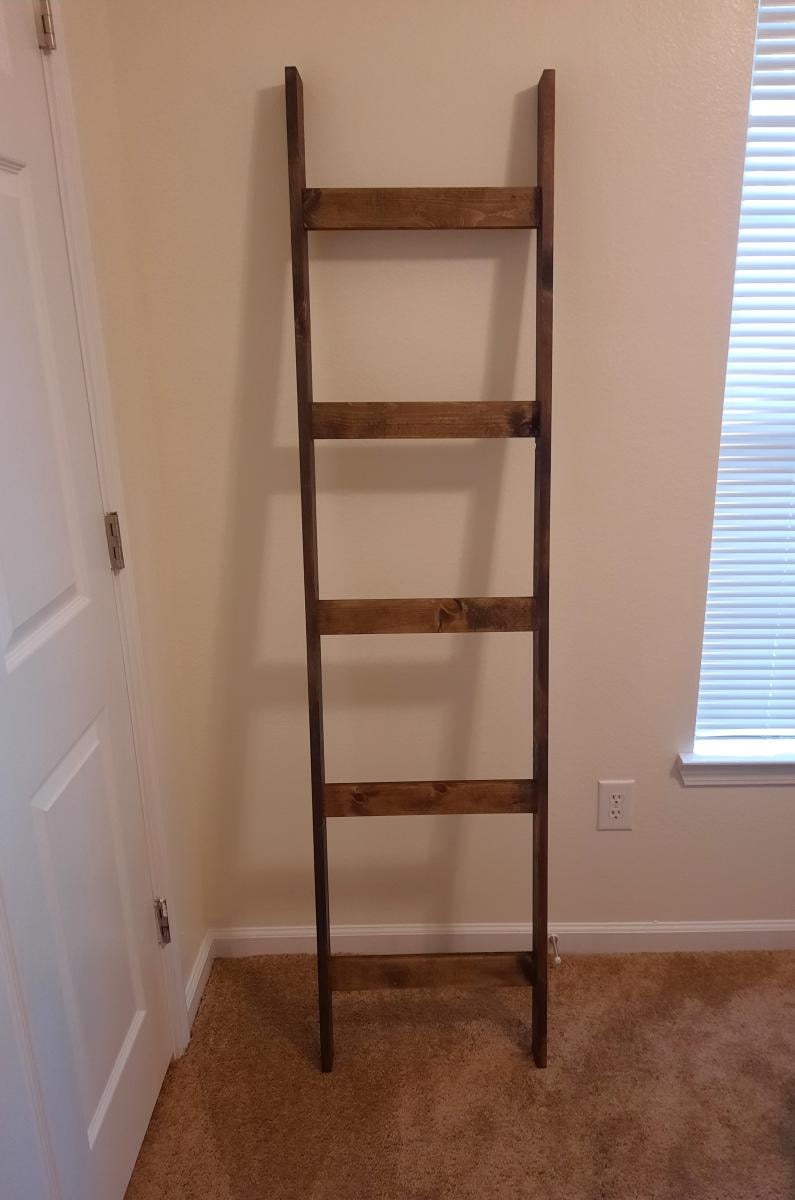
First Project Blanket Ladder
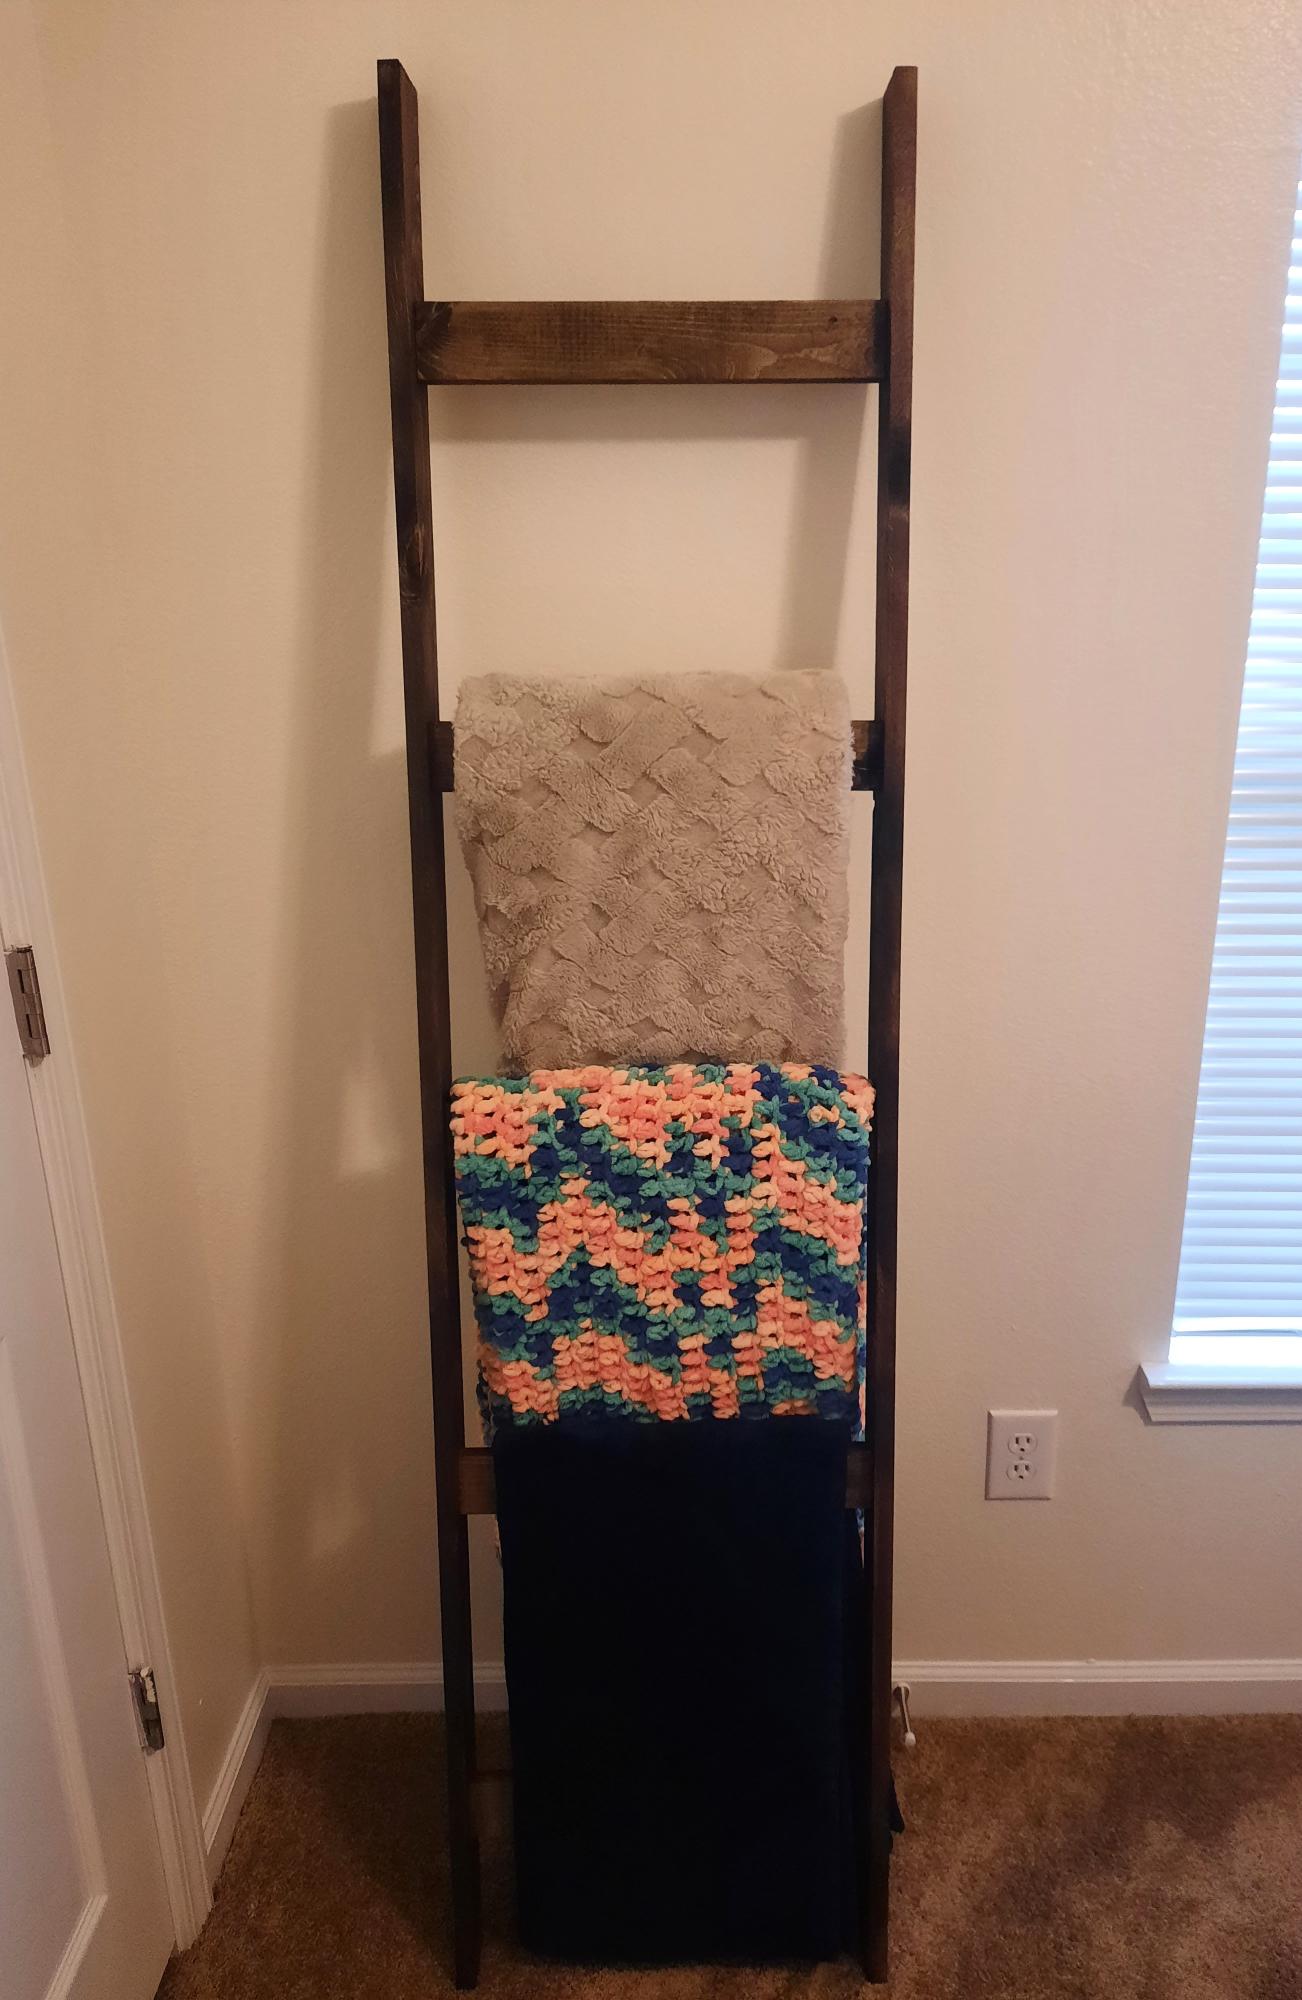
This was my first project and I am so pleased! The stain is beautiful and once I got the hang of it, so easy to complete. I am excited to try a new plan and keep going!!
Laura
Built from Plan(s)
This was my first project and I am so pleased! The stain is beautiful and once I got the hang of it, so easy to complete. I am excited to try a new plan and keep going!!
Laura
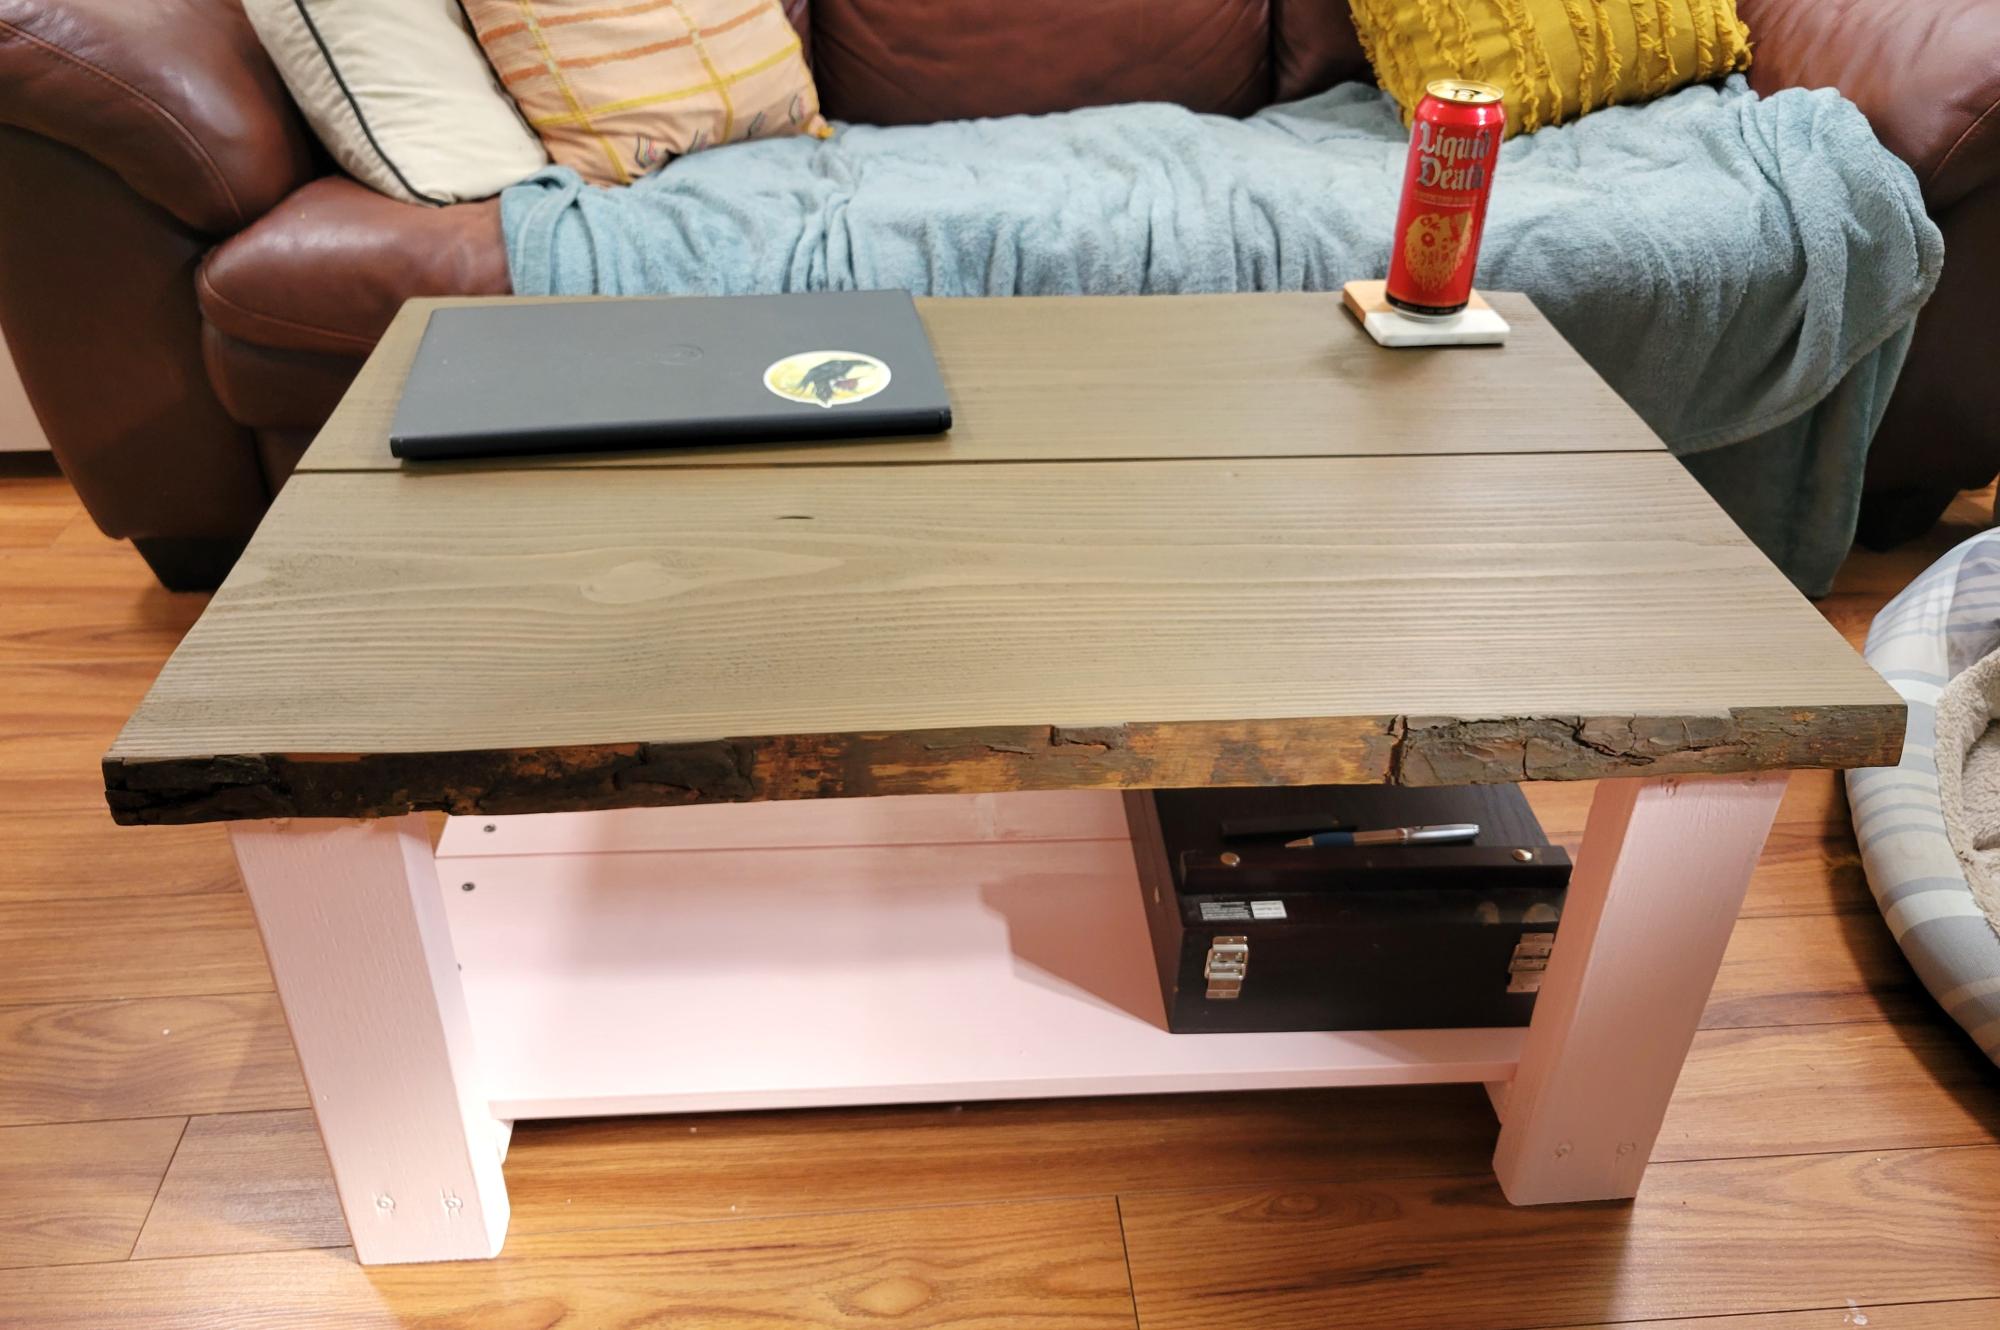
This is my first piece of furniture I've ever made that didn't come in a box ;) The instructions were so clear and easy to follow. I wish I'd had a table saw for the piece of live edge (it had live edge on both sides so I had to make a 6 foot cut with my circular saw that came out not quite perfect, but I am choosing to think of it as adding to the charm. Might go back and add some shine to the top, but for now I'm super happy with it.
emily.rhoades_
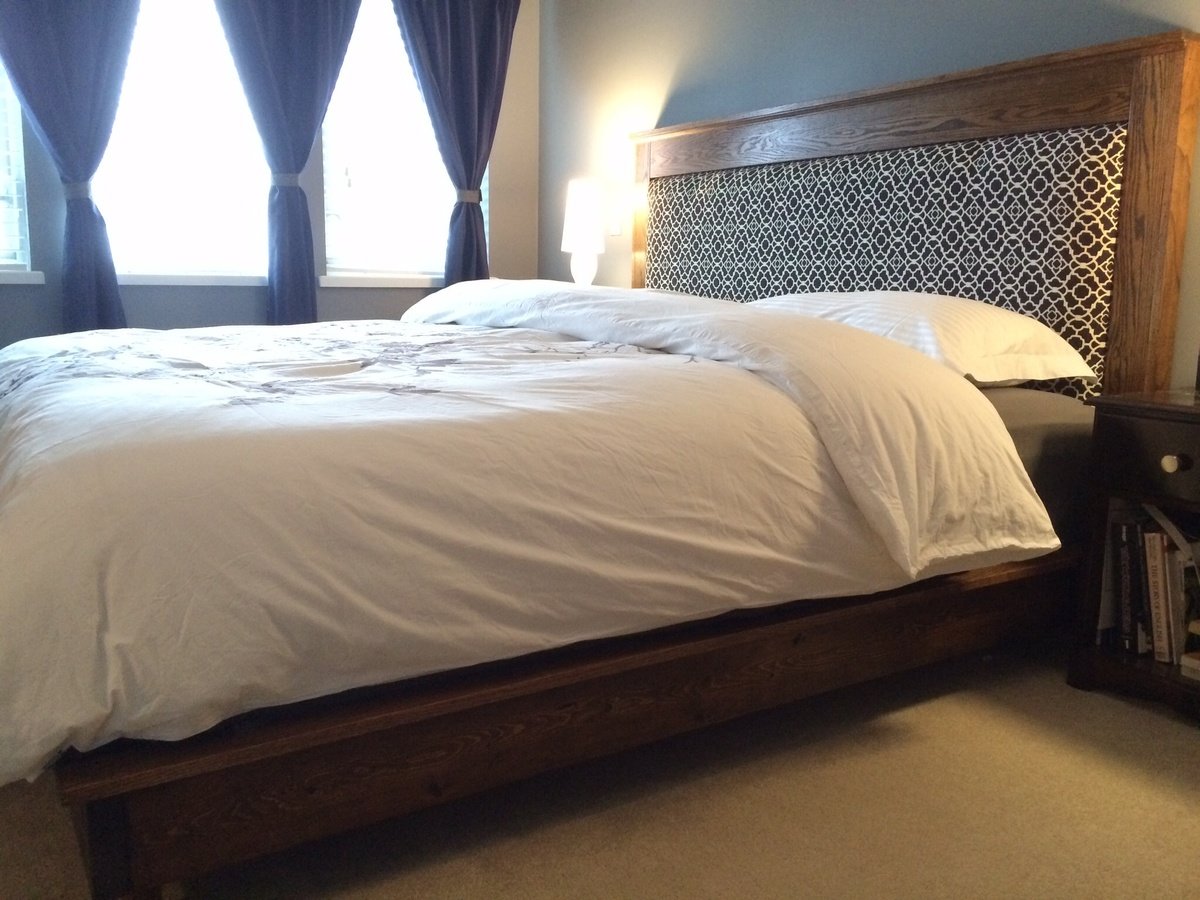
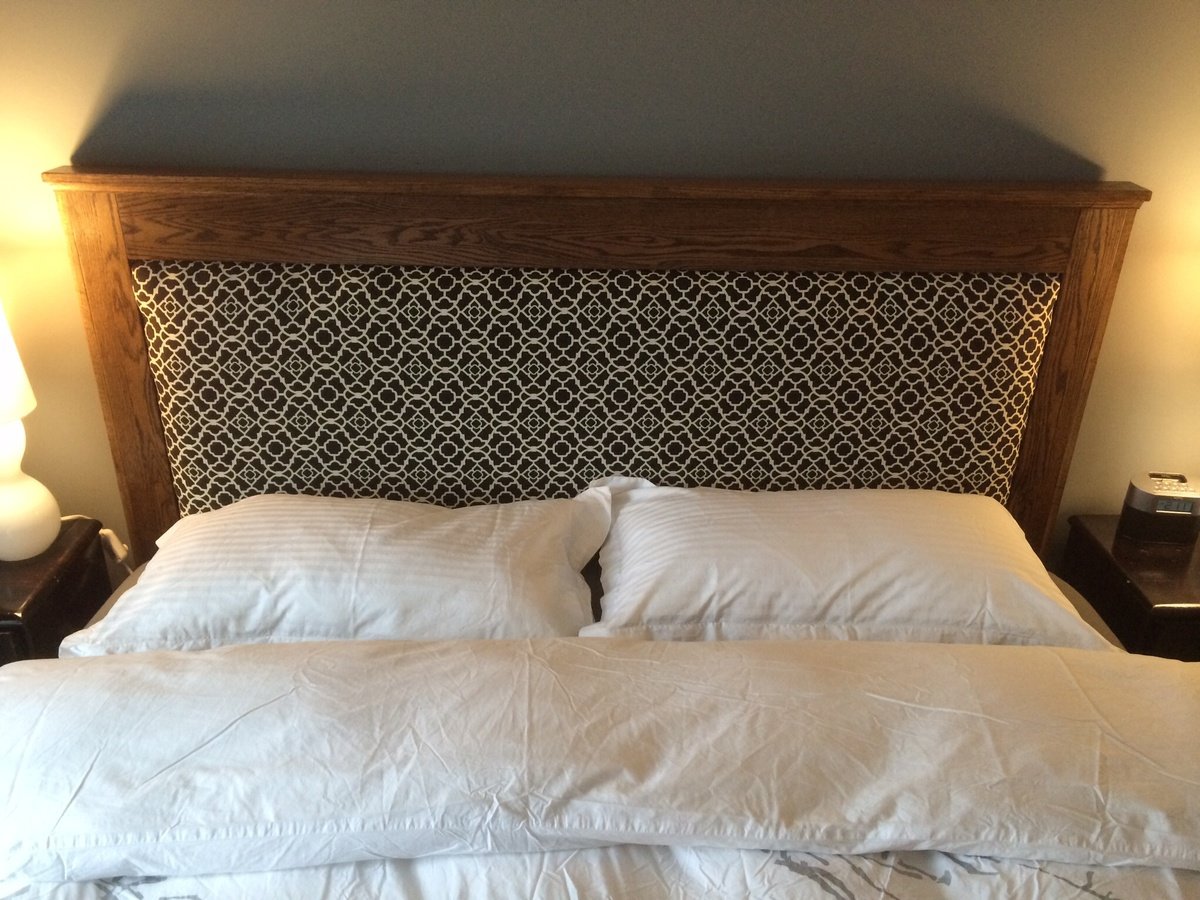
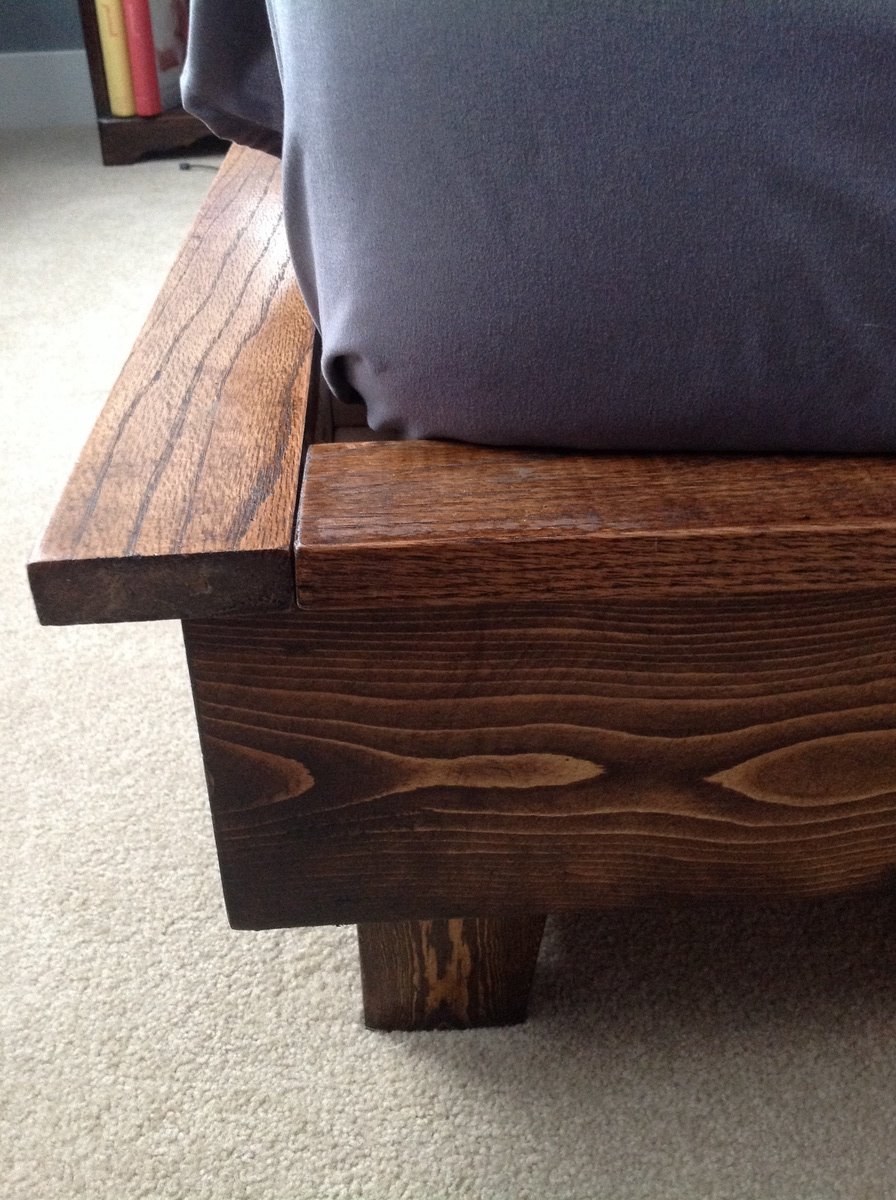
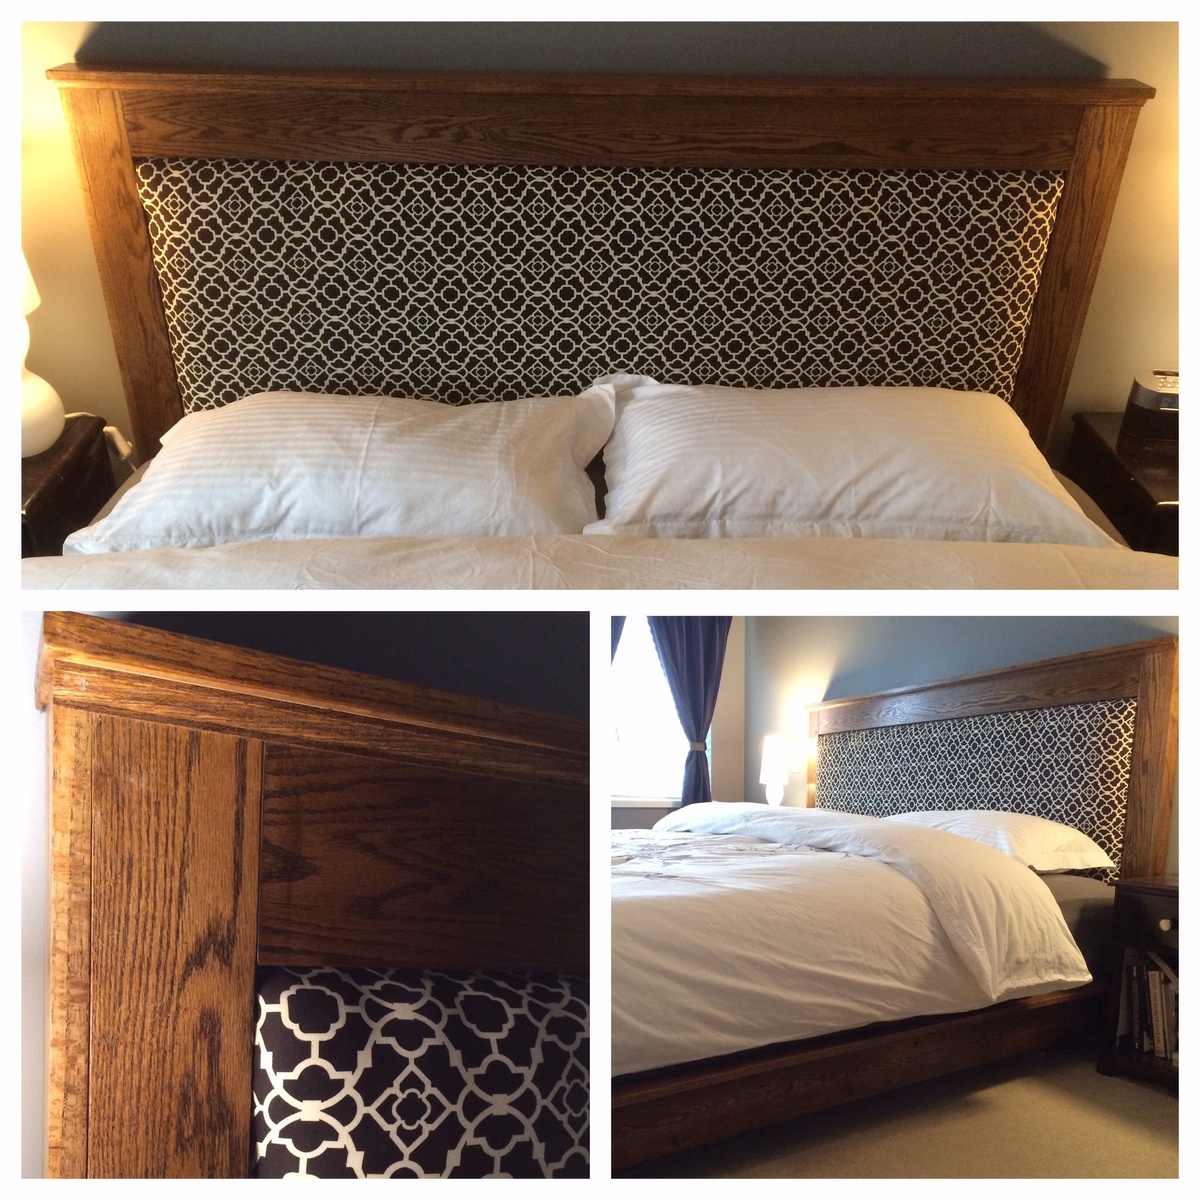
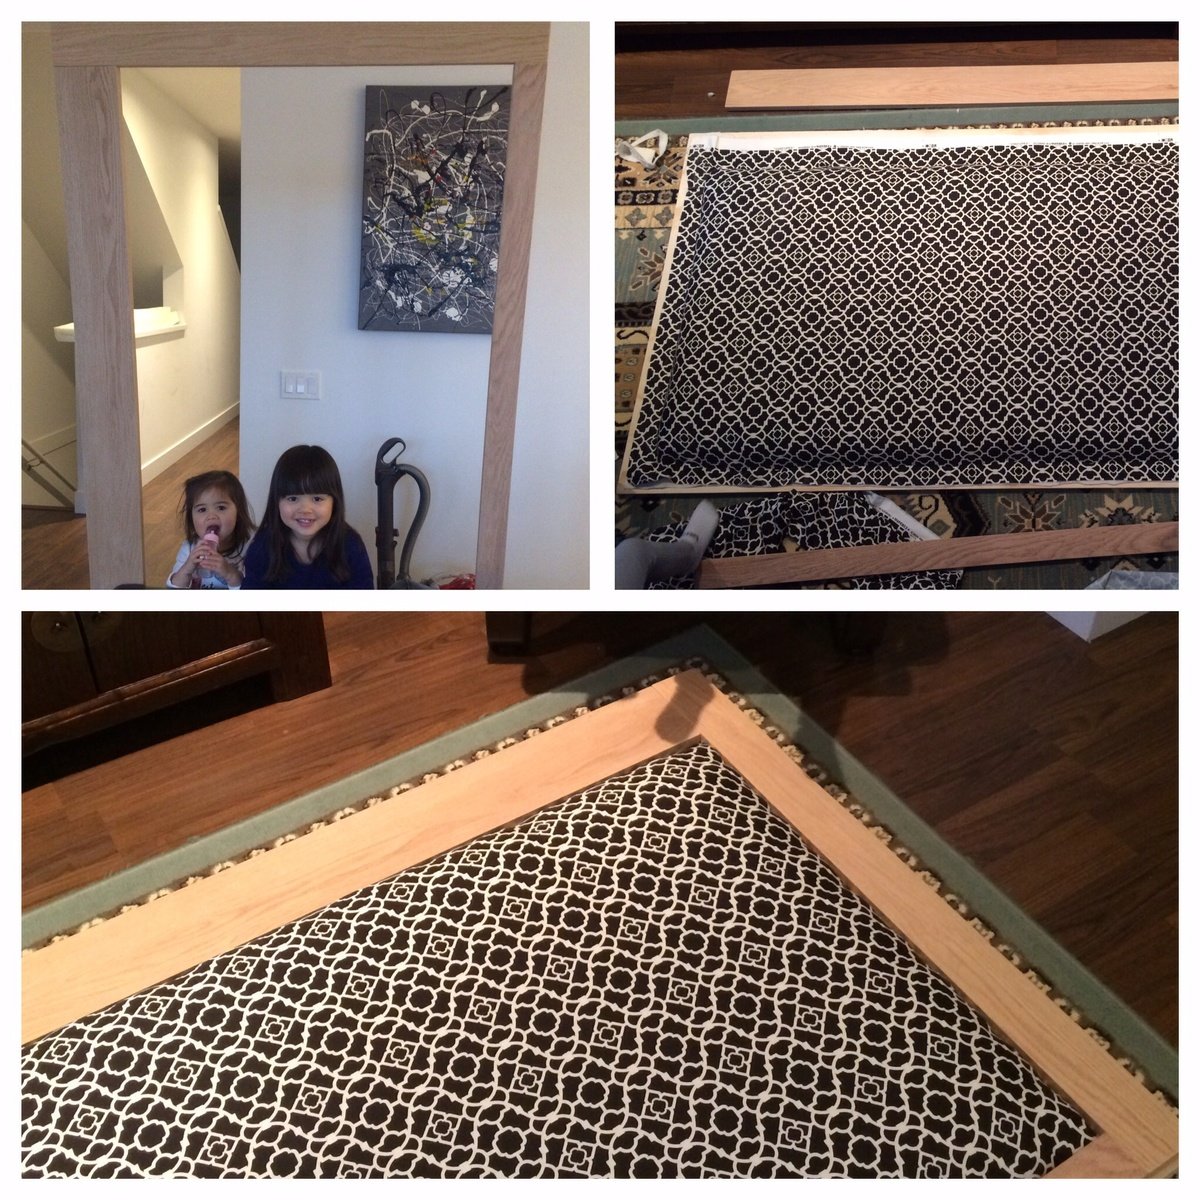
I converted the plans to king size and used oak for the headboard and the platform edge on the bed. The oak added to the cost as it is almost 10x the cost as construction lumber.
I made the headboard frame with pocket holes and attached it to the plywood with screws from behind. I also used pocket screws to assemble the bed frame.

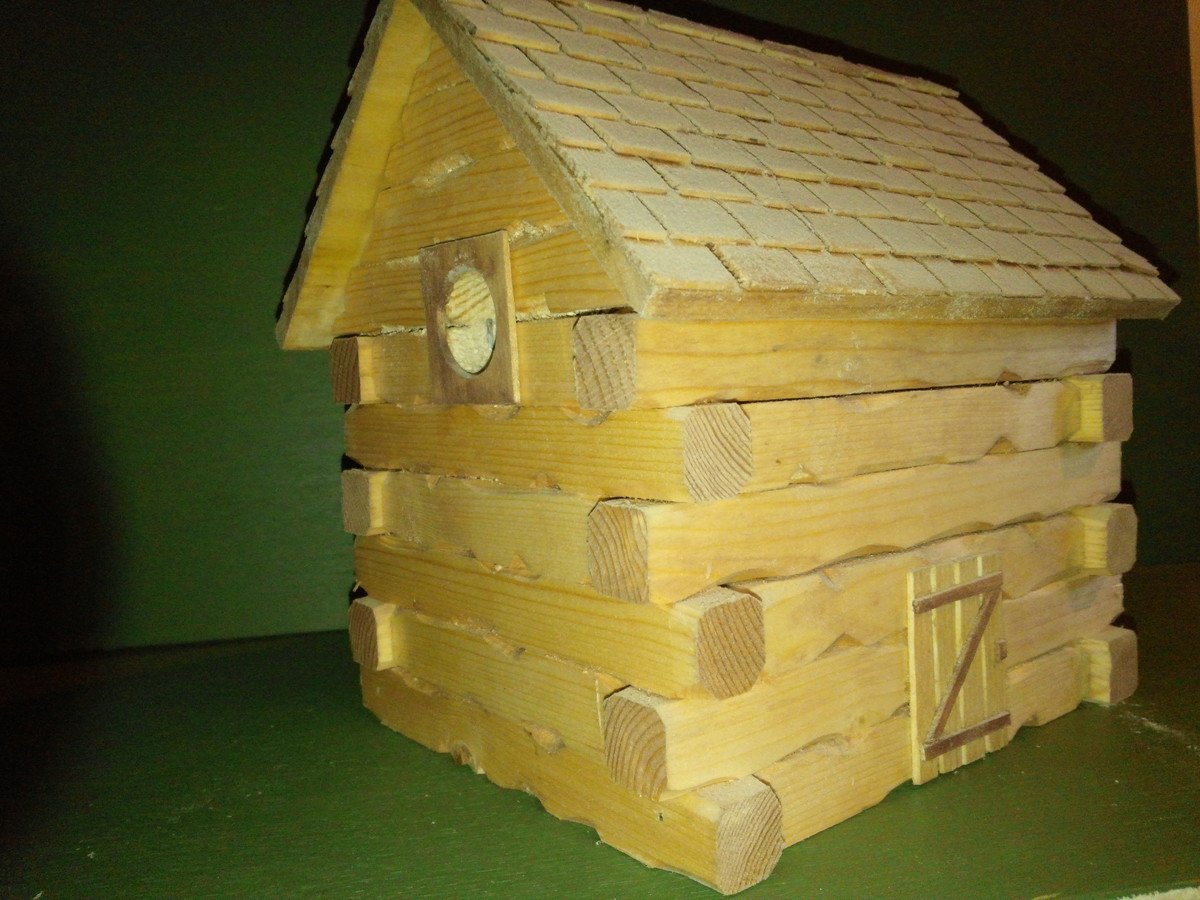
I enjoy making birdhouses and log cabin style is my favorite. I make the logs by setting my saw to rip 3/4 pine at 3/4 so I have 3/4 square strips. I then decide the size of my birdhouse and cut the logs accordingly. I also "wittle" on them a little to make it look more authentic. I simply then just stack, glue and nail one row at a time. You can use 1/4 poplar for the roof but I ripped pine at 1/16 and cut shakes with my utility knife and glue them on one at a time (there are 104 on this roof).
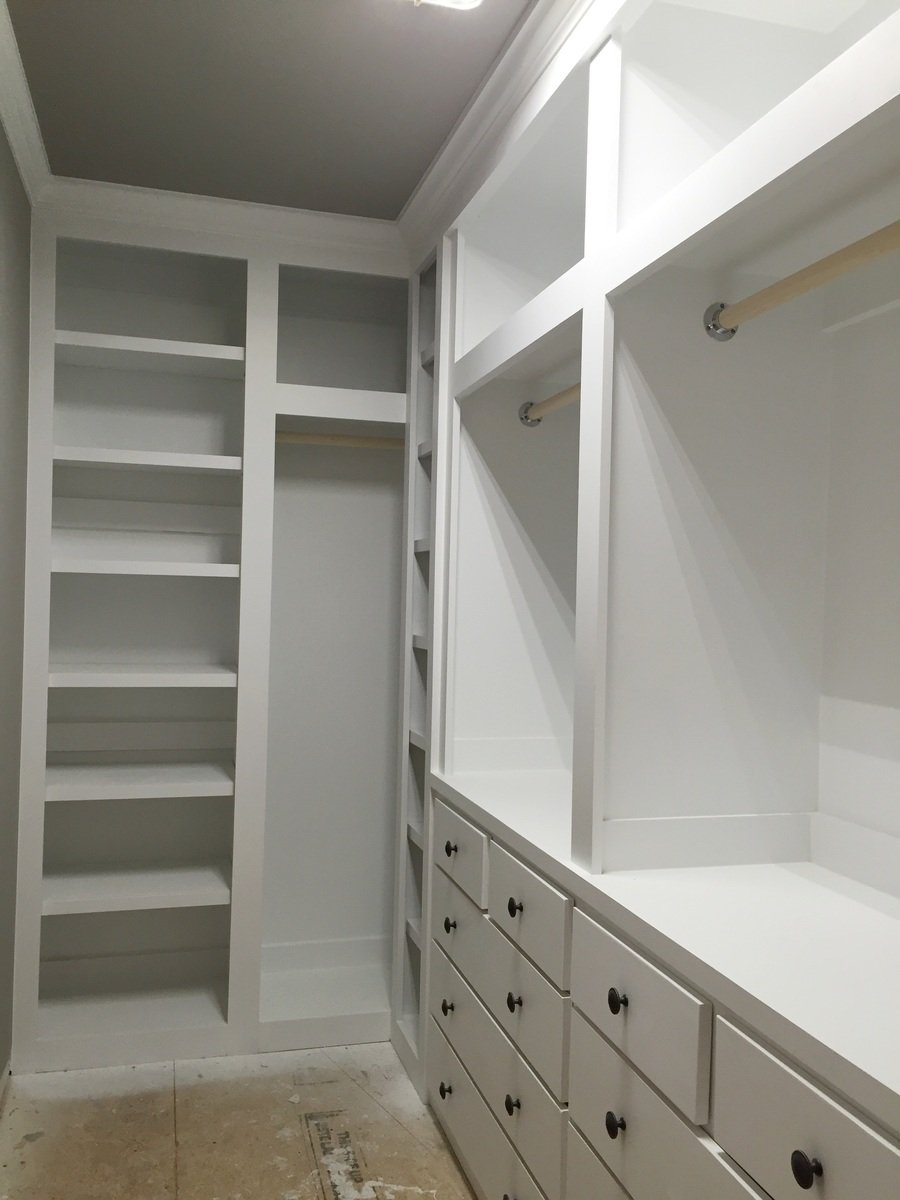
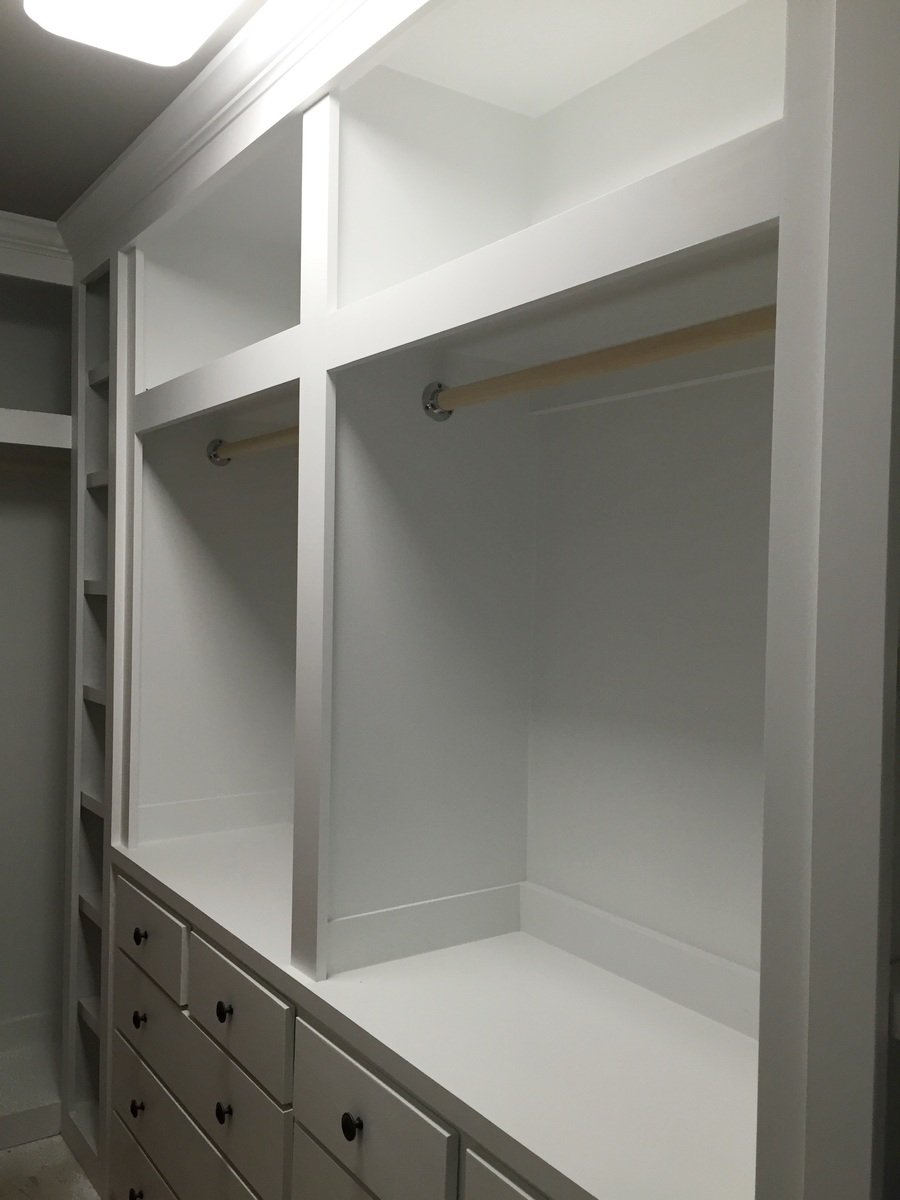
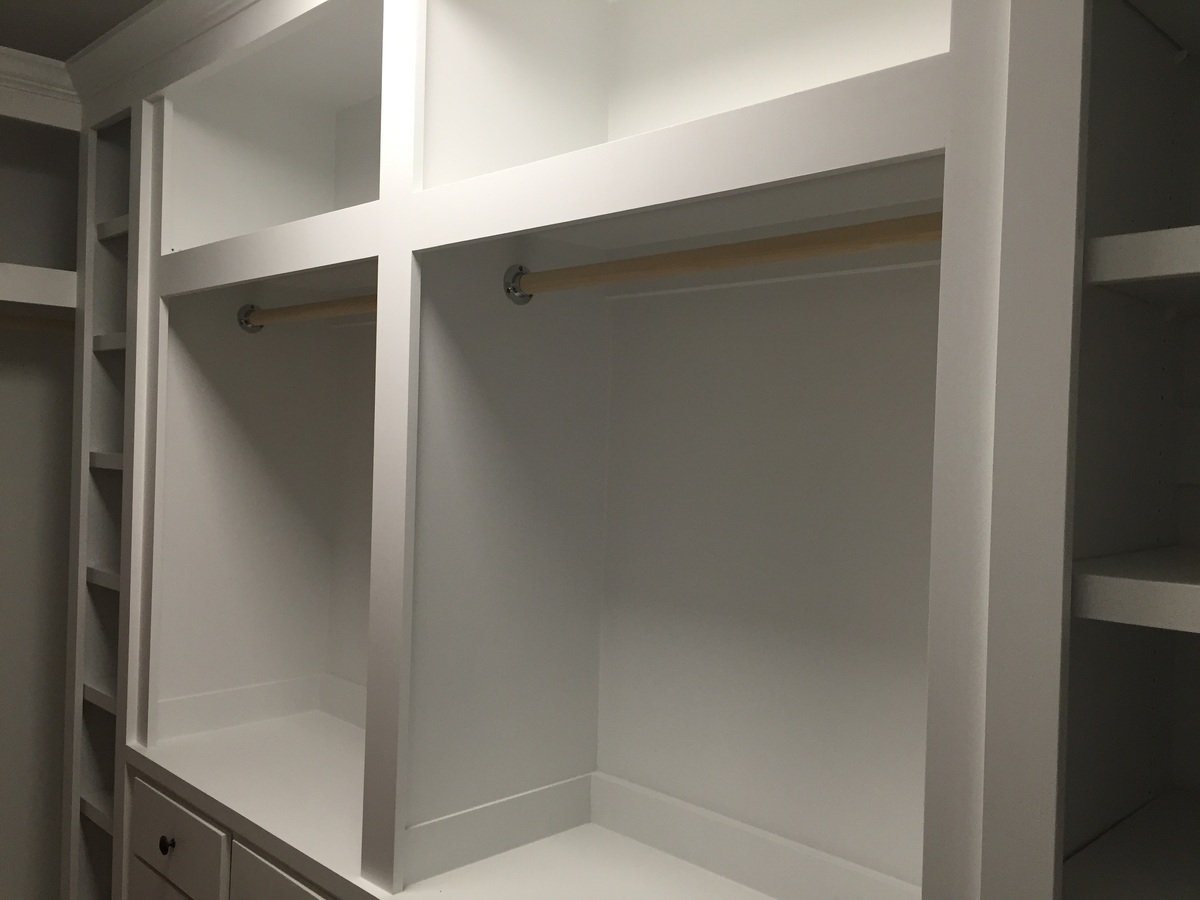
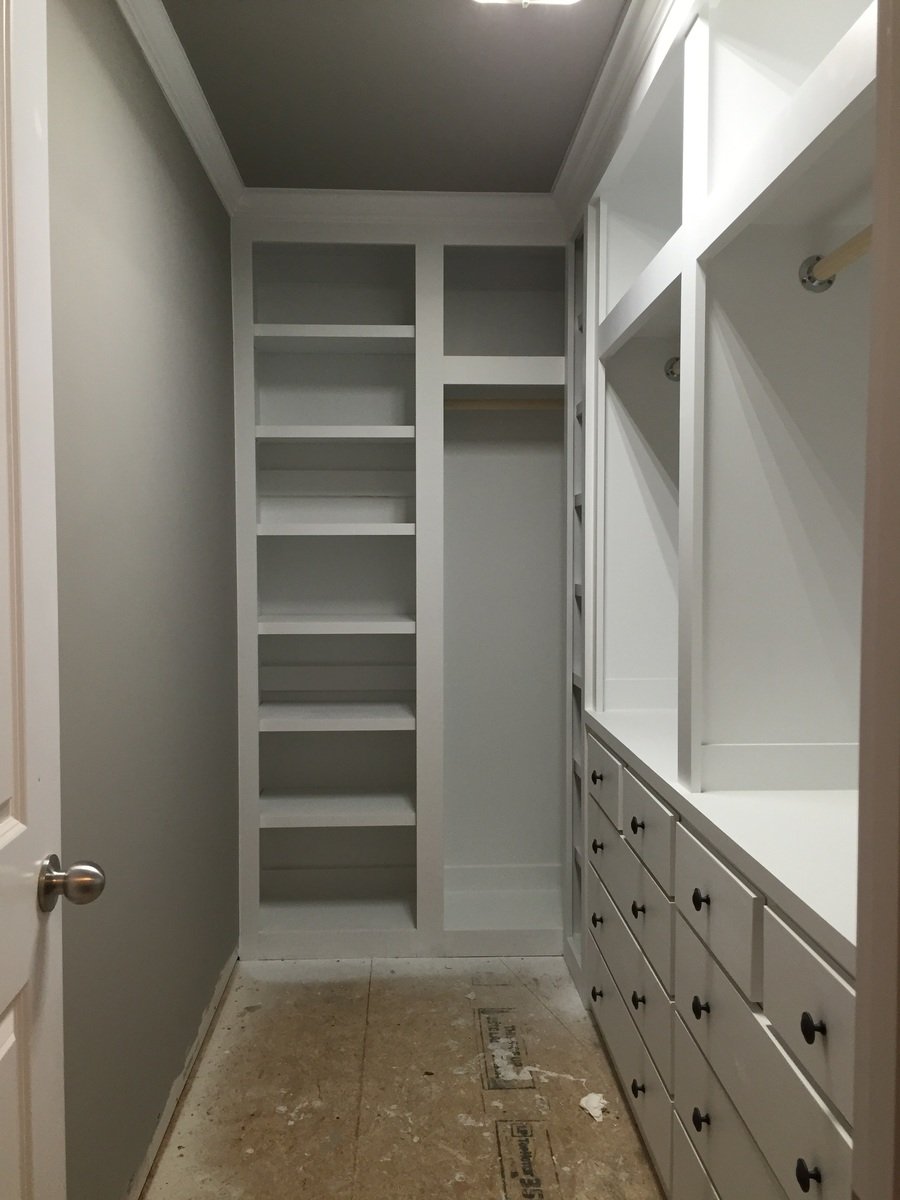
Built in closet to replace builder grade wire wracking. Closet is approximately 11 feet by 5 feet. consists of two shoe racks with 7 shelves each. 6 large drawers and 4 small drawers. Two hanger sections with storage above them. End wall has hanger for longer items and storage above and a cabinet with shelves.
Yet to finish the floor.

I saw the plan and thought I would give it a shot. My wife loved the plan, but wanted something with a higher back. I used the bases of the plan as is, but I adjusted by adding some higher pieces at the back. They are attached at the seat flat and the back rail. It worked out pretty well. I still need to sand and stain.
My 15 year old son built this for me!
Being my first DIY project - it was a pretty big task not using a saw before or doing any building. Following the plans was easy, just took a lot of time to learn how to do things for the first time.
I modified her plans to have 3 drawers on the one side to match the pb design.
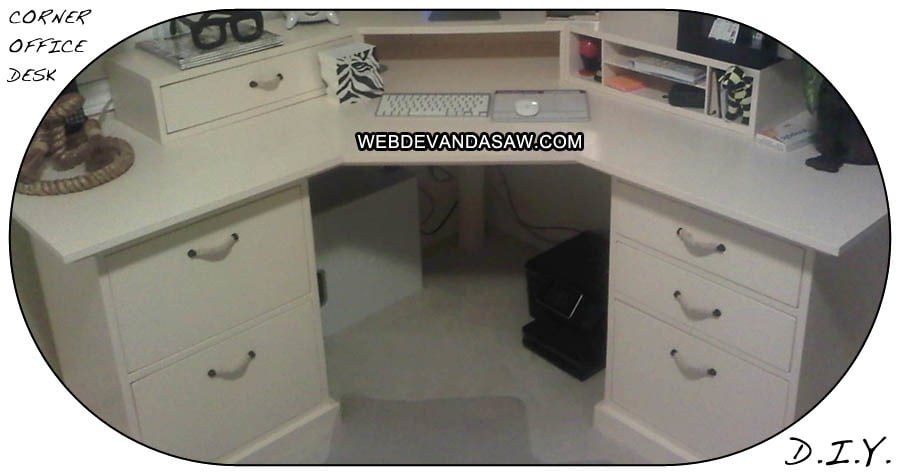
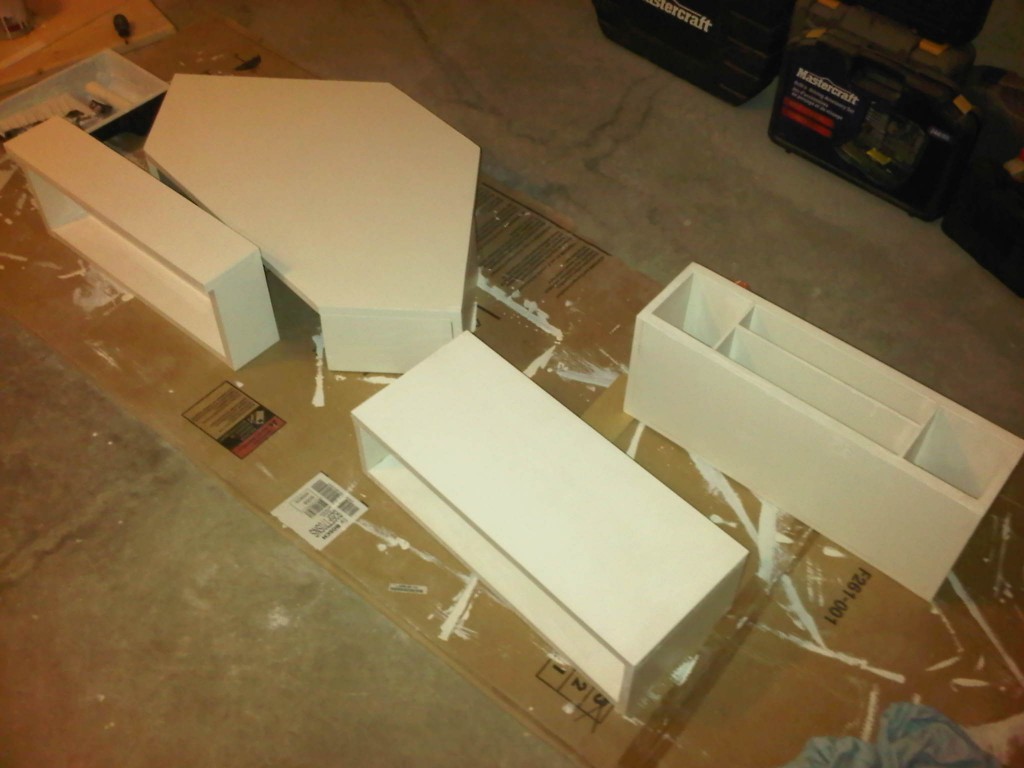
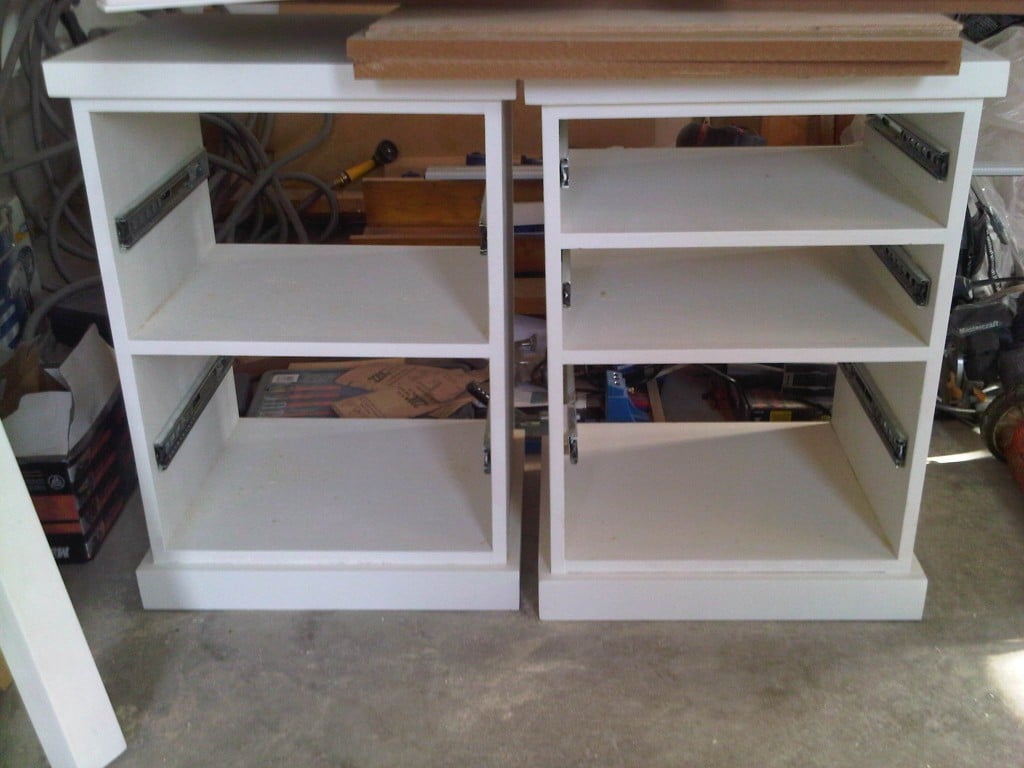
After finishing the table, I knew I needed to create the hutch that is sold along with this desk. After some rough paperwork estimates I went ahead and built the hutch.
Looks pretty amazing and similar to the real deal.
Check out my blog for further pics and details of paint, primer and drawer slides I used. Leave a comment if you'd like me to work on getting a hutch plan organized.
With doing the hutch without real plans, this project took me a while to get those cuts organized and completed.
Sat, 07/21/2012 - 15:08
I will work on getting some hutch plans up.. I did it sort of on the fly from a rough estimate on paper.. I will post up on my website and a link here when I do.. might take a bit of time to get it up and learn how to draw it up all nicely on the computer. Not sure why the website won't load for you? http://www.webdevandasaw.com/ should work. Had a few people test it :S
The desk is pretty heavy and solid. I was able to bring each part up a flight of stairs myself (all three parts of the hutch are seperate) - and the desk top is seperate, as well as each drawer I took out before bringing it up the stairs.
Tue, 08/28/2012 - 00:35
Thanks for sharing this great article!I love reading and I am always searching for informative information like this!
Mon, 08/08/2016 - 19:50
It's been a while since you built the corner desk with hutch that is posted on Ana White website, and I had a question. do you have a new blog or website where you have posted details on the paint and drawer slides you used as well as the plan for the drawers and hutch that you create? Thanks.
Maureen
Fri, 02/09/2018 - 12:22
I love this desk so much but I couldn't find a plan for this. If you could update your website, it'd be greatly appreciated!
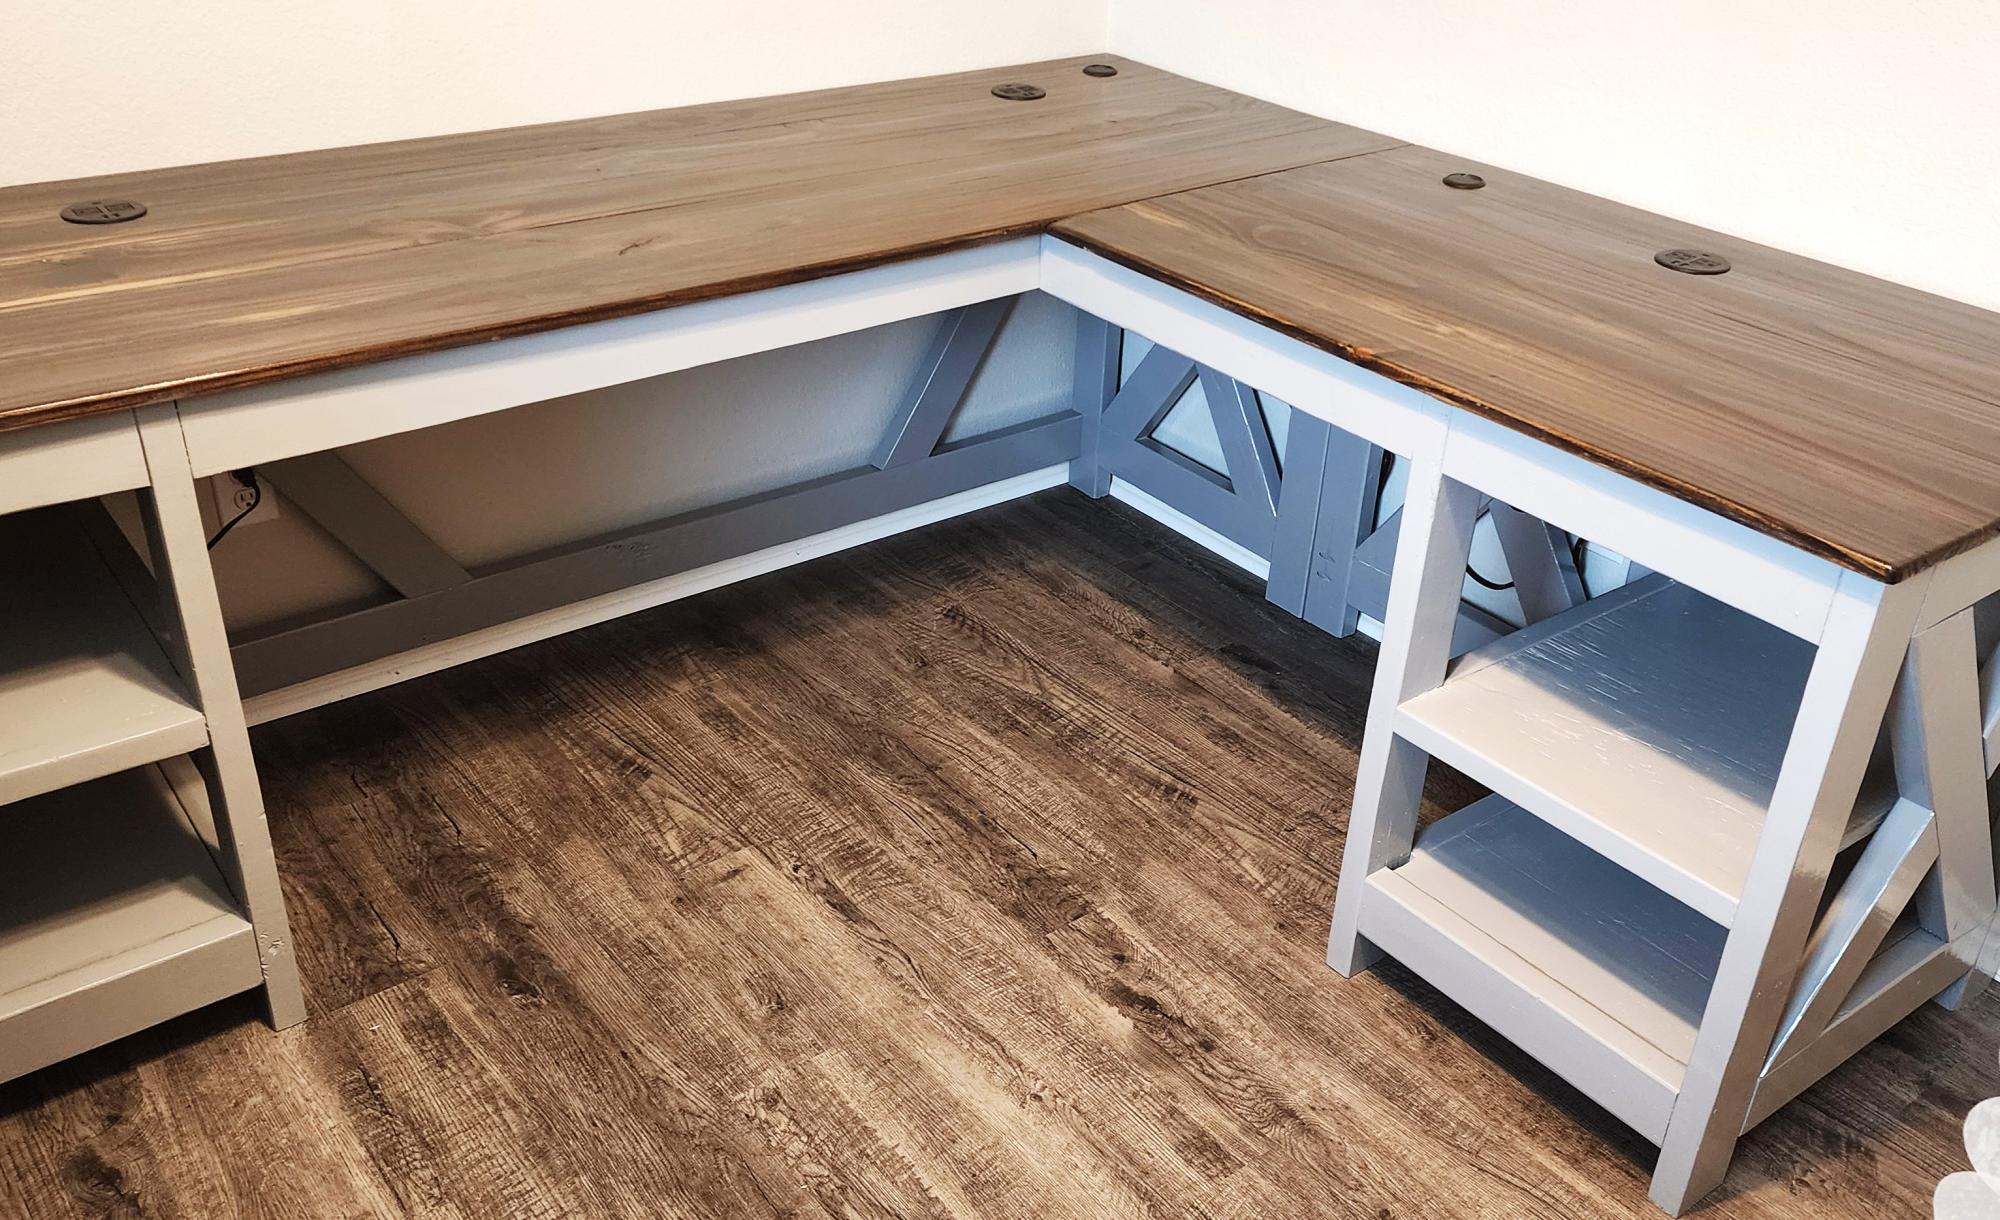
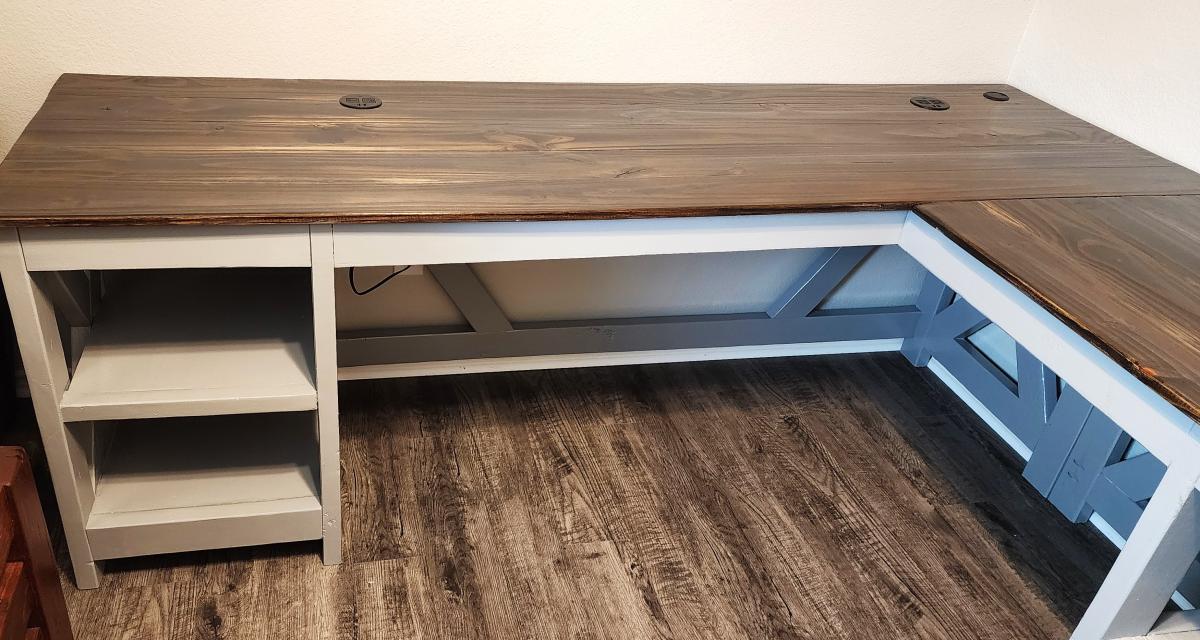
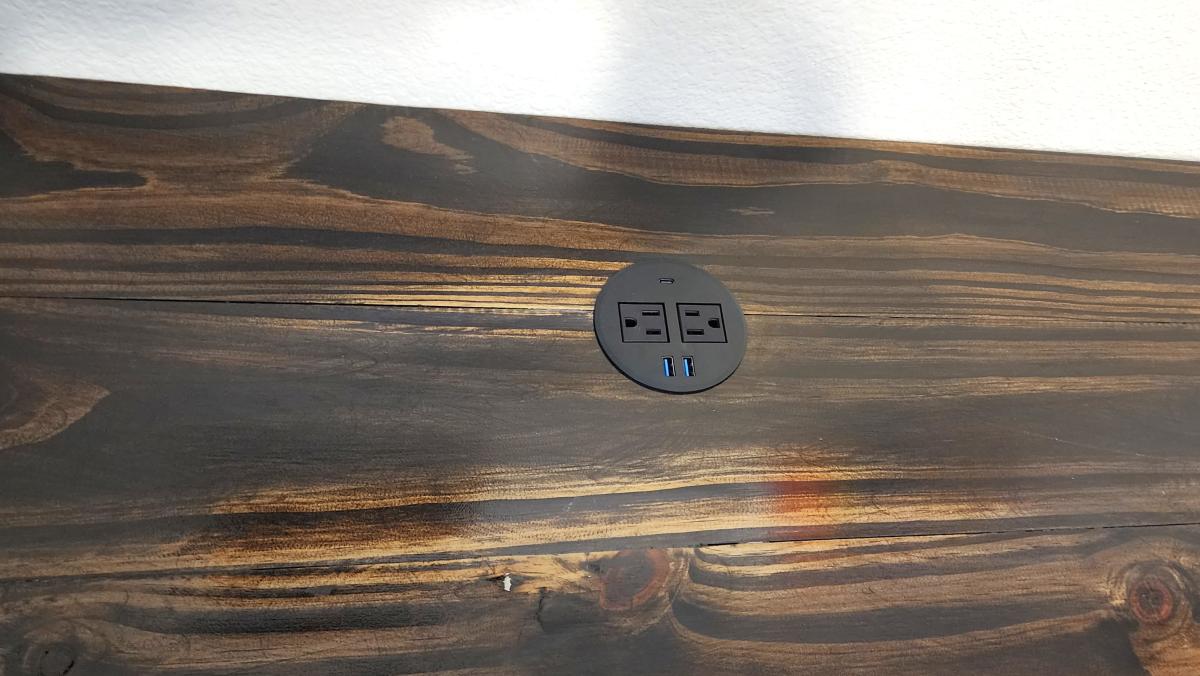
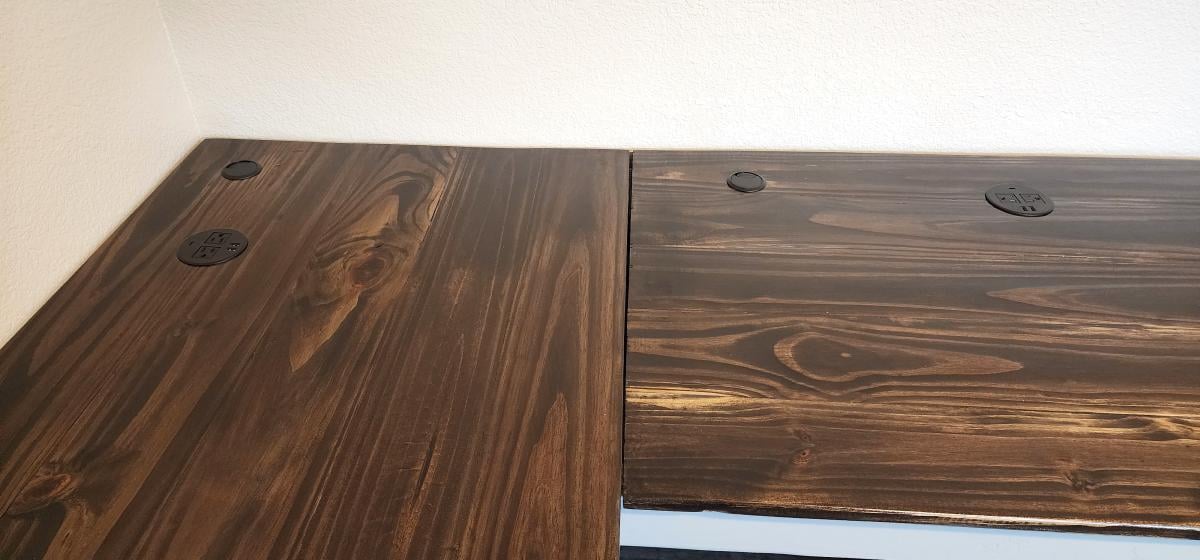
Desk for my wifes craft room.
Joshua Moore
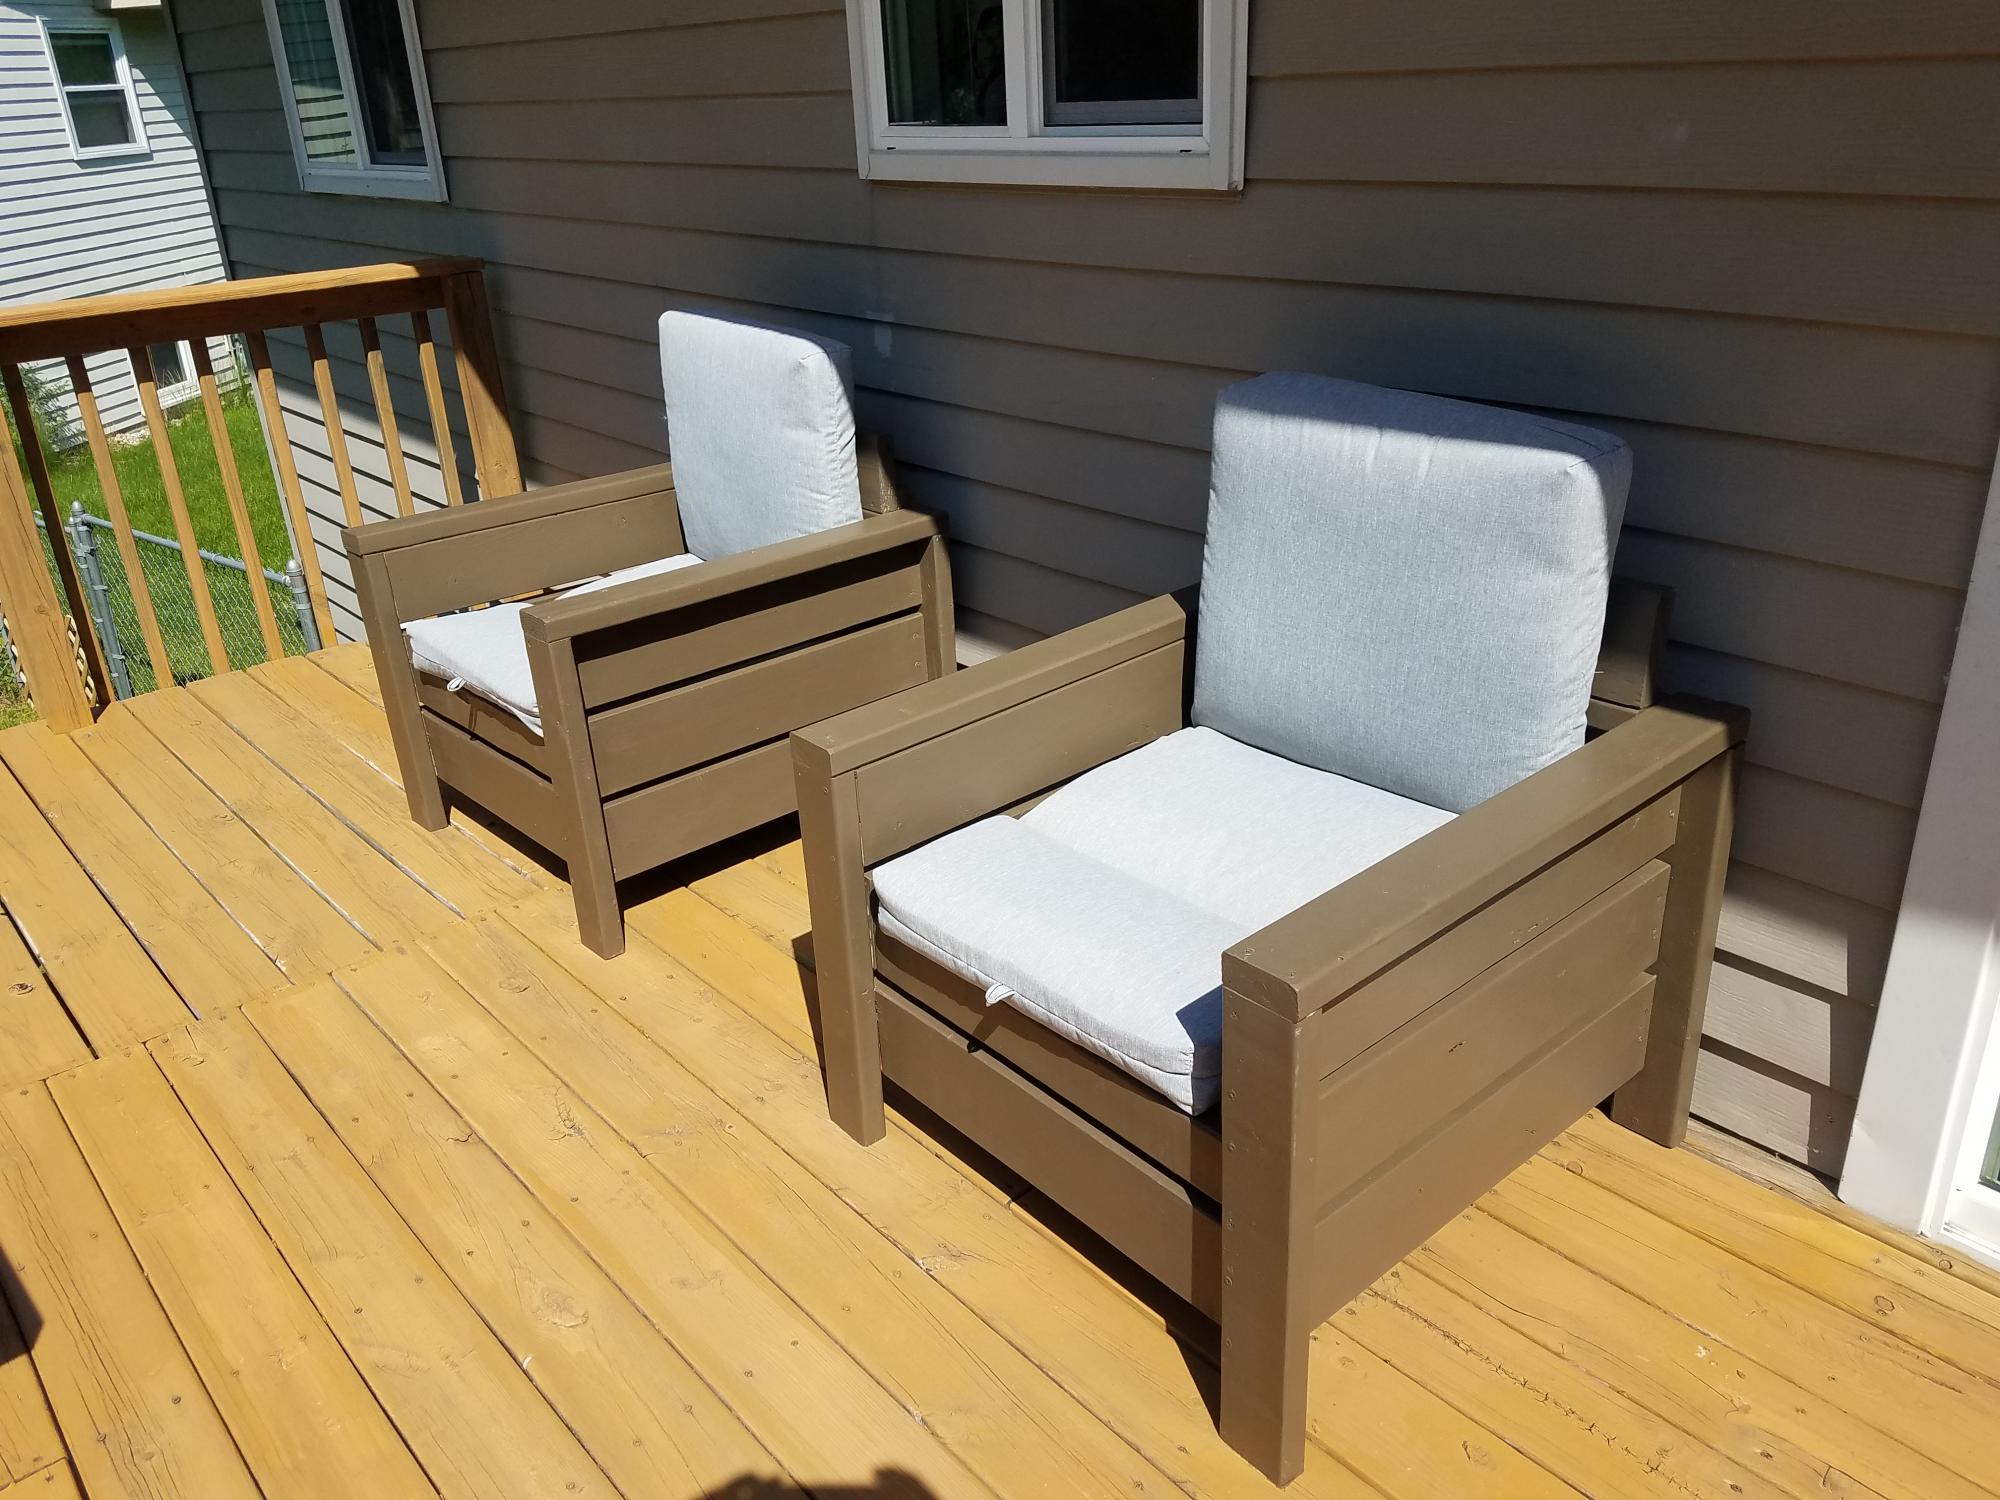
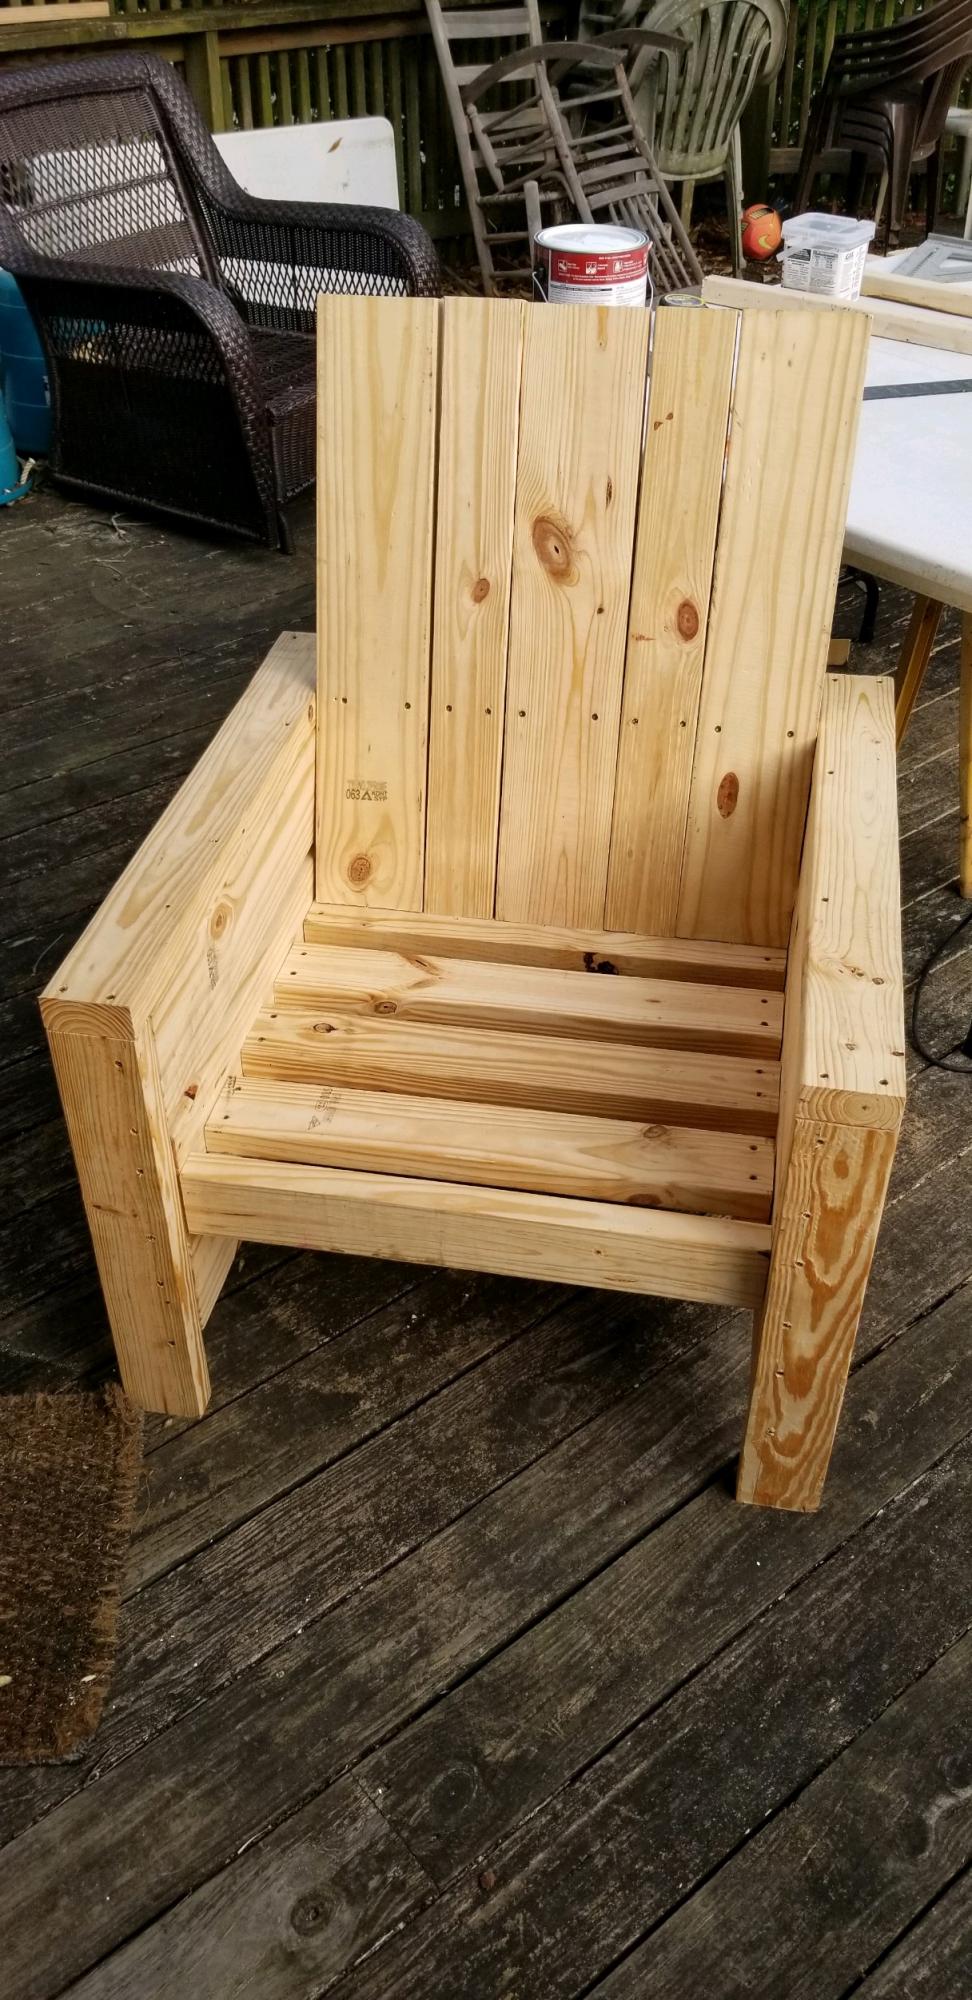
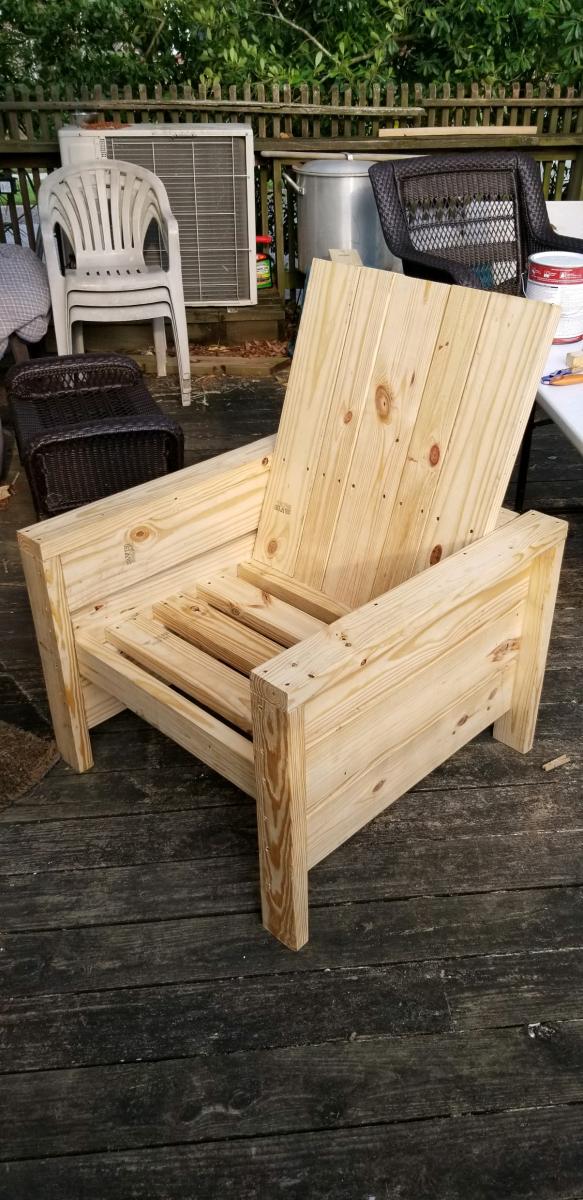
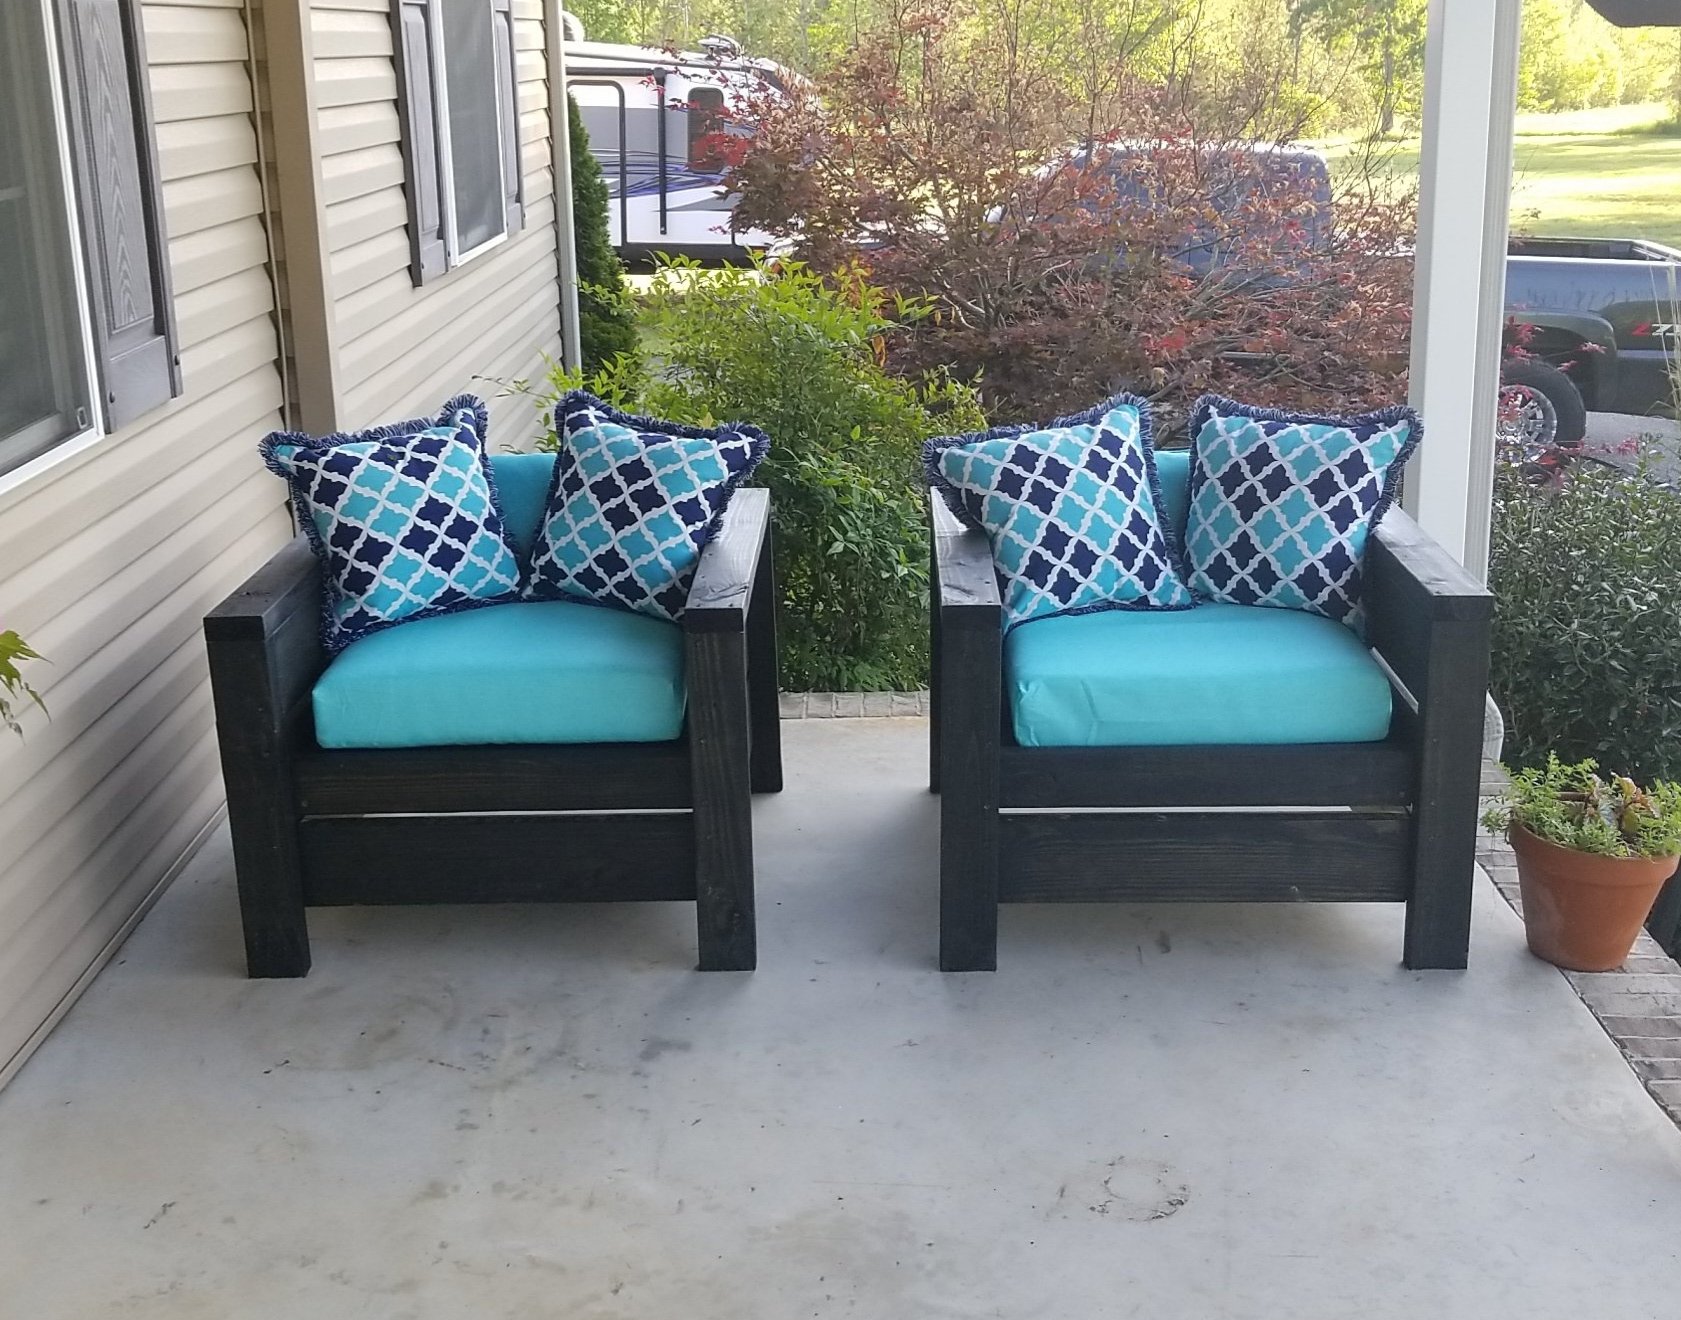
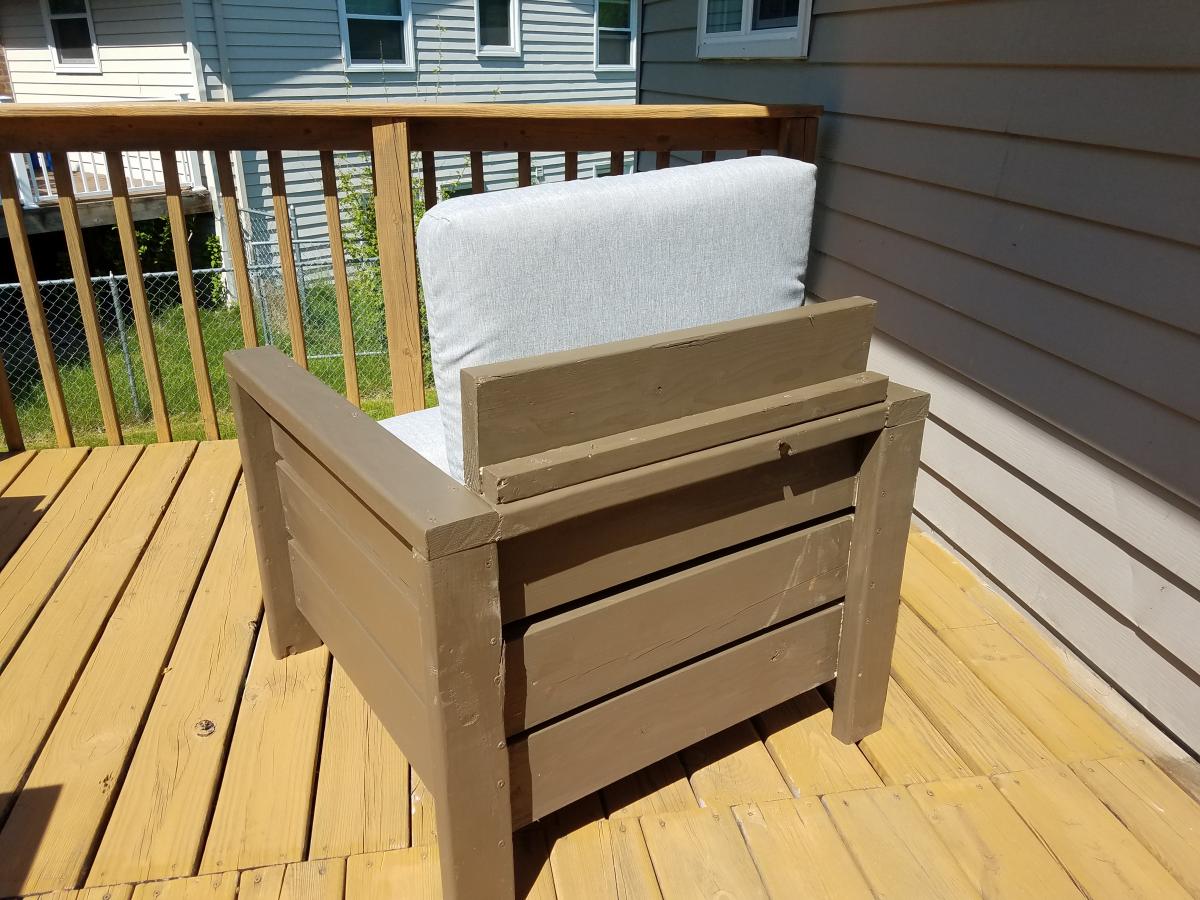
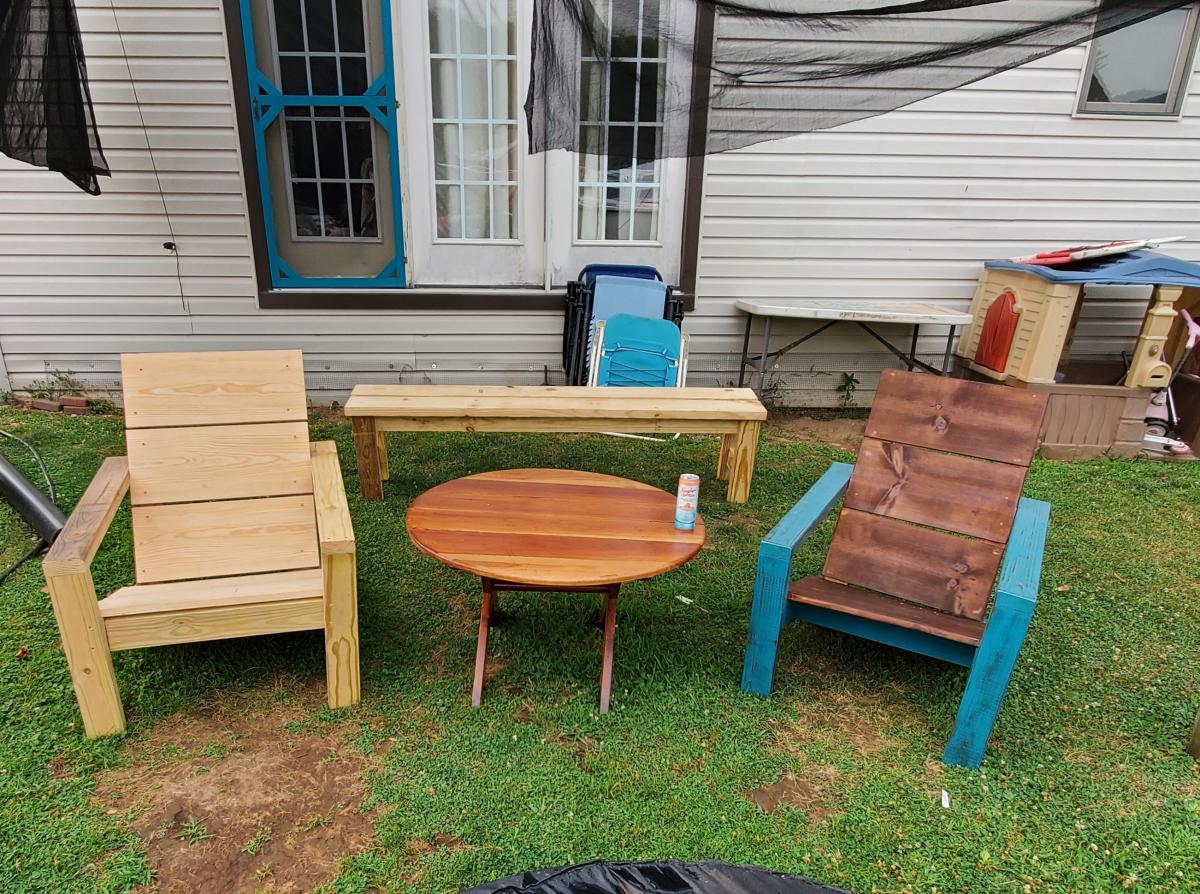
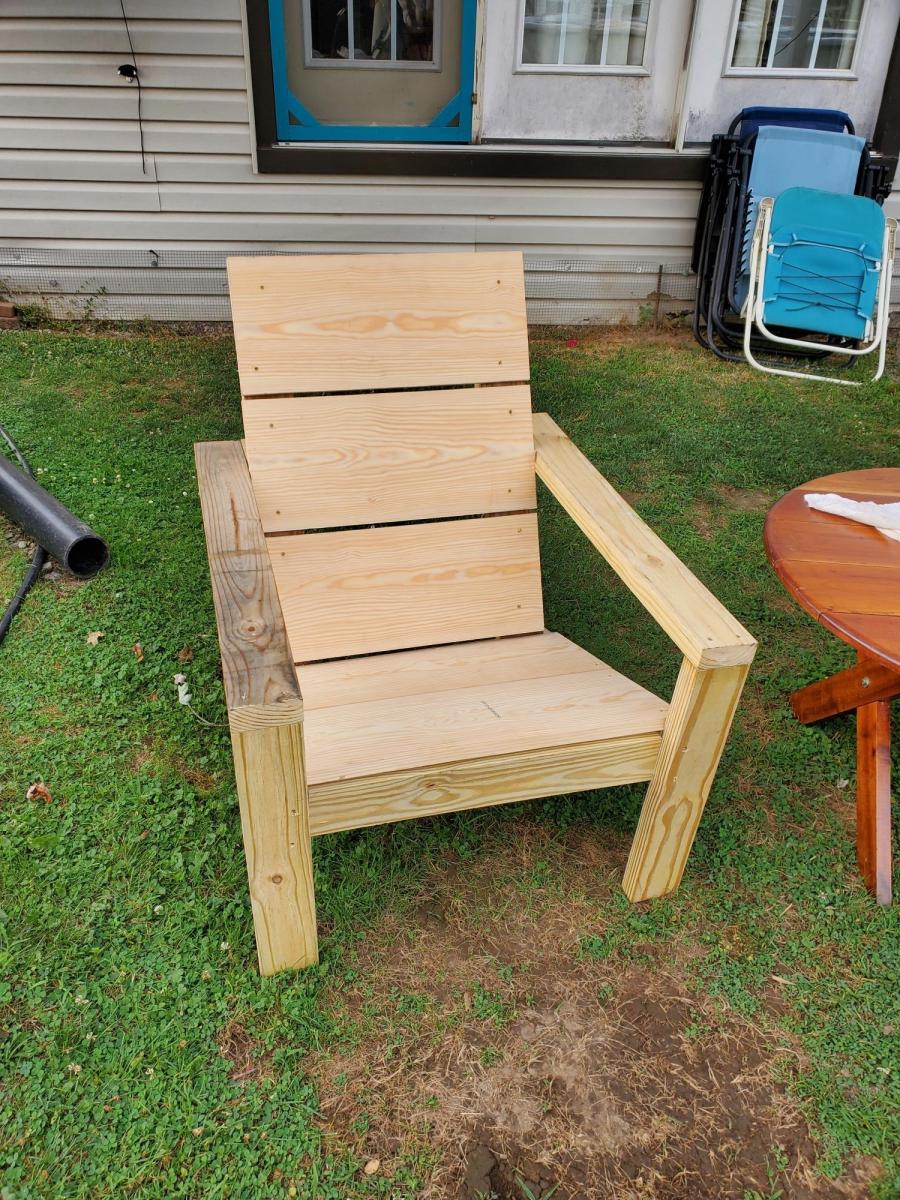
My first crack at building outdoor furniture. I built two of the Modern Outdoor Chairs built with 2 x 4 and 2 x 6. The first one was a little rough, but the second one was much better. In order to accommodate the higher cushions and make the chairs more comfortable, I added piece 2 x 6 secured to a 2 x 2 to make a partial backrest.
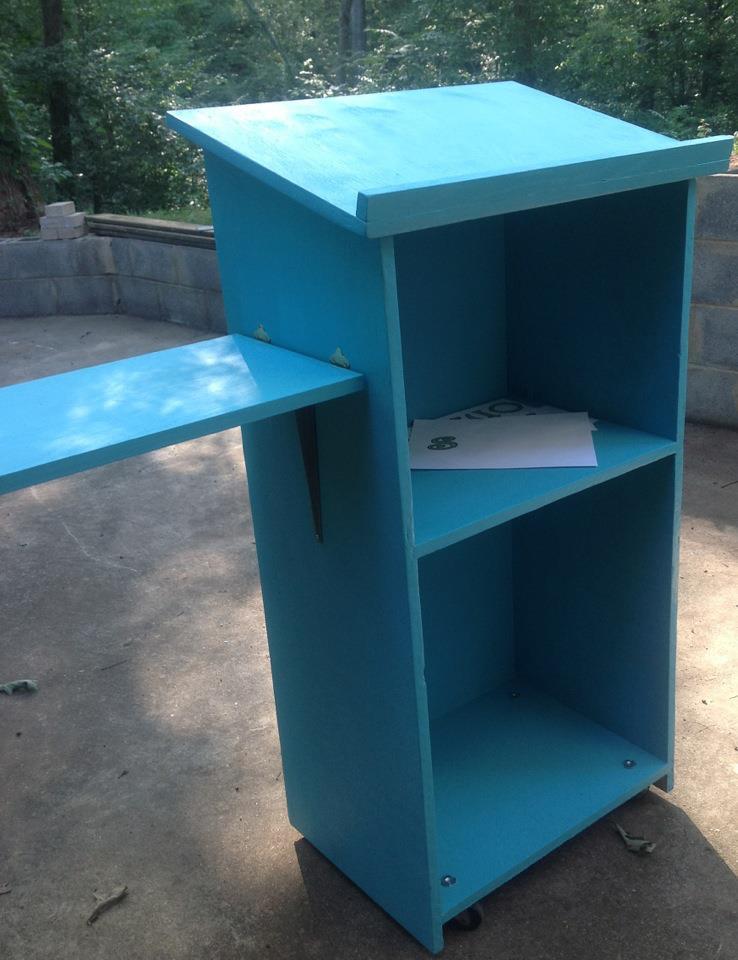
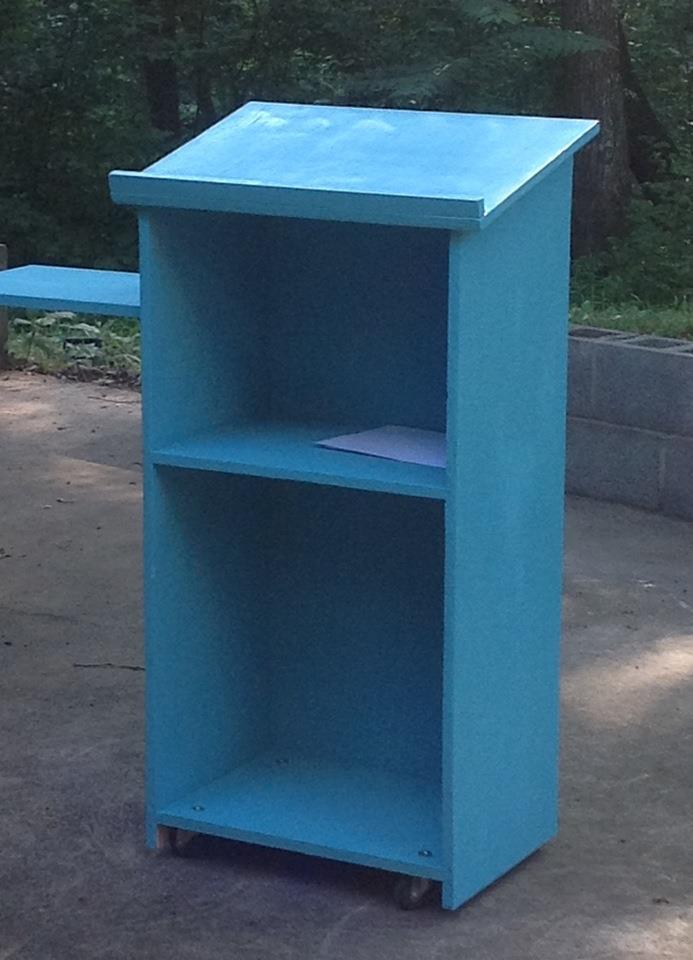
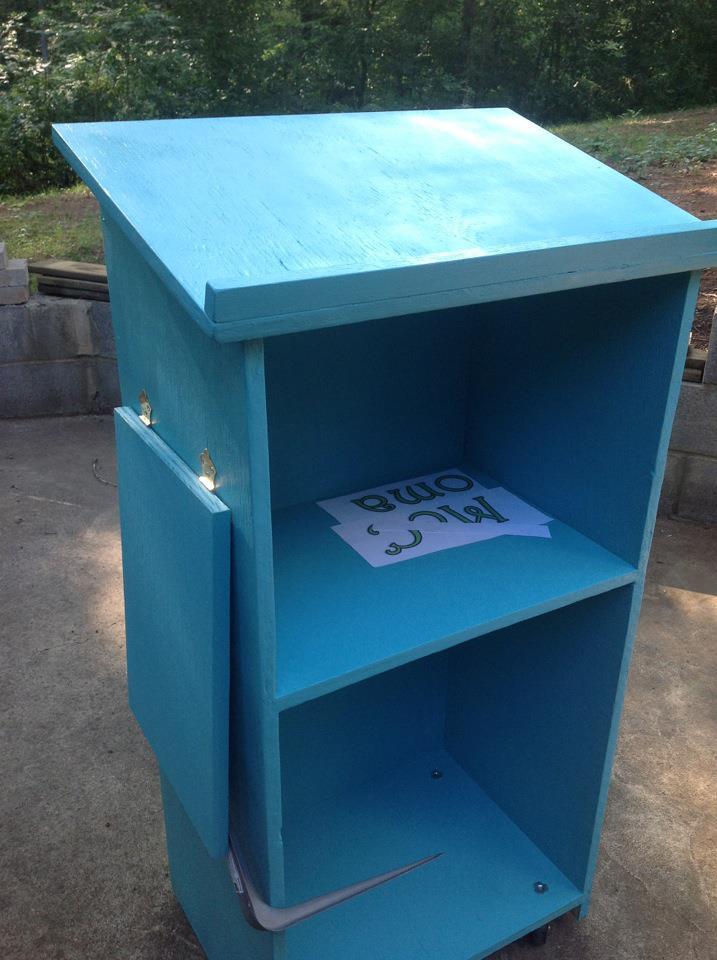
I recently landed my first teaching position, and unfortunately my predecessor left quite a blank canvas for my classroom. I will be teaching math and definitely needed a lectern to hold my book as reference for examples during instructional time. However, I was completely unable to fork over $200 for a lectern...so of course I turned to Ana White! I saw the Podium Plan that another had submitted, and used it as a guide with some changes:
1) My dimensions are 15" wide by 21" long by 43" tall (I'm shorter than your average bear).
2) Used the table saw set at 45 degrees to create mitered joint edges with my plywood
3) Inset the shelves into the frame for added stability using a router.
4) Added casters to the base for maneuverability
5) Added an easily-removable laptop shelf for the side for easy hook-up to the Promethean Board in the classroom.
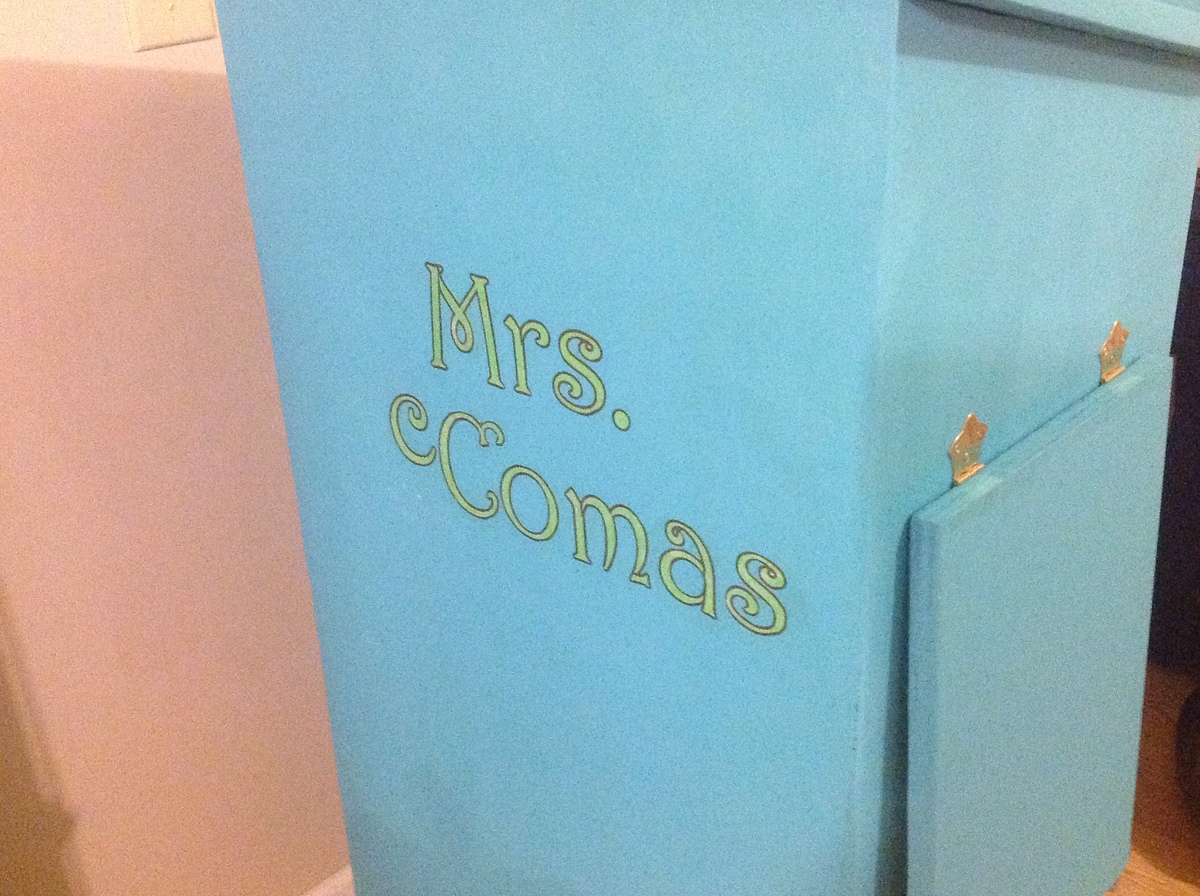
6) Decoupaging my name to the front for some visual interest...(and of course to claim ownership...:) )
My room is painted yellow, and all of my accessories are teal, lime green, and brown. This is gonna look GREAT in there, and best of all, it's attractive AND functional!

Sat, 07/28/2012 - 22:23
I don't remember having ANY teachers with anything this cool and personal in their classroom (except maybe woodshop, har-de-har-har). All the other teachers will be jealous!
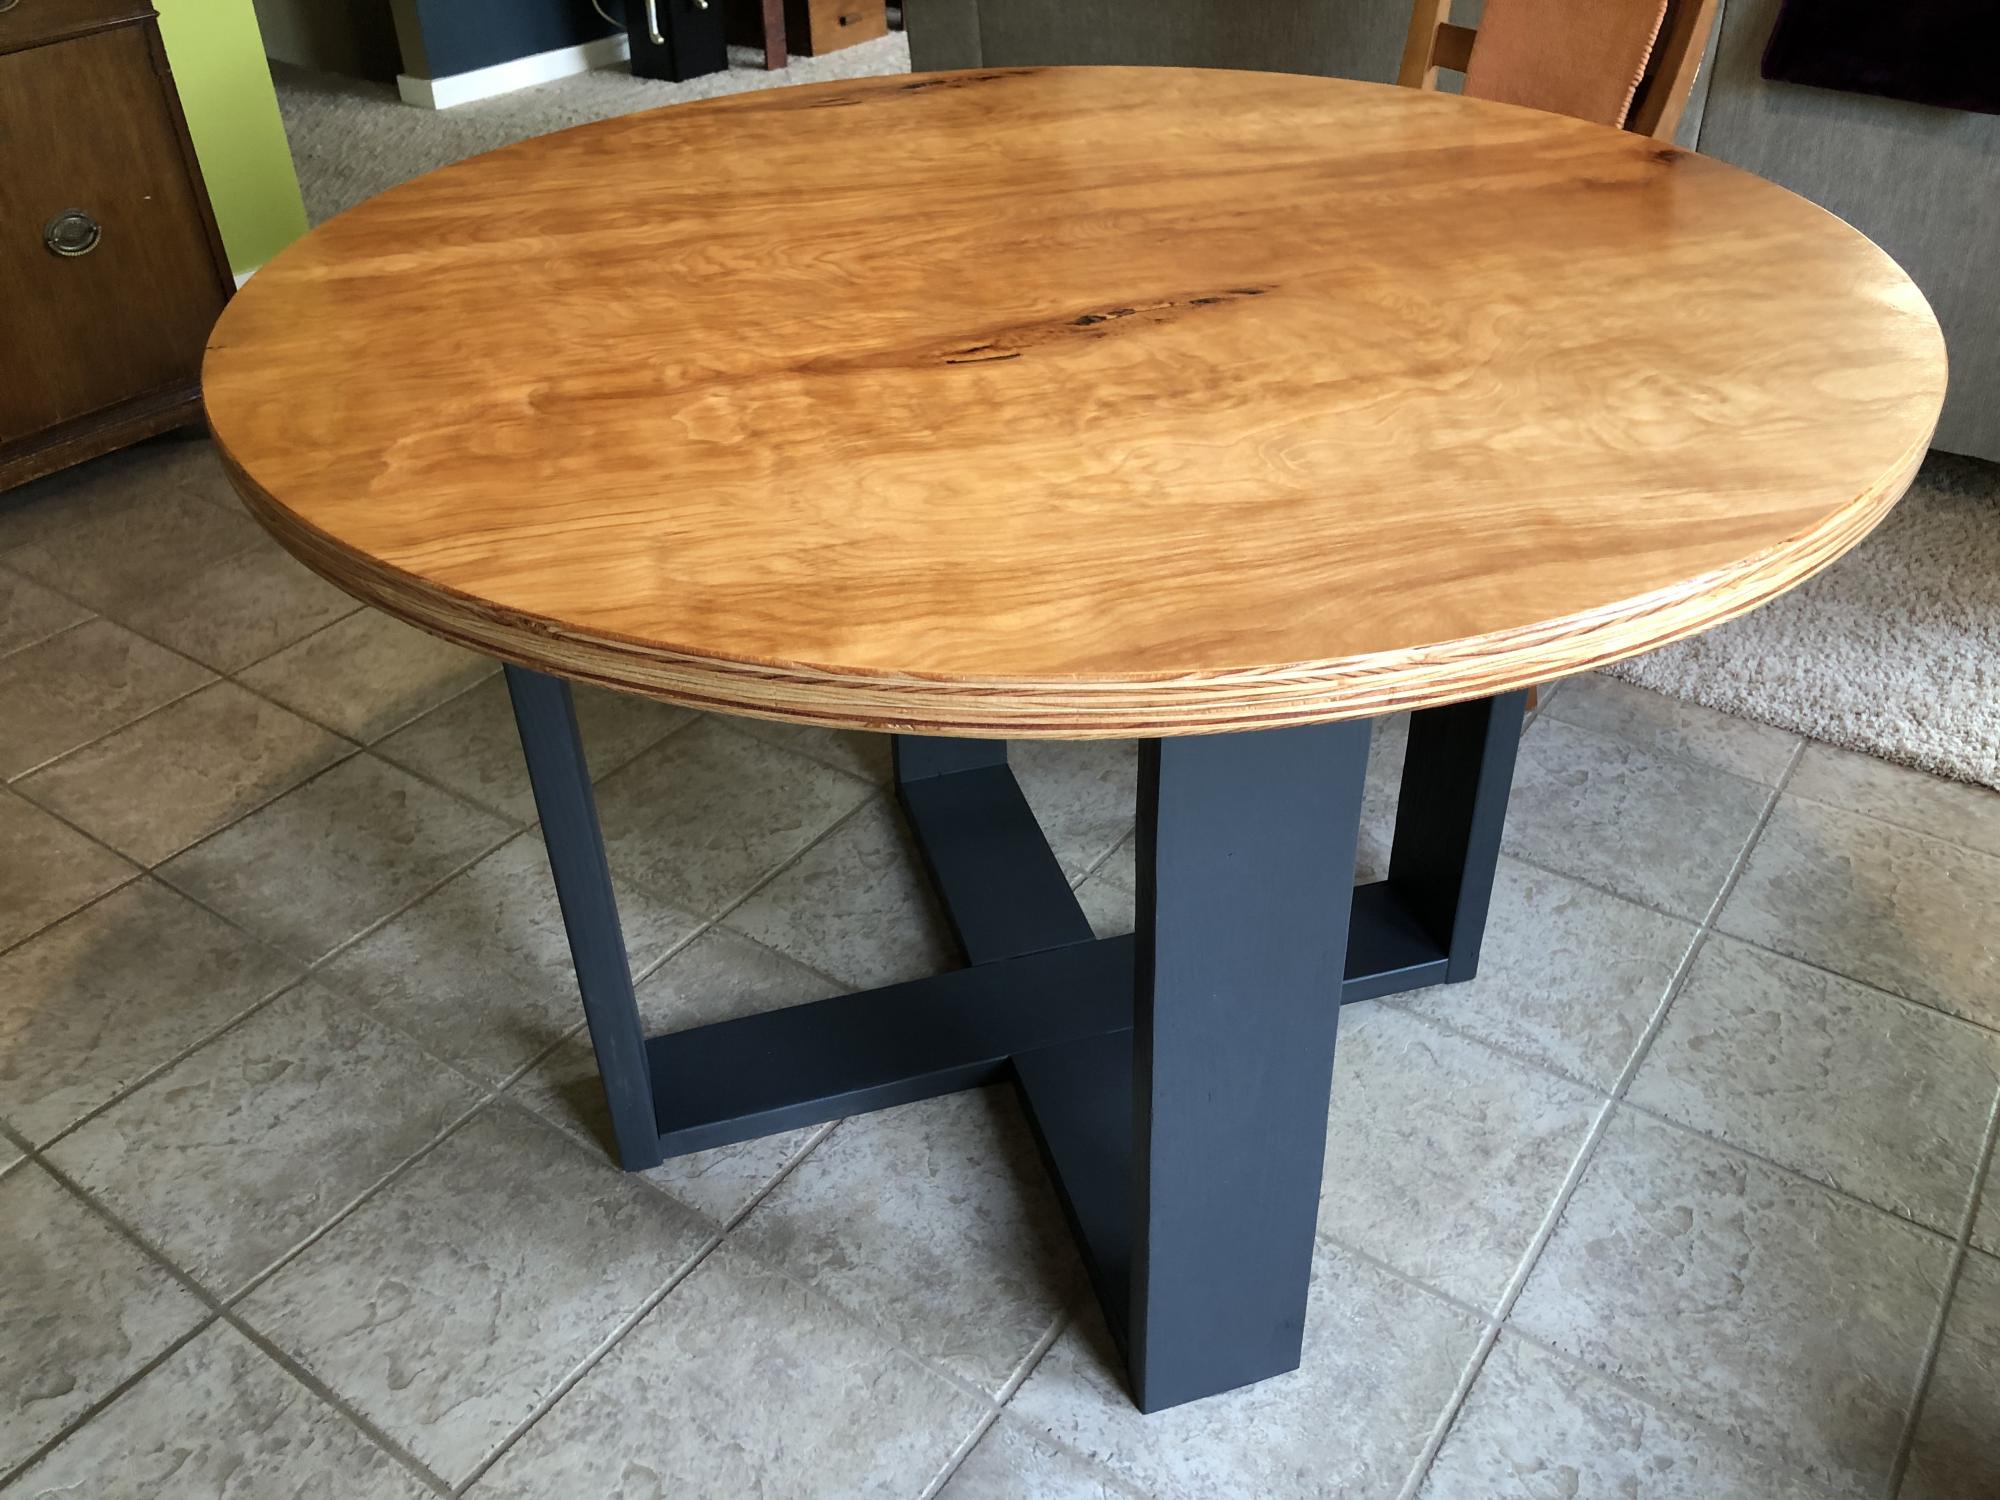
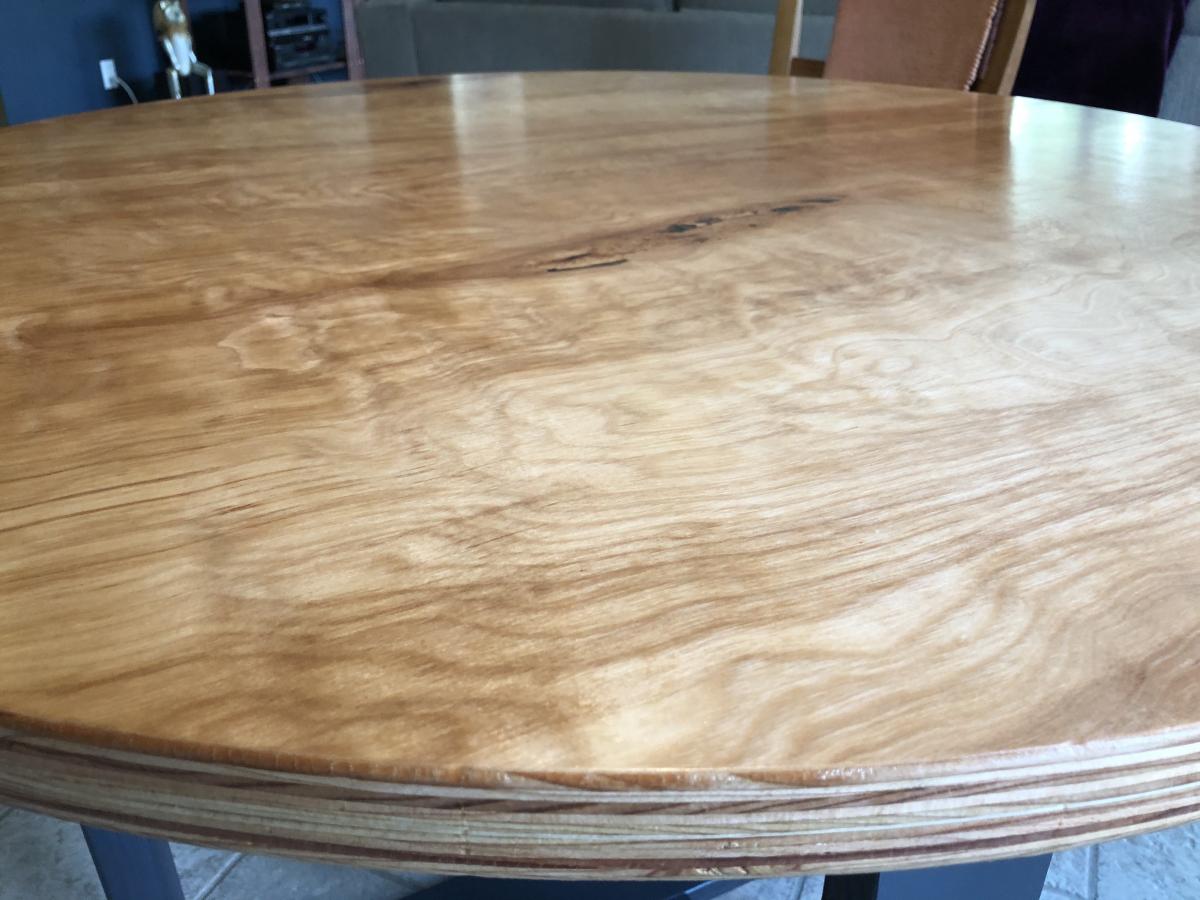
Like any good DIY project, I started with plans and then changed pretty much everything.
We wanted a modern but sort of rustic table for our dining area. The Modern Round Table plans almost fit the bill but not quite. The local Lowe’s had the perfect answer—Birch plywood. It also fit our Alaska setting.
I laminated two half sheets of 3/4” together, then cut out a 48” round top with a router.
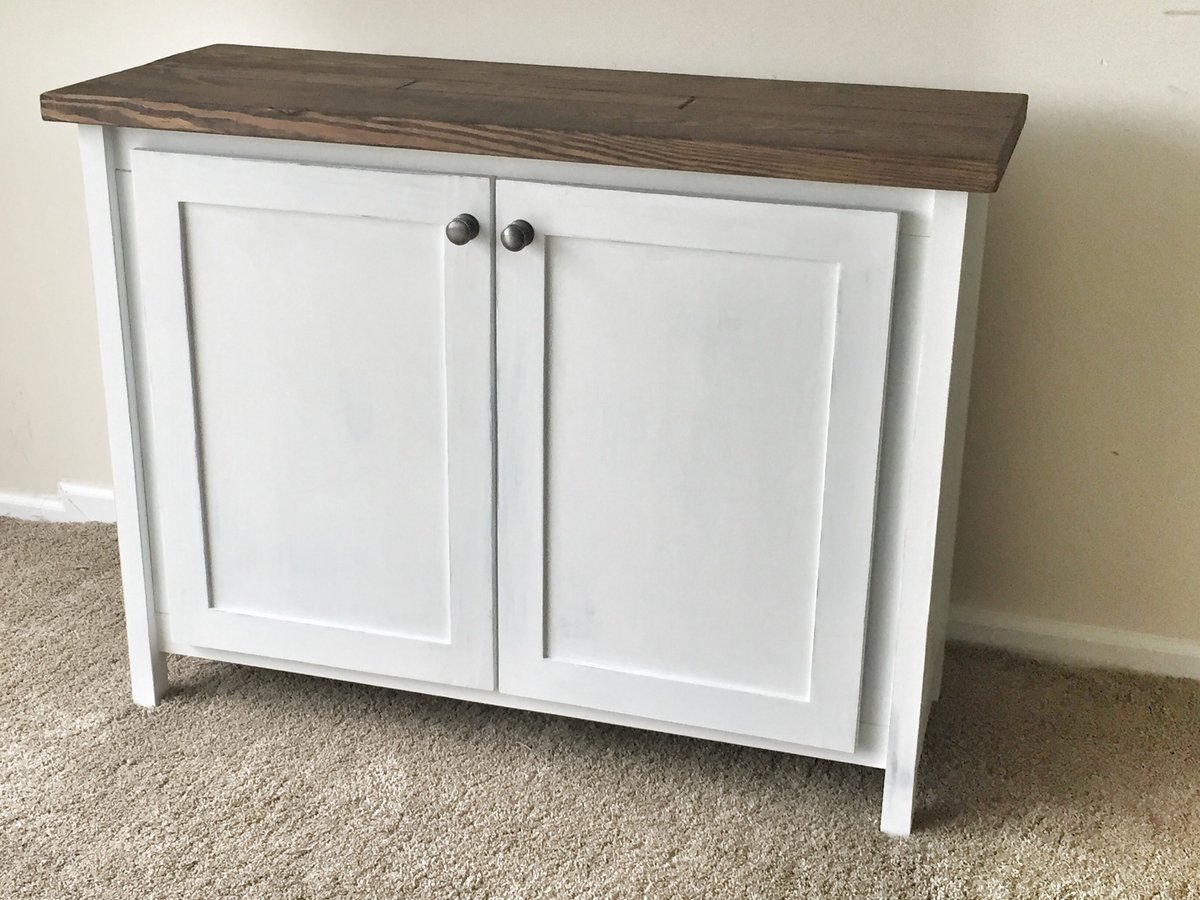
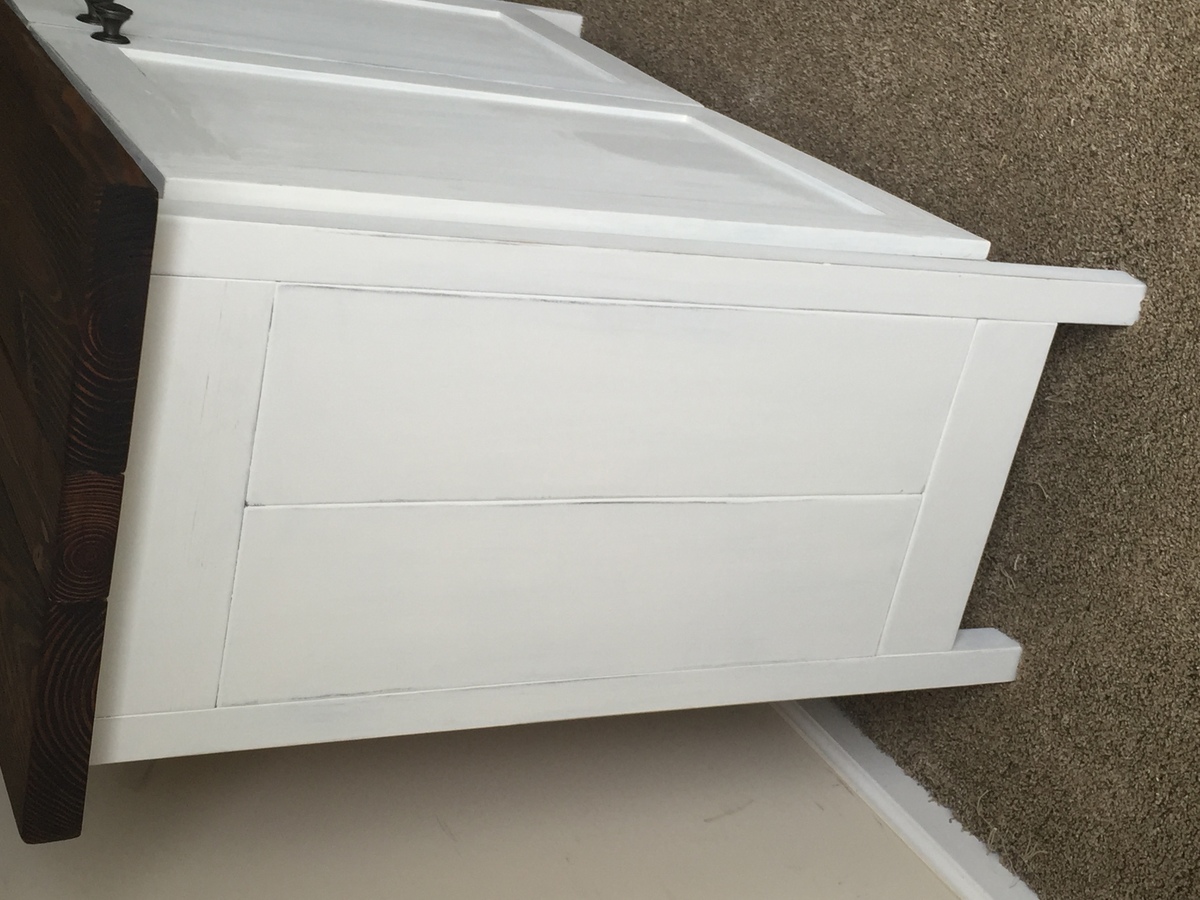
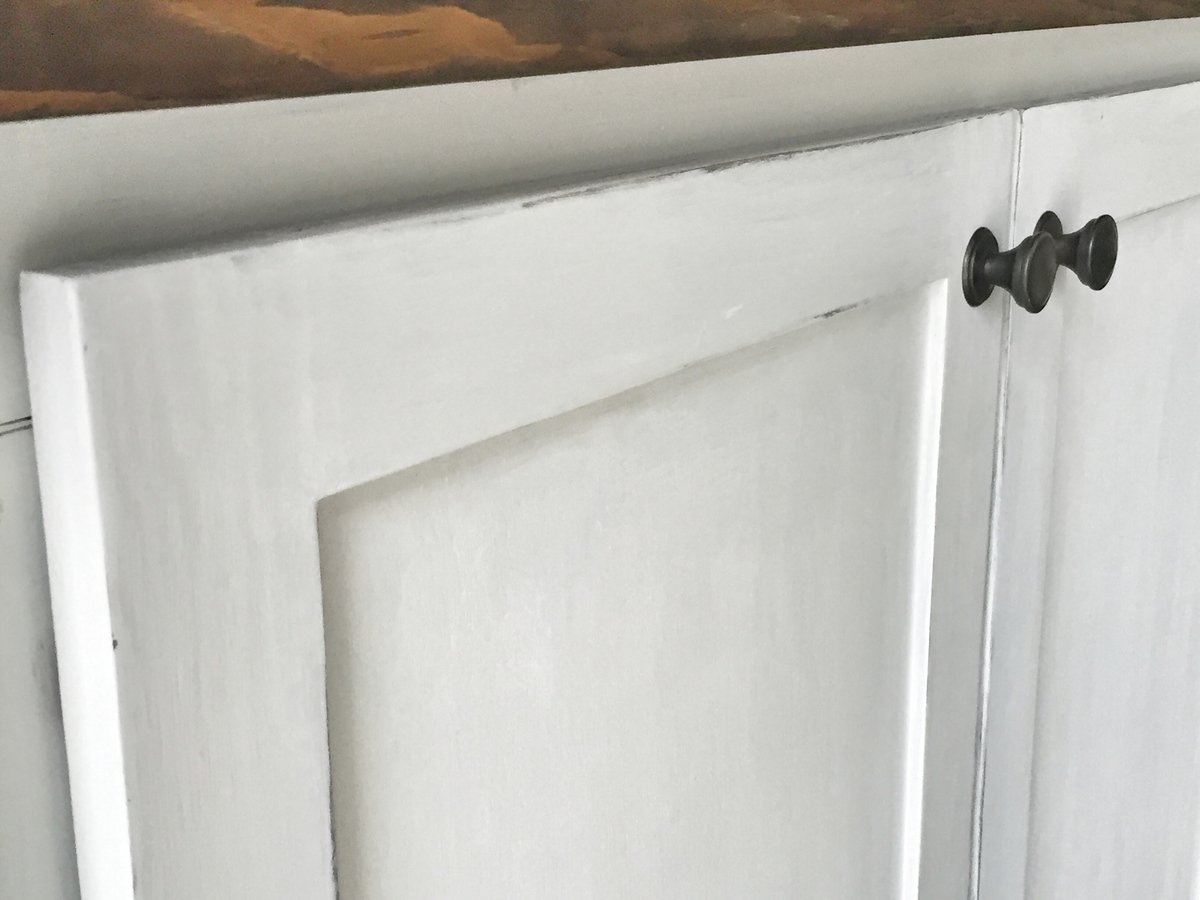
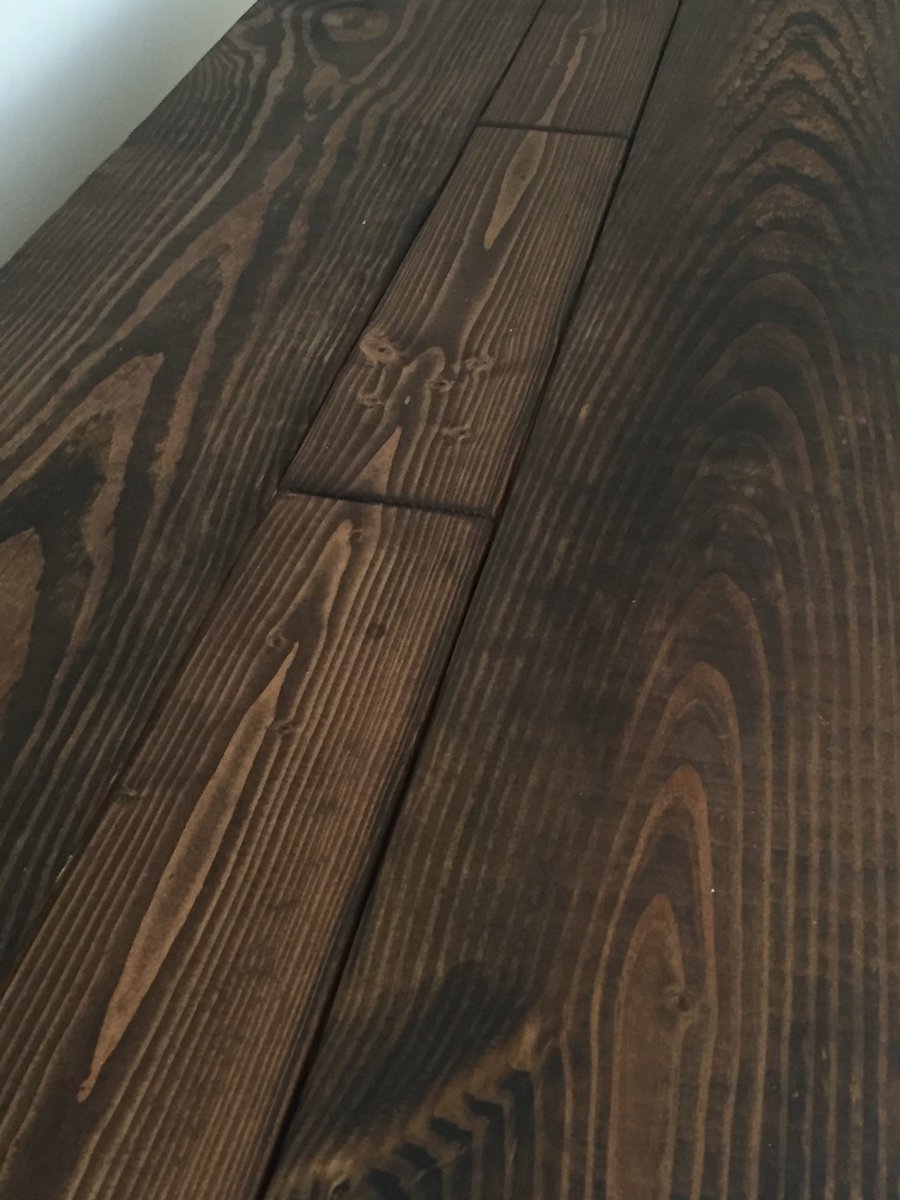
White cabinet made from some doors and hardware left over from my built in book case project and other wood left over from the book case and closet projects. All I bought was the wood for the top and the legs.
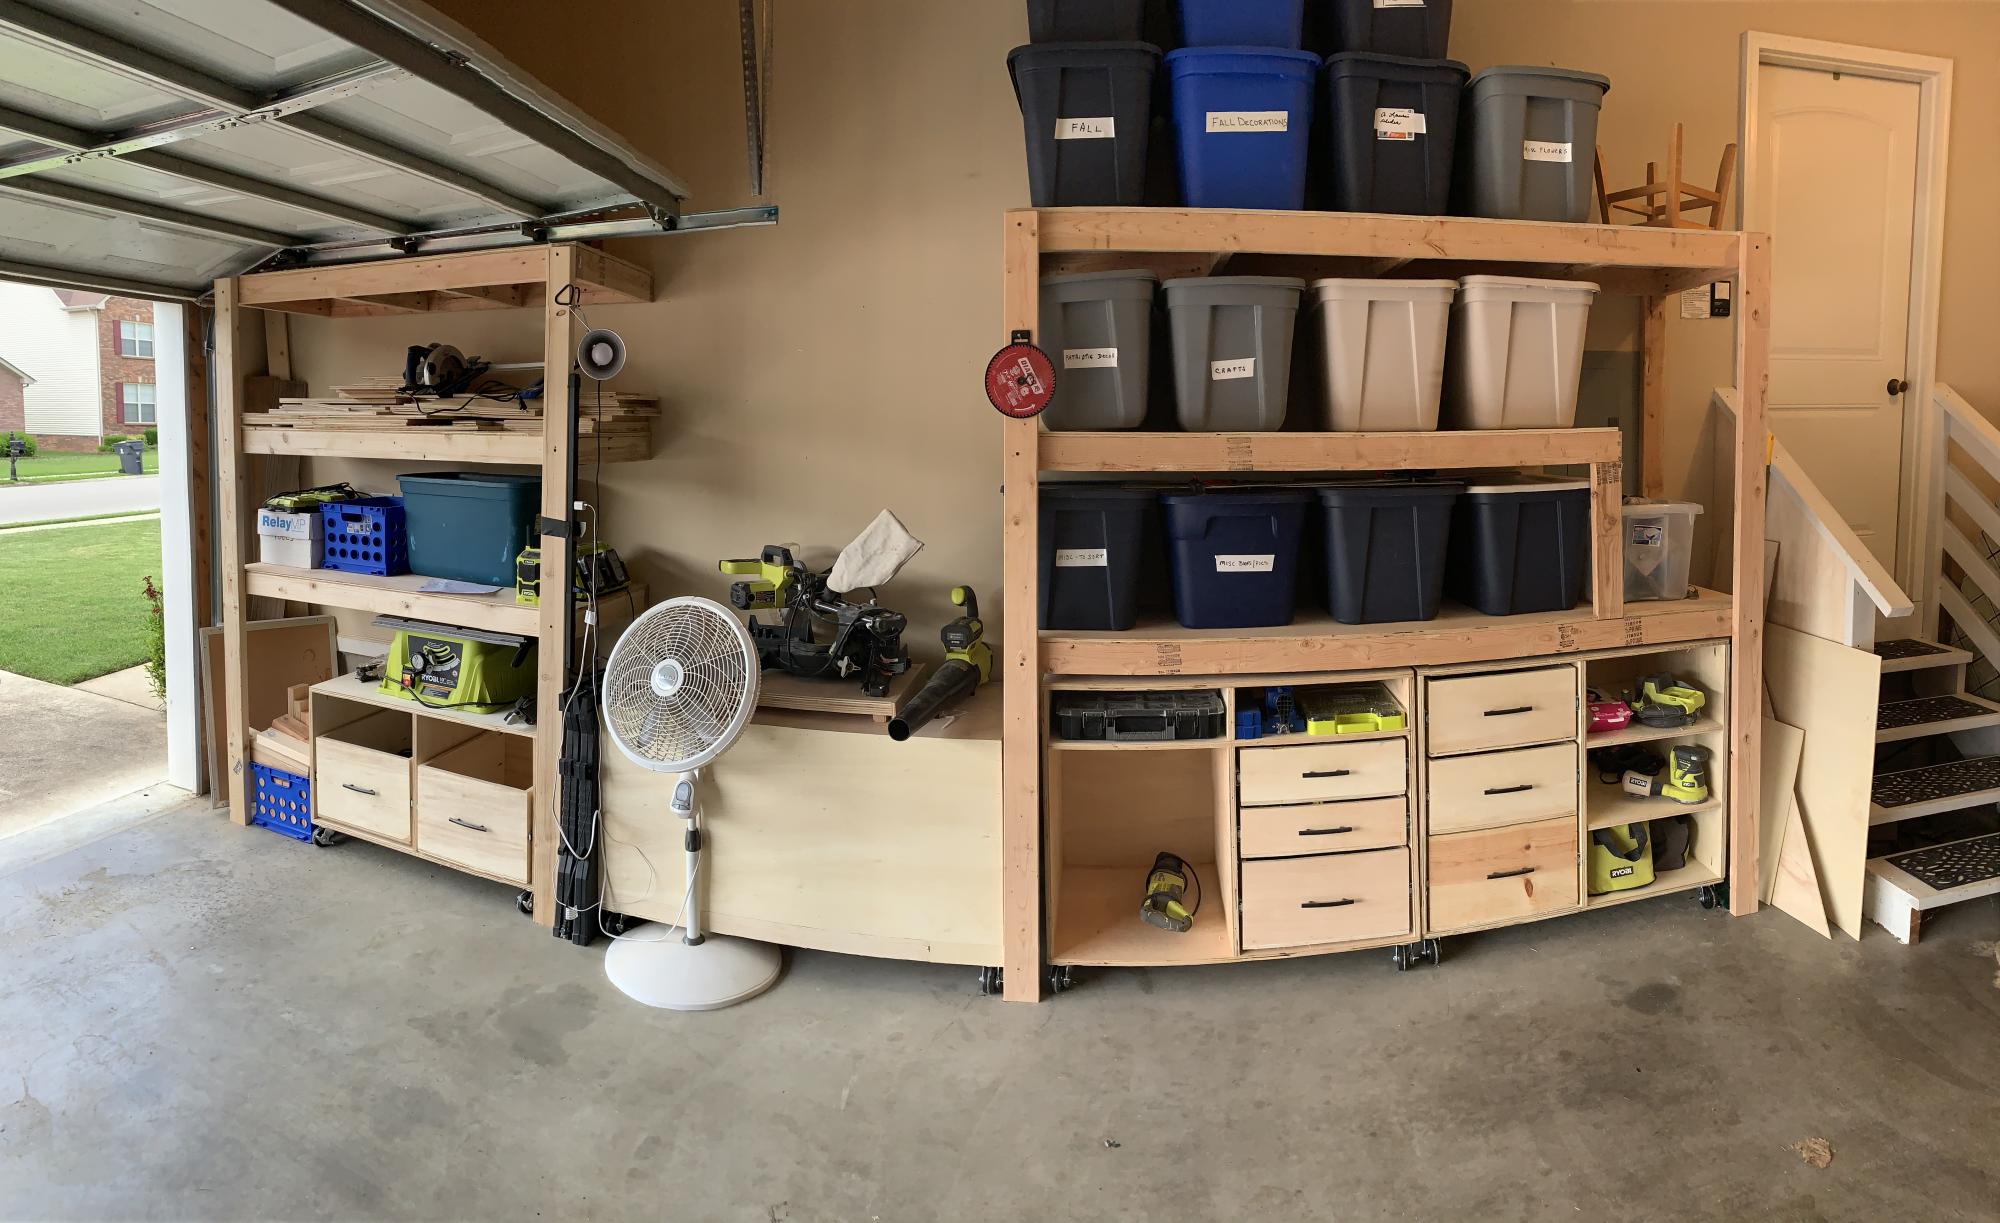
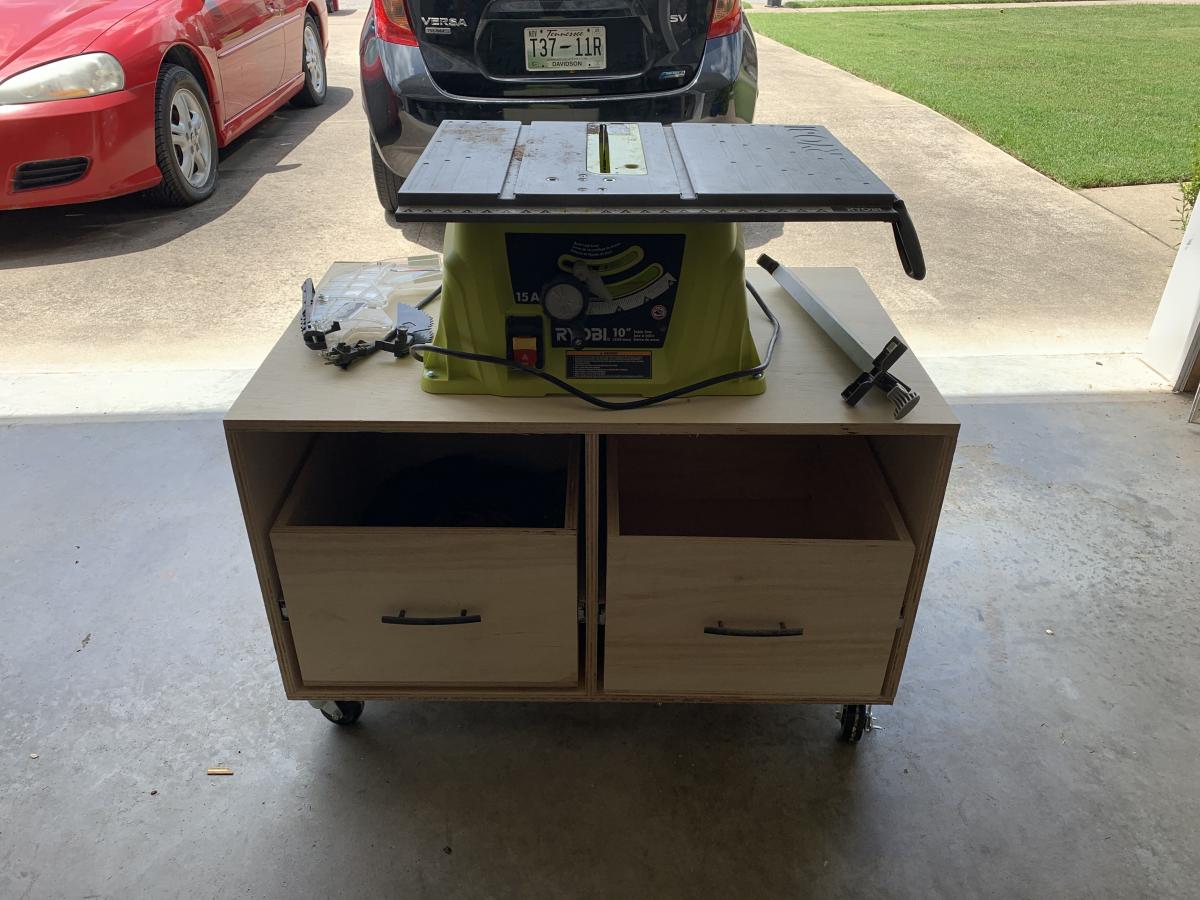
I bought a whole workshop full of Ryobi tools second hand from my brother over a year ago. I started researching workshop plans and came across Anna White’s Ryobi Nation Dream Workshop. I downloaded the plans and spent about 2-3 months working on it in my spare time. I made a lot of mistakes along the way but I’m pretty happy with it overall!
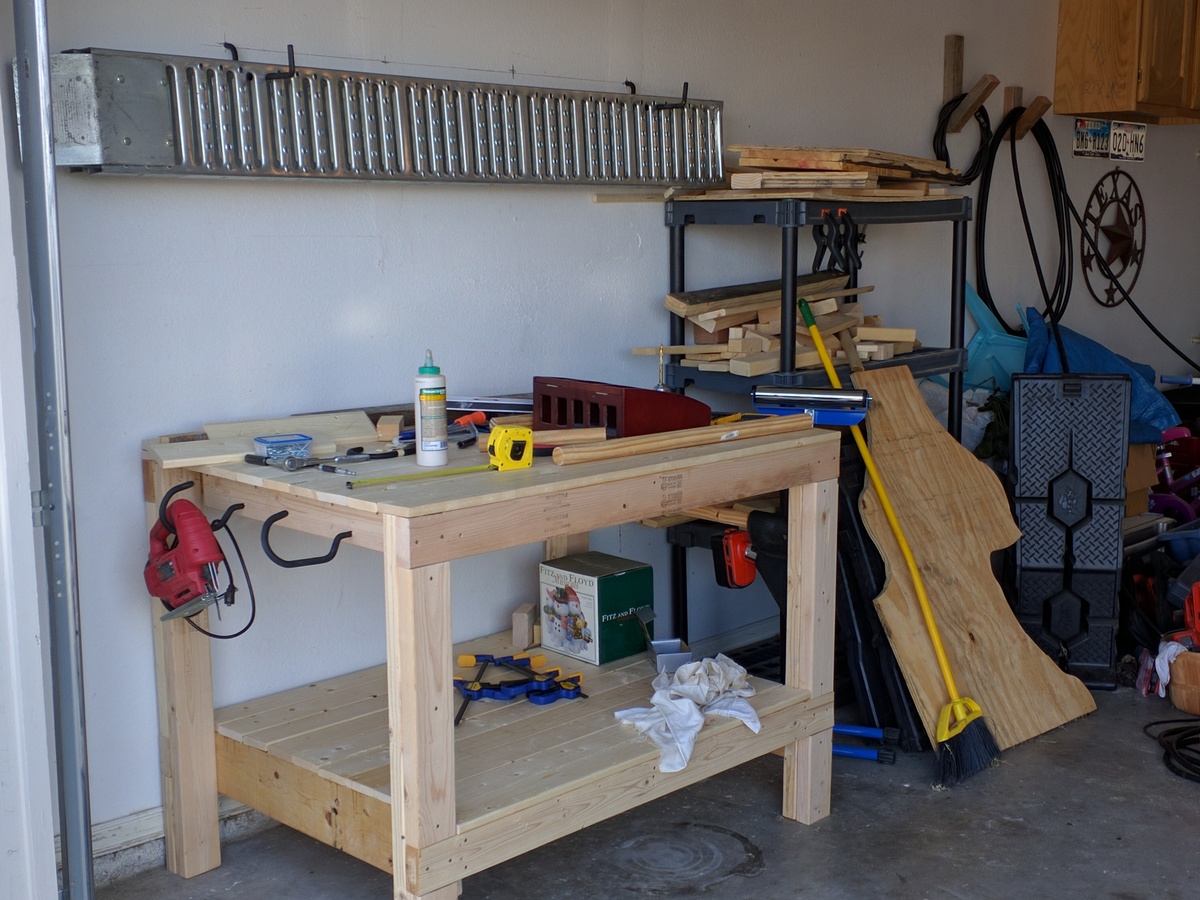
Altered the original plan only enough to accommodate the materials I had lying around without going to buy more lumber. The workbench I built is not as wide being only 48" instead of the 55" noted in the plans. For the top of the workbench and the lower shelf I used 1x4 furring boards again, because it is what I had for material at the time of building.
Once I made the basic frame, I squared it and then installed the supports for the table top and the lower shelf. Once the supports were in I cut the 1x4's to the appropriate length. As I laid each respective board, I also laid a good dose of wood glue down and then clamped them in place. I let those boards set with glue for about 5 minutes before going back and using a 2" brad nailer to finish them off. Once the nailing was done, I removed the clamps and moved to the next series of boards. Because I had several clamps I was able to lay about three boards at a time and let the glue set for another 10-15 minutes. Working slowly and methodically got the whole job done in a couple of days of a few hours a piece before completion.
Easy project and something that will last a long time when done correctly.

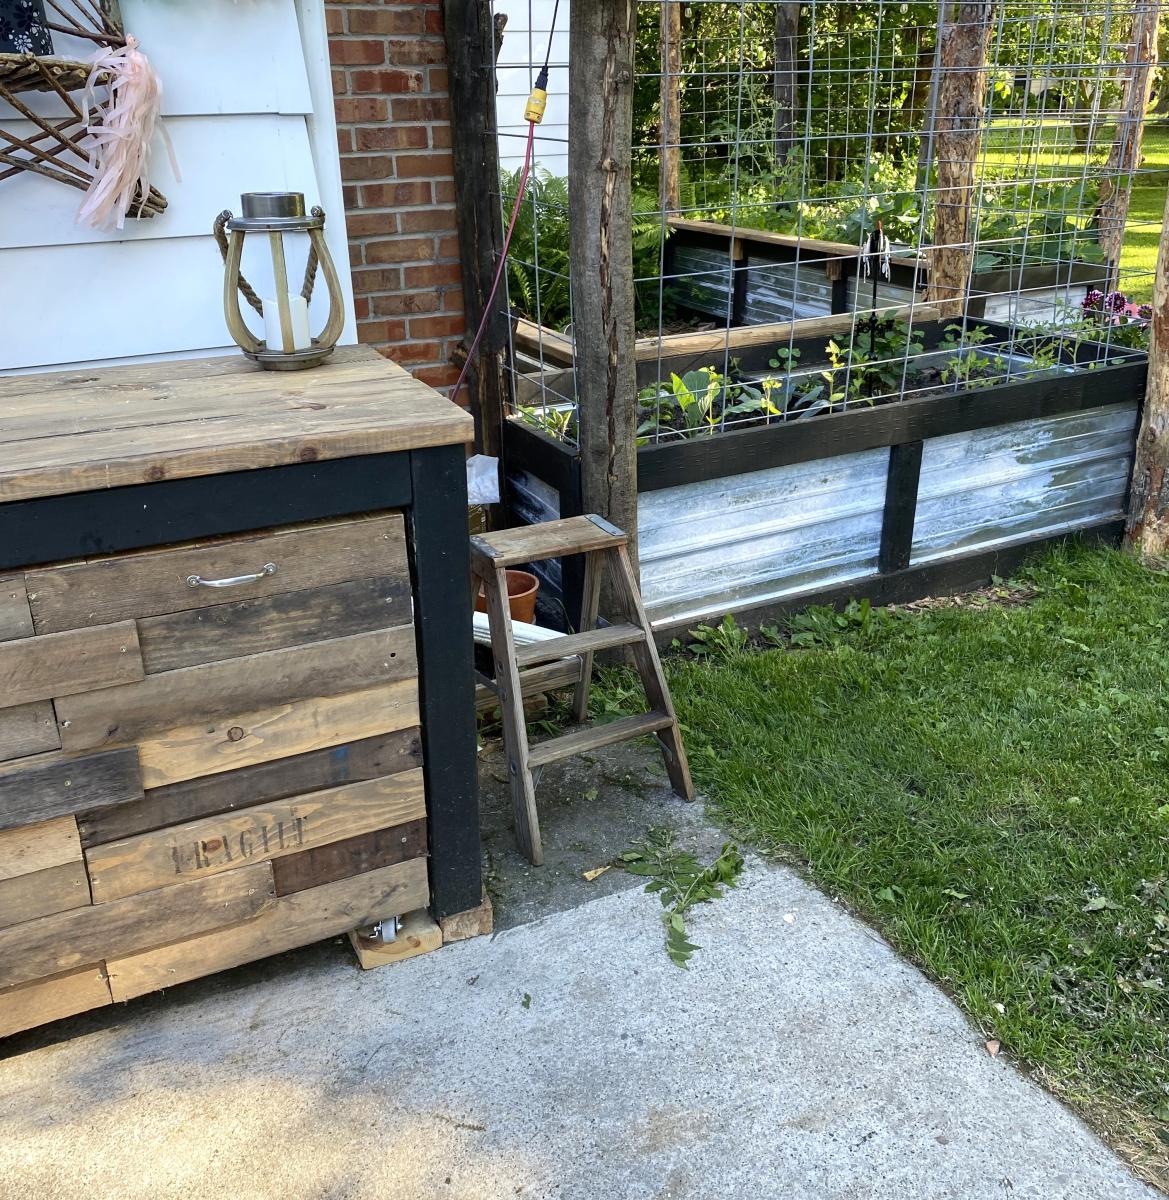
I made the grill table to match my chicken coop and my garden beds. Absolutely LOVE it!! (Ignore my cracked concrete (the table is level). The plans were easy to follow and it all came together great!! Thank you!
Kelly


I LOVE this project!!!! Great directions! Amazing results. It makes a very comfortable, and sturdy chair. So far, I have made two. Three more to go. 😄
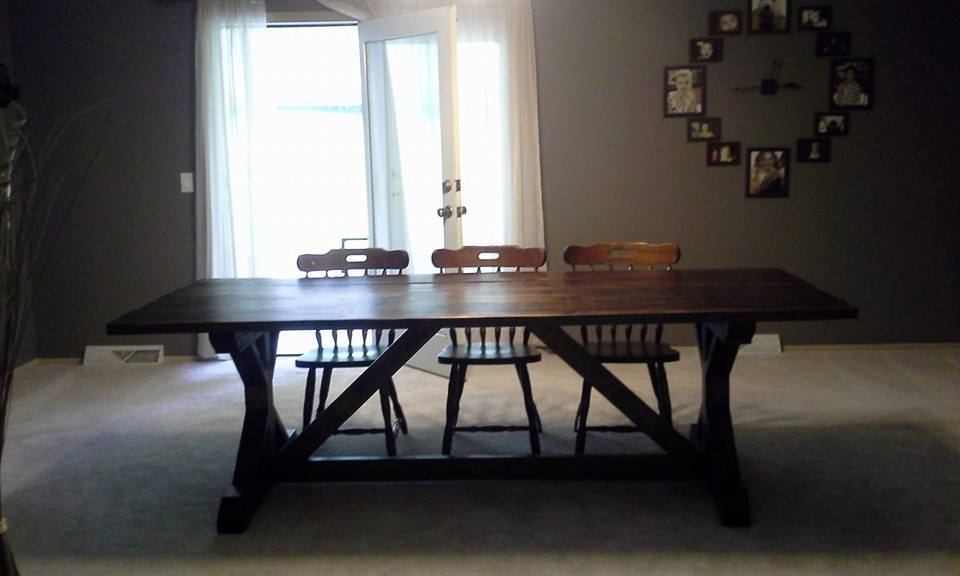
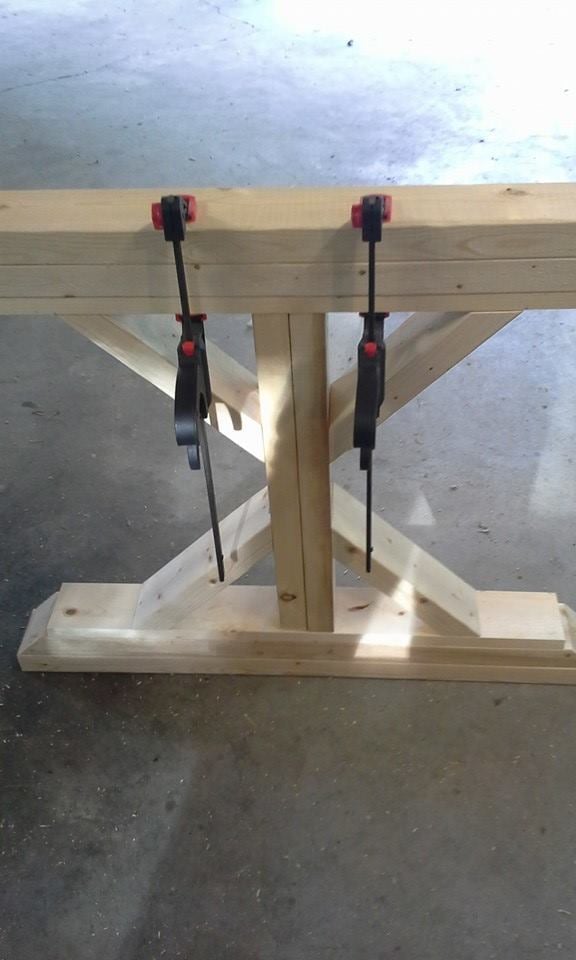
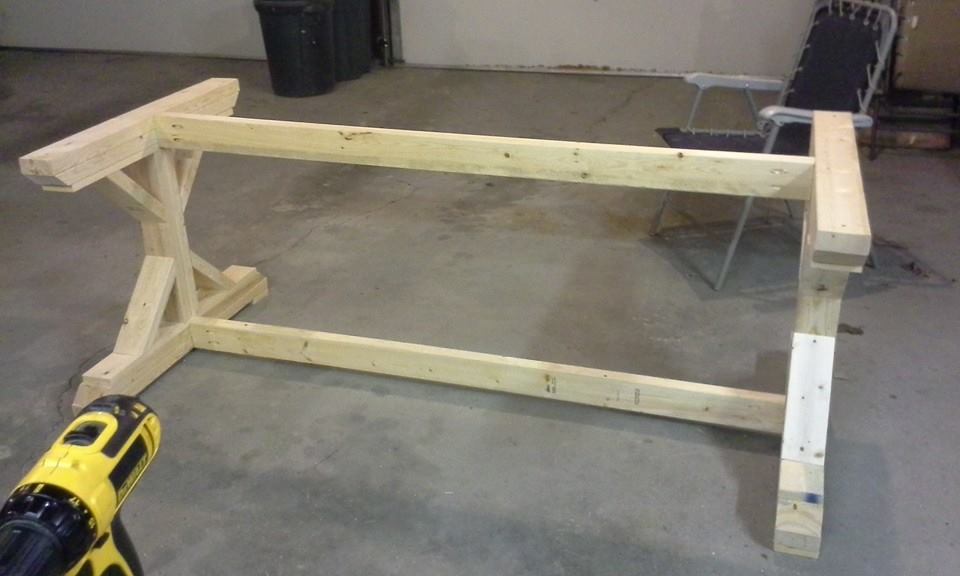
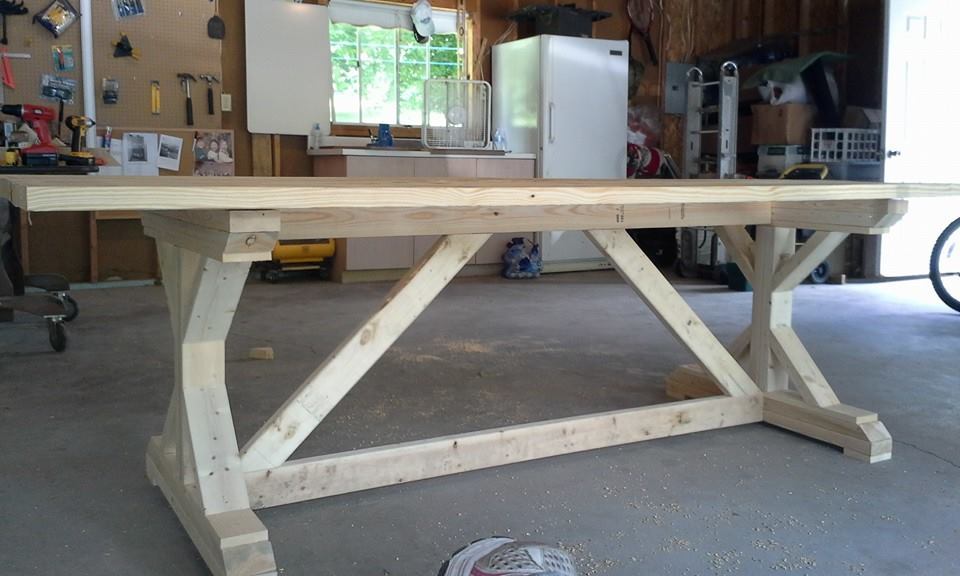
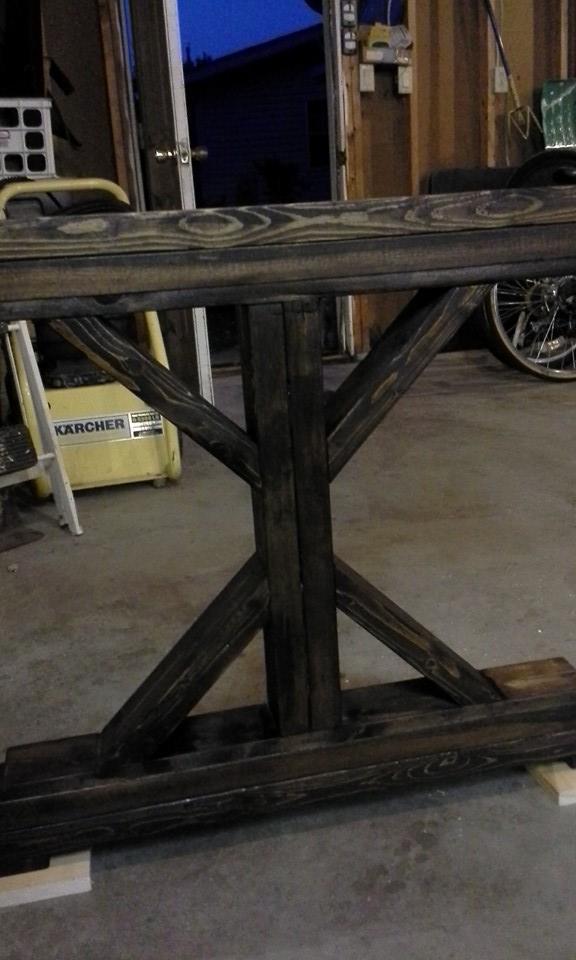
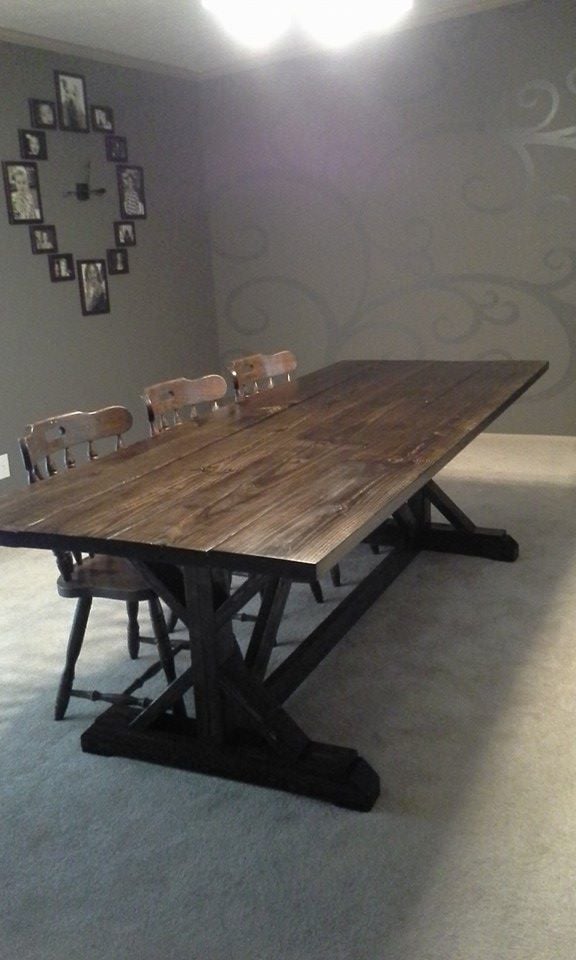
This was not my first build, but it was the first time I have done miter cuts. It was an easy to follow plan. The hardest part was trying to decide on the stain color! I am thrilled with the way it turned out. This table will easily seat 10 people which will be perfect for parties and dinners.