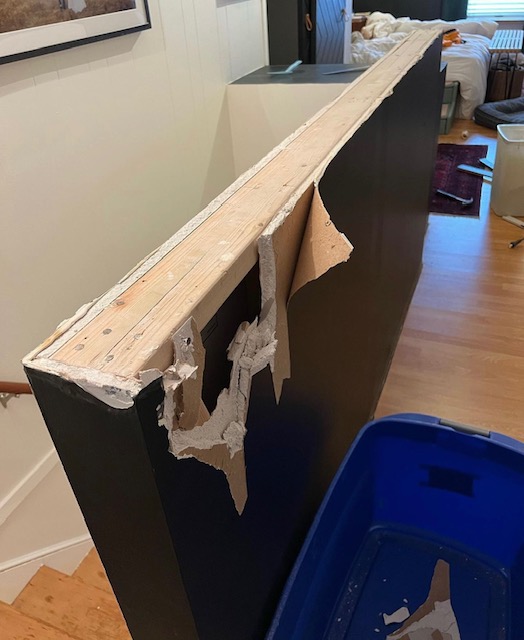
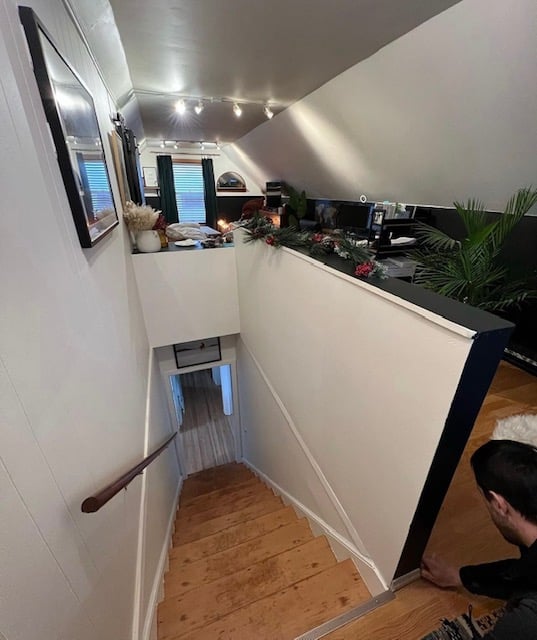
Farmhouse Railing Upgrade - by Sara and Chris
Amazing stair railing upgrade shared by Sara and Chris!
Built from Plan(s)
Amazing stair railing upgrade shared by Sara and Chris!
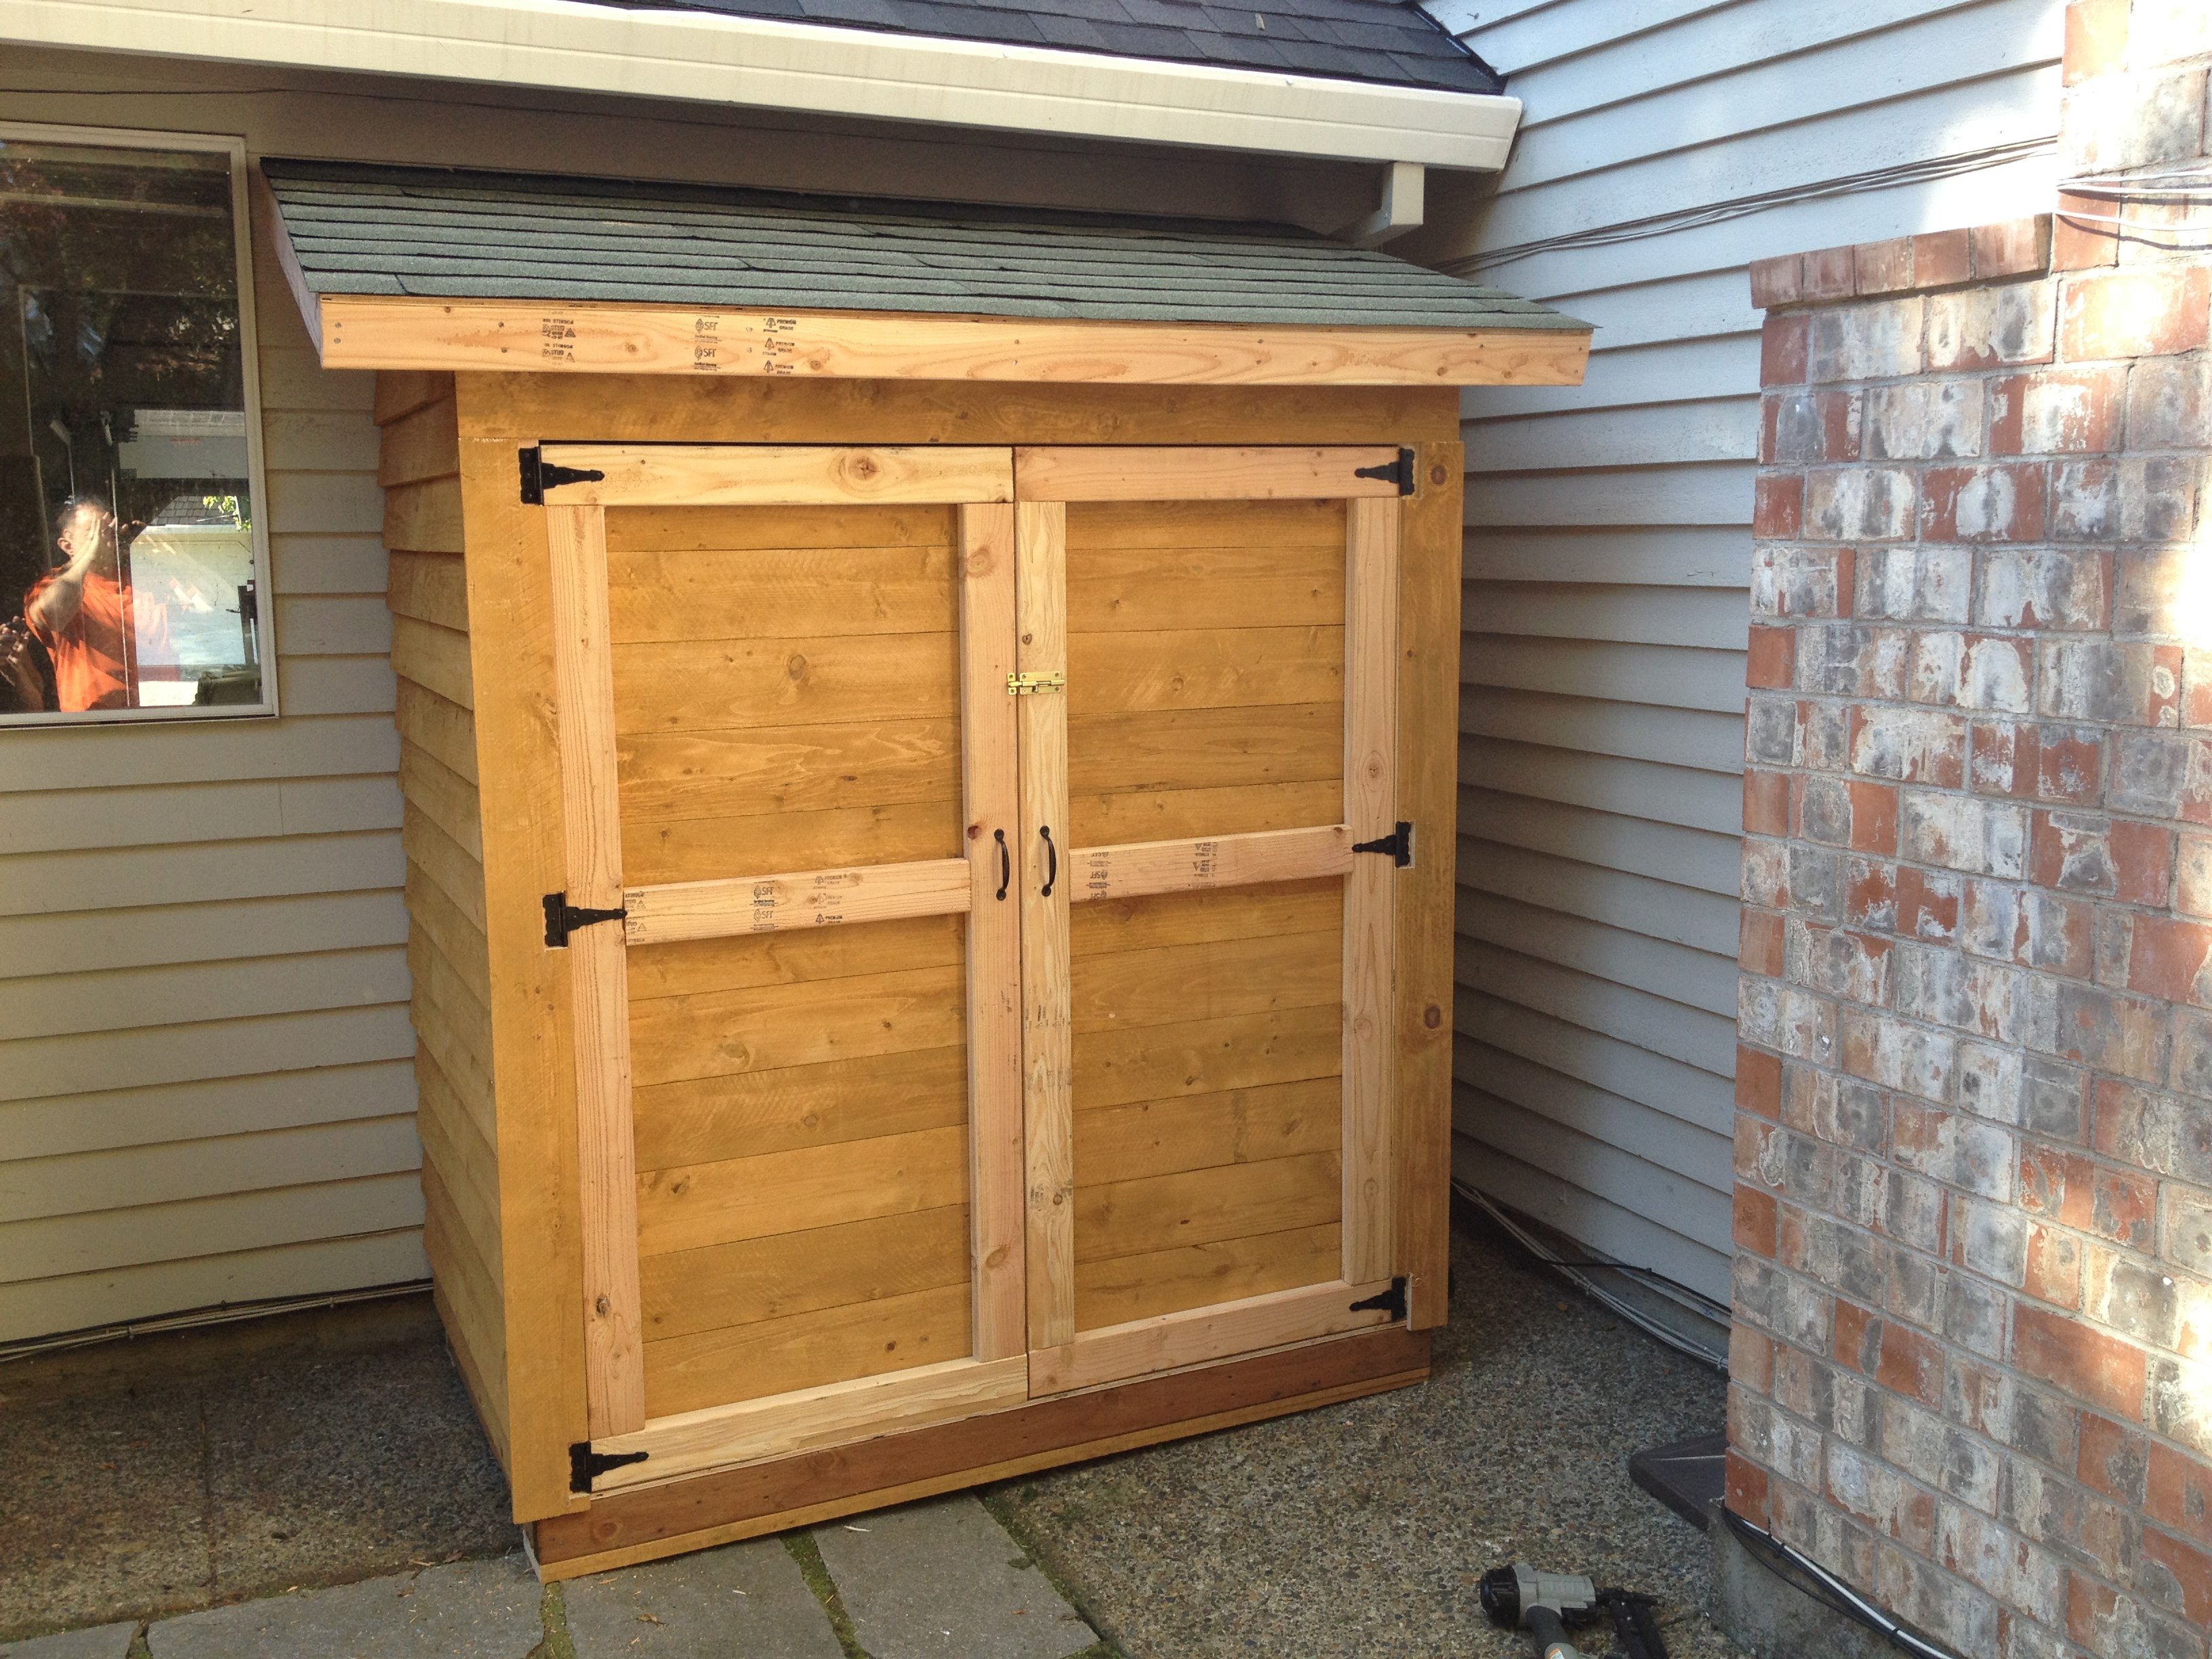
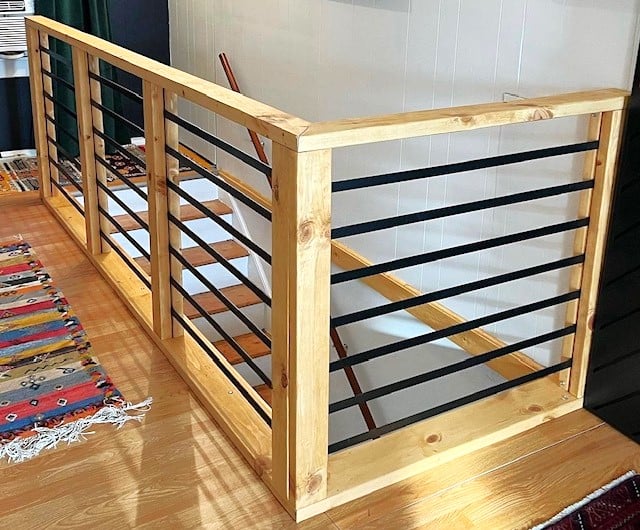
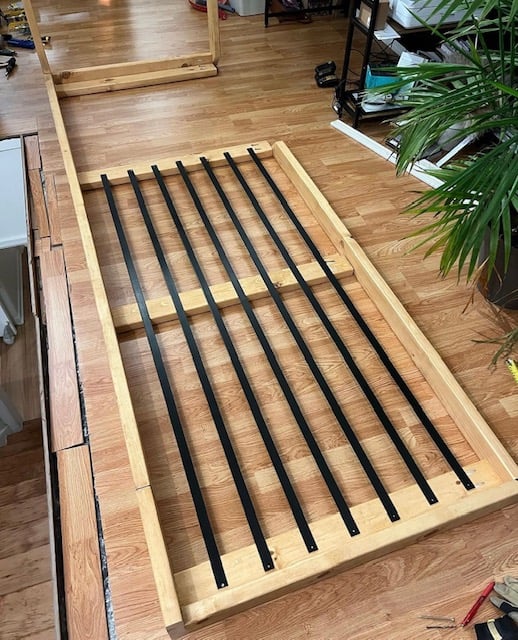
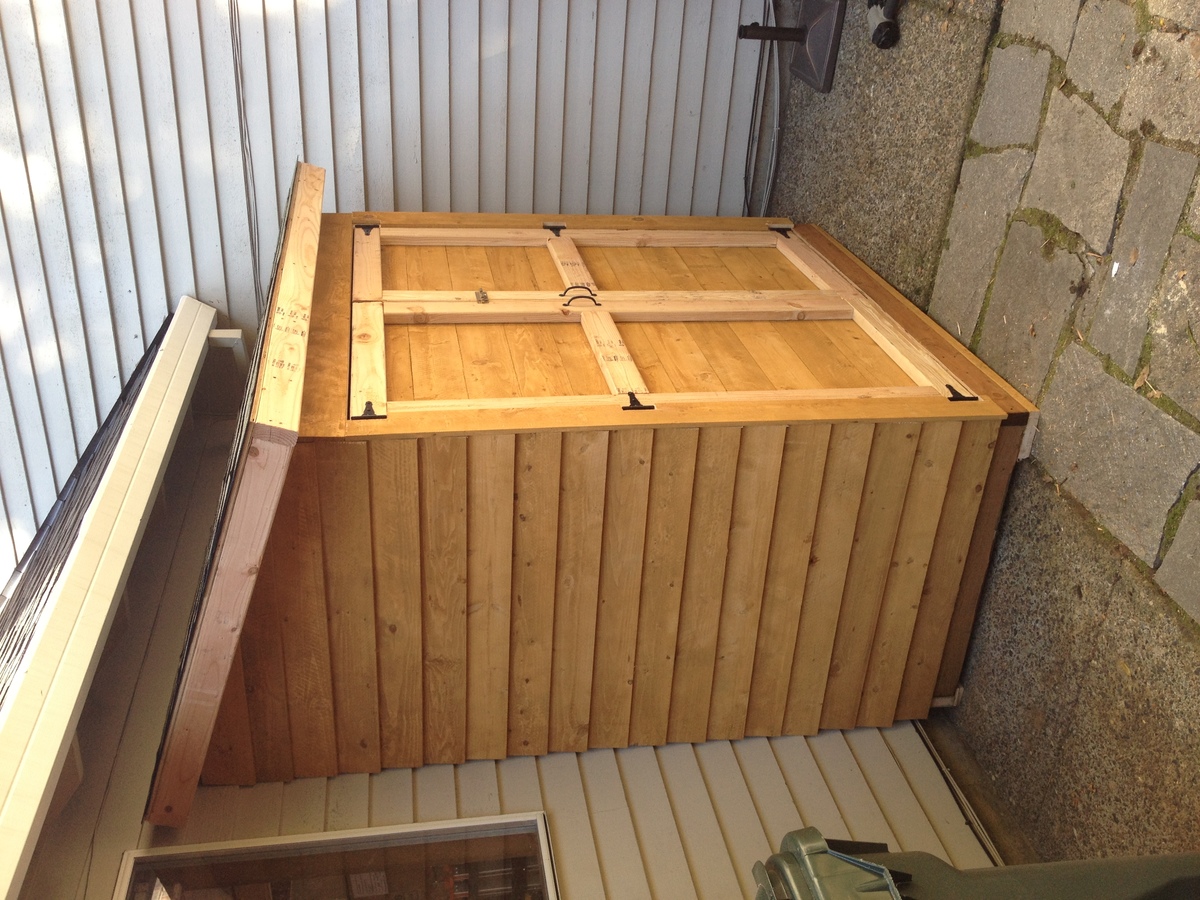
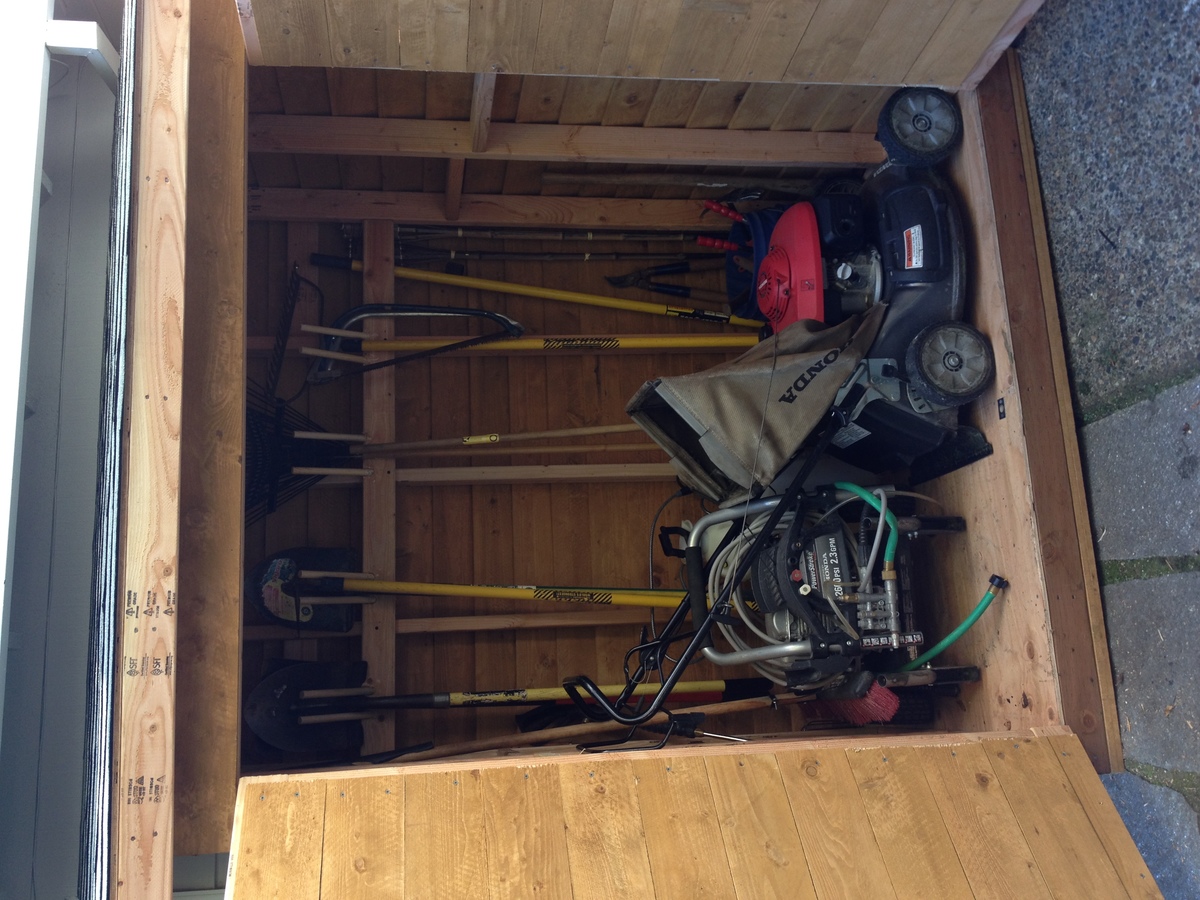
Built this in a weekend, took about 1.5 days. I ended us using 2x4's instead of 2x2's, I think it resulted in a much stronger frame. I also built a base for it to sit on. I got pre-stained cedar fence boards, and overlapped them 1" instead of a 1/2". Pretty easy project, I ended up siding the back on the ground, installing it, and then adding the side walls without the siding (just the framing), and then sided them in place. The doors work perfectly. I took my total inside dimension between walls, made sure the opening was square, and then divided that by two to get the width of each door. I then took another 1/4" off that, so each door had an additional 1/8" gap, it worked perfectly. When I set the doors, I put them on a piece of roofing closed as I screwed in the hinges, and then opened them and removed the roofing. I opted to run the door siding horizontal to use up a bunch of waste wood. I'm happy with the outcome. I also found some 6" self starting lag bolts and lagged through the back of the shed into studs (through the siding) into the garage behind it.
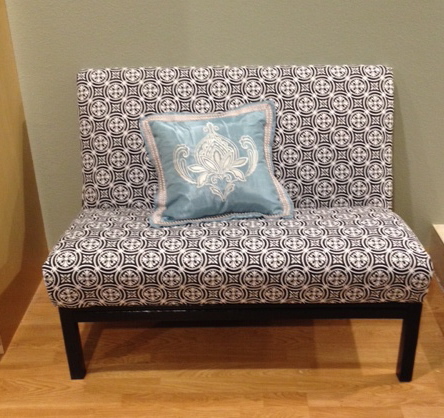
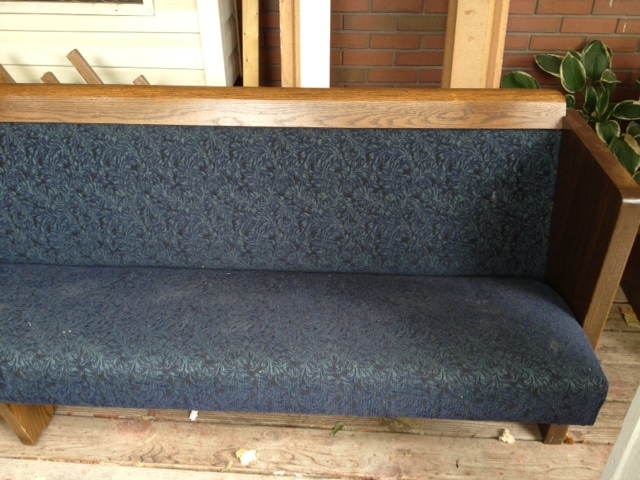
My church was getting new pews and asked if anyone wanted the old ones so I decided to take one and see what I could do with it! The second picture is what it used to look like. I had to take it all apart and cut it to the shorter size that I wanted. I then recovered it with some fabric I found for about $10. I then made legs out of a 2x4 and supported the legs with some 2x2 across the front, back and sides. I painted them with some black primer/paint that I had. This was so fun to do because I had to figure it out as I went along. It was a bit of a challenge at times and I learned a lot from this project. I really love the finished product.
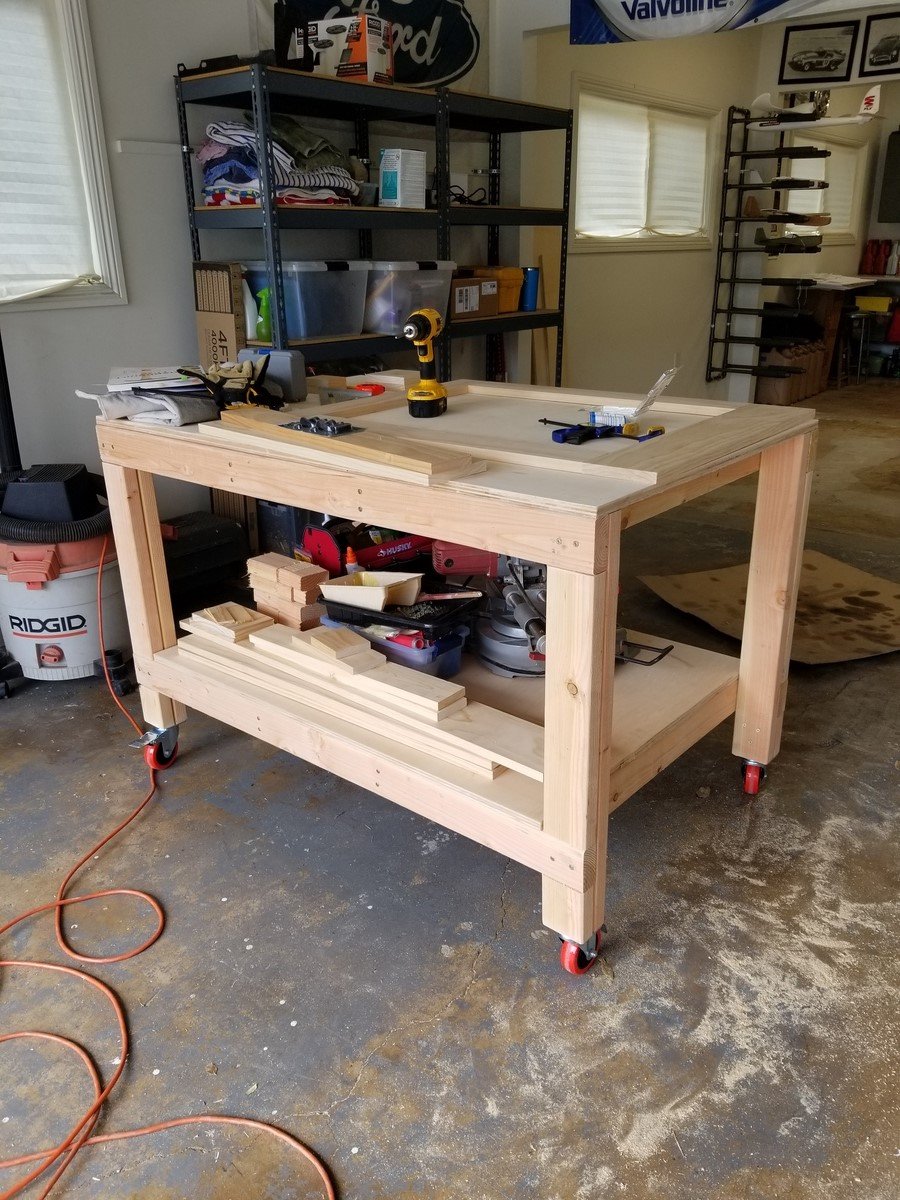
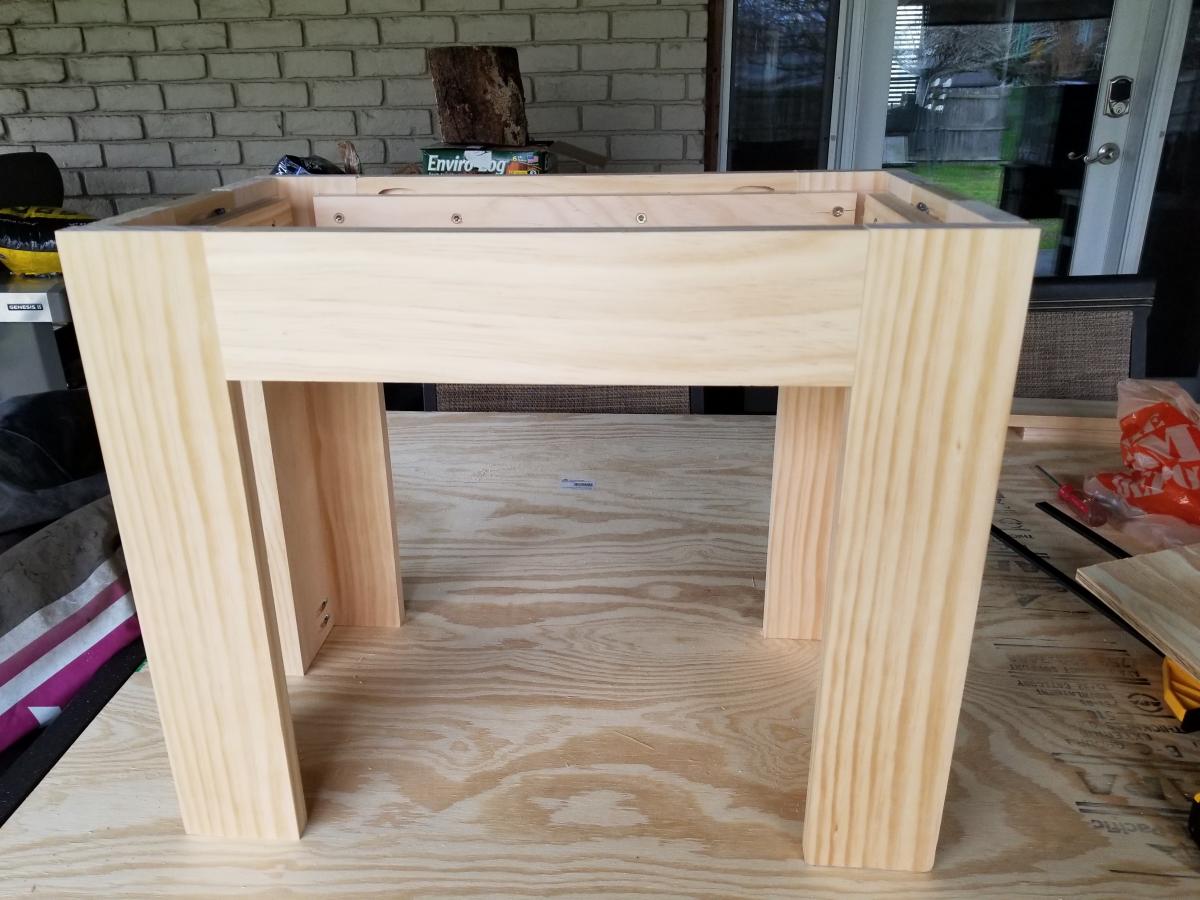
I love this workbench! I added casters so I can move it around the garage, outside, wherever it's needed. I just took 4 inches off the bottom of the legs. My hubby is admiring my handy work and planning on making one for himself.
Wed, 01/25/2023 - 14:31
Love this with the casters! So beautiful. I'm new here and wondering at what point you took 4 inches off the legs. Did you build the table and then just cut off the legs? Or did you adjust the measurements of the cuts? Thanks in advance! :)
Mon, 01/30/2023 - 02:32
The overall height of a 4-inch caster wheel is a little over 5 inches with the mounting bracket, so that also needs to be taken in to consideration. 2nd photo shows the overall dimensions, but to me the bracket and brake area appear to be a bit more than 1.03 inches. https://amzn.to/3DkMKzB
I think the best bet would be to have and measure the overall wheel height, prior to measuring and cutting the lumber.
I was looking for a bed for my daughter, and a project for my sister and me. I looked at a well-known children's website and fell in love with their cottage loft bed, but didn't want to pay $1,300 for it. My sister found Ana's website with plans and everything for the same bed! We built the bed, (with the help of our husbands) that weekend. Abbi loves her bed! Thanks, Ana!
Wed, 11/23/2011 - 15:45
Need plans for a cottage loft bed with stairs. Where do I find plans
Wed, 03/07/2012 - 13:44
Hi. I would love to have a copy of the plans. This is perfect for my daughter!! Thank you
Sat, 05/19/2012 - 20:28
This photo looks like there is more space under than he other photos. Did you follow the exact plans or alter them. I want to put another mattress on the bottom as well
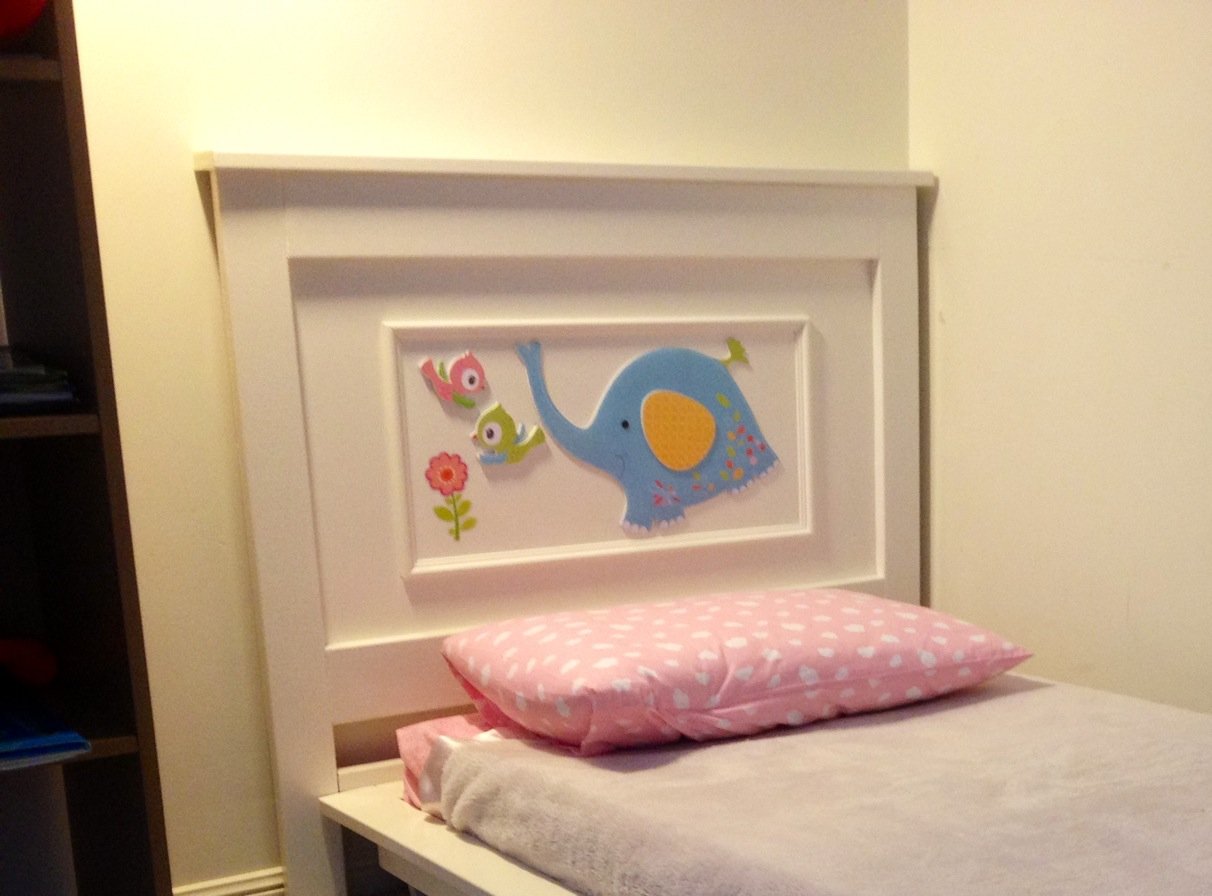
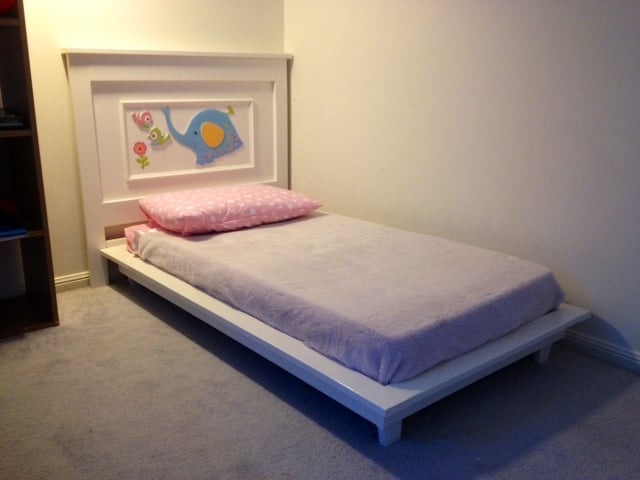
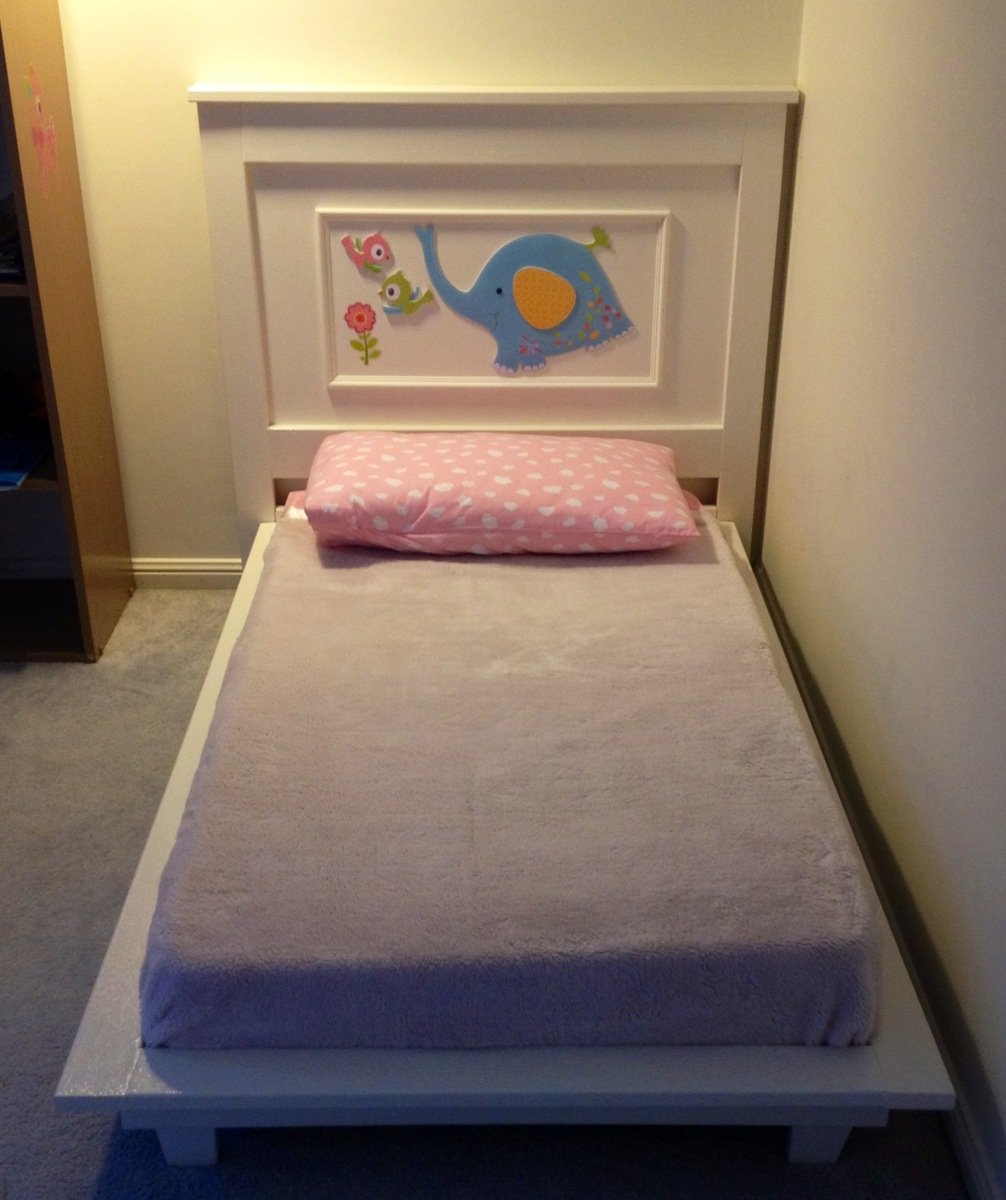
Loved this design as was sinple and elegant and easy to execute !! Constructed out of salvaged timber so only real cost involved the screws and paint .

Sat, 11/02/2013 - 18:15
What a great bed, this is super cute! Love the decorations for the headboard. Looks better than the PB Kids bed!
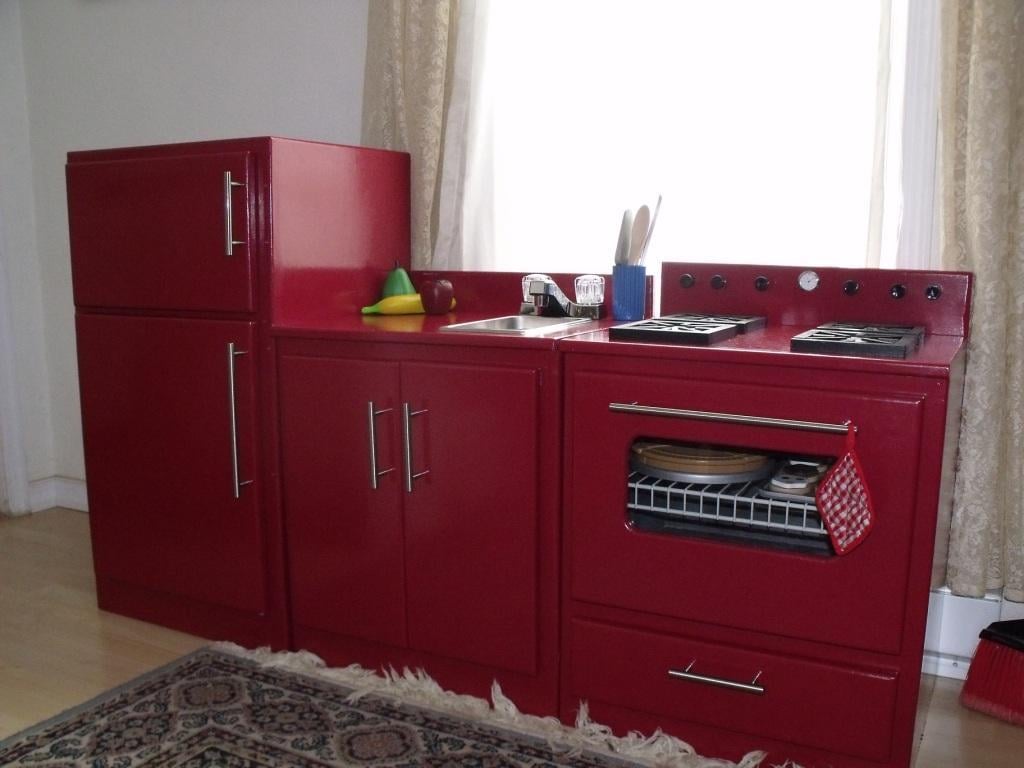
My father in law and I built this kitchen set for my two daughters, ages 3 yrs and 9 months. It was so fun to work with my father in law. I have built a few things before (table, chairs, doll bed, etc.) but nothing of this quality or magnitude. He is a great woodworker and knows how to do all the neat finishing touches that just make the project look really professional. I learned a ton working with him and had a blast!
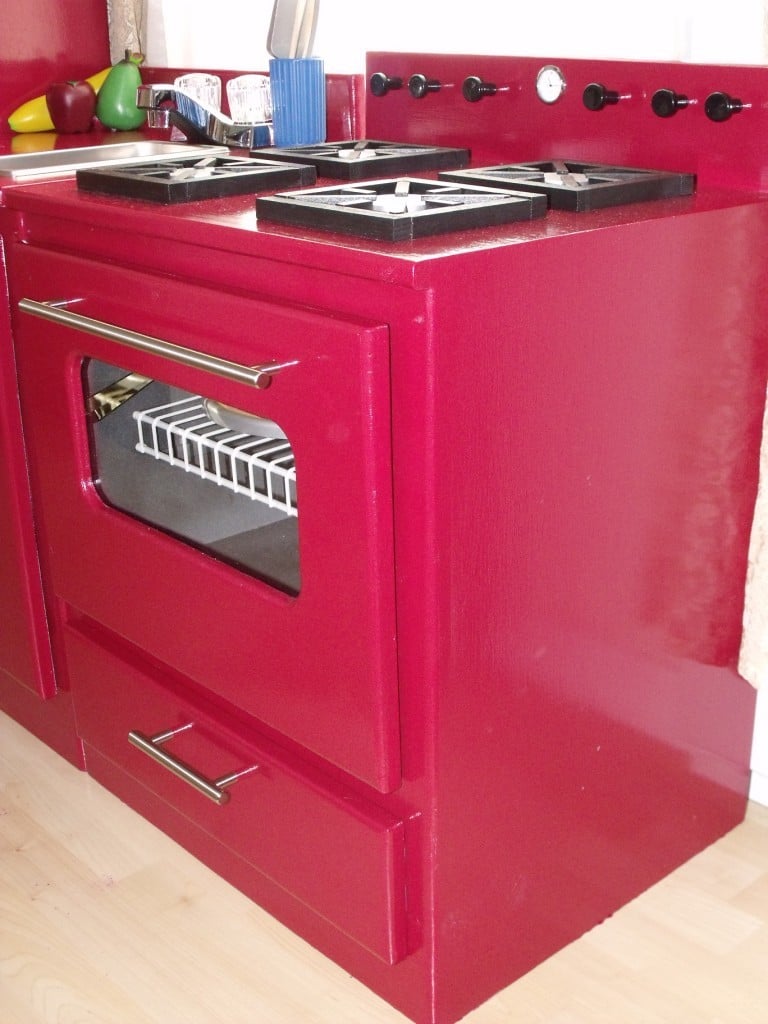
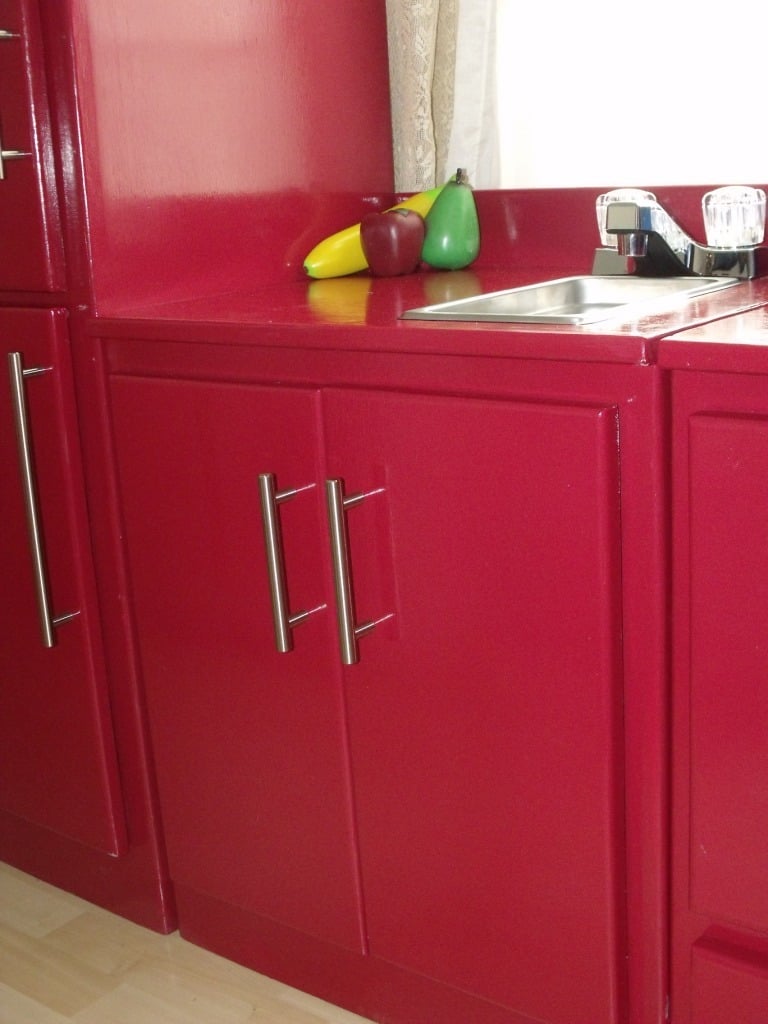
I was inspired by Ana's kitchen sets and used a combo of then and the Lowes plans and I was very happy with how it turned out. I changed a few things: put two doors under the sink, made "gas" burners instead of "electric", used half the sink cabinet top for the sink and left the other half for counter space, added a clock to the stove, made the oven door open down.
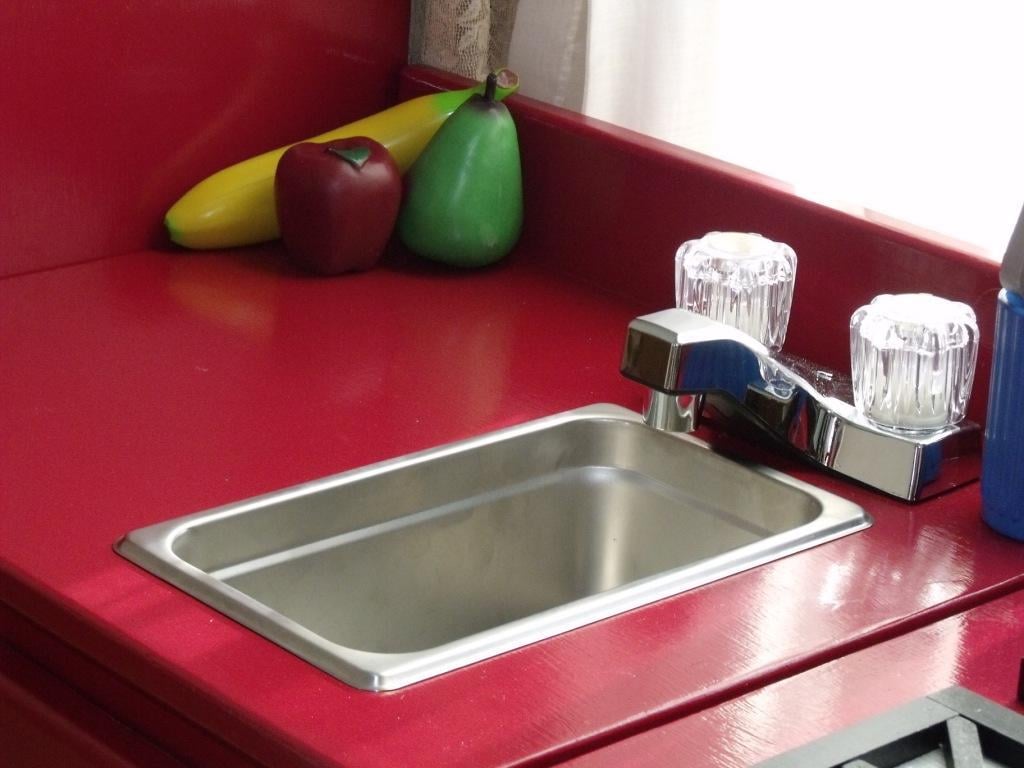
The sink is a food service warming pan 1/4 size and the faucet came from Wal-Mart for $10. I will probably replace it with a nicer one from the ReStore when I get a chance
Break down of costs:
Lumber: $100
Hinges and pulls: $40
Paint and primer: $45
Burners: $20
Sink: $24


Mon, 12/26/2011 - 12:33
What a beautiful kitchen! I love the burners! And the warming drawer! Thank you for sharing.
Mon, 12/26/2011 - 13:09
Holy cow! Fantastic job! You guys really pulled it together and I really love the creative use of hardware, etc.
Wed, 12/28/2011 - 07:50
Thanks guys! Only problem is that my girls use it so much, I only get a chance to play with it when they go to bed! :)
Wed, 02/29/2012 - 10:03
Sorry I didn't see your comment sooner - I made the burners with craft wood circles and squares and 1/2 inch pieces of wood. I notched the ends over the circle with a chisel.

Built this table and bench according to Ana's plans worked out great.
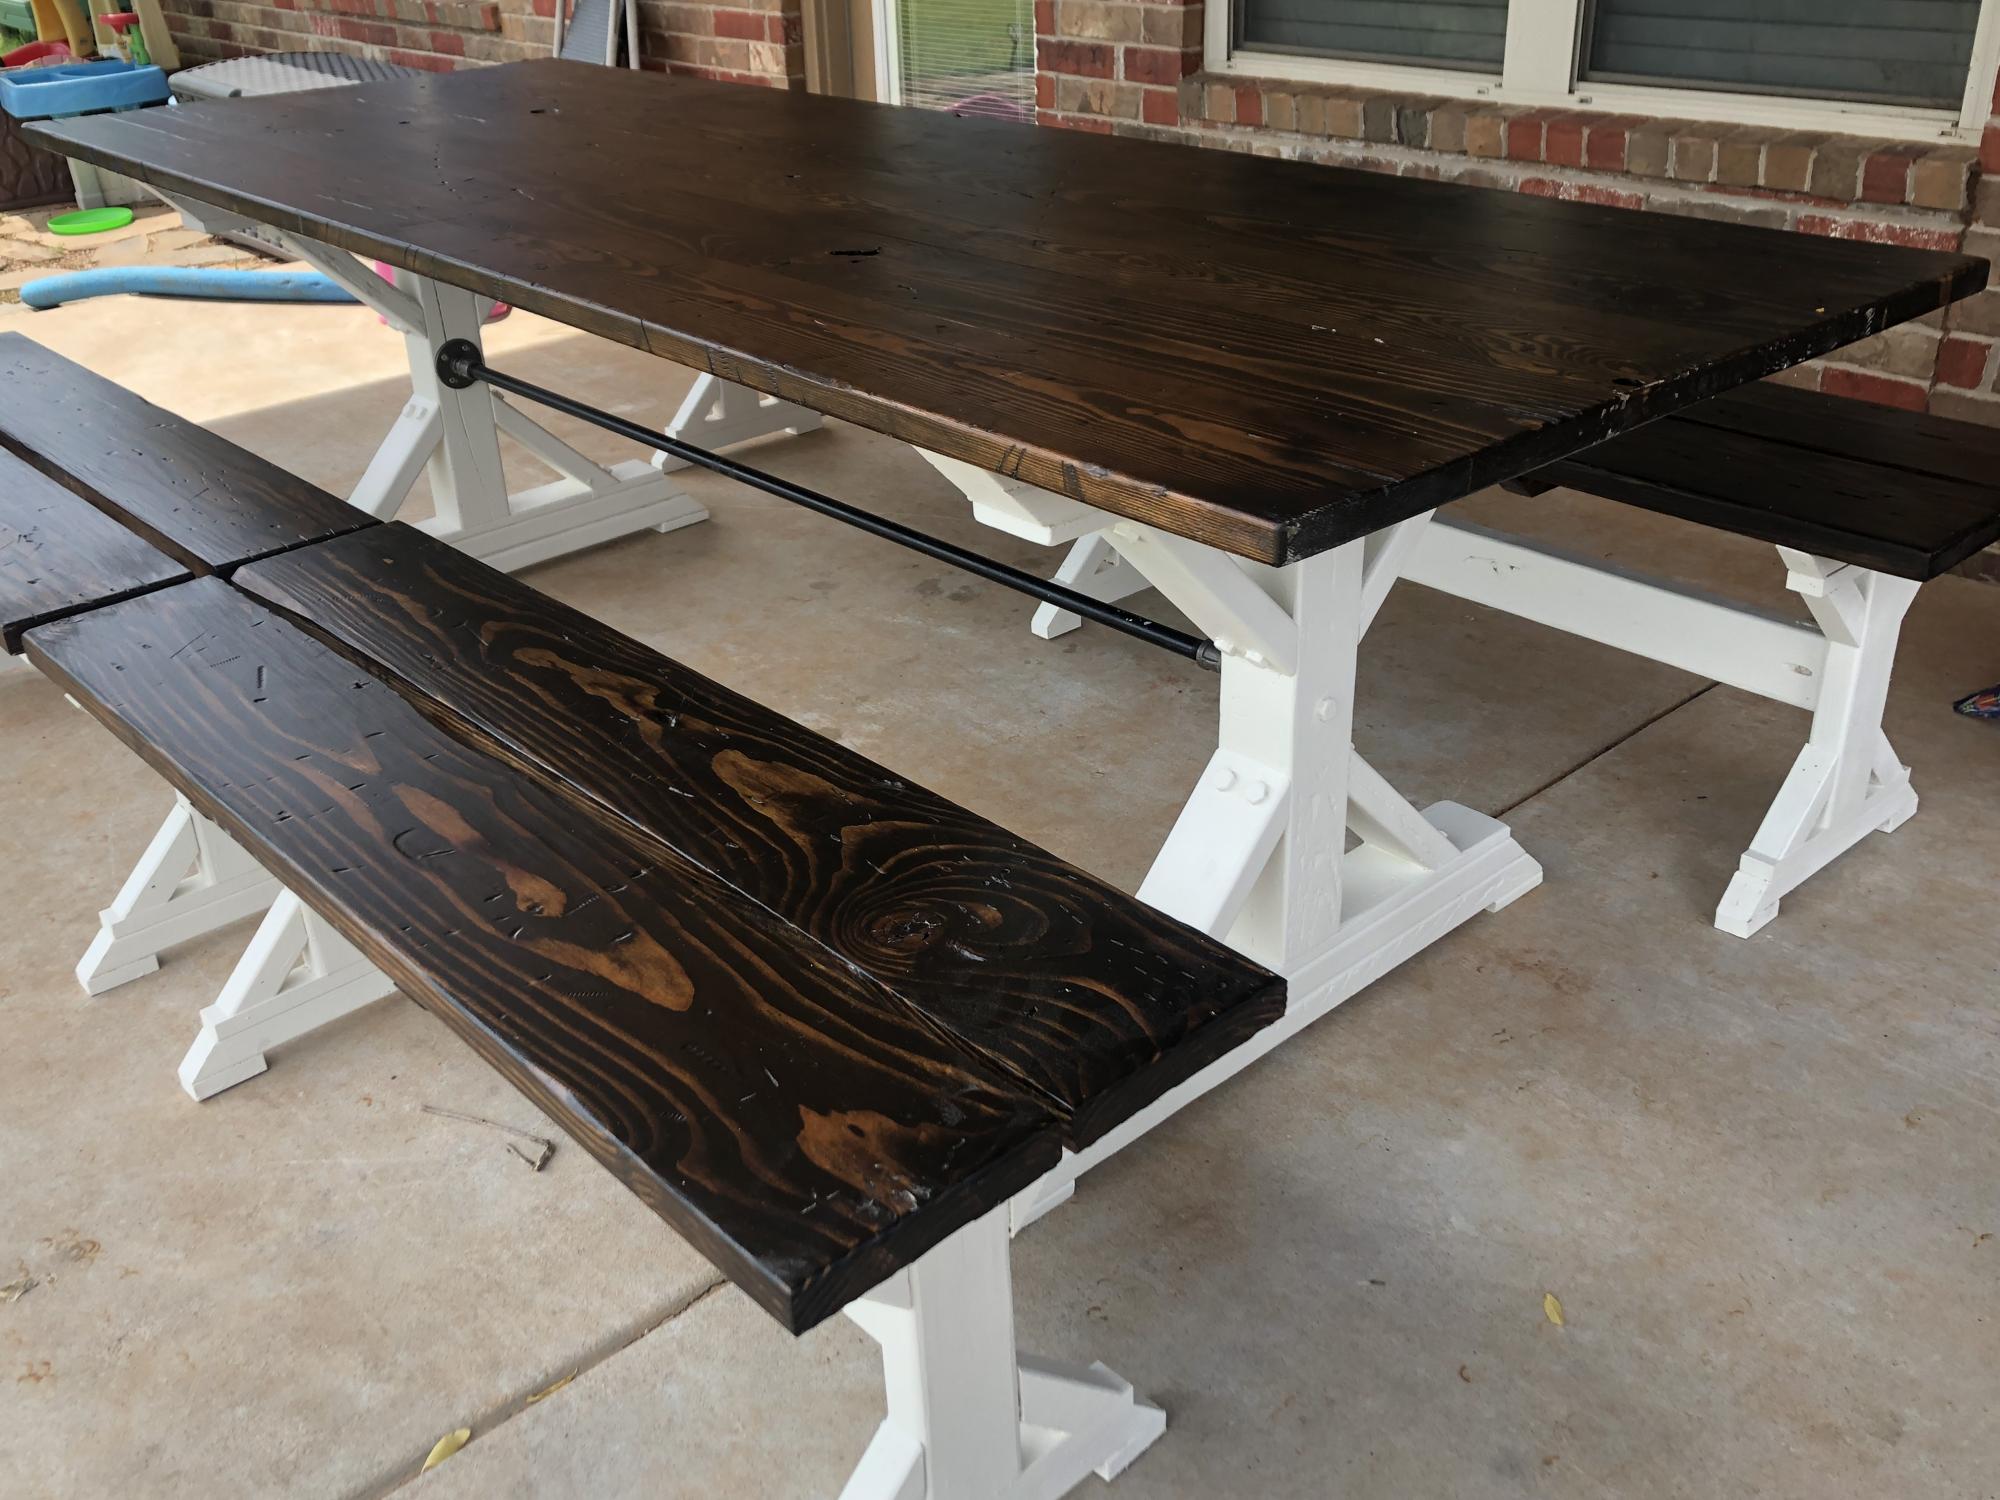
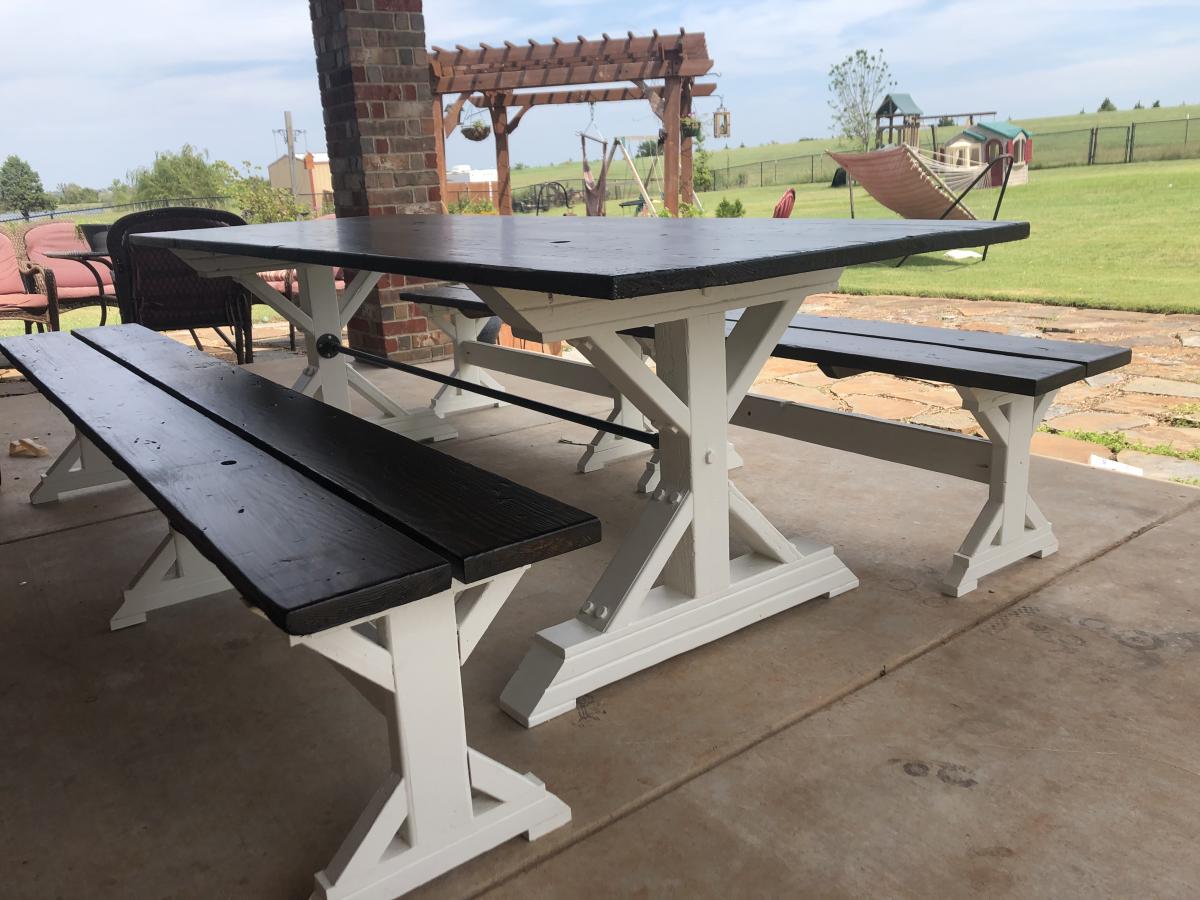
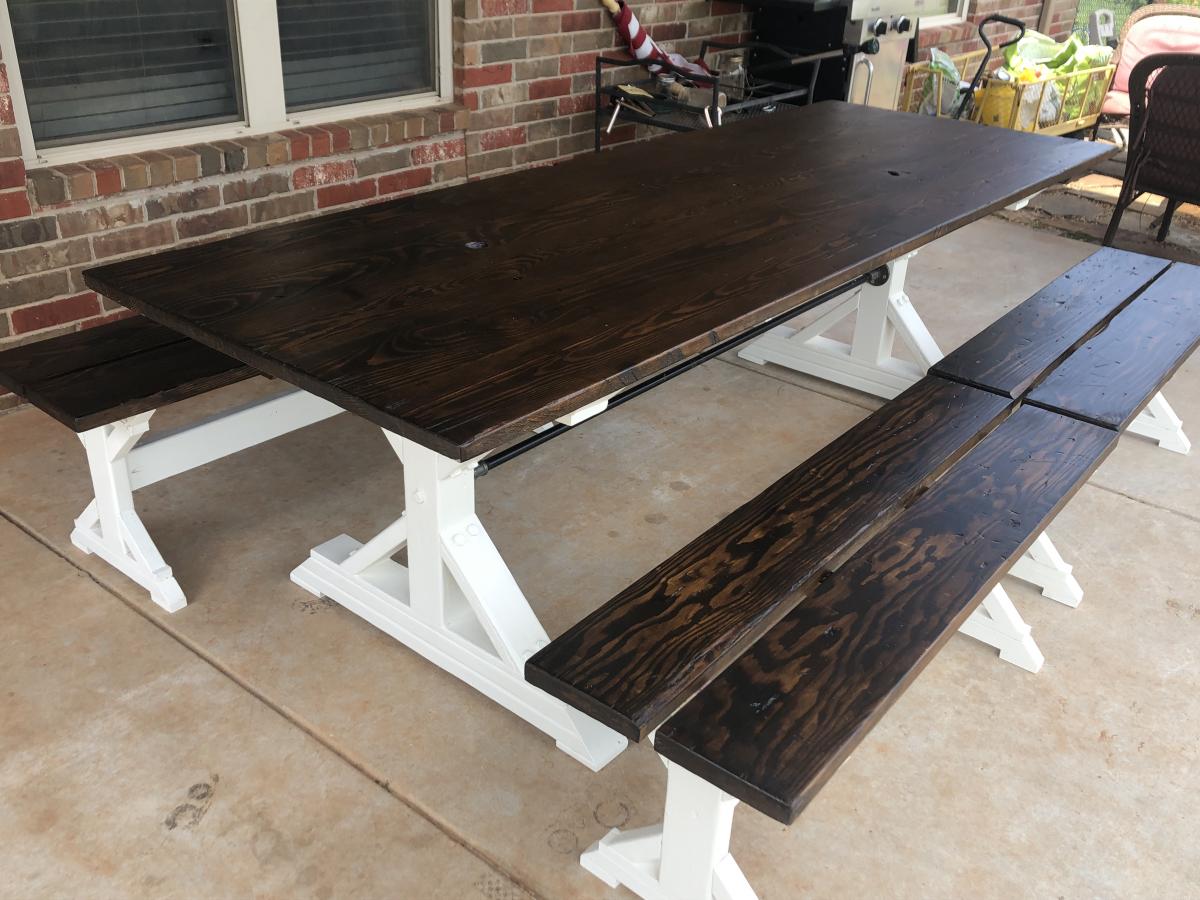
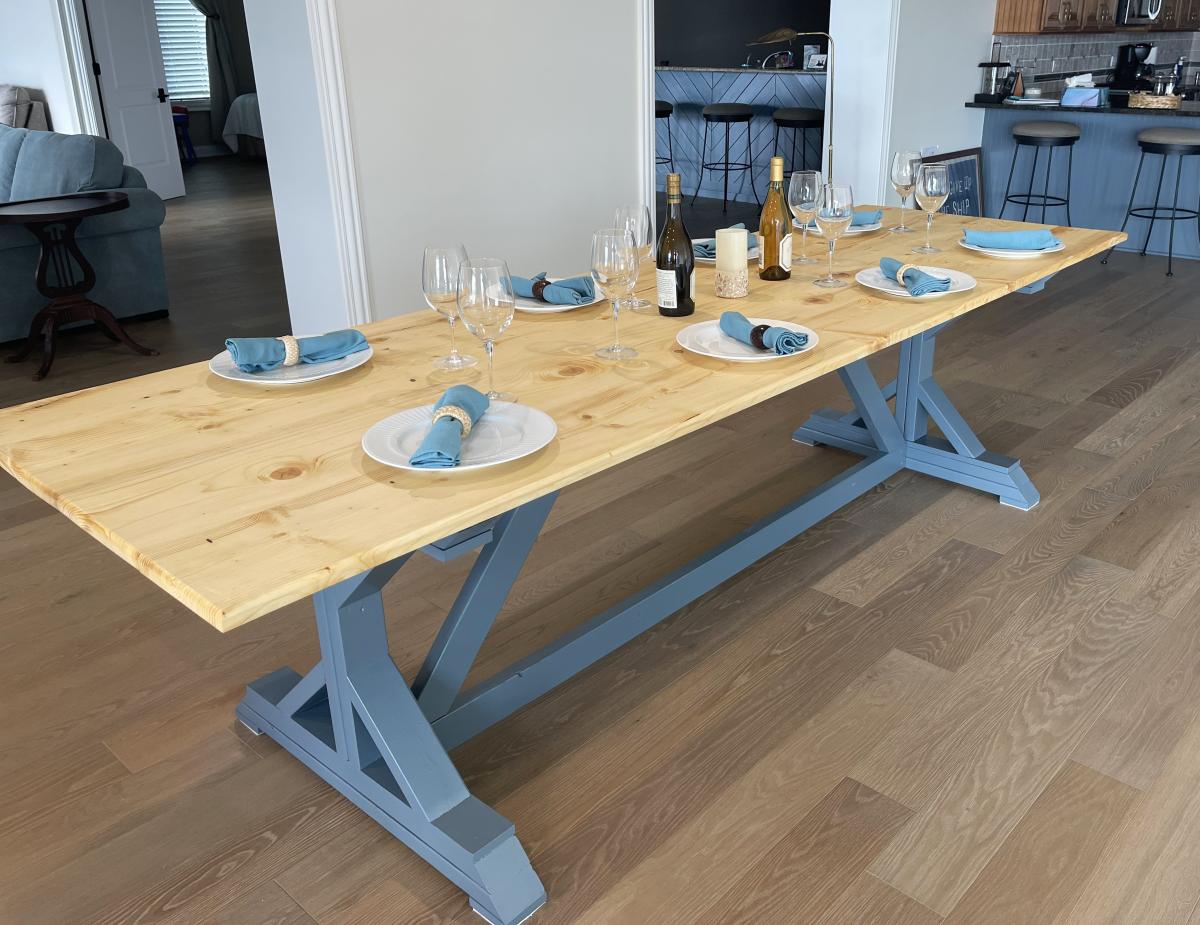
Fancy X Farmhouse table for the wife. Modified to 8ft table with 2x 4Ft benches and 1x 8ft bench. Used bolt screws to diagonal slats for looks and pipe horizontal support vice the 2x4. Top is Dark walnut stain and an egg shell Chalk paint with outdoor clear coat. Kids had a blast distressing the table and benches for an older look. Not a bad weekend project.
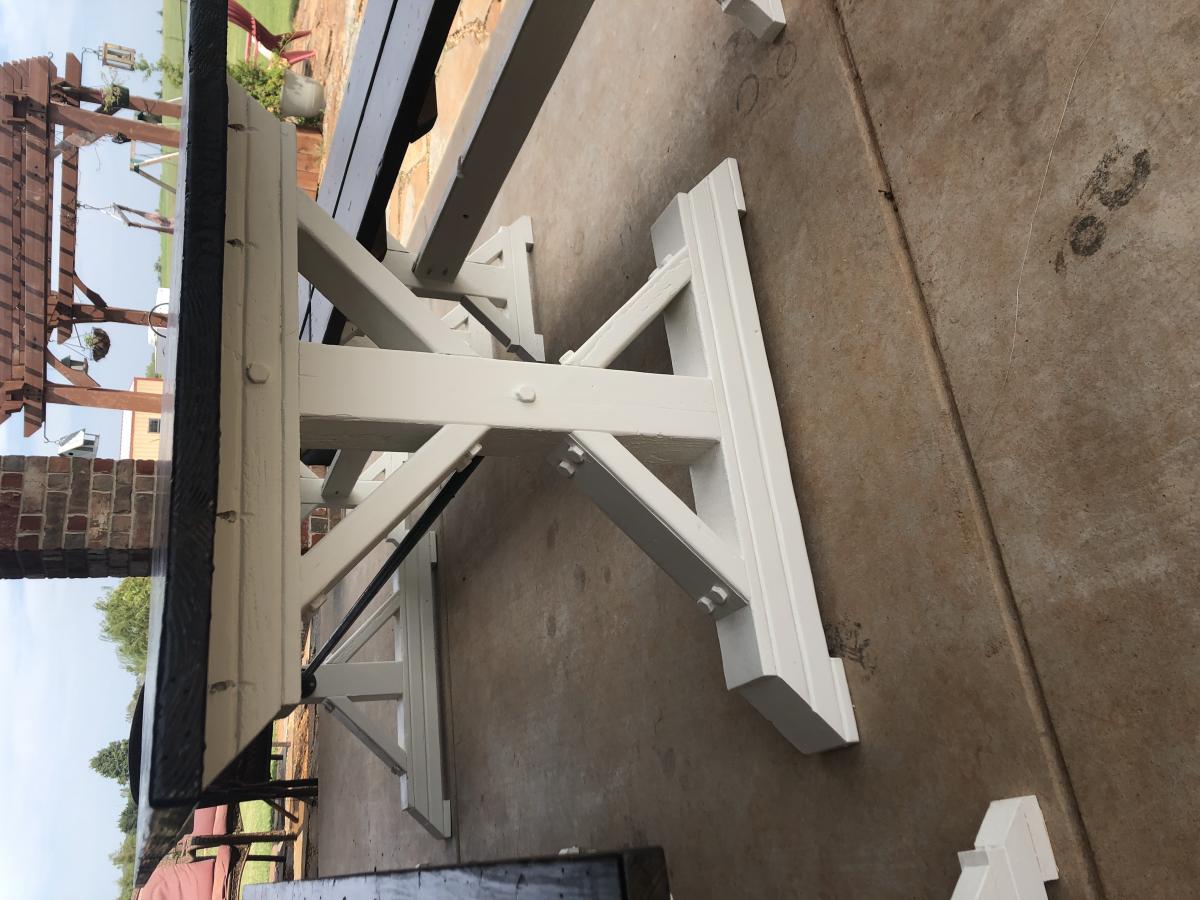
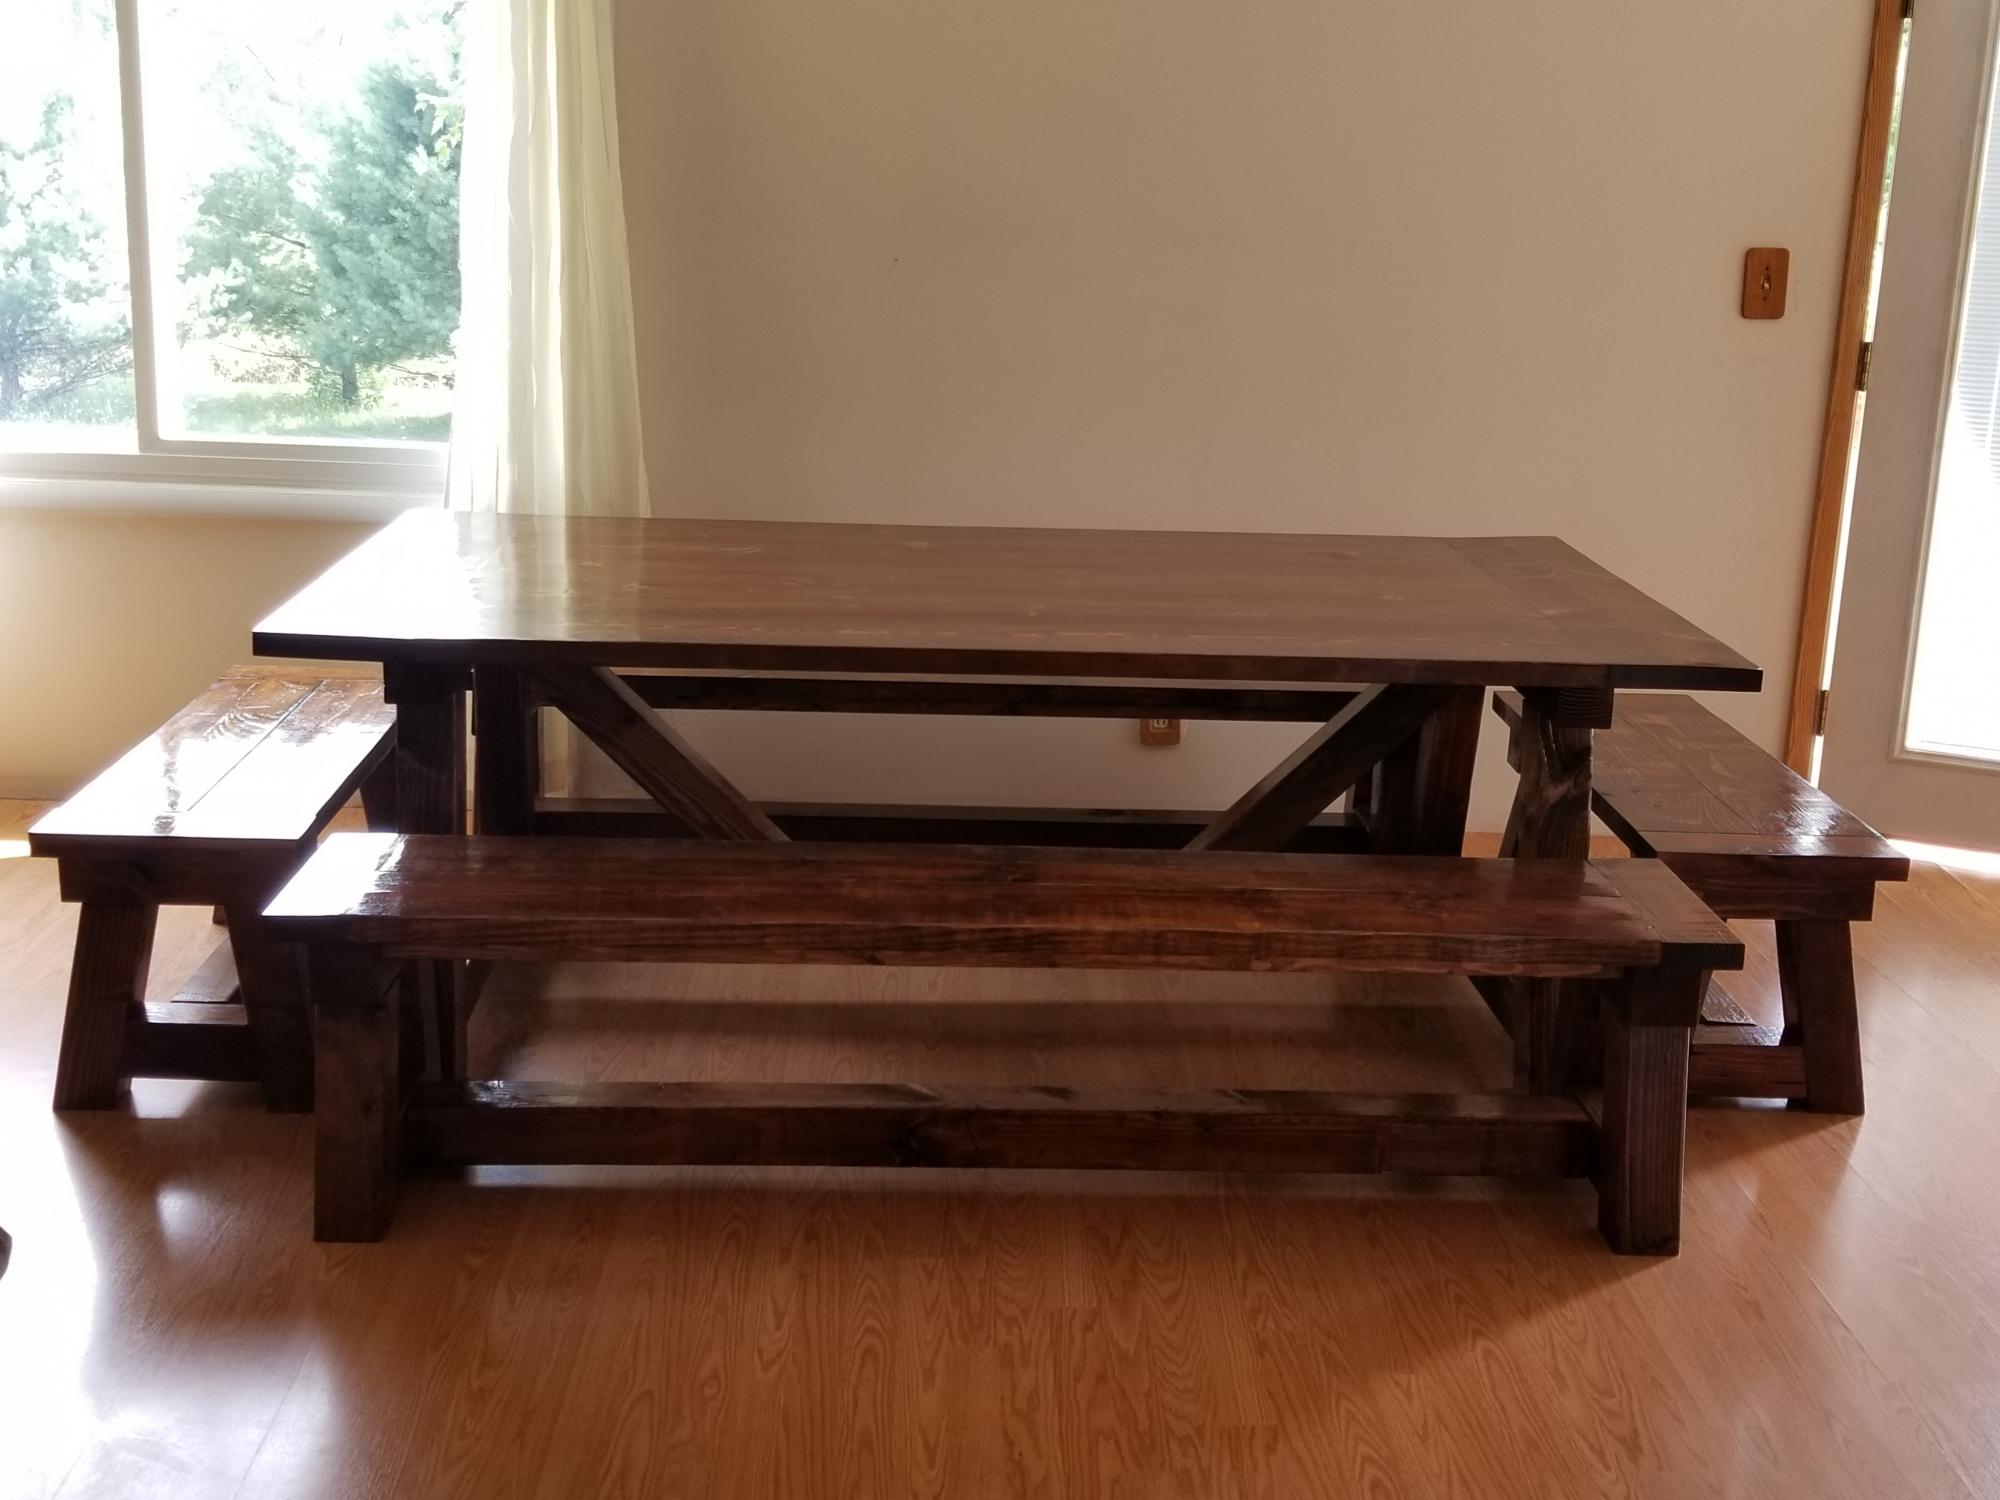
I have a friend who had a dream to have a Thanksgiving table that would seat her whole family! She asked for Two extra benches for the ends. She loves her new table, and I loved building it for her!
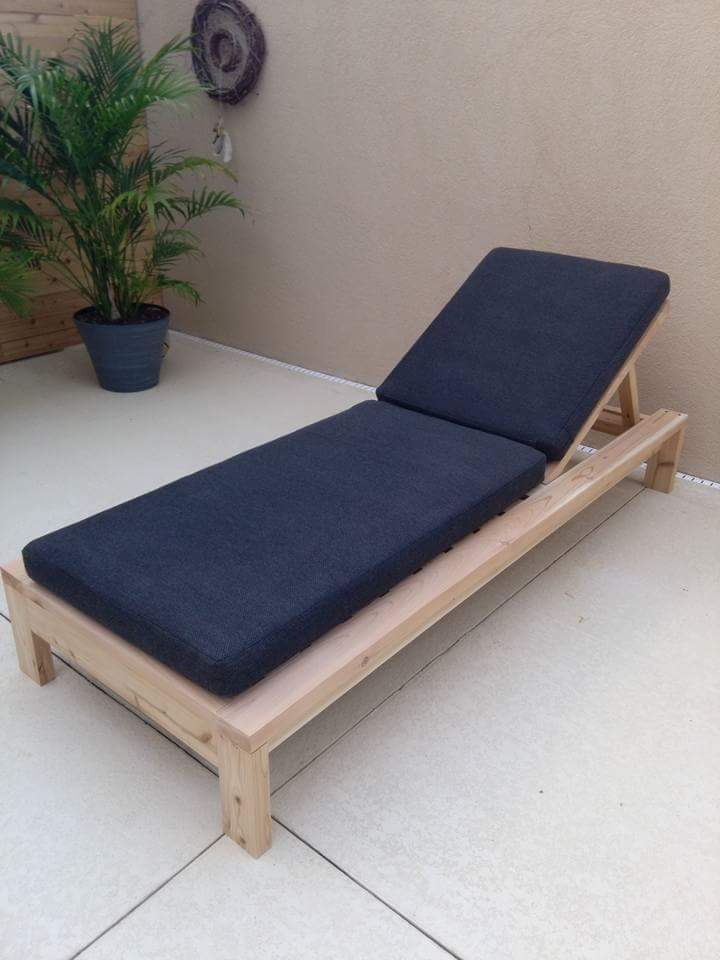
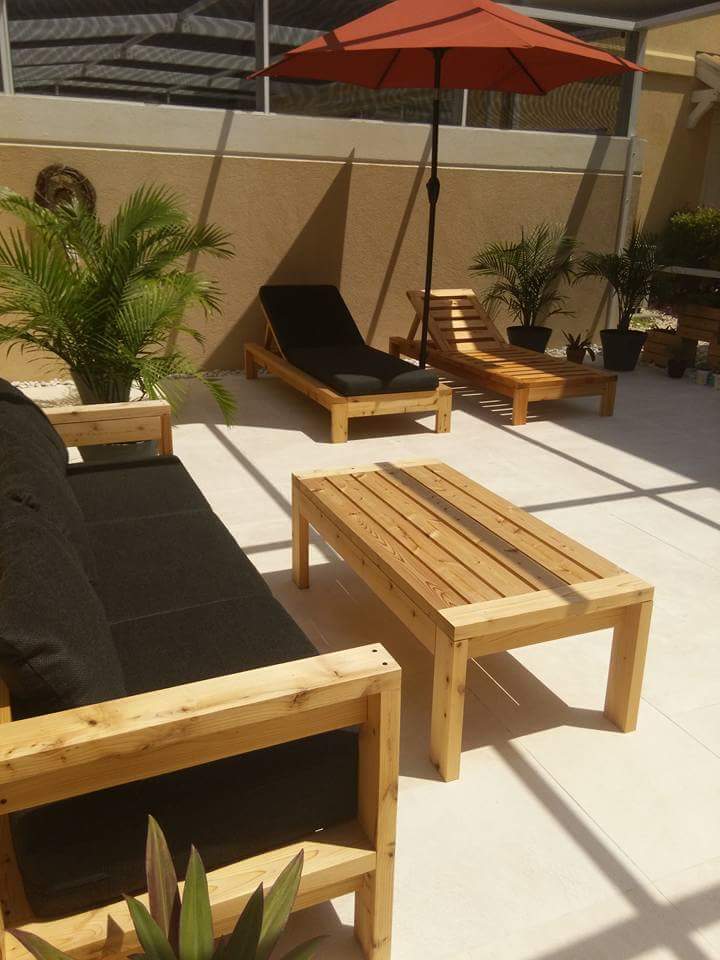
Just finished this beauty, entirely made with 2x4, plans were modify to match our outdoor sofa and coffee table. I think our best looking project so far ;) Thank you for inspiring me to build !!!

In reply to Very nice! by Ana White Admin
Tue, 03/01/2016 - 18:13
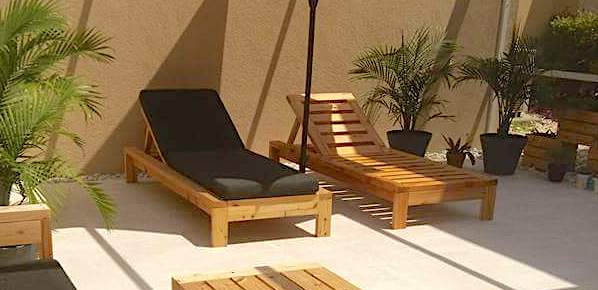
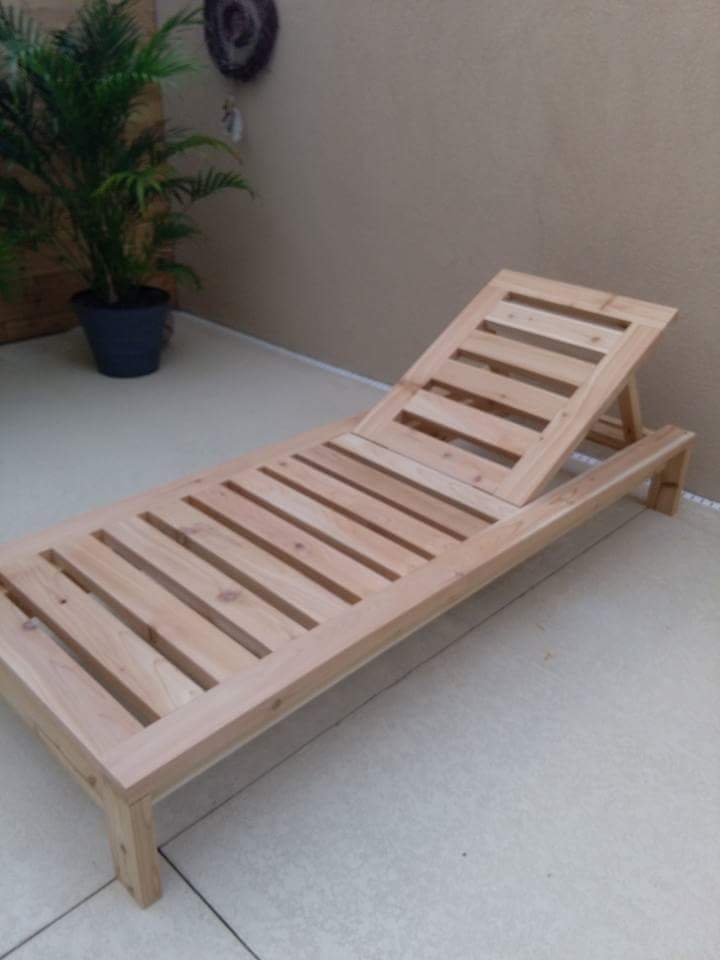
Little by little I am transforming my ugly concrete patio with no view in Zen garden...
Tue, 03/01/2016 - 18:15
Little by little I am transforming my ugly concrete patio with no view in a Zen garden...
Tue, 03/01/2016 - 18:16
Little by little I am transforming my ugly concrete patio with no view in a Zen garden...
This was my first project building something from this site. I absolutely love it! We didnt add the X's because the miter saw was at my dad's house, which I was kind of sad about, but I think it still looks good. Not too bad for mine and my husbands first build!
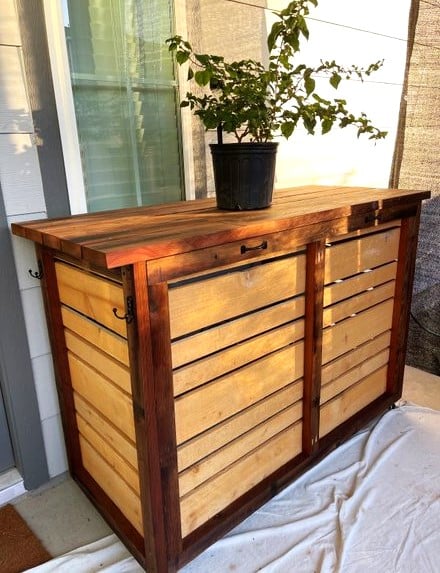
This rolling bar was inspired by Ana White's plan. It is used as a bar and conceals an electric smoker and a grill. I added handles for moving and some hooks on the sides. I stained the salvaged 2 X 6 's and brushed on clear oil based poly on the new Cedar fence boards.
Billie

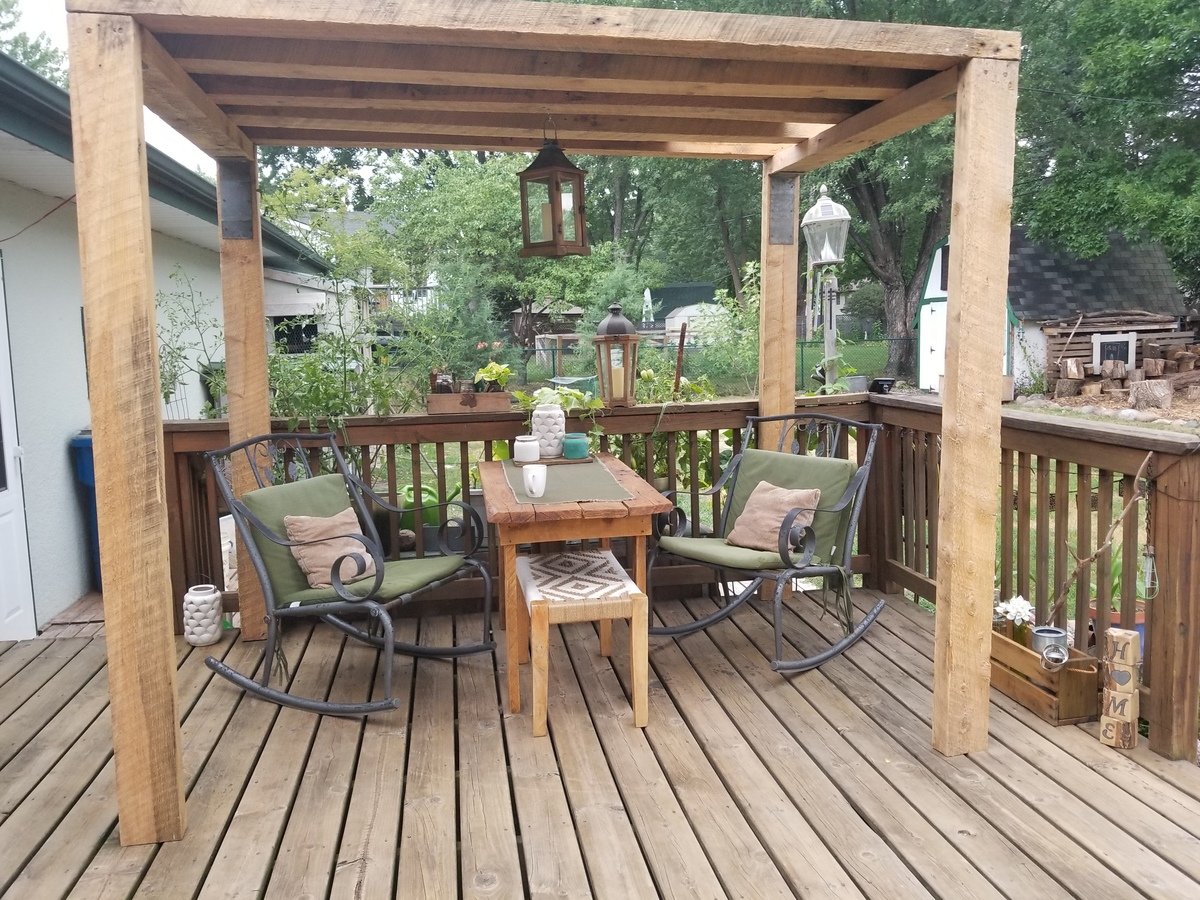
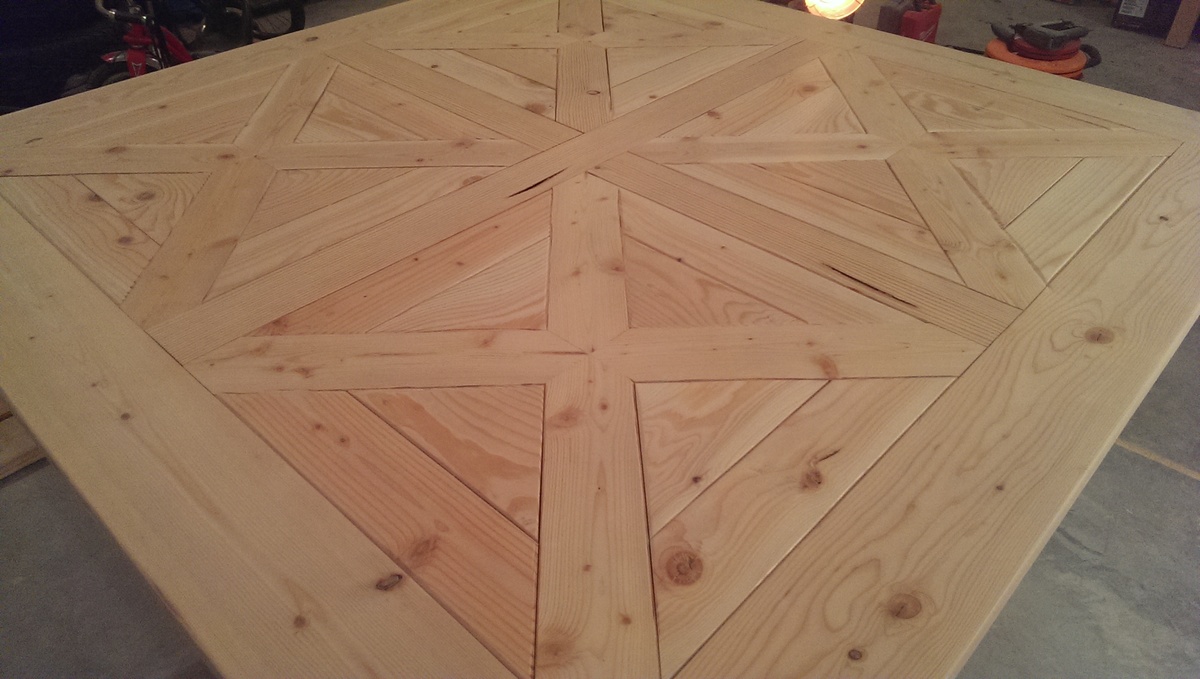
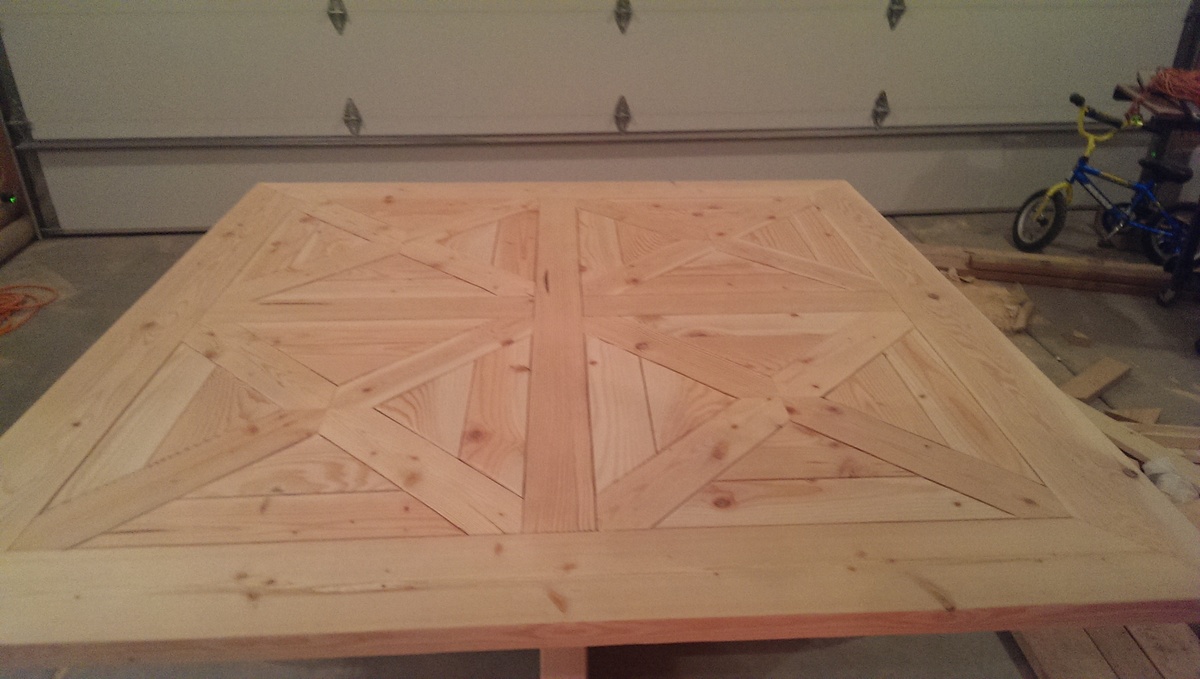
Haven't quite finished this, but here it is all put together. I started with her plans then changed then dramatically. I wanted a 60x60. So I added 17" to the sides. Required me to buy 10' boards instead of 8' boards. When building the base I added 17" to the lengths since that is what I did for the top. I left the center post the same height since I wanted a regular height table.
When it came to the top, I didn't want to do the 1x4, instead I have 2x4 and 2x6 in there. Making the crosses in the squares added lots of time, but it was well worth it. Not sure how many hours I have into this, but its a lot. Materials is right now about $130.
I'll update more when finished.
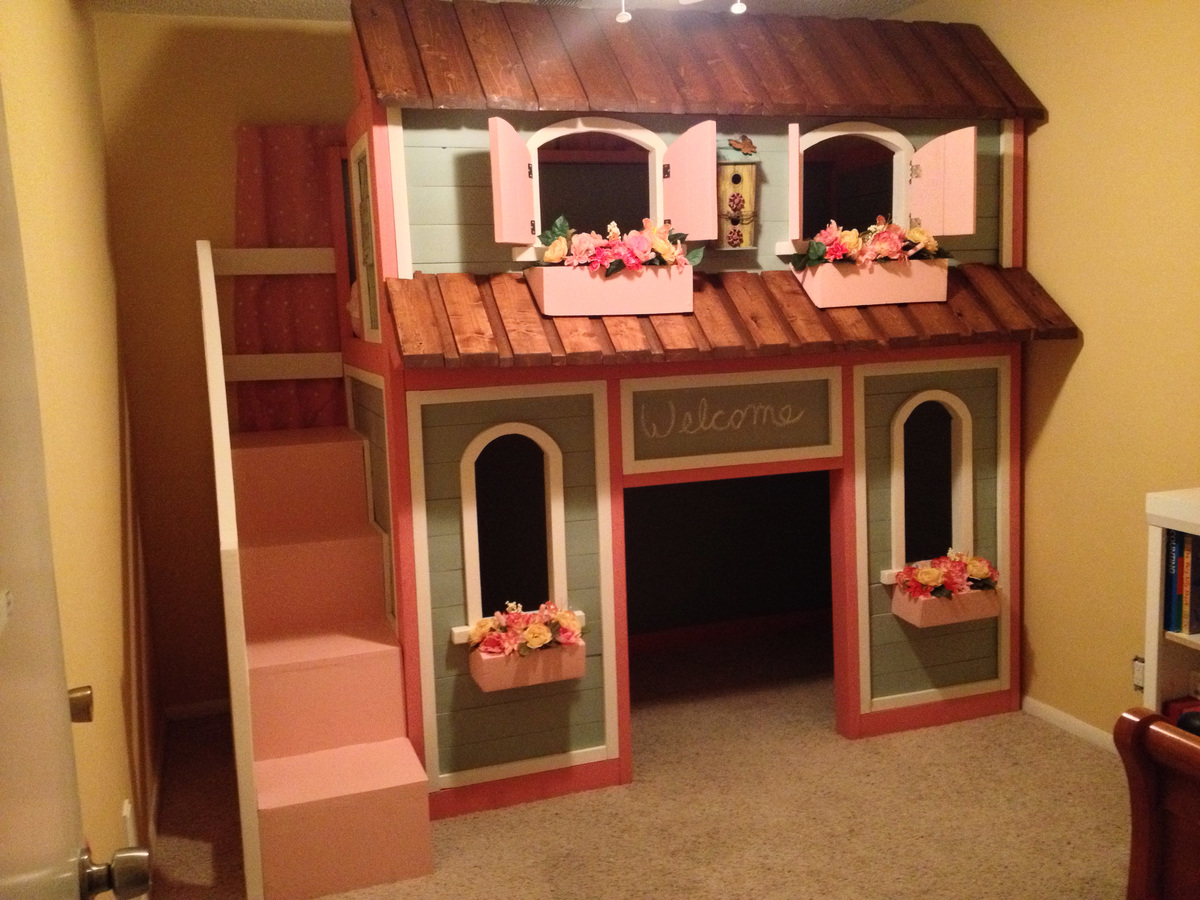
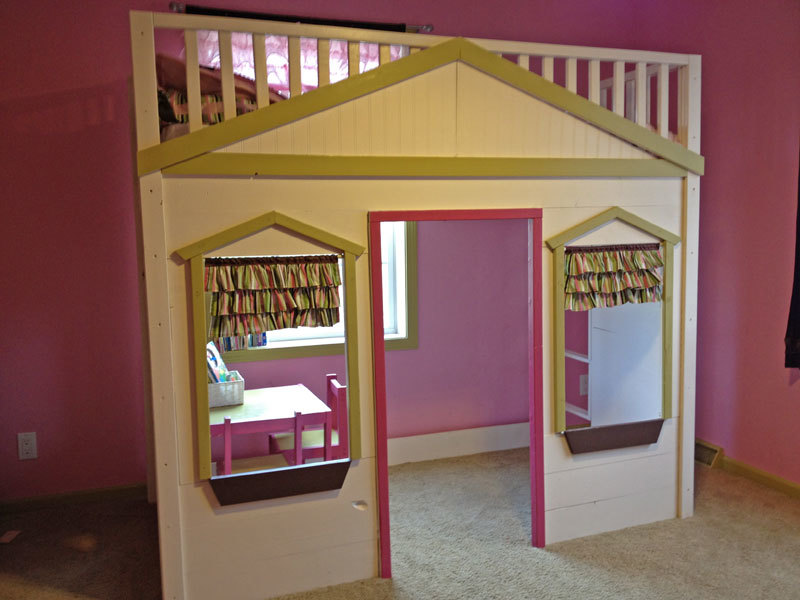
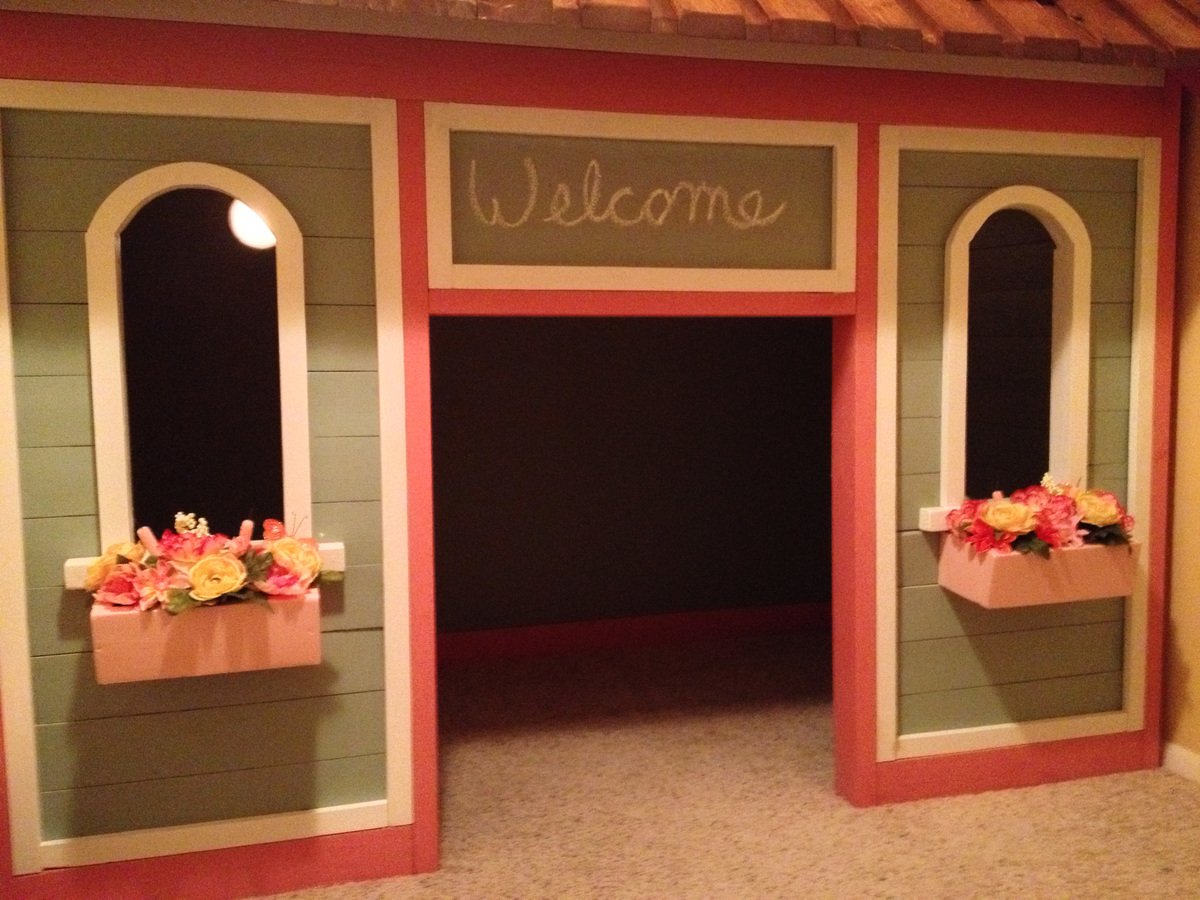
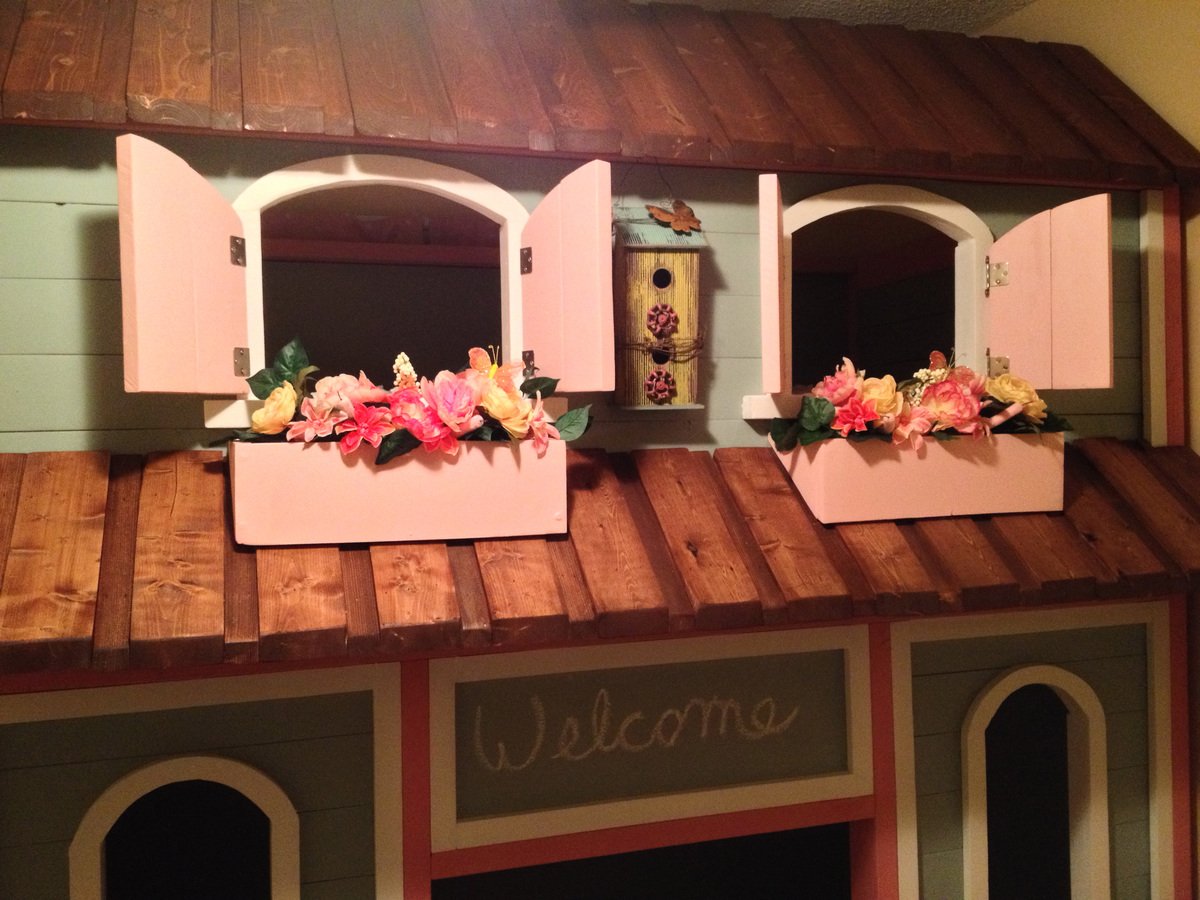
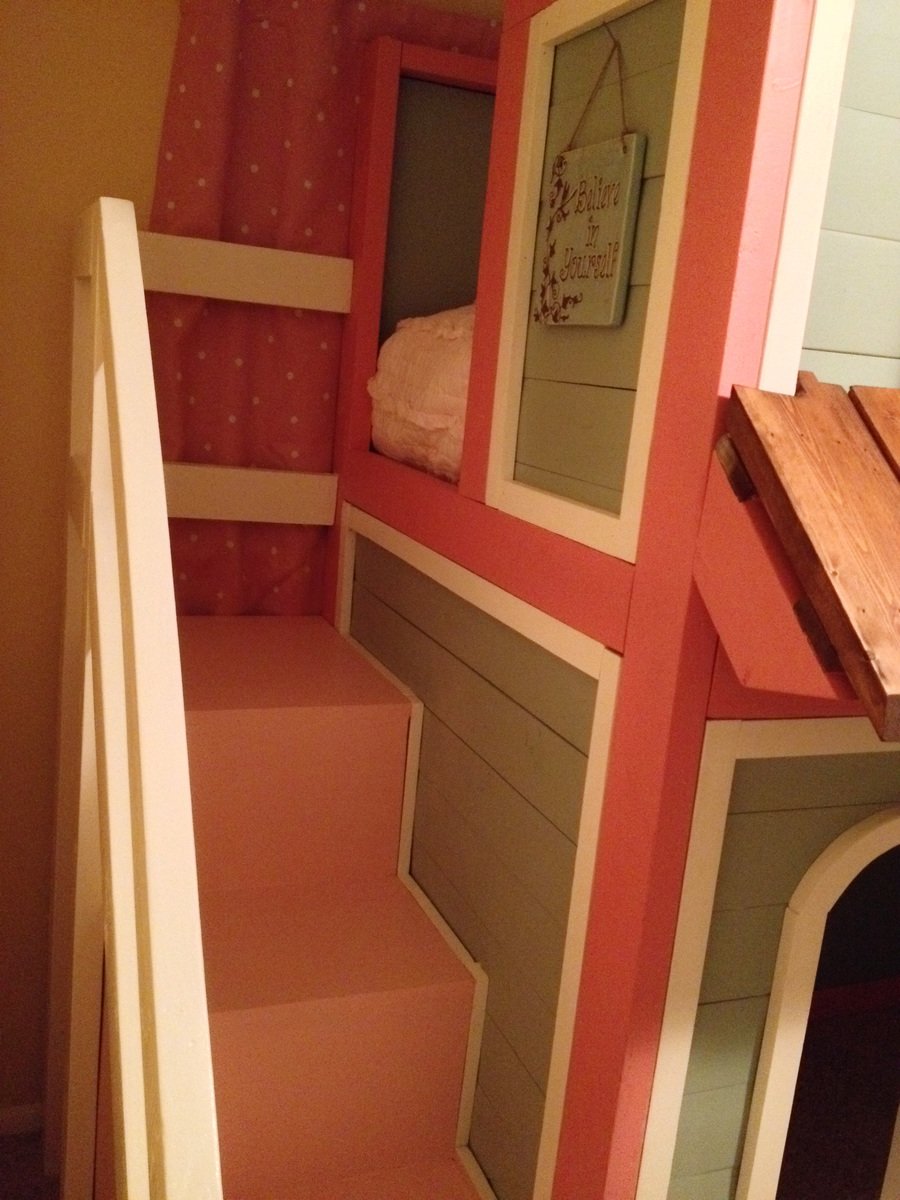
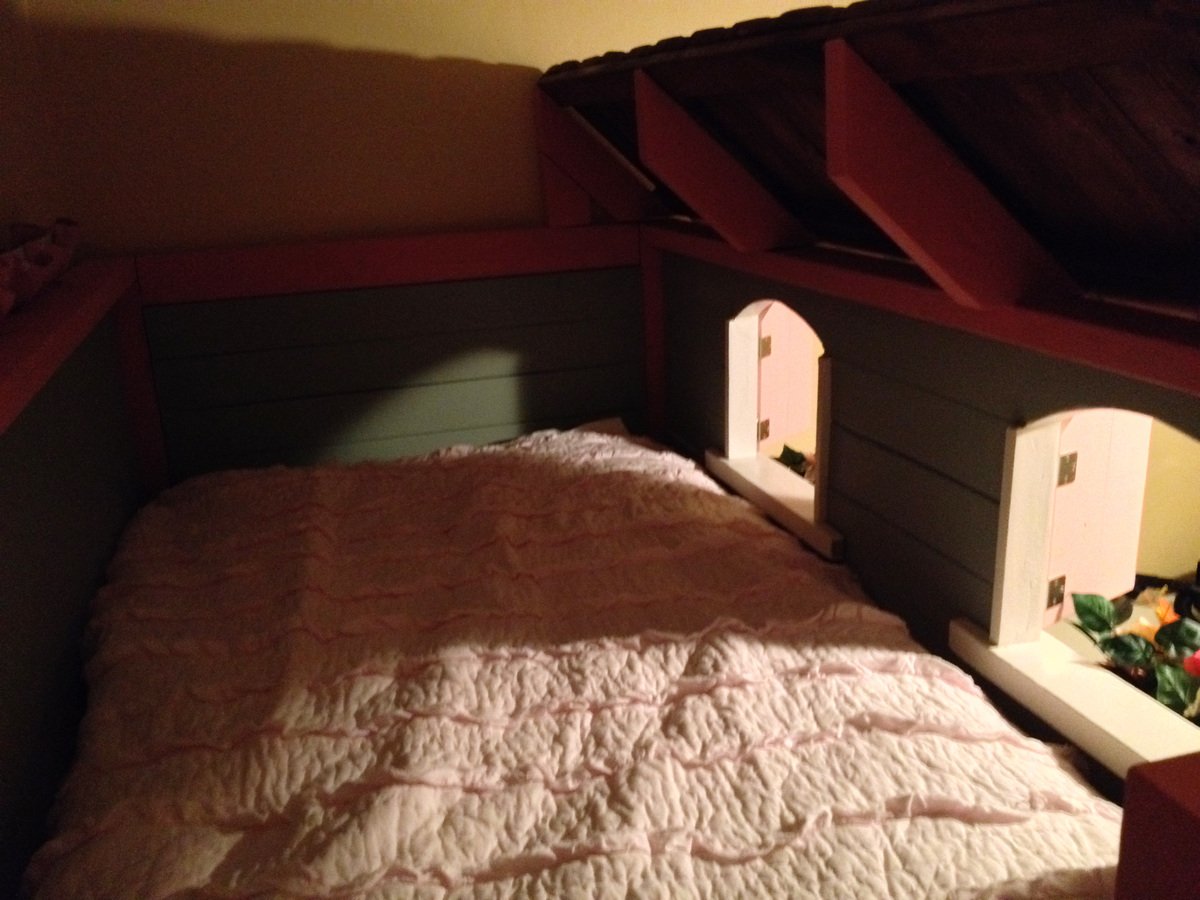
We loved the Sweet Pea plans so much but we didn't need bunk beds. We turned it into a loft bed with a playhouse underneath. We also inverted the shelves on the stairs to be inside the playhouse due to her room size. Added a second roof and window boxes. This project was fun and took us 10 days to complete. Thank You so very much for sharing these AWESOME plans!!

Fri, 01/31/2014 - 20:41
Ah! I love it! I love the roof on the lower level, this turned out adorable!
Sun, 02/02/2014 - 22:11
I am looking at making this for my daughter and I also want to do a playhouse on the bottom as she is a single child. Did you just extend the opening to the bottom bunk to the floor and then extend the bottom windows down some to let in more light? Also, I love the idea of switching the storage from the stairs to inside the playhouse. If possible could you elaborate on how you did this. Thank you.
Tue, 02/04/2014 - 15:46
We omitted the bottom bunk and took it straight to the floor. We left the side panel clear but the frame until we built the stairs then added trim & side boards around the cubbies.
Sat, 05/24/2014 - 07:51
First of all, what an amazing job on your build! I was looking for ideas for a playhouse and I will be modifying the plans for Sweet Pea Bunk beds and your build let's me know how get it can be. But what colors did you use? The look great together!
Sun, 07/17/2016 - 14:49
I love the changes on this! I had a question. What did you use for the roof and is the lower roof section built to the same specifications as the upper roof?
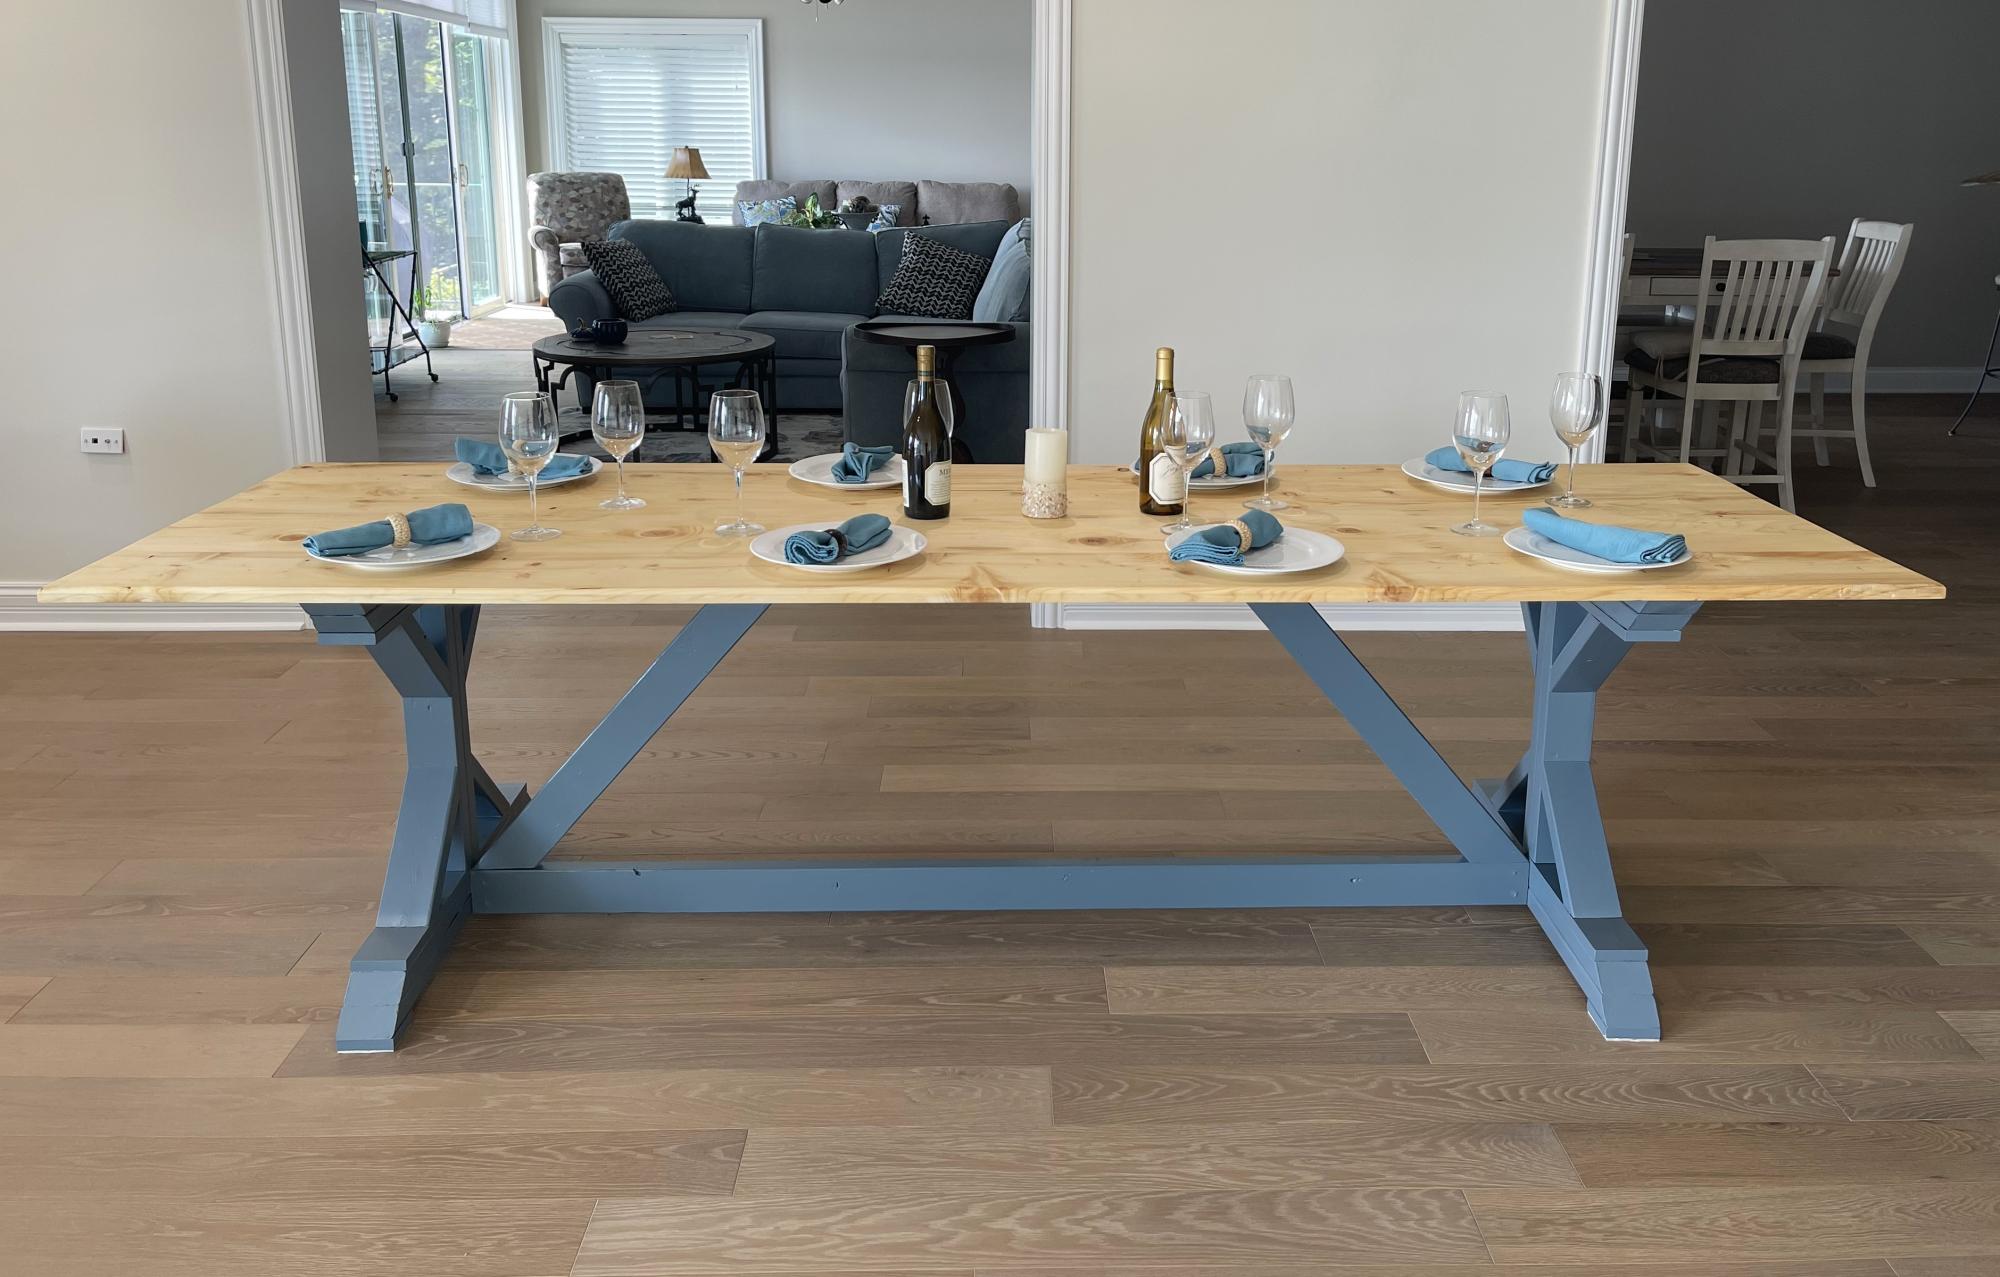
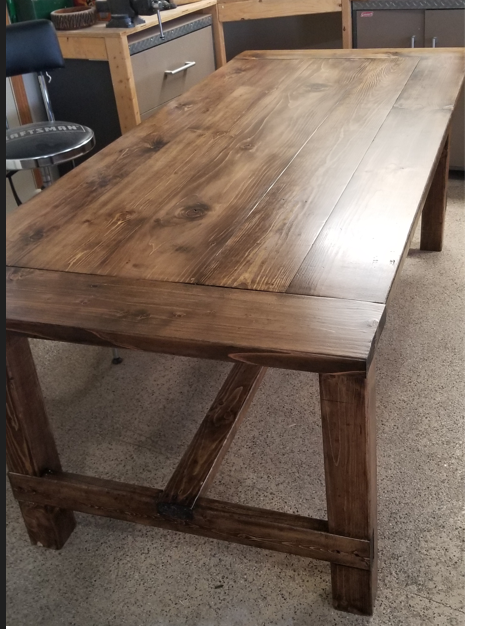
This was really fun! Actually used Spruce from a tree on my property that I had cut down and taken to a Saw Mill 6 Years ago. Been in the barn drying. The rough sawn boards were only 1.25 thick after the planer I could only maintain 1.00”. Extended the length of the table to 10’. Decided to reverse the underneath support angled boards to add support to the center of the table due to the added length and only 1” thick boards. Used biscuit joints to add strength and alignment. We love it at the lake home!
Matt Menges
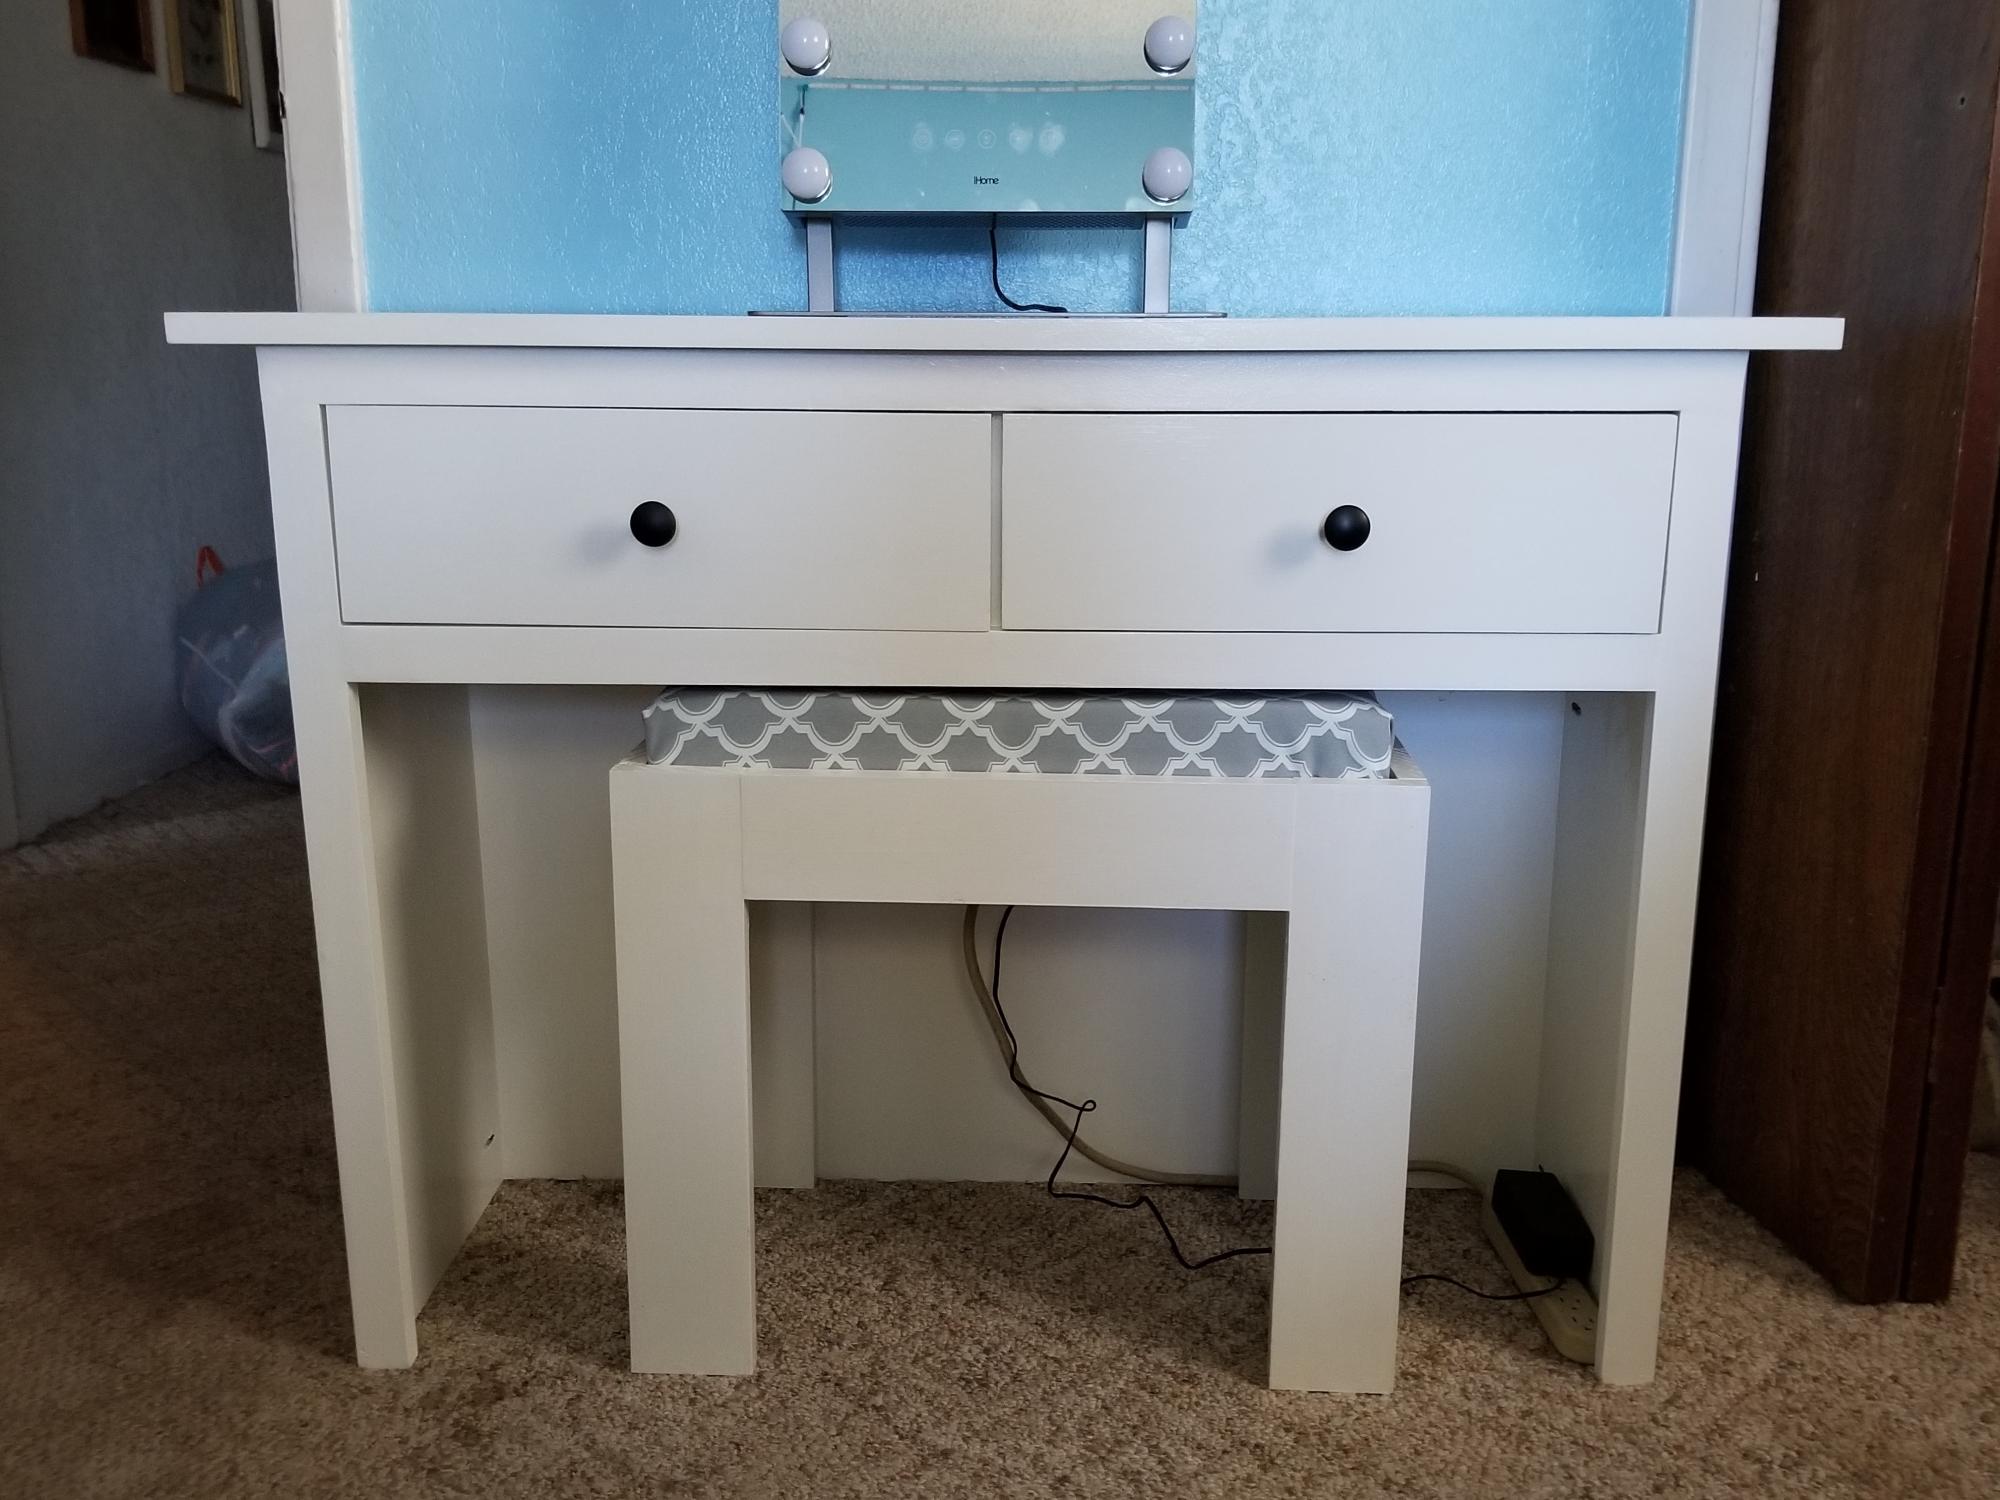
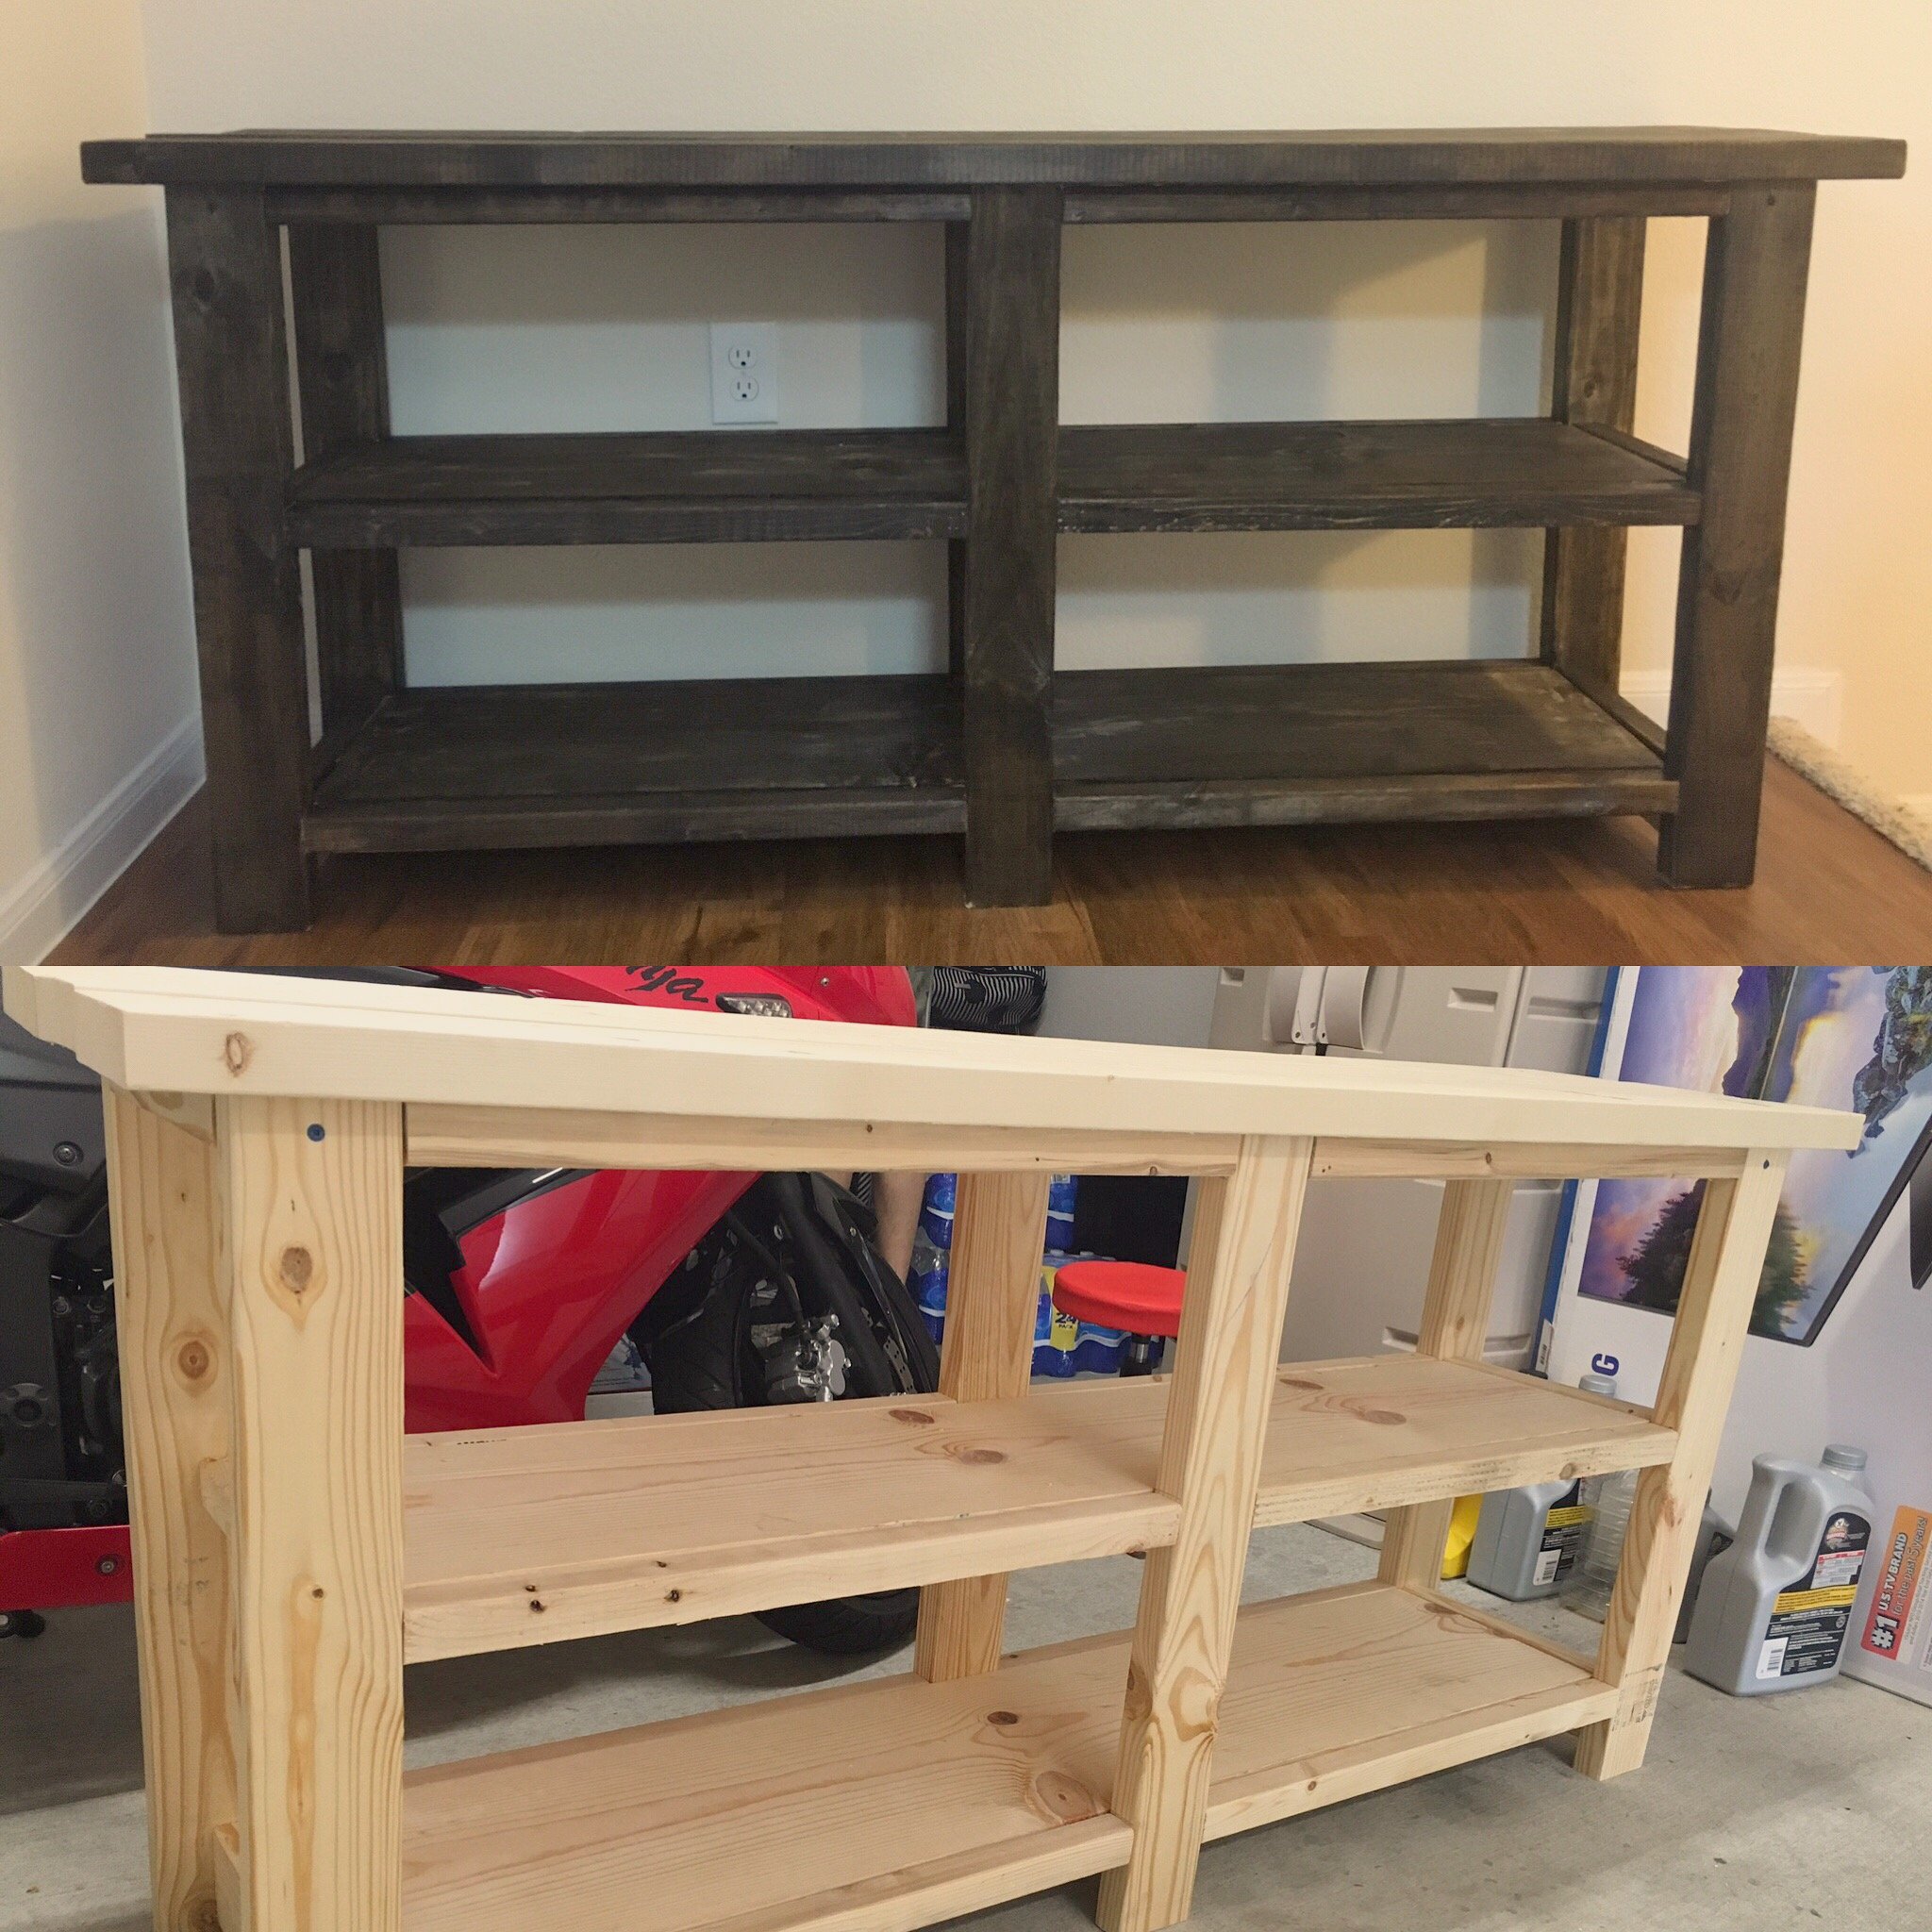
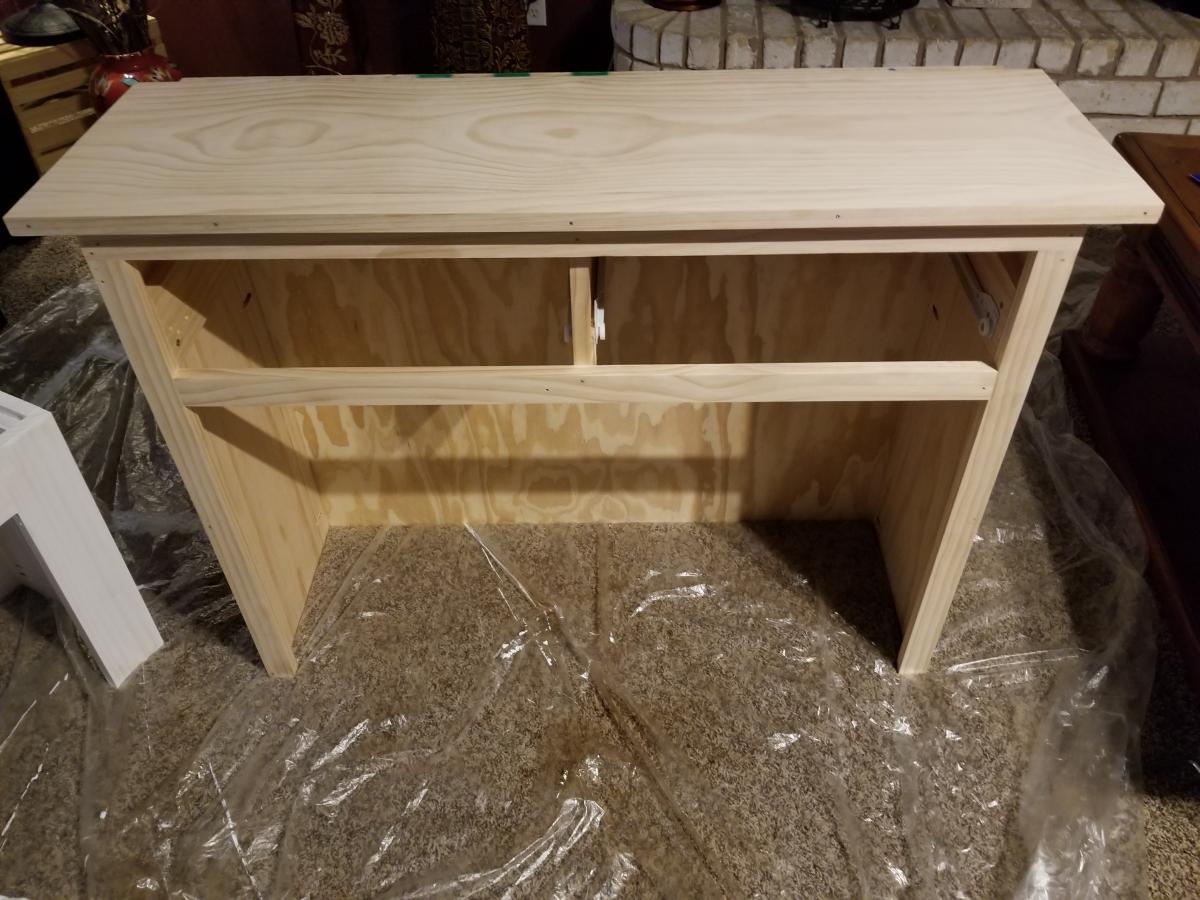
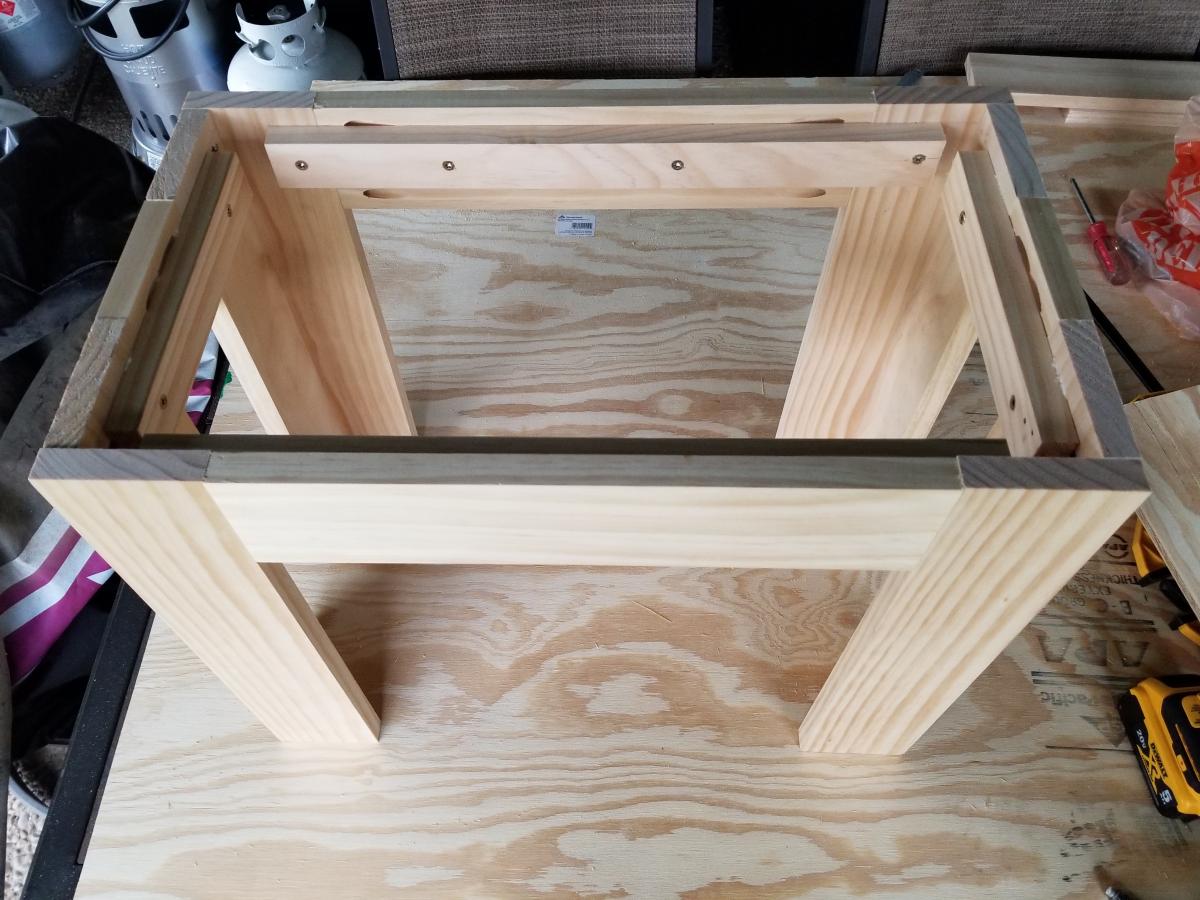
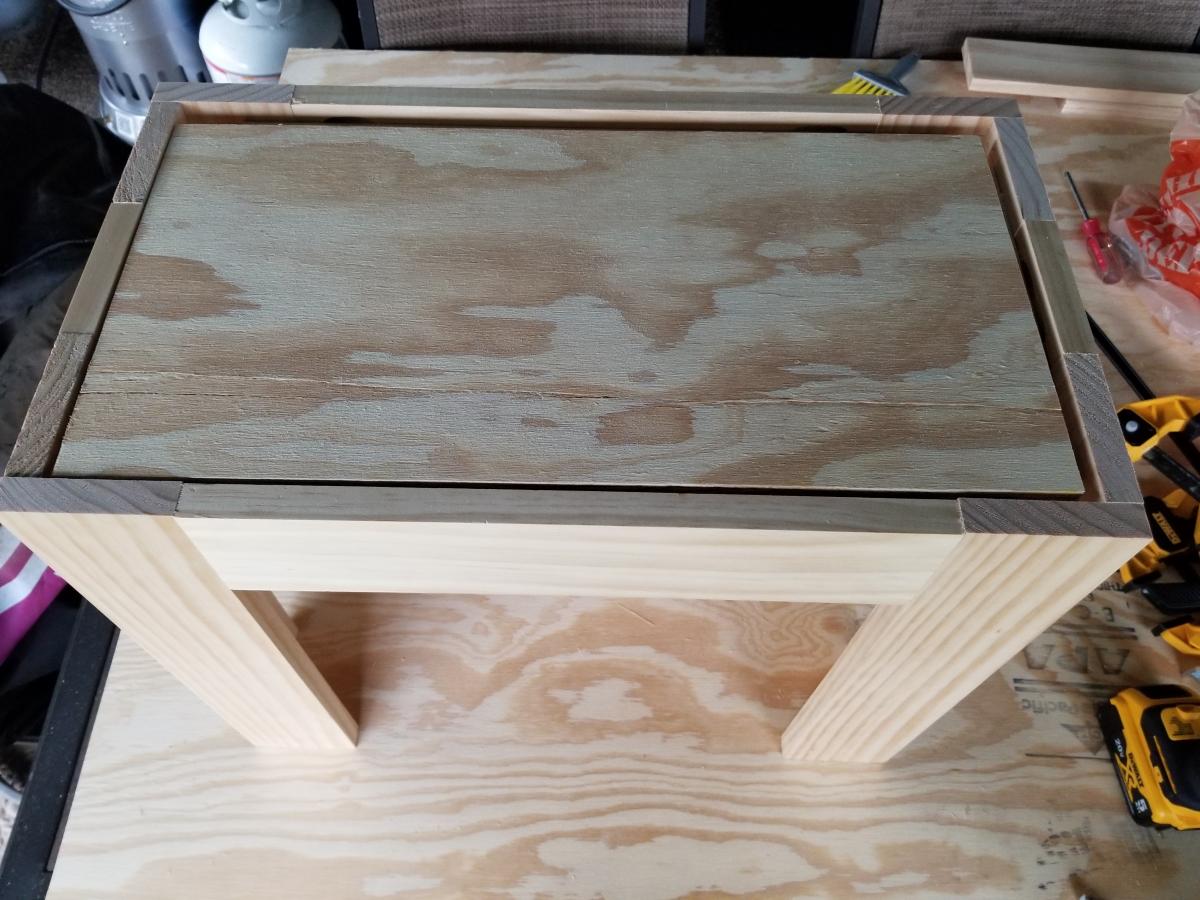
I started with the Cindy Wood Console Table but modified it. I wanted the center to be open so it could be used as a vanity table. I omitted steps 2 and 4 and altered step 3 so that the length of the centerpiece is only 8 3/4 long. I also omitted step 7. In step 8, I made the front-facing go all the way to the bottom, my cut was 27 5/8. All other steps were the same.
Since it is a vanity table, I also made a bench to go with it. I used 1X4 for the legs and side pieces. The total dimensions of the bench are 22 inches long, 12 1/2 inches wide and 18 inches tall. I had to buy an additional 10 feet of 1X4 to add this to my project. The cuts for the front and back of the bench are 14 7/8, the sides are 3 7/8 of 1X4. I used pocket holes to put the legs, font, back, and sides together. Because of using pocket screws, make sure to put the sides together first, then the front and back. I used leftover 1X2 pieces to create a railing on the inside of the bench for the seat base to rest on. I put the railings 5/8 inch from the top of the bench and secured them using wood glue and 1 1/4 inch screws. I used leftover plywood as the seat base. I cut the plywood to be 10 1/2 by 20 inches.
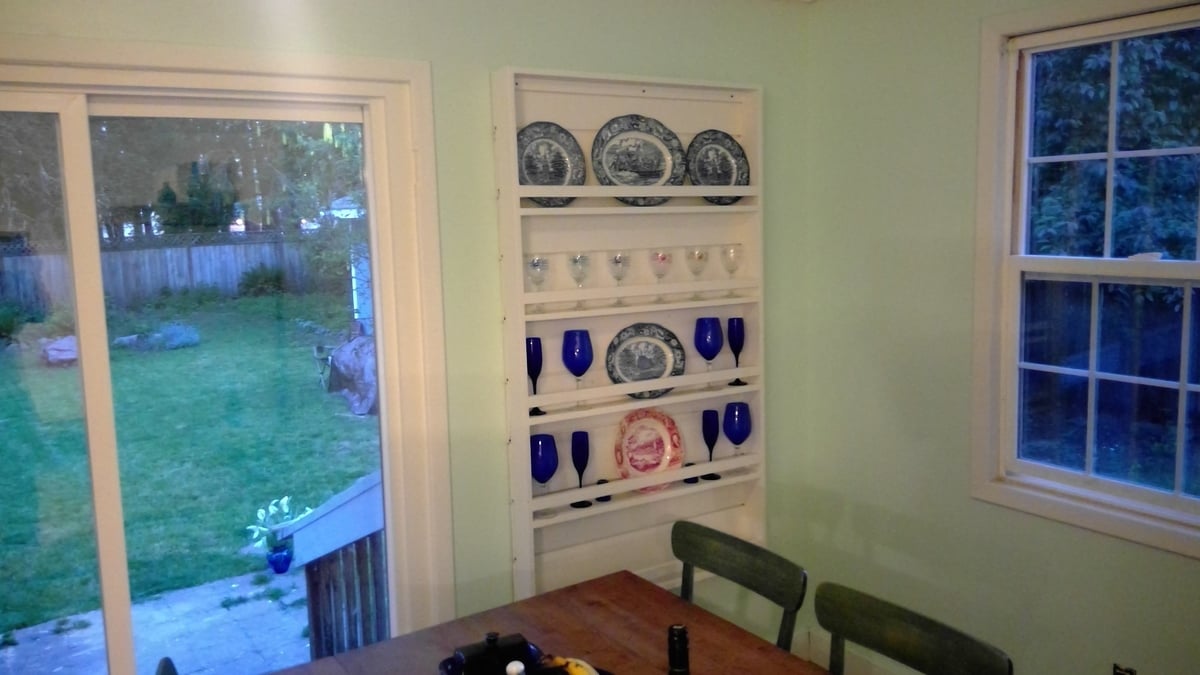
I came across the plans for the pate rack and realized it would be a perfect fit in my dining room. My house is just shy of its 100th birthday and I have been tackling renovation one room at a time. I have been trying to find new ways to use all of the materials that have been removed or replaced during my renovation. I was able to use the damaged shiplap and warped baseboards from my first room's renovation and create a plate rack shown.
Thank you for the plans!
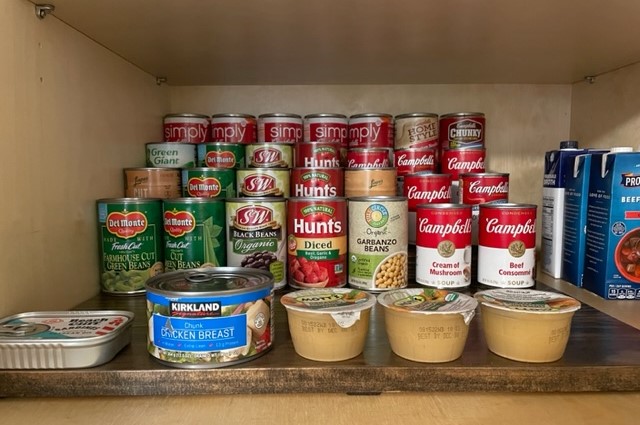
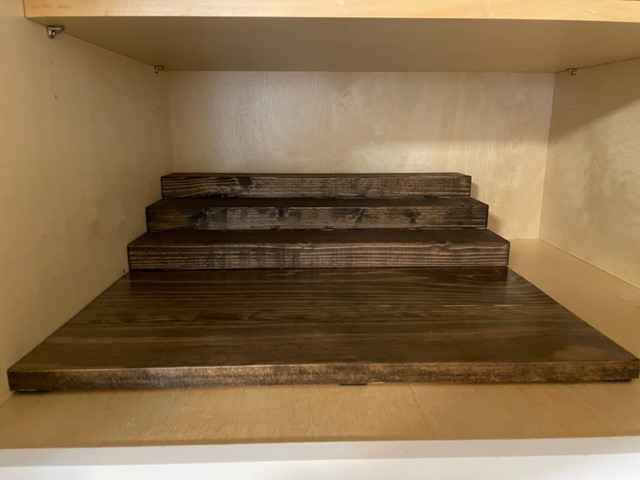
We were looking for a way to better utilize our cabinet space. Previously, our cans were all pushed in and we couldn't see what we had without moving things around. I Found Ana's tier can organizer and knew it was exactly what we needed. We repurposed a piece of stained plywood we already had and a couple of 2x4 pieces from previous projects. We did buy a 2x4x8 because we wanted to make it a 4-tier shelf. We stained it dark walnut and added felt pads to the bottom. Measures 22" D x 21.5" W. We love it and it makes our space so much more effective.
J Daughenbaugh