Community Brag Posts

Blue Console Table

Submitted by Anonymous (not verified) on Thu, 03/07/2019 - 13:15

Built from plans

Built from Plan(s)
Estimated Time Investment
Day Project (6-9 Hours)
Finish Used
Chalk paint
Recommended Skill Level
Beginner

Pretty AND Functional Wall Shelf

To finish off my bathroom remodel I built the Martina wall shelf. I reused the metal hook that was previously on my wall before the board and batten treatment. It fit perfectly in the space under the shelf meant for hooks. I wish I had measured out my towels and storage needs. I could have actually stored more if I had adjusted the plans to make the shelf a little deeper and a couple inches wider. Overall, I'm very pleased! The Kreg Jig is a fun little tool, too!

Estimated Time Investment
Day Project (6-9 Hours)
Finish Used
primer/sealer (1 coat)
Valspar High Noon in Flat Enamel finish (2 coats)
Recommended Skill Level
Beginner

Comments

Truss Shelves

Submitted by valeriek on Thu, 10/10/2013 - 11:15

First project! Cut the tops at the wrong angle. Stained with Miniwax Dark Walnut. Had some kreg jig troubles but all-in-all very happy with the results.

Built from Plan(s)
Estimated Cost
$70
Estimated Time Investment
Weekend Project (10-20 Hours)
Finish Used
Miniwax Dark Walnut with Polyurethane Coating
Recommended Skill Level
Beginner

easy build queen headboard

Submitted by Jodie on Thu, 12/31/2015 - 08:01

this was a super fun afternoon project! I used the specs for the Queen size headboard, and they were bang on. no modifications needed. i did reinforce with some screws from the back, as well as I used a 1x3 vertically in the centre of the back of the headboard, which i used to give extra stability to the horizontal pieces. i secured each horizontal board to it using 1" screws from the back, as my boards were not quite flush and I am a bit of a perfectionist! lol

Estimated Cost
$75
Estimated Time Investment
Afternoon Project (3-6 Hours)
Finish Used
oxidizing treatment followed by a coat of wax.
Recommended Skill Level
Beginner

Long Modern TV Console w/Cedar planks

Submitted by Anonymous (not verified) on Mon, 03/11/2019 - 18:50

Built this project to organize and store the electronics in the living room. Followed the plans for the most part with a single sheet of 3/4” Maple ply for the console. 2” Oak lumber for the legs. Cedar planks instead of 1/4 plywood for the backing. I glued Cedar planks to 1/2 ply and trimmed for the doors; hidden hinges. I drilled holes for adjustable shelving in each section and bought the shelf pins on Amazon.

Estimated Cost
$150
Estimated Time Investment
Weekend Project (10-20 Hours)
Finish Used
Waterbased Pickling for the console. Edge banding for the visible edges. Cedar planks for back and door.
Recommended Skill Level
Intermediate

Benches that Convert to Picnic Tables

Submitted by Steph99 on Thu, 02/02/2023 - 11:14

Simple benches that convert to picnic tables

Comments

Seasonal And Holiday

Harriett Higher Chair

Submitted by Barbarazzi on Tue, 10/18/2011 - 05:29

I made this chair for my two-year old niece so she can sit at the table like a big girl. We call it the "Share Chair" because she has to share it with her two sisters. It was fairly easy to make; I think I spent more time painting it.

Estimated Cost
$20
Estimated Time Investment
Afternoon Project (3-6 Hours)
Finish Used
Polycrylic over paint
Recommended Skill Level
Beginner

Kentwood Bookshelf

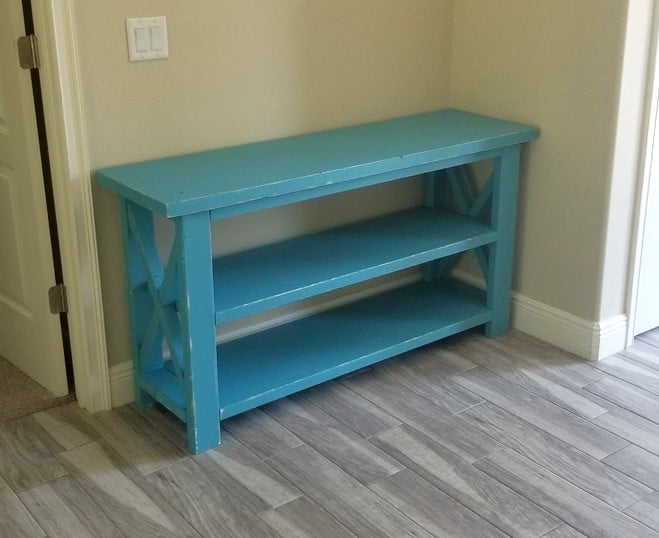
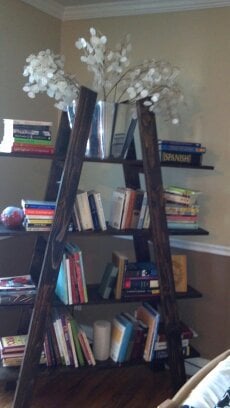
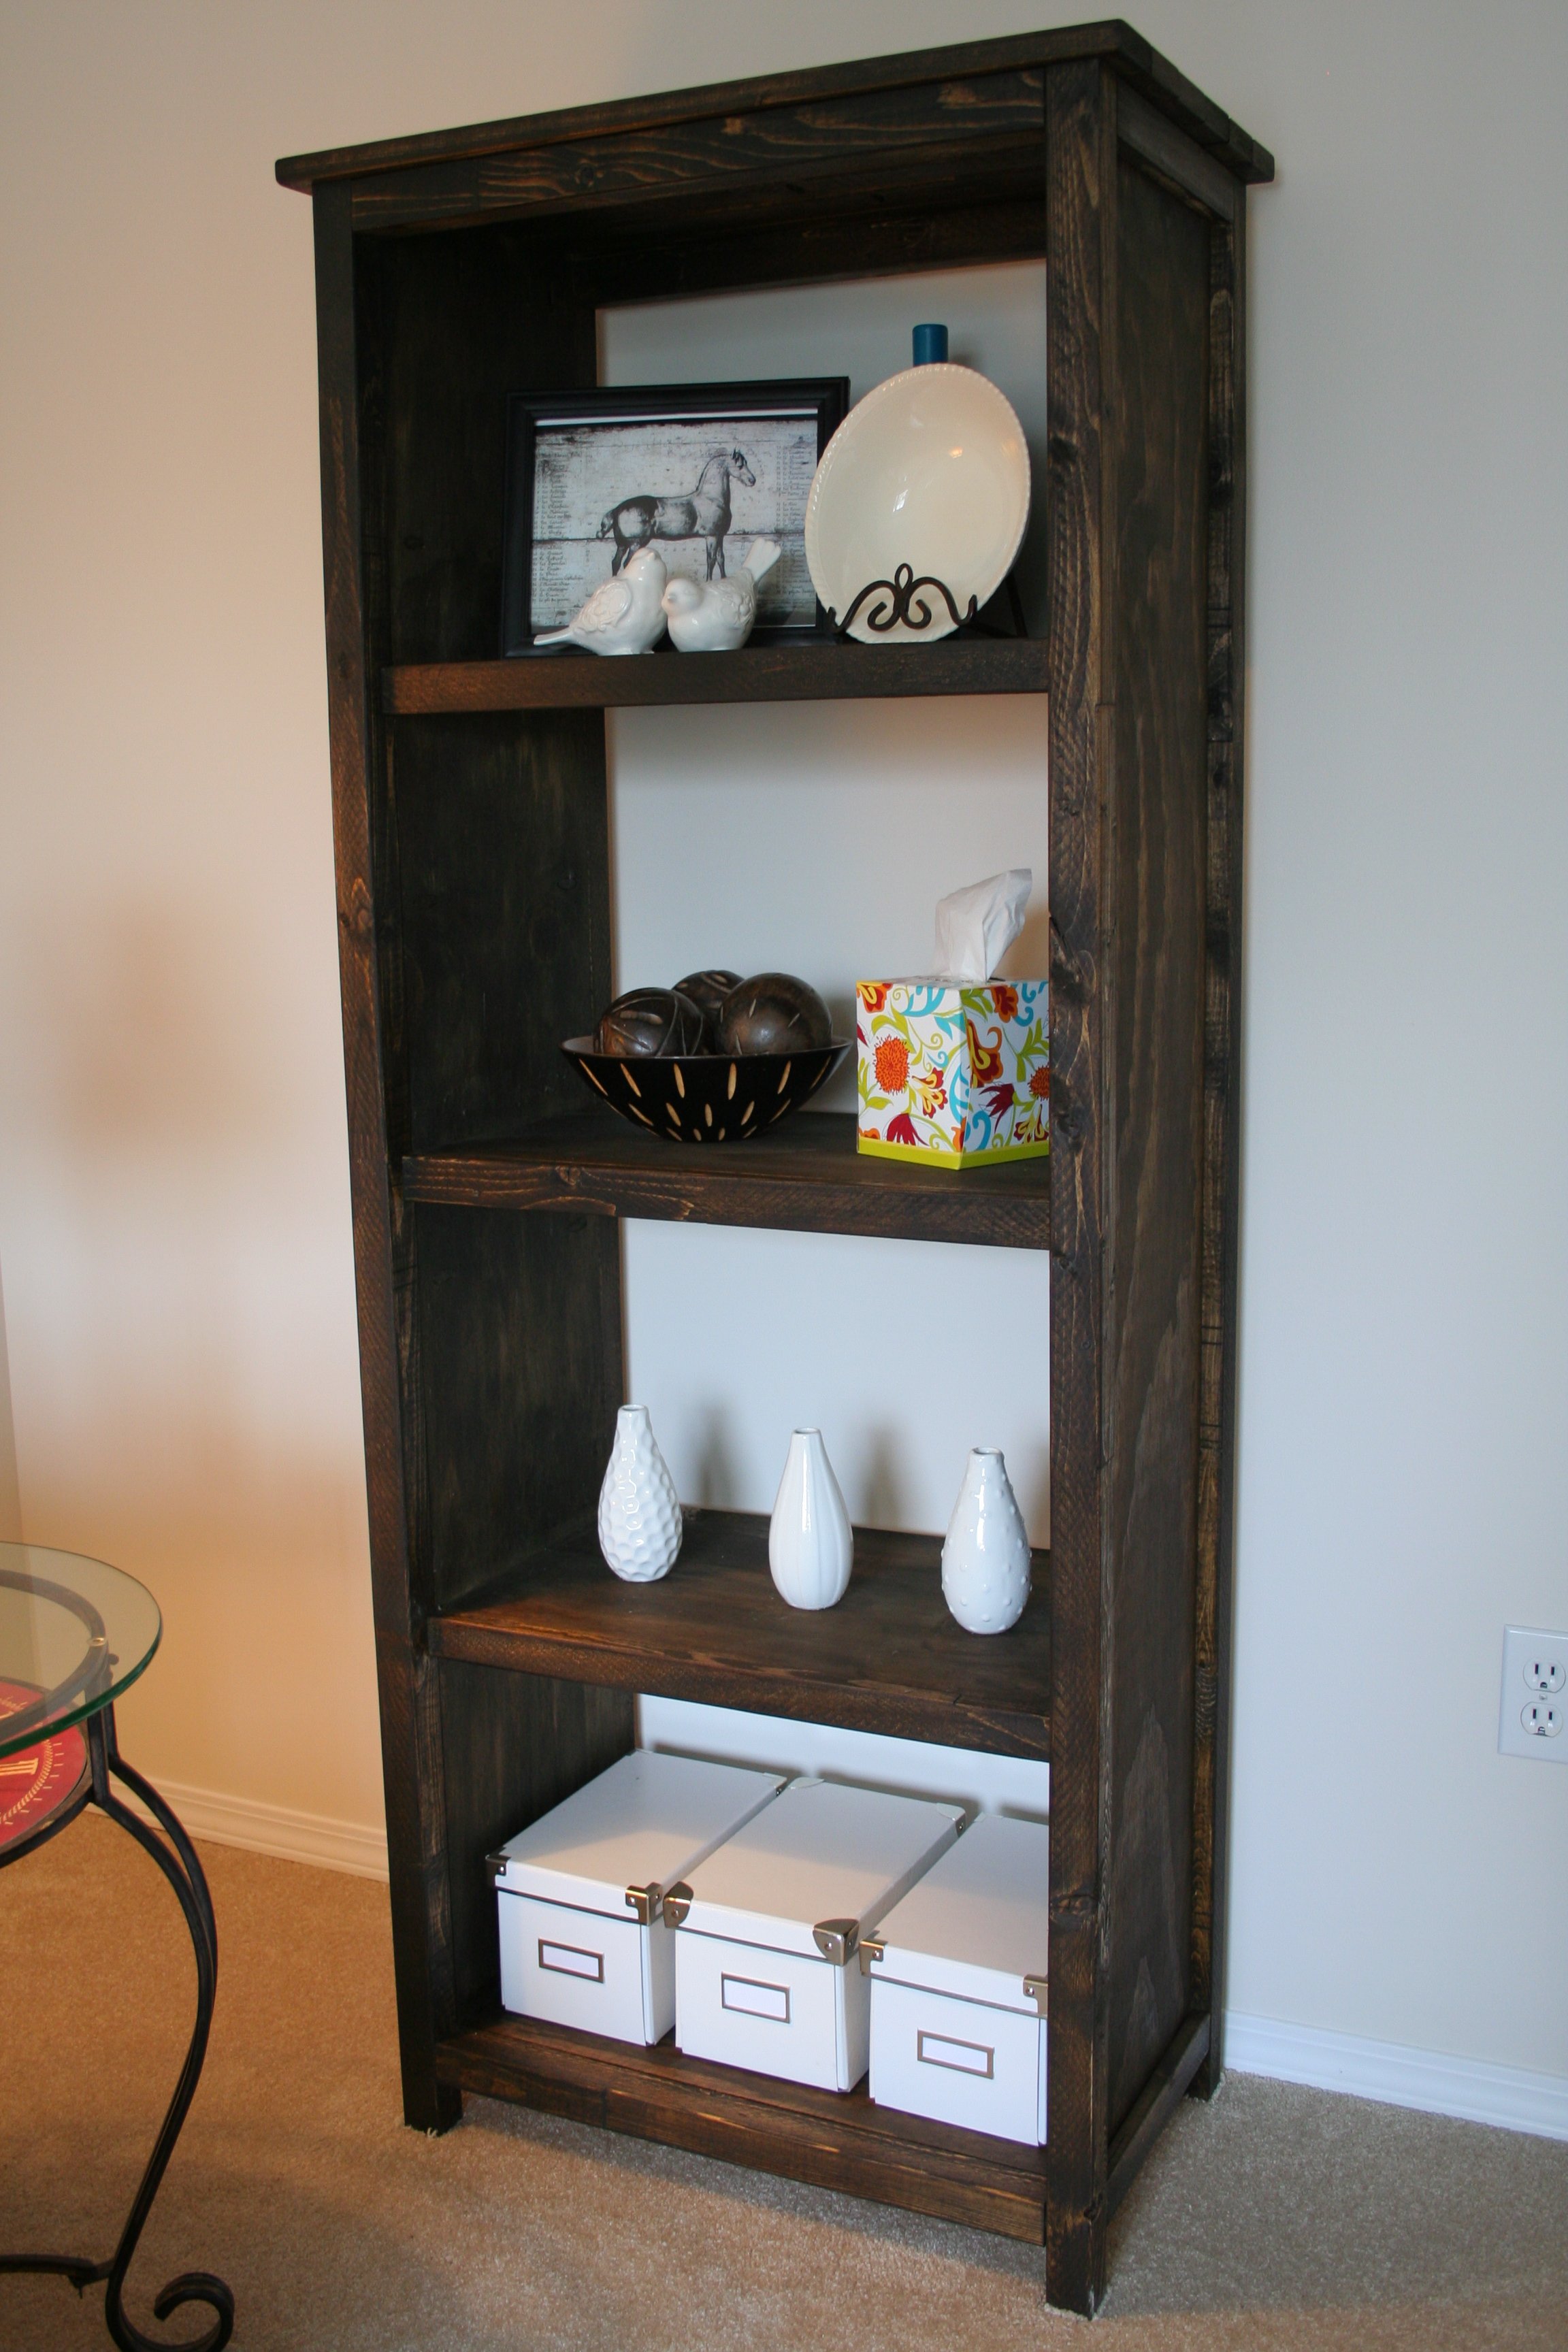
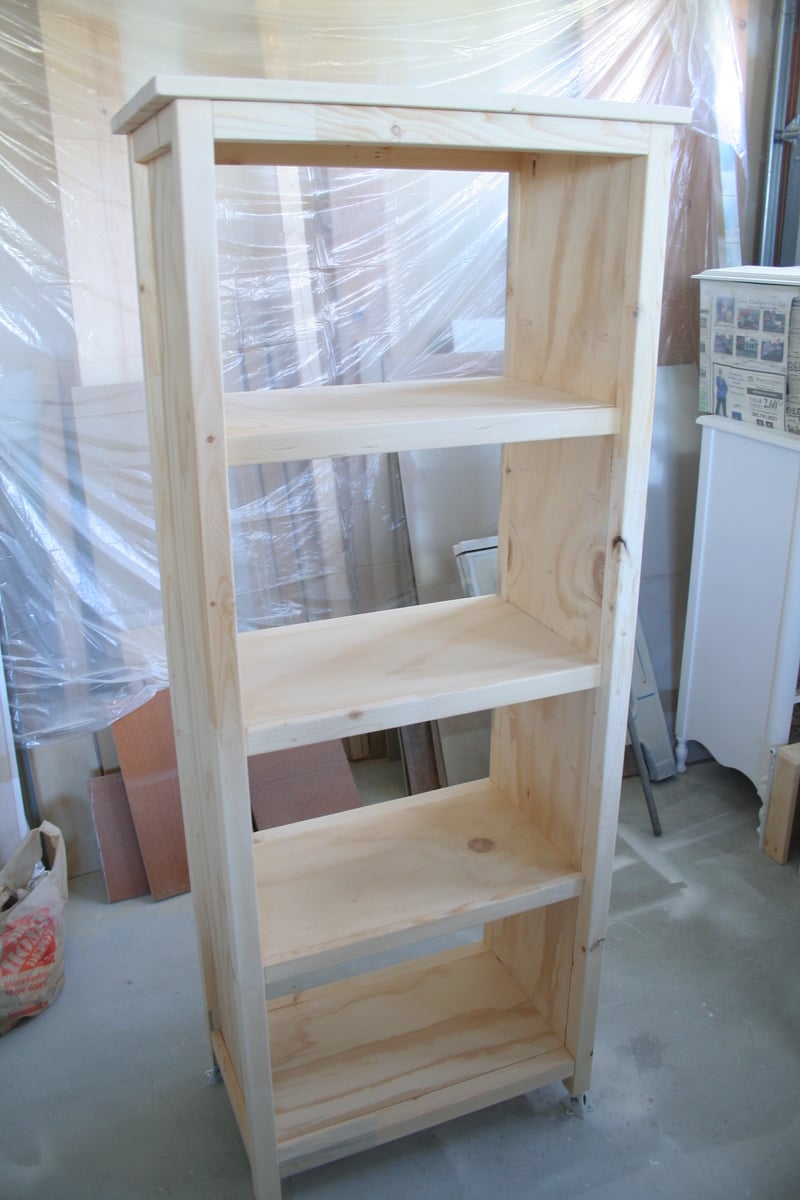
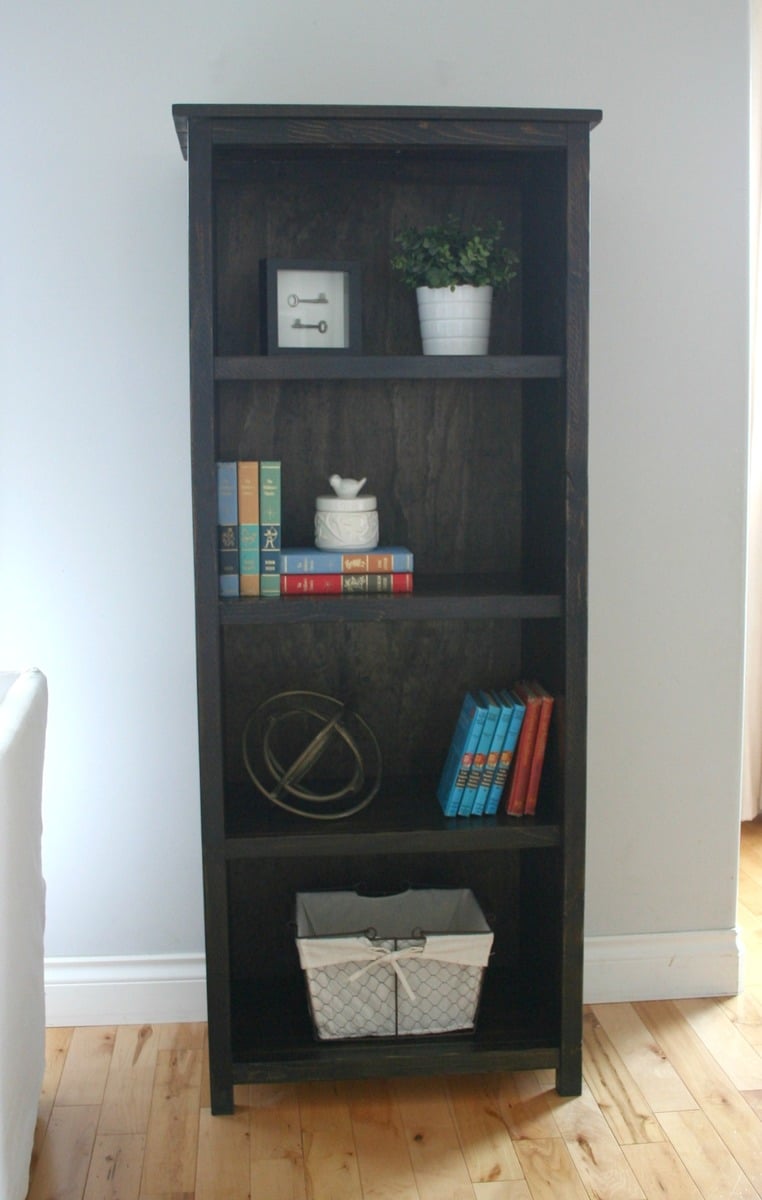
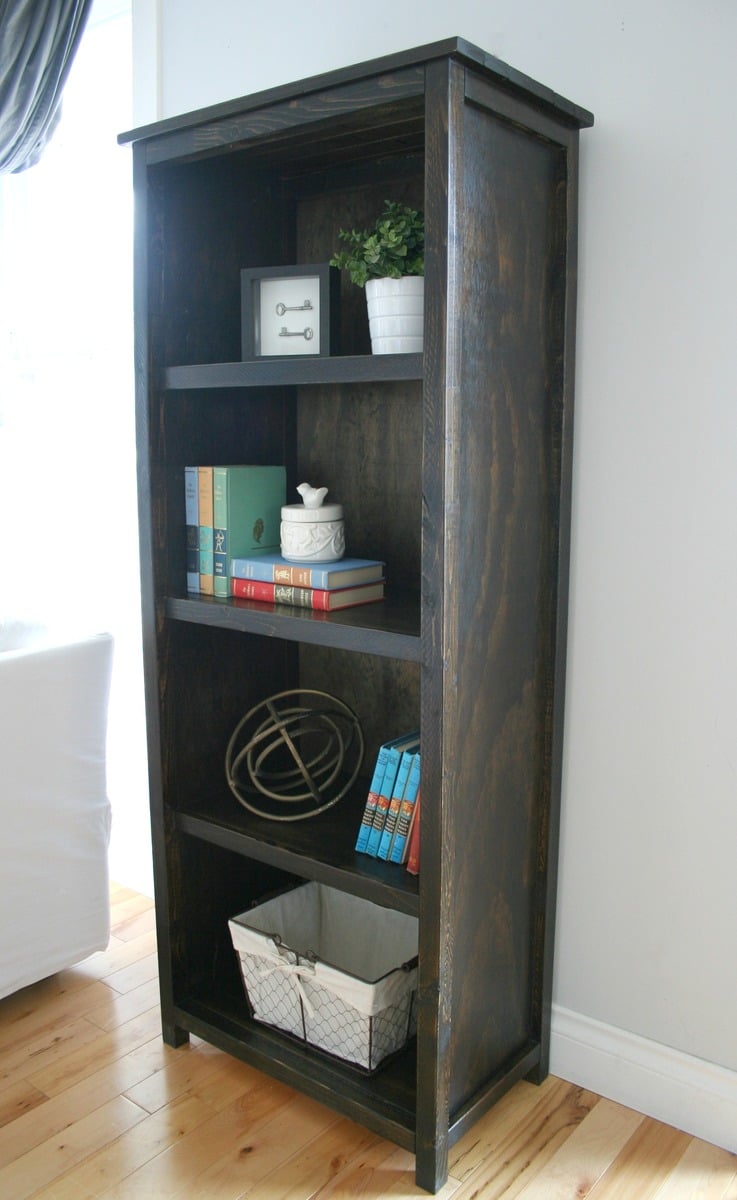
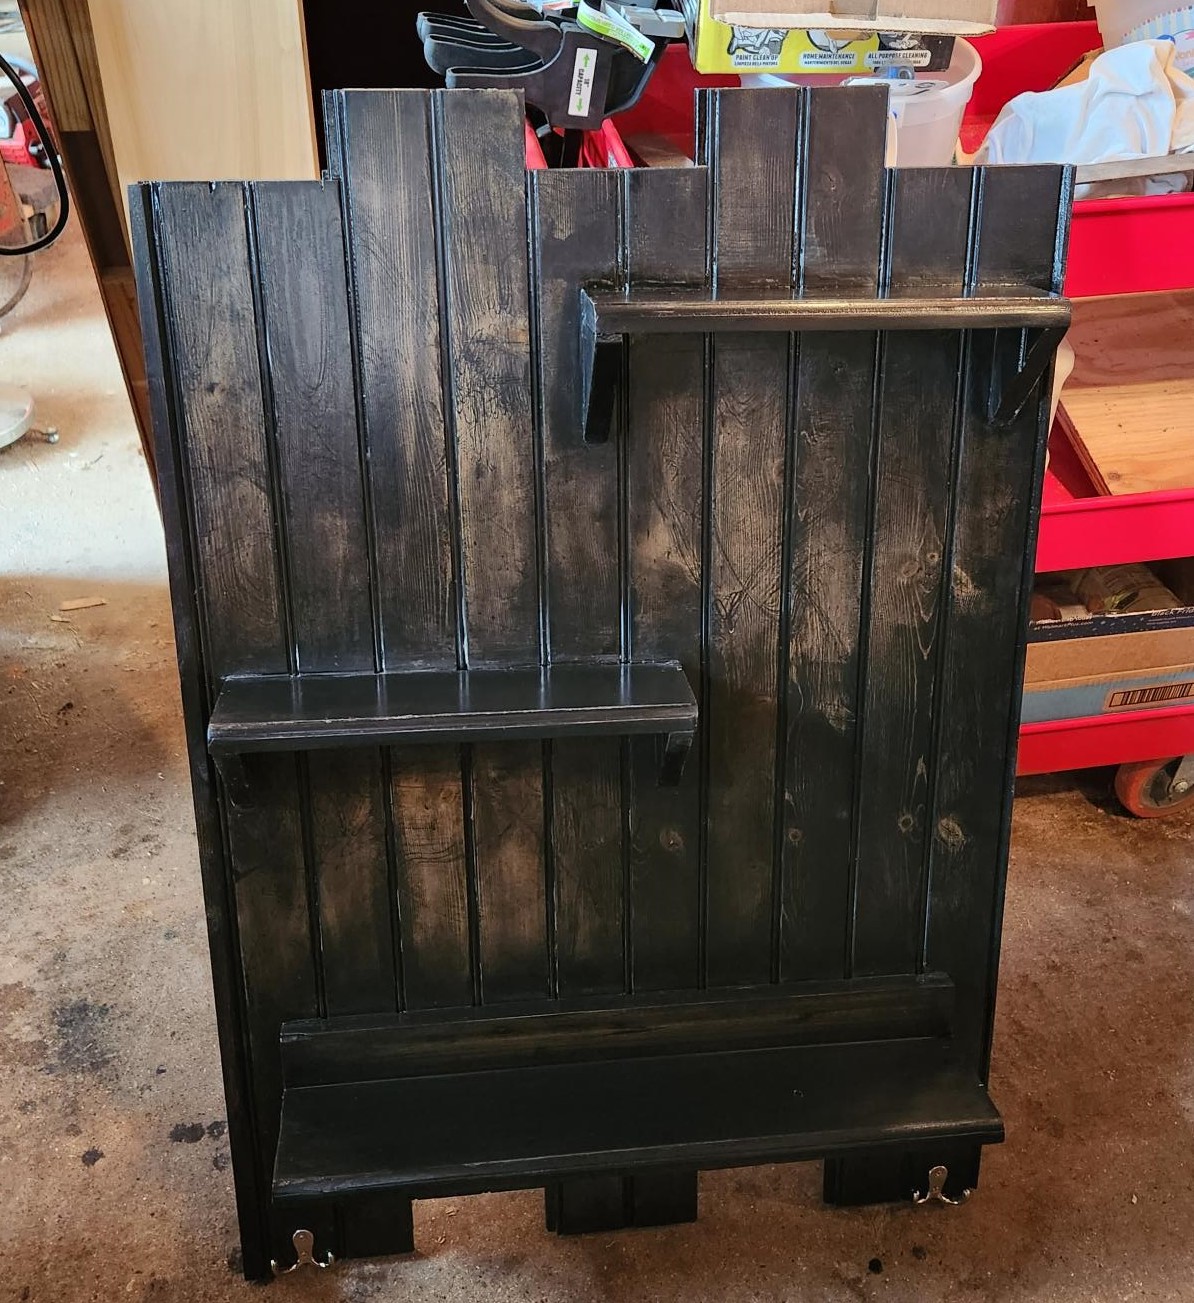
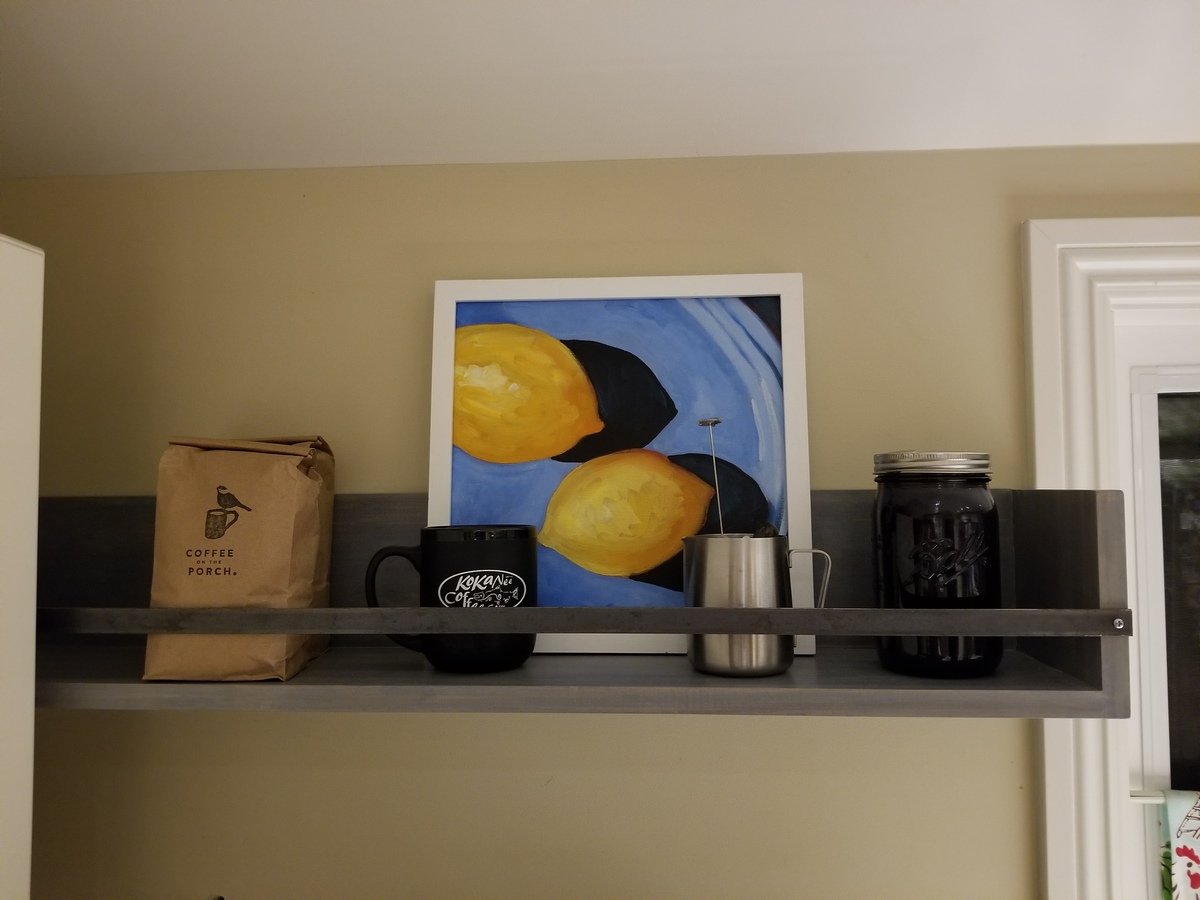
While staging my sister & brother-in-laws home so they could list it for sale, I ended up with an "empty wall" in their living room and nothing to fill it with, but knew a small bookshelf would work perfectly! I loved the look of the Kentwood bookshelf plan. I'm not the fastest builder, but after a couple hours, I had everything cut, all pocket holes drilled and everything fully assembled. I only applied one coat of stain and a single coat of poly and skipped adding a back...for now. I may go back and add a back later, but for now I'm thrilled with it (and so was my sister!)

Edit:  I finally added a back to the shelf - just in time to sell it to a friend. ;)

Estimated Cost
$80
Estimated Time Investment
Day Project (6-9 Hours)
Finish Used
Minwax Jacobean stain, Minwax Wipe-on Poly
Recommended Skill Level
Beginner

X style work bench

Submitted by Anonymous (not verified) on Sat, 01/02/2016 - 10:50

I made this work bench for my garage. Over a few weekends. It is 11' 6' long and is made of pine lumber. I used 2x10x12's on the top, mostly 2x4's are used for the farm with the exception of the center part of the legs. Those are rough cut 4x4's I had laying around. 1x6's for the bottom shelf. Getting the top seams to line up took a lot of sanding with 40 grit. They were to big for me to run through the table saw myself so I sanded and sanded. I did run skews threw the top and then filled with wood filler. I wanted strength. Plus the top boards are not glued so I can replace as needed (It's a work bench right?). This thing is big, heavy, and solid!

Built from Plan(s)
Estimated Cost
$120.00
Estimated Time Investment
Week Long Project (20 Hours or More)
Finish Used
Thompson’s WaterSeal Stain – Transparent ACORN BROWN on frame and Minwax Fast-Drying Polyurethane for the top and bottom shelf
Recommended Skill Level
Intermediate

Comments

Made for DUCKS!

Submitted by Anonymous (not verified) on Sun, 03/17/2019 - 08:12

Built in 2017 for our ducks! They use the ramp just fine! I am now working on editing this coop plan to make a coop for 4 chickens we just brought home. I'm going to leave out the planting area, since it's going inside their open run. 

Estimated Cost
$600 with materials for run fence as well
Estimated Time Investment
Day Project (6-9 Hours)
Recommended Skill Level
Intermediate

Farmhouse Bedside Table

This project was a lot of fun and didn't take very long. Already thinking of making another one with different color finish.

Built from Plan(s)
Estimated Cost
45.00
Estimated Time Investment
Day Project (6-9 Hours)
Finish Used
Valspar Ruby Red Spray paint. Used Dark Walnut stain on top and to get the aged look on table.
Recommended Skill Level
Beginner

Comments

Toy Workbench

Submitted by spiceylg on Thu, 10/17/2013 - 01:56

Second project for annual church craft show. Loved the idea of using pegboard, so I modified it accordingly. Guessed at cost as we bought 2X6s and 2X12s on clearance and ripped them down ourselves which brought the cost down.

Built from Plan(s)
Estimated Cost
$7
Finish Used
Behr Plus, sorry don't have color name.
Recommended Skill Level
Beginner

Great project!

Submitted by Anonymous (not verified) on Sat, 03/23/2019 - 10:56
This project was easy to follow and to build!  My only criticism is the "under $20" cost estimate was way off.  If you're actually buying materials and using pressure treated lumber (which seems like an obvious choice), it ran more like $55ish (lumber, hardware, wood glue (ours was dried out and is something we normally have on hand).  I think most people looking for a project would be wanting a total top cost and be happy to subtract what they may have on hand.  We also happened to have some yoga-mat foam and a flannel backed vinyl tablecloth and staples/staple gun for upholstering the seats.  I figured this was a more weather-proof option.  Our little 3 have been on it non-stop!  Definitely a win!
Built from Plan(s)
Estimated Cost
55
Estimated Time Investment
Afternoon Project (3-6 Hours)
Finish Used
None yet - may stain later...
Recommended Skill Level
Starter Project

Trinket and Sign Board

Submitted by Anonymous (not verified) on Thu, 02/16/2023 - 12:03

Just a few boards put together and added three shelves for trinkets. Main reason for the shelf is to hang a sign with statements like" LIFE IS BETTER IN THE COUNTRY" LIFE IS BETTER BEING RETIRED. ACTUALLY, THE ADDED SIGN IS WHATEVER YOU FANCY

Upholstered bench

I loved working on this easy upholstered bench. It was so much fun and so simple. I followed the plan except I raised the bench to 20 inches, because my husband and I are quite tall. I also wrapped the fabric underneath about 1/2 inch and stapled it so it has a tighter look. Thanks for the plans Ana!

Built from Plan(s)
Estimated Cost
$40
Estimated Time Investment
Afternoon Project (3-6 Hours)
Finish Used
Walnut Stain
Recommended Skill Level
Starter Project

Comments

Media Center

Submitted by Greenmet29 on Sat, 10/19/2013 - 09:44

I had a ton of fun making this media console! It is my second big project, and I would still consider myself a beginner, but I paid very close attention to detail and I think it turned out great!

I stretched the console out by about 4 inches, so that if I ever decide to put my TV on it, it will fit.

Thanks Ana for your great website!

Built from Plan(s)
Estimated Cost
$150.00
Estimated Time Investment
Week Long Project (20 Hours or More)
Finish Used
Three coats of stone hearth semi gloss and 3 coats of minwax polycrylic.
Recommended Skill Level
Intermediate

Sliding Barn Door Media Cabinet

Submitted by Anonymous (not verified) on Tue, 01/05/2016 - 10:27

Thank you so much for the plans! Very excited for how it turned out!

Built from Plan(s)
Estimated Time Investment
Weekend Project (10-20 Hours)
Recommended Skill Level
Beginner

Comments

Tracyjoe

Sat, 01/06/2018 - 18:52

I have built the cabinet part of the sliding barn door cabinet. I am trying to build the doors out of the 1/2” plywood for the back as suggested. The plywood is warping and I am not sure what options I have to salvage the plywood.

Rustic shelves

Submitted by ogie287 on Fri, 03/29/2019 - 18:06

I love the look of these shelves. I needed something for the wall space to either side of the kitchen window and sink. The ceiling slopes down at least a foot on that wall so there's less space for cabinets and putting up cabinets that fit the space wasn't working. Shelves were the answer. The pictures show only the left side of the window/sink, but I did put up a matching shelf on the right side. I used a 1x8 for the shelf and 1x6 for the back.

Built from Plan(s)
Estimated Time Investment
Afternoon Project (3-6 Hours)
Finish Used
1 coat weathered gray stain, 1 coat antique white stain, 2 coats matte polyurethane
Recommended Skill Level
Beginner