Community Brag Posts


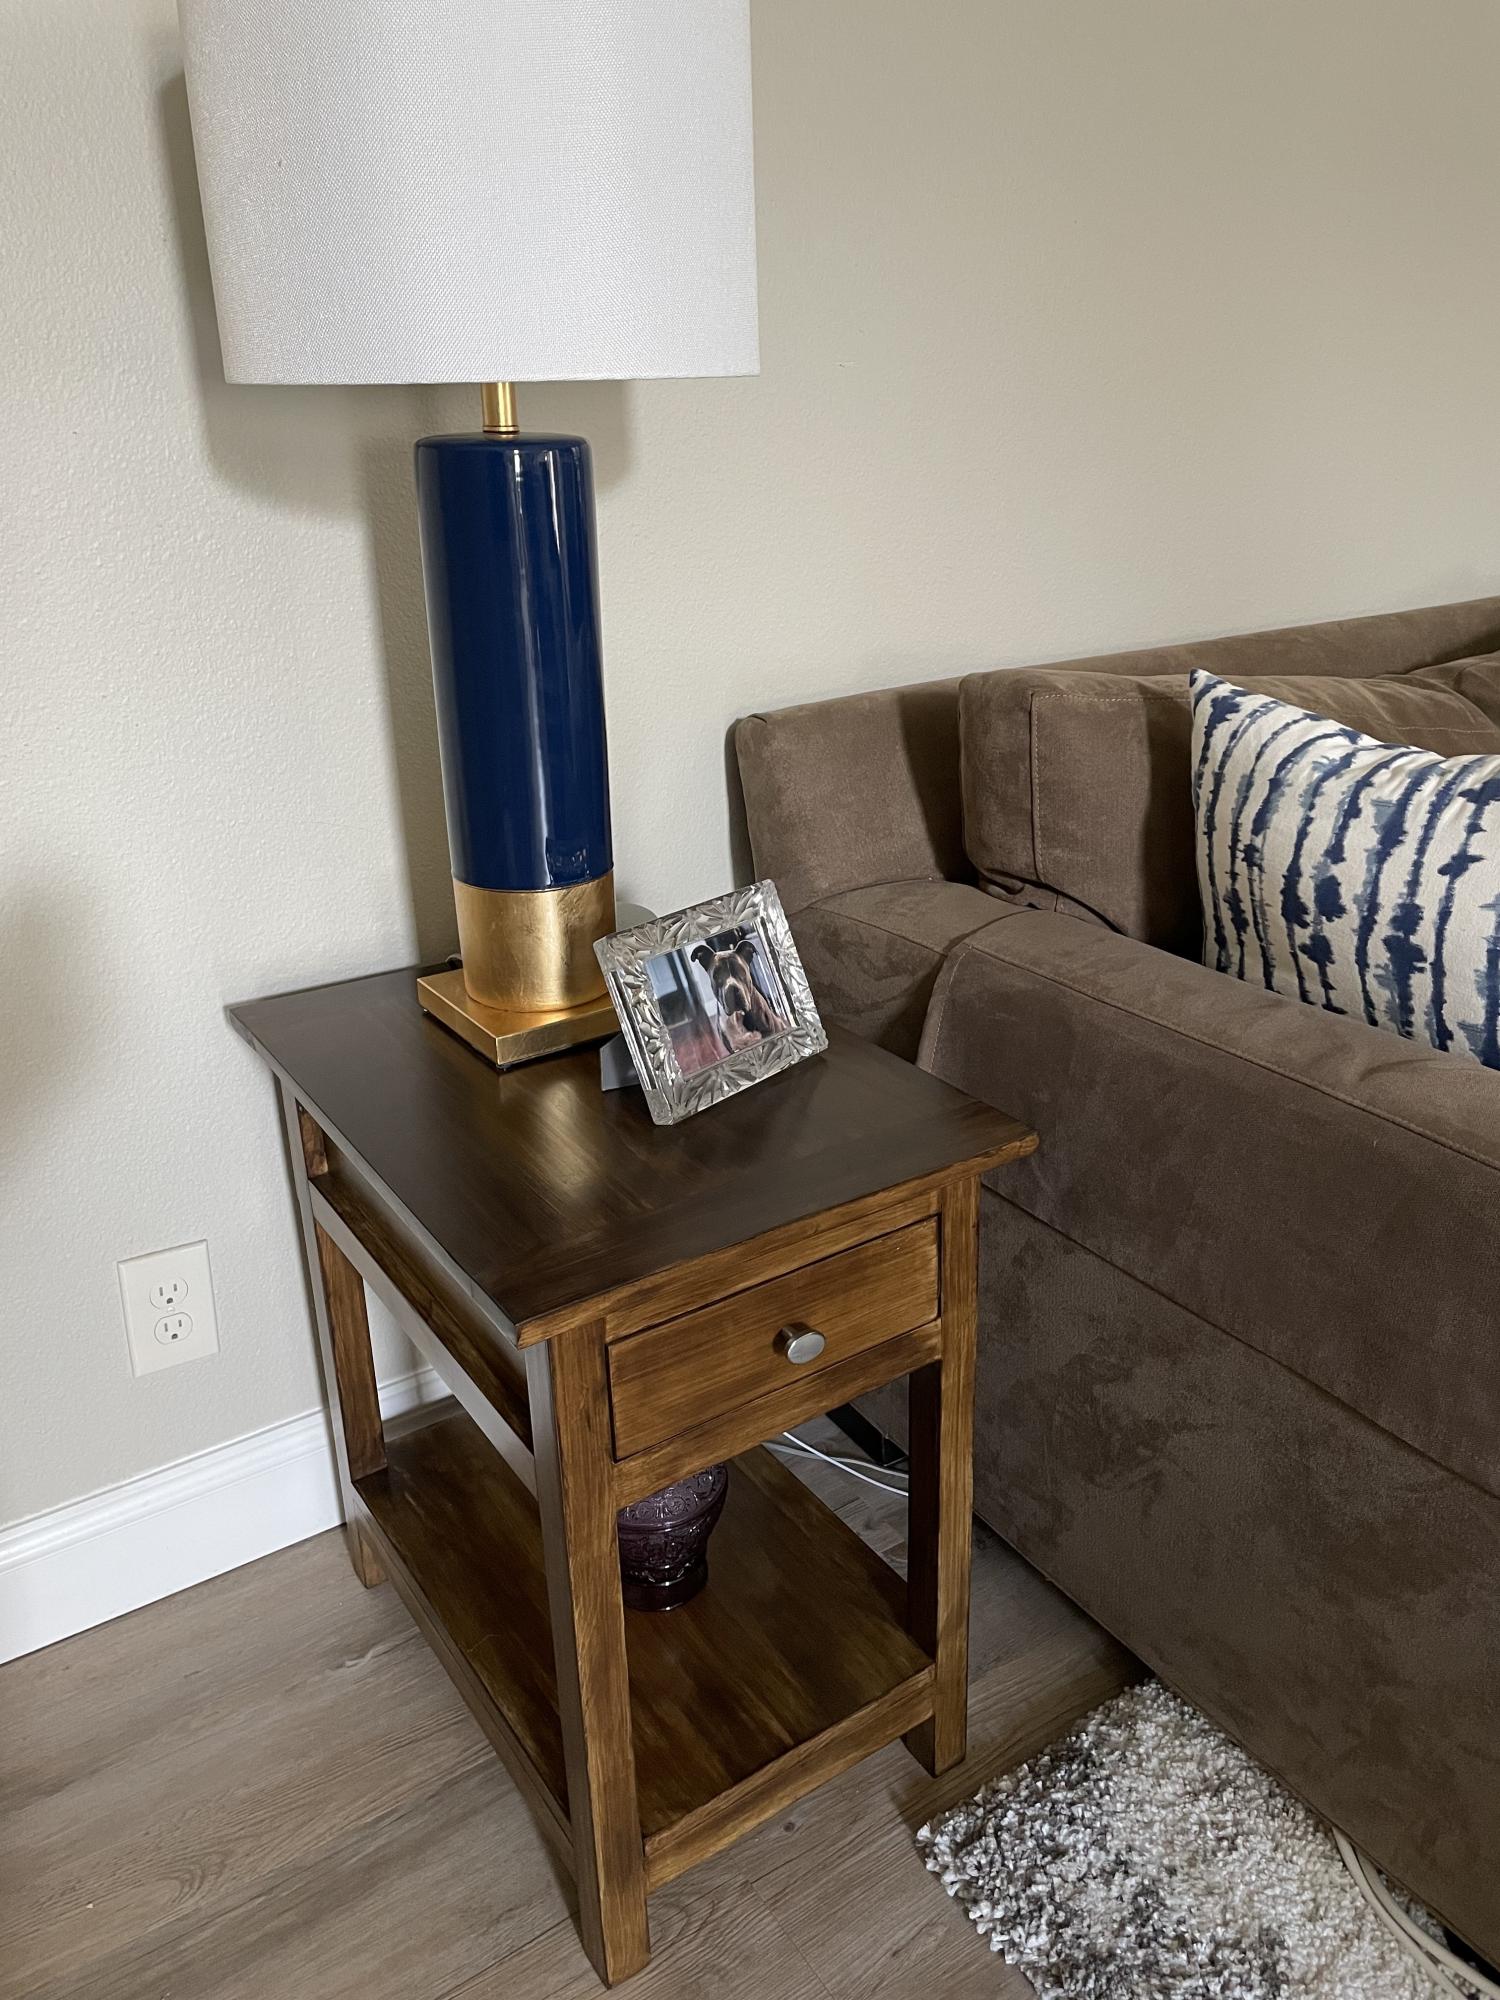
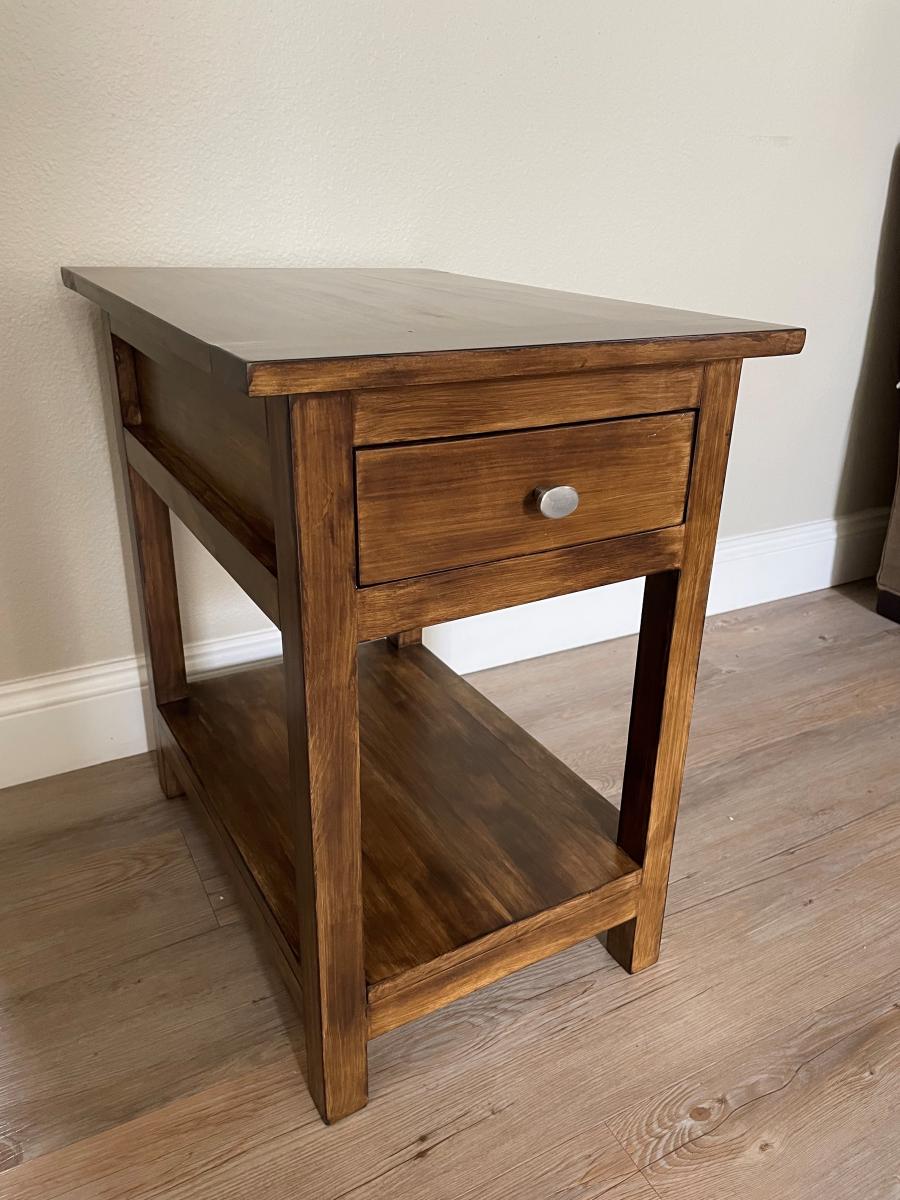
Nightstand
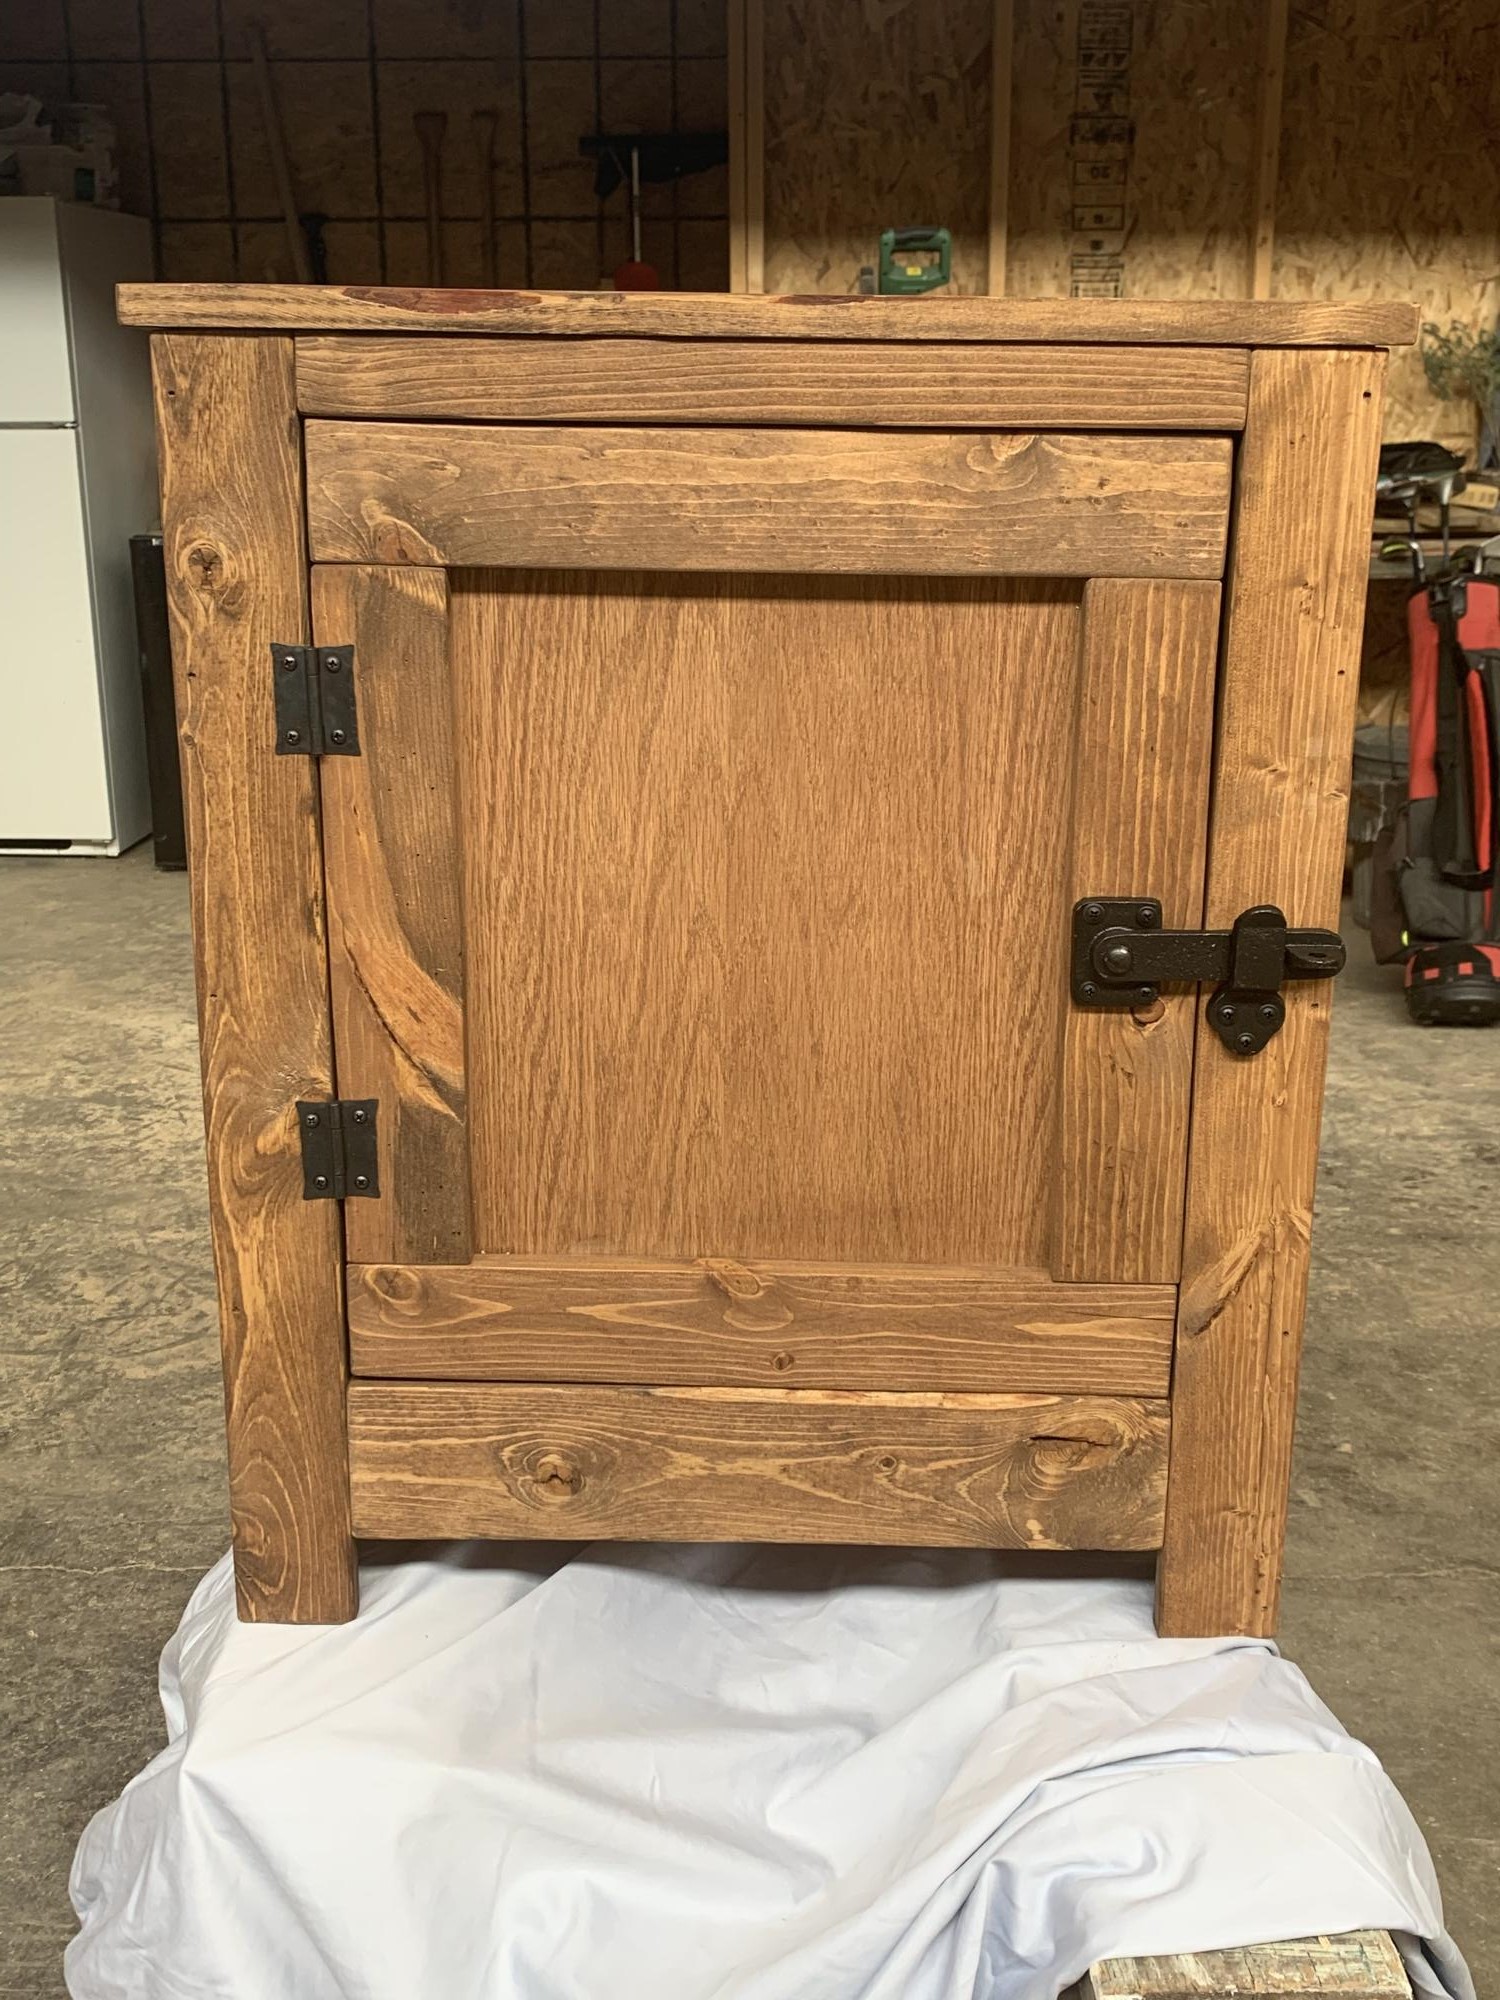
Nightstand with Minwax Early American Stain
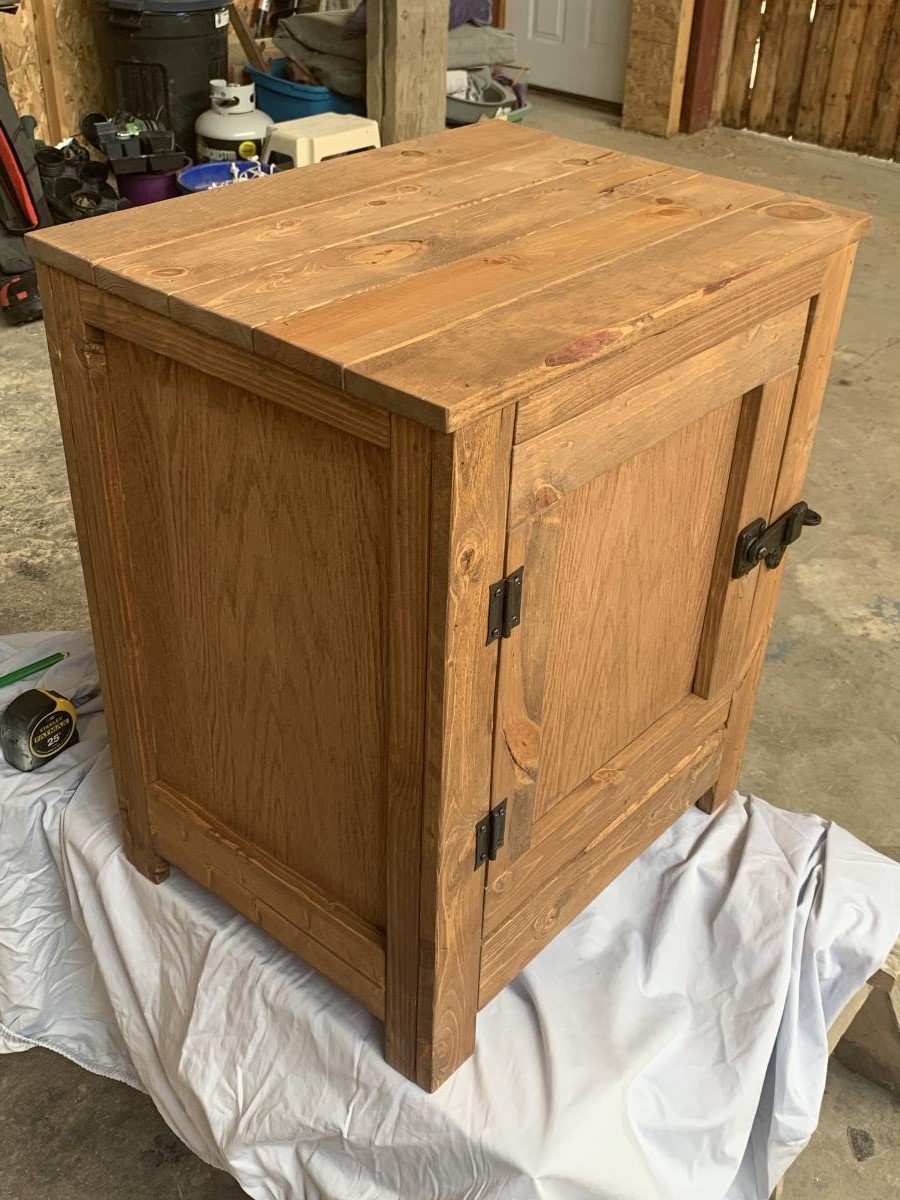
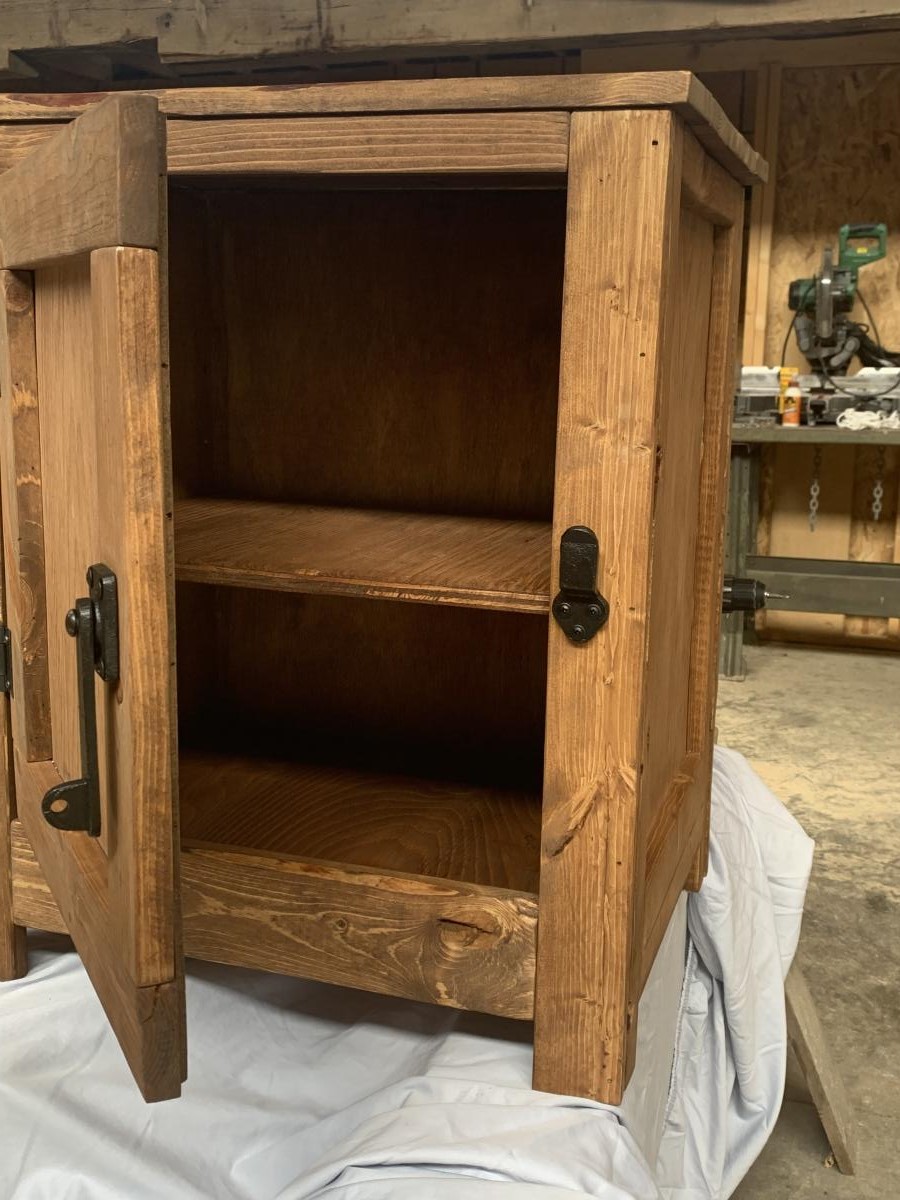
Built from Plan(s)
Comments
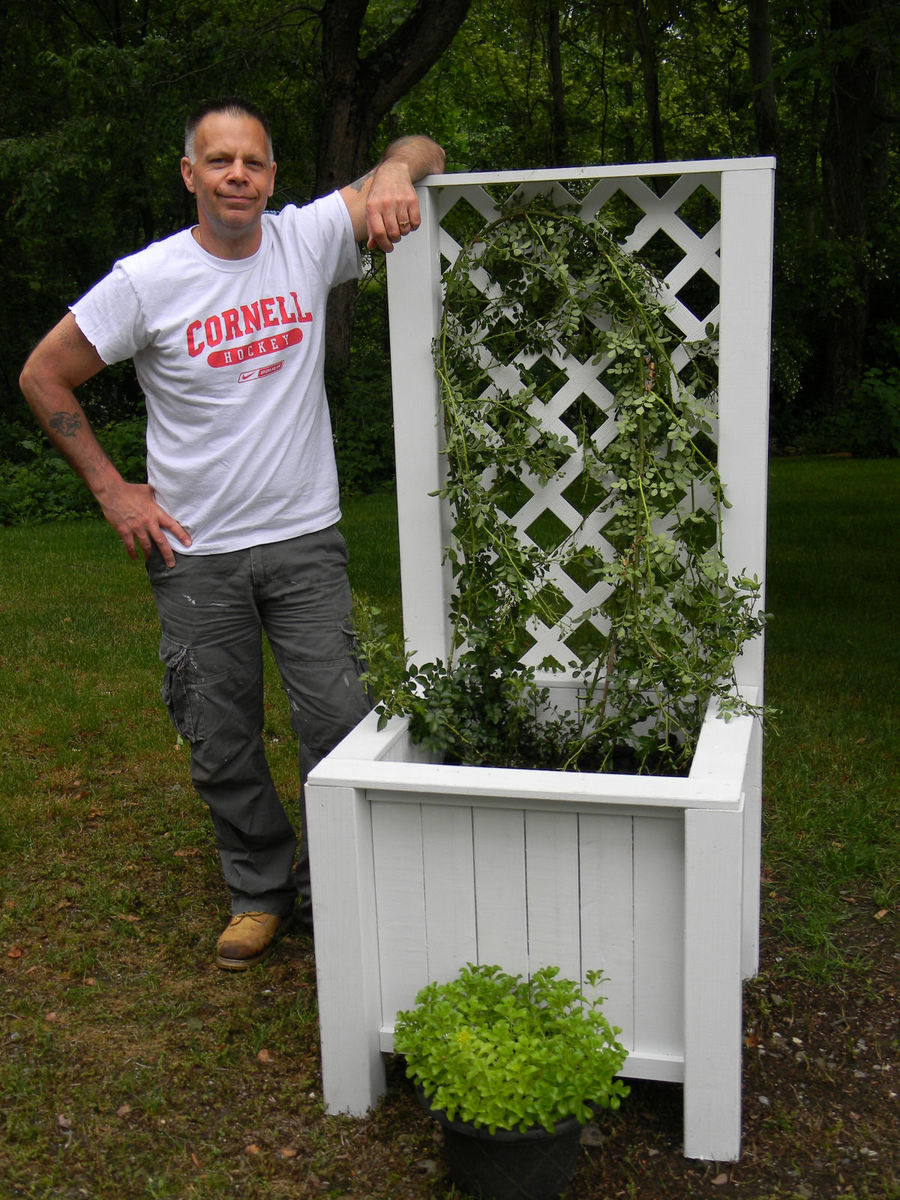
Planter Box with Trellis
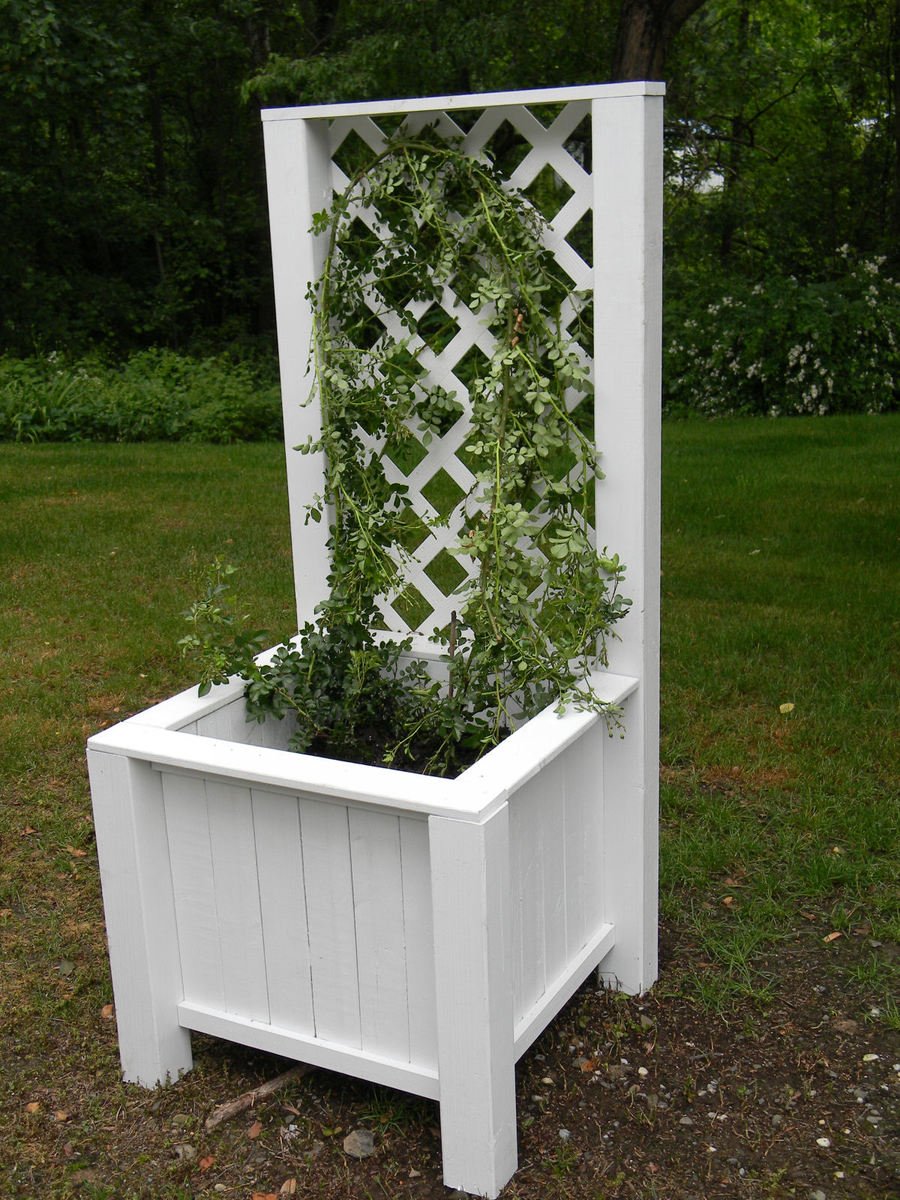
My husband built the Planter Box with Trellis for his mother for her birthday. We planted one of our rose bushes in it. They are pink teacup roses and should look fantastic against this bright white backdrop once the buds blossom.
This was a great project that was easy to cut up beforehand and put together the next afternoon. I think I want one!
Built from Plan(s)
Estimated Cost
$50 with exterior paint
Estimated Time Investment
An Hour or Two (0-2 Hours)
Finish Used
White exterior Valspar paint.
Recommended Skill Level
Beginner
Comments

Tue, 06/14/2011 - 06:21
I wish you could see my happy dance right now!
I am SO PLEASED that that design came out so beautifully! THANK YOU for using my plan!!! You did a wonderful job! =) I hope your husband's mom loves it!
~Tina
In reply to I wish you could see my happy dance right now! by biz_kid1
Tue, 07/12/2011 - 03:59
Thank YOU!
Thank YOU, Tina! The plan was so easy to follow and we were just amazed that this thing came out looking almost exactly like the picture. Often times, we are not so lucky and "modify" the project at the time, or "modify" our expectations when it looks a little different. Not so with this one. It's perfect!
Our new dinning table!!!
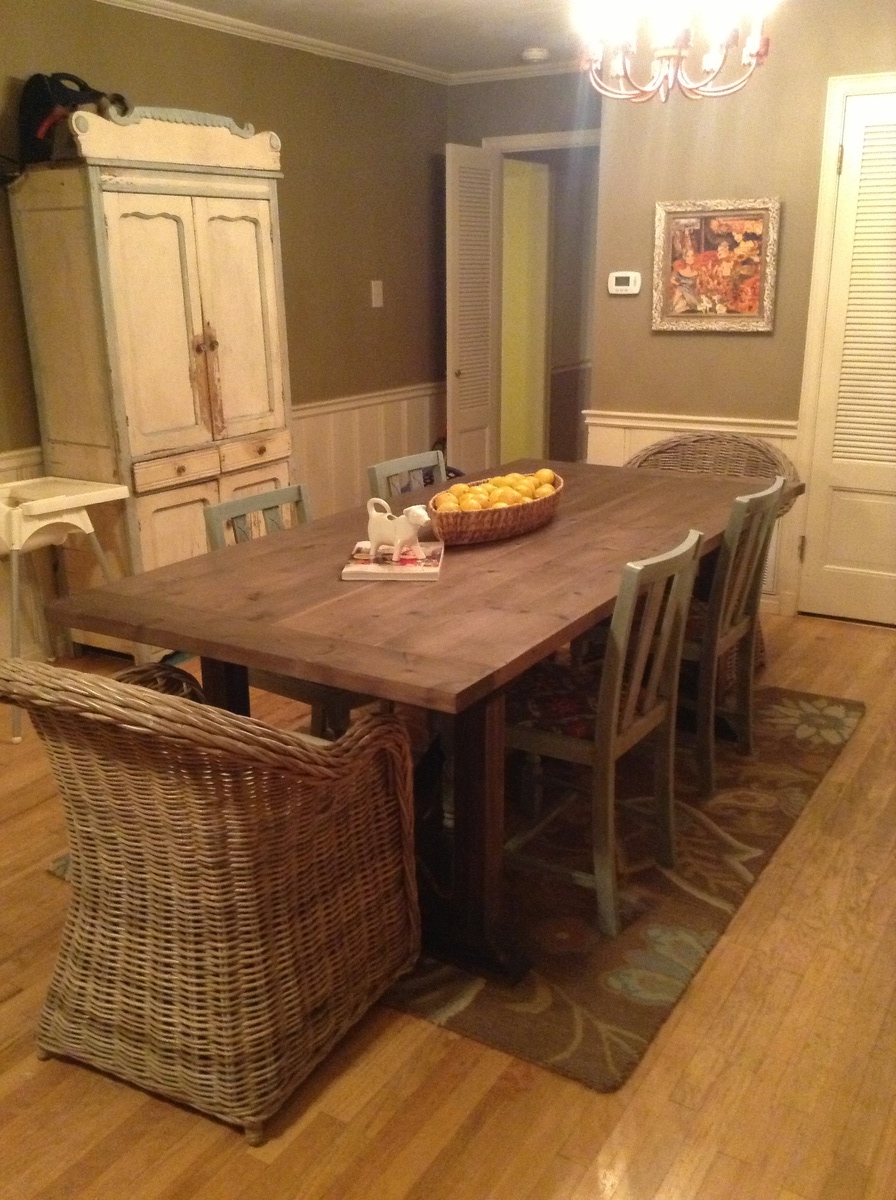
OMG!!! I'm so in love with my new table!!! I had to make a few changes due to the size of my dining area. I built it a bit big for the space I have in hopes of moving soon and having a formal dinning! I shortened the length of the table and also changed up the x to have the same angle as the original table... I decided to do a natural stain using tea, vinegar and steel wool to "age" the table I then mixed a brown wax with a clear wax to warm it up just a tad... Thanks ana so much for the amazing plans!!! Can't wait to start on another :)


Built from Plan(s)
Estimated Cost
110$ including staining supplies
Estimated Time Investment
Weekend Project (10-20 Hours)
Finish Used
After table was built I sanded the crud out of it then sanded some more ;)... I pre mixed my vinegar and steel wool in a huge mason jar not sure the size maybe close to 50oz i used 1 and a half pads of the 0000 steal wool i also washed it in some soapy water before adding to the vinegar to remove any oils that would keep it from oxidizing... i let it sit for about 25 hrs and it was plenty strong i tested it on some scrap wood... I brewed 4 large black tea bags Walmart brand in about 20 oz of water let that sit for an hr or so then squeezed out the bags... I painted the tea stain on all the wood and let dry for about 4 hrs... Pine has very low levels of tannins which the steel and vinegar react to... The tea puts tannins into the wood... If you use a hard wood you won't need the tannins I suggest testing to see how dark it turns. After the tea stain had dried I started painting on the vinegar steal wool mixture (pull the hunk of steal wool out and make sure to stir the mixture regularly). Sat back and watched it do its magic after the table had dried I waxed it... The table was very blue grey which in a modern house would have look amazing but I have very primitive taste and furniture so I wanted to warm it up just a tad I mixed briwax clear, Annie Sloan clear, and just a very small amount of briwax Tudor brown sorry I can't be more specific on ratio. It was just a light tan color...'I applied the wax all over waited for it to dry and did an additional coat on the top then buffed it out I just a cheap white rag..: it took a lot of wax make sure you make enough... The wood really soaked it in...
Recommended Skill Level
Beginner
Comments
Sat, 08/02/2014 - 20:53
Finish question
Hi Camille,
I love the color you ended up with and am attempting to replicate it. Can you tell me why you used two different brands of clear wax? Could you just mix the clear Briwax and the Tudor Brown? Also, how long did it take before the steel wool started to rust. It's been in about 8 hours and so far nothing.
Thanks!
Janae
Simplest Stool
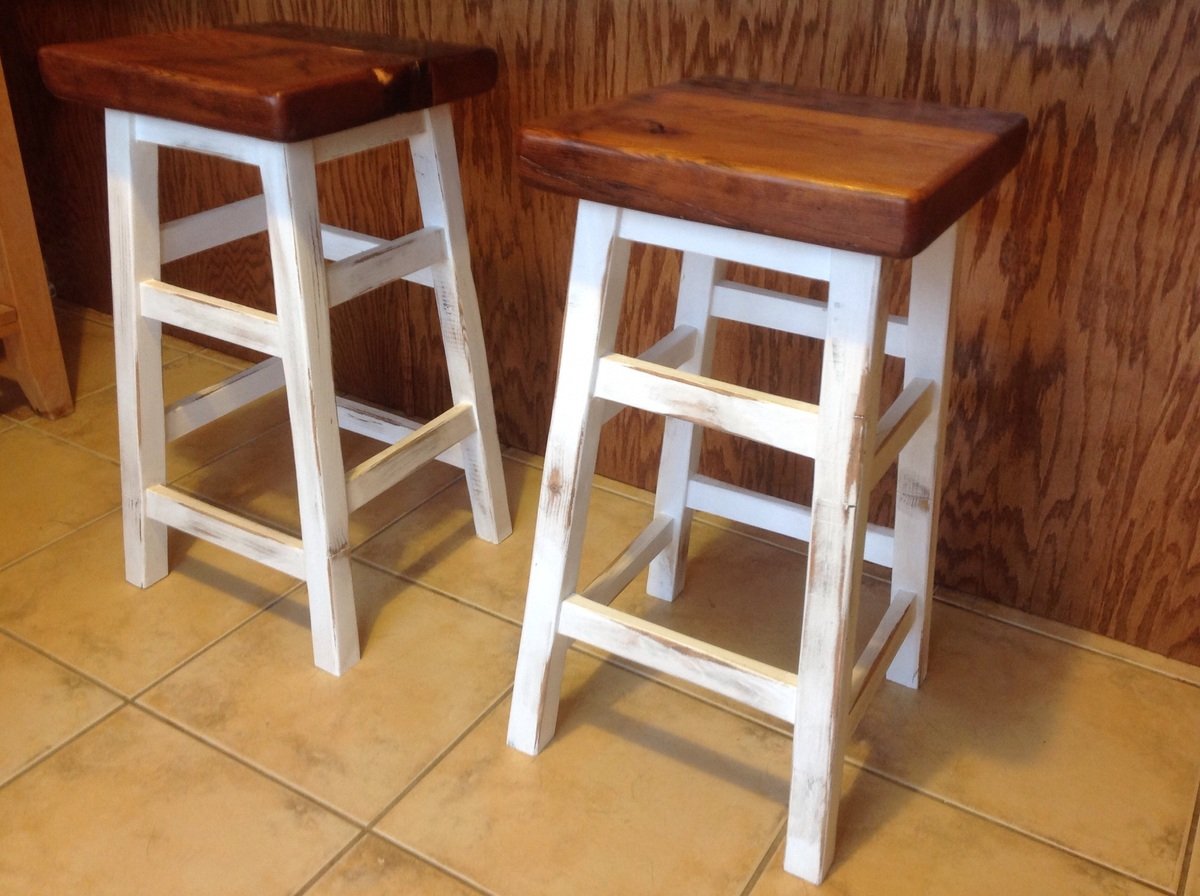
I modified the Simplest Stool plan for this project to use some old threshing floor boards that I had leftover from another project. I like the blocky and chunky look it gives it. We chose to distress these stools to make them look as though they've been around for awhile. The stools didn't take long to build, but since the finish needed time to cure between coats, the overall length of time for the project was about a week.
Built from Plan(s)
Estimated Time Investment
Afternoon Project (3-6 Hours)
Finish Used
Minwax 'Early American' with two coats of polyurethane. The legs and rungs were painted with Behr semi-gloss white paint, and distressed using Minwax 'Early American' stain.
Recommended Skill Level
Beginner
Comments
Bedside Table--Rotated :)
I needed a side table and liked the Farmhouse Bedside plan. It took some thinking and calculating, but I modified and rotated the layout. Pocketholes are now my best friends! Unfortunately staining this piece was a challenge. It may be re-stained or even painted in the future. Thank you for the plans and inspiration, Ana. :)
Built from Plan(s)
Comments
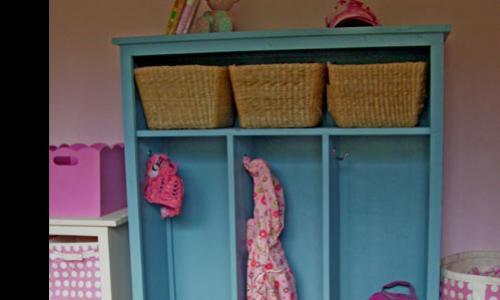
Chicken Coop with Run
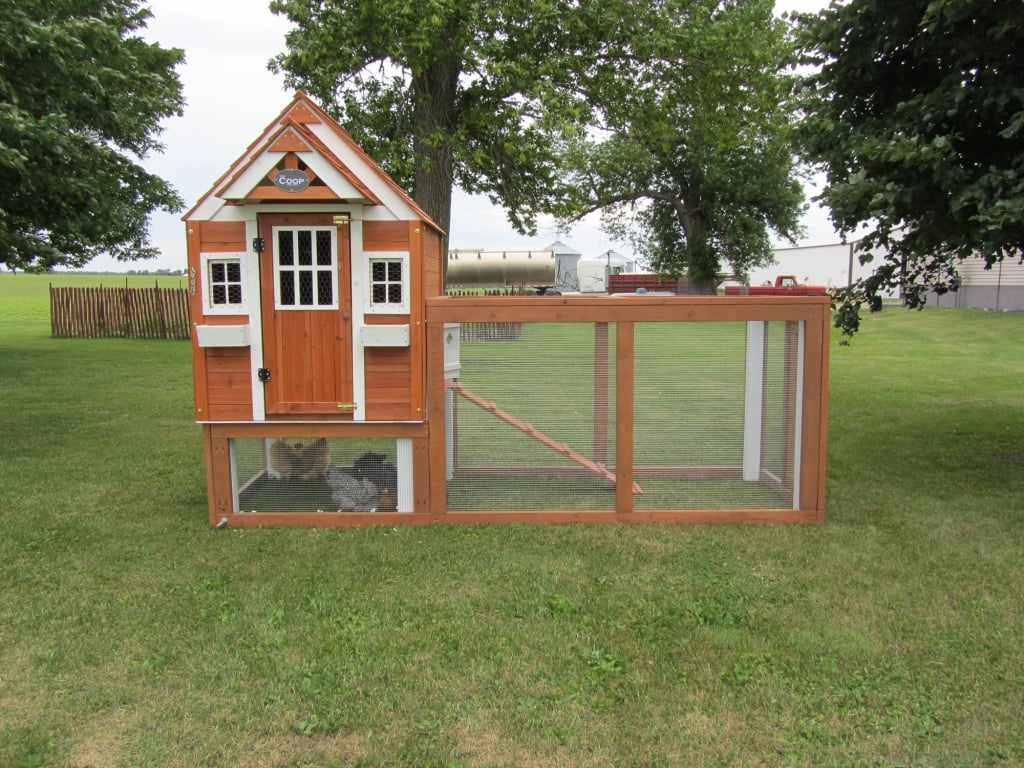
My husband and I live on a small hobby farm and are growing/raising a lot of our own food. We decided to venture into working with chickens. We wanted to start out small so we got 6 chickens and needed a home for them. We found a kids play house one day while shopping and got the idea of modifying it into a chicken coop with a run. We took off with this idea and with quite a bit of modification and some extra building materials we were able to raise it up in the air and attach a run so our chickens would have a nice home to protect them from preditors and the emements and not to mention one that looks good in our yard!
Built from Plan(s)
Estimated Time Investment
Weekend Project (10-20 Hours)
Finish Used
Cedar deck stain and white outdoor house paint
Recommended Skill Level
Beginner
Comments

In reply to OMG! by benfoldsfivealive
Wed, 05/27/2015 - 18:42
Building chicken coop doesn't
Building chicken coop doesn't have to be expensive. Just get the easy-to-follow plan from this:
http://bit.ly/how-to-build-cheap-chicken-coop
Fri, 06/17/2011 - 21:26
Looks awesome! I just spent
Looks awesome! I just spent the evening building a coop for 4 hens of my own!
Tue, 02/21/2012 - 19:08
Fab little coop!
Are the plans available? I have Black Copper Marans and Lavender Ameraucanas and I really need to separate the LAs from the BCMs and this would be perfect!
Sun, 02/26/2012 - 18:00
Where are the plans?
When I click the link to get the plans for the standard coop, they are not there. Do you know where I can find the original plans? Thanks.
Tue, 02/28/2012 - 10:20
Yes - would love the plans
Yes - would love the plans please!!!
It's gorgeous - great job!
Sat, 06/02/2012 - 15:22
No Plans.....
Sorry guys there are no plans for this coop. My husband and i just "winged it" and built it without any plans.
It is a play house that we found at Mills Fleet Farm and we modified it to make it a chicken coop. We put together the play house based on instructions from the box (with a few of our own modifications to make the window on the ground etc.) added some chicken wire to the doors and bay window, added some 4x4 "stilts" and a floor to get the house in the air, and constructed a frame around it with 2x4's and wire fencing to make the run
Sorry I dont have any plans to give you guys!
Modified to a 3 ft square table from this plan!
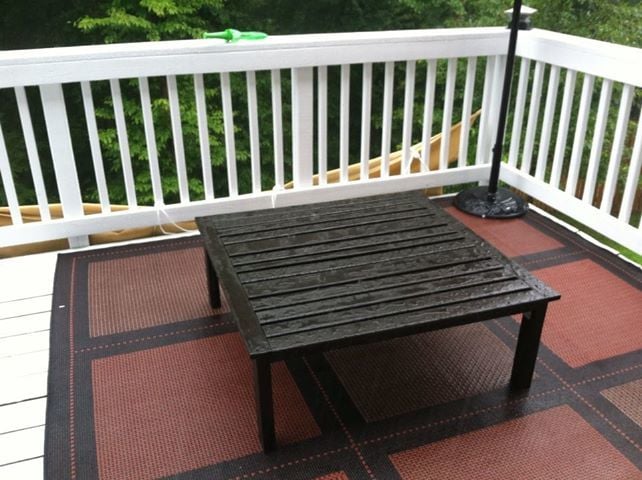
I am currently making the matching 2 seater Loveseat (making 2 of them) so I wanted a square table to go in the middle of the 2 sofas to make it look nice, so the rectangular table was not quite what I needed.
I used 2x3's for the legs and adjusted the side measurements of the square table for the extra width.
I didn't want to paint it, so this is Rustoleum Kona stain with polyurethane (clear semi gloss) over the top to protect it from the rain - which you can see was exactly the kind of weather I had about 10 minutes after it was put outside!

Built from Plan(s)
Estimated Time Investment
Weekend Project (10-20 Hours)
Finish Used
Rustoleum "Kona" stain (from Lowes), and a clear Minwax polyurethan in semi gloss - applied the stain with a foam brush and the clear polyurethane with a good quality brush (less hairs fall off the quality brushes!).
Recommended Skill Level
Intermediate
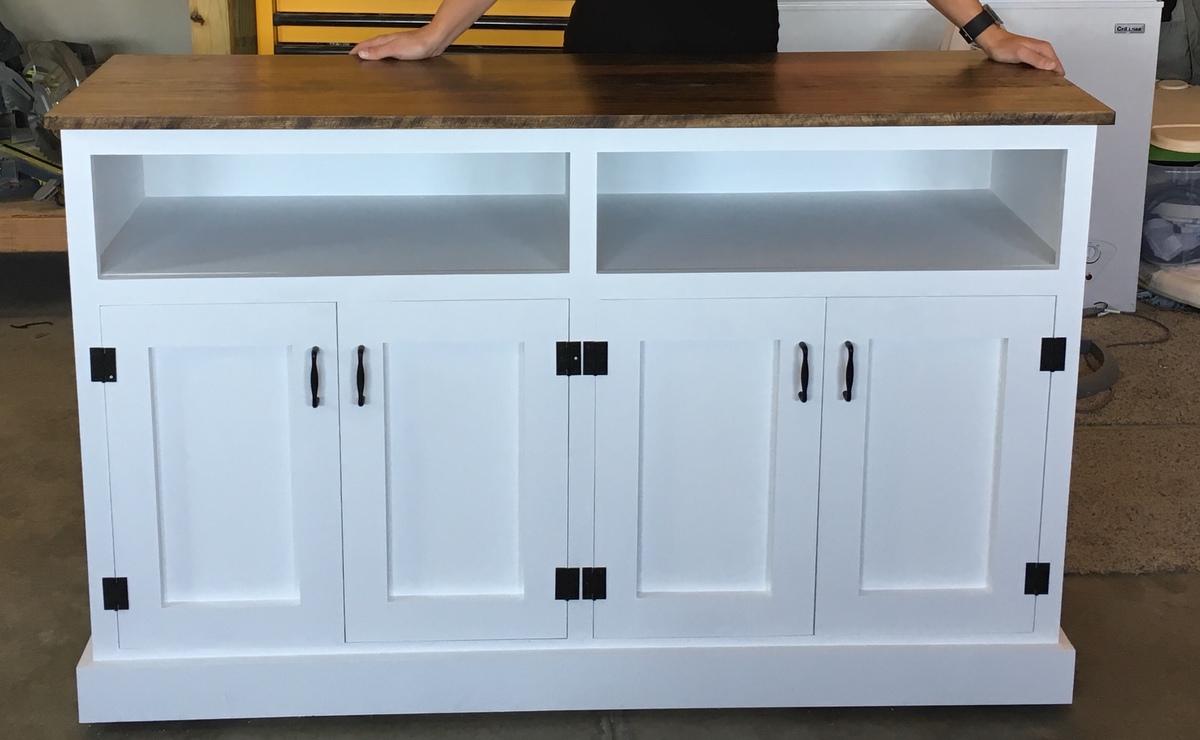
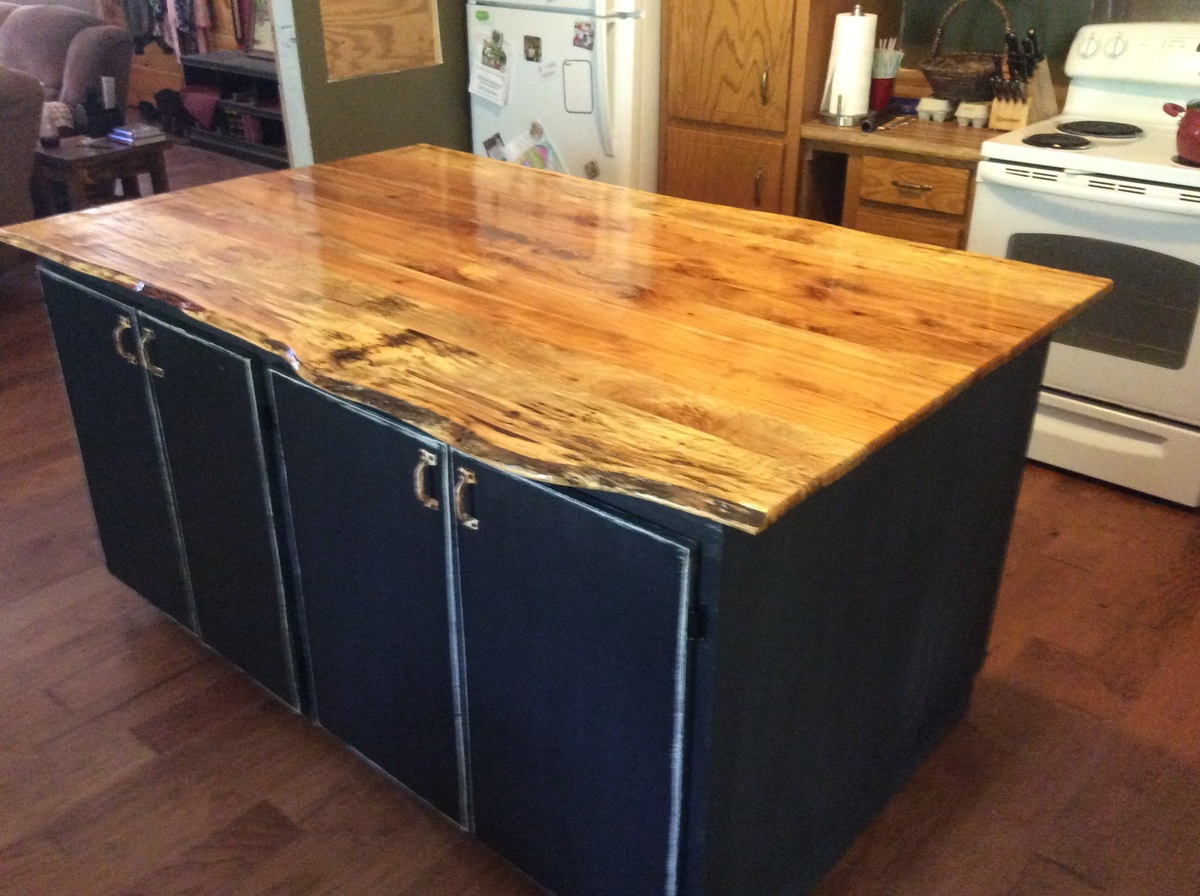
Kitchen island fom base cabinet plan
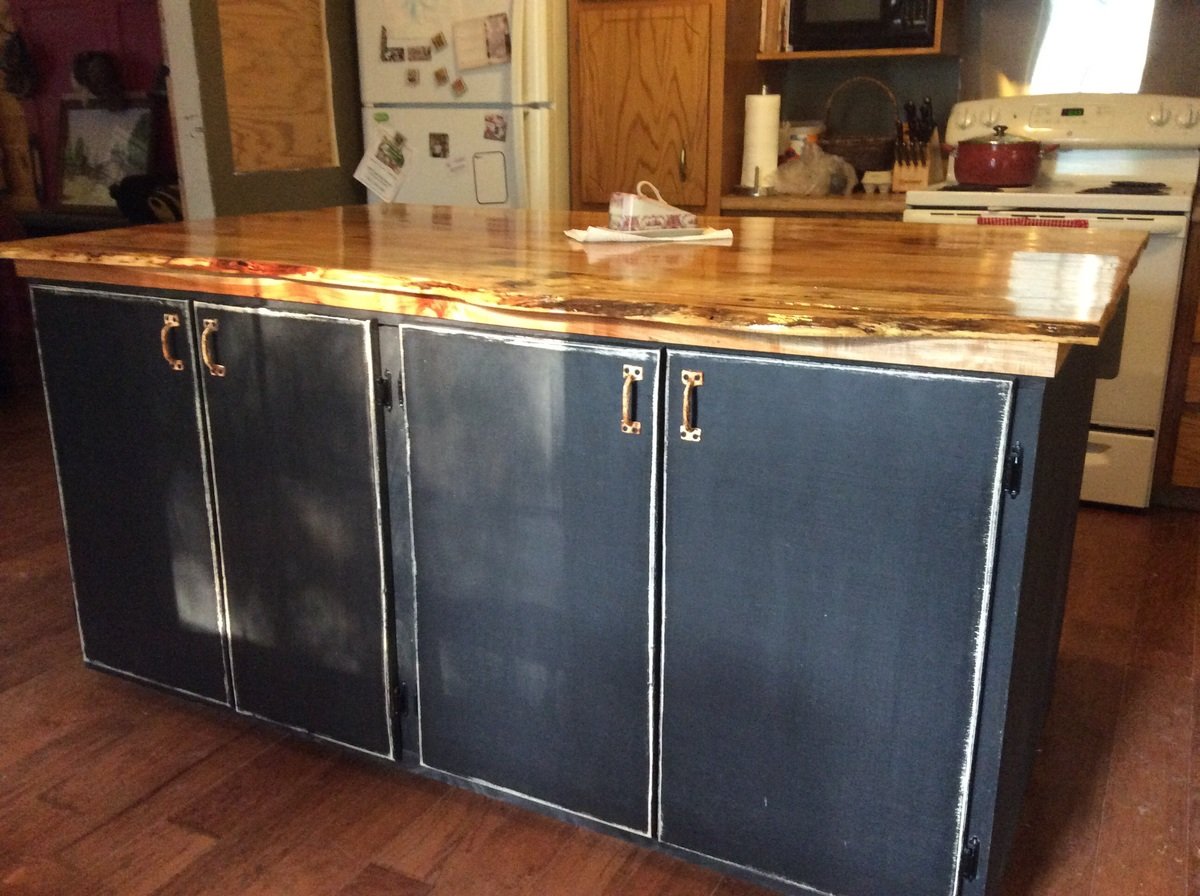
Using Anna's plan for base cabinets, I expanded our small kitchen island from 20" deep to about 40" deep and added a pecan live edge top made of 1x4's. I made two bases 34" wide so I could exactly match the width of the original island. By doing this I could match up the ends while leaving a small gap in between the base for adjustments. Then that was covered by a 1x2 so it is not noticeable. The live edge pecan top matches our "Fancy X Farmhouse Table" built a few months ago. My wife painted the base with a mixture of flat black paint and plaster of Paris to make chalk paint. The top is just 7 coats of semi gloss polyurethane. The build was less than 2 days and I got to use my new Kreg Foreman pocket hole machine for all of it. The poly was several more days of sanding, application, and drying time.
Built from Plan(s)
Estimated Time Investment
Week Long Project (20 Hours or More)
Finish Used
Black "chalk paint" for the base. Minwax semigloss polyurethane for the top.
Recommended Skill Level
Intermediate
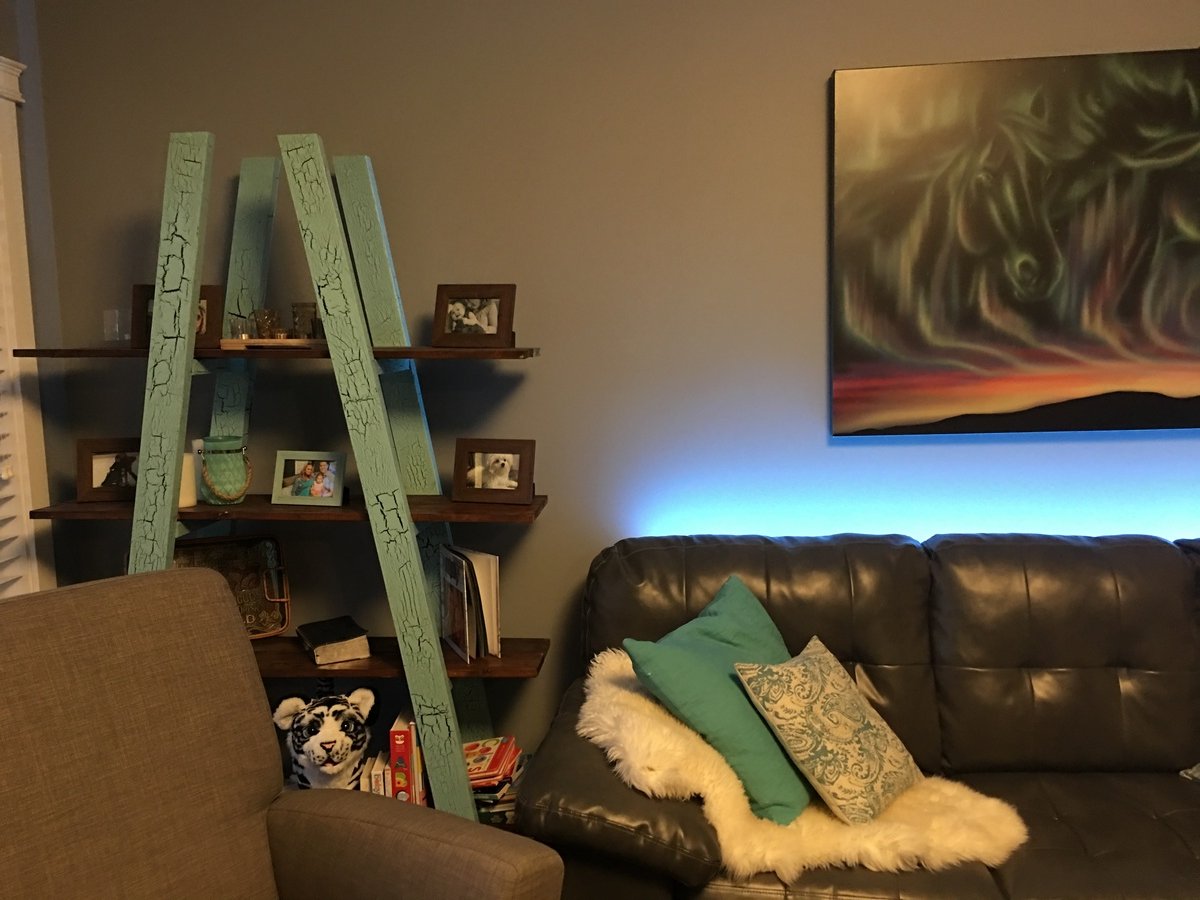
Accent truss bookshelf
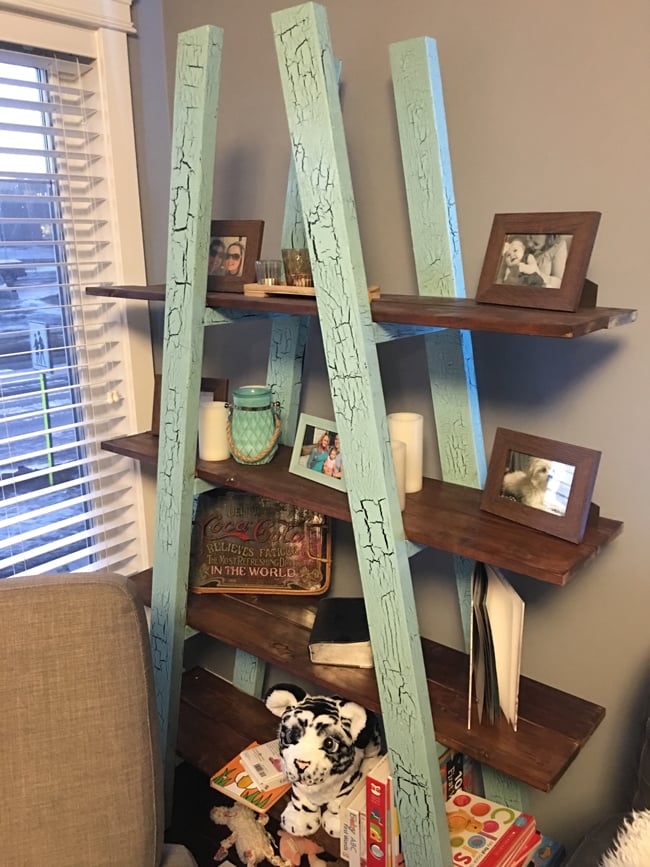
We needed to fill the corner in the house, wasn’t sure what project to do forever! We liked the look of the rustic furnitures and decided to go forward with this truss shelf design.
We used a crackle paint with a black base and turquoise top layer and finished the wood planks with a pickling solution to weather the wood.
Let me know what you think.
Maldonado thanks for the prints for this awesome design!
Built from Plan(s)
Estimated Cost
80
Estimated Time Investment
Day Project (6-9 Hours)
Finish Used
Black tea to add Tannin
Crackled paint
Vinager and steel wool solution
Crackled paint
Vinager and steel wool solution
Recommended Skill Level
Beginner
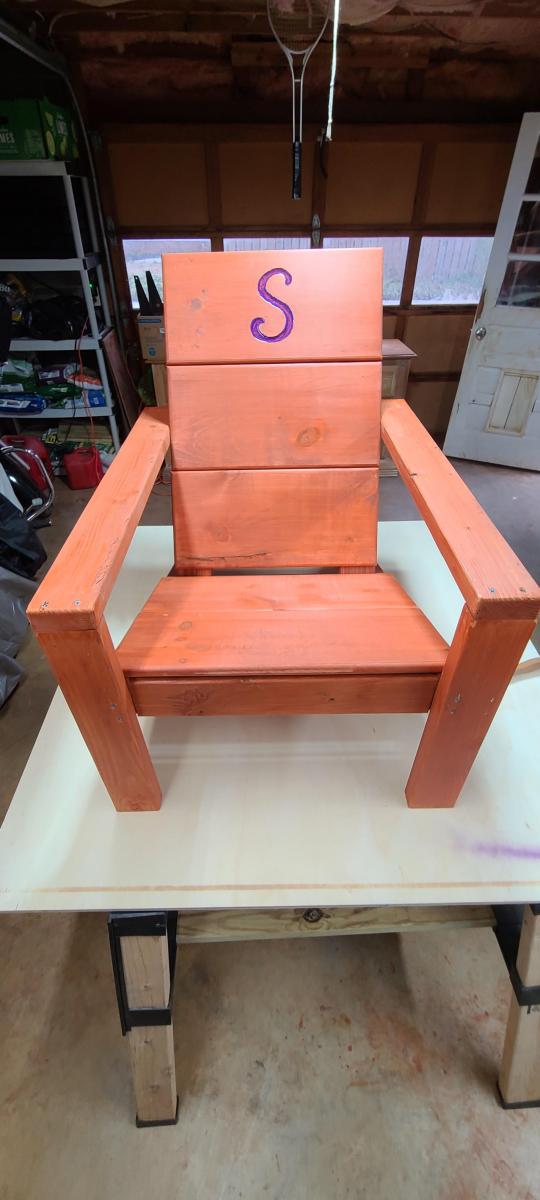
Modern Adirondack
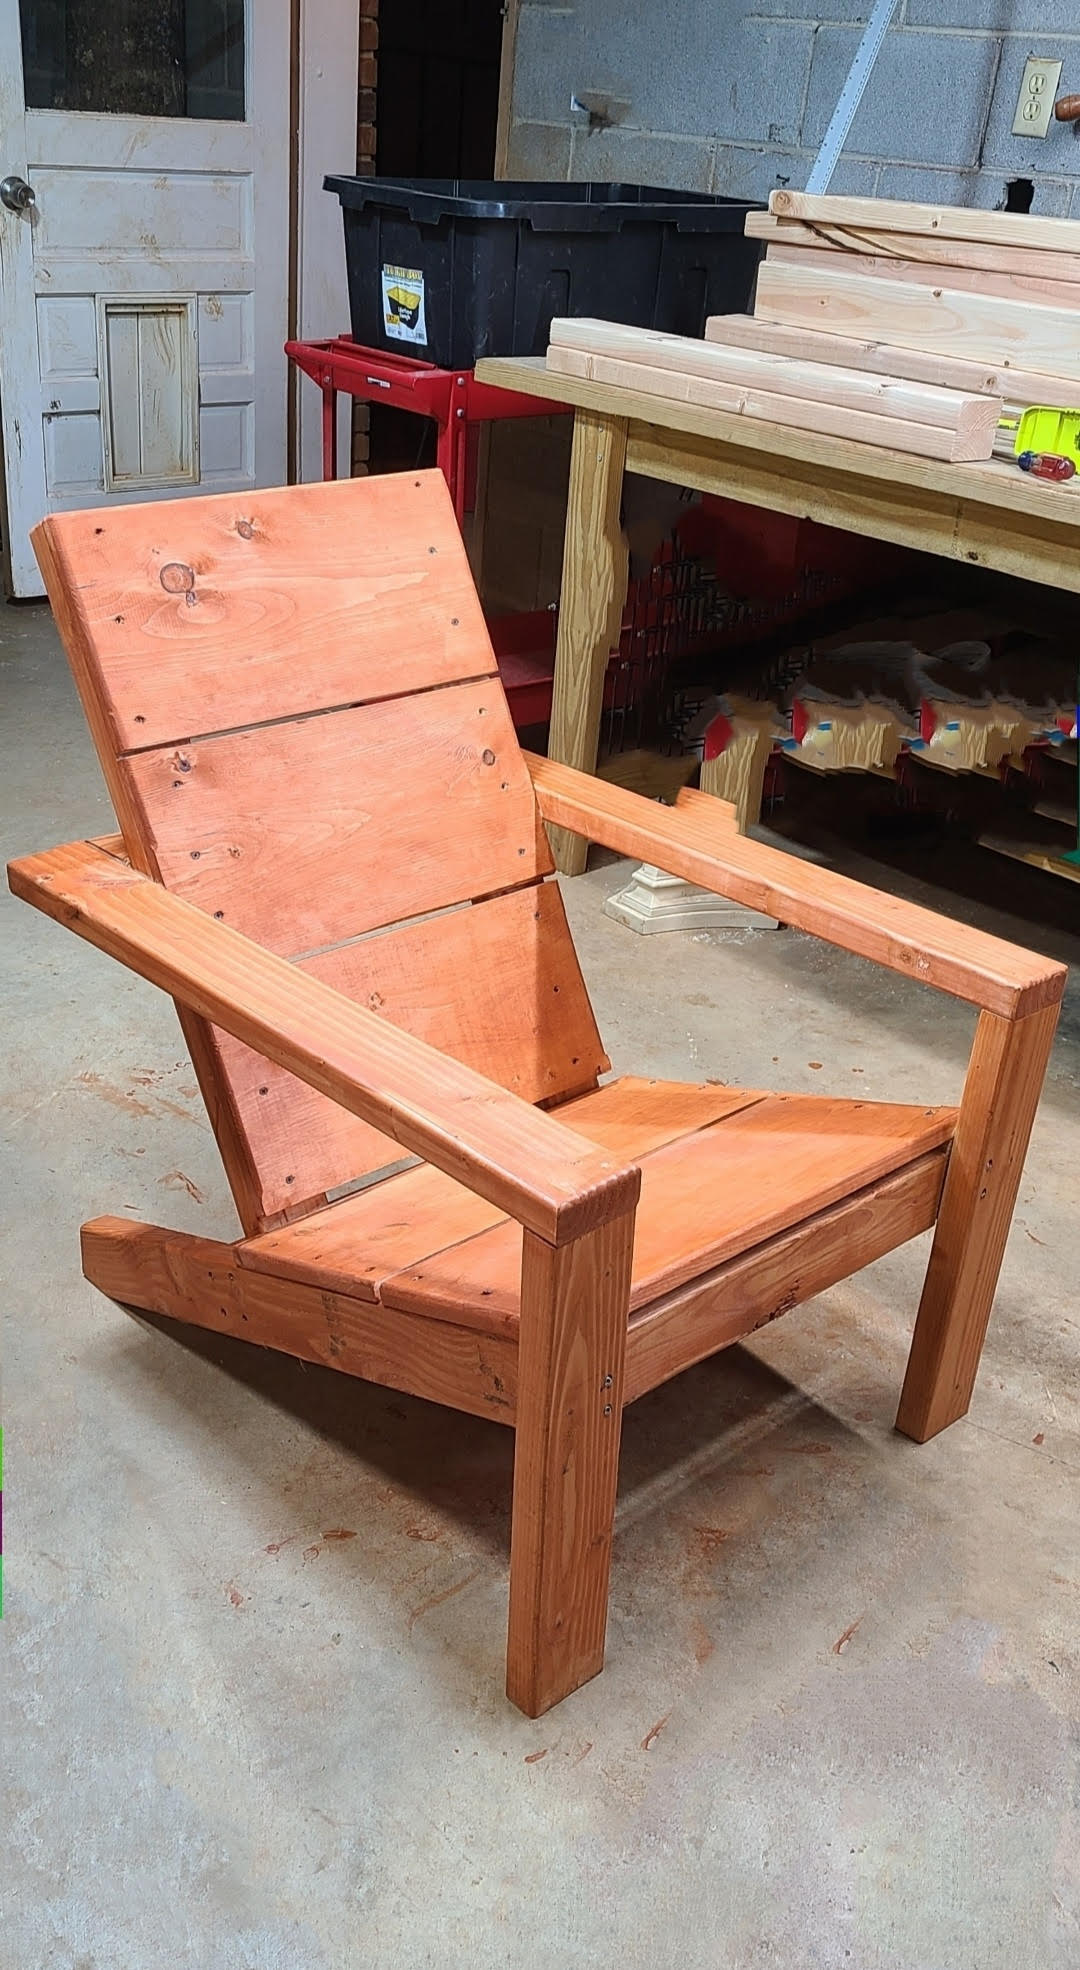
I made these for my BFF to sit outside by her alpacas...
She loves them!
Built from Plan(s)
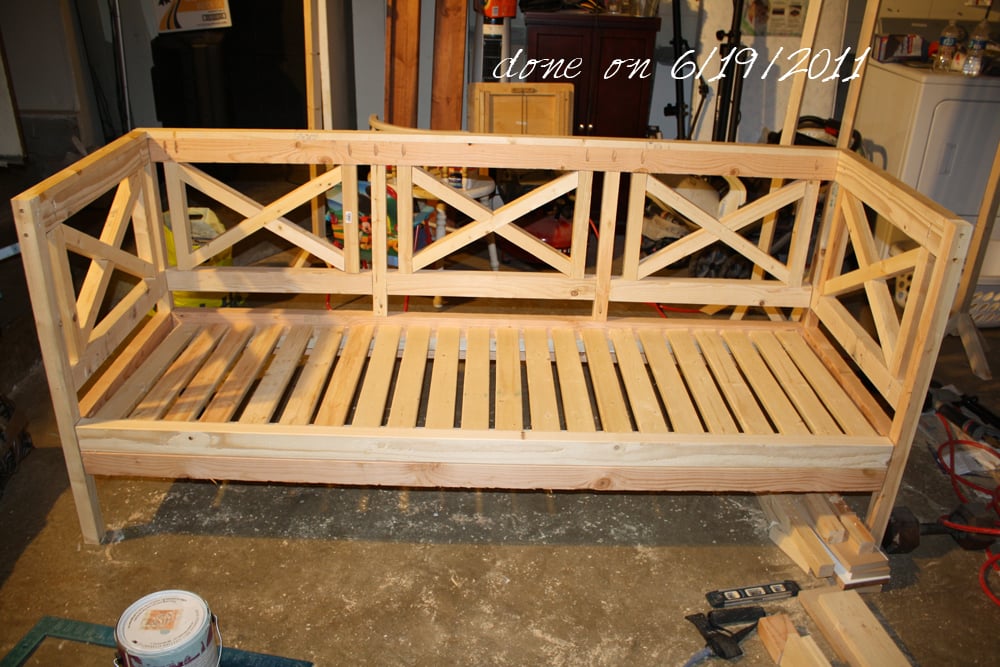
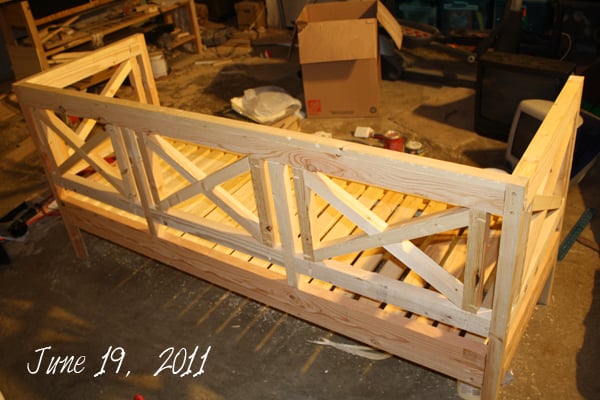
I am in Love
I am more excited about building now. I started this project Saturday, started on the cuts, almost immediately and assembled later that afternoon. By Sunday Morning the whole thing was done. I have 2 Children (2 yr.old and 10month old) so breaks were VERY frequent in between. I am so exciting about building now, my husband has even offered to help in the near future for more must haves! We are planning my very first Birthday Party ever! (including childhood) so I wanted to have comfortable and beautiful seating, I’ve been drooling over these plans since Ana posted them up and thought to myself, there is no way I could do it. But…I was wrong, with hardly any help I was able to do it all on my own. The only problem I came across was the small end X pieces, I am not sure what I did, but I needed to make the cuts at 9 15/16 instead of 10 3/8 in order for the 1x2’s to fit in the center, I thought it would affect the rest of the plan, but it didn’t. Another little hiccup I did was at the HD- I went alone, I couldn’t carry the 2x6 by myself, so I got 2 2x3’s instead, I think it still looks exceptionally well. What am I saying?! I LOVE THIS THING!
My husband and my live in brother were impressed, as was I! My mother even made a comment that my grandfather’s spirit is in me! (He was a carpenter) So, with all these compliments it only motivates me to continue and build! Build! Build! My mother wants one for her Birthday as well, so I will be making another beautiful Weatherly Sofa for her, she deserves it! She takes care of my little angels while I work…the least I could do is make one for her. As many of us who started building due to income deprevation , I am living pay check to pay check, so the little wiggle room we have will be 1 project + scraps. I don’t care how long it takes to get the material, this hobby/love is going to be a long beautiful relationship.
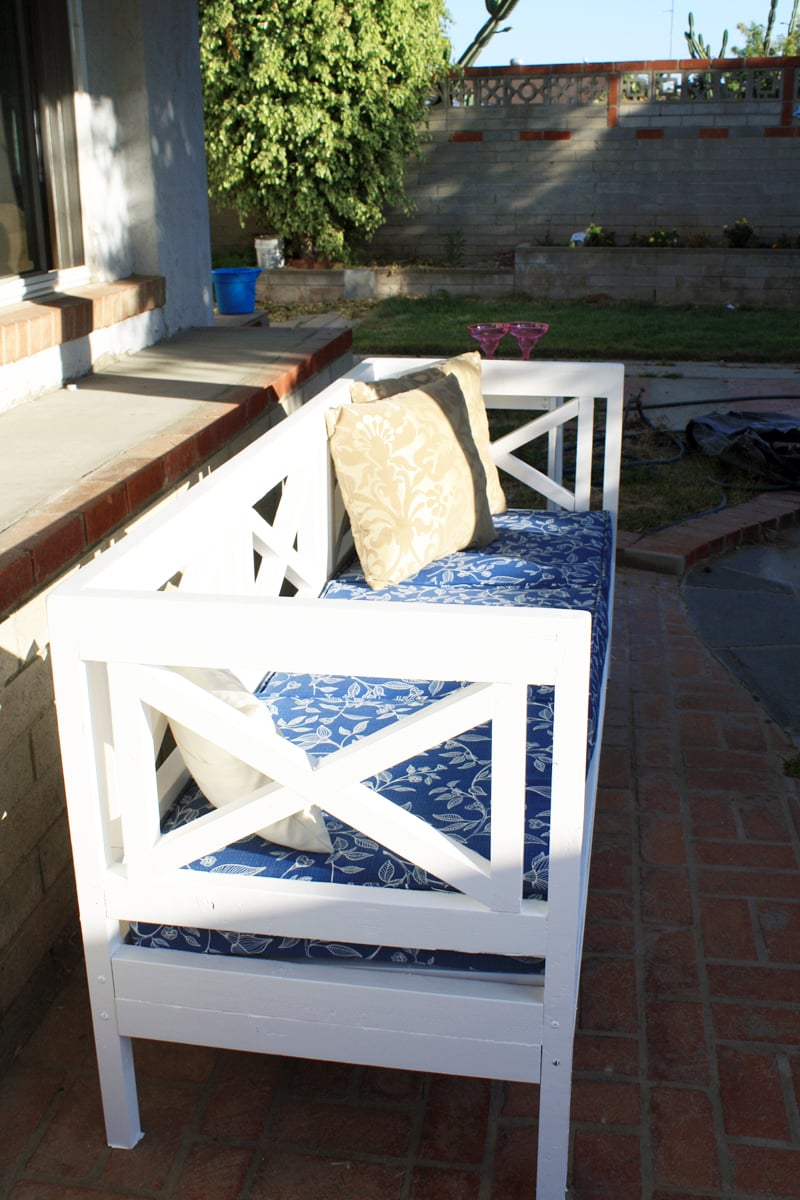
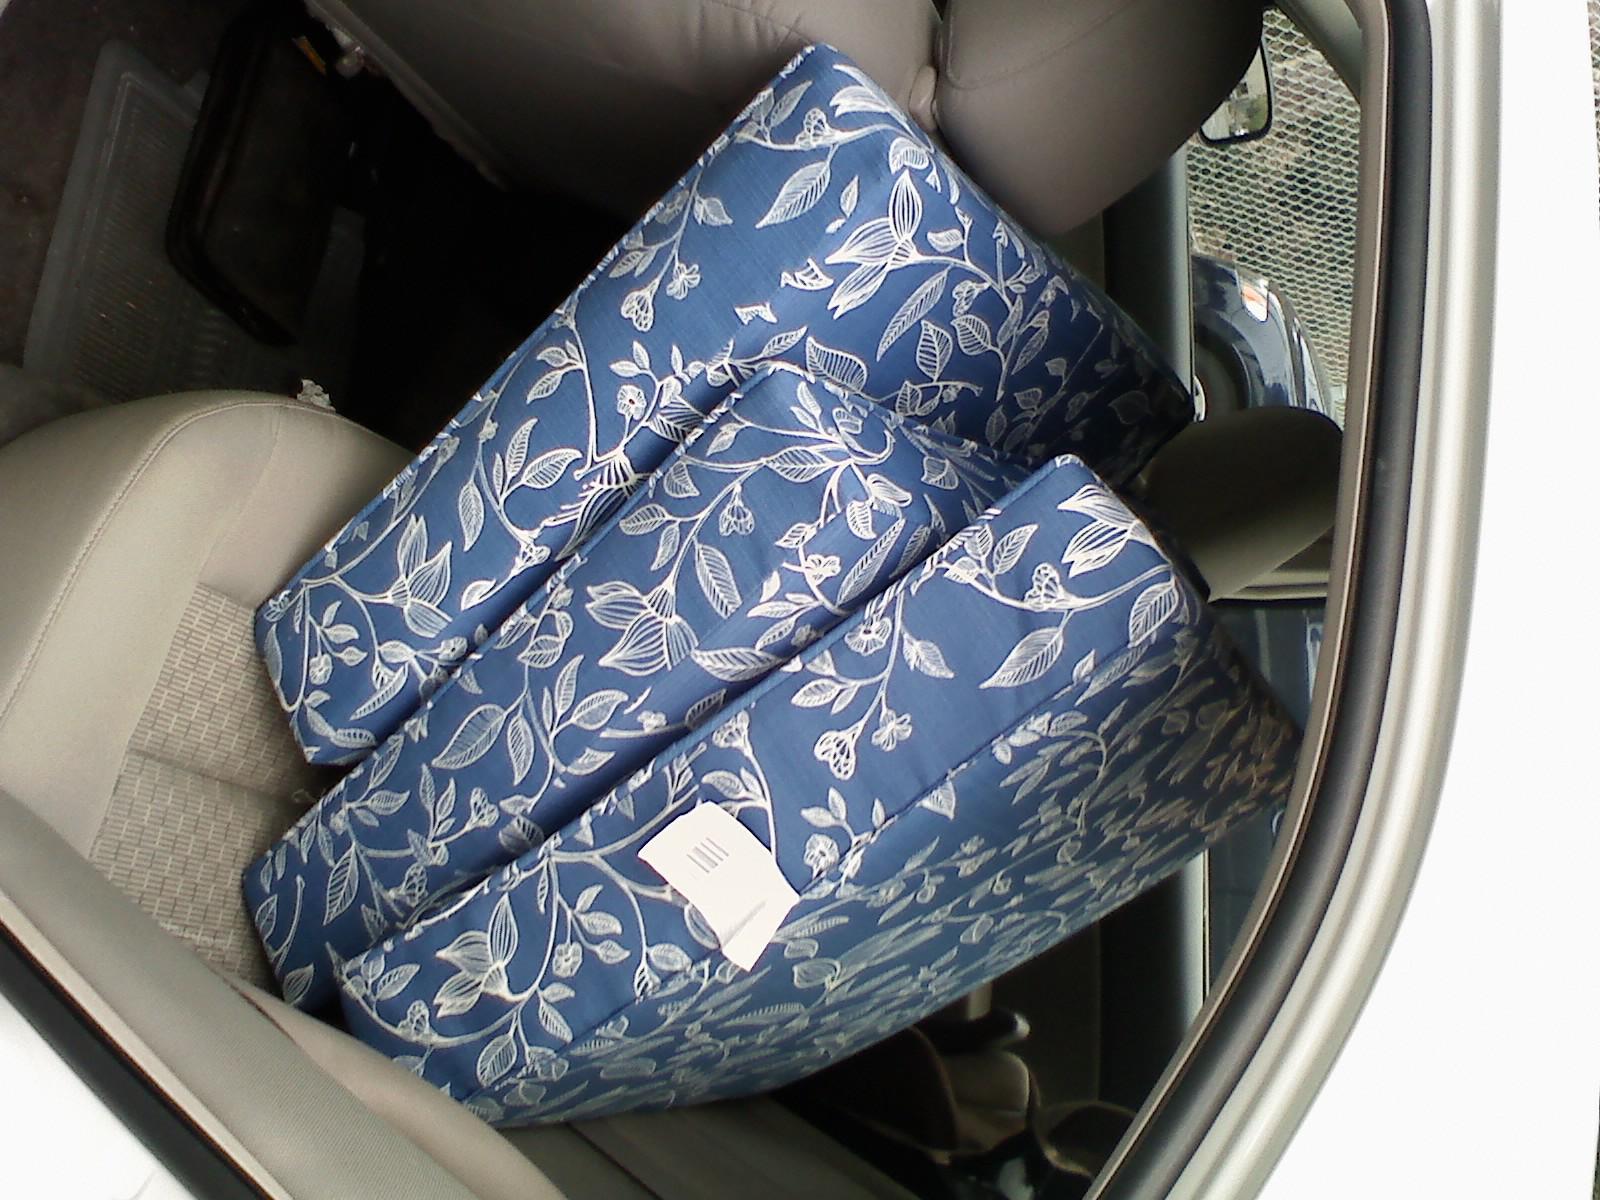
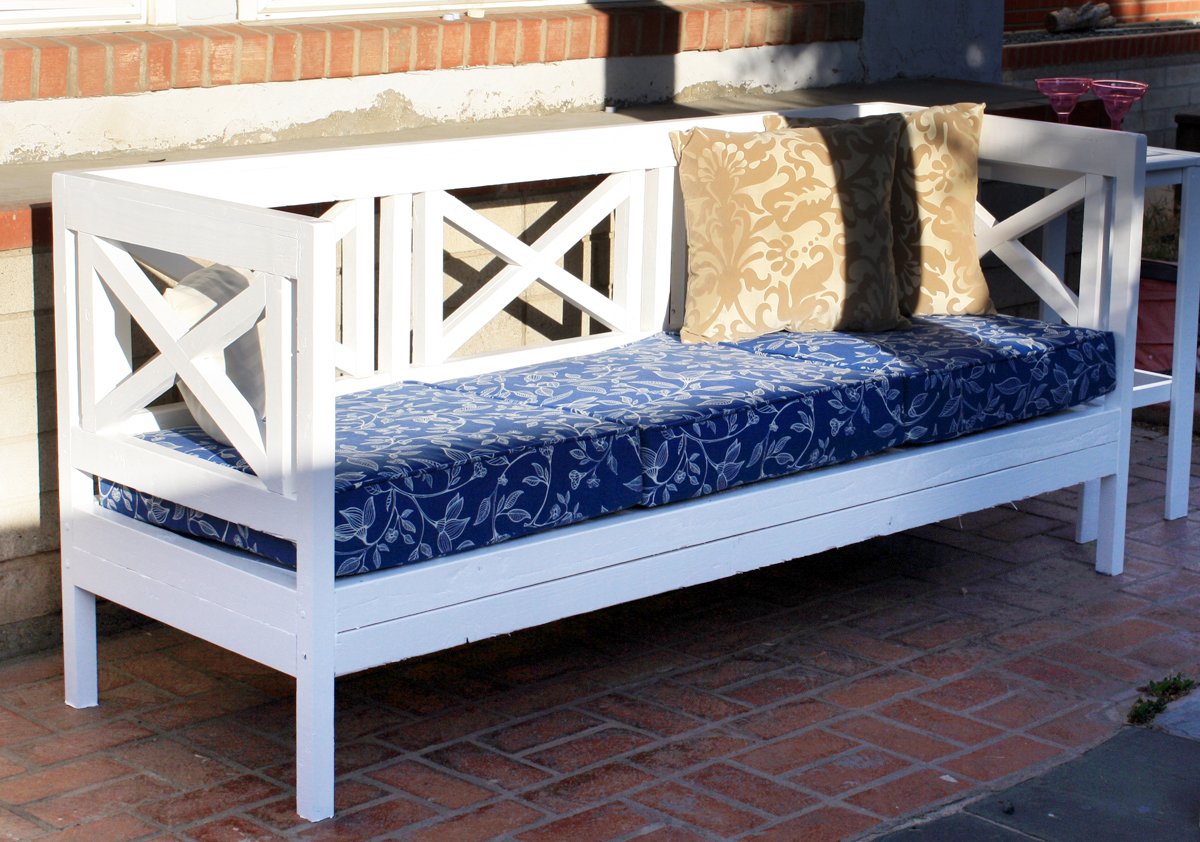
Cushions, the lipstick on this outdoor sofa…so hard to pick!!!
I’ve been eyeing beautiful cushions online that I could afford, and Walmart was the only place that had reasonable prices, although $20+ dollars is always a stretch for me, the ones I settled for were $24.00 each, and I cringed when I stepped to the register…but, if I were to go anywhere else to purchase and outdoors sofa as lovely as this one, I am looking at $500 easy!!! So, that helped me out in purchasing them. I love the pattern on them and I was debating on another set, which were red, beige and white with wide stripes, I loved it…but the Blue one, won…husband had to vote too.
Built from Plan(s)
Estimated Cost
$40 or less
Estimated Time Investment
Weekend Project (10-20 Hours)
Finish Used
unknown yet- any tips on finishing for outdoors will be greatly appreciated.
Recommended Skill Level
Intermediate
Comments

Mon, 06/20/2011 - 23:56
It looks great! Building is
It looks great! Building is the fun part, finishing is hard work!
Tue, 06/21/2011 - 01:50
Walmart has a big sale on
Walmart has a big sale on outdoor cushions, and they're surprisingly beautiful. i just picked up red ones, comparable to the more expensive ones for sure,.
great job, it looks absolutely beautiful
Tue, 06/21/2011 - 05:51
This is lovely!
This is so lovely. You did a wonderful job on this! Oh- and Happy Birthday! :) Cheers!
J
Tue, 06/21/2011 - 20:12
This is beautiful!
You did an amazing job! You have every reason to be proud!!

Tue, 06/28/2011 - 11:12
thank you!!! :)
Finally finished, used KILLZ outdoor paint and Behr outdoor paint in white
Fri, 02/24/2012 - 14:22
So pretty!
I am new to the Ana White site, and the talent of her peeps is amazing!
Queen loft bed

We built ours for a queen sized mattress. We used the plans for the stair case since our son is only two and can't handle a ladder. We decided to go with stain on the trim instead of paint and feel this makes it look a little nicer. The inside has Christmas lights hung from the ceiling and a "secret hiding spot" under the stairs.

Estimated Cost
$300-$350
Estimated Time Investment
Week Long Project (20 Hours or More)
Recommended Skill Level
Intermediate
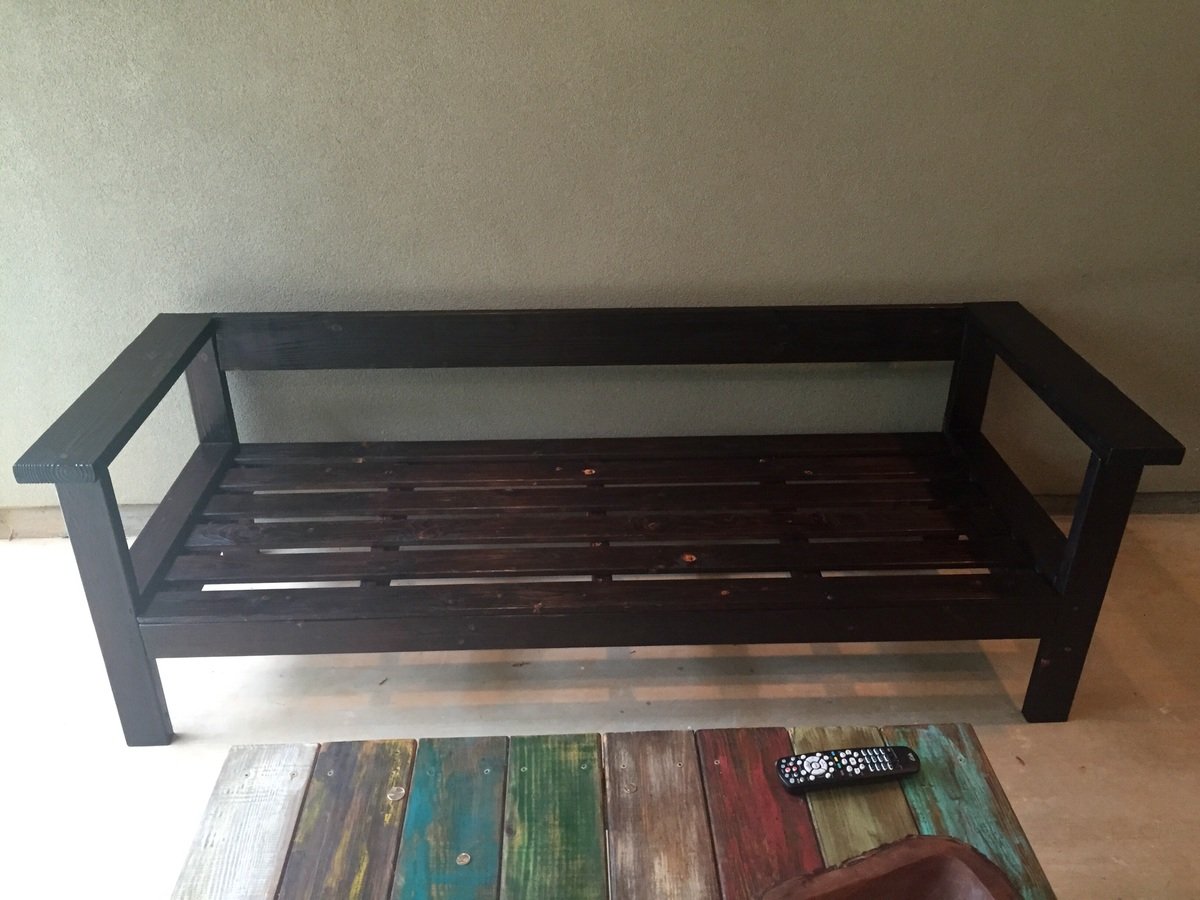
Outdoor sofa
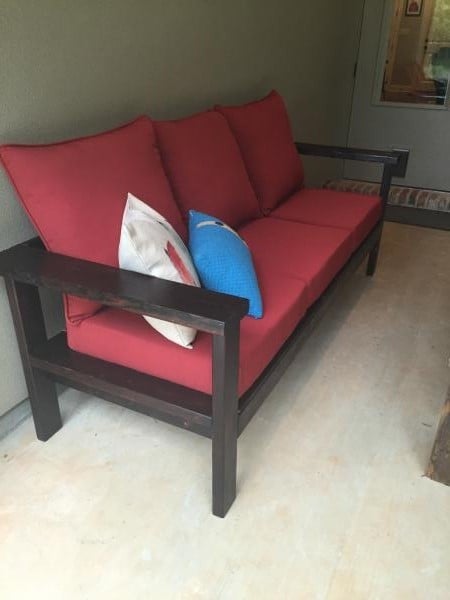
Tweaked the plans a bit. Used 2x6s for arm rest (to support a cocktail better) and back rest. Also tilted the back 2x6 to make it more comfortable. Burnt wood with a torch. Then stained and used a spar urethane.
Estimated Time Investment
Weekend Project (10-20 Hours)
Finish Used
Burnt wood, stain and spar urethane
Recommended Skill Level
Intermediate
Comments
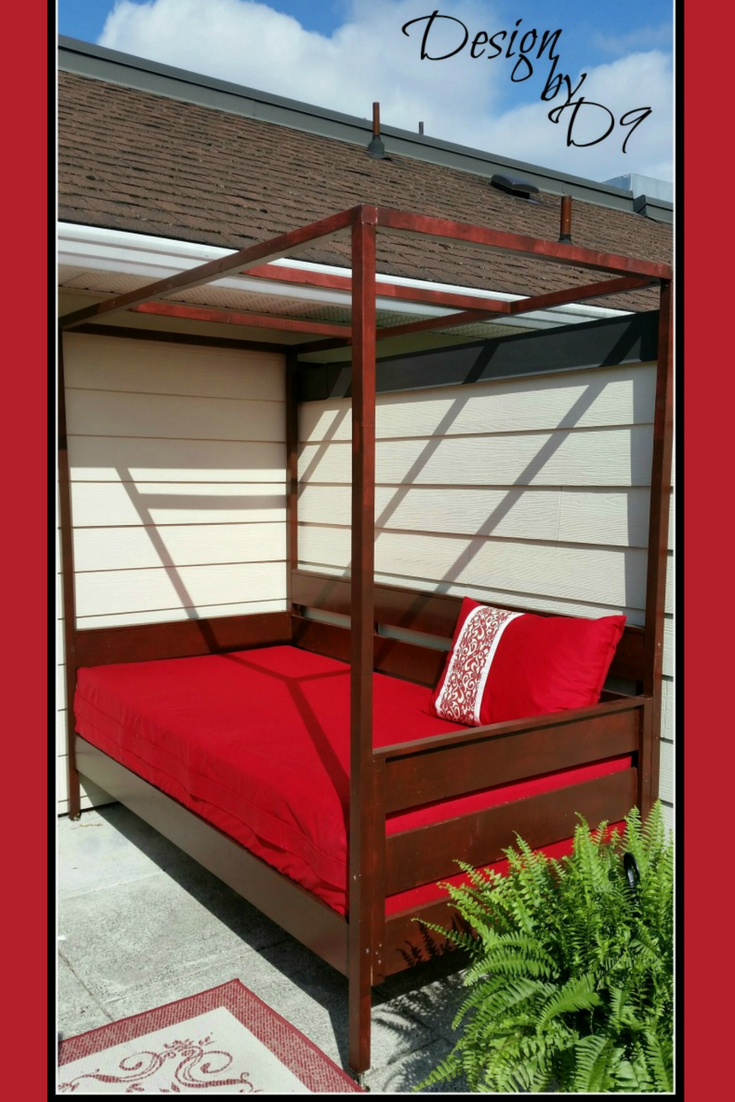
Outdoor Daybed with Canopy
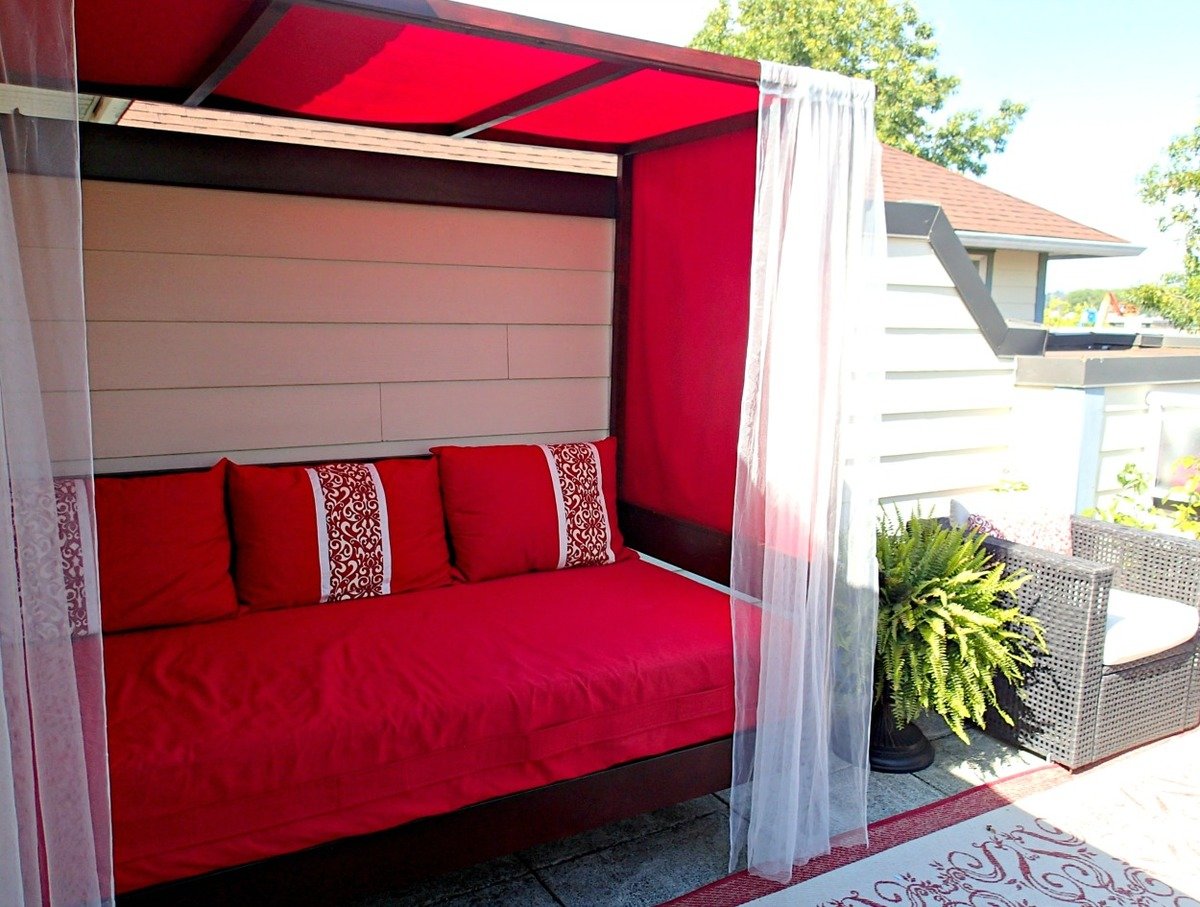
I used Ana's outdoor daybed with canopy pattern to make this awsome daybed. I made a cover and matching pillows.
Built from Plan(s)
Estimated Cost
$250 (Cdn)
Estimated Time Investment
Weekend Project (10-20 Hours)
Finish Used
Behr paint
Recommended Skill Level
Beginner

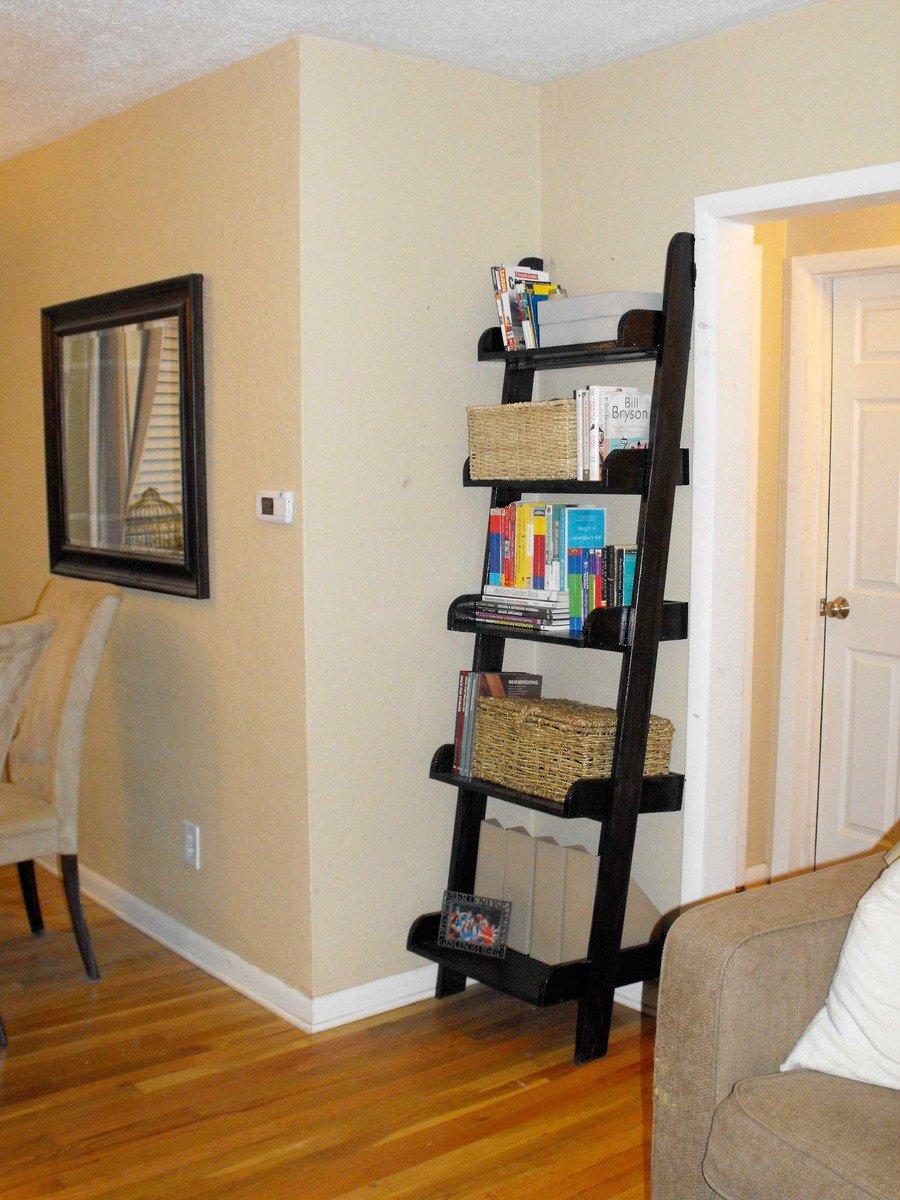
Leaning Bookshelf - Narrow
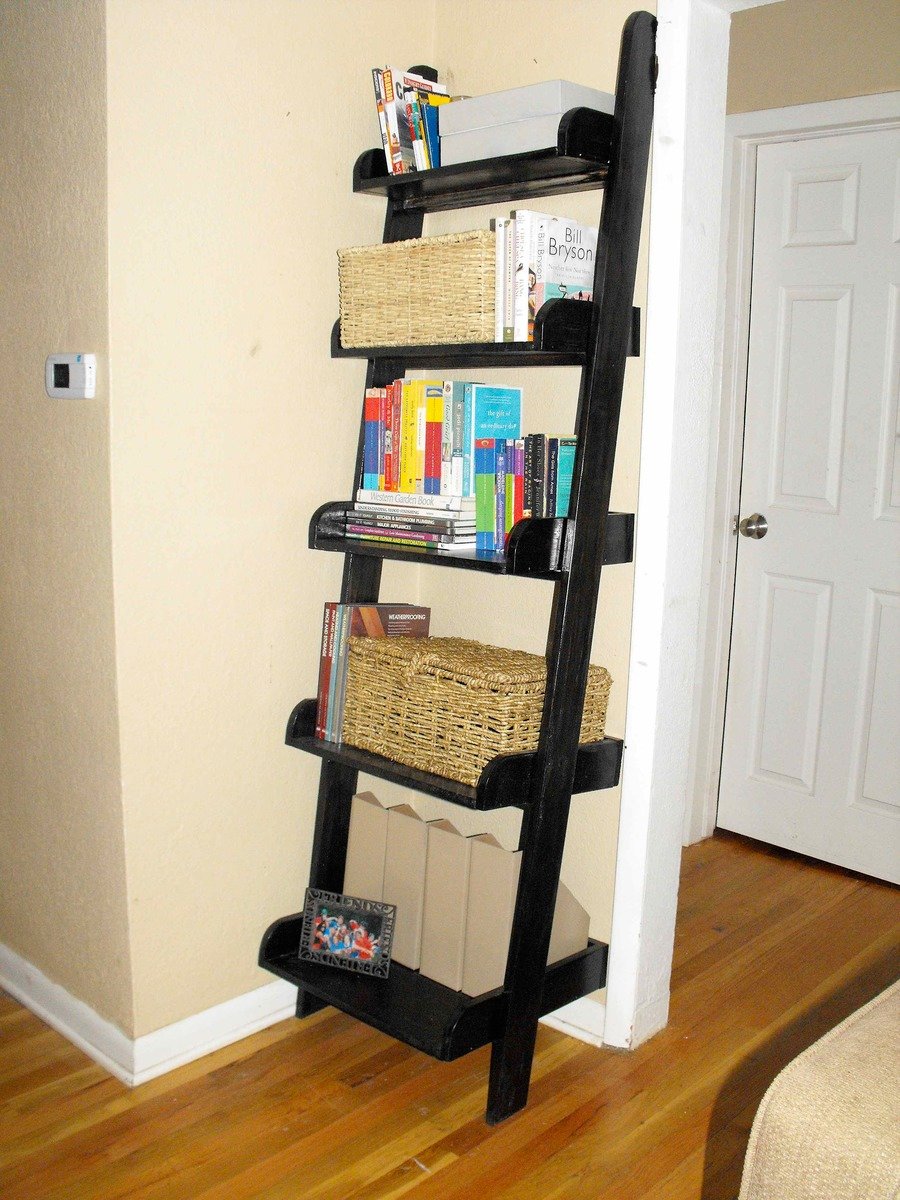
I was in Home Depot one day and found a large piece of MDF & straight 1x4 in the "scrap bin". Because my to-do list is longer than any christmas list, I knew I could find a use for it. I ended up buying a quality piece 1x4 for the legs. The remainder were scraps. My total cost of the wood for this project was approximately $20.
My living room space is narrow and awkward, so I subtracted 4 inches from every horizontal measurement. This plan was very easy to adapt for your space.
To round the edges, I traced with a circular piece of tupperware, cut with my jigsaw and sanded. To build, I used a nail gun and kreg jig on some parts. I also stained before putting it completely together.
I'm very happy with these plans and how the finished project fits right into my space. This project was easy to follow and easy to adapt. I would recommend it to anyone starting out
PS: I could use some help with my shelf styling. Recommendations welcome :)
Estimated Cost
20
Estimated Time Investment
An Hour or Two (0-2 Hours)
Finish Used
Miniwax early american (1st coat) and miniwax ebony (2nd coat)
Recommended Skill Level
Beginner
Fancy x farmhouse table... my version!
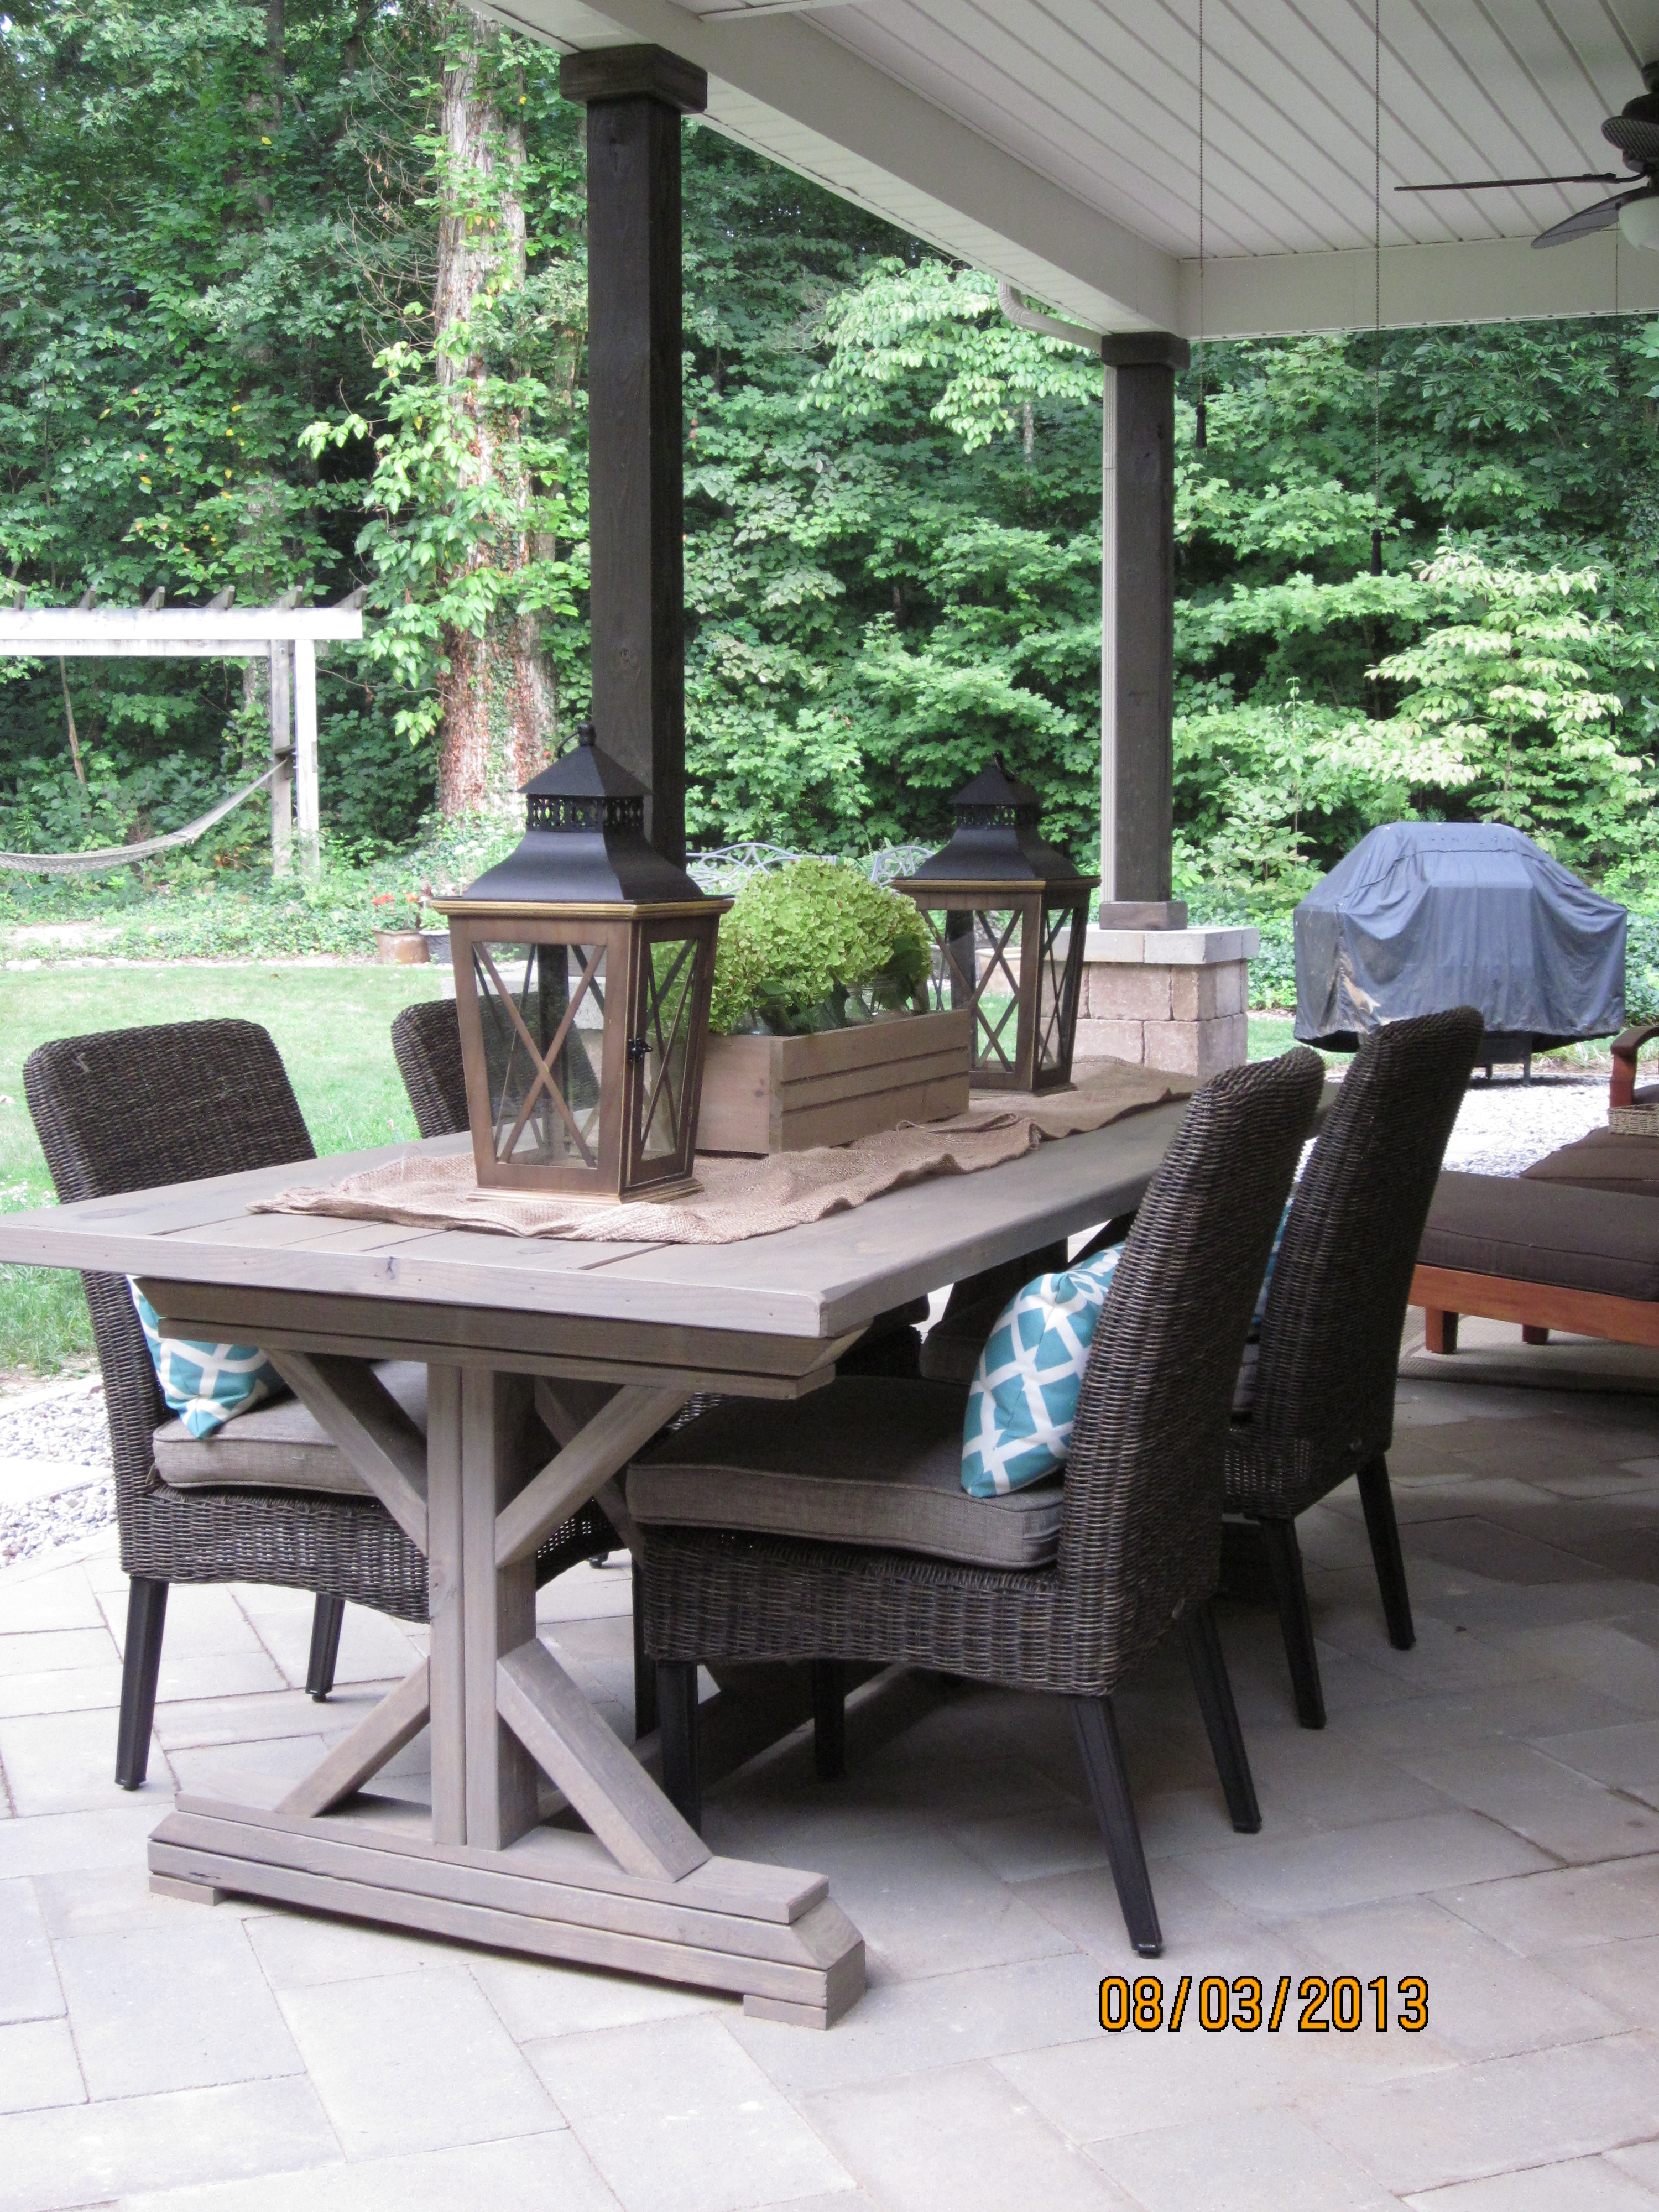
My version is a 7' table. I made the distance between legs 60" with a 8" overhang on each side. The stain is Olympic Driftwood. I also added 1 x 2 pcs on the ends for a more finished look & to secure the 2 x10's. One last thing, I used a router to round out all the outer edges of the table top and the legs.
Highly recommend....
I used some T braces/plates on the bottom of the table to connect legs with 60" pcs. Otherwise there is nothing to keep the legs square with the table.
Love the look...thanks so much for the plan!
Other notes: I used treated lumber so it's VERY heavy.
Built from Plan(s)
Estimated Cost
$130 ($100 lumber, $30 stain)
Estimated Time Investment
Day Project (6-9 Hours)
Finish Used
Olympic Driftwood
Recommended Skill Level
Intermediate
Comments
Sun, 08/04/2013 - 22:50
Very nice table
Your table turned out fantastic! Love the whole look on your patio too.
Sat, 08/30/2014 - 19:33
x farmhouse table
hi there..your table is great! can i ask if u think there is enough room at ends of table for a chair with the 8 inch overhangs that u did? i would like to do the same. thanks so much!!!
Tanya
Fancy X Farmhouse Bench

A lot of time and planning when into making this bench! Love how it turned out
Built from Plan(s)
Estimated Time Investment
Weekend Project (10-20 Hours)
Recommended Skill Level
Beginner
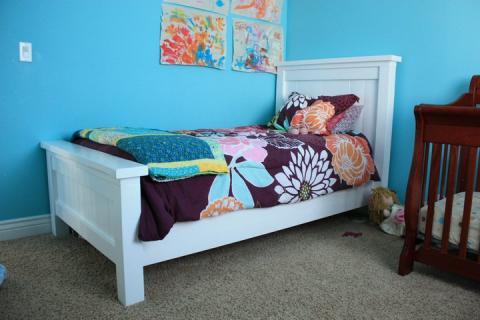
Modern Farmhouse Bed
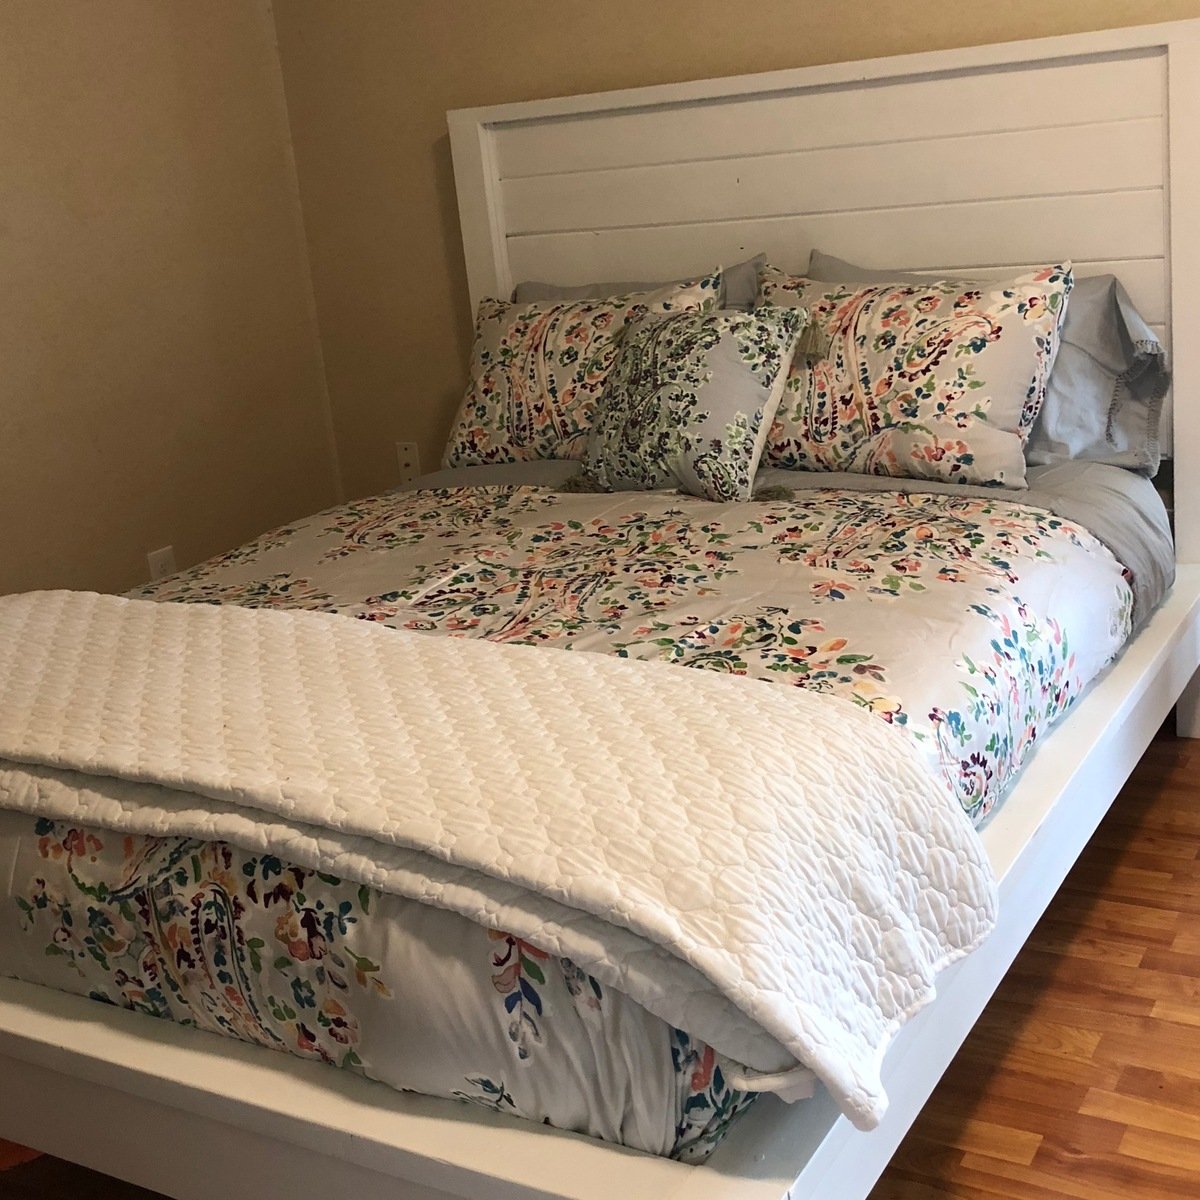
I wish I could get a better picture, but the bed is in an odd-shaped space and I can't back up enough to get a full picture. We used Fusion Mineral Paint to finish it. I love that paint, no need to prime OR add a protective finish! After it fully cured, this paint is so durable, and marks easily wash off.
This was our first build ever, and the plans were very easy to follow. We had it built in one day, and painted in the next. Definitely gave us confidence to continue on to other projects!
Built from Plan(s)
Estimated Cost
$100 in wood, $40 in paint
Estimated Time Investment
Weekend Project (10-20 Hours)
Finish Used
Fusion Mineral Paint in "Picket Fence"
Recommended Skill Level
Beginner