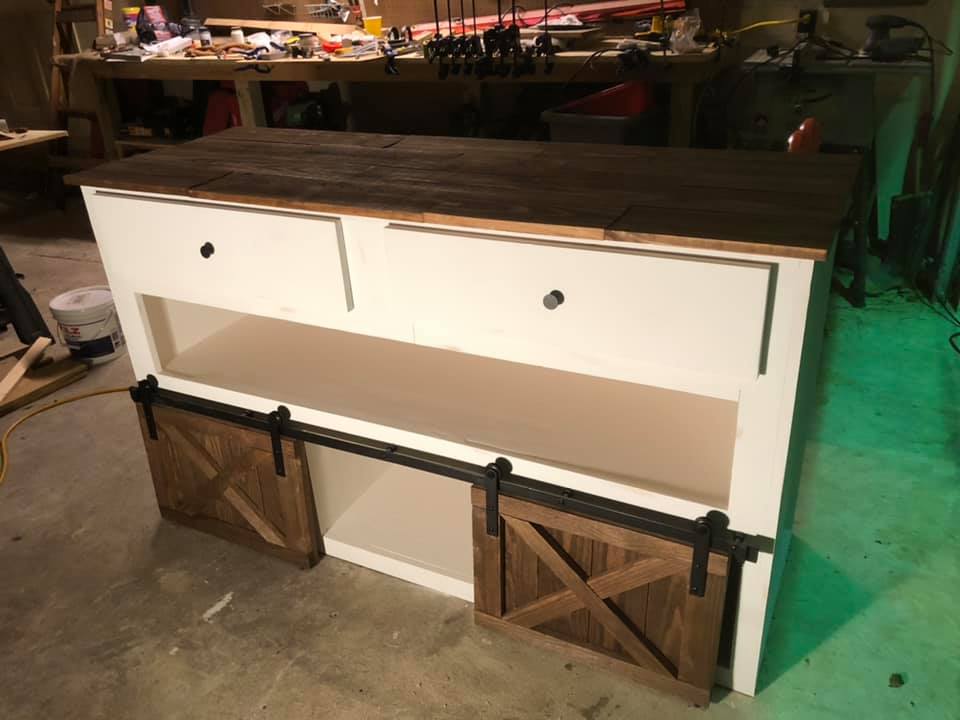
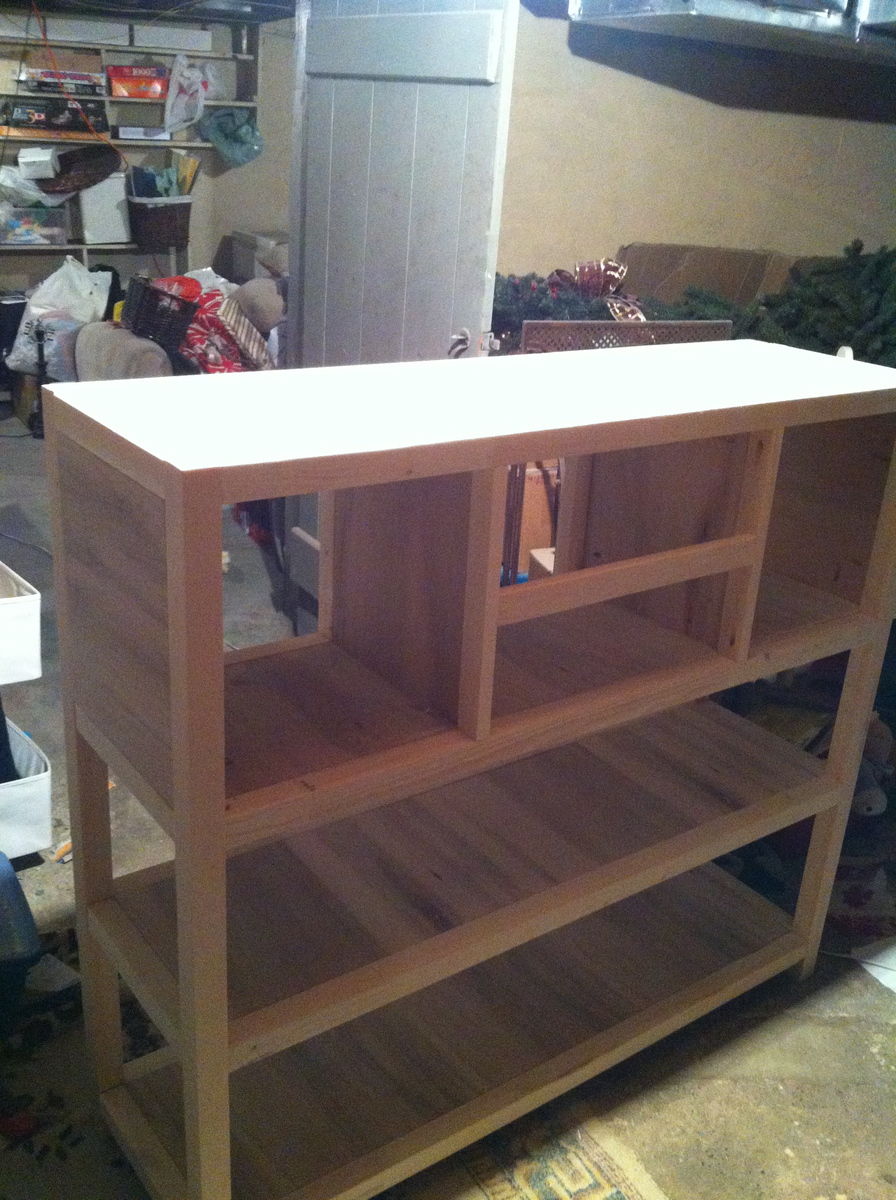
Barn Door Console with Shelf and Drawers
Built by Christ Rutledge
Built from Plan(s)
Built by Christ Rutledge
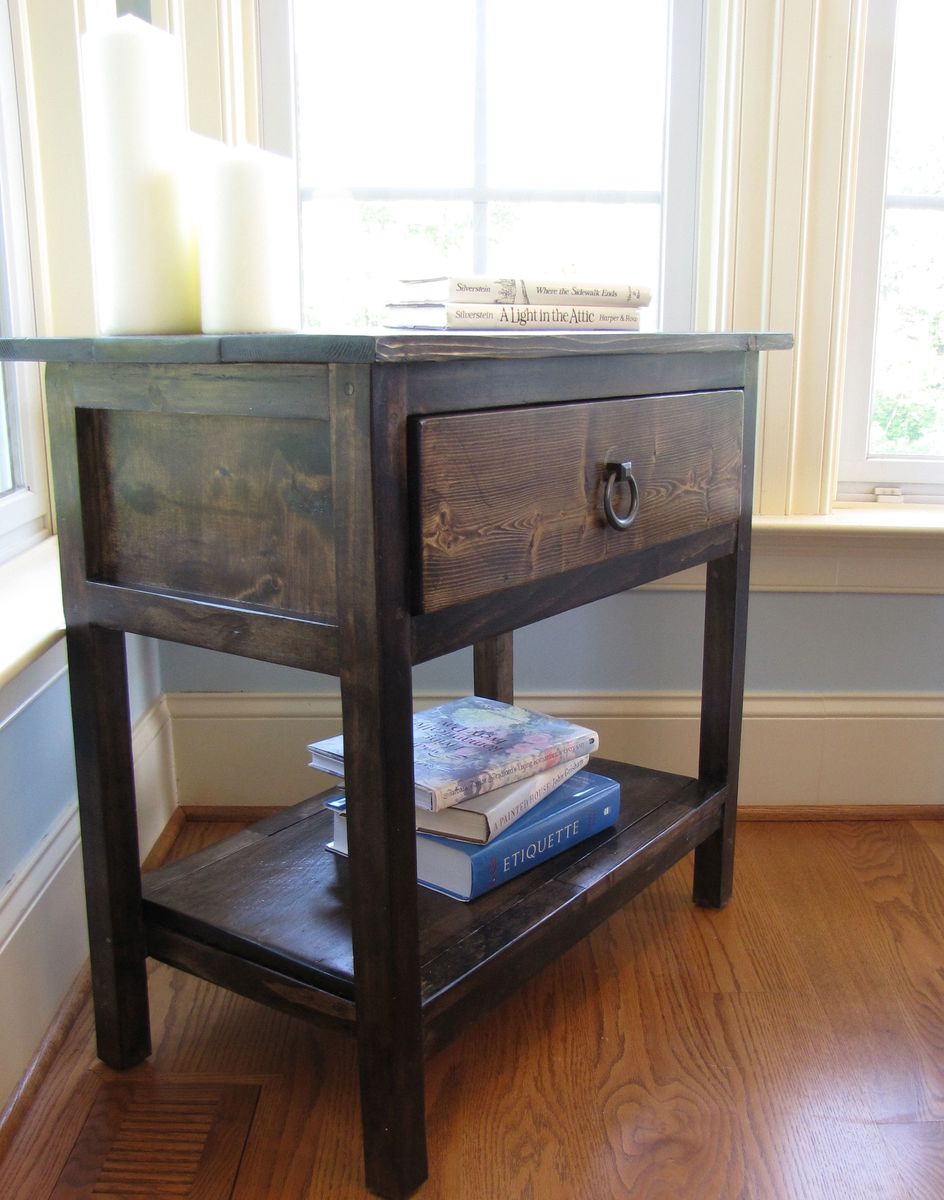
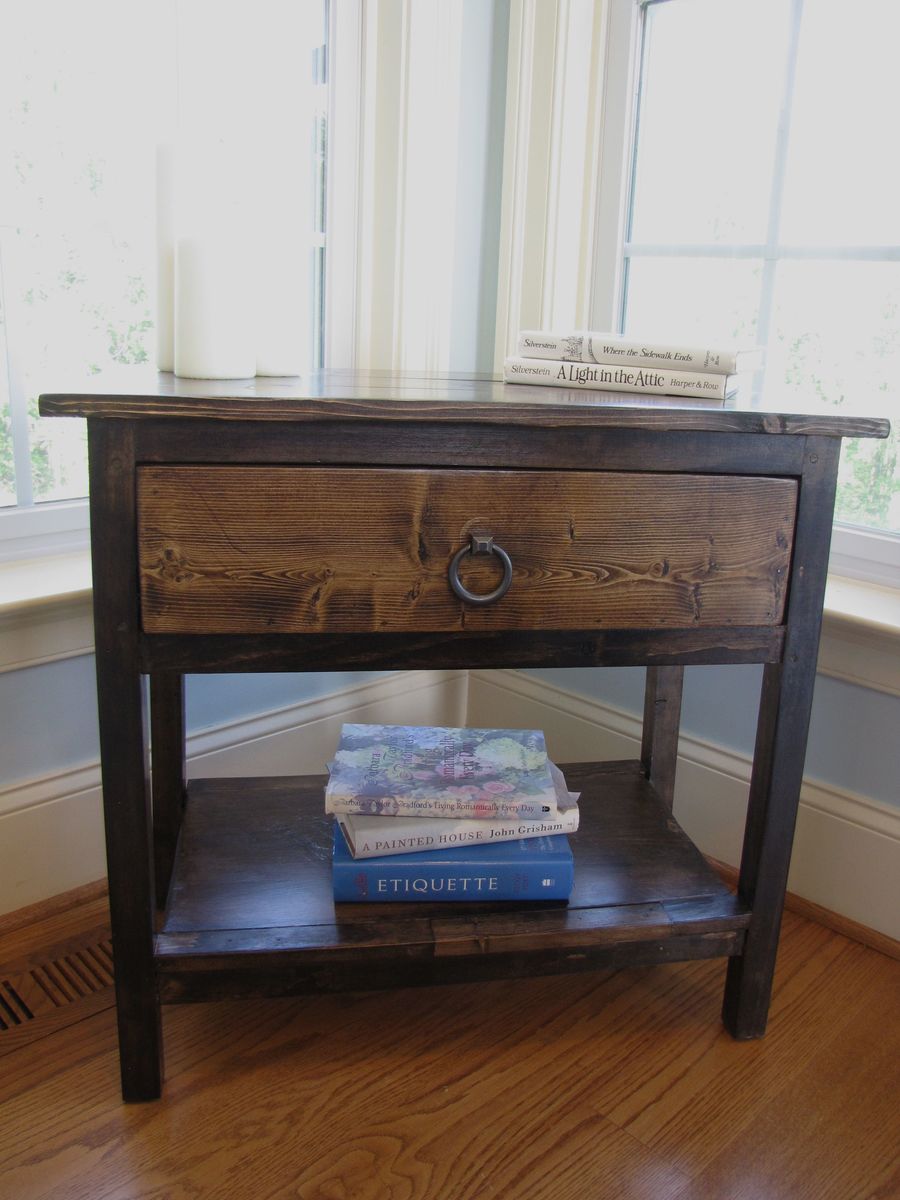
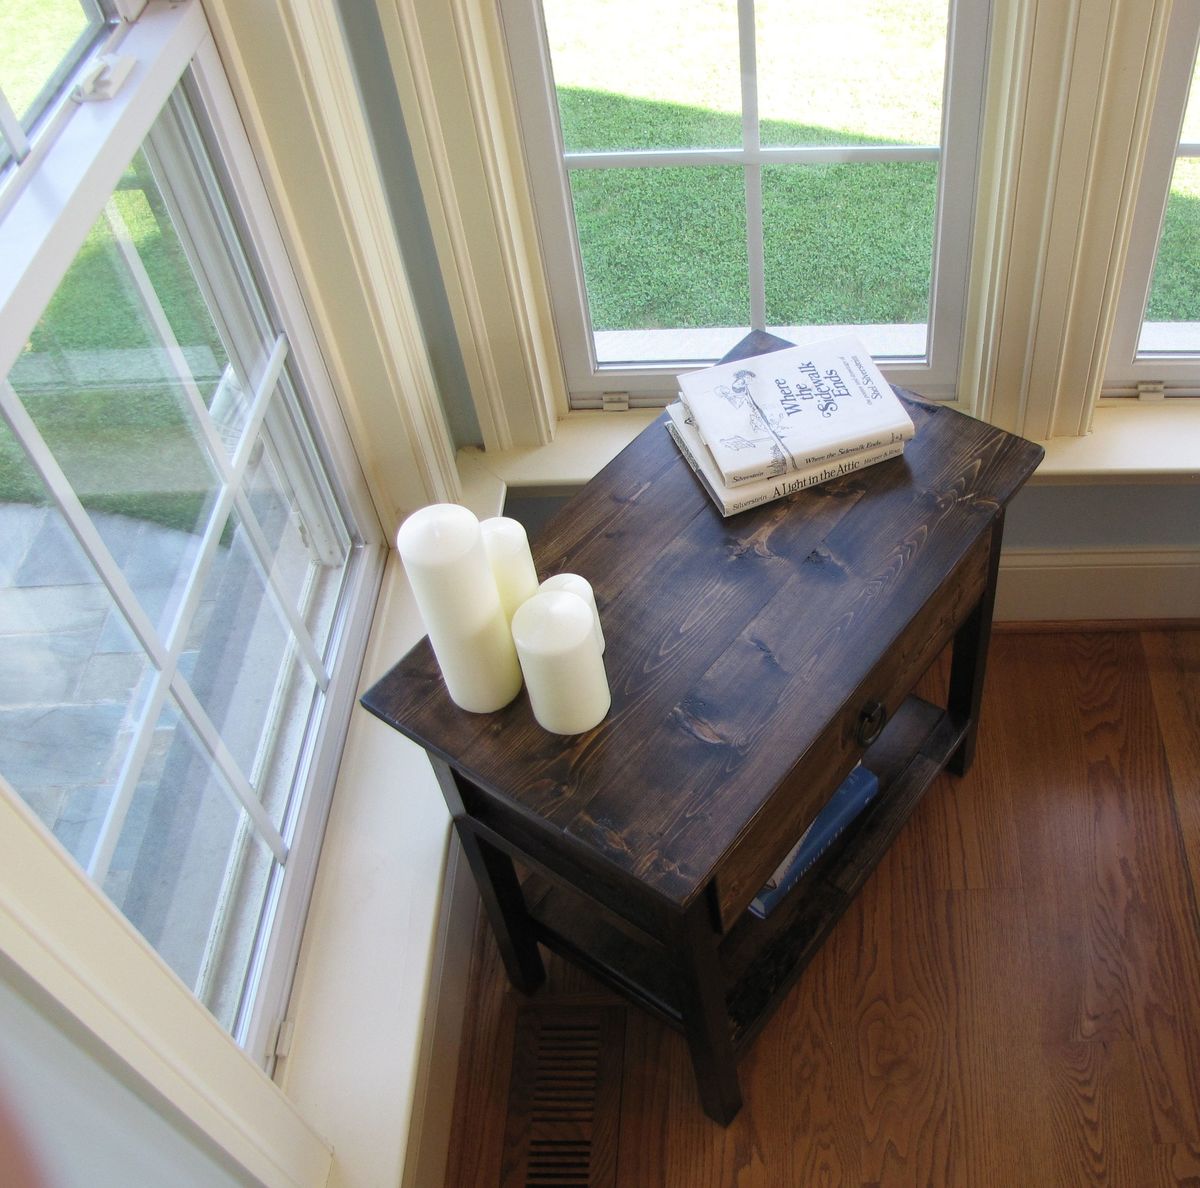
I decided to build this bedside table for a friend of mine who just graduated from college as a special graduation gift. I thought it was a beautiful plan, and knew she would love it. This table was fairly easy to build and easy to finish. I ran into problems with the shelf, at first I decided to just add 1x2's around the bottom, but didn't like that and then built the shelf with a "frame" around it. It turned out nice, I hope she likes it.

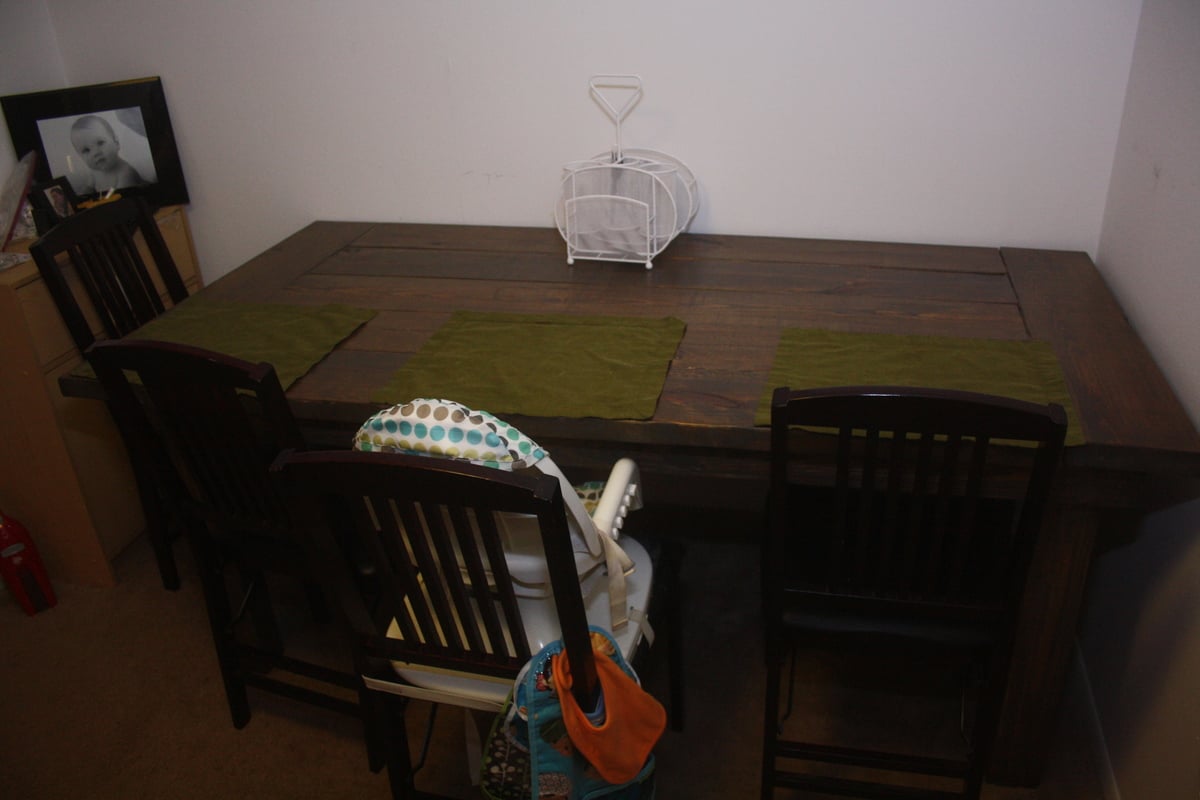
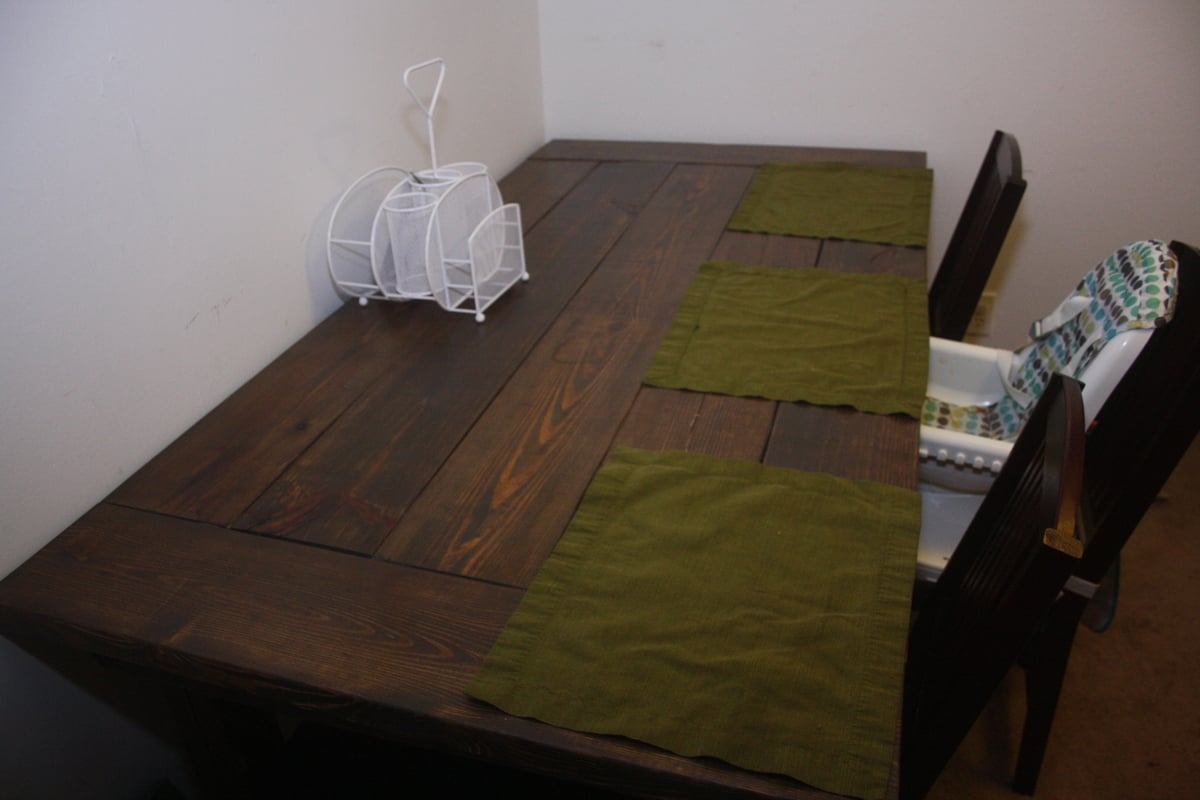
We needed a sturdy table that we could put our son up to. We looked around at a few different options and discovered this plan that we could build on our own for the same price it would have cost us to buy a used table. I have built a few small things like a bookshelf and a headboard, but this is by far the biggest project I have ever done. It took about 5 hours on a Friday afternoon and about 8 hours on a Saturday to get the construction and first coat of stain on. After that we put 3 coats of a satin polyurethane on over the course of the next several days. We are really happy with how this turned out and it was a relatively simple project.
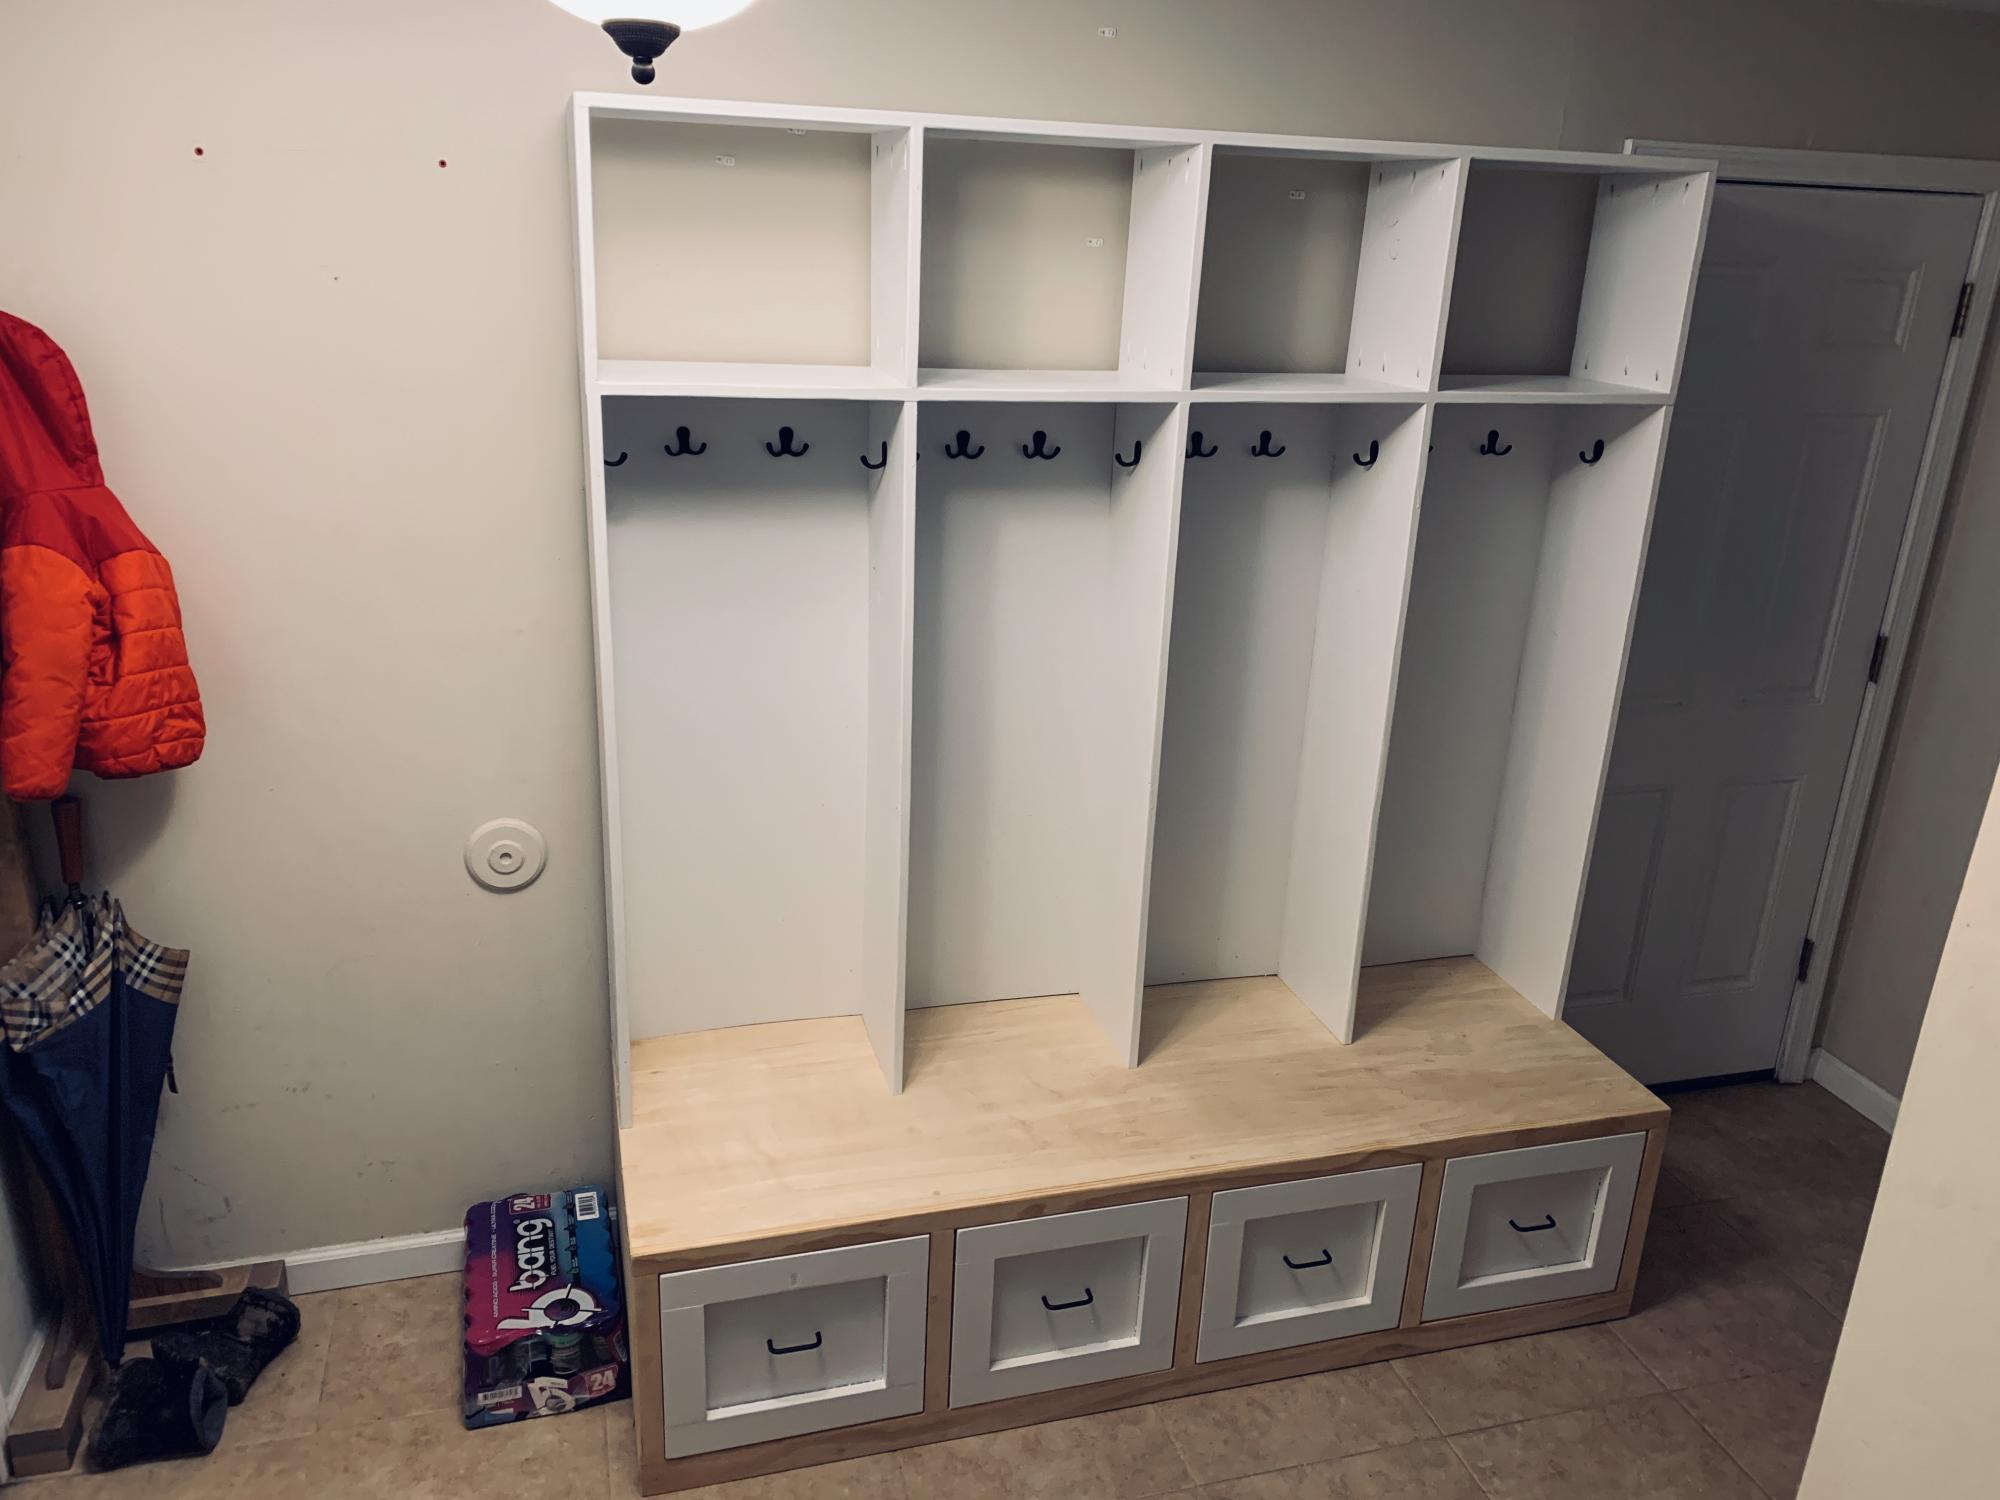
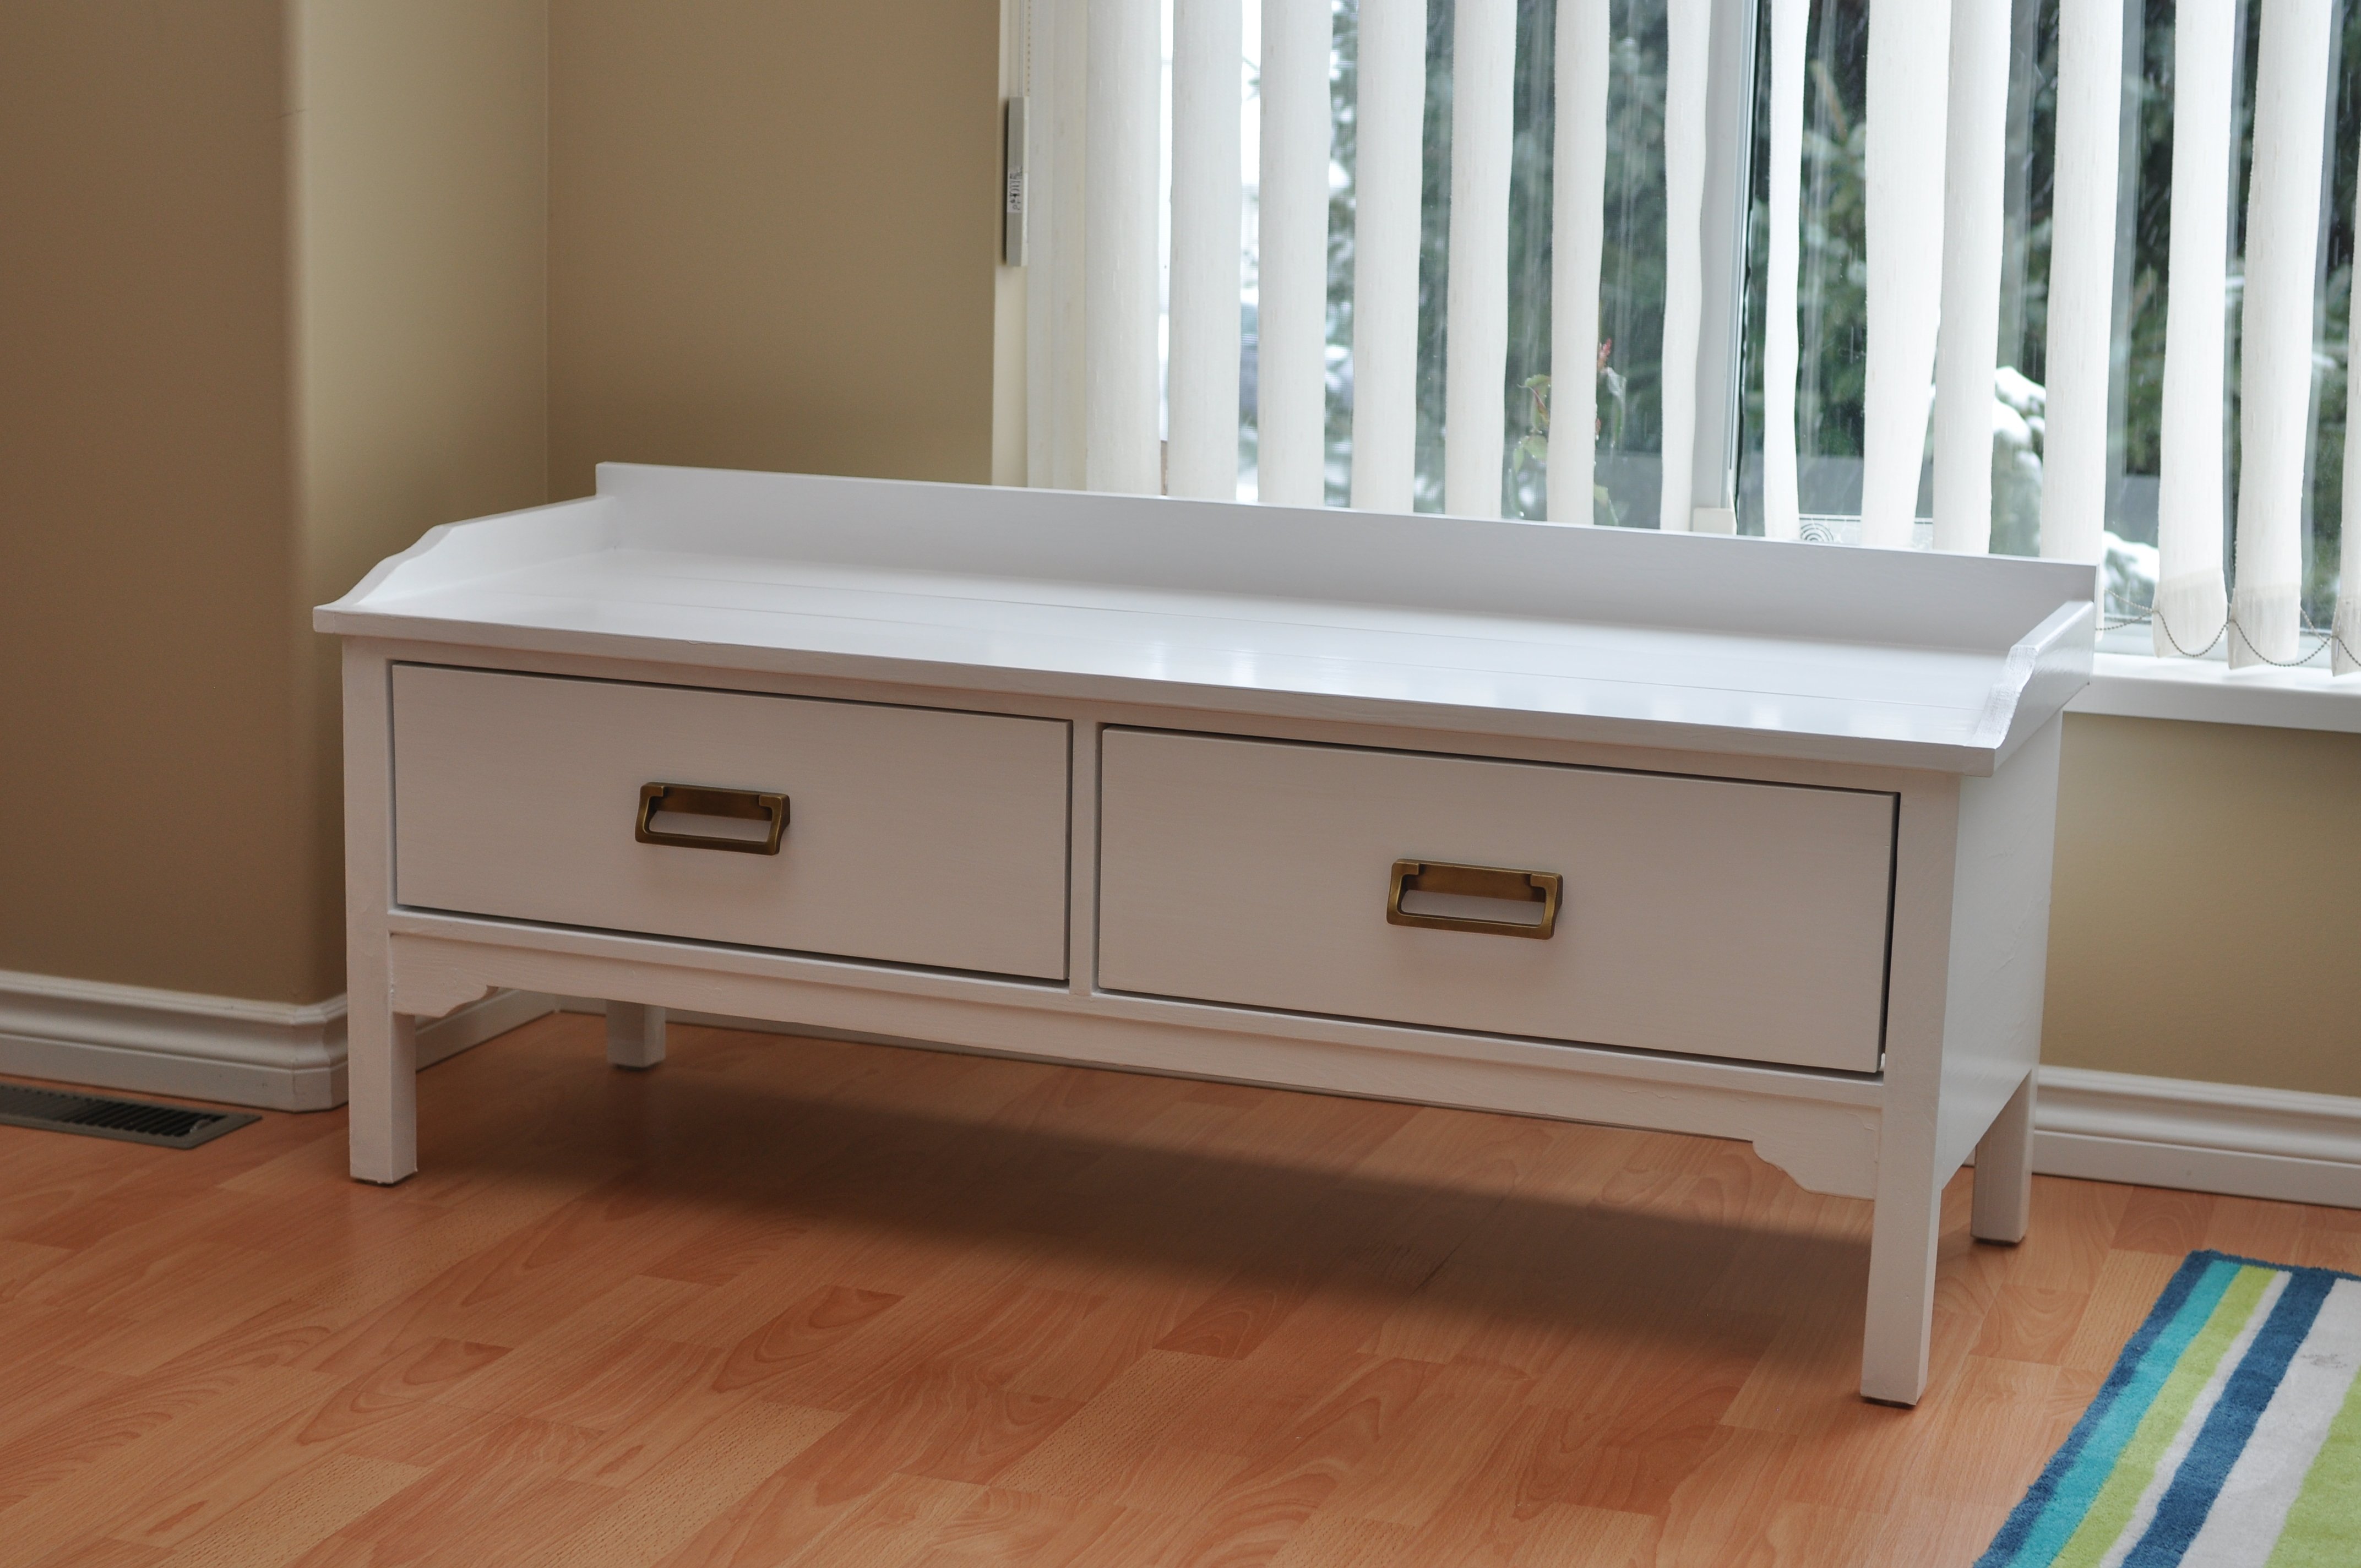
I kept the lockers super simple, but the drawers / bench followed me the plans. Thanks as always for the plans!

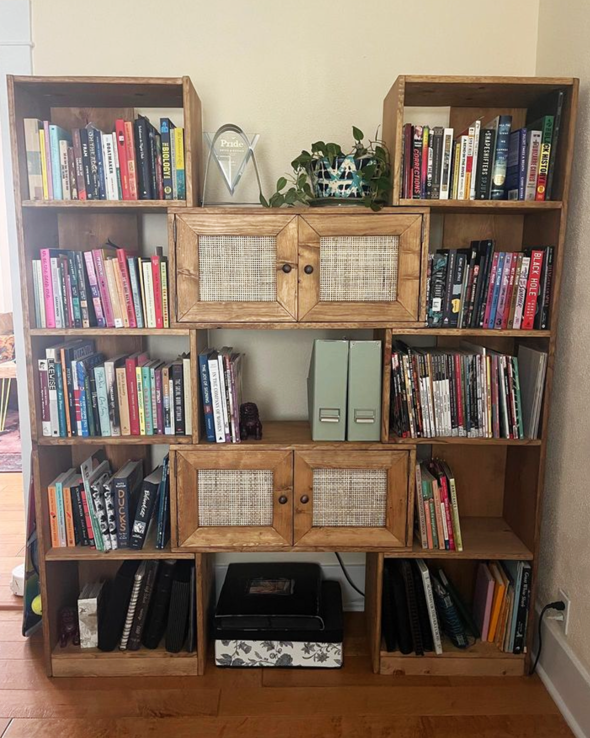
Modern Puzzle Bookcase

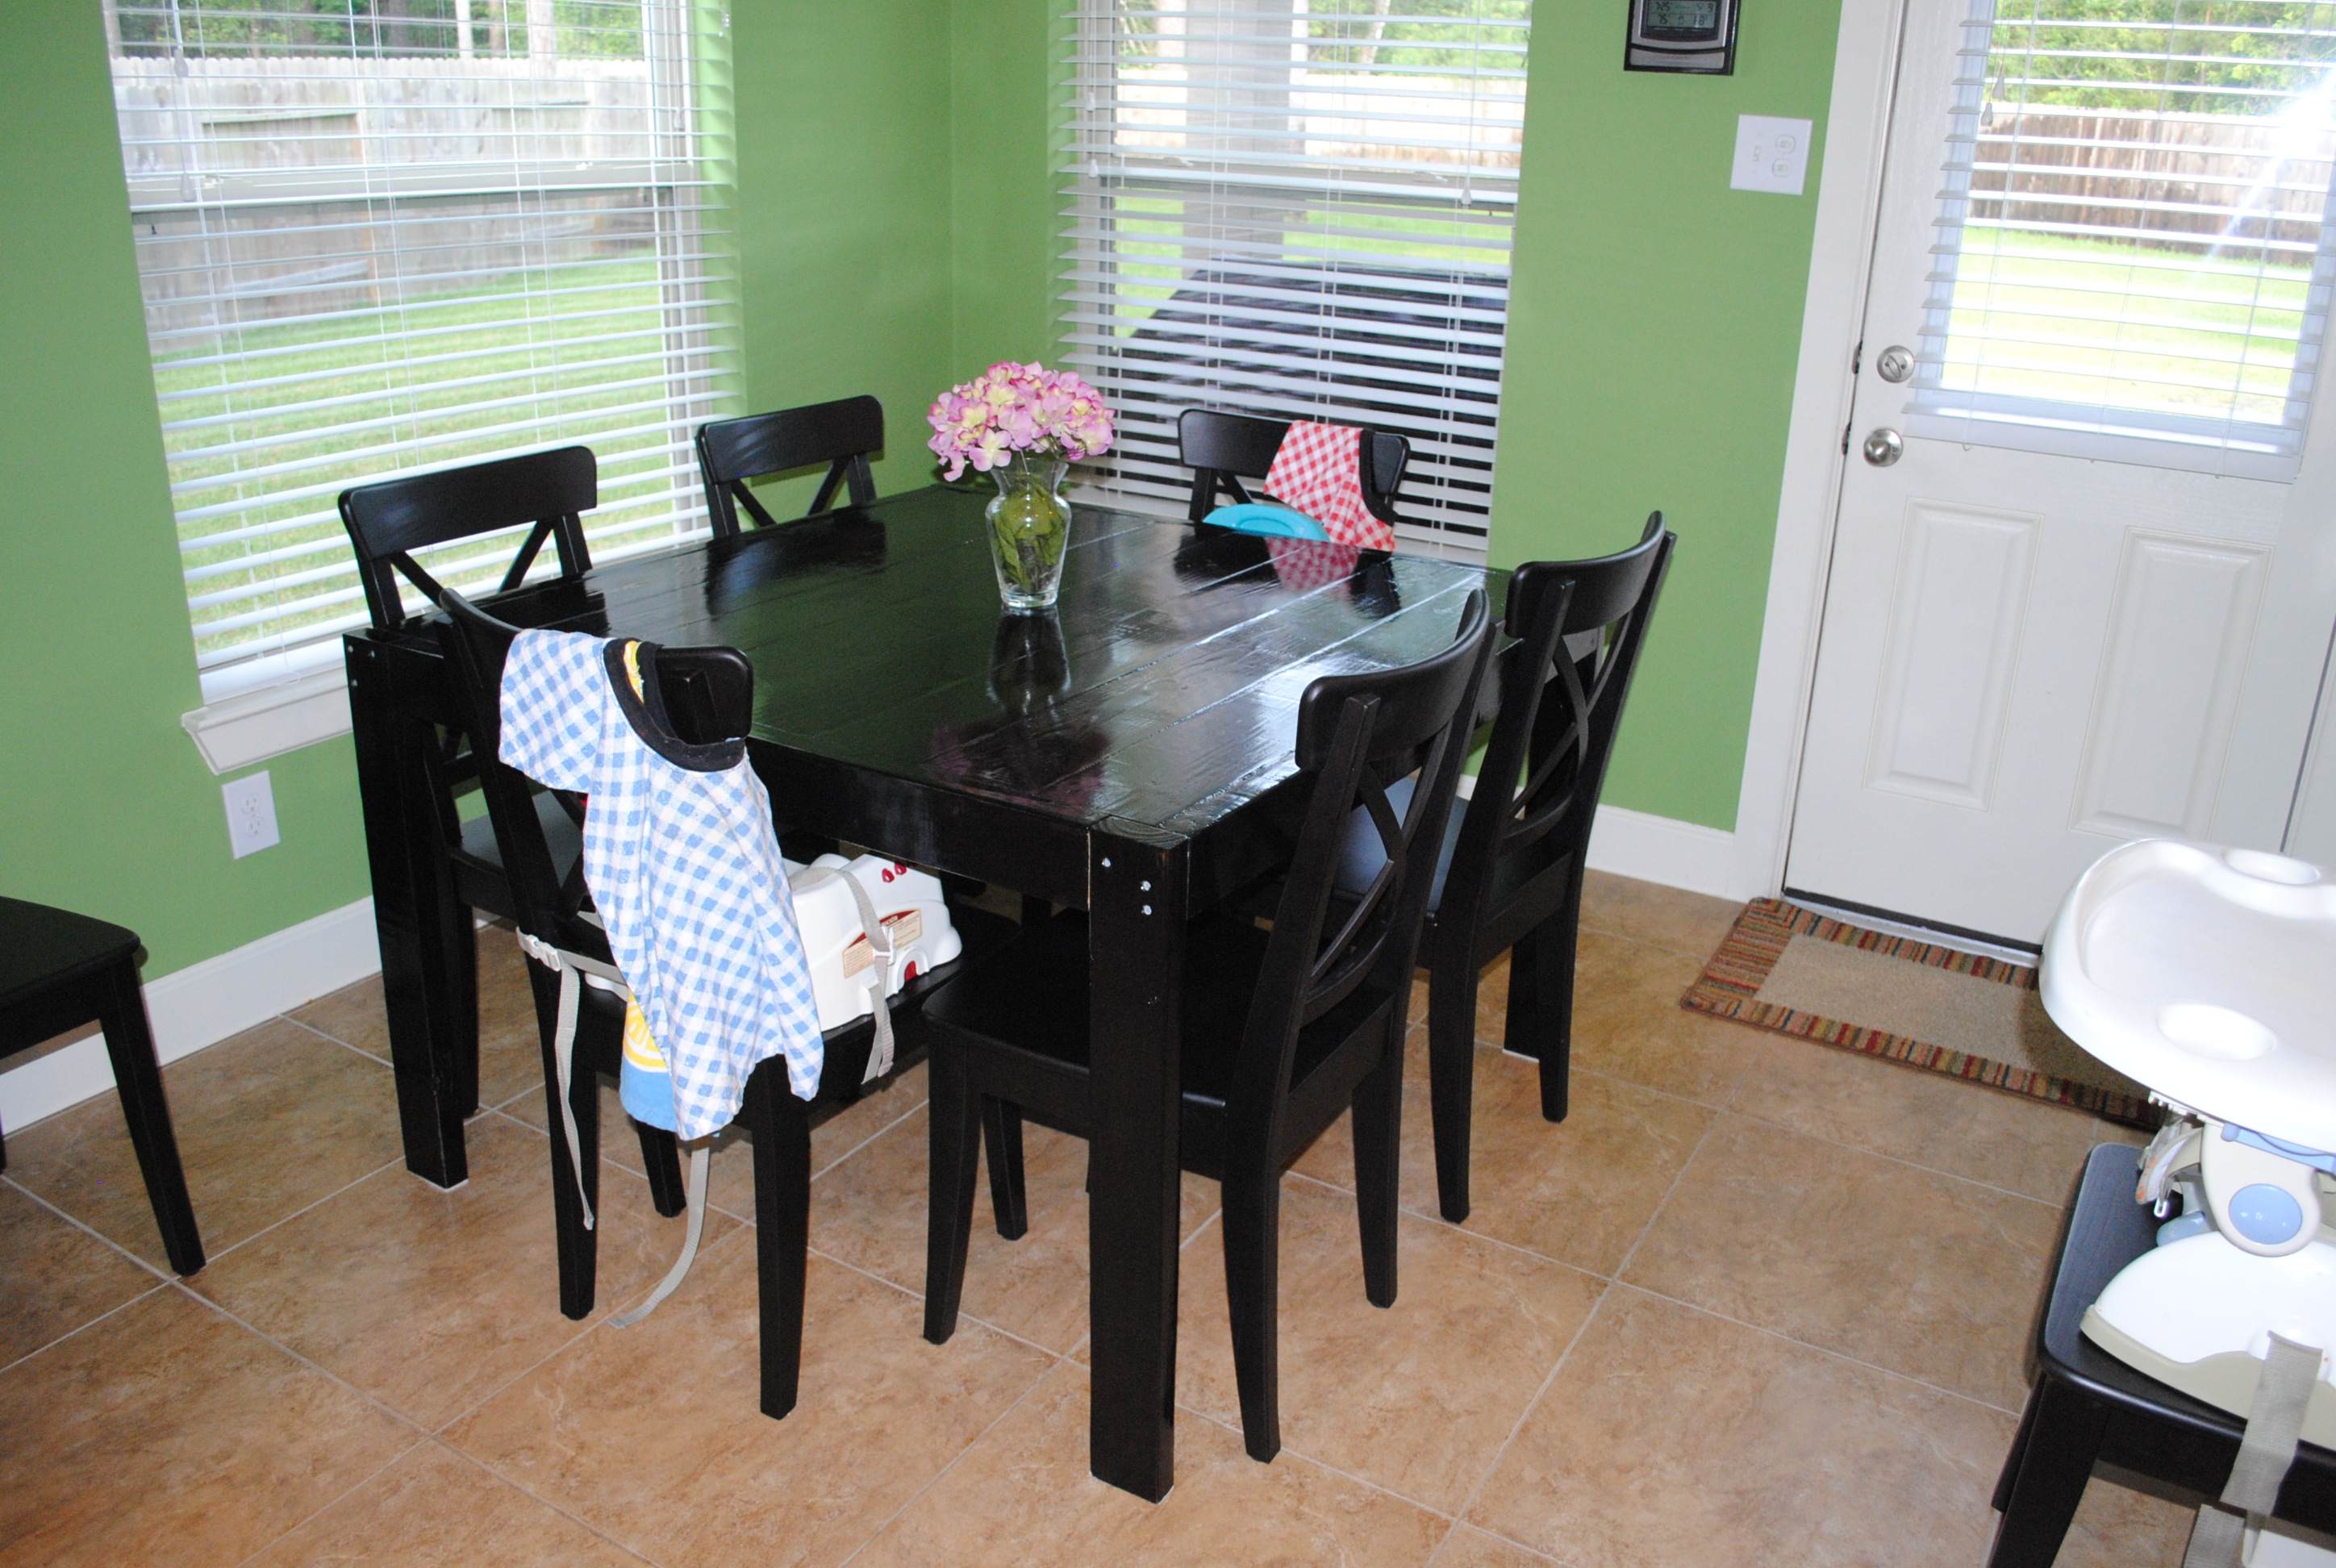
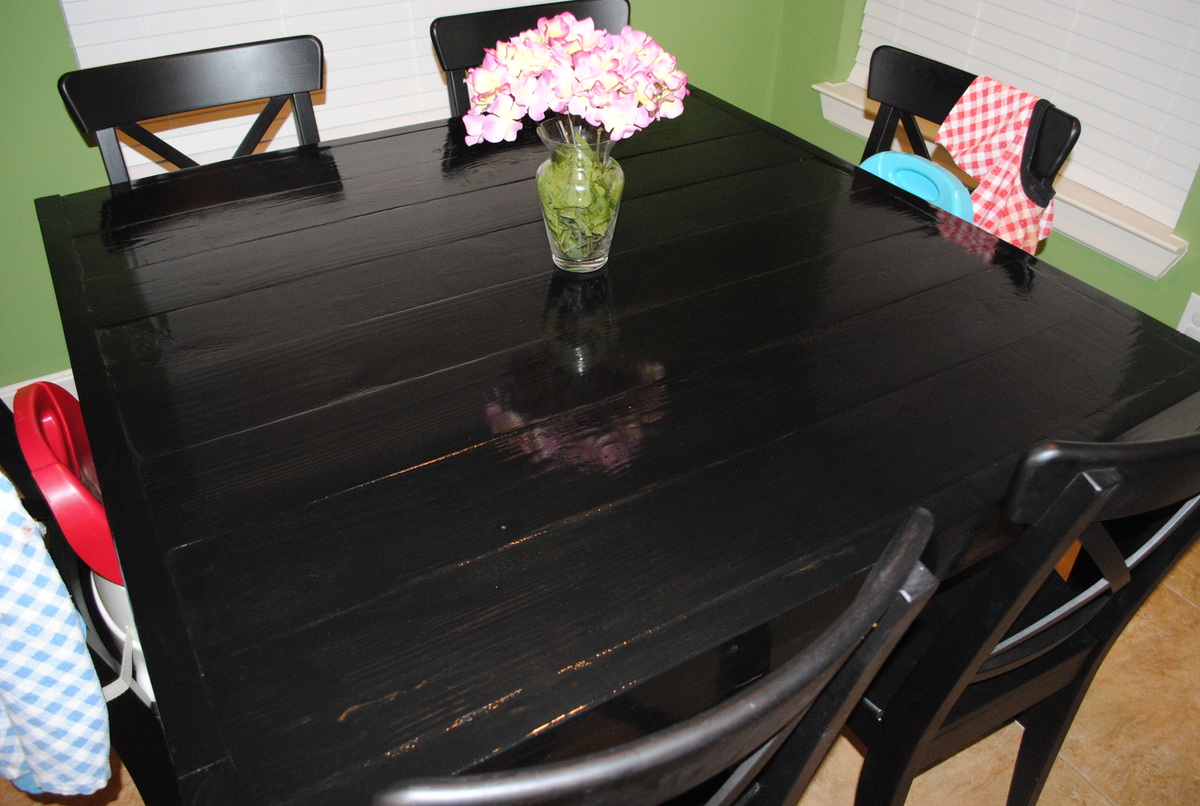
I wanted a square table that was standard height but not too big for my 9' by 9' breakfast area. I used the plans for the square modern farmhouse table, but mine is a 47 inch square. It seats 6 easily (and the chairs tuck in), but can seat 8 if we need it to. It turned out great!
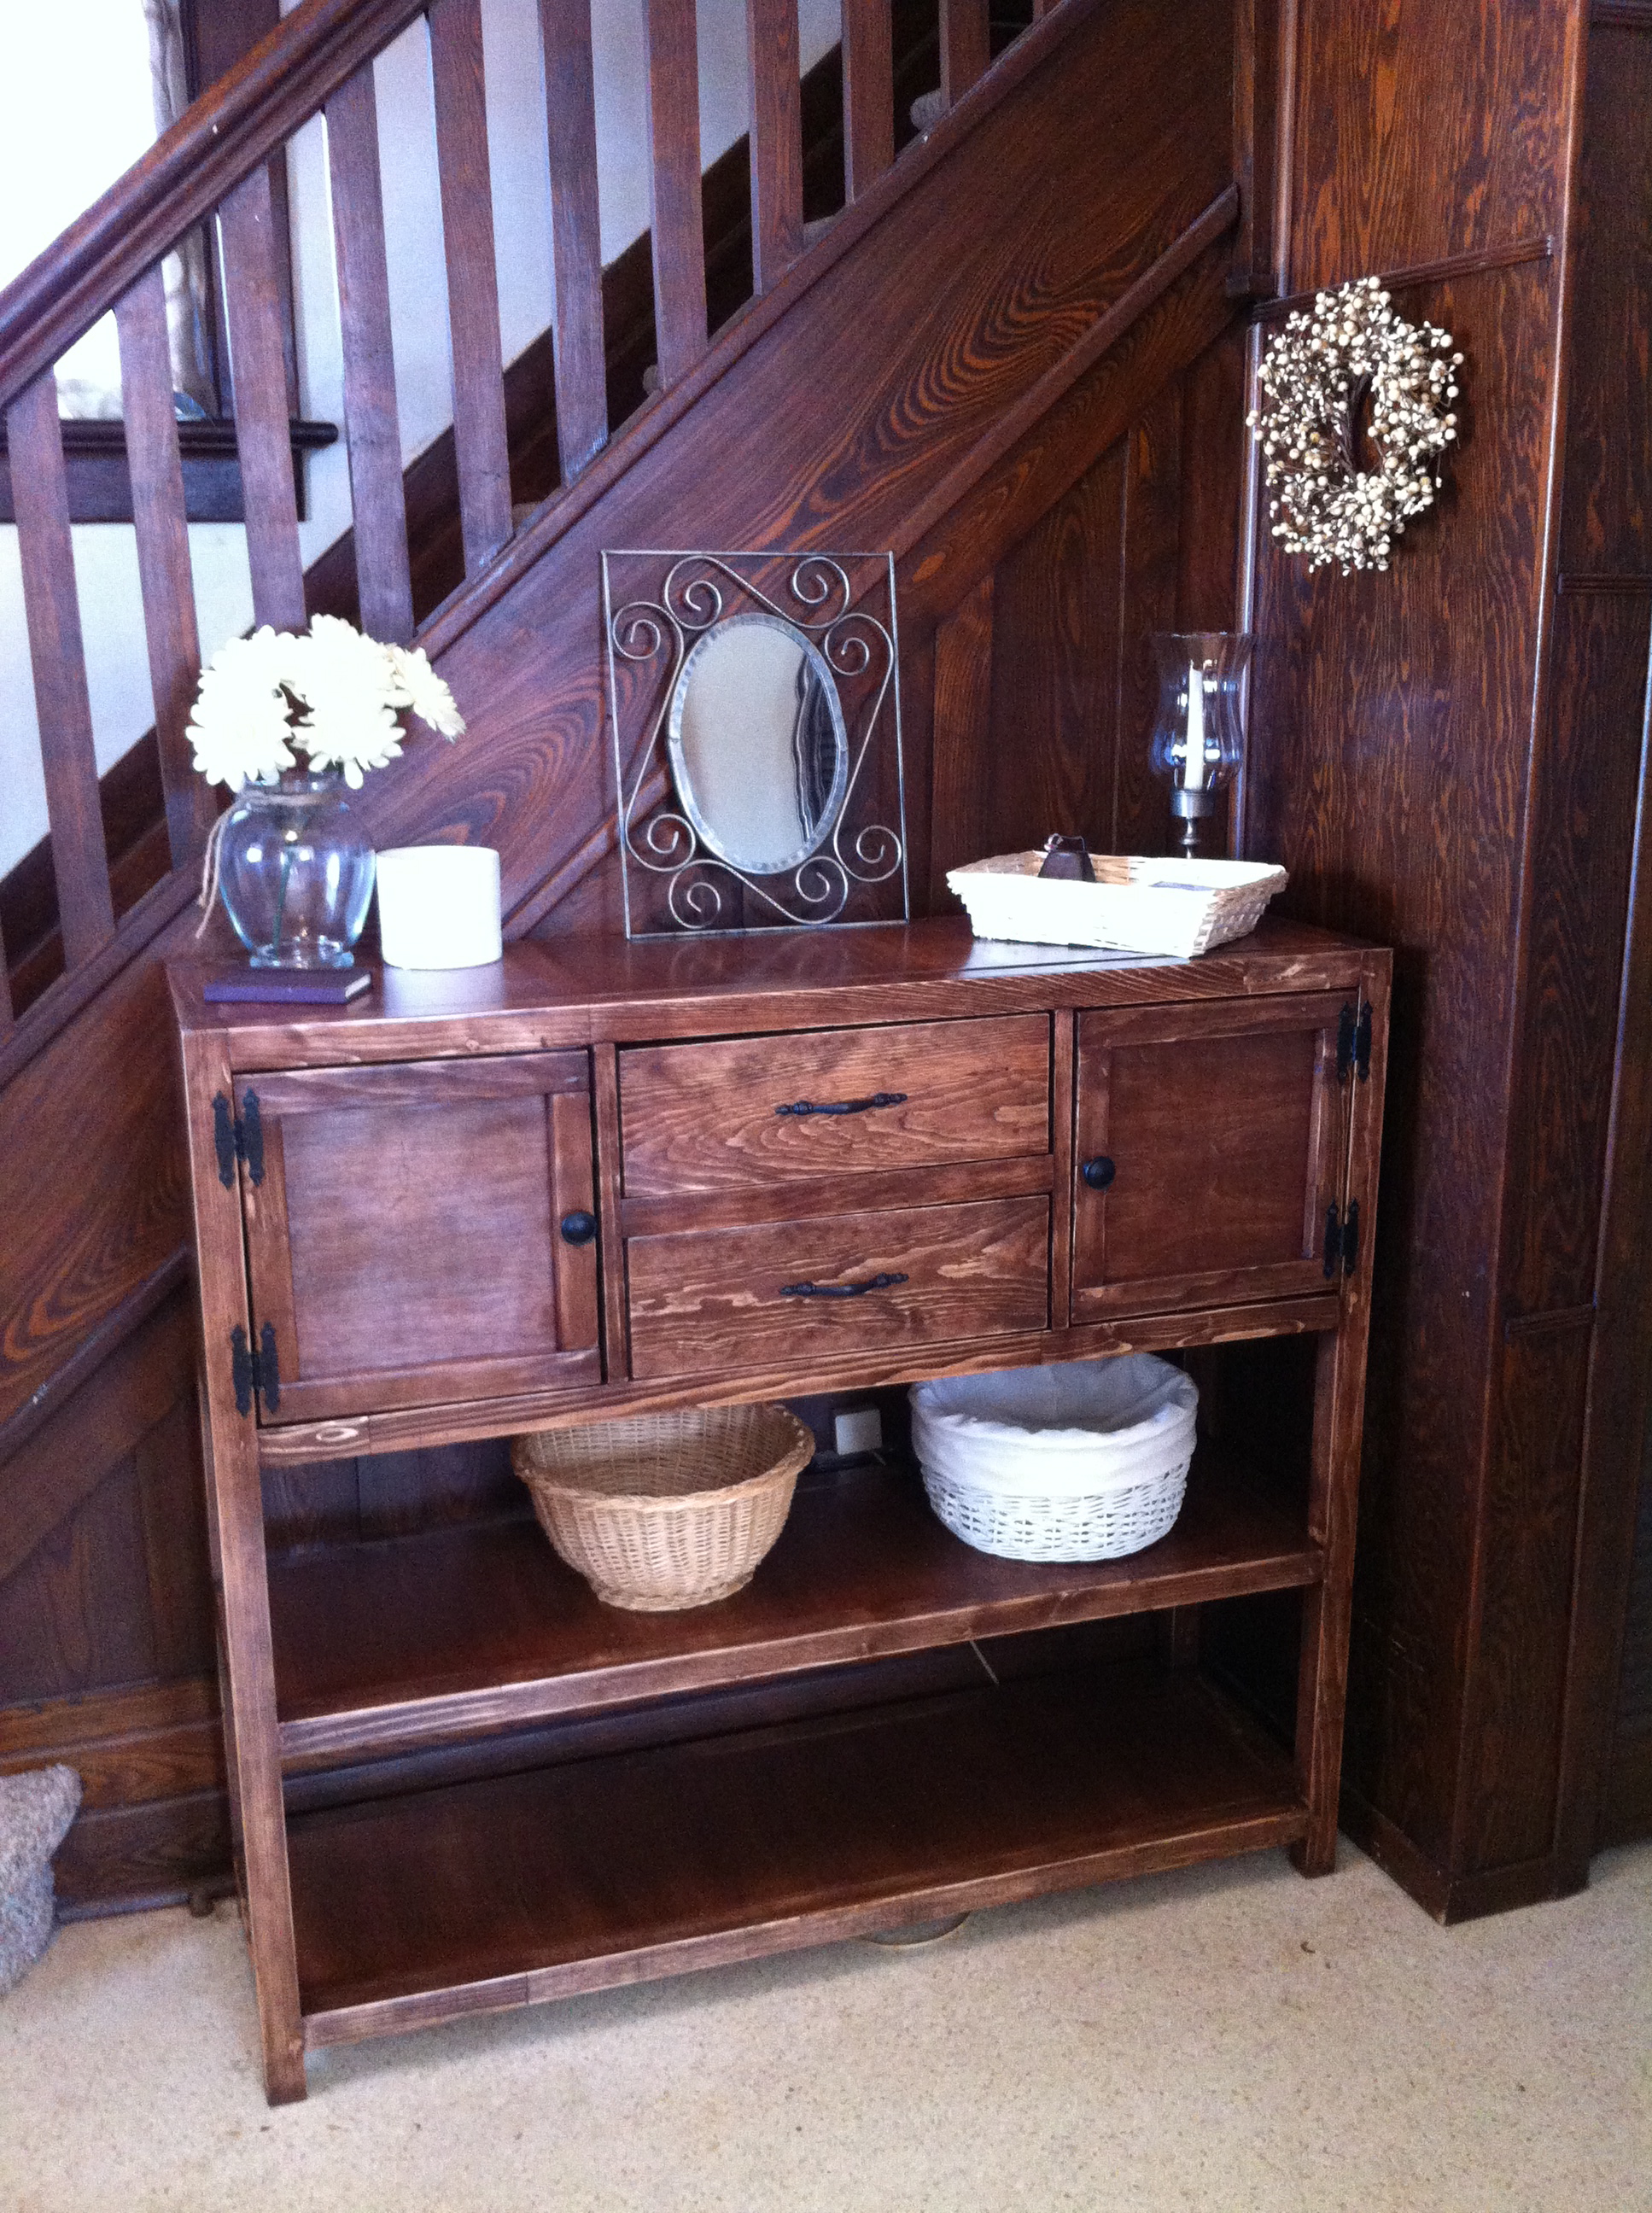
I made this Console table for our entrance way! I modified the plans by adding an extra 10" in height and included a second shelf. We are now using the bottom for a shoe rack and the middle for hats, mitts and stuff! It's a perfect fit for our front entrance!
It was my first time with drawers so I had a bit of trouble. But they open and close and aren't too lopsided, so I guess they are a success! Love these plans!
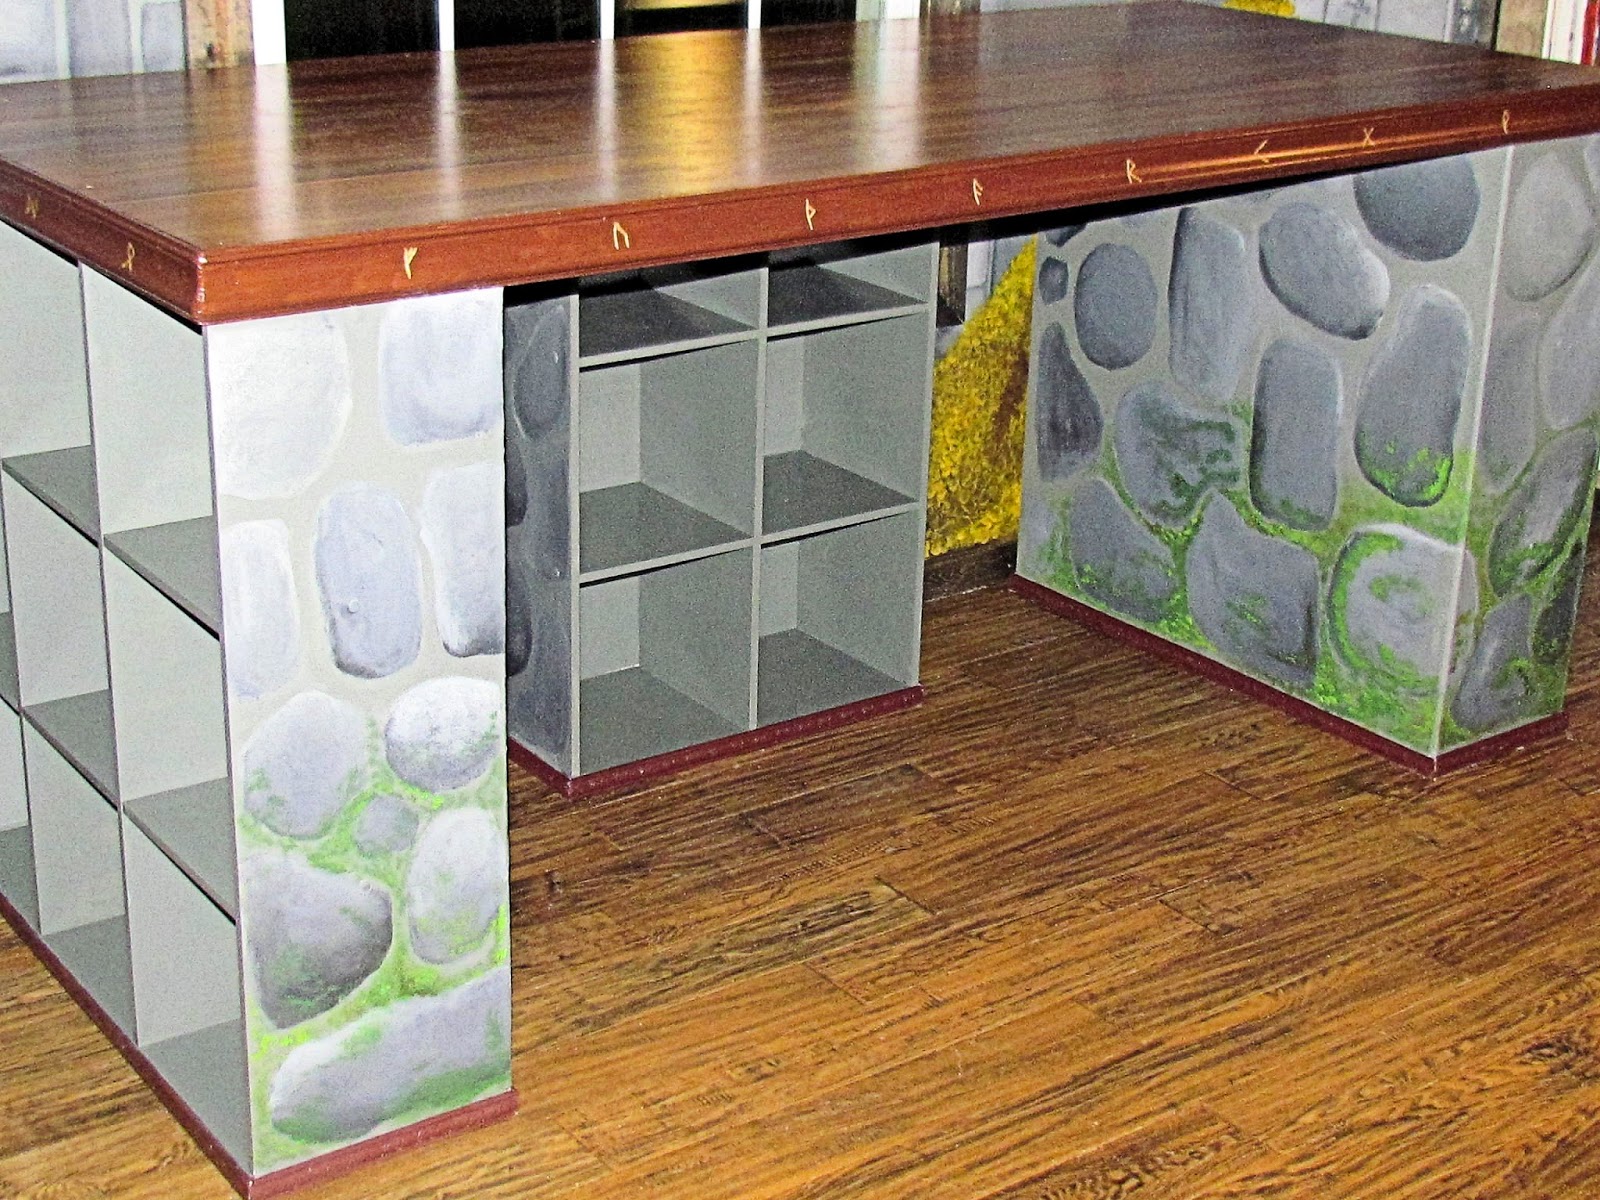
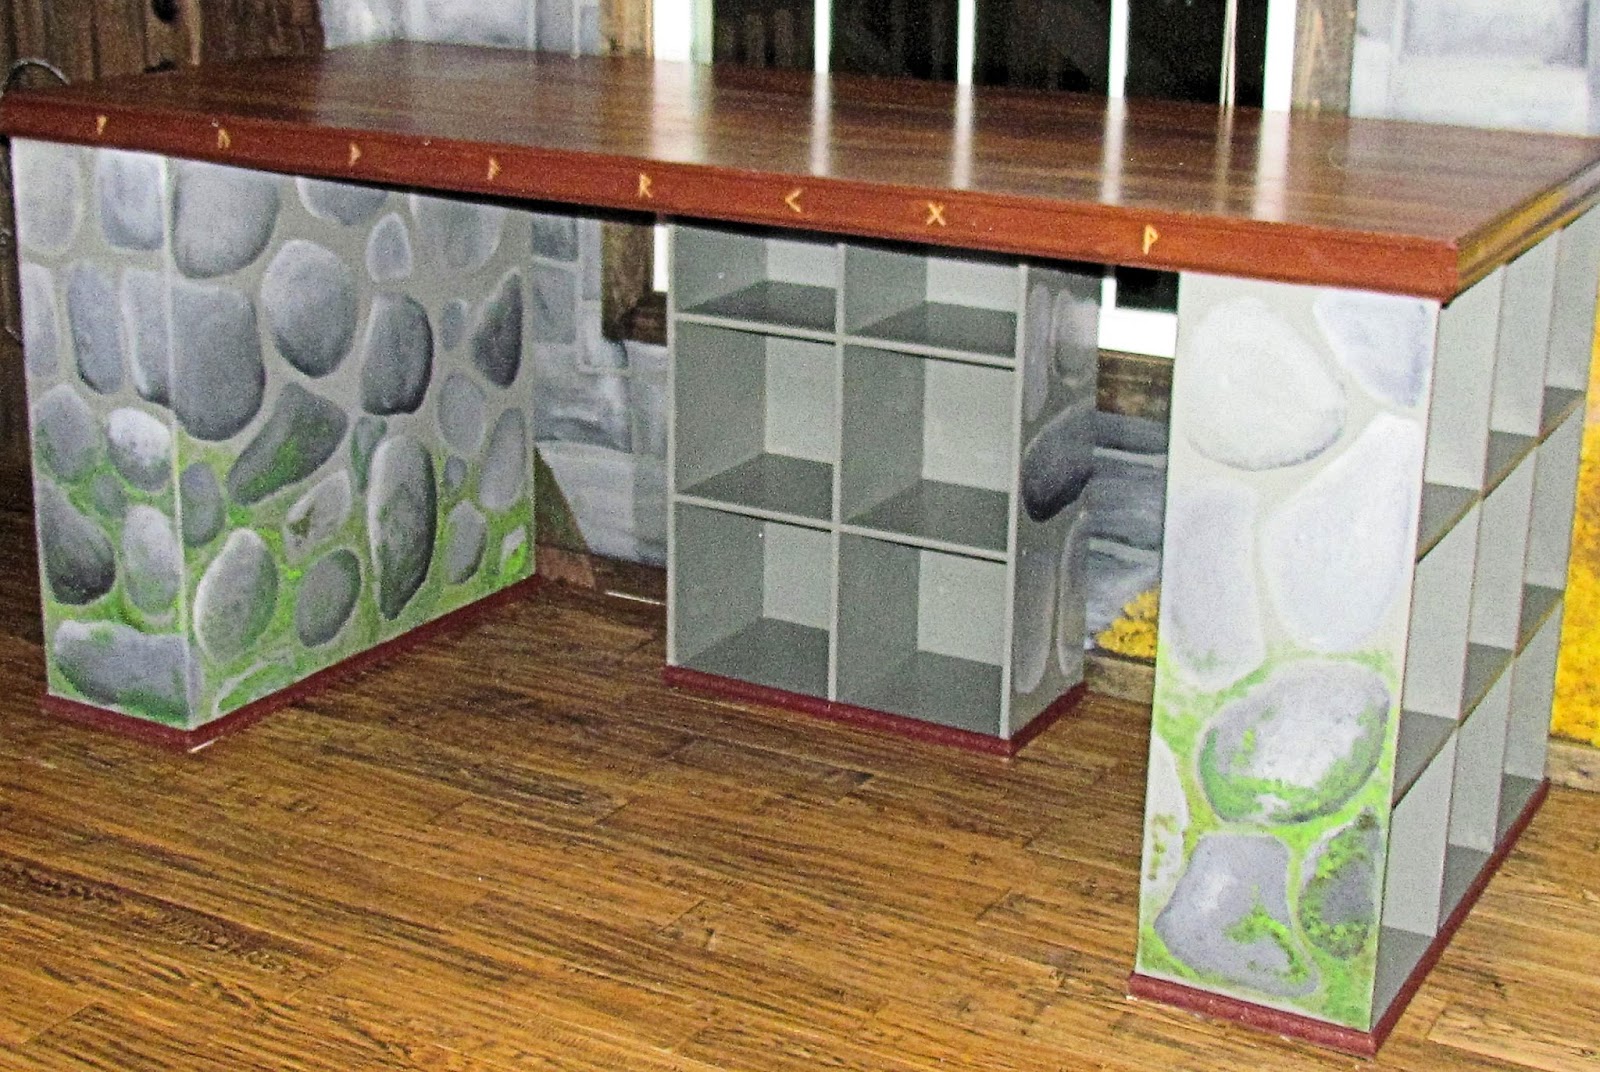
I liked Kristi's version of the modern craft desk but I decided to add another cubby area. I have a lot of art things and I like for them to be organized. Here is Kristi's version: http://www.ana-white.com/2013/10/kristis-craft-desk
I really love the way it turned out and I've definitely got my use out of it.

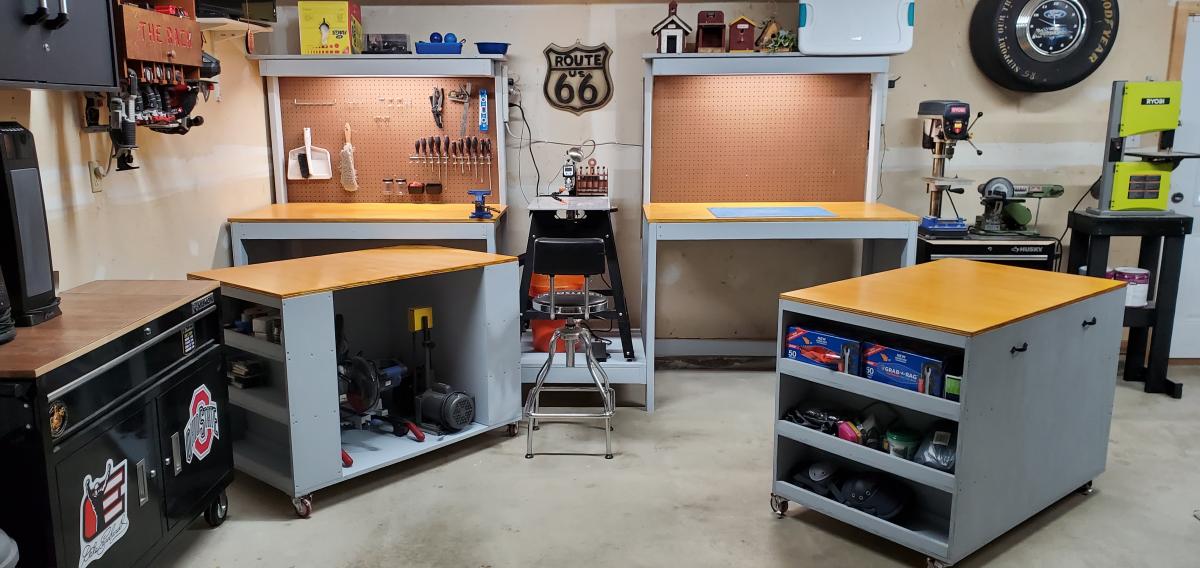
I loved the idea of roll away cabinets that could double as more tabletops for larger projects but then be able to hide them and save space. I usually have 2 cars parked in the garage and space us at a premium. Instead of a mitersaw I placed my scrollsaw in the middle added peg board, lights, and a shelf. Thanks for the plans and the idea.

Tue, 12/08/2020 - 18:19
Excellent use of space. This would be great in a smaller shop.

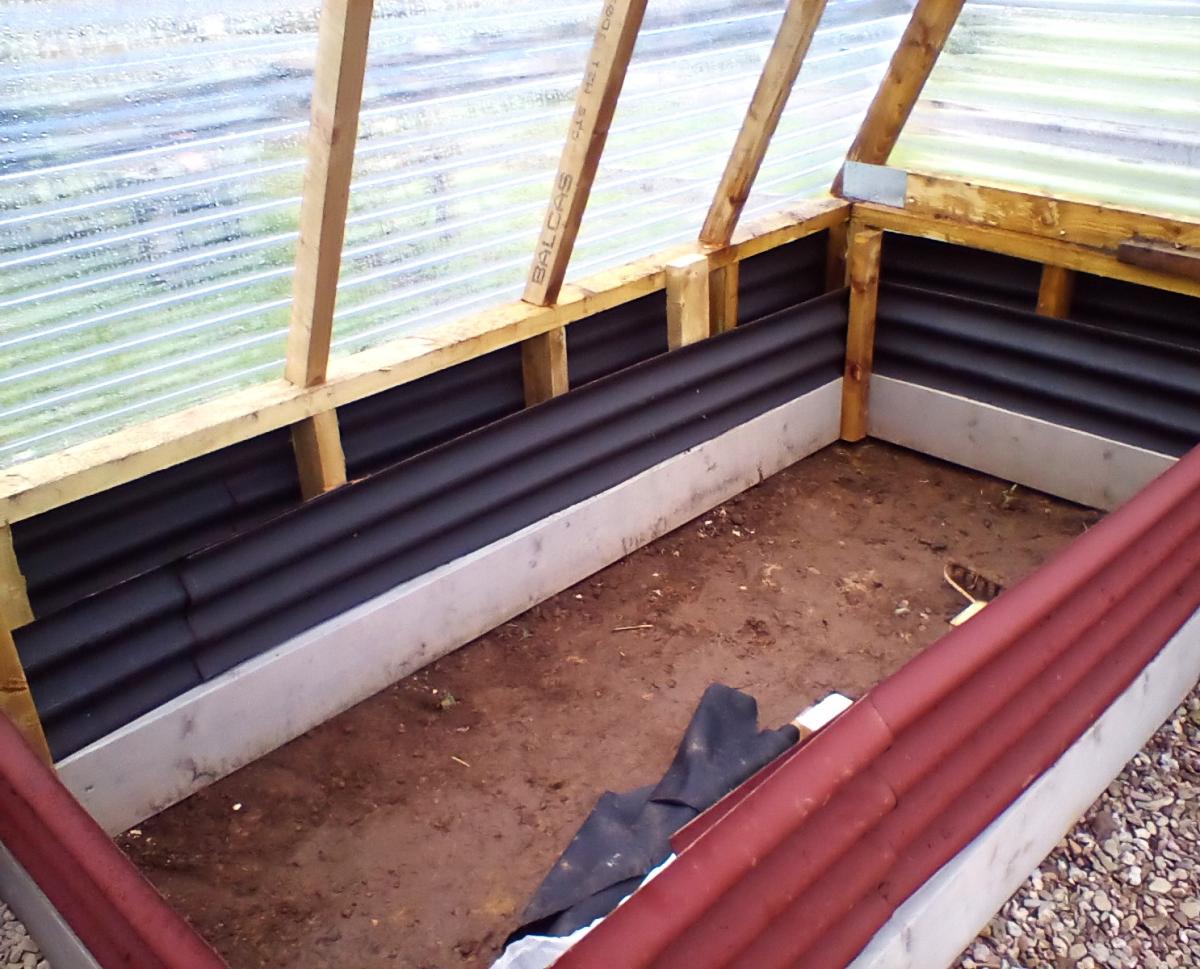
Had a bit off a mate doing this project due to damaged deliveries but looks good and is solid. Used 3 x2 for the rafters and bitumen sheets for the bottom. Two 3x2 strangers on the top rafters has it's seriously open too the wind. Misses loves it.
Welshsmoker


Fri, 10/20/2023 - 08:12
I can see all the work that went into it, looks wonderful! Thanks for sharing.
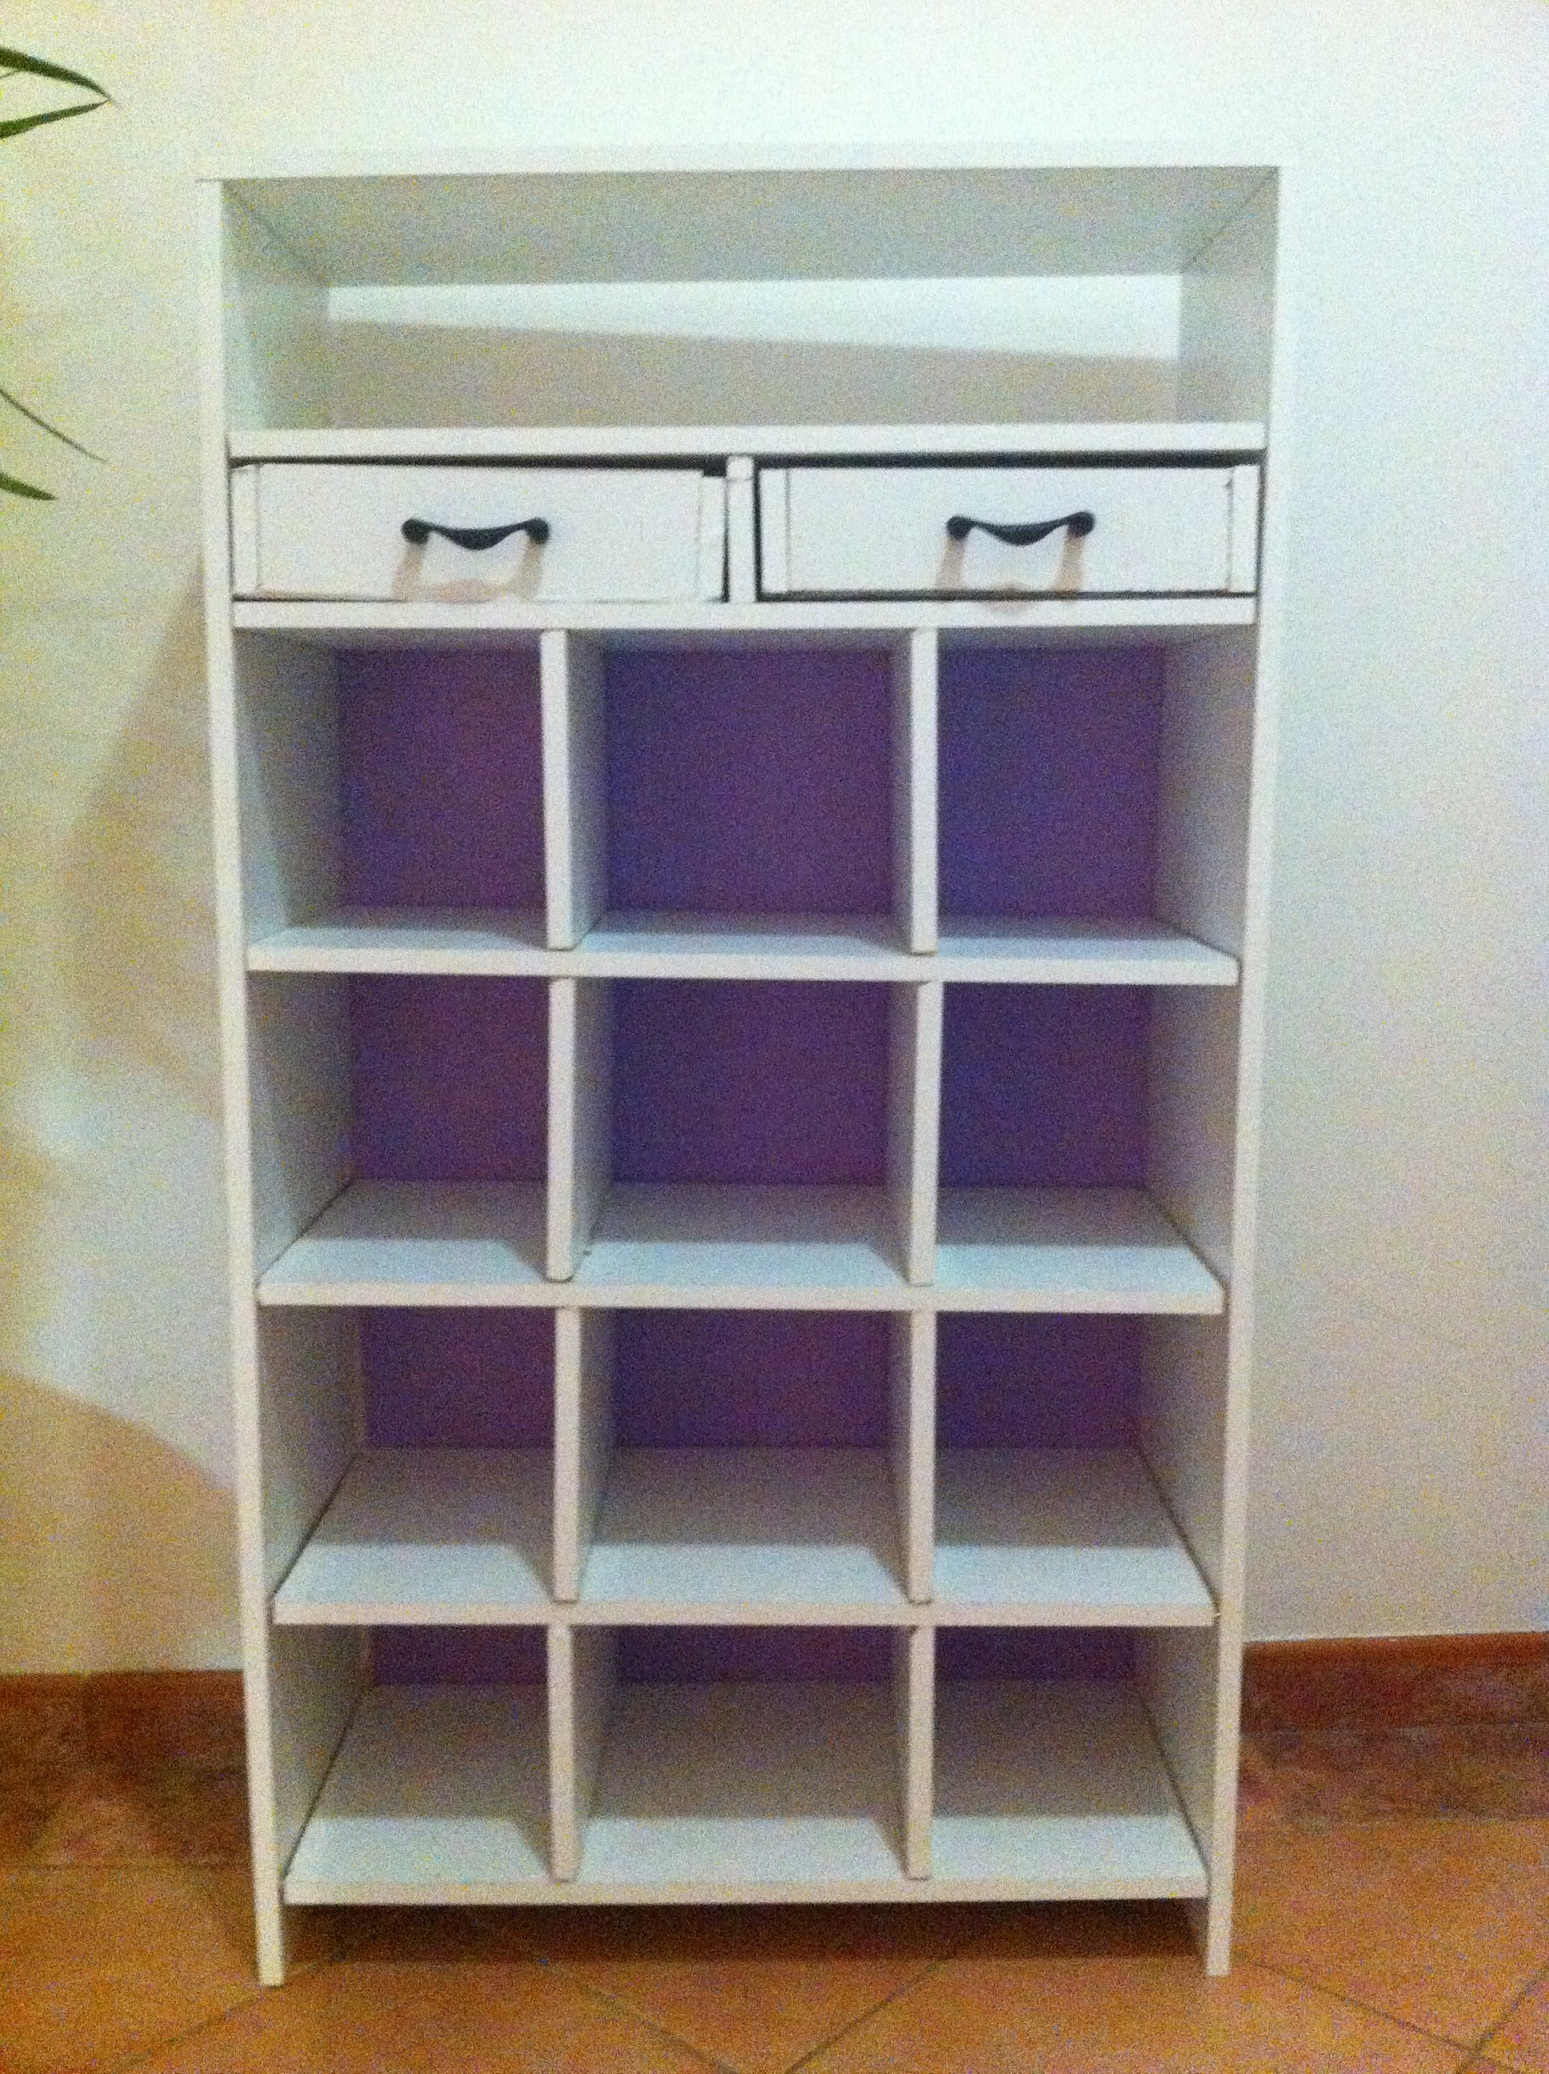
I searched for nice shoe storage for ages and found these plans on this awesome website and even though it is an intermediate project I gave it a try. As you can see my drawers and the whole thing in general is squint but I am proud of my first ever build project. It took me 2 evenings to complete.
I added some drawers for my jewelry like one by balard designs.
I hope my next project has better right angles and joints.
Oh and I used a Kreg jig and it is amazing!!!
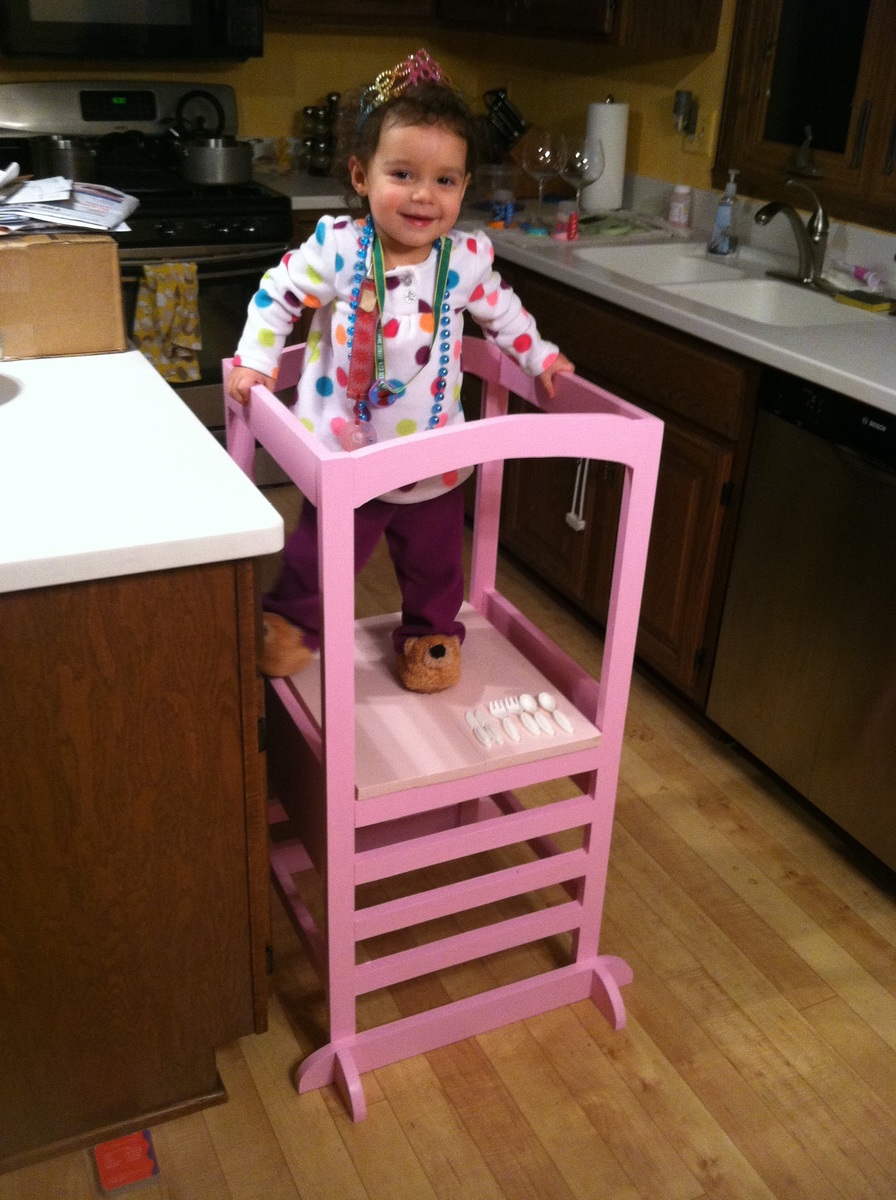
I used white shelves from the home store, that I cut to size. I live in Saudi Arabia so wood is not so easy to find. Maybe I can use palm trees next time!
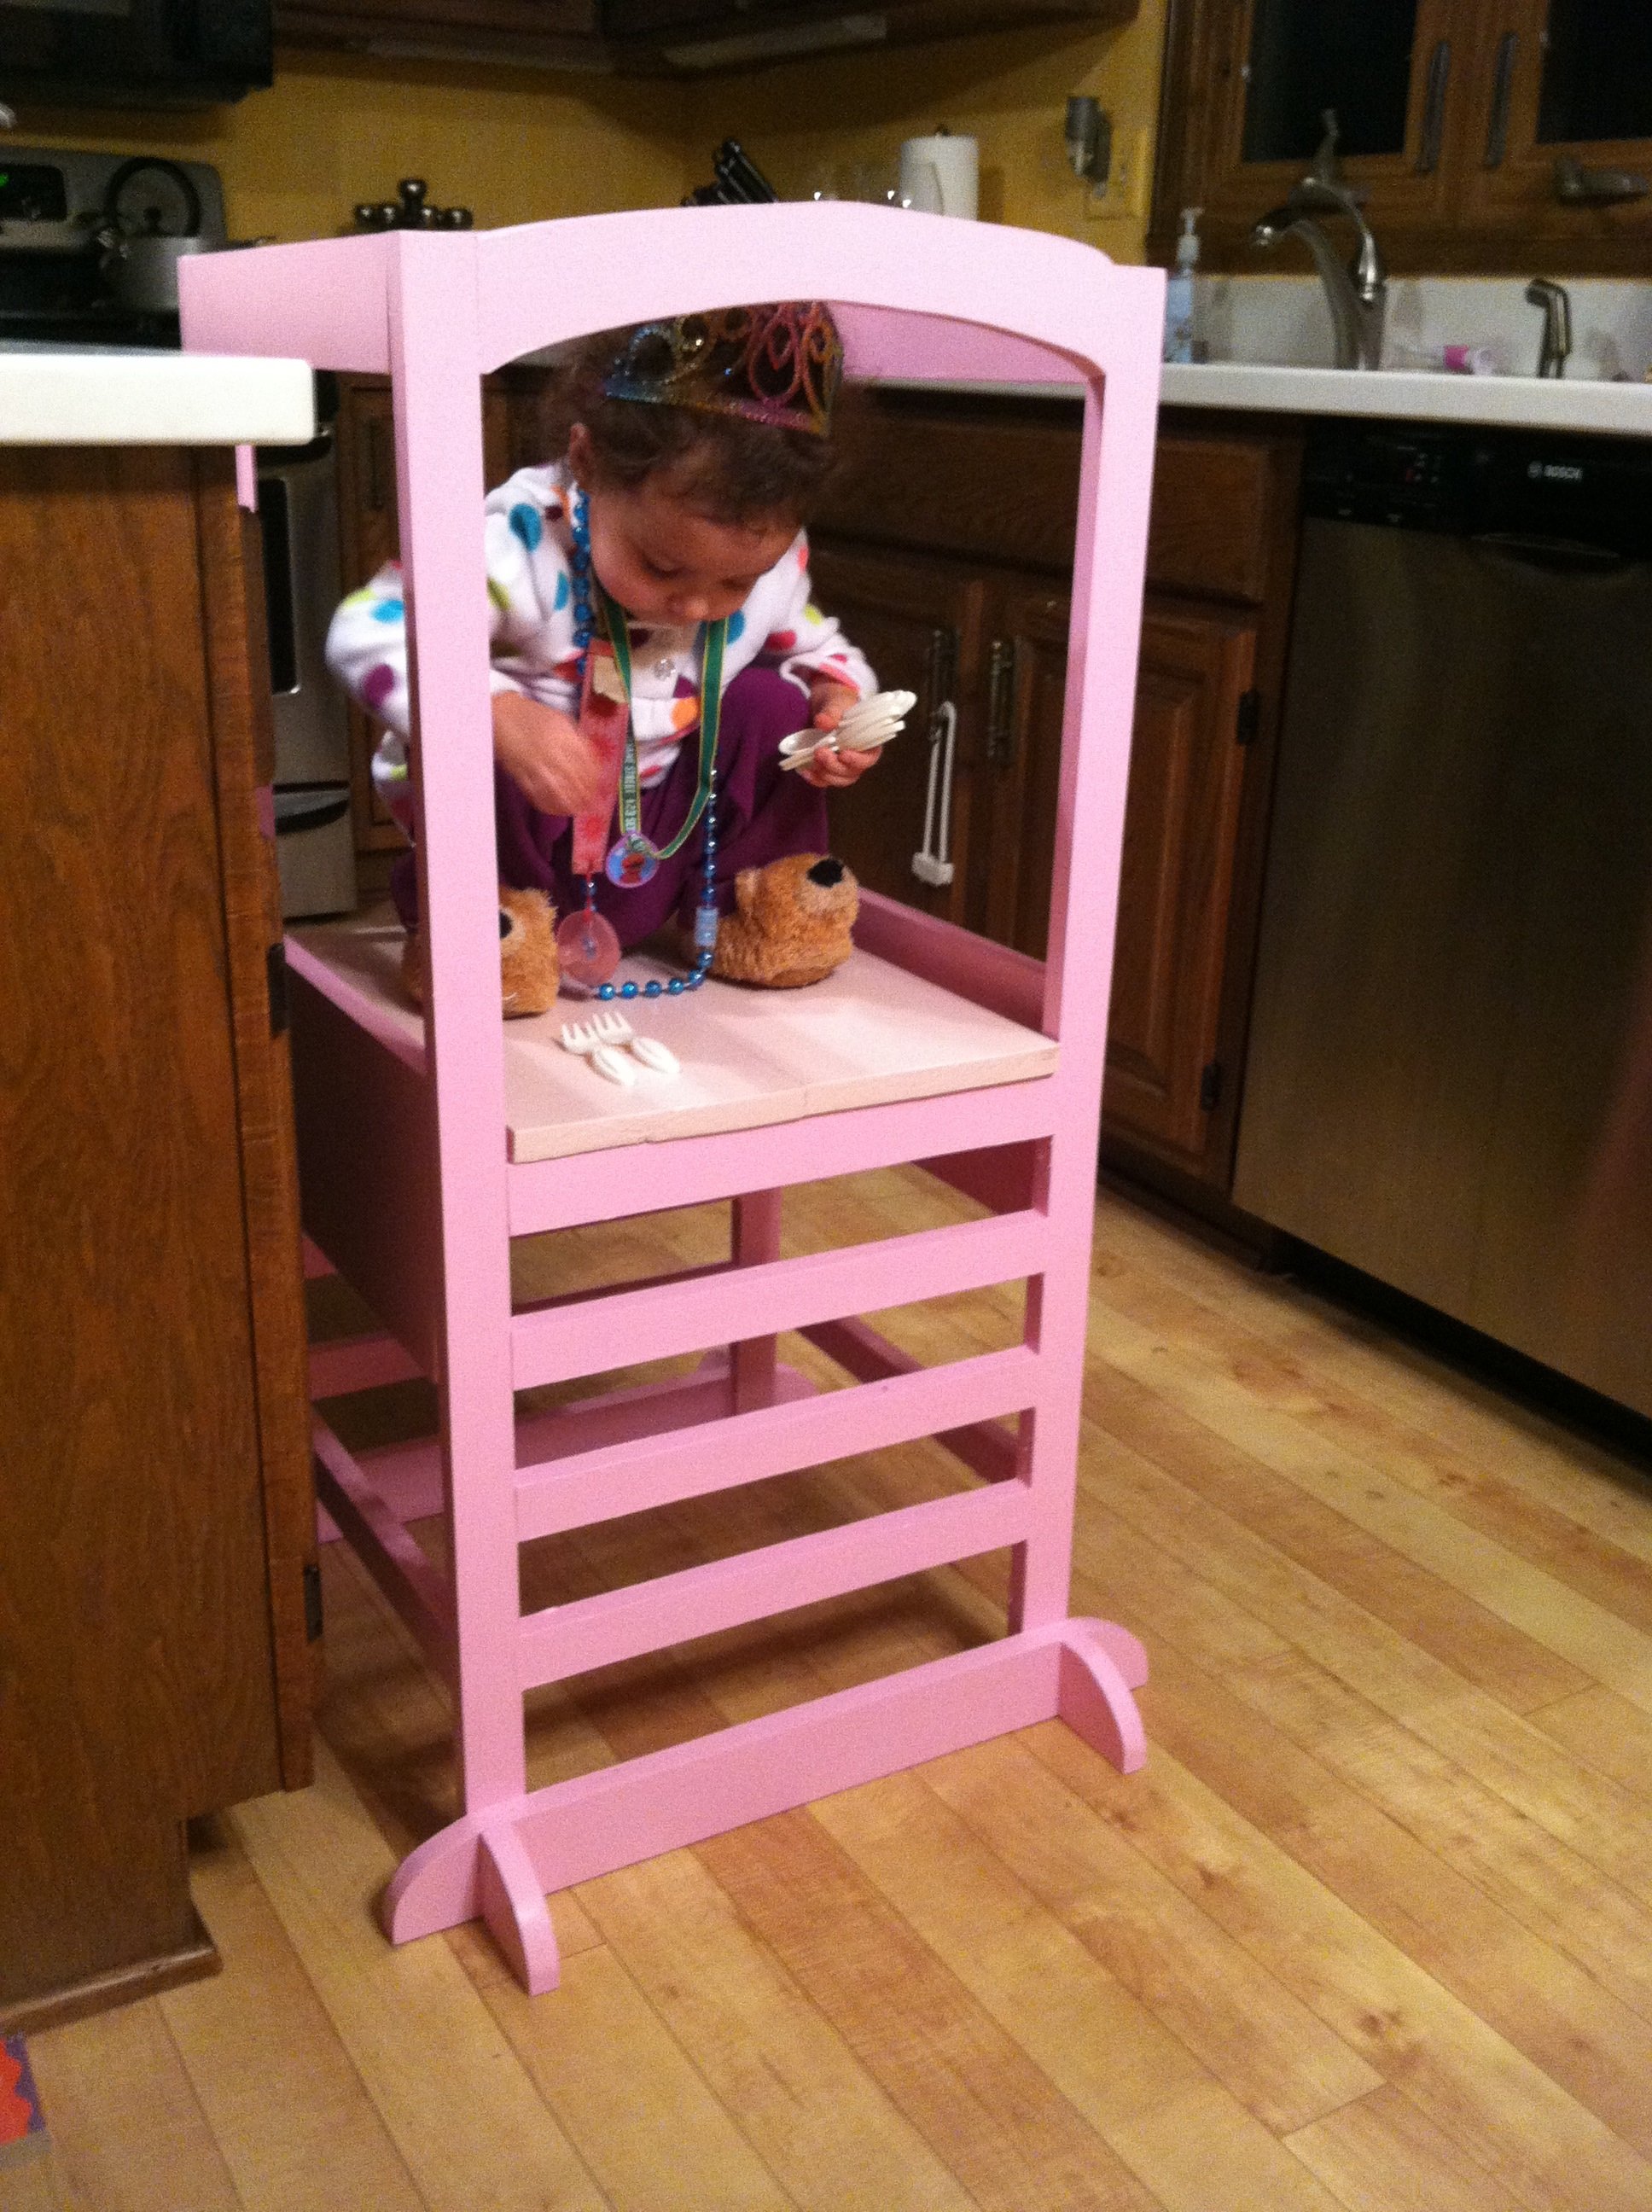
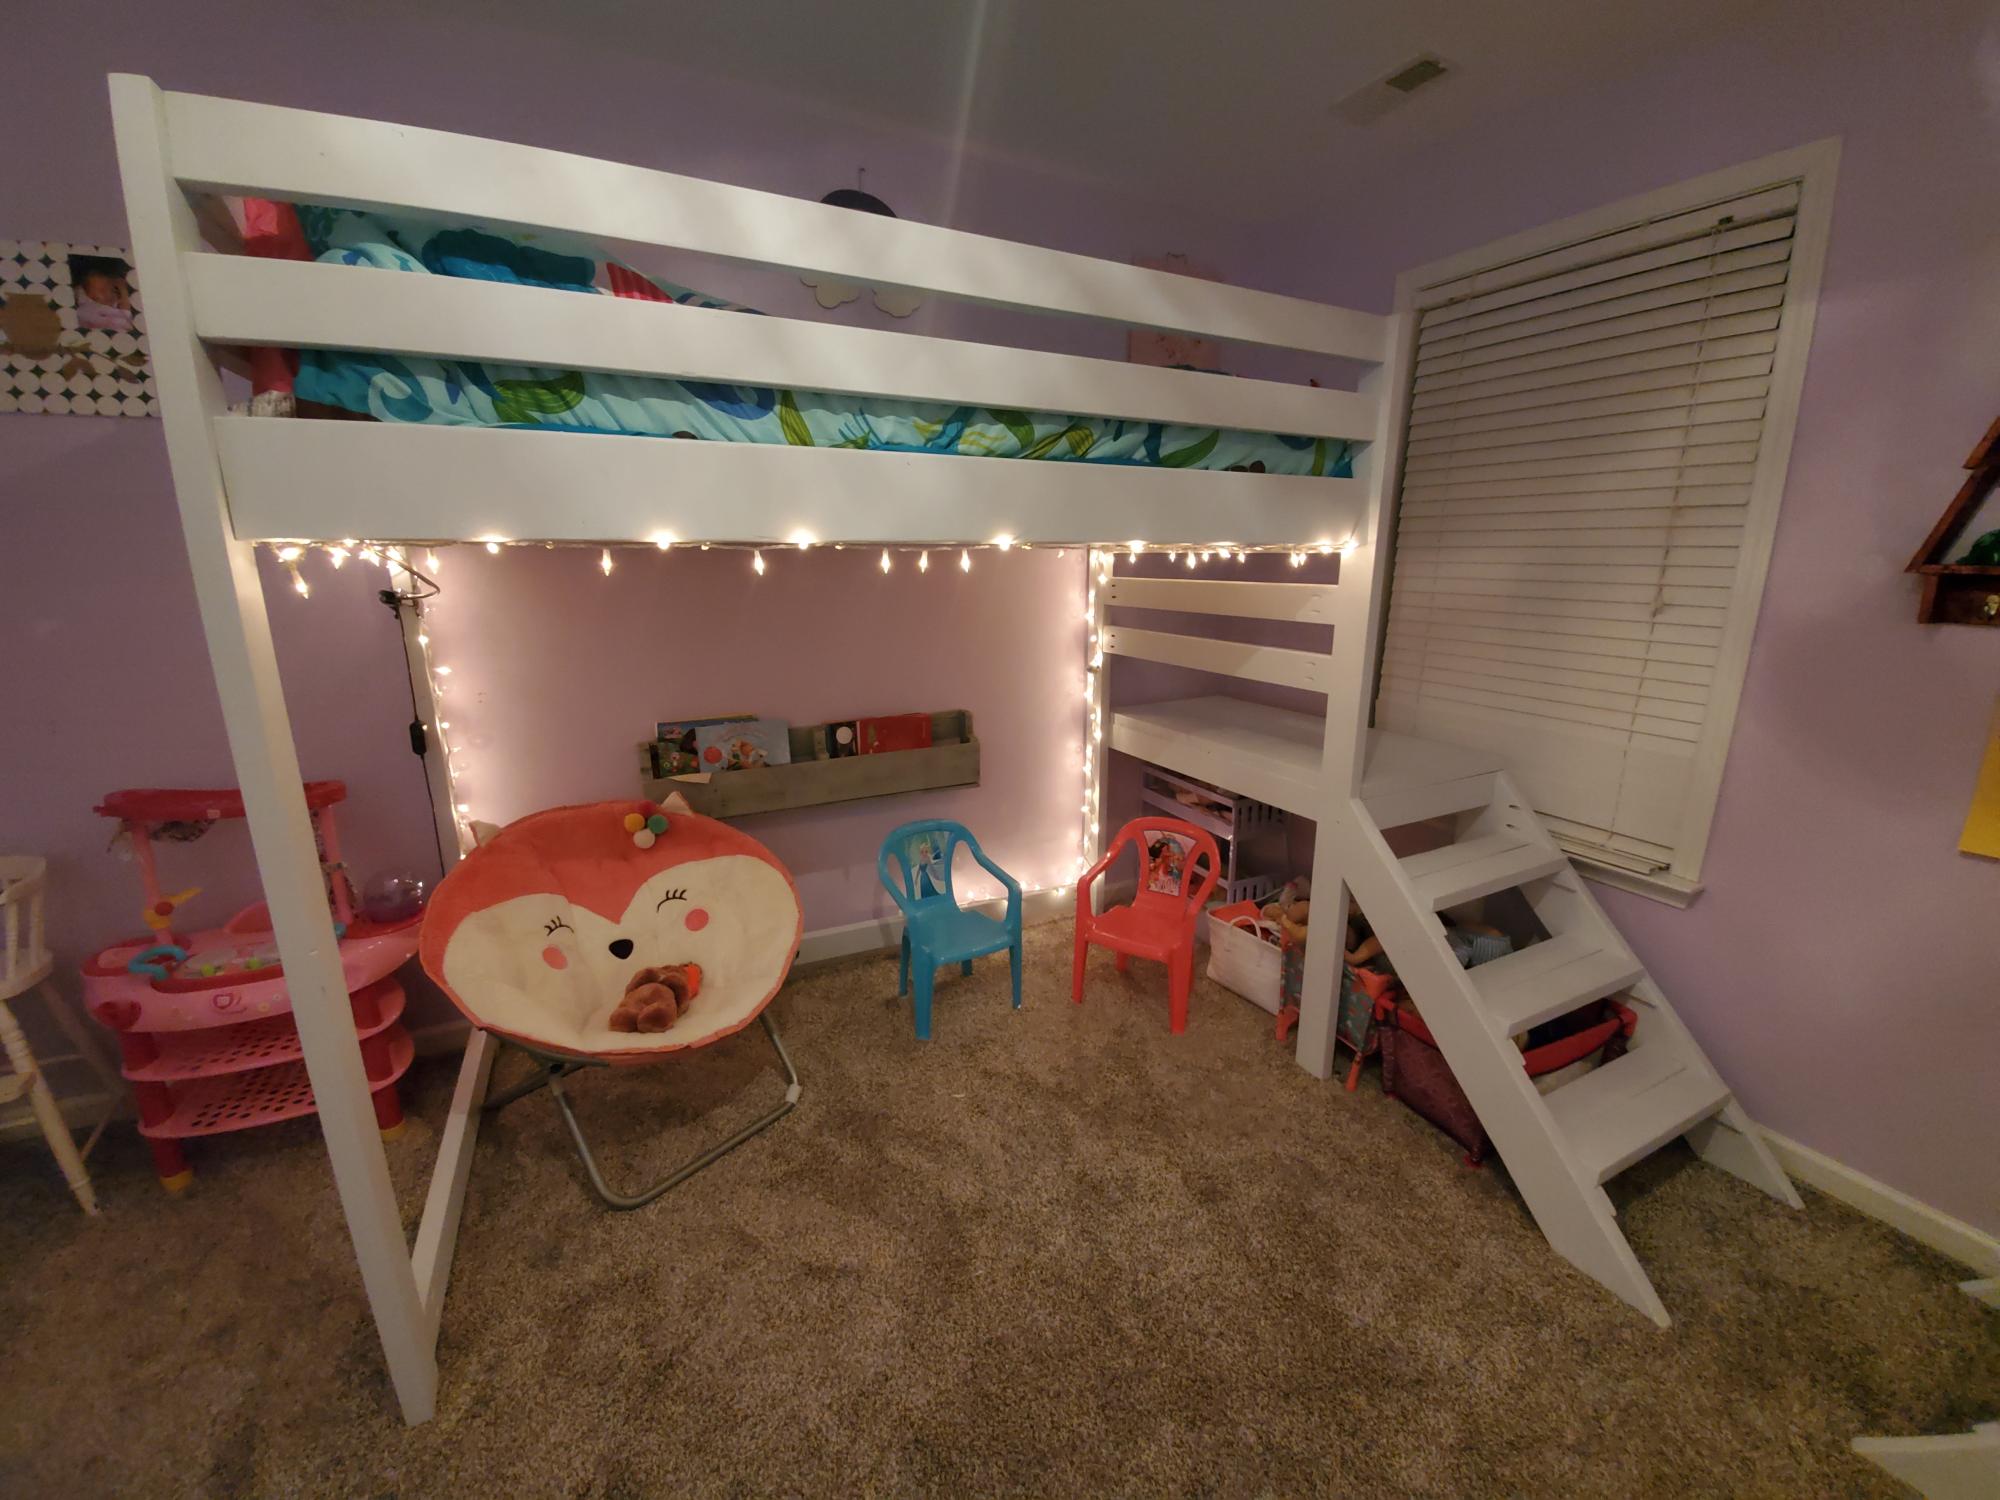
While our daughter initially freaked out at the thought of standing on this, she is starting to come around. The adjustable level will make this a mainstay next to our kitchen island for the next few years.
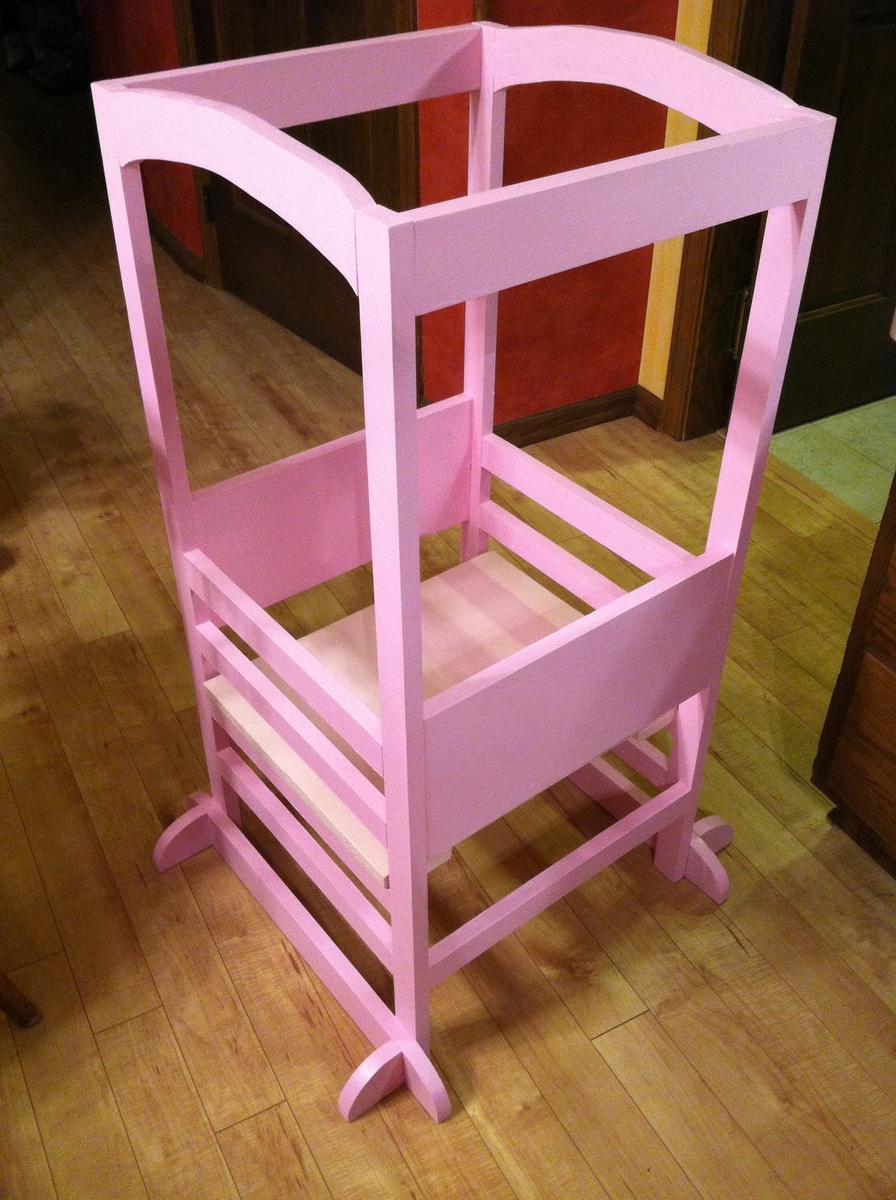
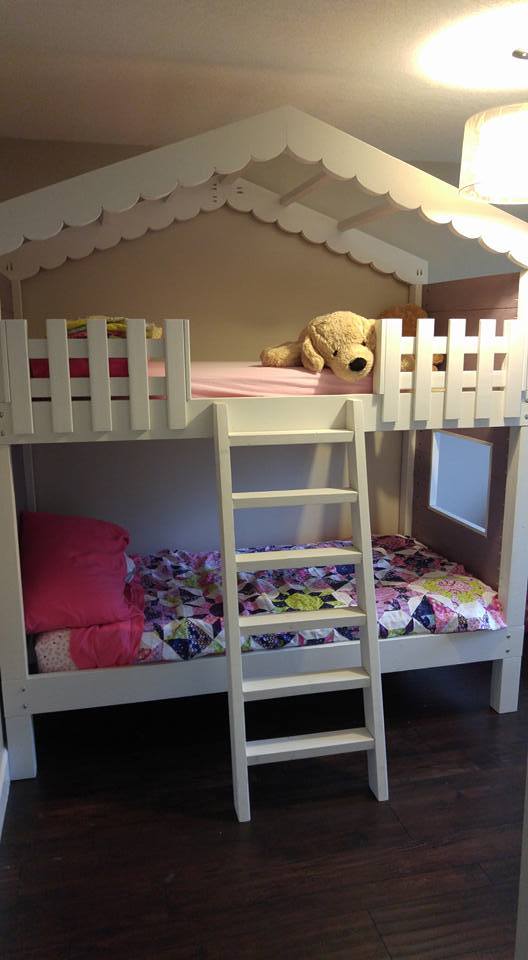
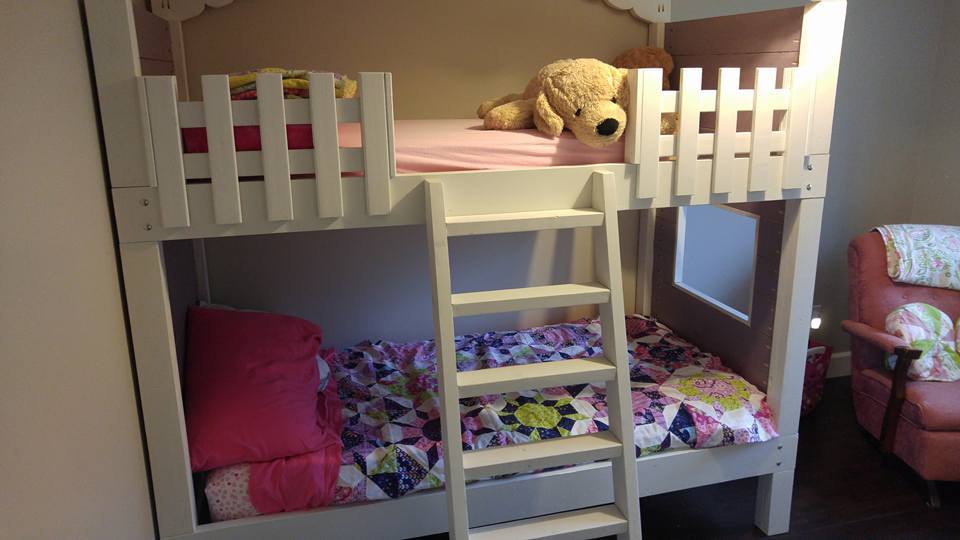
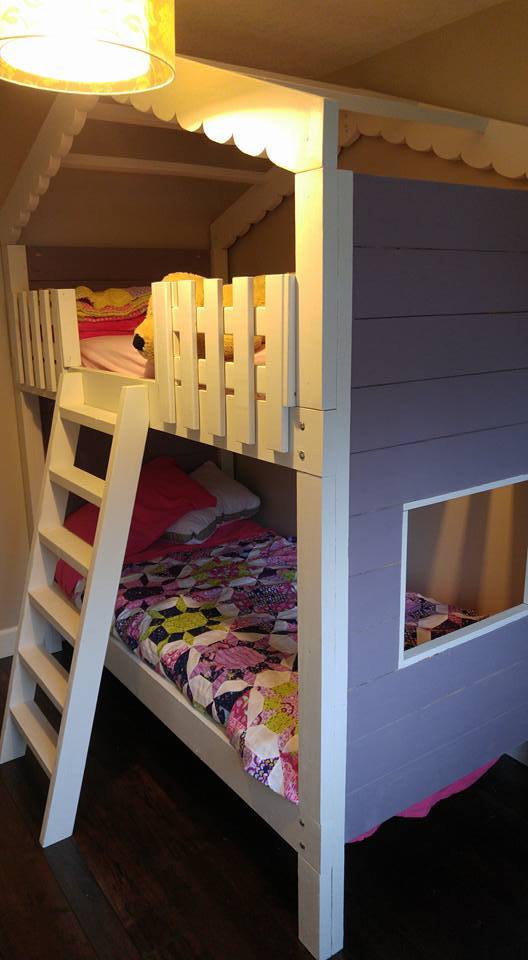
2x6's all the way up the sides, added window and "roof"
picket fence rails and angled ladder
I made 2 of these beds this weekend. It was pretty fun - I made a video of me making it and put it on my youtube
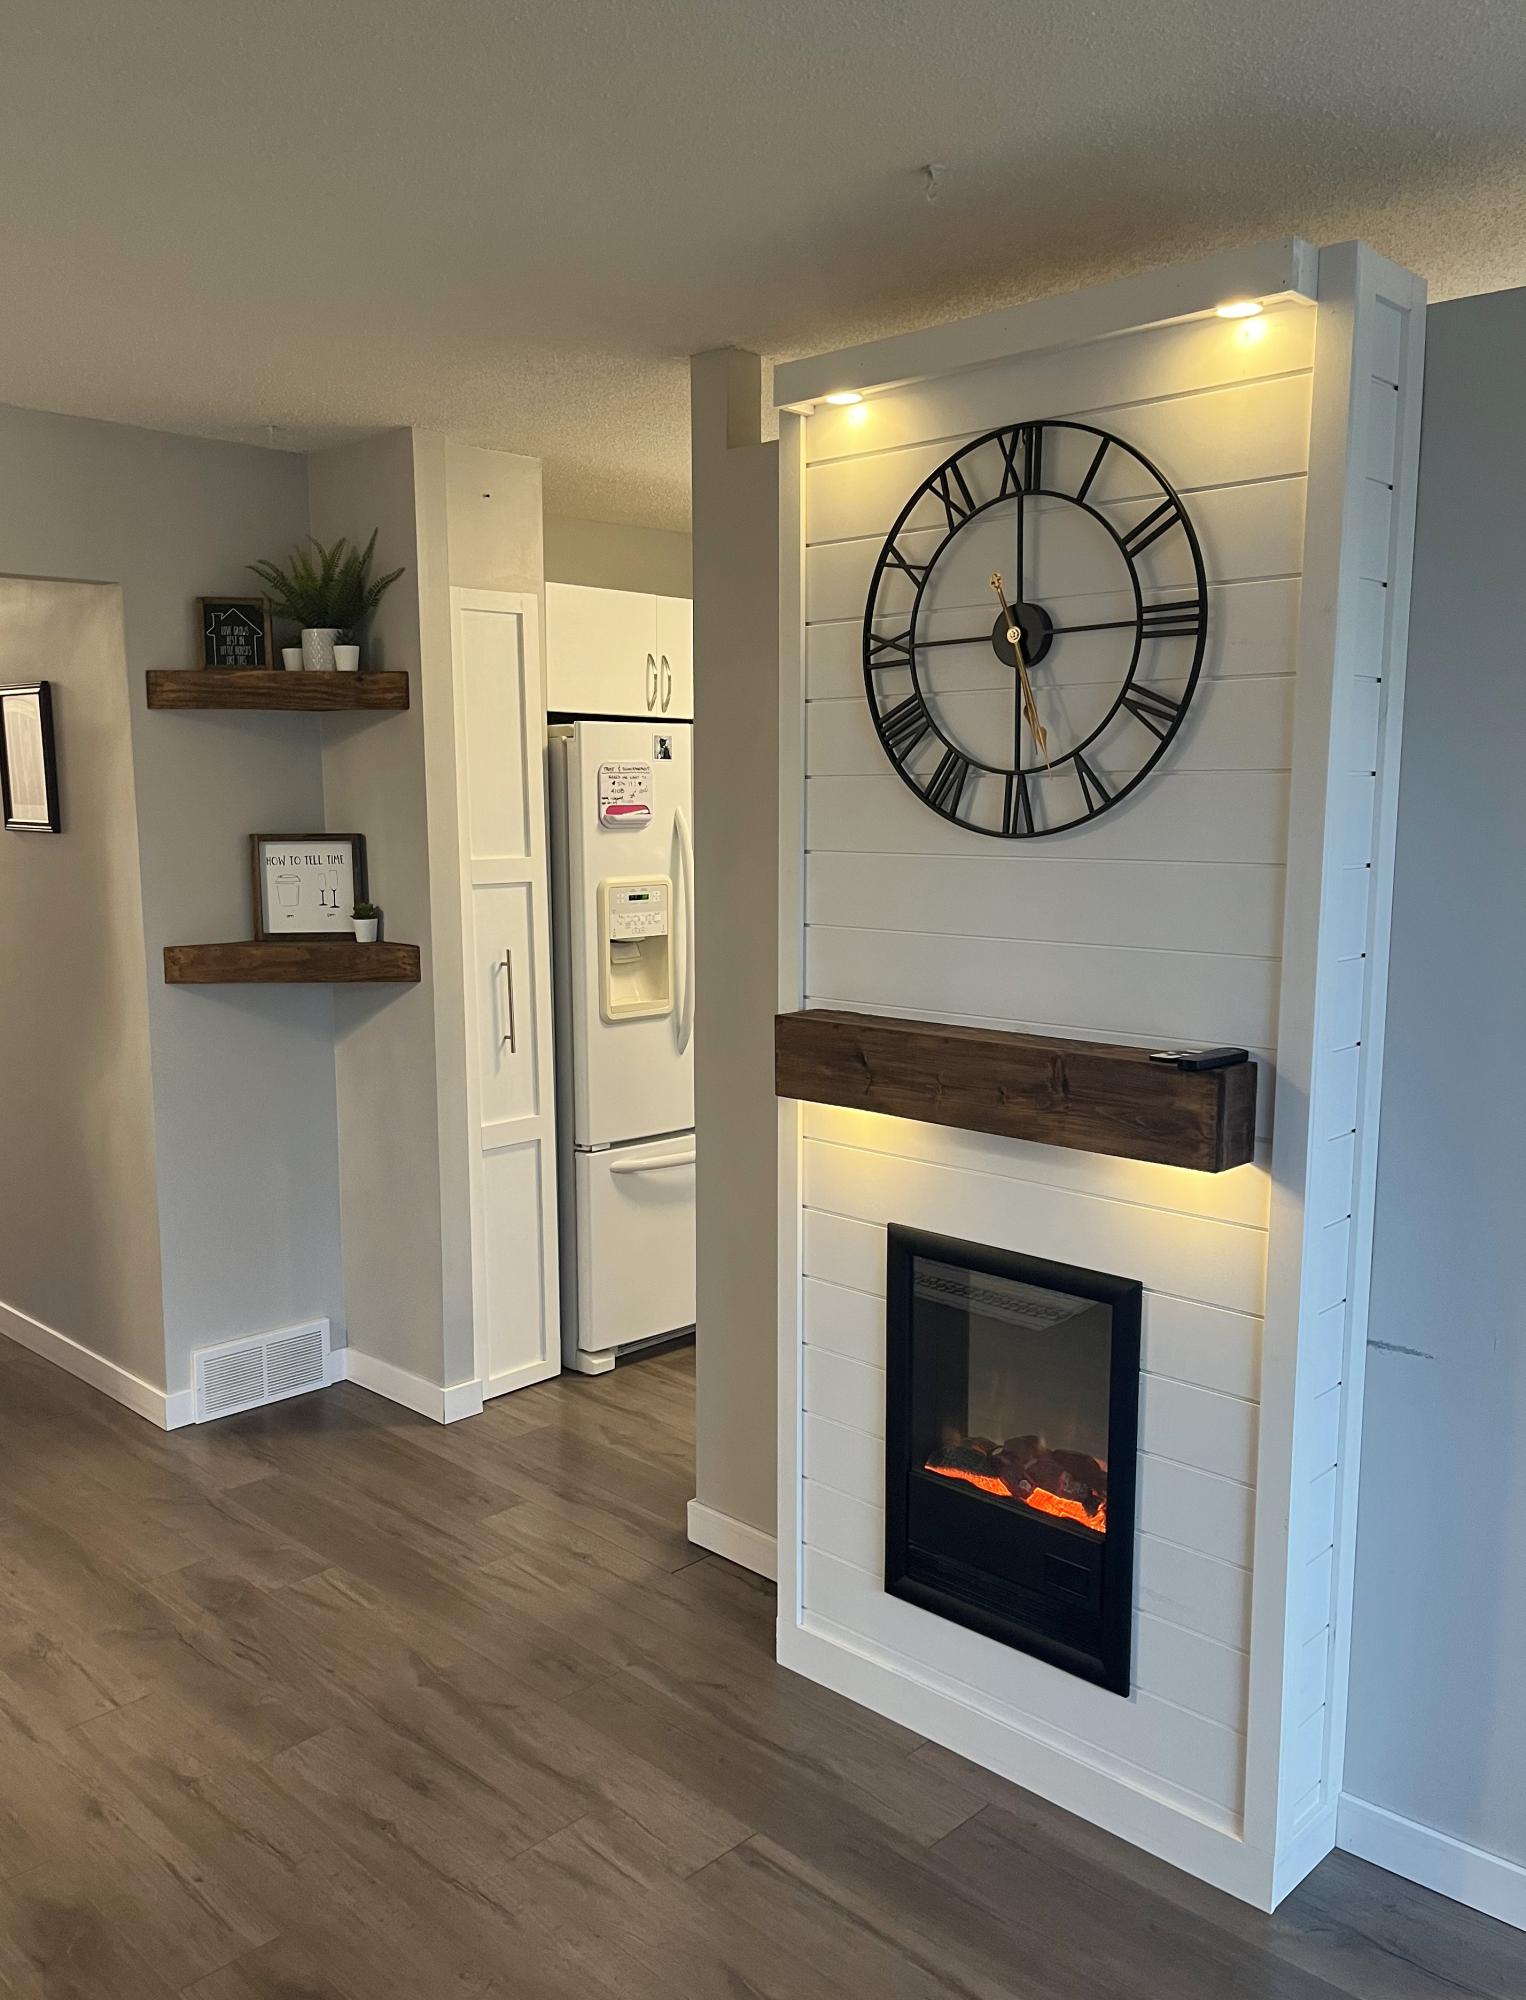
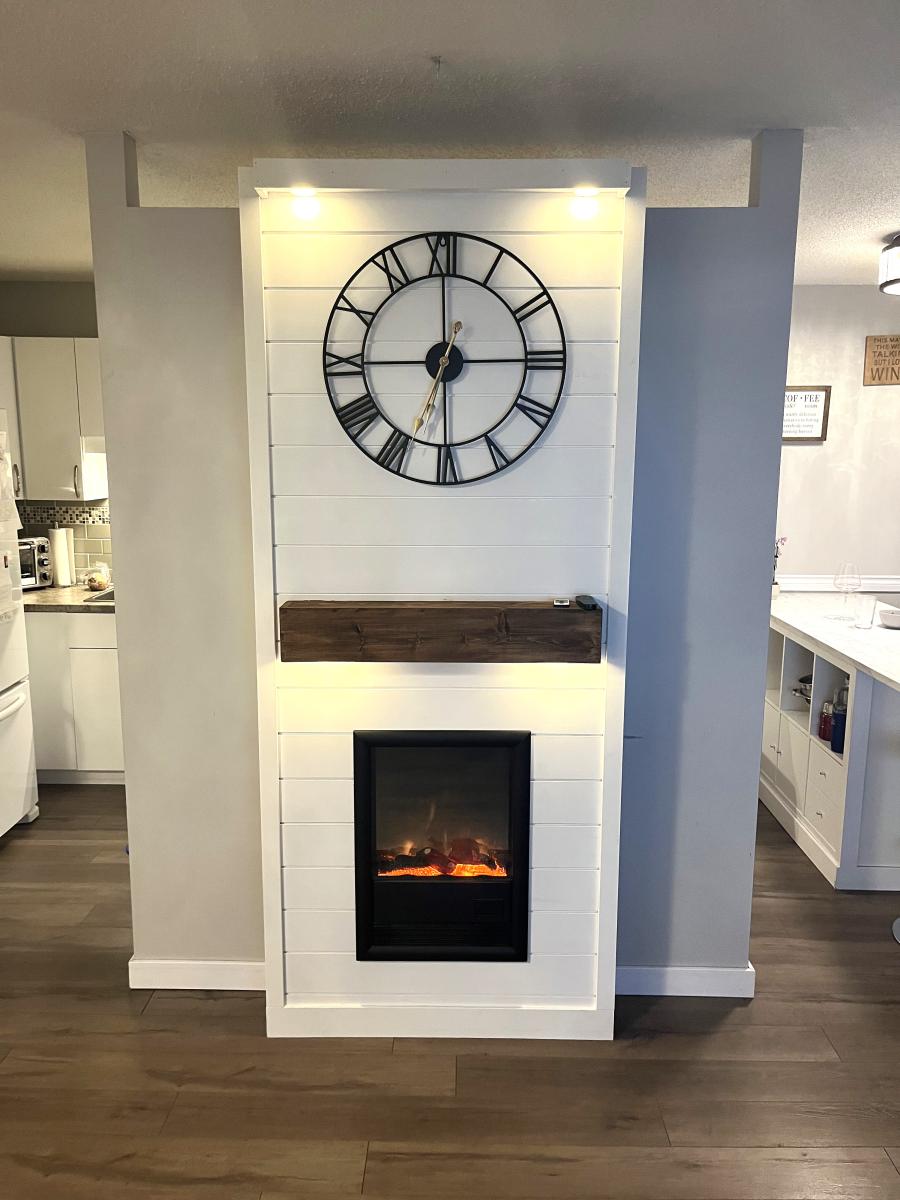
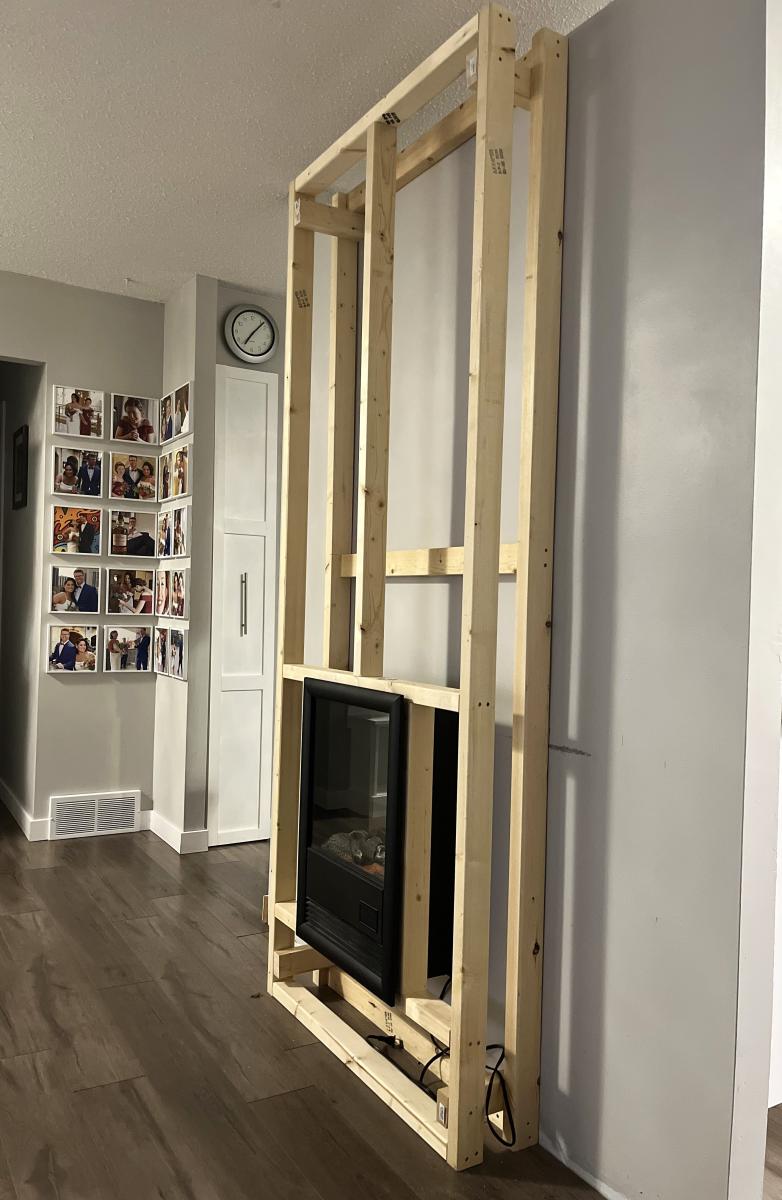
I copied Ana’s fireplace insert design. So easy and looks amazing.
It’s my favorite so far.
Thanks Ana!
Al
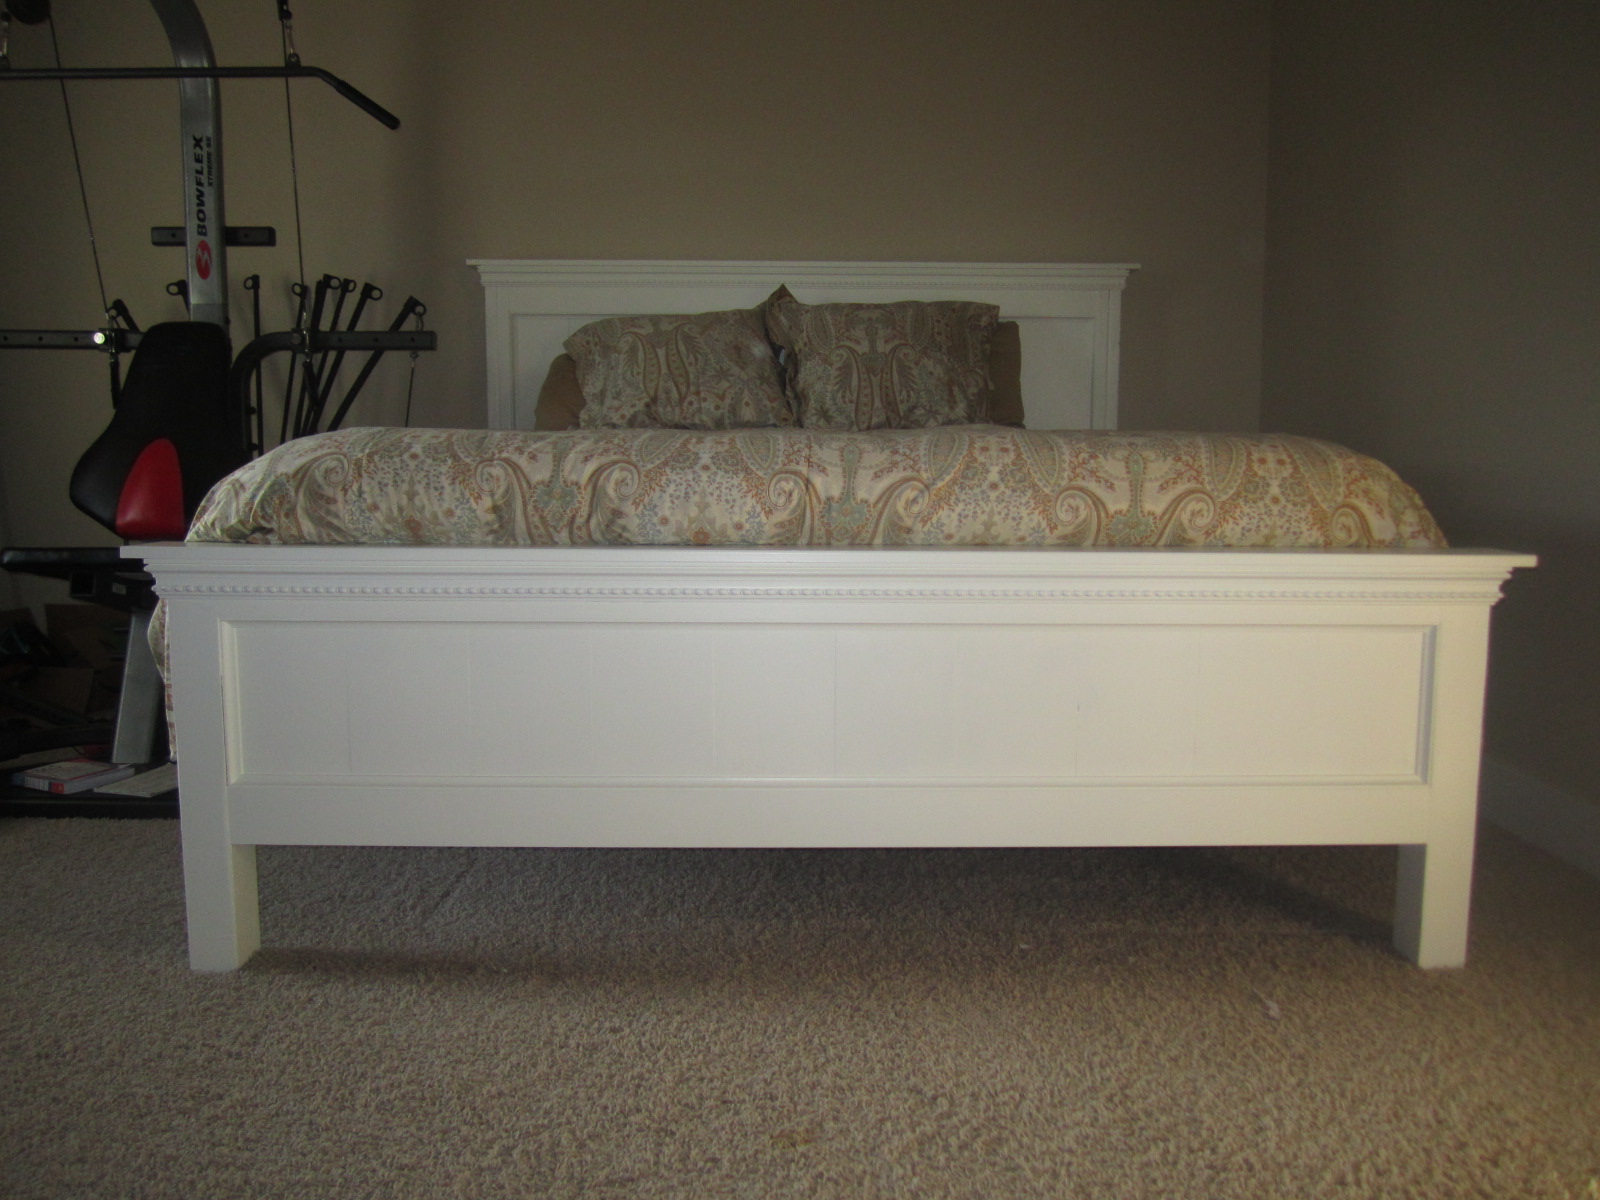
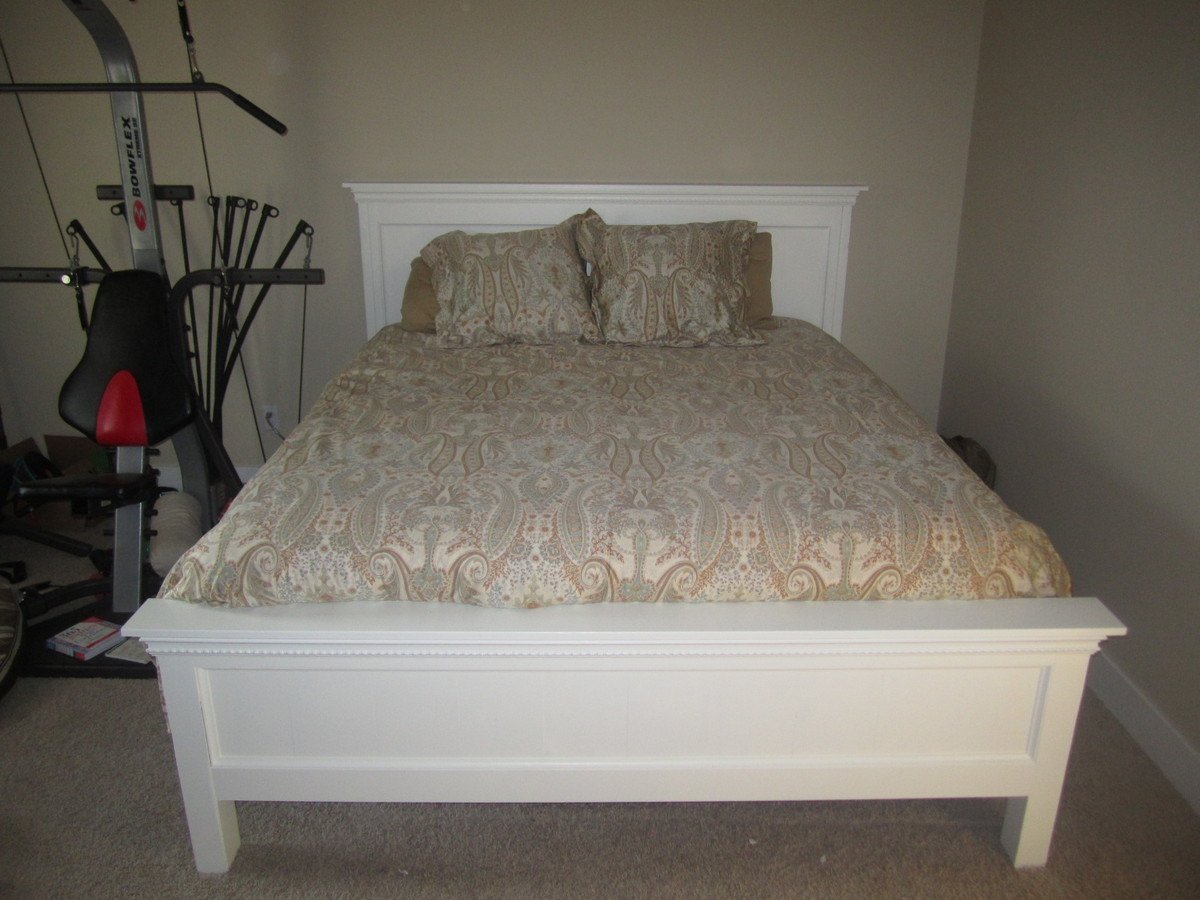
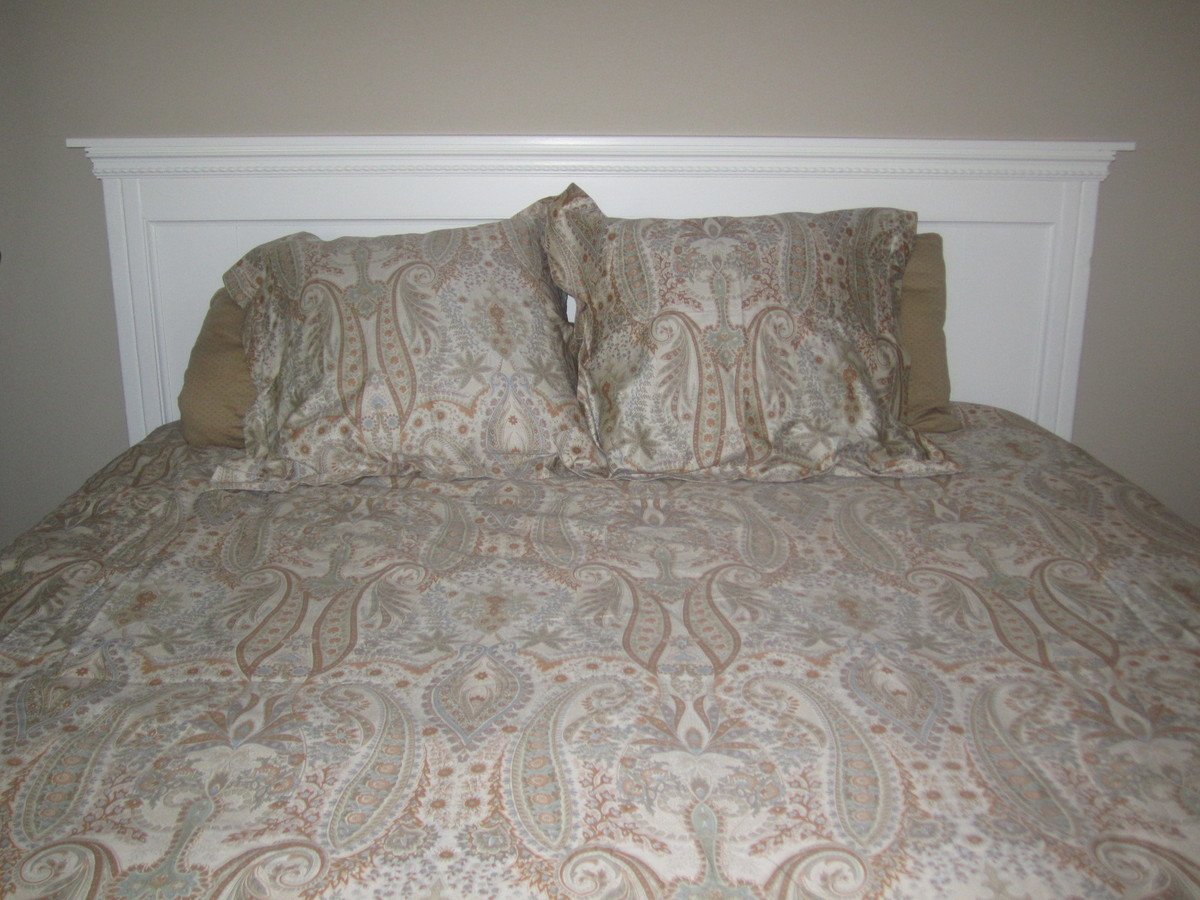
I LOVE the Farmhouse bed but wanted to do something new with it. After looking through some other brag posts for inspiration I made my own blend of things to get what I wanted. There are a a few things I did differently than the original Cali Kinf Bed instructions, which are noted in a list below.
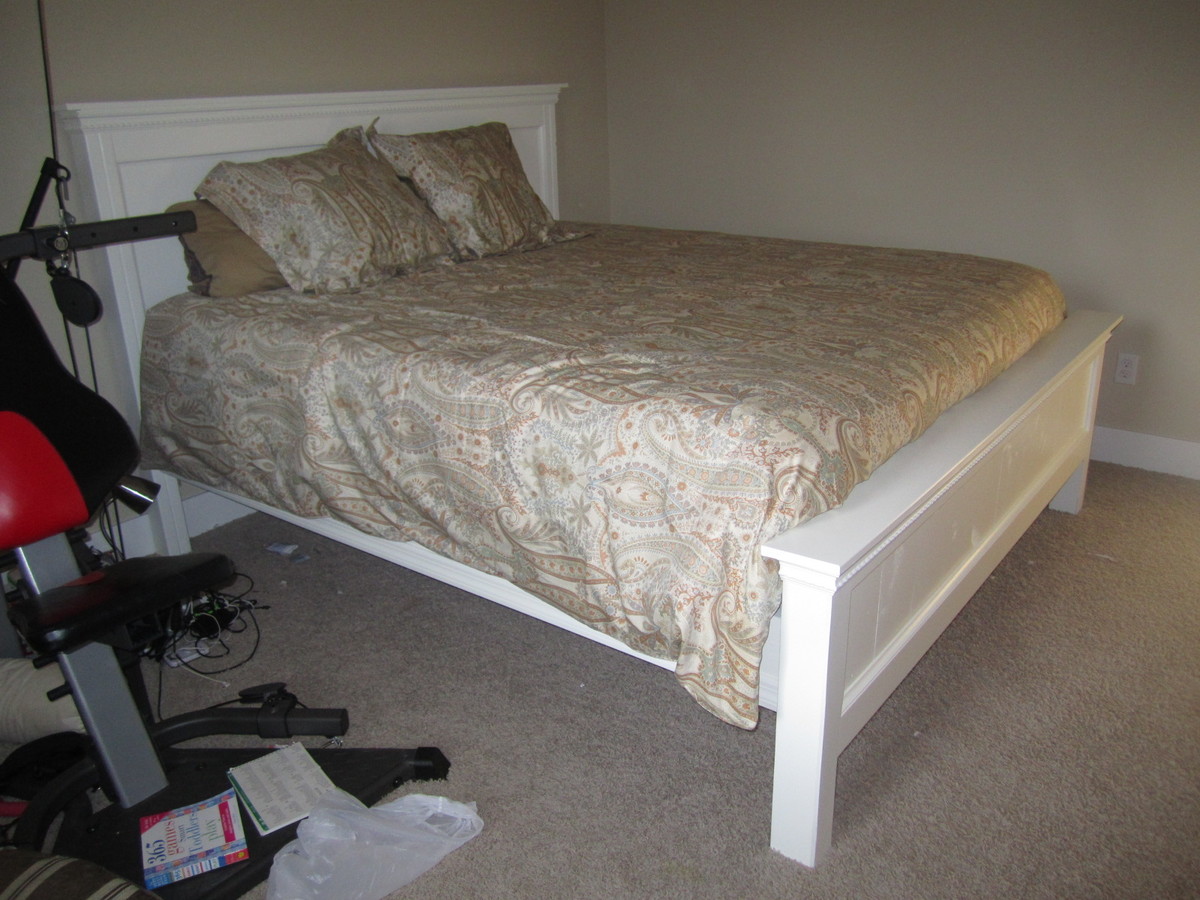
I'm a military wife so whatever I made needed to be easily taken apart, moved, and put back together. For this I used 2x4 joist hangers on the inside of the side rails and cut 2x4's to width. I also wanted to have storage available under the bed so I made it a little higher, 12 inches rather than 10. I should have also made the overall headboard 2 inches higher as well, not just the spot the side rails sit on. Our mattress is a little taller against the headboard than I thought it would be. That's the only thing I'd of done differently.
I didn't use 4x4s for the foot board sides, I did use 2x4's and put them together like the headboard instructions with the slot for the side rail. The difference in mine is that I added thin backer board on the front of the 2x4 and mounted the foot board flush with that, and then used wood filler to smooth around the edges and give it the appearance of a 4x4. Adds a little more work but it was well worth it.
~ I did not use 2x4s laid on top of the finished head and foot boards
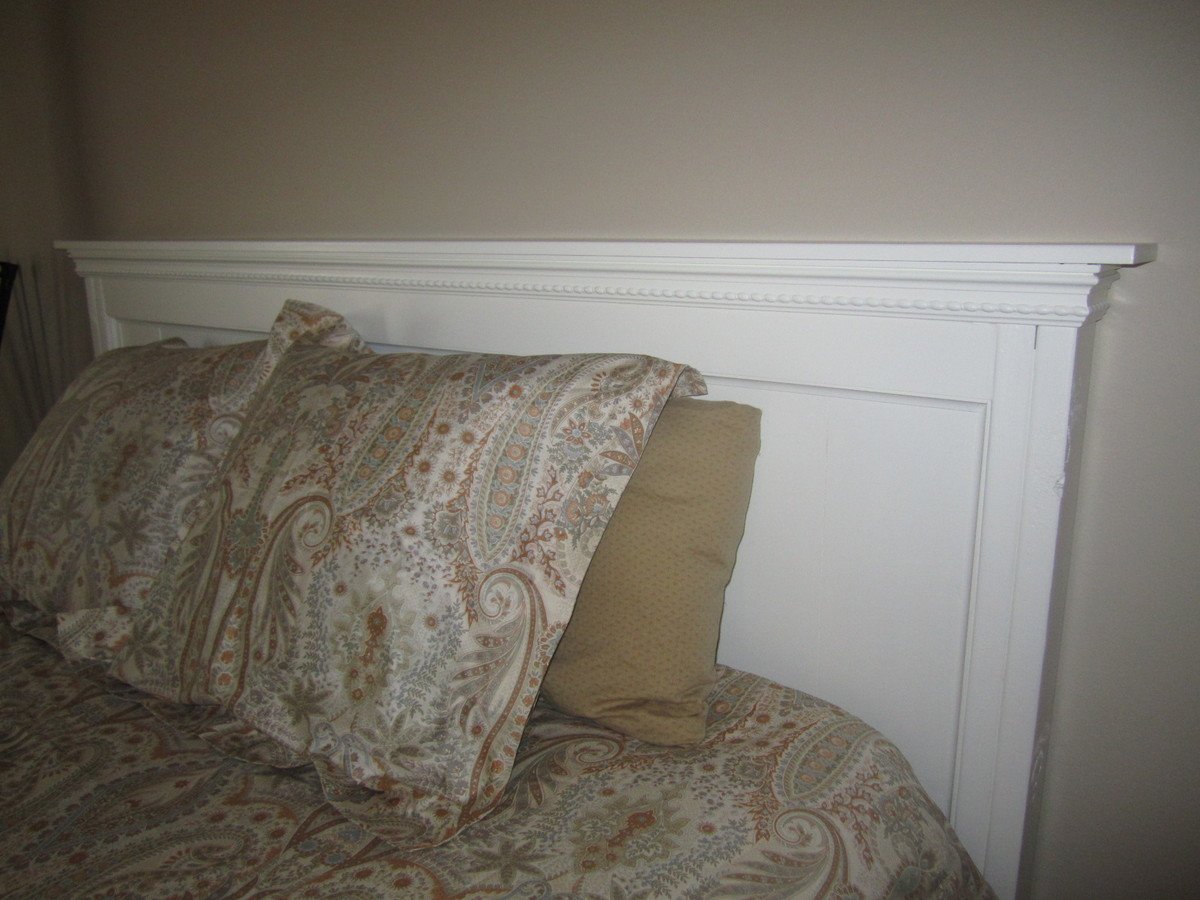
~ The headboard top has a 1x6 rather than the 1x4
~ I added rope chair rail on the tops of the head and foot boards
~ I added cove molding around the plank section of the head and foot boards
~ The very top pieces of wood on the head and foot boards have a 1 inch overlap to the back of the 2x4 sides. This allows space for floor trim behind the headboard and comforter stuffing behind the foot board.
~ I added molding to the bottom of the side rails, they looked too plain with the rest of it together and that made a big different in the overall look.
Overall I'm very happy with the way this build turned out, especially for my first furniture build!

This is one of my first furnish DIY projects.
I really had trouble to pick defect-free 1x6 boards at my local home depot, and it took me two different store trips to get all I wanted.
I spent more time than what the plan estimated. The drawer rails were tricky to install. In the end I had to disassemble the drawers and trim them down a little bit in order to get the rails fit.

Great plans. Fairly easy project. My husband built it and I stained it, Briarsmoke by Varathane. The most difficult part was to get the bread boards to sit flush with the perpendicular boards when attached. We had to undo and re-do that part several times. We followed the plans and built the table base before adding the bread boards at the end, but my husband decided that it would have been easier to attache one end of each board to the bread board, then attach the perpendicular boards together, then attach the other bread board.

My first woodworking project. The plans were easy to understand and my four kids love it!
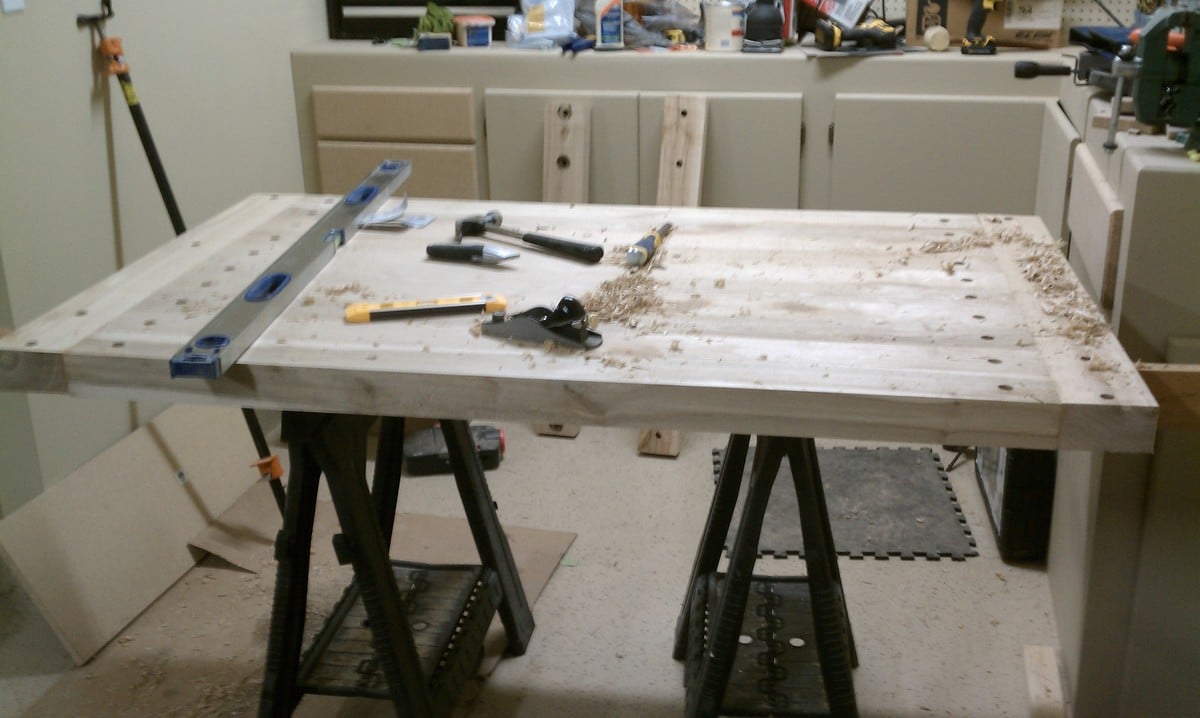
UPDATE: For everyone that was asking to see additional photos, I have uploaded them all to flickr. Here is the link: HERE Since doing this table I have built probably 15 more just like this one and developed a much better process then in the pictures above. If you have any questions or want to chat about it further shoot me a comment or email at [email protected].
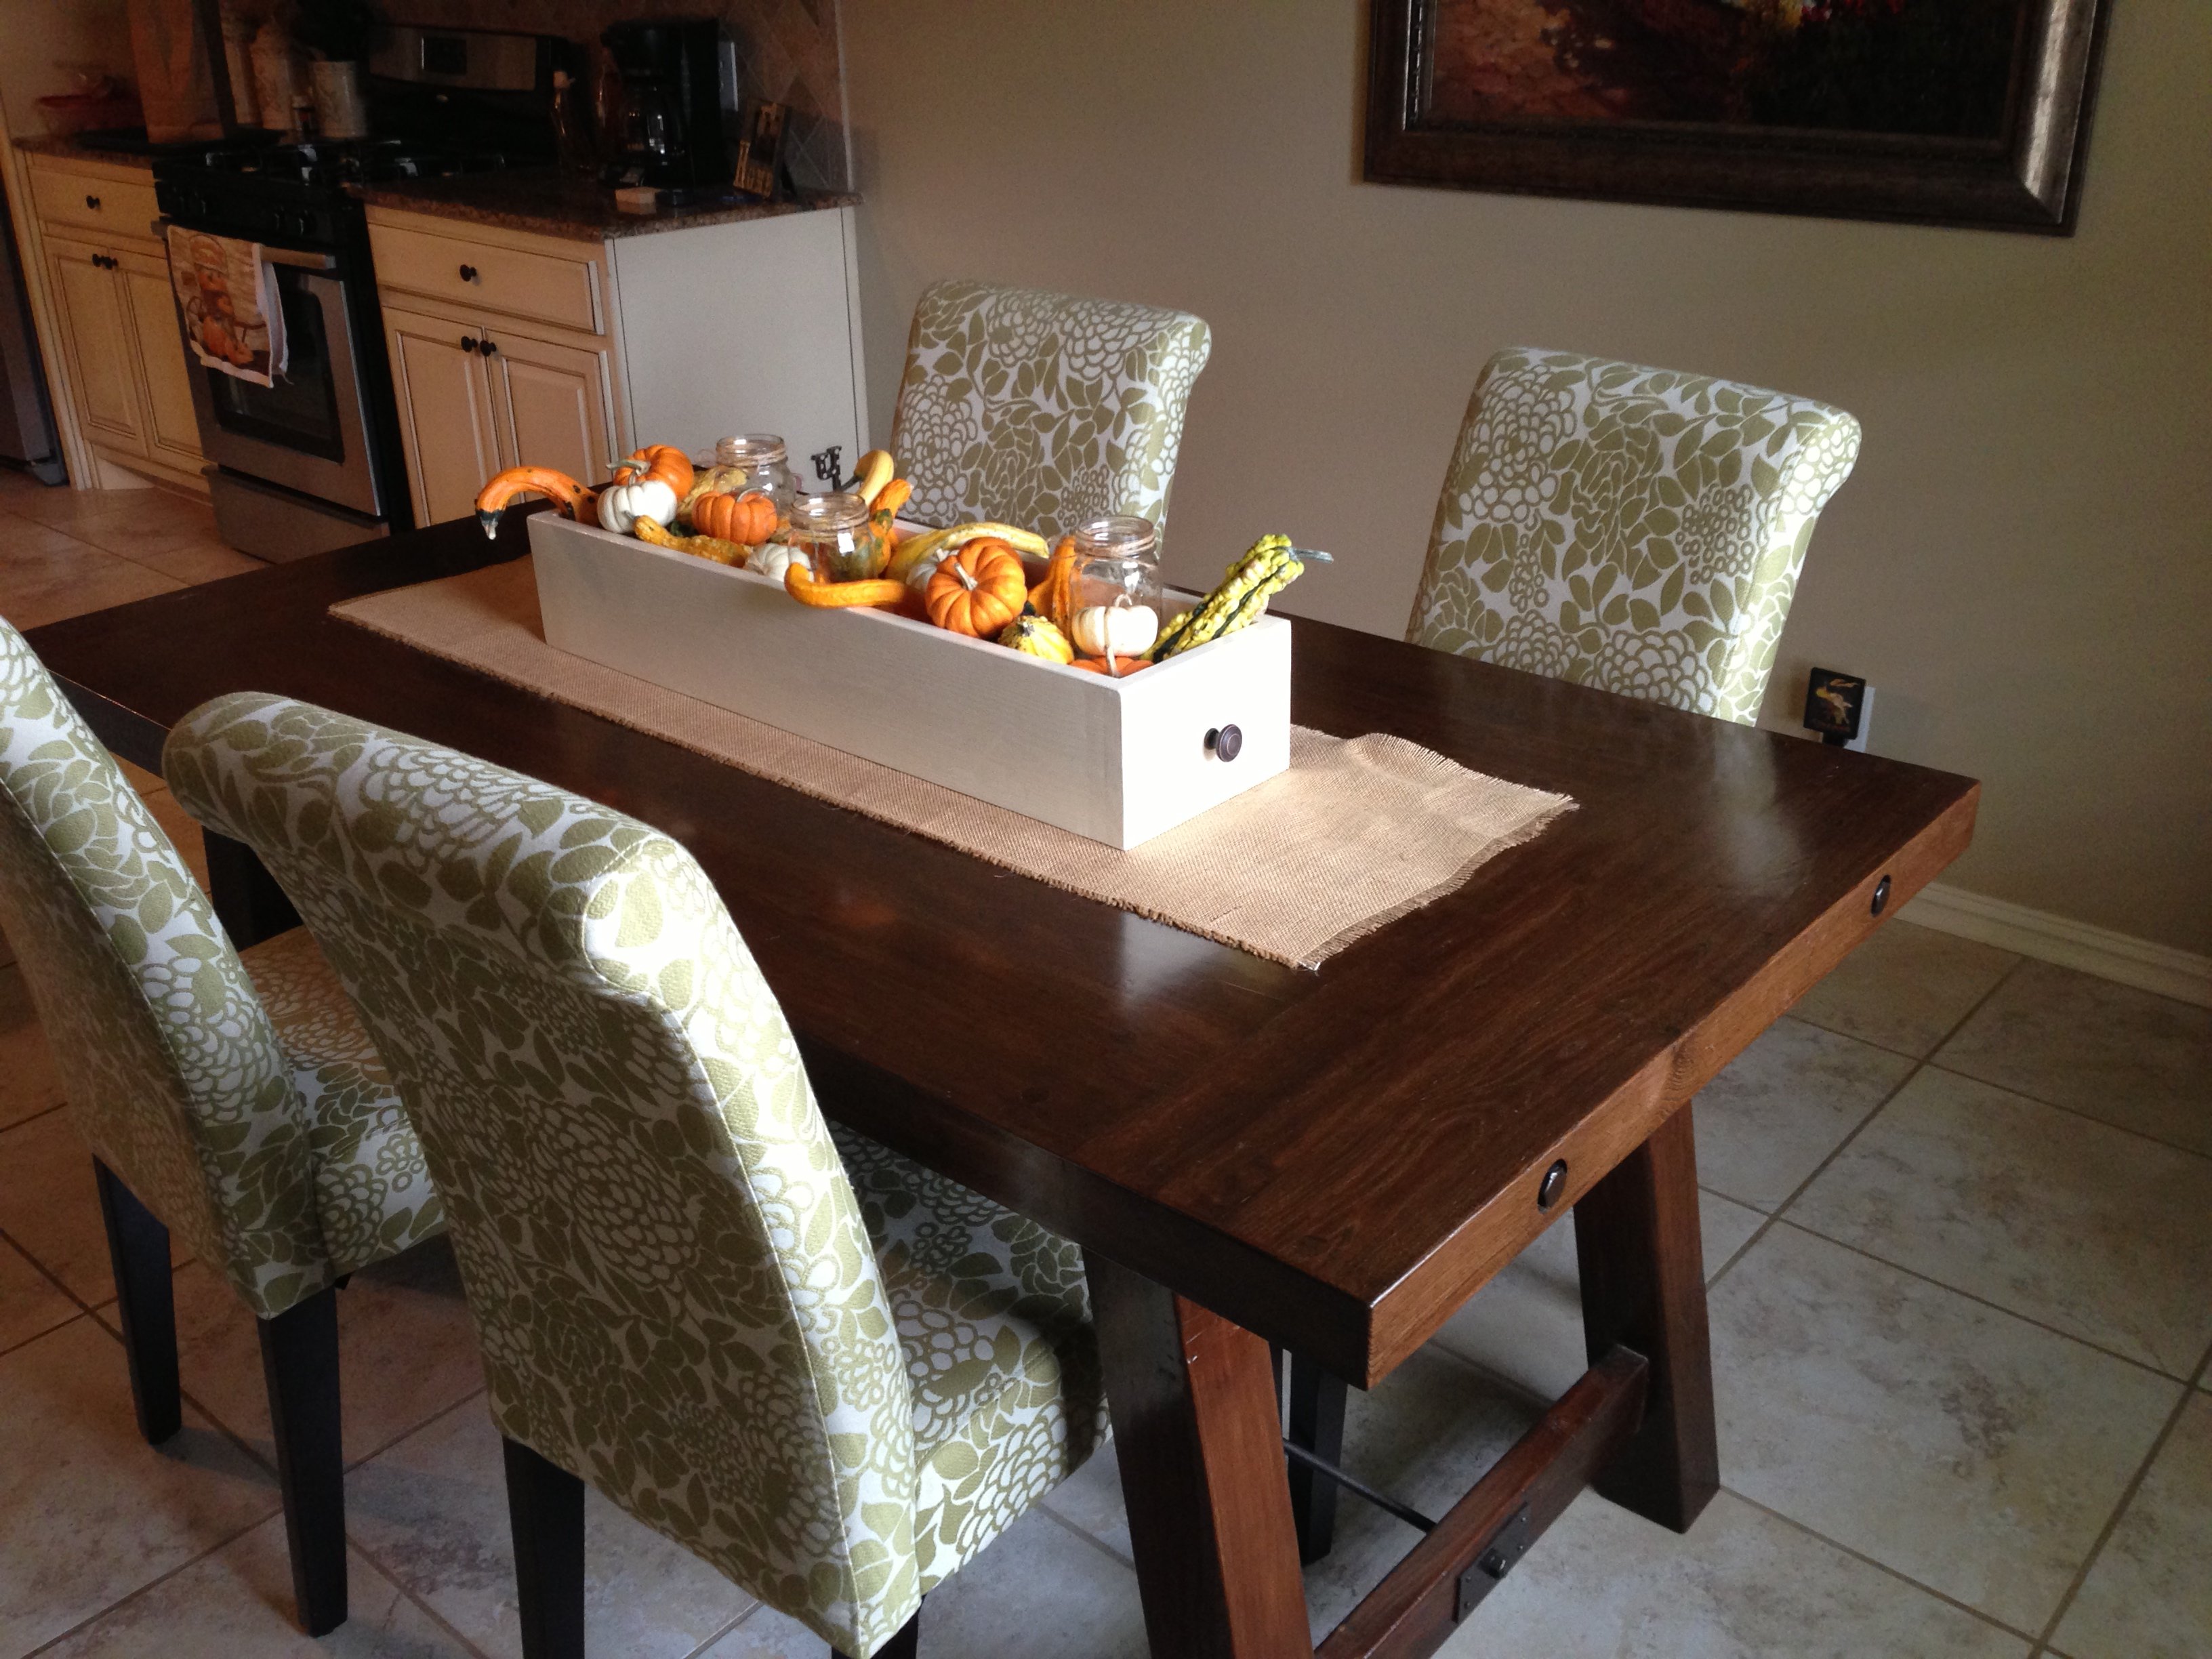
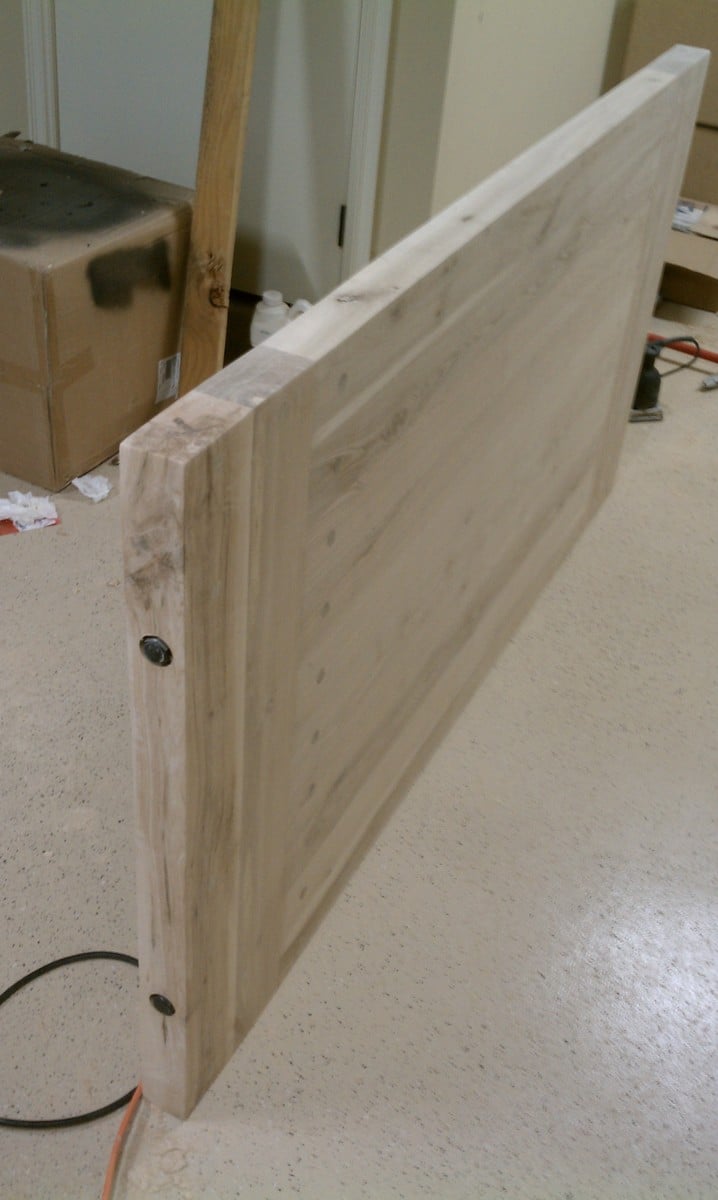
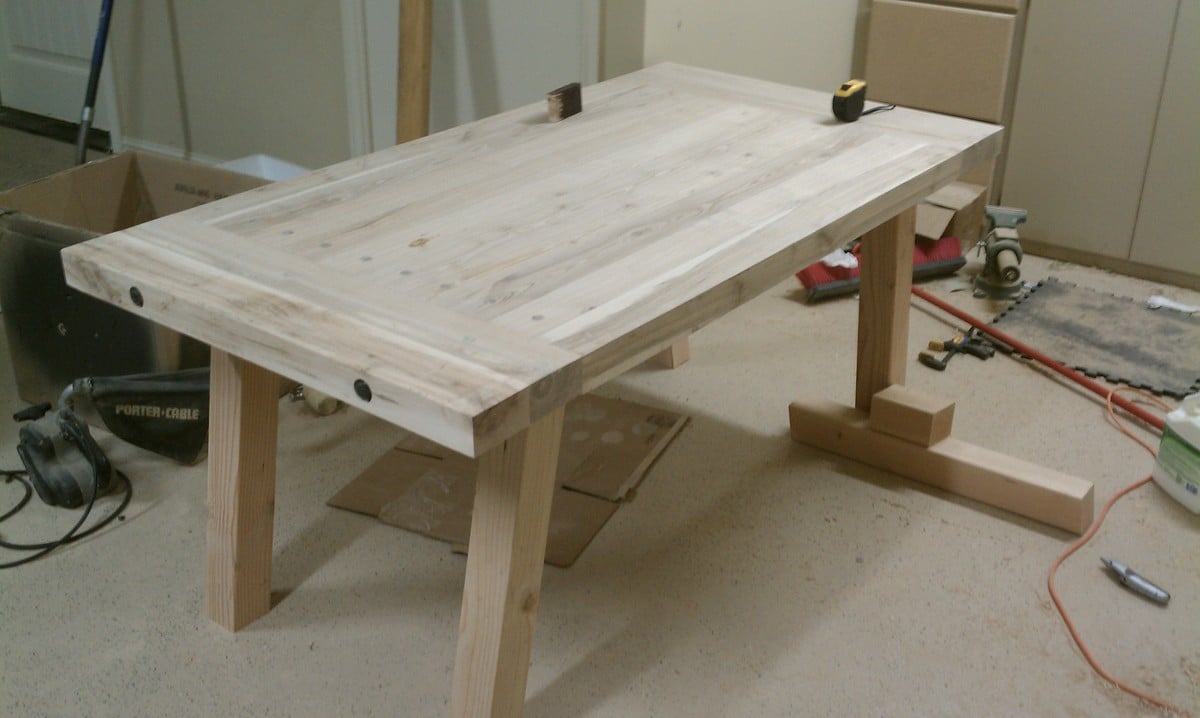
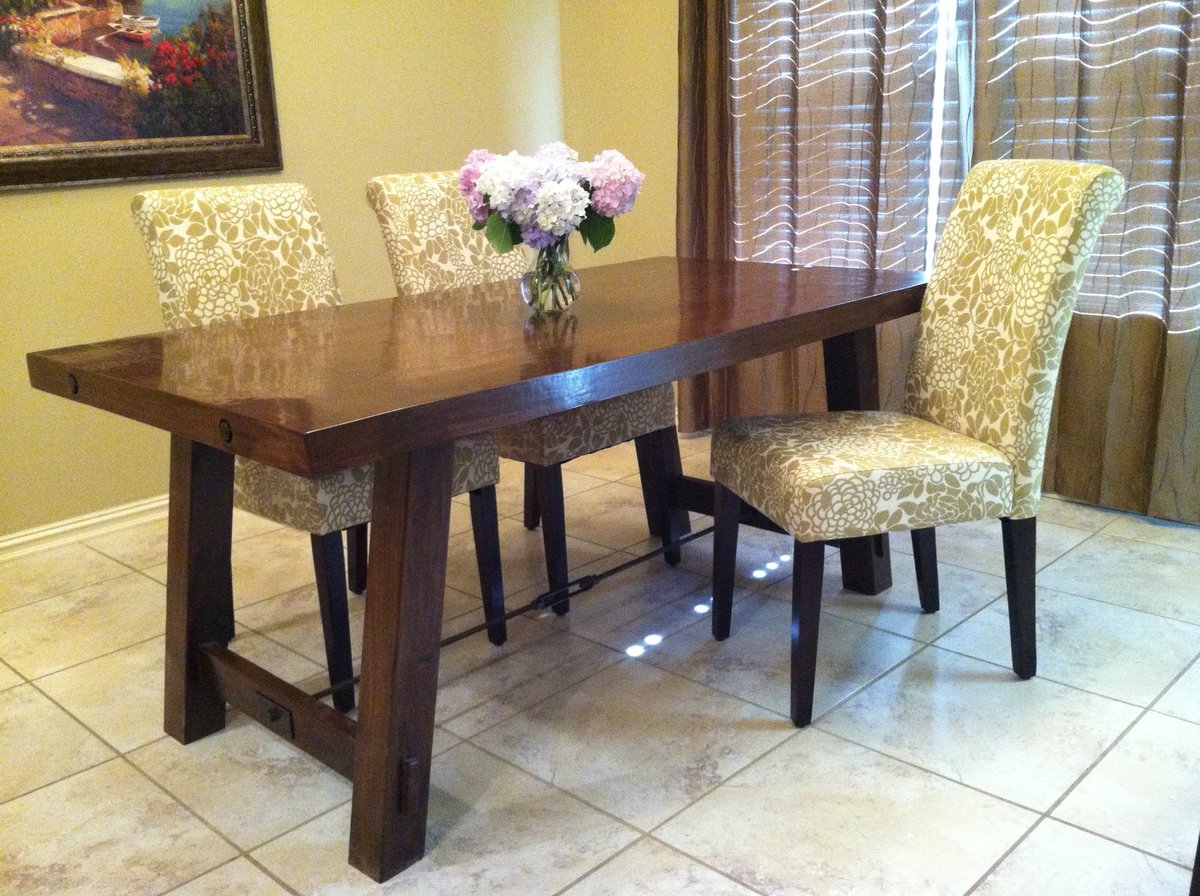
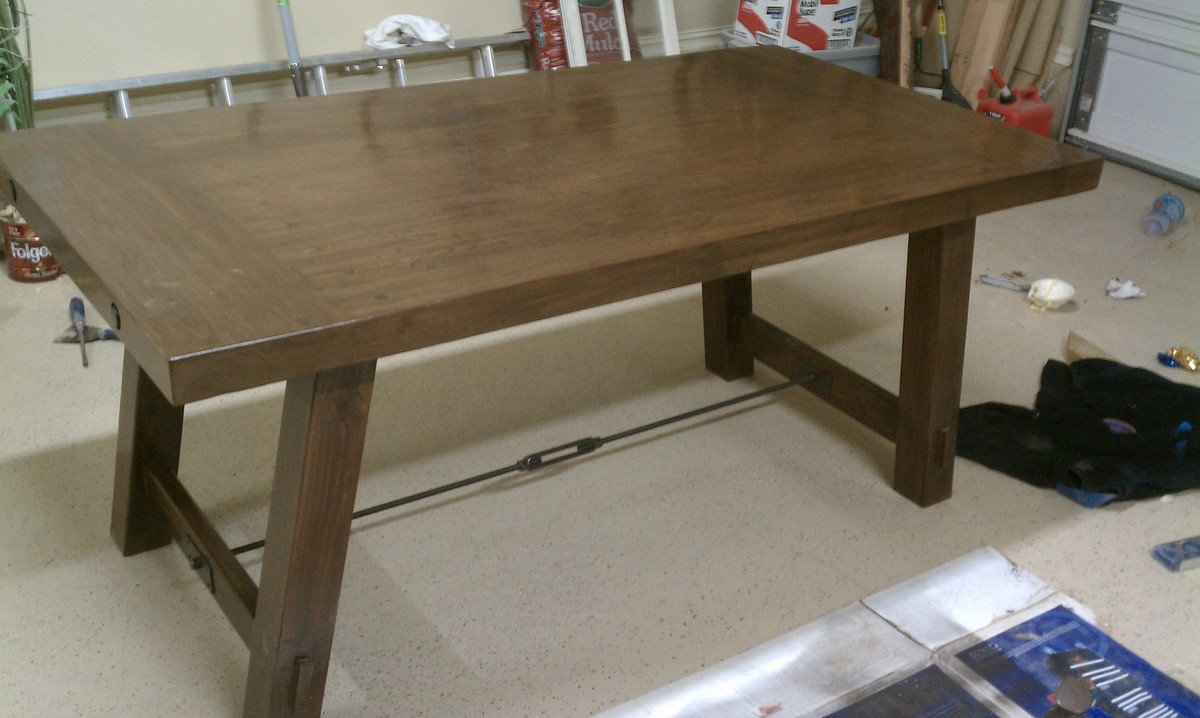
I had originally seen this table on the Pottery Barn website. My wife and I really liked it but couldn't afford to pay the $1200 bucks after tax and shipping. it didn't look to difficult to build so I decided to give it a shot. The wood for the top of the table was almost 3in thick 4.5in wide and 51in long. It was wood from an old pallet that was used to transport a very large air handler. Very heavy dense wood. Since the lengths were only 51 inches I opted to put 2 horizontal pieces on either side to extend the total length to approx 70in. I was inspired by the plans for the benchwright table that I saw on this site but chose to deviate from the plans on here to make it as close to the real thing as possible. I also happen to have access to very thick pieces of hardwood. The only thing I had to buy at lowes were the legs. The legs are 4x4 Douglas fir posts. The top pieces were all glued and screwed together. The ends were also done this way but had a very large lag bolt that held them together to match the pottery barn table. This was originally very rough wood so anything to help get the warp out was used. The legs are set at a 10 degree angle and the table stand 30 in tall. The hardest part of this table was finding the turnbuckle and the threaded rods so it could officially be 99% like the pottery barn table. I also had no idea how hard it was to find left hand threaded anything. I ended up finding everything I need at McMaster.com and my local Fastenal store. To make the brackets that went on either side of the rods i simply bought a piece of 1/8 sheet metal at my local Home depot and cut it to size. They also sold hammered brown paint which gave the metal a worked old look. Once this was all constructed I used two heavy coats of wood conditioner to seal the wood. This was the key to getting the color I wanted. It tells you on the can not to let the wood conditioner dry on the wood but if it does, when you apply the stain you get a 100% consistent color. Worked wonders. It almost felt like I was cheating. I used a water based condition and stained it with rustoleums "dark walnut" stain. Finished it with 5 coats of minwax semi gloss. I only did 5 coats because I was brushing it on and had trouble getting the bubbles out of it. In the final picture it looks much shinier then it is in person. The last picture of when it was still in my garage is a better indication of the final finish. I have a boat load of additional picture, so if you have any questions or want to see more pictures of how it was constructed, shoot me a message. Thanks!
Sat, 05/19/2012 - 22:40
This is incredible. I mean really, really incredible. I cant wait to see what you build next!
Sun, 05/20/2012 - 08:16
I've had trouble with bubbles too... I have two pieces of advice for your next bubble-free project...
1. Get a sprayer. Seriously.
2. If you don't get a sprayer, use the foam pad-brushes for your final layer of poly. Put the last layer on thick and use the largest side of the brush (the side) and lay it down over the wood and drag it slowly accross with the whole large surface on the wood. If it is soaked in poly it will lay it down smooth with little if any bubbles, keep the surface you're working on flat, and after you've finished that, just make sure you clean up any edges where the poly may have dripped down. Last step, when it's almost dry, use 600 grit sandpaper to VERY lightly smooth out any little bumbs, which will come off more like paste than dust. But really, you should just get a sprayer. :)

In reply to Bubbles... by Bunnie1978
Sun, 05/20/2012 - 17:42
Hey Bunnie,
Thanks for the tips! I completely agree with you about the sprayer. I do actually have a sprayer but didn't want to get the garage covered in over spray. Maybe one of these days I will get ambitious and apply another coat. :)

Sun, 05/20/2012 - 09:35
This is awesome! Can you give more direction as to which specific items you got at mcmaster.com and Fastenal?
Also, how did you attach the sheet metal pieces? If you have any more pictures of the underside (frame) of the table, I'd love to see them!
Thank you very much, and again, this is spectacular. We want to try to build this, too.
Great job!
In reply to This is awesome! Can you give by SawgrassHomeGirl
Mon, 05/21/2012 - 09:23
See my comments below...
Sun, 05/20/2012 - 10:38
Love it! This project turned out great and I love how you tracked down the hardware - that finishes it off perfectly!
Like SawgrassHomeGirl, I'm wondering what the actual names of the items are that you tracked down. I went and paged through the McMaster and Fastenal sites, but since I'm completely unfamiliar with mechanical doodads I'm not even sure which categories to look under.
Fantastic job! Thanks for posting this!
Sun, 05/20/2012 - 18:13
Thank you for the nice comments. This was my first official project so I am happy that it turned out well!
Sure! I'd be happy to know the names of the hardware items. At Mcmaster.com the turnbuckle I purchased was Item number 30045T44 . It is about 6in long and seemed to fit nicely with the length of the table. the rods were just simply threaded rods which I purchased at fastenal since we have a few of their stores in town. The rods come in 6 ft pieces so I didn't want to have to pay the shipping. If you don't have a Fastenal near by here are the item numbers for the rods; 90322A220 -right hand threaded rod and 95625A160 - left hand threads. They are a bit more expensive at mcmaster though.
The biggest thing I was worried about was that the entire rod had threads on it so I was worried that it would look odd. But after getting it painted you don't even notice that it isn't just a solid pipe.
Sawgrass: shoot me your email address and I'll send you some more pictures. This site only allows me to post 5 additional photos. But to elaborate on the frame and the metal pieces, I didn't' really build a frame for it. You can essentially break it down into two pieces: Top and the legs. Instead of building a frame and screwing the pieces down on it, I opted to screw each of the pieces together using a Kreg tool and also glue them. the wood was heavy enough to support everything without an elaborate internal structure. The two end pieces help keep things from warping. The only reinforcement I did for the top was to take 3 2x4's and screw them horizontally on the underside. You will be able to see all of this in the pictures. As for the metal pieces, i drilled 5 holes in each piece. 4 holes for the screws that hold it to the leg region and one half inch hole in the middle for the rod to go through. I have a bunch of close ups of this process so you should be able to get a very good idea of how things work. Overall I tried to keep everything as simple as possible.
Thanks for all the interest and if anyone has anymore questions please don't hesitate to ask!
Tue, 05/22/2012 - 09:01
Thank you so much for taking the time to answer our questions! You did a fantastic job on this table and I am adding it to my ever-growing list of projects to do!
Now I'm off to find that hardware. :-)
Thanks, again!
Fri, 11/08/2013 - 06:33
My e-mail is [email protected]
My husband is making this table for Thanksgiving dinner. We are expecting 14 people so he is making the table a total of 12 feet long! Any input or pictures will be greatly appreciated!
Lisa and Gary Peters
Angola, IN
In reply to More information please! by lillylamp
Fri, 11/08/2013 - 08:13
Hey Lisa,
Check your email. 12ft long! I think you'll have to edit the build a little from my design but if you have any questions about the pictures please let me know and i'll be happy to help you out!
Thanks!
Tue, 05/22/2012 - 16:58
So i wanna build this table this summer, could you shoot me some more pictures of the designs and actual steps for building it. i absolutely love it, and i hope mine comes out as good as yours!
In reply to Love this table by Destiny (not verified)
Thu, 05/24/2012 - 10:59
Sure will, what is your email address?
Thu, 02/28/2013 - 18:35
Hey Nathan can you send more the steps also of how you build the table and any difference between the Ana White steps.
In reply to Pottery Barn Table by Jay Daniel
Wed, 04/10/2013 - 13:54
Hey Jay,
I didn't really follow the plans listed, I just kind of built things as I went. So i don't have anything that I can send you. However, I'd be happy to answer any questions you might have about any part of it.
Thanks Jay
Thu, 02/28/2013 - 18:35
Hey Nathan can you send me the steps also of how you built the table and any difference between the Ana White steps.
Sat, 05/26/2012 - 13:13
This has been on my to do list for a while now, but I haven't been able to work out the hardware details like you did. I would love to get some more pictures especially of the underside and of your rod to stretcher connection. Thanks again and you did an amazing job!
In reply to Awesome table! by Robert (not verified)
Mon, 11/04/2013 - 13:30
Hey Robert,
Here is a link to the rest of the pictures:
Sat, 05/26/2012 - 17:54
I love this table! I am new to this site and to building, but I want this to be my first project. Could you possibly email me the detailed pics and plans also so I can get started? :) Thanks so much!
Sat, 05/26/2012 - 18:07
Sorry, I forgot to sign in before I submitted my post. I posted the above post as Aubrey but this is my username so you can contact me.
Thanks Again.
In reply to Love the table!! by Aubrey (not verified)
Mon, 11/04/2013 - 13:30
Thanks! If you have any question please ask away!
Tue, 05/29/2012 - 18:41
I am really inspired by the table you built. It looks like you built your legs with 4x4s. Did you drill through them to get the notch on the outside or did you do something else just to get the look? Great work!
In reply to Amazing Table by ajmccallister
Tue, 05/29/2012 - 20:58
Hi Aj,
Yes, I did use 4x4's for the legs. It was much easier this way, did a great job achieving the heavy look I was interested in and was the closest I could come to the pottery barn table. To answer you question, no I did not drill through. I attached the 2x4 cross member with 2 leg screws from the outside of the 4x4 leg. I then cut a small piece of the 2x4 and nailed it over the lag screw holes to simulate the 2x4 cross member coming through. It looks just like I cut a hole and the whole thing is coming through. I get asked how I did it by people that see it in person because it doesn't look like a separate piece is just nailed on.
If you look at IMAG0306 and IMAG0308 on flickr you can see what it looks like without them on and if you look at the bottom left hand corner of the picture you can see the pieces that have been cut and not put on yet.
In reply to Cost? by Sara (not verified)
Mon, 06/11/2012 - 11:01
The Lower portion was probably about $200. The biggest expense was the threaded rods and the turnbuckle. The rods were about $30 each and the turnbuckle after shippping was about $20. The wood for the lefts and cross members were purchased at my local lowes so they were pretty cheap. As for the top, its hard to say since wood prices vary quite a bit between types and thickness. If you were to buy wood like I used you would probably have to visit a sawmill and see if you could get rough cut wood that is at least 2.5 inches thick. I would estimate $300 give or take. If you follow the plans that ana has setup for the top you don't necessarily need to get wood that is that thick. You can achieve close to the same look but just using 3/4 in pieces. I think if you look very closely at the pottery barn pictures, they do not use 100% solid wood either. But I wanted the heavy look and the solid appearance. So total you are probably looking at $500-$600. Hope this helps!
Wed, 06/20/2012 - 11:28
Great job Nathan - I appreciate your workmanship on the table. You've answered one of my questions regarding the look of the cross member protuding thru the leg - slick idea. My other question - why all the large round holes in the bottom of the table? By the way, the dowel effect that you accomplished really pops. I too like the looks of the thicker boards. Thanks for posting an interesting and comprehensive article. Curt
In reply to Benchright Farmhouse Table by Curt (not verified)
Thu, 06/21/2012 - 13:06
Those holes in the bottom of the table were there when the wood was salvaged. This was a pallet so they had it bolted together with large lag bolts. The bolts had large washers inset into the wood. The bolts were secured on the underside of the wood and went through every piece. Luckily, they were consistent and only bolted from one side.
Thanks!
Tue, 07/10/2012 - 06:36
Thank you, Nathan, that really helps! Did I mention your table is beautiful?
Fri, 08/03/2012 - 12:53
Hi Nathan,
Awesome table. I just hope I can find some 3" thick lumber without breaking the bank! It looks like you attached the legs by putting 2 bolts through the legs into the small apron on the short ends of the table. It also looks like you might have also put in some pocket holes on the inside of the legs, going straight down into the underneath of the table boards. Is that right? I am just wondering how sturdy it is, since it's such a heavy table.
Thanks!
Lea
In reply to Attaching Legs by leabea28
Mon, 08/06/2012 - 11:43
Yes, you are correct. I attached the legs with 2, 6inch lag bolts. I pre-drilled them at the correct angle (which I eye balled) and ratcheted them in. I was a little worried about them being sturdy enough so I went ahead and made a few pocket holes and secured it that was also. The legs overall are very sturdy. The table probably weights 150-200lbs and I was able to pick up one side of it only holding onto one leg. Table doesn't wobble at all. The cross member holding the legs together also helped pull everything together.
Thanks for the question! Feel free to ask any others!
Nathan
Sun, 08/12/2012 - 18:17
Fantastic table! Thanks for posting all the instructions and places to buy hardware. My husband and I can't wait to try this!
Sun, 08/12/2012 - 18:19
Fantastic table! Thanks for posting all the instructions and places to buy hardware. My husband and I can't wait to try this!
Fri, 08/24/2012 - 09:33
Nice work! I made bench seats in this style - maybe I'll post pics sometime too! I saw in your description that you used thick wood to be more like the original... just wanted to let you know that I have seen the "original" and yours is much better! Pottery barn does NOT use solid 3" wood for the top. If you look closely at the pics in their online catalog you can even tell... they use thin planks with a side piece to make them look thick. The only hefty piece is on the very end .
Also, I wanted to mention that I have had great luck with wipe-on polyurethane... never any bubbles. Just be sure to use lint free cloths and lots of thin layers.
Again, nice work!
In reply to Better than the "real" PB Benchwright by 3RaysofSunshine
Fri, 08/24/2012 - 09:54
Thanks for the nice comments!
Did you apply the poly with a brush or with a cloth?
Fri, 08/24/2012 - 10:05
I apply with a cloth. It takes many coats but they are so thin they dry fast. In between coats, I wet sand with 1000 grit wet/dry sandpaper. After towel drying, I run my hand across the surface. You'll feel any spots you missed. Then use a tack cloth to pick up any dust (there's always some...) I get a perfect finish using this method. I'm sure spraying is great too... I just like not having another piece of equipment to clean!
My last project (a patio table) I had run out of the wipe-on poly and decided to use something else - whatever I had on hand. Grr! Not nearly as nice looking so I'm doing it over. I'll post pictures of a few projects as soon as I can figure out how.
Sun, 11/18/2012 - 21:15
Why cant my husband make stuff......booooooooo! Wonderful table I am so jealous lol.
Fri, 01/04/2013 - 07:37
This is a great Table! I'd love to build something like this. Good Job!
In reply to Amazed by Shannan with an A
Tue, 04/23/2013 - 10:23
Thanks for the comment! Glad you like it :)
Thu, 05/02/2013 - 10:52
Hi! Just wondering what tool(s) you used to cut the sheet metal and drill the holes in it.
Thanks.
Lea
In reply to sheet metal cutting by leabea28
Thu, 05/02/2013 - 15:04
Hey Lea,
It was only 1/8 in thick metal so a simple jig saw with a metal bit worked great. Wear eye protection though. It shoots off all sorts of hot metal bits. To drill the holes I just used a power drill with a metal bit. Make sure you drill 100% straight or the bit will bind and jerk the drill right out of your hand. Ideally, a drillpress would work much better since I nearly broke my wrist on the second large hole.
Let me know if you have any other questions!
Thanks,
Sat, 06/01/2013 - 20:36
The table looks awesome man! Love it. I just got done building the benchright table to Ana Whites plan, see mine here http://ana-white.com/2013/05/farmhouse-benchright-table-build-0
I just ordered the left hand threaded rod, right hand threaded rod and turnbuckle from McMaster.com...total cost for all 3 was 22 bucks. Here are the McMaster part numbers:
90036A033- left hand rod
98841A033- right hand rod
30045T44- galvanized turnbuckle
I'll hopefully get the rods and turnbuckle this week so I can totally complete this project.
Again, awesome job nathan!!!

In reply to Very nice job, nathan!! by tcoche
Fri, 11/14/2014 - 05:06
I saw your listing for the parts number, thank you. I was wondering, these are galvanized parts....how are they being made dark for the finished product?
Fri, 06/28/2013 - 10:52
Please, PLEASE send me the plans on how to build this table. Yours turned out great!
Thu, 07/11/2013 - 12:55
I'd love to if I had plans. I kind of just built this as I went. Feel free to ask any questions though if you aren't sure where to start or your stuck somewhere.
Thanks!