Community Brag Posts

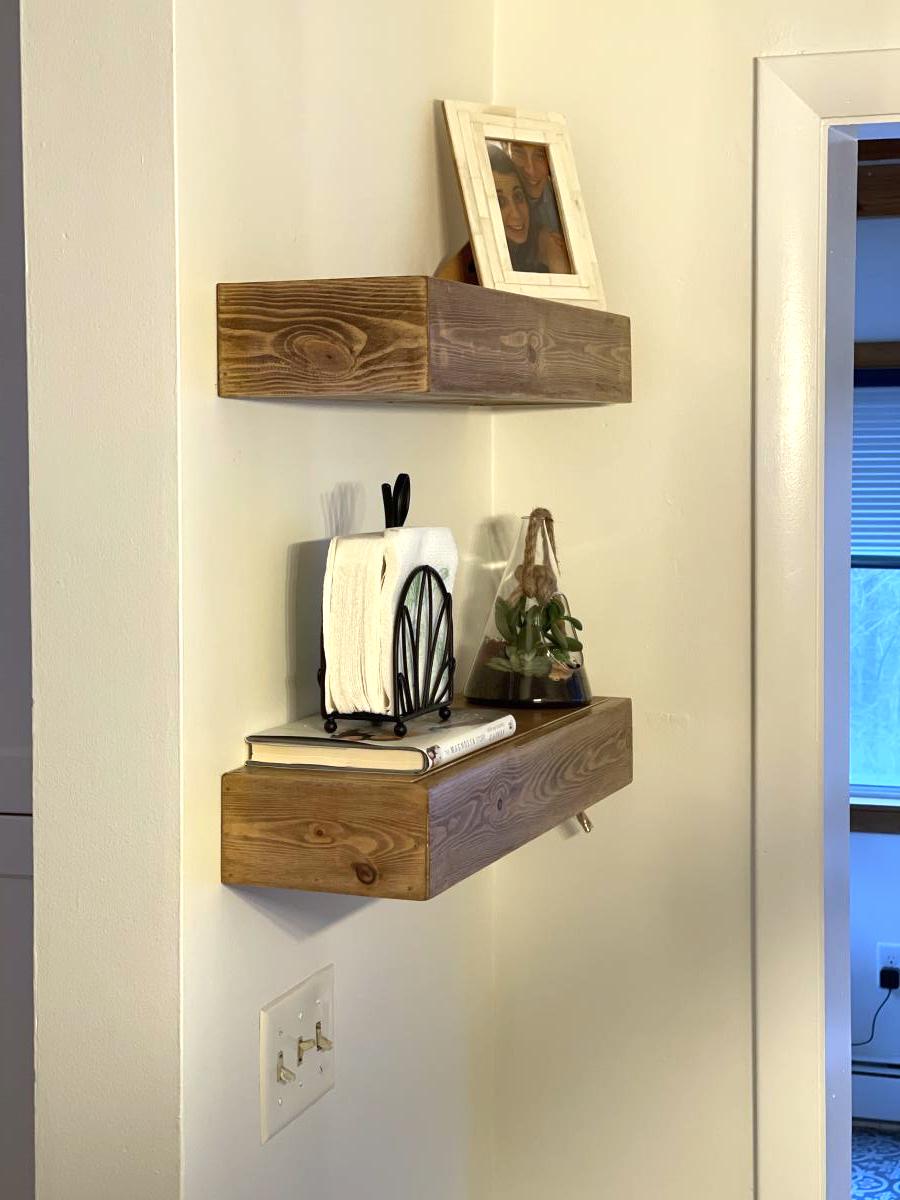
Farmhouse Table/Bench and Floating Shelves

Submitted by Al_on_Rose on Mon, 12/14/2020 - 14:09

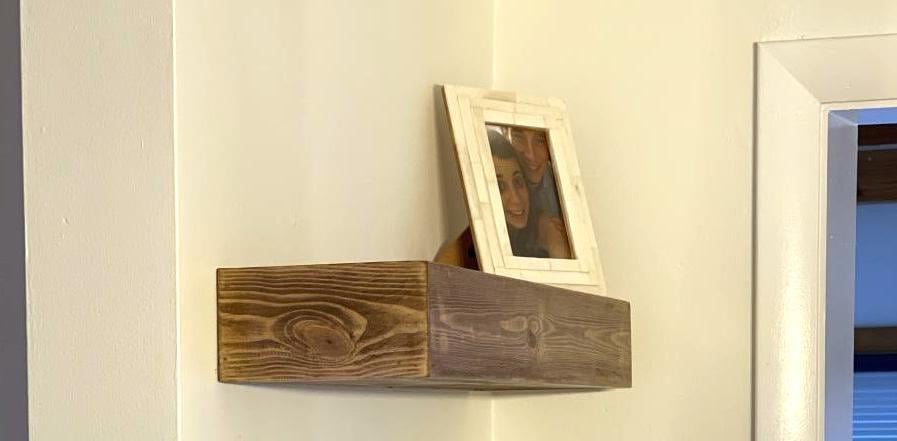
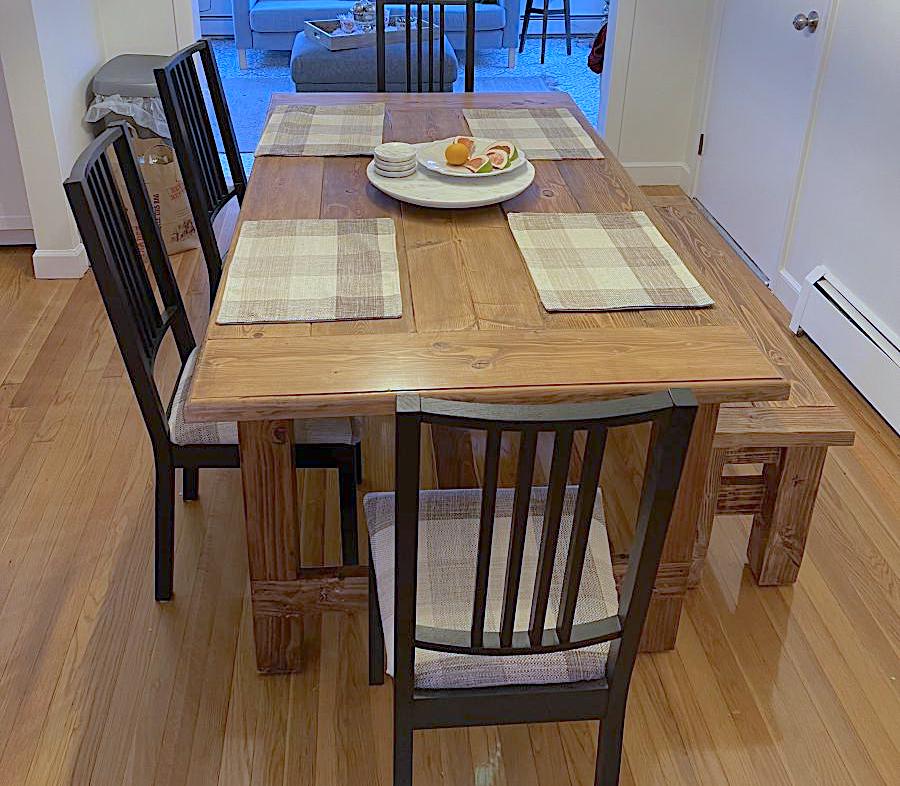
My daughter wanted to create the Farmhouse look for her New England home. Had so much fun building the Table, Bench and Floating shelves. The Plans were perfect, and of course customizable (she wanted it a little shorter). My next project is a real workbench for my garage. I think the only issue is the New Jersey winters.

Estimated Cost
$250
Estimated Time Investment
Weekend Project (10-20 Hours)
Finish Used
Early American Stain
Recommended Skill Level
Intermediate

Comments

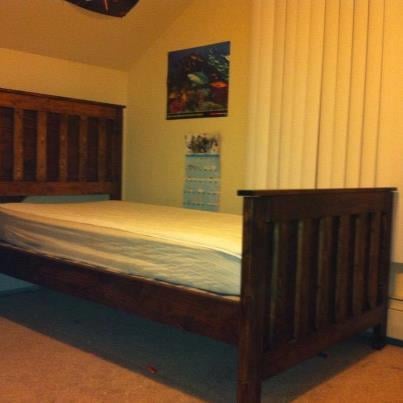
Kentwood Bed

Submitted by 5tarts on Sun, 01/27/2013 - 21:39

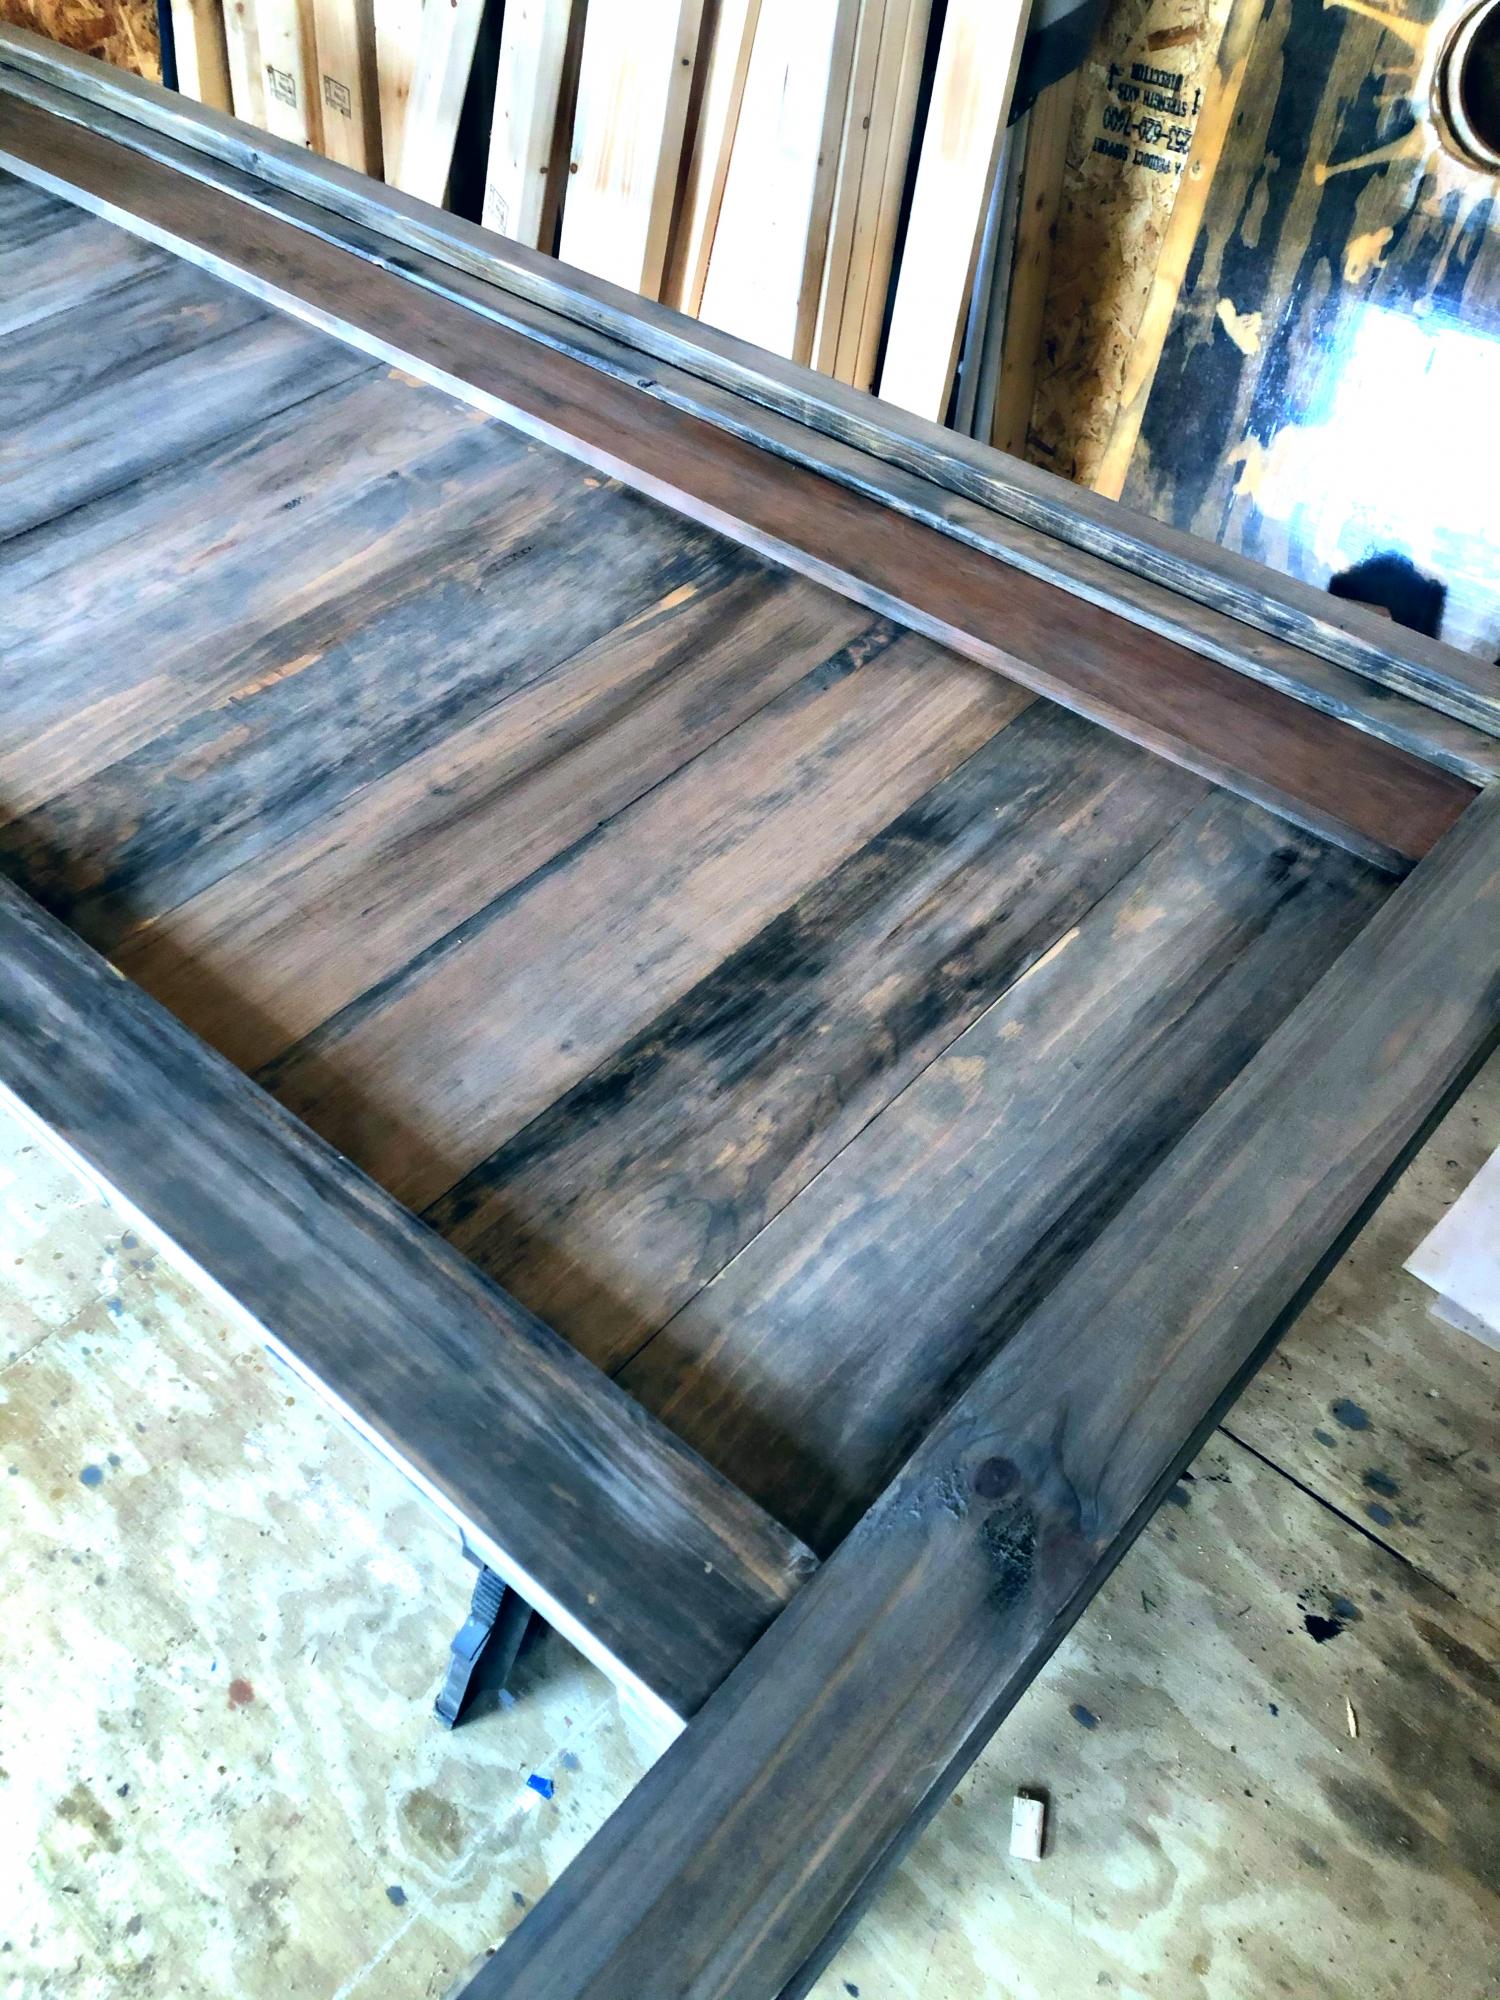
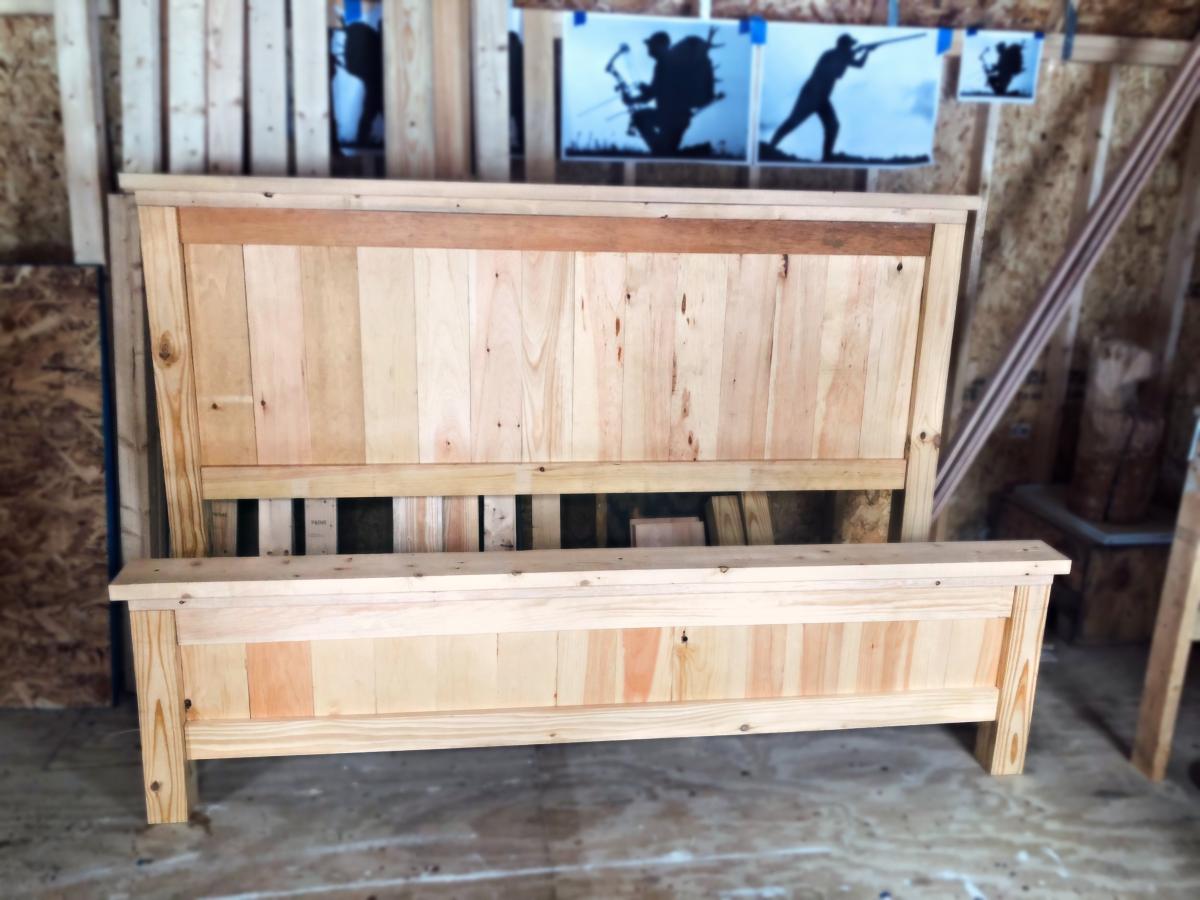
My wife and I began the Kentwood bed last weekend as a project for 1) our oldest boy needed a new bed 2) a family project and 3) a project that would count for my oldest Weblos project to earn a building badge. After reading up on it about a month ago and finally finding the last Kreg jig in town (fairbanks, ak) we purchased the wood and began the building. This plan calls it a weekend project which it would have been if I had not been in school and other family engagements to get too during the weekend. So the weekend project turned into a two weekend endevor. After much hard labor and buying two cans of stain ( as the first can took a dive onto the garage floor and stained more floor than my project) the finally result is pictured. My wife and I love the look and sturdiness of this bed. After completion and final assembly my only addition or change to this plan would be to suggest using hardware attaching the side rails to the head and foot board, so there is less wear and tear on your project. Thanks for the plans!

Built from Plan(s)
Estimated Time Investment
Weekend Project (10-20 Hours)
Recommended Skill Level
Intermediate

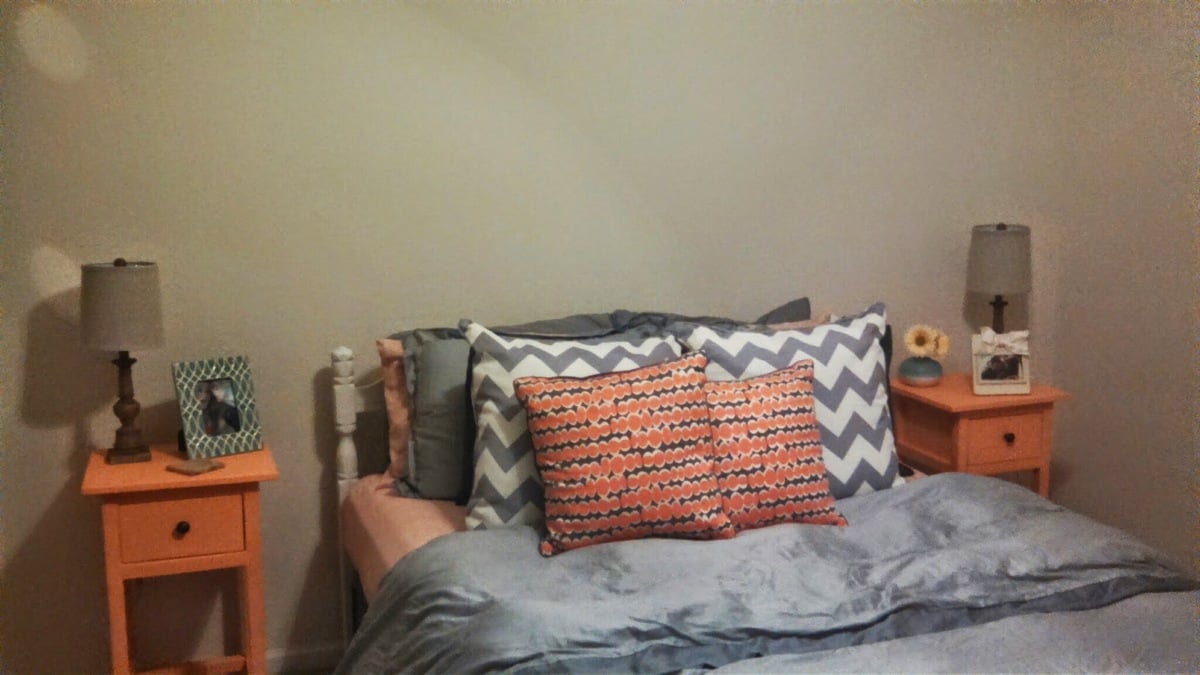
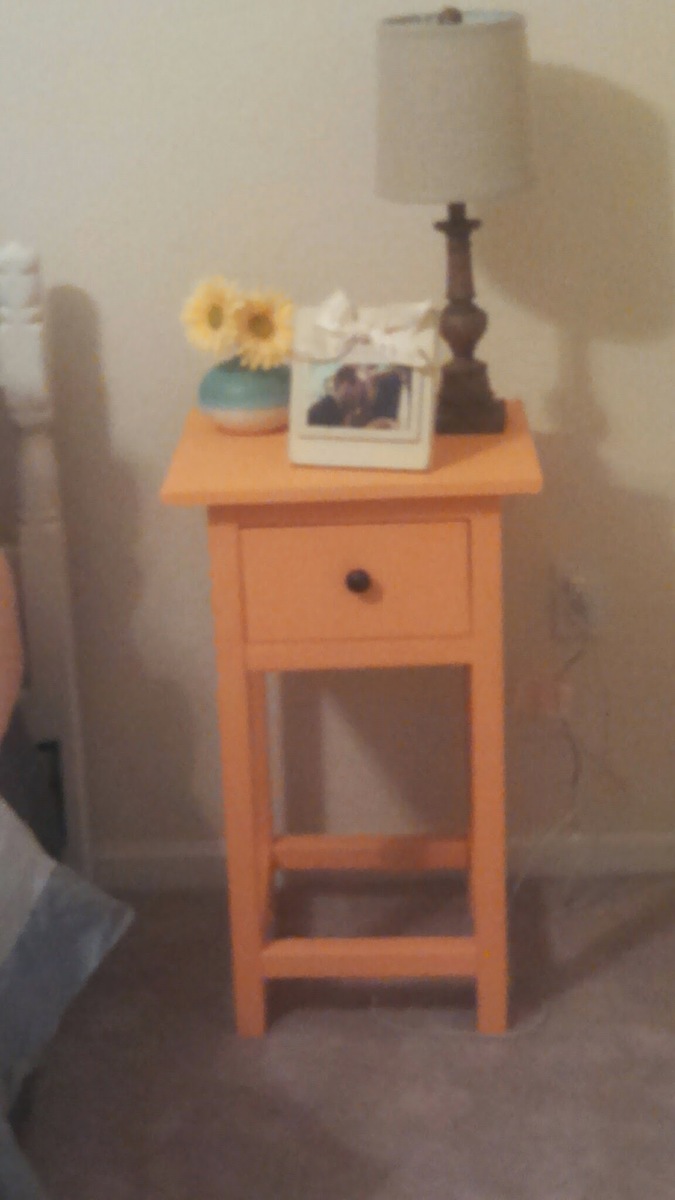
Daughter's Mini Farmhouse Bedside Table Plans

Submitted by pondrider on Wed, 11/26/2014 - 10:44

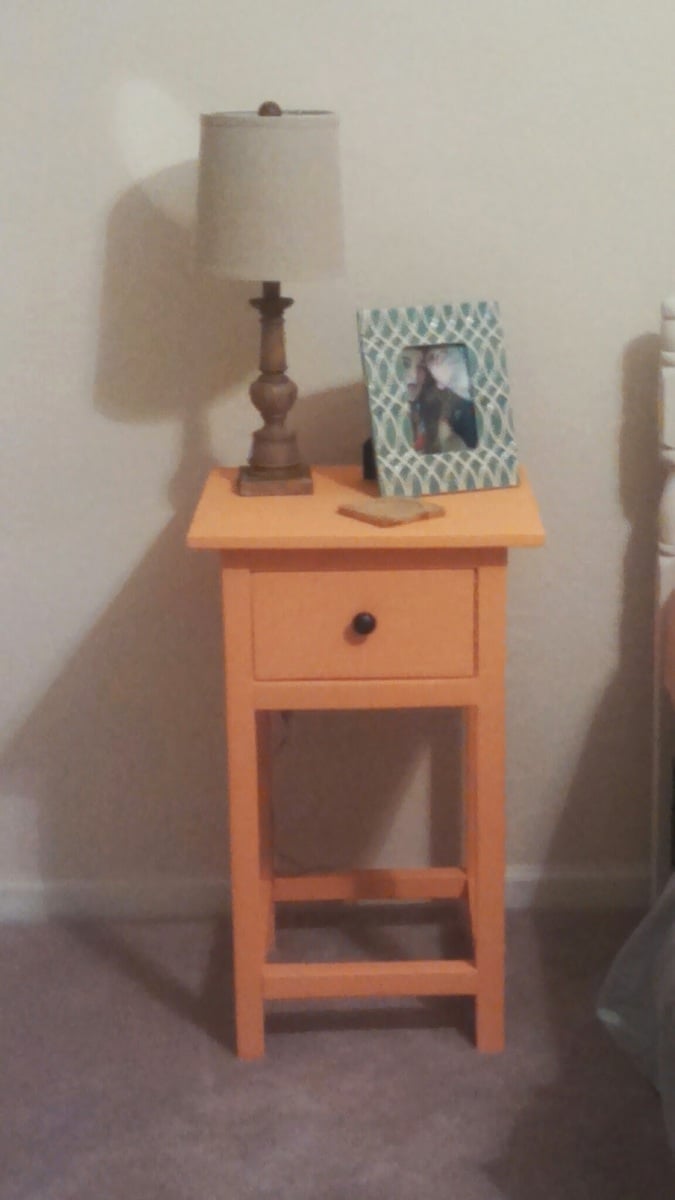
This project made from http://ana-white.com/2013/05/plans/mini-farmhouse-bedside-table-plans was a birthday gift for our daughter who was moving into her own apartment and preparing for an approaching marriage. This is exactly what she requested.  While I did use Ana’s posted plans you may see some slight modifications. 

Estimated Cost
Plan estimate is around $75.00
Estimated Time Investment
Weekend Project (10-20 Hours)
Finish Used
Sanded and painted as requested.
Recommended Skill Level
Beginner

Comments

tweaked X console

Submitted by katiedove on Wed, 03/01/2017 - 18:08

Slimmed down version of the original plan. 60" x 11" x 35". Super happy with how it turned out!

Built from Plan(s)
Estimated Time Investment
Weekend Project (10-20 Hours)
Finish Used
Burnished Clay by Behr & a custom stain color I made by mixing an espresso with a honey.
Recommended Skill Level
Intermediate

Barn Door Bookcase/Pantry

Submitted by Anonymous (not verified) on Sun, 12/20/2020 - 15:31

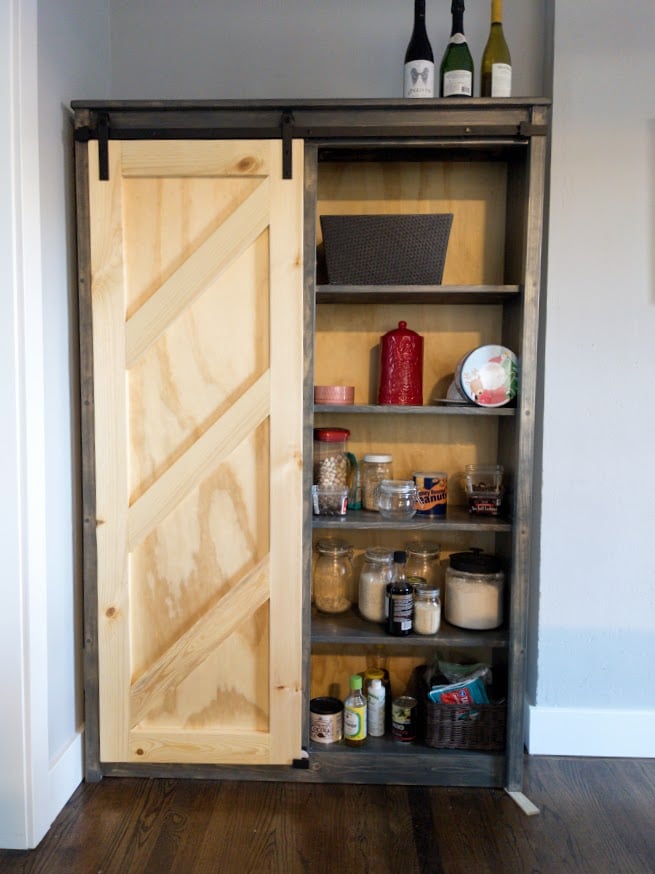
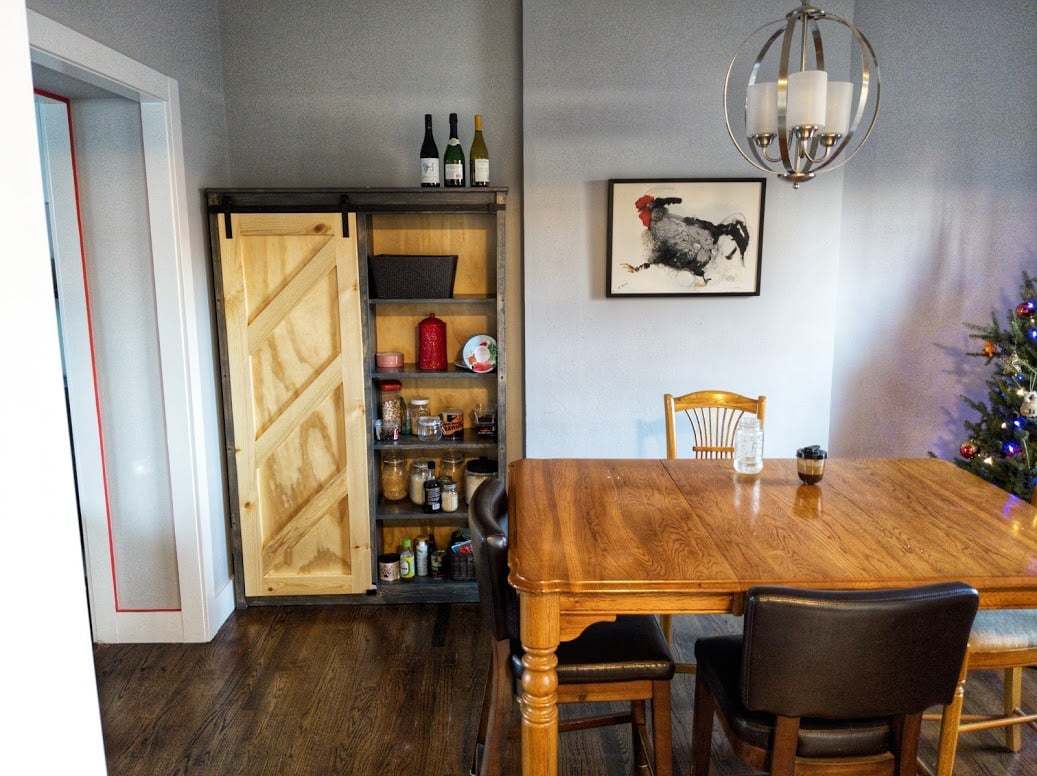
Despite relatively high ceilings, we have a small, pantryless kitchen and needed more shelf space. Couldn't be happier with how this turned out. Besides taking off 2 inches in width to make sure it would fit in the space, I followed the measurements exactly.

Made just one modification with the instructions involving the face frame. I first assembled it together per the instructions, but it was just not lining up with the carcass well at all when I went to attach it. Before the glue got too dry, I made the quick decision to take the face frame apart and just apply the individual pieces of it one at a time to the carcass. I figured this could maybe leave some very small gaps where the face frame pieces joined each other, but that seemed better than what it would look like leaving it as is, with almost no section flush with the carcass. This ended up being the absolutely right choice. Everything was very very close to flush and there ended up being virtually no gaps. If I ever built again, I would do the same and attach each piece like that.

My only other struggle was at the very end attaching the barn door hardware. Nothing wrong with the hardware or the instructions, I just ended up installing the rail too high up on my first attempt. Because this piece has a top that slightly overhangs and gives that nice little lip, it means there is a maximum height which you can't go above when installing the rail hardware. If you go too high, like I did, the rollers that are attached to the door will physically not fit on the rail, b/c that lip will be in the way. This might be very obvious to most people but I thought I'd mention it. Once things clicked, I just had to get some new measurements and redrill the holes a bit lower(but not too low b/c then you will have a gap!).

I decided to leave the door natural wood after seeing someone else's finished piece posted here and given how dark my stain was, I also left the plywood back panel natural. It's still a bit light now and it may even take 2 or 3 years, but I know pine can do a decent job darkening up.

Lastly, I did put a whole quart of satin polyurethane on this over 5 coats. Each coat but the last was cut with %50-%25 paint thinner applied with a foam brush. Yes it did take a long time but seeing it up close, it was absolutely worth it. I would recommend it for anyone making this project.
Built from Plan(s)
Estimated Cost
$350
Estimated Time Investment
Weekend Project (10-20 Hours)
Finish Used
Varathane wood stain mix. Half "weathered gray" half "Carbon Gray." Five coats Minwax satin polyurethane.
Recommended Skill Level
Intermediate

Comments

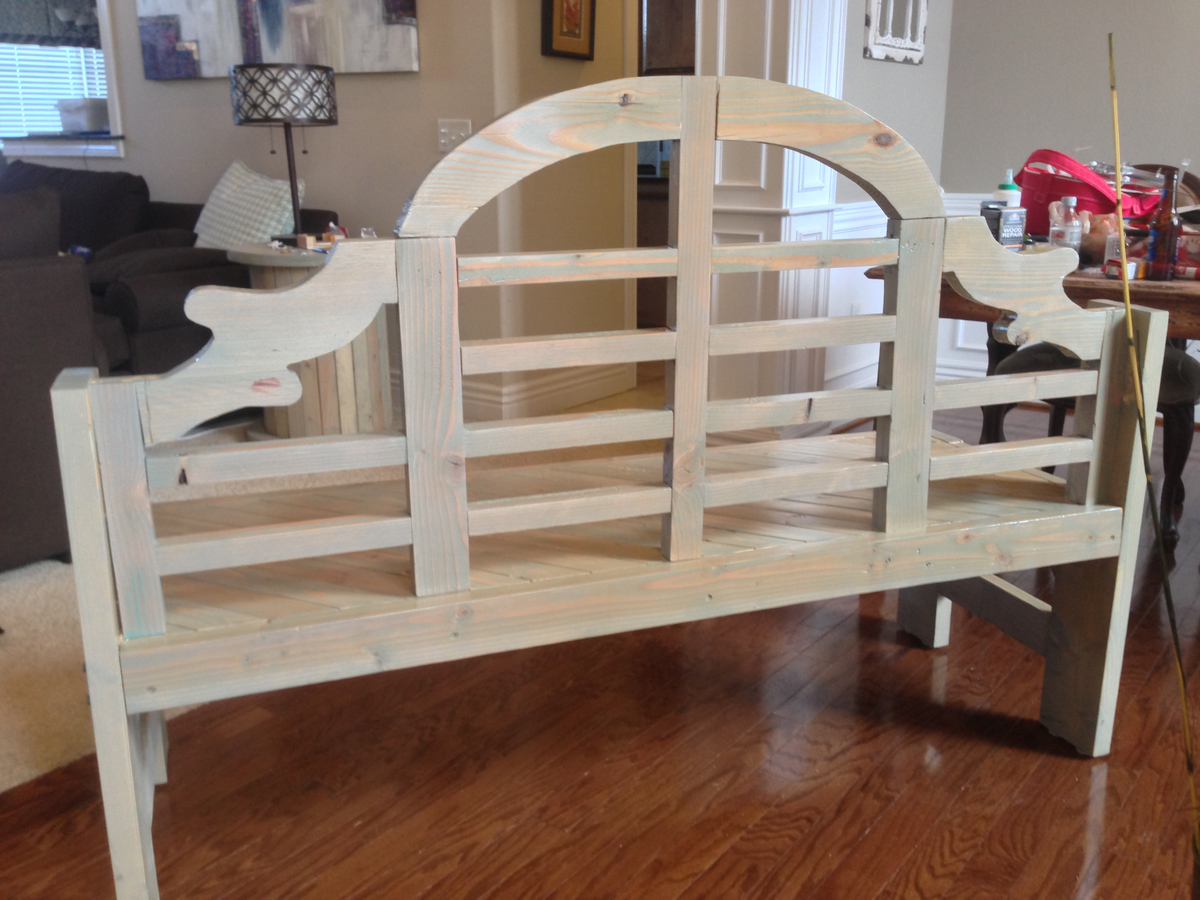
Dining Room Table Bench

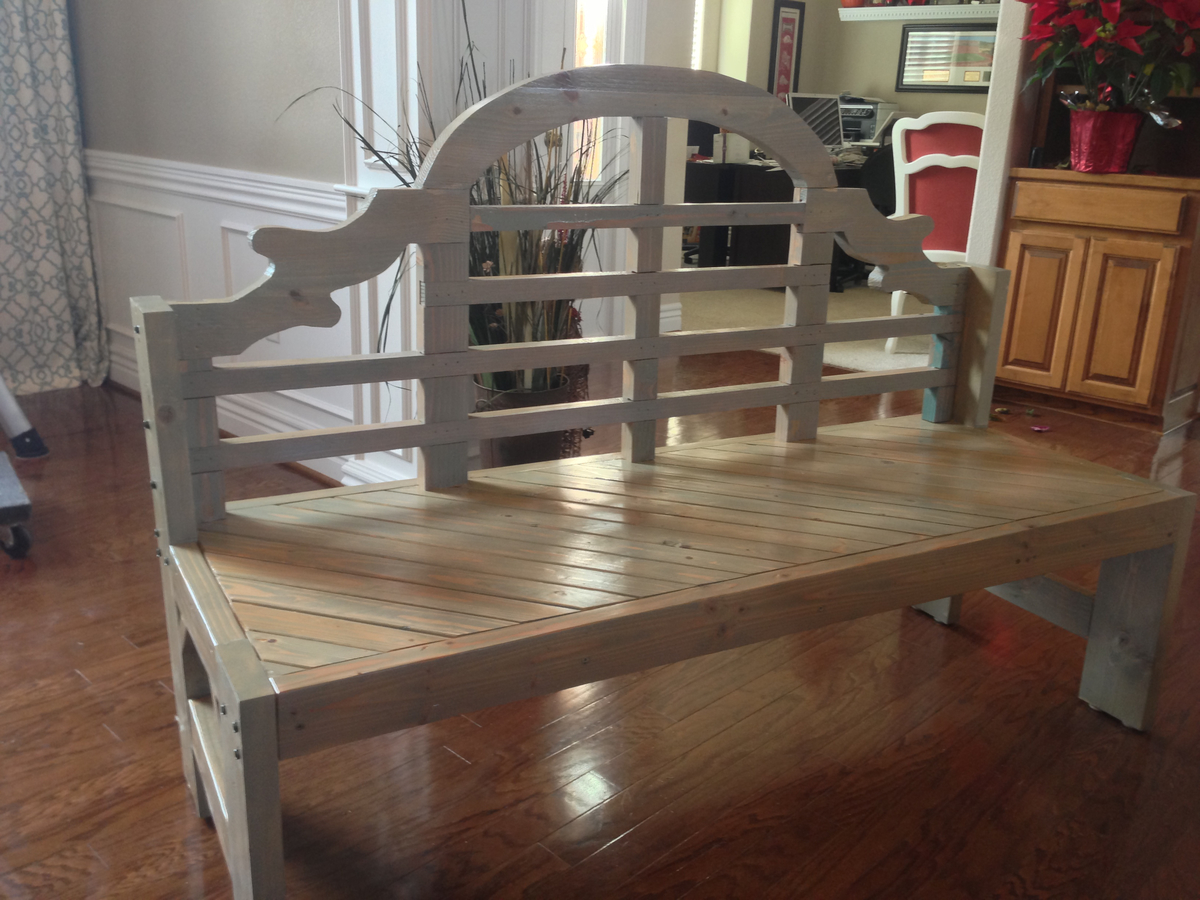
My wife wanted a bench for one side of our dining room table. After looking at prices to purchase, I decided to see if I could build it. This was my first wood working project and I built the bottom half using only a circular saw. By the time I decided on the design for the back, and actually figured out how to build it, 18 months and many other building projects had passed. This is the final piece.

Built from Plan(s)
Finish Used
Sherwin Williams Pickled White with a blue tint.
Recommended Skill Level
Intermediate

Comments

Shaewc

Tue, 01/29/2013 - 14:21

This is gorgeous! I hope to tackle my first project also soon (see upholstered settee sketch I posted a few days ago) I will be overjoyed if mine turns out half this good!

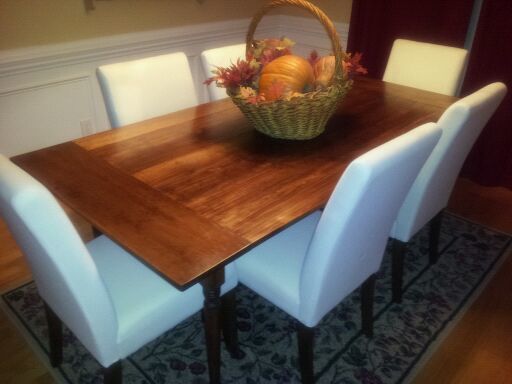
Mahogany Double Pedestal Farmhouse Dining Table

Submitted by ekmoy on Sat, 11/29/2014 - 15:54

I decided to build a dining table after finding Ana's site and being encouraged from the straight forward plans and great brag posts.  Thank you for the encouragement, Ana!

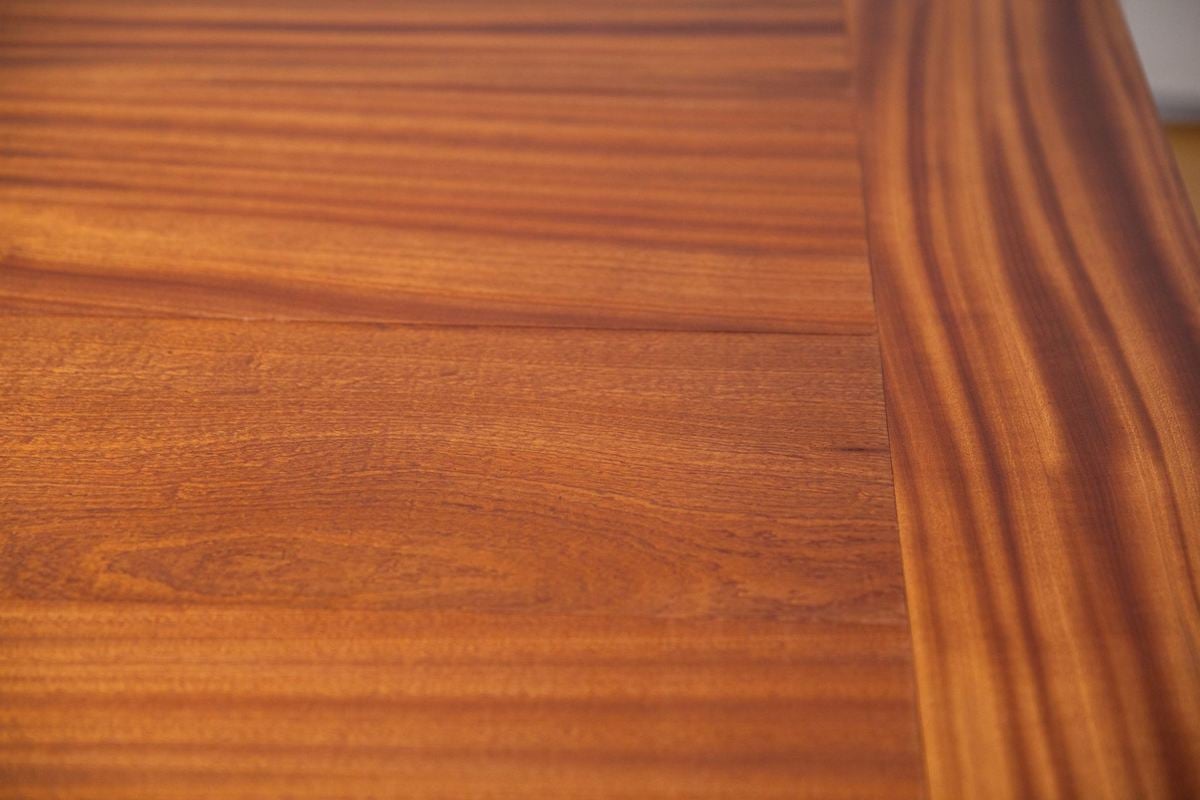
This project took much longer than anticipated since we changed around the plans, used mahogany which is unforgiving, and I'm a bit of a perfectionist so we spent a lot of time on each step to make sure things were correct.  In terms of modifications, we used 1x12, 1x10 and 1x8s on the table top.  We only made two pedestal legs so we could fit chairs on the end.  The overall dimensions are 96.5" x 46.5" x 29".  We kind of fell into those dimensions after having to change things to make sure the breadboards fit properly.

I'm happy to share any additional plans/information with folks who want to build a similar table.  We didn't use a stain but rather just 3 coats of MinWax Wipe-On Poly.  It really brought out the beauty of the grain and color of the wood!

Thank you again, Ana!  I hope future generations will keep this table and think it's cool that their family made it.  I'm planning to have a plaque engraved with our names and the date to attach to the table as well.  

Built from Plan(s)
Estimated Cost
Since we used mahogany it was much more expensive. We spent ~$1700 on the wood alone, nevermind the tools etc.
Estimated Time Investment
Week Long Project (20 Hours or More)
Finish Used
MinWax Wipe-On Poly
Recommended Skill Level
Intermediate

Comments

Meljohnson

Fri, 05/22/2015 - 20:41

Out of all the pedestal table plan variations yours is my favourite. Not only because of the beautiful wood but I like your modification of the base the best. Can you tell me what is the inner width between the two pedestal legs? Also how many people can you comfortably fit around that table and how many can you squish around? If you have a moment to answer my questions, thanks so much.

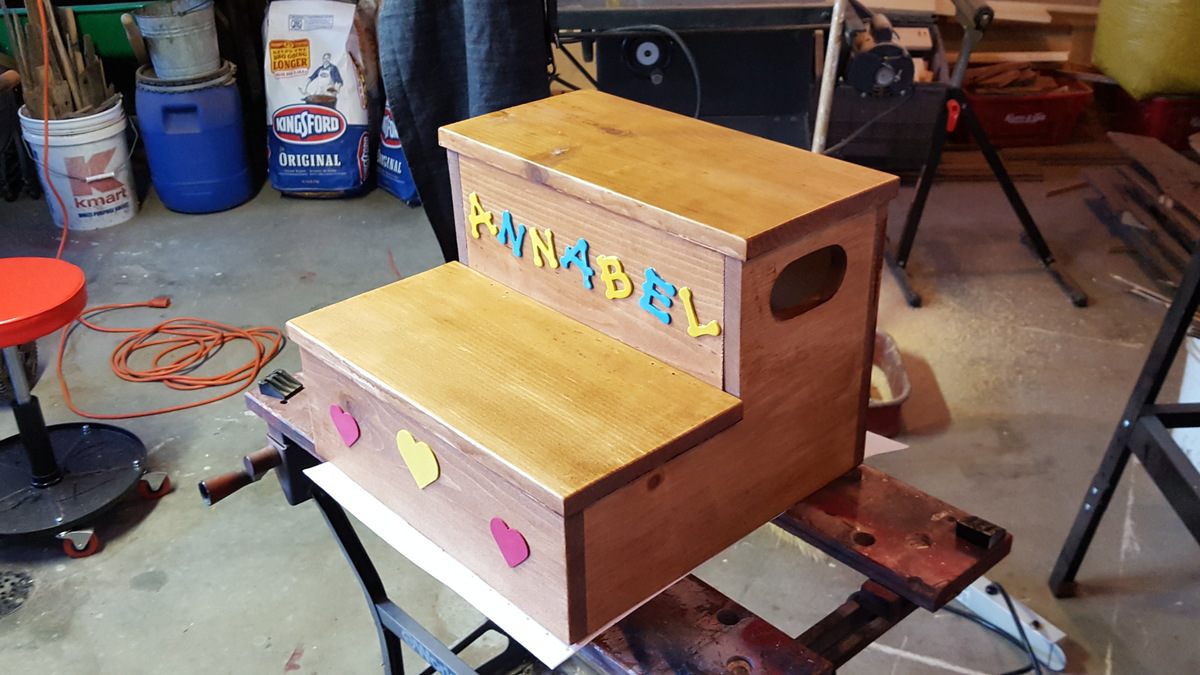
Annabel's Step Stool

I built this step stool for my granddaughter after looking at quite a few different plans on the internet and not really finding exactly what I wanted.

Estimated Cost
$30.00
Estimated Time Investment
Weekend Project (10-20 Hours)
Finish Used
Minwax Polyshades
Recommended Skill Level
Beginner

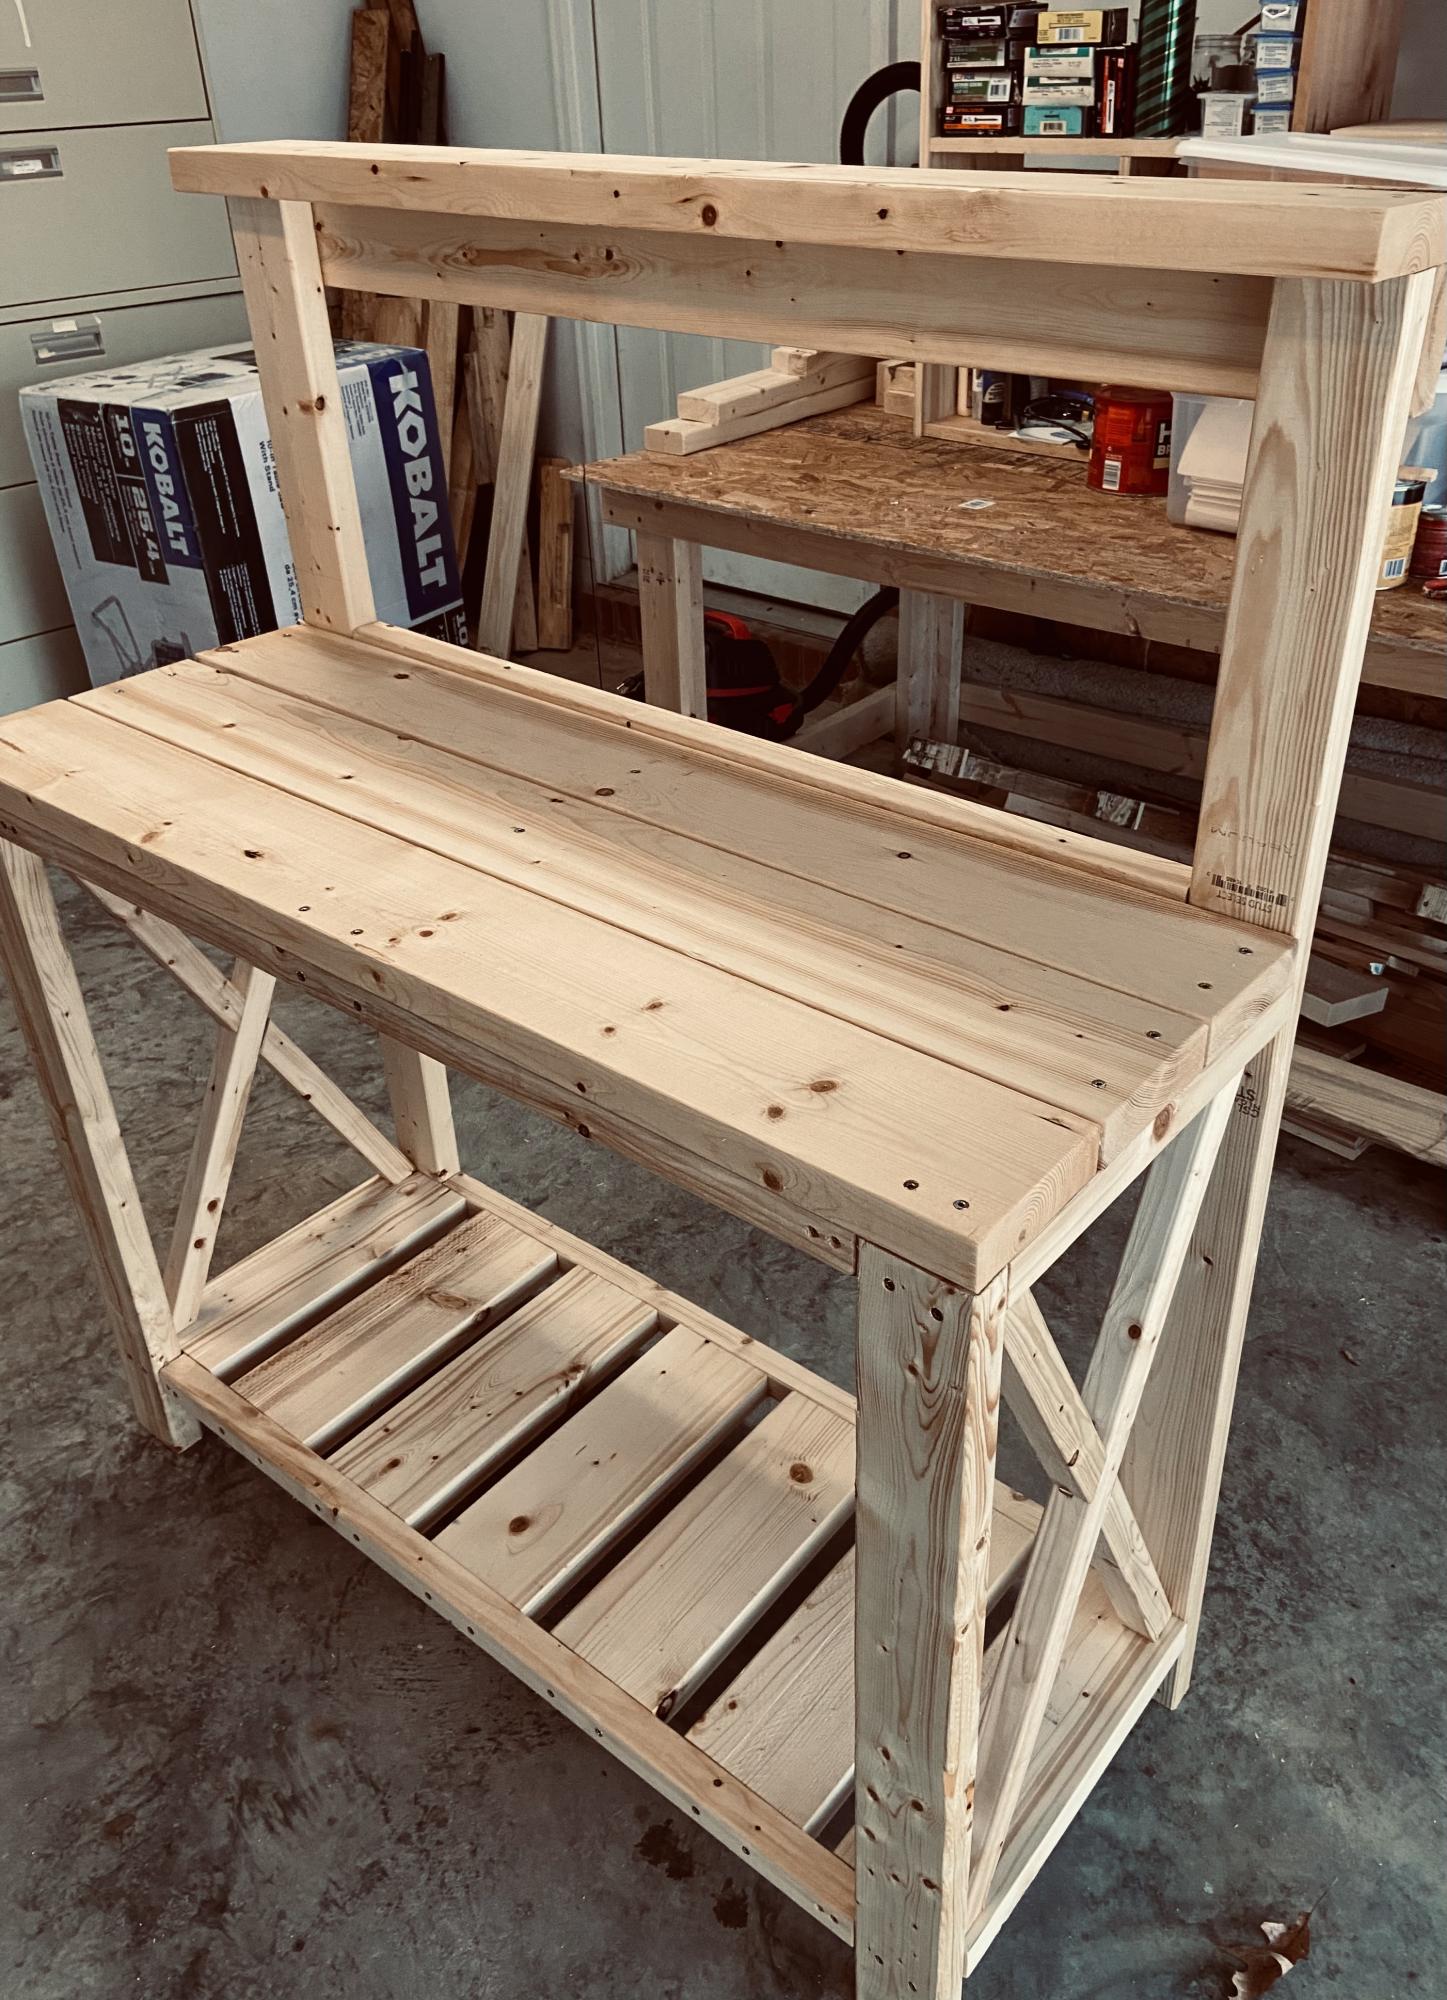
Potting Bench

I am a complete newbie to anything woodworking. I just turned 60 and used a drill for the first time about 9 months ago. Thanks to Anna and her plans and videos, I have developed some some self confidence in this art and absolutely loving it.

Farmhouse coffee table and king size bed is next.

Thank YOU Anna!!! You totally rock!!!!!!!!

Estimated Time Investment
Day Project (6-9 Hours)
Recommended Skill Level
Beginner

Comments

Ken and Matt's Farmhouse Table

Submitted by Kenndfan on Fri, 02/01/2013 - 07:18

We used the Farmhouse Table plans but made a few modifications to get the look my wife was looking for. We've since built a cupboard to go with it.

Estimated Cost
$150
Estimated Time Investment
Weekend Project (10-20 Hours)
Finish Used
Early American stain with a satin poly
Recommended Skill Level
Beginner

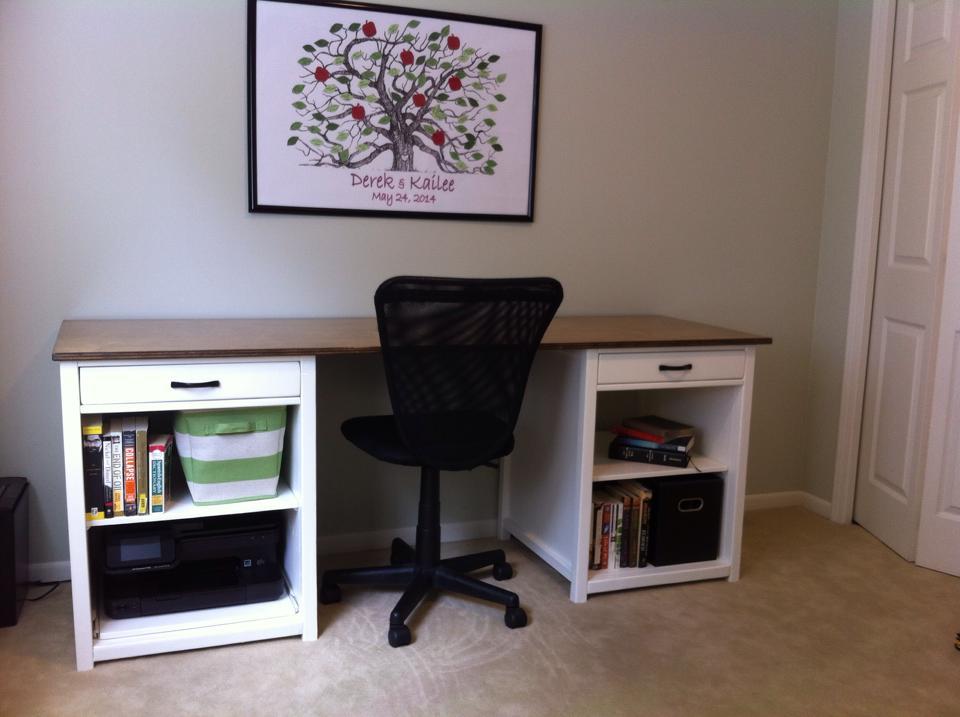
Office Desk

Submitted by kaileelev on Mon, 12/01/2014 - 12:33

My husband is finishing up his last year of graduate school and needed a big desk for all of his engineering homework. 

We changed the plans a bit by making the shelving unit a bit narrower (just wide enough to fit our printer), adding a second shelving unit (which then made the whole desk longer) and making the desk deeper so it would be easier to fit more stuff on top. We also added a sliding shelf so we could pull out our printer. 

It ended up being about 72" long, 24" deep, and each shelving unit was about 20" wide. 

This desk ended up driving up crazy. Drawers are SO difficult to get exactly square and perfectly lined up. The left one turned out a little bit crooked but we gave up on it and left it like that. This is the major reason I ranked this project as intermediate. In my opinion paint is more difficult than stain, because it filled in some of the gaps between the wood pieces but not all of them. 

Our maple plywood for the desk top took our stain kind of funny so I spent a lot of time trying to sand out the messy parts. The polyurethane also went on funny, but when I finally had the third coat perfect and ready to go, someone left a paint can on top of the desktop before the poly was completely dry. I had to sand out the mark and start all over again with the poly. Argh. 

Even with all the frustrations, we ended up very happy with this desk. If you look super close you can see the little mistakes, but from a normal distance the desk looks great! My husband can spread out with all of his homework!

Built from Plan(s)
Estimated Cost
About $115 with all of the paint, stain, poly, etc.
Estimated Time Investment
Week Long Project (20 Hours or More)
Finish Used
I used an off white colored oil based paint for the base of the desk. For the desk top I used MinWax Prestain and then two layers of Minwax Provincial stain. I ended up doing a total of four layers of Polyurethane on the desk top because of a mistake I made partway through.
Recommended Skill Level
Intermediate

Comments

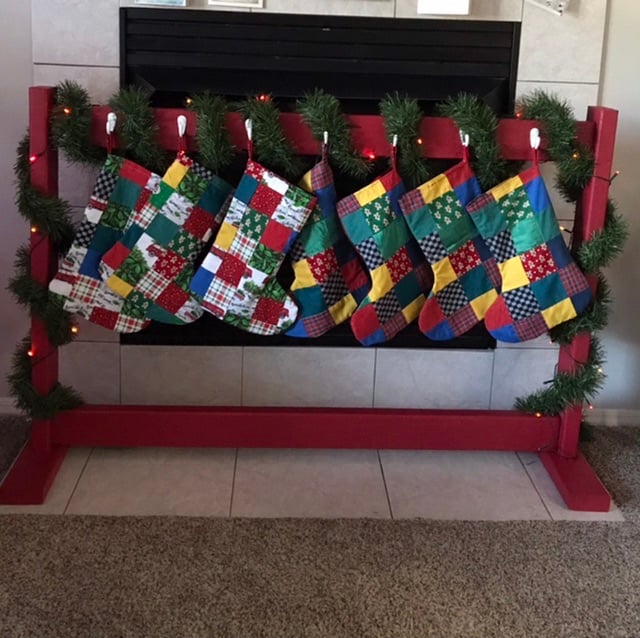
Christmas Stocking Stand

Submitted by Anna-M on Mon, 12/28/2020 - 09:27

I wanted to show you the stand we made this year, using your plans. It was a big hit! I made the base pieces 15” long for added stability since we put 7 hooks on it and plan to add more to the “backside” as our family is growing.
Thank You for sharing !

Built from Plan(s)

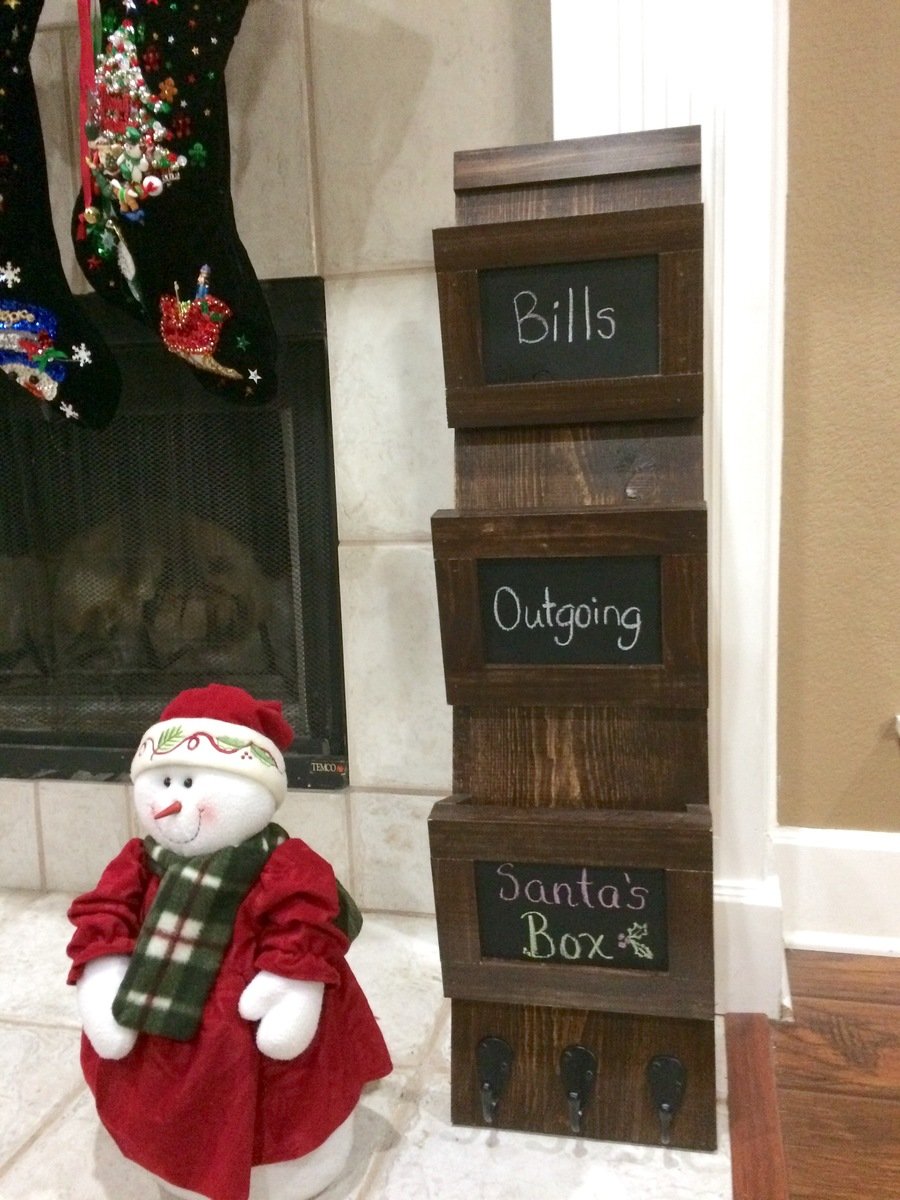
Wood Mail Sorter with Santa Box

Great quick project. Made two so that I could give one as a gift. Used chalkboard paint so I could change box names. Made bottom box a Santa box for the Christmas season. 
 

Built from Plan(s)
Estimated Time Investment
Afternoon Project (3-6 Hours)
Finish Used
Used a dark walnut miniwax stain and a polyurethane varnish
Recommended Skill Level
Beginner

Mimi's Faux Mantle

Submitted by Anonymous (not verified) on Fri, 03/10/2017 - 04:51

Built this using Anna White's "MIMI'S FAUX MANTLE" but instead of using crown molding I elected to use STONE TILES in neutral tones and finished the surround and mantle in white giving the piece a nice soft appeal.  The building plans were easy to follow and took about 2 days to complete the whole process (because of drying times) not to mention how reasonable the cost was.  I already had the tiles,  adhesive, and paint from left over projects.

Estimated Cost
Cost was more than reasonable. I already had the tiles ,adhesive, and paint. Total cost was approximately $66.00.
Estimated Time Investment
Day Project (6-9 Hours)
Finish Used
I used Behr White Semi-Gloss Enamel paint purchased from Home Depot (I had the paint from a previous project). Use any tile of your choice since these were left over tiles I had on hand. When tiling use an appropriate tile for the space and glue with tile adhesive. I let mine sit overnight and grouted it the next day using a sanded grout in Bone (purchased from Home Depot) #832.
Recommended Skill Level
Intermediate

My first build

Submitted by makadams on Mon, 02/04/2013 - 14:52

This was my first used left over 2 by 4 from basement remodel and was first project using kregjig

Estimated Time Investment
Afternoon Project (3-6 Hours)
Finish Used
mahogany
Recommended Skill Level
Starter Project

Ornament

Submitted by spiceylg on Tue, 12/09/2014 - 06:28

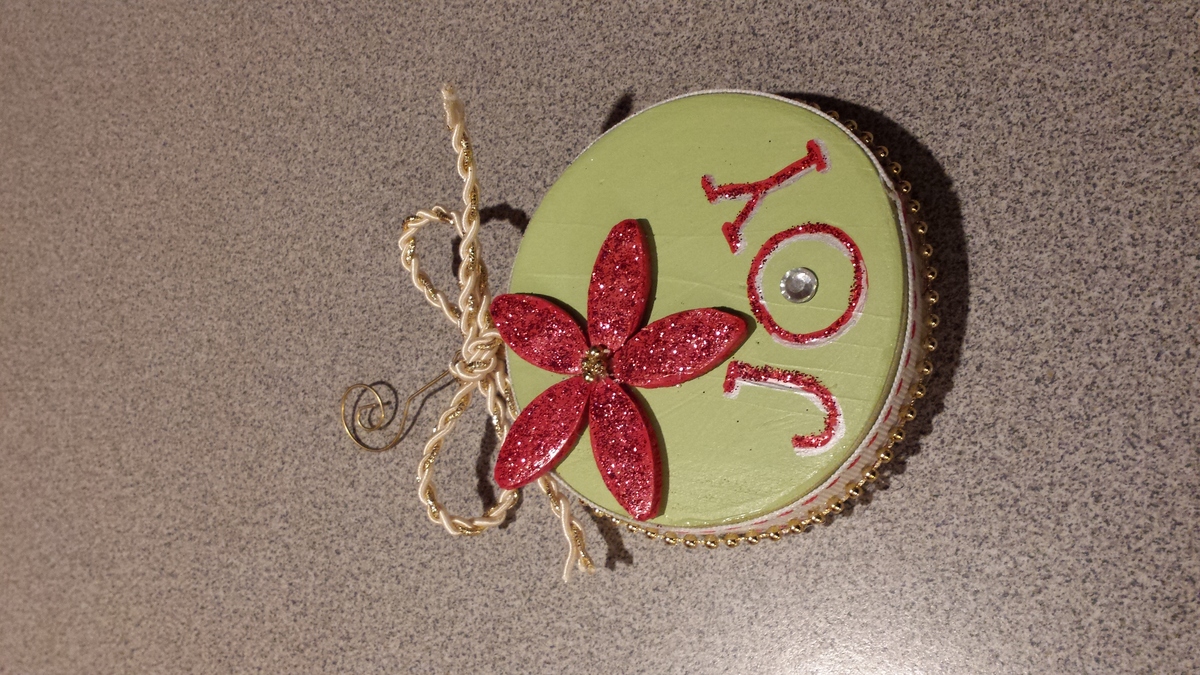
I will be getting together with my girl's group and exchanging ornaments, which are supposed to be handmade. I was determined to use only what I had on-hand. I didn't use a plan and this is what I came up with. I did have to go buy the bling, sparkles and a hook but I had everything else. I'm pretty happy with it. By the way those pedals are made from wood biscuits! Not sure why this is uploading sideways as its not sideways in my file.

Estimated Cost
Minimal.
Estimated Time Investment
An Hour or Two (0-2 Hours)
Finish Used
Valspar sample paint jar for background, sorry don't know color. Sharpie paint pens in red and silver for lettering.
Recommended Skill Level
Beginner

Industrial Closet Organizer

Submitted by jvos on Sun, 03/12/2017 - 13:16

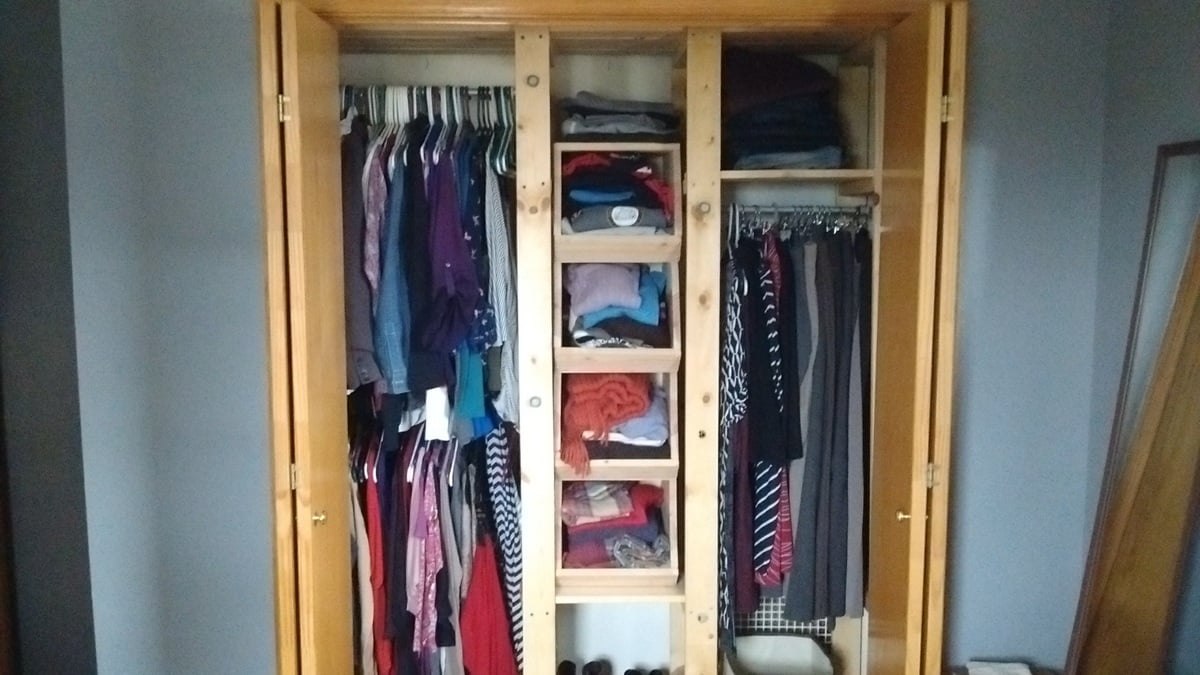
I originally built this for a small closet in an old home.  When I moved, I took it with me and was able to rearrange it to fit in a traditional closet.  The center section is a modification of a toy storage plan that I use to store folded clothes.

Estimated Cost
I used 1/2" galvanized pipe and that alone was $80. The lumber was probably $20-$30 more.
Estimated Time Investment
Afternoon Project (3-6 Hours)
Finish Used
unfinished
Recommended Skill Level
Beginner

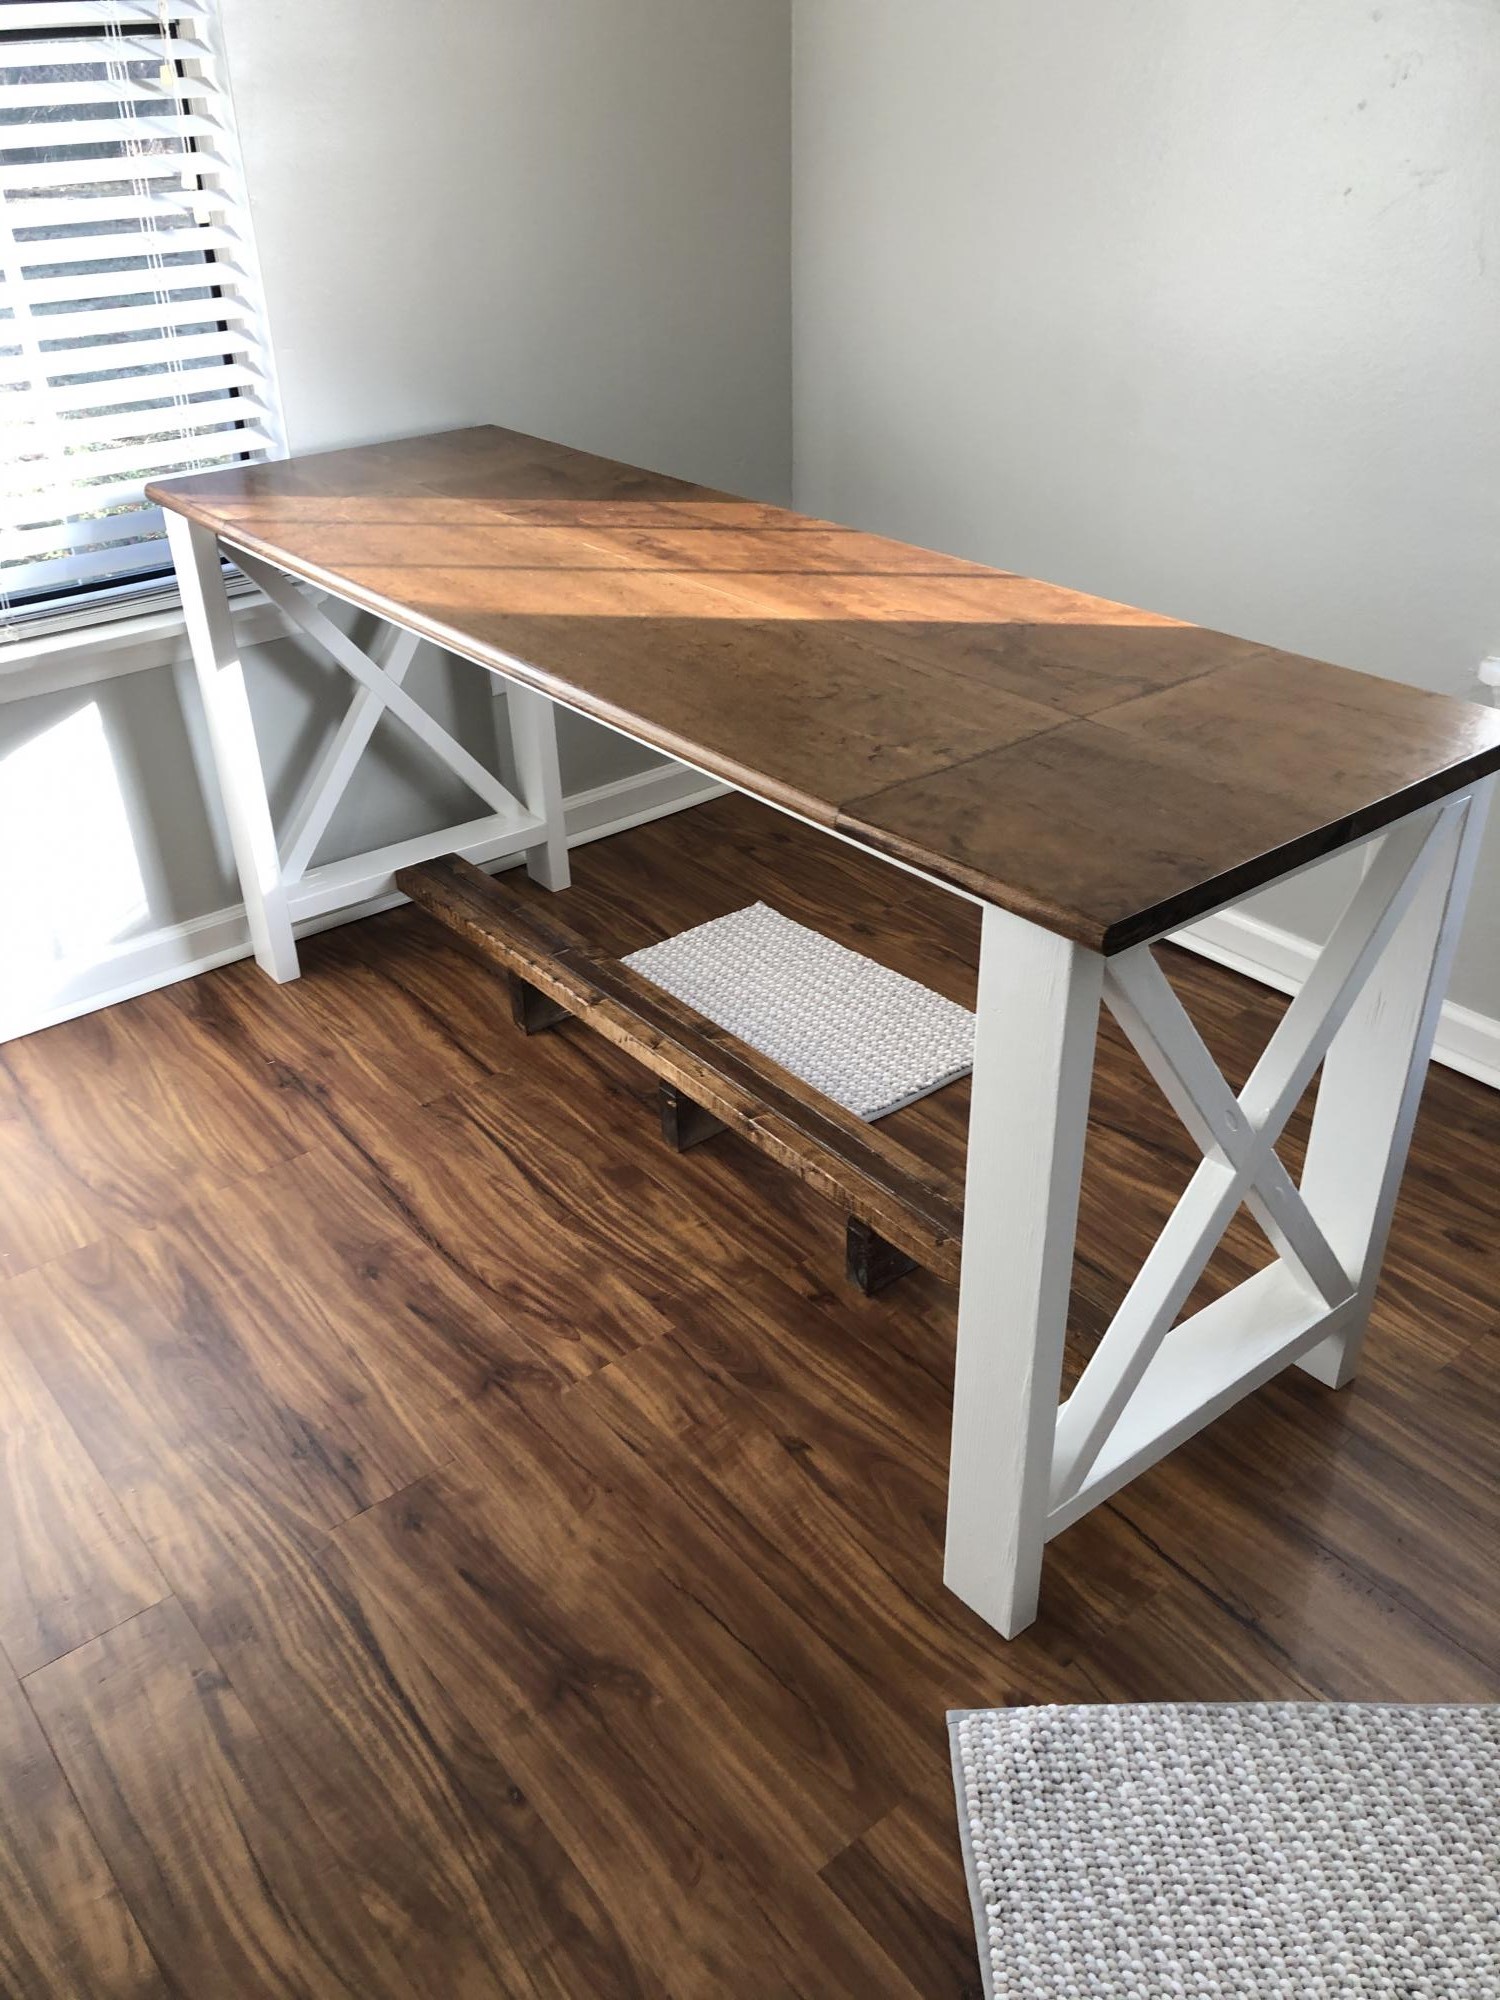
My very first wood project- 6 foot farmhouse desk with modifications

Submitted by Thersha on Sun, 01/03/2021 - 15:48

I needed a 6 foot desk, but could not find one online that I liked that was within my budget.. I decided to make this desk and modified it to a 6 foot with a foot rest in the middle so I can have both sides functional and have a spot to put my feet up... I also added 8 shaped fasteners to attach the top to the base.. I was so inexperienced when I started this project that I had to watch videos on how to use a drill and the pocket hole jig...So if I can do this, anyone can, Thanks Ana for inspiring me!! I am on fire to do so many more... !! I need so much more tools now!!!

Estimated Time Investment
Week Long Project (20 Hours or More)
Finish Used
Used American stain by MinWax
Recommended Skill Level
Starter Project

Comments

Factory Cart Coffee Table

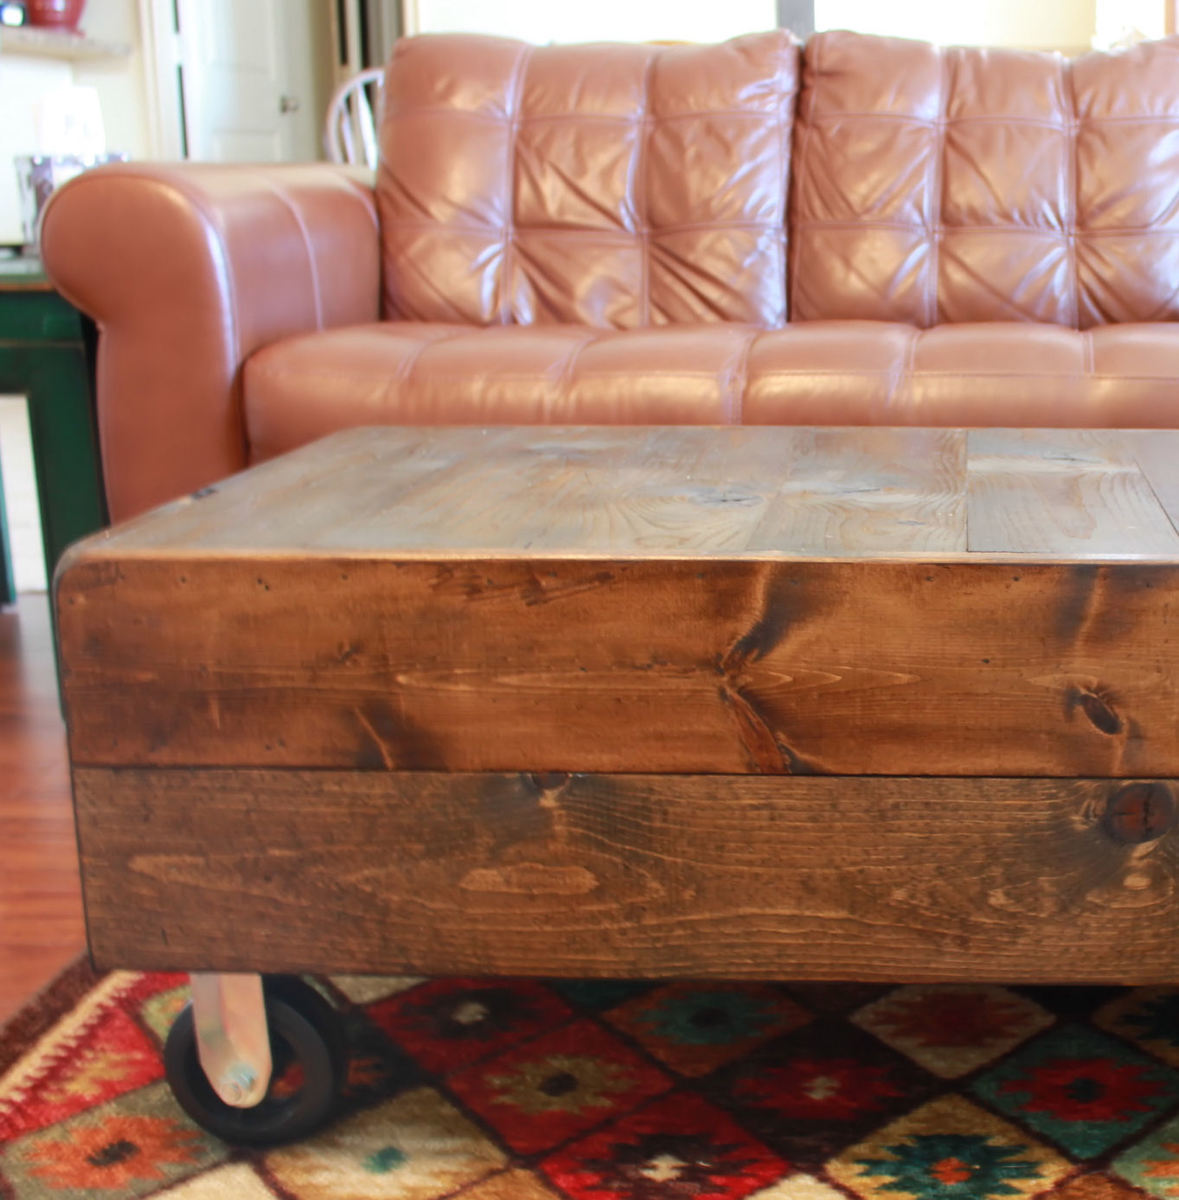
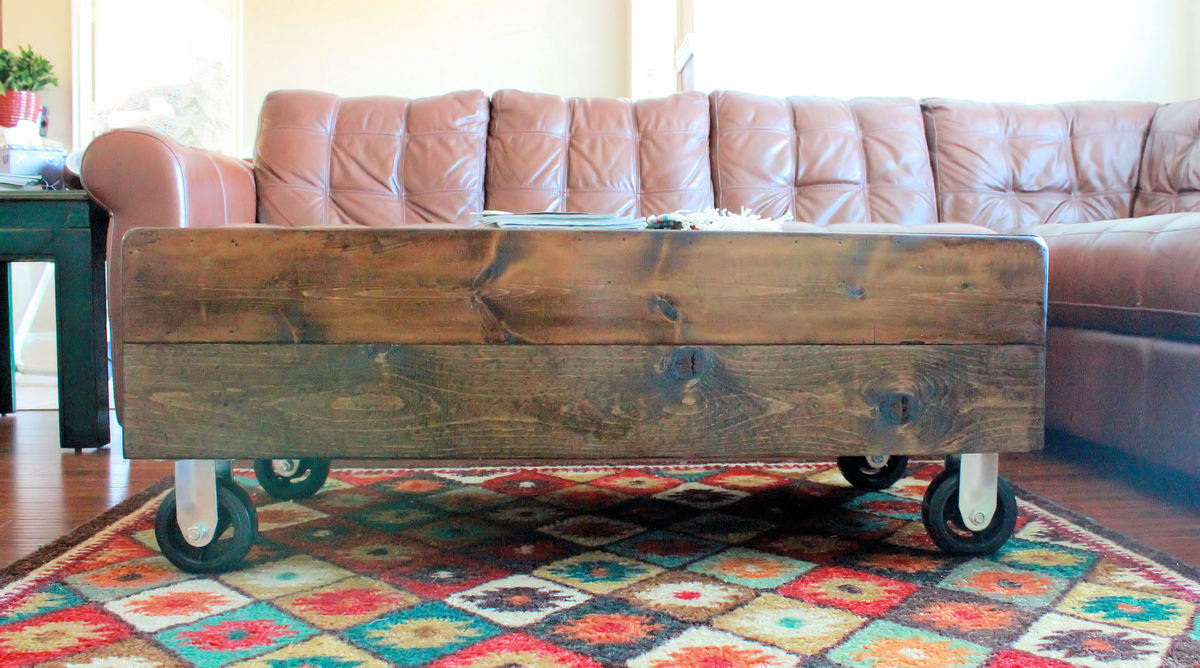
My husband and I needed a new coffee table. While browsing this website we found one we liked. We changed it up a little to make it taller. Hubby also added more wood inside of the table to make it heavier.

Built from Plan(s)
Estimated Cost
$75 (the wheels were the most expensive)
Estimated Time Investment
Afternoon Project (3-6 Hours)
Finish Used
Minwax's "dark walnut" stain with a polyurethane coating to seal it.
Recommended Skill Level
Starter Project