So, this project started out years ago with my oldest daughter. She was in daycare and frequently came home with her latest drawing or art. I wanted to make something from her art that would be a gift for mom and the grandmothers. Mother’s Day was coming up soon and we needed inspiration. Her mother said that she would like a ring post to keep jewellery on her dresser top so we came up with this.
First we outlined the daughter’s hand and about 3 inches of wrist on a piece of white paper. (We had a similar example from Thanksgiving, the daughter brought home her hand outline on a paper plate decorated as a turkey). Took our outline to the printer and photocopied it. One of the nice things about a photocopy is you can place it face down on a piece of wood, then use a hot iron (cotton setting) and iron the image onto the wood.
Once the image was transferred, we cut it out on the bandsaw, then sanded all the rough edges. As my daughter was very young, I did the bandsaw work and she did the sanding. Once the hand was ready, we needed a base which we found in the scrap bin. We cut out about a 3 1/2” circle and using the wrist end of the hand, we marked and cut a notch for the hand to be glued to the base. We cut it off-center to allow room for a message to mom. We found a local guy who could engrave a message make us a brass tag for our base. The tag was large enough to engrave the child’s name below the Mother’s day message helped to identify the sweet little hand that made the gift.
Again, more sanding and fitting the notch to match the sweet little wrist followed by staining and finishing.
We left the hand natural and used wipe-on polyurethane (2-3 coats), then glued everything together with a piece of felt for the bottom. It was pretty tough keeping the project a secret until Mother’s Day, but somehow we managed. The grandmothers and mom loved their new ring post which has a place of honor on their dressers.
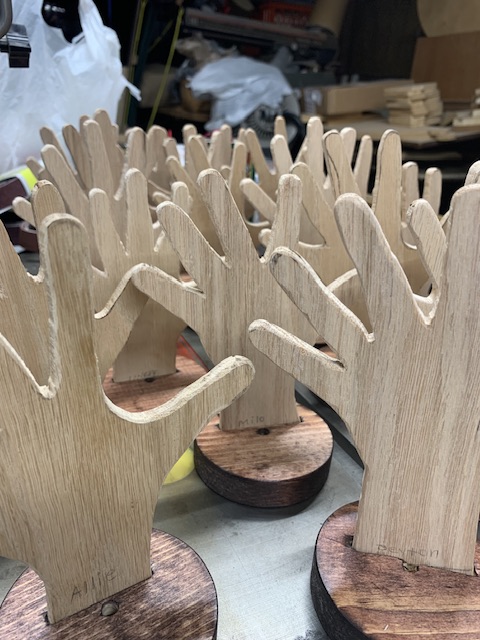
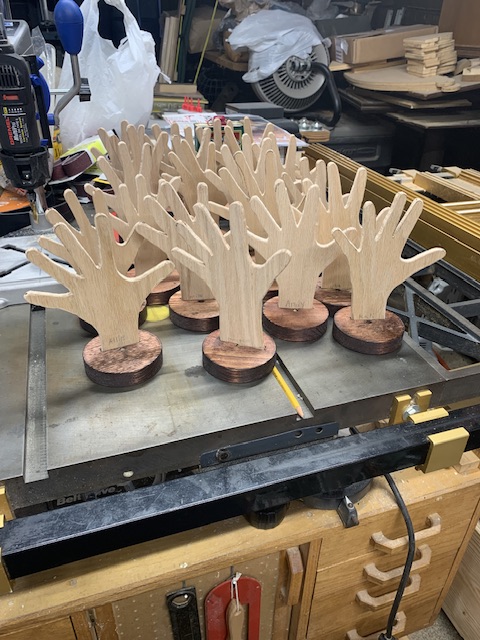
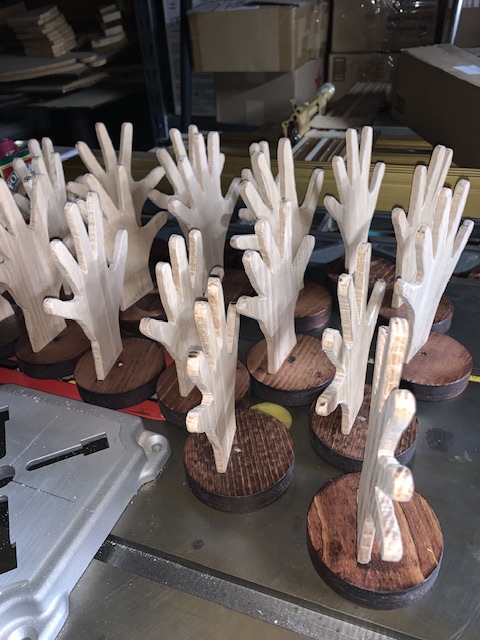
Fast forward 30 years. My son is a kindergarten teacher with a class of 20 or so looking for a great project for Mother’s day and this is what we did. It took a bit of work to get everything ready so the kids just had sanding to do. Attached are some pictures of the ring posts dry fitted and ready for the kids to finish.
Can’t keep secrets from home in daycare, but you can have great surprises. All the moms love their new ring post and all the kids are proud of their work. Since the completion of this project, we think we have a great idea to adapt it for a dad gift as well.