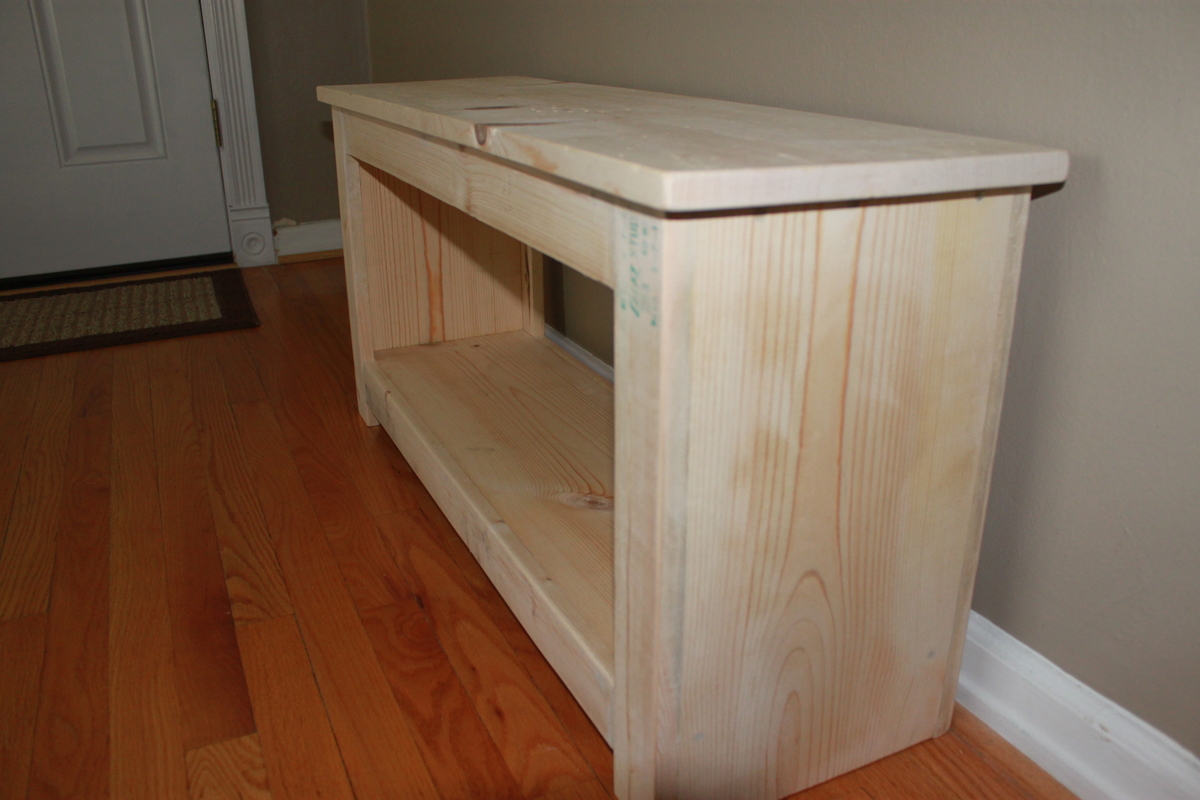
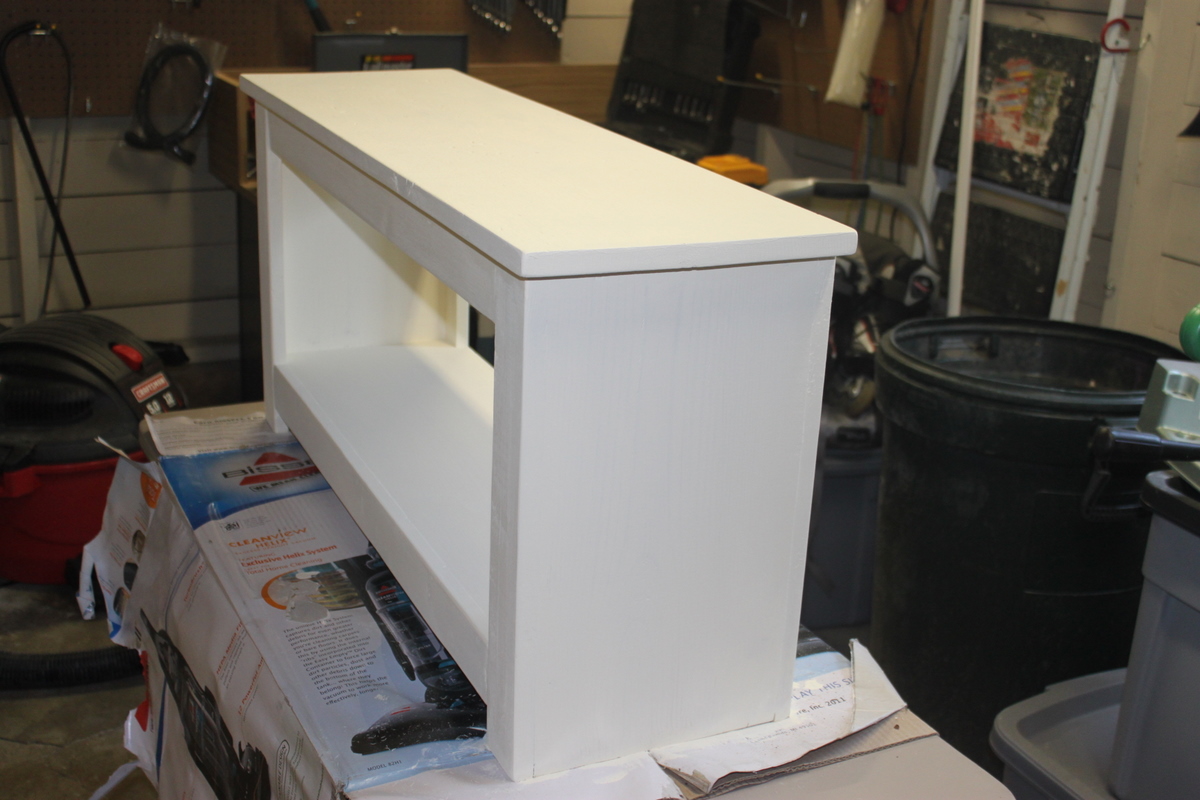
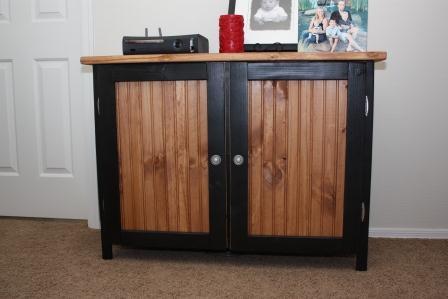
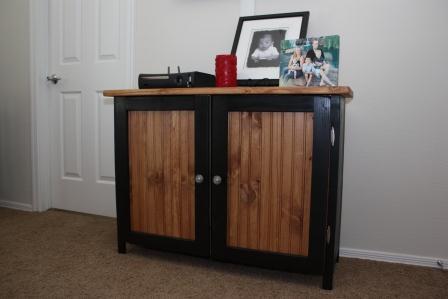
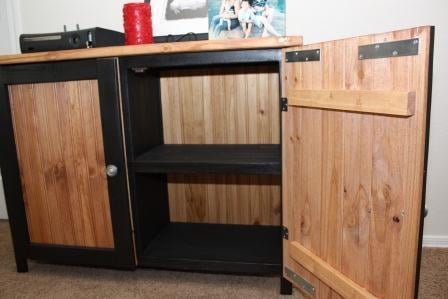
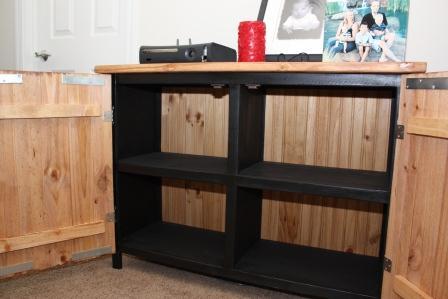
Tilt-Out Trash Can (Slightly Modified)
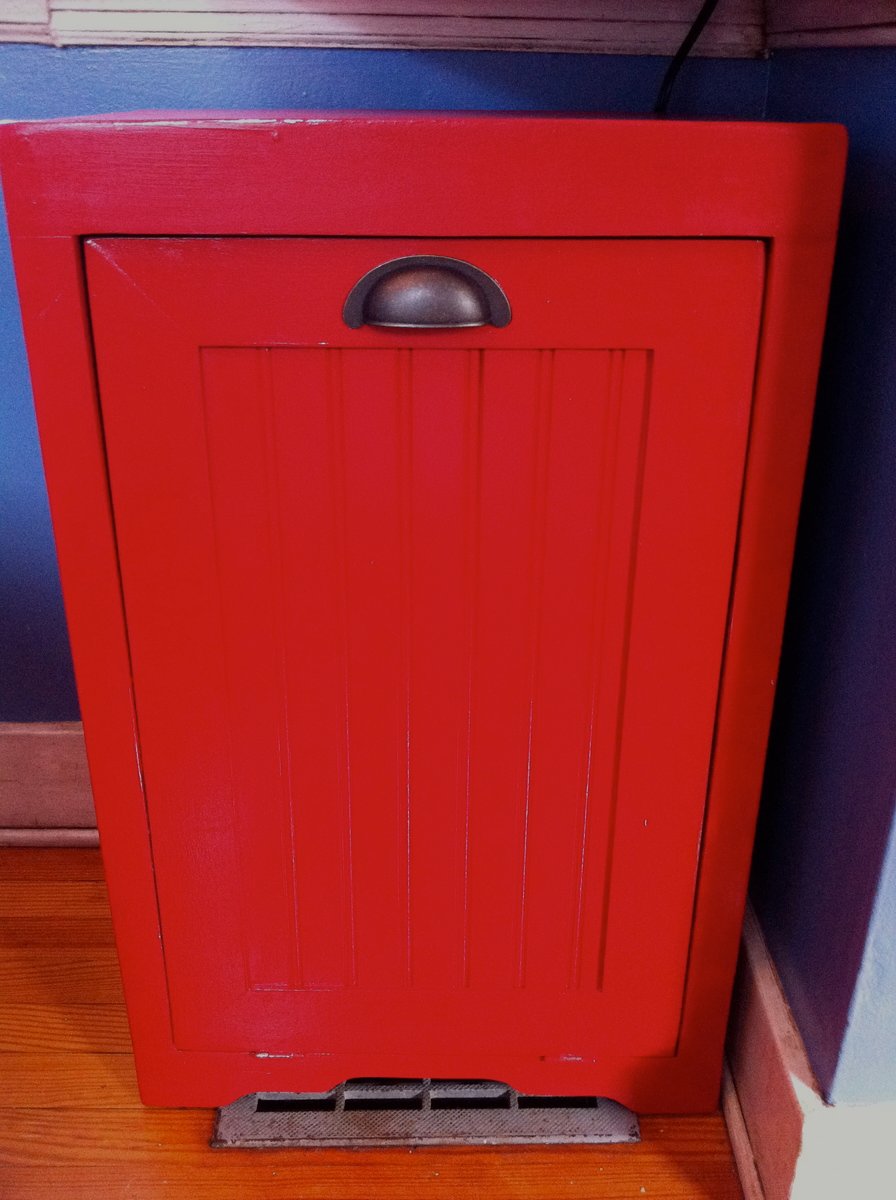
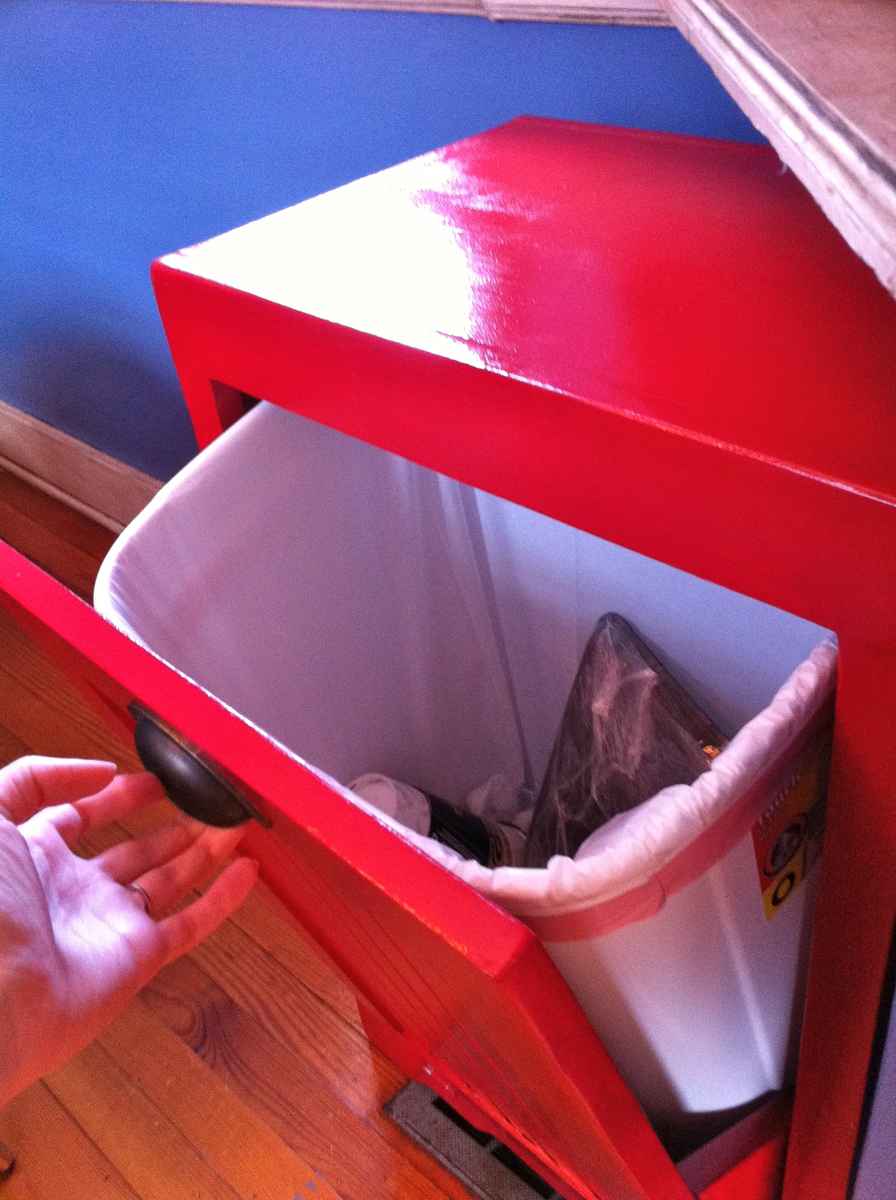
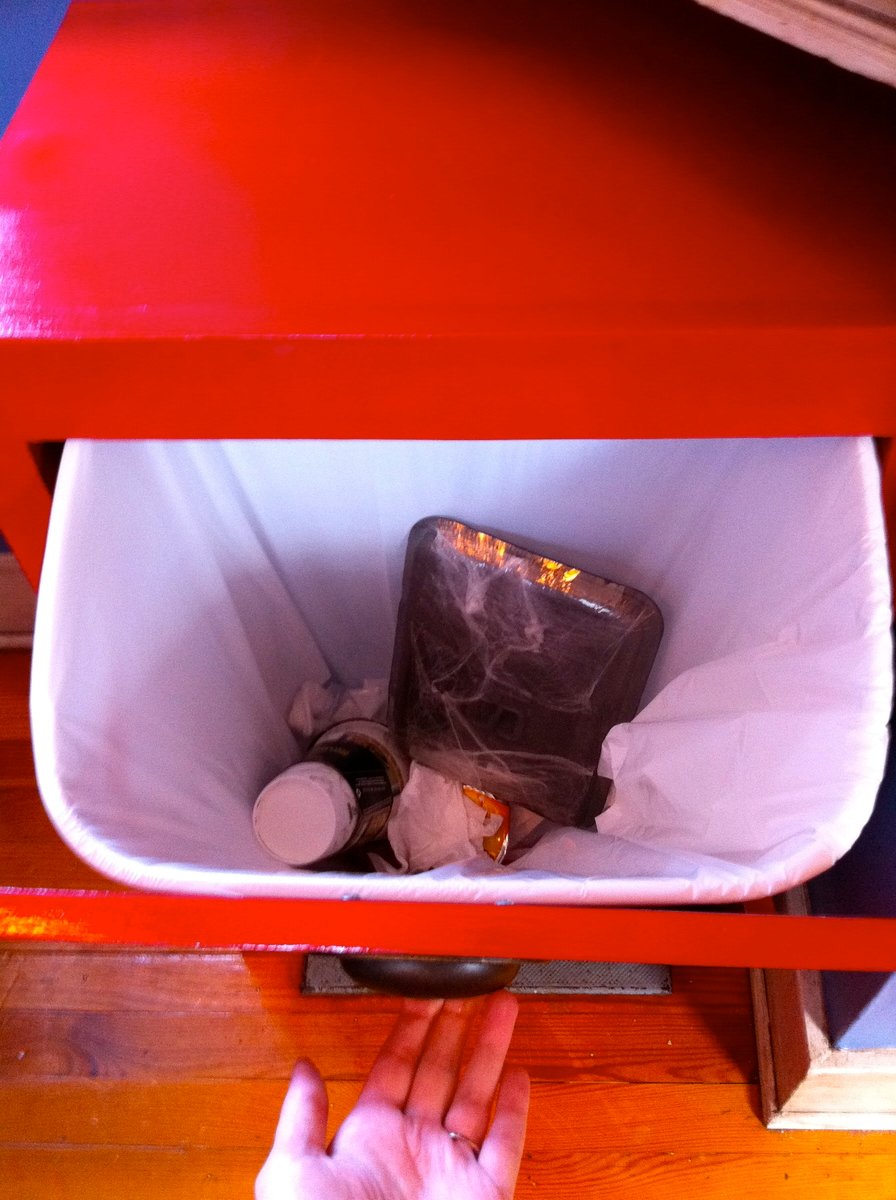
We built this tilt-out cabinet for our trash and plan to build a matching one for our recycling. We modified it a little and used bead board on the face of the cabinet to match some other elements in our kitchen. We painted it bright red using some leftover paint and absolutely love it!
We ended up not using any mechanism to prevent the drawer from falling to the ground - the trash can we purchased is JUST big enough that it stops the drawer from opening all the way, which is great!
There are more pictures below and on our blog, http://strawbridgestuff.com

Built from Plan(s)
Estimated Cost
$25
Estimated Time Investment
Afternoon Project (3-6 Hours)
Finish Used
We painted the cabinet using Valspar's "Fabulous Red" in semi-gloss.
Recommended Skill Level
Beginner


Comments
project maker
Sun, 02/26/2012 - 05:06
plans
How do I get plans for this? I really like it!!
In reply to plans by project maker
strawbridge stuff
Thu, 03/01/2012 - 09:40
We used Ana's plan for a
We used Ana's plan for a tilt-out trash can, http://ana-white.com/2011/04/wood-tilt-out-trash-or-recycling-cabinet, and just used some beadboard paneling instead of doing the raised panel on the door. Hope that helps!
rosie4bw
Tue, 05/15/2012 - 14:00
trash bin
Hi, I really like the way you did the brash bin with the beadboard door. Could you
tell me what size the door frame is. I just started doing different projects and are still new at it. THanks Linda.
Jodieth
Fri, 09/07/2012 - 12:35
Trash bin
Your trash bin looks great. I too love the beadboard. I am putting a lot of beadboard in a small house I am planning on renting until my kids are out of college, then I want to make it into a place I can teach sewing and make furniture covers.
scothershman
Thu, 10/29/2015 - 08:51
Sketchup file?
Is there a sketchup file for this plan? I would like to modify it alittle but it would take me awhile to reproduce due to my bad sketchup skills.
Thanks!
Wooden Heart
Sun, 03/27/2016 - 01:31
Trash Can
I love this! I live in a one bedroom apartment and I just have a space between the fridge and a cabinet for pots and pans where the bin sits. I've always found this ugly to be honest but haven't known how to change it but this is perfect, thank you!