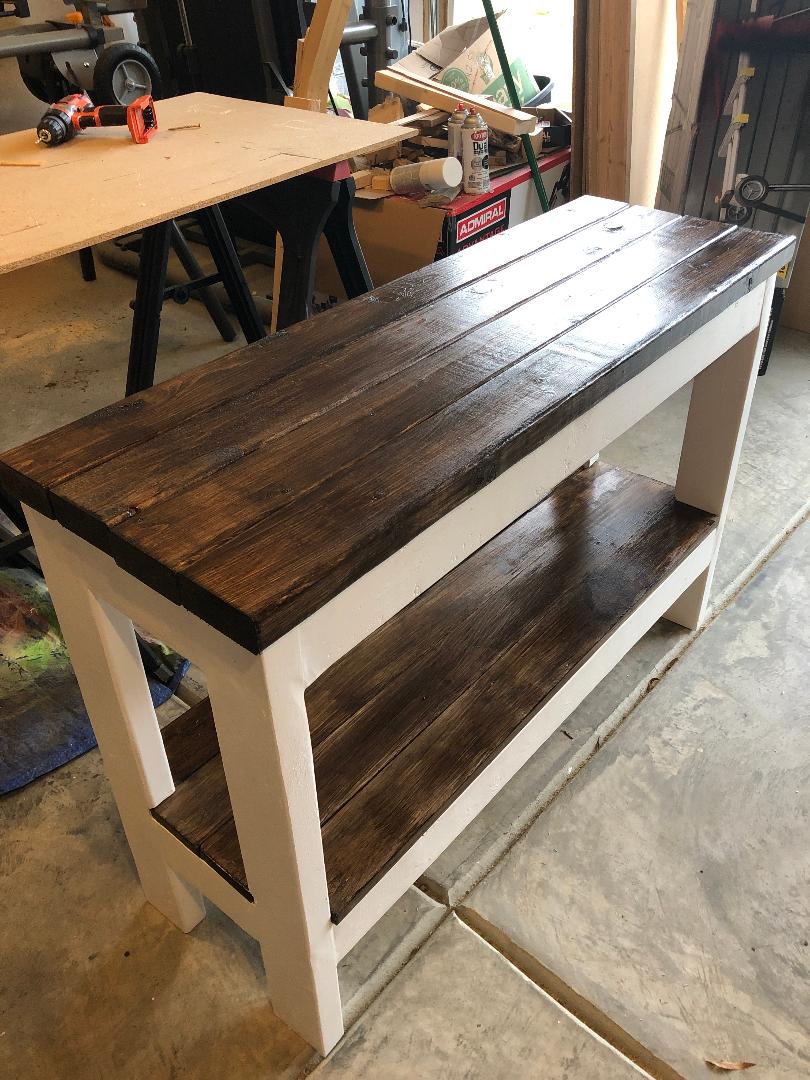
Work Bench

This was my first project.

Built from Plan(s)
Estimated Time Investment
Afternoon Project (3-6 Hours)
Recommended Skill Level
Starter Project
This was my first project.

This isn't really woodwork but was something made to get my step daughter interested in the art of making things from wood (and other materials)
Made from scraps of wood after an idea we saw on Pinterest. She helped paint them and make the eyes and scarves for them.
It's the smallest project ever done but hopefully will embed the "bug" into her that making things with your hands is fun.
She has another 5 to decorate ready for Christmas.
Maybe she will be the next Ana, you never know!! :-)
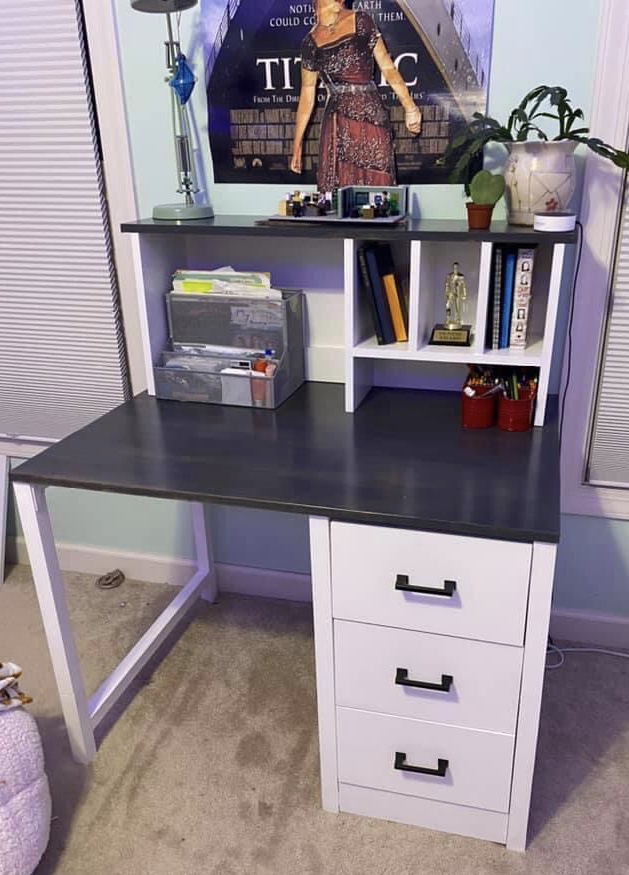
Modified from the hutch and desk plans. Made for a friend’s daughter who needed a larger desk to accommodate all of her virtual learning needs.
https://www.ana-white.com/woodworking-projects/desk-hutch-file-cubby-ba…
https://www.ana-white.com/woodworking-projects/desk-drawers-and-file-cu…

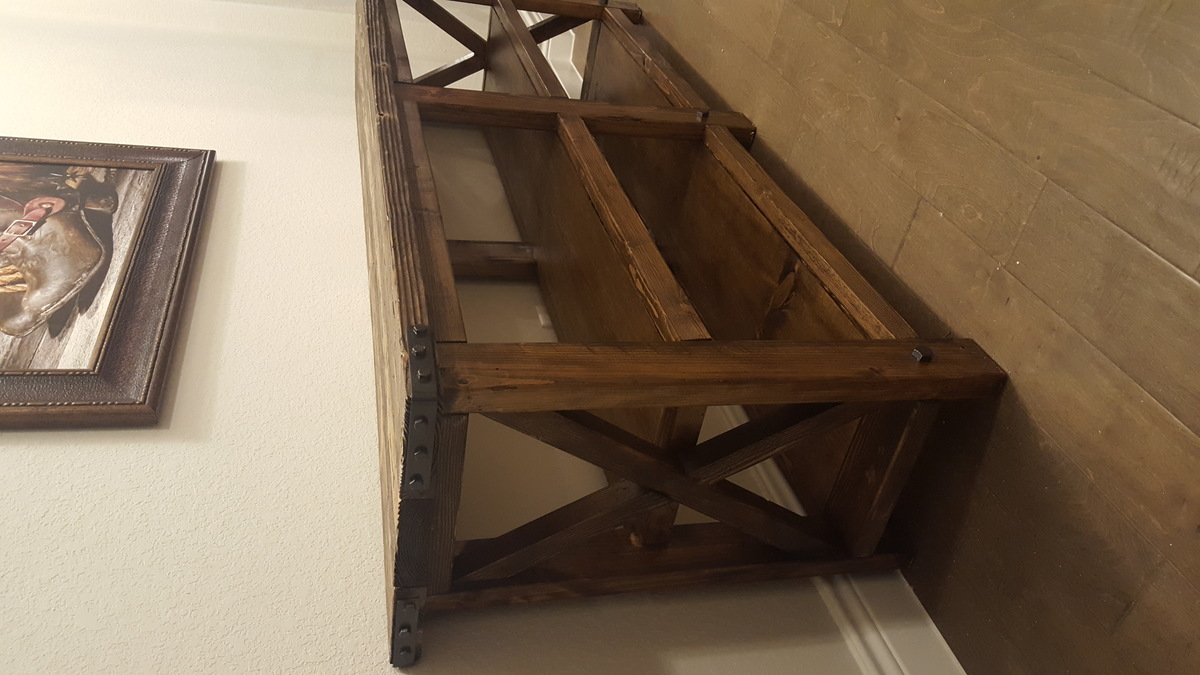
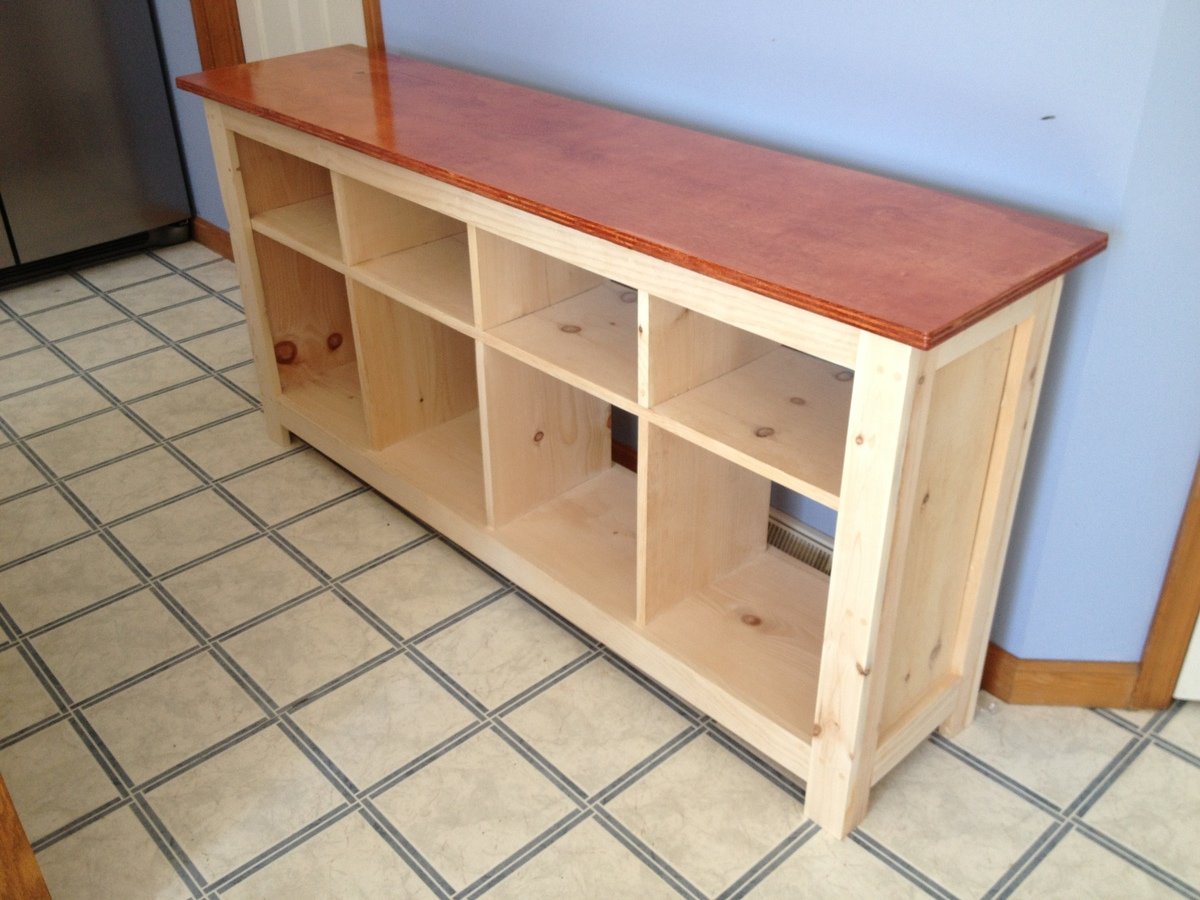
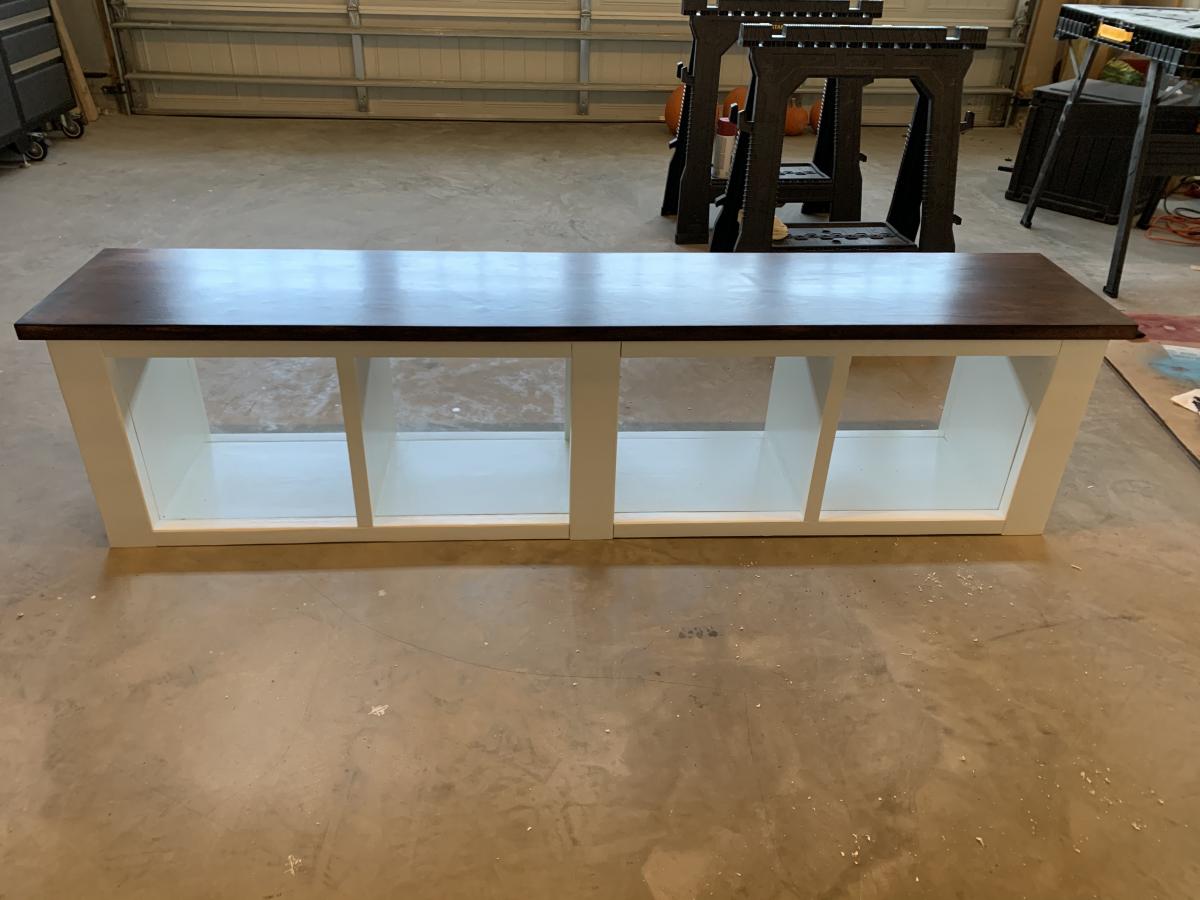
Planked wood sideboard without drawers, used as a media console table.
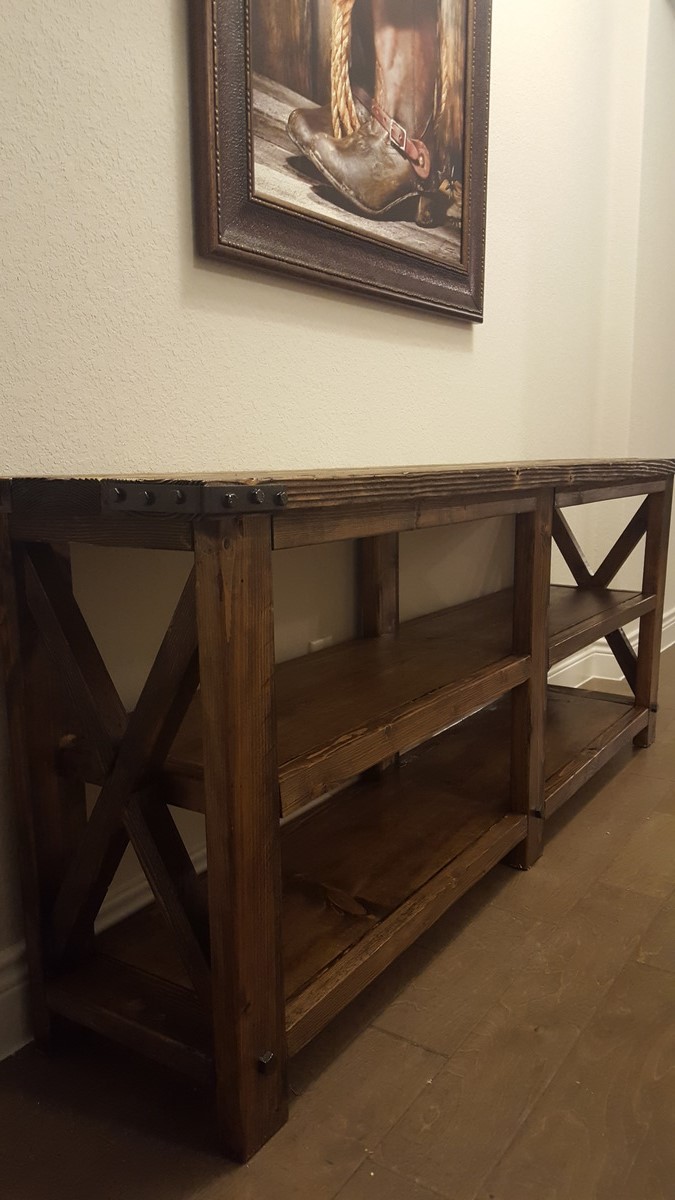
Love my entry way table, plans details really easy to follow! Thanks you so much for this helpful website.
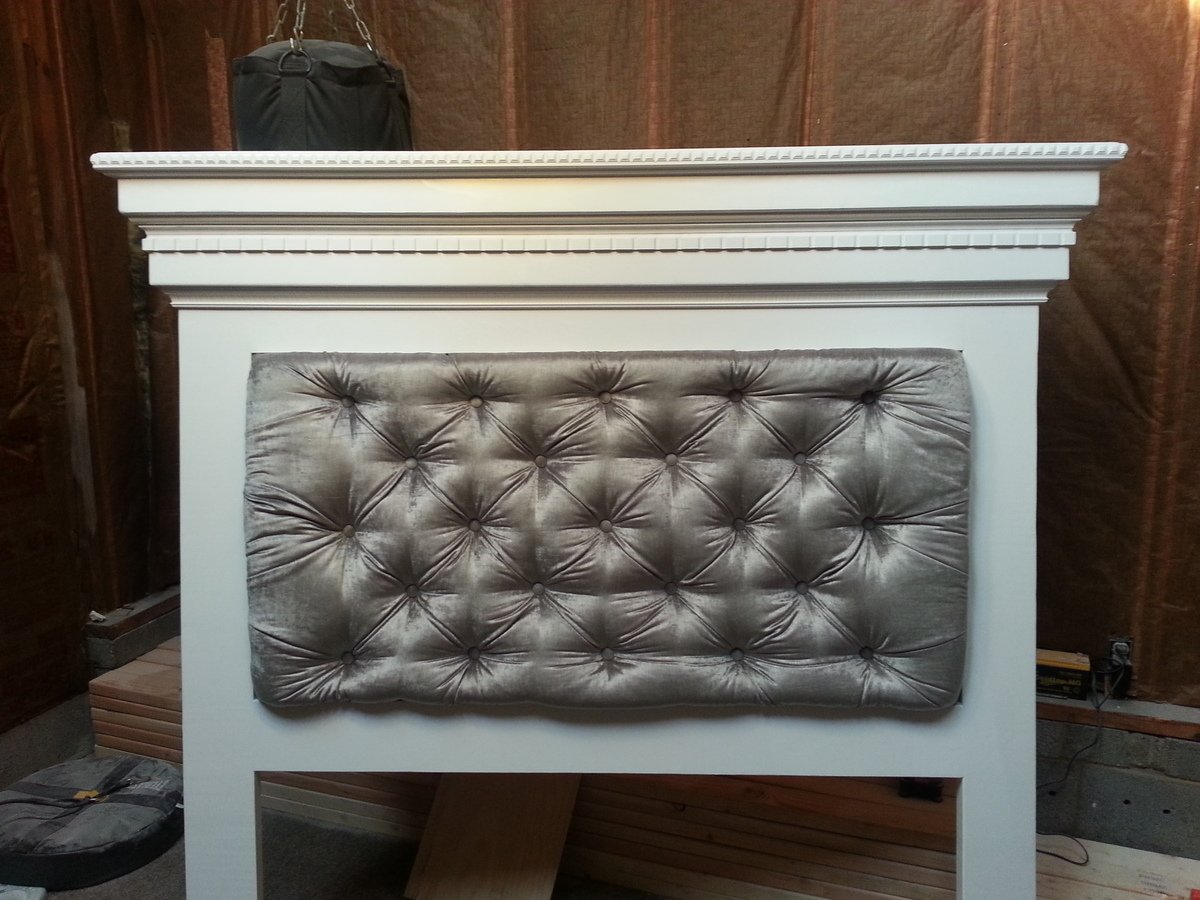
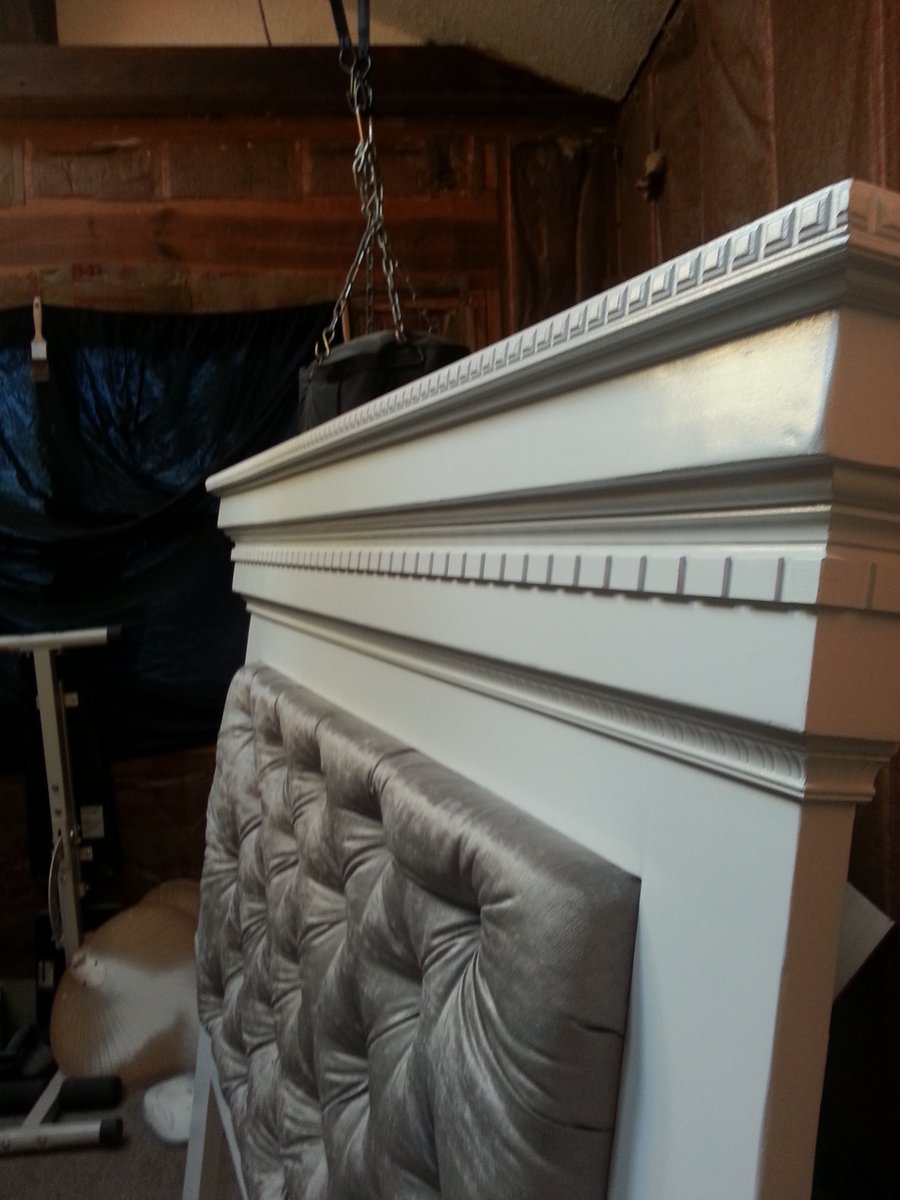
We followed the instructions for the most part. However, we did add 6 inches in height and the center of the headboard was larger. We completed a tufted upholstered insert that we added. It only took us about three days and we are very please with the results.
Only recommendation: After you sand, fill holes and other dents/dings in the wood use wood putty. Sand again. Prime. After priming, more "flaws" can appear. Take the time do fill again with wood putty and a light sanding. It is hard to do when all you want to do is paint...but the time will be worth it in the long run.
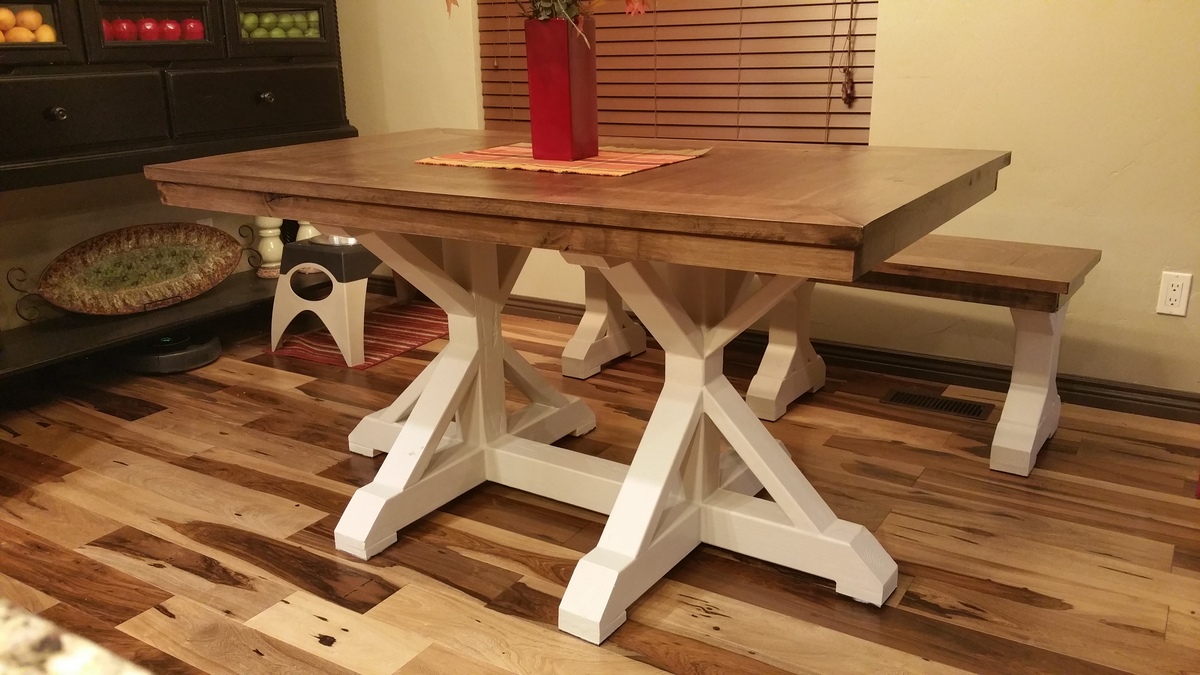
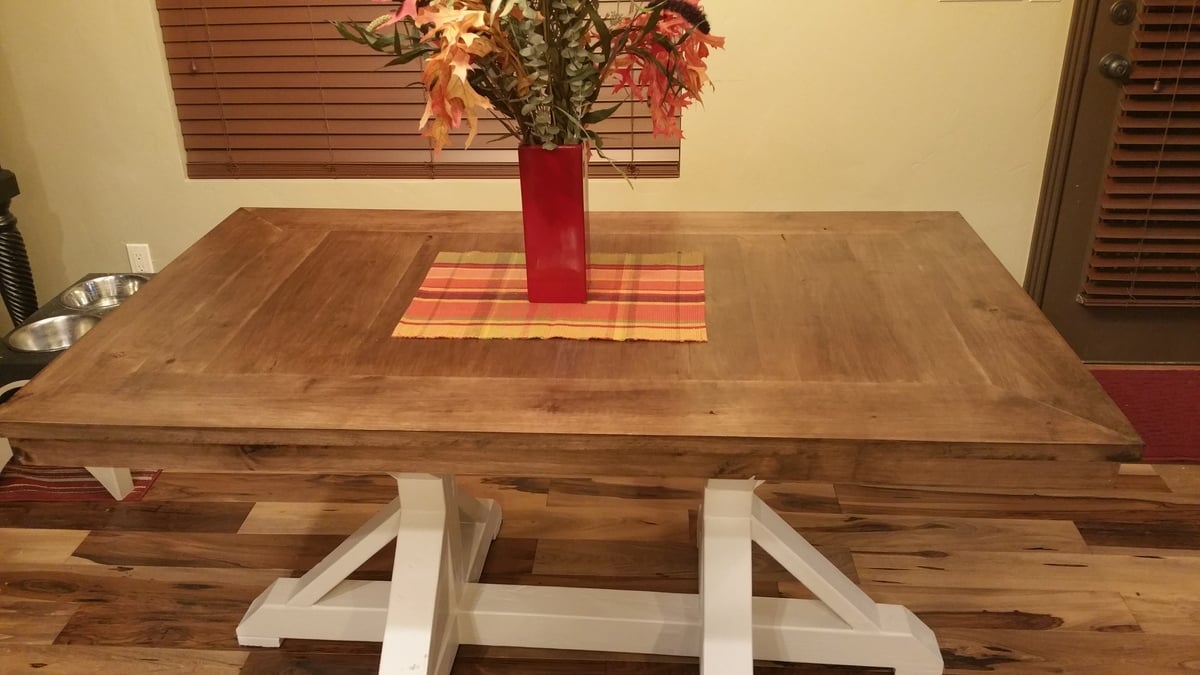
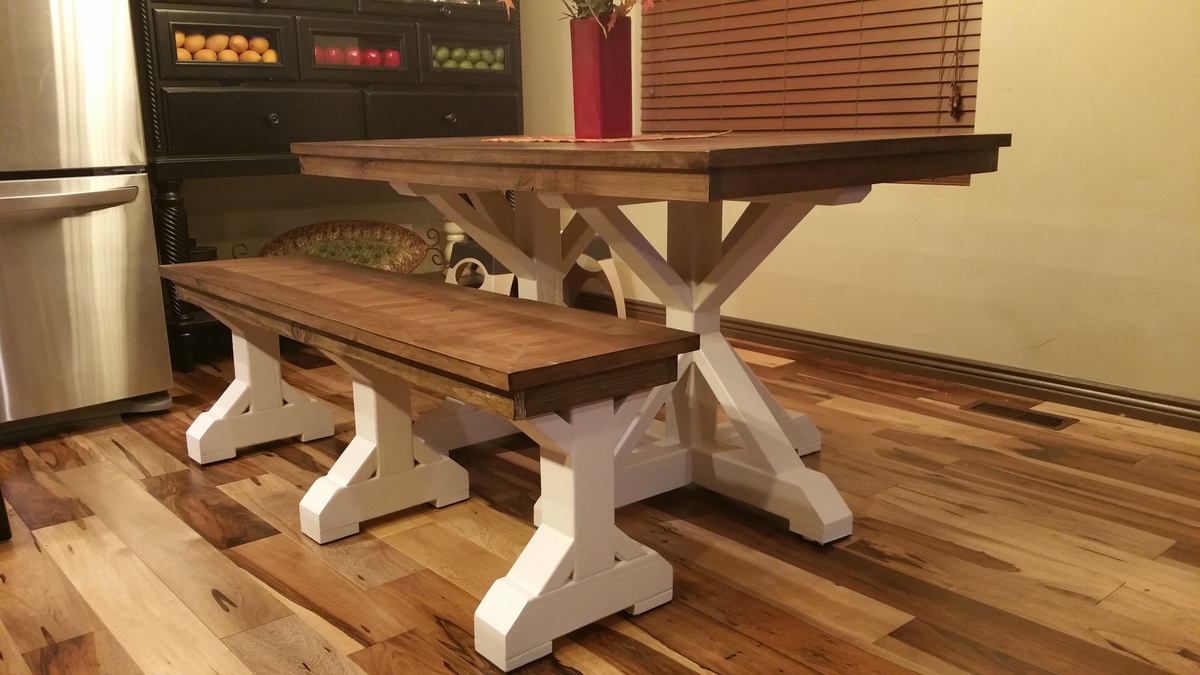
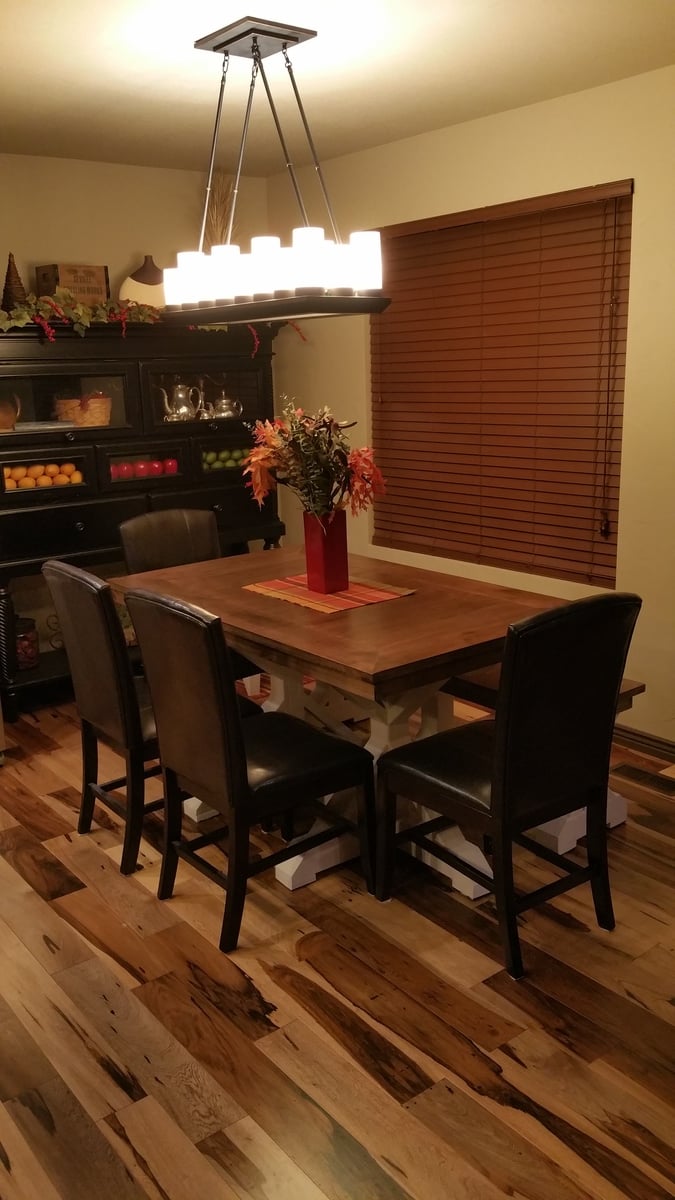
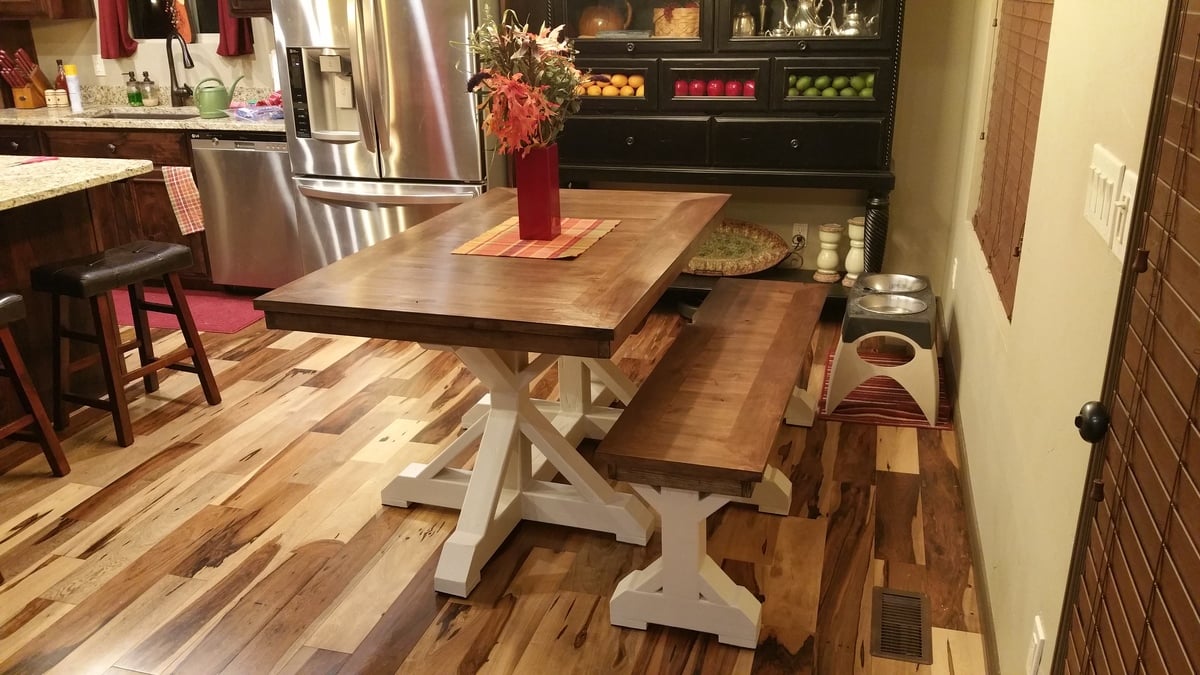
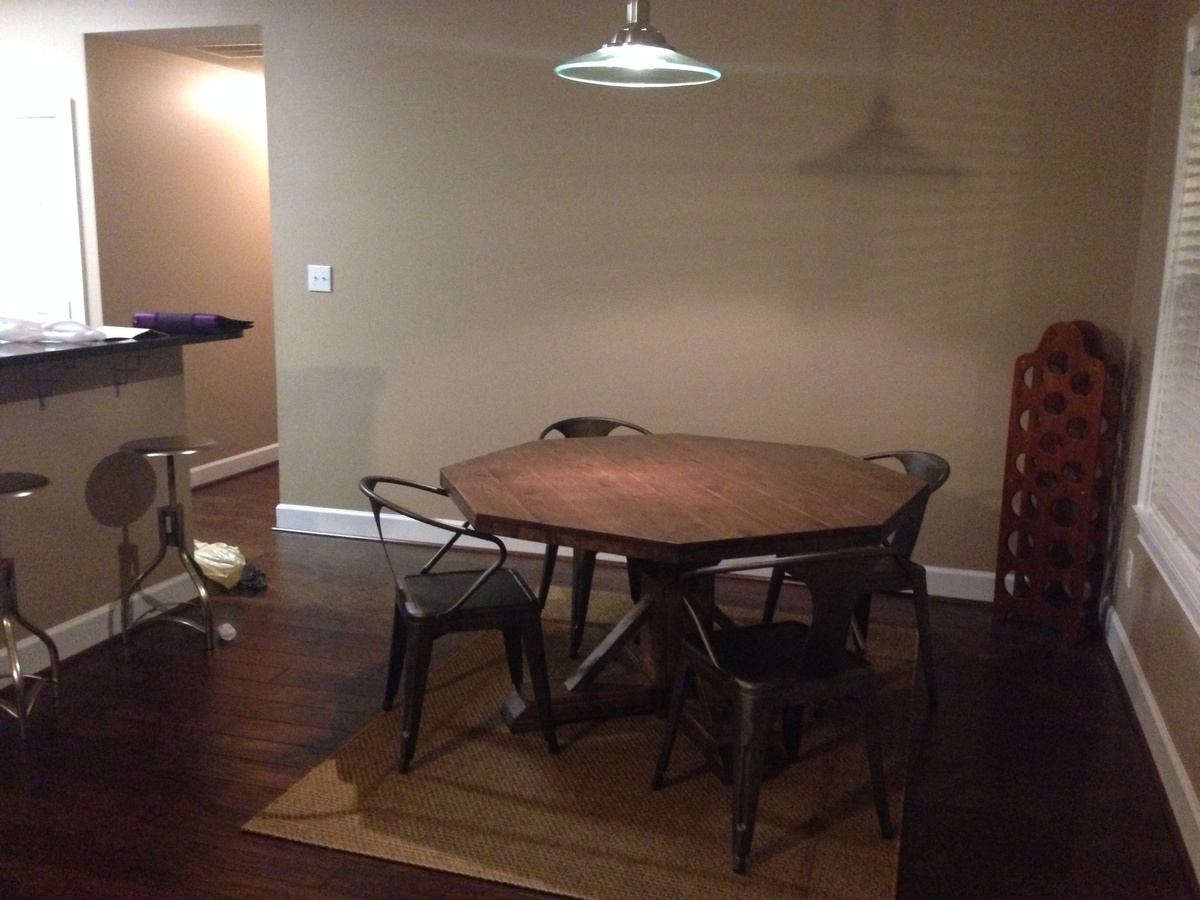
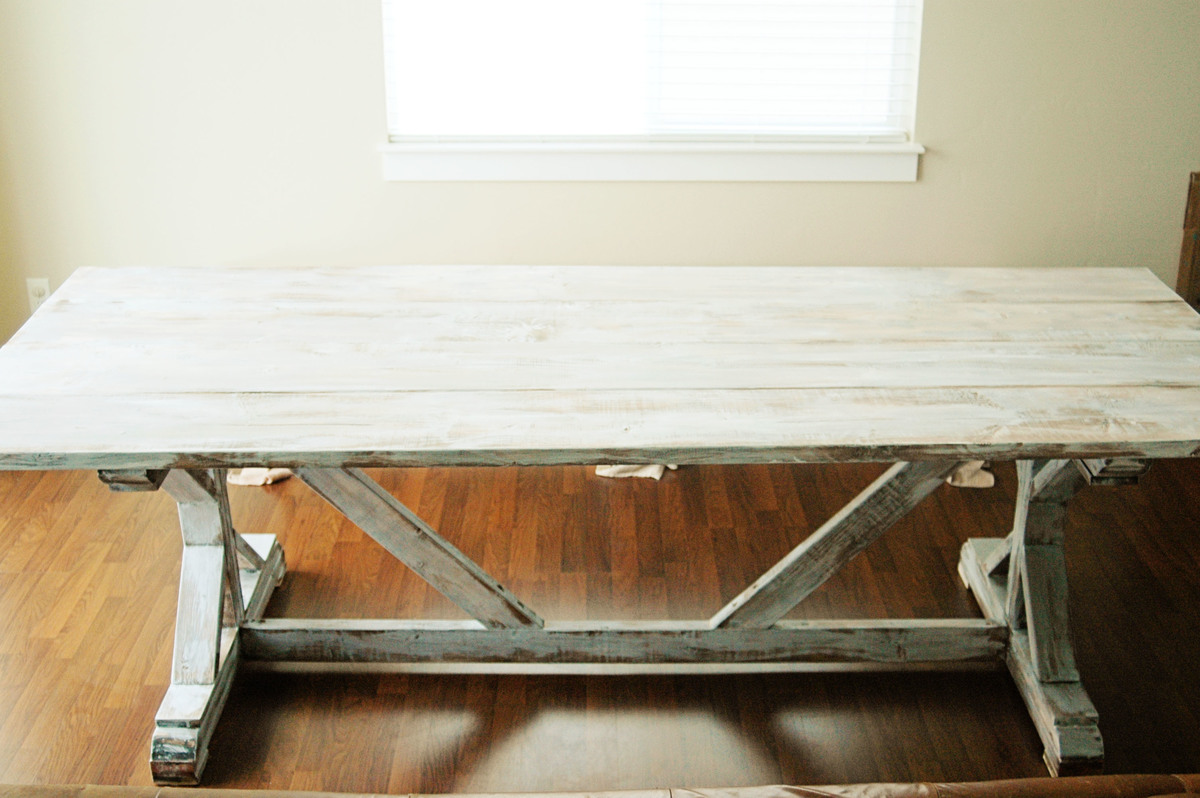
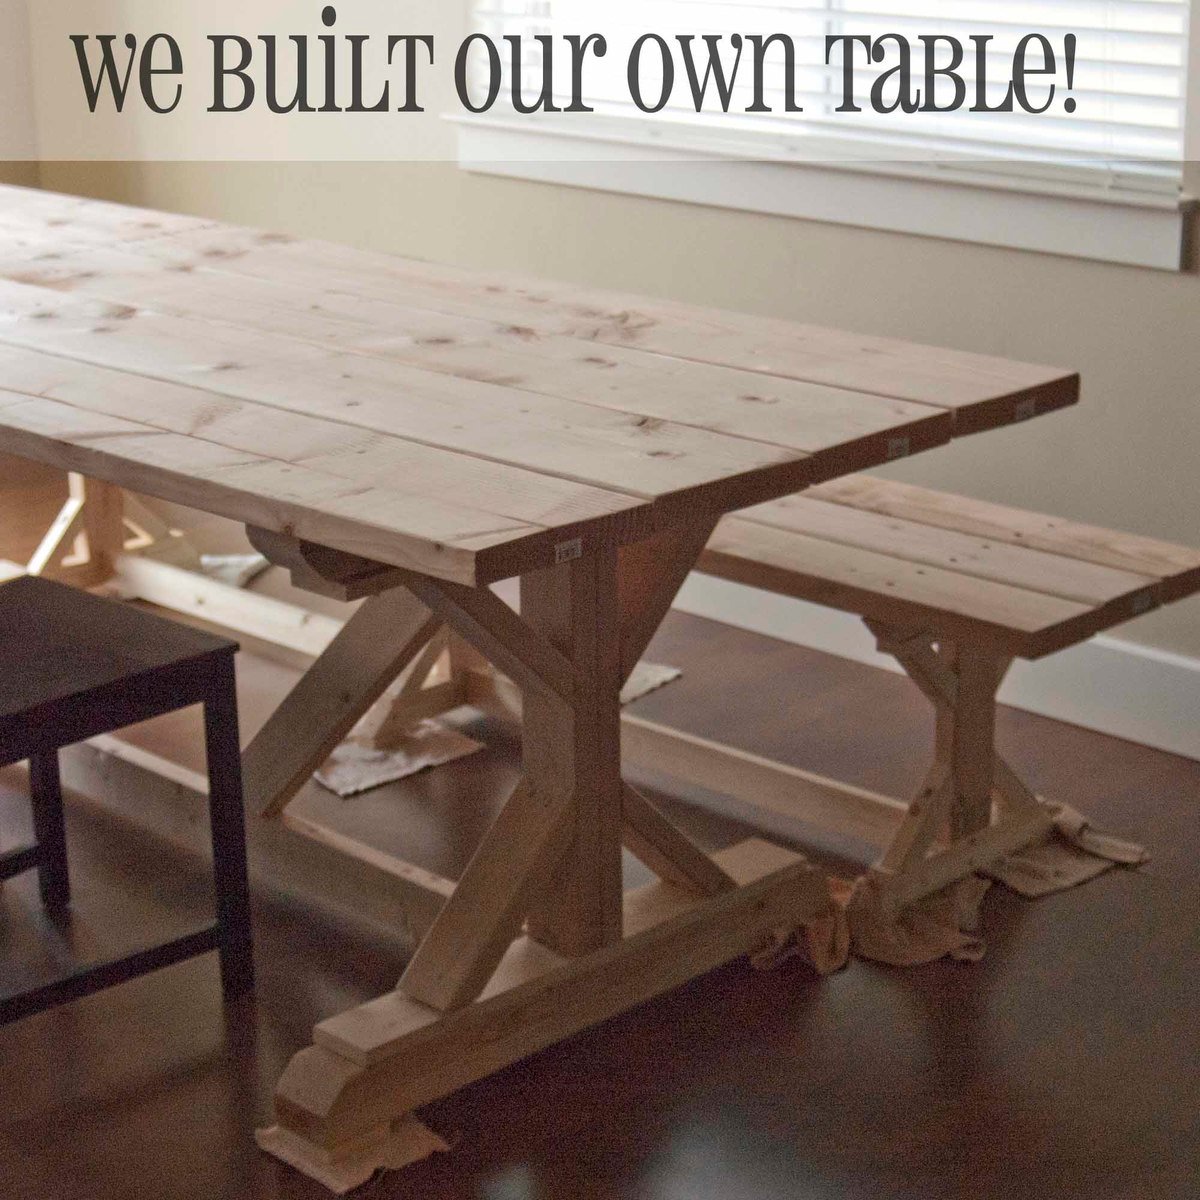
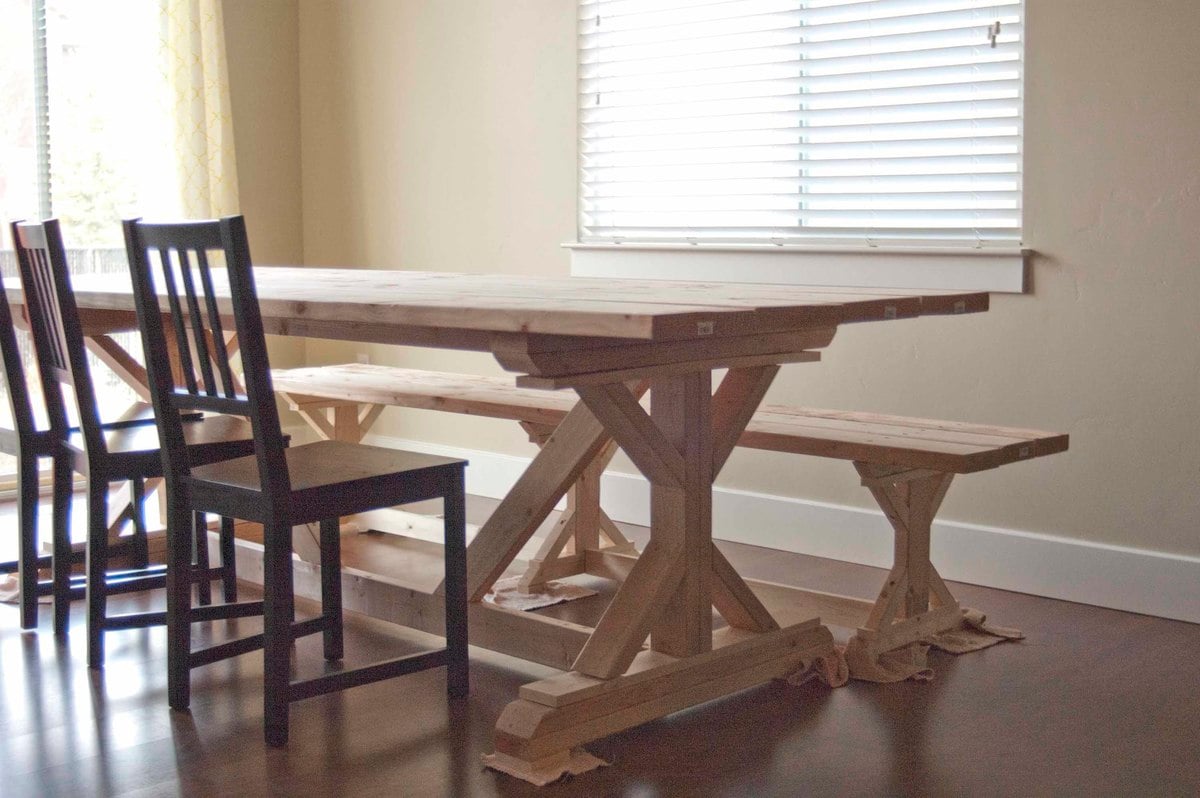
Restoration Hardware Inspired Dining Table. Got these plans from Shanty 2 Chic.

Tue, 11/18/2014 - 21:26
Wow! Now this look super sweet! I love the colors that you chose!
Tue, 11/18/2014 - 21:26
Wow! Now this look super sweet! I love the colors that you chose!
Began with supplied DIY plans from the www.ana-white.com and slightly modified them based on the length and width of the table. Table now resides in Haddon Twp, NJ as a community farm table for a small local business. The plans provide the foundation and cut list and depending on your experience, comfort level, and tools it is fairly simply to elaborate, expand, and modify.
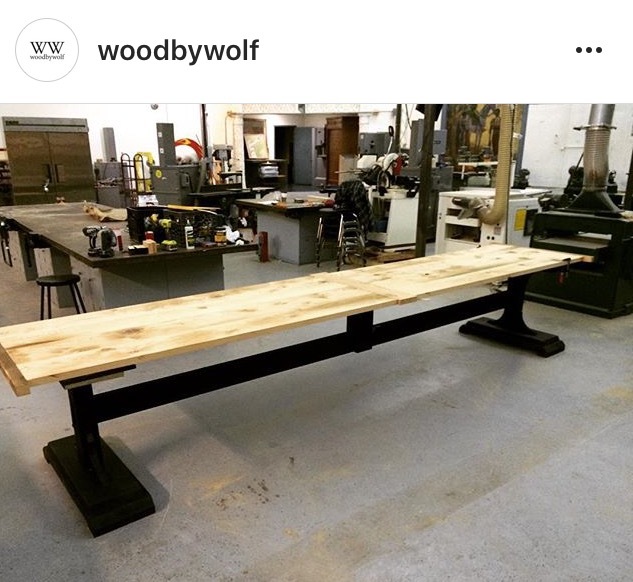
While browsing Pinterest I stumbled across this design and liked it. One of the links led me here, so I will contribute the photo to this site.
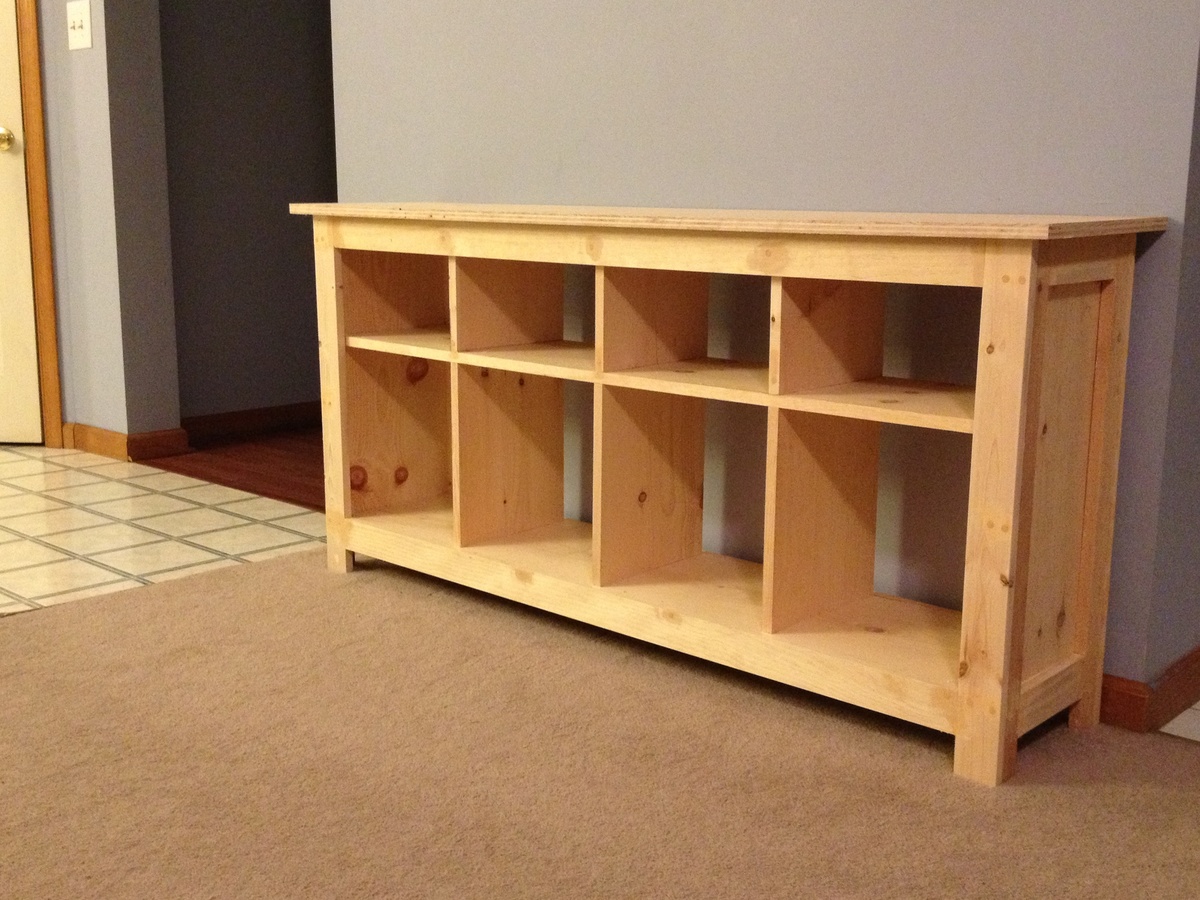
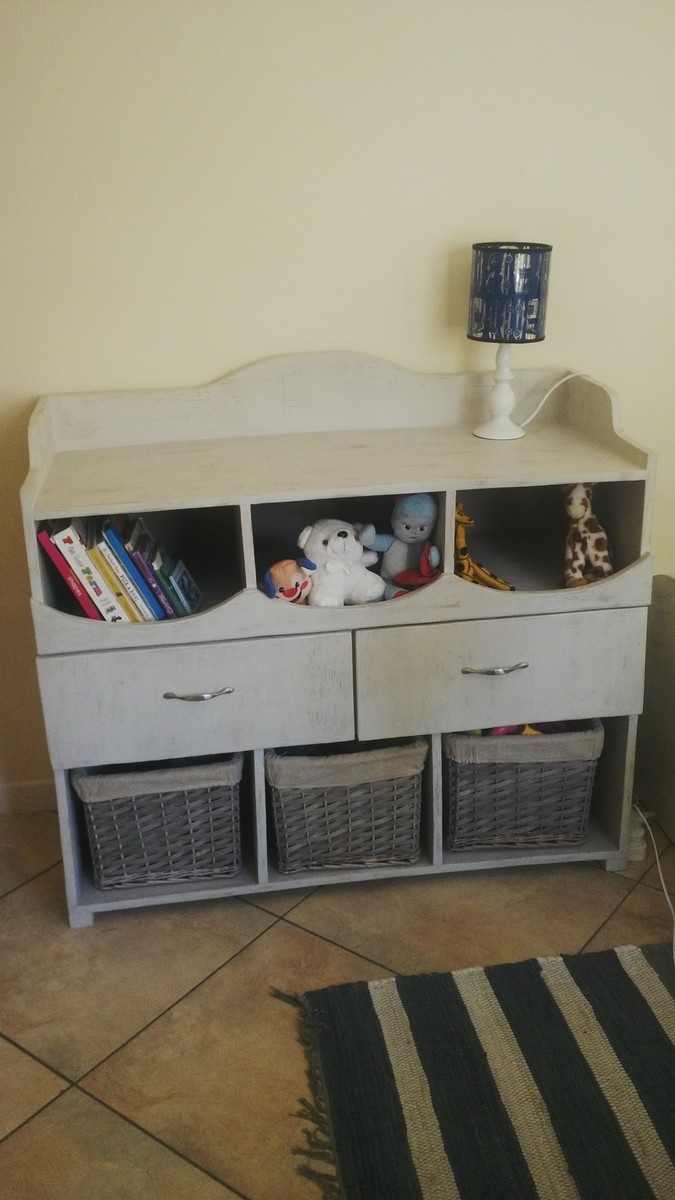
I used pine ands birch plywood instead of mdf to construct this. This was a pretty simple design, but I really like the way it turned out. I was looking for something that I can store some sad keys in to hide some kids toys that are in the living room from time to time and this will aid imaging it an easy cleanup at the end of the night.
This will take some time to build because see of multiple pieces, but is not a hard build. It is important to select better quality pine for the outside legs and edging so that it fits together easier (and looks nicer too)

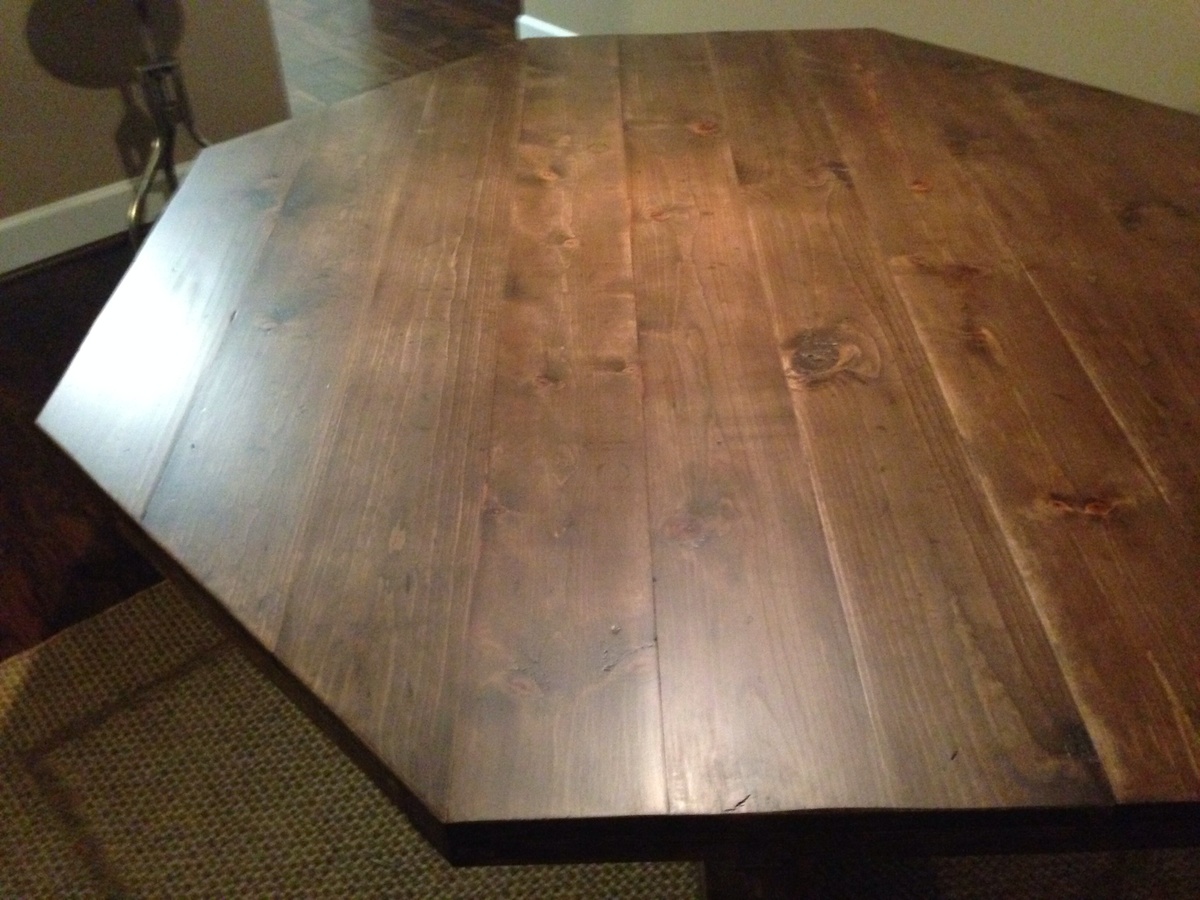
Octagon table with metal chairs

Fri, 11/21/2014 - 09:22
Wow that looks amazing! It looks great with your wall color and the floors! The rug is also a reall nice touch!

I wanted to make a black and brown picnic table, this one turned out really nice and it gets a lot of compliments.
I, also, reinforced the 2x6s used for the seats by boxing in 2x4s underneath. I just cut 4 53" (probably could have been 54" honestly) and mounted them to the bottom of the seats and screwed them into the seat cross members. This should keep them from flexing.
Tue, 01/14/2020 - 08:29
I love the look of this, it is great. I'm looking at your estimated cost wishing that was the case where I live .
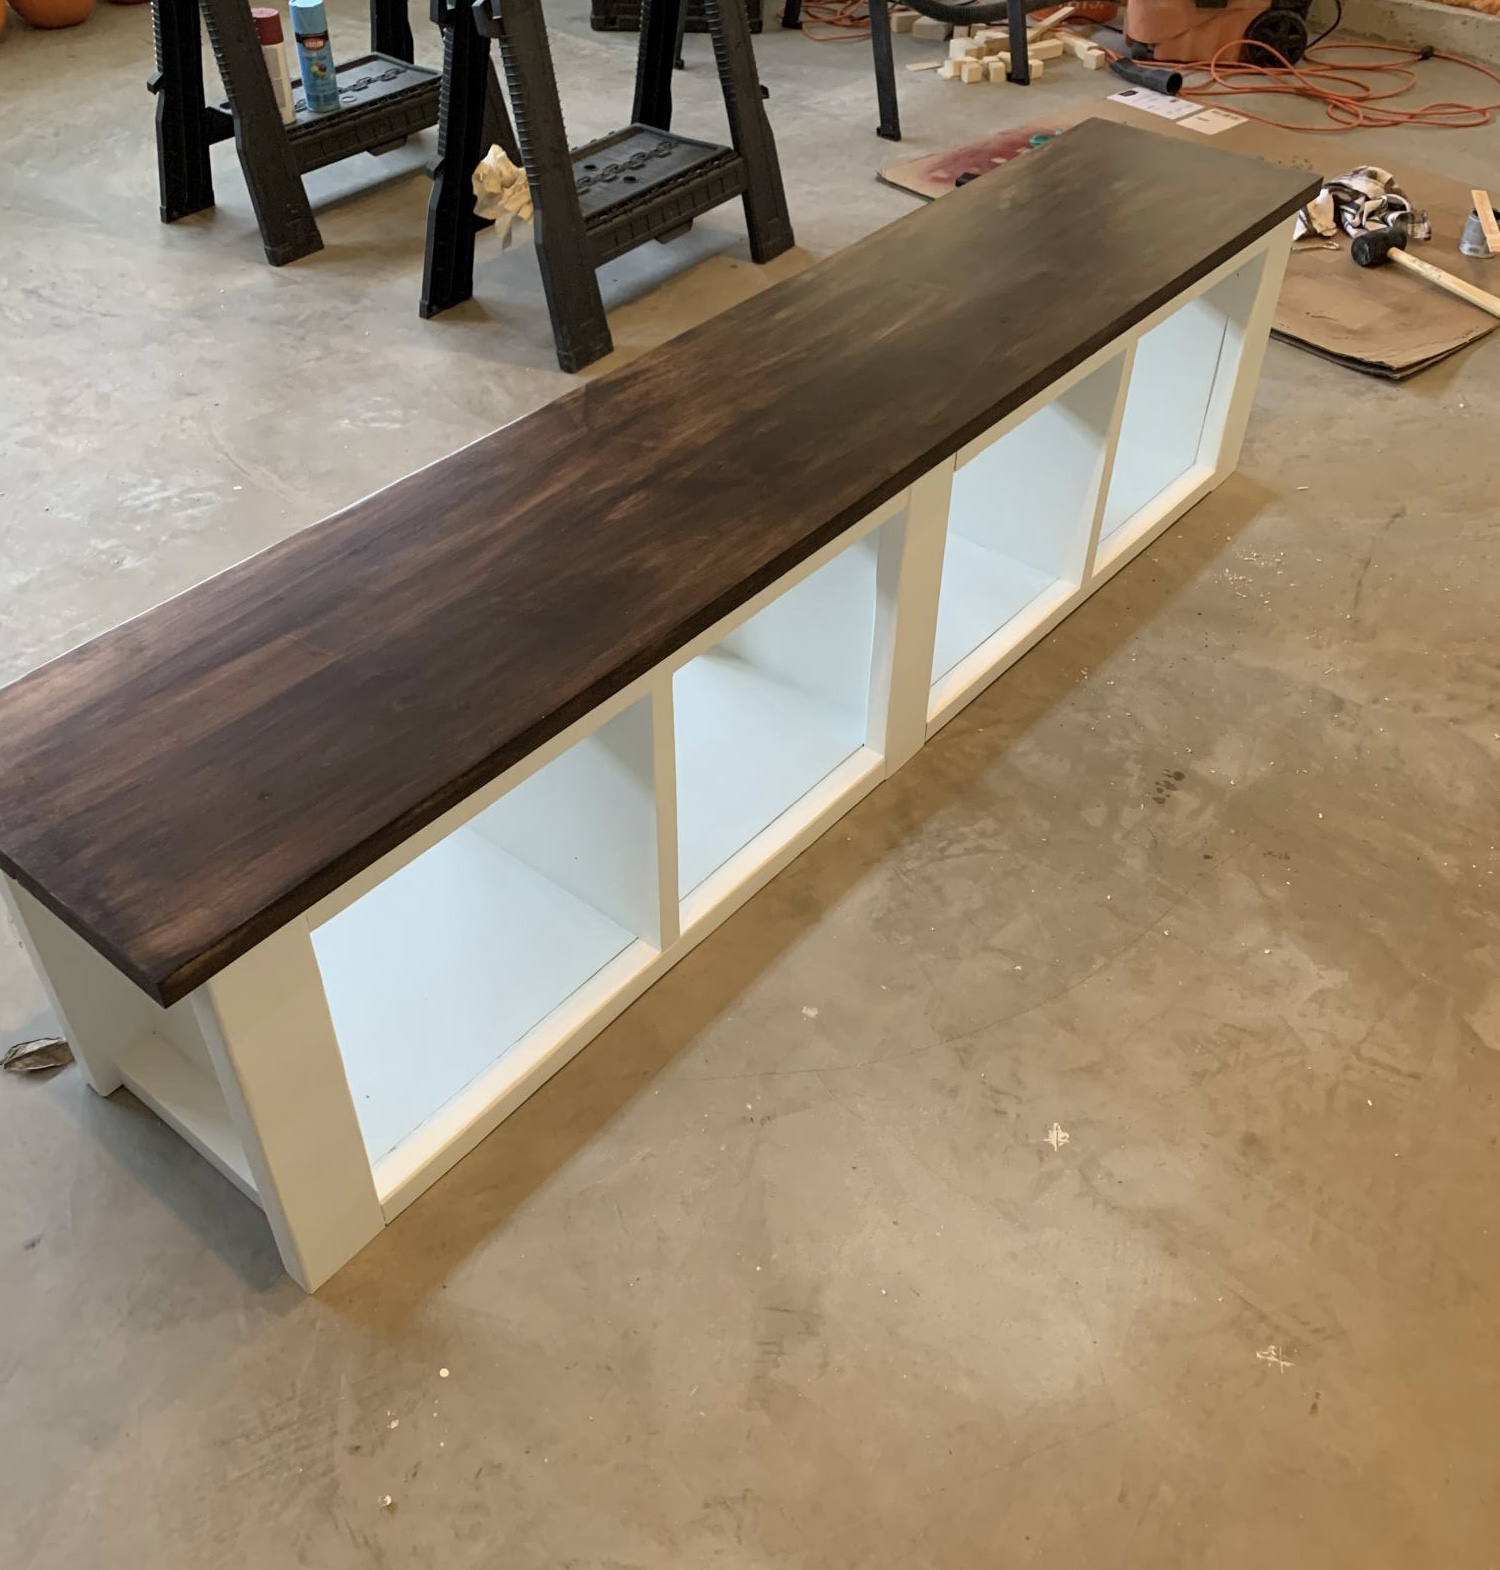
Thanks Ana for all you do to help us find our inner wood worker. I took one of your designs and modified it slightly to build this entryway bench for my daughter as a Christmas gift and hopefully future keepsake for the grandkids.
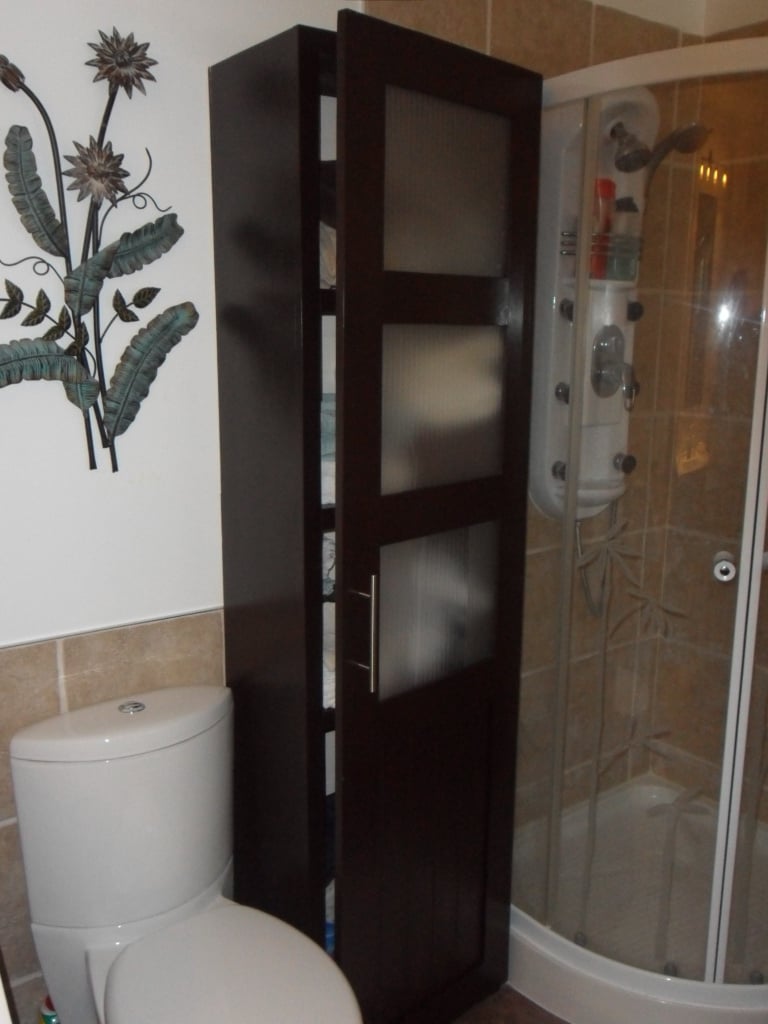
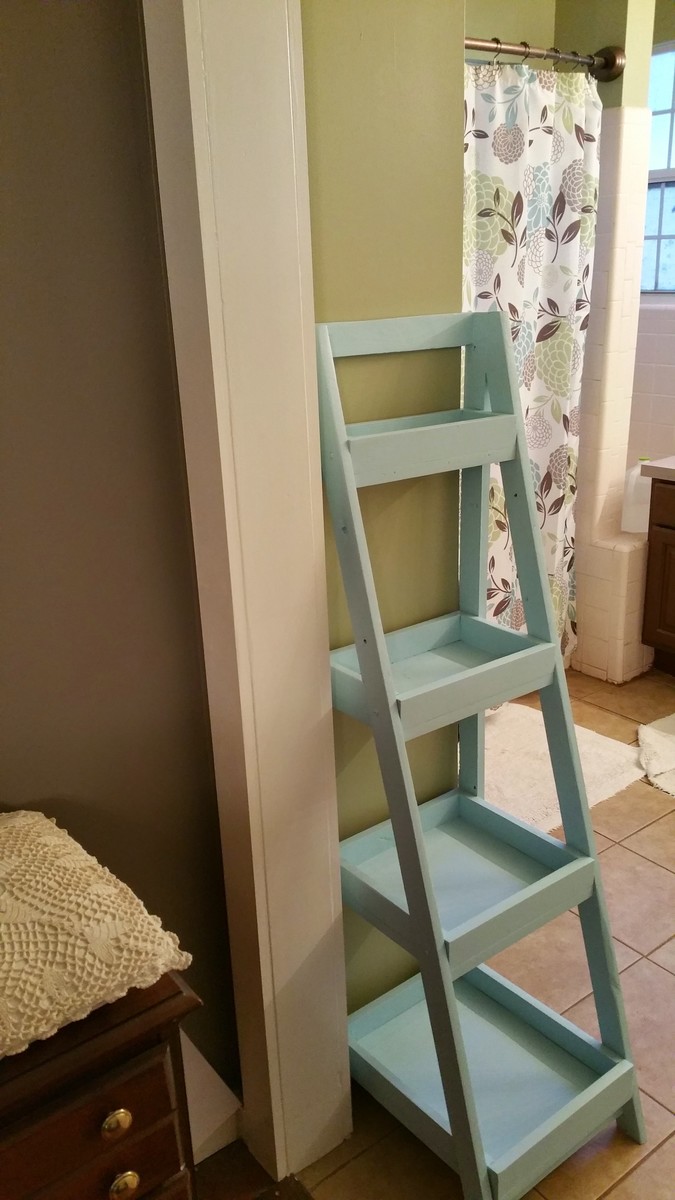
I loved the look of the Craft room Storage tower but modified to suit my wife's bathroom theme/decor. The inside back (MDF beadboard) is painted a milk coffee color to lighten it up. The door inserts are plexiglass, which was more expensive than glass but with 2 boys 6 and 2 it is well spent, and the MDF beadboard. Covered the plexiglass with self-adhesive film for glass on both sides to hide the towels inside. This project took me about 12 hours to complete but over a 3 month period, mostly spent on finishing the project with my boys underfoot or at 12-2am. YIKES!!! If i keep this up she will want to buy instead of letting me build.
Price List:
wood: $100
Stain/Paint: left over from house reno. would have been $15 stain $20 Varnish 30$ quart of paint
Handle: $7
Hinges: $4 basic style
I wanted to use Eurostyle hinges but opted to buy the Kreg system instead of Forstner drill bits.
Will be building another just different dimensions for laundry room makeover.
Sat, 01/26/2013 - 12:18
Thanks! It was my first furniture building project! I did a huge reno that i did on my house but that is construction and 1/8th in isnt as big of an issue as in furniture.

Mon, 01/28/2013 - 20:45
I've been wanting to build something similar for my bathroom! Yours turned out great. It inspires me to get to work!
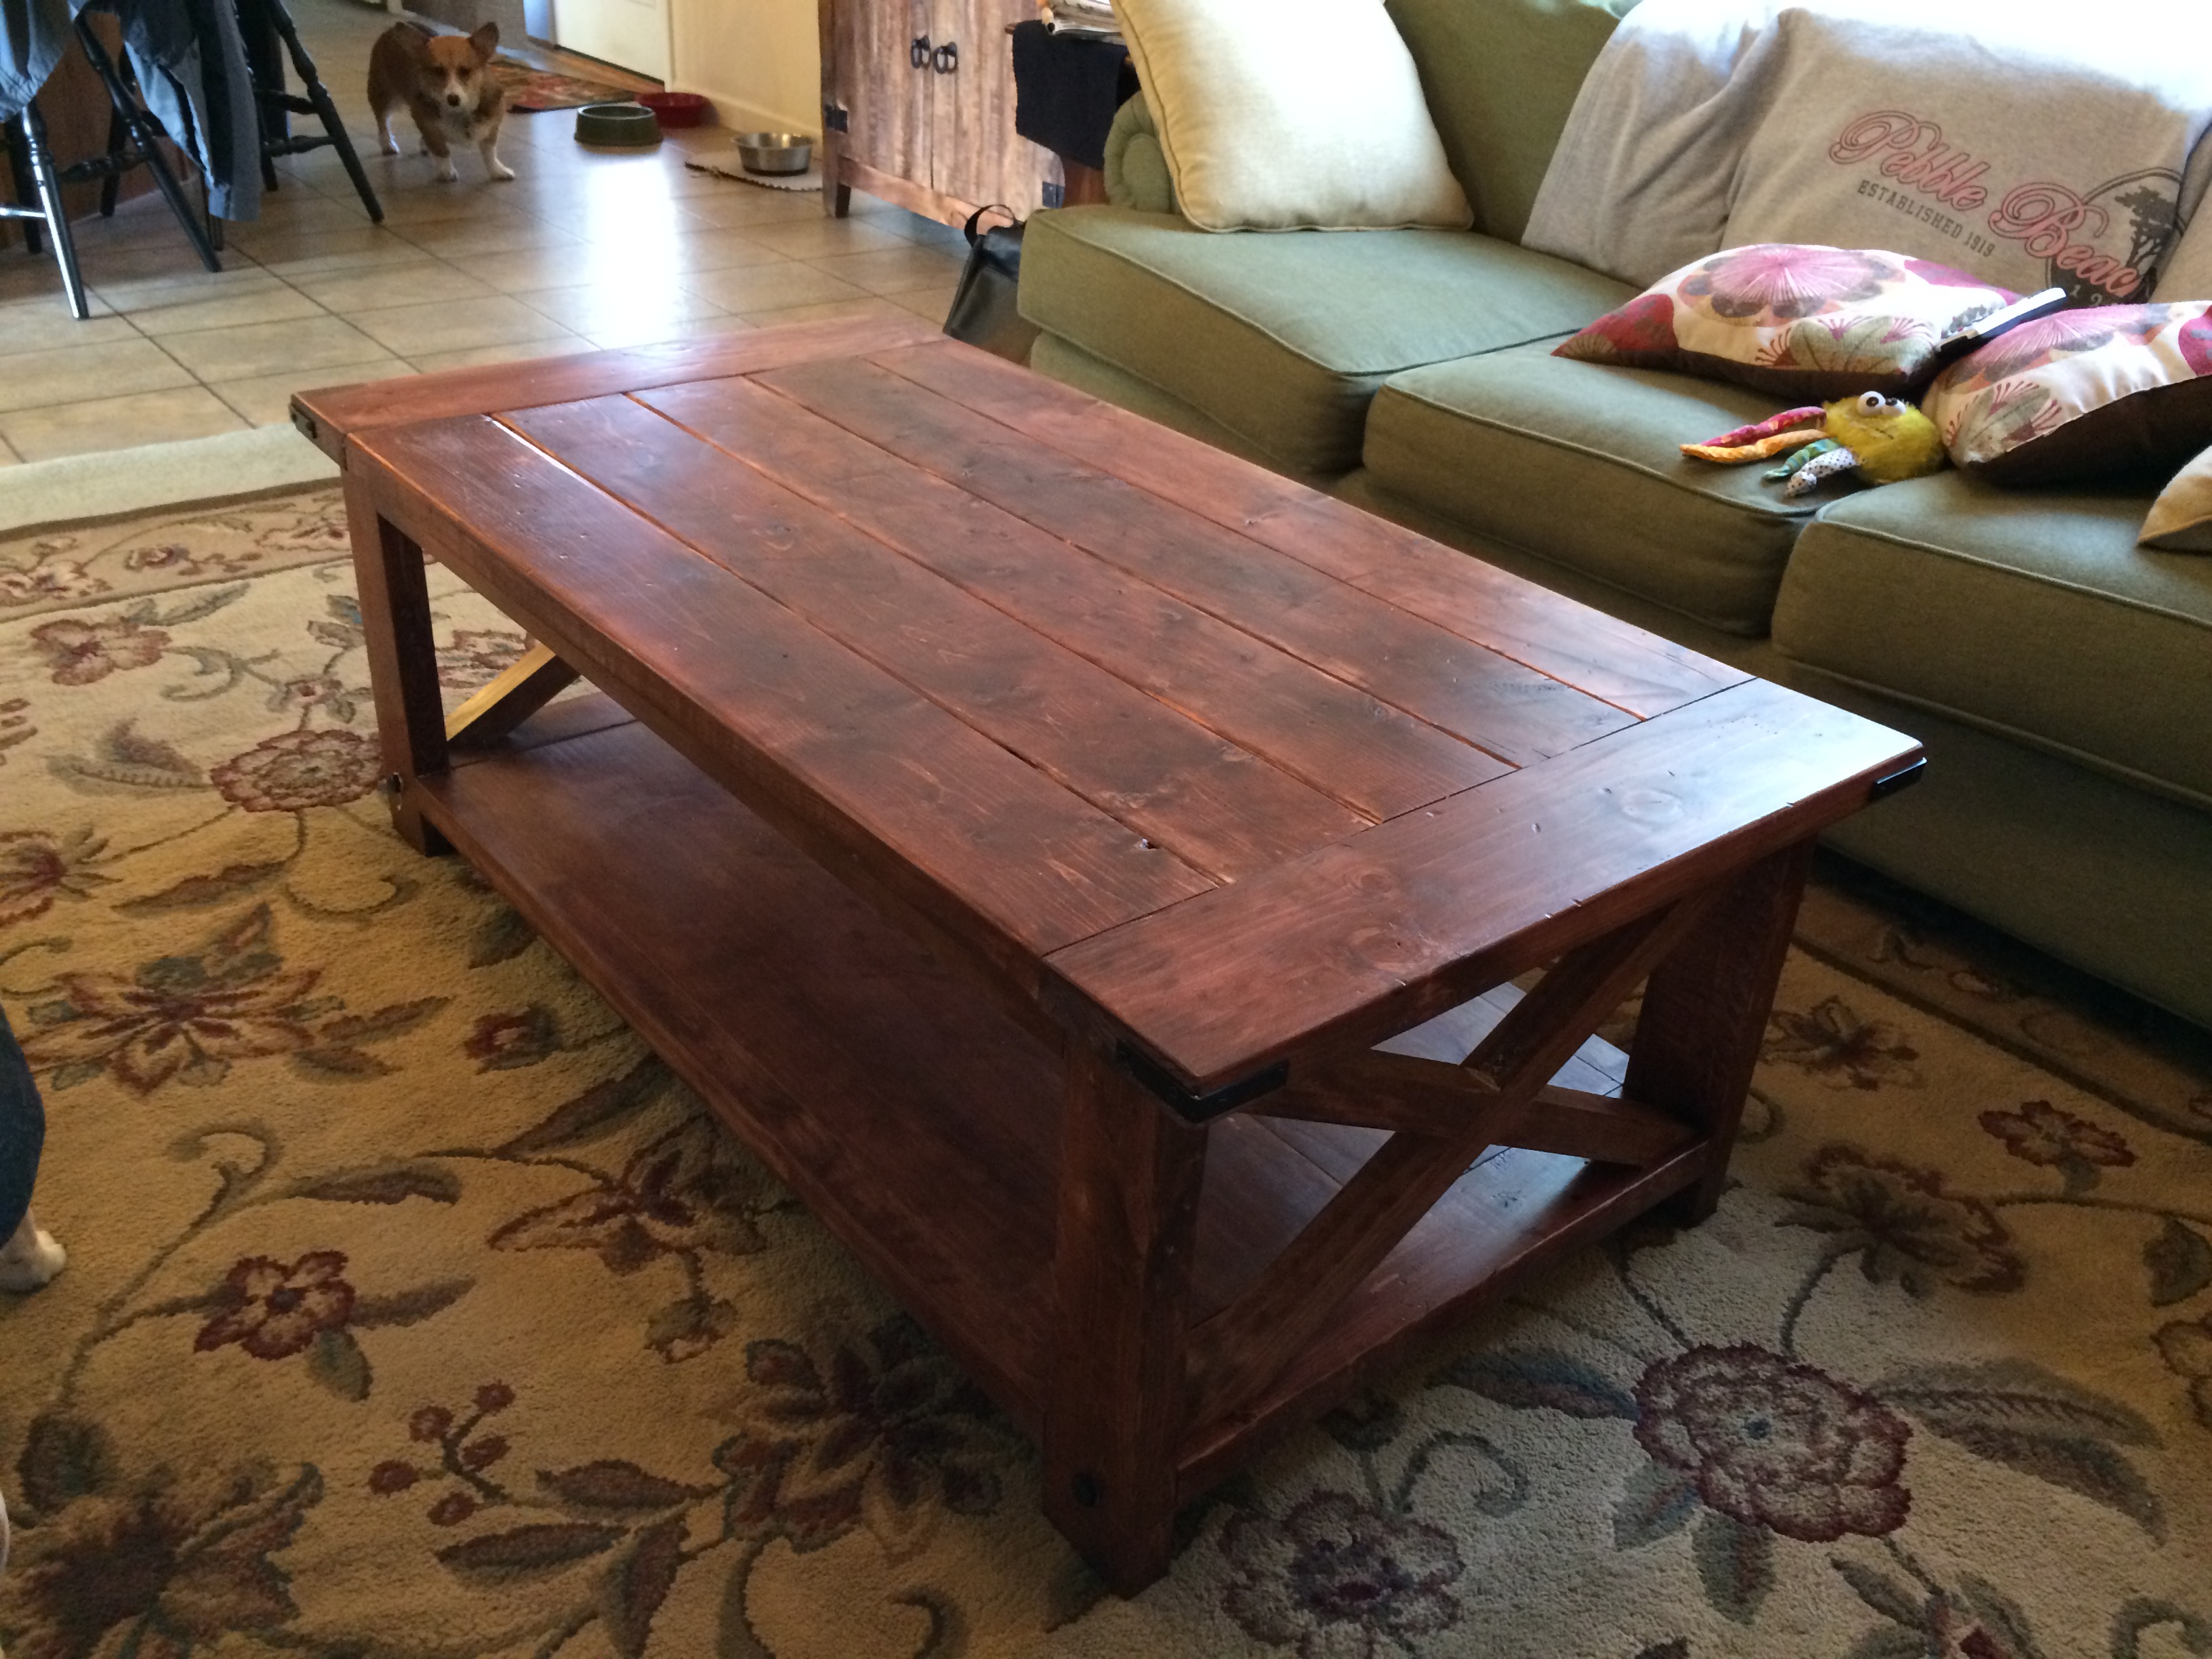
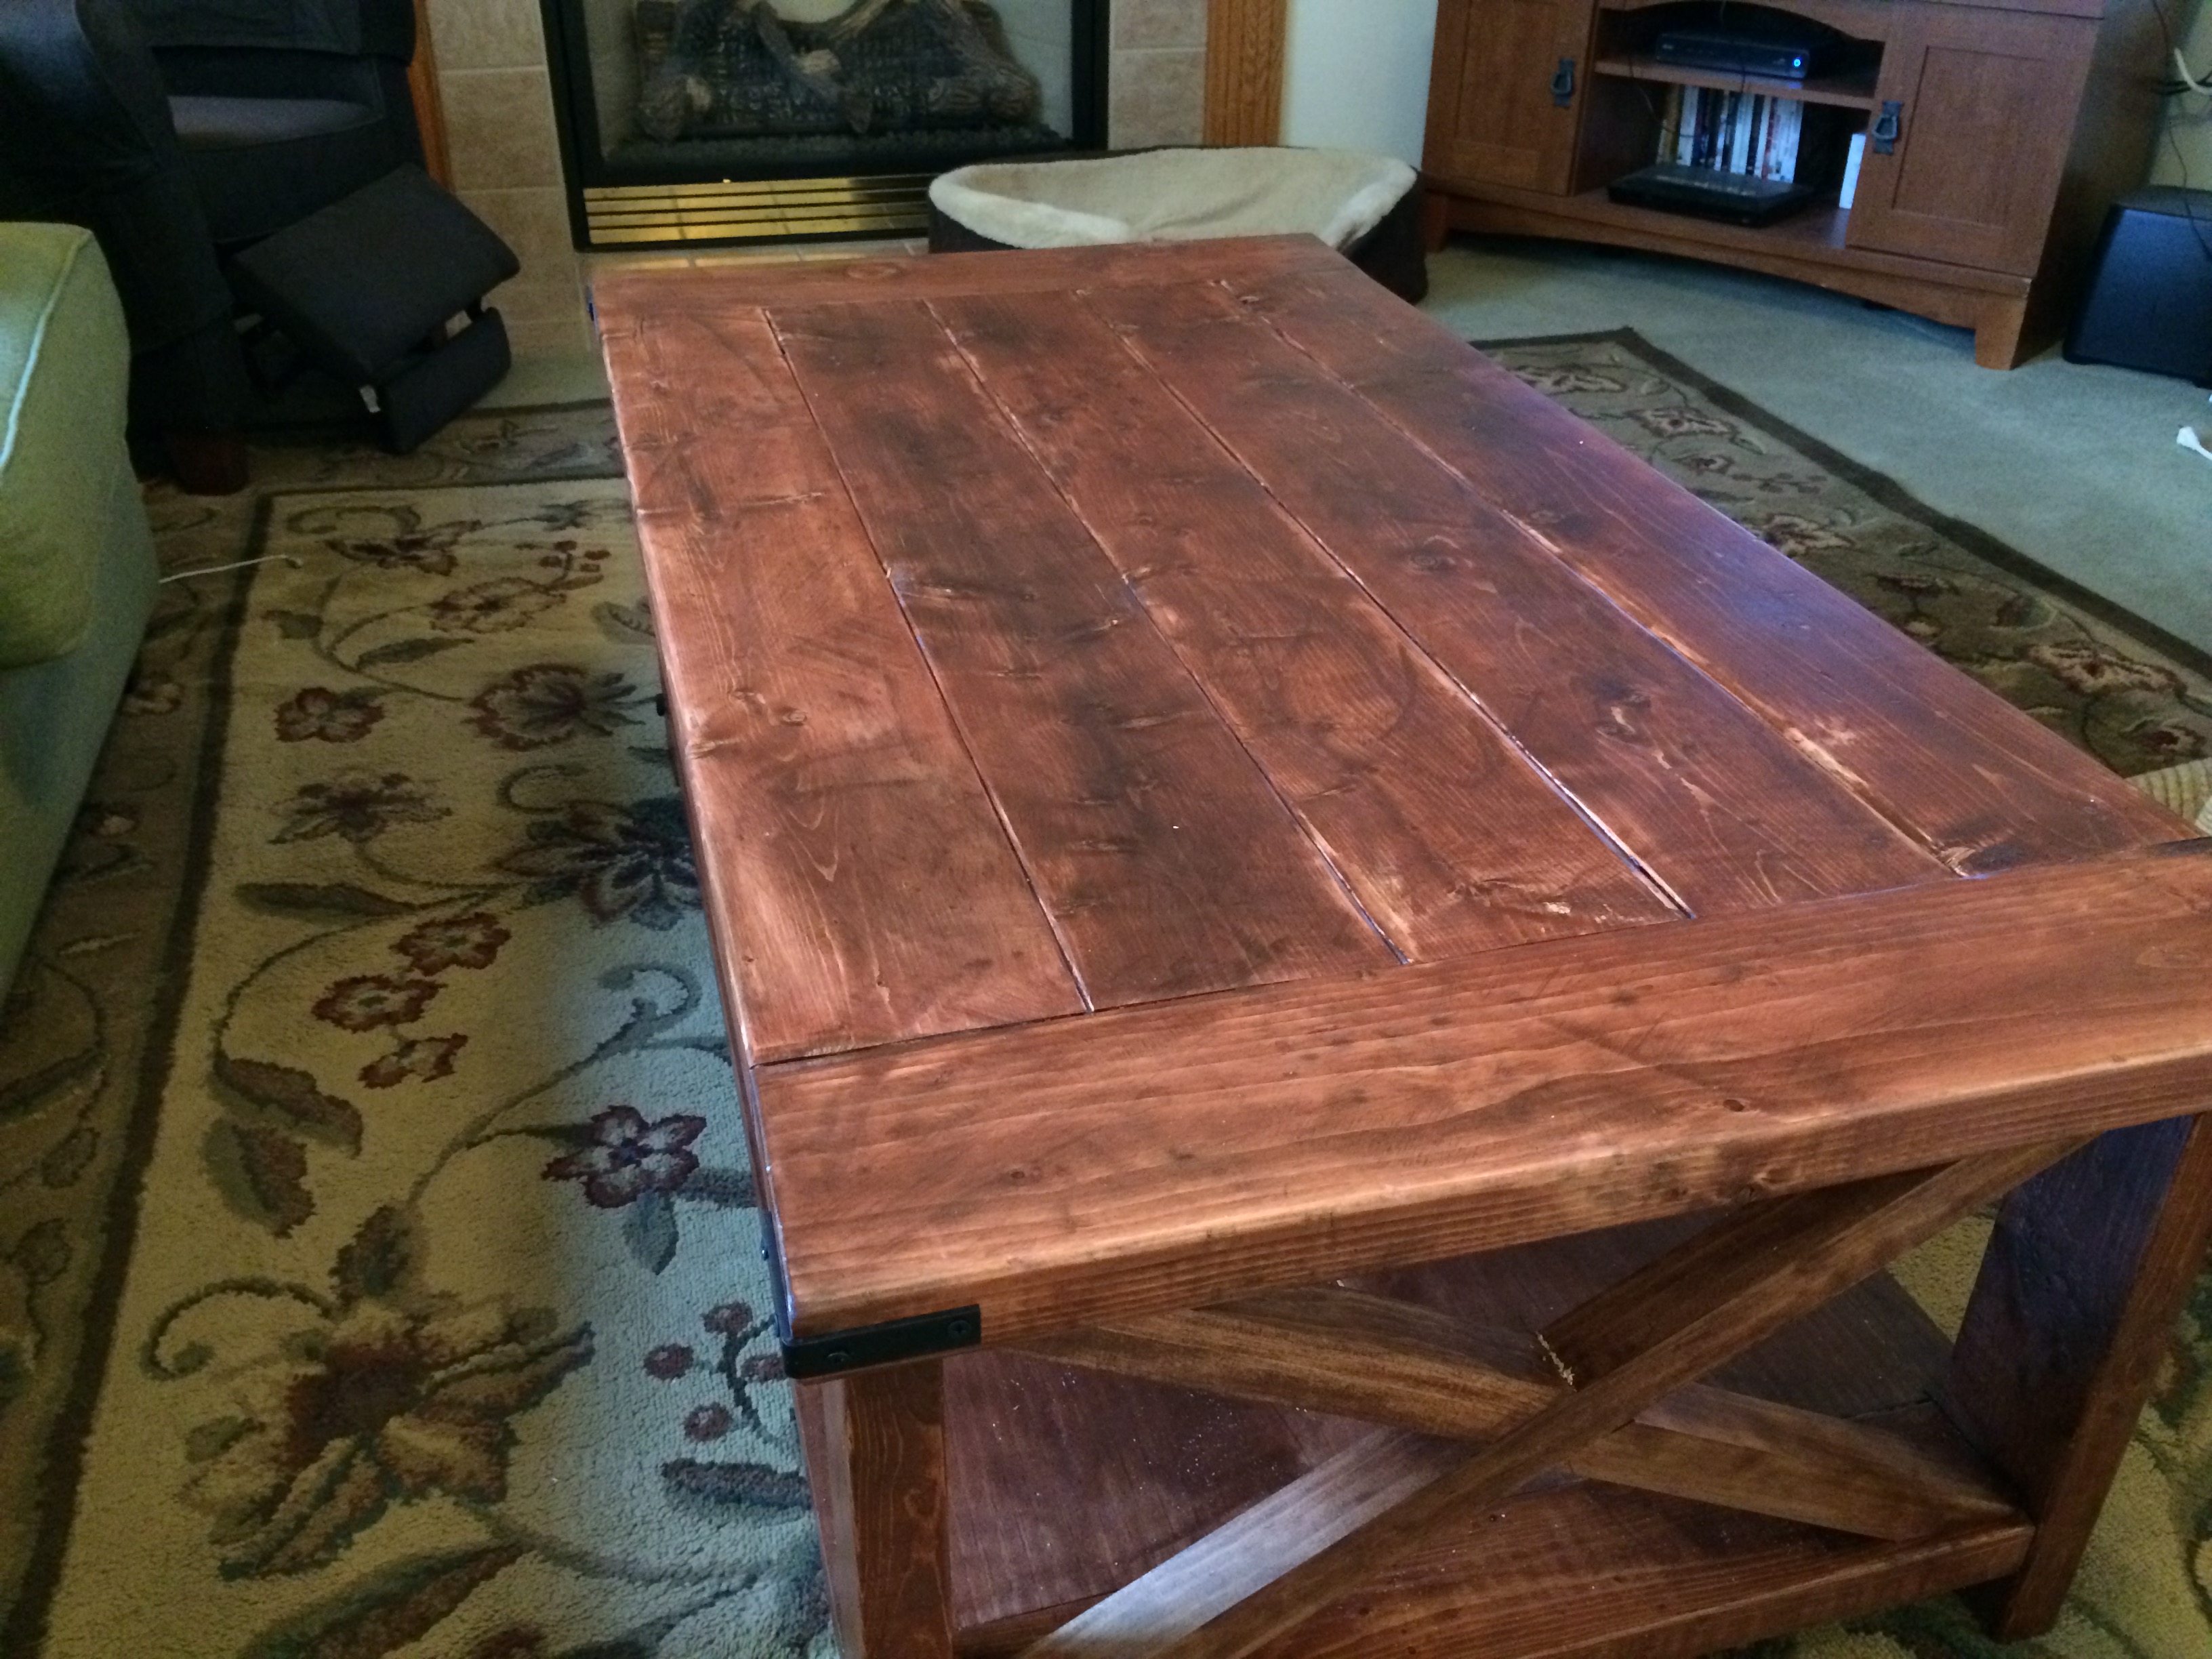
Used the Rustic X Coffee Table plans for this project. I altered it slightly to add the bread boards on the end. I also used my jointer to create a more flush joint between boards. When I went to cut the "x"'s out of 2x2's the boards ended up being too short. I'm working on a similar piece for a family member and I am waiting to cut these pieces until I'm almost finished to save stock. I also used a chain, hammer, nails, and metal clamp to beat the table top to "age" the wood a bit.
This project doesn't take long to build. Finishing takes about a week.

Took an old whiskey barrel, secured the staves before cutting in half. Built a frame around the top. Built the lid out of old cedar picket fencing and cut the legs out of old Barnwood. Sprayed the inside with Flex Seal to make it waterproof. And used an old used Horse Shoe for the handle. Stained in 4 different shades and clear coated the whole table.


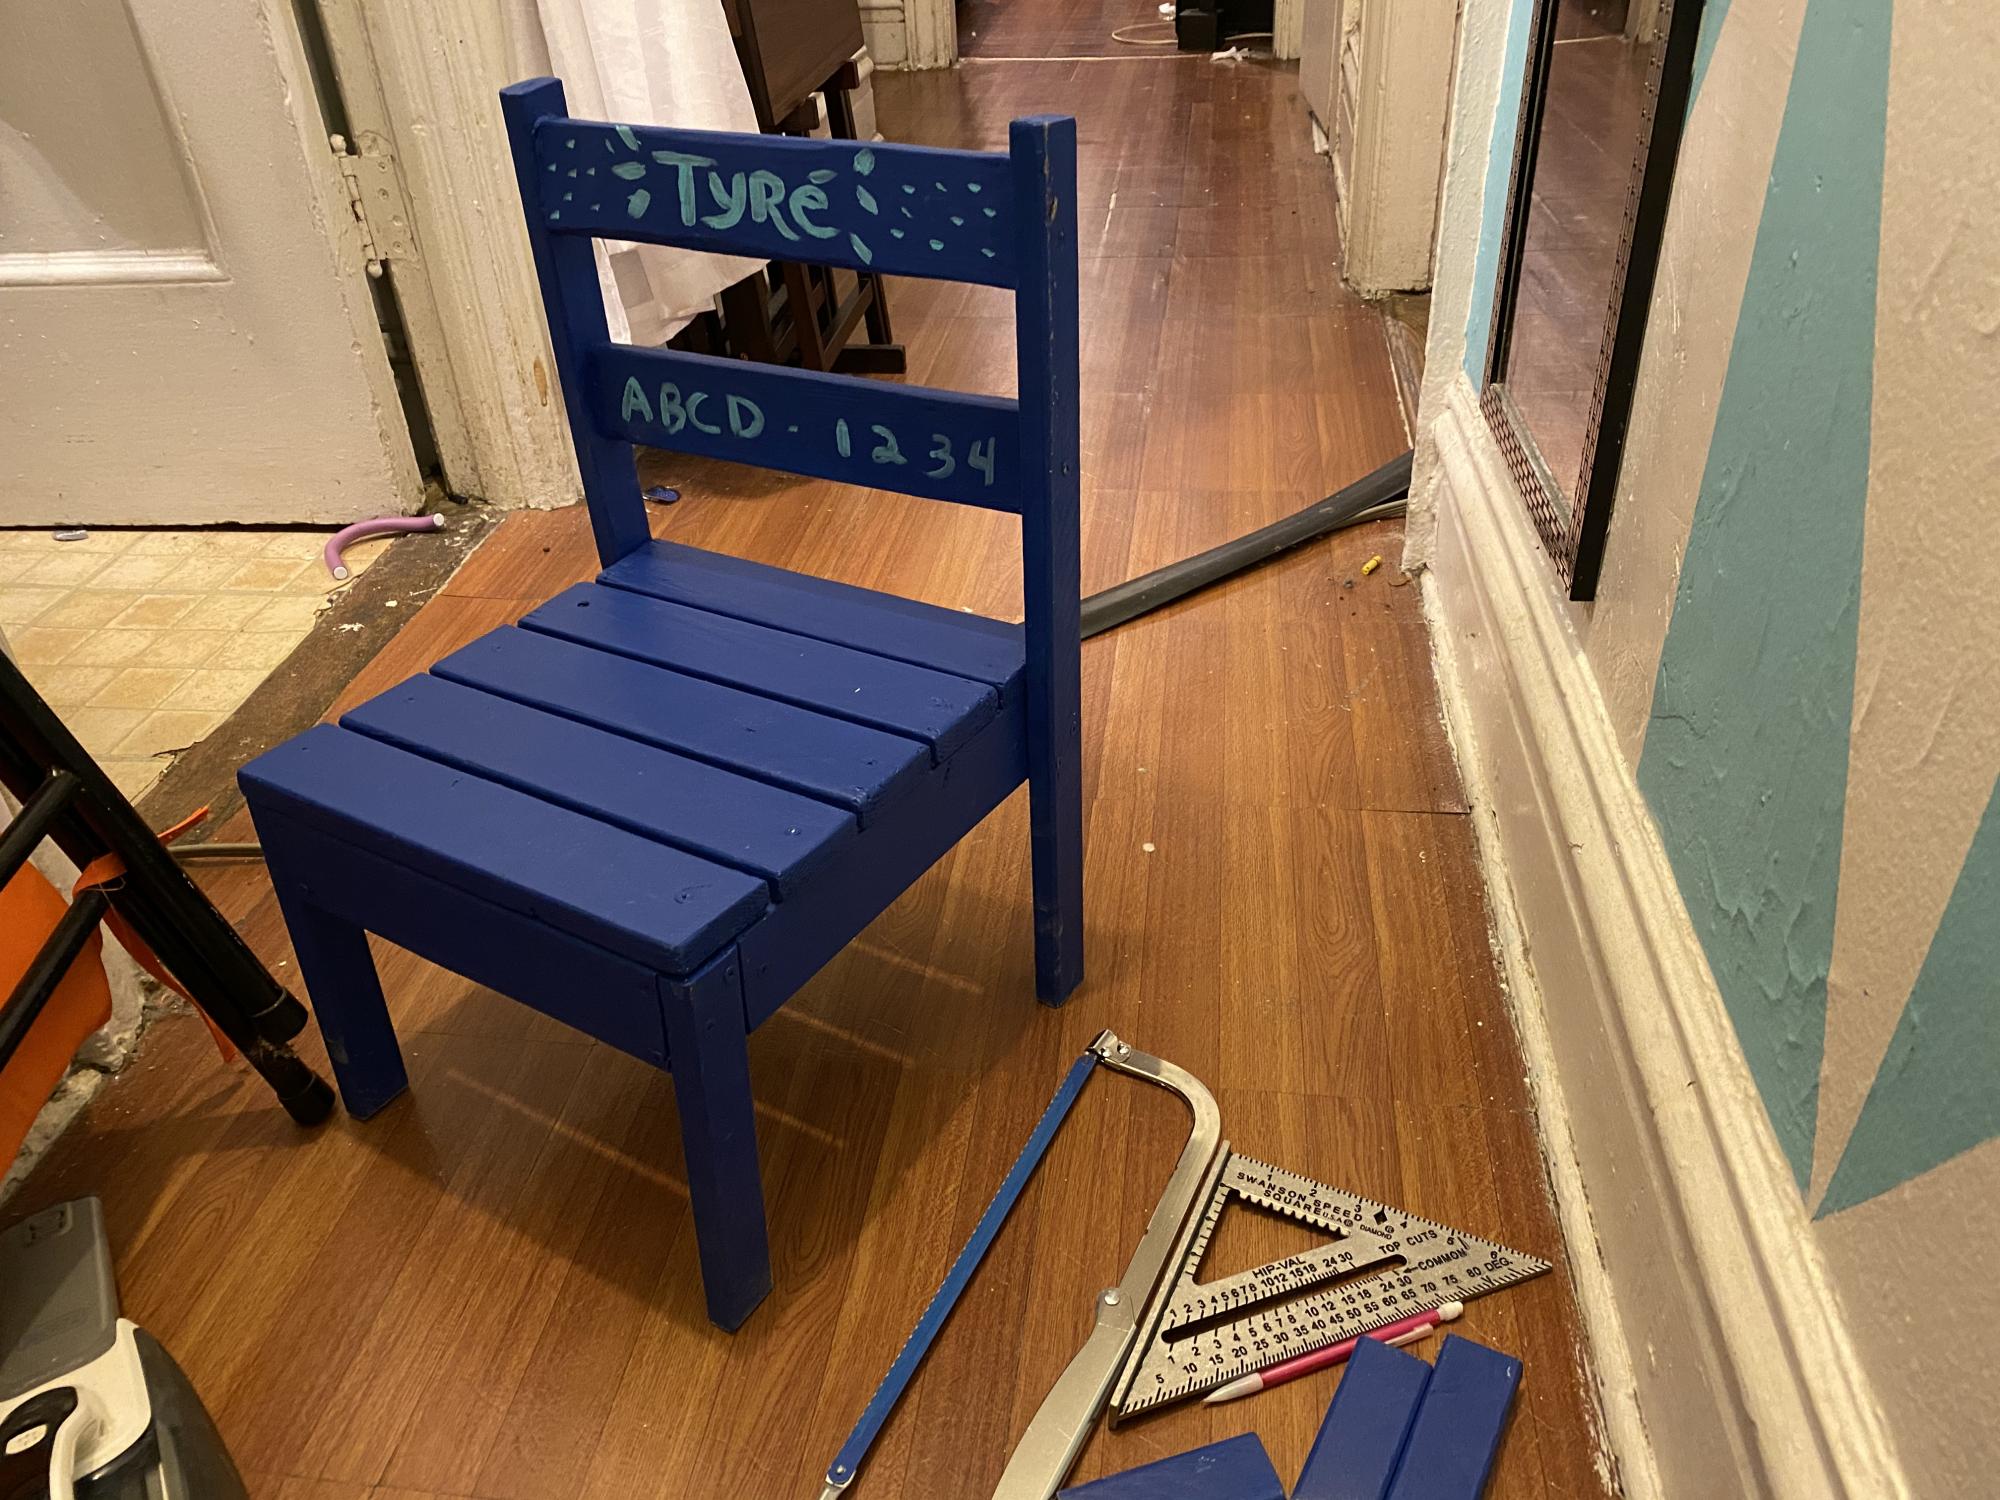
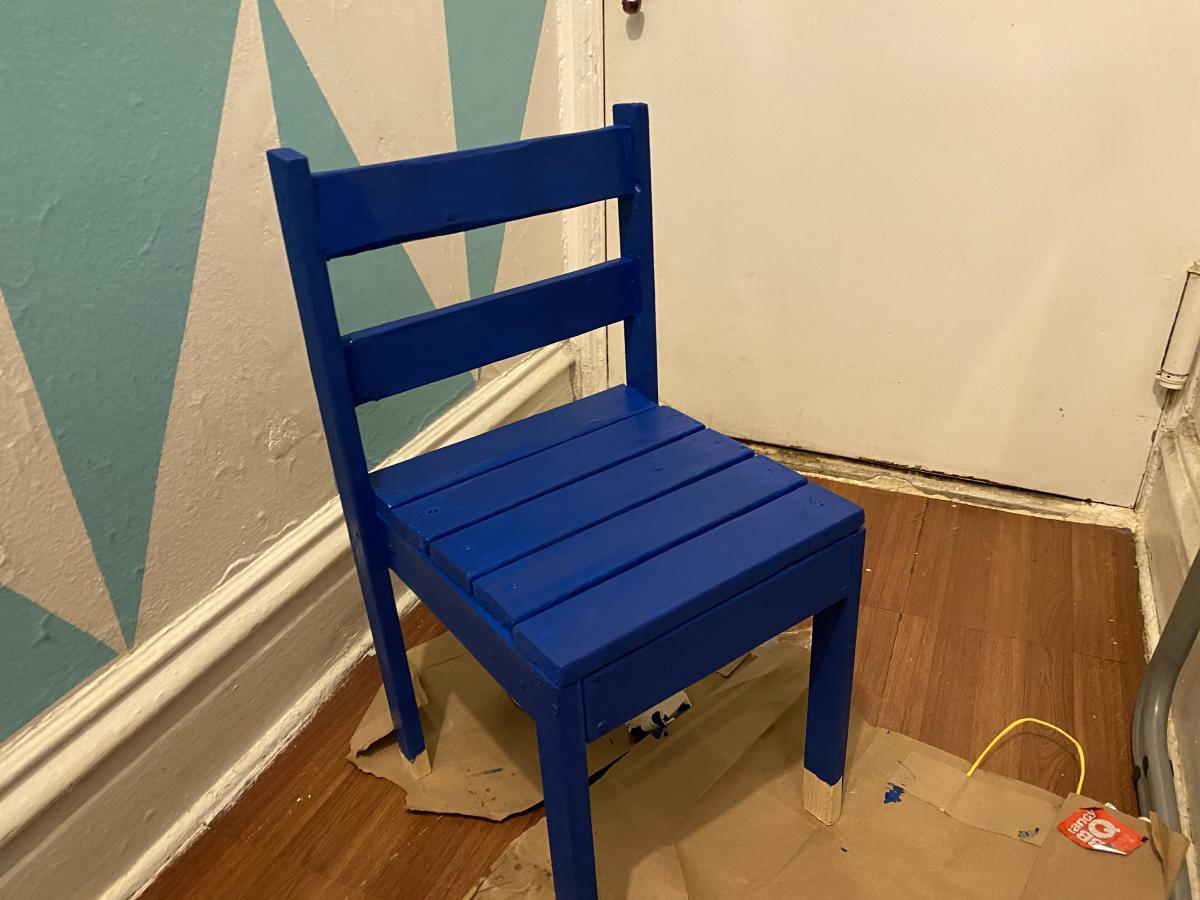
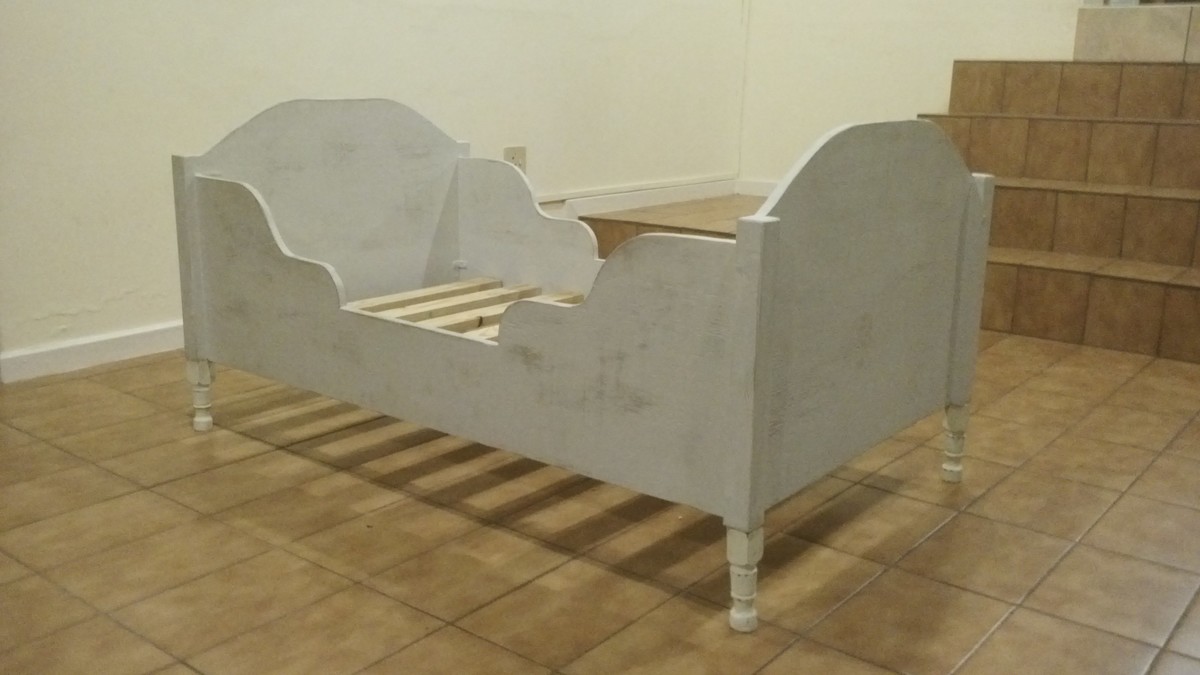
My first build. Toddler chair. Had to cut the legs from the original plans since my 2 year old nephew’s legs dangled and it was hard for him to climb on to. Loved it. Thanks Ana for the plans.
we built this table for our new home when we couldn't find an existing table that we wanted for under $1000. we were hesitant to attempt building it ourselves since we haven't attempted anything similar before, but knew we could do it with a plan. there were a couple bumps in the road as we learned how to read the plan and understand the different techniques, but we LOVE the end result. Especially because it didn't cost us anything out of pocket! {we had a lowes giftcard:)} the total came to about $130 for all the supplies; including the paint and poly for the finishing.
read more about the process on my blog: http://www.carissamiss.com/2012/11/house-projects-completed.html

I used all distressed or reused wood. While I followed plans from Ana’s posting I used reused or distressed wood, cutting the wood to the plans specifications. Cutting the wood I also considered the nominal size of lumber and the size requested in the plans. Even with the unit sanded and pained the I like the character that has come through.
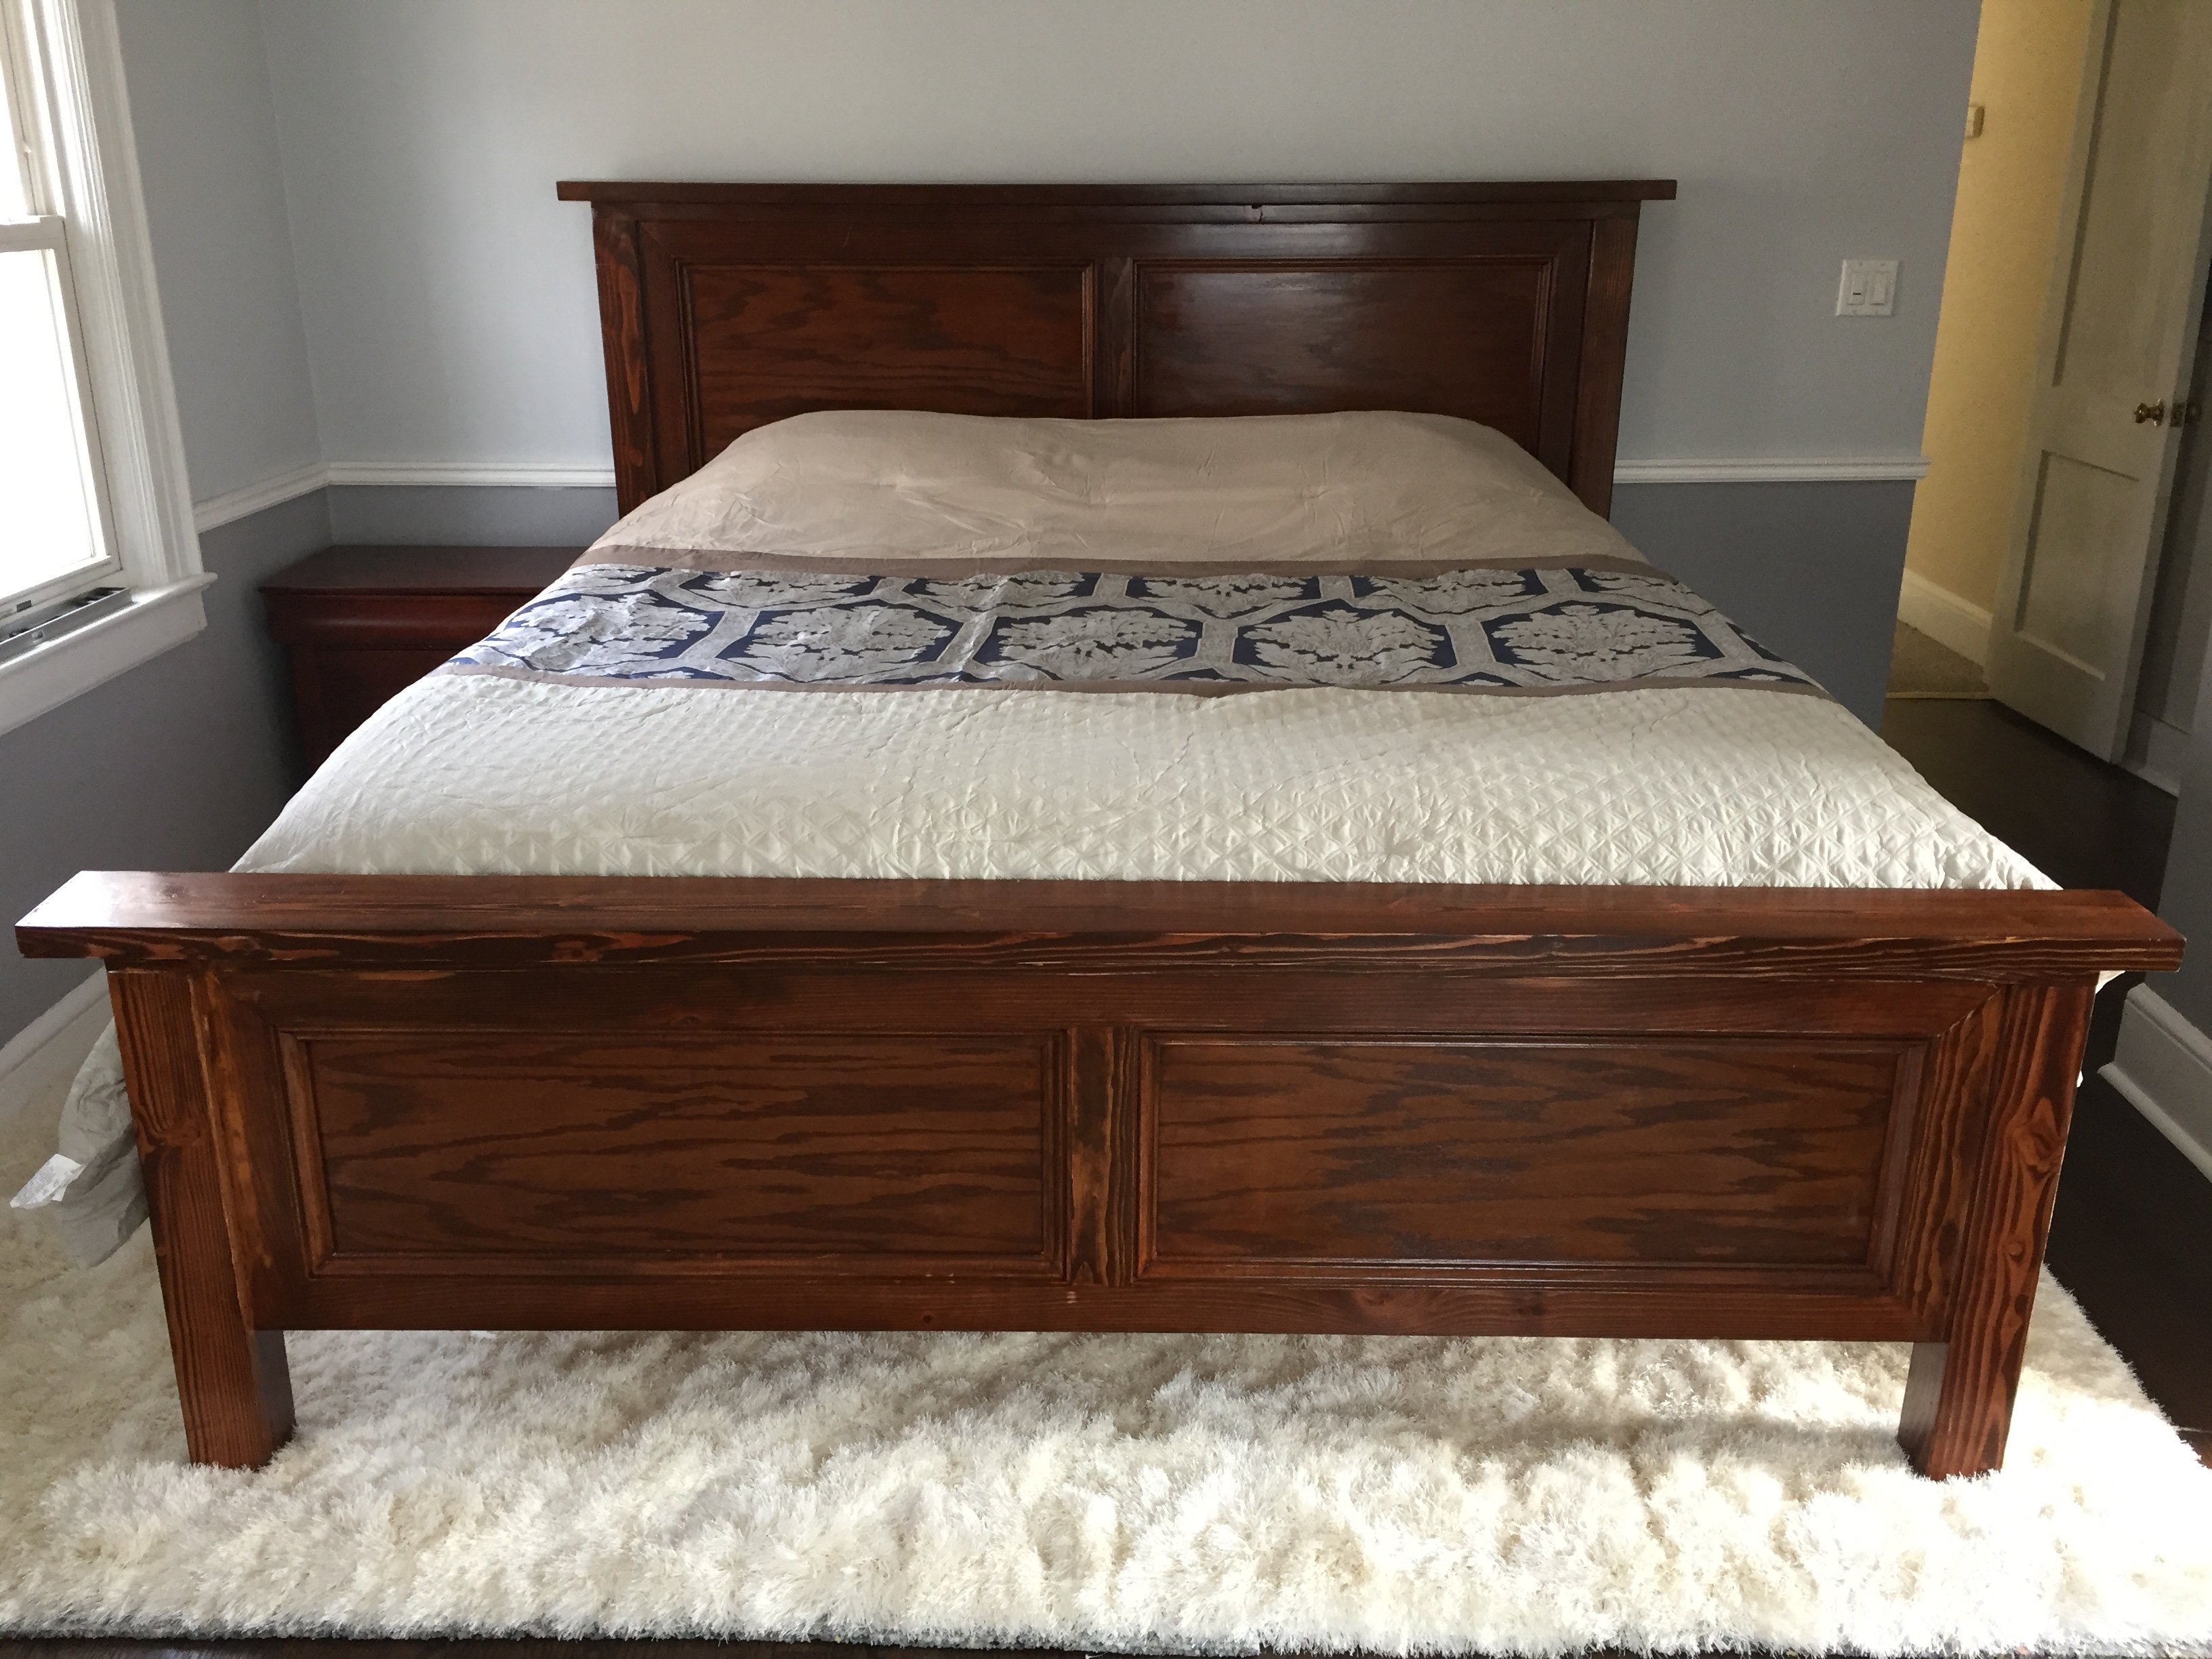
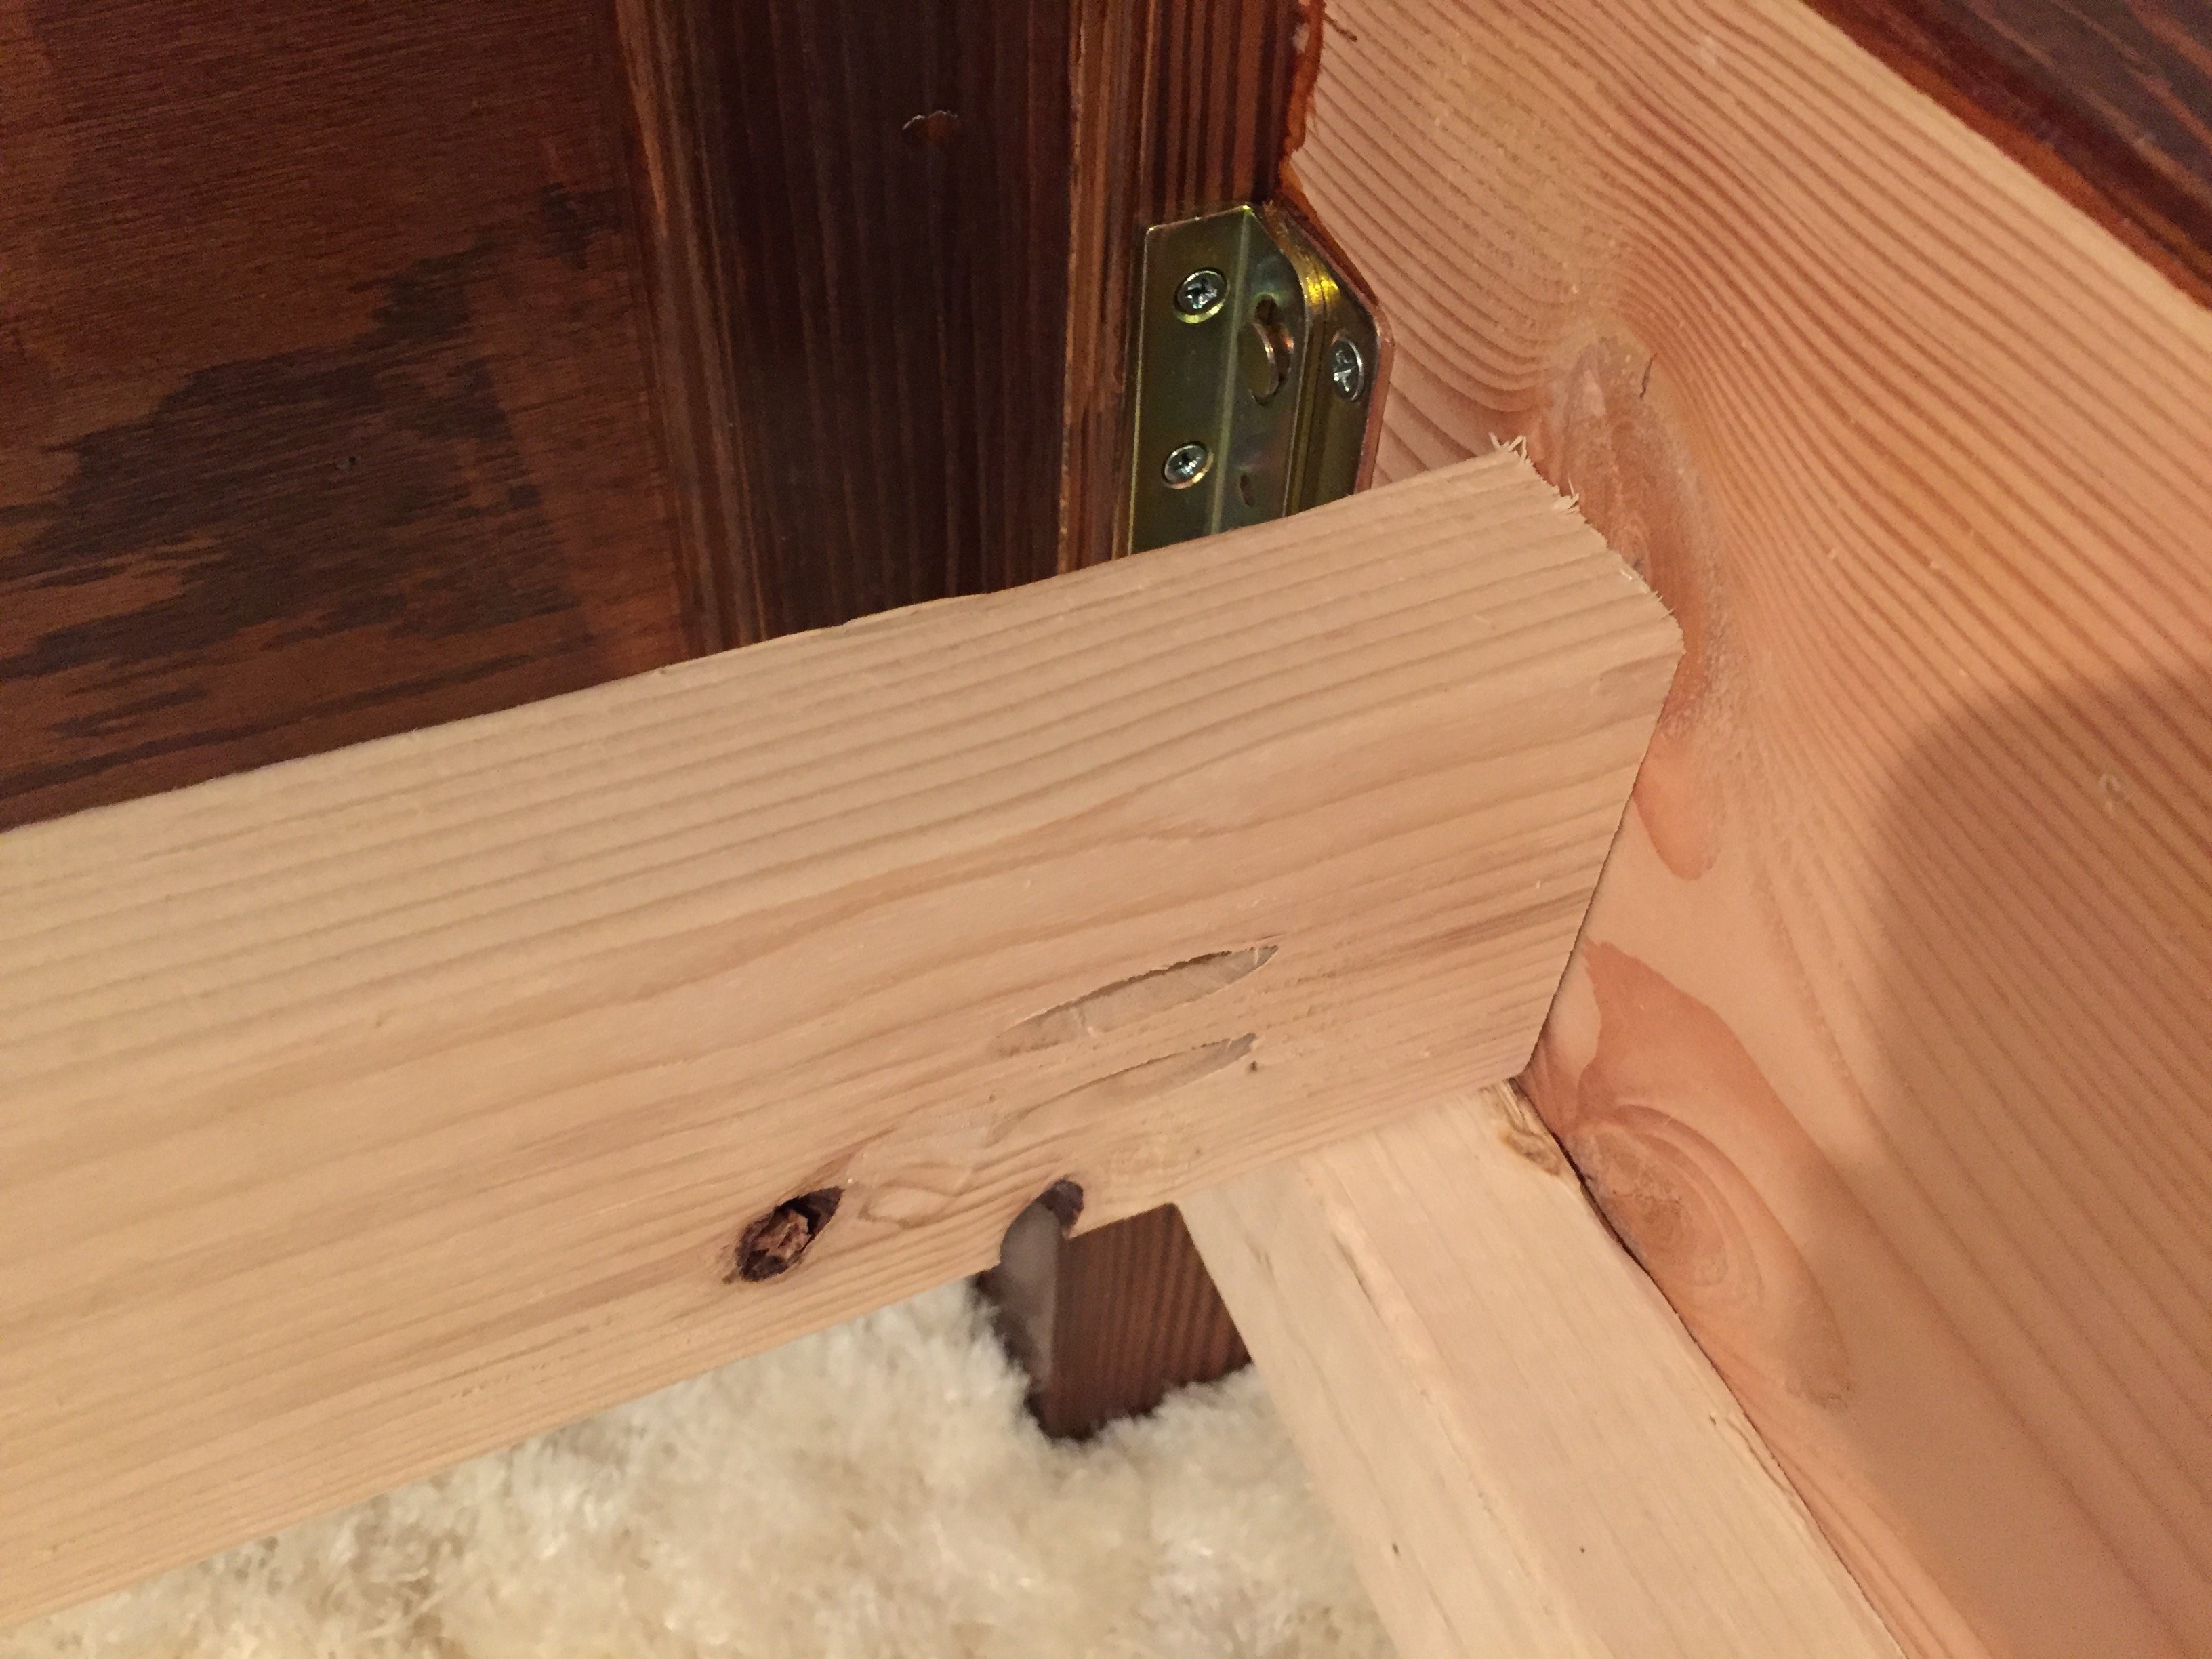
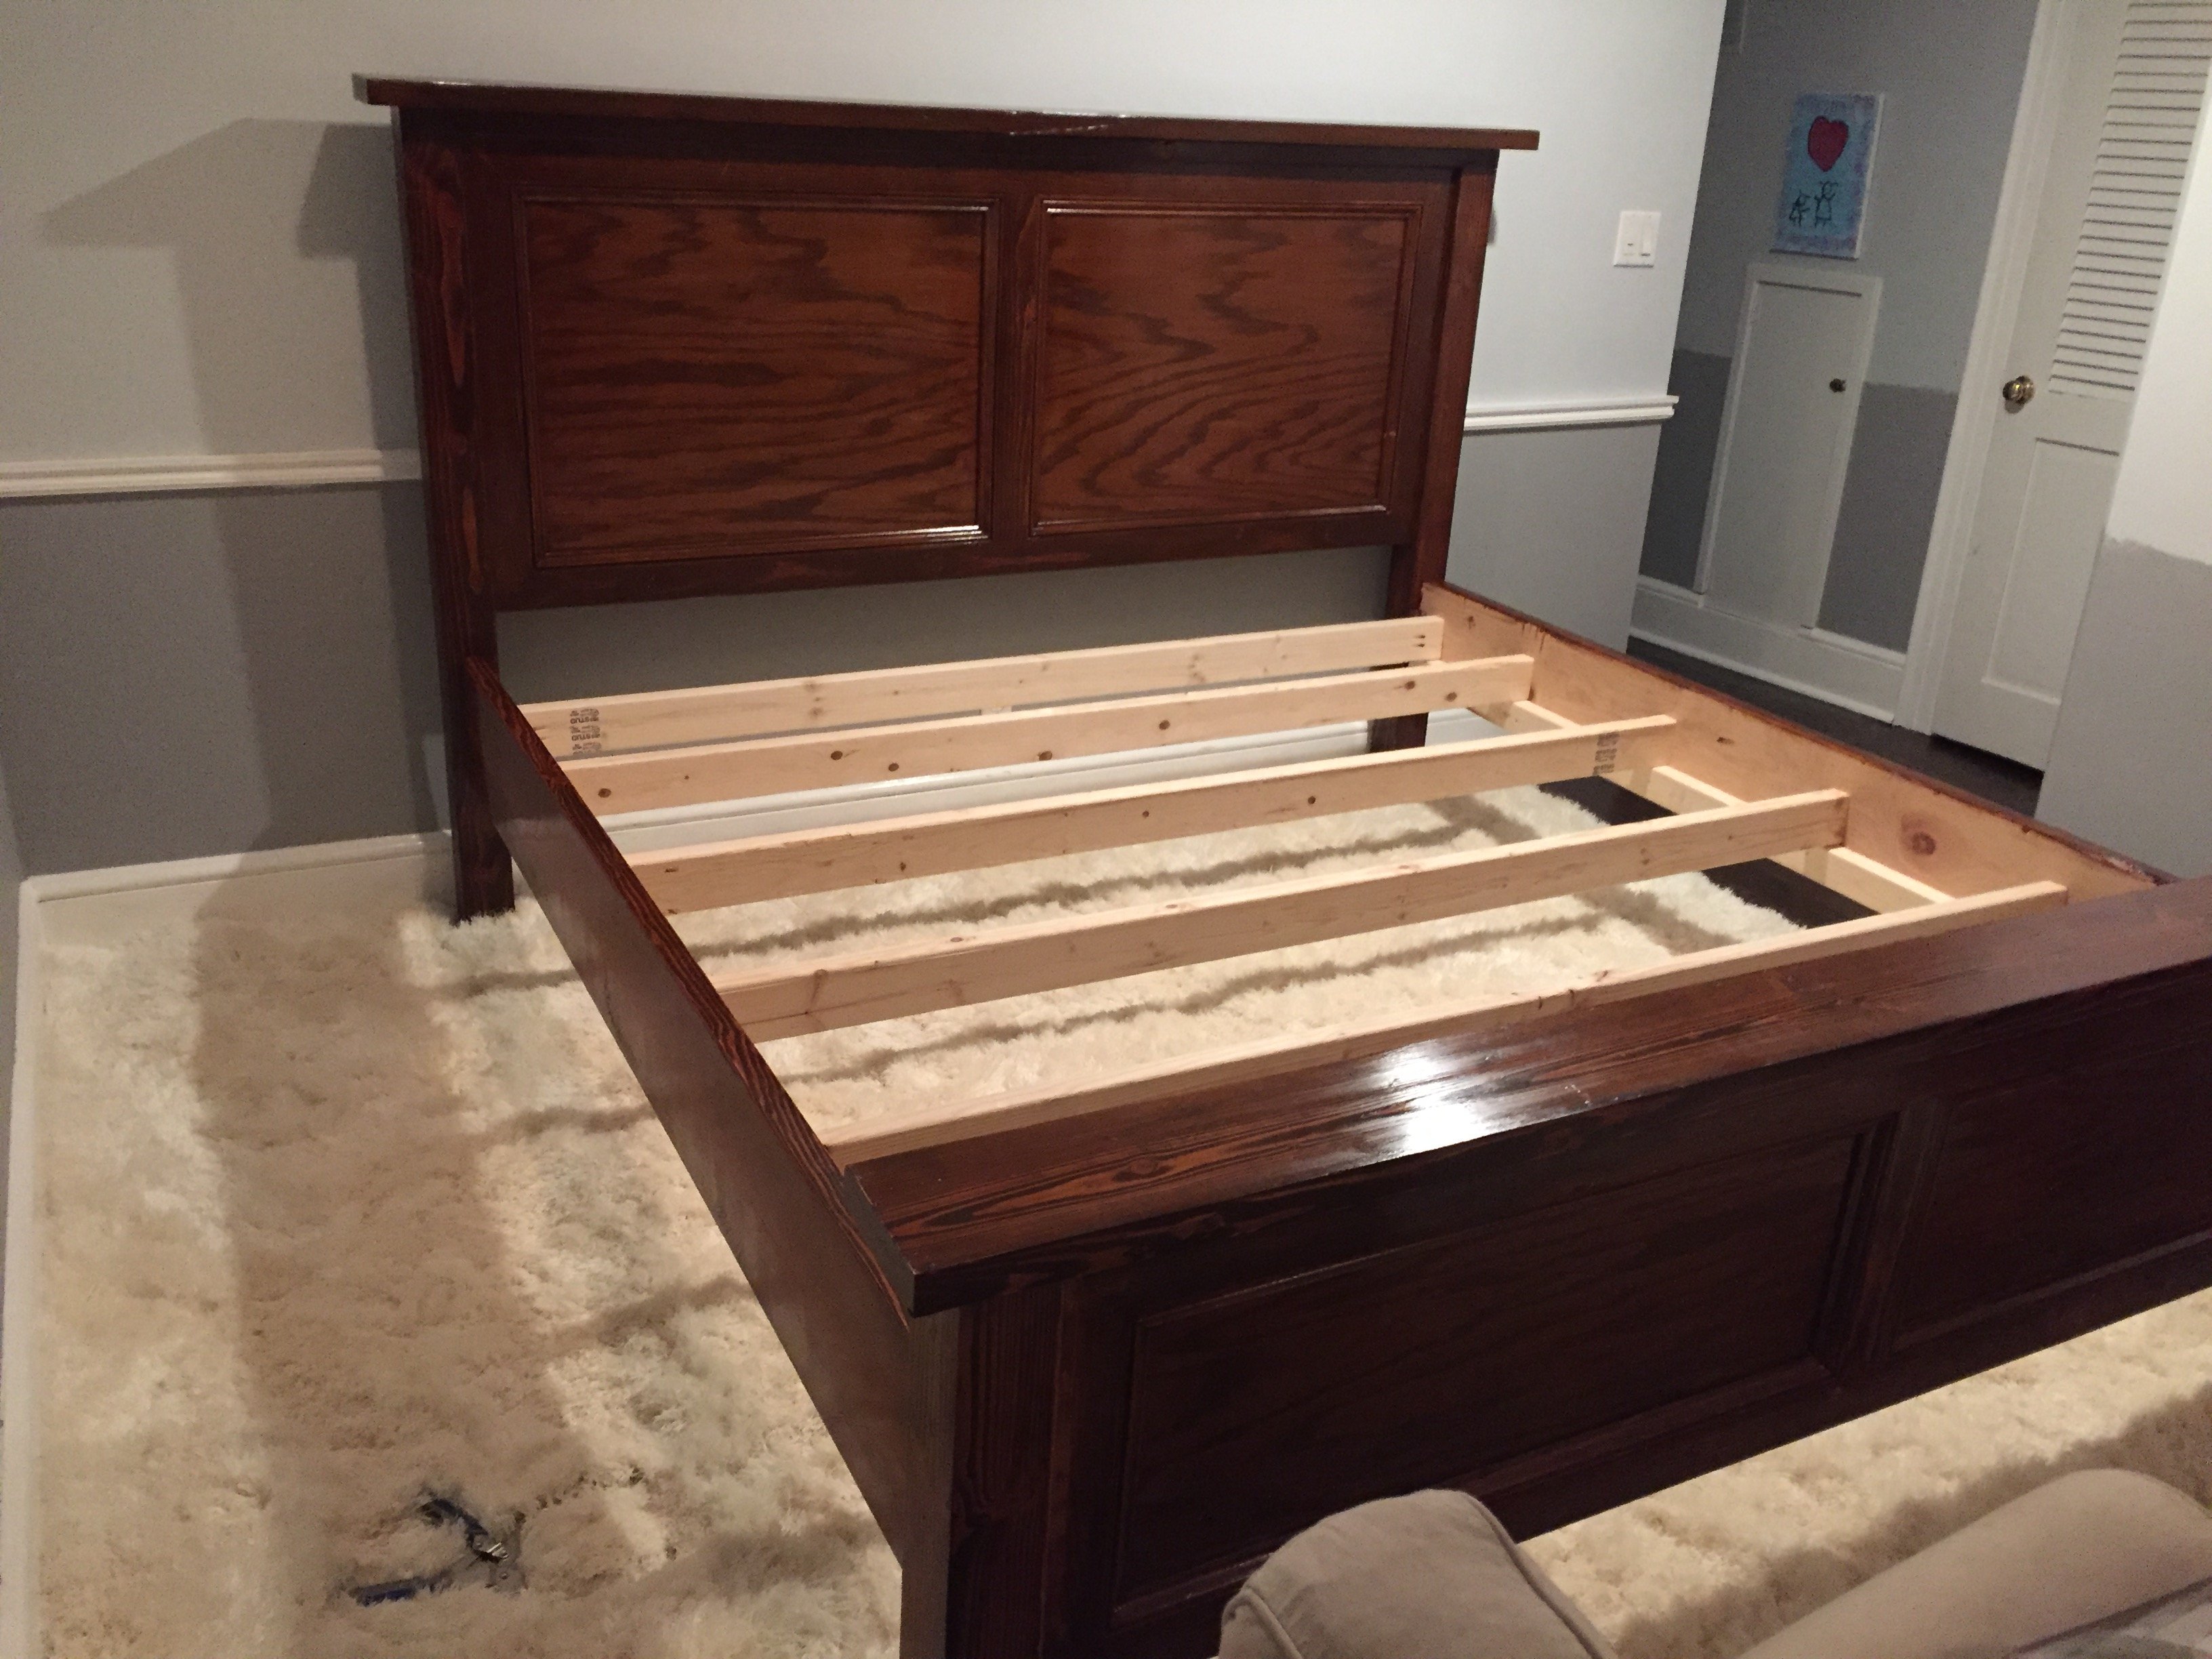
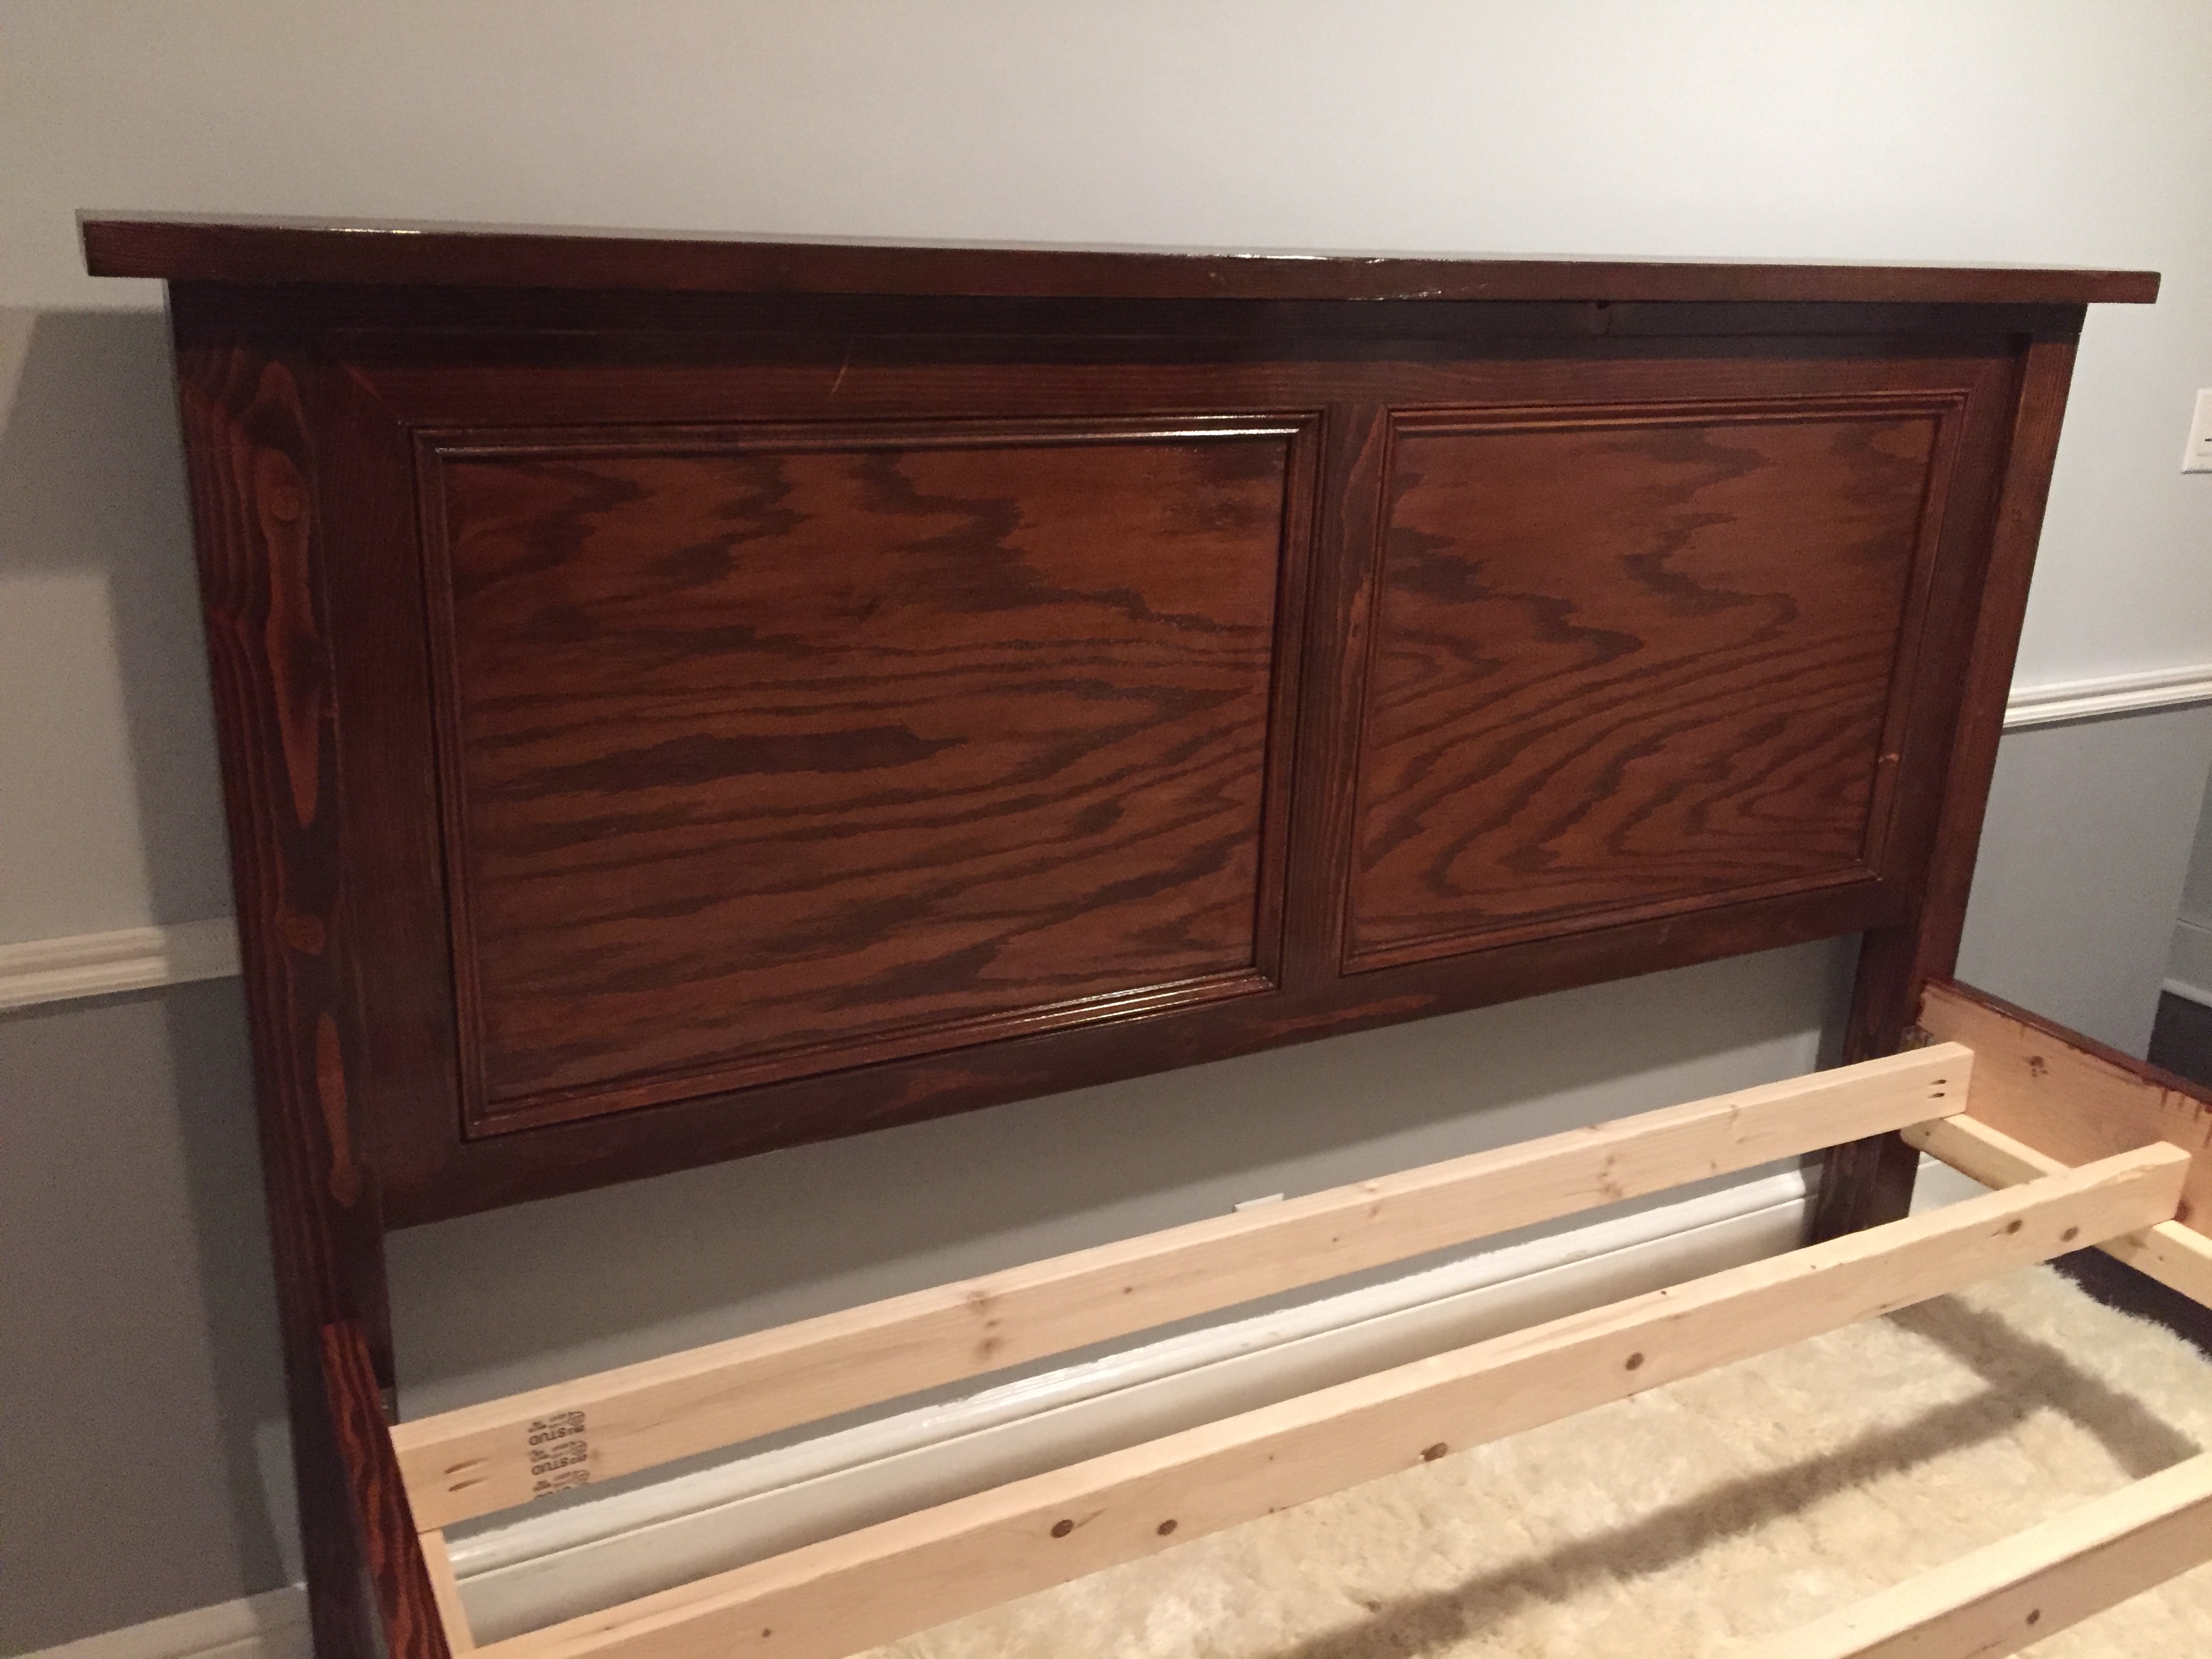
Big thanks to Ana for the plans and the rest of the community for ideas! This was my first major project, and I'm very happy with the way it turned out. This bed was based on the King Farmhouse plan. I wanted a look that was a little less rustic than the classic farmhouse style, so I substituted the boards for oak plywood and framed it out with some pine boards and cove molding. The pine boards are 1x3s. I topped the headboard and footboard with a 2x4 and then a 2x6 overhanging the 2x4 evenly on three sides (it's flush in the back).
The posts are 4x4 cedar. I used lag bolts and glue to attach the posts and concealed the large holes with wood plugs cut from scrap sections of the 4x4.
I wanted to be able to break the bed down, so I used Rockler no-mortise bed fittings to connect the side rails to the headboard and foot board. I highly recommend these fasteners. They are easy to use and seem very solid. I framed out the bed with 2x4s that I connected directly to the side rails with pocket hole joinery. (First time using the Kreg jig - love it!!).
Thanks again!!
Comments
Jake
Wed, 01/16/2013 - 17:47
Great Work
Great work and result for your first project. Something as simple as this bench/table still results in a thing of beauty, especially if it is square and level when you are all done.