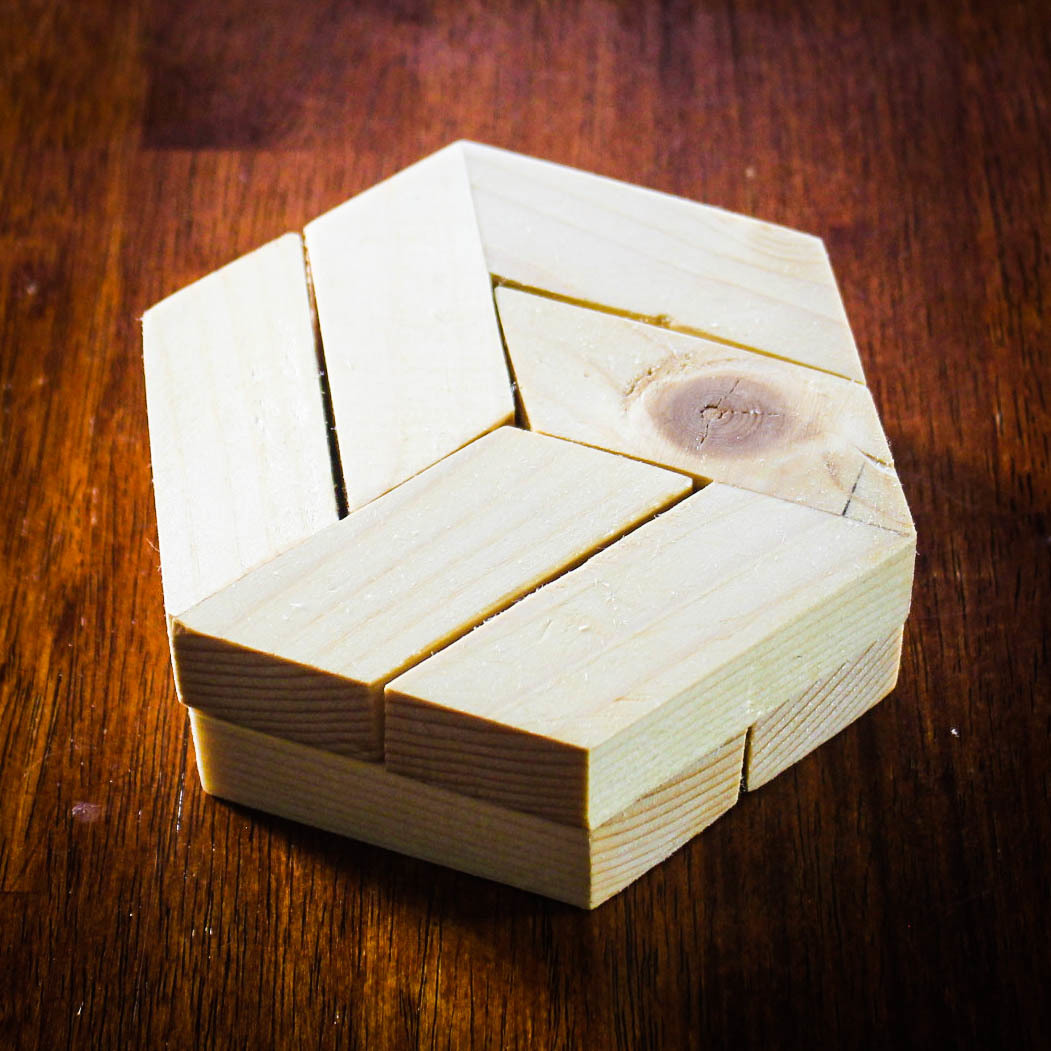
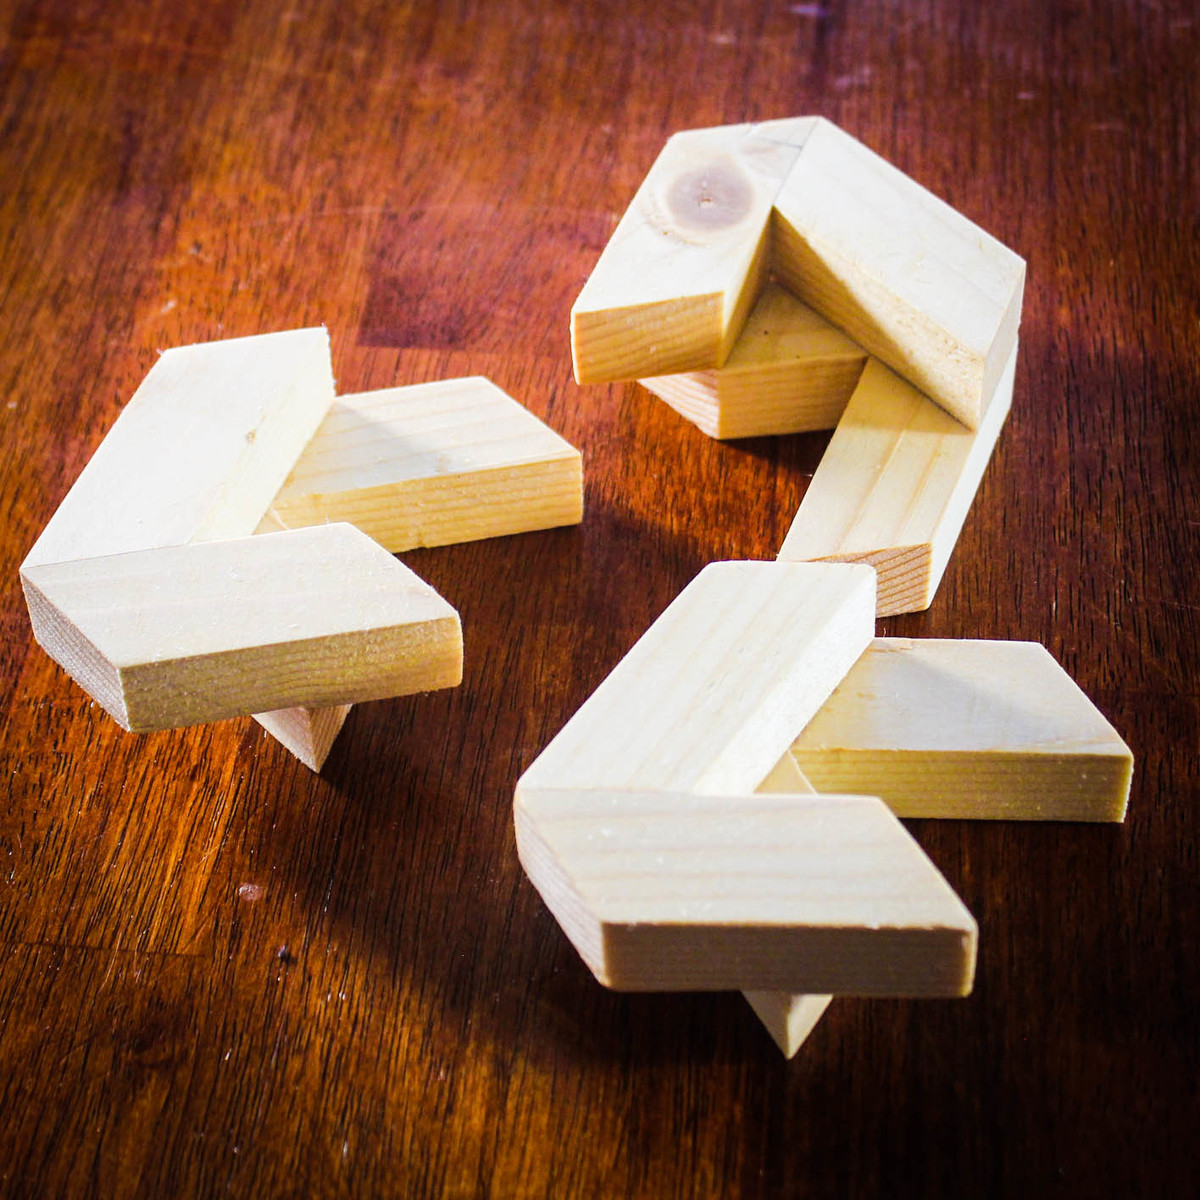
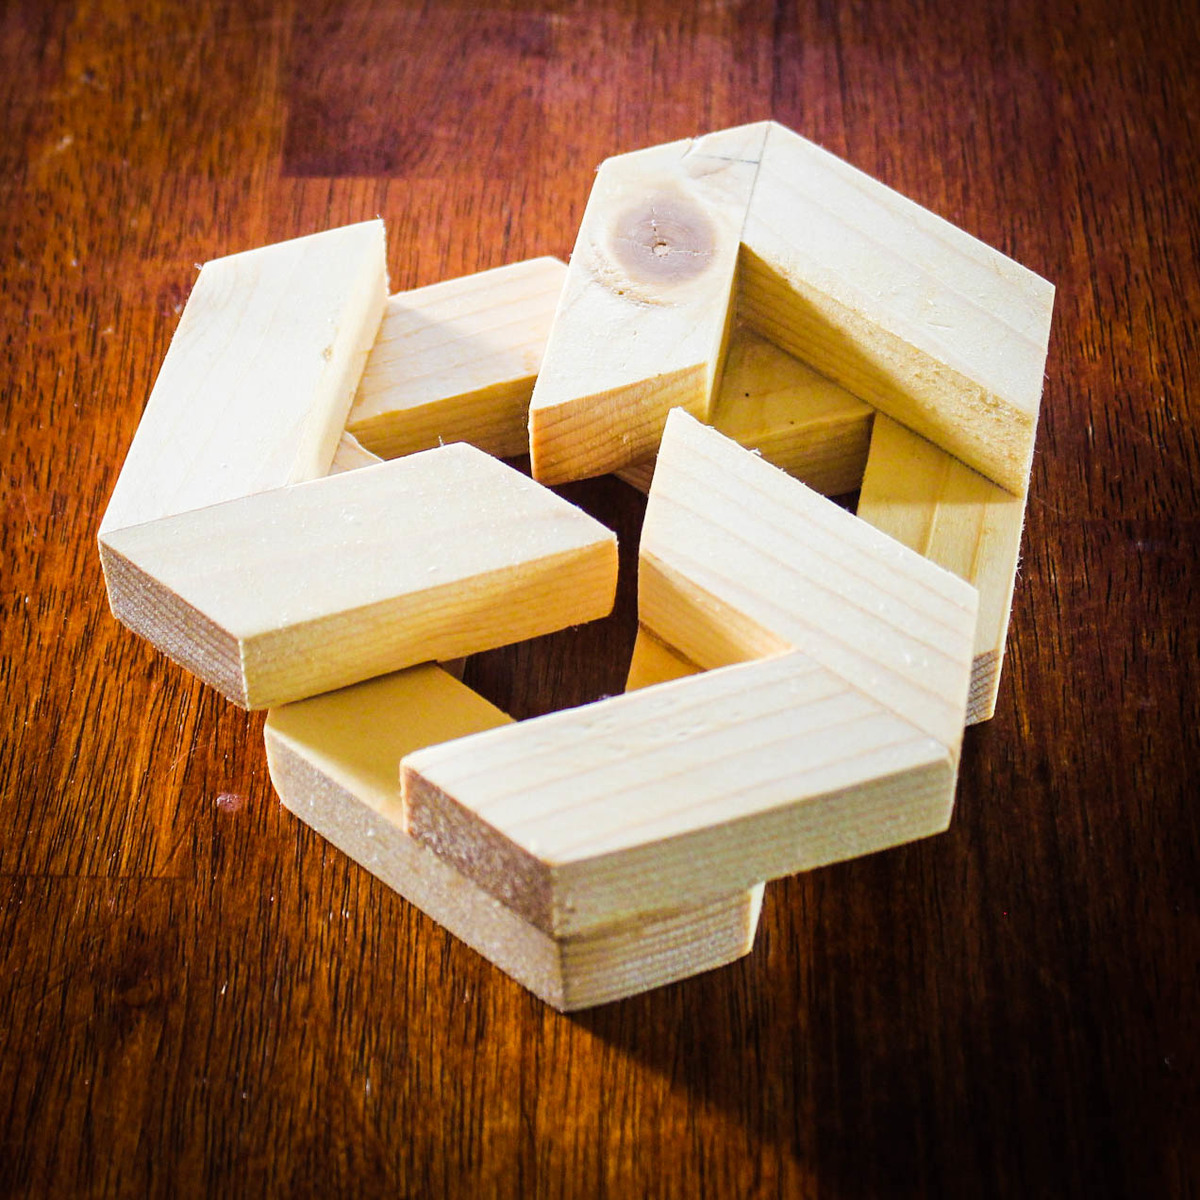
Modern Outdoor Chairs
![](/sites/default/files/chair%20brag.jpg)
Modern Outdoor chairs. Great plan that I’ve wanted to do for a while. Very easy to execute the cut list and plans as written.
Mike Sebazco
Modern Outdoor chairs. Great plan that I’ve wanted to do for a while. Very easy to execute the cut list and plans as written.
Mike Sebazco
I was tired of having my laundry piled on my garage floor. These plans were the perfect solution. It fits great in the small space I had next to my washer. And it was so easy. I was able to do it all by myself. My husband just had to catch the plywood for me when I ripped it. I was able to find the baskets on the plans at Target and used left over paint from my sons' playroom. My laundry is now always sorted, making it much easier and faster to clean.
We used the plans from the jelly cabinet \pie safe and added a wine rack at the bottom and wine glass rack that the top! I love it! I get so many compliments on it.
This 2x2 desk base was the perfect size for our 6' exchange student. He needed plenty of room width and length wise. We went with stain in Kona. More time was spent staining then building.
Have 3 granddaughters; 3, 2 and 6 months, so far 😉 Saw your treehouse video and made a modified version of your triangle platform using the trees I had available. Kinda went over the top a bit, but give you all the credit. Repurposed mostly old deck PT wood and rough hewn beams from neighbors.
Thanks!
Bill Magyar
Duluth GA
I am a teacher and constantly bending over lower desks and I did not have a table to teach off of in the front of the room. So, I built one with Ana’s ideas of a console table with two shelves. I found a link to Kreg from her site and here was this table. I changed the height and width to give proper support of my back (counter hight) and a width that would hold a teacher book. I liked the A-Frame loom and had not built anything like this before, so I learned. I burned the wood for a fun mix of light and dark wood tones. My dad gave me some router bits and I used one to curve the edges of the top, ropy under frame, and shelves. That way all edges are curved for myself and students. I finished it with a coat of poly and a light sanding in between. Thank you Ana for the skills, confidence, and now a love for creating something useful and fun! My students and parents were shocked !! Plus it adds so much warmth to the classroom. Blessings, Jennifer
This was such and easy project. It went together in a few hours. The hardest (and most time consuming) part was finishing it. I detailed the build process on my blog if you'd like more info.
My wife was wanting to get some cupboards and a hutch for her craft room that we were setting up. I looked to buy something but it was very hard to find anything the right size and combination. I was looking at different plans and I came across your site and was inspired to have a go myself. I used the plans for Patrick's Jelly Cupboard and also the Schoolhouse hutch.
I had to change some of it to get the right fit. It took a fair while to complete but I now have a very happy wife
I followed your plans, with the exception of the computer desk. I mede it just a bit deeper, 1.5" or so. If I were to do this again, I think I'd go a little deeper still, maybe. Anyway, great design.
Thanks to Ana's plans for the attached garage shelves, we've managed to change 12' of garage space into 60! A quick trip to the local Home Depot and following the included instructions, these SUPER easy shelves were perfect for our needs. Thanks, Ana!
I had an empty space next to my stair case and desparately needed a place for my kids to hand their back packs and put their shoes that wasn't all over the place! I adjusted Ana's plans for 4 drawers since there are 4 of us and added board and batten. I also was placing the bench over an outlet which I didn't want to lose so I got an extension piece and cut a space out for it on top with a jig saw. Love the way it came out!
You can't tell in the pictures but the frame where the bolts are supposed to be barely touch the legs on the headboard. I have a standard queen bed on a standard queen frame, but it's just a bit too wide to bolt the frame to the headboard. I also had to take about 8 inches off the original plans because of the window the bed is under. Measure, measure, measure.
Get straight wood. The straighter, the better.
I used standard finishing nails and liquid nails glue to hold it. I didn't need to break out the Kreg Jig as the original plan stated.
This has become my dream sewing/craft desk!! This project took about a week from start to finish (with work days in between). The shorter portion of the desk is used for my machine and sewing. The taller portion is used as a cutting table. The plans (dimensions) were tweaked some to get the perfect heights for me :).
Wed, 03/25/2015 - 06:31
Your desk is GORGEOUS!!!! It's exactly what I've been looking to build for my space. I would love to know how you modified the plan to make it.
Wed, 03/25/2015 - 07:21
I need to modify my home office/craft space and building a couple of these just may do the trick.
Wed, 03/25/2015 - 07:23
I also wanted to comment on the thread shelf you build, that is really awesome, you can see all your colors right in front of you. Mine are in a drawer and I have to pull the whole thing out to see what I need. This is really giving me ideas.
Fri, 09/04/2015 - 08:45
Would you please send the plan instructions (with measurments). It is perfect for me as I sew and embrodery both and have two machines.
This was the first West Elm Knock off I attempted. This was the first coffee table my sister requested. This was also my first experience welding. All in all it turned out pretty amazing. She wanted one with a lifting table. I bought the lift off of Amazon for around $60. The wood is all Poplar and she used a mixture of stains to get the look she wanted. I also added a hinge to the back other half of the table top so you can lift it to add more stuff inside the table. I do not have any plans for this project as well i mostly just looked at the website and used the dimensions they had posted.
Wanted new nightstand but also wanted so shelving for pictures and stuff. Saw a picture on here and google images and decided to make it my own.
I finished my first project. Although there are some cosmetic errors, I think overall it’s amazing. We had a lot of wood left behind by the builder of our log home. So, I was able to use a lot of that. I made some adjustments to the height of the boxes to help the back!
Michelle M - Jefferson, NC
Our first building project and couldn't be happier with the outcome!
My husband and I were in the market for a new bed frame, but nothing in the shops were what we were looking for. We discussed making it. I came across these plans (http://ana-white.com/2012/01/plans/hailey-platform-bed) and off we went! The headboard was something we "designed" on our own (we did not work off any plans). We wanted something simple and functional.
We started from scratch .... had to buy tools, wood conditioner, stain, etc. But unbelievably thrilled with the outcome (and cost)
It is a very sturdy and heavy bed, something that is great for use, but may cause some issues when we move .... ;)
I did not include the time needed to dry, only the time it took to get items/measure/cut/build/assemble.
Flip down tray added for computer keyboard.
Wed, 12/27/2017 - 20:15
I love this, it is exactly what I am looking for! Is some type of extra support needed for the flip down tray for the keyboard ? If so, what would it be, or is there a special hinge I should look for?
Love these plans for the farmhouse table comsole
We have a small pantry as well, so we used the shelving featured on your website to help!
I absolutely love it. They’re not as beautiful as yours but I’m happy with what I made :)
Alison