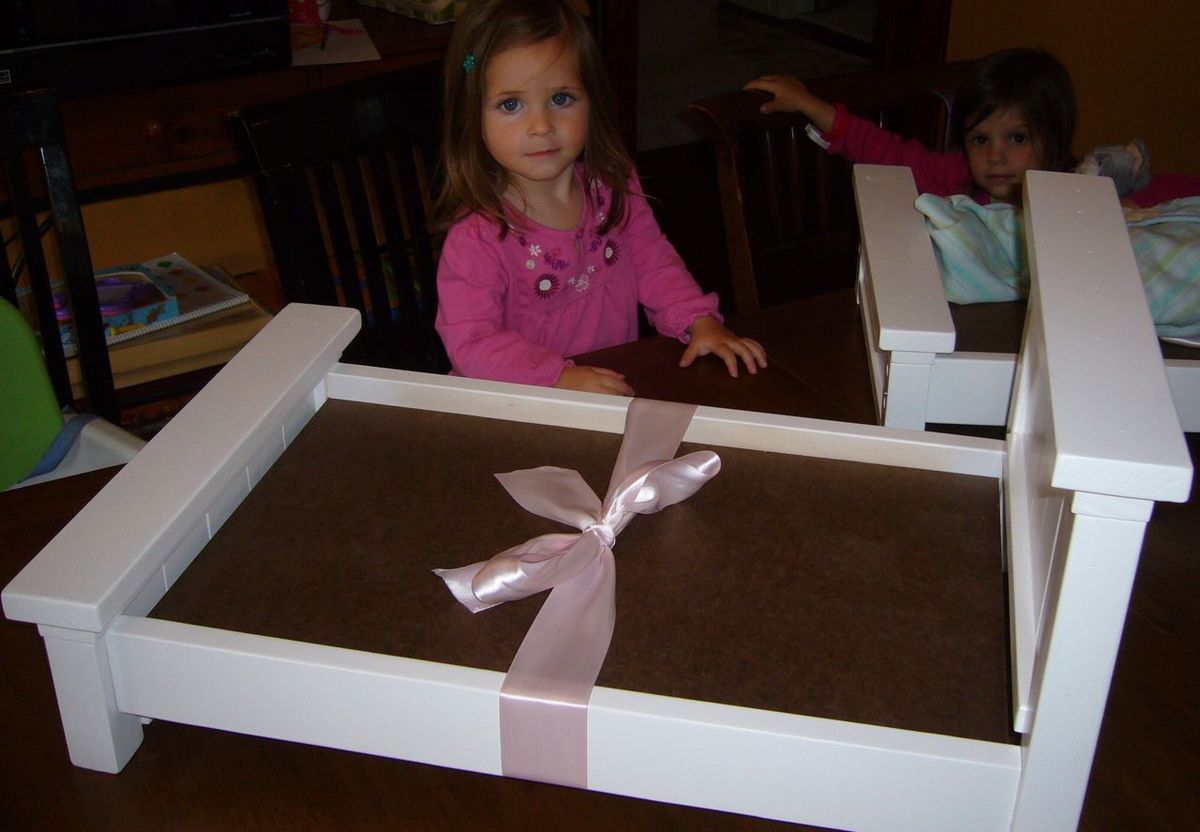
Double Trestle Play Table

Great plans and we love the finished product!


Built from Plan(s)
Recommended Skill Level
Beginner
Great plans and we love the finished product!
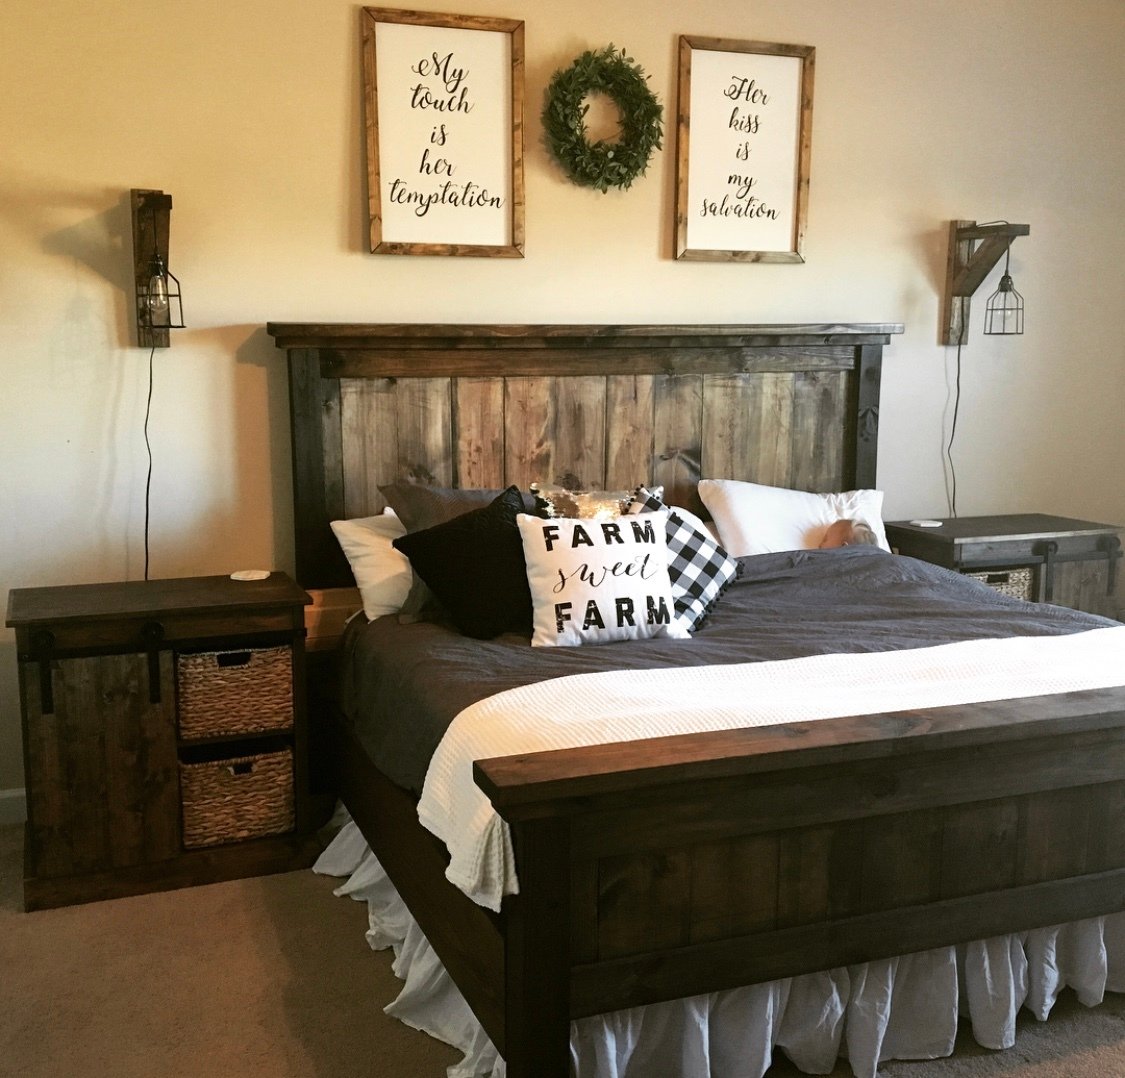
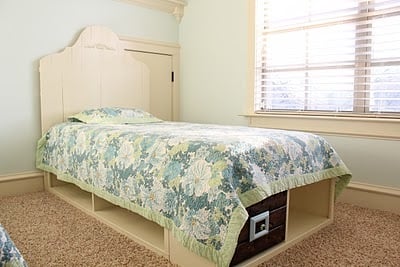
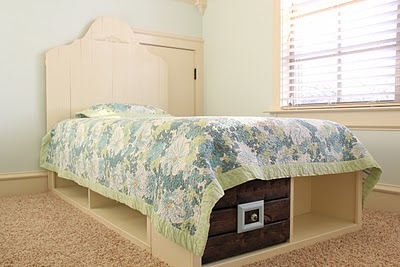
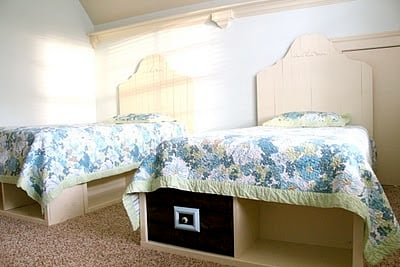
We couldn’t be happier with the outcome! This bed is beautiful and everyone who sees it is impressed. We did raise both the footboard and headboard so that both gave a bit more impressive appearance and so that the footboard rises above the mattress.
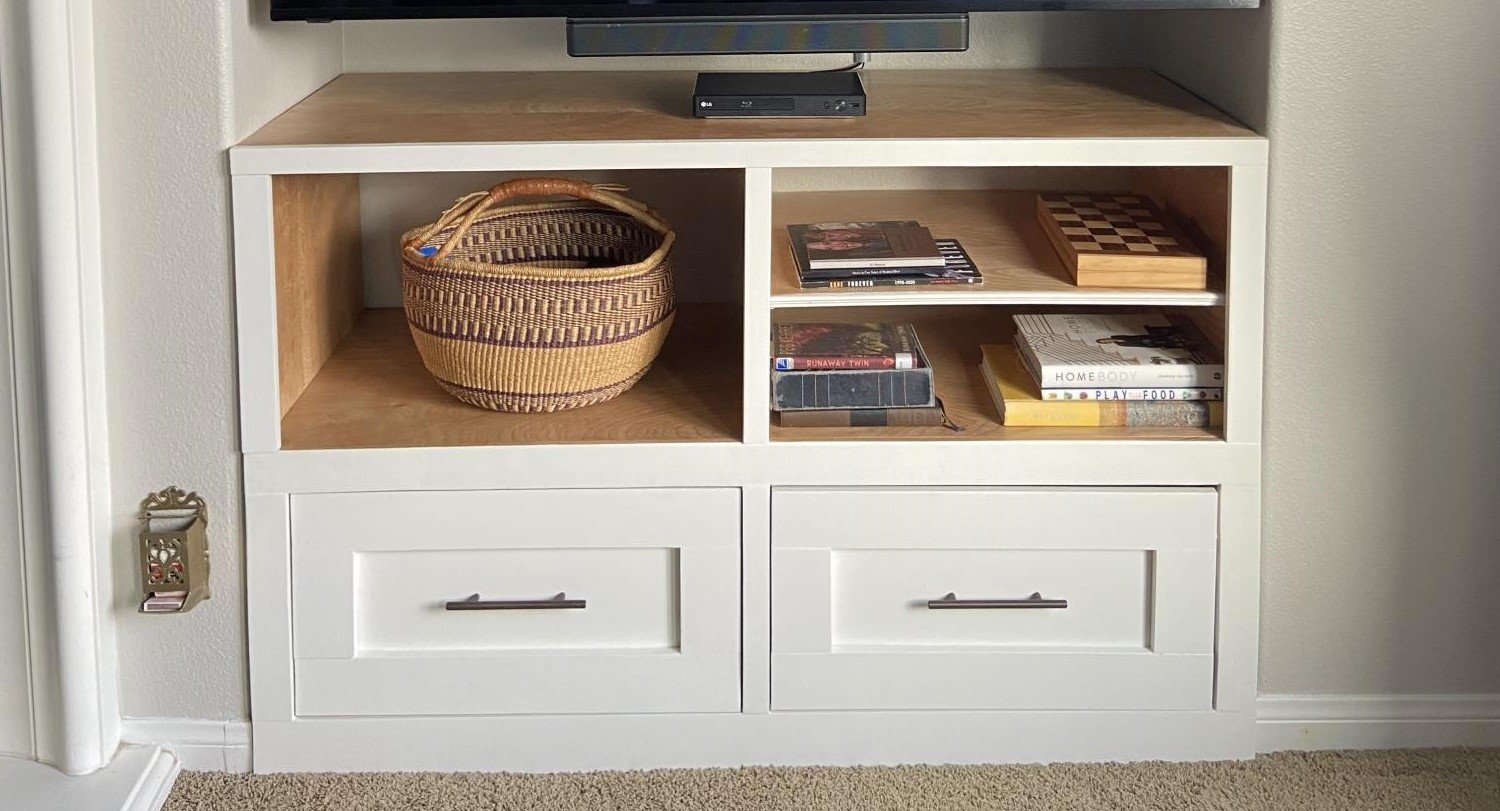
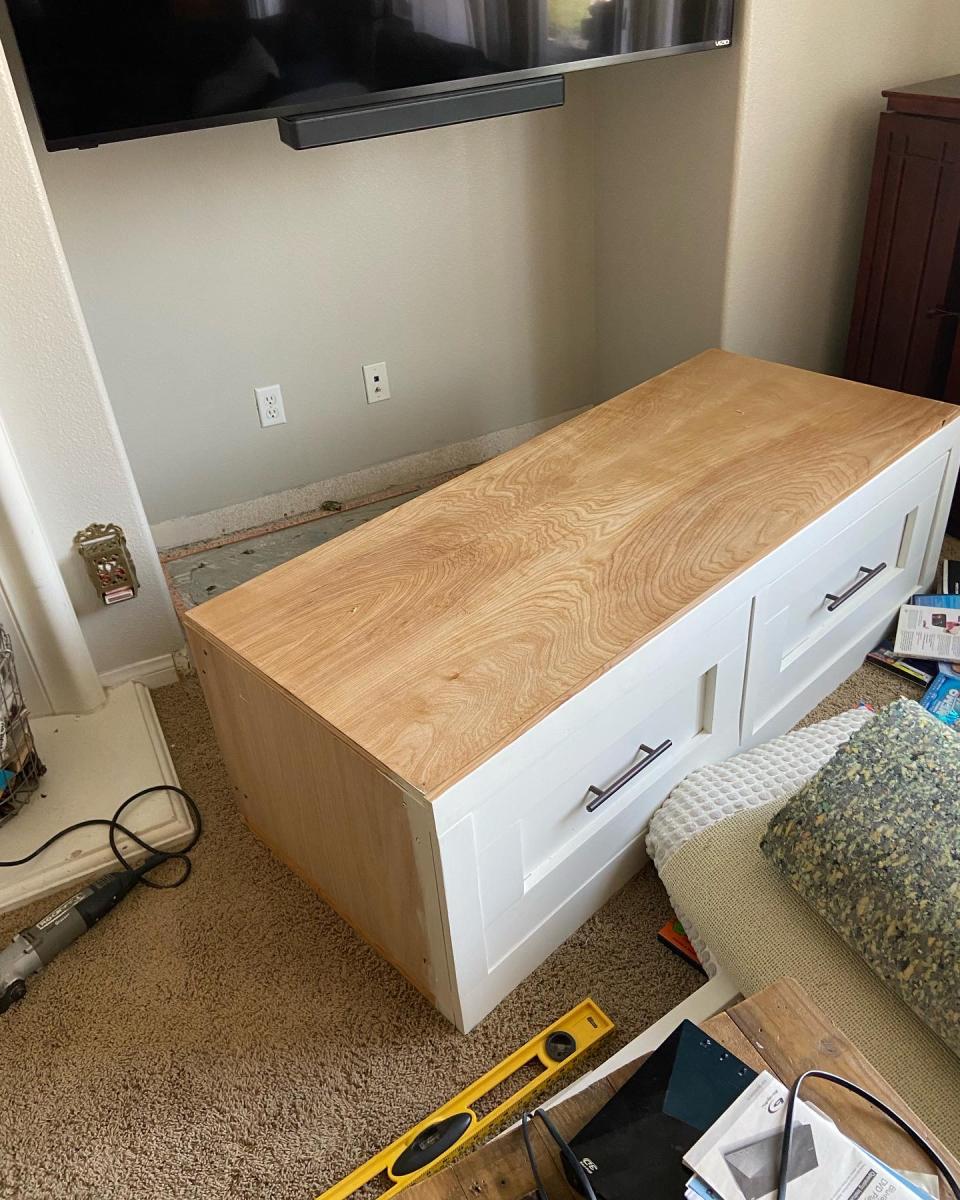
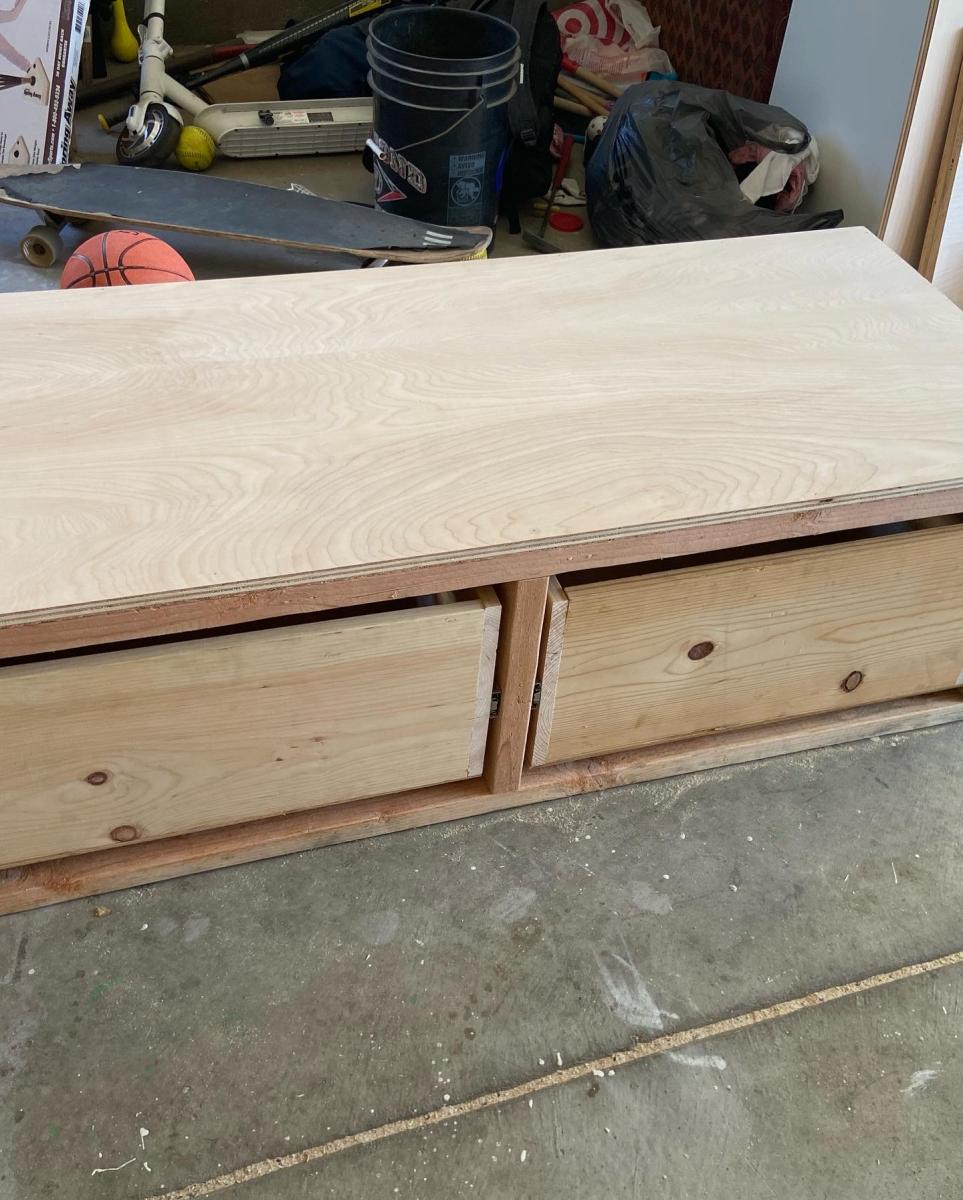
Modified the mudroom bench with drawers to make a built in entertainment area. Thank you for the ideas. It was tricky to modify and definitely a learning experience but I always learn something new when I build.
Tue, 05/03/2022 - 10:37
That is just beautiful, way to think out of the box to get exactly what you wanted! Thanks for sharing.

This was our second project from the site.
We used the plans from the Queen Farmhouse Bed as a guide, and used information from the Two-Tone Kingzize Bed to finish it off.
Some differences we had were to used a single panel instead of multiple panels for the headboard and footboard. We then bordered that panel with 1x3's, and a 1x3 down the middle of the panels.
We also attached the box frame (we dont use boxsprings) a little higher than the plans. We attached these at 11.5 inches up. If you like high sitting beds, this will do it.
Great project. We havent sanded/stained it yet.
Tue, 07/03/2012 - 07:47
Thanks for the tip about attaching the frame higher. I prefer high-sitting beds (I'm tall, so I hate feeling like I'm falling onto the bed), so I'm happy to see I can make it higher up.
Sat, 10/13/2012 - 08:29
Love the single panels. Did you use one piece of wood for the panels? What size? Also, would love to see pictures of it with finish!
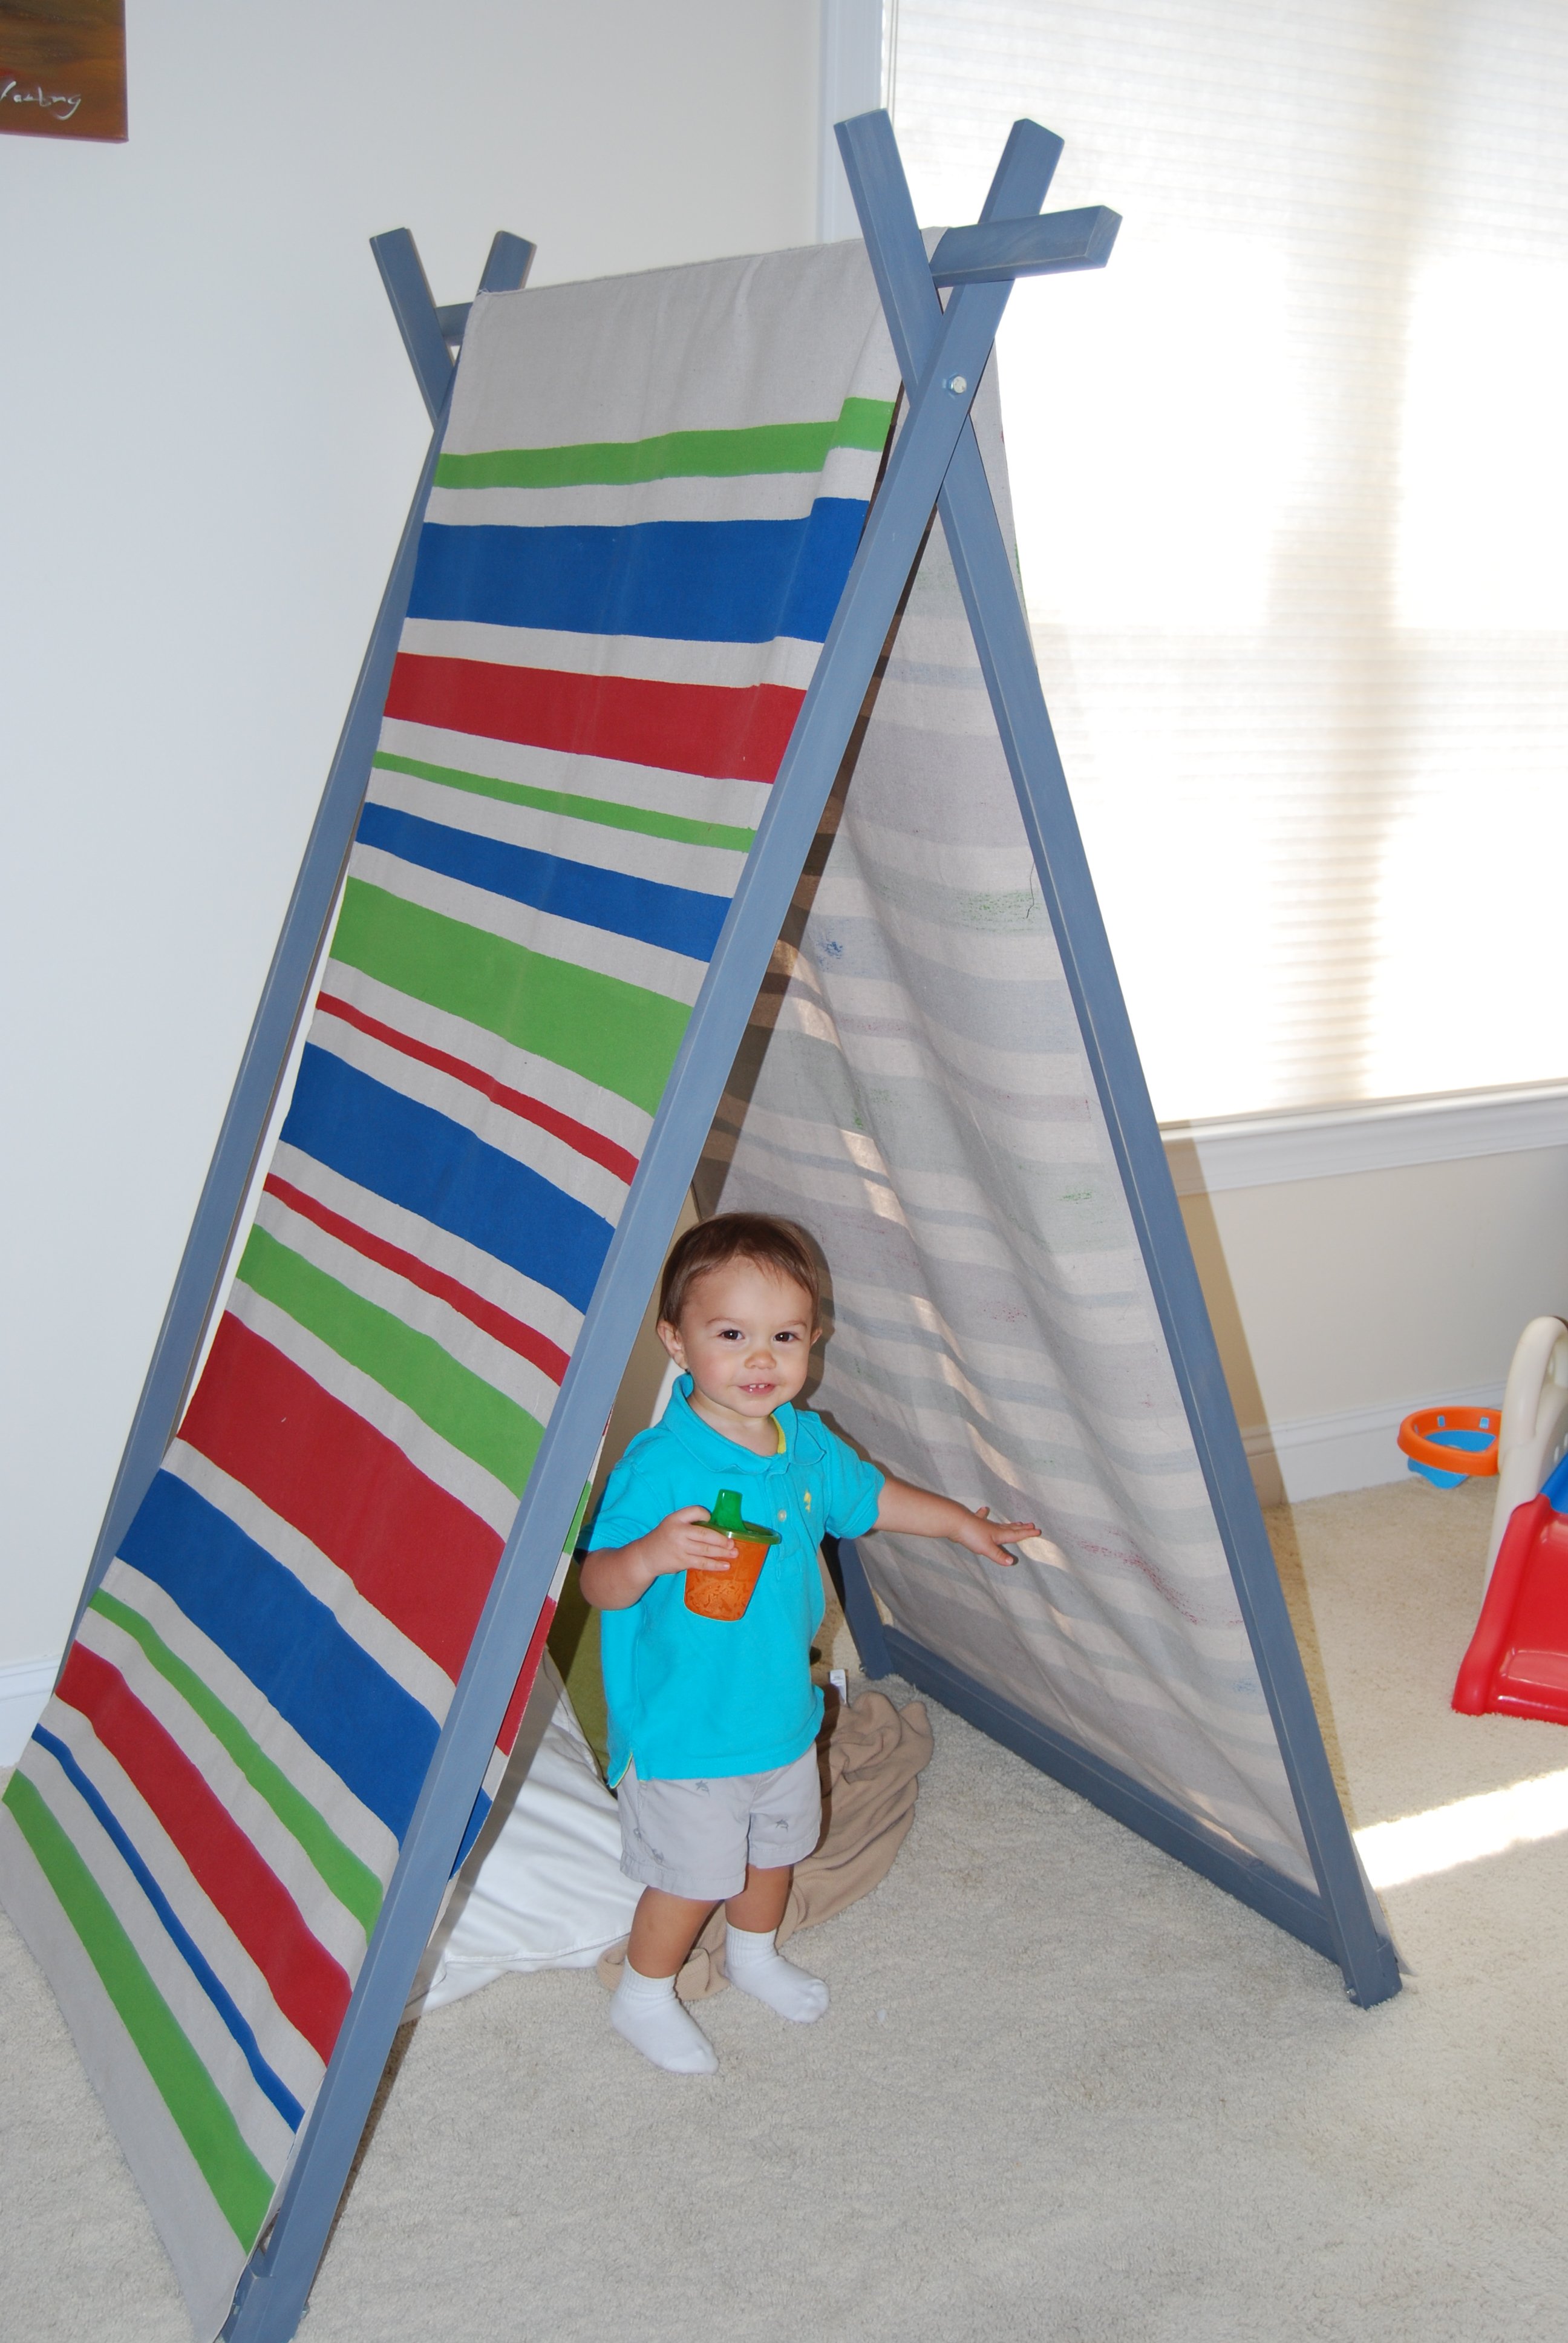
Not too bad for my first project without my dad to oversee! I did adjust the plan a bit for a more colorful option. I bought a 9' x 12' canvas drop cloth at Home Depot, cut a 3' wide strip, and used Dritz Stitch Witchery to finish the edges. I then mixed samples of Behr paint with fabric medium to paint stripes. So that I could wash the canvas if needed, I attached it with Velcro strips at the base of the tent.
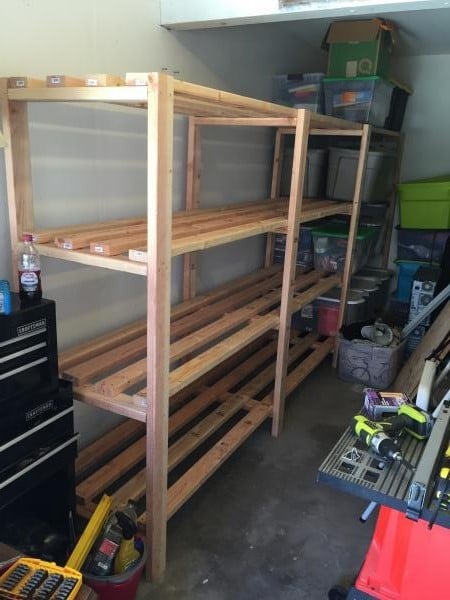
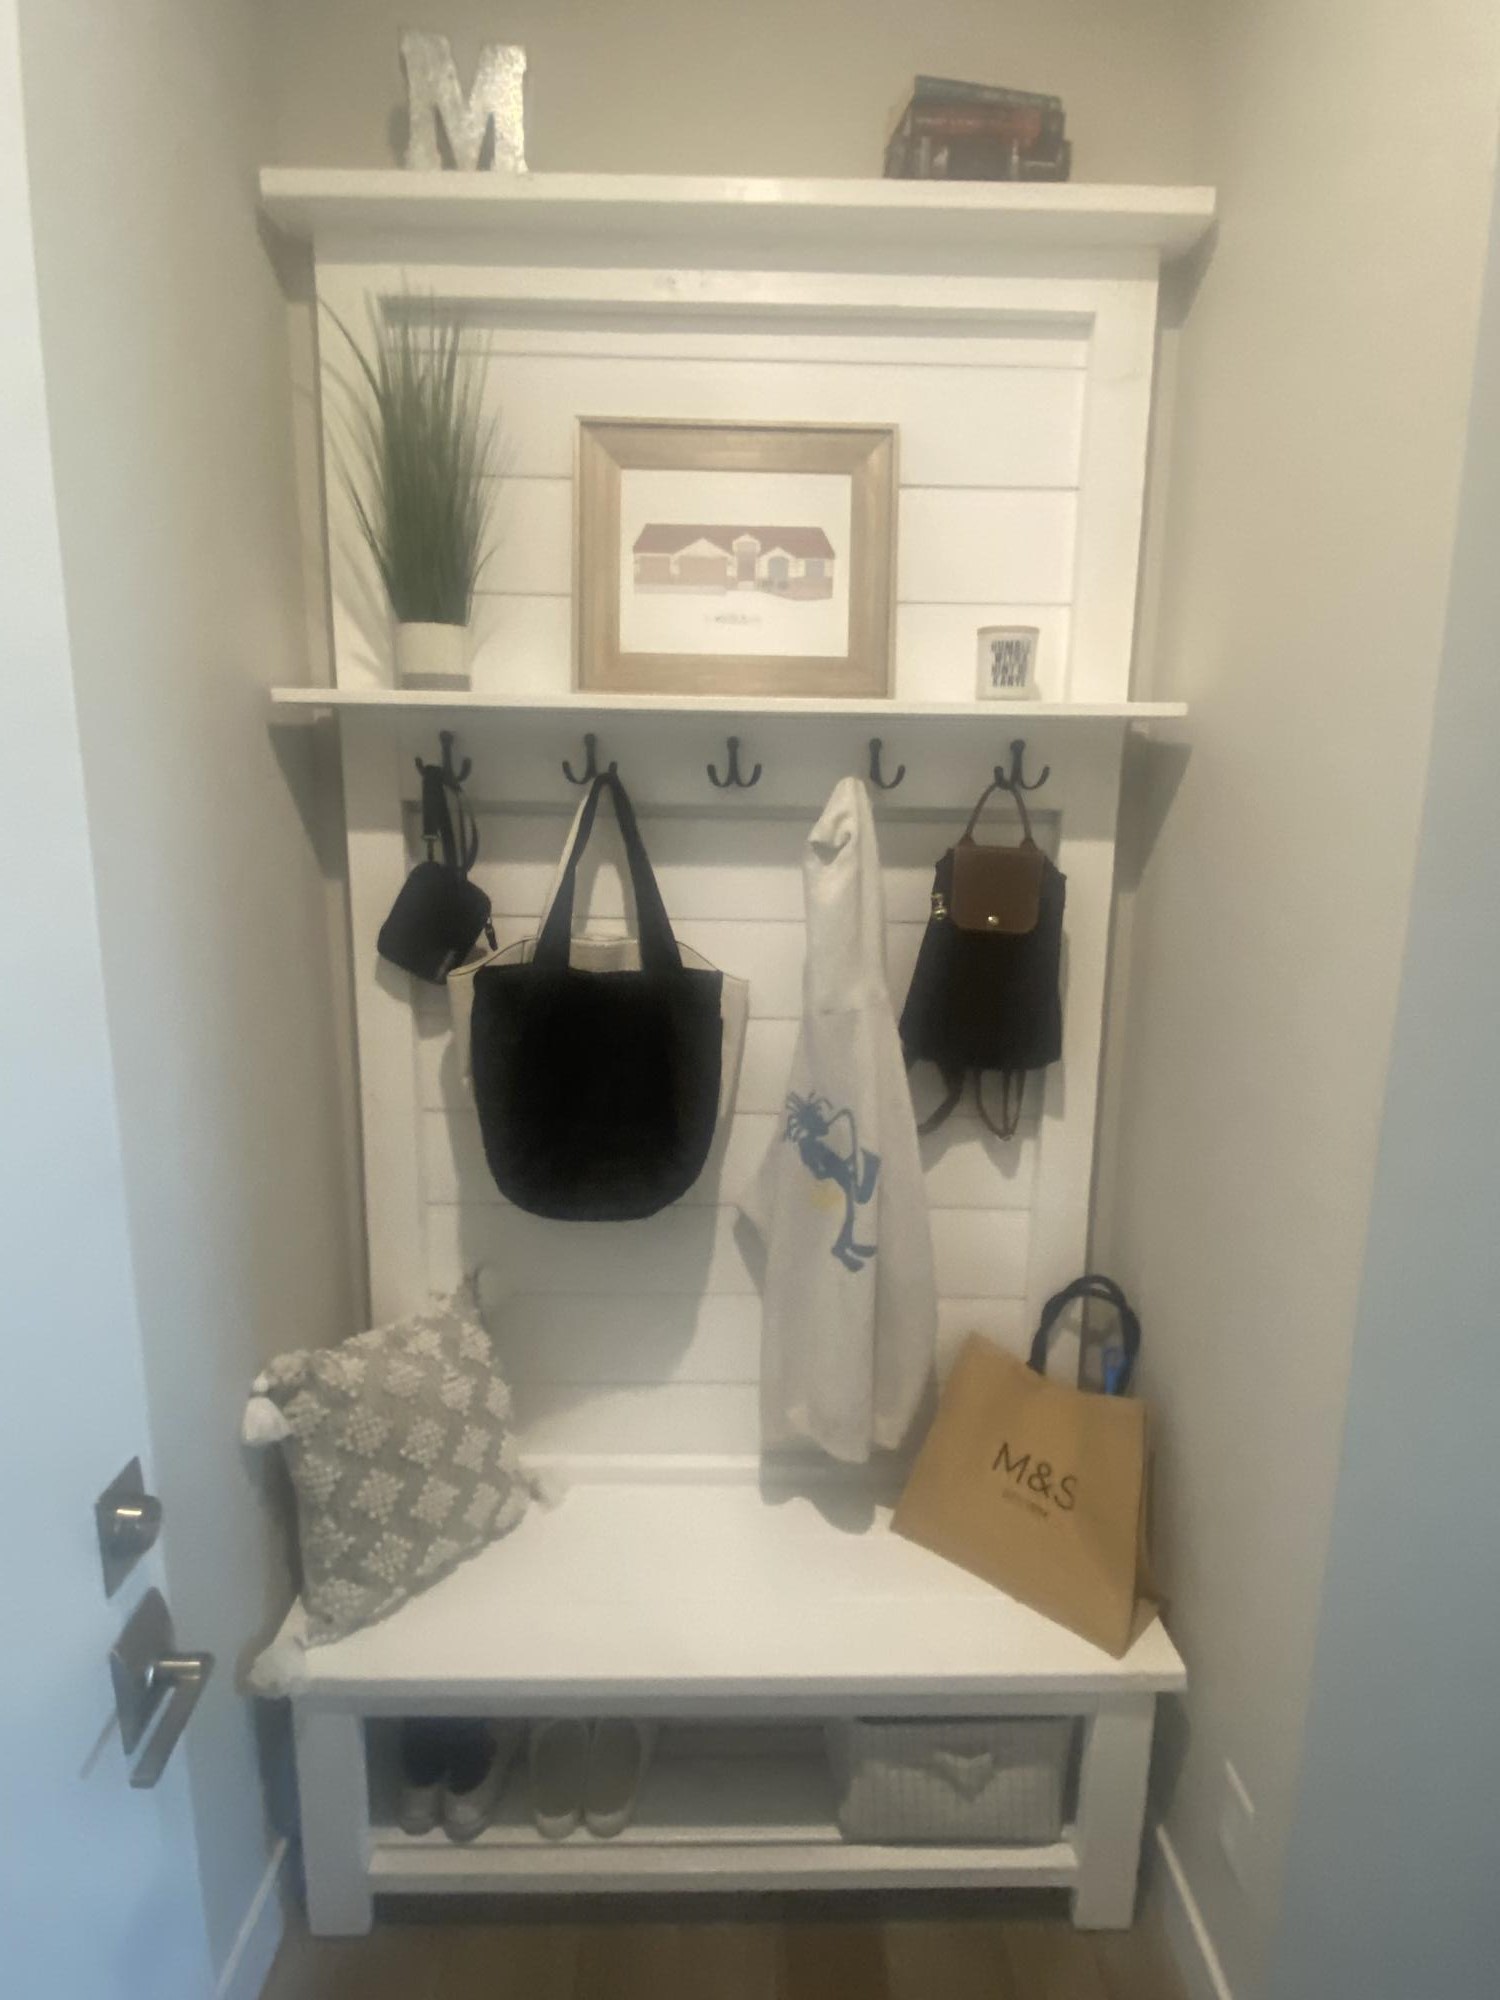
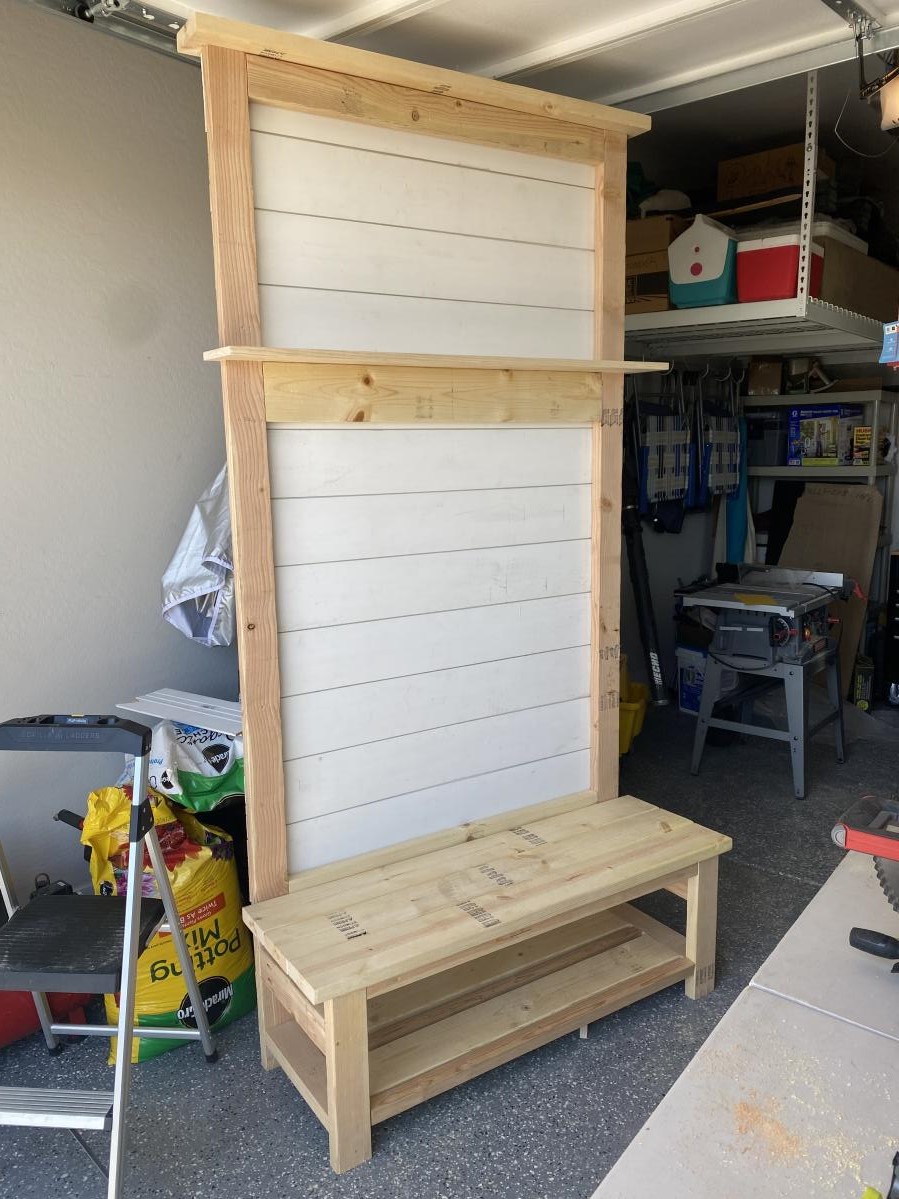
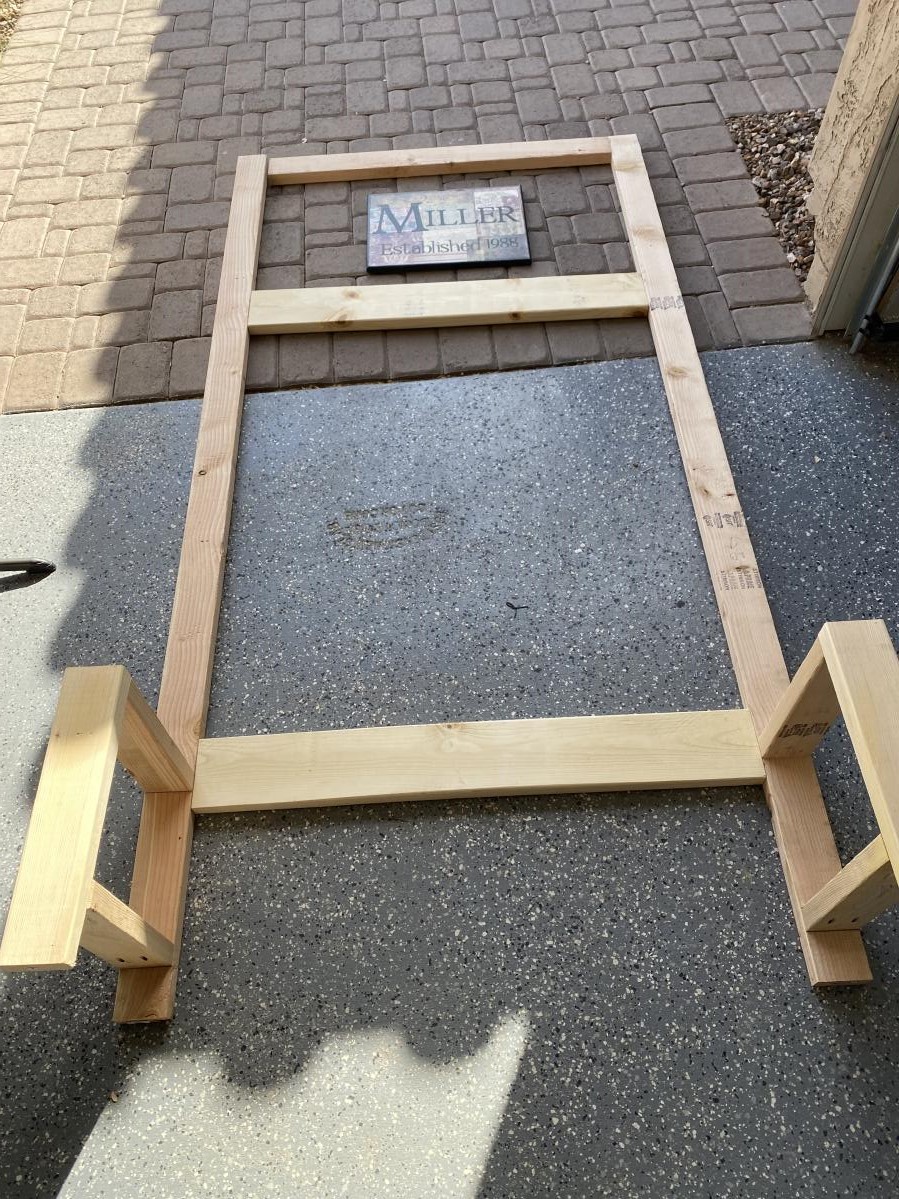
This was such an easy project to complete although it did take some time to measure and cut all the boards. I could only transport 2x4s at 8' so after cutting the height to 6' for the braces I used the extra 2' for the shelf width. The extra width really helped with some of my storage totes. I made the first section at 5' in length to handle the heavier totes, and the second section I used the full 8' board with a brace in the middle. I wish my garage was a little deeper to handle 16' of shelves as it would have saved me a good bit of time. I'm also glad I have an extra ryobi battery to charge while I assemble. Gotta love how fast those things charge. Can't wait to try another one of your plans.
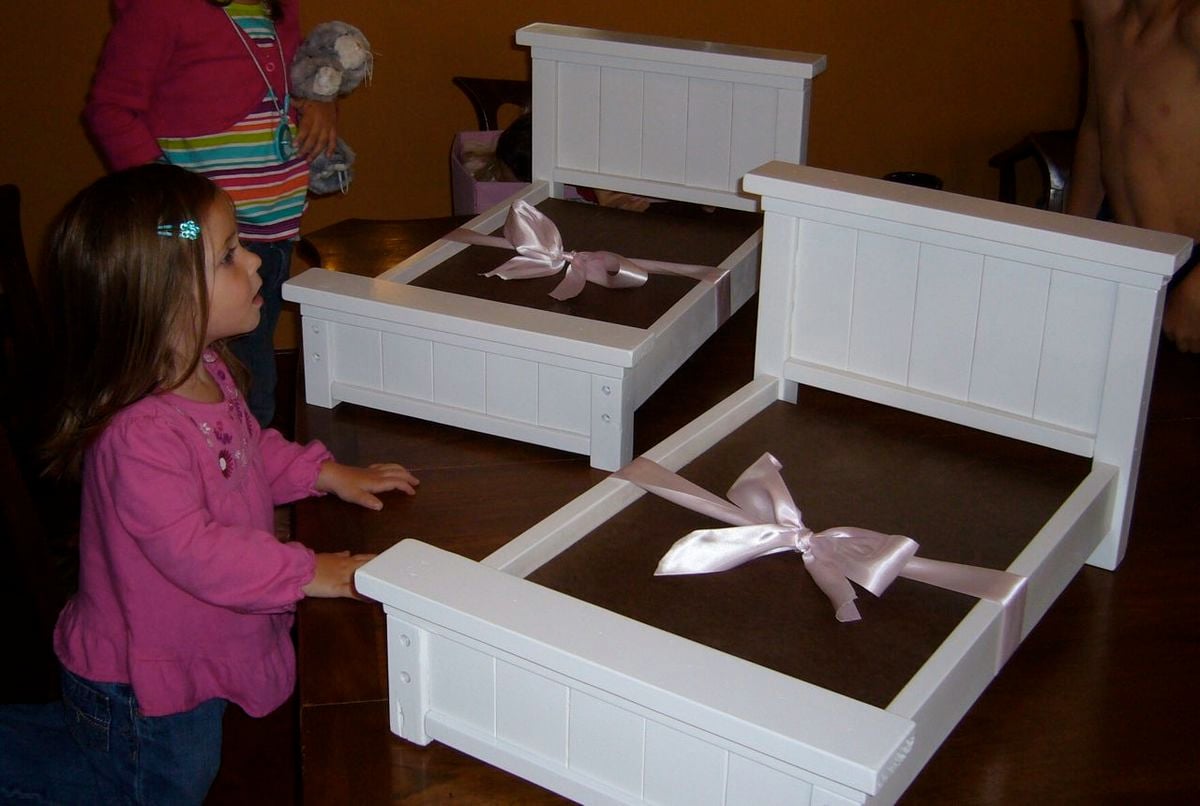
I built my girls' beds using two of Ana's plans. I used all whitewood boards for the construction. It took a few hours to build both beds and I love the result! I used my brad nailer and gorilla glue for both the headboard and bed base. I also used drywall screws (my fav) to attach the bottom bed pieces. You can see more details at http://www.shanty-2-chic.com/2011/01/beds-finished-well-almost.html !

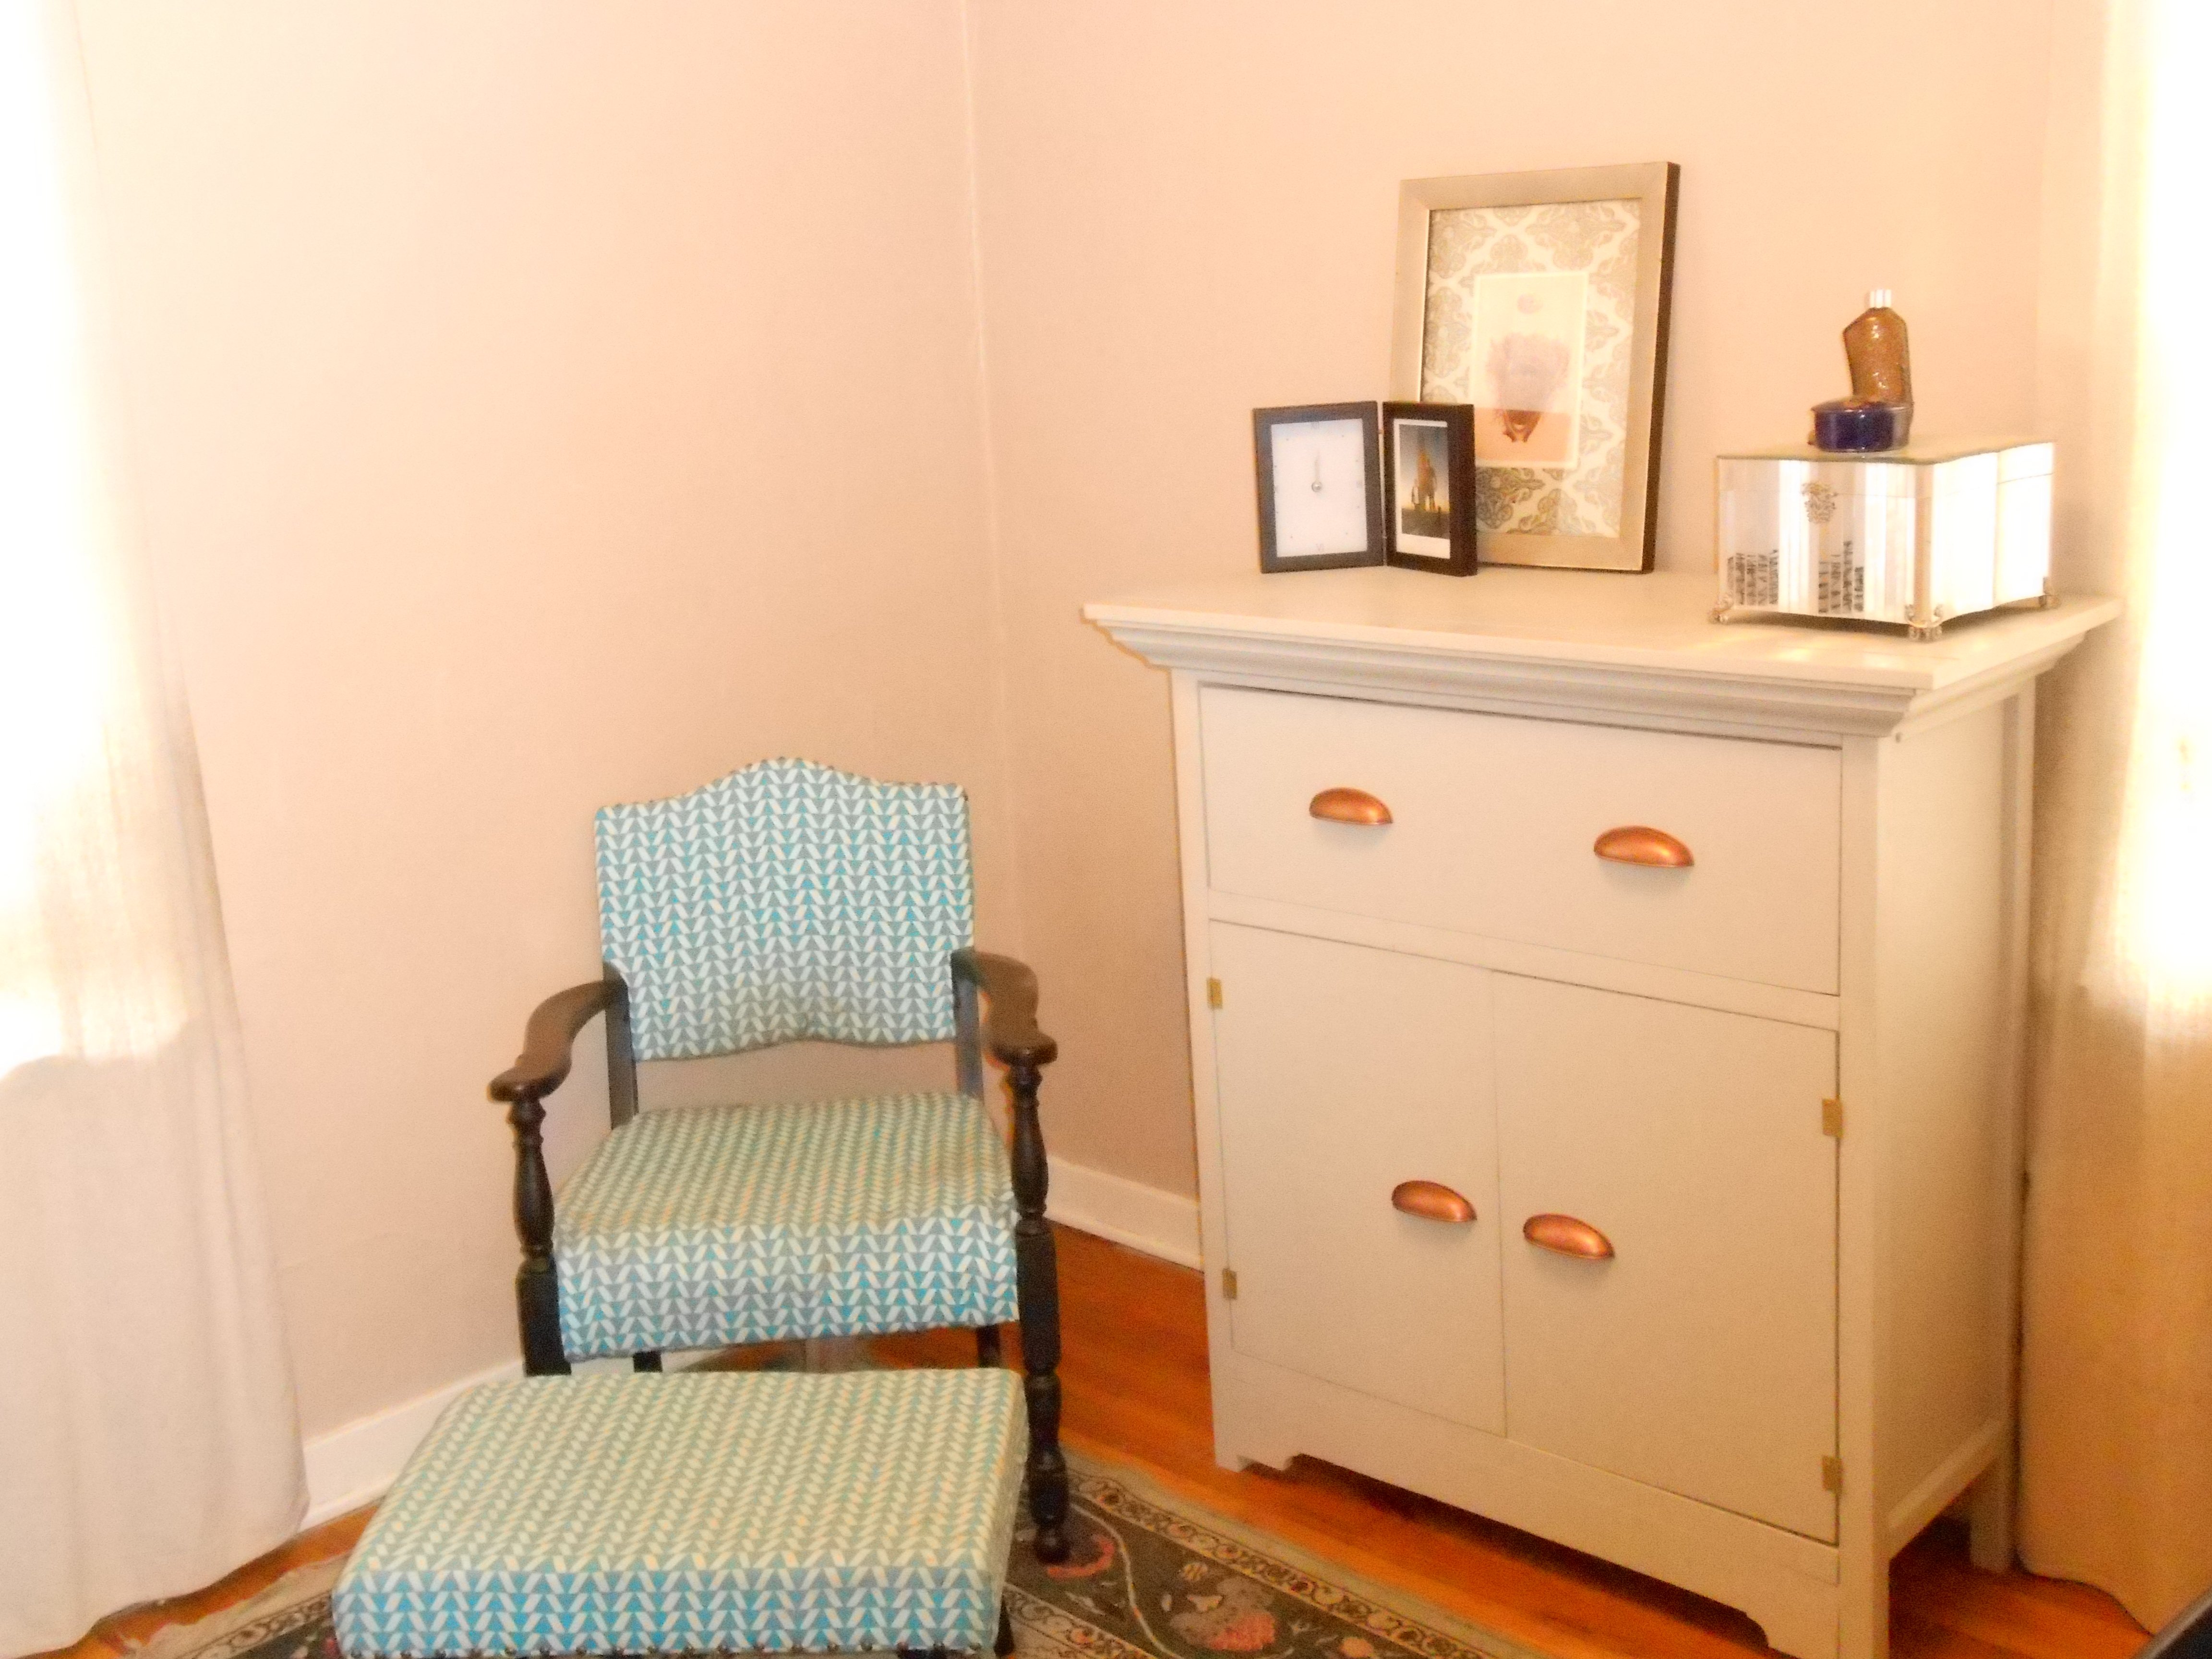
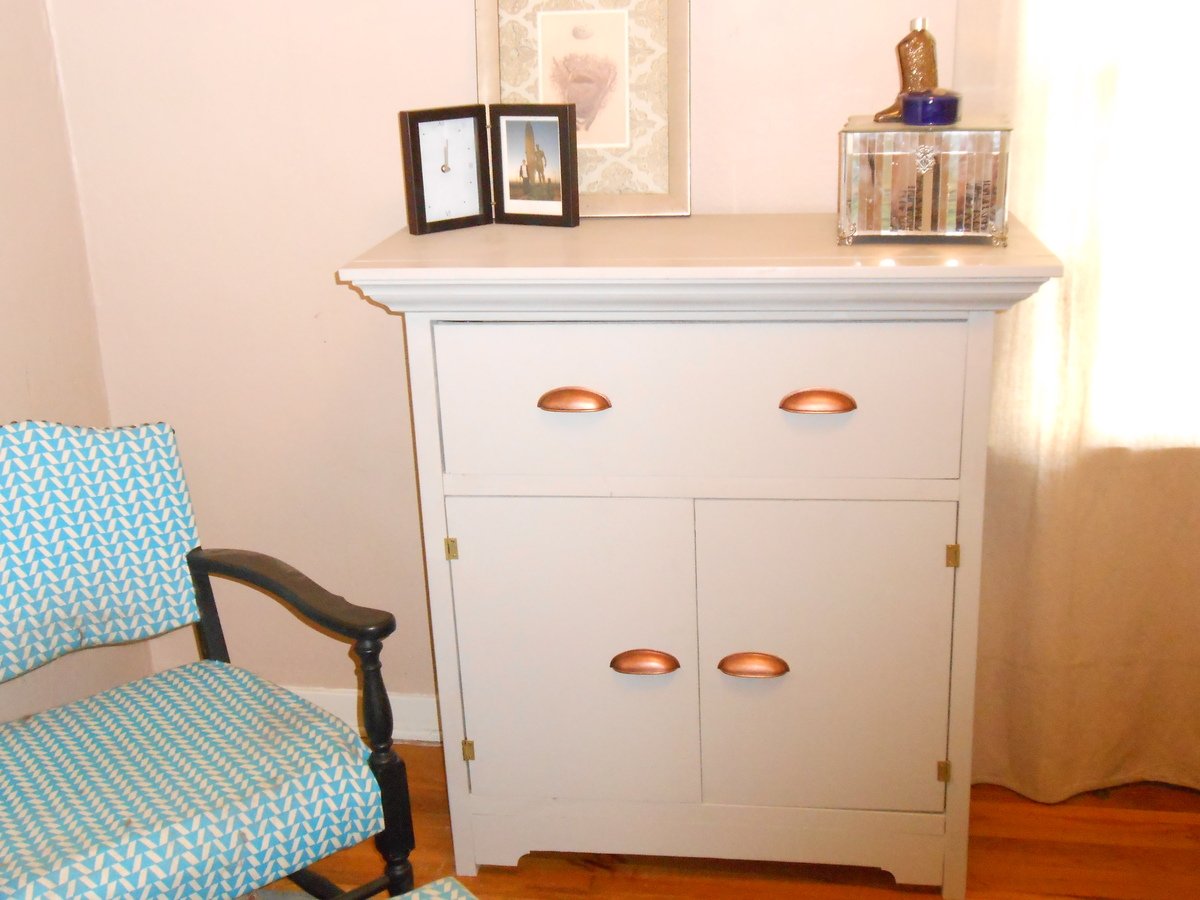
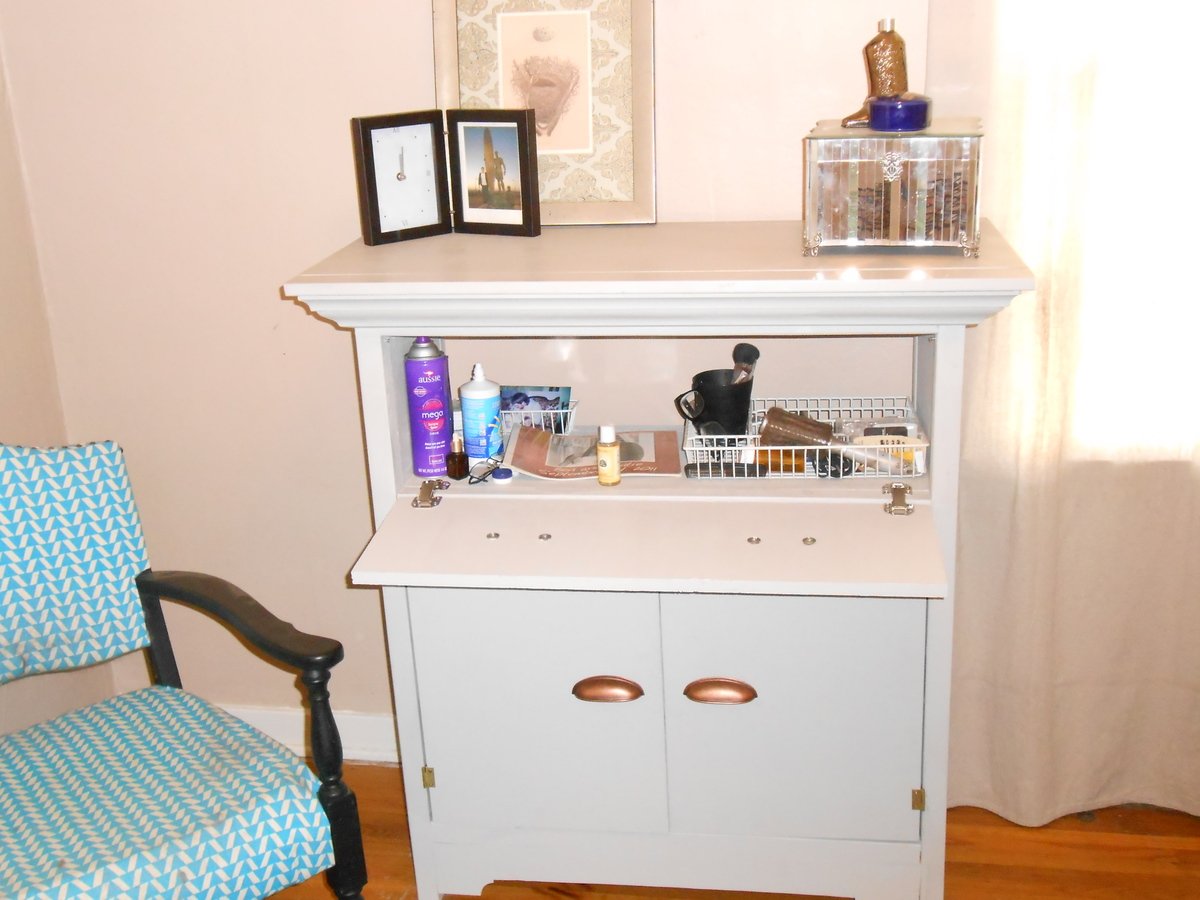
This was our first build requiring any doors. We didn't get them perfect, the inset part was kind of challenging, but its still functional and beautiful! I will be lining the top section (the desk part) with mirror and will be using it as a vanity desk! It has created sooo much storage in our extra bedroom and I LOVE THAT! It was a pretty easy build except for adding all the doors and hardware, which turned out to be the most frustrating part. We added some leftover crown molding to the table top which makes it feel a little top heavy. I'm thinking about adding some chunky feet to it to balance it out a bit.
The secretary is from Ana's awesome book: The Handbuilt Home!
Cost: approximately $60
Finish: Soft Gray paint in eggshell (What was I thinking using egg shell? It should have been a semi gloss but I guess that's what happens when you're using what you've got.)
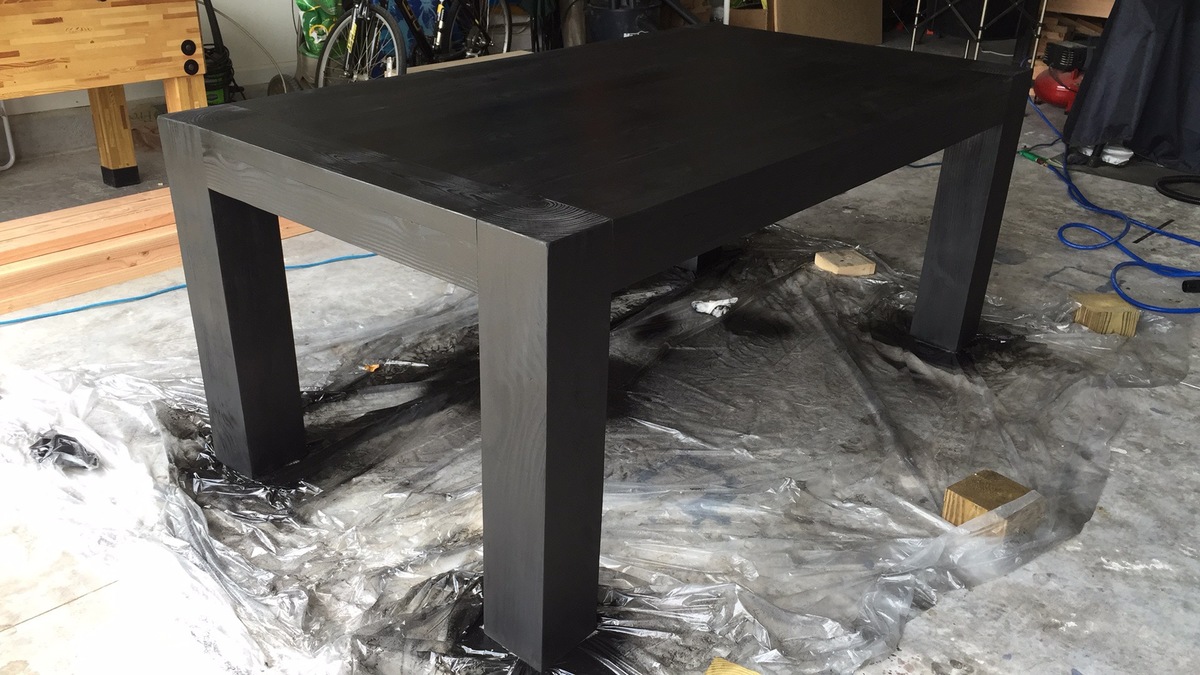
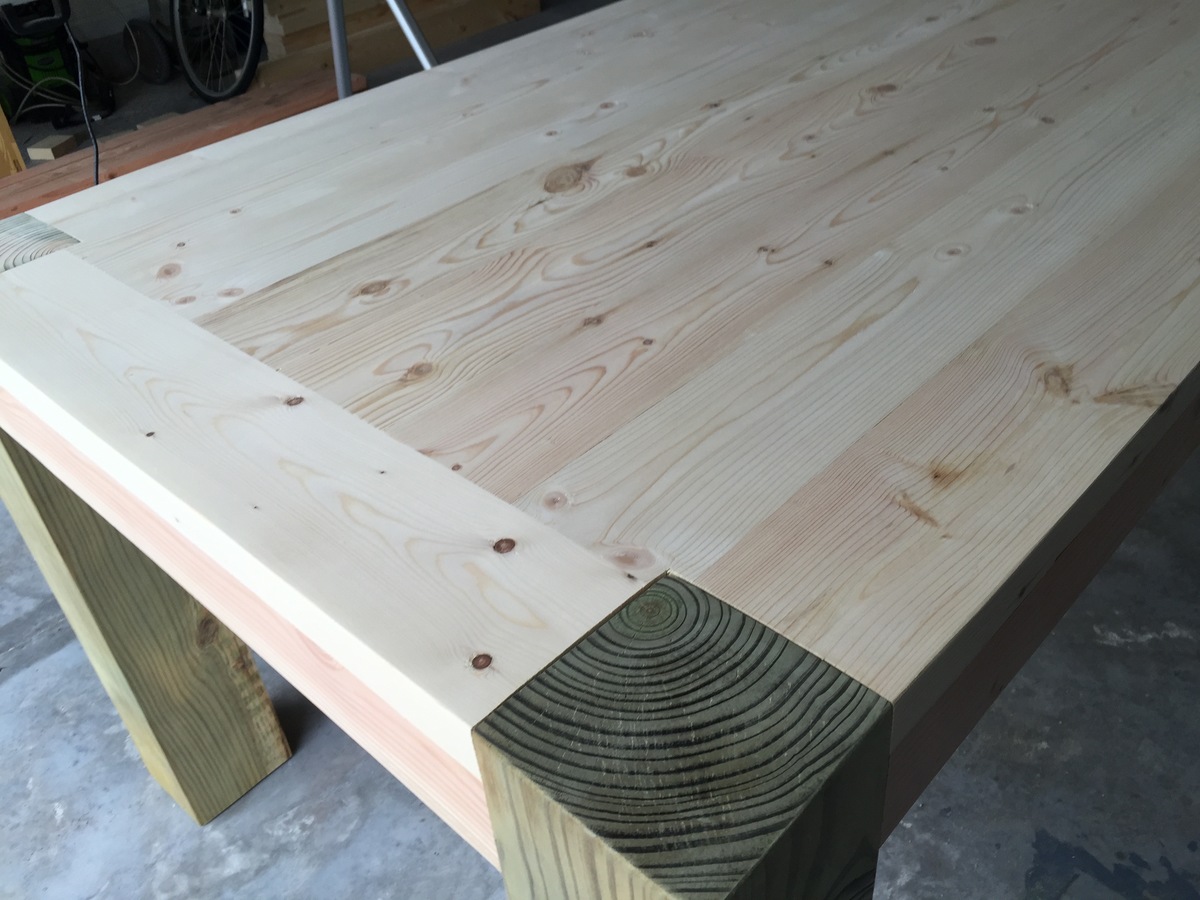
I have decided to build the iTable as a dining table last weekend and I am very happy, this is becoming our new dining table! I used 6x6 for the legs and stained with ebony stain, and protected with 3 coats of polyurethane.

Had a blast with this project and am getting more confident with drawer slides. I built a matching dresser that is much shorter and wider. It can be found here: http://www.ana-white.com/2018/08/DIY_furniture/bedroom-dresser

Mon, 08/03/2020 - 18:44
I must be missing the link to the plans for the dresser. Sorry, could you help me find the plans?
Wed, 09/30/2020 - 17:13
I would also like the plans?? Any help finding the link?
Mon, 12/28/2020 - 11:12
Are the plans available for this piece? Its beautiful! If so, please let me know.
Thu, 08/12/2021 - 15:35
Any way to get a copy of these plans? I really like the look and want to give it a shot. Have to make a few of these if all goes well for all my boys.
Thanks
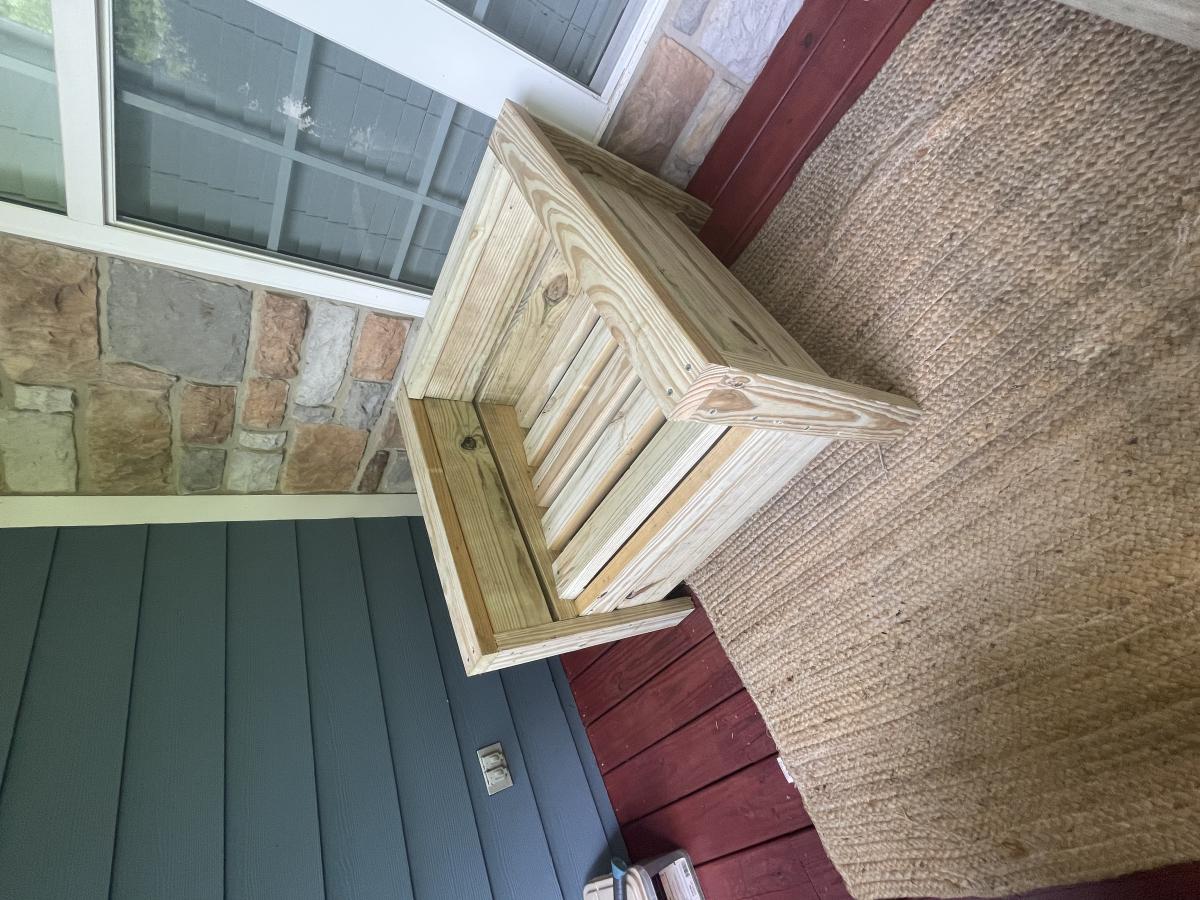
Simple to do with a good saw and drill. Took me about 3 hours to do both.
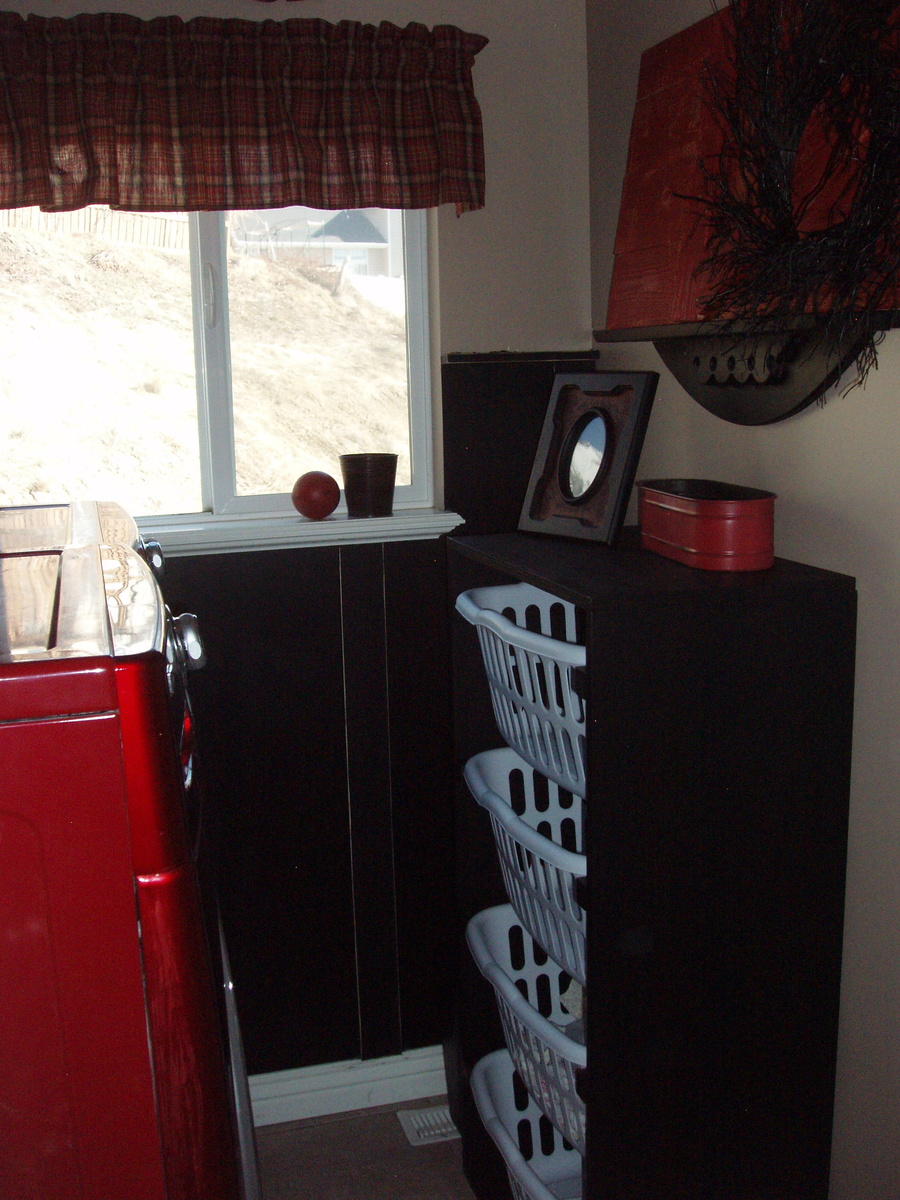
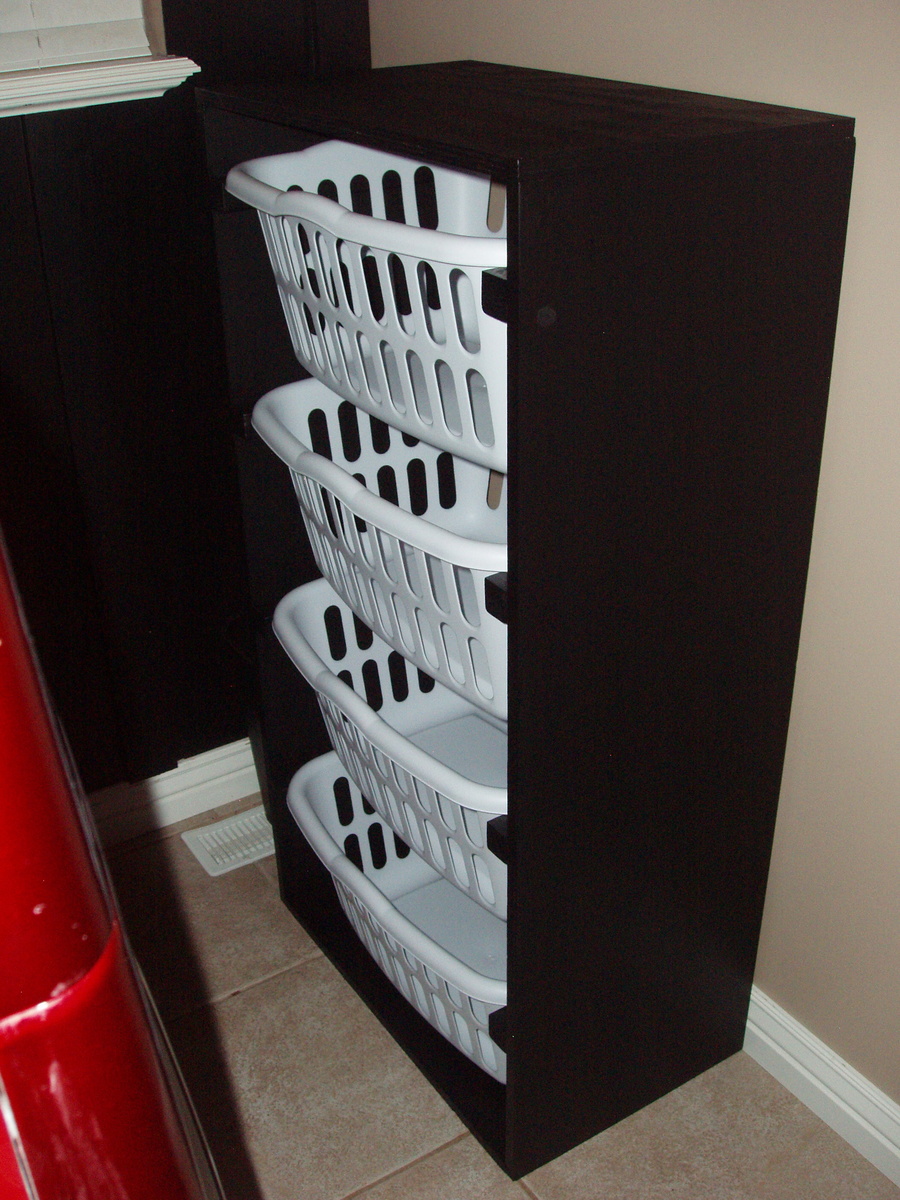
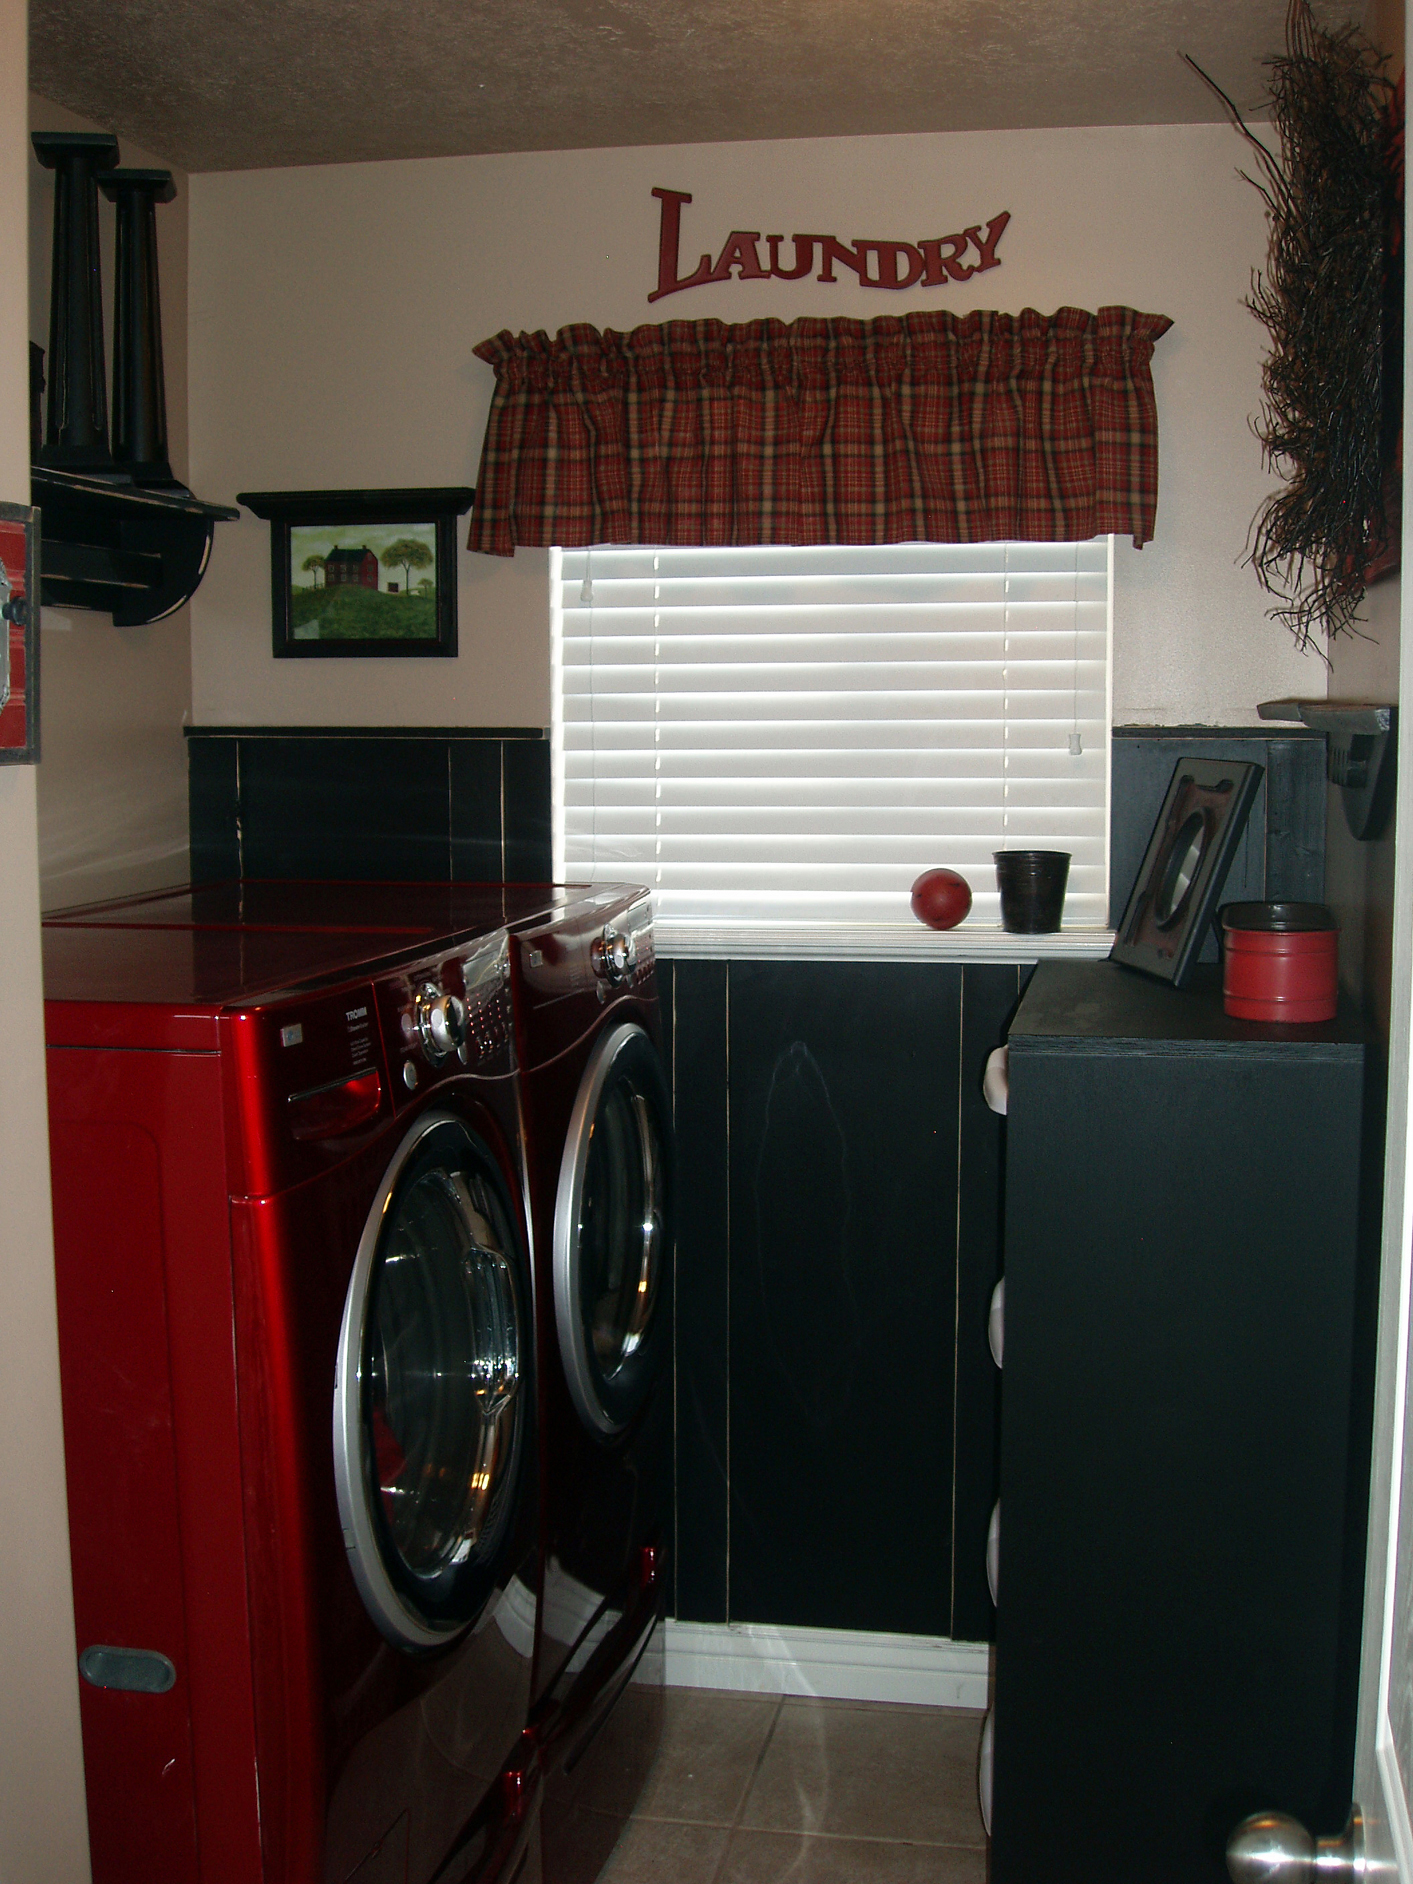
If you'd like to find out how I modified the laundry dresser to hold four baskets and how I hung the board and batten wall, check out the details on my blog. http://isteppedoutofmycomfortzone.blogspot.com/2011/02/and-did-spontane…
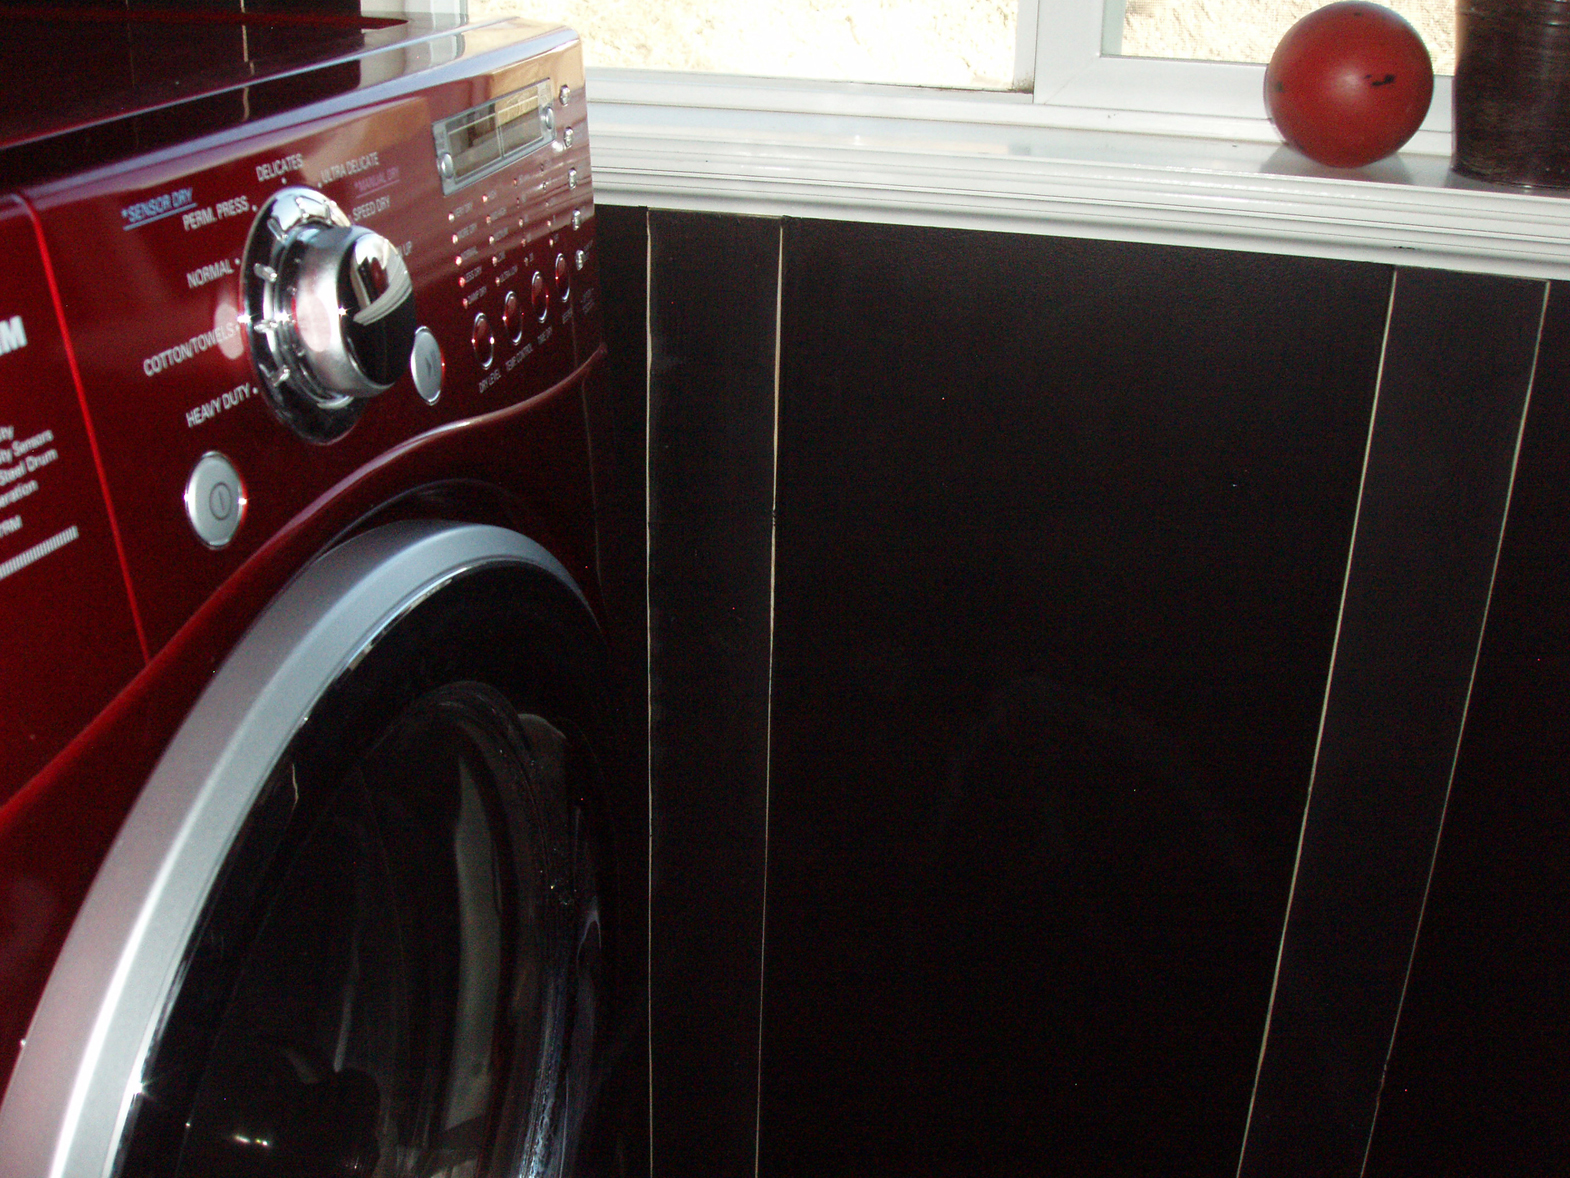
After I hung the boards with Liquid Nails I found out that if I ever want to take them down, the sheet rock is coming down with them! So I would probably skip that step...just incase!
Sun, 01/08/2012 - 15:34
Des [url=http://www.longchampbagsfr.com]Sacs Longchamp[/url] sont des sacs qui sont faites dans l’usine de masse, juste comme le genre plus mature que vous pourriez probablement découvrir dans les grands magasins, sauf qu’ils sont créés rendant l’utilisation du bien, dessins à couper le souffle. En fait, ils ont des styles, couleurs et matériaux qui sont comme des sacs de créateurs, mais sont ensuite utilisées dans l’itinéraire des sacs fabriqués en usine. De cette fa?on, vous obtenez le très plus efficace de chaque monde. Vous serez en mesure d’obtenir une belle revanche, un sac dynamique, mais payer alternativement bien moindre que vous n’aurez probablement besoin pour vous d’obtenir une marque de fabricant qui est en développement à être utilisé. Vous serez en mesure d’obtenir ces généralement en ligne, aussi que dans plusieurs magasins. Des sacs Longchamp, par exemple, sont généralement créés beauté. Ils fournissent des designs tout en utilisant favorisées régulière et les schémas, les figures de dragon animé individus, aux conceptions fourre-tout, après quoi il a offert à tous qu’ils obtiennent à travers le monde, à cause de cette réalité, ils pourraient générer suffisamment pour tout le monde. Vous ne devez posséder plus longue dans les sections et de payer pour à peu près n’importe quel élément limité, tout simplement parce que des dirigeants avides de style dans l’industrie.
Sacs à main sont vraiment un énorme business, et des ressources énergétiques et du marché de milliers de dollars. Sacs à main Longchamp pliage, en particulier, sont offerts comme objets de grande classe ce marché étoile et montrent loin de d’, portant le co?t et alléchantes chaque femme à vouloir un équivalent particulière à cela. Elle a utilisé étant de savoir comment la série vous vécu était d’acquérir une normale, sac inintéressante brun, [url=http://www.longchampbagsfr.com]Sacs Longchamp[/url] ou avoir à payer pour le meilleur co?t de posséder un concepteur de sac extrêmement. Mais heureusement, qui pourrait effectivement très probablement pas être plus longs vrai, parce que la mode des sacs sont en train de révolutionner l’industrie.
Avant, [url=http://www.longchampbagsfr.com]Sacs Longchamp[/url] sont réellement développés au sein d’une manière assez normale. Vous avez vécu des usines qui a élaboré des normes, brun ou des sacs, offerts à des milliers pour pas cher, alors vous incontestablement connu les sacs de créateurs. Les individus sont réellement développés par des designers bien rémunérés qui ont travaillé dans l’industrie de style, et montrerait loin de leur nouveaux sacs à chaque douze mois sur le tapis de couleur rouge. Là, ils obtiendraient des célébrités, acteurs et artistes en général, à mettre sur leurs nouveaux modèles, et leur montrer lointaines à partir de la route du monde. Mais quand il est arrivé le temps de les générer, ils ne font de petites quantités, tout comme le choix de maintenir le co?t varie de haut. Voilà comment ils seraient artificiellement fournir les gens de la demande et la pression ces temps qui désiraient acheter ces articles à dépenser des prix exorbitants. Mais dans les décennies précédentes, cela a commencé à changer avec Longchamp bon marché, ainsi que la révolution qui est-il passé au sein de l’industrie de style.http://www.longchampbagsfr.com
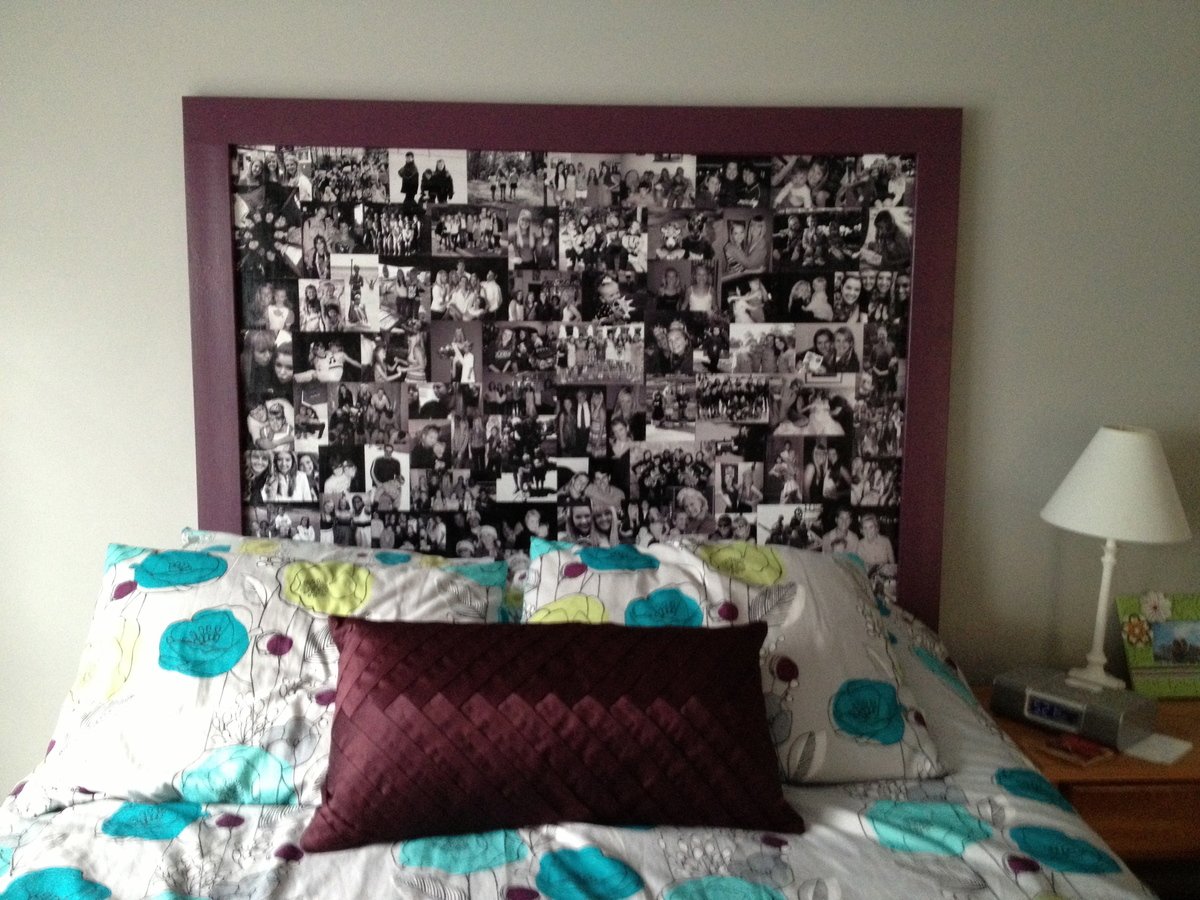
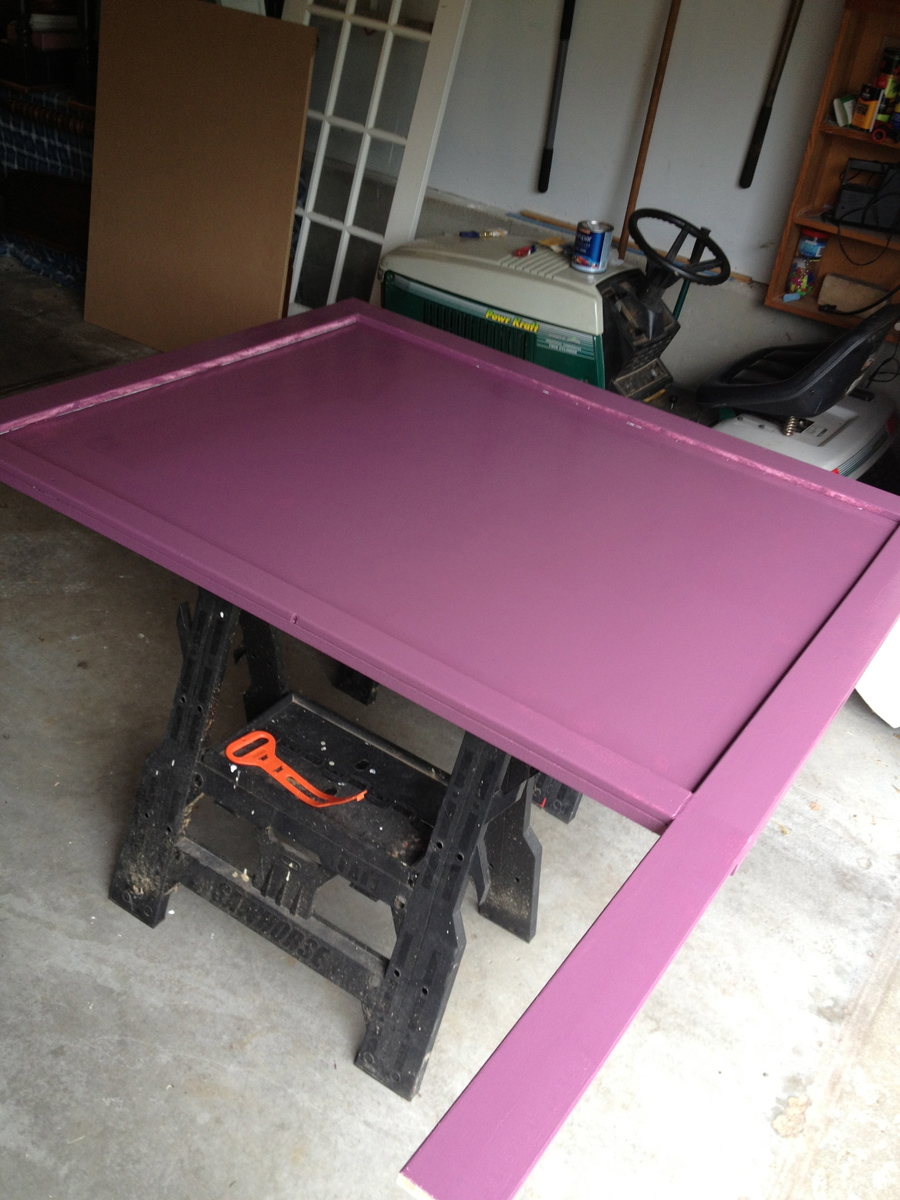
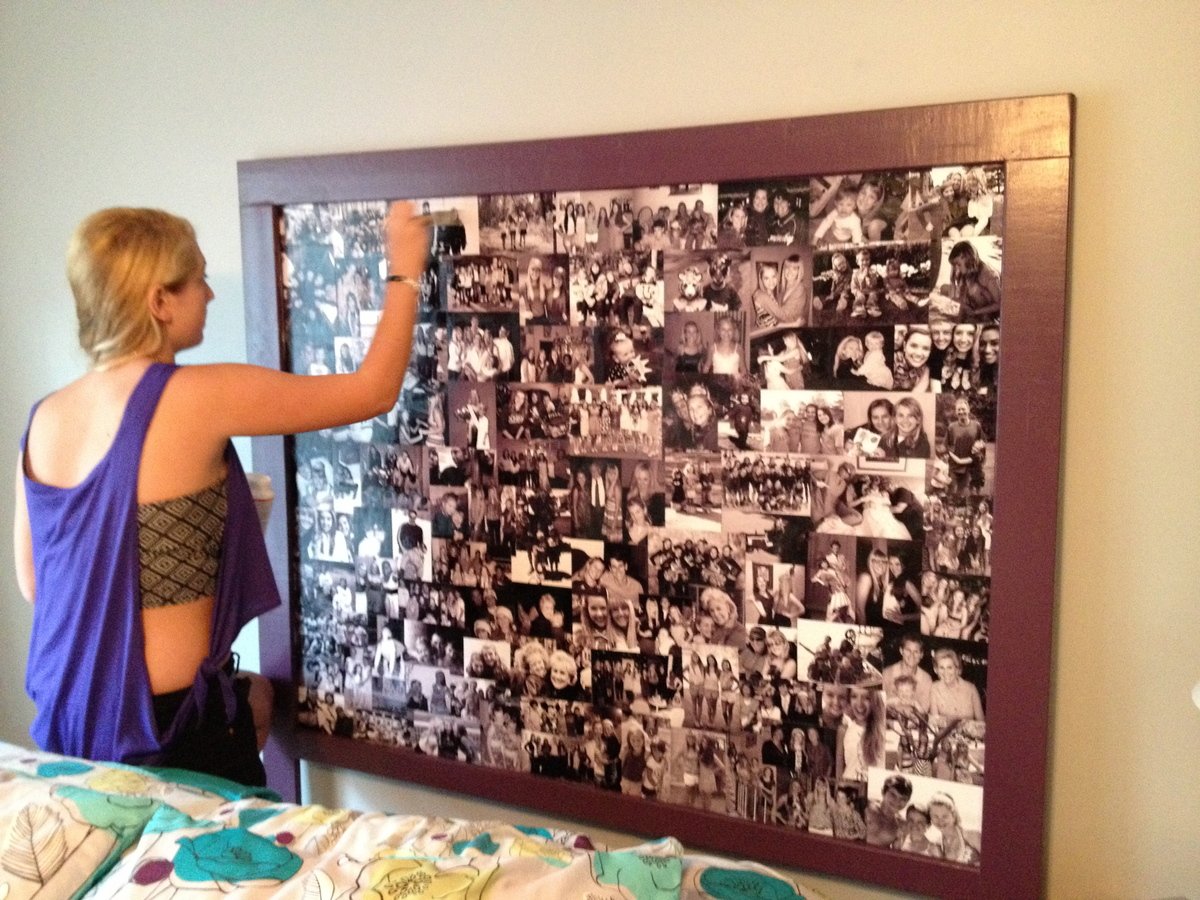
I chose to modify one of your headboards by only doing step 1-4.
We made a queen headboard and I wanted it slightly taller than the plans suggested so I added 12". I used 3/4" MDF as the back cut 60" w x 48" H, 1x4s for the sides and top and a 1x3 for the bottom. I glued and nail gunned each piece to the edge letting the sides extend down for the legs of the headboard.
I filled the nail gun holes with wood filler. The piece was primed, then painted with 2 coats of color, and then the photos were Modge Podged onto the interior of the headboard touching and overlapping. As my daughter gets older we can add more photos or I can make a fabric insert to go over the photos. She loves it and I'm happy we could do something different.

Sat, 08/17/2013 - 16:23
I love how you made your daughter's headboard personalized. No one else in the entire world will have a headboard like hers! :) That's amazing! And the color coordination is great. =D

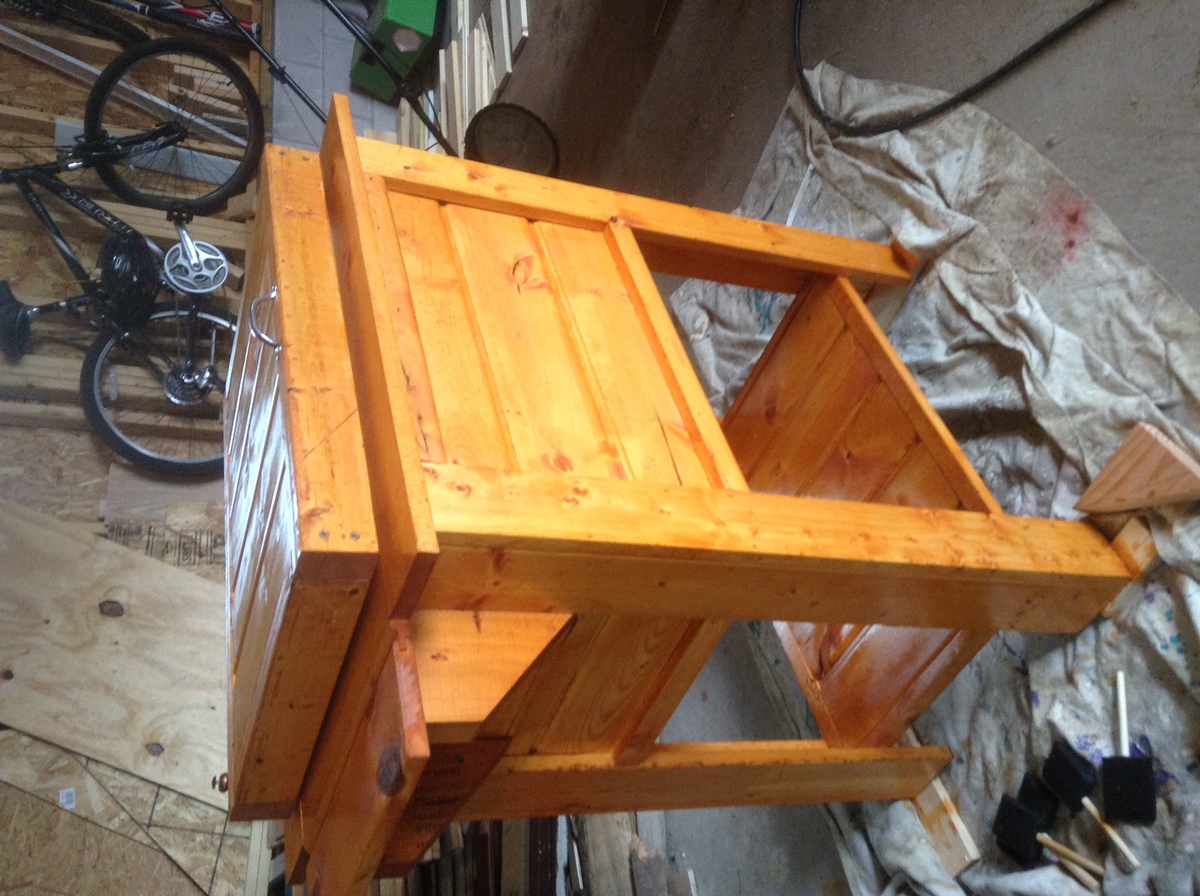
Build Instructions and additional pictures:
http://www.instructables.com/id/Rustic-Pumpkin-Lantern/
This triangular pumpkin lantern could be a nice addition to your Halloween décor. To give the lantern an aged timeworn look, the rustic finish uses multiple layers of paint, rough sanding and then an outer layer of oak stain. Since the pumpkin is made from wood, I would suggest using LED Tea lights for illumination

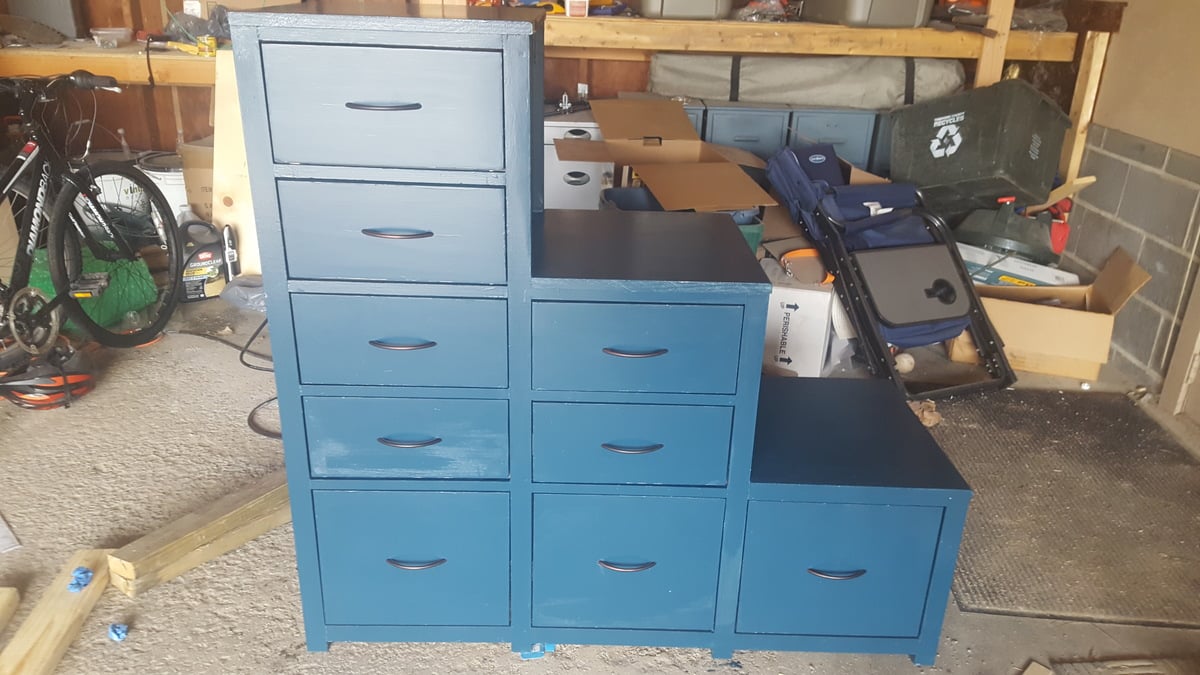
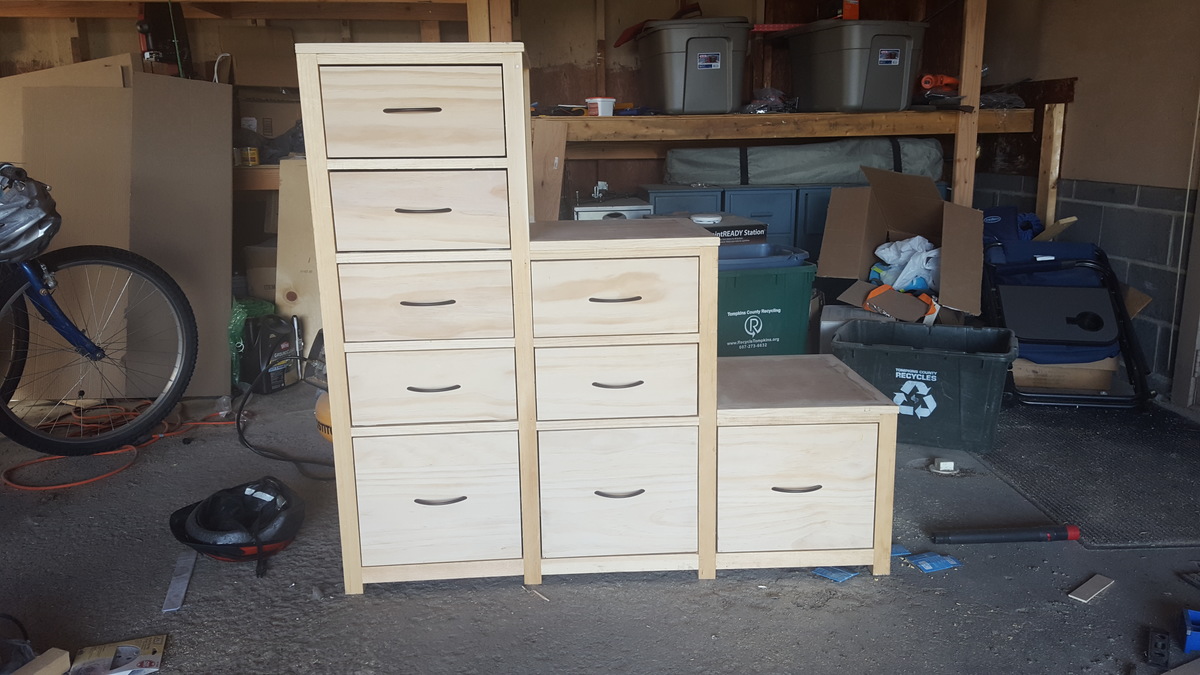
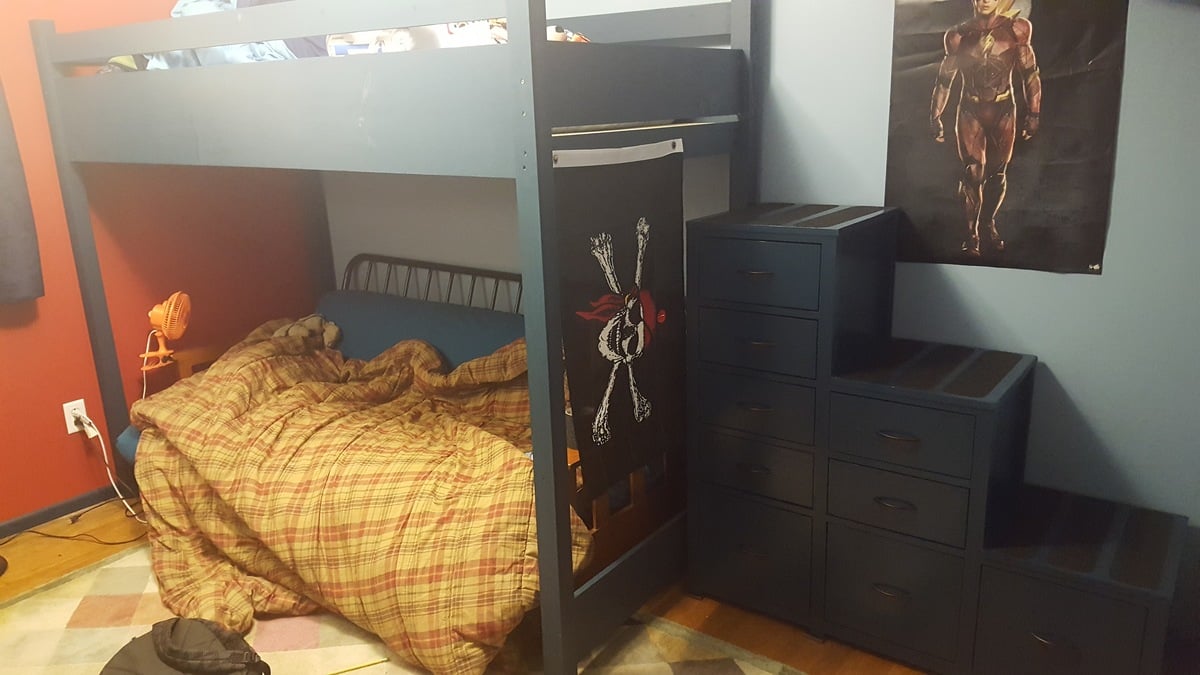
Based on the Kendal Extra Wide Dresser but customized to work as a companion piece to the loft that I built for my son earlier this year.
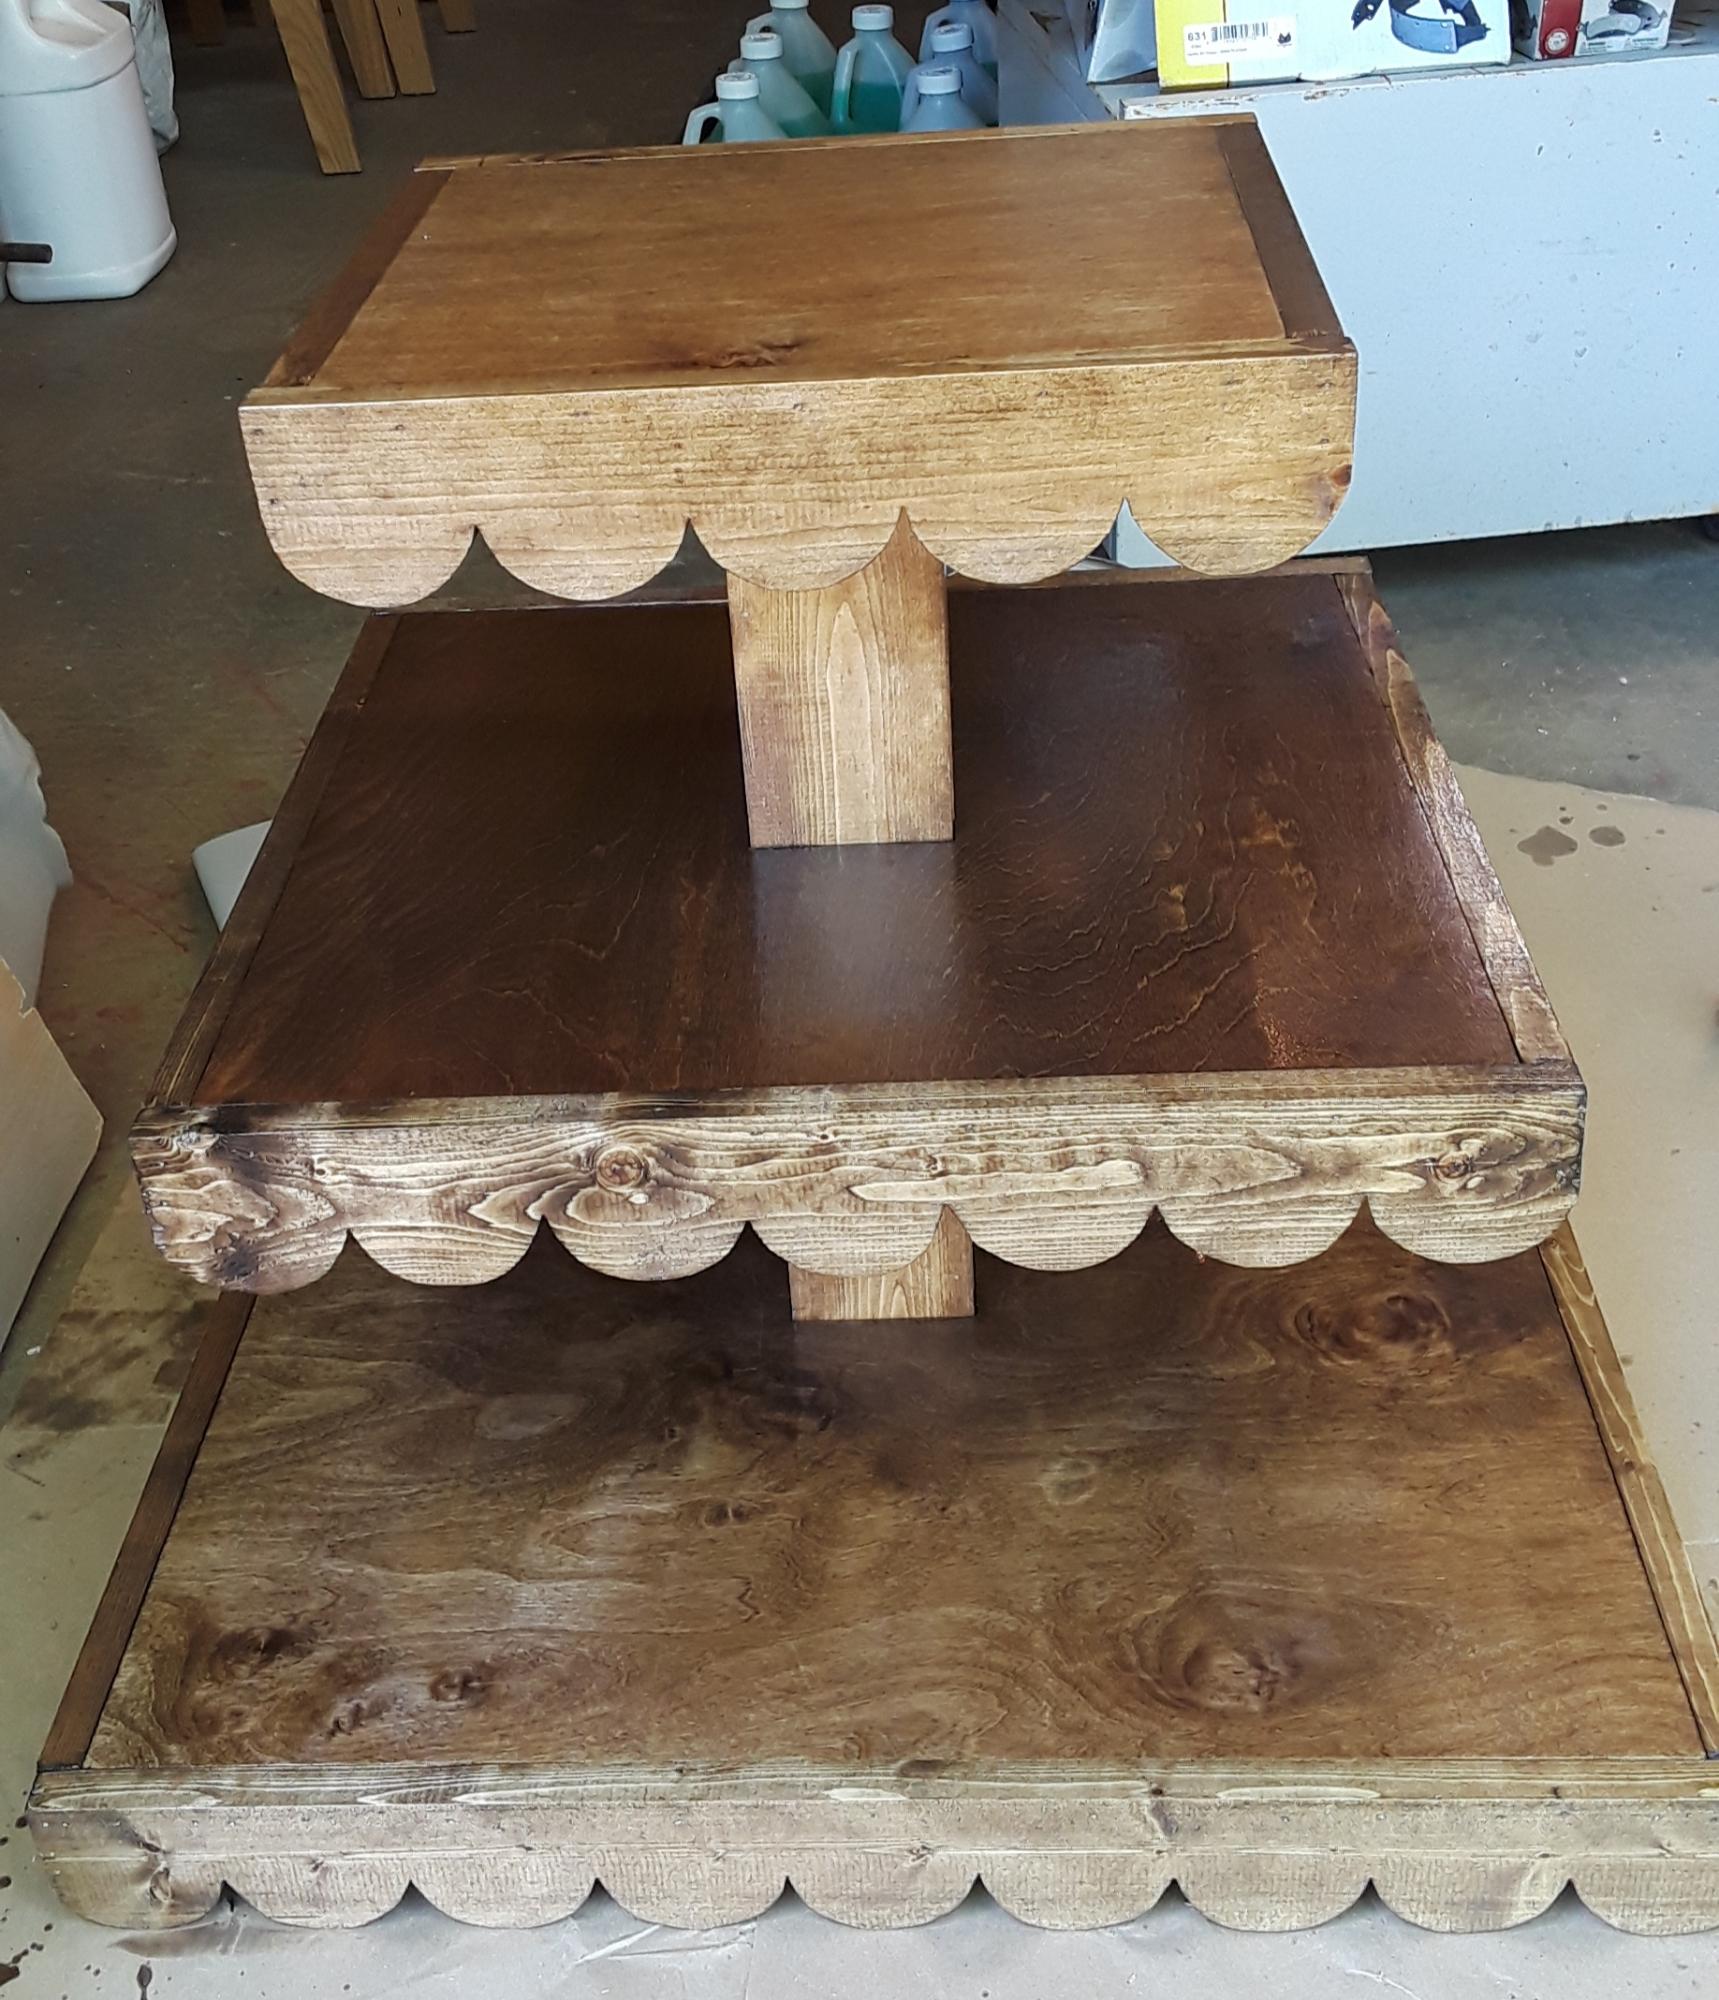
Rustic Cupcake Stand!
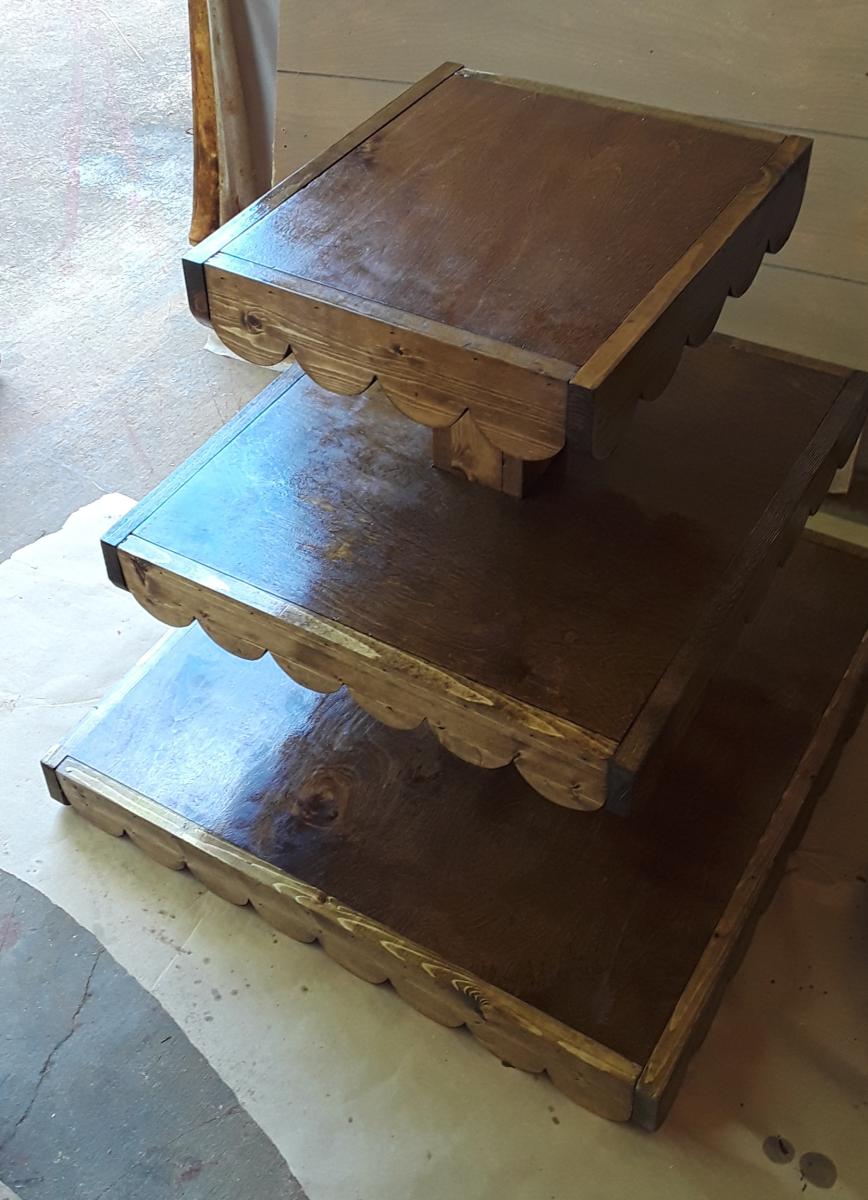
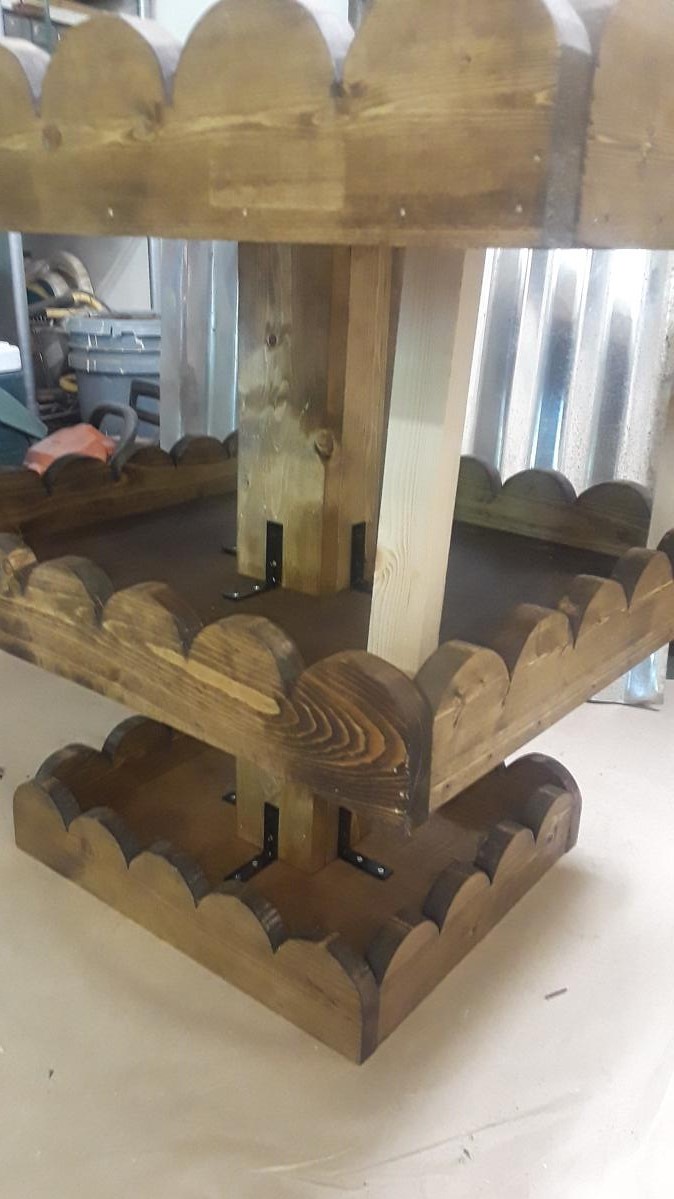
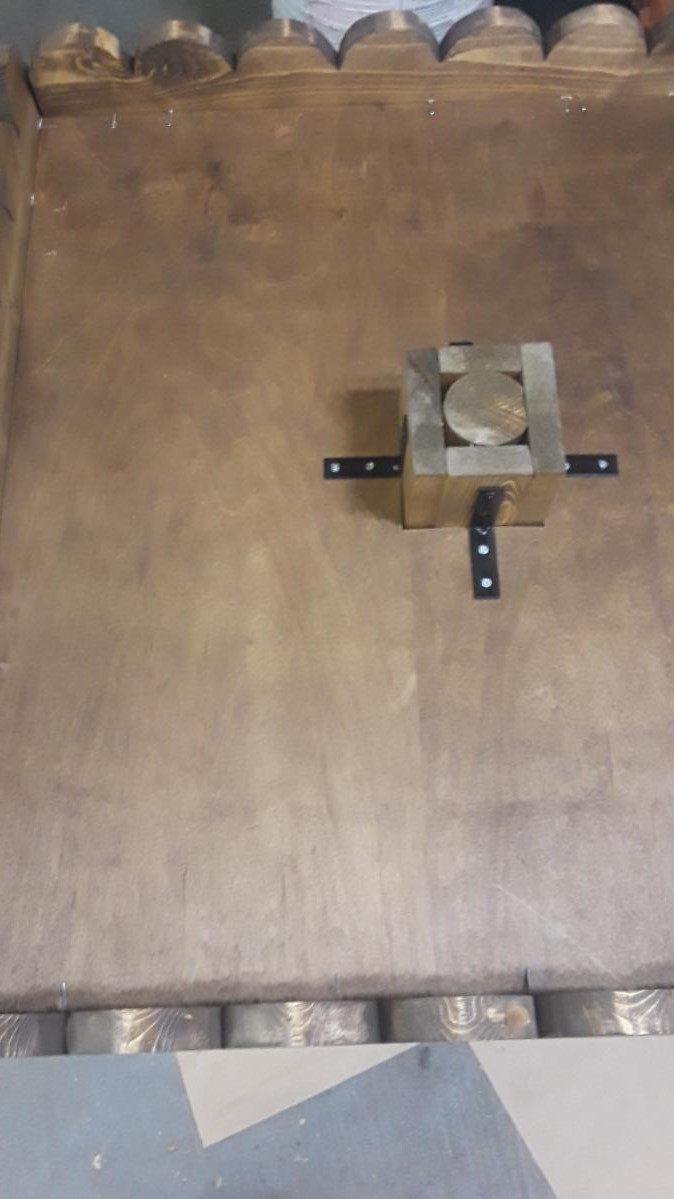
I asked my husband to build these as birthday presents for my daughter and my niece this past spring. Very cute, collapsable when they get tired of playing with it, sturdy enough to be sat on and used by both small children, the dog and the dolls! Materials and labor were cheap (thanks hunny!) and the product will last for as long as the girls play with dolls.
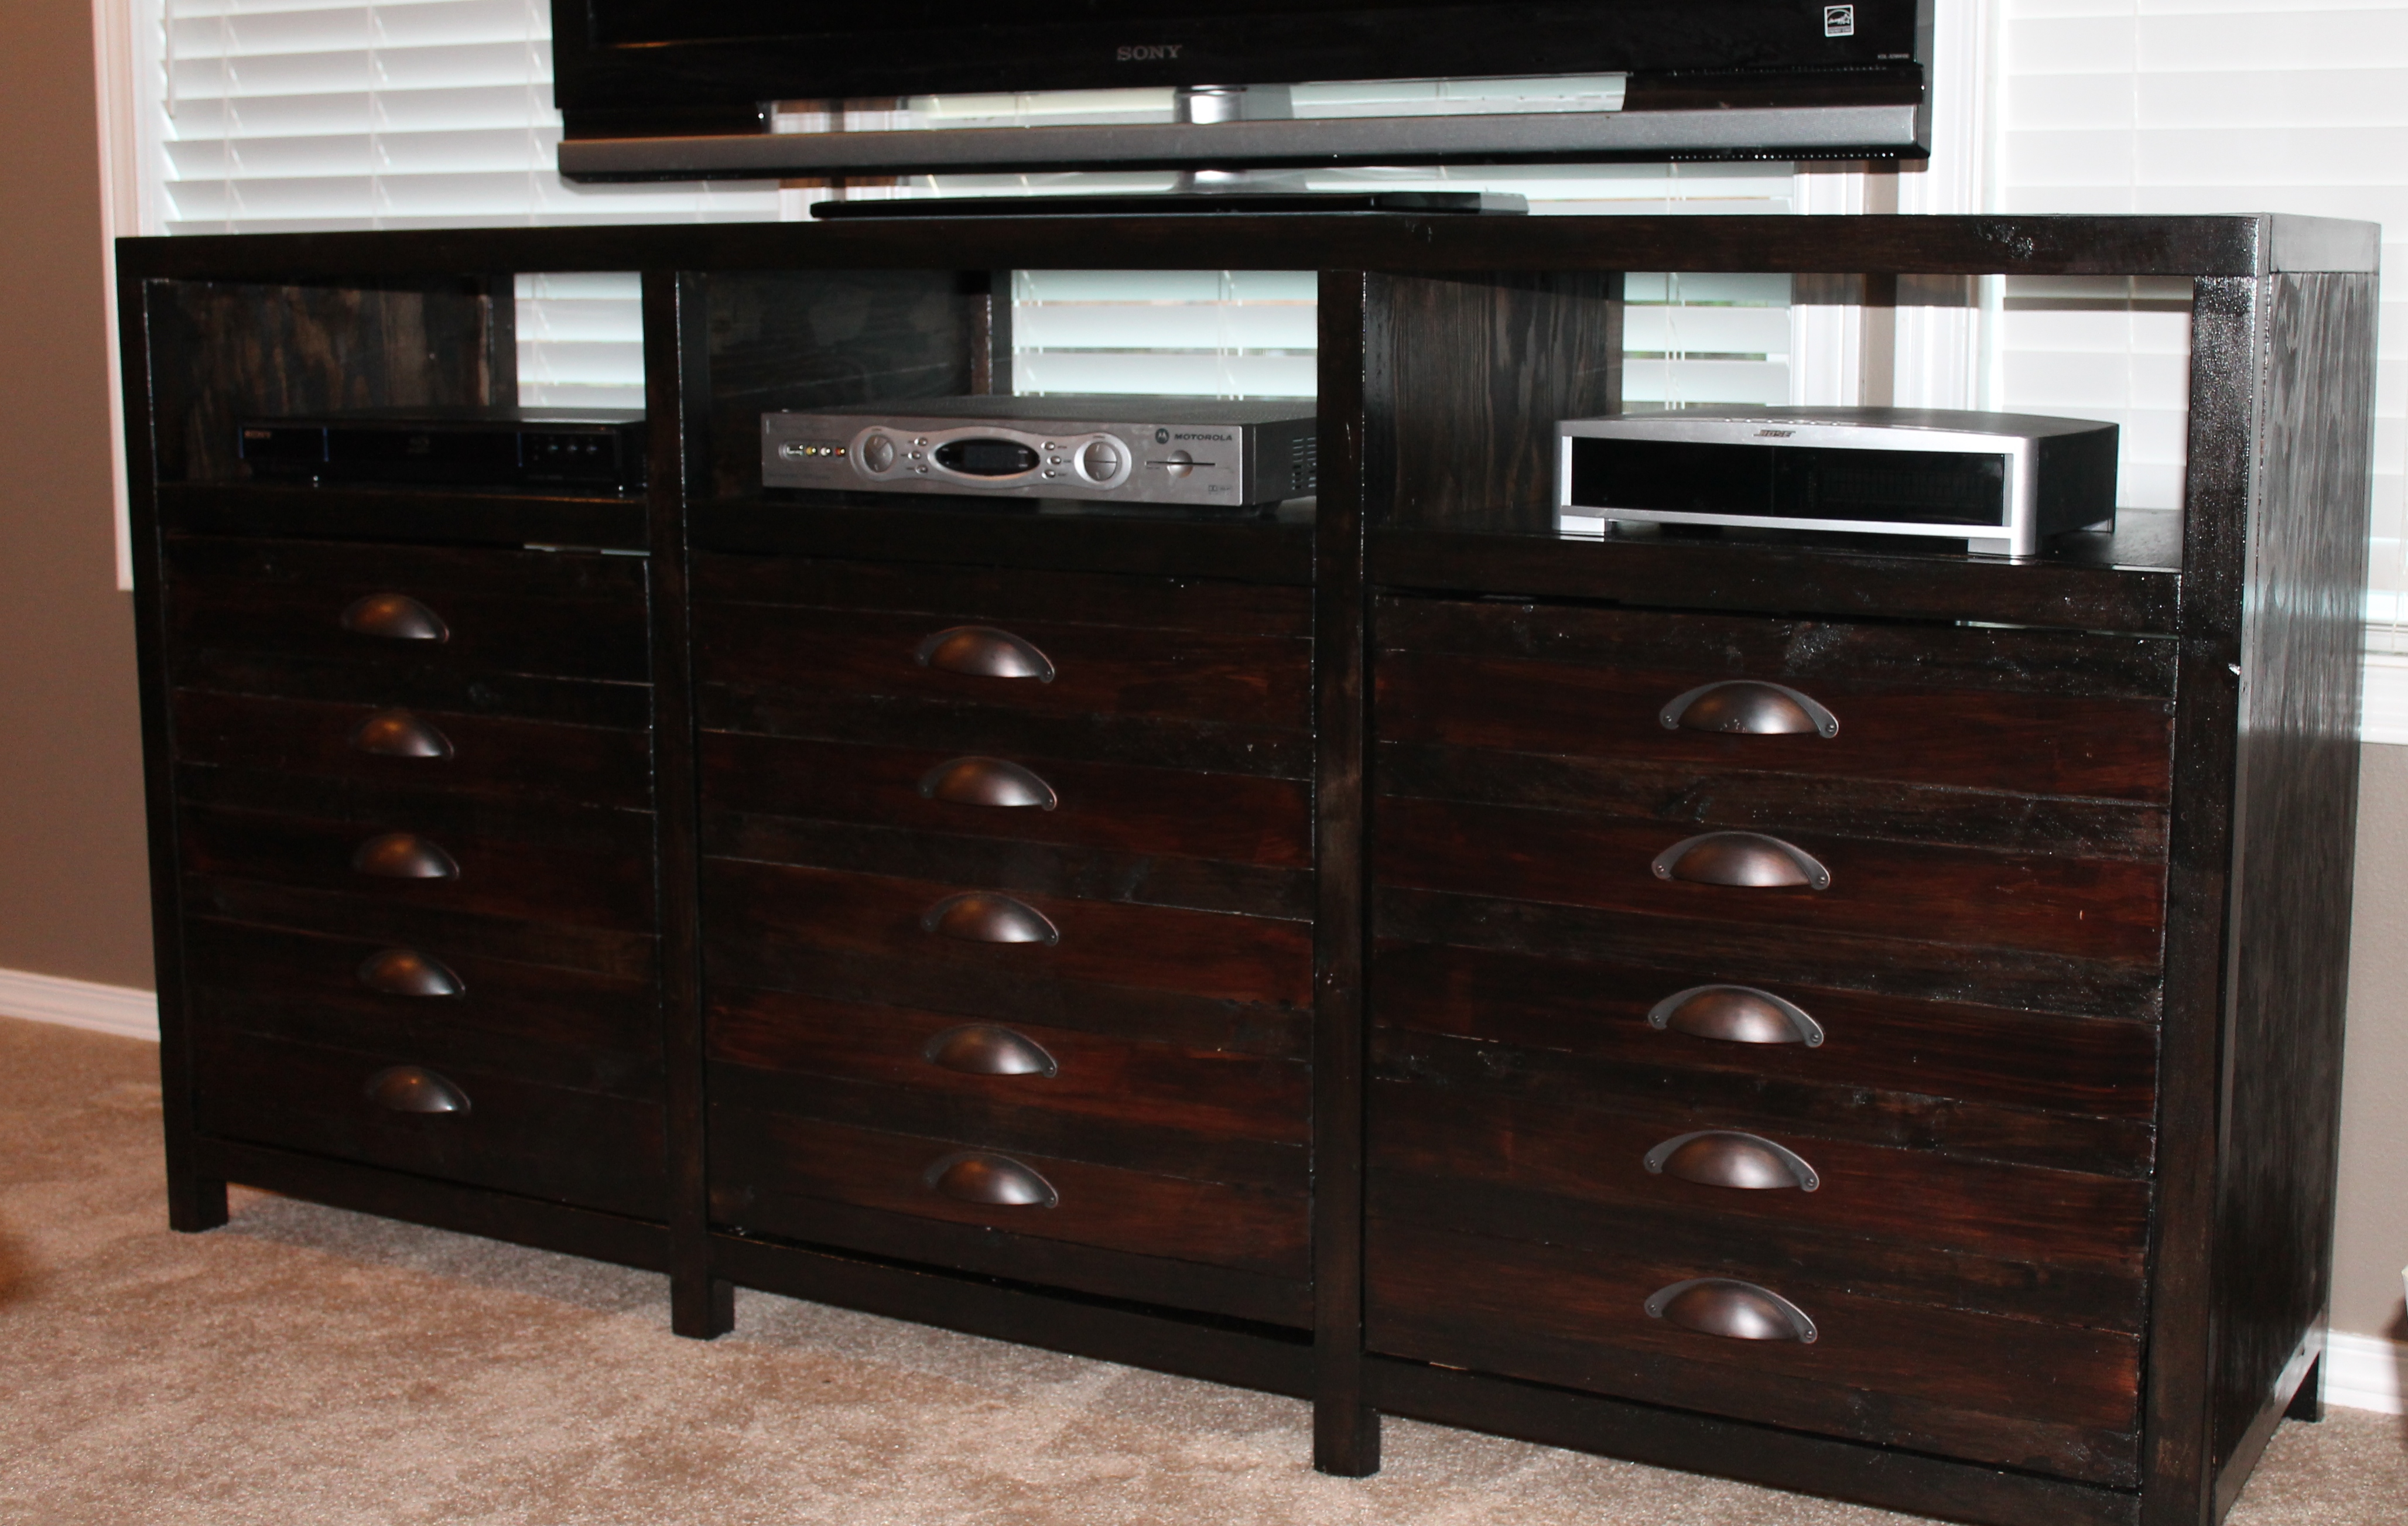
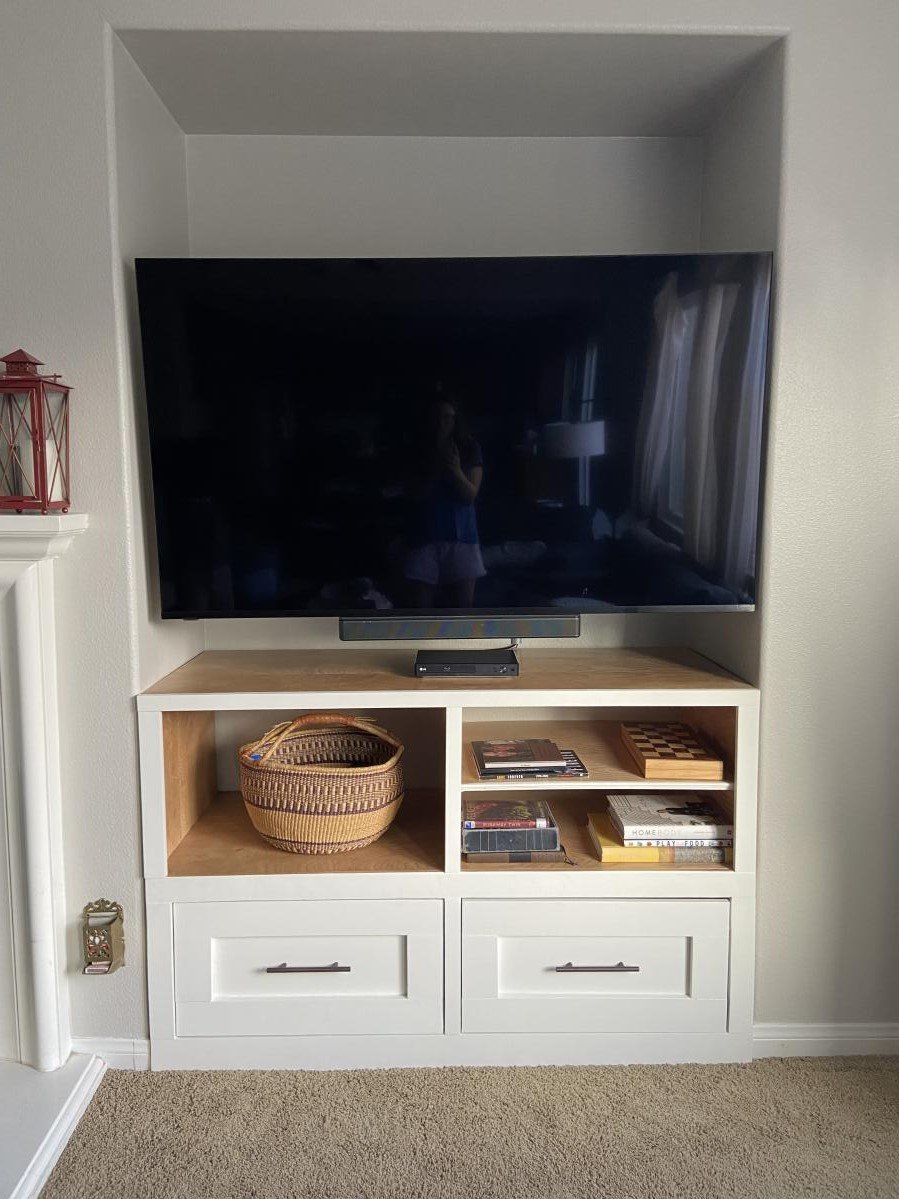
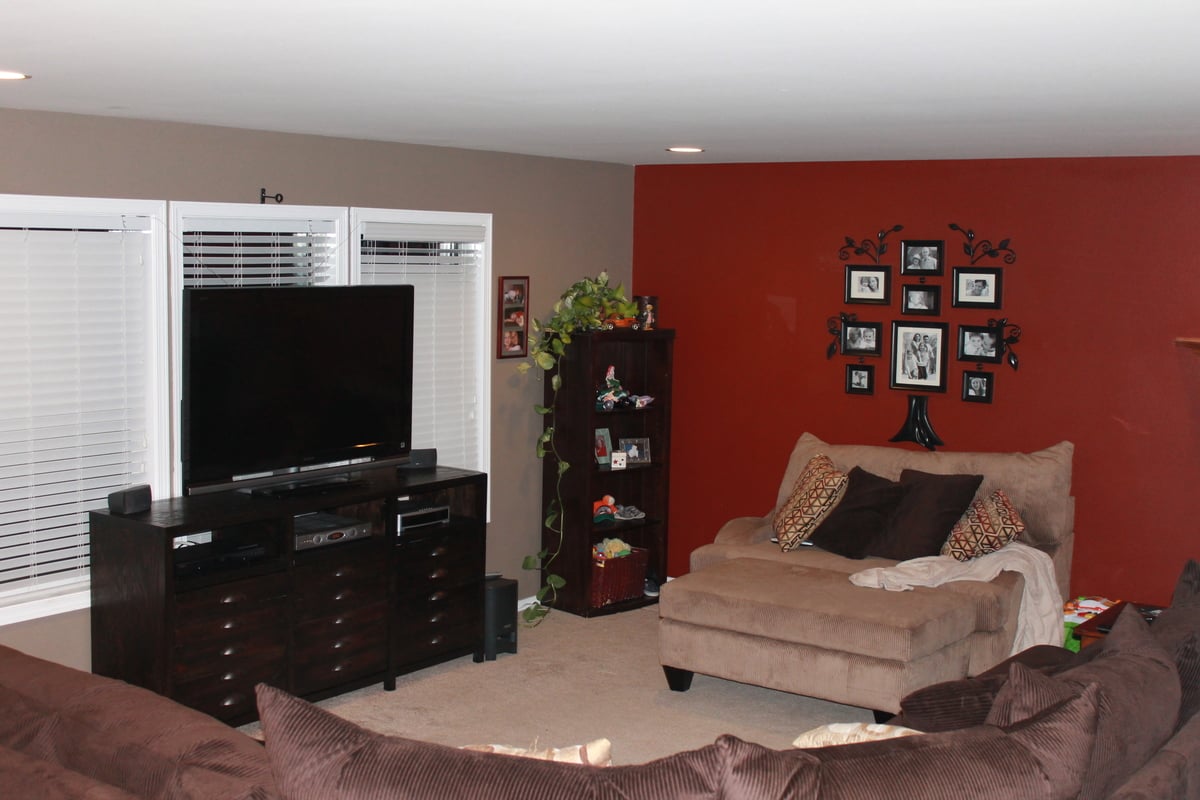
I found the plans for the Printer's Triple Console on Jen Woodhouse's blog and fell in love with the design. Once I studied the entire Ana White website, I decided I could try to build this as my first project because the plans were so clear!
I changed the top to be cubbies instead of drawers to accommodate TV components and such. I just measured the openings, cut the ply board to those dimensions and used my kreg jig to make installing the cubby bases super easy.
I blogged the process (it took me a while so it is three separate posts) at becauseitalktomyself.com, look under "Optimistic Ideas"
I was DELIGHTED with how it turned out! I still can't believe I MADE THIS!!
THANK YOU ANA WHITE!


Tue, 08/20/2013 - 07:45
Having built a version of this myself, I really appreciate the work that went into this. I can't believe this is your first project -- really amazing!! Great finished product!
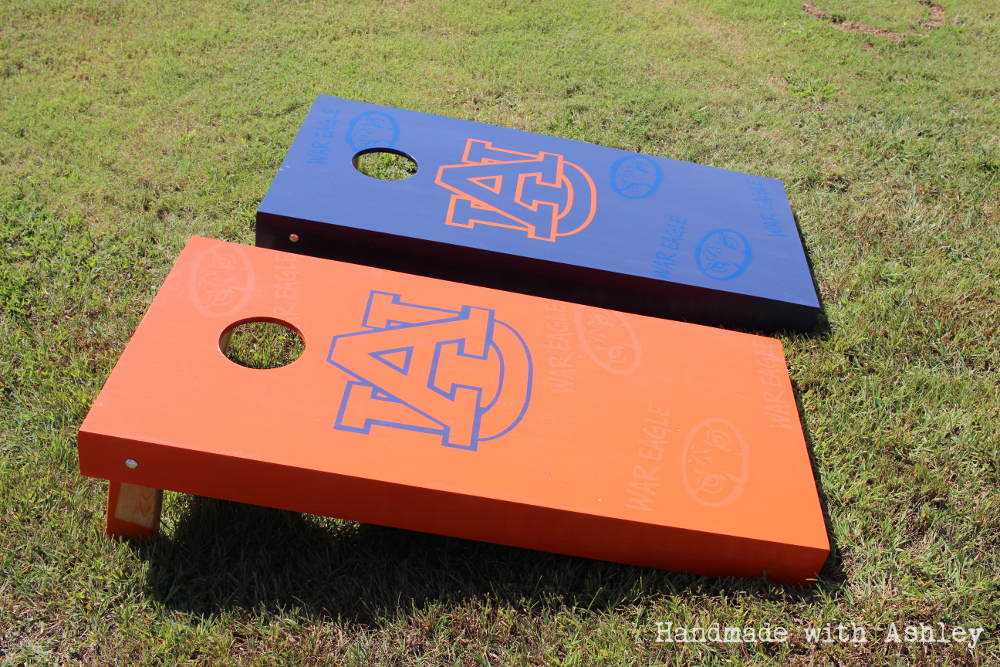
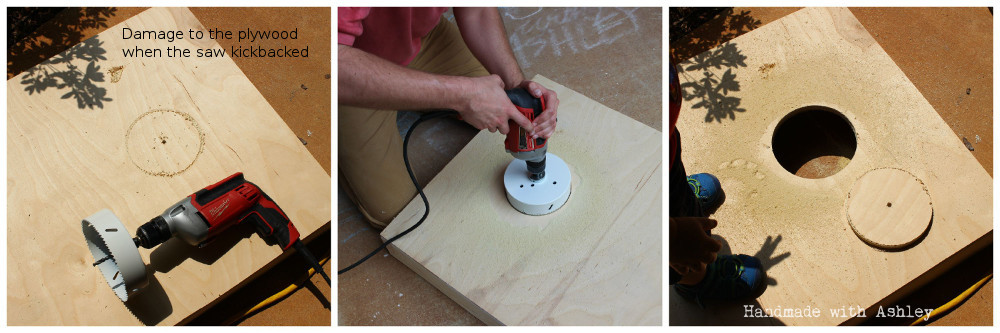
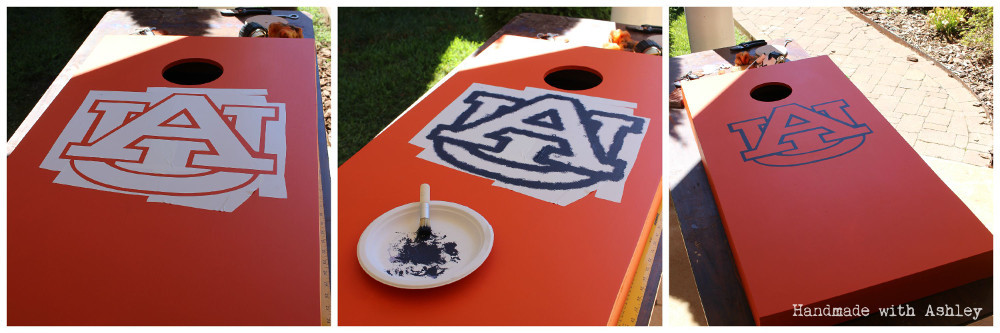
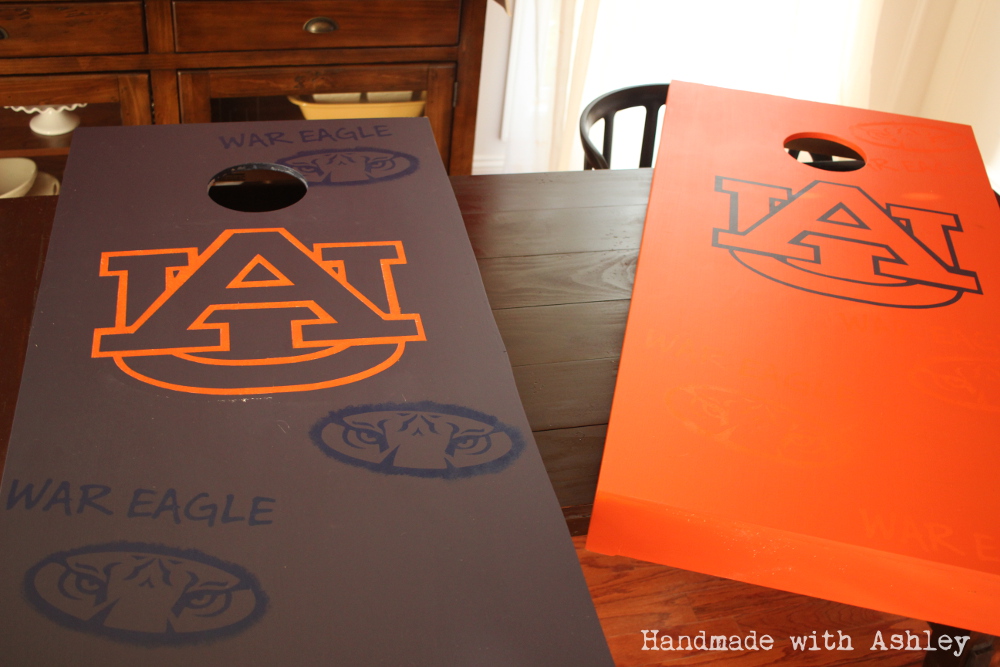
I built a pair of cornhole boards following a tutorial on This Old House. I used the Glidden Paint Team Colors line to get the a quart of blue and orange paint in the official Auburn colors. I used my Silhouette Portrait machine to create stencils for the AU logo, Auburn tiger logo and "War Eagle" text.