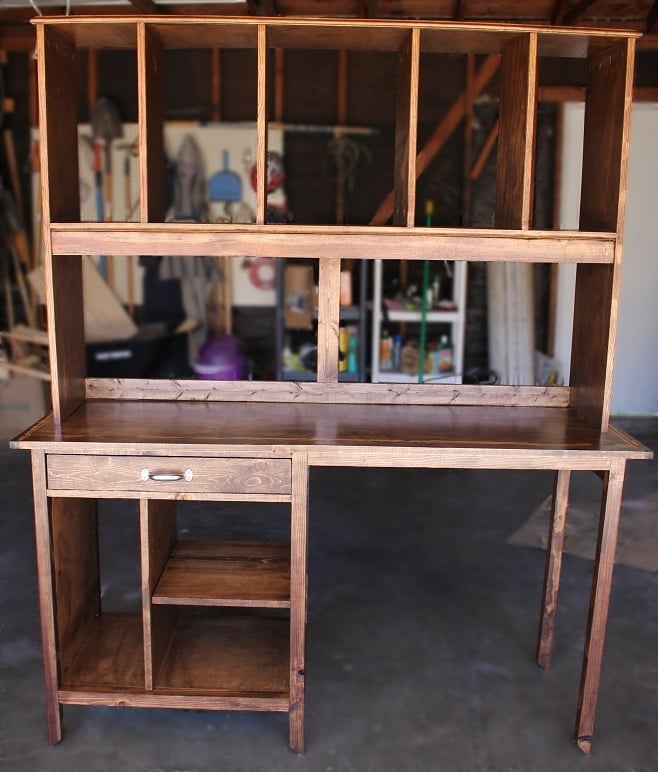
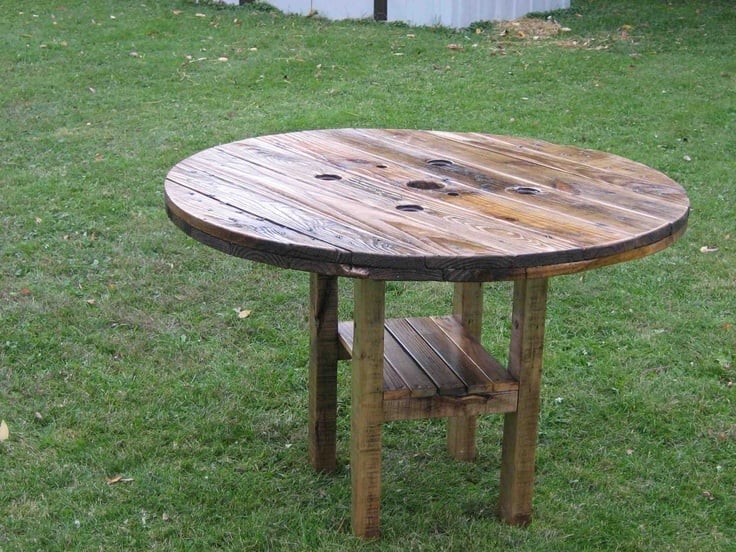
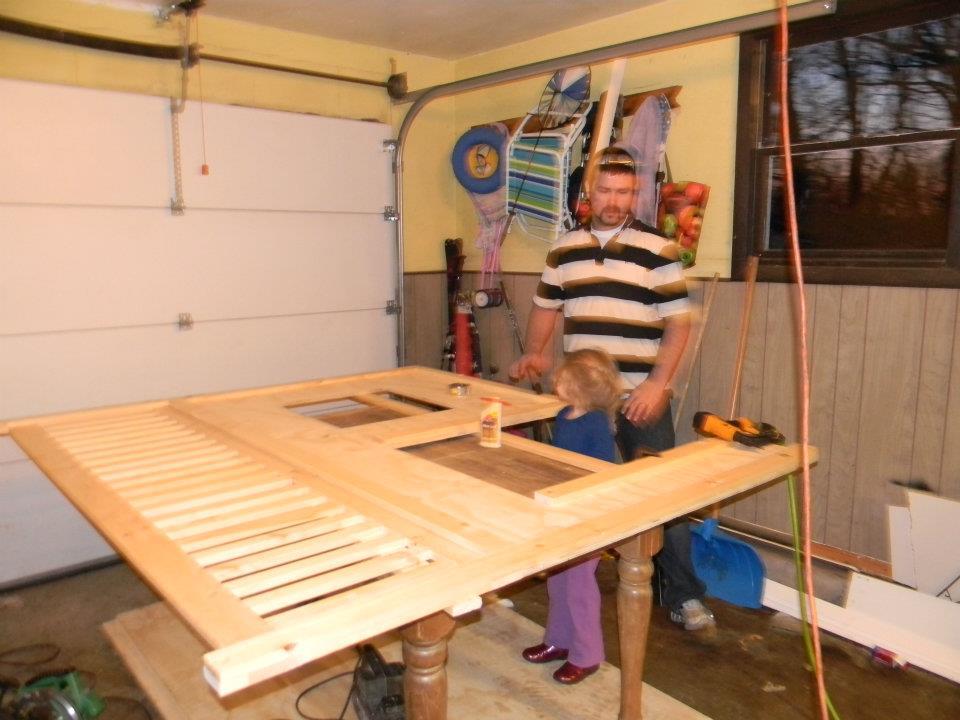
Community Brag Posts

Outdoor Sectional

Submitted by ghozt21 on Mon, 05/27/2019 - 16:54

I followed the plans as written,  It took me about 6 hours and that includes sanding and staining. Very simple yet offers a very wow finish.  I think in total we spent about $300 for all supplies including cushions which was the most expensive part. I just finished it off with Teak Oil and an Americana theme for our covered patio.  We love it.  

Estimated Cost
$300
Estimated Time Investment
Day Project (6-9 Hours)
Finish Used
Teak oil
Recommended Skill Level
Beginner

Barn Door Pantry Build

Submitted by Anonymous (not verified) on Sat, 03/18/2023 - 14:54

Using the Barn Door Pantry plan, I partially built this in my shop then took it apart and transported it to my son's house where we reconstructed it. This is a massive project and I recommend that you have enough room (and help) to build it and move it. The door is built with 1/2 inch plywood, framed with 1 by 4's with bead board inserts.

Built from Plan(s)

Comments

Bread Box

I started baking my own bread a few months ago, and storage was an issue. My husband decided to build me an old fashioned bread box and set out designing one on his own to fit in our small galley kitchen. I love it. It is a double decker, so I can fit two loaves in it just fine. The inside is coated with a food-grade sealer.

Estimated Cost
$20: $16 for the food-grade sealer and $4 for the handle, scrap wood used from other projects.
Estimated Time Investment
Afternoon Project (3-6 Hours)
Finish Used
White spray paint, food-grade sealer inside.
Recommended Skill Level
Beginner

Comments

JoanneS

Wed, 12/07/2011 - 03:49

This is an awesome idea, can't wait to make one for my kitchen. Beautiful job! Thanks for sharing this!

Rustic X Console Table

Submitted by hmctagg on Sat, 11/02/2013 - 13:06

We followed the plans closely, and it turned out well for the first project. It was the perfect size for what we needed! My husband had never built anything like this before and after a little research on how to use the kreg jig, he was able to finish it in a weekend.

Estimated Cost
$120 including finishing supplies
Estimated Time Investment
Weekend Project (10-20 Hours)
Finish Used
I used one coat of Minwax Provincial. I originally bought a sample can to practice on some scraps and then planned to go buy the bigger can, but I was able to stain the entire table with the sample size using an old T-shirt instead of a brush (I didn't want to risk brush marks). I liked the look after one coat, so I stopped there. I also decided against adding the hardware since I liked the look without it.
Recommended Skill Level
Beginner

Reclaimed Wood Look Bedside Table

Submitted by frymaster on Mon, 01/18/2016 - 09:01

This was my first bedstand build, and I was pleased with how they turned out! A possible recommendation might be to make your own 2x2's if you have the means, I looked everywhere around here and could only find firring strips. These look ok after a good bit of sanding, but the huge radius edges make for some funny looking joints, and they're super inconsistent dimensionally - like off by 1/8" smallest to biggest, which can make issues with fitting drawers. Another option would be to build the base frame, then make the drawers once it's all together and modify dimensions slightly to match. I would also note to make sure your drawer bottoms are flush with the outside of the drawer side to side, and not slightly bigger at all, it made for pretty a pretty tight fit for the drawers to make it in. Squareness was paid extra attention thanks to all of the good comments on these plans, and I didn't seem to have any issue with drawers fitting as a result, just a bit snug. I would suggest using 1x4 for the drawer frames for two reasons: The first is that the drawers are pretty shallow, and there's plenty of room to use 1x4 instead of the 1x3. The second was the alignment of the drawer pulls and the top of the drawer box frame. Mine ended up right on the border of the drawer box frame in order to get the drawer pull centered. This was a problem as I had to grind off the edge of the interior box frame to get the screw to fit. If you had a 1x4, you could just countersink it without any issues, since it wouldn't be right on the edge of the drawer box. Overall awesome project, and great plans! Thanks Ana!

Estimated Cost
$150 for two
Estimated Time Investment
Week Long Project (20 Hours or More)
Finish Used
Dark Walnut, two coats, 5 coats of poly on top, 3 everywhere else.
Recommended Skill Level
Beginner

Bench

Submitted by cheech on Thu, 06/06/2019 - 18:13

Lot of fun just purchased a pocket jig and first project can't wait to make another. Thanks for the plans 

Built from Plan(s)
Estimated Time Investment
Weekend Project (10-20 Hours)
Finish Used
Semi gloss white paint
Recommended Skill Level
Intermediate

Comments

Large Cubby

Submitted by Anonymous (not verified) on Fri, 03/24/2023 - 17:04

My son moved into his first very small apartment and wanted a cubby array rather than a dresser. I made this following your plans and it came out great! It’s 4x4 cubbies as you can see. I used 1/2” plywood to keep the weight down. It was a little flimsy, so I put 1/8” tempered sheet on the back, which made it completely stable. He loves it! Thanks Ana!

Built from Plan(s)

Comments

My farmhouse table!!! 1st project

Submitted by wesleylp on Sat, 12/10/2011 - 10:01

My husband and I created this using farmhouse table plans and we're very excited. It took us longer to get done than most because we all ended up sick. :o) Total cost was under $100 and it is awesome!! Thank you so much for the plans!!

Estimated Cost
under $100.00
Estimated Time Investment
Weekend Project (10-20 Hours)
Finish Used
stain and poly finish.
Recommended Skill Level
Intermediate

Comments

wesleylp

Sun, 12/11/2011 - 09:29

We are currently making a bench and a version of the stackable chairs for our 8 foot table. WE are so excited. I have work to do but only want to help build now. :o)

Laundry Pedestal

Thank you for the fantastic tutorial to build this laundry pedestal. I was able to have the the pieces cut at my local Lowes store. After making the pedestal I would make a few adjustments to make it more sturdy. I would attach the four posts to the inside corners and cut the bottom platform corners to fit around the posts instead of attaching them to the platform with brackets. I made my posts a little taller too because my laundry baskets were taller. I love my new addition to my laundry room! The link to Saushas Laundry Pedestal that I followed is here, http://ana-white.com/printpdf/2011/01/sausha’s-washerdryer-pedestals.

Estimated Cost
$75
Estimated Time Investment
Weekend Project (10-20 Hours)
Finish Used
Painted
Recommended Skill Level
Intermediate

LOVED this easy build!

Submitted by Anonymous (not verified) on Wed, 01/20/2016 - 14:48

Built this over 5 days, around my son's naps (including 2 days for sealant to cure). Actual time was probably around 8 hours total. Not too bad for my third project! I only built one shelf and am using it for storage in our master bathroom. I love the way it turned out. Thanks again, Ana, for a great project plan. :)

Built from Plan(s)
Estimated Time Investment
Day Project (6-9 Hours)
Recommended Skill Level
Beginner

Patio couch

Submitted by Anonymous (not verified) on Mon, 04/03/2023 - 08:09

I have been looking at your blog and always been interested in making my own furniture. However, I was scared to try. Your diagrams and measurements were awesome. Thank you! Gave me the encouragement to try!

Built from Plan(s)

Comments

Tryde Coffee Table with shelf

Submitted by Snipes on Thu, 12/15/2011 - 09:51

I built this coffee table for a friend. It is a square version of the Tryde coffee table with a shelf underneath. The dimensions of the tabletop are 42" x 42." It took a couple of weeks of working at night to complete, but she loved it.

Built from Plan(s)
Estimated Cost
$125
Estimated Time Investment
Week Long Project (20 Hours or More)
Finish Used
I used a Minwax Early American Stain with a coat of satin wipe-on polyurethane and 2 coats of satin spray polyurethane over that. I distressed the table a little with a chain, drill bits, hammer, etc.
Recommended Skill Level
Intermediate

Farmhouse Table

Small Farmhouse table with custom made husky legs and side trim. I used my router to create the legs and trim.It was my first attempt at turned legs. I used minwax white wash pickle, then I went over with a mixture of minwax of dark walnut and golden oak.

Finish Used
minwax white wash pickle, then a mix dark walnut and golden oak, polycrylic
Recommended Skill Level
Advanced

Comments

Val Manchuk

Thu, 11/07/2013 - 08:18

Great job on those turned legs! That table looks beautiful!

Val
artsybuildinglady.blogspot.ca

JoanneS

Thu, 11/07/2013 - 12:23

Your table looks awesome! What an amazing job you did turning the legs, and the finish is fab! Beautifully done!

Truck Shelf

Submitted by DMax2010 on Thu, 01/21/2016 - 15:26

Loved making this shelf!

Built from Plan(s)
Estimated Cost
Under 10.00
Estimated Time Investment
Afternoon Project (3-6 Hours)
Finish Used
Minwax express color in Indigo, Minwax express color in Walnut
Recommended Skill Level
Beginner

60" Round Table with Pedestal Base

Submitted by NachoDog on Fri, 07/05/2019 - 10:21

I modified a couple of plans I found on this site. If anyone is interested in instructions or cut list, I can post it later.

Estimated Cost
$650
Estimated Time Investment
Week Long Project (20 Hours or More)
Finish Used
Sanded everything down to 120 grit, used prestain conditioner, stained the top with Minwax coastal gray stain, lightly sanded with 120 grit for extra weathering, and then did six coats of poly while sanding with 220 grit in between coats.
Recommended Skill Level
Intermediate

Raised Tile-Topped Pet Feeder

Submitted by Joni on Mon, 12/19/2011 - 11:00

I modified the single bowl raised pet feeder by adding tile over hardibacker cement board (over the wood platform). Then, I trimmed it with a thin border of wood. These are pretty addictive to make, as you can see from the pictures!

Finish Used
On the white version, I simply used white acrylic craft paint. On the stained versions, I used a mixture of Minwax water-based stains using Antique Walnut & Onyx, topped with 4 coats of General Finish Satin EnduroVar.
Recommended Skill Level
Beginner

Comments

BrennaLiz

Mon, 12/26/2011 - 13:12

I love the tile look you used! I have been looking everywhere for attractive raised pet bowls and have found nothing I like. I do have a few questions: is the cement board necessary? What size and type of wood did you you use for the trim and how did you attach it?

Thank you for posting I would have never thought of this myself!

Joni

Wed, 01/04/2012 - 12:59

Thanks for the feedback. According to the guys at Lowe's, you could skip the cement board and use liquid nails to attach the tiles. But the grout/adhesive that I was using would not bond to wood (and I think that may be true for many, if not all of them), so I went ahead with the cement board. This required a special drill bit for my roto-zip (to make the circle), and a special drill bit for my screwdriver (in connecting the cement to the board). I used "craft wood" trim (available at Lowe's in Pine). It's 3/8" thick and 1 1/2" wide. It's the perfect size for covering a 3/4" frame, cement board and the tile. I glued the boards together and then nailed thin brads in to secure it.

katieevans140@… (not verified)

Fri, 03/02/2012 - 20:11

Hi. I love your post! Did you lay the tile and then cut it or cut the holes first? What tools do you need to cut the tile?

Thanks,
Katie

In reply to by katieevans140@… (not verified)

Joni

Sun, 03/04/2012 - 10:38

Katie, I didn't have a tile cutter. I purchased a tile nipper from Lowe's, and was surprised at how easy it is to snip off the parts you don't want. I nipped it first and got it all laid out around the circular hole prior to putting the adhesive down. It helps to put the tile pieces in a vice, and then nip it. -Joni

calli (not verified)

Fri, 03/16/2012 - 10:11

this is awesome. our great dane has a massive drool issue (to be expected) so i've been trying to find a plan that isn't JUST wood top. problem solved. i think i just found my new christmas present gifting tradition too! thanks!

Picnic Table and Benches

Submitted by proach55 on Sun, 11/10/2013 - 10:53

Picnic table and benches from an original (as far as I know) design I copied from my father-in-law. It is roughly 4'x4' and can comfortably seat 8 people, and is very sturdy.

Estimated Cost
$200
Estimated Time Investment
Weekend Project (10-20 Hours)
Recommended Skill Level
Intermediate

Outdoor Sectional

Submitted by ajs662 on Tue, 07/09/2019 - 11:57

I decided for my patio a love seat/sofa combo would work better than the sectional. It was easy to make both and modify the plans to have arms at both ends of the pieces. 

Getting inexpensive cushions was a challenge. I ended up getting IKEA HÅLLÖ cushions. I added more foam to the back cushions as was suggested in another post since the IKEA cushions were a little flimsy and tend to fall through the back of the sofa. I might add some bigger cushions at some point

Estimated Cost
$300
Estimated Time Investment
Weekend Project (10-20 Hours)
Finish Used
Olympic Semi-Transparent Cedar Natural Tone
Recommended Skill Level
Beginner

Comments