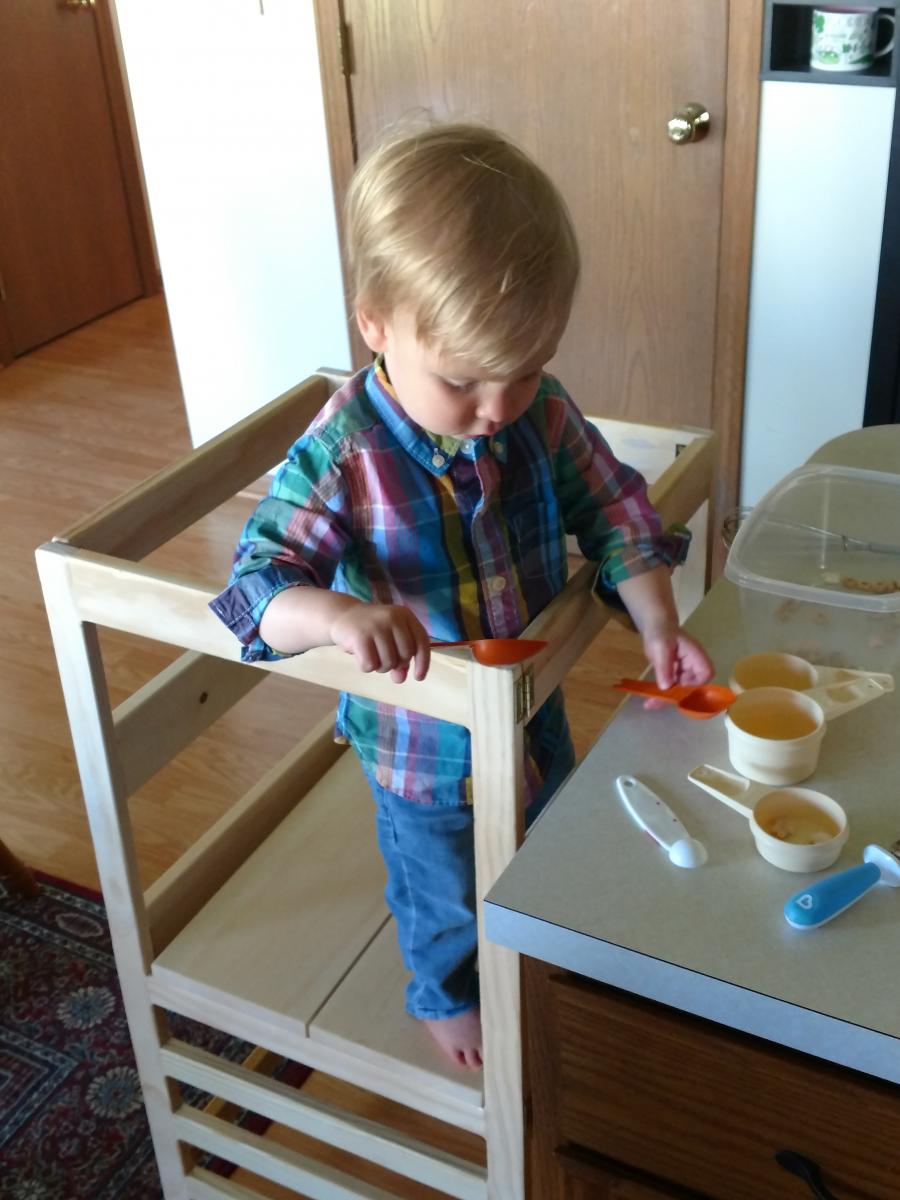
Helper Tower
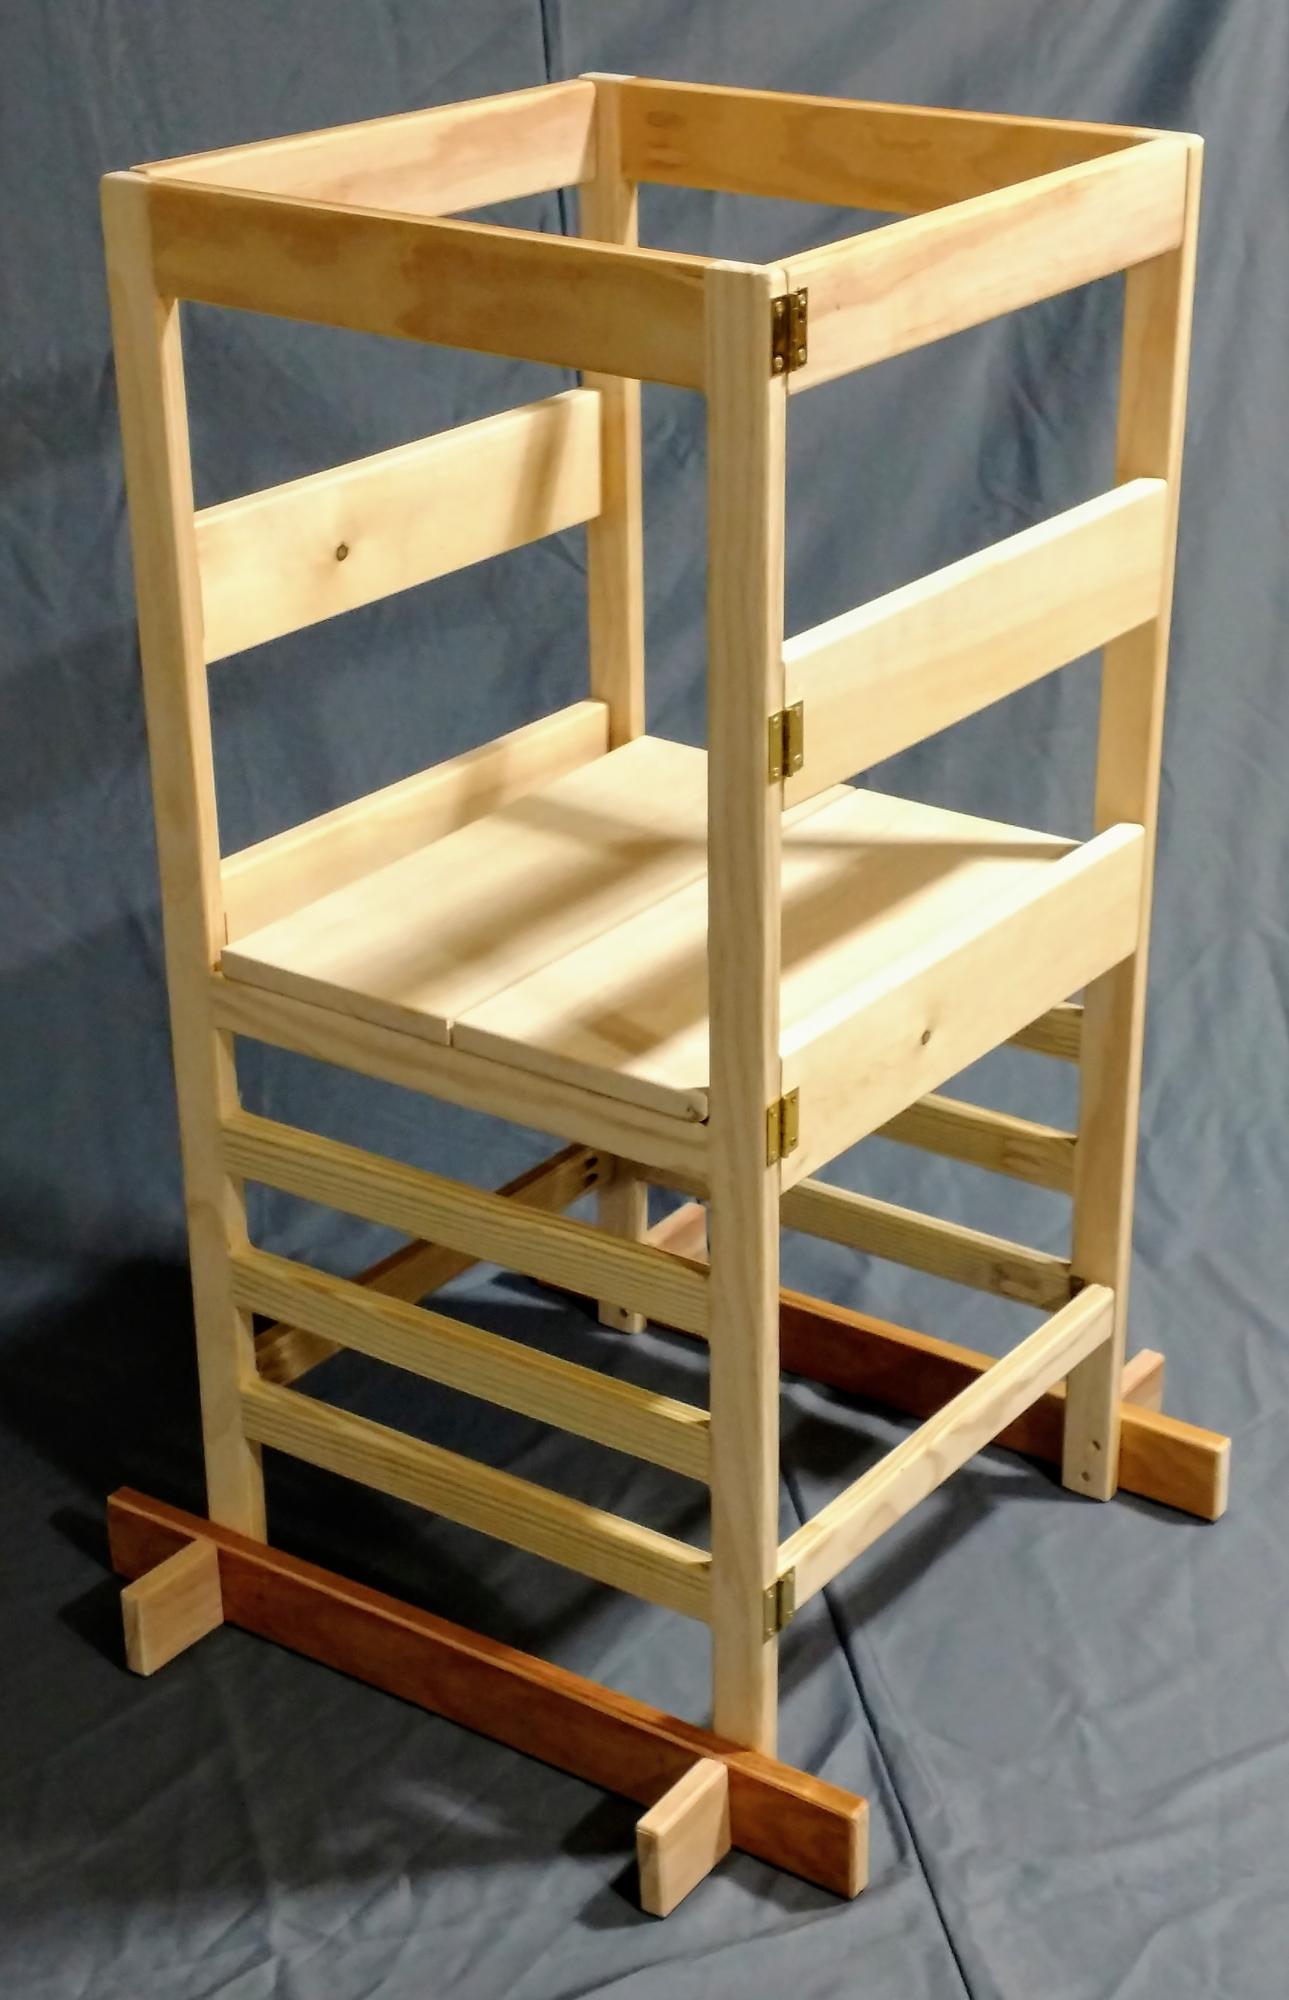
Built the Helper Tower for my grandson. It's the optional hinged version. He uses it every time he visits, and will get a lot of use out of it - platform is at its highest setting.
Built from Plan(s)
Built the Helper Tower for my grandson. It's the optional hinged version. He uses it every time he visits, and will get a lot of use out of it - platform is at its highest setting.
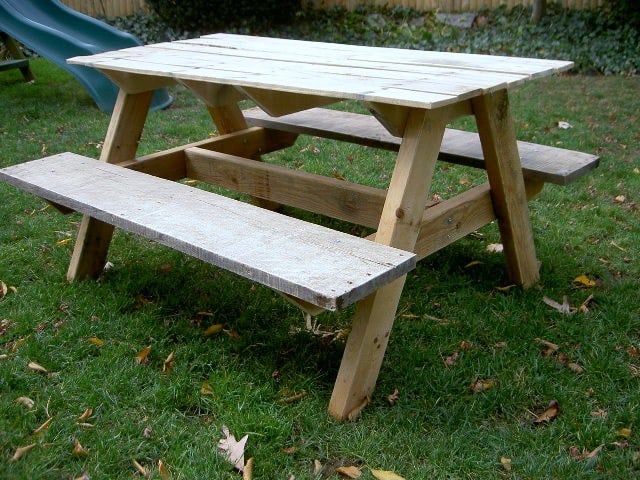
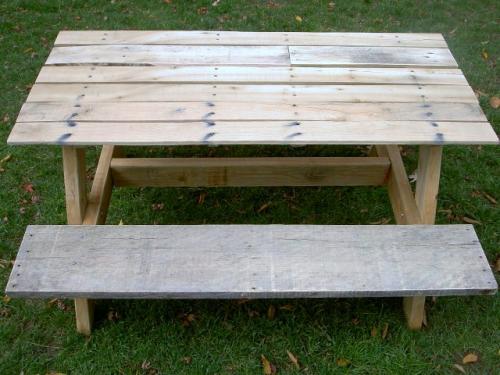
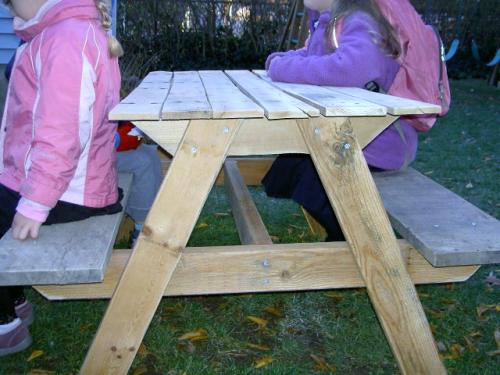
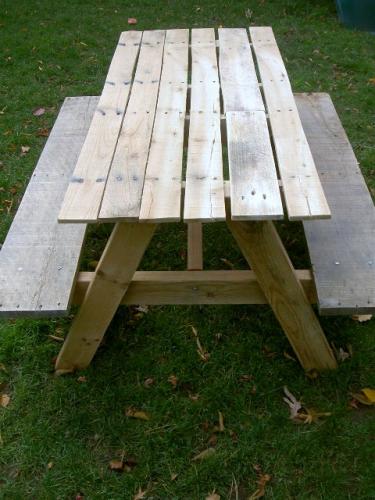
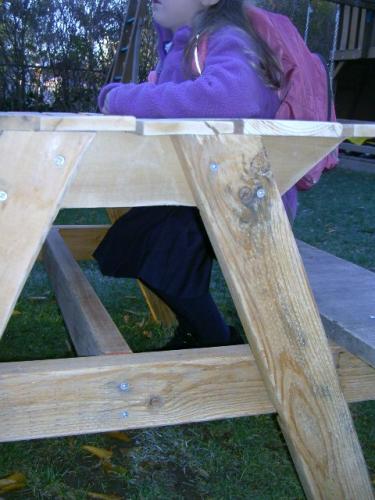
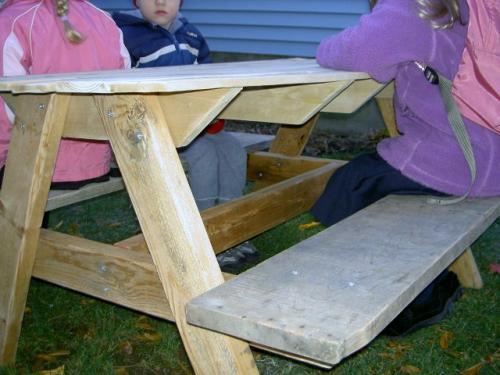
Kids picnic table made from pallet and scrap wood.
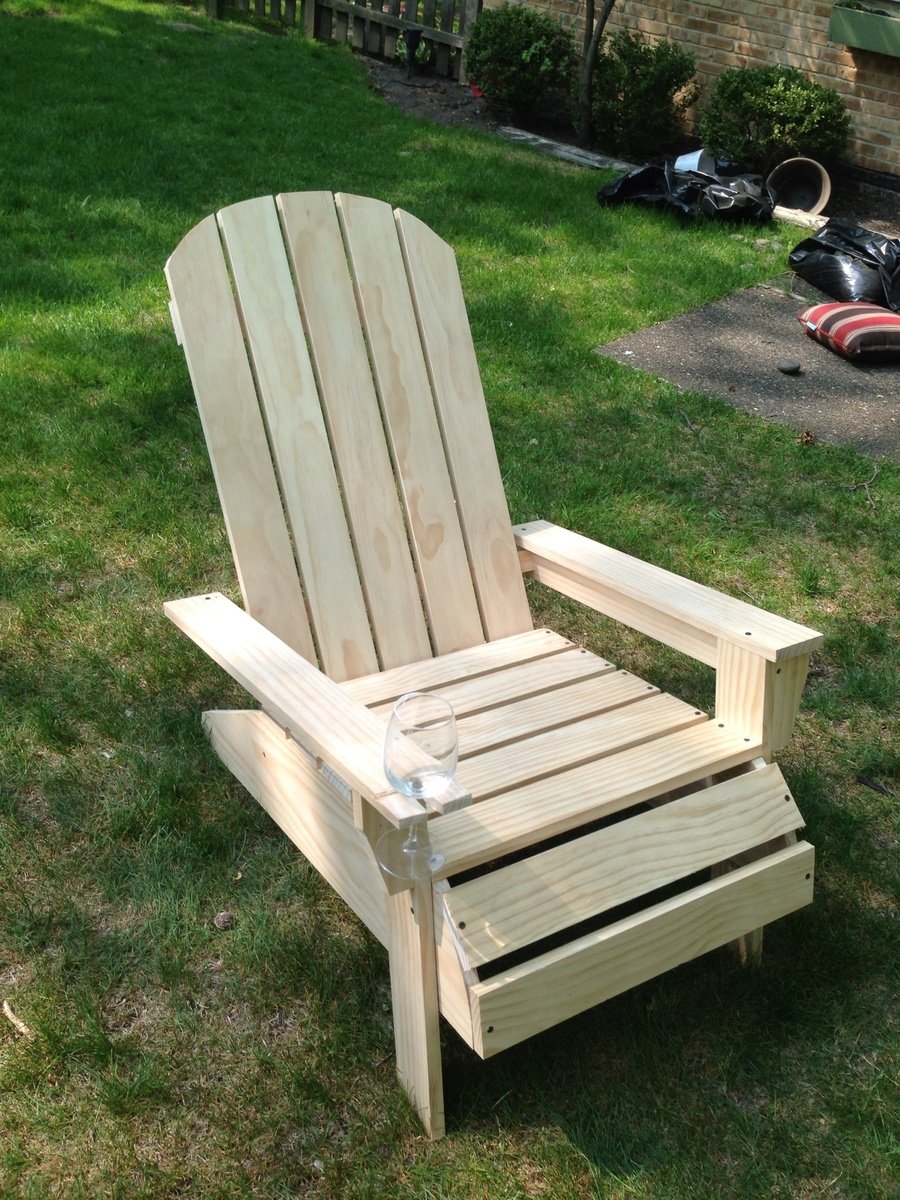
The only thing I did different to the plan was add 4.5 inches to the back slats so I could round the edges and 3 inches to the right arm rest so I could cut out a track to rest a wine glass. One thing I highly recommend is to create a stencil of the stringer. I did and now I have it for the next one so the next chair will be consistent. Thanks Ana white, this site is very therapeutic for me. Already built 3 projects in the last month.
Thu, 06/06/2013 - 06:38
The mods on this make me now want to build a set of these, the wine glass holder is genius! love the rounded front and back, so much better than original plans, thanks for inspiration!
This was my first build and I loved making it! I wasn't able to make the 60 degree cuts needed for the x's but I hope to be able to add them in the future!
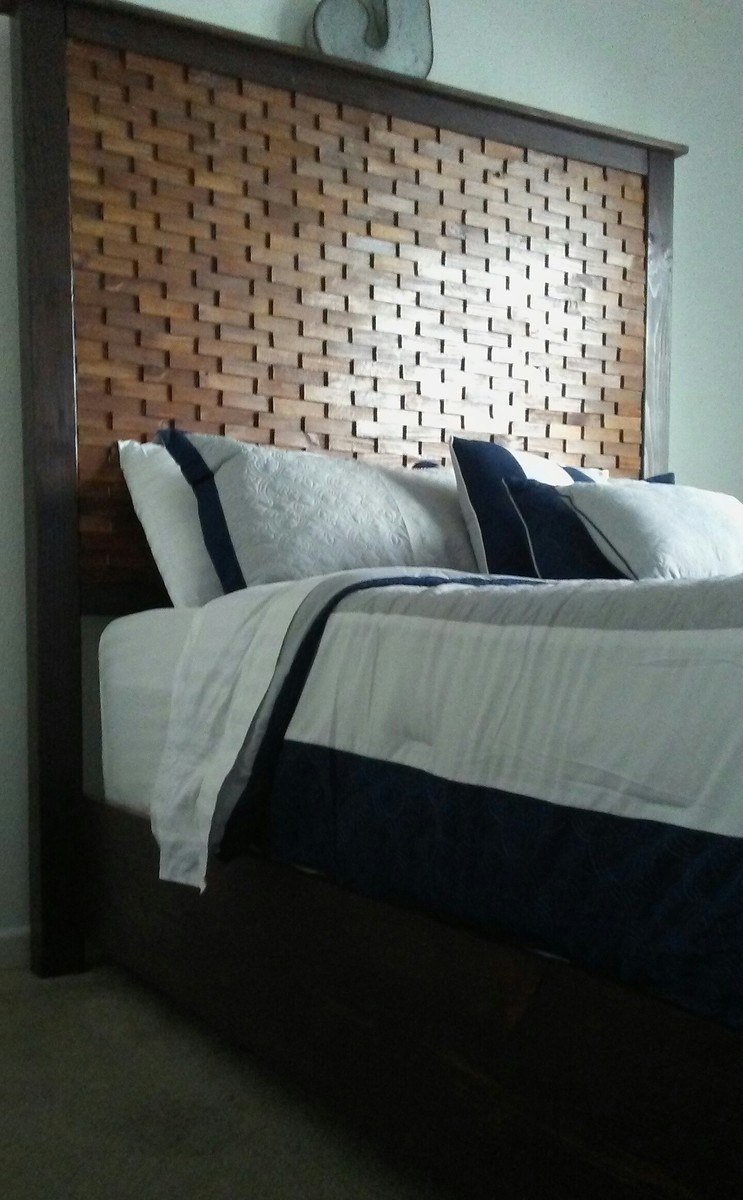
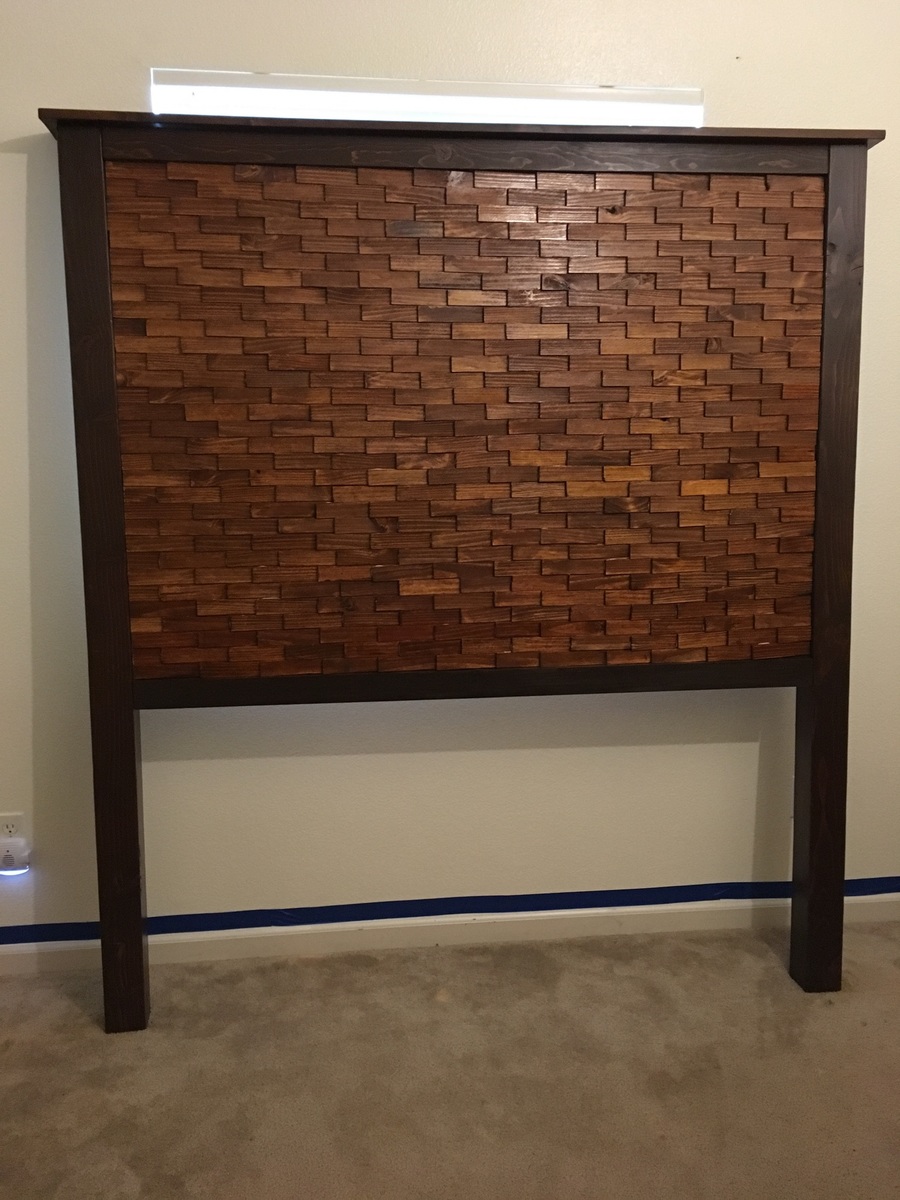
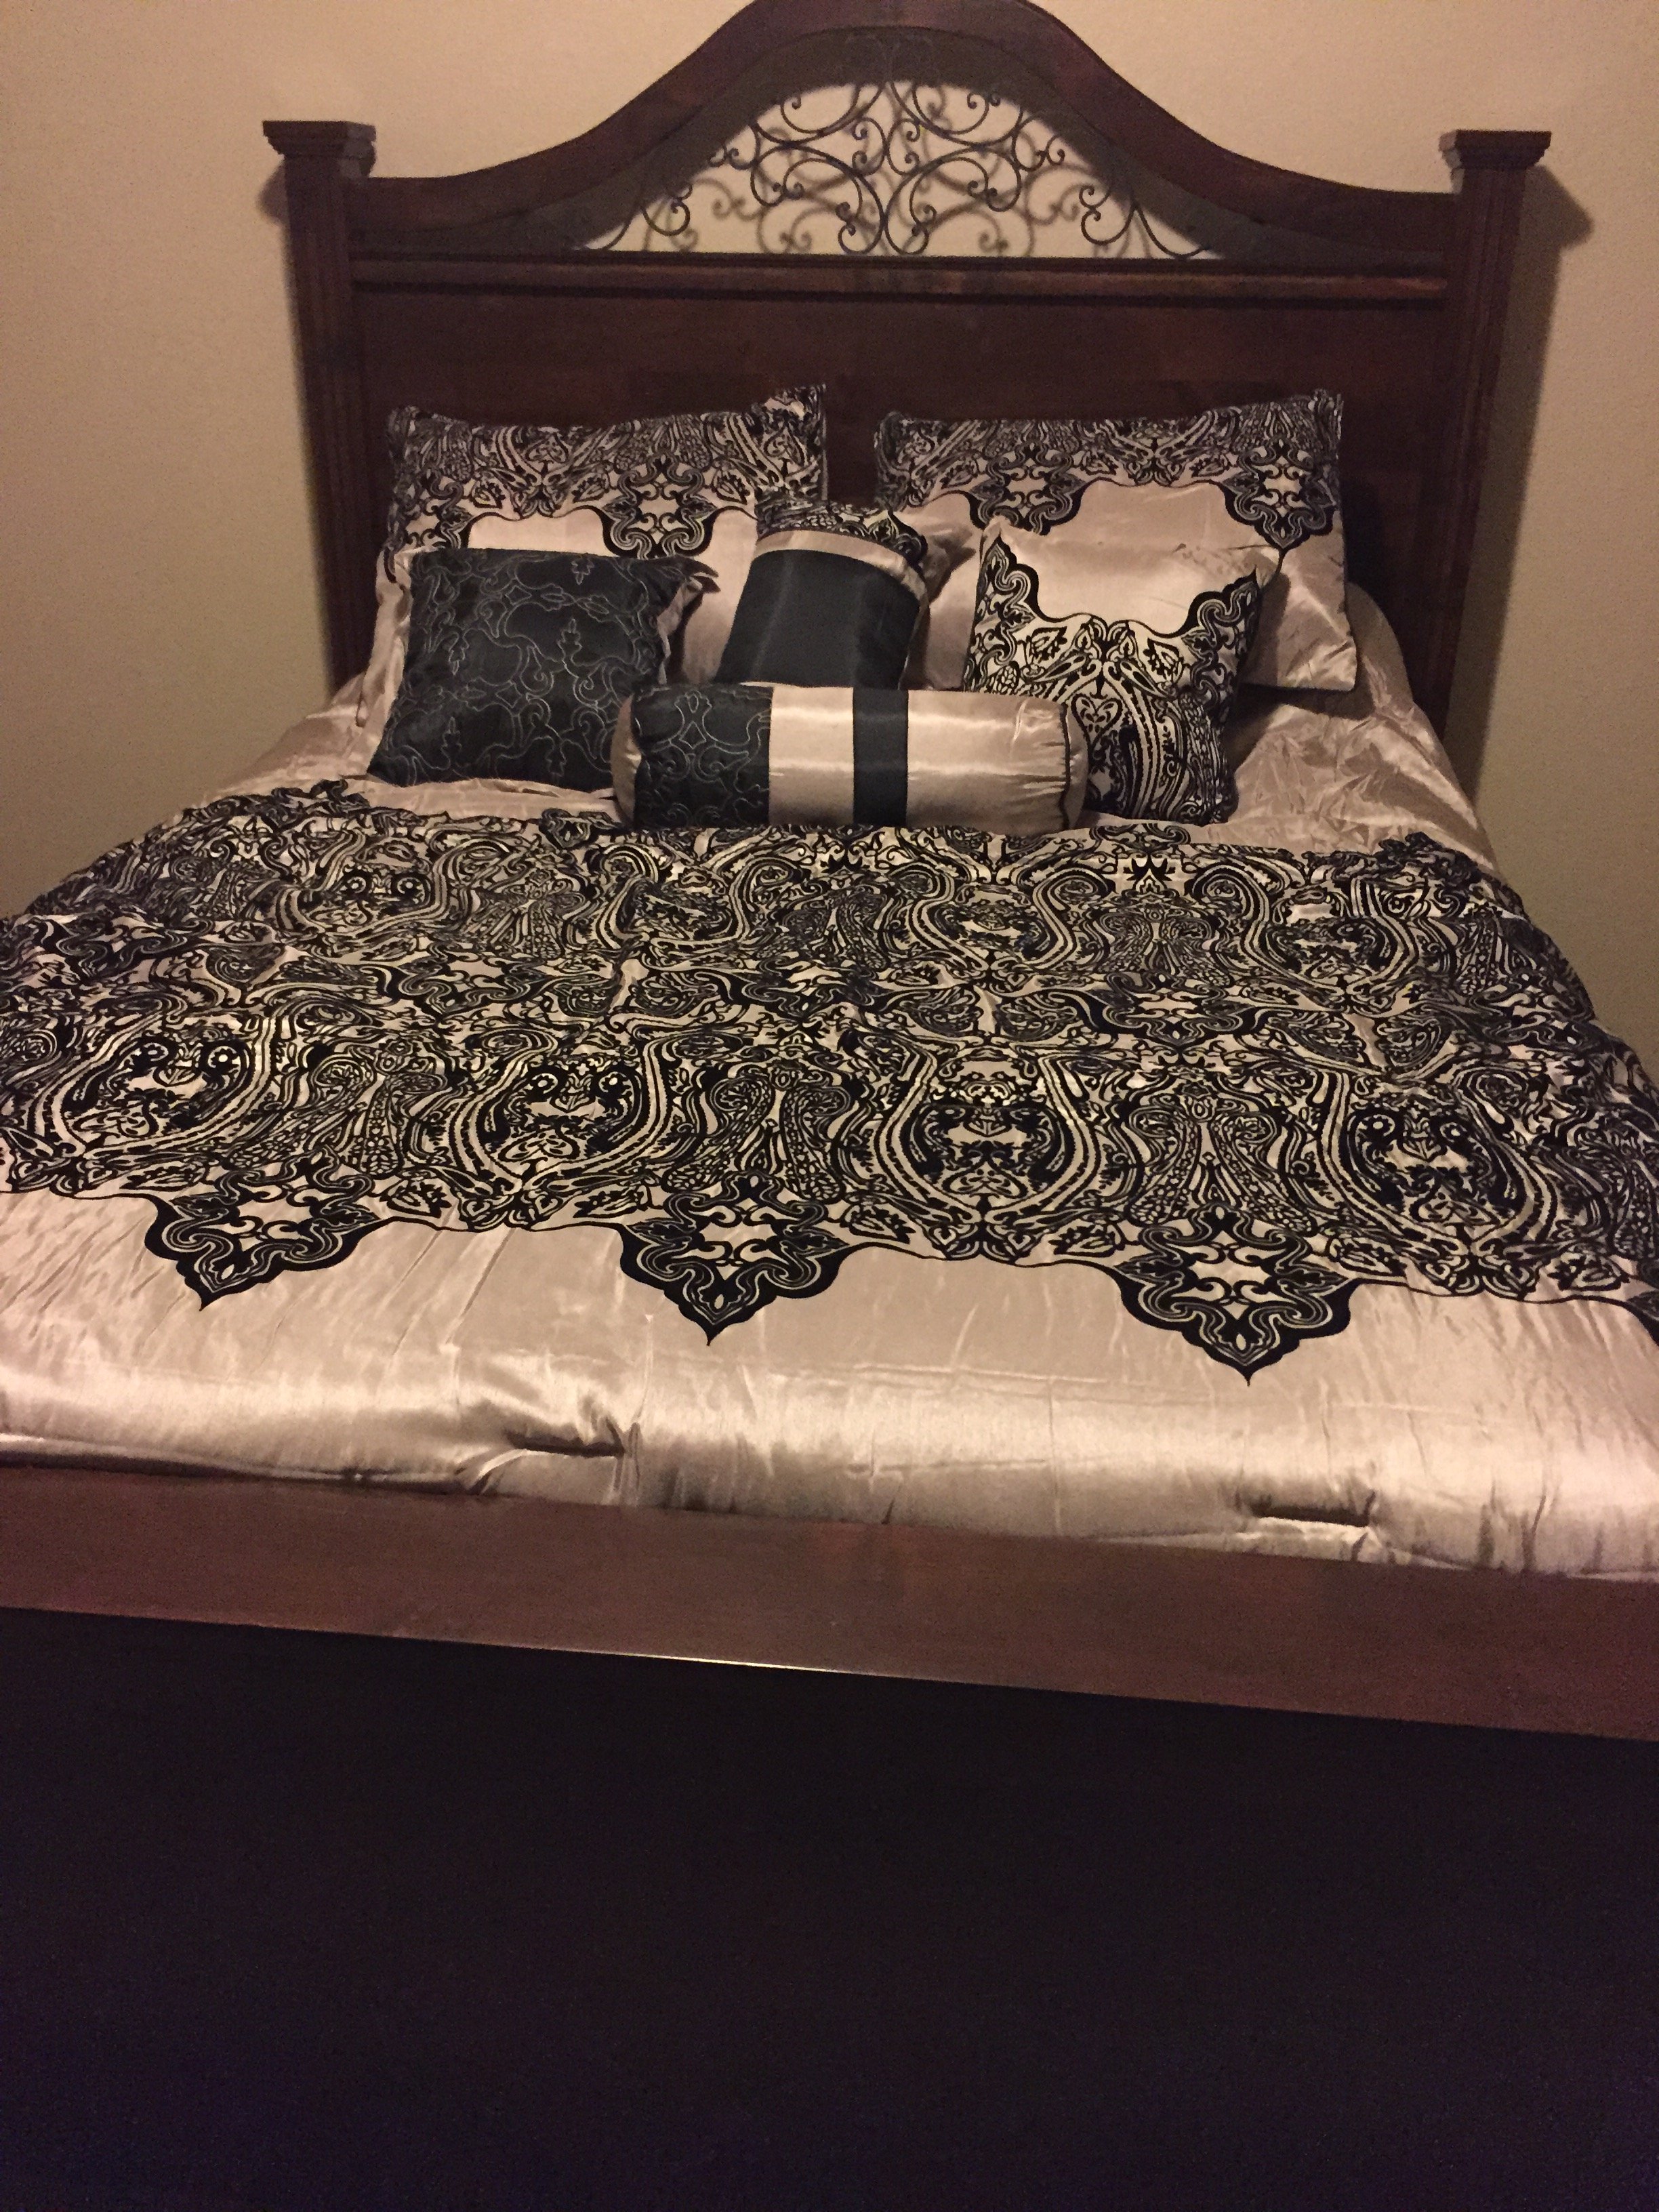
My oldest son grew out of his twin bed and we found the plans for the Cassidy bed and thought it'd be perfect. He couldn't think of a " theme" for his room so we decided to make the headboard taller to keep from having a "blank wall" to have to decorate. It turned out great! We used Colonial Maple, American Walnut and English Chestnut stains for the shims & Colonial Maple + Kona for the border. This was my first time building a queen bed. I am so excited with the way it turned out. This project was so much easier than I had anticipated. It took about 3 days for me because we had triple digit weather and that limited the amount of time I could work outside. I needed help with the final assembly, but other than that, it was a breeze. Thanks again for the awesome plans!
Check out the free plans for these laundry room projects!
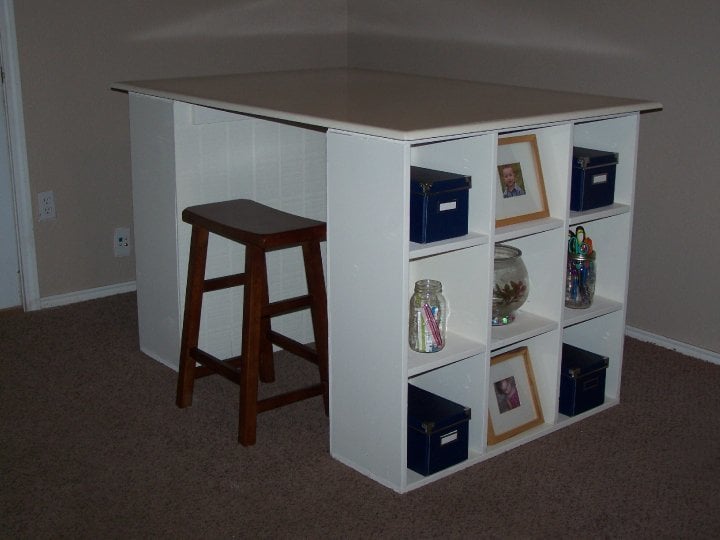
This is my favorite piece we have in our home. We added a wood edging around the desk top to give it a nice finished look. We had a hard time locating the right size drawer slides and ended up buying a lot of them online, so if anyone needs a set of drawer slides, please let me know lol.
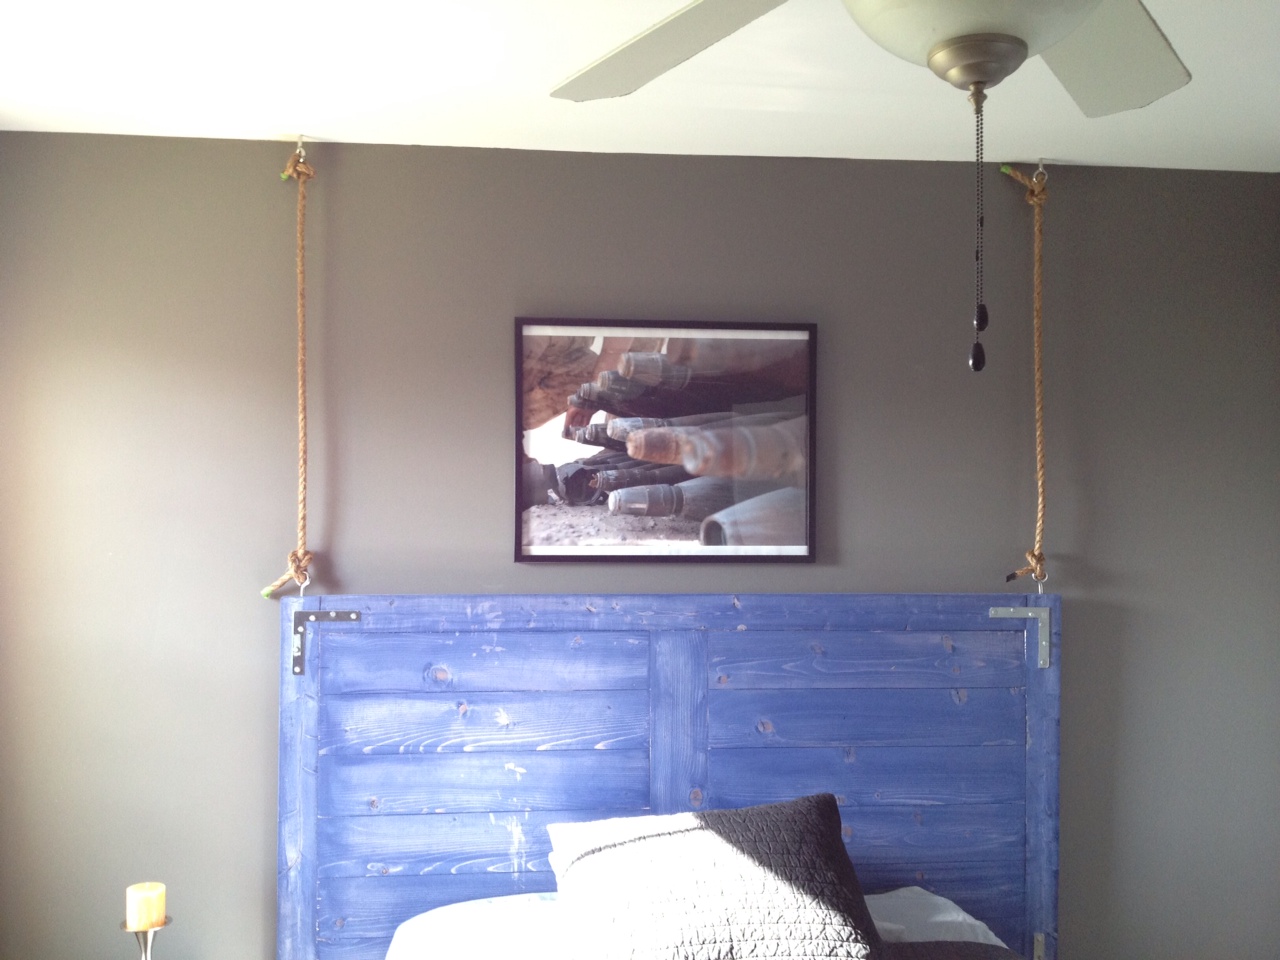
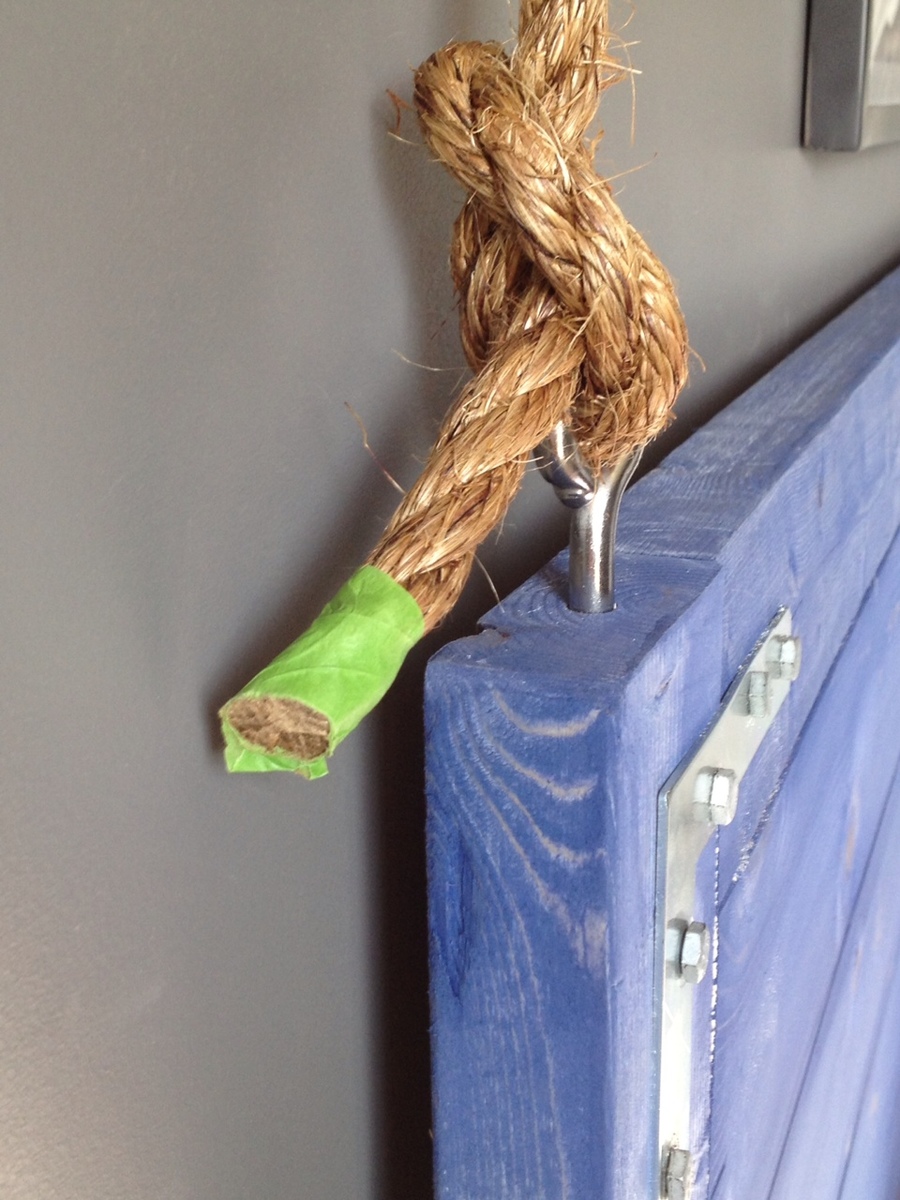
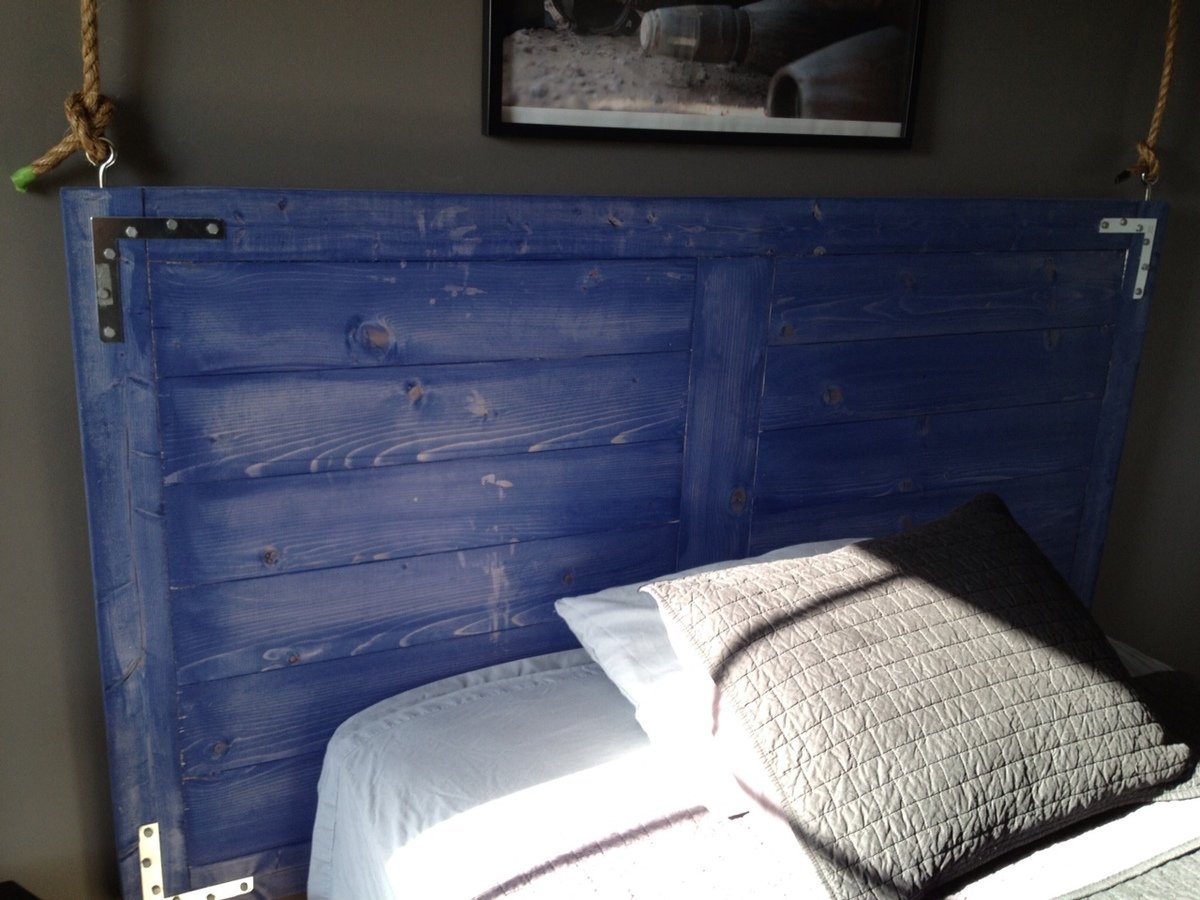
This was supposed to be a table top, however I screwed up a corner so we stained it and turned it into a headboard. We decided to add eye bolts and make it look like it was suspended from the ceiling with rope.
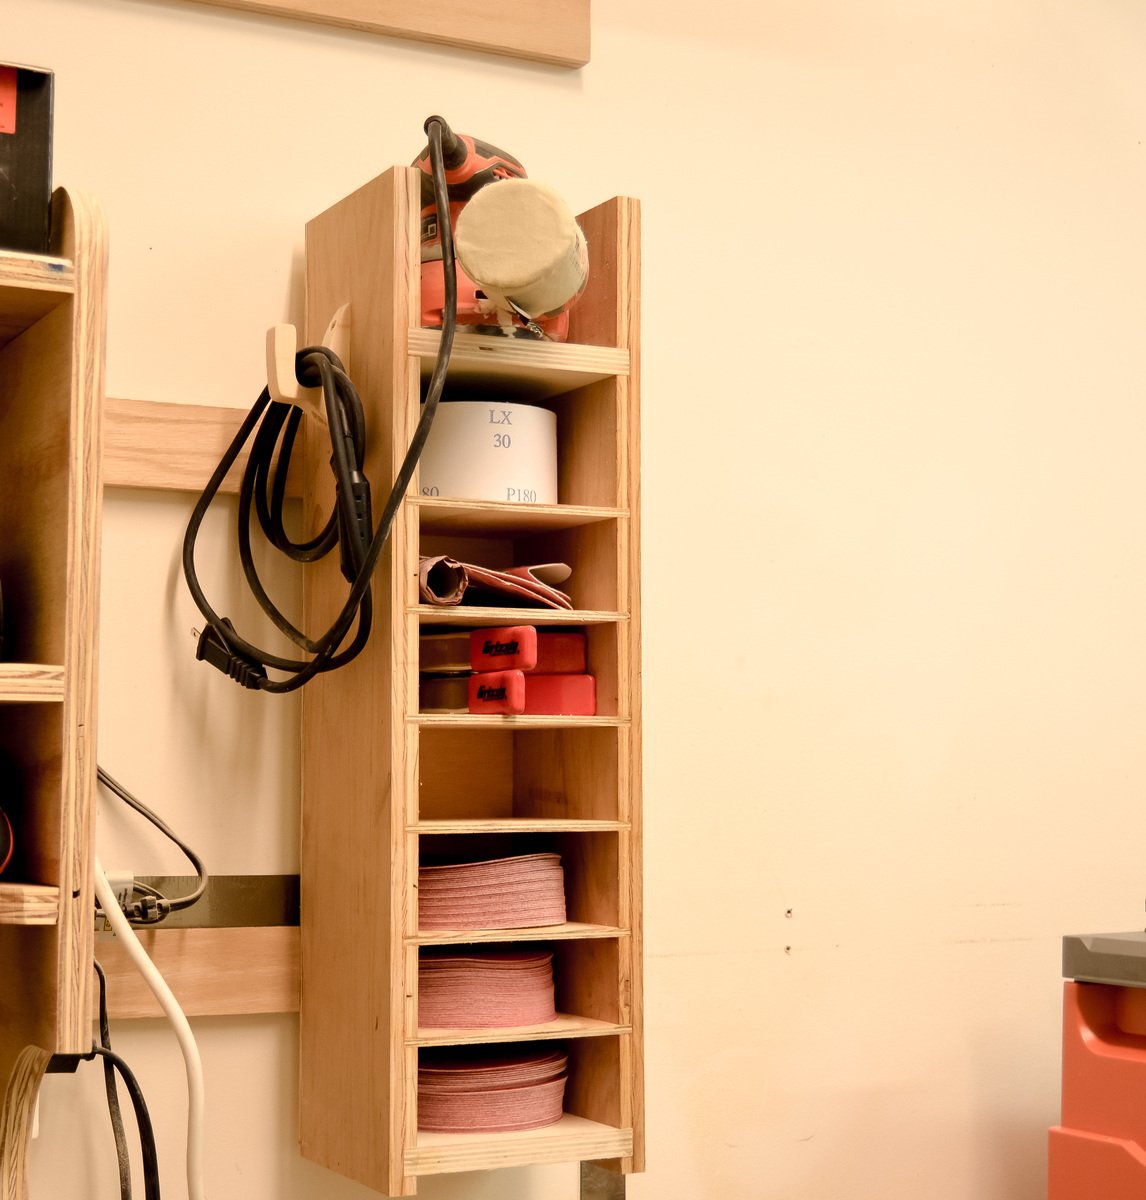
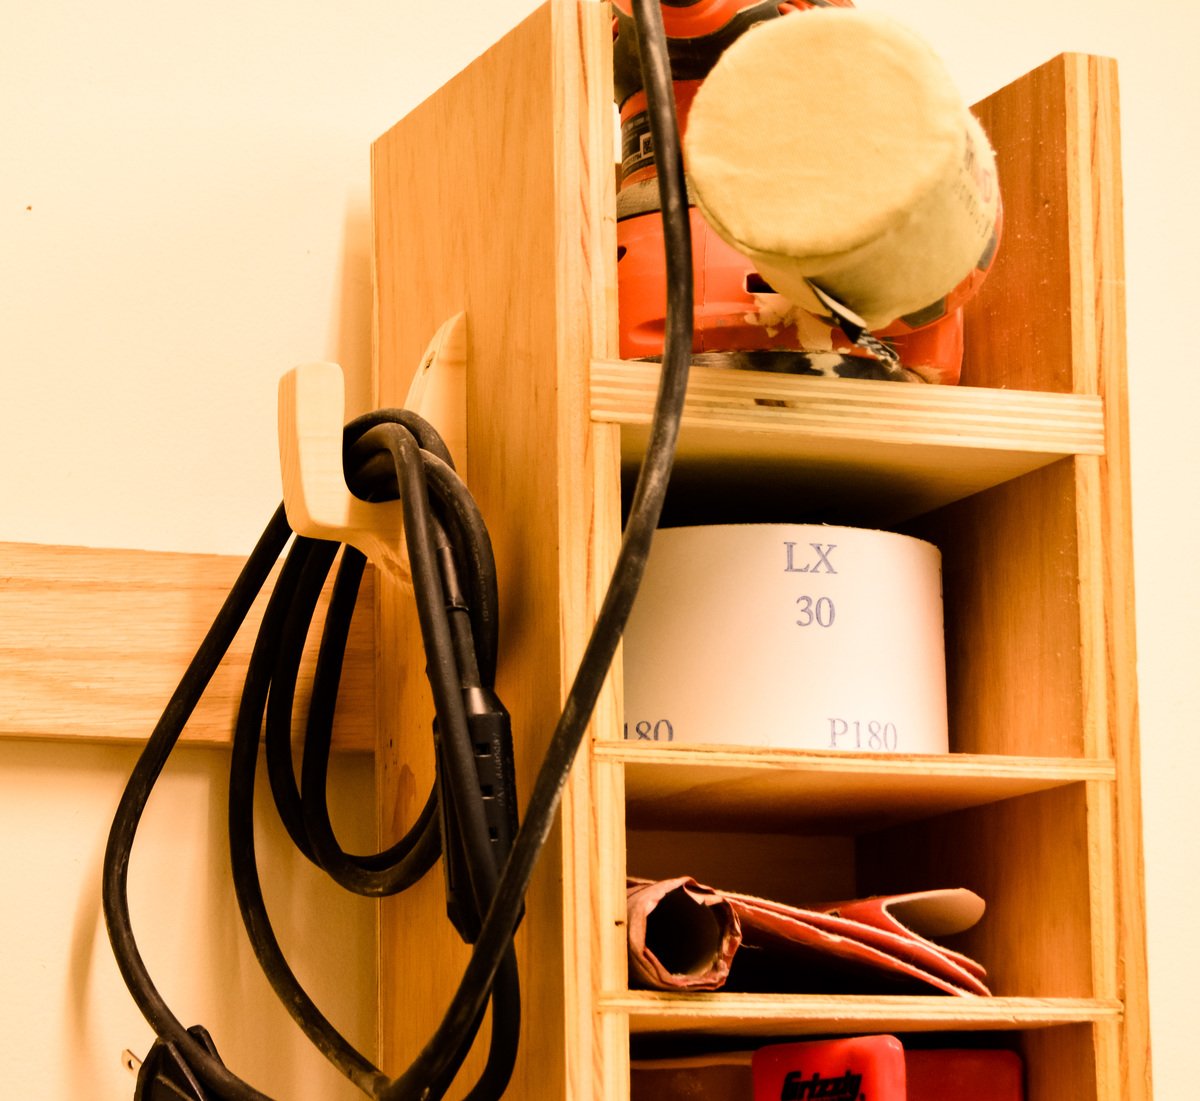
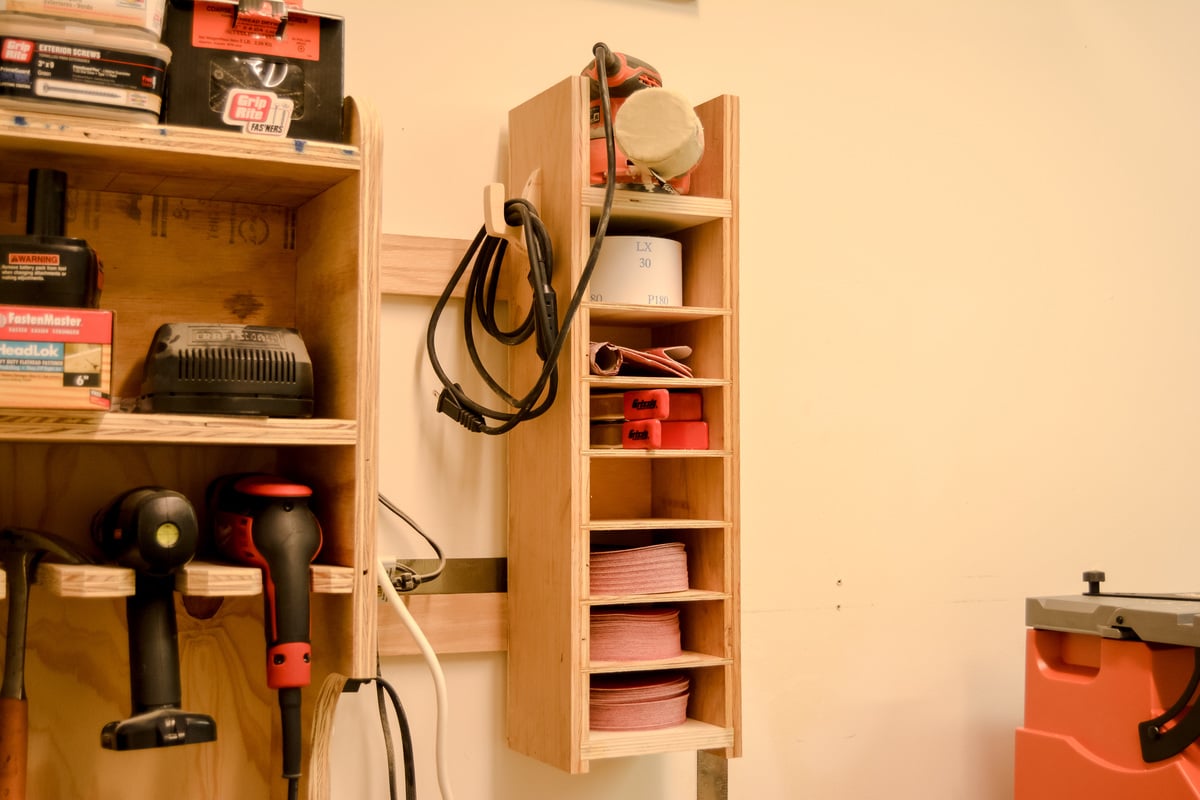
This week I built a french cleat sanding station to house my orbital sander and sand paper!
Blog: http://www.lanebroswoodshop.com/2015/04/french-cleat-sanding-station.ht…
Plans: https://drive.google.com/file/d/0B_RQfvQzkmz3OENtUWdmMENCYlk/view?usp=s…


Another cute, easy project!
Wed, 10/06/2021 - 20:11
That's a great little set, love the finish! Thank you for sharing:)
Thu, 10/07/2021 - 21:43
Thanks Ana ... and thanks for all you do! You're the best!!
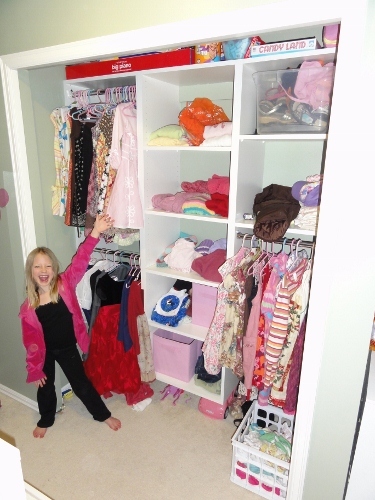
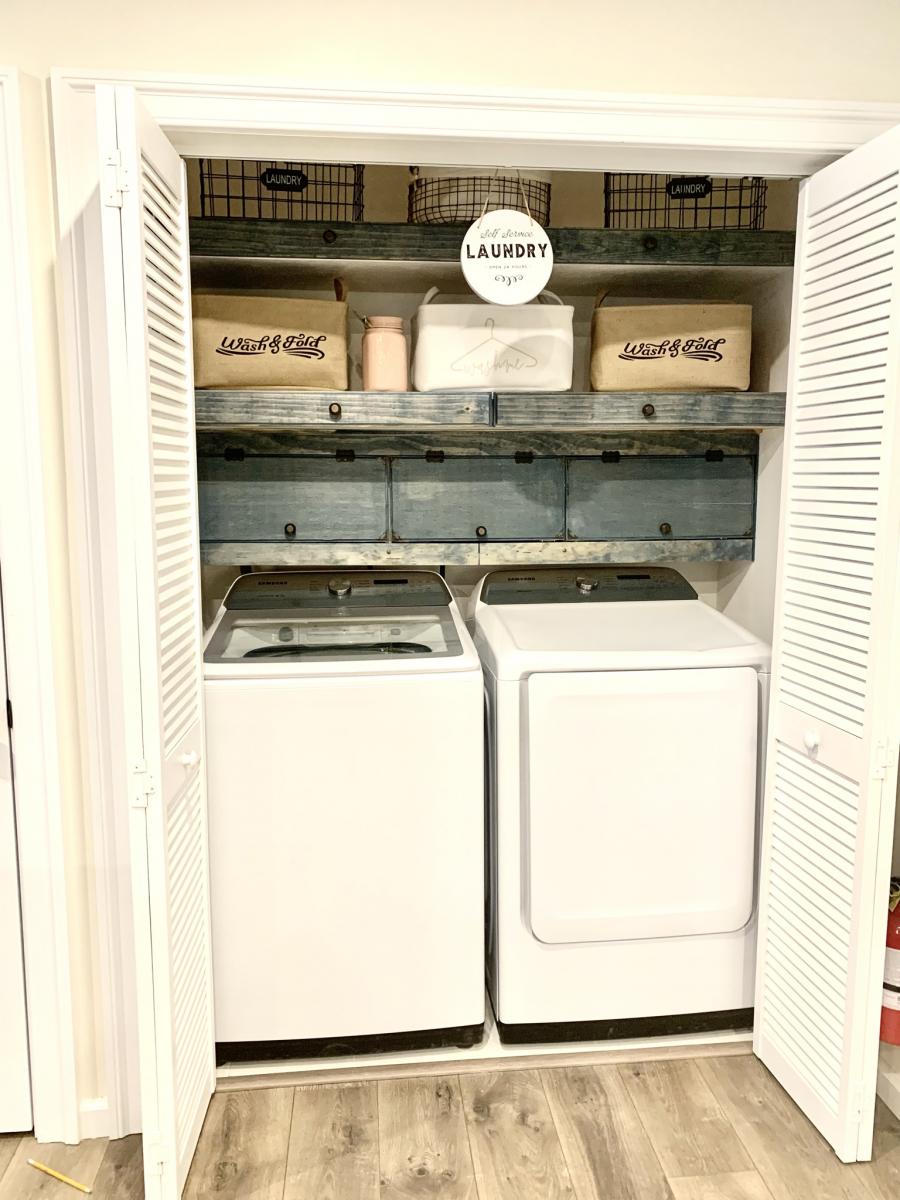
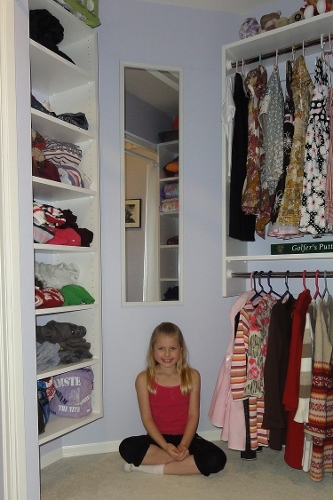
I used Ana's 'Simple Closet Organizer' plan as a starting point and then went a little nuts. :) If you read the comments below the plan, a wonderful, professional closet designer gave some fantastic tips and then another person shared EasyClosets.com.
So I plugged all of the dimensions into the Easy Closets website and used the plan I drew up based on its recommendations and my daughter's needs. :) She has three usable walls.
This was also my very first time using my Kreg Jig. I got it for my birthday months ago, but wasn't sure which project to "learn" on. :) I did quite a few tests on scrap before starting. Melamine coated particle board is SLIPPERY stuff so have LOTS and LOTS of clamps or your joints will not be square. Wow!
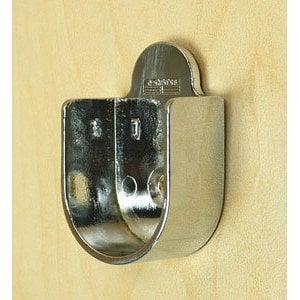
I got these chrome closet rods at The Container Store – so cheap and they'll cut them to size for you! Like $3~ a rod!? In the photos below, I'm using large, plastic closet rod flanges that I found at Orange, but I have these pretty chrome (peg-friendly) flanges ordered from Amazon. They're really cheap too! They will fit the 1-inch diameter rods I bought much better than the plastic ones and are made specifically for the pre-drilled 32mm closet boards. :) Yay!
Only other thing I did differently was use 1x4 boards to square the closet boxes up. I just cut them to the same width as the shelves and pocket-screwed them into the very top and very bottom of each box. Then I painted them to match her purple wall color.
I was so happy with how it turned out that I did my other daughter's closet that next weekend! I used the same website to design it too. LOVE IT!
Anyhoo, here are the finished closets for both of my daughters! Thank you Ana! I would never have done this if you hadn't have posted that plan! Totally inspired me! Can't wait do do our master closet! EEEK!


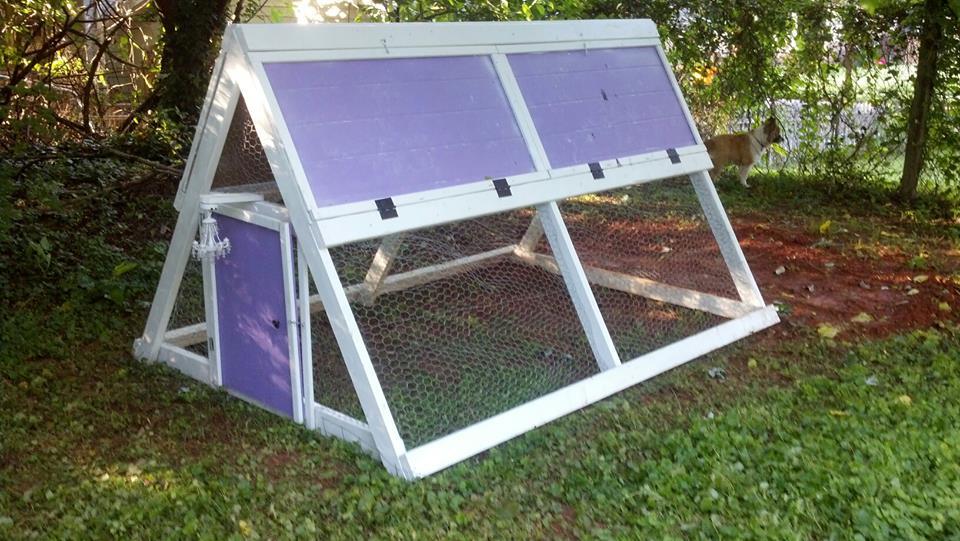
We're adding our chickens this weekend!
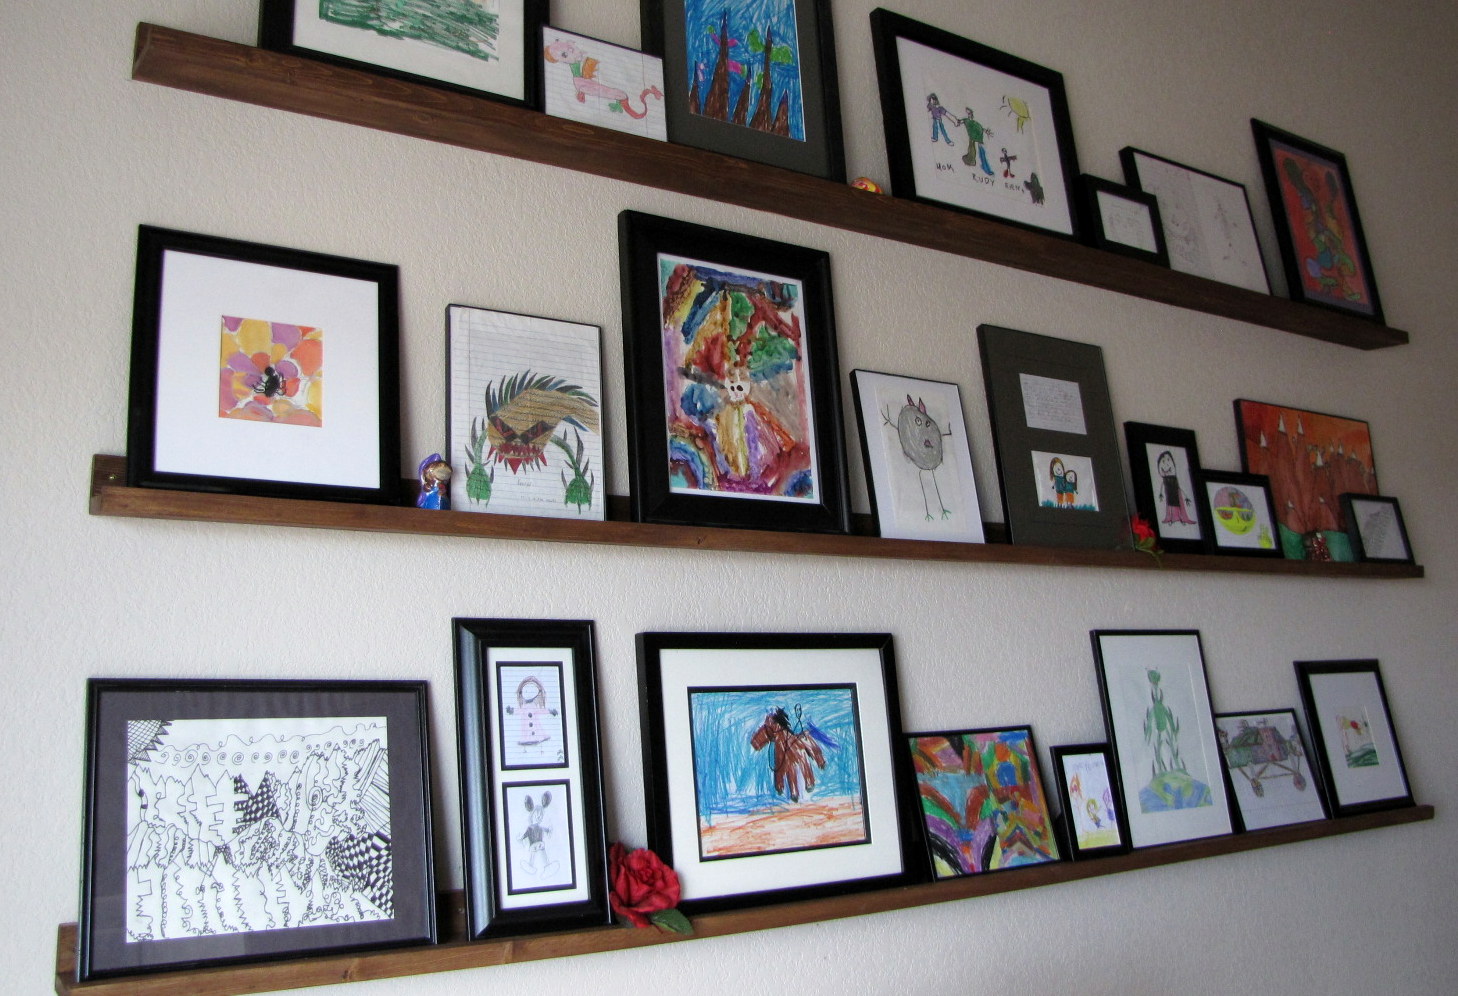
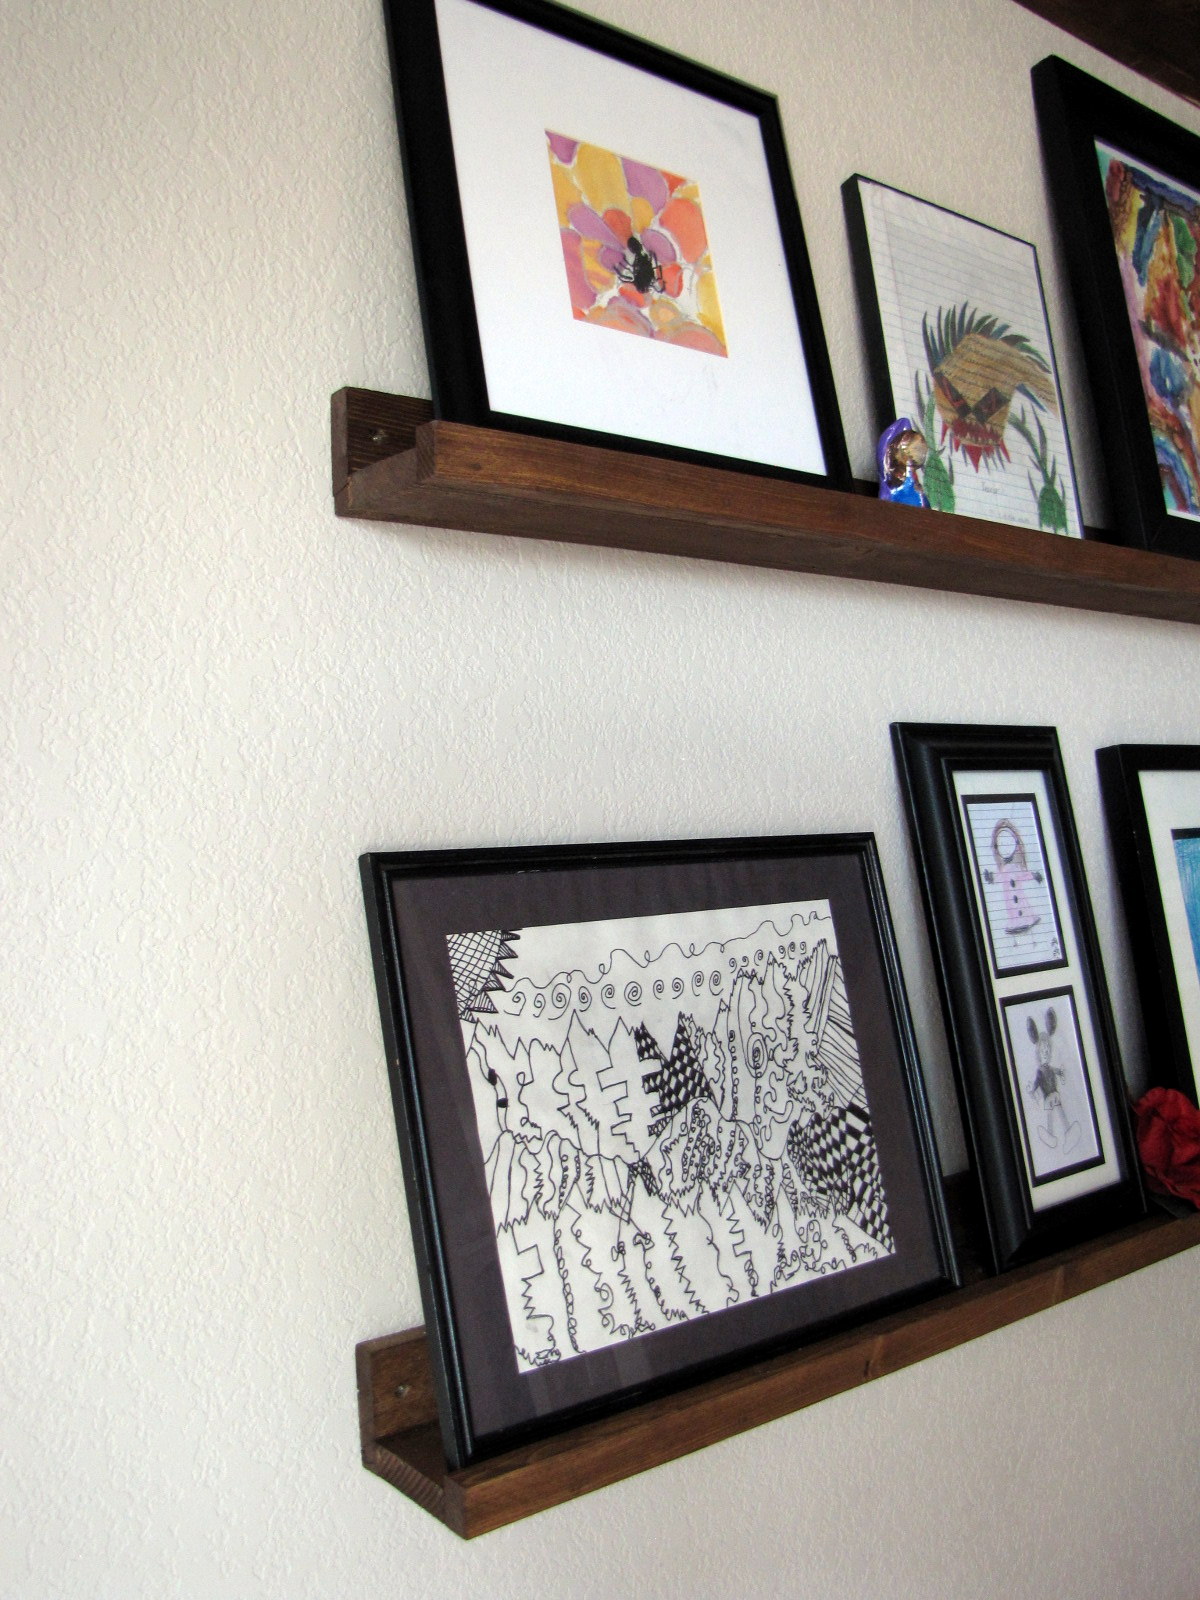
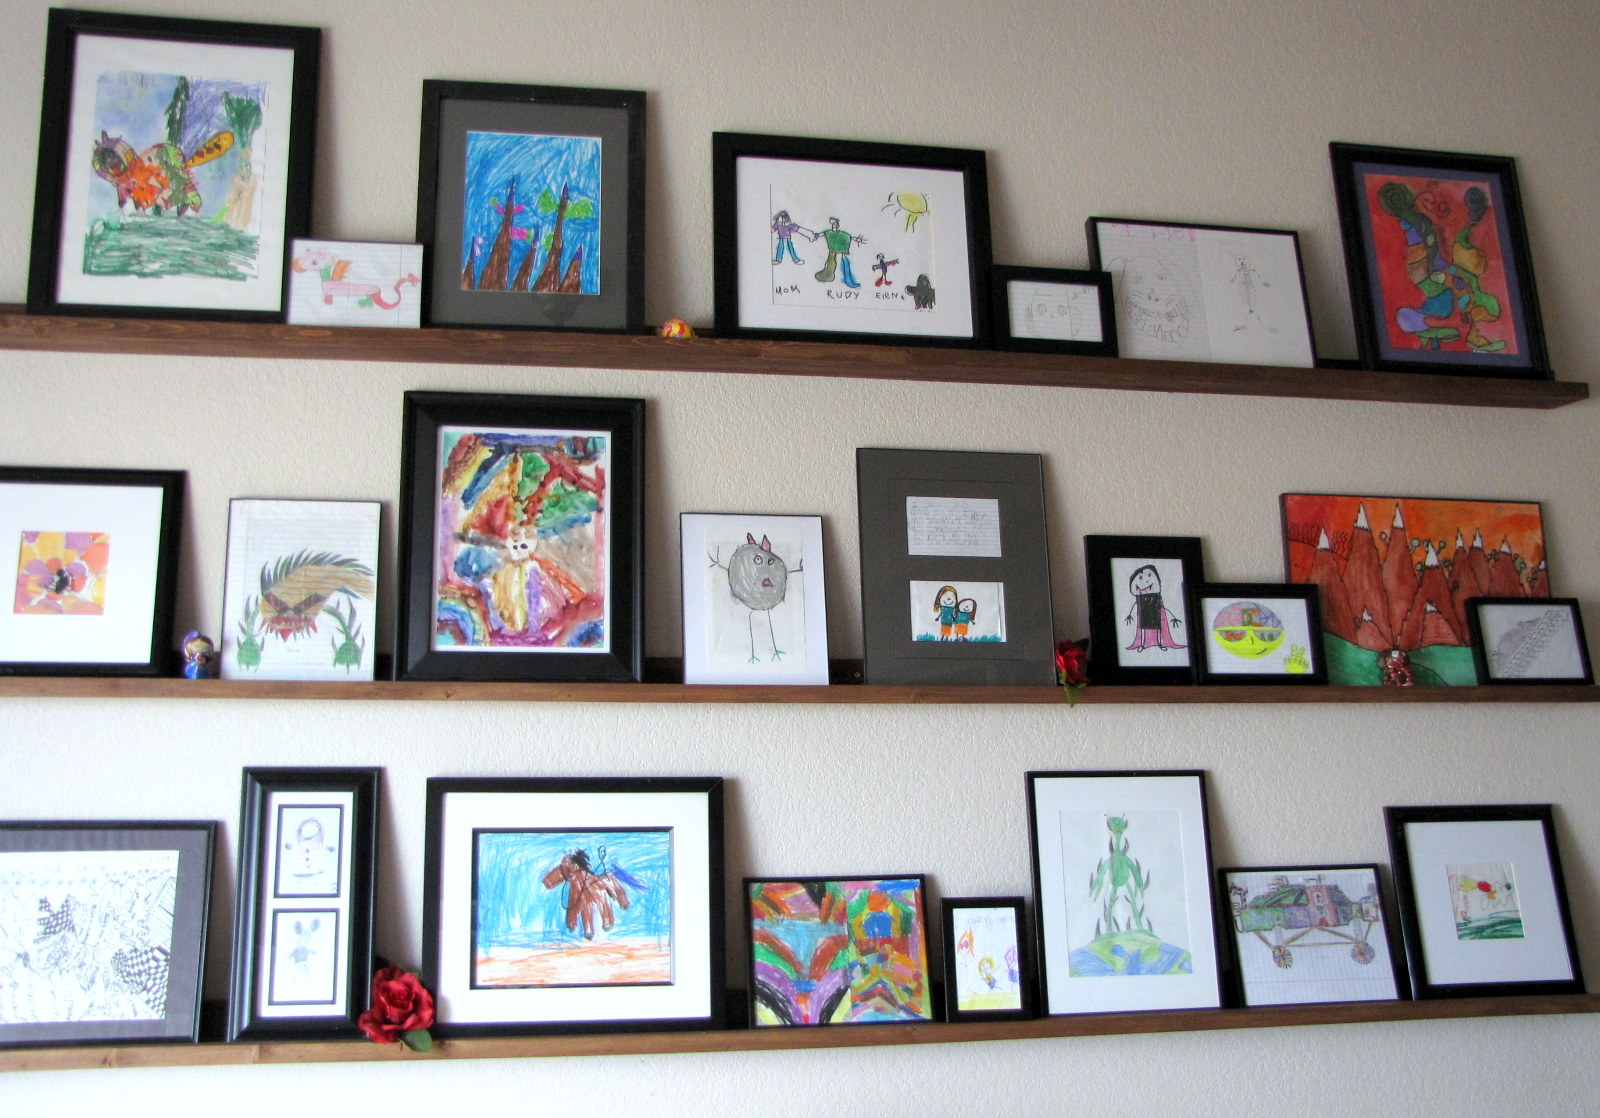
I love these shelves. So simple to build and still make a big impact. I built mine just a little different from the plan. I used 1x3 furring strips for the bottom and back pieces instead of 1x4's and then ripped a 1" strip from another 1x3 for each shelf to create the front trim piece instead of a 1x2. The shorter front trim piece gives me just enough ledge to keep the frames from slipping off the ledge, but provides maxium display area for the art work.
For three shelves just like these you need:
They were assembled using 2" fiinishing nails and lots of wood glue.

I built this bench for my niece on her birthday. It as easy and fun to build. My niece and everybody at the party loved it.
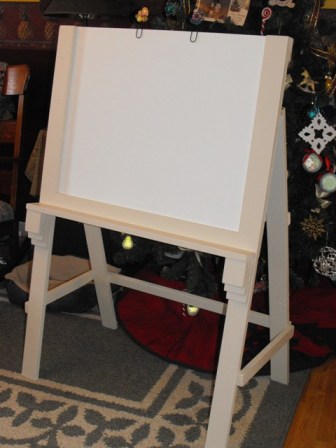
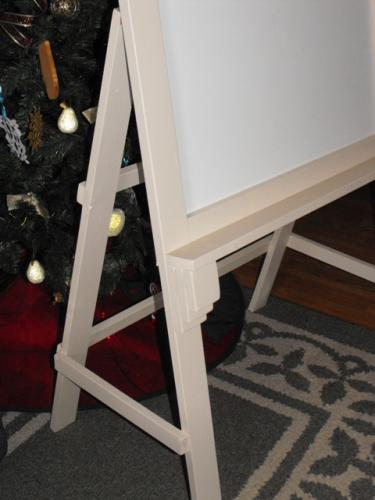
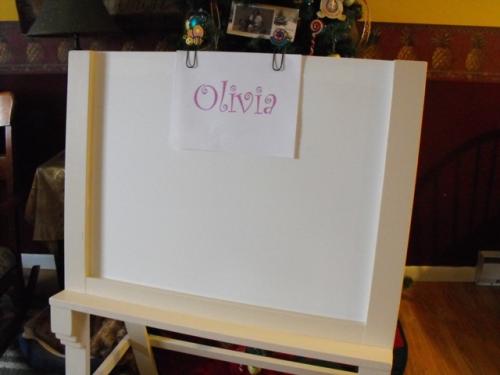
I made this easel for my 5 year old niece. It was tweaked from another Ana plan. I used dry erase board and added oversized paper clips at the top to hold sheets of paper. It has turned into a very loved possession.
This was my first project and it turned out great!
https://www.etsy.com/listing/150638354/truss-bookshelf-pick-up-only-48-…

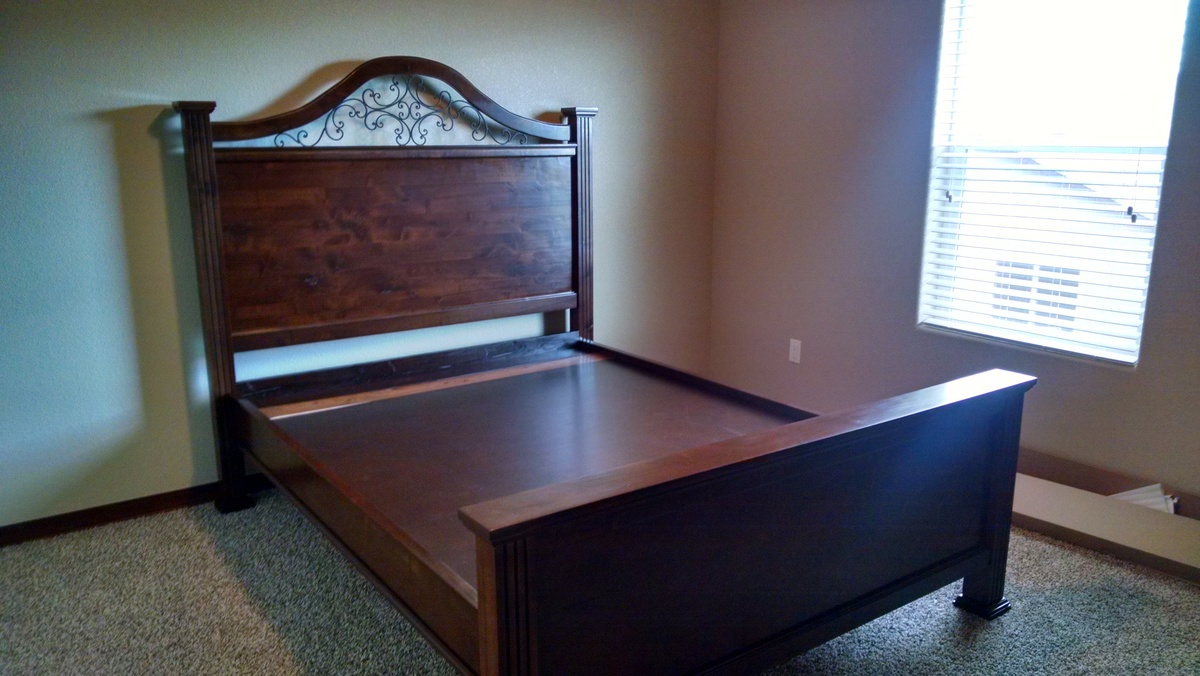
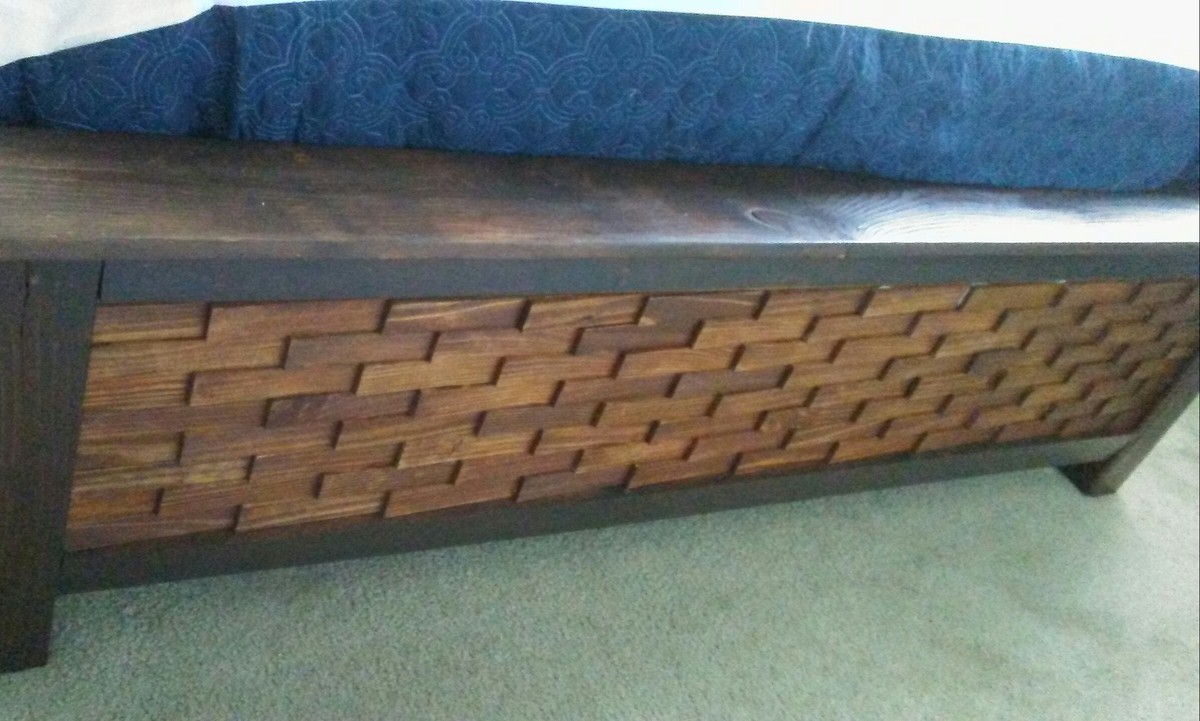
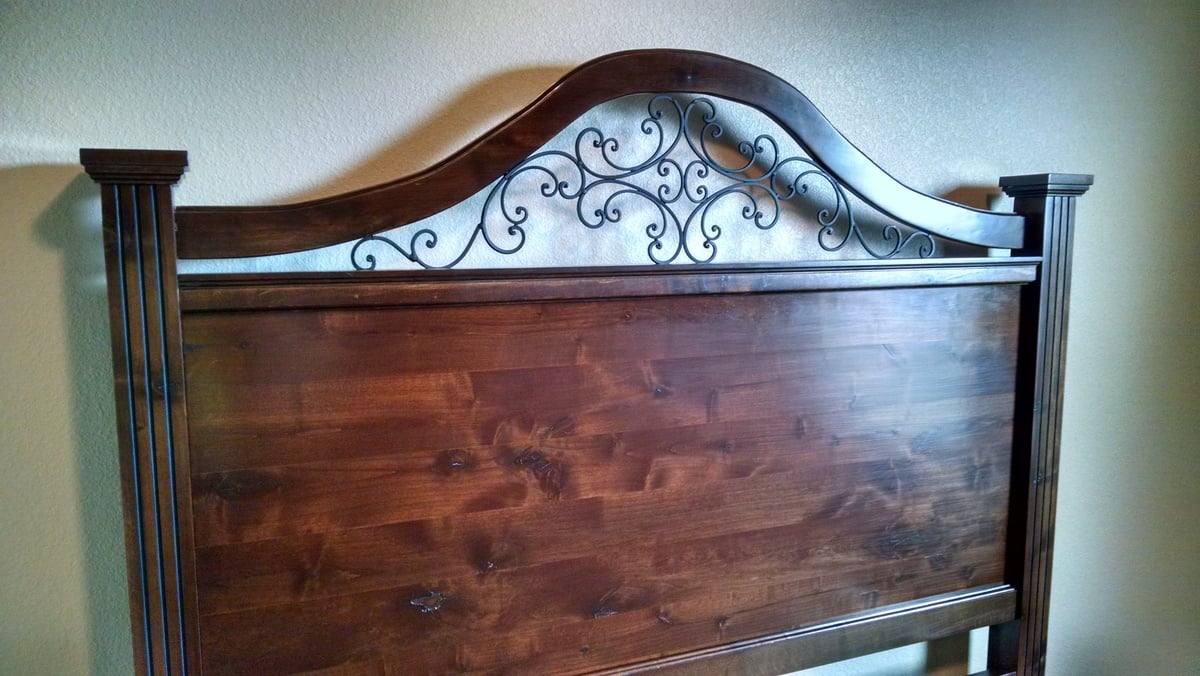
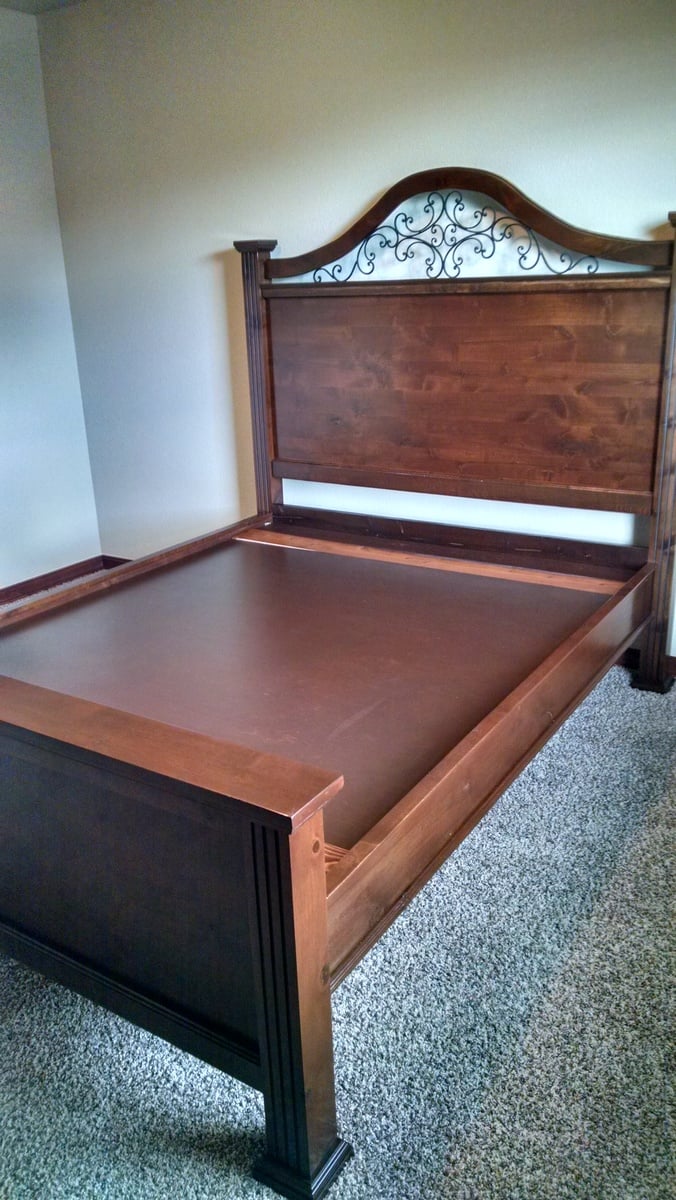
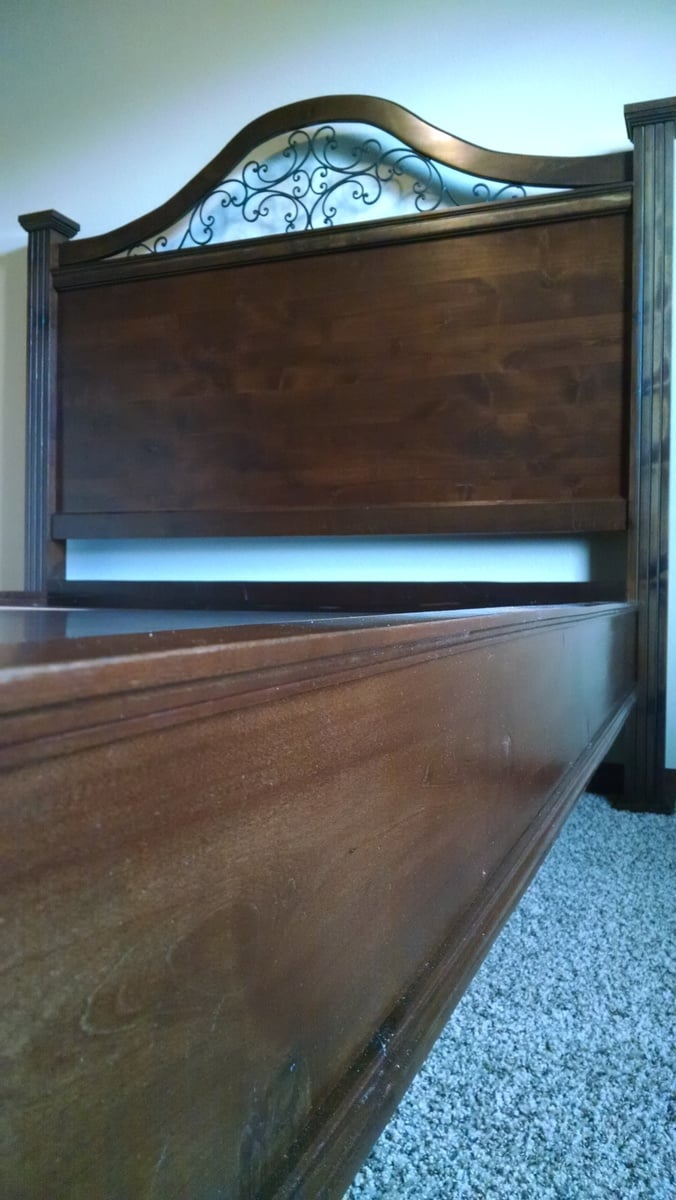
This bed frame is for my daughter’s new house, in the guest bedroom. She chose the design and got all the supplies to make it. The wood is knotty alder. It came out looking fairly close to the inspiration picture my daughter gave me to follow.
I used the Cassidy bed plan and made adjustments to accommodate the iron piece. The feet and top caps are made of one routered square with another slightly larger, unrroutered square stacked on top of it.
Thanks for the easy-to-understand plans. Everything I’ve learned about building has come from this awesome website!


Shrink size and make double truss small coffee/project table. Select Minwax NATURAL BEIGE water base stain and got very warm, peachy color.

I built the console table and liked it so much I decided to modify the plan to make a whole set. I made two side tables , and a coffee table. This is also the first time I installed drawer hardware. I was a bit intimidated but after watching a “how to” video from Anna it was pretty easy. I’m working on finishing the coffee table now. The stain is weathered oak. They’re finished with gloss lacquer.


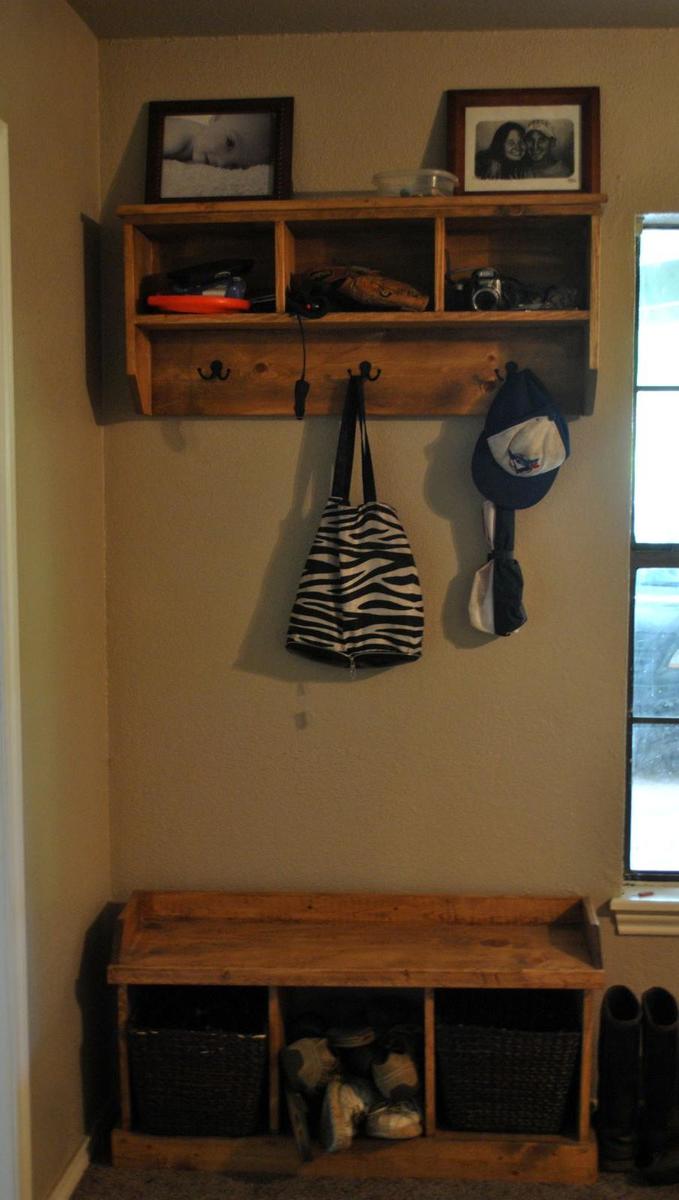
This is perfect for our front room- (most) shoes fit in the storage baskets, and the hooks are perfect for scarves and coats in the winter, towels and life jackets in the summer. The top cubbies hold gloves and hats, as well as sunglasses, umbrellas and sun screen.


Comments
Ana White Admin
Mon, 10/04/2021 - 16:51
YAY for little helpers!
This is such a great way to include the children in learning and fun! Thank you for sharing, it looks amazing!