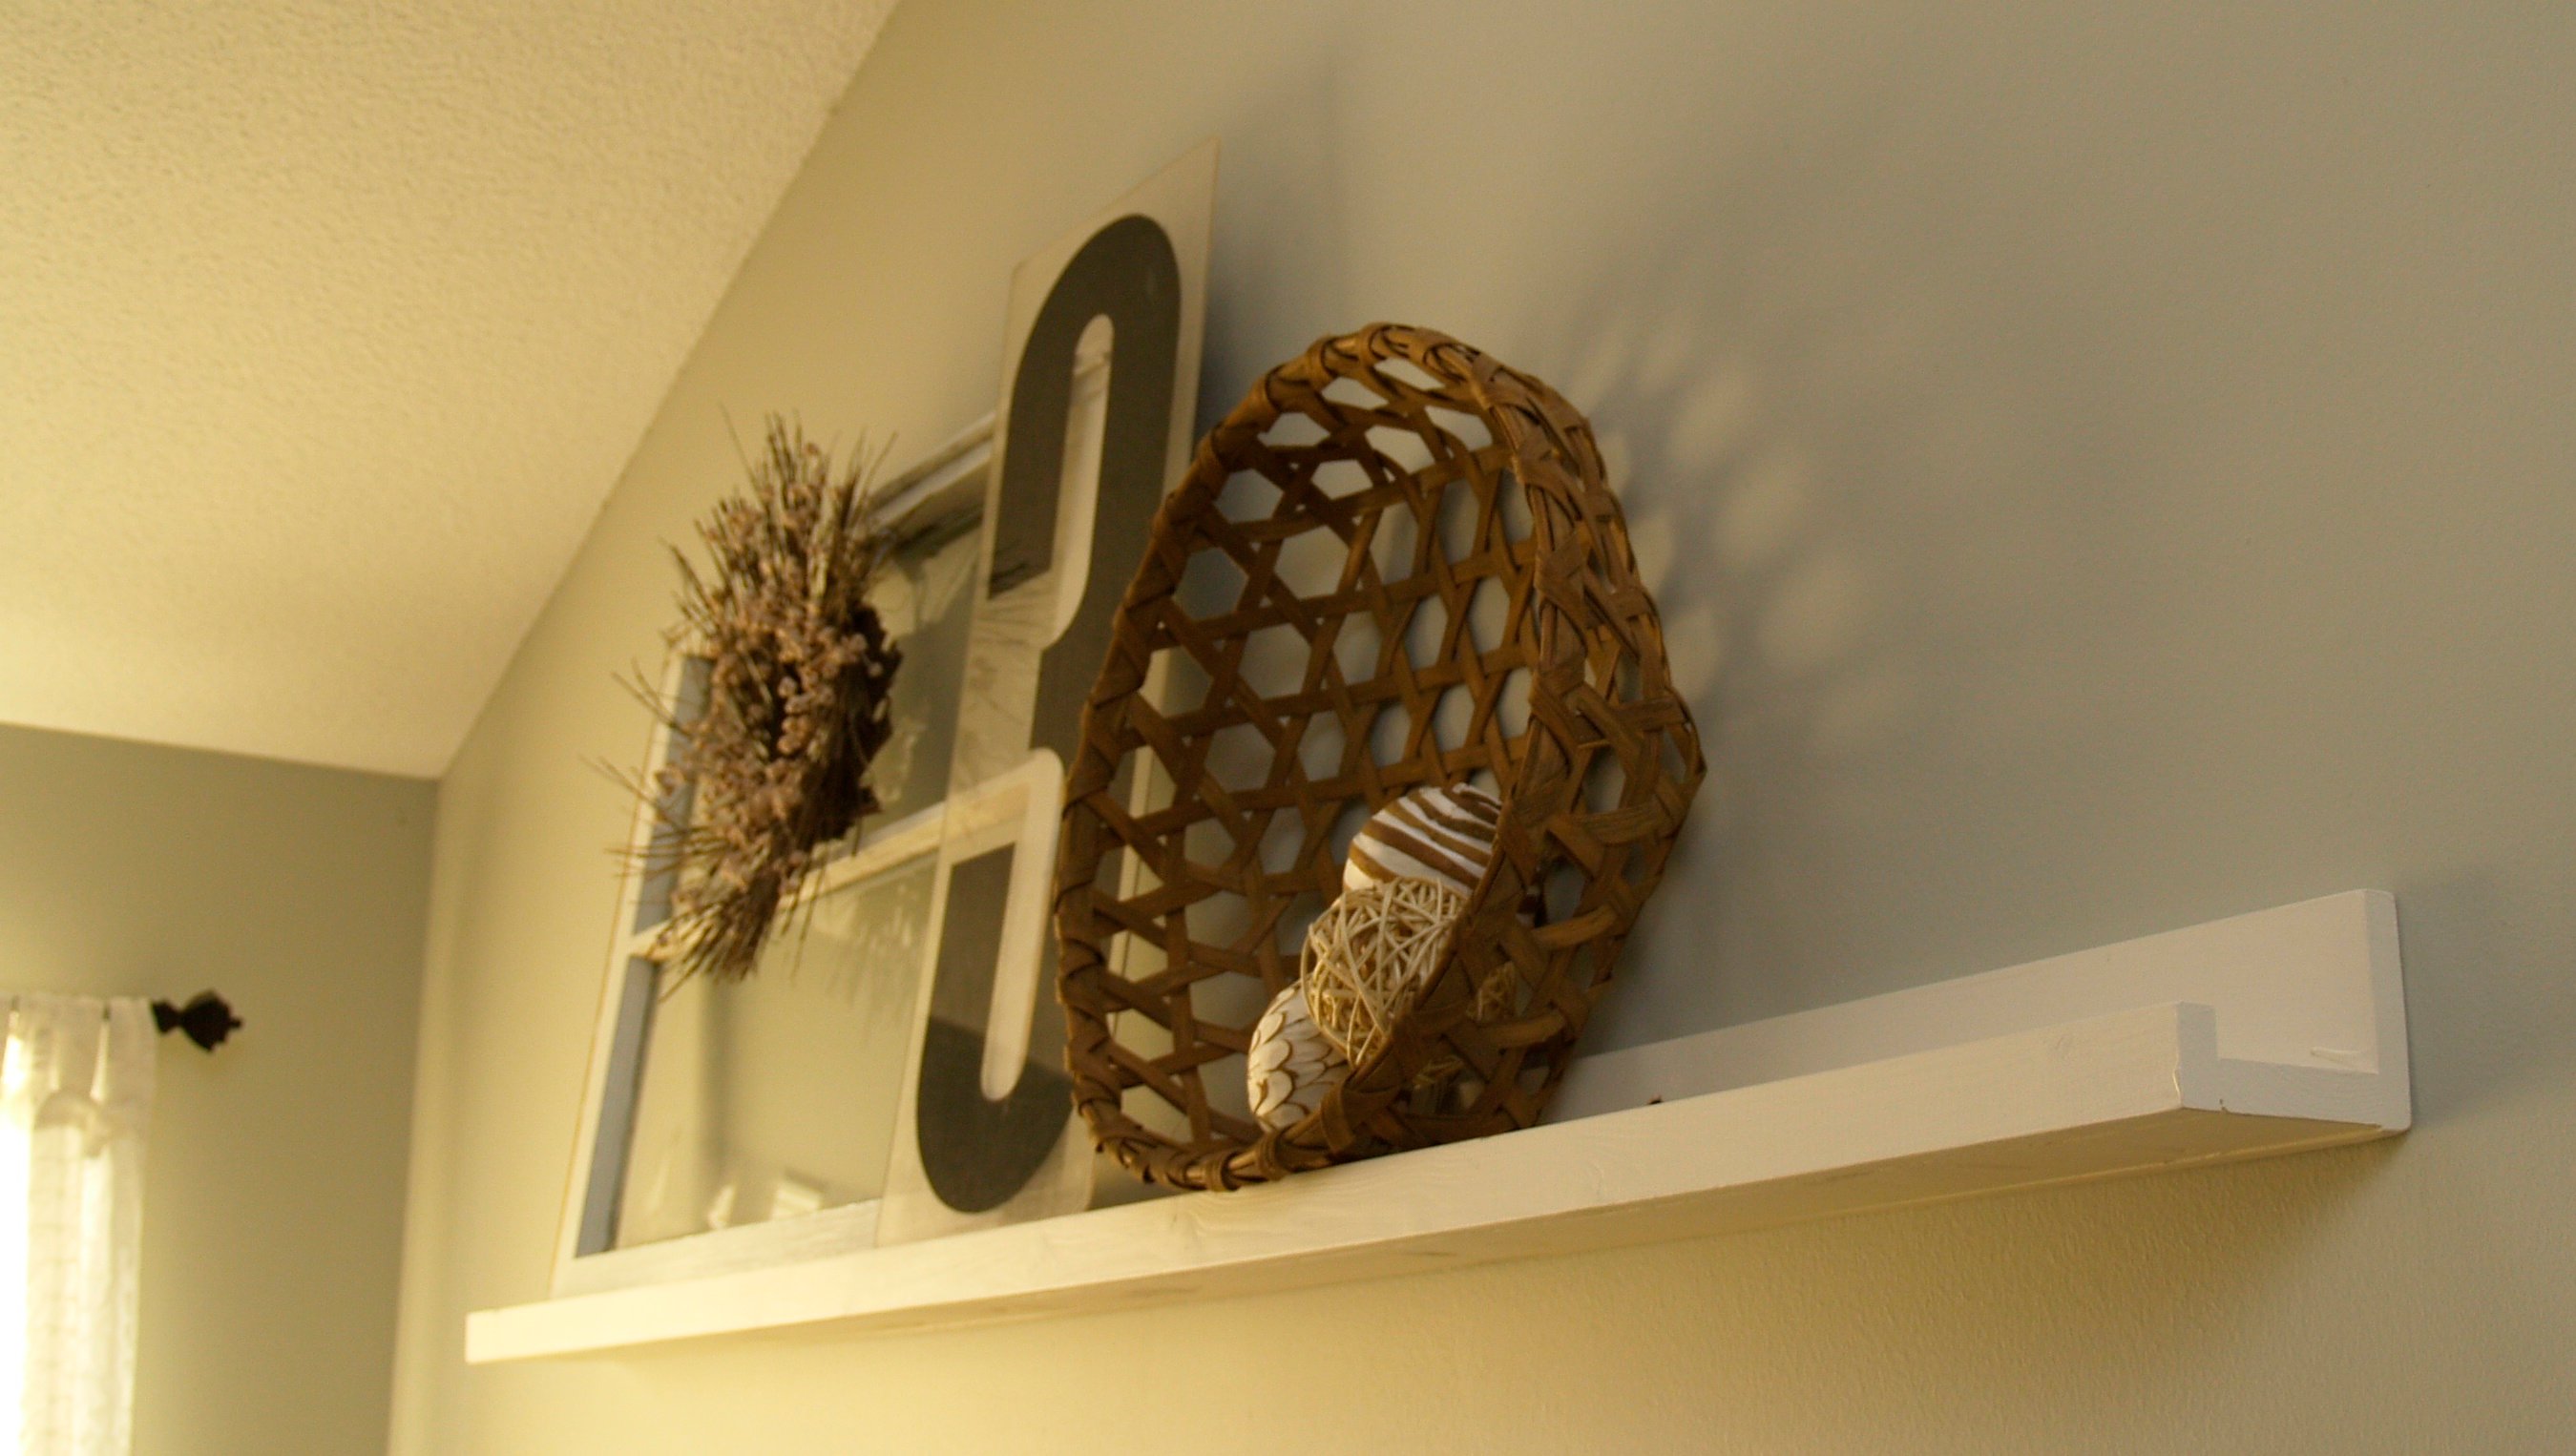
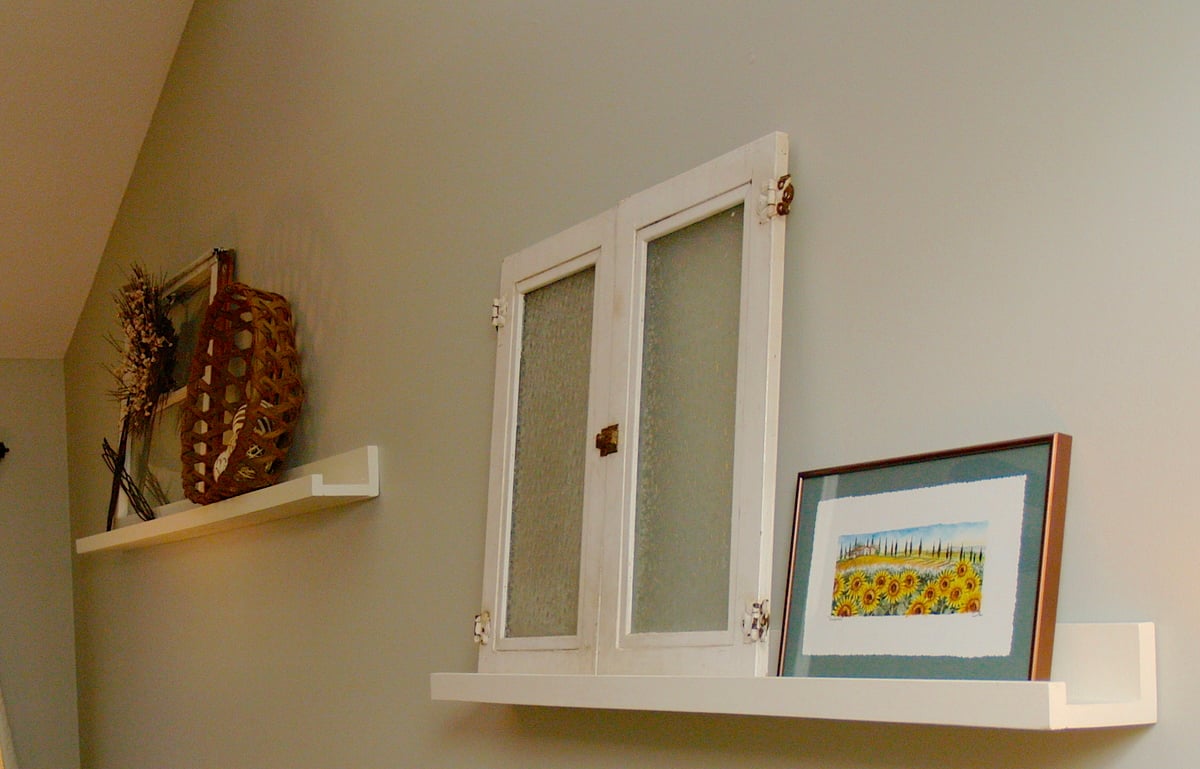
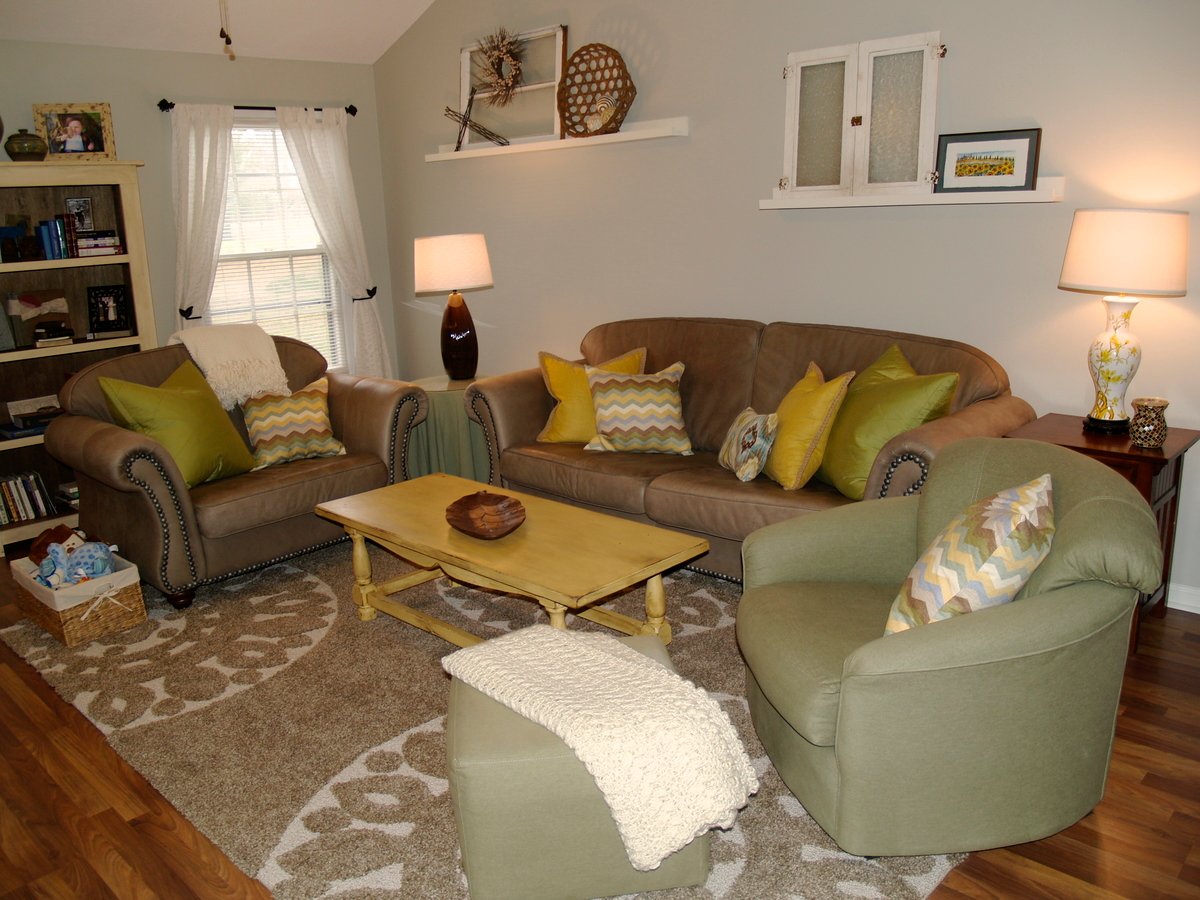
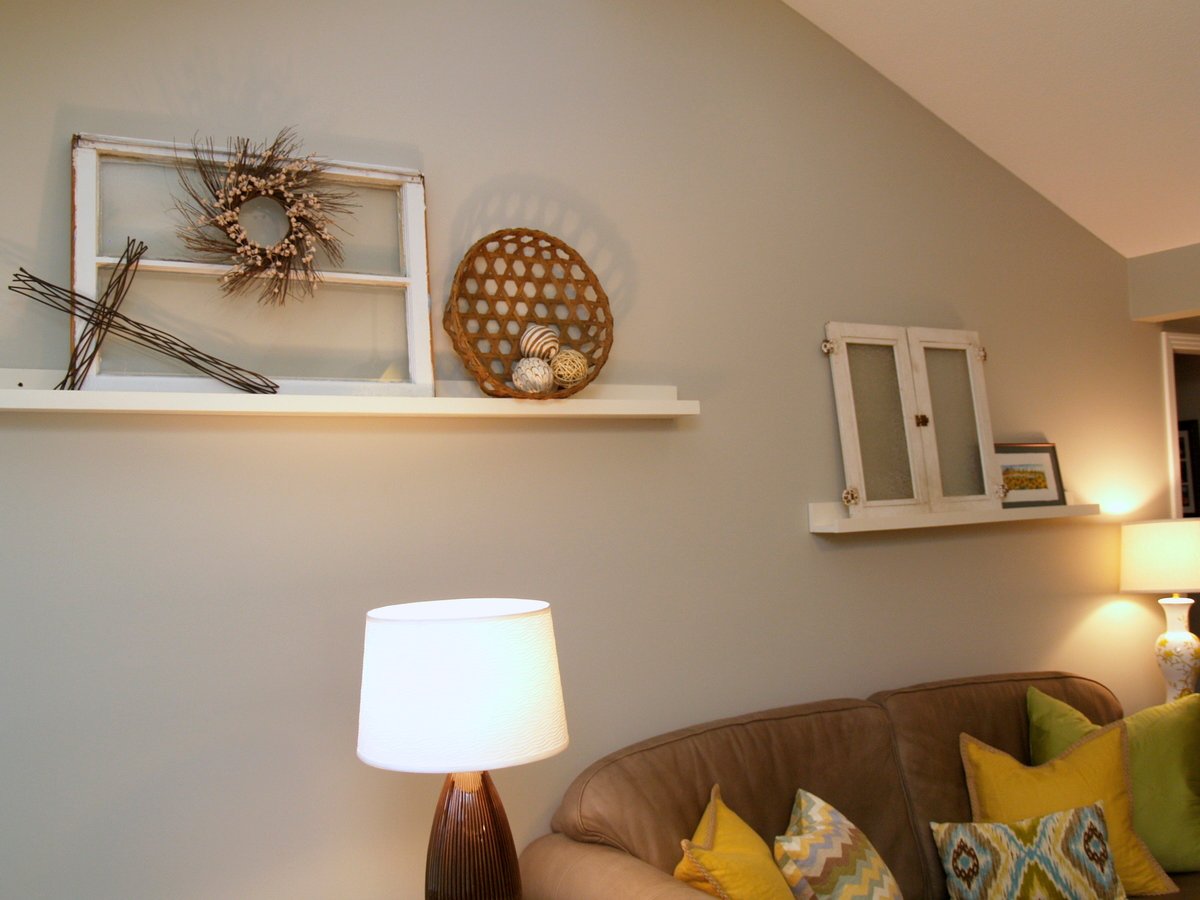
Nesting Grill Station for Fundraiser
![](/sites/default/files/tim1.jpg)
I recently built this for a fundraiser for a friend, who suffered from a stroke, people loved it.
I asked my husband to build these as birthday presents for my daughter and my niece this past spring. Very cute, collapsable when they get tired of playing with it, sturdy enough to be sat on and used by both small children, the dog and the dolls! Materials and labor were cheap (thanks hunny!) and the product will last for as long as the girls play with dolls.
I found the plans for the Printer's Triple Console on Jen Woodhouse's blog and fell in love with the design. Once I studied the entire Ana White website, I decided I could try to build this as my first project because the plans were so clear!
I changed the top to be cubbies instead of drawers to accommodate TV components and such. I just measured the openings, cut the ply board to those dimensions and used my kreg jig to make installing the cubby bases super easy.
I blogged the process (it took me a while so it is three separate posts) at becauseitalktomyself.com, look under "Optimistic Ideas"
I was DELIGHTED with how it turned out! I still can't believe I MADE THIS!!
THANK YOU ANA WHITE!
Tue, 08/20/2013 - 07:45
Having built a version of this myself, I really appreciate the work that went into this. I can't believe this is your first project -- really amazing!! Great finished product!
I used the trundle bed as a template to build this one for my niece as a birthday present. I used black walnut that I got as scrap from a hardwood mill and planed it down and cut it into usable material. My wife sewed the matress, quilt, and pillow for me. Im not very handy with a sewing machine!
It took me till the end of the summer but I finally finished my awesome wood cooler project! Check that one off my to-do list.
Plan to use as a cooler :) adjusted dimensions to fit a bigger planter box and added some decorative details. It came out great!
I used Ana's plans to build a Cameron Wall unit for my new nursery. I used 3/4" MDF and 1 1/4" brad nails with lots of Gorilla Wood Glue to assemble. I also used bead board on the doors. Great storage! You can read more at http://www.shanty-2-chic.com/2011/07/furniture-for-the-new-nursery.html
Wed, 07/20/2011 - 04:57
Very nice! I really like the beadboard on the doors.
Found the headboard directions on here... Messed w dementions for footboard n connect it w a 2x12 w three lag bolts each comer. Night stand was constructed the same but on a smaller scale
I used the rustic end table plans from ana-white.com, but modified to include a drawer for additional storage.
We built the outdoor sofa from 2x4 collection, me, my dad and my kids. Didn't take too long to put together, maybe 2 and a half hours from start to finish. It's my dad's gift for Father's day and we had a great time doing it together! We used pressure treated wood and sanded at the end. Just needs to be stained and get some throw pillows.
We did use an extra 10x2x4 (cut to fit of course) to box in the cushions. Which were 24x24 inches. Great project. 👍🏻 Thanks!
Thanks to Ana's plans I was able to build this in a couple of hours. It's not necessary, but a miter saw makes this project a cinch. I used one coat of Minwax Mahogany for the stain and distressed the wood with various sharp edged tools from my garage. I used a large Lowes moving box ($1.50) to cut the backing to 18"x24" and spray glued it to the print. I didn't use glass partly because its expensive and I was a little lazy. As you can see in the pictures below I just stapled the back to the frame. Even without the glass, I think it came out pretty well. Another project completed to go in the mountain house....
We had extra space in the backyard and I always wanted somewhere cozy to sit. Of course, the 'conversation' sets you find in stores were out of our price range so we turned to Ana!!
The whole project took a long weekend to complete - including shopping, cutting, sanding and putting it together. The cushions took a bit longer because they were custom made.
The project was much easier than I expected and the result is fantastic (in my opinion, of course!). I can't believe we actually built a piece of furniture!!
Thanks Ana!
Wed, 09/04/2013 - 14:03
The fabric was from www.tonicliving.com - Silsila and Tilescene were the names. Both were outdoor fabrics and I'm super happy with them!!
I decided to go with a different top for my project, in order for it to fit our home better. The top is just stock pine 1x4's from the local lumberyard. I ripped the edges off on the table saw for a tighter joint, and used the Kreg Jig and wood glue to join them together.
My husband built my son’s bed using plans of this website before (we didn’t post to brag chat but almost two years later and a move the bed is still holding up!) so we were very happy to find plans for a kitchen table here too! My husband did all the wood work and I painted and stained. It’s perfect for our dining room. Now on to the benches!
Made from Ana's Kids Chair with Storage. Love these little chairs. I riped up some 2x4's to 7/8th and used a 1 x 12 stair tread for the seats. glued with screws, then removed the screws and replaced with glue and dowels. Made for kids, strong enough for adults.
Mon, 07/04/2022 - 18:26
Built up the storage shelf with some laths and added a piano hinge to the seat. Nice little toy box.
Our home improvement store didn't have non-pressure treated 4x4s so we screwed 2 2x4s together to make the posts. We chose not to put quarter round around the posts, but instead added baseboards to the front and side to finish it off. We're really happy with how it turned out.
I wanted to make a small memento box as an anniversary gift, and I used Ana's pirate treasure trunk as inspiration. My cuts are a bit different due to the scraps I had in my "shop", but I still used 1x4 and 1x6s. I loved the idea of the side brackets. They look good and add to the structural integrity of the box. Win-win. I also added a bit of dark red felt to the bottom of the box, which I think gives it a little bit of a fancier look.
My wife wanted a hutch to store her canner and supplies in. We searched online for hutches and Hoosier cabinets and they were anywhere from $1200-$2000!!. That's when I said "I can build that". I sat down and custom designed on CAD and started my build. I was able to find the butcher block top at Lowes for $50!!. It took me about 3 weeks to build it in my spare time. I had to special order some of the hardware because I could not find what I wanted locally. I had a lot of fun building it. On to my next project!!
Brightly Painted chairs are popular here. I made two unpainted chairs in an afternoon. I would paint the pieces before putting them together if I made them again. Very comfortable!
When the neighbors came over and looked at this, they thought it came from pottery barn. I knew it reminded me of something, but I couldn't put my finger on it. This picture is about 2 years after I made it.
This was my first large project. Built it in one very long day and then finished over a few weeks. Instead of 2x4's for legs I opted for a 4x4 post with a bolt running through. I didn't really want to figure out the square washer so I just went with standard round. I spray painted all of the hardware silver with Rust-Oleum Universal Hammered Spray paint to coordinate with the Tolix like chairs I purchased from Restoration Hardware.
Mon, 09/02/2013 - 07:12
I was wondering the same thing as Medickep, were all of the coats necessary or was it just the way you wanted it finished? I do like the end results though.
Tue, 09/03/2013 - 09:03
The multiple coats wasn't intentional. I just couldn't get the right look so kept on going with the colors. I'd say the finish portion of the project was the most difficult for me. I am happy with out it turned out and cannot wait to build something again!