This is my take on a few of these I have seen. It started out seeing the retail version of this table at a large furniture store with a $2k price tag on it. I really like the look of it so I decided to build one and searched for additional pictures and found these plans.
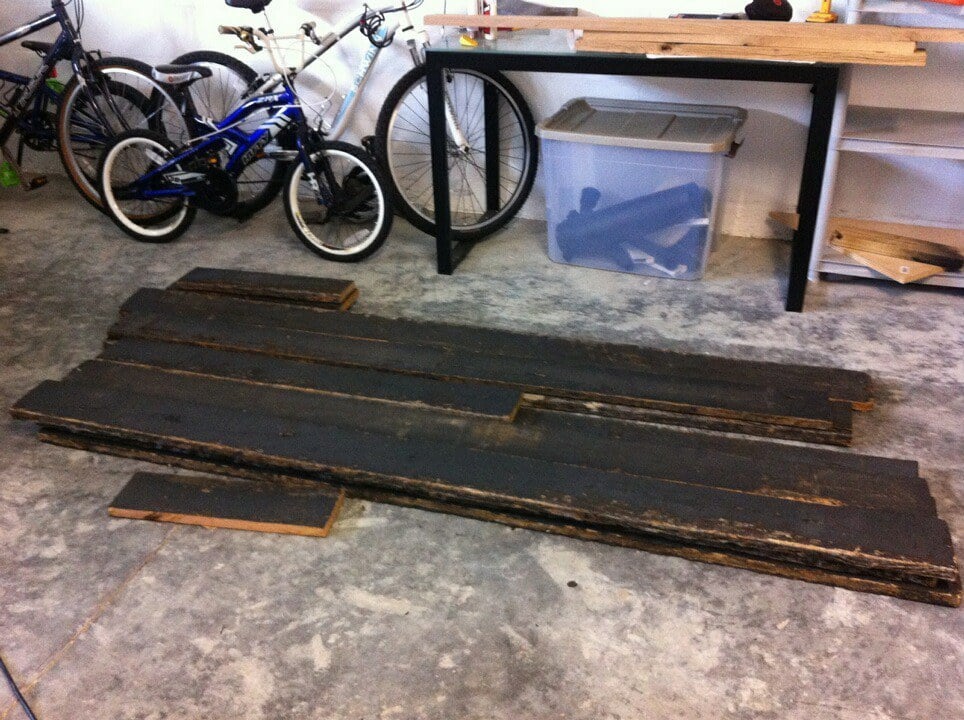
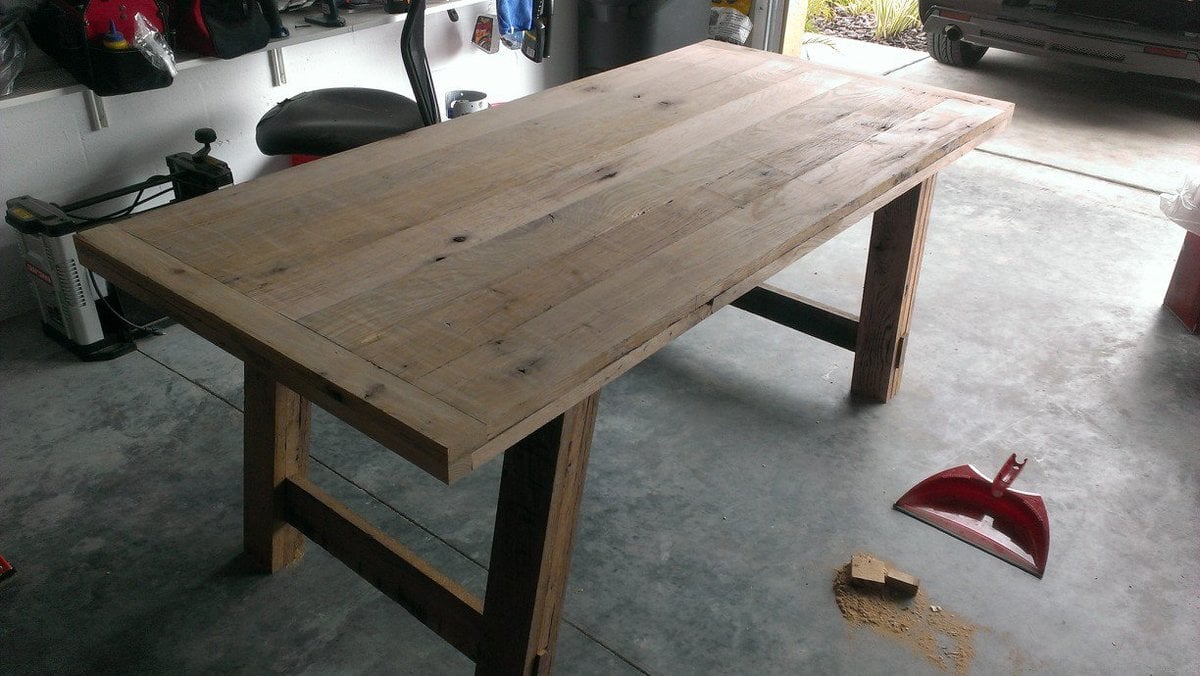
I used the plans as a guideline for overall dimensions for the table. I was using reclaimed oak fencing from an old Kentucky horse farm (who uses oak for fencing!!). This stock came in 5/4" x 6" x 7' boards so I had to get creative with the dimensions, etc. It was a mixture of red and white oak and this stuff was HARD!
The boards also came painted black with years and years of build-up and weathering. On a side note, if you ever work with reclaimed wood that has been painted or stained, please test it for lead. Lead based paint was banned around 1973 and you don't want to be planing or sanding on this stuff unless it is safe. Fortunately, I had this tested using a kit from the local big box. Most of my time was spent planing the boards down enough to show the oak but also leave some character as you will see in the pictures.
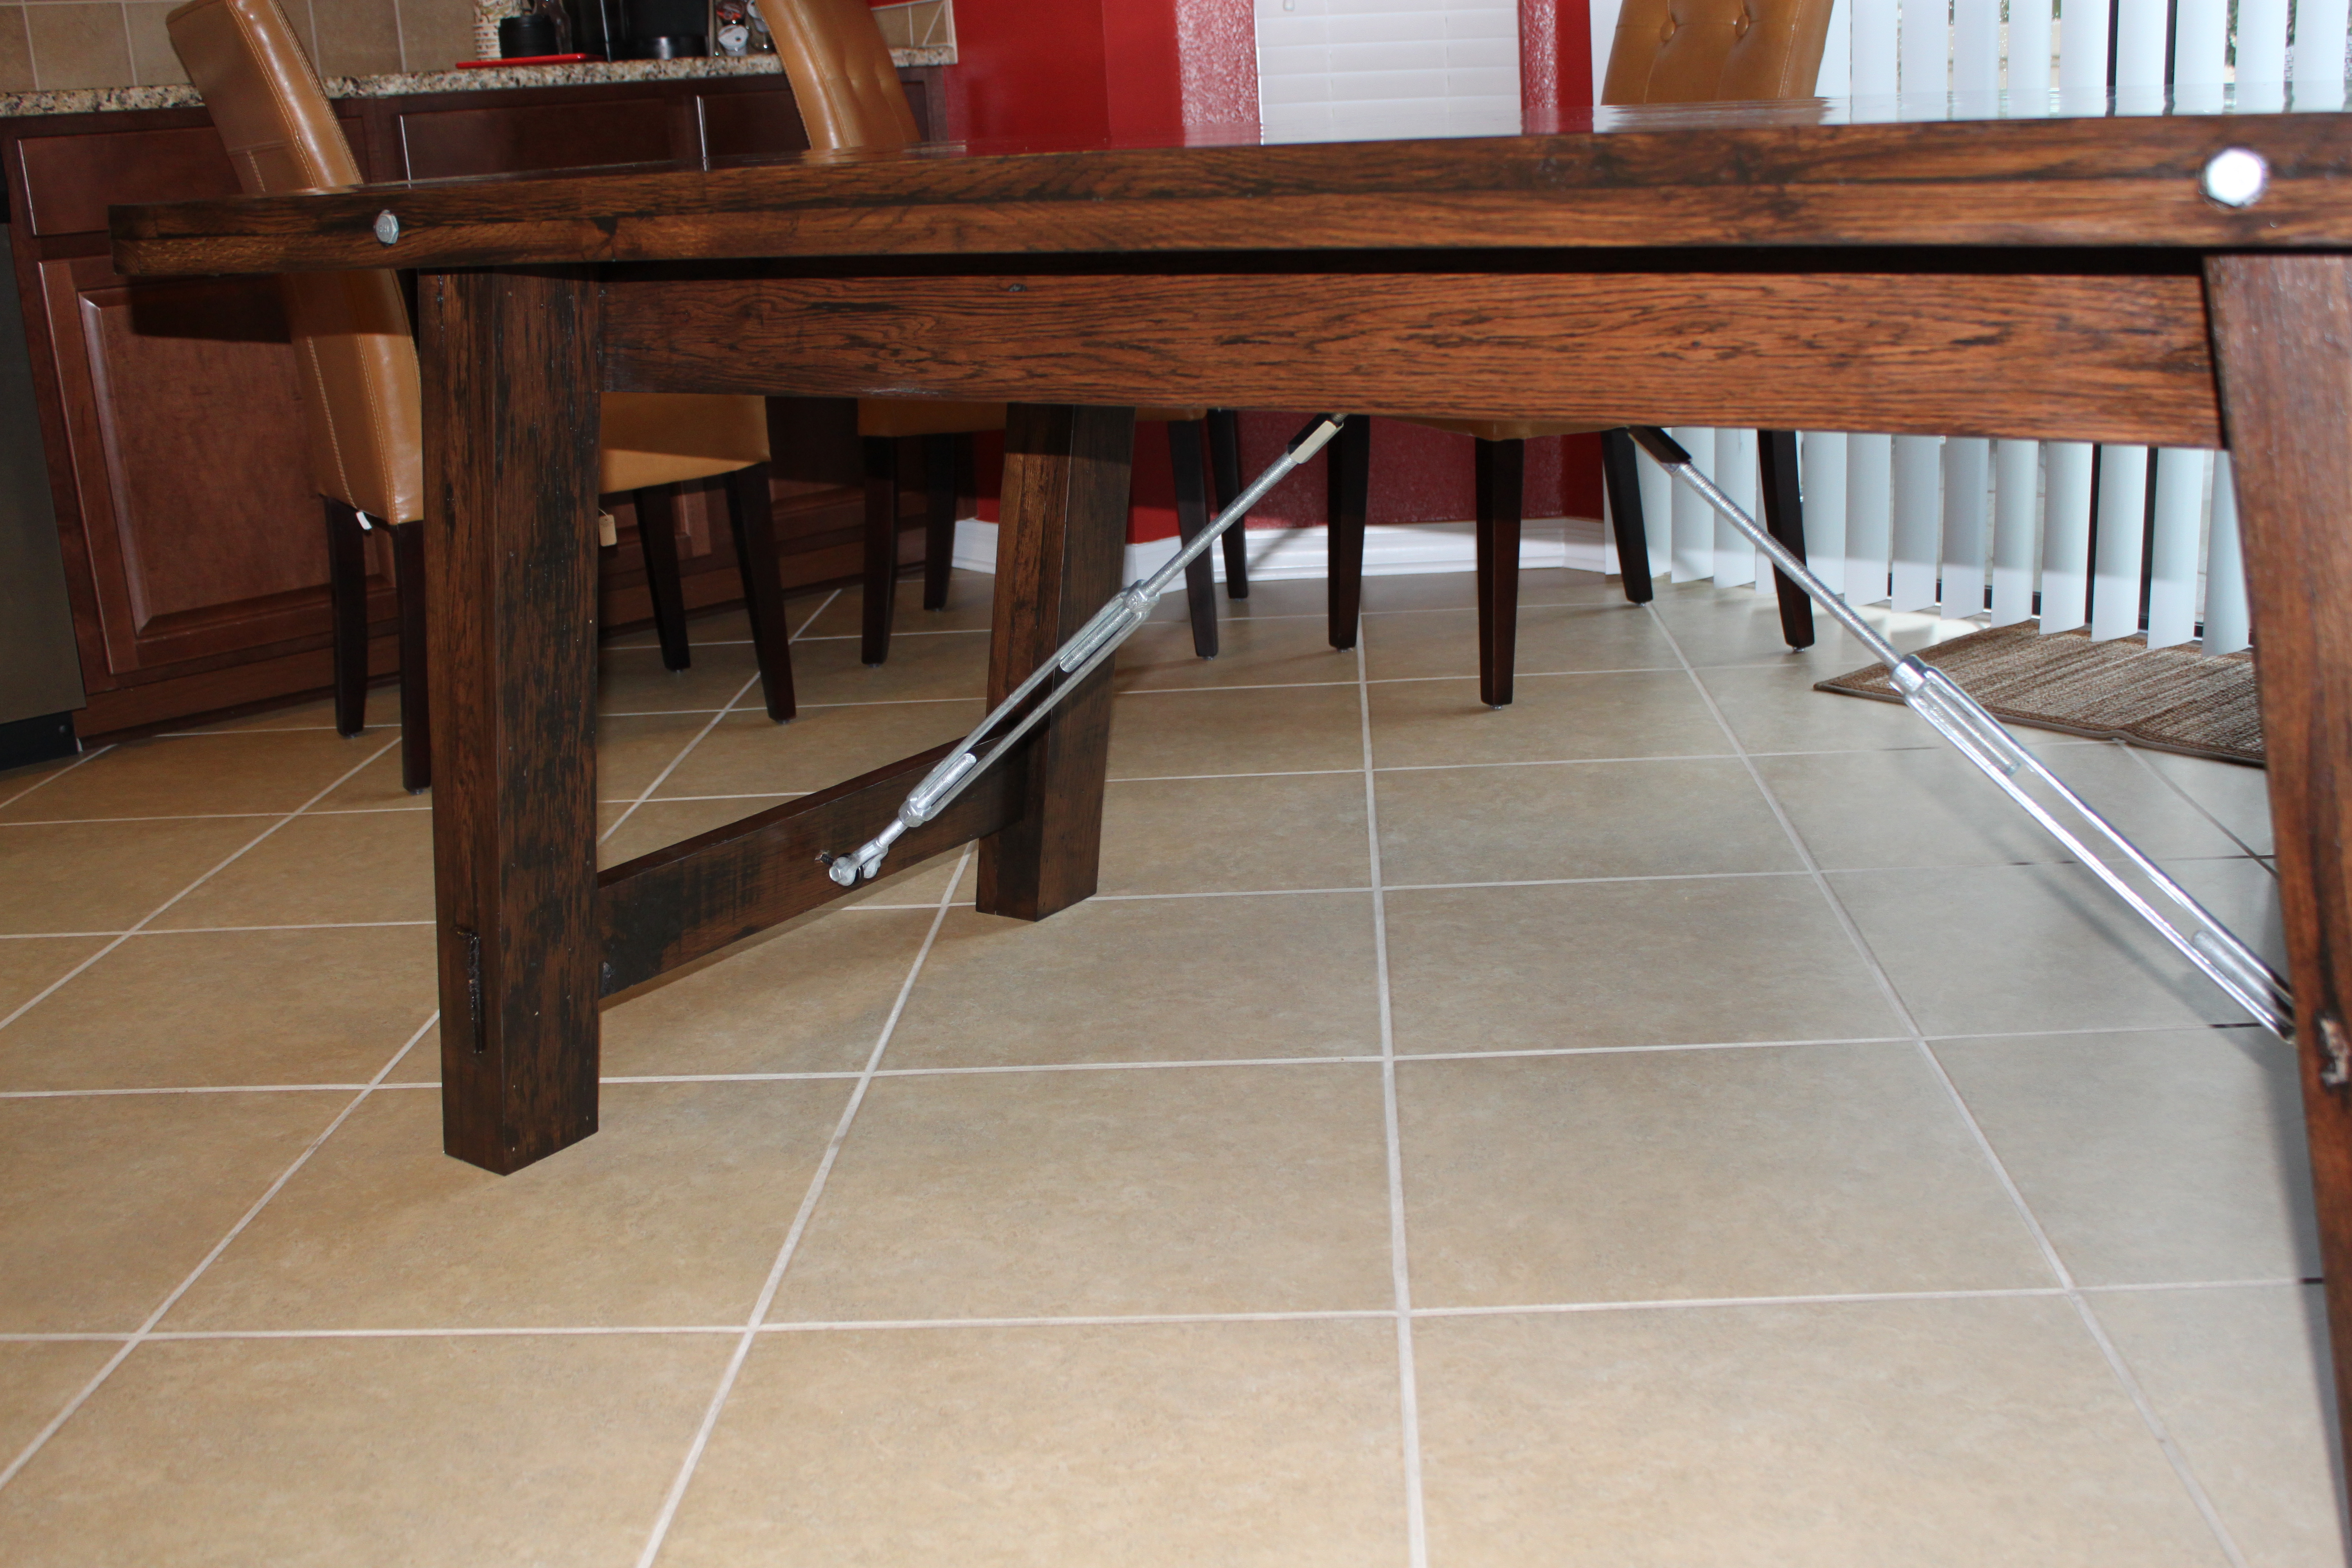
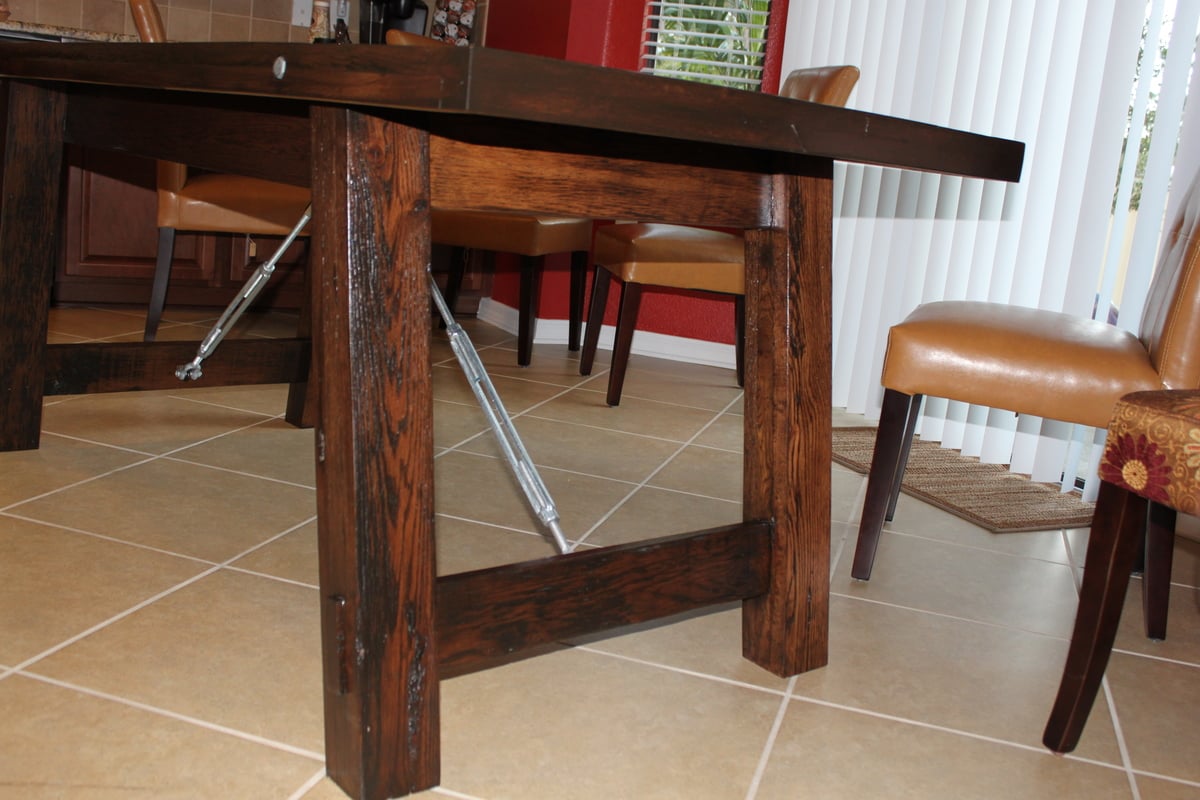
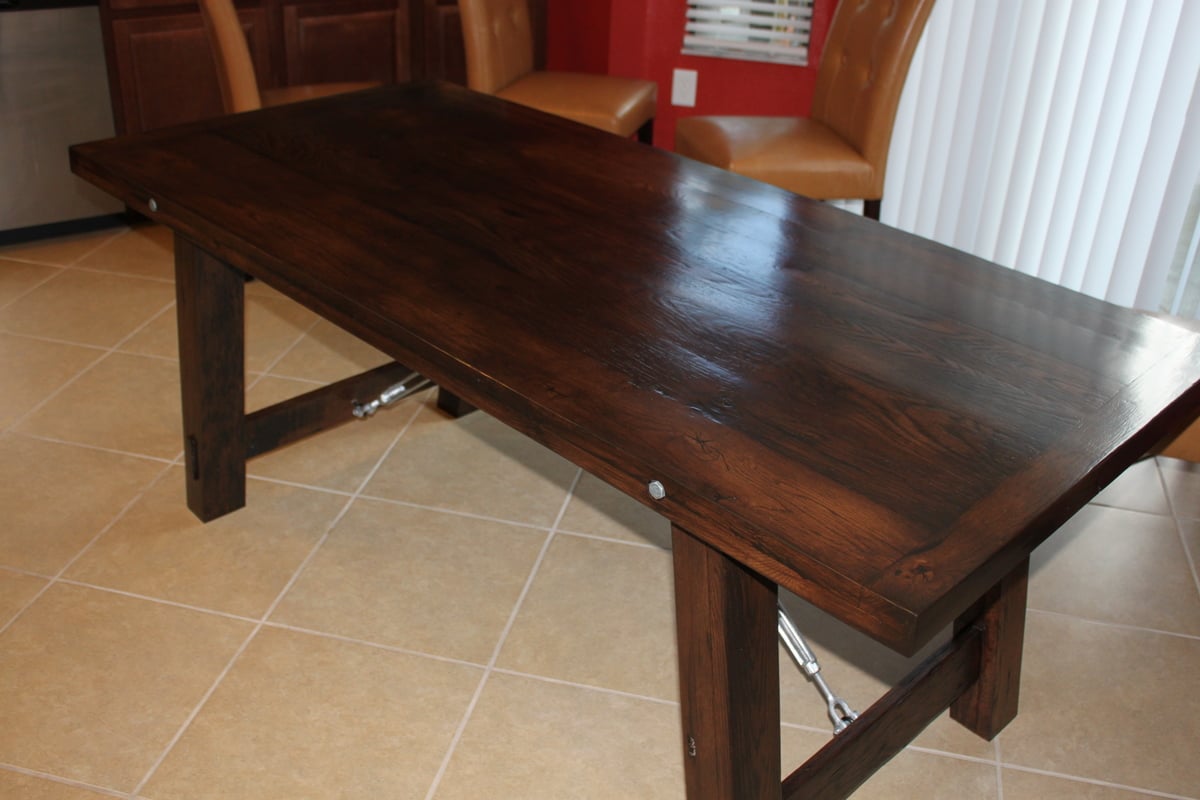
I like the look of knots and this wood had a few of them so i left the knots exposed on the support frame, however, on the top, I used a clear epoxy to fill the knots. This allowed the top to be smooth but you could still see the depth and character of the knot on the surface of the table. I did some mild distressing on the table top but nothing too dramatic as the wood really was cool. I also added the bolts near the tops of the legs and used threaded rod and turnbuckles for an industrial look.
The stain is a dark brown, almost ebony color. This went will with the black paint that was left in the saw marks after planing. I finished the table with 2 coats of satin polyurethane and and additional 3rd coat on the table top.
I have built furniture in the past but this has to be my favorite for both the history of the wood and the character.