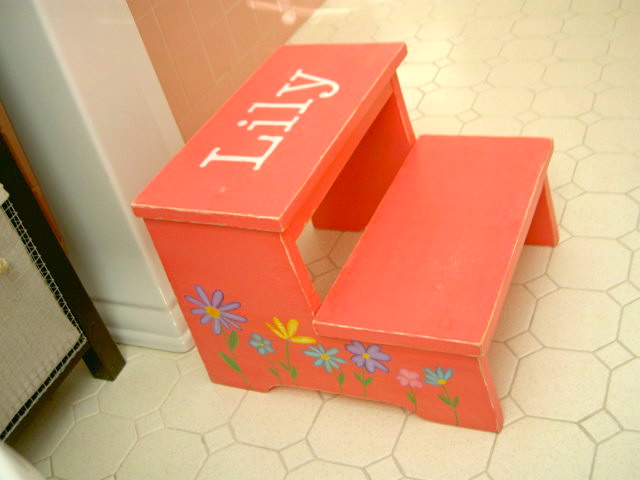
Little Helper Tower
![](/sites/default/files/4e55629deddc6c0641004155.jpg)
My husband made the little helper tower for my son. After using it for a day I asked him to add a seat so that my son could eat lunch at the counter while I worked in the kitchen. I LOVE this tower!!!
This is my vision of what a fine lady’s treasure trunk might have looked like back in the days of pirates. It is made from the Pirate’s Treasure Trunk plan. I used another alternative hinge for this one. It is a 2 ¼” radius quarter-circle of heavy craft leather, attached to the box top with some super glue and decorative furniture nails. The bottom acts as the pivot, and is attached with a furniture nail.
The decorations are made from craft leather, and attached with super glue and furniture nails. The keyhole escutcheon is made from a piece of foam shelf liner, cut to the shape of the keyhole template from the plan, and spray painted gold.
The finish for this is 2 coats of Clark & Kensington paint (white, with a little brown stain mixed in to make it a cream color).
This build was nearly free – the furniture nails were left over from the prototype build, the wood was scrap, and the paint was left over from previous projects. The craft leather is from Michael’s (cost was about $3.99 - I think it was on sale, but couldn’t find it on the web site to attach a link, so a picture of the packaging is attached).
I’ll be using this one for trinkets, and it’s not going to get heavy use, so this was a good project for trying out the leather hinge idea. I’ve wanted to try that for a while. Not sure how durable it will be over time, but I think it looks cool. :)
Tue, 09/17/2013 - 17:51
Or as they say in pirate-speak: Thank ye so much! I be glad ye like them! Many hearty thanks fer postin' a comment! :)
Thu, 04/17/2014 - 05:48
For a more durable hinge could you use an angle covered by the leather? Just a thought
Wed, 12/03/2014 - 18:28
Yes I think that is a very good idea! I'm going to try that for the next one I do with leather. Thanks for commenting! :)
My husband has some cherished knick knacks and I am hoping to give our little home a little charm.
The most difficult part of this project was lining up the dowel holes for the shelf.
2-1x6's cut to the length of the window
2-1x6's cut to 6-1/4" for the sides
1-1x6 cut to 4-3/4" for the center support
Fostner (sp?) Bit at 1" for the dowels, I centered them and put them 2" down on each side and the on each side of the center support
Then I sanded, sanded and then sanded some more.. .
I used the 1/2" fostner bit and spaced the holes 3 3/4" apart on center for the rail and the top.
I cut a 1/2" dowel into 2" pcs.
The rail is a 2x2 that I trimmed down on the table saw, it finished out at 7/8"x1-1/16"
Lots of glue, more sanding and it was complete
Added 3 hillman heavy duty hangers to it and hung it over the living room window.
A little taller, and a different finish, but built from scratch inspired by your design. Thanks so much.
Beautiful living room side table with drawers!
by Samantha
I have a large master bedroom, but a severe lack of furniture. I love love love my king bed, but couldn't find any night stands to meet my needs or budget. So I built the farmhouse bedside tables! I love how large and tall they are, adequately flanking my large bed. I missed the mark on matching the stain color of my bed, but I worked so hard on these tables, I still love them.
I call this a master bedroom transformation because I also painted, added new bedding, and new lamps during this project. I'm so excited for my husband to come home from his month-long business trip to see all that I have accomplished in his absence!
I made this with the help of my dad. This was my first project and it turned out so well! Such a great addition to the house, it really warms up the room. So glad I found this!
What I really liked about this plan is its versatility. Relatively easy with pocket hole joinery and inexpensive materials, I used paint to match existing furniture and solid wood tops and drawer fronts to add just a touch of elegance.
Fairly easy and fun build! We followed the plans almost entirely and spent a few hours each day throughout a week working on it, painting it was definitely the most time consuming part. It came together very easily in the bedroom and was done just in time to surprise our 3 year old for Christmas, he loves it! And I love that we can fit another twin bed underneath to turn it from a loft to bunk beds in the future.
I used plans from the classic Adirondack chairs and modified the arms for a wider width to place cups/glasses on them. I also curved the top as well. It was a fun project and took about a day and a half, off and on. Thank you!
Super fun and easy! This was my first kreg jig build! Not sure how I got by before I got one!
Loved building this table. This was my first time building anything! I have a lot to learn but I think it turned out great!
First coffee table build. Plans were perfect! Built for $50, sold for $255
Using your plans, I built this king size farmhouse bed and console table.
kids step stool made using scraps, personalized with name and flowers
Sat, 09/03/2011 - 10:02
LOVE the name and flowers! Just adds such a charming touch!
In reply to LOVE the name and flowers! by Ana White
Sat, 09/03/2011 - 19:14
comments from you truly make my day. I'm working on a big build (Brady Entry units x 2) custom size, mixed finishes. Thank goodness kids go back to school on Wed., Mommy needs some 'build time'. Enjoy the long weekend.
My husband surprised me by making this sectional after I found the plans on your site. THANK YOU! We love it! It's been the centre of many cocktails and conversations over the years!
Note: cost includes the cost of the outdoor cushions which were purchased at Lowes Canada and slightly modified.
As the days have gotten shorter and the nights have grown colder I’ve found myself breaking out the winter coats and boots. The problem is, I didn’t have any place to store my coats or shoes. My house doesn’t have a coat closet. And in the past I’ve had a problem with scarves, shoes and winter gear clogging my front entryway. So I set out to come up with a solution. I needed inspiration. I needed guidance. My entry closet needed to be aesthetically pleasing because it would be near the front door and visible from the great room. So I went to Pinterest to search for a solution. I found these plans for an Industrial Style Wood Slat Closet System with Galvanized Pipes by Ana White.
We needed a place for our garbage/recycling bins that would look nice and was inaccessible to our dogs. I decided to make two drawers for the bins and two drawers for storage. I found a set of 10 drawer slides on Amazon for around $50. They are heavy duty and full extension. I measured our garbage bins and built to size. The total height of the cabinet is 36" including the countertop. The cabinet width is 35.5" and the depth is 20". The butcher block countertop(25" by 48") was purchased from Home Depot for $98. I only had to do a light sanding, router the edge, and apply a finish. The cabinet will be located along a wall and have room for a counter height chair. This will allow my youngest to have a snack while I work in the kitchen. Although I didn't use a specific plan, I used ideas from several of Ana's designs. Thank you for the inspiration Ana!
Two weatherly sofas butted up against each other make a great sectional! The "Lego" table has a checkerboard on the bottom of one of the removeable table top sides, and the other acts as a water table for the little one to splash around in. Thanks so much for the plans! These were all fun projects!
Super easy candle ledges!
Made from the above plans. Instead of use pocket screws I just drilled through the table top and used wood filler to fill the counter sunk holes. It was an easy solution and really isn't noticeable. I used basic pine for it as I wanted a very rustic/reclaimed look and think I achieved that. We also didn't have a saw that could 4x4's so instead I just took 2 2x4s and glued/wood screwed them together. Gives the table another fun dimension. Used a few coats of stain and then poly over top. Went with 1x6s instead of 2x6 to save some weight.
Comments
cdswhite
Thu, 08/25/2011 - 18:51
Love the added seat!
What a great, space-saving idea!
In reply to Love the added seat! by cdswhite
stockups
Mon, 07/20/2015 - 10:47
little helper
does he have the material and tool list that he use
In reply to Love the added seat! by cdswhite
stockups
Mon, 07/20/2015 - 10:47
little helper
does he have the material and tool list that he use
fethiye
Fri, 08/26/2011 - 09:20
Great idea and build!
This is what custom furniture is all about! If you had a store bought tower, I bet you would not even think about messing with it to add that seat. It looks great and now it is multi-purpose!
VelvetSky
Sun, 08/28/2011 - 20:25
Cool!
I have a two year old who is going to need this soon. Does your son try to stand up while the seat is in place? Do you have any trouble with him trying to get out of it? Would love to know because my son is always climbing on stuff. I am worried he might fall. I wonder if I could put a seat belt in it. hmmm....I am a first time parent so maybe I am a little paranoid. lol
But it looks so cool. I want one.
Titabehm (not verified)
Tue, 12/13/2011 - 09:54
Awesome idea!!!
I absolutely love the idea!!! We have a real small house and we are always looking for ideas that will help to maximize the space and functionality of our furniture. My husband built a couple of months ago the tower and our 2 kids (2&4) can climb in there at the same time and help me to cook, wash dishes or just look what I'm doing around the kitchen. It is a little bit crowded when both are in there but they learned to make it work for both :). Thank you for sharing your idea... it is awesome!
Huthbert
Sun, 11/09/2014 - 13:23
<3
Love the added seat! Seriously awesome! Thinking about adding that mod to mine!