Modern Outdoor Sofa and Loveseat
Modified the loveseat plans and created a sofa as well. No one that sees these thinks I built them. They look so much nicer than anything you can buy!
second coat Varathane Briarsmoke
Modified the loveseat plans and created a sofa as well. No one that sees these thinks I built them. They look so much nicer than anything you can buy!
I built this for a friends upcoming baby shower! She has yet to receive it so I hope she loves it. It was super easy to build, even the fancy scrolling at the bottom of the sides was relatively easy. I can say that only because I'm an experienced builder, but for someone new to this, it could be daunting. Just go slow and try it out on practice boards first!
Wed, 08/17/2016 - 11:01
Hi,
Do you ever make pieces for other people? I absolutely love this, but we live in a small apartment and don't have the space or resources to have the right tools for the job. We're newlywed students on a budget too, so any I've found in stores have been way out of our price range.
Just thought I'd ask, since I think the one you made here is beautiful!
So easy and fun!
Fri, 07/11/2014 - 22:09
She comes to me an says DADDY ( with a straight face)
* i want a merry go round *
Um i cant afford that hunny, she says w. out a pause -But you build everything else-
...I froze.
lol well Ana my dear friend I think I need your help on this one...
Such easy plans to follow! Thanks, as always!!!
Love making it!!!
Crystal Shanaman
We modified the farmhouse table plan and made office desks from reclaimed lumber! Check out the full post on my blog: http://livingvintageco.com/category/do-it-yourself/woodworking/.
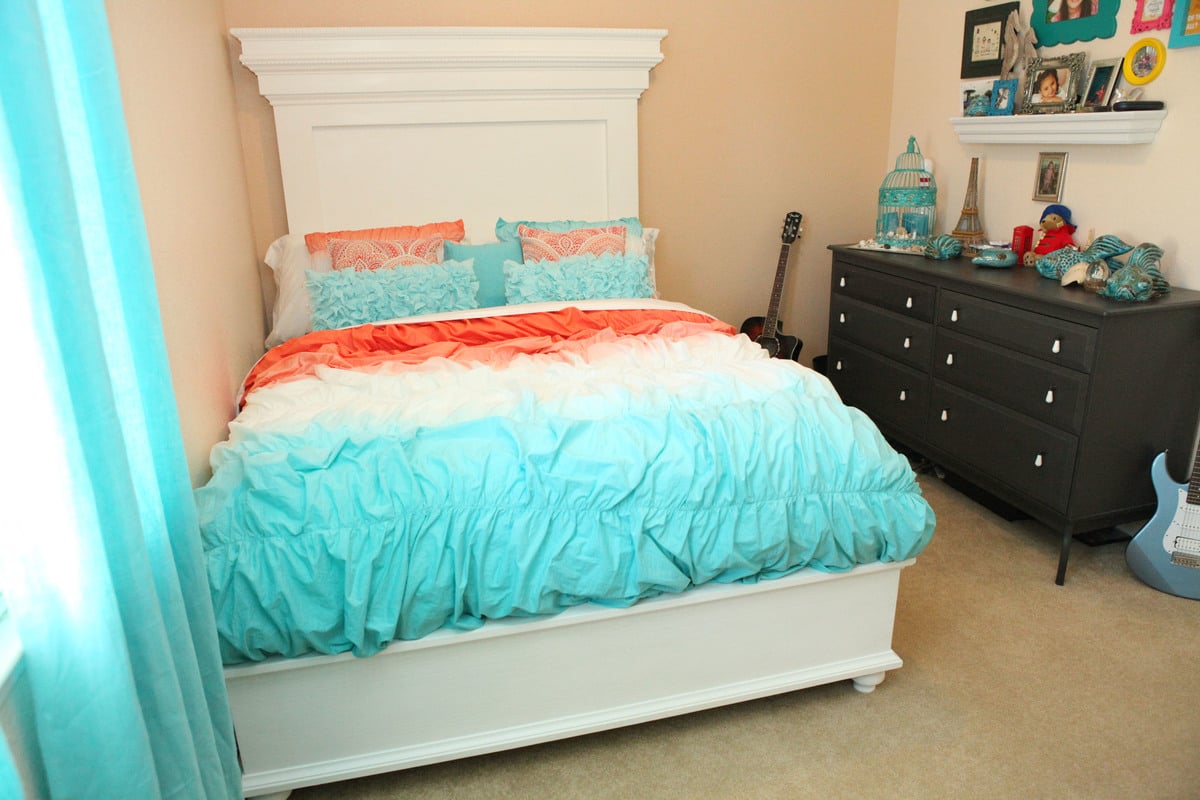
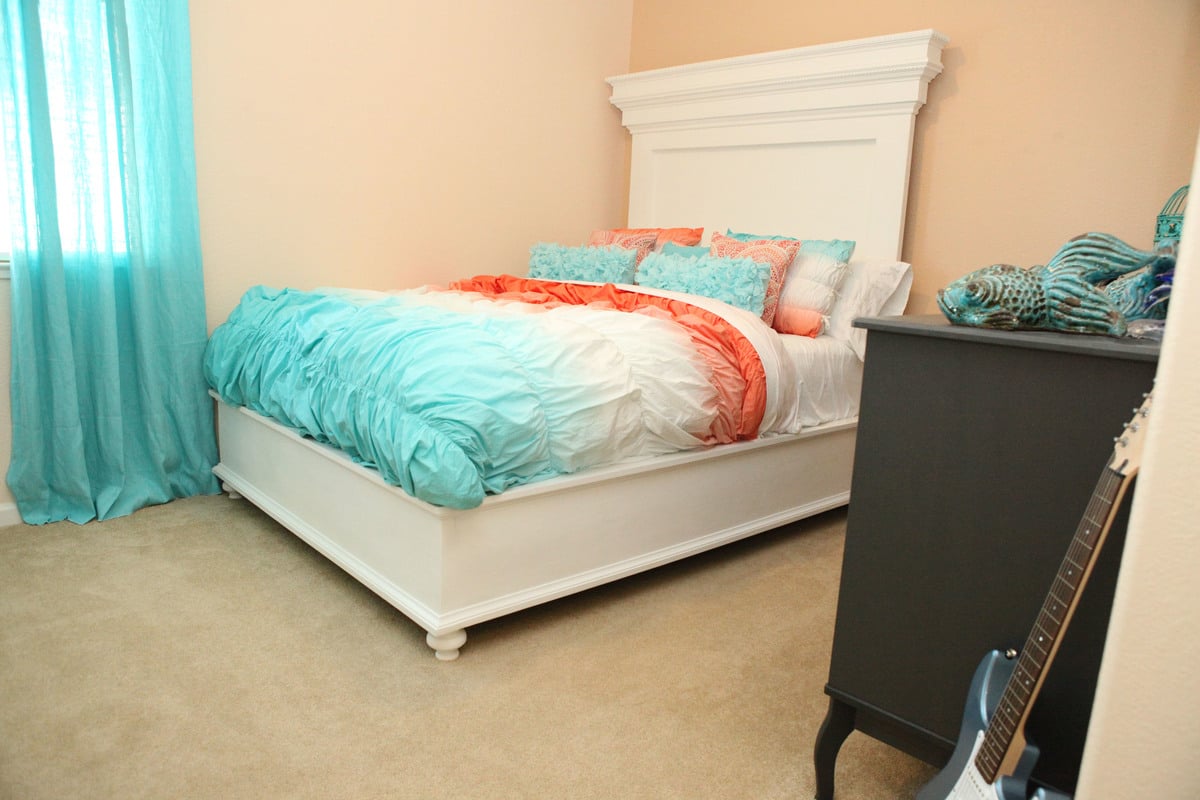
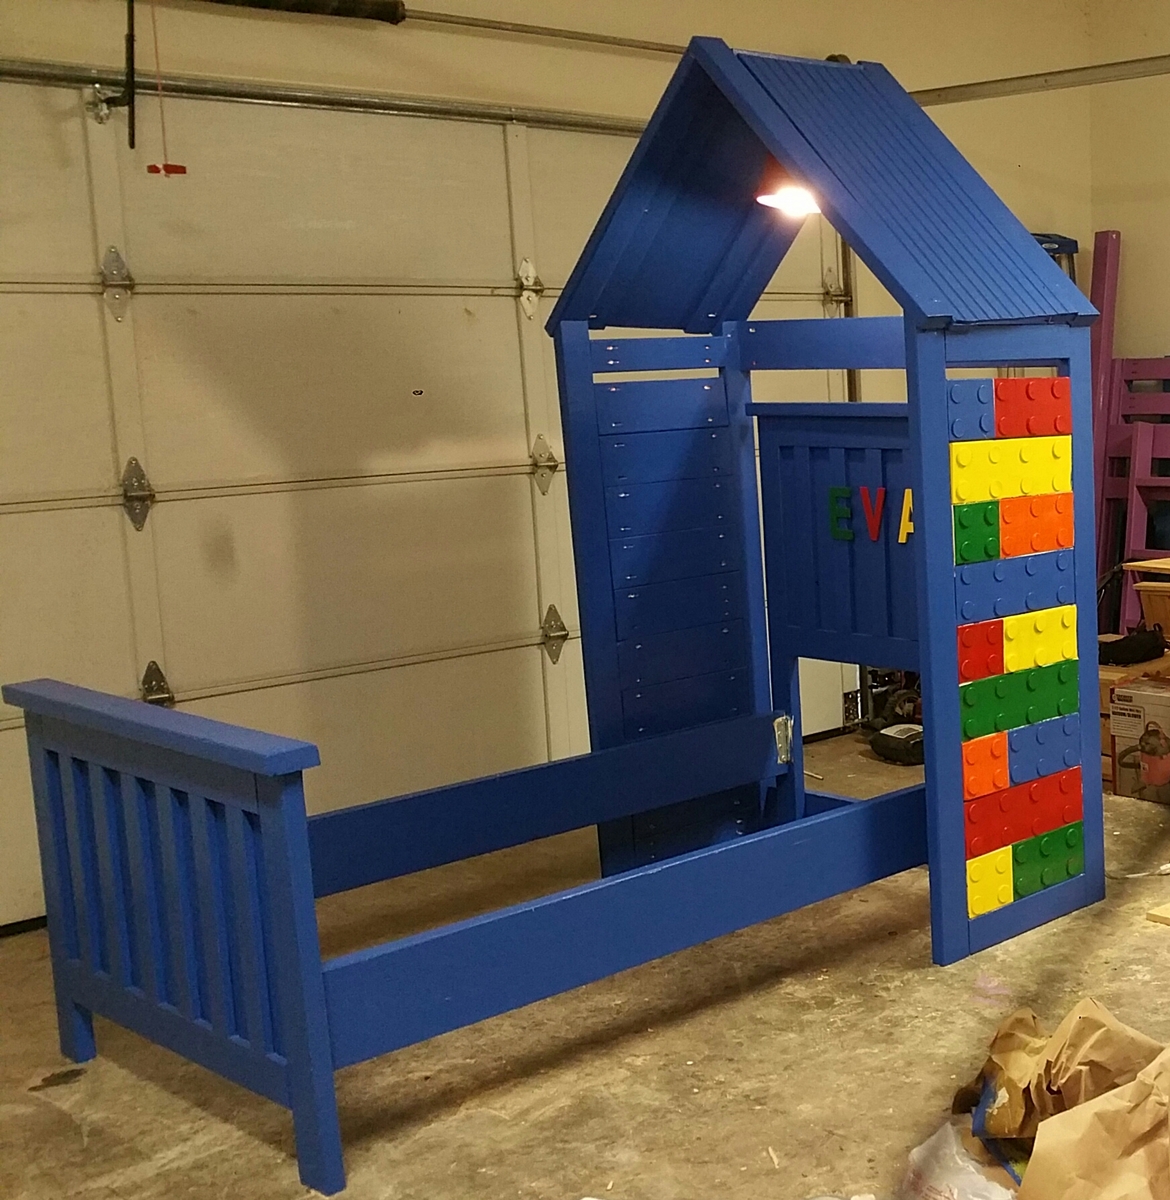
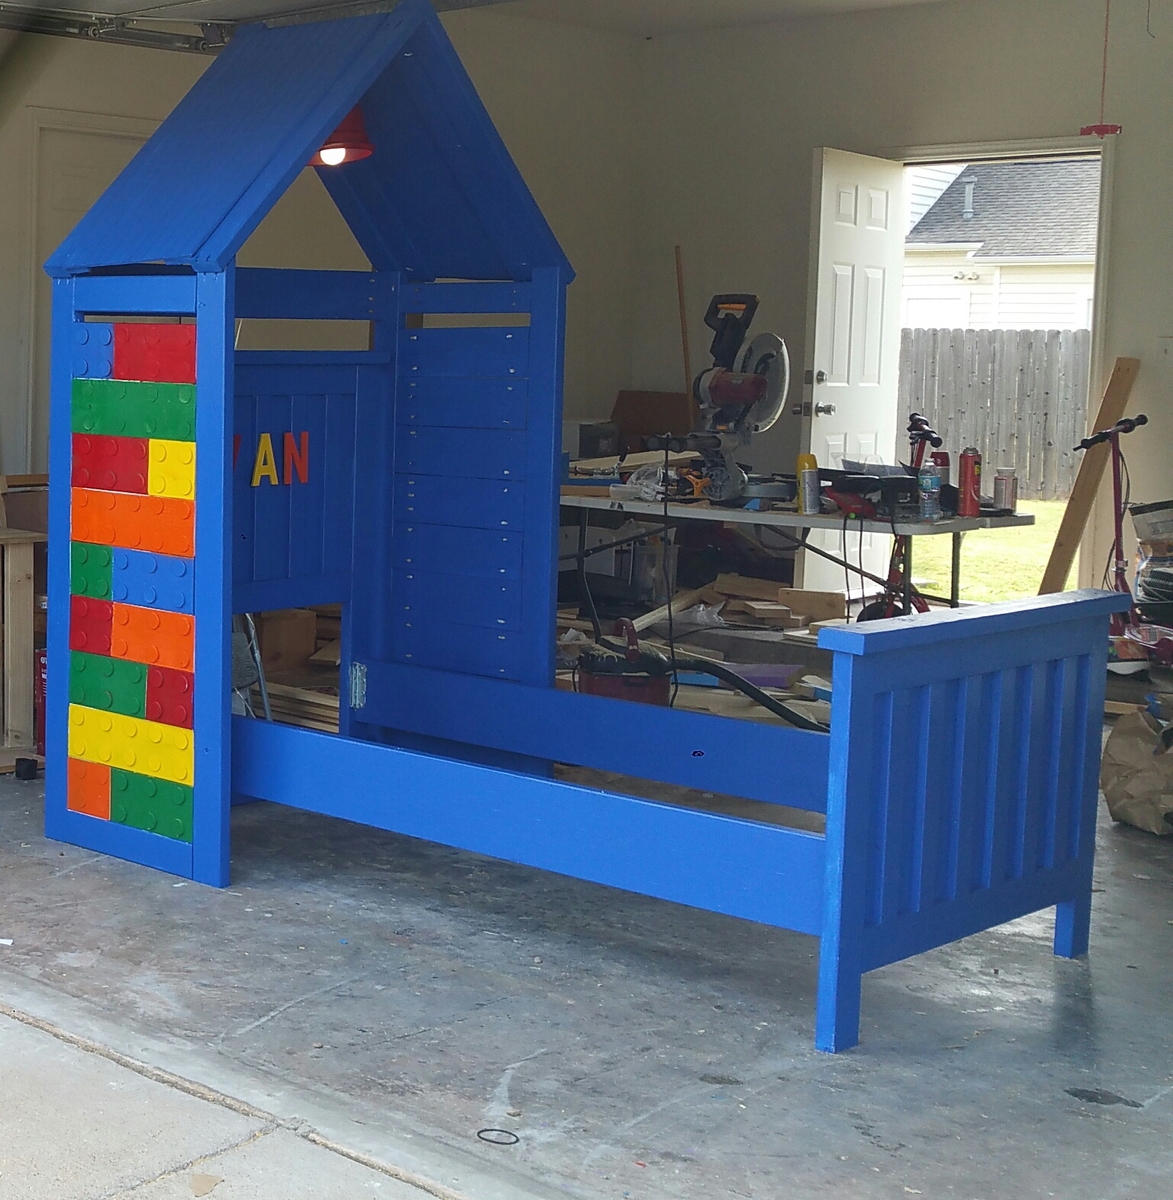
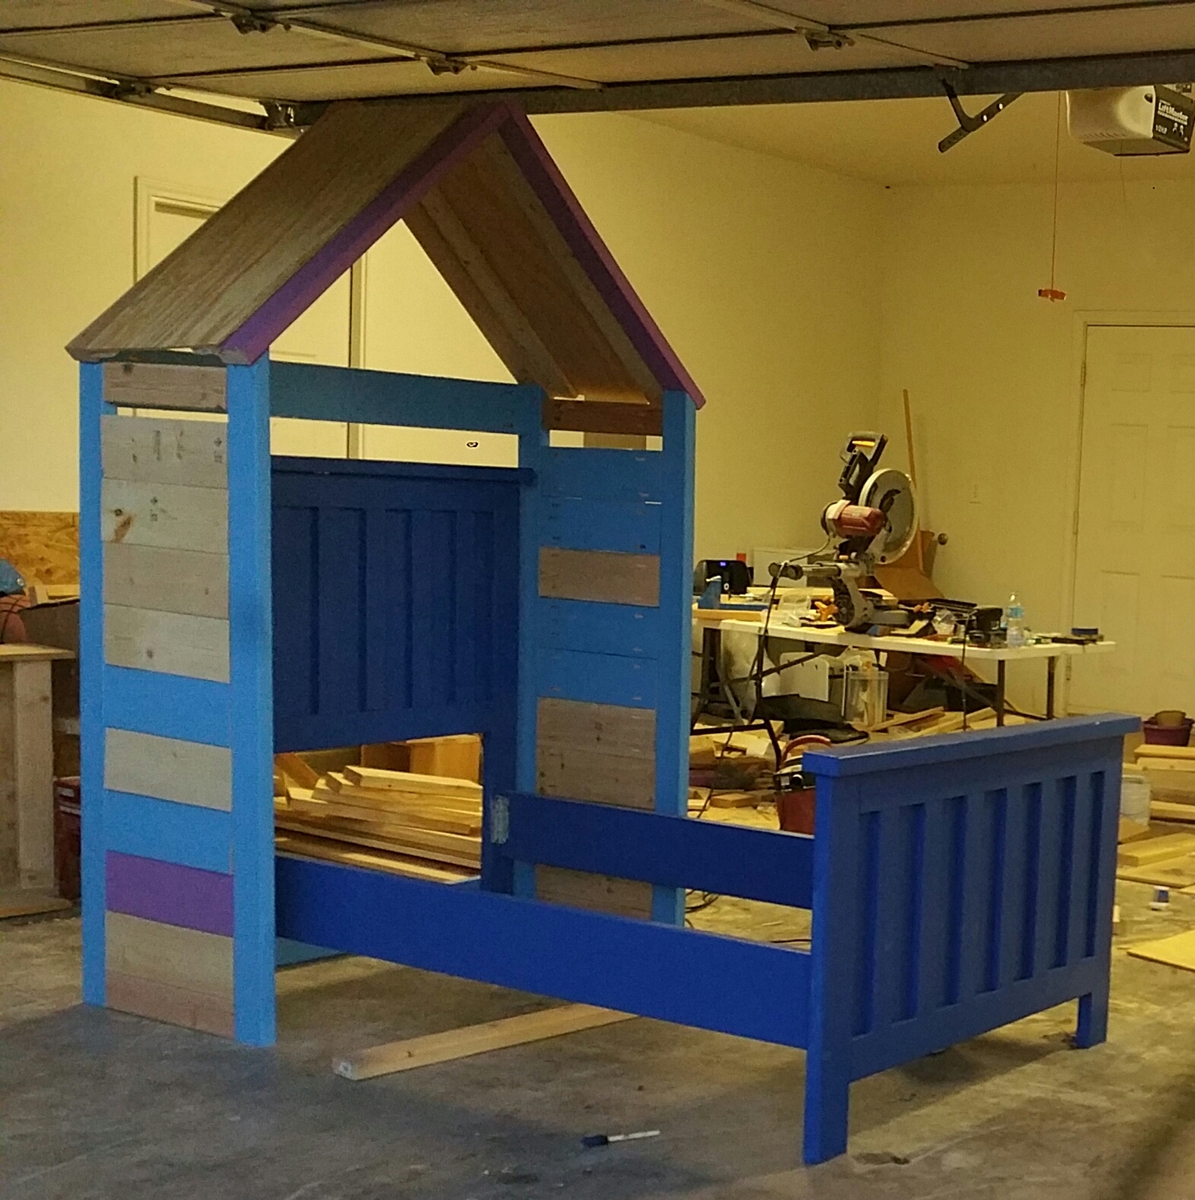
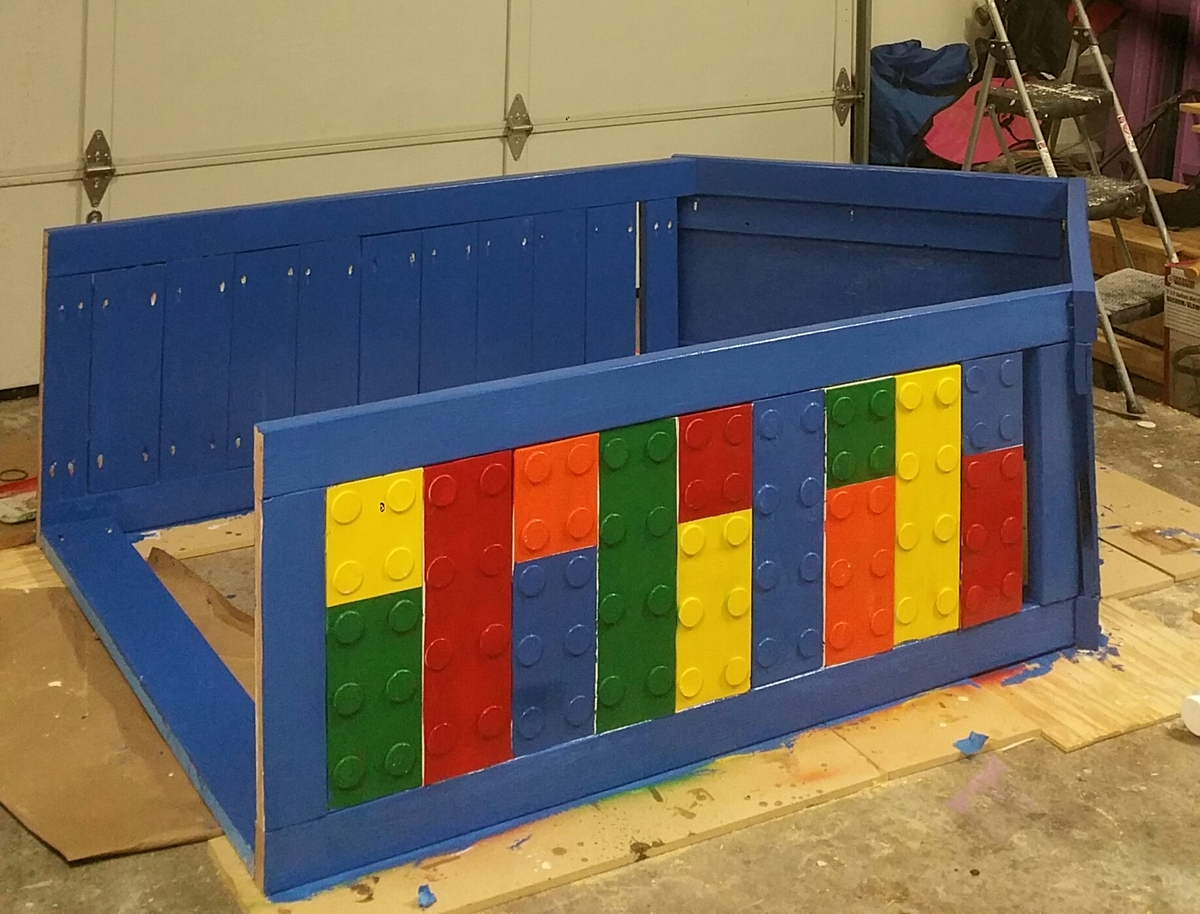
My husband and I took two plans, the Mantel Moulding Headboard, and the Chestwick Platform Bed. We made some slight modifications which are as follows.
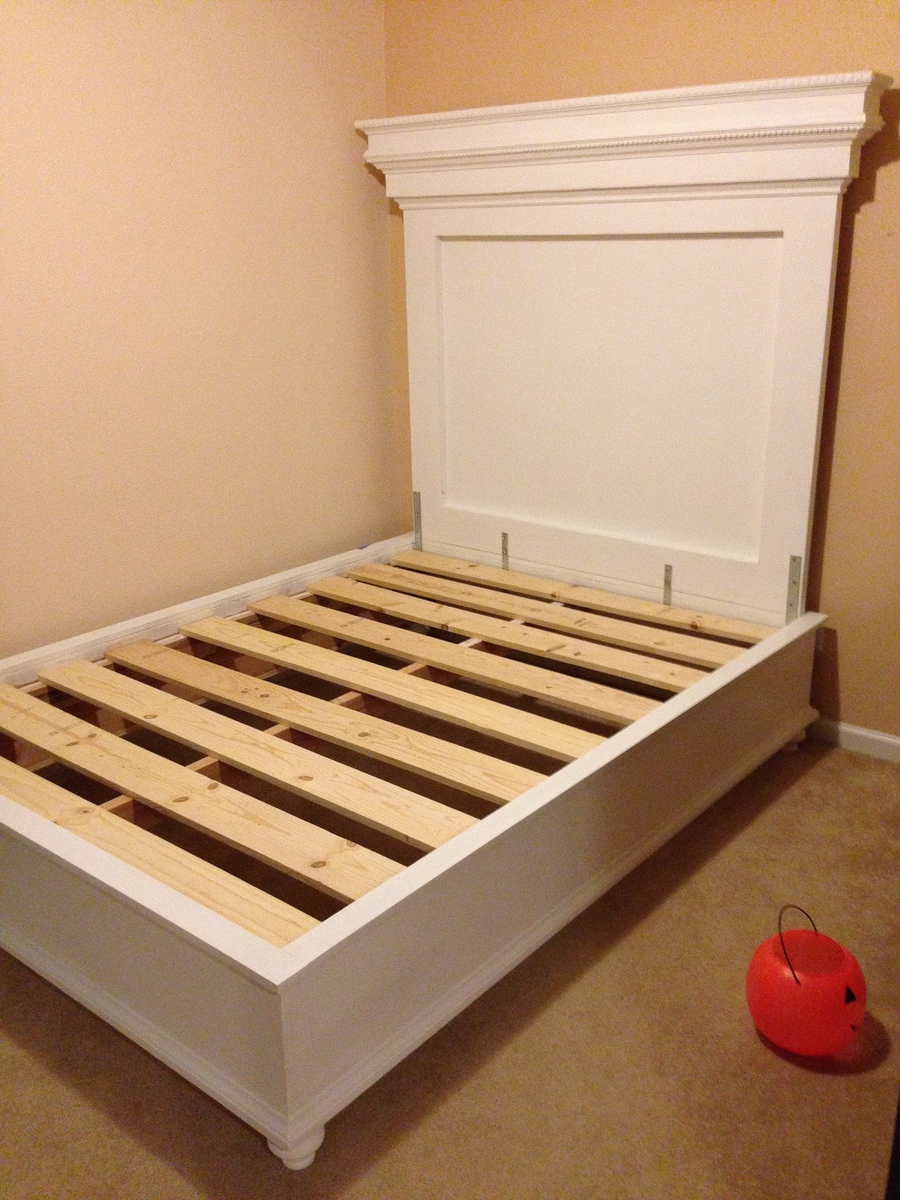
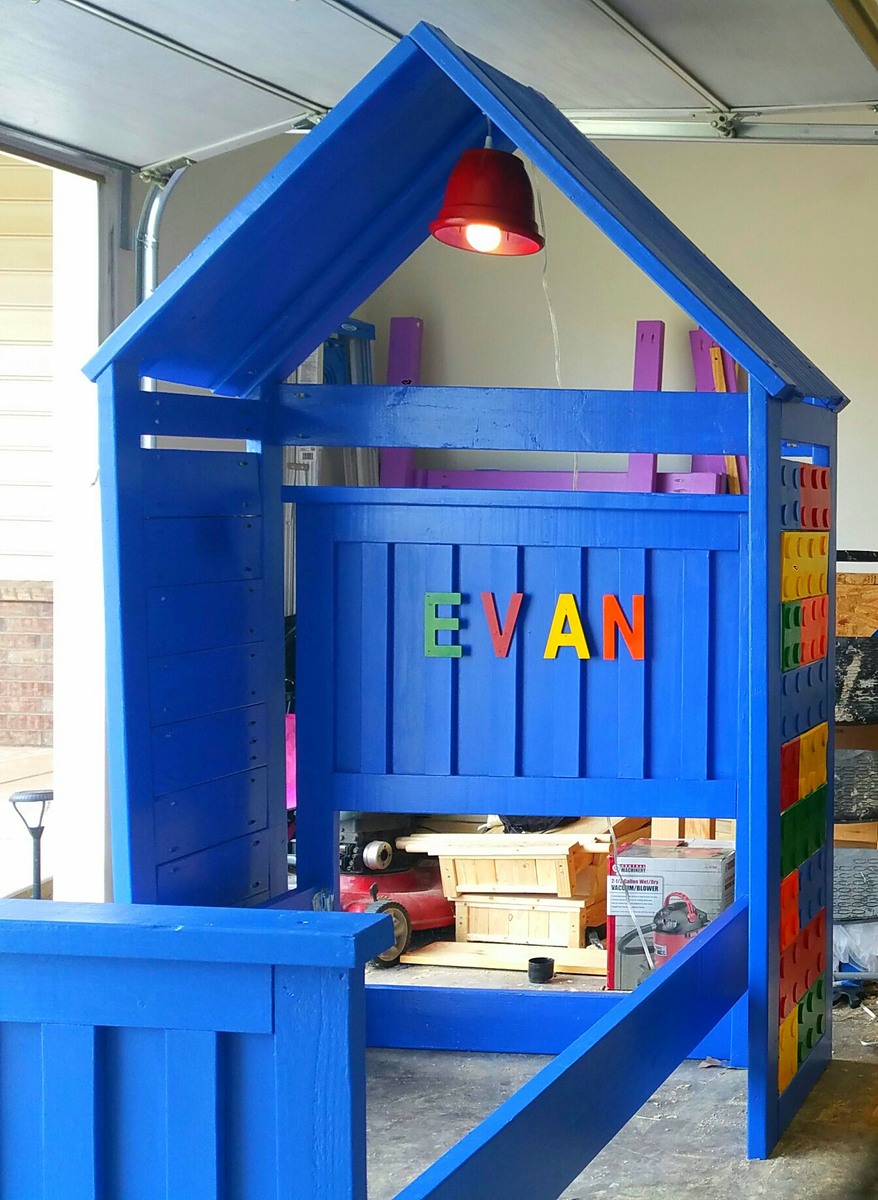
For the Mantel Moulding Headboard I wanted it to be a tall. The original plans called for the headboard to be 61 1/2 inches. We made ours so that it sat at 74 inches. We also made the width of the headboard 60 inches so that it was a perfect fit for the base.
For the Chestwick Platform bed we used 2X12's. Since we decided to make the headboard taller, I felt that the 2X8s wouldn't have been aesthetically pleasing. We used heavy duty top corner plates to screw in the bun feet.
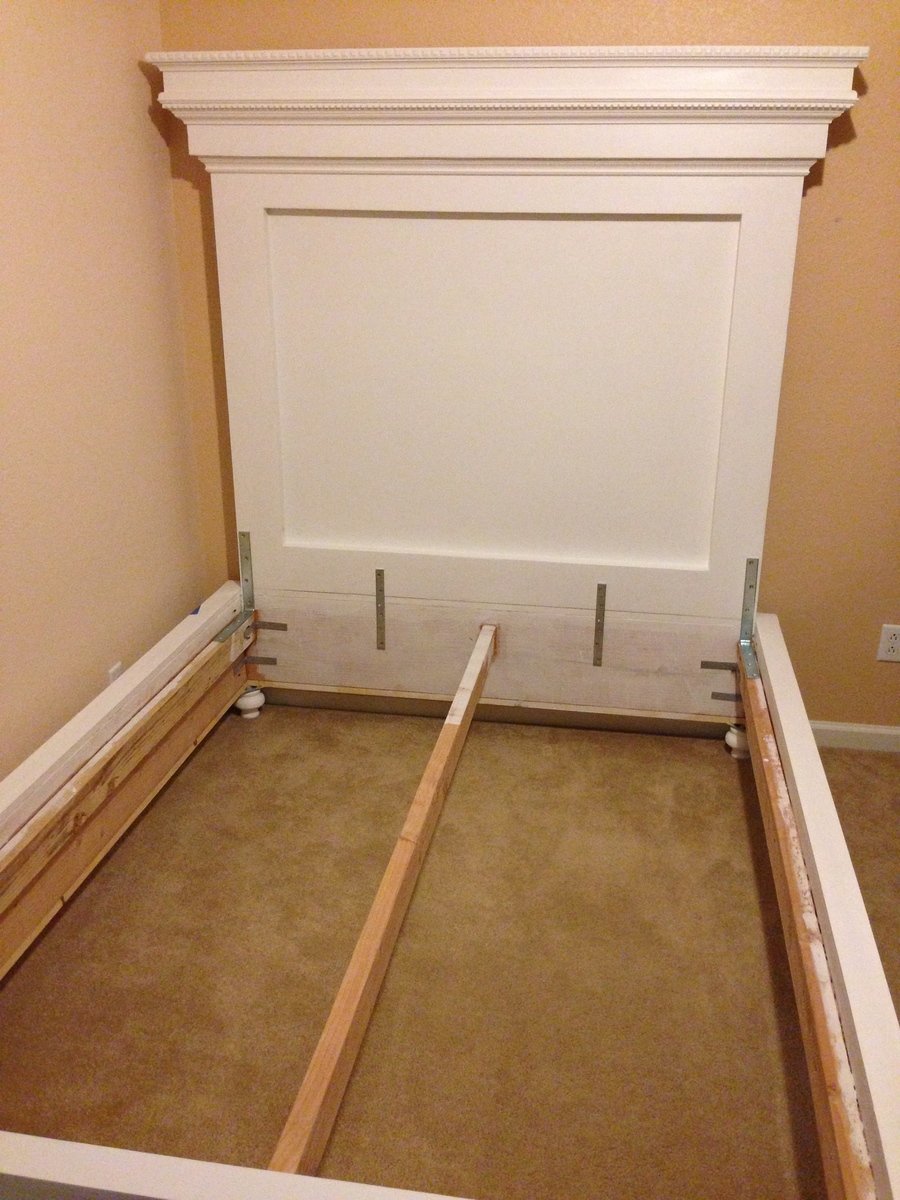
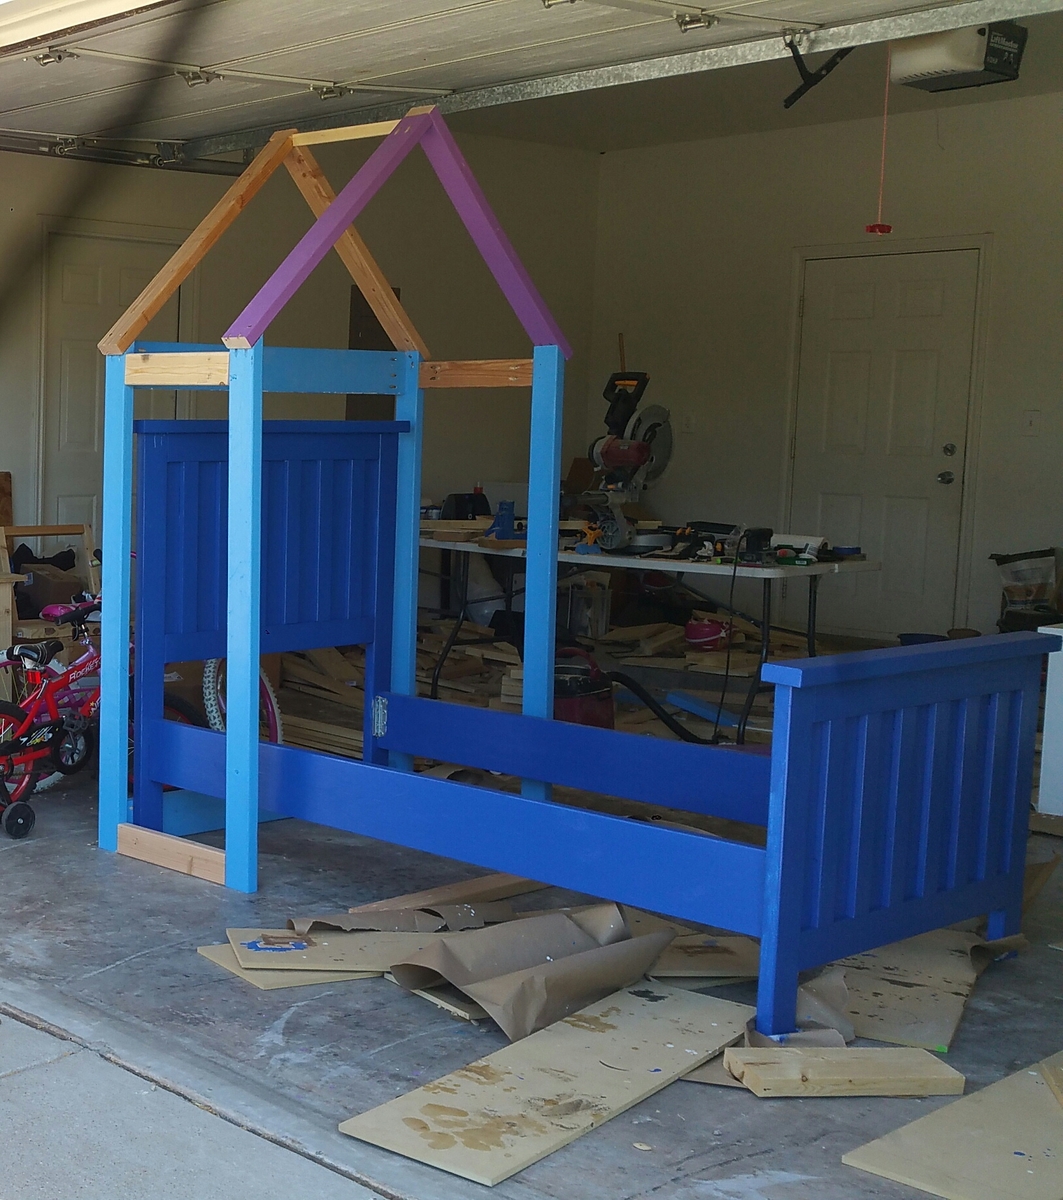
Mounting the headboard: Due to the size of this headboard, it is recommended that you attach to a stud in the wall behind headboard to prevent forward tipping. We used french fleat picture hanger with wall dog mounting screws (200 lbs), read instructions. We attached two vertical 1X2's to the back of the headboard for added support, since the headboard rests on the platform bed. After the headboard was properly secured to the wall, and resting on the platform bed, we then installed four mounting brackets. 2 heavy duty corner brackets, and 2 mounting brackets. The heavy duty corner brackets are long enough to screw into the mattress supports, the platform bed, and the headboard (see pics).
This was our second project, and we couldn't have done it without Ana's help.
Was realy easy to build.
My husband and I are very happy with how this table turned out, we put it together in a couple of hours on a weekend. It took me a couple weeks of sanding and staining and sanding and staining to finish it, but it was worth it.
Decided to use up some previously bought stain, Minwax Polyshades in Royal Walnut, but it just wasn't getting as dark a color as I wanted, even after three coats, so I picked up some Varathane Gel Stain in Dark Walnut. 2 coats of that brought it up to a nice rich color.
I'd like to say that I'll never do that many coats of stain again, but I will probably have to go through the whole process again, as we have a in-progress matching side table that I want to finish the same. :)
Thu, 09/20/2012 - 07:33
hi there,
what a lovely piece of furniture
can i just ask? is that wood putty used or wood filler, prior to sanding
thanks
k
Fri, 09/21/2012 - 13:31
I used elmer's paintable/stainable wood filler. I wound have rather not had to use anything because it isn't completely invisible when it was finsighed, but the edges of the 4x4's we got were pre-rounded so they left some gaps in the top and sides, and some of our other joins weren't completely straight either.
Thu, 10/25/2012 - 13:15
Would you happen to have the dimensions of the side table?
I made these chairs for friend. Very sturdy and look great!
Had to make modifications for size, errors, and personal preference, but we love this table! Still deciding on all white paint or a 2-tone finish. Also- first time using a Kreg jig. What an amazing tool.
Fancy turned leg dining table.
We are in so in love with this finished piece! We made some modifications to the original plan to fit our needs. We made the top wider - 24" wide like the Pottery Barn original. We also used 4X4's for the legs and widened the distance between the legs to sit the shelves inside the legs.
We also built the second shelf. We created the second shelf to hold wine, so we modified the front of the shelf to allow for the wine bottle necks to rest. The handle was made from plumbing hardware. We got this wonderful idea from one of the posters on this site, I need to find their name to give proper credit, but it worked beautifully.
For the hutch, we also made modifications for our needs. We made it taller by 4" (so 40" tall). We used 1 X 12's for the shelves for a deeper shelf. We also raised the bottom shelf up to accommodate our Keurig coffee maker. We did not divide the middle shelf to leave a tall opening for some items we wanted to display. We also left a gap at the bottom of the hutch for cords.
Once built we distressed the entire piece, then stained with Provencial stain, and finished off with a semi-gloss poly.
The best thing, it cost about 10% of the price of the original!!
Fri, 09/21/2012 - 06:43
This is so awesome, and nobody will have one anything like it! I love how you totally modified it for your space. The gap for the cords was brilliant-that would be something I would of thought of after I was completely done! This is very inspiring. Thank you for sharing.
Child's chalkboard as a birthday present. "Frozen" inspired color theme. Received feedback that it would also work very well as a boutique store sidewalk sign.
I am one of Ana's biggest fans. I have been building furniture using Ana's plan for a year in a half now. This is my first time ever posting though. I built this lego themed kentwood bed for my 5 year old son who loves legos. The lego house is built with left over scrap wood I had laying around. I love how it turned out and my son also loves it! Thanks Ana!!
Thu, 10/27/2016 - 14:56
Love the added lego decor! Beautiful build, with great colors and finish!
Toil paper holder
Took your bench and used center to hold the mini cooler ,u-type frames fastened to 2x4 in bench frame underneath. all 2x4 with the exception of flip top which is 2x4 cut down on either side then the remainder cut again and sanded to give rounded edges. Mitre saw, table saw, 18 gauge brad nails around edges of top bench side and to fasten straps down covering cooler.
This was my very first project. I cut the wood during the week, to have it ready for the weekend. I intended this to be my summer project. I had so much fun, i completed building both chairs in a day and a half!!!!! I then ordered the foam which took a couple weeks. I ordered the fabric online. I had two large pillows which I covered and used them for the back cushion. The total cost for BOTH chairs was under $250.00. Looking forward to my next project. :)
Mon, 09/24/2012 - 18:05
Where did you order the foam from and did you have to cut it or did it come in two pieces?
Comments
Ana White Admin
Sat, 02/27/2021 - 20:33
I agree!
Seriously awesome, great job!